


If you haven’t made one or two tomato pin cushions in your quilting life what are you waiting for? I bought this pattern from Birdbrain Designs several years ago and set about making several of their Big Fat Tomato projects. Here’s a link to their website:
https://www.birdbraindesigns.net/big-fat-tomato-pin-cushion-set
The pattern is for one size tomato pin cushion, a needle strawberry and a darling little needle keep booklet.
In order to made many different sizes of pincushions, I placed the master pattern on my printer bed and after printing one copy of the pattern at 100% (so I could cut it up), I went on to reduce the pattern to the following sizes: 90%, 80%, 70%, 60% and finally to 50%. Now, the 50% reduction makes a tiny yet darling pin cushion!
In the picture below you’ll see I’m using the pattern reduced to 70% of the original. Important math: if you want a pattern to be 70% of the original size, you reduce it by 30%. Your desired final pattern size (say 60%) plus the amount you reduced it by (40%) always equal 100 if the numbers are added together. Got it?

So you cut out 4 football shaped paper pattern pieces. (1 pattern piece cut out 4 times.) I cut the above pieces “on grain” with the fabric weave. It’s always fascinating to fussy cut on the bias each of the pieces so they are exactly the same. They sew up into great visual patterns like the red and blue plaid tomato below.

I also discovered that if the 4 pieces are cut on the bias, they are easier to manipulate into unique shapes as you fill and finish them.
So here I am sewing 2 of the football shapes together. I’ll then sew the other 2 shapes together and finally, with right sides together, I’ll sew these 2 halves into a sphere. Now remember, you’ve got to leave about a 3/4″ space open in your seam in order to fill them. I have found it easiest to have this 3/4″ opening about 1/2″ away from where the 4 seams meet up at the top and bottom of your sphere.

See how the fabric changes up when the 4 pieces are sewn together and stuffed!

Here’s one I made from a man’s flannel shirt I picked up at a resale shop:

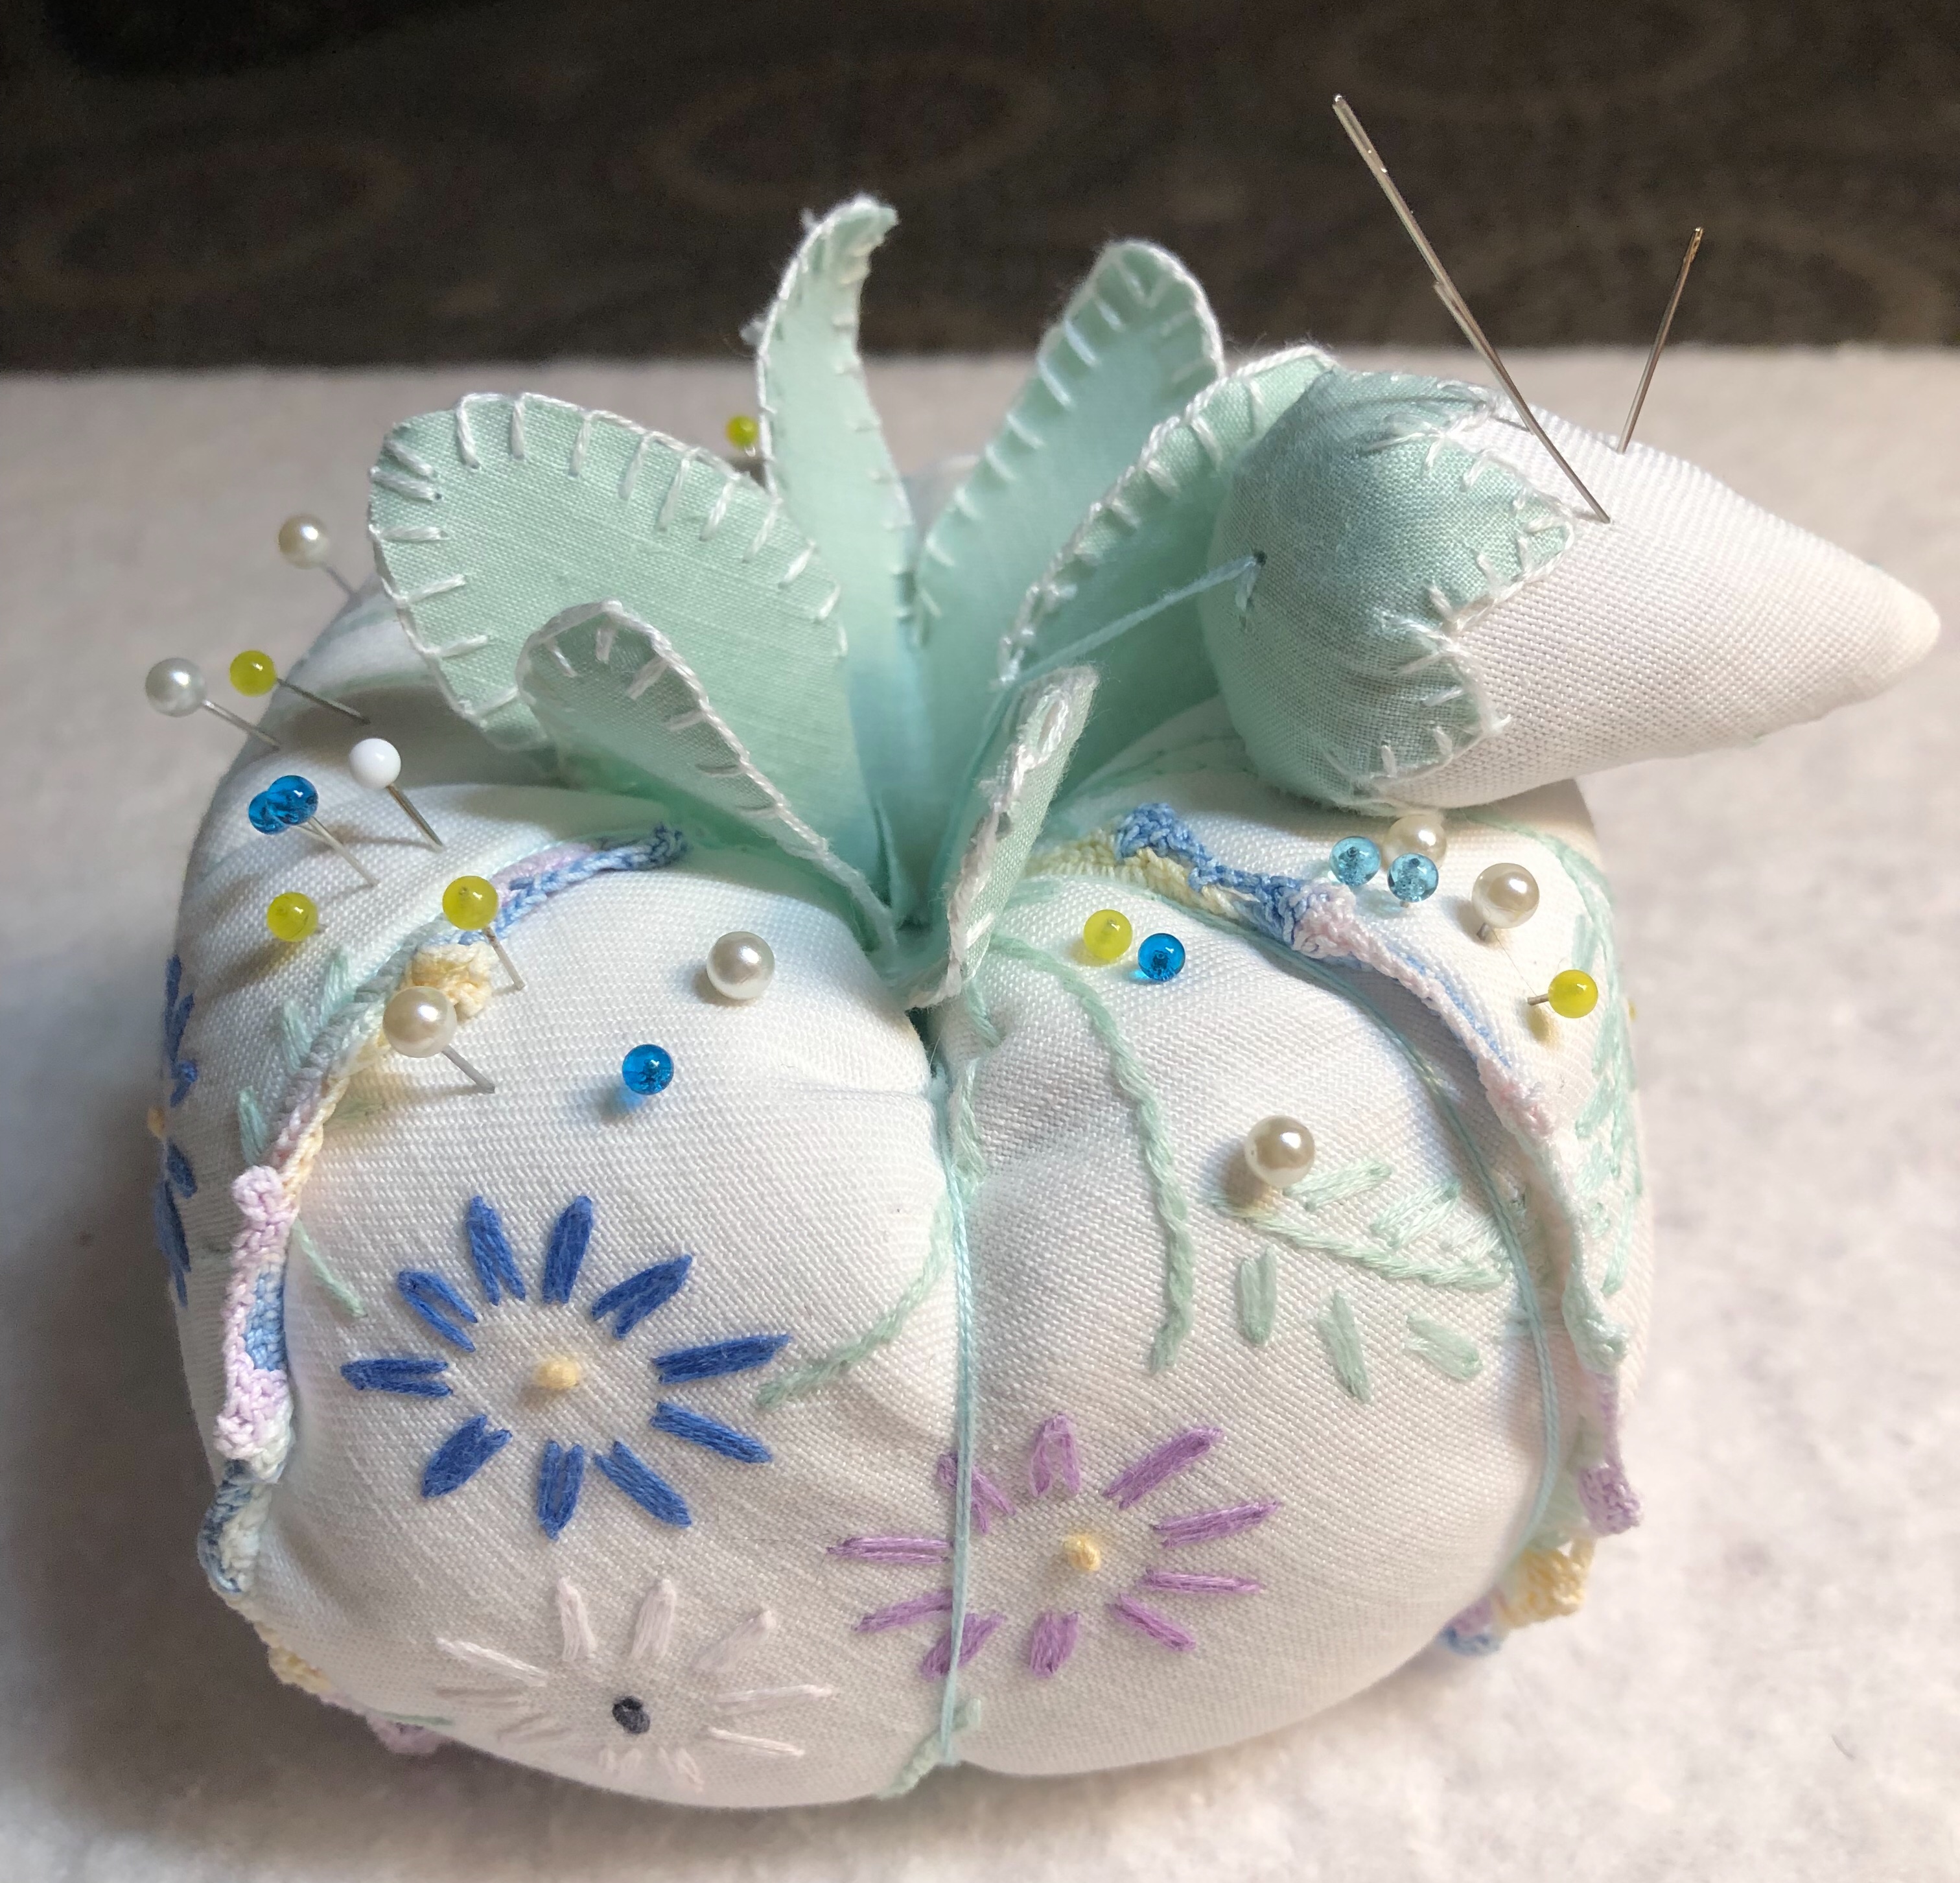
But what happens if you decide you need a tomato pin cushion made from a vintage dresser scarf? I laid the full sized pattern strategically on the embroidered designs and cut out each. The fabric is old and rather on the thin side so I doubled up by also cutting 4 additional pattern shapes out of the middle of the dresser scarf.


I did a running stitch on my sewing machine to hold the embroidered piece and the bleached muslin together. After stitching they become 1 unit.


The lovely hand crocheted edging of the dresser scarf was saved as I realized it would look great inset in the 4 seams of the pincushion.


So below you’ll see my sphere with the crocheted edging in the seams.

Here’s the 3/4″ opening I’ve left unstitched in order to add the filling.

But you’re probably wondering what I’m using as filling? Crushed walnut shells purchased from the pet store. I believe I may have bought this bag at Petco. Ground walnut shells are used as cage bedding for both lizards and some birds. Who knew! But what about the little Strawberry Needle Keep that’s attached to the Tomato? For the fill I’m using 0000 (Super Fine) Steel Wool purchased from Lowes. When stuffing your little Strawberry, work over a table covered with newspaper, as when you pull tiny bits of Steel Wool off of the pad you’ll get quite a bit of shedding. Stuff your Strawberry as tight as you can but use caution not to burst the seam.

I’ve got a funnel (very necessary) and a scooper and I just slowly fill the entire sphere as full as I can get it. Continue to pounce, squish, manipulate your sphere to pack the ground shells in tight. Once I think it can’t hold one more speck of lizzard bedding, I slip a small (maybe 1″) square of quilt batting in to cover the opening and then carefully and tightly hand stitch the opening closed. Do a very good job of stitching this closing! The last thing you want is pits of shell working their way out.


This little cone below will become my pin cushion needle strawberry.


In the example below I’m cutting 3 fan shaped patterns that will make the large (think about 4 1/2″ tip to top) Strawberry pin cushion.

The fabric I’ve chosen for these giant Strawberries is a 2 sided gauze-like fabric right off the bolt at JoAnn Fabrics. The weave of the fabric on the red side makes it look like the little black dots are strawberry seeds. Even though it’s a double layer fabric I’m still concerned that some of the ground walnut shell filler might filter through so I’ve added 1 layer of muslin to the process.


When you’ve filled your Strawberry with as much of the ground walnut shells as you can and have drawn tight the cord at the top, you’ll probably find that the top of the strawberry looks flat. You’ll also find that you still have maybe a 1/4” hole at the top. This is ok. I found some small pieces of batting, cut the batting into about 1/4′ by 1/2′ pieces and using tweezers, I stuffed these batting bits into the Strawberry. You’ll find that this will fill up the top very nicely! Keep stuffing batting bits into the top until you’re happy with the shape.
These Strawberries need a green wool top and I (most often) do the leaf stitching at the edge before they are added but on the strawberries, I want the greenery stitched down to the berry.

I was recently at a Retreat, one of my new favorite ventues:
The 1914 Boehm House in Moulton, Tx.
and
https://www.facebook.com/BoehmHouse/
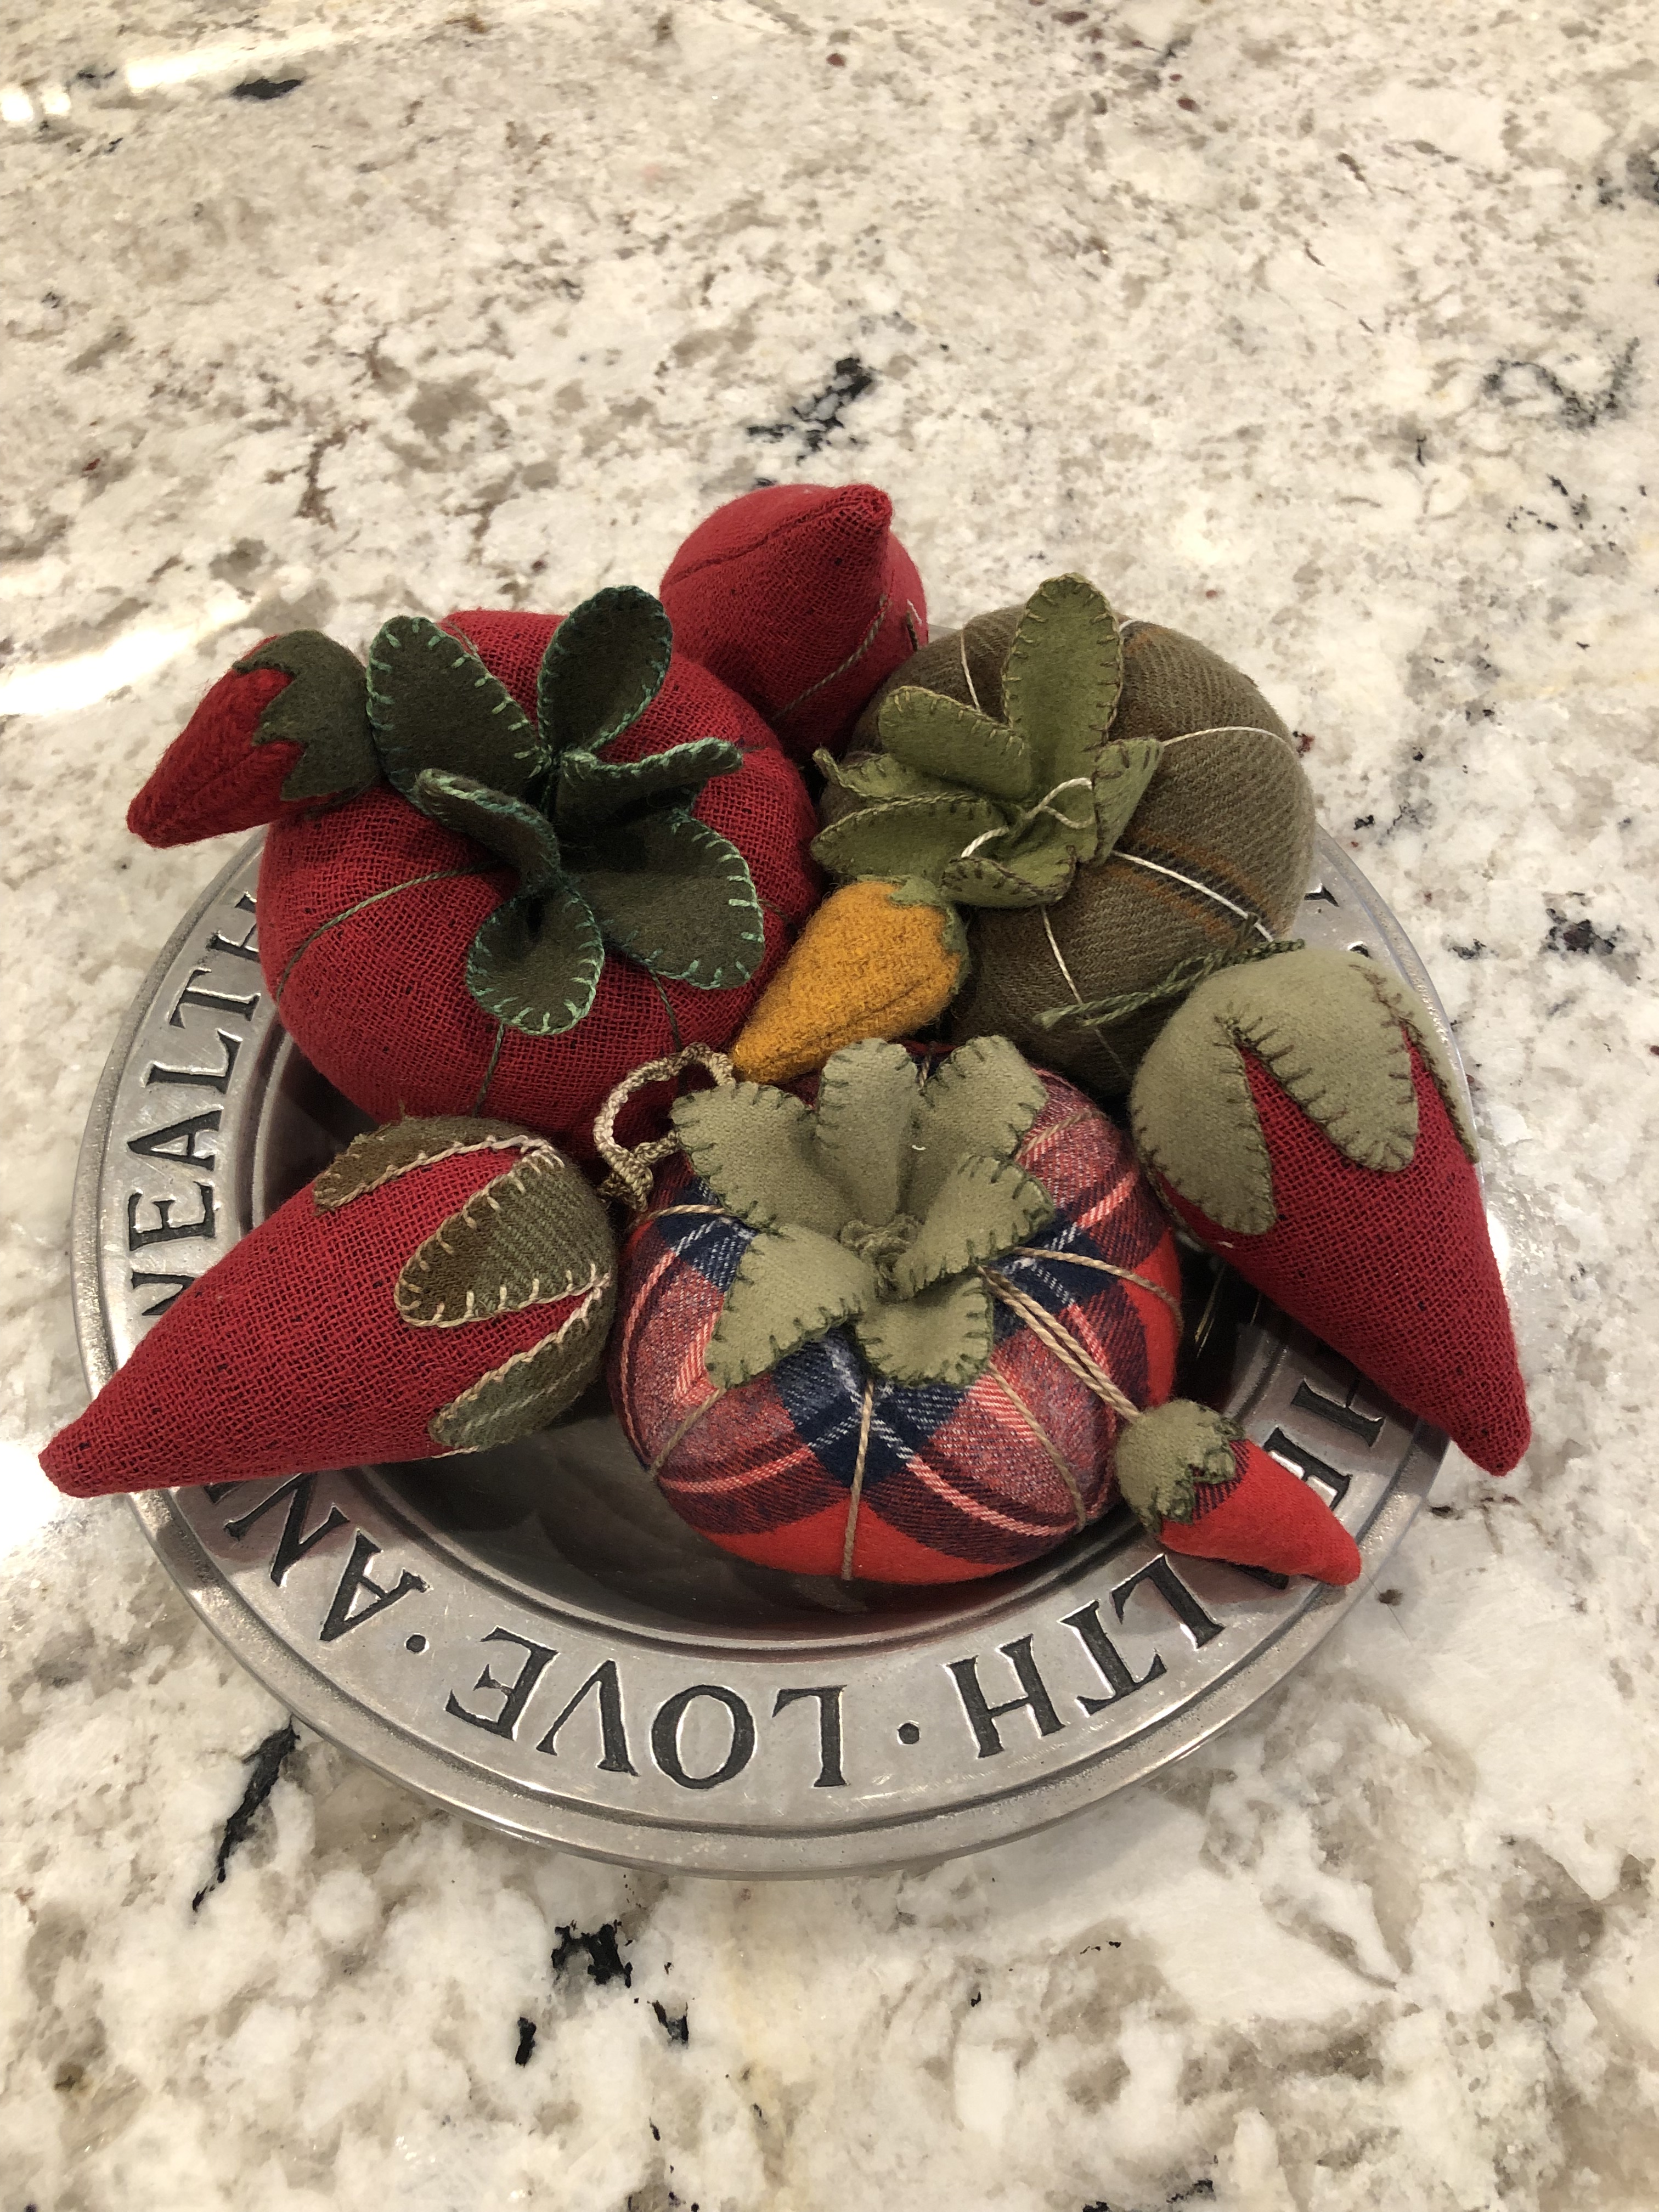
I made most if not all the pin cushions below at the Retreat. Starting at 12 o’clock you’ll find a Strawberry in the gauze-like fabric, a felted wool plaid Tomato with a golden felted wool needle keep, again a Strawberry, a flannel Tomato and solid red needle keep Strawberry, another large Strawberry as before and finally a Tomato out of the gauze fabric.


While retreating, my sweet friend Anita and I traded fabrics and I was on the receiving end of this wonderful orange-ish brown-ish wool!

Here’s another tomato in the works, a flannel of red and black. I’m finishing the “wrapping” of the sphere using a nice heavy weight wheat colored Pearl Cotton.

You’ll need a long needle with a big eye when using the Pearl Cotton. Just keep in mind that a big needle with girth is not your goal. You’ll find it leaves quite a large hole in the tomato and sometimes the crushed walnut shells can filter out. Just find a needle with a big eye that’s maybe 3-4″ long and you’ll be fine.

There’s a word picture below. Do you get it?

Yep, Fried Green Tomatoes! The Lodge company makes these tiny cast iron skillets. Their intended use is a Spoon Rest. They are priced at around $4.50 each and while available at many places, I found these at my local Academy Sports store.

When will I stop making these? Who knows! They are addictive!

They’re also a nice addition to my already growing collection of Vintage Tomato Pin Cushions. The giant pin cushion at the top is the very first one I made years ago. I followed the pattern exactly for this one made of felted red and felted green woolens.

And I can’t finish out this post without including this picture of 3 of my very favorite people!

Happy New Year and Happy Quilting to everyone!


Thank you sew very much for making my Bird Brain Designs BIG FAT Tomato pin cushion…I love that you reduced it in size to be more like “Granny’s Tomato” and made so many colorful versions. All your followers will want to make a bunch, too! Happily, the pattern is still available on our website. Keep on stitching, Rhonda, I am too! Robin from Bird Brain Designs
LikeLiked by 1 person
How can I get permission to use one of your pictures? I would like to use a picture to make something for my craft room please.
LikeLiked by 1 person
Just as long as you give credit, you can use any of the pictures I have on my website. Thanks for asking, that’s so considerate of you! Have a great day!
LikeLike
I love all these tomatoes. I just never thought to make my own and to make such a variety. These will make great gifts and at least one for me. Thank you again.
LikeLiked by 1 person
Hi Rhonda, just wanted to let you know I had no success finding the Bonnie Sullivan book. I emailed her All through the night company and they did respond and do not carry it anymore and the 2 Facebook wool pages that I follow was no help either. Thanks again for all your help though,it was much appreciated! Have a lovely day🙂
LikeLiked by 1 person
☹️
LikeLike
I remember both my grandmothers had tomato pincushions and as a little girl me being fascinated with the thought that a pincushion could be in the shape of a tomato. Thanks for the memories!
LikeLiked by 1 person
Thanks for your kind words, I love these pin cushions!
LikeLike
These are so cute, and something else to add to my long “going to do” list. As always, thank you for sharing your talents and inspiration!
LikeLiked by 1 person
Thank you for your kind words!
LikeLike
What sized is the vintage linen tomato?? %? Might have another obsession brewing!!!
LikeLiked by 1 person
Join the club!! Here’s the thing… I can’t remember if I made it 100 or 90%! That’s what happens when I don’t write things down!!
LikeLiked by 1 person
Totally get that! Pattern ordered……..warning…..too much fun ahead!! LOL!
LikeLiked by 1 person
Don’t forget pictures!! I’ll need pictures 🙂
LikeLiked by 1 person
Just measured, it’s a 100% pattern size pin cushion.
LikeLike
Hi Rhonda, just found you on Pinterest,your pincushions are so adorable! I was wondering what pattern your beautiful Xmas penny rug you used to display them on in the last pic. I would love to make that for my daughter. Thanks very much and Happy New Year!
LikeLiked by 1 person
Hi Teri, yes, isn’t that a wonderful penny rug!! It is called something like Seasons Greetings I think, it is a pattern my Bonnie Sullivan of All Through The Night. Here’s a
Pinterest link so you can see the whole project:
https://pin.it/fdc5gnwvxxitkg
LikeLike
Thank you so much, I am actually working on a Bonnie Sullivan pattern called Acorn Hallow right now but never seen this one. I appreciate your help and will look it up on her website🙂
LikeLiked by 1 person
Now that I’m thinking about it I believe this pattern is in one of her older booklets, the 3rd one I think. Let me know if you have trouble finding it.
LikeLike
I just sent you an email…
LikeLike
Thanks again for your help, I couldn’t find it anywhere. I reached out on a Facebook wool appliqué page so maybe something will show up. I appreciate your kindness!
LikeLiked by 1 person
Keep me posted. I’m not surprised as she heavily discounted these booklets a few years ago 😦
LikeLike
Too cute!!! Thanks for describing the process in detail. Another use for those crushed walnut shells just sitting on the shelf.
LikeLiked by 1 person
Thanks!! These are definitely fun to make!
LikeLike
Very nice! I always enjoy your posts and you are so nice to give us all the detailed instructions and photos! I don’t know how you do all you do but it is very inspiring! Beautiful!
LikeLiked by 1 person
Thank you Betty!
LikeLike
Thank you for this wonderful post. Now I want to make tomatoes!
LikeLiked by 1 person
Thank you! Take pics of your project!!
LikeLike
How cute and clever! Thanks for this process post.
LikeLiked by 1 person
Thanks! These are so much fun to make and of course, they’re immediately gratifying!
LikeLike