


It was once a beautiful quilt but with use and age, many of the fabrics are either deteriorated or thread-bare. I had a goal for half of this quilt and the following gazillion pictures will take you about 90% of the way to finished for this Double Wedding Ring quilt makeover.
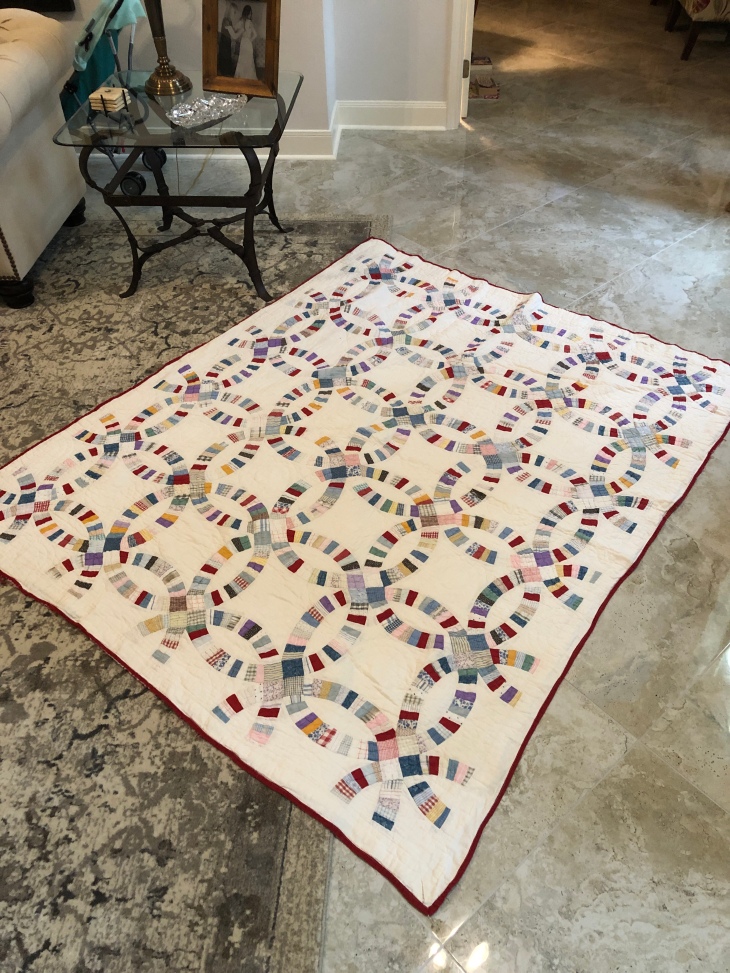
From a distance this looks like a quilt in near perfect condition.
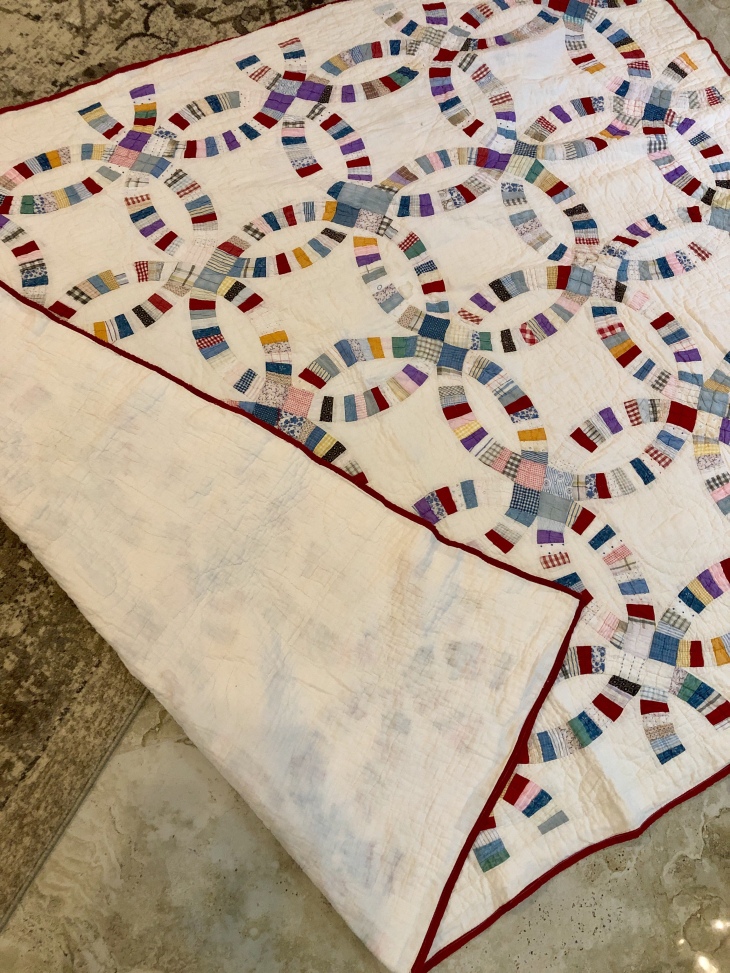
The back fabric is made up of mostly gauze-like Safeway flour sacks, right side turned in. I don’t know a lot about batting but I feel confident this quilt has 100% white cotton inside. Before the quilt was divided into 2 pieces I washed it in warm water, cold water rinse, unscented laundry soap with 1 tablespoon of bleach to sanitize and distilled vinegar in the fabric softener dispenser. It came out of the dryer so soft!! After dividing the quilt, I serged the edges to protect the cut edges. The only issue the serger presented was that it stretched the cut edge just a bit. I would deal with that later.

Here’s half of the quilt, measurements are approx. 37×62″ with the worn out red binding removed.
I set out to be very random in my approach to saving this piece. At the onset these were my parameters: 1. Maintain the integrity of the piece, 2. Make “un-obvious” but necessary repairs, 3. Make it durable enough to be used on a daily basis through the winter months (for southeast Texas that translates to 3.5 days…), 4. Ensure that it could be laundered in my front load machine and finally 5. Honor the skilled hands that made it.
From the beginning thoughts of my grandmother were with me on this project. Did she make me a DWR? No. Did she ever make a DWR? I don’t think so, but did I think of her so much as I worked on this project. She was a quilter and throughout my work here I consistently wondered how she would react to see this piece, what she would think about acrylic templates, rotary cutters, longarms, fancy sewing machines and the likes.
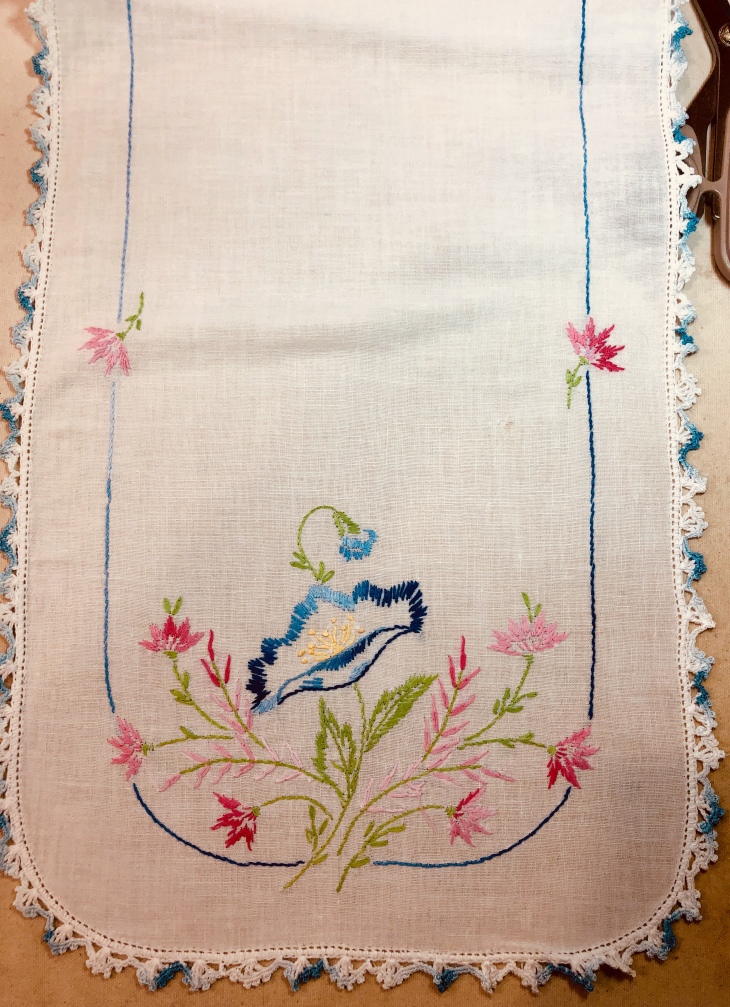
I’m just about at the point in my quilting journey where I am convinced that vintage linens and trims can save almost anything! This is the “good end” of a once lovely dresser scarf.

A well placed acrylic template and a Frixion pen are my tools.

I cut out the circle taking care not to cut through the beautiful blue and white variegated hand crocheted trim. It will be used later in the project.
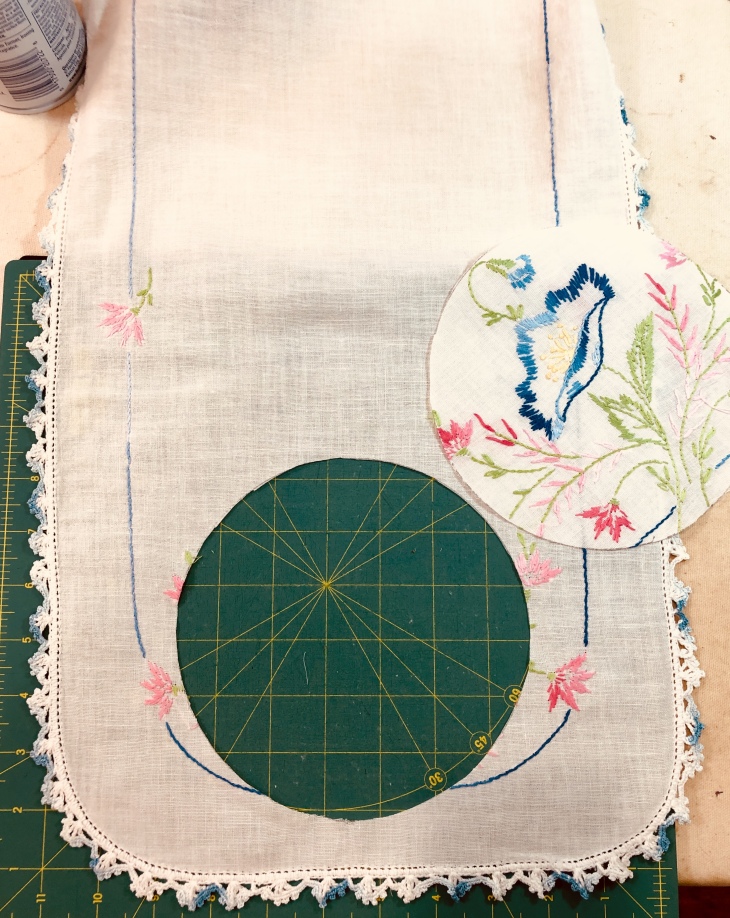


The only salvageable part of this dresser scarf was one end and luckily I was able to get 2 complete circles. But see the embroidery that remains outside the circles? In my sewing room nothing gets discarded and these left over pieces are no exception! They will be used in the near future in making a Crazy Vintage Linens Quilt.

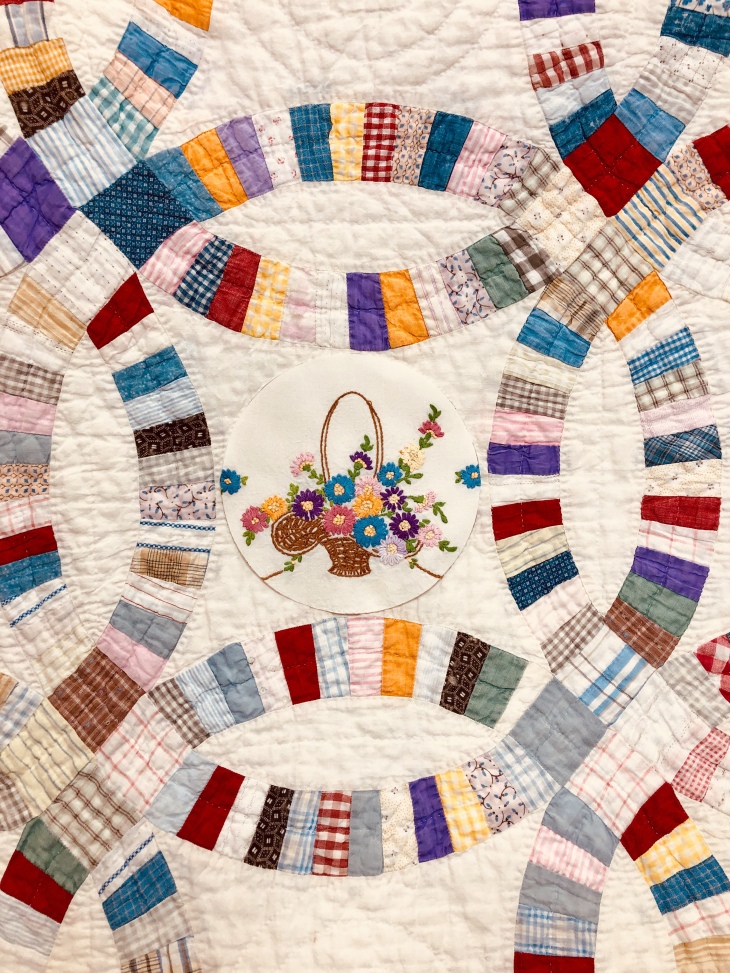
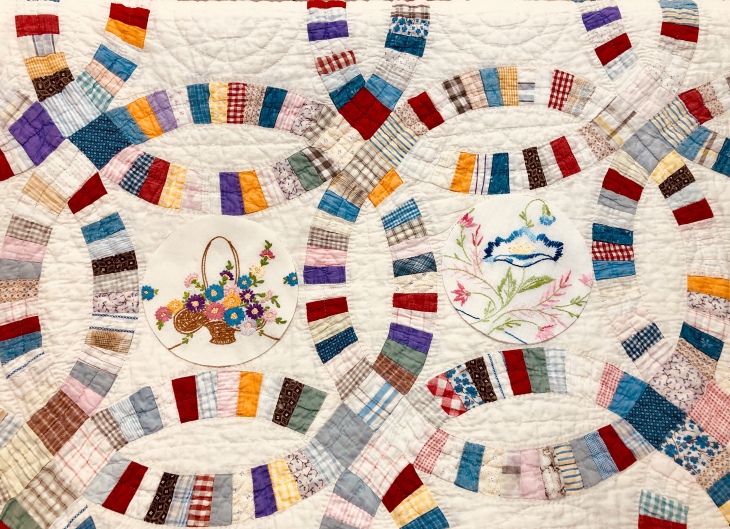
I’ve got my 8 feature circles cut and placed, now I need to sew them to the quilt. I used either a straight or a zigzag stitch on my domestic sewing machine. If I were to make a second quilt/throw like this I would have stitched closer to the edge of the circles.

Once the circles were sewn down, I then auditioned hand crocheted edging and stitched the crochet using a zigzag stitch.


Notice anything unusual about the sweet work above? The embroidery is unfinished. Is that a scowl on her face?

Draped over the end of my ironing board, you can see most of the quilt/throw. I stitched all the crochet down with my sewing machine, both the edge that sits on the circle and the outside edges of the trim. I started out thinking I would do the outside of the crochet by hand but liked the speed and strength of the sewing machine stitches.

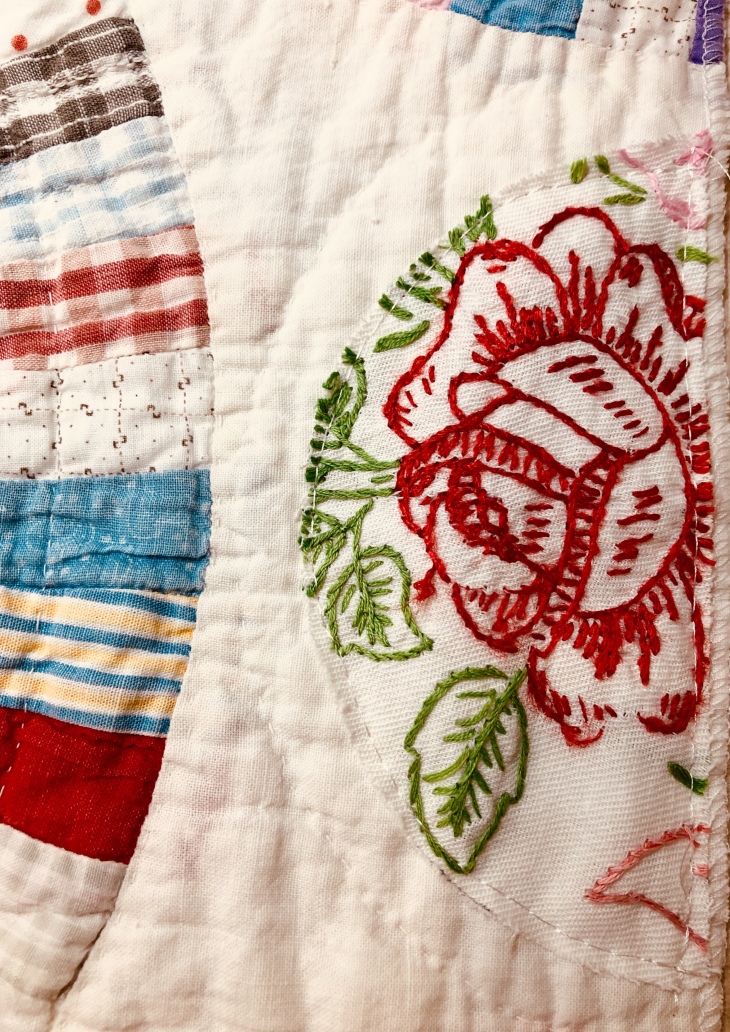
Let the embellishing/damage repair begin! The butterfly is a new-ish piece.


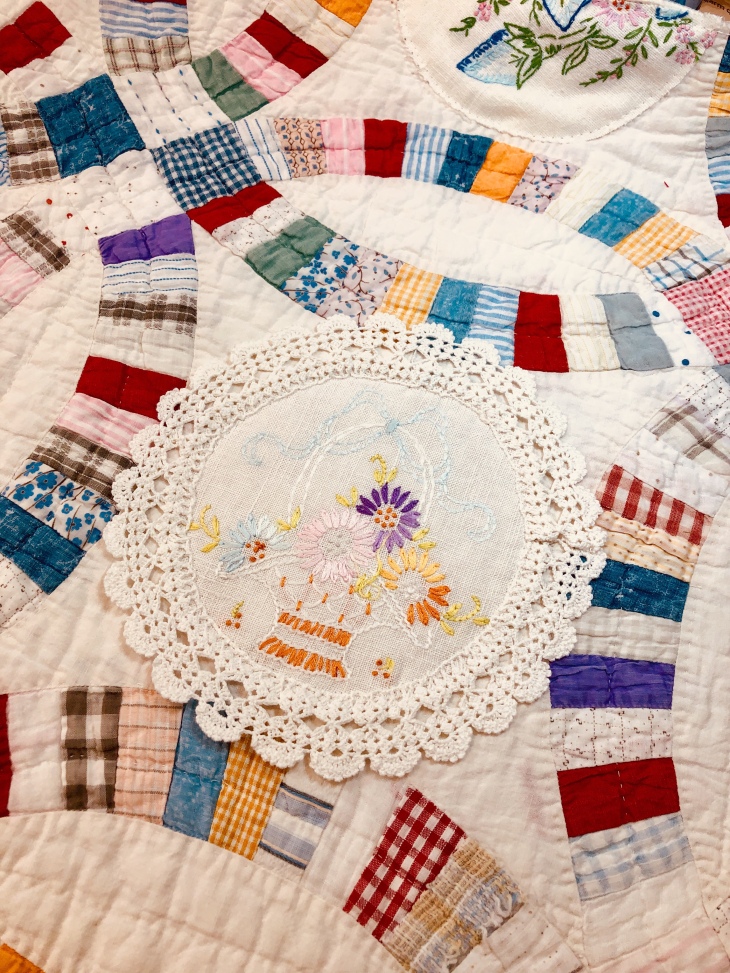
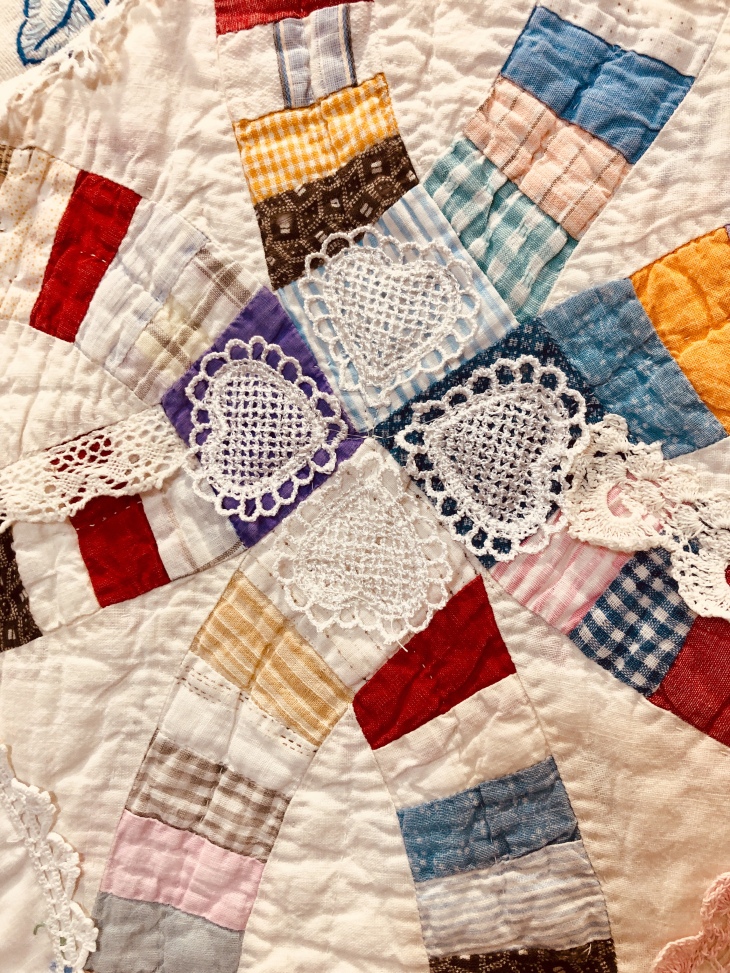
A terribly damaged light ivory crocheted doily gets a new chance as a medallion covering the damaged 4 Patch. I’m not concerned that there are some cut edges in the crochet, it might begin to unravel, it might not. It has been used and laundered so much that the crochet thread is almost melded together. If it starts to unravel I will secure the thread by either hand or machine.

New-ish heart appliqué.

See the 2 long streamers hanging on the Throw? I’ve got yards and yards of the one on the right and about 2 yards of the one on the left. The left trim didn’t make the cut. I’ll save it for a future project.

Above you’ll see I’m machine stitching (zigzag) down the trim. The cut ends of the trim? They got zigzag stitched in place. Can you tell I’m using a light ivory thread in my needle? The bobbin thread, well that didn’t go as planned. I wanted to use a matching thread but I was well into the project when I remembered I forgot to change the bobbin. It has a white 60 weight poly but in the long run it turned out fine.

Did I mend all the fragile/damaged pieces? No, I’ll take care of the rest on an as needed basis.
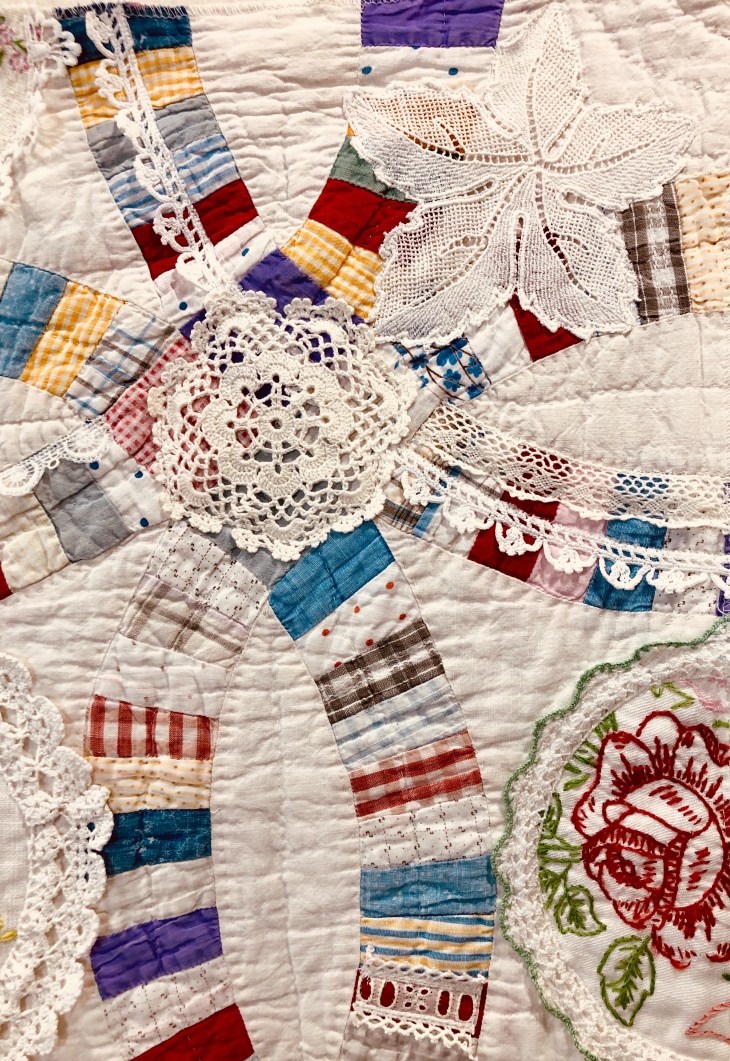
The leaf above on the top right? It almost ended up in the trash a few years ago. It’s part of a seriously damaged table topper I got in a box of purchased “sight unseen”. I just couldn’t imagine what I would ever do with it. I came across it as I was rummaging through my stash. I cut out 4 leaves, one for each corner and I’m thrilled with how they look.
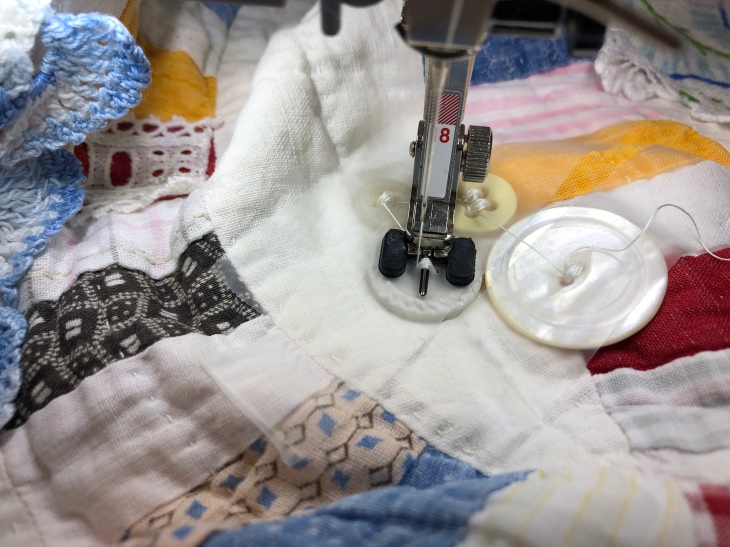
Below you’ll find a 12 picture tutorial about how I machine sew on the vintage buttons. I sewing here on a Bernina, using their #18 foot and have click thru the different stitches to the Buttonhole section. There is a specific stitch choice for traditional holed buttons. Below is my layout. For further instruction I have removed the shank button from the Throw.


Using Scotch Brand tape, I’ve secured the buttons to the piece.

Next step is to choose the correct stitch area on my sewing machine. Here you’ll see I’m working on the last of the 4 buttons. Just as a side note, if your button has 4 holes you must stitch the 2 holes closest to you first. Then with the presser foot up, slide the button forward a bit to expose the remaining 2 holes.
Before I cut the needle and bobbin threads:

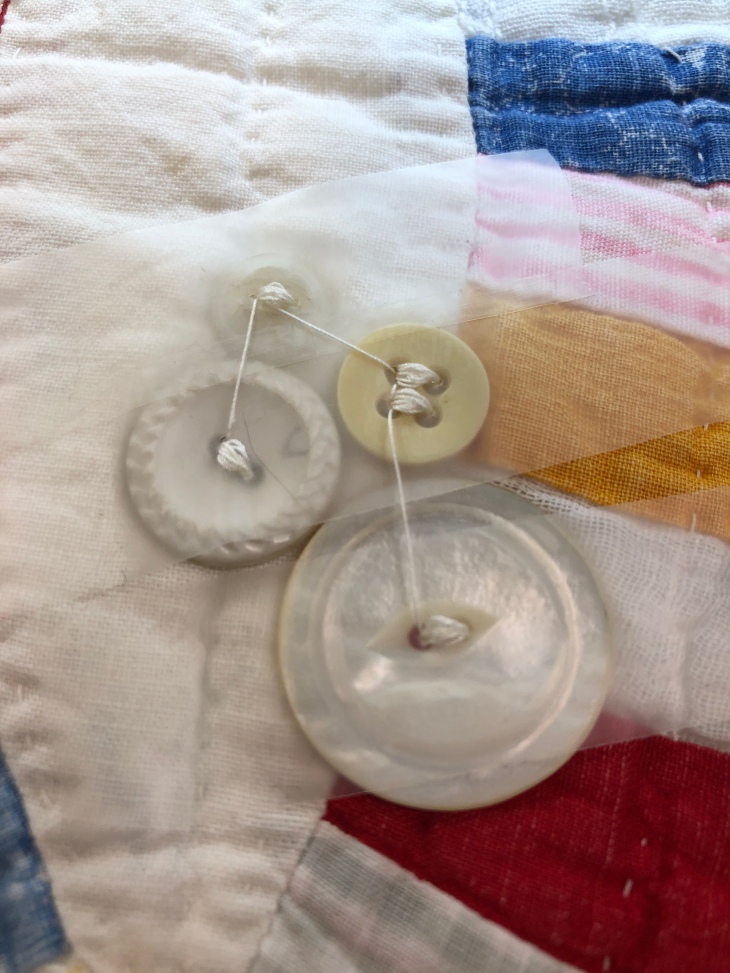
Trim away the jump threads between the buttons:

With a bit of care, gently remove the Scotch Brand tape.
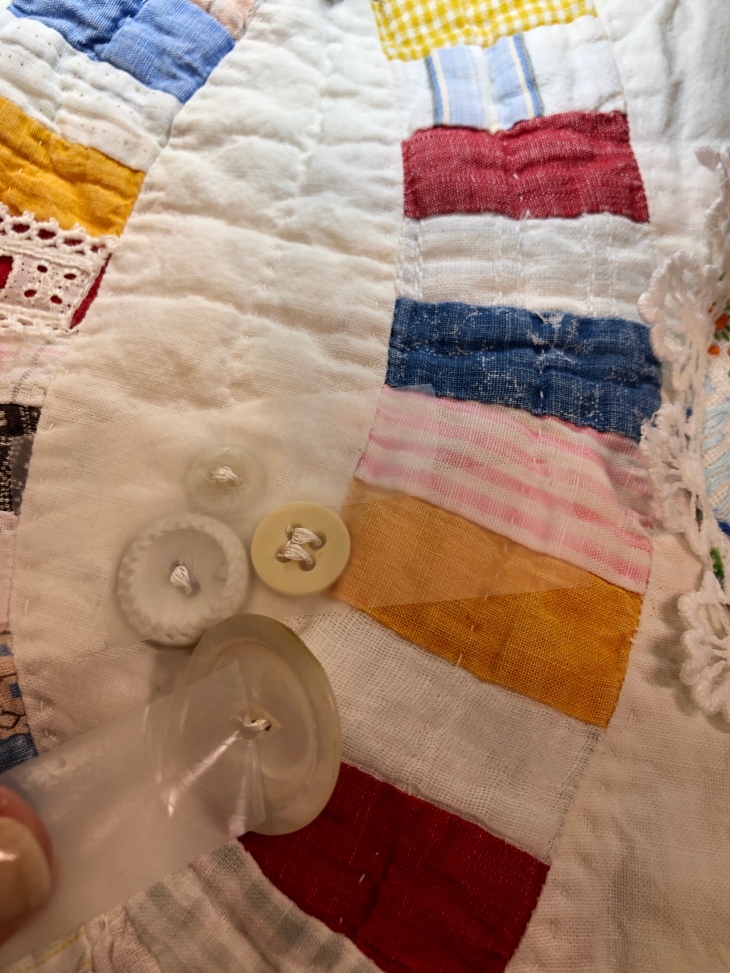


A very quick and easy way to firmly secure your vintage buttons onto your project!

Here’s where I am so far. The 8 full and 8 half circles are finished, there are areas of damaged fabric repair, there is trim sewn to many of the pieced arches, there are button clusters randomly across the Throw, leaves in each corner and some sort of decoration on each of the 4 Patches. Remember way up in the beginning I said I was striving for randomness, well I’ve verified what I already knew about myself, I’m basically a very structured person. Everything about this piece is structured. But I really really like it. 🙂

What’s next? I put it to the test this morning and sent it through the front load washing machine, Delicate setting, cold water, low spin-out, distilled vinegar in the rinse.
It came out with flying colors. I’ve blocked the damp Throw and it is drying as we speak. I’ll do a separate blog post in a day or two about blocking a vintage piece.
Once dry, I’ve got 4 or 5 shank style buttons to sew on by hand and then it’s on to the binding. I’m going to match as best I can the original damaged red binding. My last step will be to add a beautiful 3″ wide hand crocheted edging I’ve been wanting to use…if I can figure out how best to attach it.
Want to see this finished piece in person? Come to the 2019 Fall International Quilt Festival in Houston, TX and find Deborah’s Quilts and More, Booth 2426. She will have this piece to show you during the 5 day show. I will be doing demos in her booth on Friday at 10:30 and Saturday at both 10:30 and 2:00. If you can stop, please oh please introduce yourself!

Questions about this project? Wanting to do one of your own? Use the comments section and let me know what’s on your mind, I’m always ready to help! if you’re truly stymied, send me a text message. If I’m not sleeping or driving, I’ll be ready to help!
Blessings and Happy Quilting!
Rhonda

I am addicted to your posts. I have inherited from a grandmother and great aunt many doilies, buttons, hankies and runners. I have used some as collars for teddy bears along with vintage buttons. I hope I live long enough to try some of your fabulous ideas. I have a very old log cabin quilt that would be happy to be embellished and seen. Thank you so much for your inspiration.
LikeLiked by 1 person
Thank you for your lovely photos!!! I love rescued quilts and rescued embroidery!! I feel as though we do honour the makers when we do!! Just delightful!
From Australia…💖
LikeLiked by 1 person
❤️Thank you!
LikeLike
I am just now reading this post in April, 2021. I live near Nacogdoches. I SO enjoyed watching how you saved and put your own imprint on this lovely quilt. Last spring, during the pandemic, I finished hand-quilting my grandmother’s star quilt top. I worked for days and days, but thought of Mamaw with joy the whole time.
LikeLiked by 1 person
Thank you for your kind words and congratulations on your hand quilting! What an honor and a treasure for you!
LikeLike
Can you imagine the person who made this quilt never imagining it would last this long and getting a fun new life also. I just love how many different ways you can save things. Besides having such an amazing gift you show and teach us how to do these also. Thank you for being so generous with your time and talent.
LikeLiked by 1 person
Thank you!!!
LikeLike
This is absolutely beautiful, I work of art!!
LikeLiked by 1 person
Thank you!
LikeLike
Beautiful as always! You’re so creative and always finish them so nicely!
LikeLiked by 1 person
Thank you!
LikeLike
Rhonda, I always look forward to your posts! They are an inspiration, motivational and… freeing all at once. A couple questions: why did you cut the original quilt in half? In the last pic of the full quilt pics it looks like you added half circles of embroidery on the quilt edges. Am I seeing things? Are the buttons just for decoration or do they cover problems as well.
LikeLike
Thank you! Well, about cutting the quilt in half…a very famous quilter/designer has the other half. Deborah the Business/Booth owner asked if I could do something with a cutter quilt to show that they have purpose. I knew I didn’t want an entire quilt as my project so I purposed (to this other quilter) that we each take half and do something with it for Festival.
The Buttons, yes, they’re serving both purposes, a few are covering holes and a few are simply ornamental.
Also yes, there are half circles of embroidery around the perimeter of the piece.
LikeLike
Hi Rhonda Your double wedding piece is beautiful. You are so talented and such an inspiration. I have recently purchased the Sweet Sunday pattern and am having fun with some vintage linens. I have not decided if I am going to use fabric in some of the blocks or just keep it to the linens and then frame them with fabric. Happy quilting Lori
>
LikeLike
Thank you! Oh! The Sweet Sunday pattern! I’ve had so much fun with that pattern!
LikeLiked by 1 person
Rhonda, the maker of this beautiful DWR would hug you big! What a beautiful restoration you did! Thanks for sharing, I like the taping of the buttons great idea.
God bless you
LikeLiked by 1 person
Thank you!
LikeLike
I love this post, thank you.
LikeLiked by 1 person
Thank you!
LikeLike
I love this one. Vintage quilts seem to find a way to me. Watching what you have done with this quilt is so freeing. Why not use what you have, even some embroidery that might not be finished! It looks so beautiful when put together. Thank you for sharing your process. This quilt is lovely.
LikeLiked by 1 person
Thank you!
LikeLike
I loved reading all about this project and seeing the pictures. Just lovely!
LikeLiked by 1 person
Thank you! This was such a fun project!
LikeLike
Thank you for all your instructions on using vintage linens. My Dad recently gave me a lot of table scarfs and doilies that my stepmom and her mom used as long as I can remember. Several are damaged but I had been following your posts and gladly took them all. Once we finish and get settled into the new house (and my new sewing room!), I am looking forward to seeing what I can come up with for them.
LikeLiked by 1 person
How fortunate for you! Keep me posted on your progress!!
LikeLike