

Another vintage linens challenge with Allie Aller and Dawn Ronningen ended yesterday, Aug. 15 and I finished just in the nick of time.
The rules were few, we just needed to use 3-5 vintage pieces, we could use any number of embellishments both old and new and the timeframe to complete the project was 2 weeks.

But how did this all start? Where did my inspiration come from? Get ready for a whole bunch of pictures to take you through the process.
Sorting through my stash I came across 4 matching old napkins. I laid them out on the ironing board placing the decoration at each of the corners. I cut 2 edges of each napkin so that when I stitched them together the overall measurement would be 20”.

See how the decorative corner on each napkin makes an excellent base once they’re sewn together.
I sewed the napkins together with a 1/4” seam allowance, pressed the seams open. I left the raw edges knowing this 20” square would be placed atop bleached muslin. No worries about fraying. With this “base” piece completed I search for the perfect white crocheted doily.

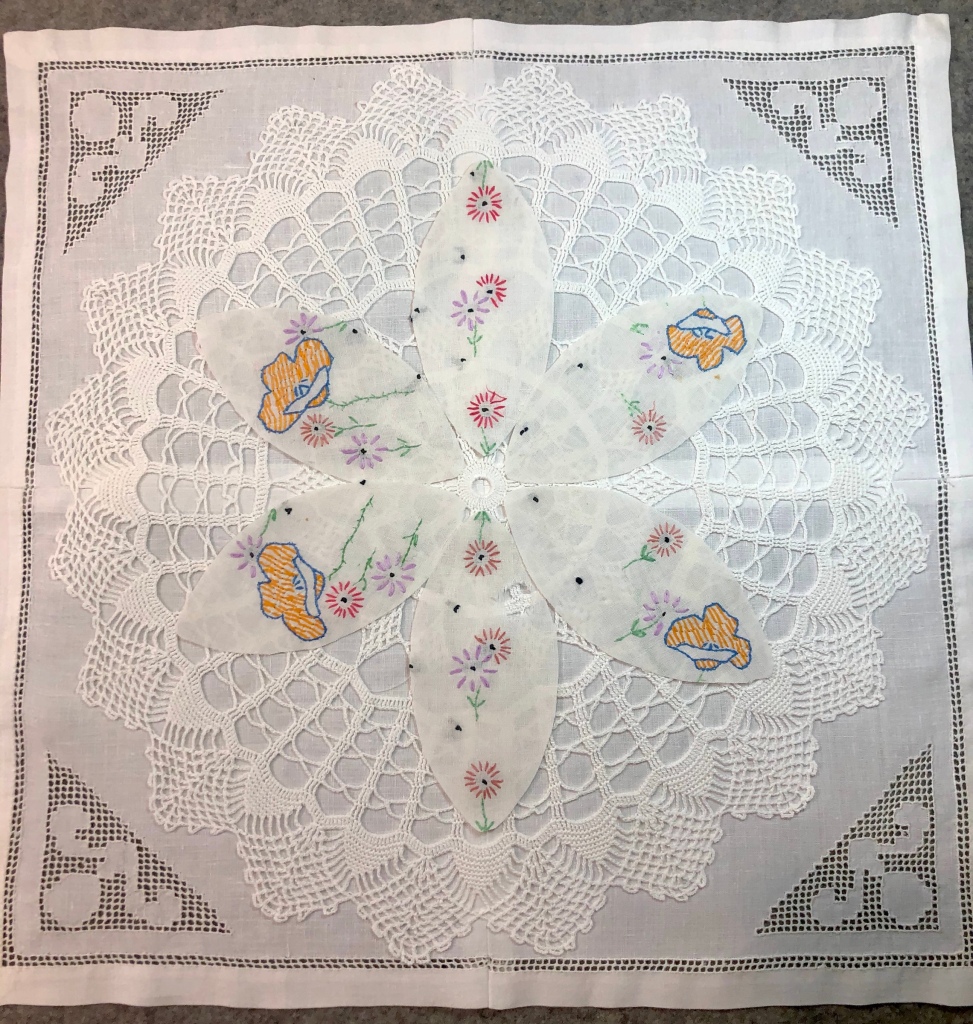
Seriously, this looked so pretty I could have stopped here but I knew I needed at least 1 additional vintage piece to meet the challenge requirements. I’ve been toying around with working with melon shapes, I’m a huge fan of the Friendship Dahlia quilt pattern and one thing led to another which led to me on a search for an embroidered piece I’d be comfortable cutting up into pieces.


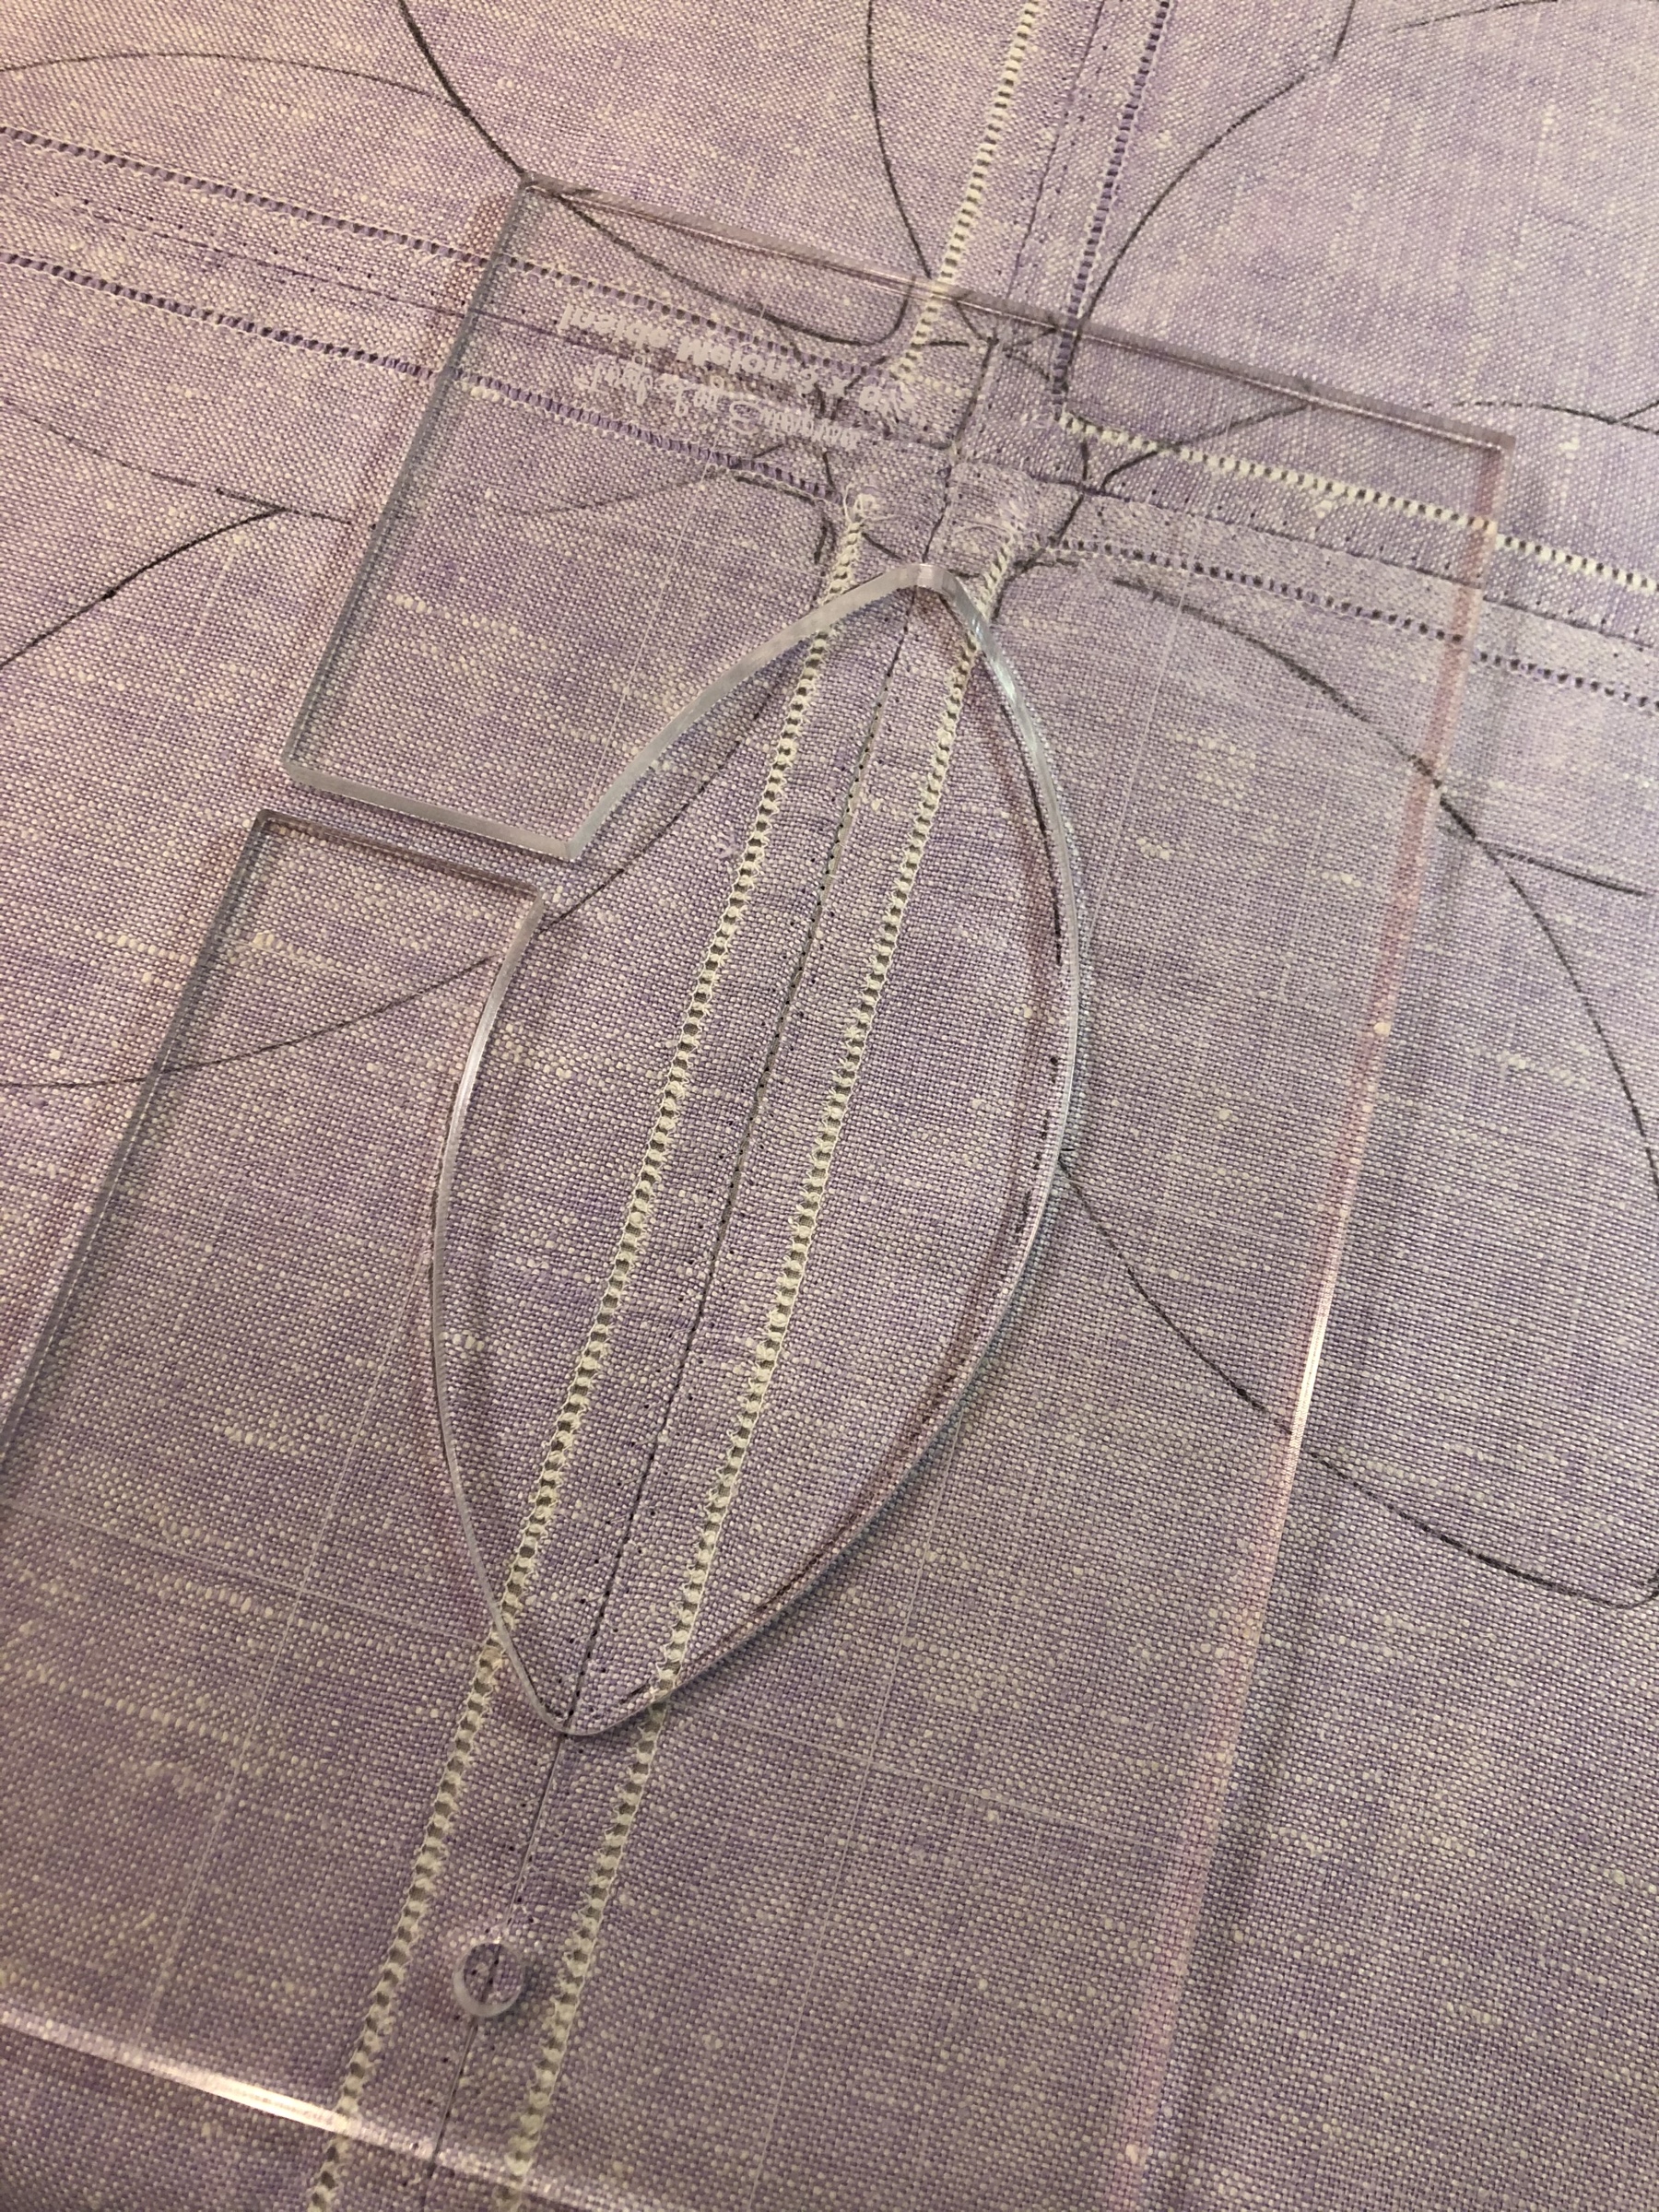
I have a melon long arm template that did double duty as a guide for marking with a black Frixion pen
These are the types of vintage pieces I don’t mind cutting into at all. They have seen better days, they have stains, holes, ripped decorative edging and missing pieces.

Here’s what I’m left with after I cut out the 6 melon shapes. Will I throw this away? Oh goodness no! There are still areas that will will be part of a future project.
The trial run makes me happy with the melon pieces. I also like that the crocheted doily pattern shadows through the thin dresser scarf fabric.
If you’re a repeat reader of my blog posts you’ll know Elmer’s White School Glue is my friend. I use it on so many quilting/sewing projects and this pillow challenge is no exception. I am not a fan whatsoever of using fusibles with vintage pieces except when using cut damask. (Damask has a mind of its own and if you even look at it wrong it will ravel!) Just a word of warning about my friend Elmer: when dry it is easily stitched thru with the sewing machine. It is awful to stitch thru when doing hand-work.
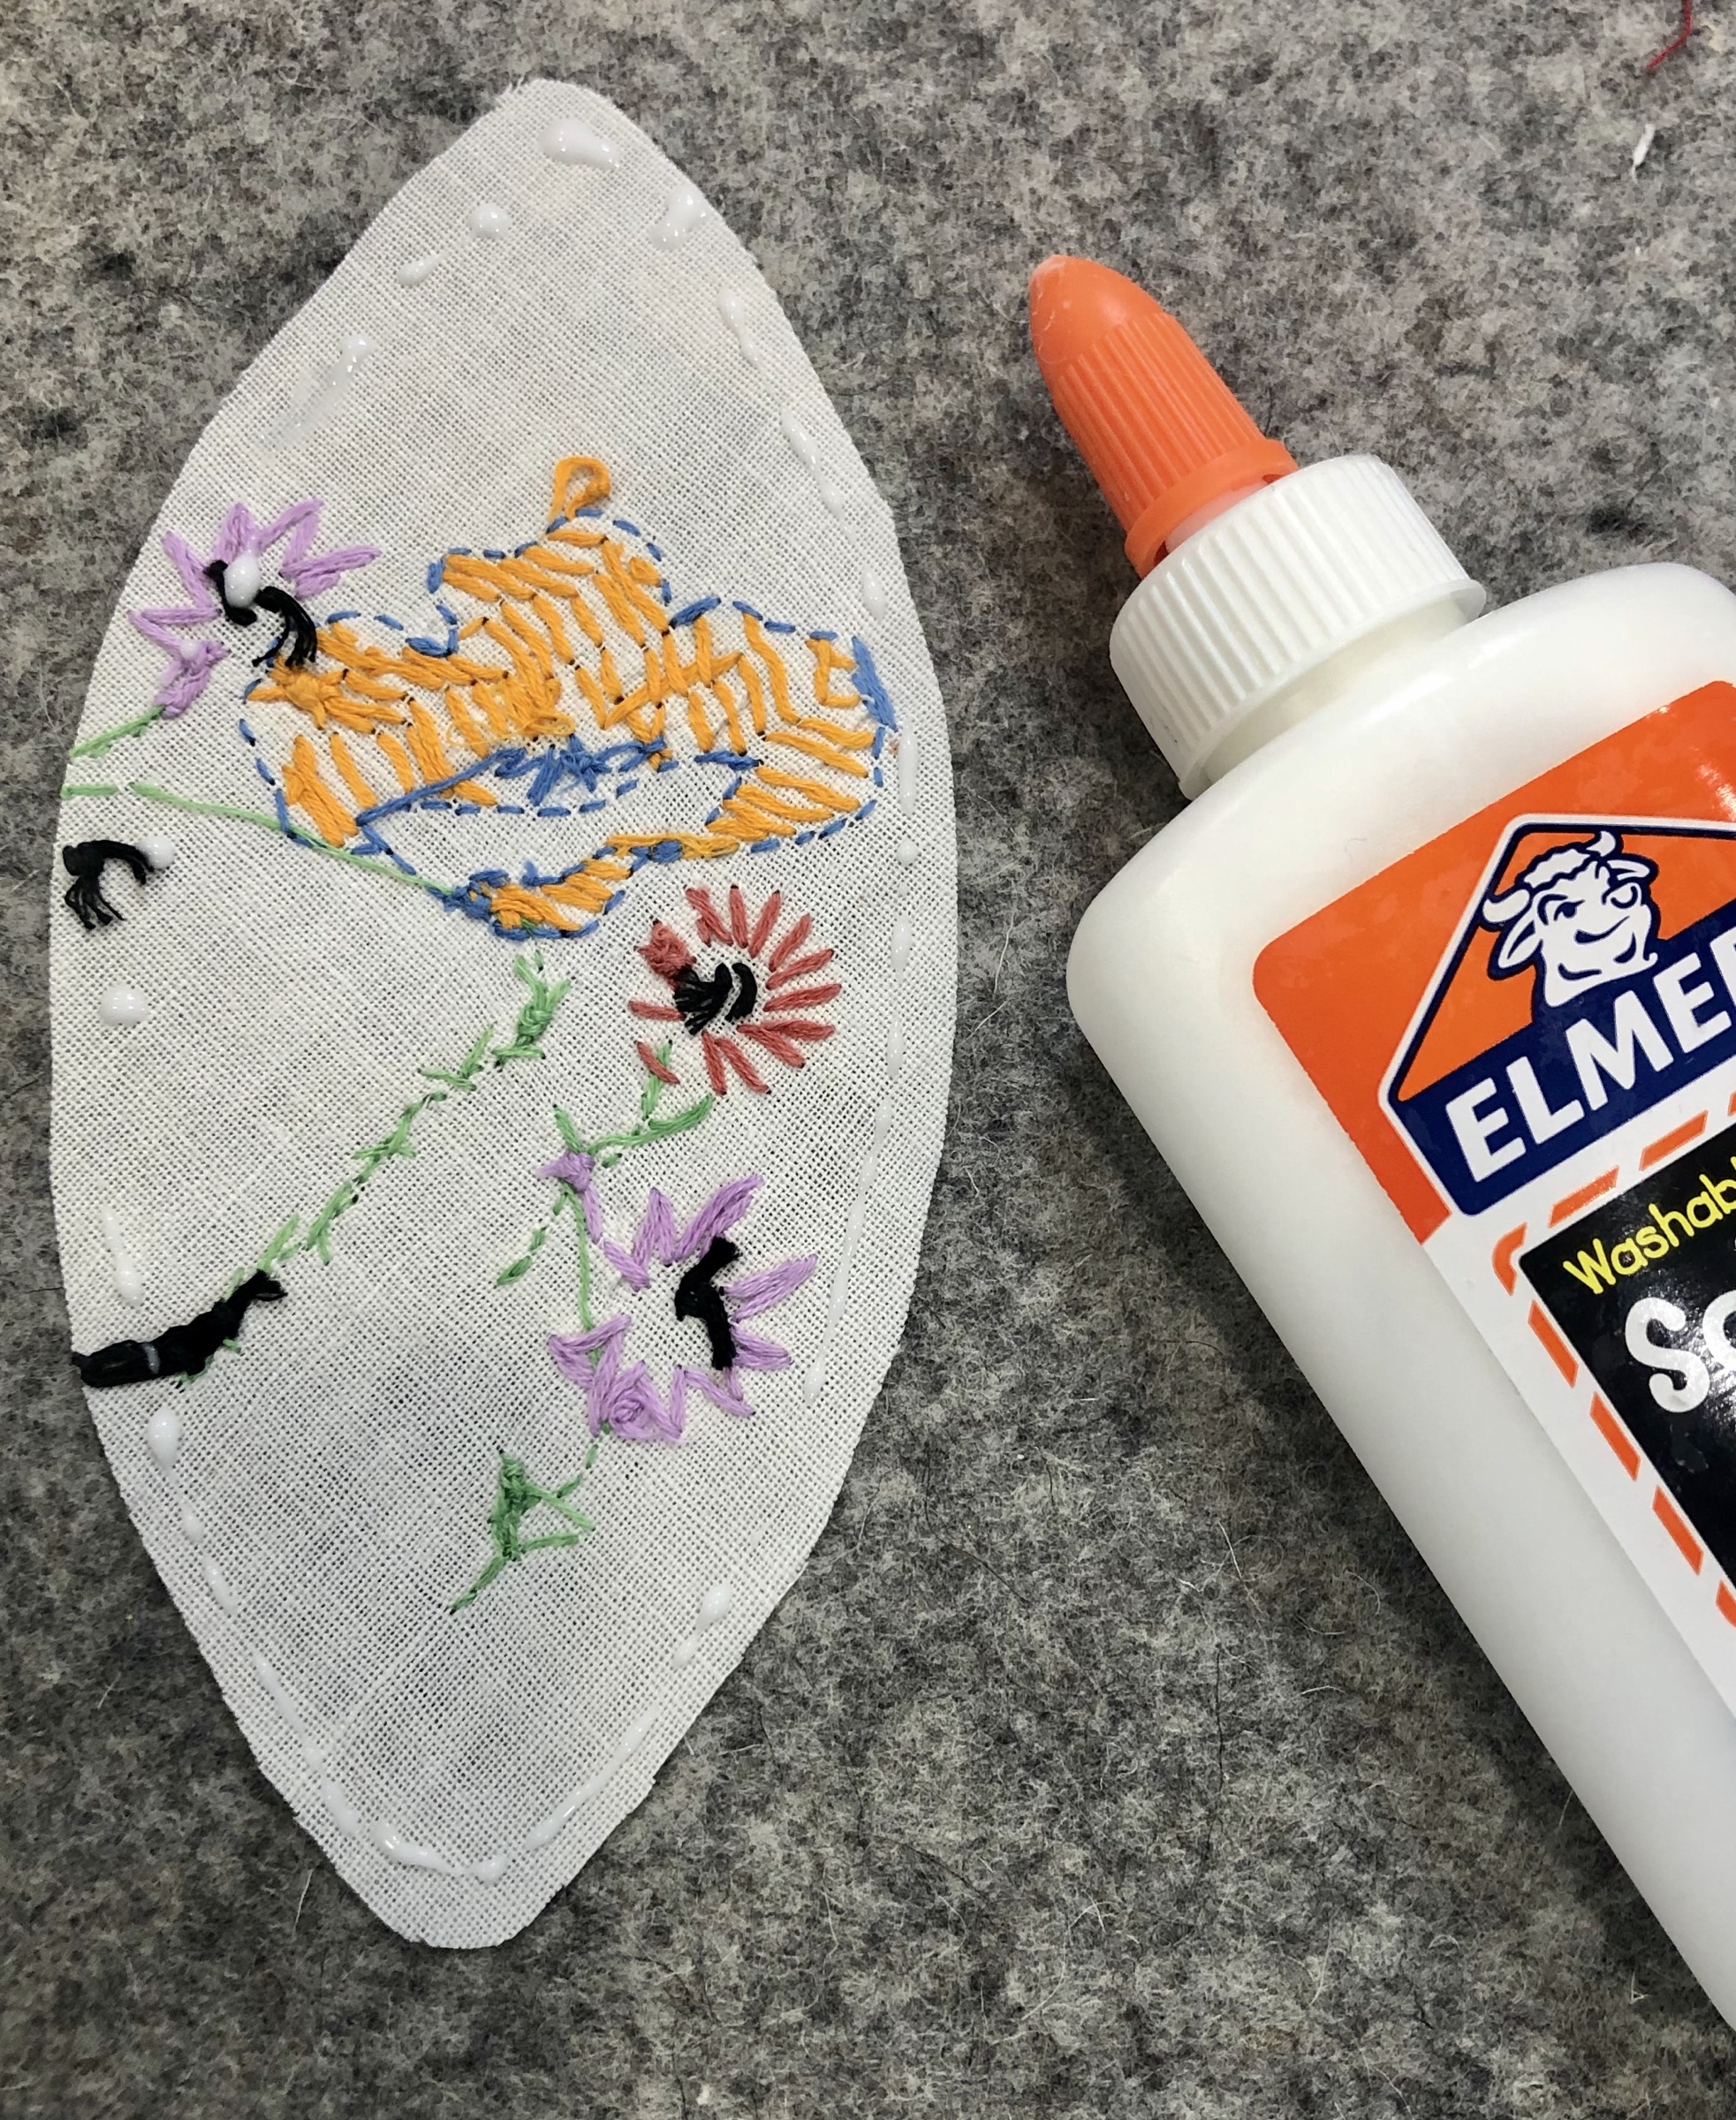

The Elmer’s along the edge serves several functions. It holds the melon shape in place for future machine stitching and then longarm quilting and it helps to secure the edges so that they don’t ravel or fray while I’m working with them.
*** Update: I put a drop of glue also at each of the crocheted doily outer scalloped edges. Dried with the iron, the glue held the doily in place nicely until I could load and stitch it down on the longarm.

Once the 6 melon shapes are in place, the next step is to decide on the color of thread for the decorative stitching. I auditioned just a few colors but was always leaning towards lavender. I also was positive I did not want to use the traditional machine applique or buttonhole stitch. Using a scrap piece of fabric I adjusted both the width and length of the build-in stitch that resembles a little twinkle star until I was happy with the results. Does this stitch have a name? Who knows!

This is what the pillow top looked like after each of the melons were glued into place. Have I mentioned that once the piece is placed, I dry the glue by pressing with a hot iron, no steam. If you’re gluing remember to press not iron as the back and forth motion of ironing can cause your piece to move. Ask me how I know…

Above you’ll see one melon stitched in place with the lavender machine embroidery thread. Only 5 more to go.
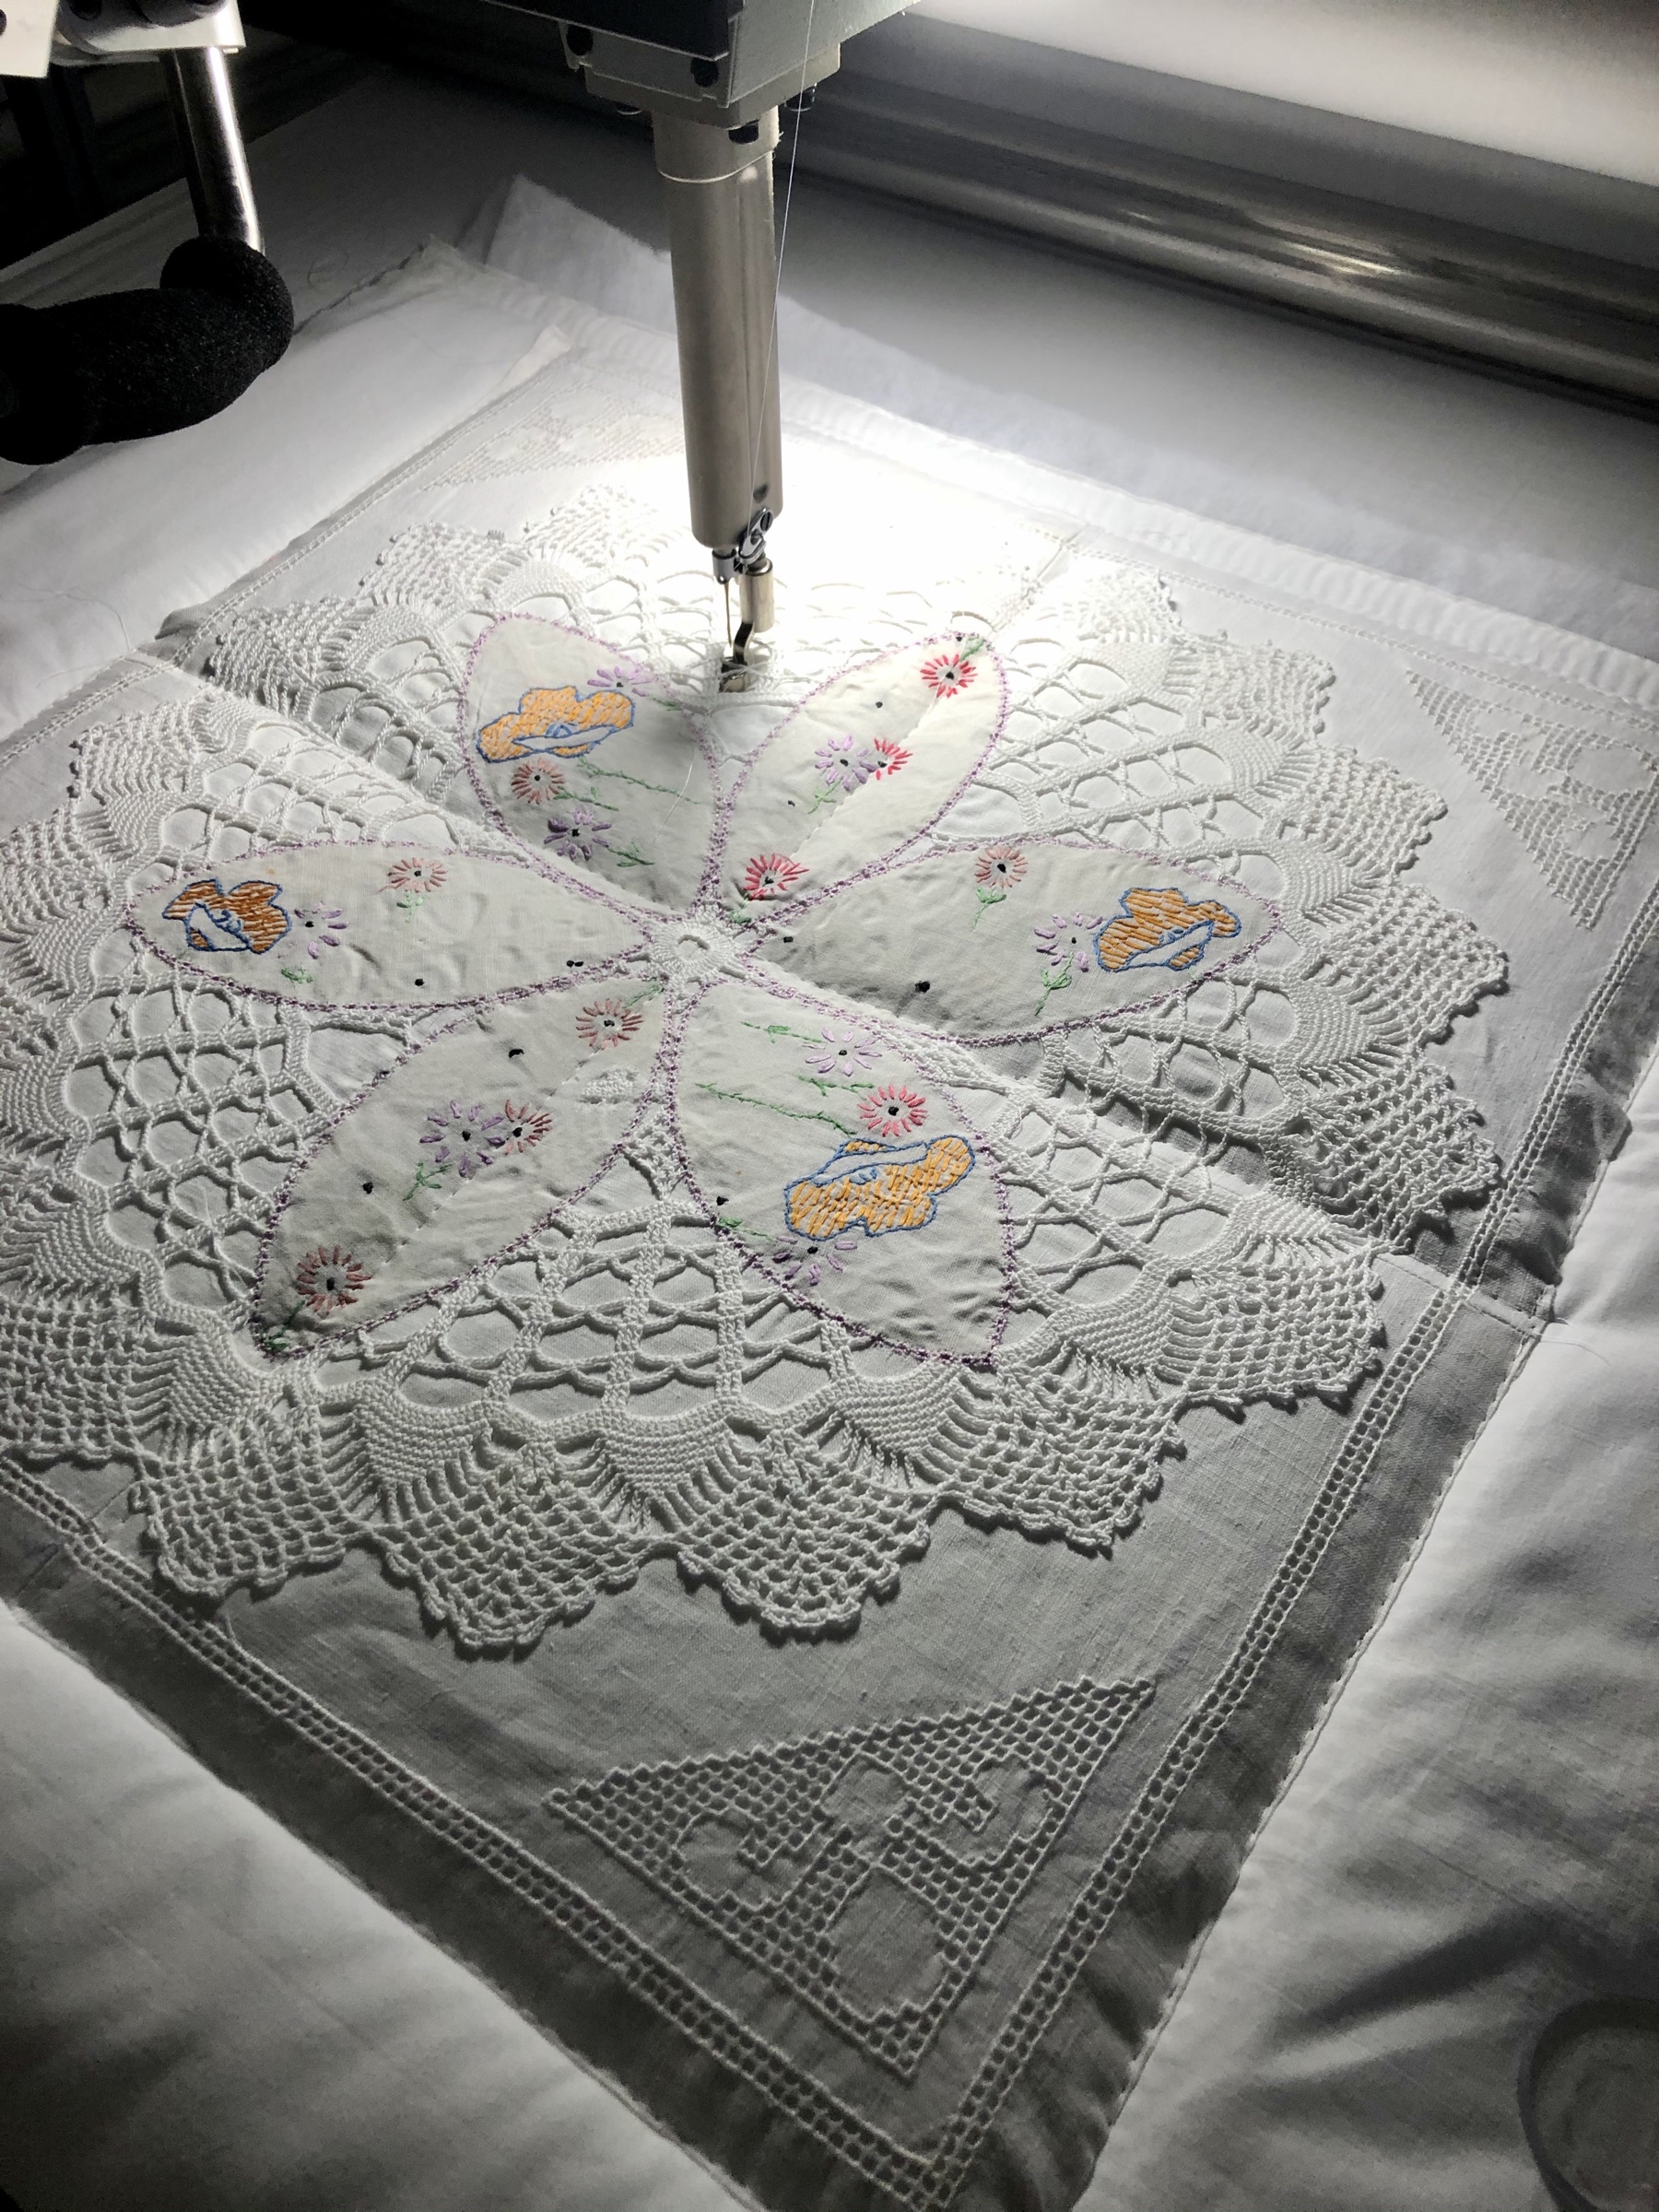
With the pieces decoratively stitched in place the pillow top is ready for the longarm. I’ve used well laundered bleached muslin for both the top and back fabrics and 2 layers of Hobbs white Tuscany Poly for the batting. I have a Wonderful Specialty Threads called Deco Bob (80 weight) in the bobbin and the needle. For this pillow I’m using white thread. My first steps are to baste the pillow top along the upper horizontal edge, vertically through the center, horizontally through the middle And then along the remaining 3 outside edges. I have to be very careful and quilt very slowly because the hopping foot could easily catch on the crochet and rips could happen. I do not use a longarm Cup Foot because I feel it hinders my visibility when free motion detail quilting.

Using a blue water erasable marking pen by EZ International, I marked the center lengthwise on the melon pieces. This will serve as the stem of my free motion feathers. After all the melons were feathered I went back and quilted in feather veins.
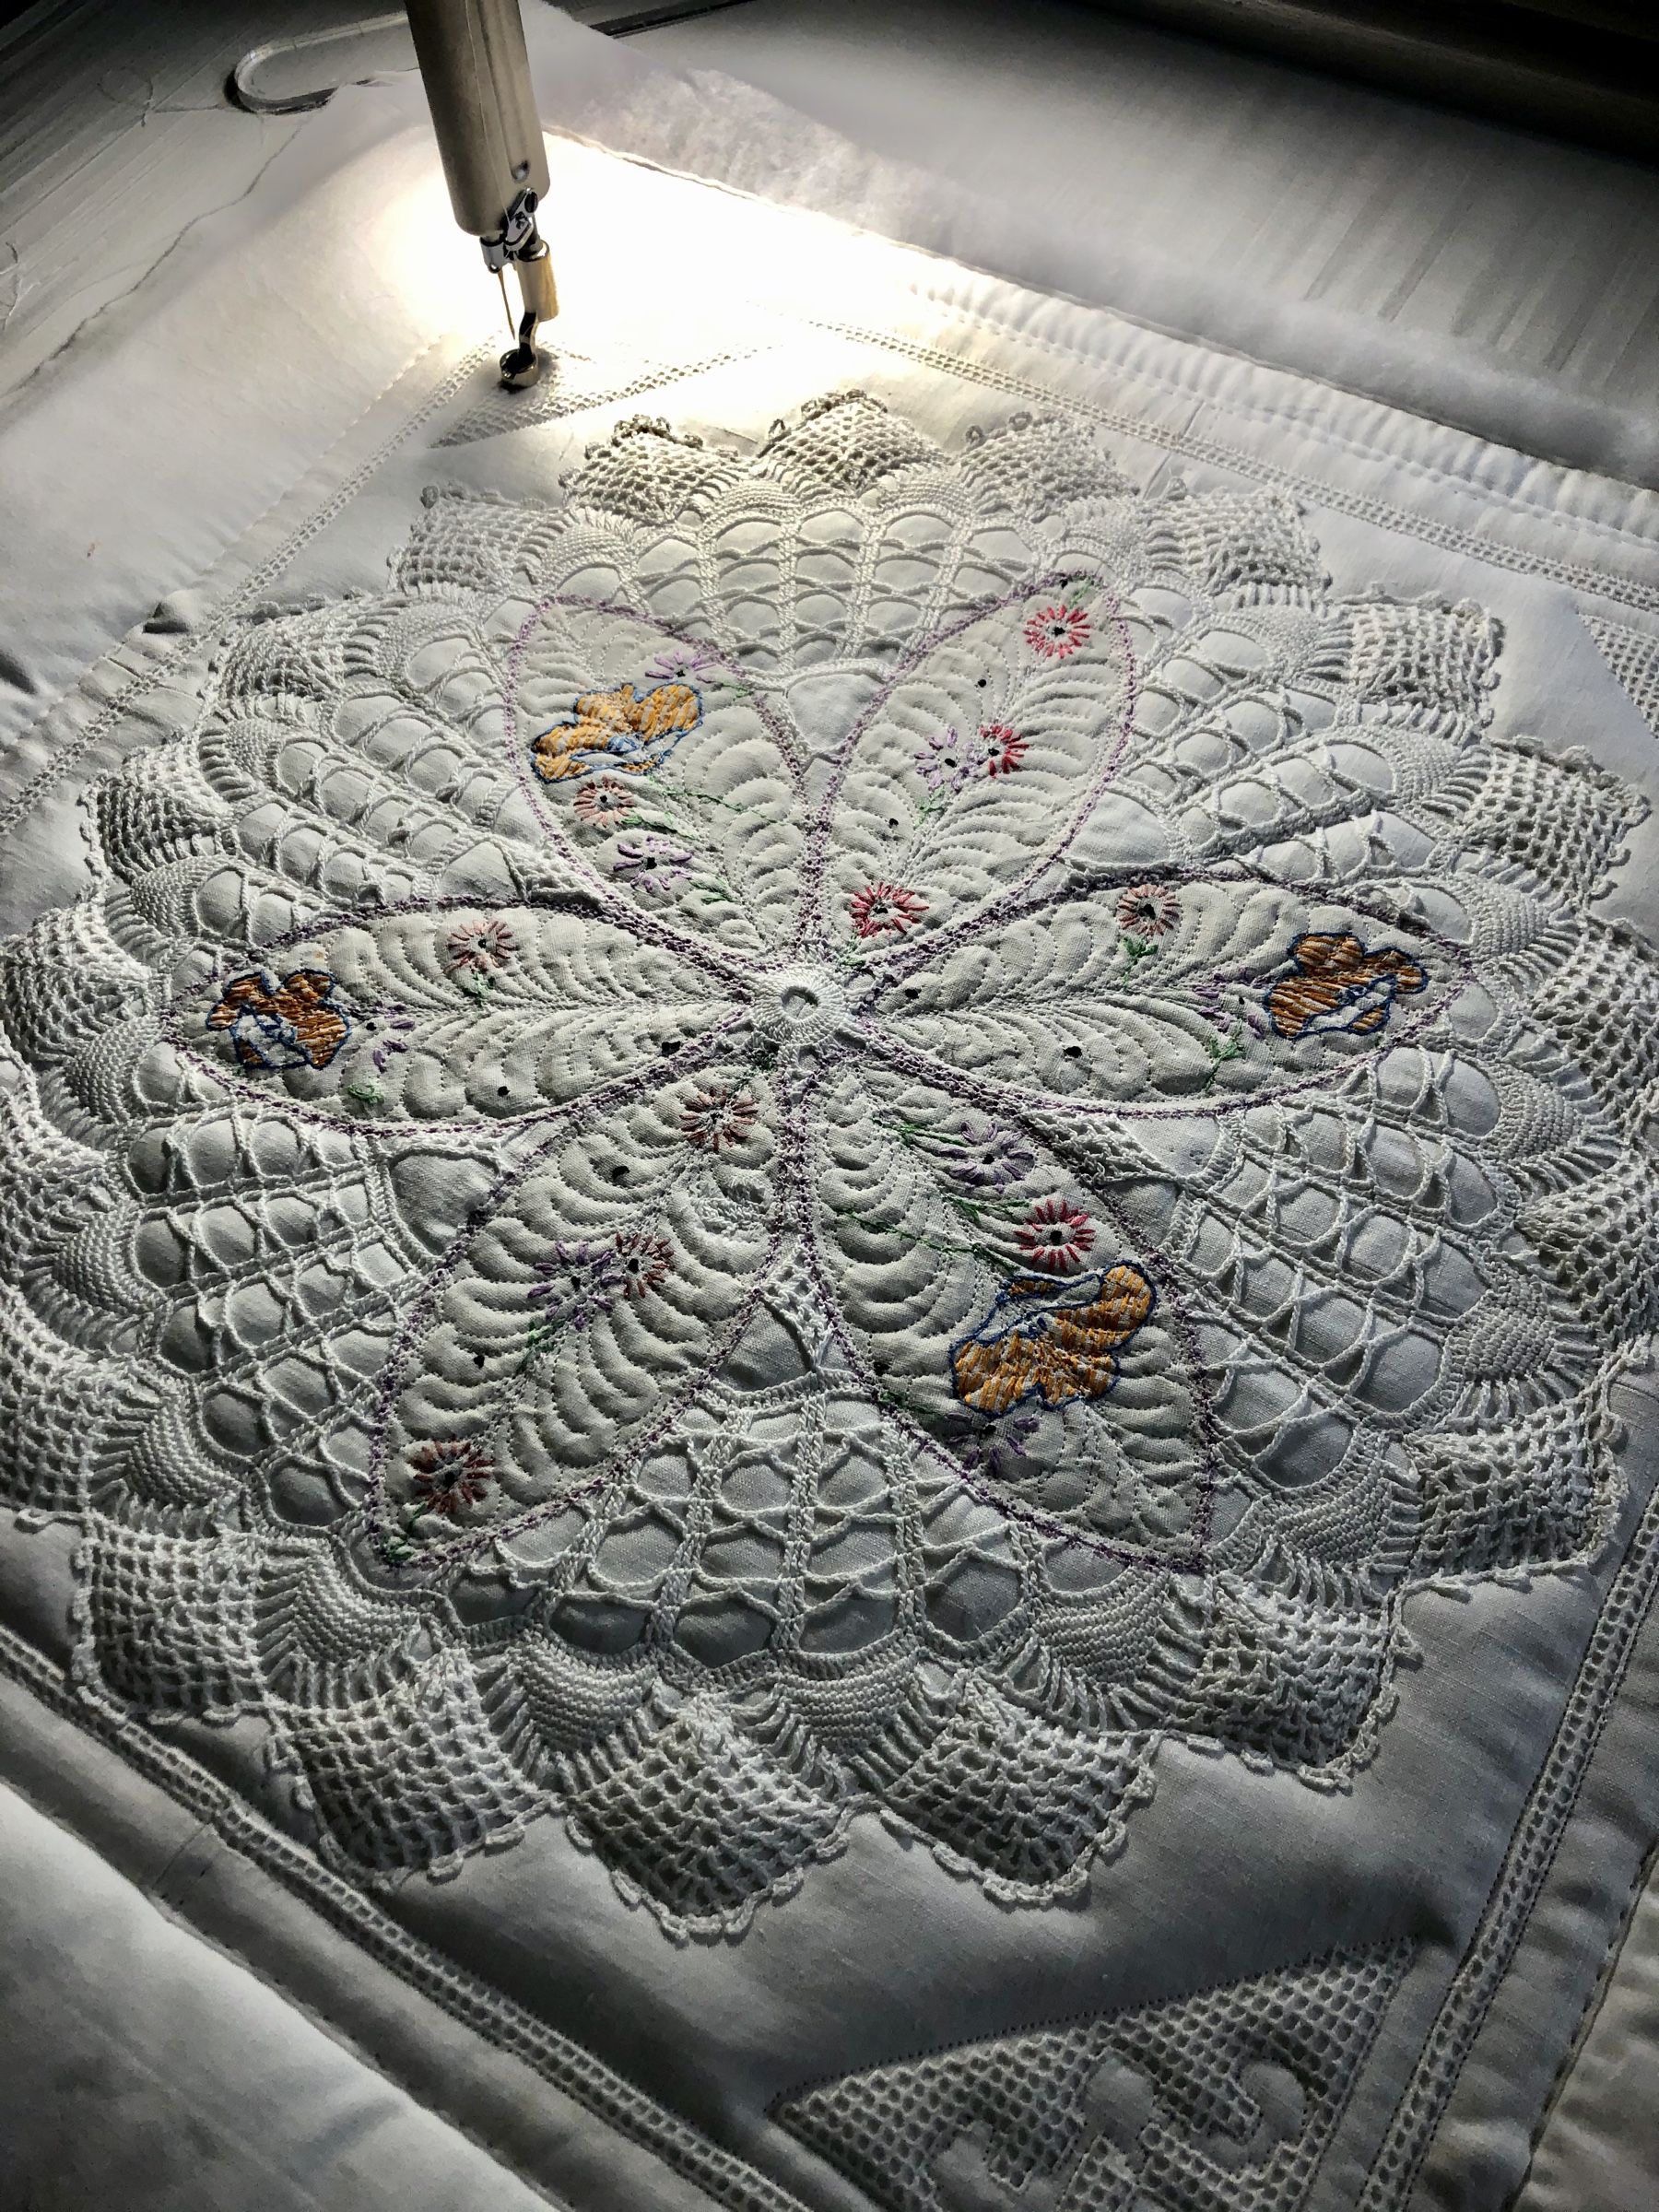

Above you’ll find 2 pics showing the quilting on the white crocheted doily. Have you ever quilted over a crocheted piece? Patience and slow quilting are necessary but oh how I like the look of it! I stitched around the edges and the inside design of each corner motif and decided I was finished quilting. I have in mind to do some additional decorative sewing machine stitching but need to do the bead embellishing first.

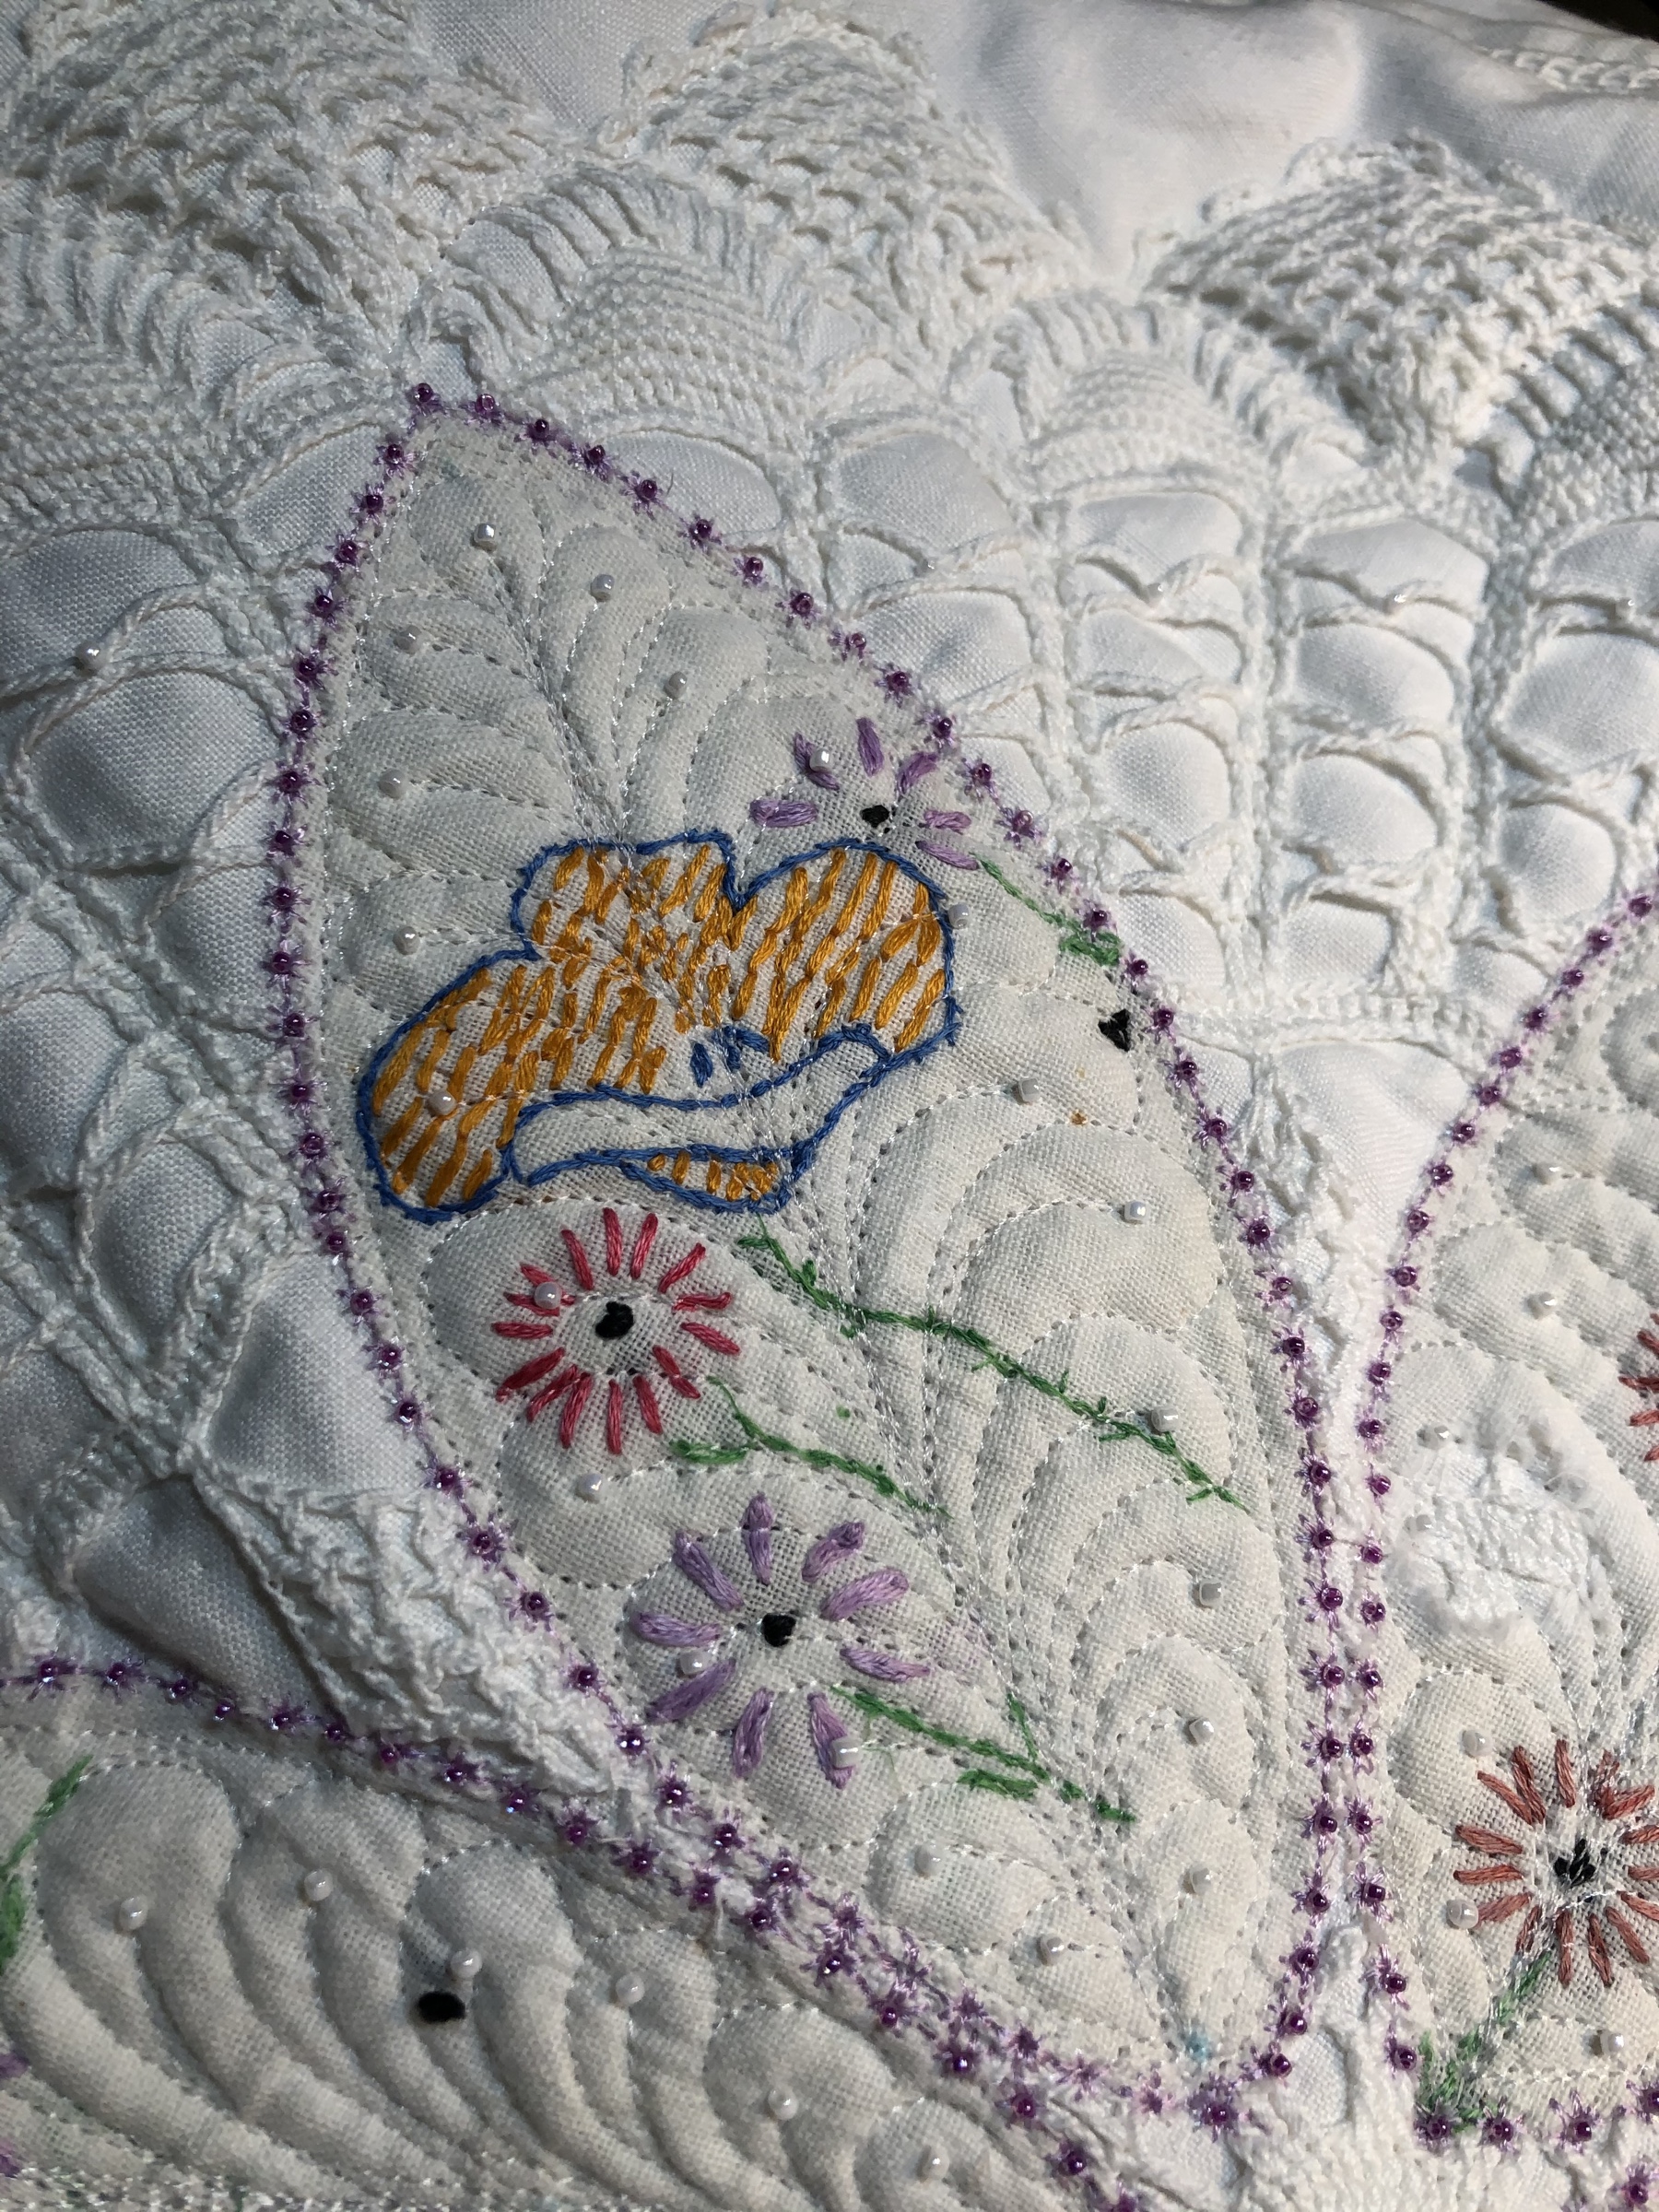
I wanted to be kind of subtle with the beading so I am using bead sizes 11 and 15 in this picture. In a later picture you’ll see some much larger white beads around the outside points of the crocheted piece.


I’ve sewn tiny lavender beads along the inside part of the 4 corner designs and you can see I’ve added 2 outside rows of machine decorative stitching, one row in lavender and finally if you look closely you can see the outer row stitched in white.
I always like to use an element at least twice if I can so my next decorative stitching is directly on the doily using the same stitch used to attach the melon pieces. See the picture below:


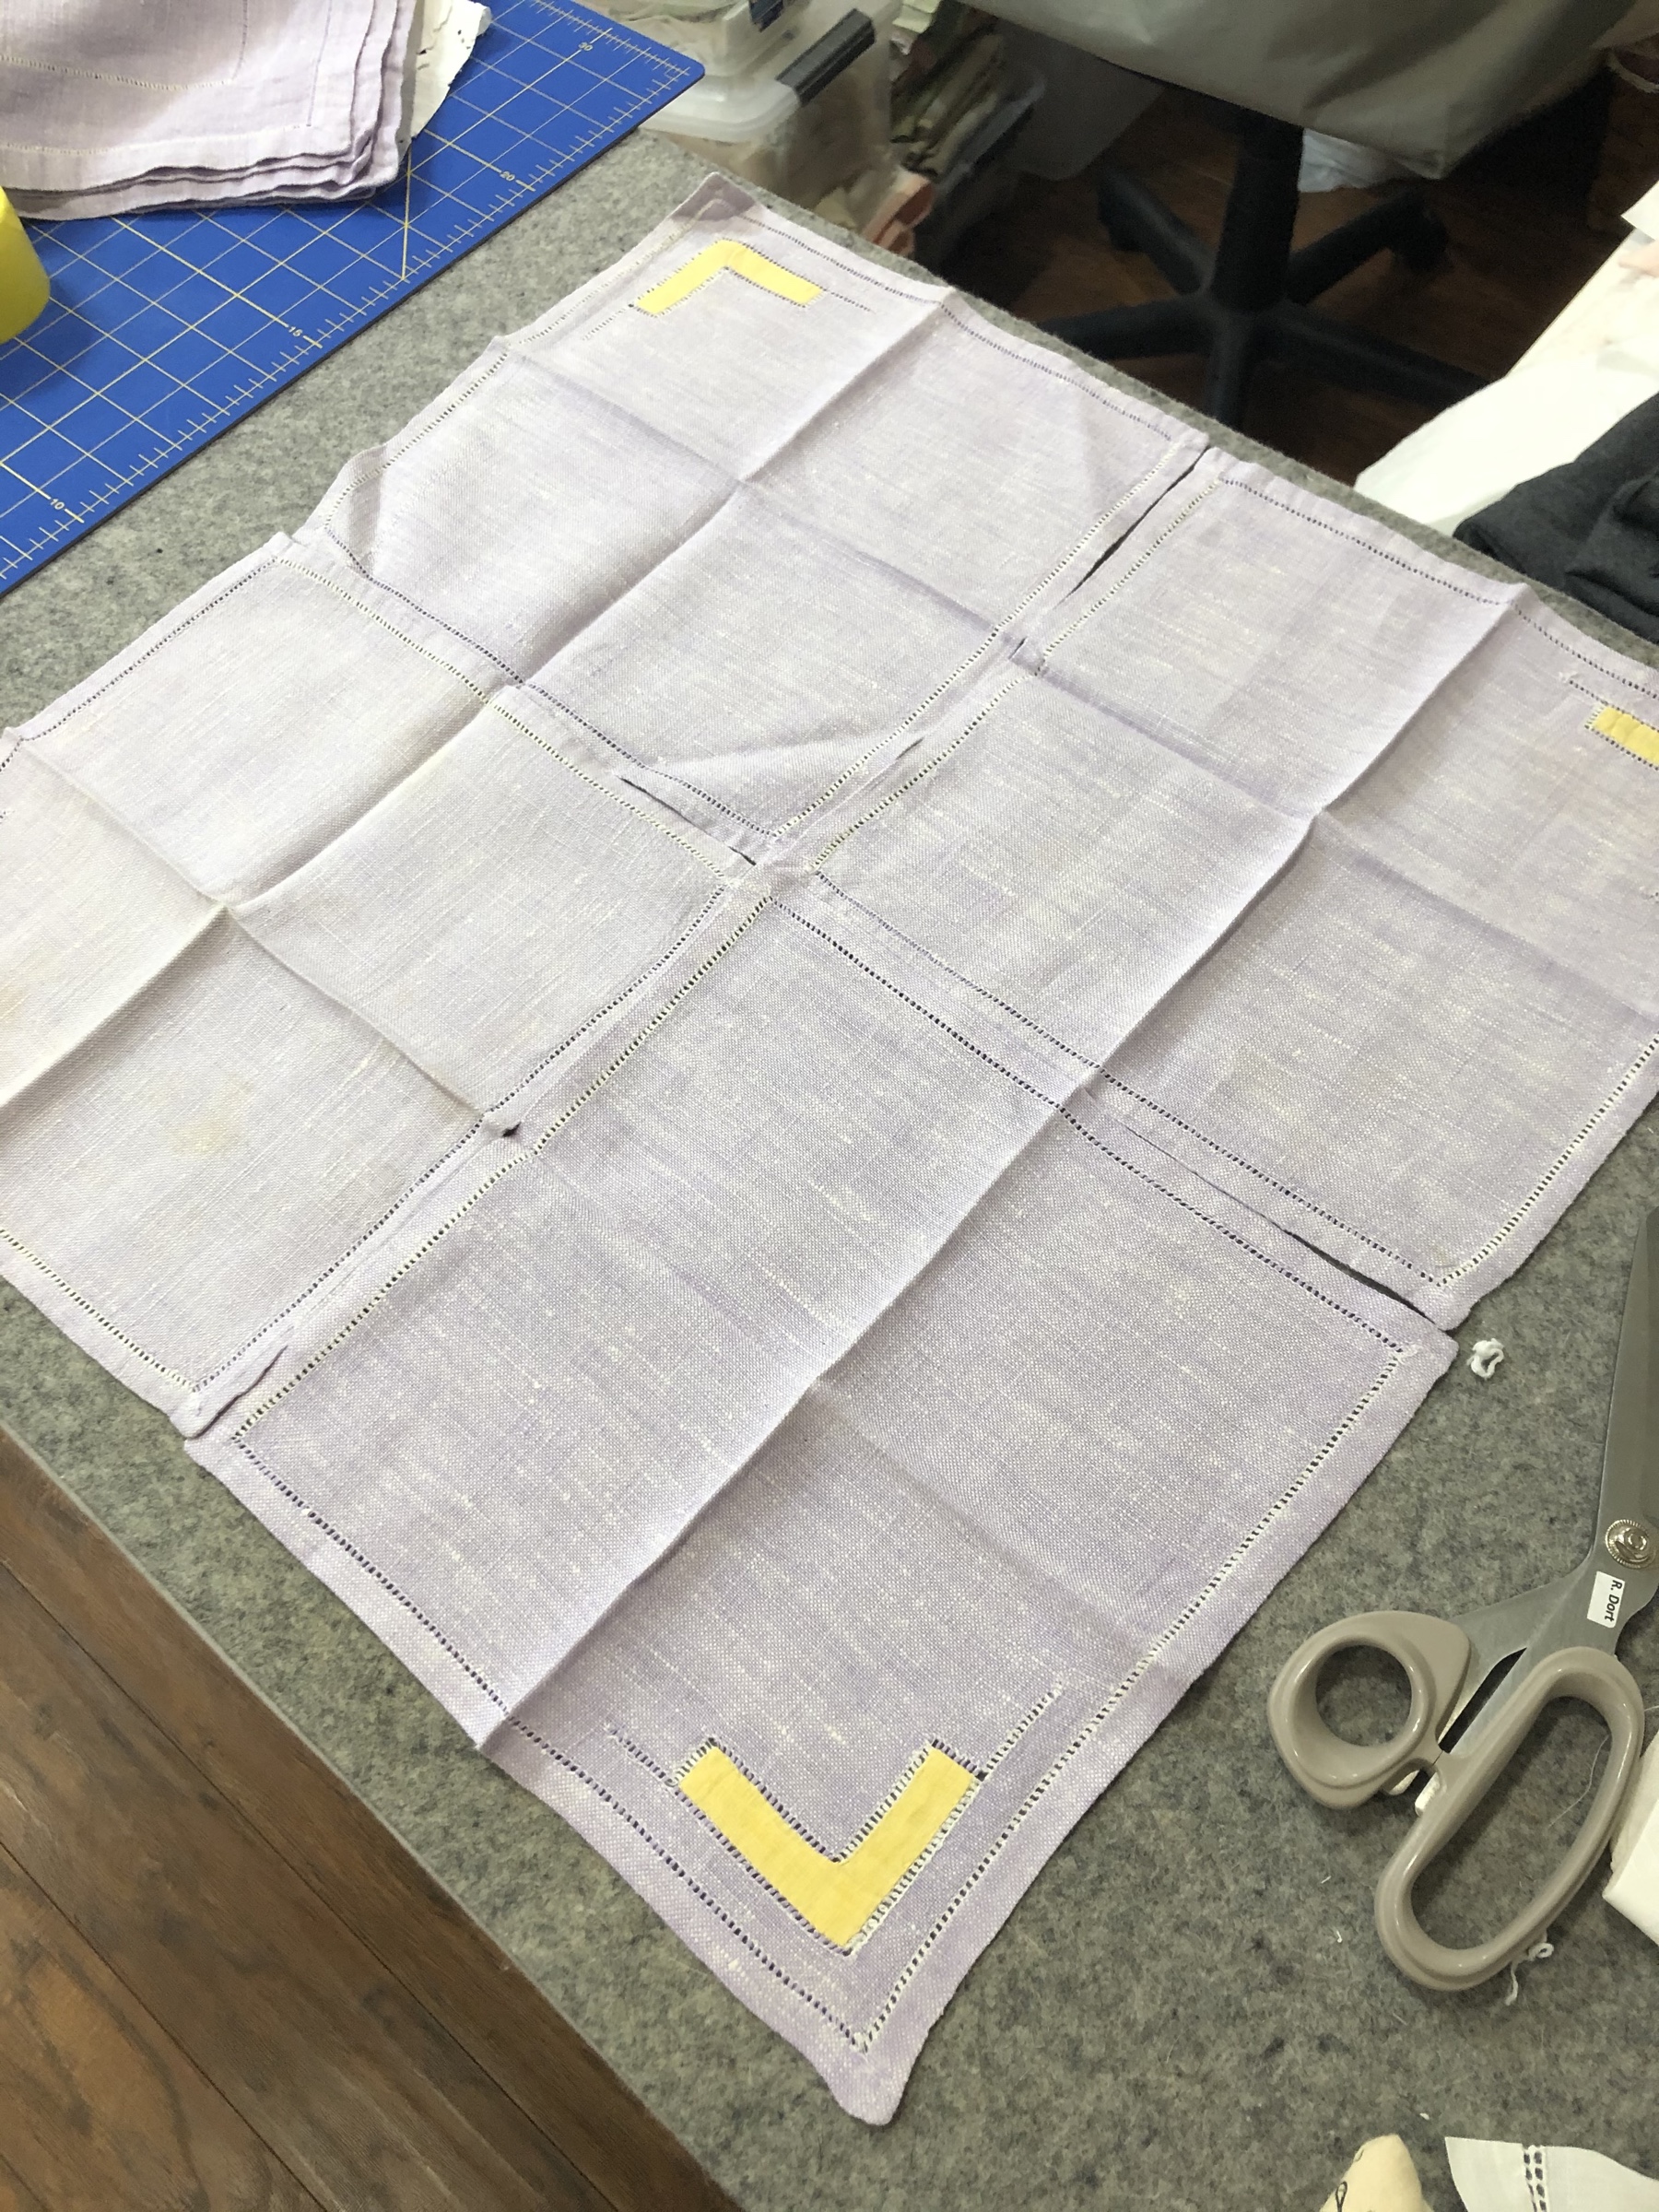
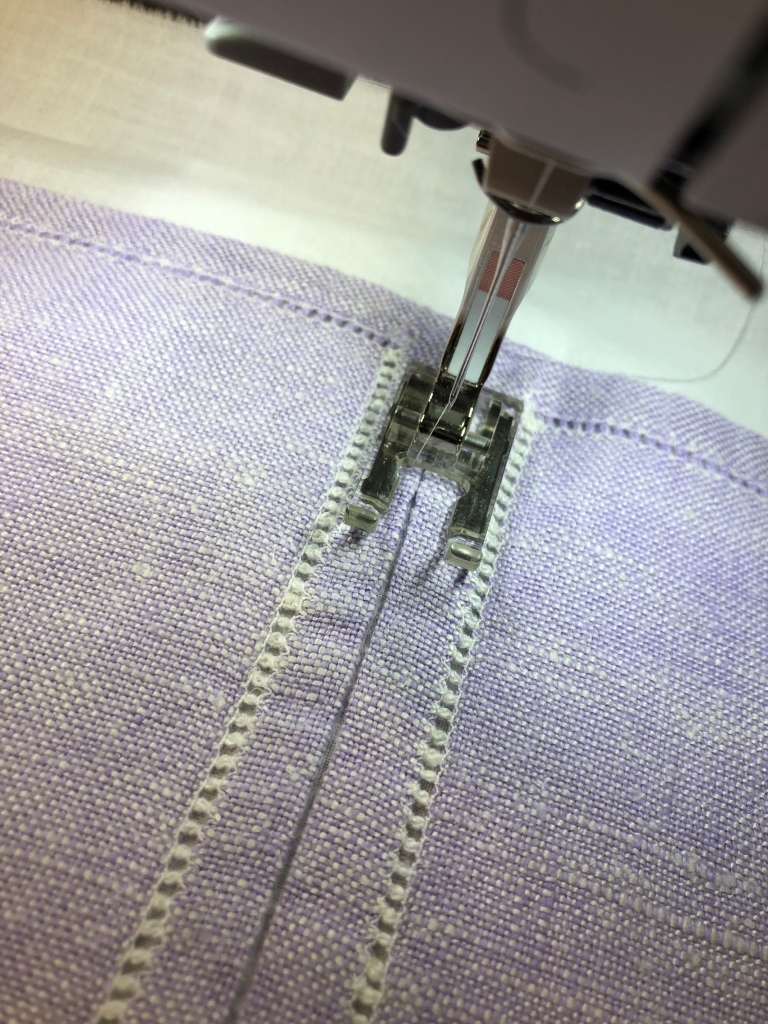
But what about the pillow back? While rummaging through my stash looking for pieces for the front I came across lavender luncheon napkins. They were just the perfect size to make my pillow back. I’ll take you quickly through a series of pictures that will visually give you the steps taken.


So there you have it, step by step instructions/guidance start to finish. Of course I’m always ready to answer any questions, just type them into the comments section.
Blessings for a great day and of course, Happy Quilting!
Rhonda


Rhonda I can’t wait to try this! I have been collecting pieces since I first discovered you. I was wondering about the melon pieces, do you turn them under? I just couldn’t tell. Thank you for sharing this!
LikeLiked by 1 person
Good morning Linda thanks for your kind words! Regarding the melon pieces, no I do not turn the edges under. Oh I chose a decorative stitch and I just made sure when I was stitching to go right down the edge of the melon. I won’t have a problem with raw edges fraying that way. It’s a wonderful way to do the appliqué without having to worry about unraveling later!
LikeLike
This is a beautiful piece of art. Our guild showed your recording for our online program meeting this week of your work. All I could think of was all the lovely pieces of embroidery, dollies and other lovely linens from my mother, grandmother and aunt. Can’t wait to try some of your techniques. Thank you for sharing and being an inspiration to all of us quilters out here.
LikeLiked by 1 person
Thank you for your kind words, I’m also happy that your Guild had the chance to show my presentation! Wishing you all the best as you work with the lovely pieces from your relatives!
LikeLike
Thank you for sharing your beautiful work. You are an inspiration to me as I have so many of my mother’s and grandmother’s crochet dollies and dresser scarves.
LikeLiked by 1 person
Thank you for your kind words!
LikeLike
I also meant in my previous comment… do you glue your doily down before you glue on the melon pieces.? Darn Auto correct…love seeing your projects and how your creativity works.
LikeLiked by 1 person
Hi, maybe I missed it but Rhonda did you glue the doily to the background also? Before you glided down the melon shapes?
LikeLiked by 1 person
I did and should have mentioned that! I sparingly put small drops of glue at each of the scallops of the outer edge of the crocheted doily.
LikeLike
Beautiful, thank you for the detailed step by step info. I’m a new follower. Do you laundry the piece once completed—just wondering about the glue.
LikeLiked by 1 person
You’ll need to evaluate your piece once finished to determine if it needs to go through the laundry once your stitching is complete. Because this is not a utility piece, I did not. Excellent question!!
LikeLike
Wow! Truly lovely! You are wonderful artist with such attention to detail 🙂🌻
LikeLiked by 1 person
Thank you!
LikeLike
Another beautiful vintage linen make over.
LikeLiked by 1 person
Thank you sweet friend! ❤️
LikeLike
Loved the creativity and all the different fabrics and stitches and embellishments. You did an excellent job explaining and progress picture taking. Makes me hungry to fire up my imagination, use some the goodies I have been hoarding and get started!! Curious why you added Hobbs batting – would this take the place of putting another fabric like facing for stability???
LikeLiked by 1 person
Thank you for your kind words! I added the batting as though I was creating a small quilt. So there are my layers of the pillow top only from the bottom up:
Bleached muslin
2 layers of the Hobbs batting
Bleached muslin
Base layer of the 4 white napkins sewn together
White crocheted doily
And finally
The cut up dresser scarf melon (or petal) pieces.
LikeLike
Your work is beautiful. Did you starch your doily before you used it?
Kerry
LikeLiked by 1 person
Yes I did! I should have thought to mention Spray-Starch is my middle name! 🤣
LikeLike
Beautiful pillow.
LikeLiked by 1 person
Thank you!
LikeLike
So pretty! Interesting that you incorporated the bobbin-sized hole right into the cover w/o bothering to camouflage it at all.
LikeLiked by 1 person
Thank you! Yes, the big-ish hole will never be noticed until a magnifying glass is used. There’s so much visual going on with this piece it blends right in.
LikeLike
Thank you so much for the details!!!!
LikeLiked by 1 person
Absolutely! 🙂
LikeLike
Your pieces are amazing!
LikeLiked by 1 person
Thank you!
LikeLike
Beautiful and so inspiring to those of us that have these kinds of linens in our closets wondering what to do with them! Thank you for sharing.
LikeLiked by 1 person
Thank you for your kind words! Glad you enjoyed the blog and happy to hear you have been inspired to create something beautiful with your own vintage linens!
LikeLike
I have wanted to utilize the old linens that were my grandmothers for a long time. Starting with a pillow feels doable. Thanks for all the details re layers, stitching options, front and backs! Could be a great project for the coming winter, that I won’t be spending in Florida!
LikeLiked by 1 person
Great!! Make sure to take picture along the way of your”great vintage linens adventure”!!
LikeLike
Hi, Rhonda! You do the most beautiful work! You are the MOST CREATIVE quilter I have ever seen! This is a GORGEOUS pillow – so much love and creativity put into it. Thank you for sharing your work!
LikeLiked by 1 person
Paige, Thank you so much for your kind words! I do enjoy a challenge with my friends, it sparks my creativity and I’m always surprised with what I end up with! Again thank you!
LikeLike
BEAUTIFUL! Now I have a starting point for all the doilies and hankies I collected all these years. There might even be a quilt sampler. Thanks Rhonda.
LikeLiked by 1 person
Thank you! A quilt sampler! What an awesome idea!!
LikeLike
Thank you so much for sharing your process for this one – what an amazing transformation and inspiration for old napkins. I certainly wouldn’t have thought about using applique or a doily this way – feels like I can now crochet them with purpose! Beautiful, beautiful cover.
LikeLiked by 1 person
Thank you for your kind words! I do so much love working with old pieces. They get a new opportunity to be love again!
LikeLike