I’ve been collecting Pansy Doilies for years and years and decided they could be used in as a collection in a quilt.
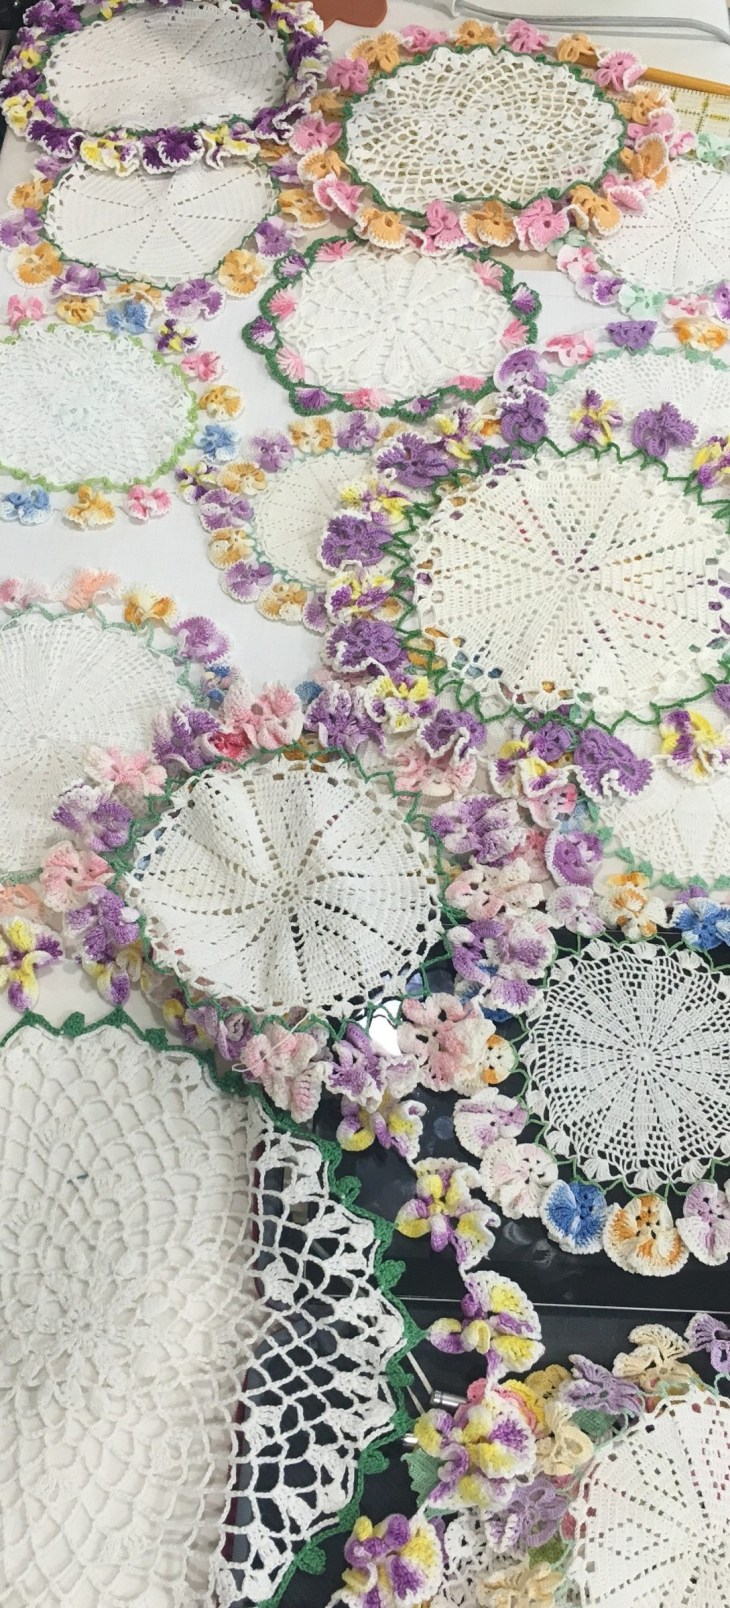
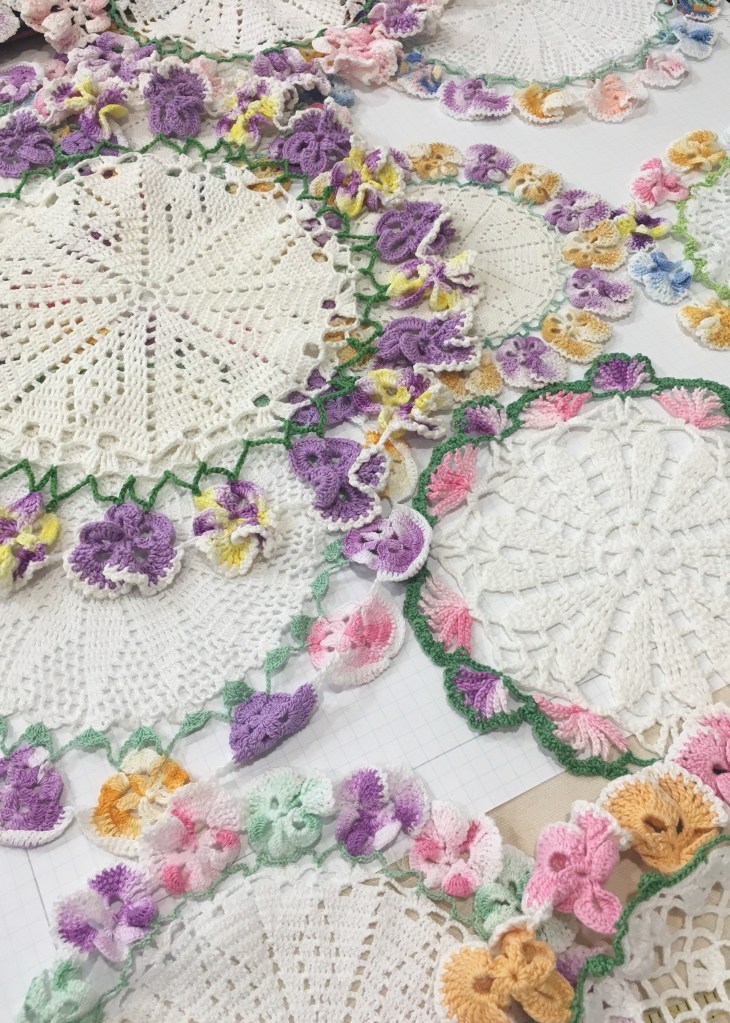
I sorted them by general color as I have those with white or very light ivory centers and others with darker ivory/ecru centers. I also discovered many in my collection were not actually pansies but rather, creative unknown flowers. See the doily in the bottom right of the picture below. Beautiful, but not pansies.
Like any other of my vintage linens, if they haven’t been soaked, starched and pressed, I set about to get those things underway.
Using my design wall I began an experimental layout. The doilies below became my “main players”.

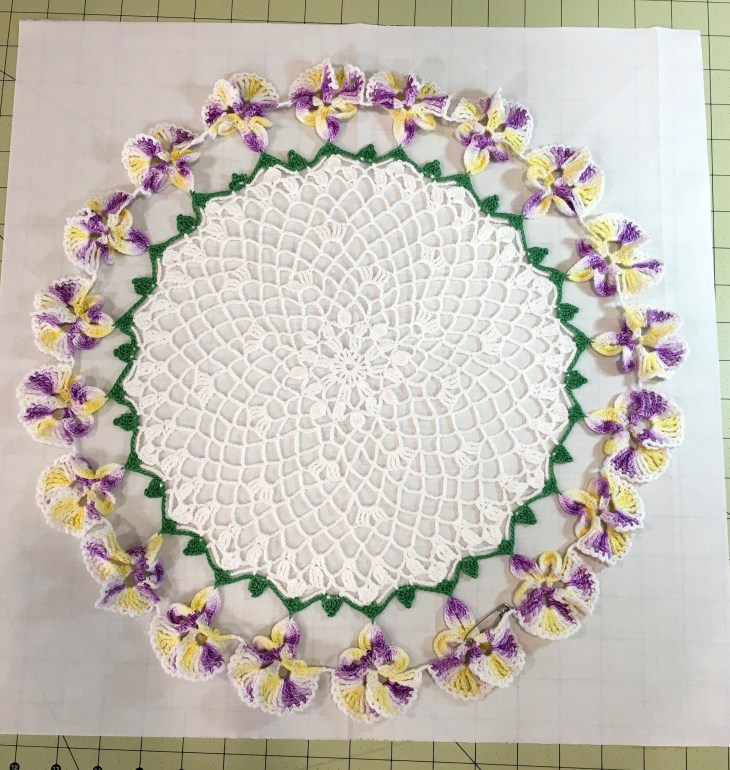
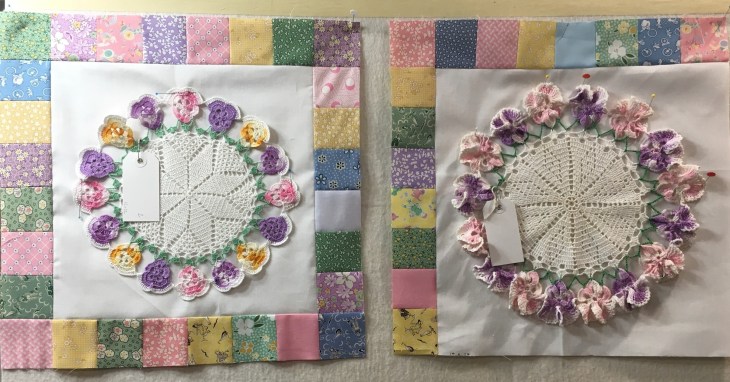
If I felt the doily passed the layout test, I then laid it out on the bleached muslin to make sure it looked acceptable on white fabric. Some of the ivory centered doilies looked dingy on white and so they were relegated back to the storage drawer for another future project. If a pansy doily was still in the running I gave it a hang tag with a number.
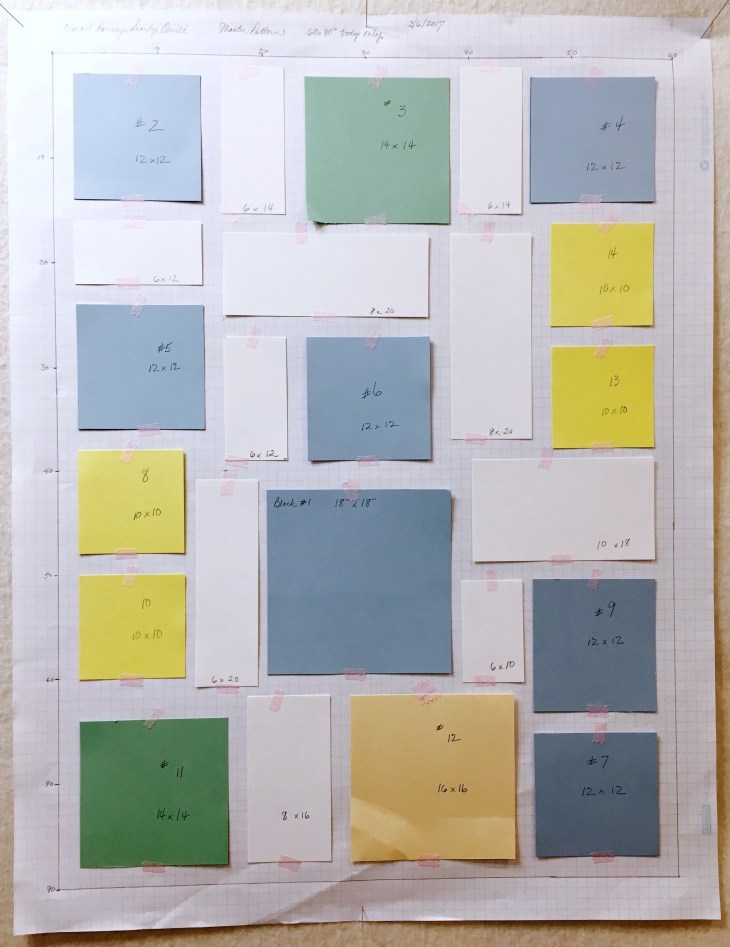
By this point I felt I needed a plan so with graph paper I set about drafting what I thought would work. Each of the colors below represents a specific pansy doily. On each of the color shapes I notated not only the pansy doily number for that block, but the finished block size as well. It was my intention to always work in multiples of 2″ but with a few odd sized doilies you’ll see I have a few areas where finished 1″ blocks were necessary.
Each of the white blocks represented negative space to be quilted and then to place additional pieces of vintage crochet.
With the pansy doilies in hand I pulled out my fabric stash of 1930’s reproductions and began to cut strips measuring 2 1/2″. From these strips I then cut 2 1/2″ squares. I contemplated strip piecing for speed on construction but changed my mind deciding I did not want “consistency of fabric/color placement” throughout the project.

Earlier I mentioned each pansy doily was assigned a number printed on a hang tag. Here’s a picture of two such doilies.
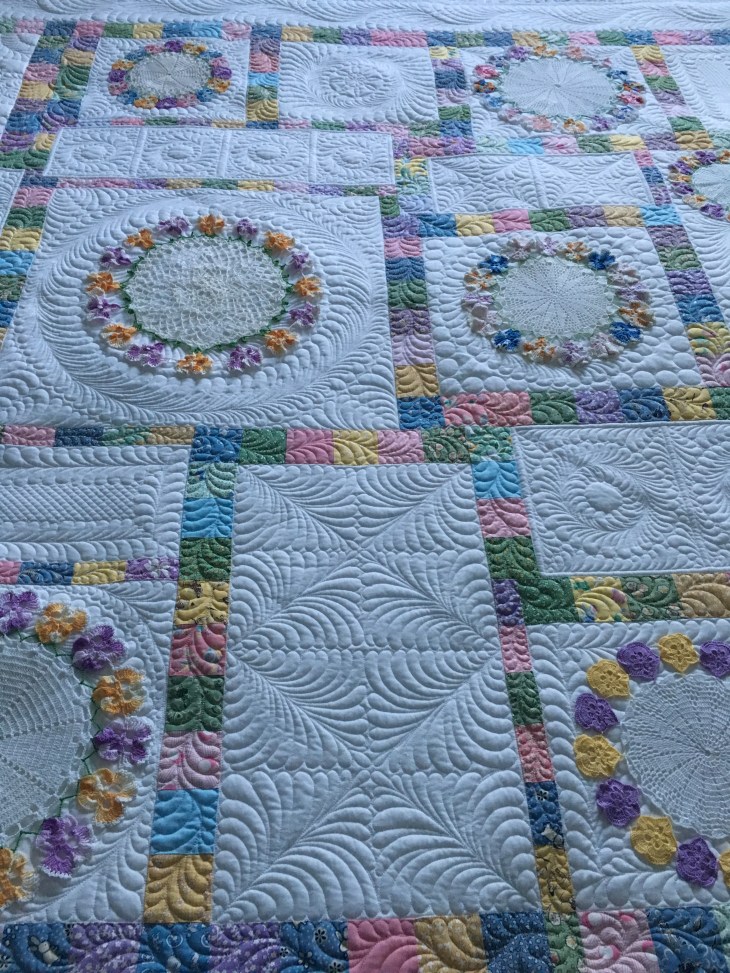
The white “negative” spaces were intended to host pieces such as the snowflakes and hearts below.

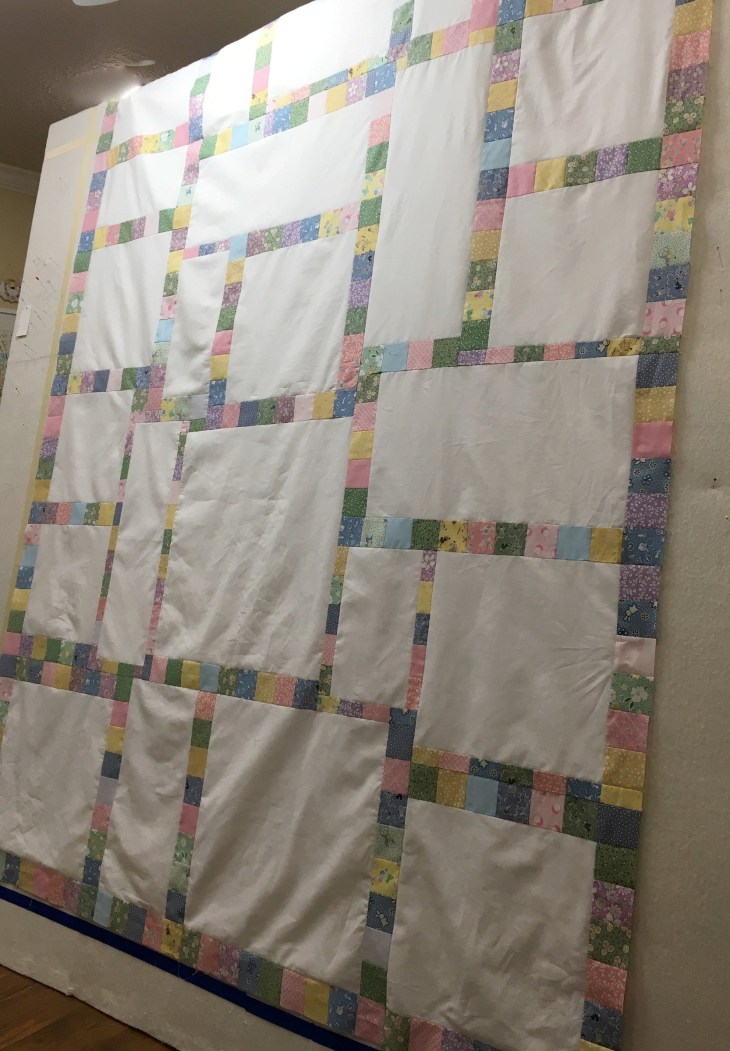
So with my chart as my guide I began to set the blocks together to make the quilt top:
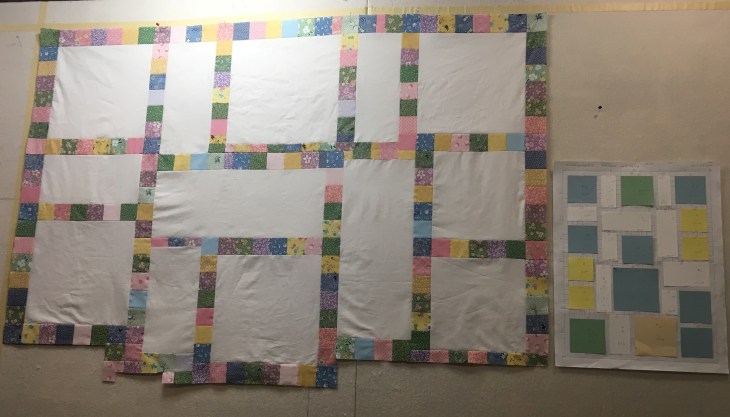
This was Plan A: (visual bedlam!)
After placing maybe just half of all the various pieces I stepped back and said “I need a Plan B!” There was way too much going on, there was no place for the eye to rest.
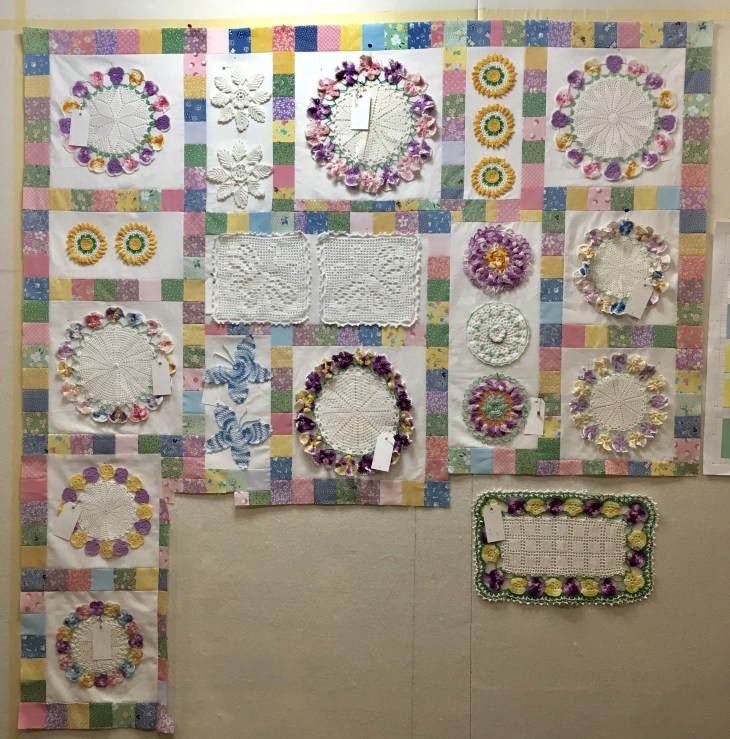
Now mind you, at this point I am not happy. I’ve collected vintage pieces for many years and I’d thought this project out in my mind for at least a year and was so excited to finally be creating this giant experiment. The only pieces that made the final cut were the pansy doilies.
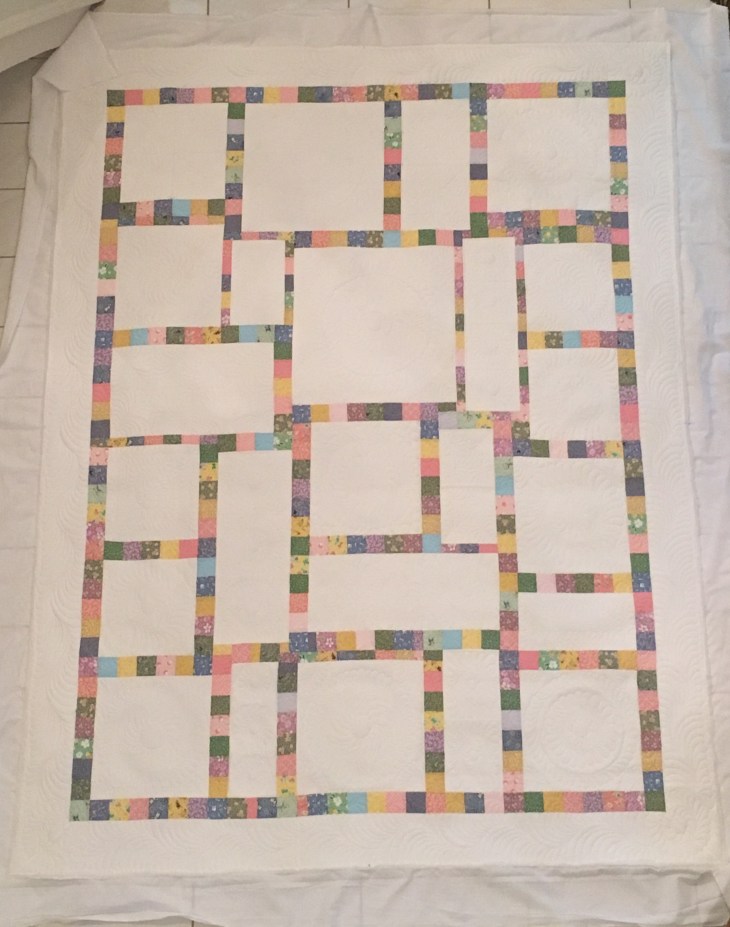
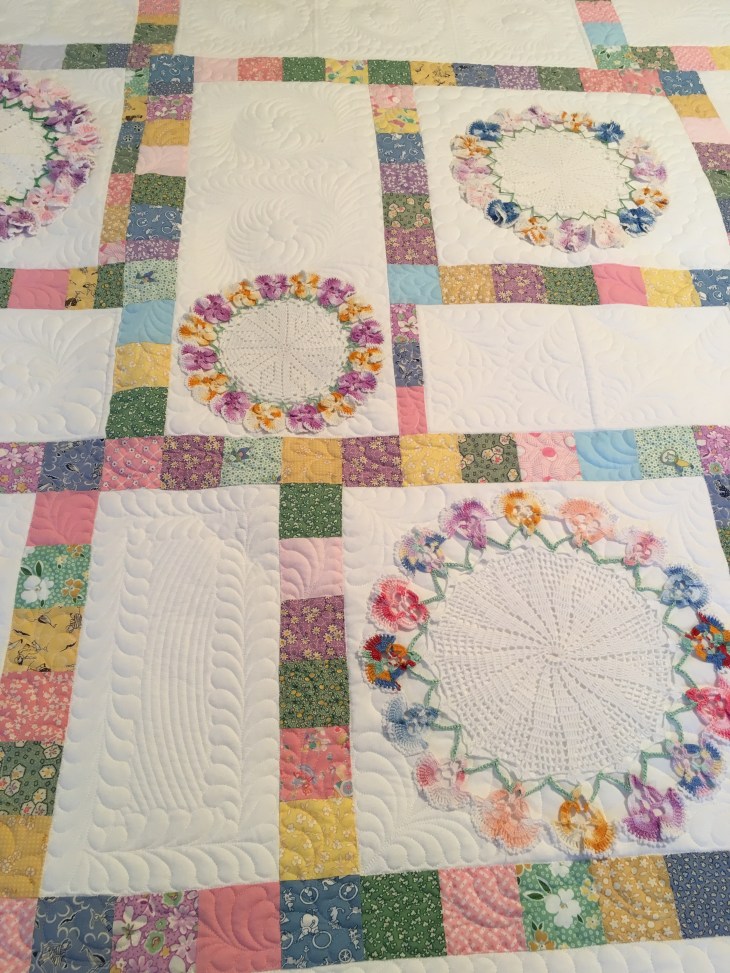
Plan B won out and I used only the pansy doilies.
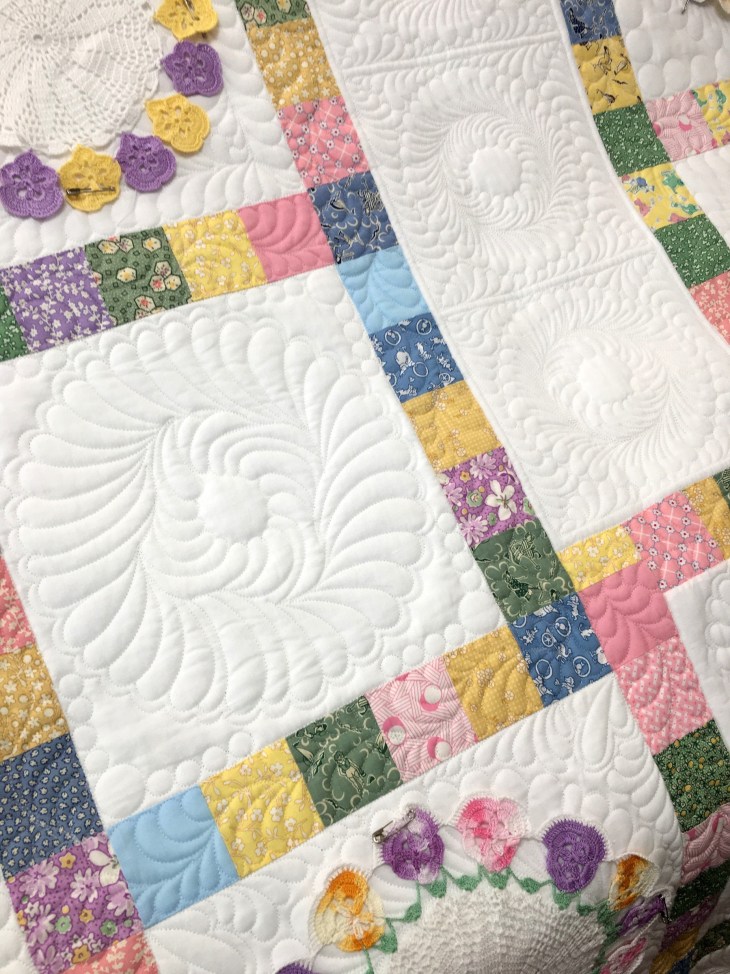
With the entire quilt top created (including 6″ white borders not shown above) I loaded it on my Innova longarm. I used 100% cotton bleached muslin on the back, a double batt of Hobbs white 80/20 topped with Hobbs Poly Down. If you’ve read any of my other blog posts you’ll know I’m a fan of Wonderfil threads, specifically their Invisafil and Deco Bob.
Invisafil won the toss for this quilt. You’ll see in lots of pictures below that by using one of these threads there is no need to change colors as you quilt over different color fabrics.

For the first time ever I quilted the top border first. I usually always quilt the body and then decide about borders.
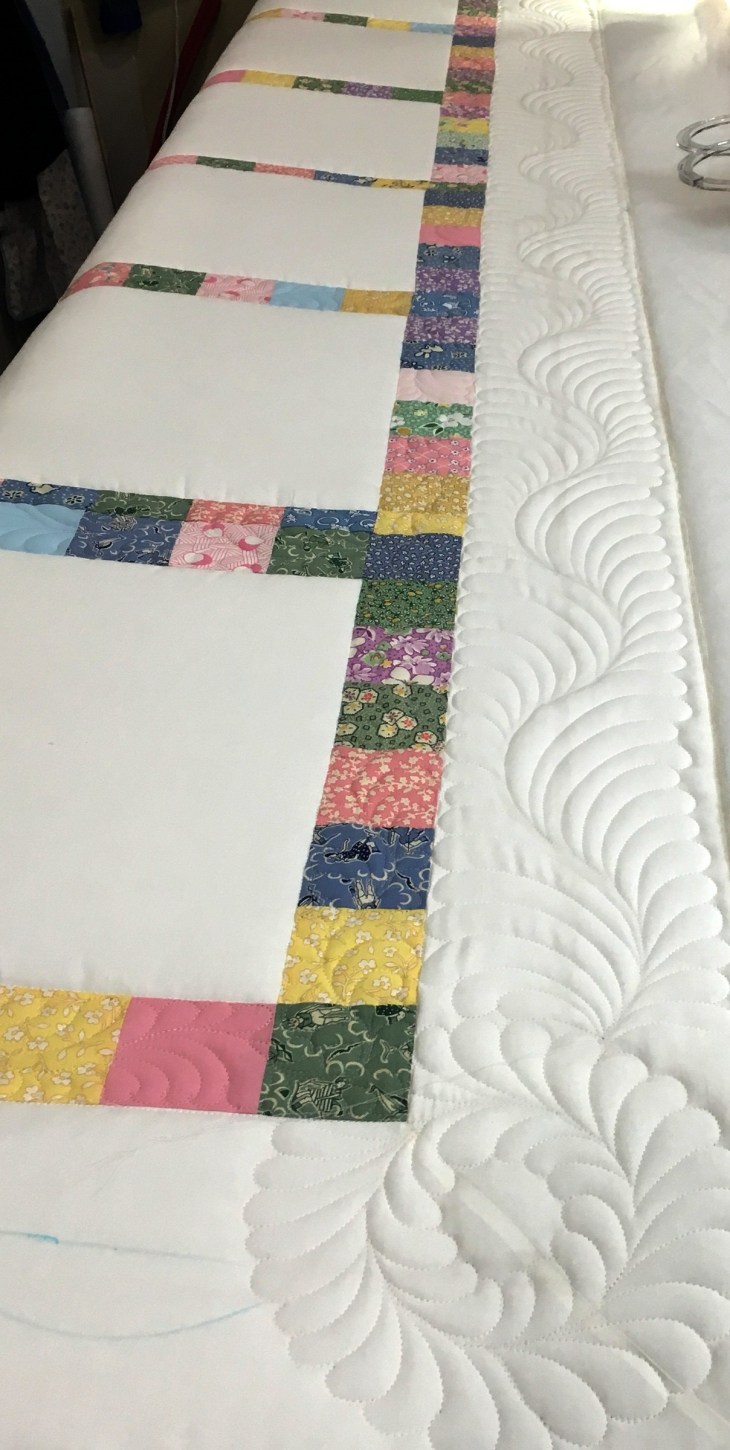
Look at the thread below as I quilted over the different color fabrics! Amazing! If you haven’t tried either Invisafil or Deco Bob, what are you waiting for?

After I quilted the top border I moved down the quilt top quilting all the sashings. I can’t remember if I also quilted the side borders as I moved down but I’m thinking I didn’t??
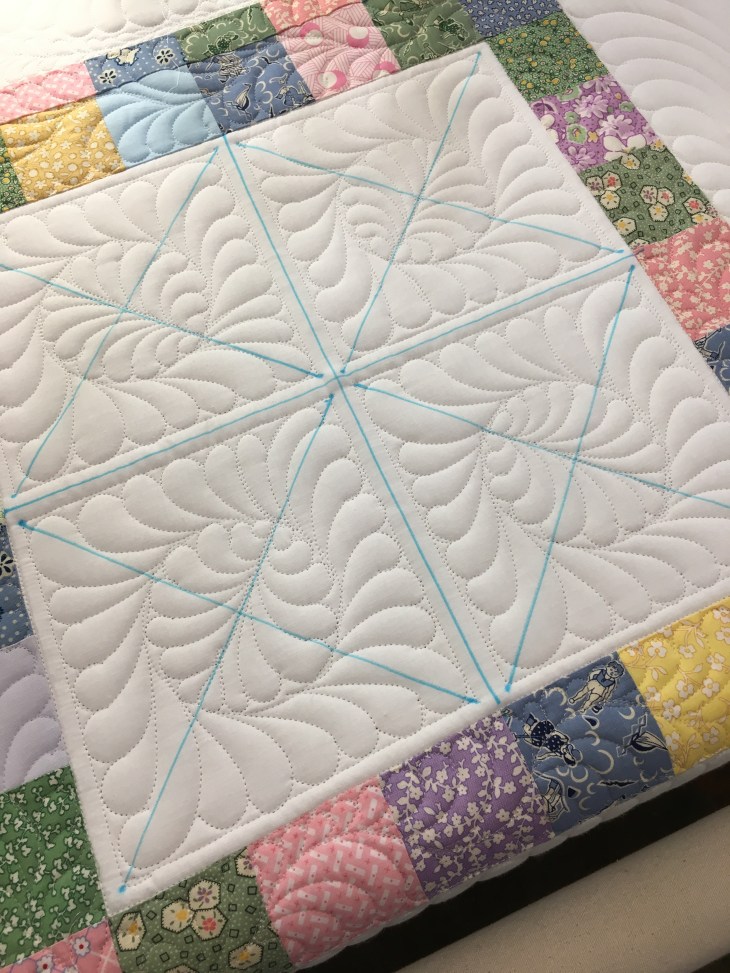
I mark registrations lines/circles when I quilt. I always mark the “vein” of feather wreaths and when I know I want consistency in feather lengths, I mark an outside circle telling me where to stop.

Using my blue marking pen I used the “divide and conquer” method of quilting negative spaces.
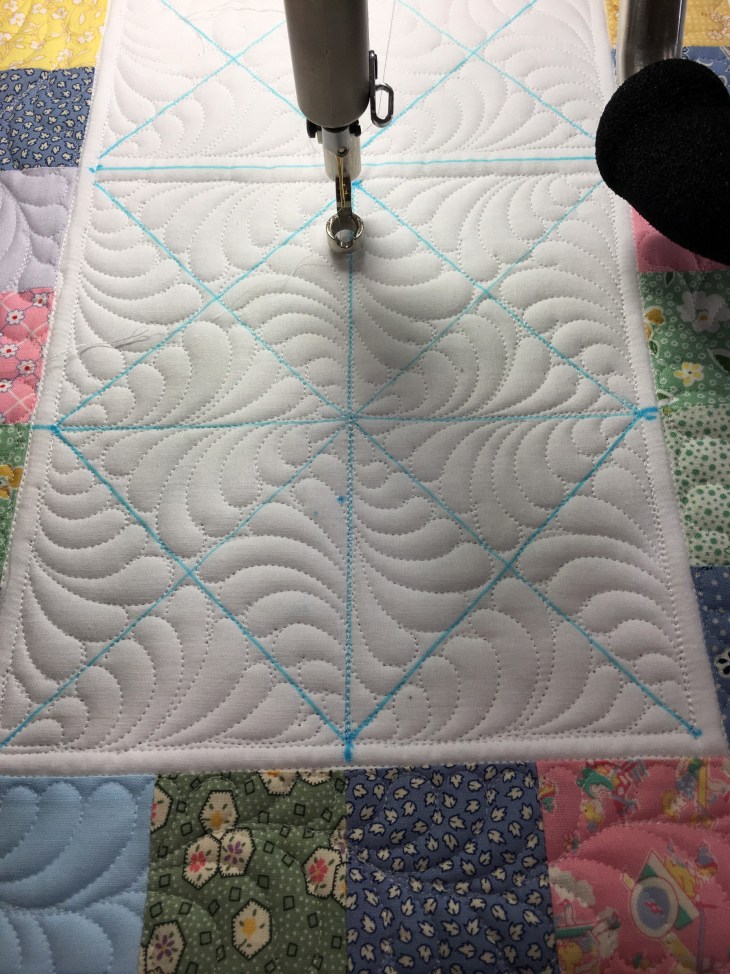
You’ll see below that after I marked the block I changed my mind about what to quilt. The diagonal lines serve no purpose other than they indicate the center point of each of the divided areas and they did dictate the direction of the feather plumes.
While you can’t see the quilting you can see distinctly the sashings that ended up being 1″ in width. They stand out in the picture below but once the doilies are attached they blend in nicely.
The quilt at this point is trimmed and bound using the same white fabric as both the front and the back. And what’s not to love about it receiving the “Winston the Cat” approval!

After the quilt was quilted, trimmed and the binding finished, I laid out the pansy doilies and hand stitched them in place using a small curved needle and the Invisafil thread. I tacked them in the center and then all around the outside edge.
But… the pink and orange doily always bothered me and a few weeks ago I removed and replaced it.
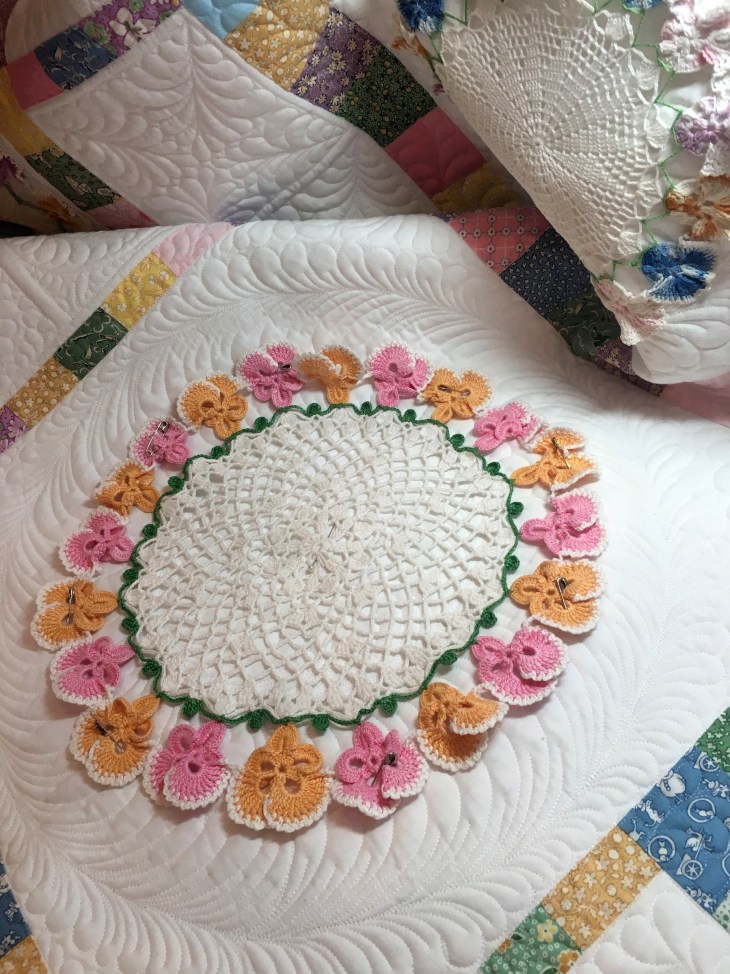

I still don’t have anywhere in my house to set up my portable quilt display stand so laying out on a king bed will have to do. The picture below shows the pink/orange doily replaced with a more suitable player.
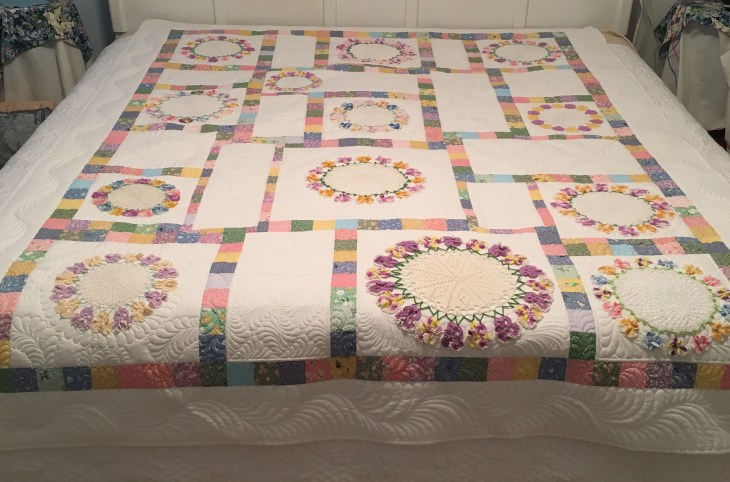


The lighting gives the quilting a chance to shine:


I was very worried that the white negative spaces would appear awkward as the original plan was to have a vintage crochet piece in each.
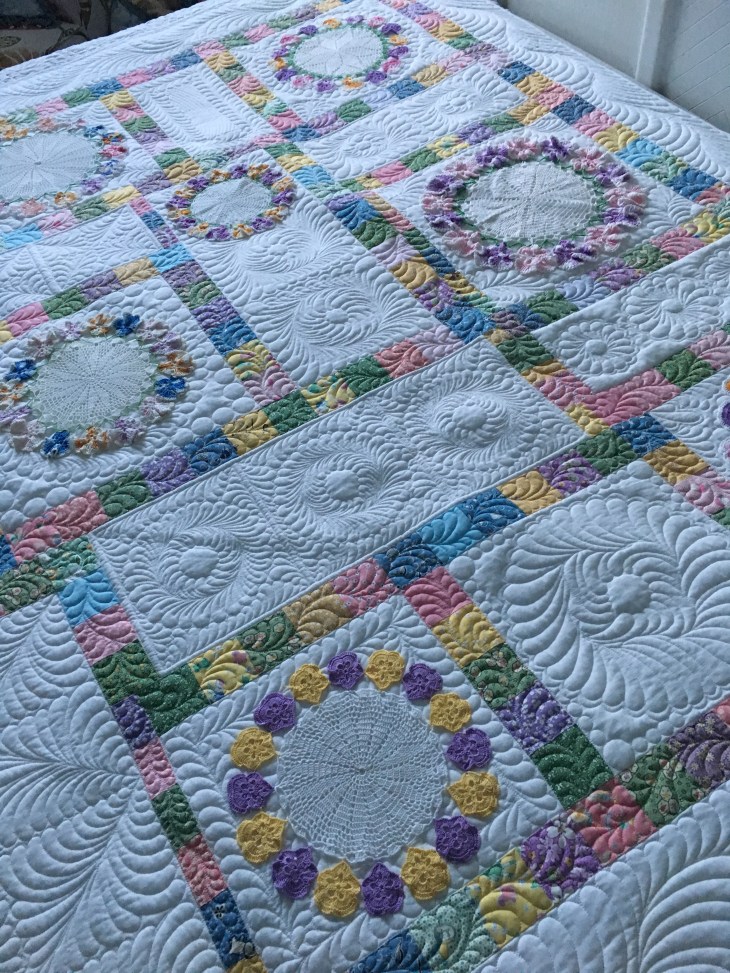
With this revised layout/placement, it gives the quilting a chance to shine.
You know, I’ve really never met a feather I didn’t love…


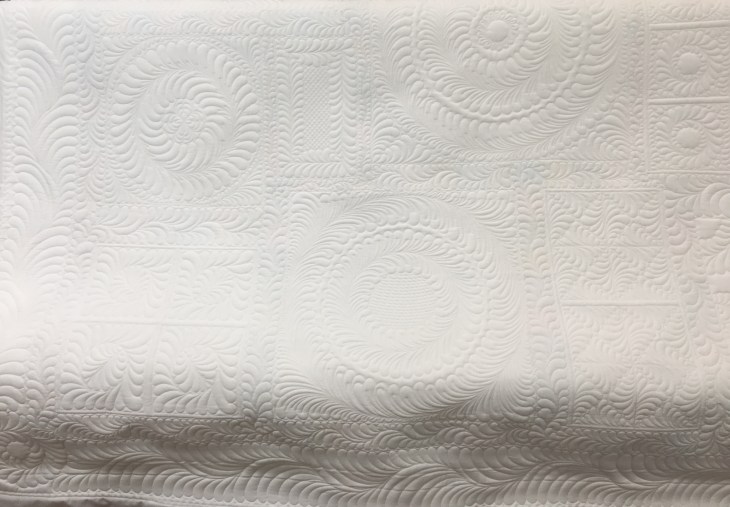
And finally, a bunch of pictures of the back:


The finished measurements are: 70 x 90″. This project took 31 hours, 40 minutes to quilt and about 2 weeks ago I had it appraised. I’m sharing the Replacement Value with you not to brag but to let you know you should have your quilts appraised (by a certified quilt appraiser) and then insured. Let’s just say I was STUNNED: $4,500.00.
I created this piece to be a teaching tool/example for what you can do with a collection of vintage pieces. As I speak to different groups, I’m always asked something like “I have grandma’s dresser scarves/doilies/handkerchiefs. What can I do with them other than stack them in the linen closet?”
Am I glad I stuck with it and finally created this quilt? Absolutely! When I look at this quilt I smile. I feel that it is a peaceful tribute to the hands that spend hours crocheting the Pansy Doilies.
If you’d like to use the graph to make your own quilt, please do so! If you need a better graph shot, email me and I’ll send you a better picture.
Let me know if you have questions, and if you’re thinking of creating your own Vintage Doily Quilt, keep me posted!
Blessings to all and Happy Quilting!
Rhonda
***House update: The fireplace wall is finished (and the fireplace is installed). The Master is painted with baseboards, the Dining Room is painted with baseboards and the Powder Room is looking better. The Office is painted. We are waiting on the new windows, the master fireplace, and the kitchen cabinet repairs. The back staircase is ready to be stained, the front staircase is next on the list. Big Progress!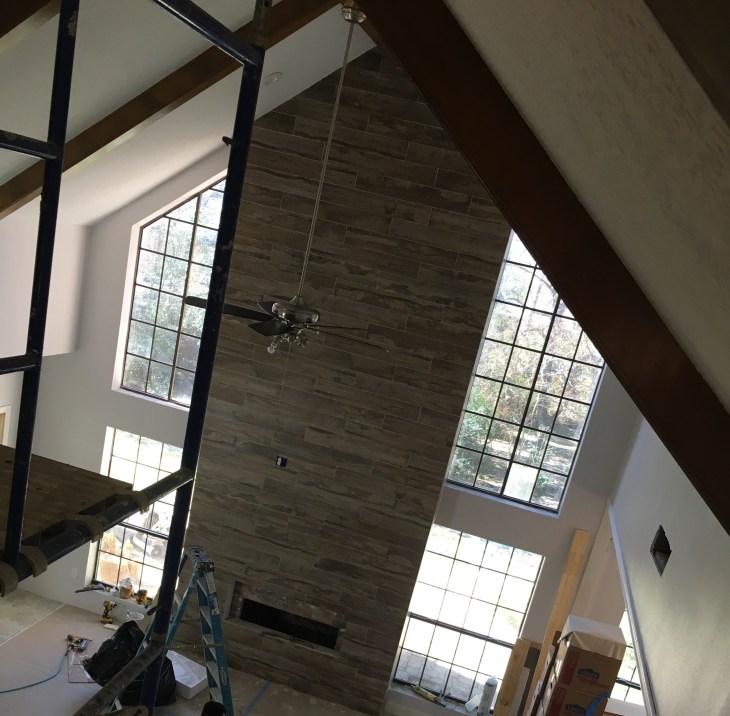
Happy New Year!