Vining Feathers in the Sashing and 3 other common questions…

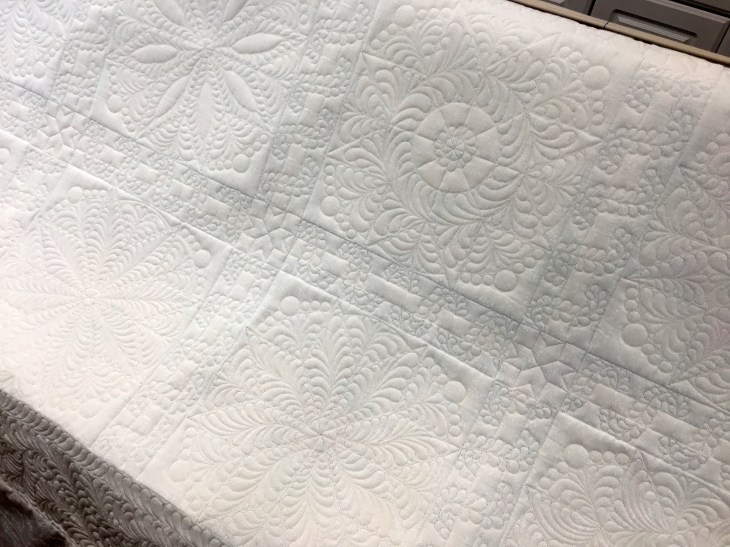
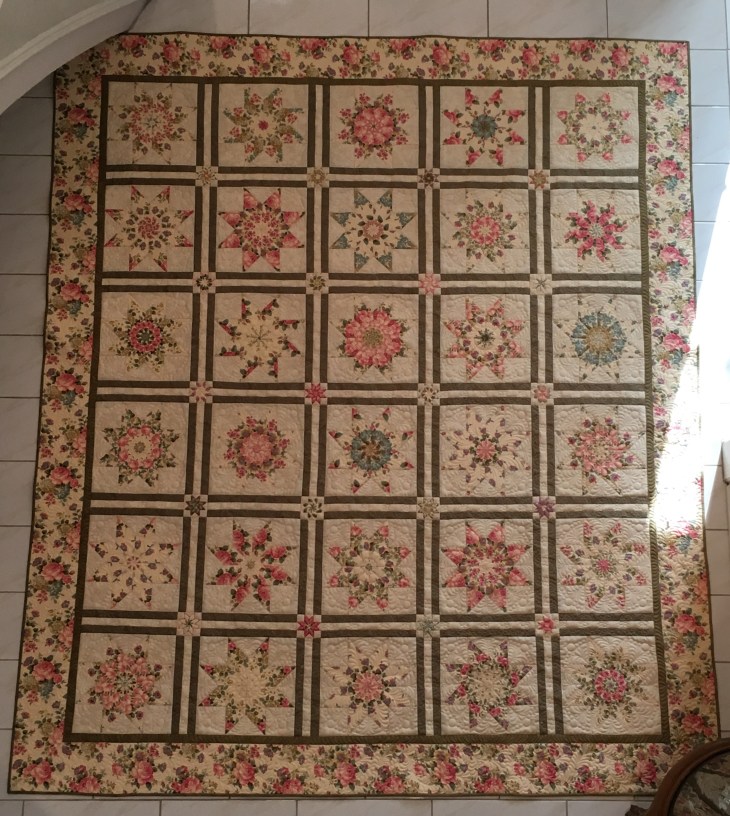
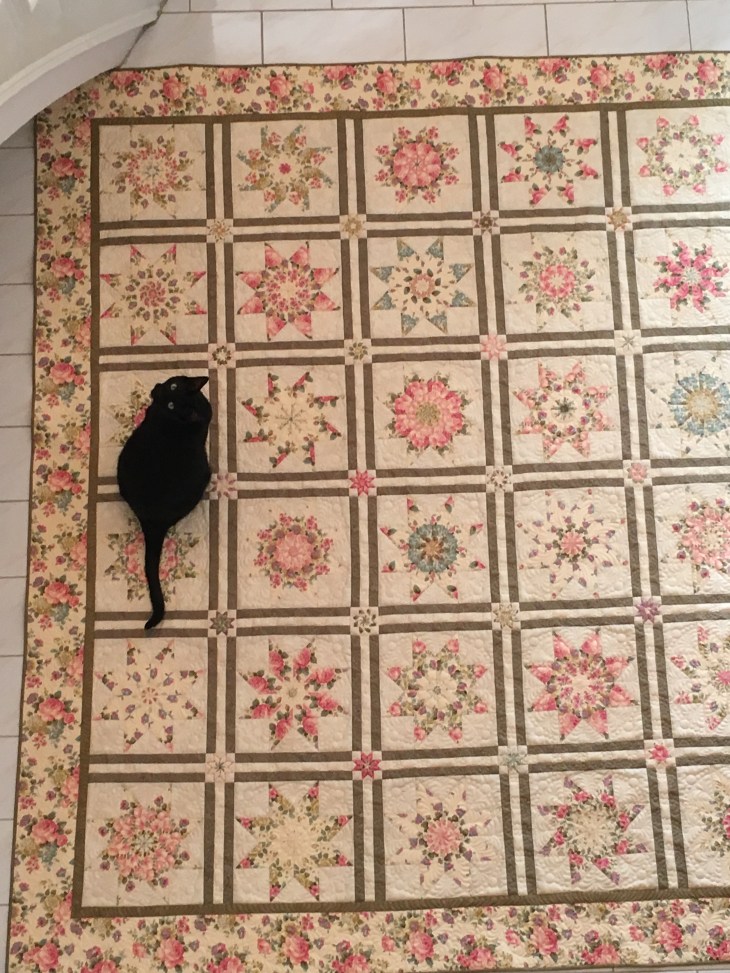
As a follow up to my blog post yesterday featuring the Stack and Whack quilt several of you have asked for more specific information about different aspects of the Roses Stack and Whack quilt.

I’ll address the following questions in this order:

  1. how did you do the sashing feathers
  2. what is the focus fabric
  3. how did you do the tiny stack and whack sashing cornerstones
  4. how long did this project take

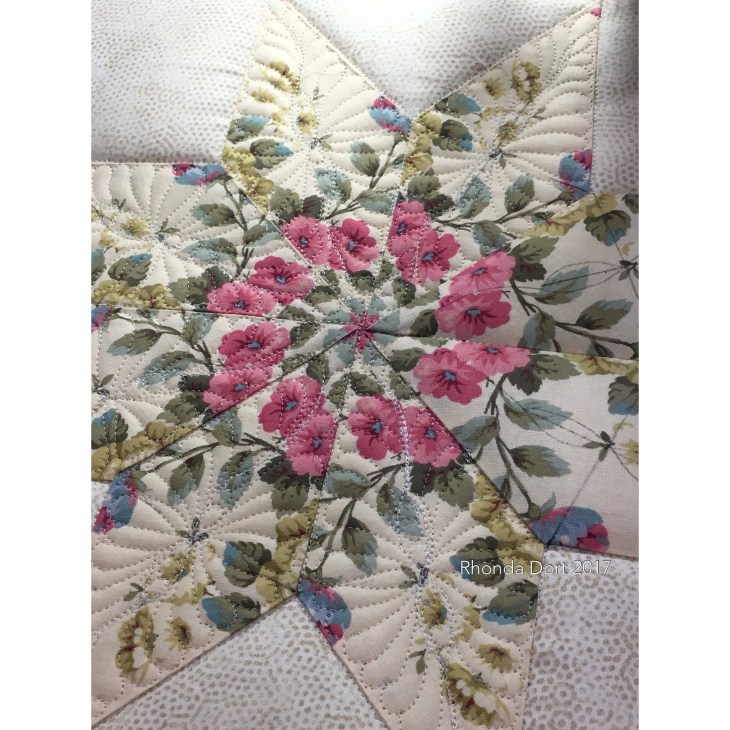
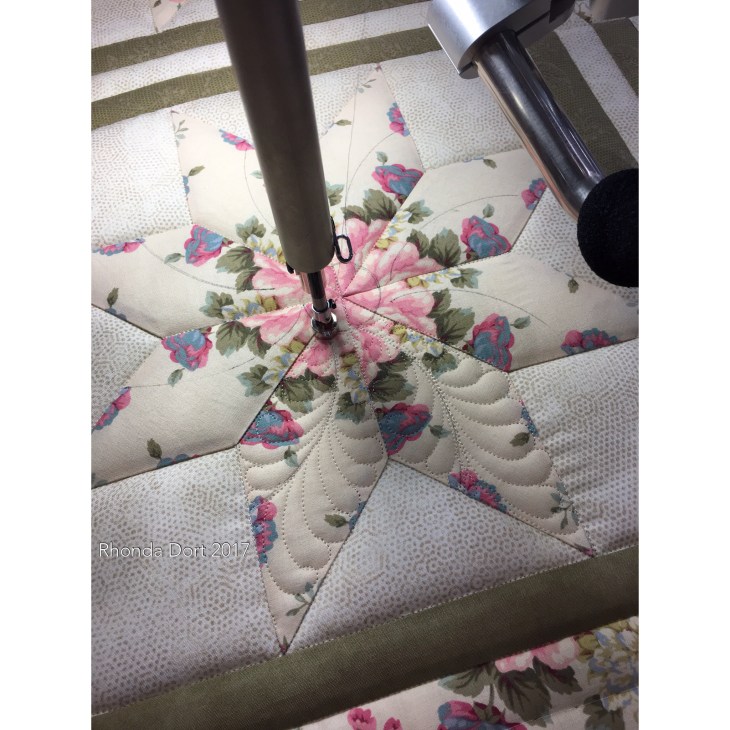
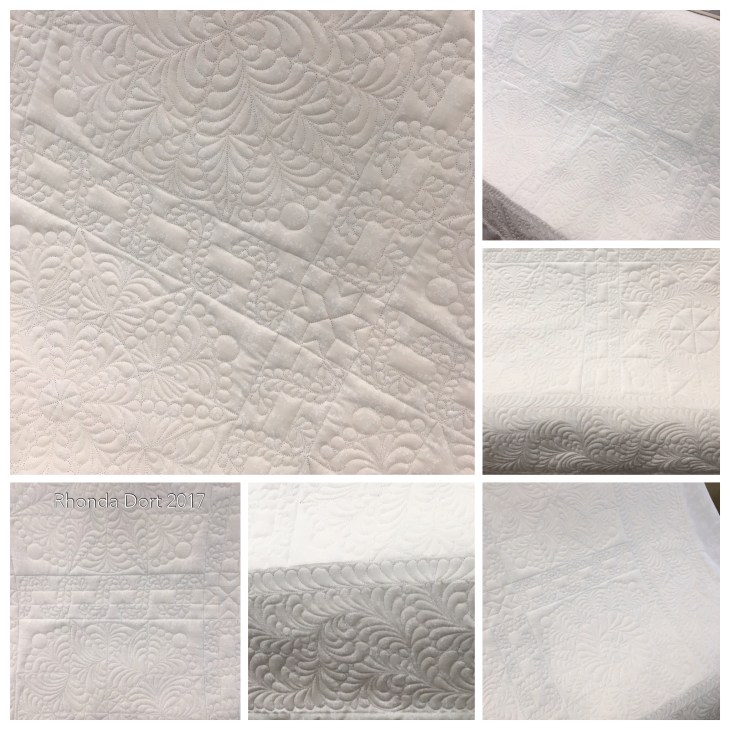
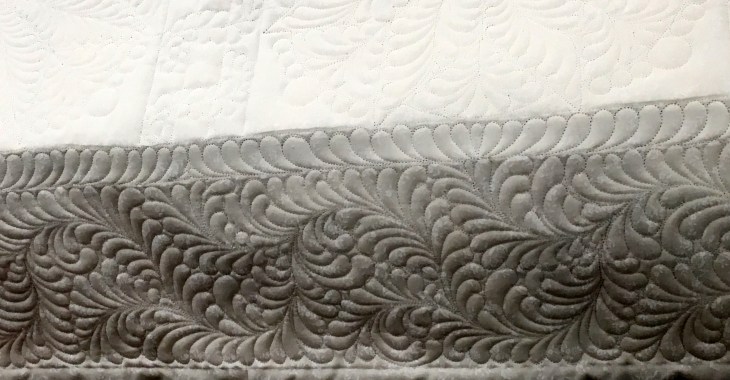
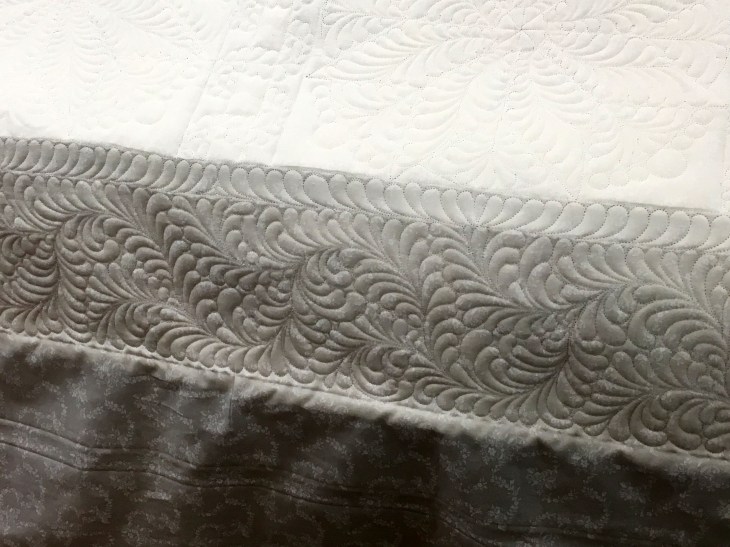
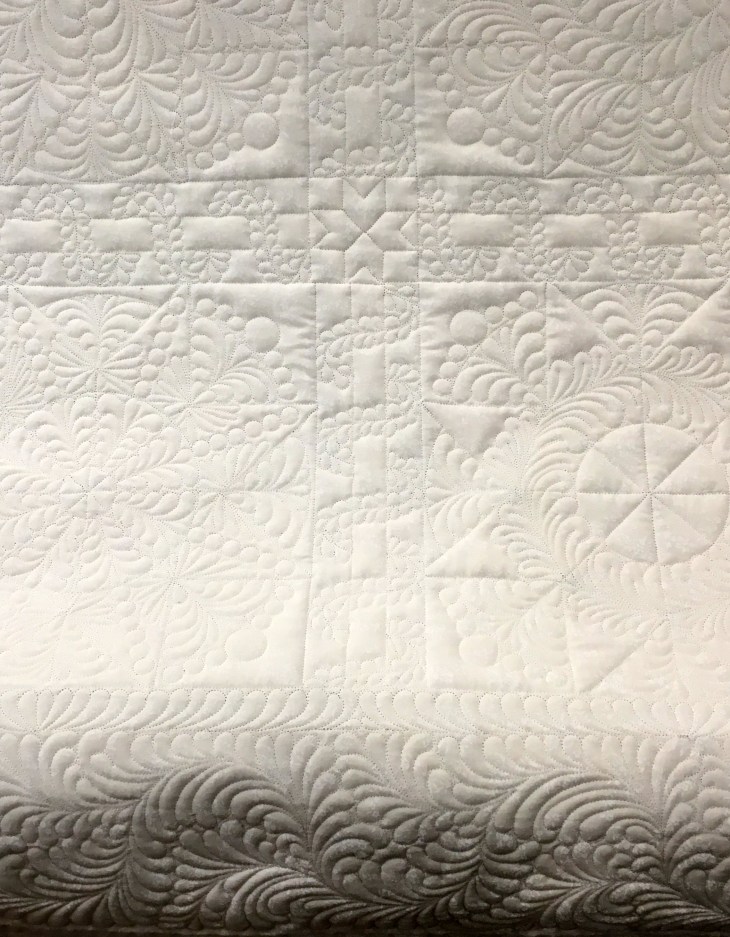
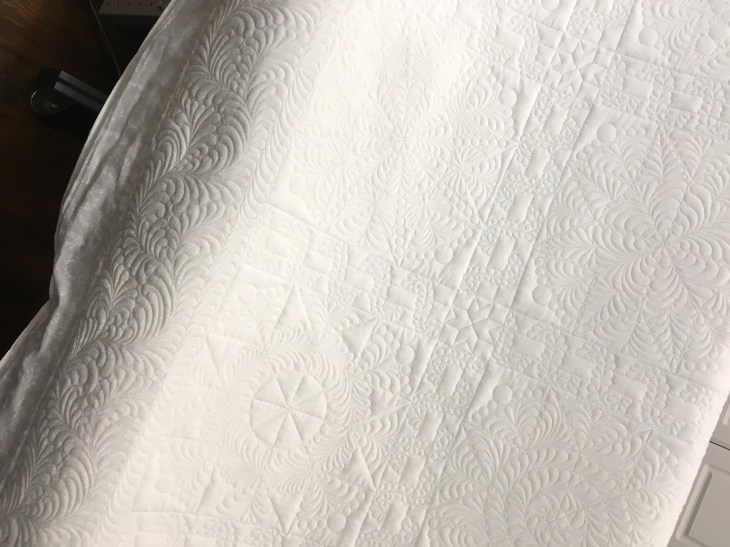
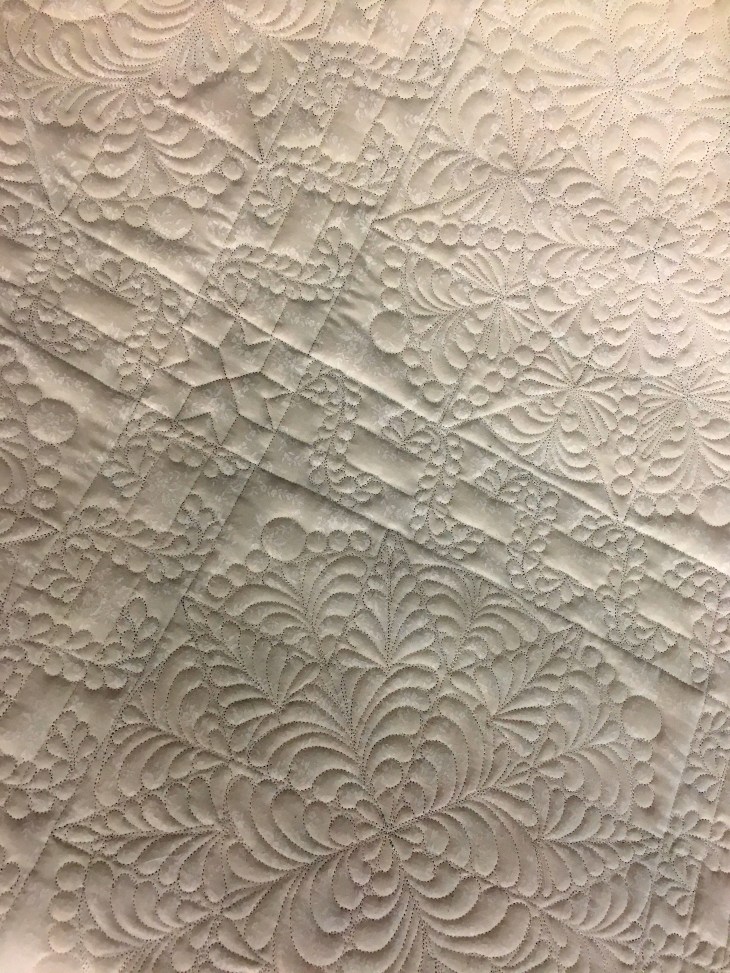
First, let me start with the vining feathers. I’ve drawn out instructions in the 5 pictures below. For starts, let me say I can’t hold a pen very well so my drawing (when not using a ruler) is pretty pathetic…

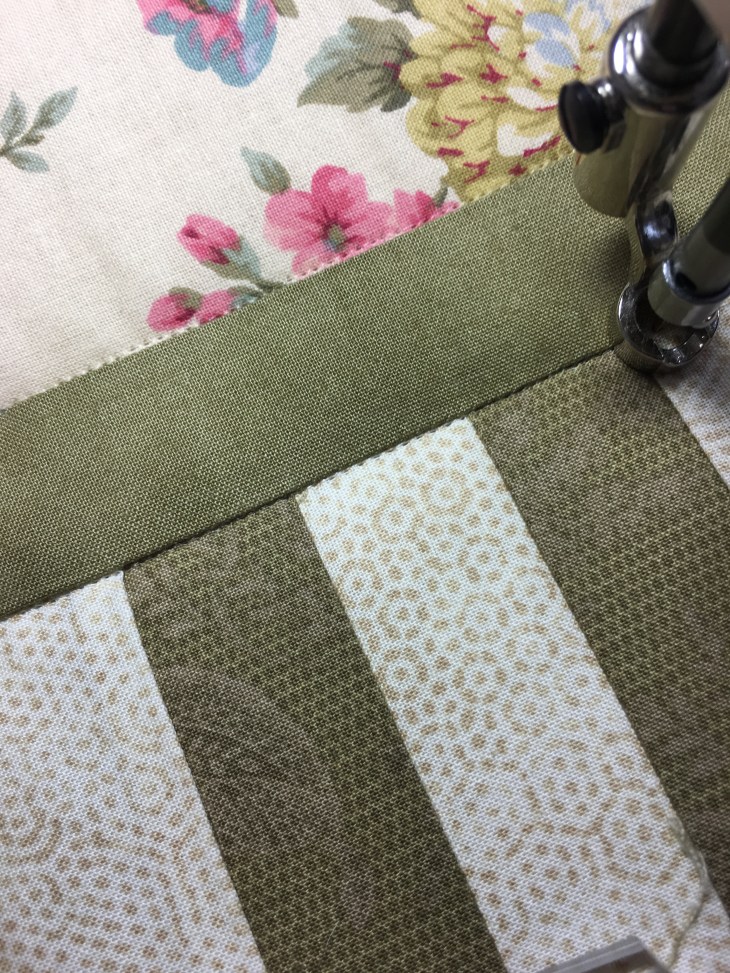
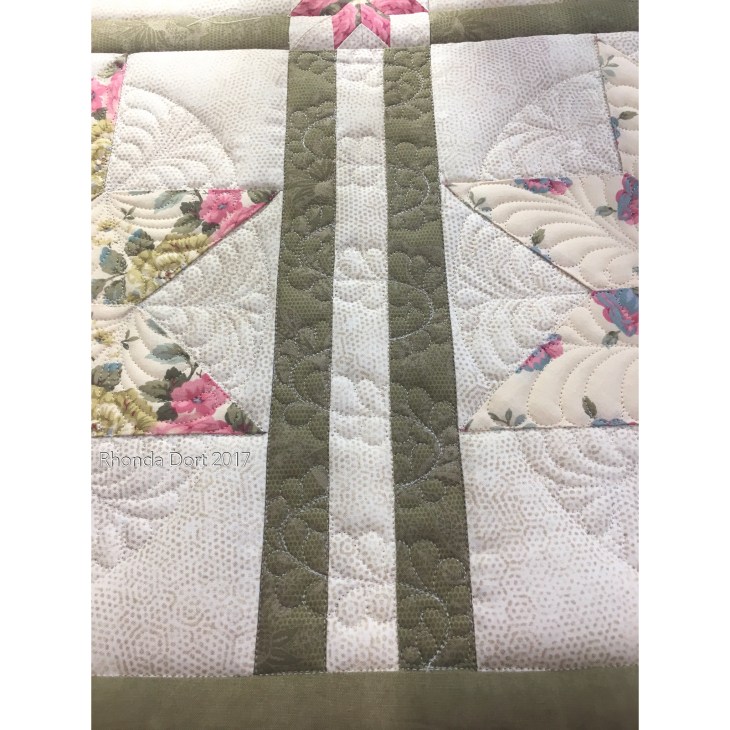
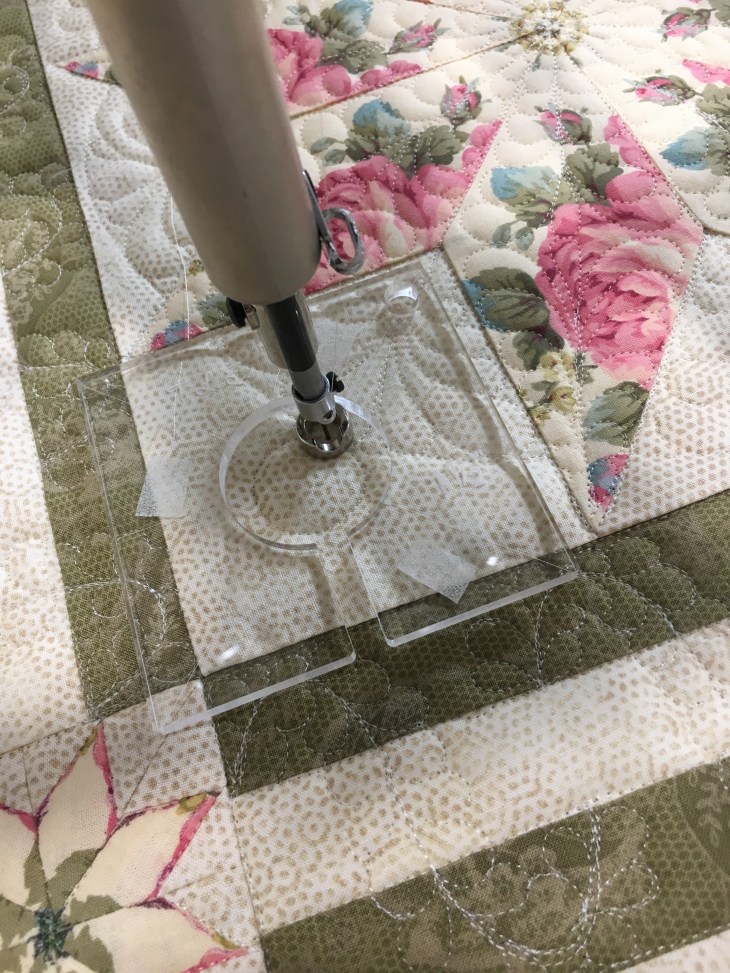
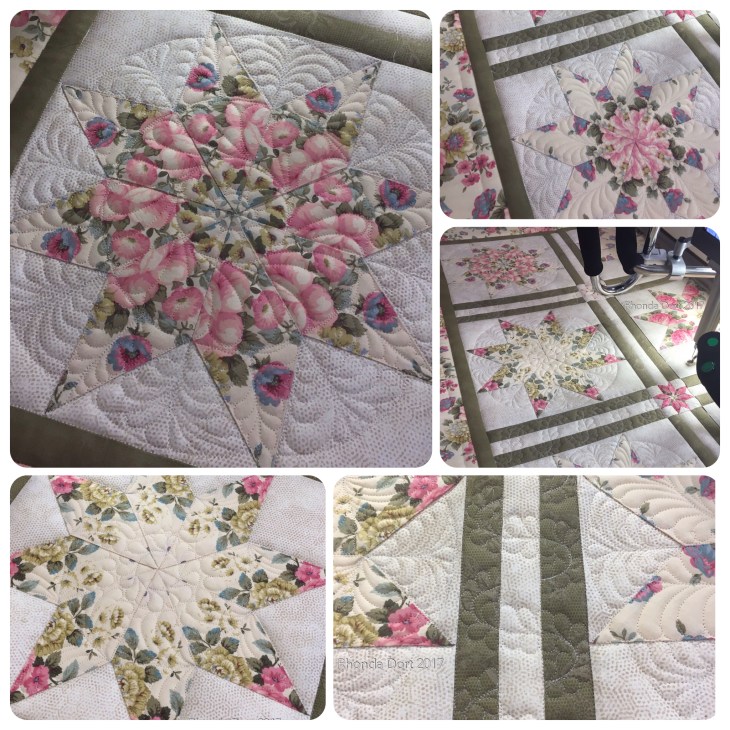
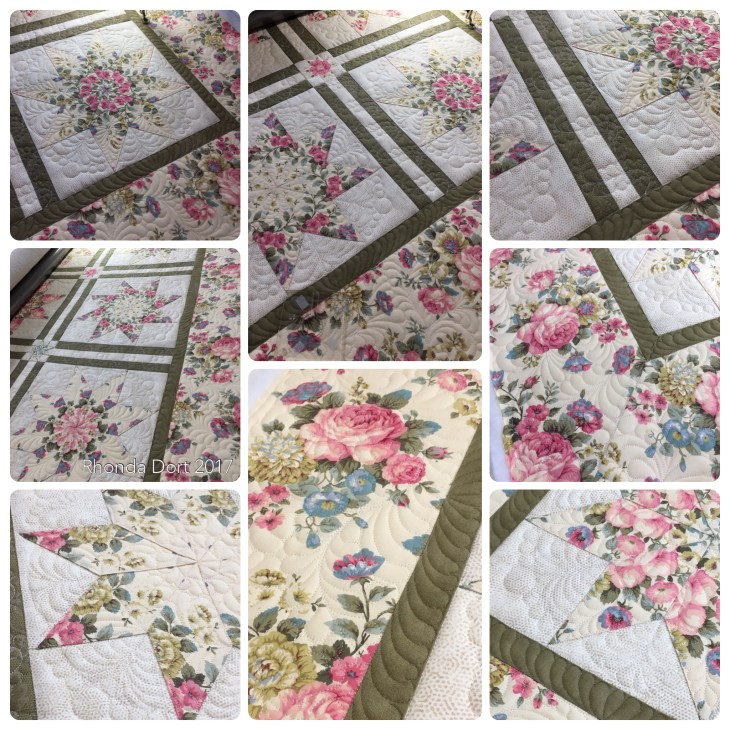
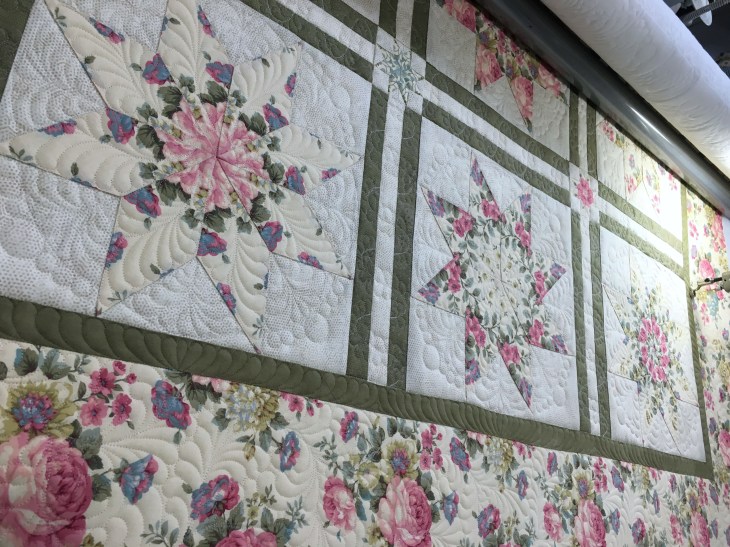
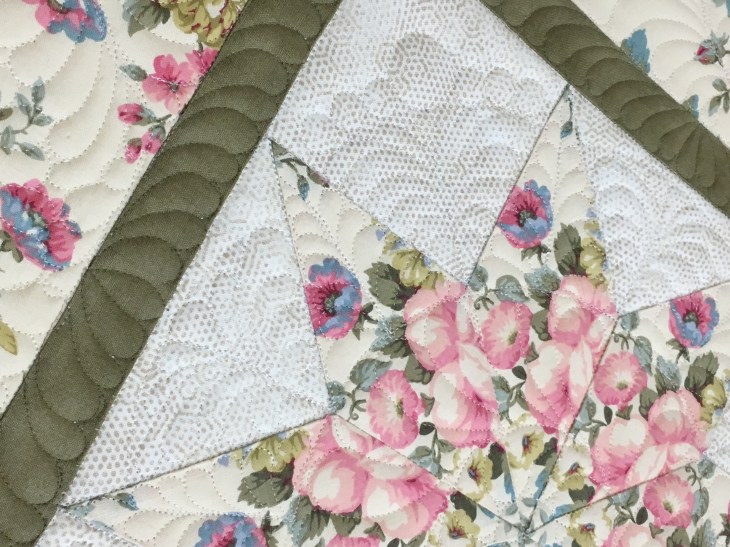
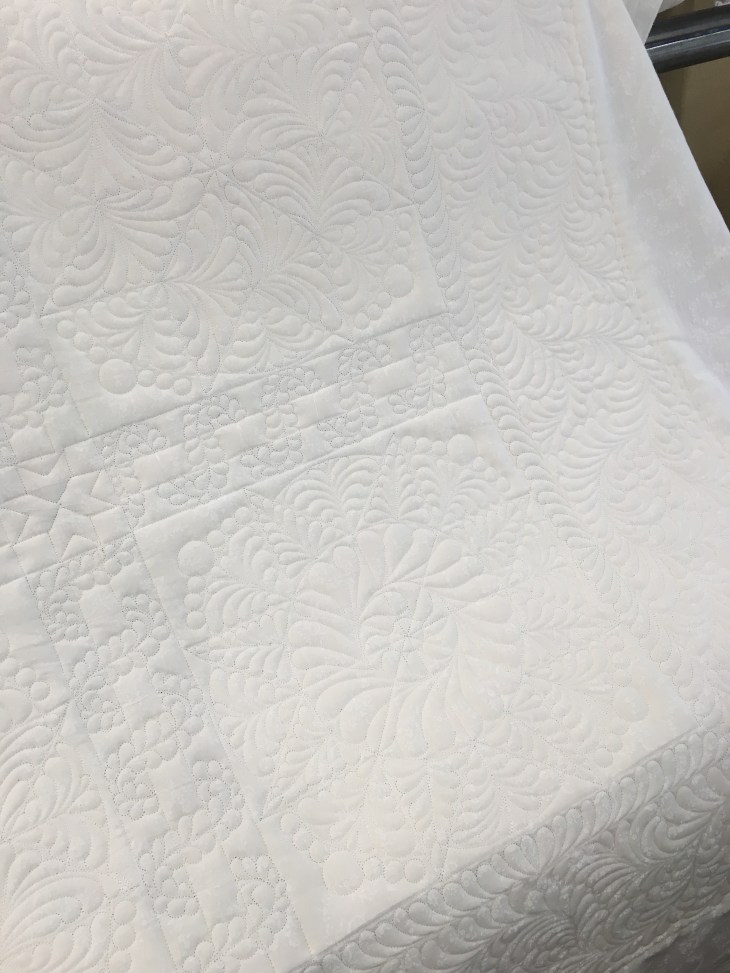
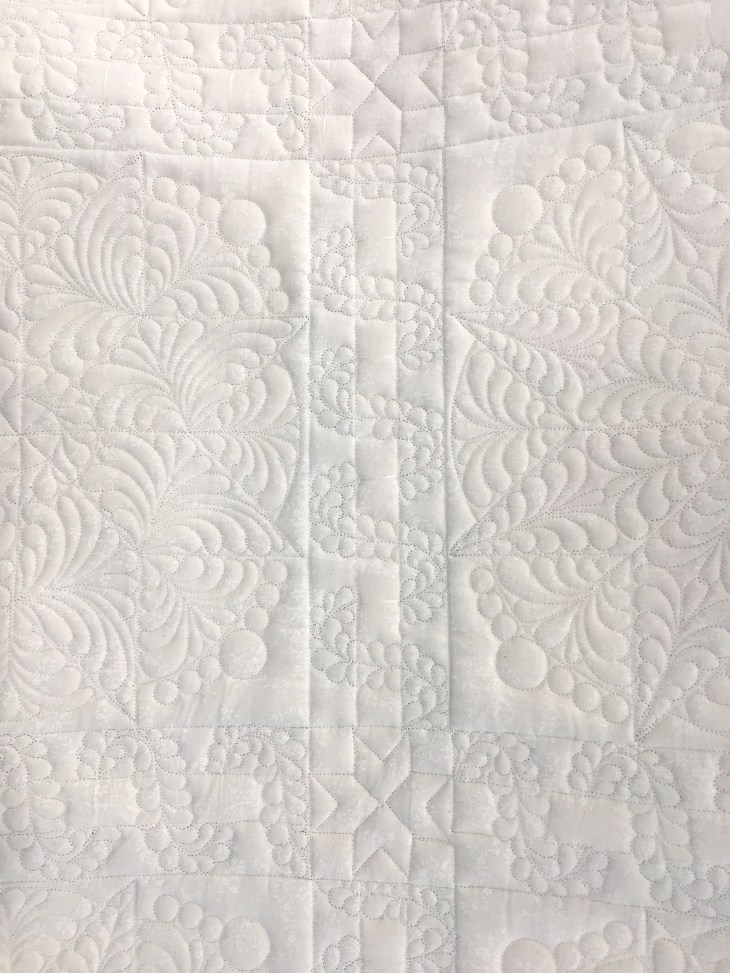
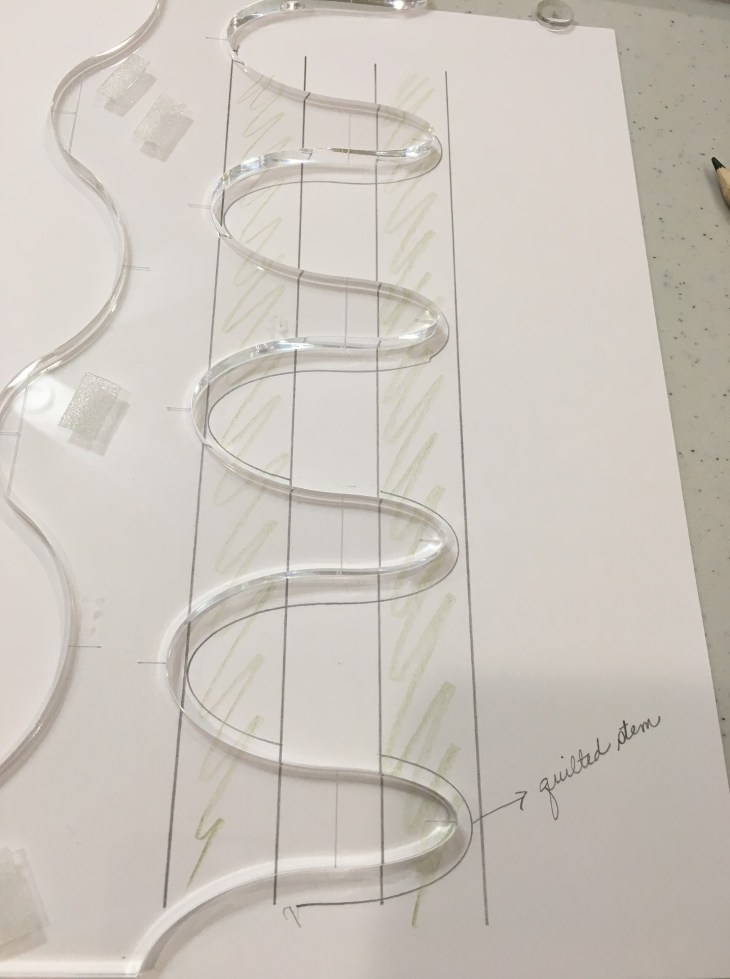
  1. This picture demonstrates the sashing of the quilt. The 2 outside fabrics are the dark green, the center fabric is the ivory. Pretend this is the quilt loaded on a longarm. I’ve positioned my wonderful acrylic template so that the center lines on the template fall at the “eye-balled” center of the ivory strip.

Feathers 1

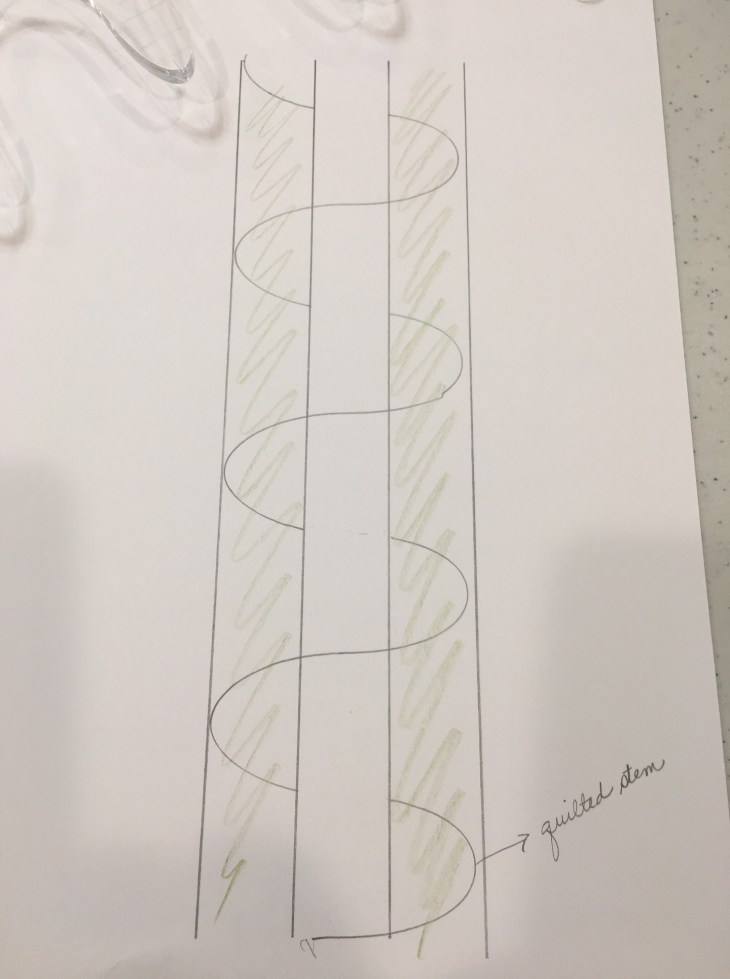
2. In the next picture you’ll see that I’ve stitched/quilted in the feathers stem. If you want it to appear that the feathers are wrapping around the center ivory strip you have to skip every other “center strip stitch over”. Does this make sense? Look at the stitching line and you’ll see that  are several Stops and Starts to the feather stem line. Yes, you’ll need to secure your quilting stitches in some fashion. For this type of project I choose to take several small back and forth stitches at each stop and start point.

Feathers 2

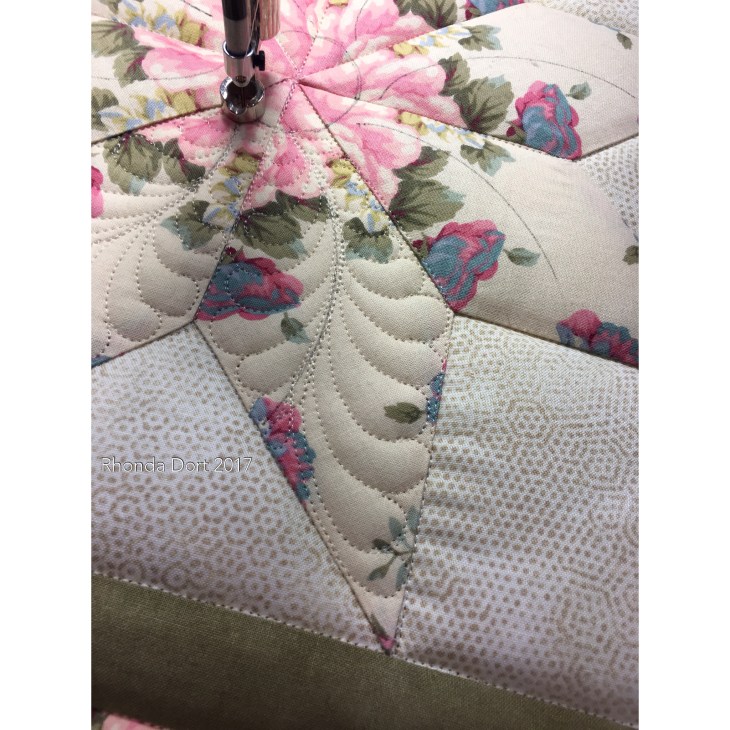
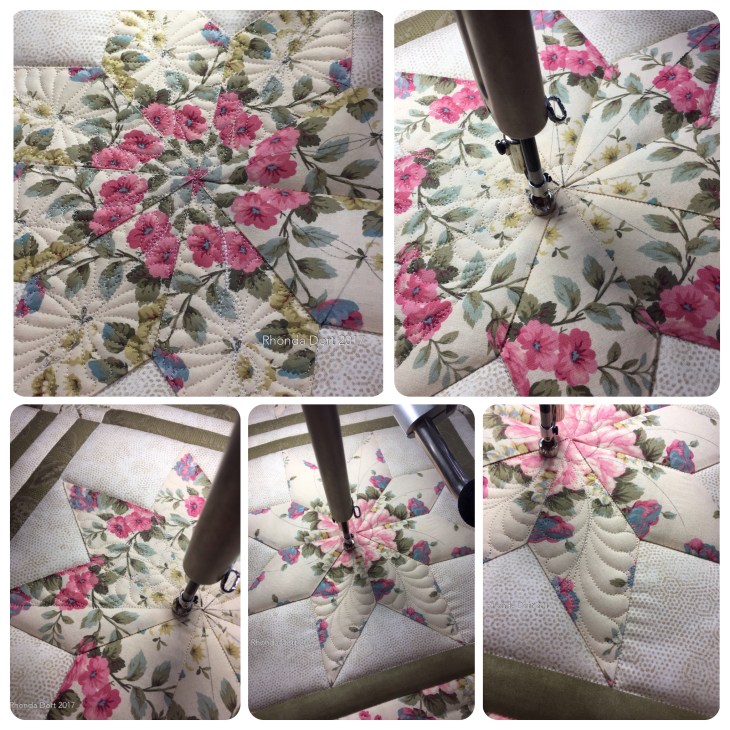
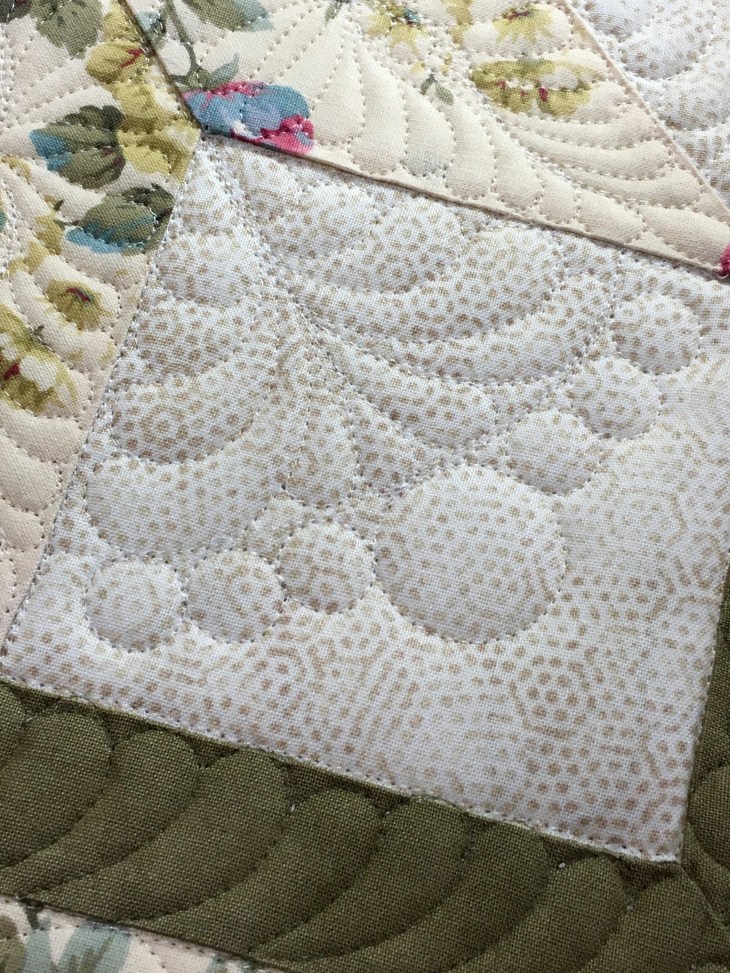
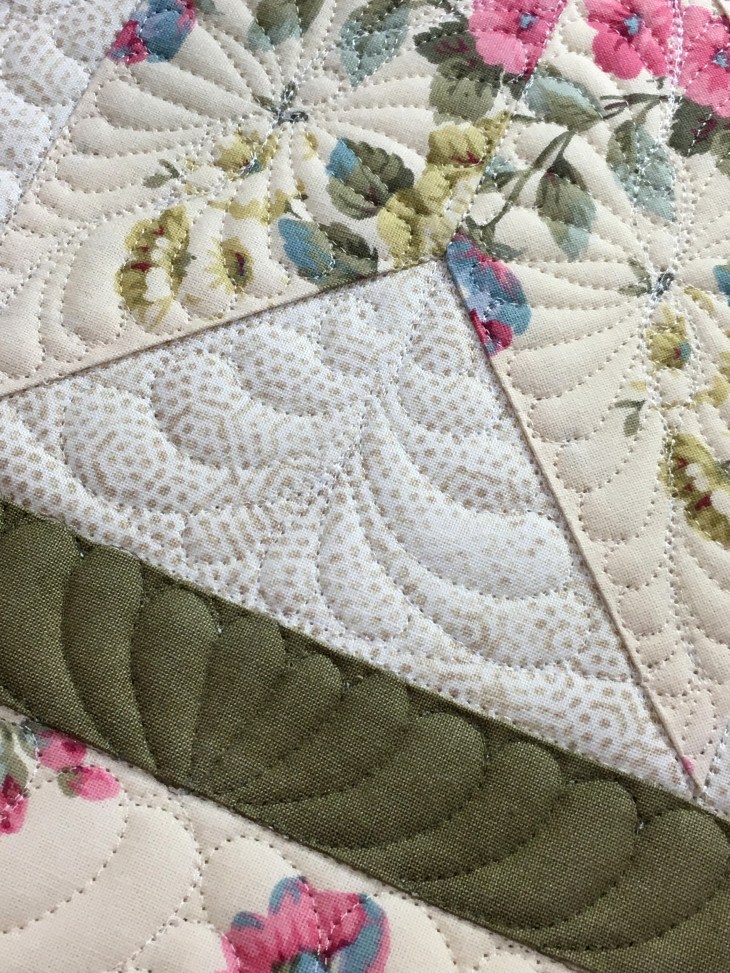
3. After you’ve quilted your feathers stem and remove the acrylic template, you’ll have something resembling the picture below. Looking good at this point!

Feathers 3

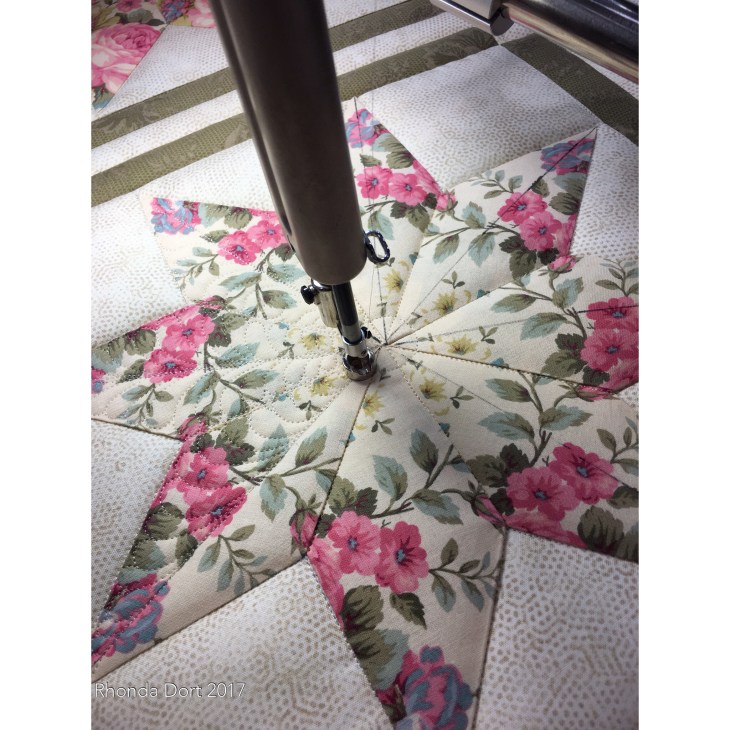
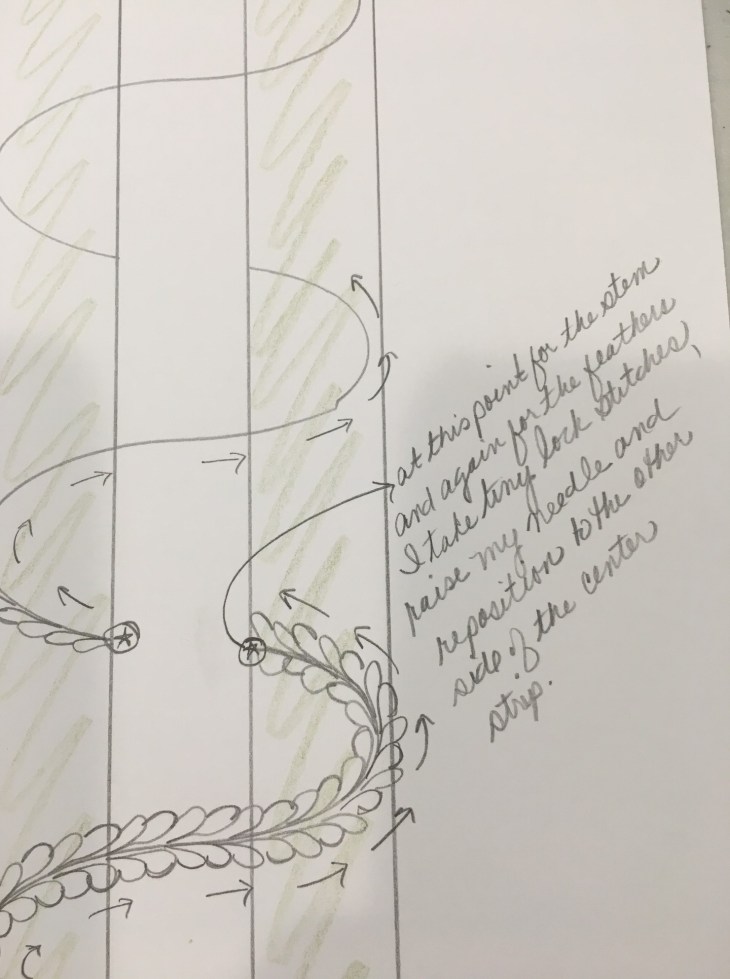
4. Quilting in the feathers comes next. I always begin with the feathers on the right. You have to remember that when the feather stem stops, so do your feathers. Yes, you have to secure your stitching in some fashion. You then raise your needle, move it to where the feathers will begin again on the other side of the center strip. Once there, lock your stitches and continue up the sashing until you reach the next point where the stem stops.

Repeat this process up the entire length of the sashing until you reach the top or the sashing cornerstone. At this point, lock your stitches and head back down to the start. Here you will begin the feathers on “the other side of the stem”. Using the exact same techinque, move up the sashing strip until you reach the top, making sure to start and stop where the previously quilted stem directs.

Feathers 4Feathers 5

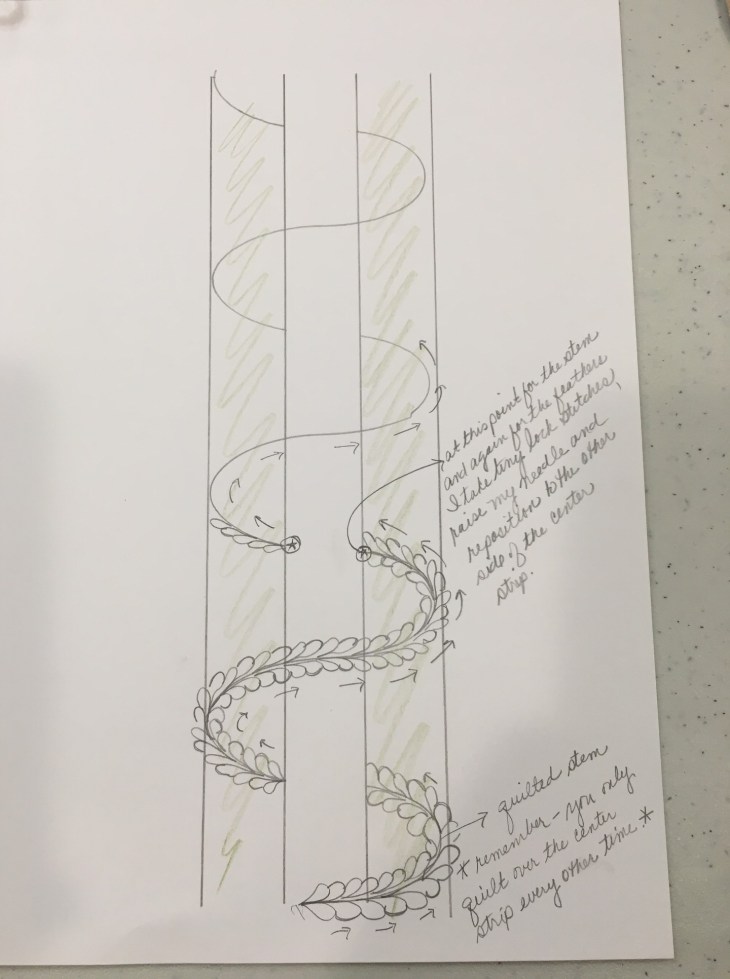
For the horizontal sashings, use the exact same technique.


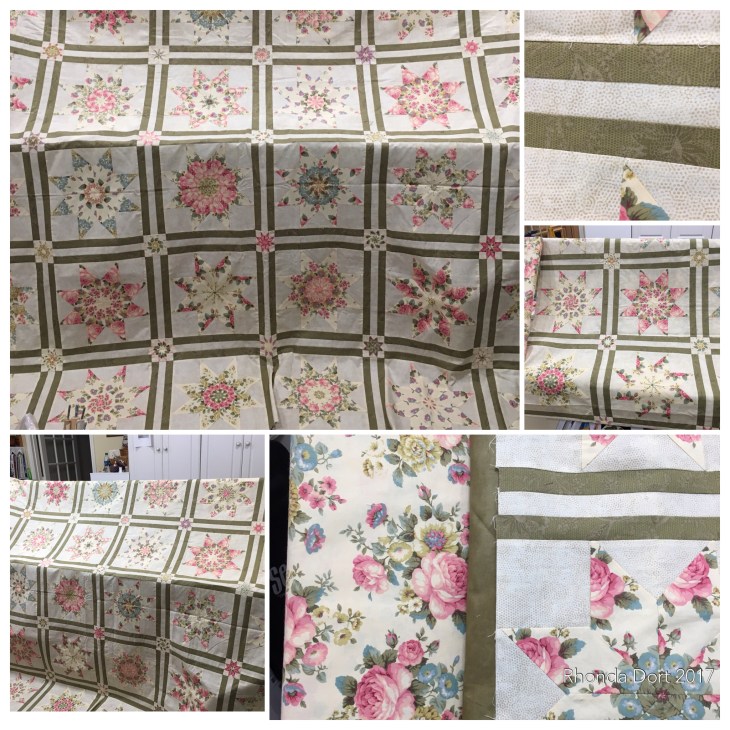
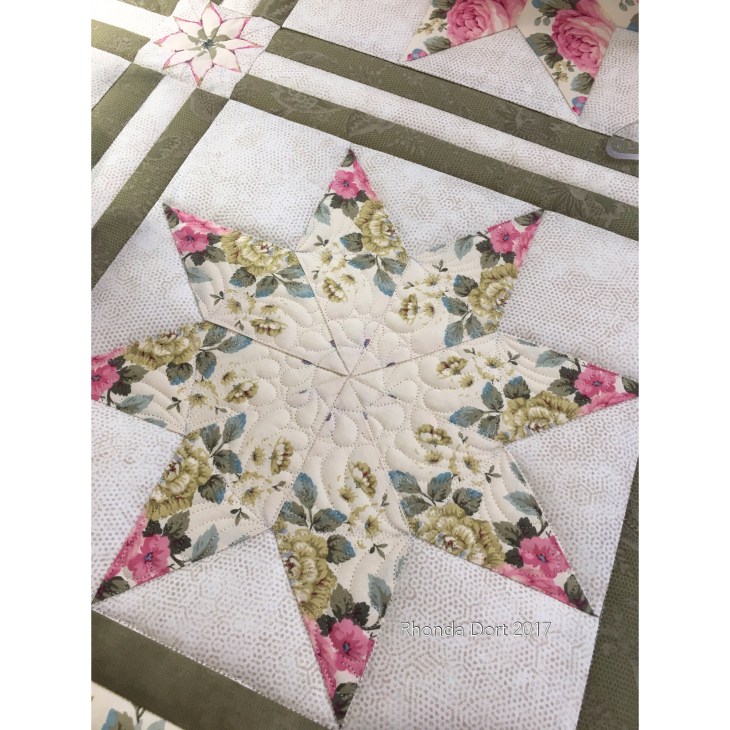
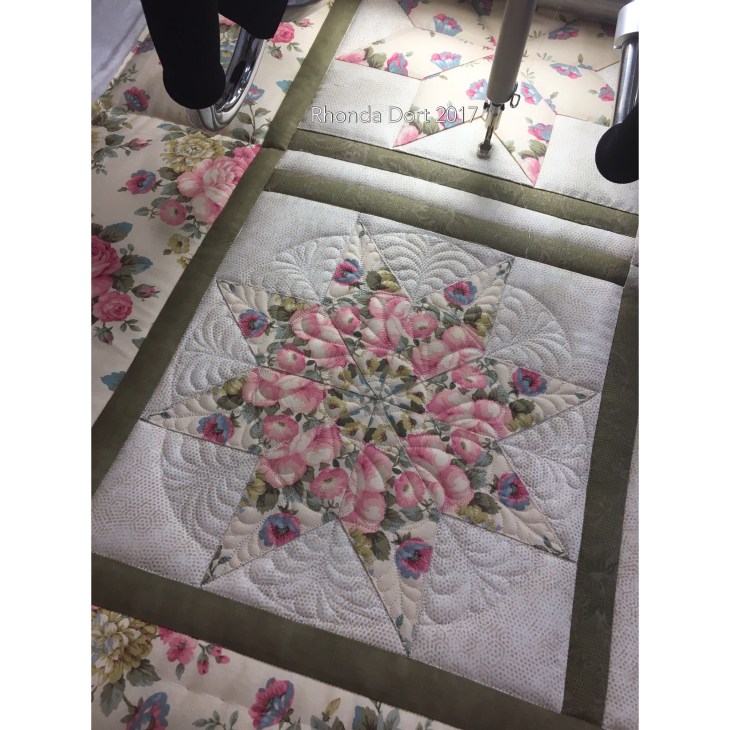
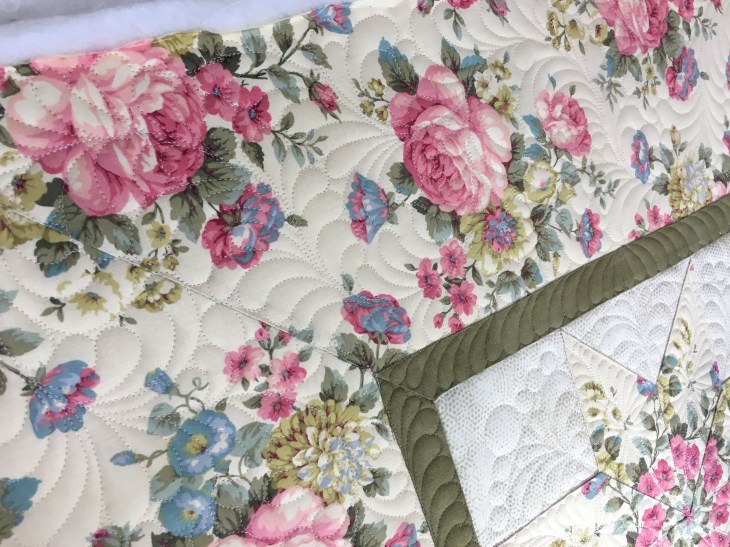
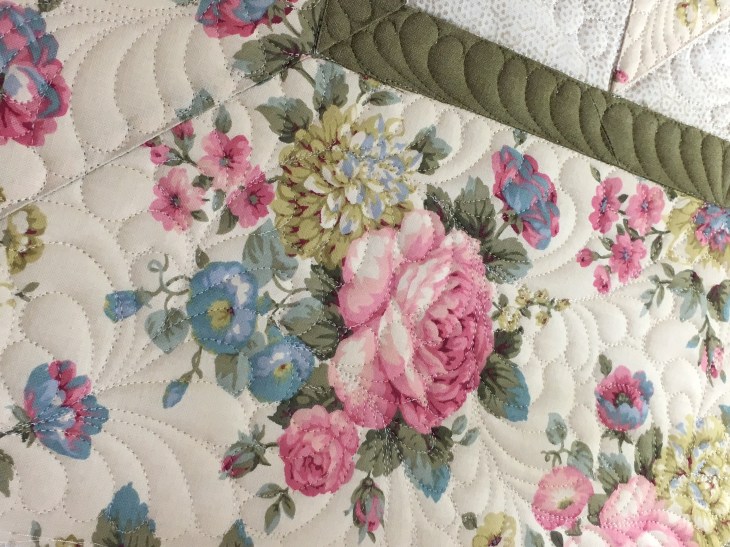
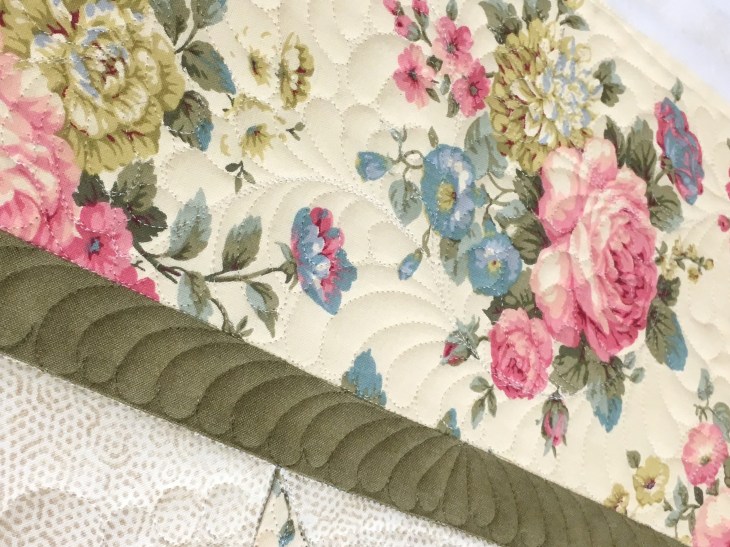
Question #2: So….. l was shocked to find the year 1998 on the focus fabric selvage. Let me also say I know this was not an expensive fabric. The manufacturer looks to be Classic Cottons, the pattern name is Emily’s Roses, there is a phone number on the bolt label: 212-391-2300. The style, color way and pattern number are completely smudged out by a label that was attached and then removed. The selvage lists only Classic Cottons and 1998.


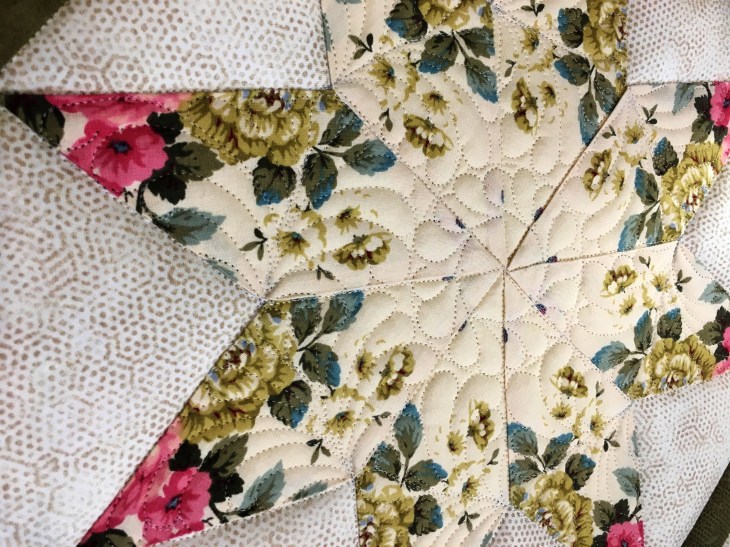
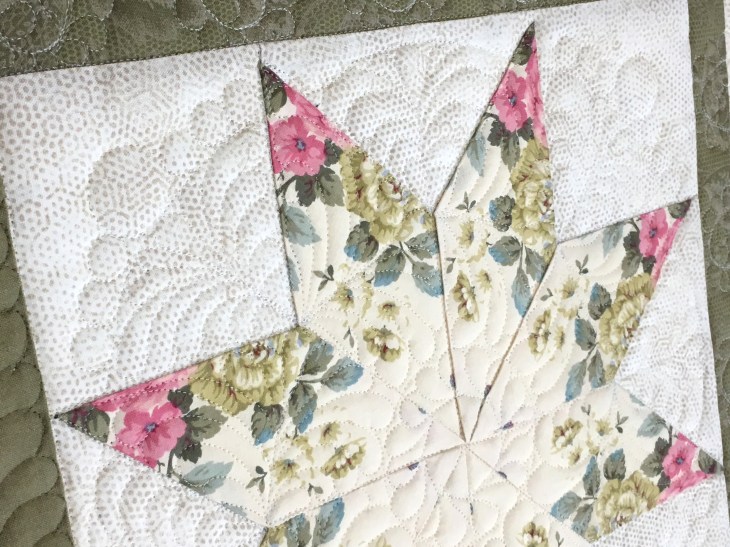
Question 3#: How did I make the tiny sashing cornerstone blocks?  First let me say I just pulled Bethany Reynold’s book from my cabinet. If you are referencing her original Magic Stack-n-Whack Quilts book, published by AQS, copyright 1998 then you will find on page 61 the pattern for the LeMoyne Star Throw Quilt. I used this pattern. The strips of sashing are cut 1 1/2″ each, there are three of them so we can assume the sashing will finish to 3″. Her pattern calls for a 3″ 9-Patch as the sashing cornerstones. I substituted a 3″ stack-n-whack. The picture below is a diagram I just drew up as to how I recall making these little blocks. Don’t be intimidated by their size, they are well worth the effort! Notice that on the big blocks I did set in corner squares, not the case on these little babies. Take the easier route and use half square triangles. Sure, these are crazy measurements and sure, I most likely fudged a bit here and there. Give it a try and see how it goes for you, you’ve got nothing to lose but a bit of time!

mini stack whack block diagram

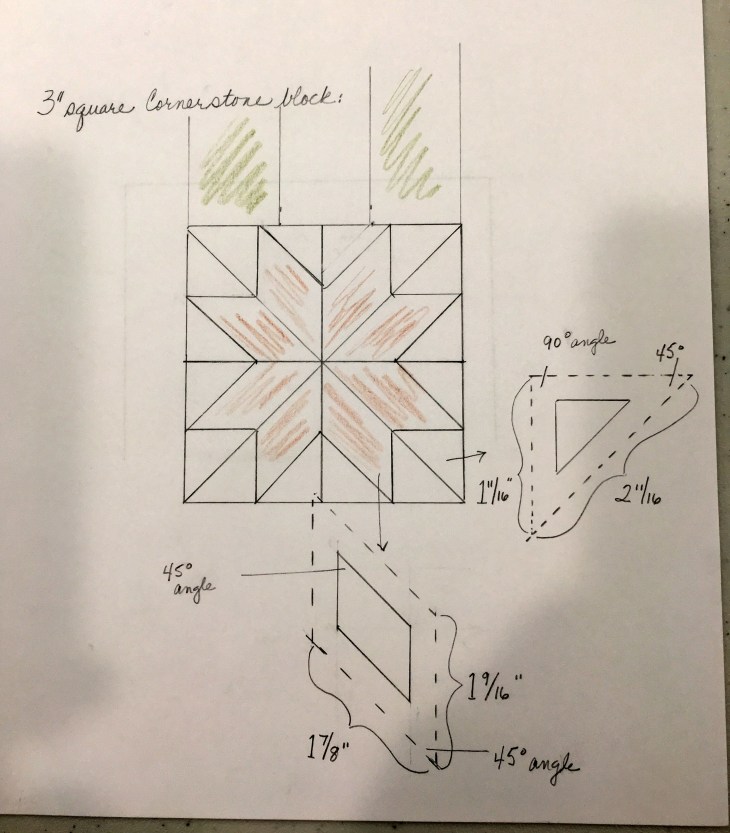
You can see by looking at the 6 tiny blocks below, they are far from perfect but they work! If you strive for absolute perfection on these little babies you’ll make yourself crazy!


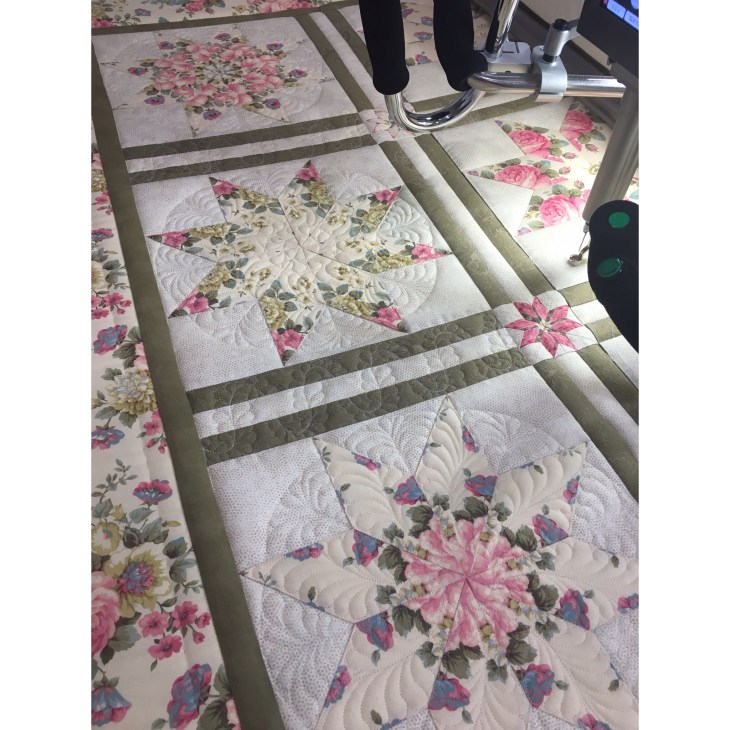
4. How long did this project take? hhhmmmmm… well let’s just say I had this UFO on my hands for years! I did everything but the green border and the outside focus fabric border. Why did it sit so long unattended? Most likely because I knew it would be a BIG quilt and at that time I was doing all my machine quilting on either my domestic Bernina or my Juki and I knew it would be a monster to wrangle around underneath the needle. Once I got my awesome wonderful fantastic longarm, I set about to tackle my UFO’s and this one’s number came up. So a long answer to this short question is: a. years and b. 63 hours to quilt.


Is any of this information clear as mud? Please, if you still have questions, please ask! I’d rather stumble through an answer than have you remain bemuddled about my project! After all, we all learn from each other, right? !!!

To close, here are pictures of 6 of my precious little baby blocks, hope you enjoy!

Happy Quilting and blessings,

Rhonda


Oh those Stack-n-Whack quilts!

Several years ago mom and I got into the “Bethany Reynolds” mode and we each made several Stack and Whack quilt tops. The funny thing about this quilt is that the feature fabric has pink and turquoise and roses. Three things I’m not fond of AT ALL! But I LOVE the quilt! Go figure.

So, you’ve done a Stack and Whack? They’re extremely addictive! And fun! Be forewarned if you’re just now deciding to give them a try. 

Like I said, I made the quilt top several years ago, the only thing it still needed was the feature fabric outside borders.  I laid it out, draped over my longarm and immediately knew I needed to add a 1″ finished green sashing fabric border first, something to straddle the quilt top and the outside border. Only problem: I didn’t have but a few small scraps of the fabric left. No selvage to give me fabric info, no idea where I bought it, who made it, etc, etc. What to do? What to do?

I took a small piece of the green and headed to GRS in Old Town Spring, TX. where I’m convinced they have or have carried every bolt of fabric known to man. Lo and behold… they had a Moda that almost matched perfectly. The original fabric is patterned, the new fabric isn’t but it’s the best I could come up with. Check it out much later in pictures way down below, you’ll see that after it’s quilted, it’s very hard to pick out the two greens.

IMG_5221

So here’s the quilt top before quilting:

IMG_0646

And here’s the first “star” block with the quilting underway. I lightly marked some quilting registration lines with Frixion Pen (yes I know, horrors, gasps, etc, I’ve heard it all.)

My goal starting out was to 1. quilt all 30 star blocks differently but with feathers as a central theme and 2. quilt vining feathers in the block sashings. So here goes, there are tons and tons of pictures:

IMG_0732IMG_0733IMG_0734IMG_0735IMG_0736IMG_0737IMG_0738IMG_0739IMG_0740

Here’s a good pic of what I mean by vining feathers, the over and under as they wind their way up the sashing:

IMG_0741IMG_0742

So can I tell you I was running out of quilting ideas by time I hit star number 23. I stuck with it and got through 30, but man-oh-man it was tough. From the picture below you can see that each of the background areas were quilting in the same fashion. I didn’t know what should go in each of the block four corners until all the stars were finished. I decided it needed two different sized of circles. I pulled out my “trusty awesome everybody should own a set” of Teryl Loy circle templates and viola! Perfect! Get the whole set! You’ll use them! You’ll thank me later! See how cool these are:

IMG_5302

IMG_0743

Each of the four corners got 7 circles and whew! I was finished with the body of the quilt top.

IMG_5357

IMG_0760

The little sashing cornerstones are also tiny Stack and Whack blocks. The only quilting I did in them was SID. You’ll see what I mean below when you come to the pictures of the quilt back.

IMG_5251IMG_5252IMG_5354IMG_5355IMG_5356IMG_5358IMG_5360IMG_5361IMG_5362

I call this my quilt version of a hair ball: These are all the threads I clipped during the entire quilting process: As I clip I have a small fabric container that travels across the project with me. When I finish a quilt it gets upended into the trash. Don’t know what possessed me to dump them here and take a pic, guess I thought you needed to see all those threads!

IMG_5363

So in my mind here’s where the quilt really shines: the back. I love love love to quilt and I love it even more when the back of the quilt is just as beautiful as the front. It is always my preference to use a solid fabric as by backings and mostly I gravitate towards medium weight muslin, either bleached or natural but in this case I had on hand a very light ivory with a tone on tone small floral spray. With all the quilting you really have to look hard to see the flowers.

 I’m not going to talk about the back pictures, just hope you enjoy perusing through them:

IMG_0759

IMG_5365 (Edited)

Ok, I will talk about how I quilted the outside focus fabric borders. I marked an almost half way line down each border. In other words, if the border finished to 6″ I mark the line 3″ away from the inside seam line. Clear as mud? I need to remember that I will be taking a 1/4″ seam on the outer edge as I attach my binding. I prefer my feathers not touch or fall under the binding fabric. Am I always successful, sometimes…  Anyway, once I had my 3″ line drawn, I then used a circle acrylic template and marked alternating half circles for the spine of my feathers to follow. I almost always do not stitch feather center spines. I let the individual feathers do that work. You’ll notice below that as I stitched the undulating feathers, at the “top” of each half circle, I incorporated an off shoot of feathers. It’s a nice way to quilt additional space and keep the feathers generally the same size. In other words, I didn’t have the need to quilt any long sweeping feathers to fill space. If this makes no sense at all, leave me a question in the comments section and I’ll try and draw out a diagram to go with my words.

IMG_5365IMG_5366IMG_5367

Oh no! More words! Here’s a good pic below of the vining feathers. I had an overall plan. On the vertical sashings all the feather vines are headed up, on the horizontal sashings they begin on both the right side and the left side and meet up in the center.

IMG_5368IMG_5369 (Edited)IMG_5369

Ok, I guess I had more to say about the back than I realized. See the star block below on the right, another example showing how I was able to use those AWESOME Teryl Loy circle templates to get those perfect lines of 6 half inch circles within the star and the 7 on the outside.

IMG_5370

Whew! Look at that! Even the binding is on! If you know me well you’ll know I don’t care for the binding process whatsoever.

IMG_5411 (Edited)

And what’s a blog without a picture of my black fur baby house panther! This is Winston and from what I can tell, he approves of my quilt!

IMG_5415

Are you still with me? So, about the thread! I used Wonderfil Invisafil #112 light ivory throughout the entire quilt with the exception on the outside 1″ green border. On the green border I used Invisafil in a beautiful matching color.  I love this thread! Haven’t tried it yet? Run out and get a spool or two or three! The bobbin? I used a white 70 weight poly throughout.

IMG_5273

Batting? My fav, Hobbs white 80/20 on the bottom and Hobbs white Poly-Down on top. I love that combo!

About the binding, I used the same new green I went in search of. I like a small binding so I cut my strips 2″. I find it’s much easier to take a 1/4″ seam and fill the entire binding that way. It keeps me from getting judging comments that say something like: the binding could have been better…. 

Finished, this quilt measures 86×100. It’s larger than most of my more current work but I love the quilt and I love the size! I keep a very detailed journal of everything that I quilt. Oh, I quilt on a 26″ Innova with Lightening Stitch. Love my longarm! I logged 63 hours of quilting on this project! 

This will be an entry in my guild show May 5-6th, wish me well! 

Happy quilting and blessings,

Rhonda