A trip north to spend time with my parents :-)

I live a long long long way from mom and dad but I try my best to not let that stop me from heading north to spend time with them every few months. They still live in the city where I grew up in Missouri and every time I return I see changes everywhere!

I’m a 3rd generation quilter. Mom is the reason I quilt. She taught me that quilting is an amazing way to satisfy the need to create things of beauty. Her talents are many, she paints, she constructs garments, she carves and paints birds, she gardens, she longarm quilts, she’s amazing! She taught me that it’s ok to branch out, to use a pattern simply as a guide and that artistic license makes a project personal. When she could, she was very involved in several quilting groups. Caring for my dad has curtailed many of these gatherings but she gets out when she can. She’s got a wall covered with the many ribbons she’s won over the years, each one so deserved. She has set the standard high!

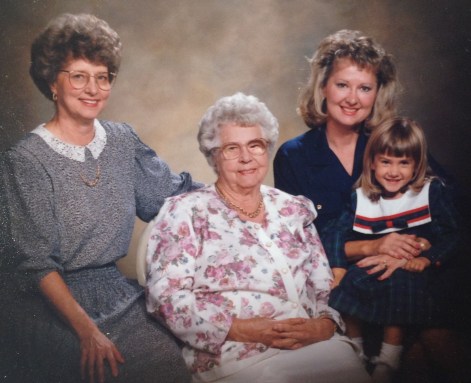
I took lots and lots of pictures this last trip. In no order I am going to show you just a tiny tiny portion of her amazing quilts and quilt tops. But first, how about a 4 Generation Picture; my grandmother, my mom, my daughter and me. Yes, it’s a picture from about 23 years ago but I love it! Hope you enjoy!

img_1537-edited

***

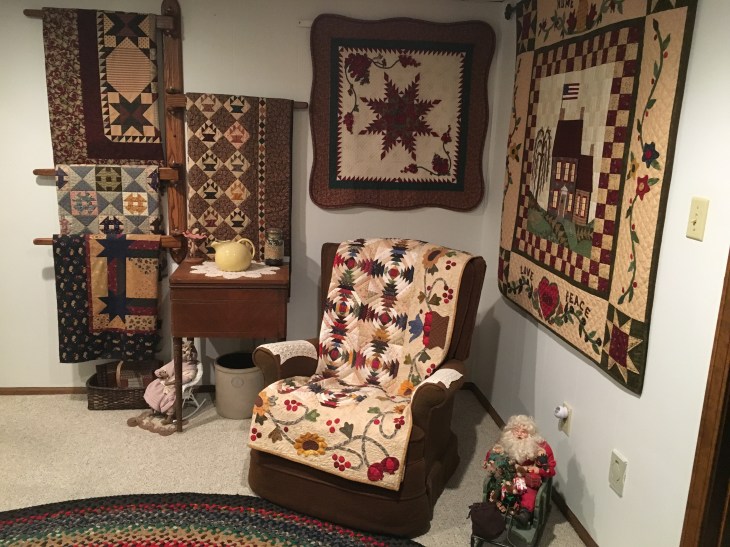
The picture below is one corner of the finished basement of their home. The sewing machine cabinet (and sewing machine) were grandma’s and my uncle (mom’s brother) made the wall rack that holds the quilts. Mom made both the Santa in the sleigh and the rabbit in the rocking chair, the hand braided rug and all the quilts.  Like I said, talented!

img_4979

***

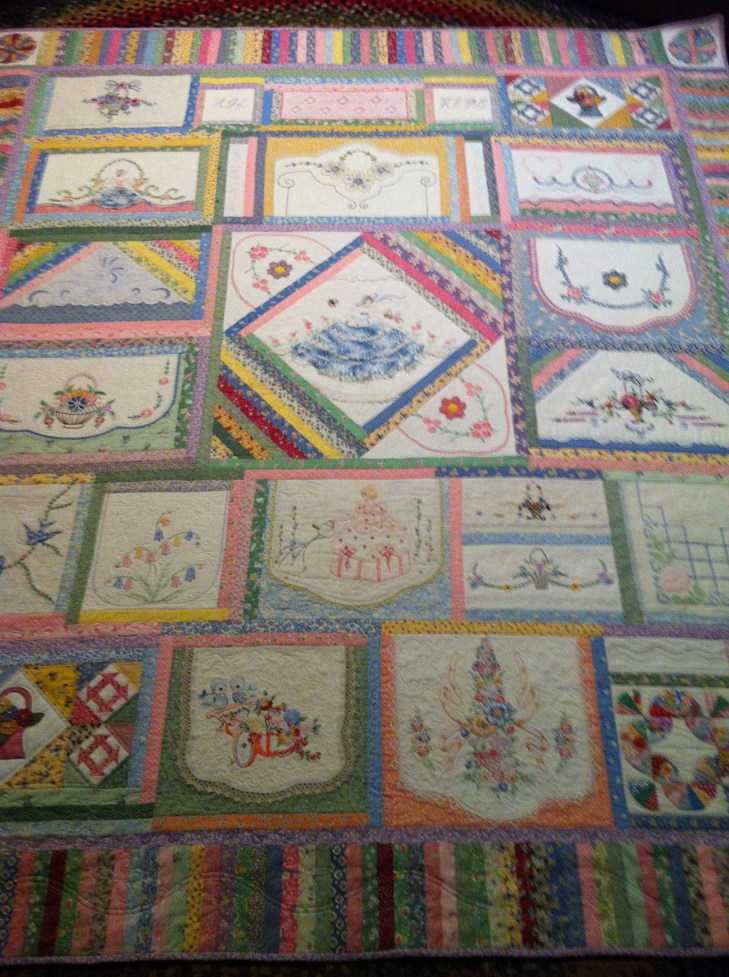
This fantastic piece is titled “My Old Linens Quilt.” Mom has given this piece to her sister, my aunt and I know she cherishes it.

img_1344

***

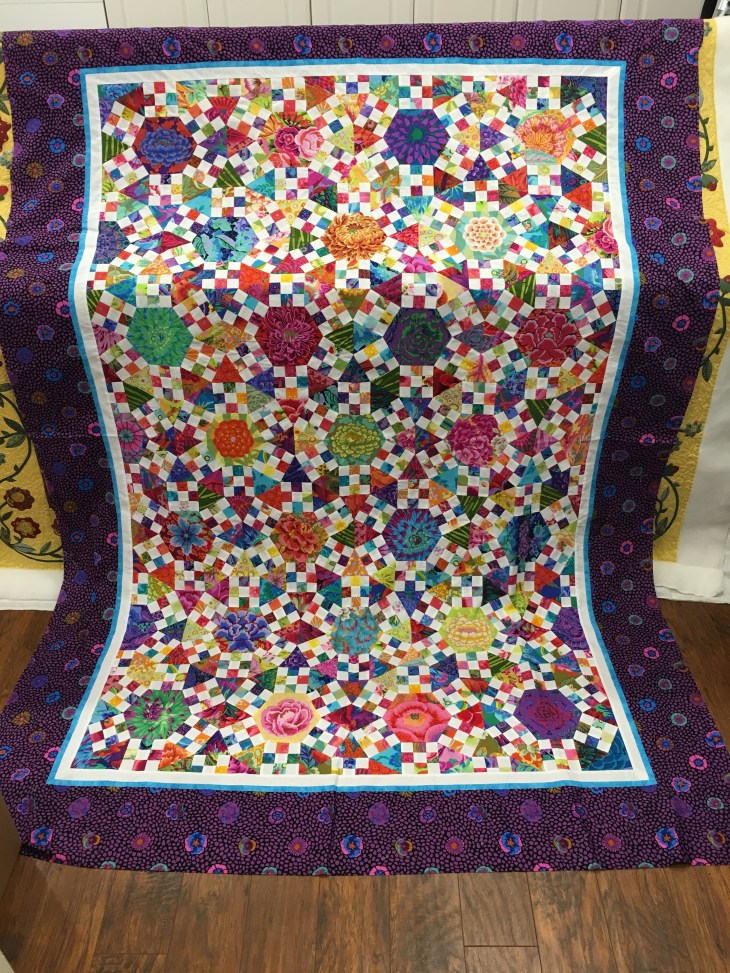
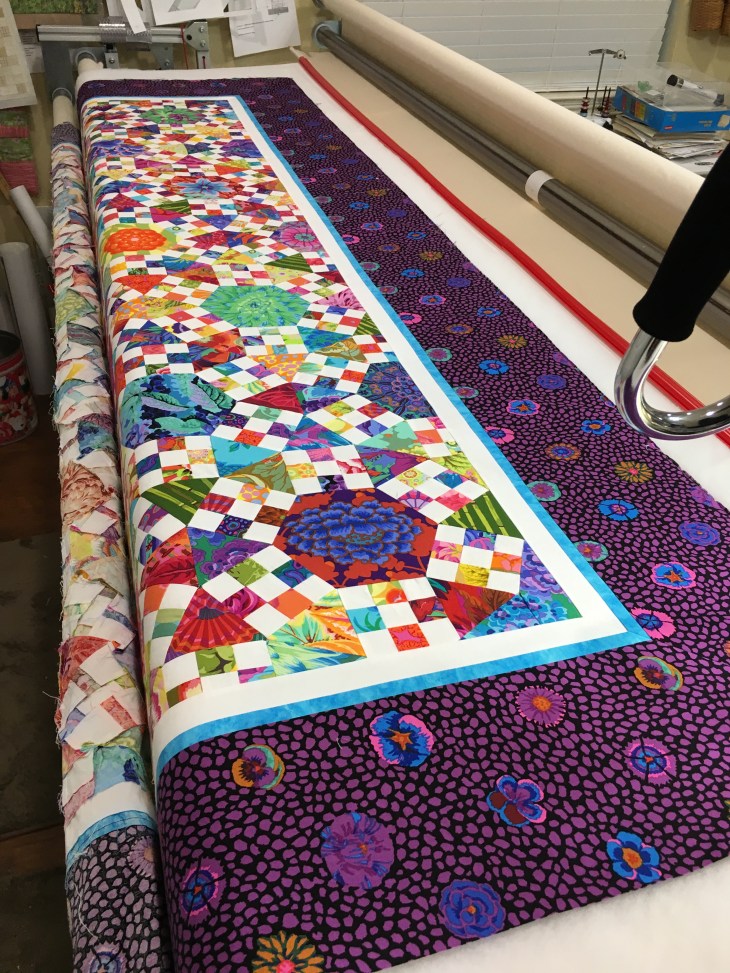
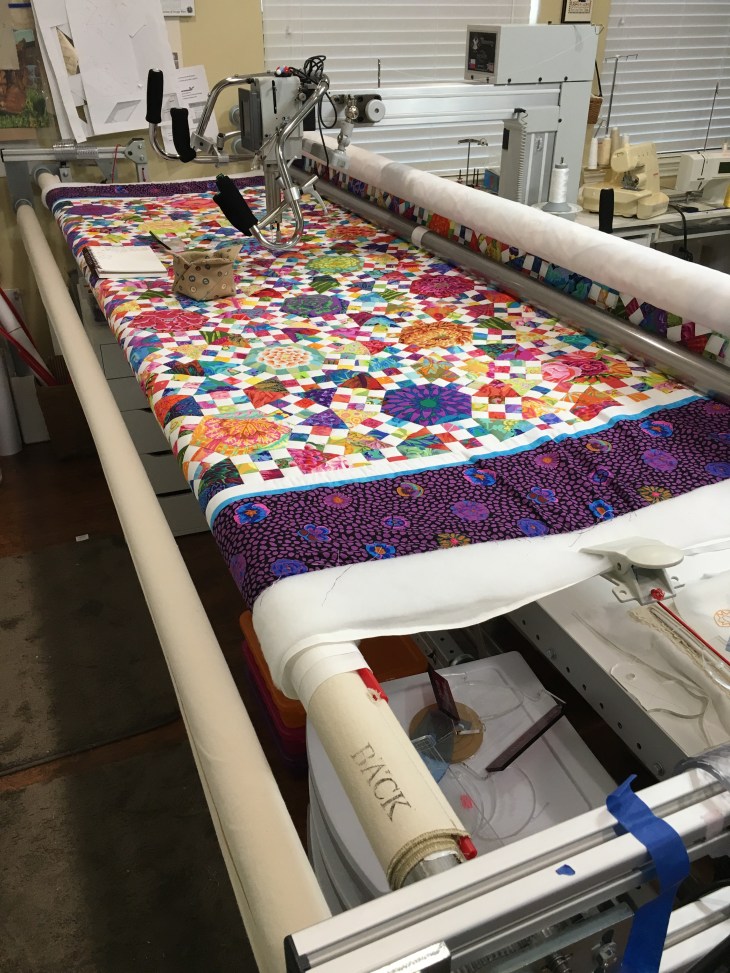
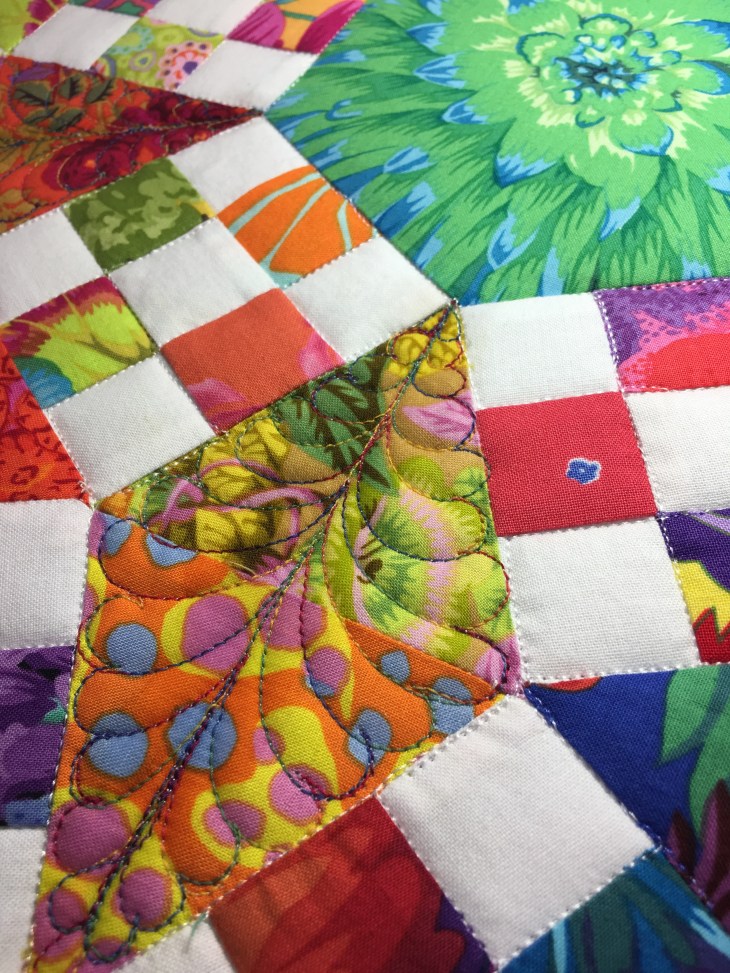
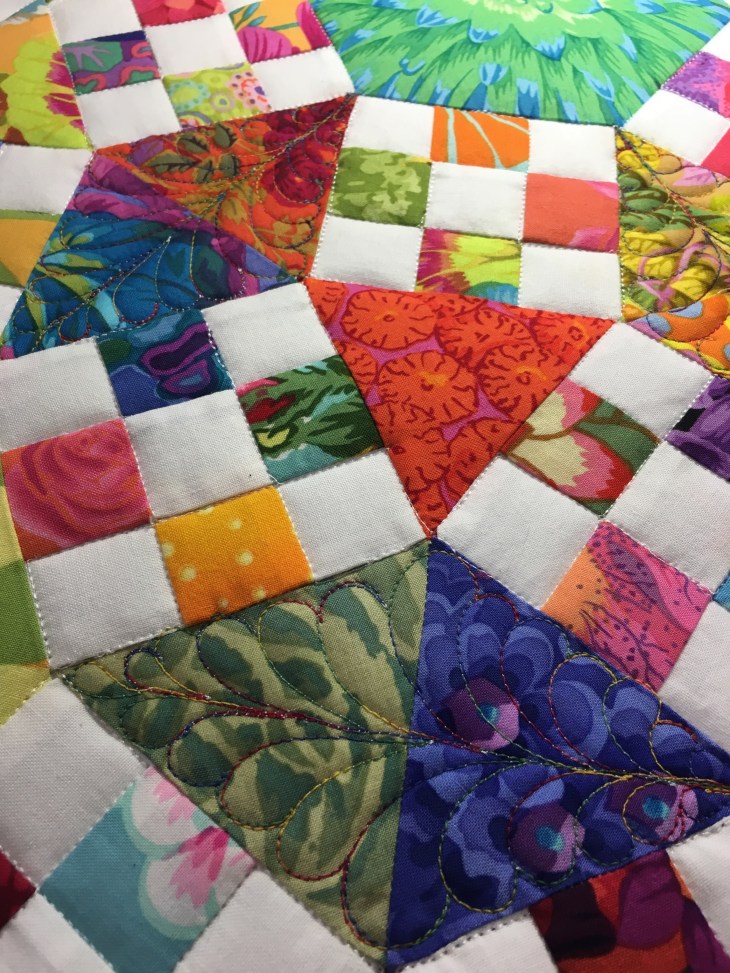
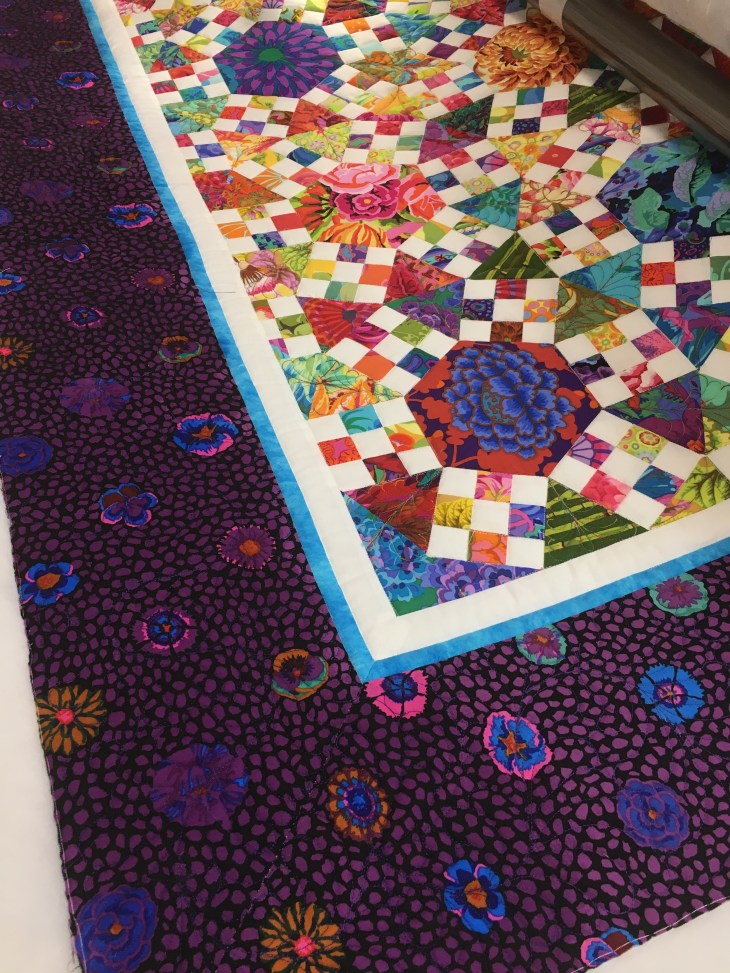
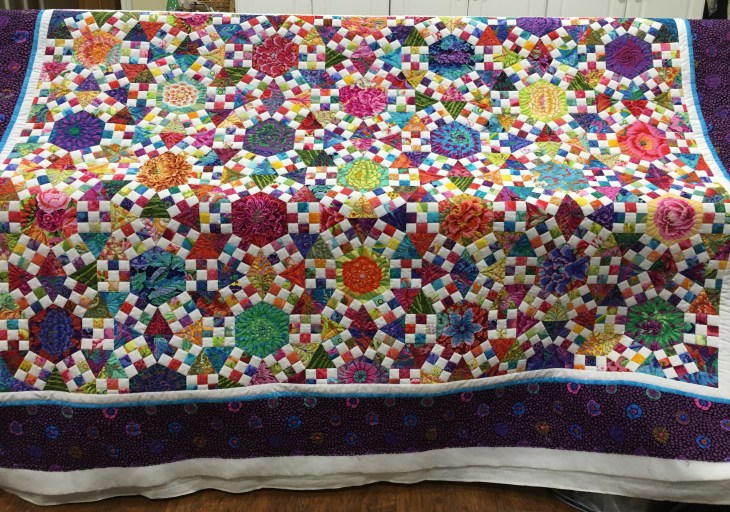
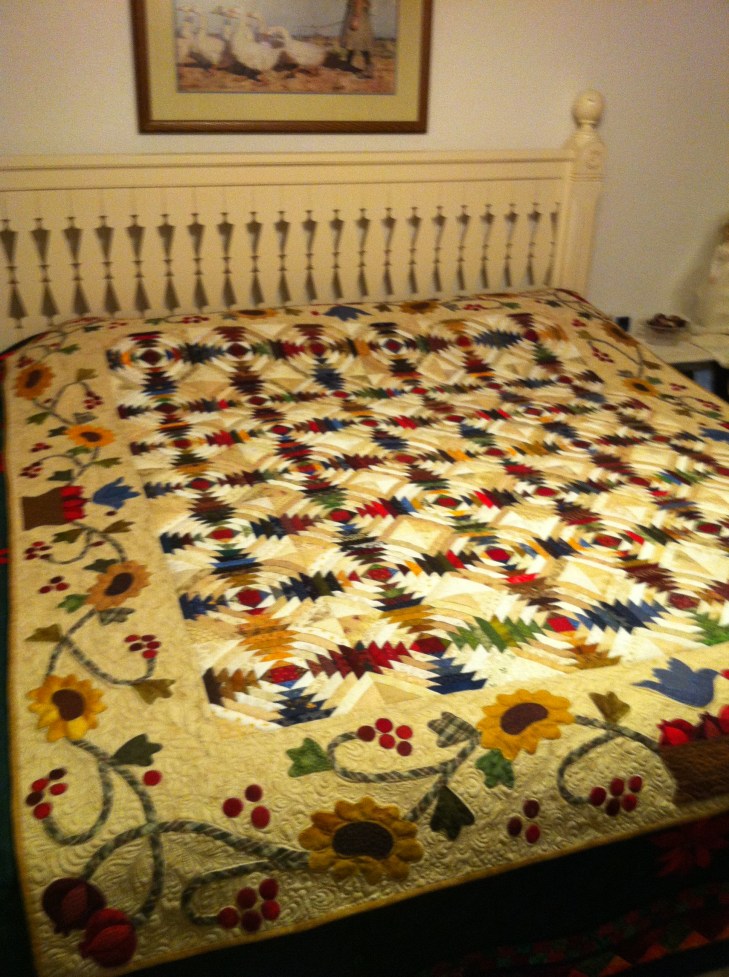
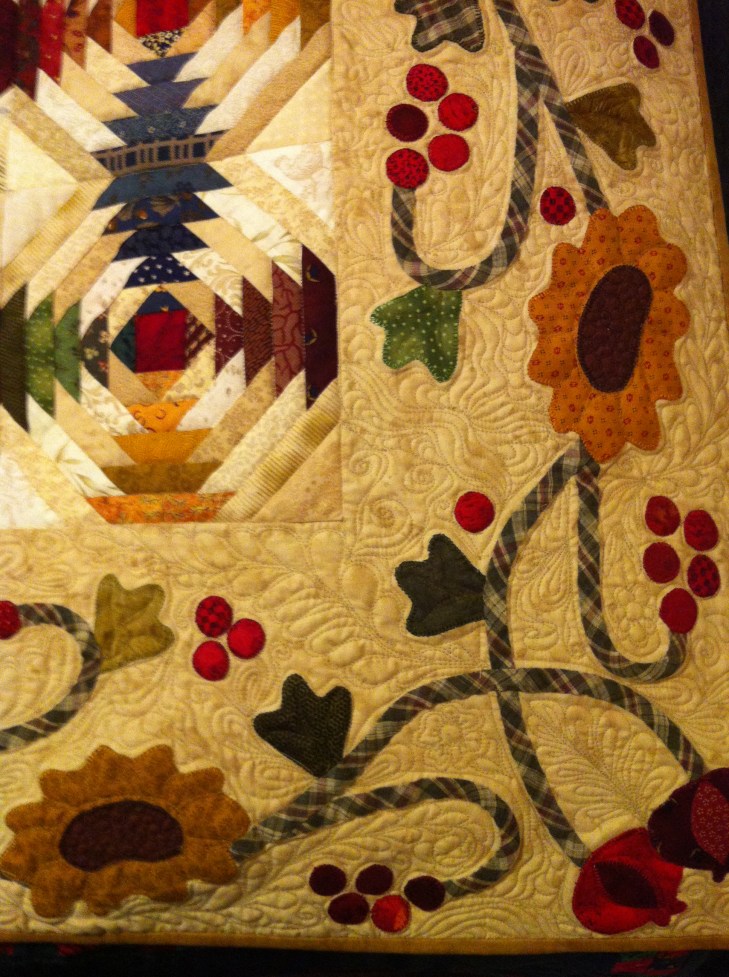
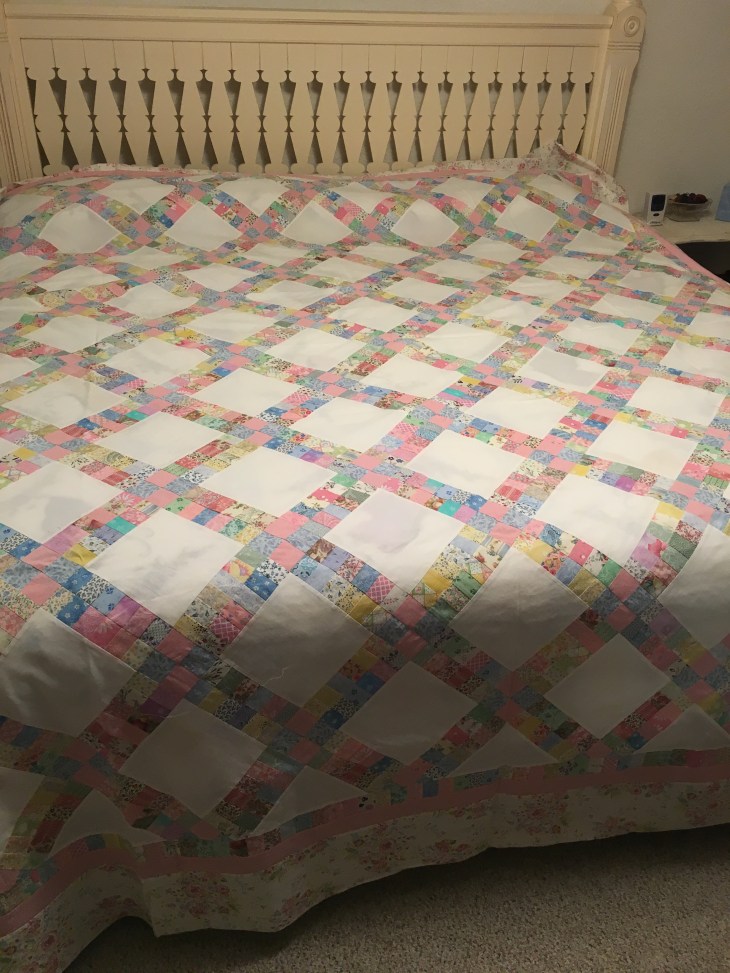
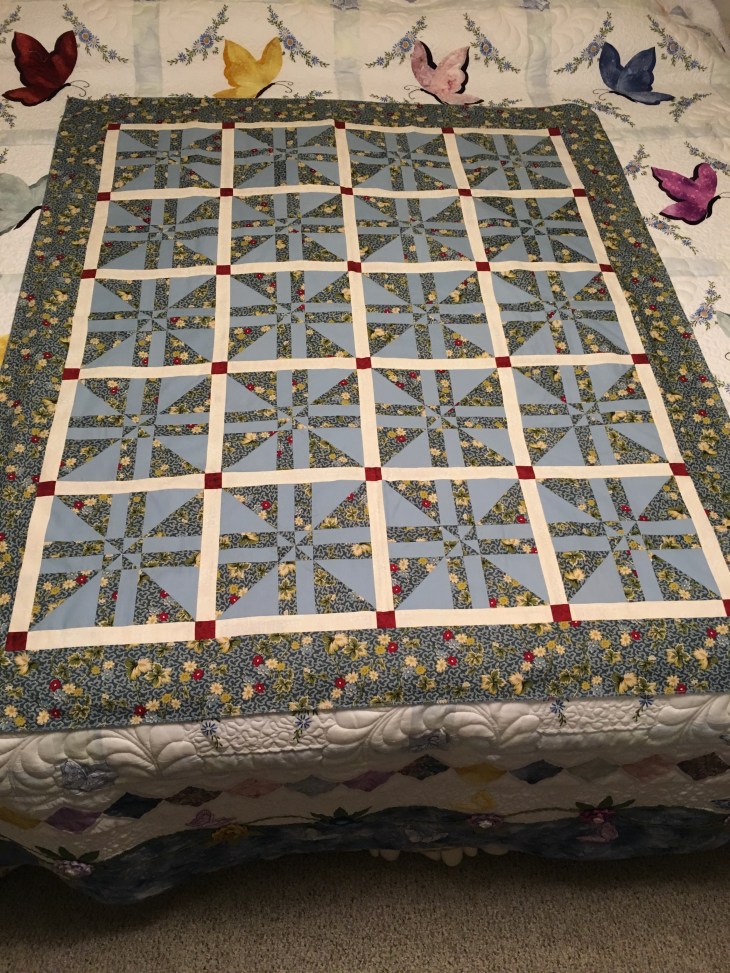
I’ve laid claim to this quilt below. I love everything about it, the pattern, the colors and especially the borders.

img_1354img_1351

***

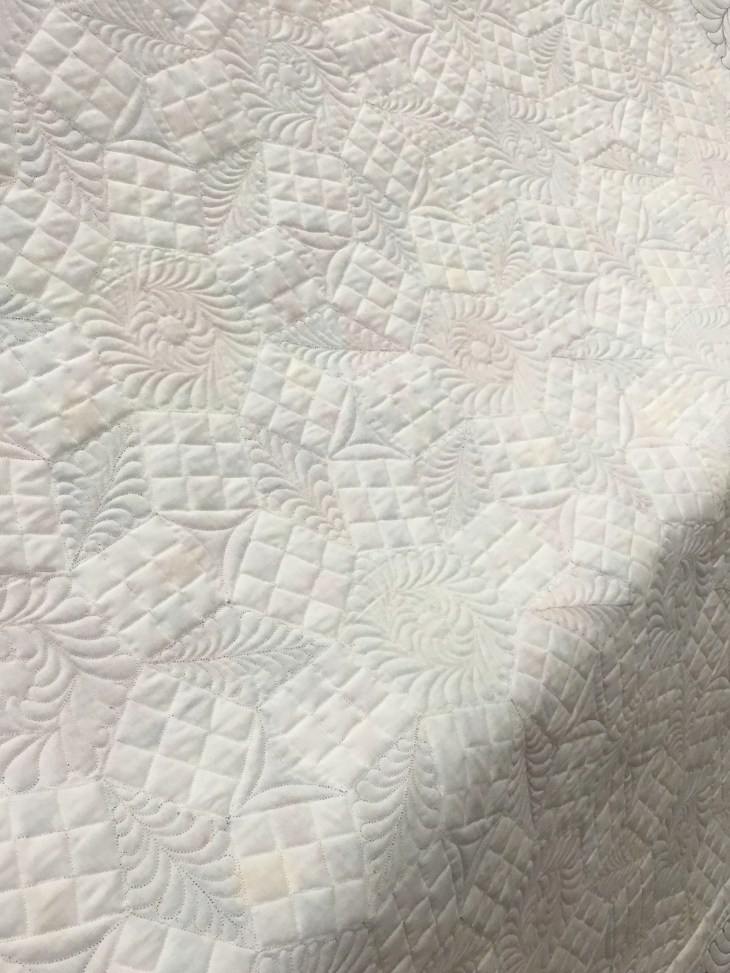
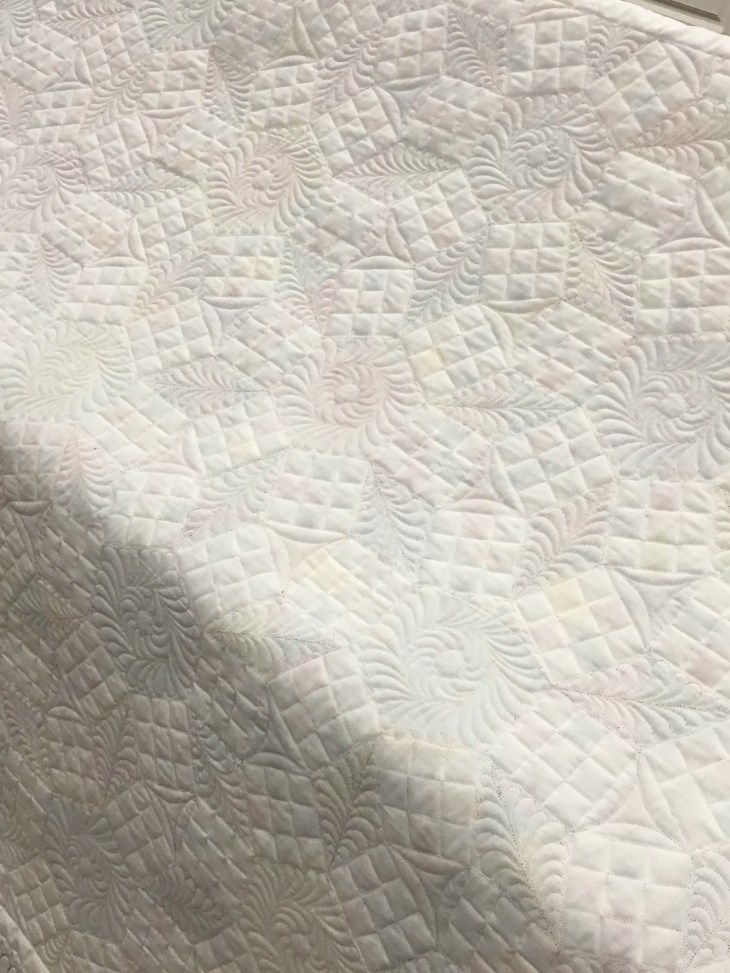
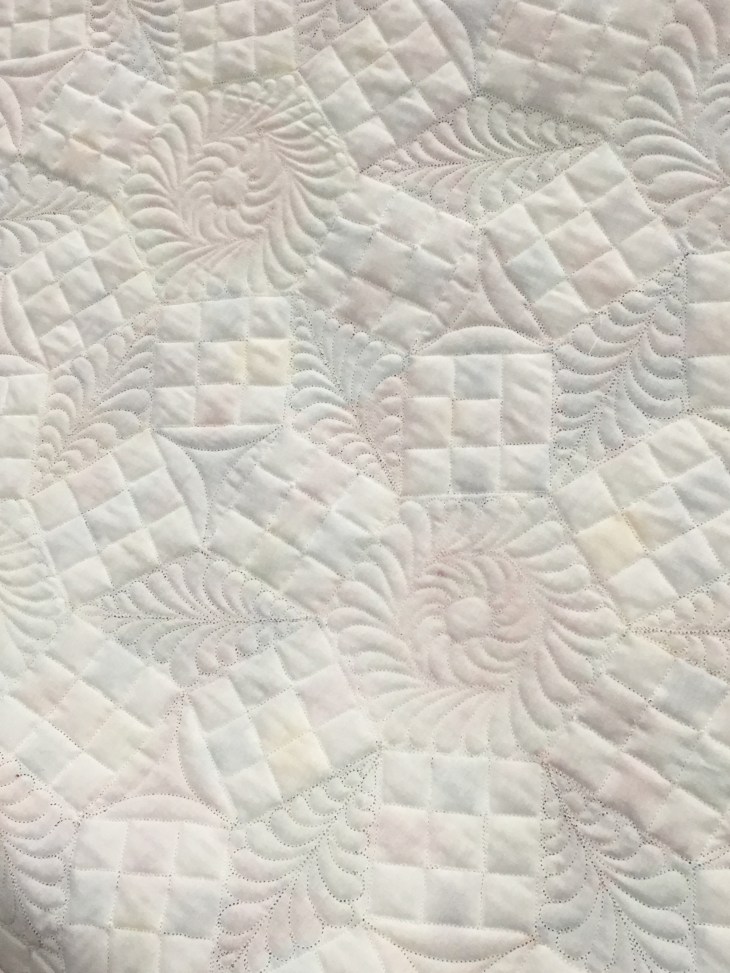
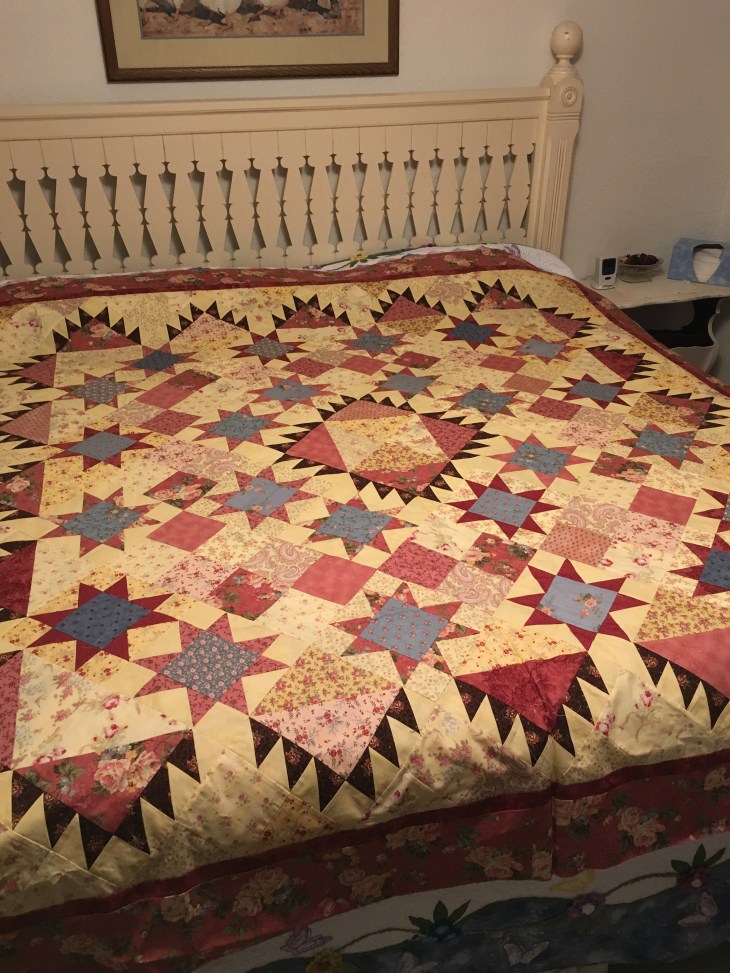
This is a  pattern titled Feathered Fantasy by Shirley Stutz. I  brought this top back to Houston with me and plan to quilt it sometime this summer. What a challenge to do justice to this fantastic piecing! See the tiny pink bordered quilt on the left, a Lori Smith pattern, hand embroidered.

feathered-fantasy-revised

***

This quilt was made from the pre-printed butterfly quilt blocks from the Fairway Needlecraft Co. Instead of hand embroidered butterflies, she chose to appliqué each of them using different fabrics. The borders are filled with butterflies and roushed flowers. A spectacular and very large creation!

butterfly-revised

Here’s what the individual pre-printed quilt blocks look like straight from the package:

printed butterfly

***

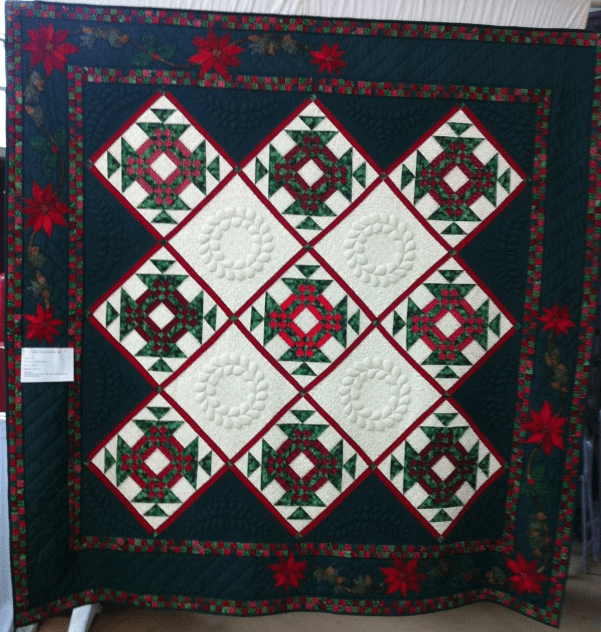
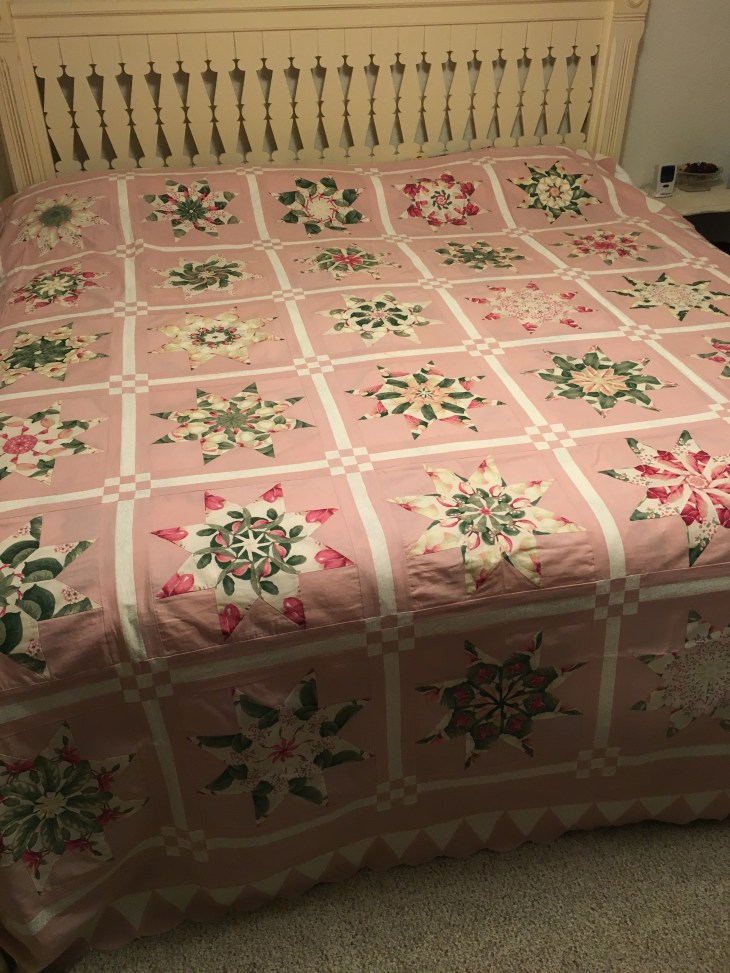
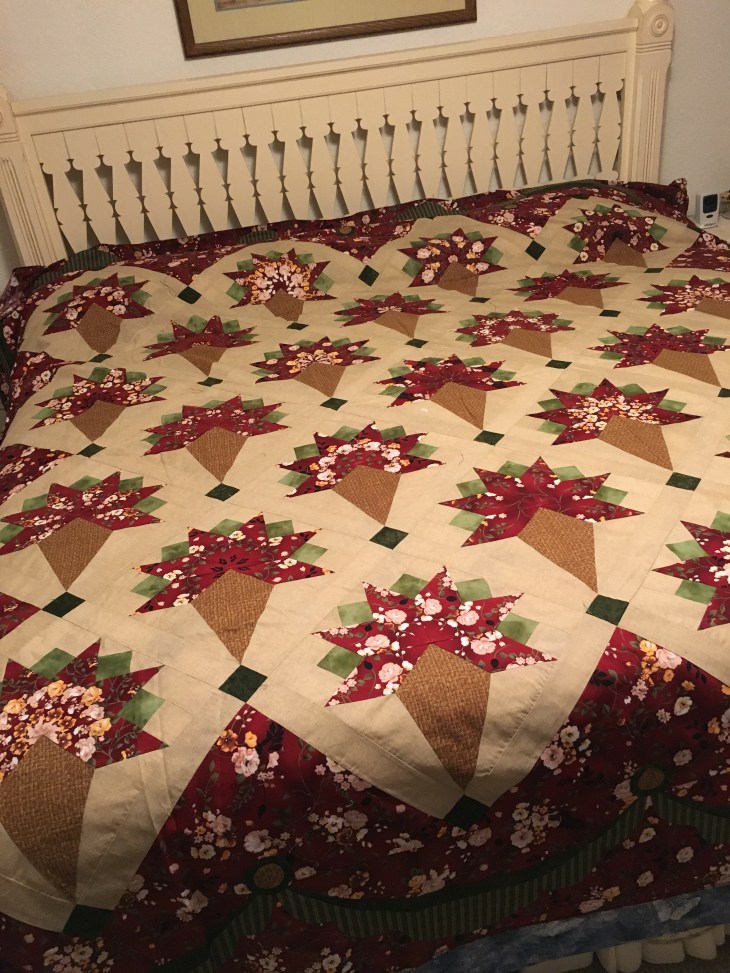
This Christmas quilt with poinsettias and trapunto quilting work is fabulous and the finished piece is quite large! The picture does not do it justice. This was a Mystery Quilt project, the pieced blocks are Goose on the Pond.

christmas-quilt-revised

***

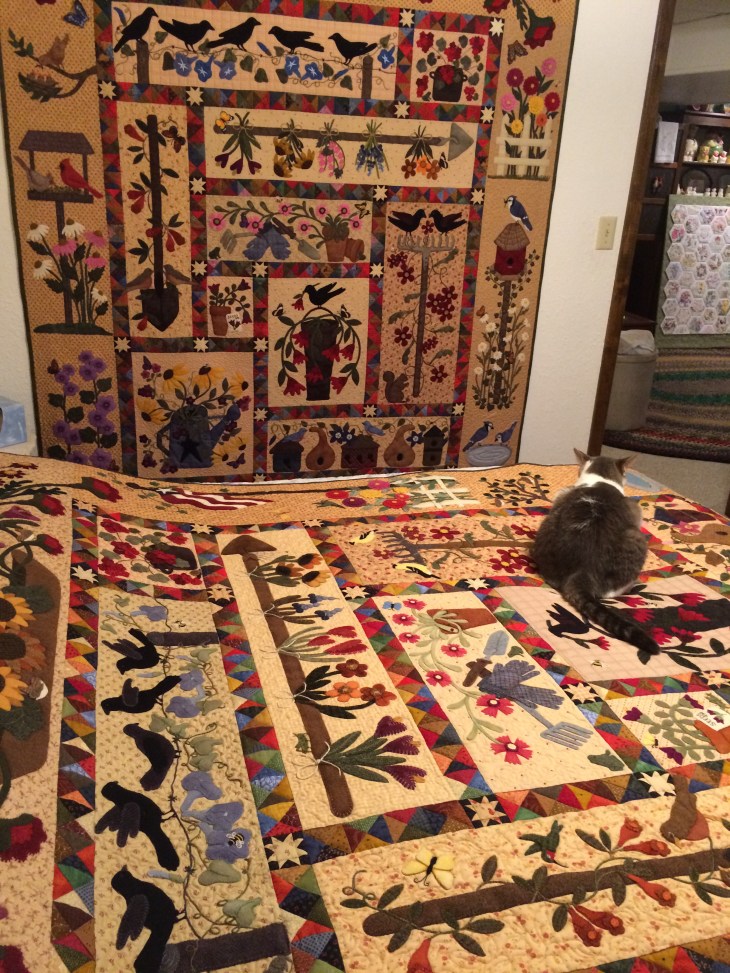
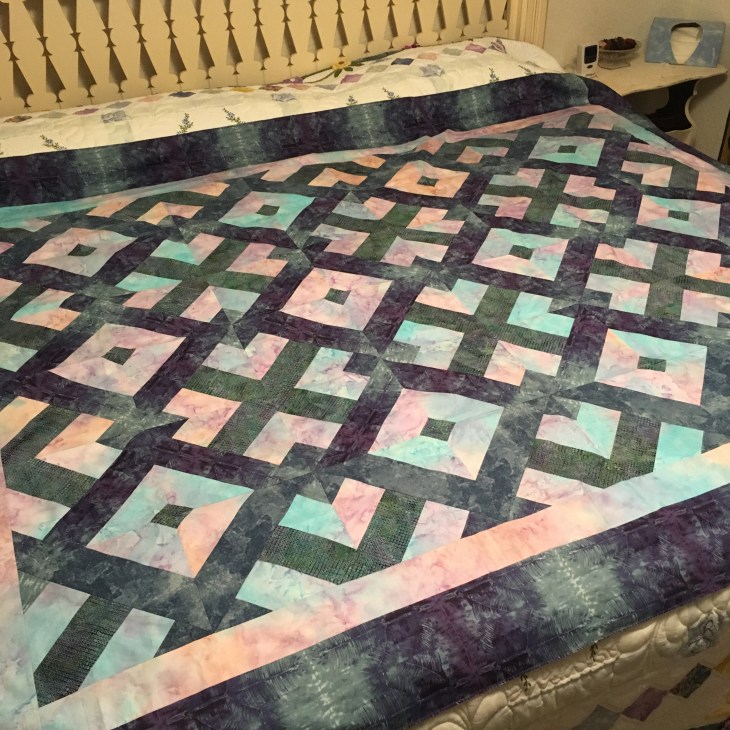
In 2007 at the International Quilt Festival in Houston mom and I came across this quilt pattern in the Primitive Gatherings booth: Primitive Gatherings. Love at first sight! We bought the pattern and worked on our quilts miles and miles apart. Mom finished hers first, mine was completed in 2015. I love this picture, mom’s hanging and mine across the bed. You can see both are “cat approved”.

img_1808

***

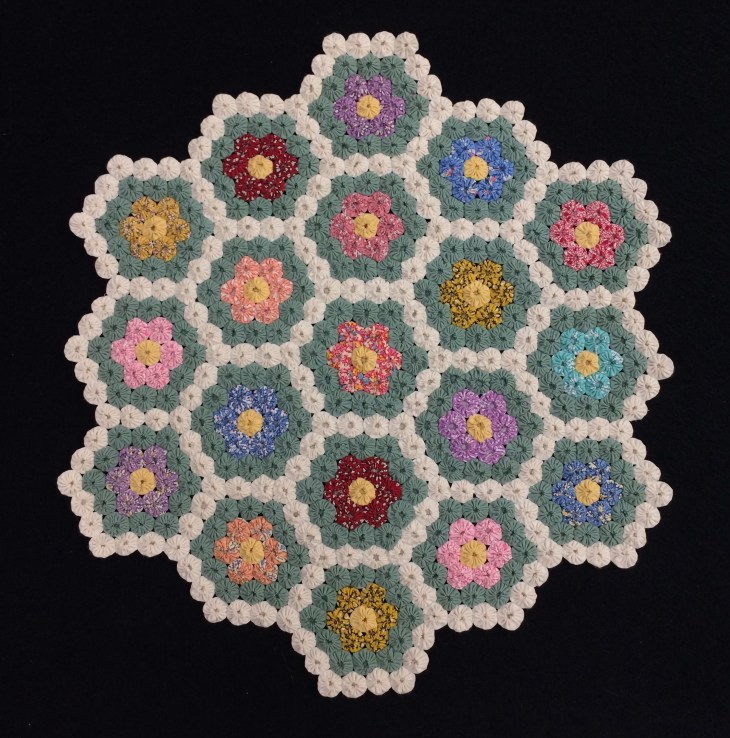
The hexagon yo-yo quilt is amazing! Each of the hexagon yo-yo’s are smaller than a dime!

img_1815-edited

***

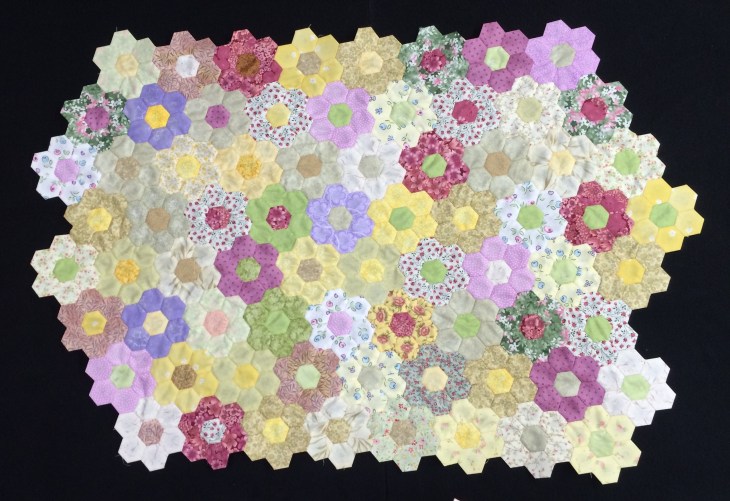
This work in progress is an English Paper Piecing project.

img_1822-edited

***

The hexagon wall hanging below (hanging on a green quilt) is made up of 6 machine embroidery designs from a collection titled “Aunt Bea’s Parlor”.  After a quick search of Black Cat Creations I see the design collection is out of stock. It look like it’s available here: Aunt Bea’s Parlor Embroidery Designs .

img_1823-edited

***

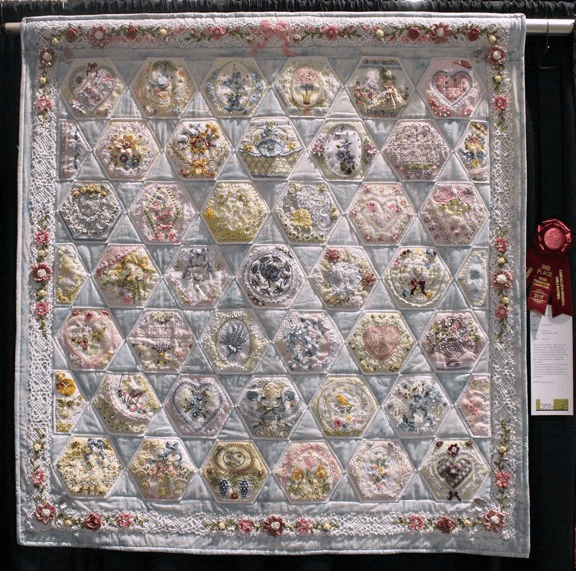
This fabulous quilt titled “Hexie Love” took 2nd place at the 2015 Midwest Regional Quilt Show in Leawood, Kansas. Hours and hours of handwork went into creating this piece!

img_4988

hexie-love-kay-lea

***

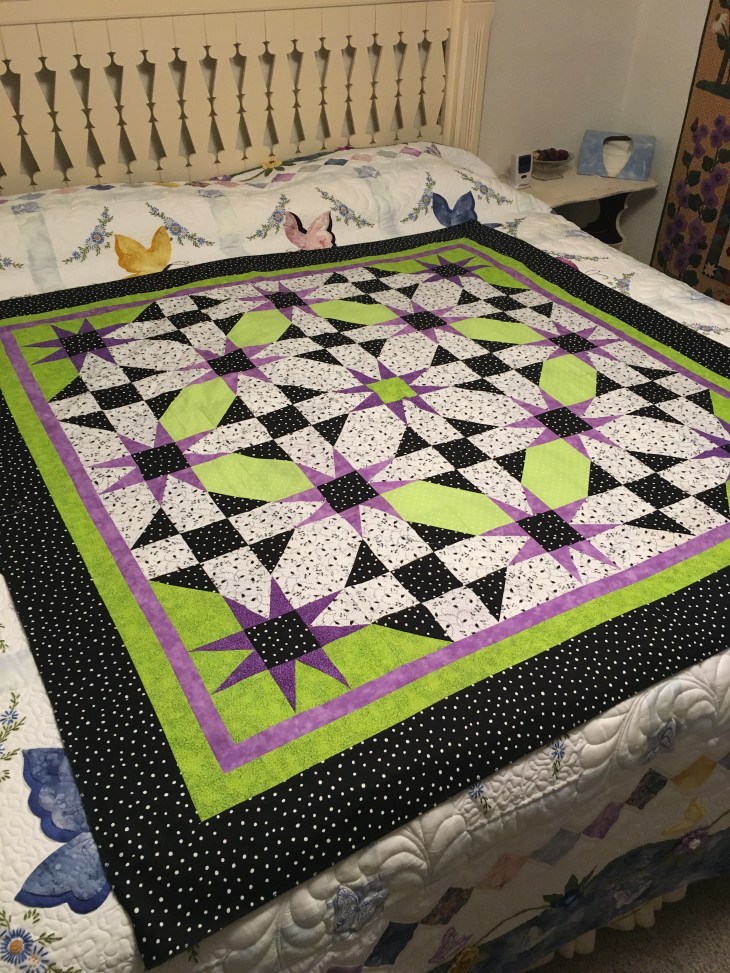
This was a guild challenge. Colors were determined by a paint strip from the paint department of a big box store. This is her original design and it won a 1st place ribbon!

blue-white-revised

***

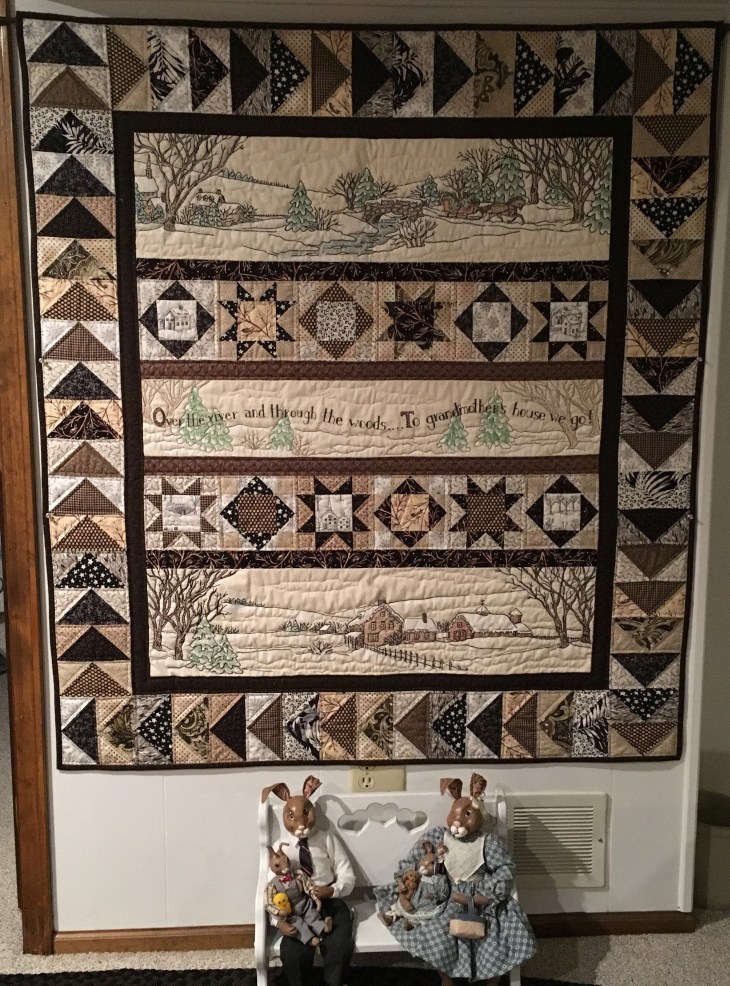
From Crabapple Hill, this quilt is “Over the River and Through the Woods”. The hand embroidery is enhanced by colored pencil shading. The middle strip has added trees and snow, not part of the original pattern.  And yes, mom made Mr. and Mrs. Rabbit and their children on the bench below the quilt.

img_4987

***

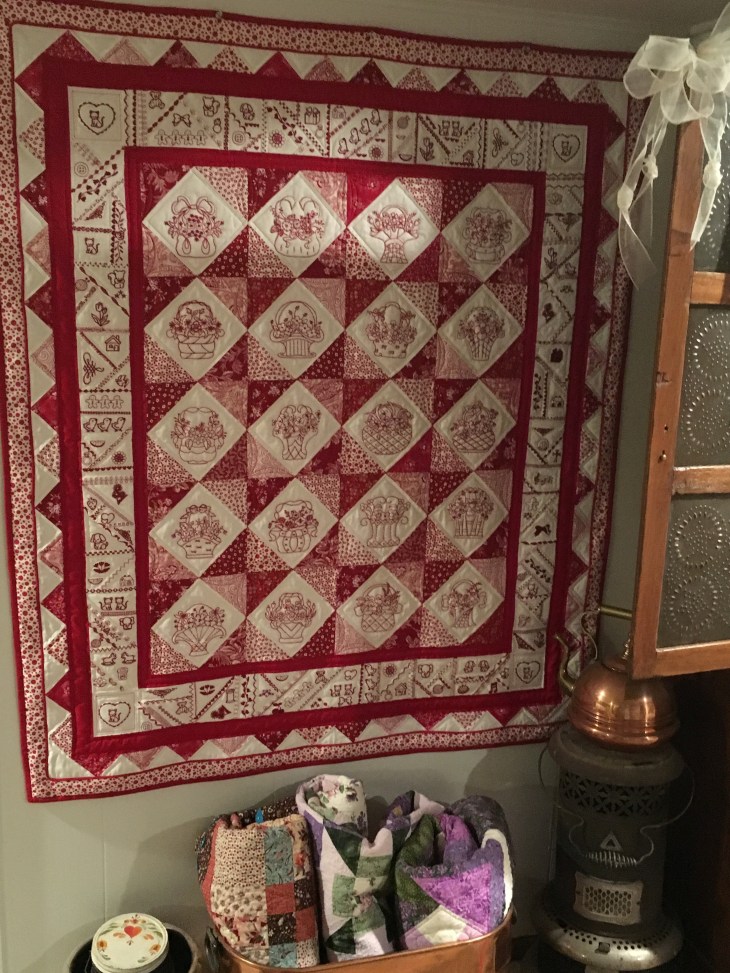
Remember the machine embroidery designs up above? Here they are done in redwork, again from a collection titled:  Aunt Bea’s Parlor. I believe most of the tiny redwork designs in the border are built-in designs from both her Brother and her Janome embroidery machines.

img_4986

***

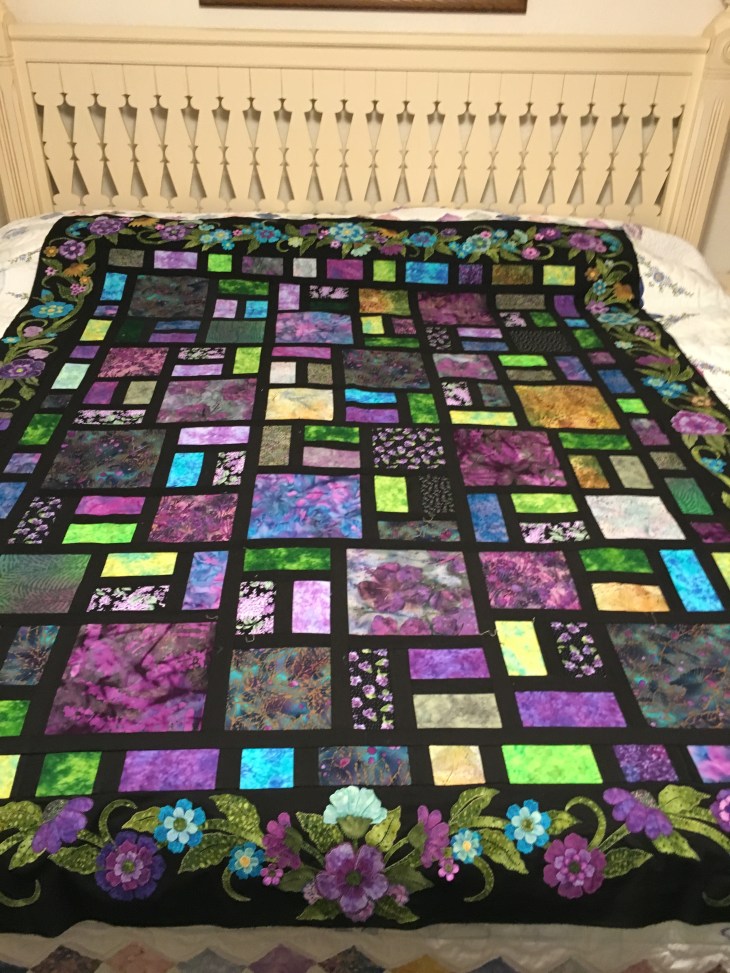
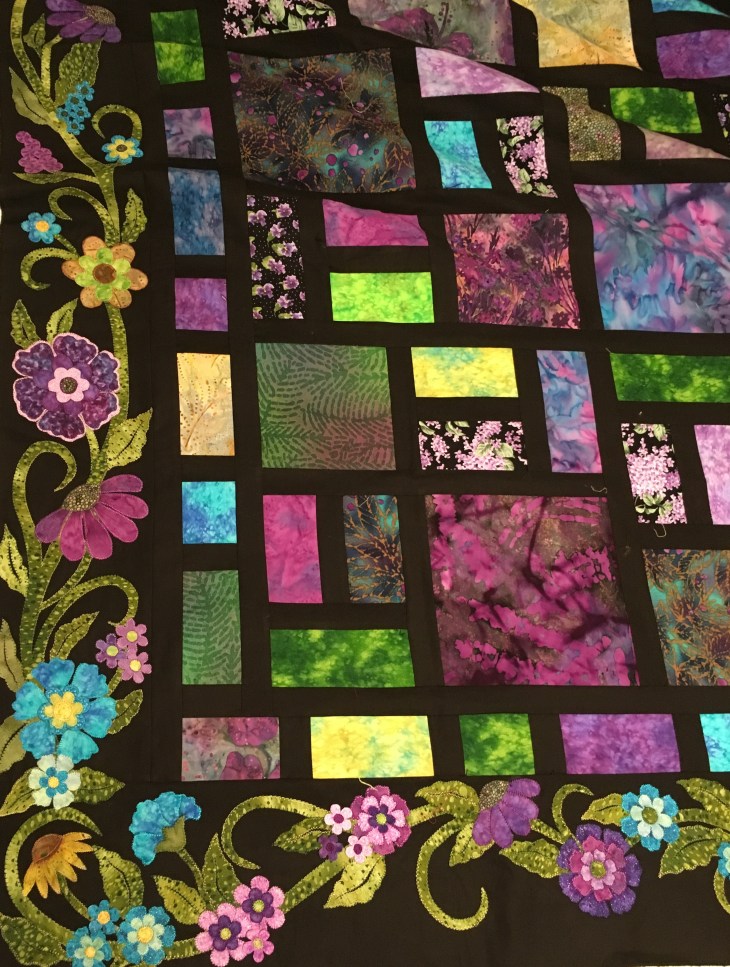
Fantastic colors and a wonderful border on this stained glass quilt top. The borders are of her own design. Look at that detail-there are over 200 flowers in the borders!

img_4942

img_4943-r

***

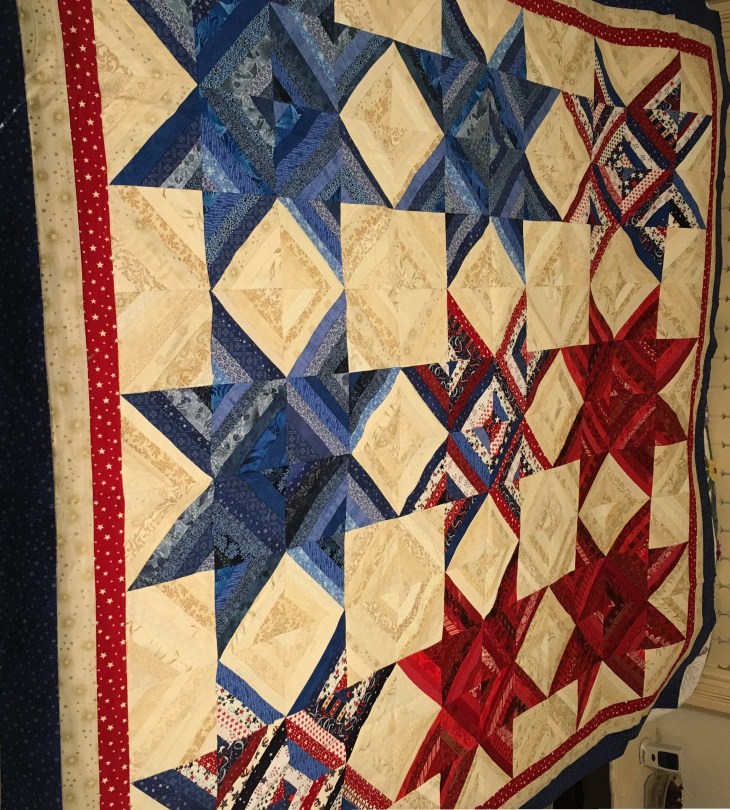
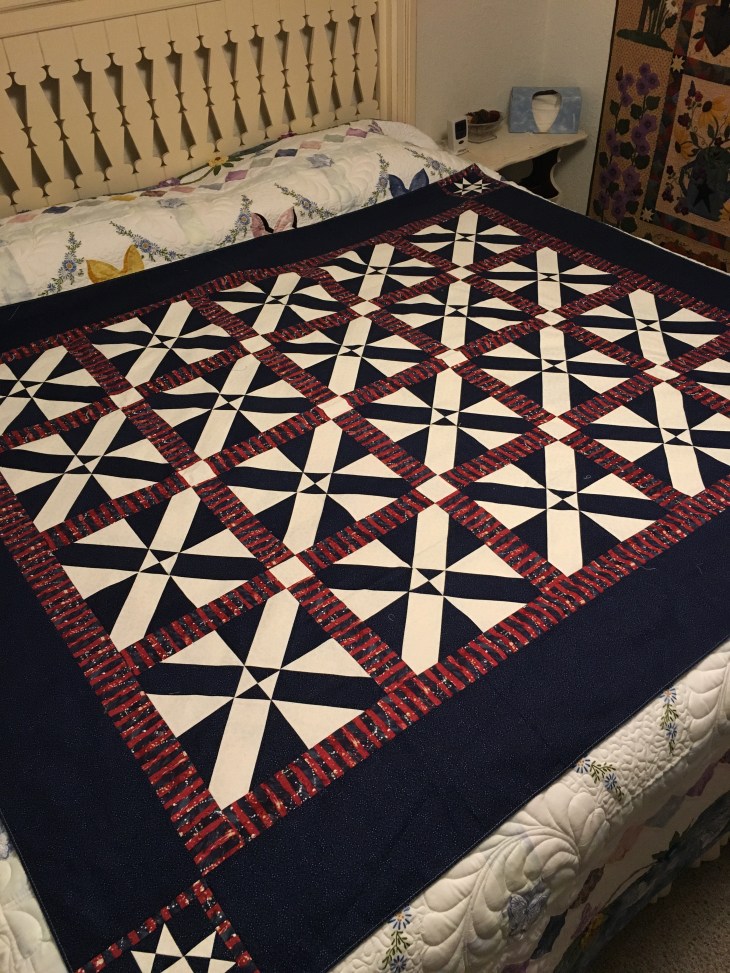
A very patriotic string quilt! Pieced on a muslin foundation, this quilt top weighs a ton!

img_4940-r

***

A very colorful  Stack ‘n Whack  quilt top:

img_4939

***

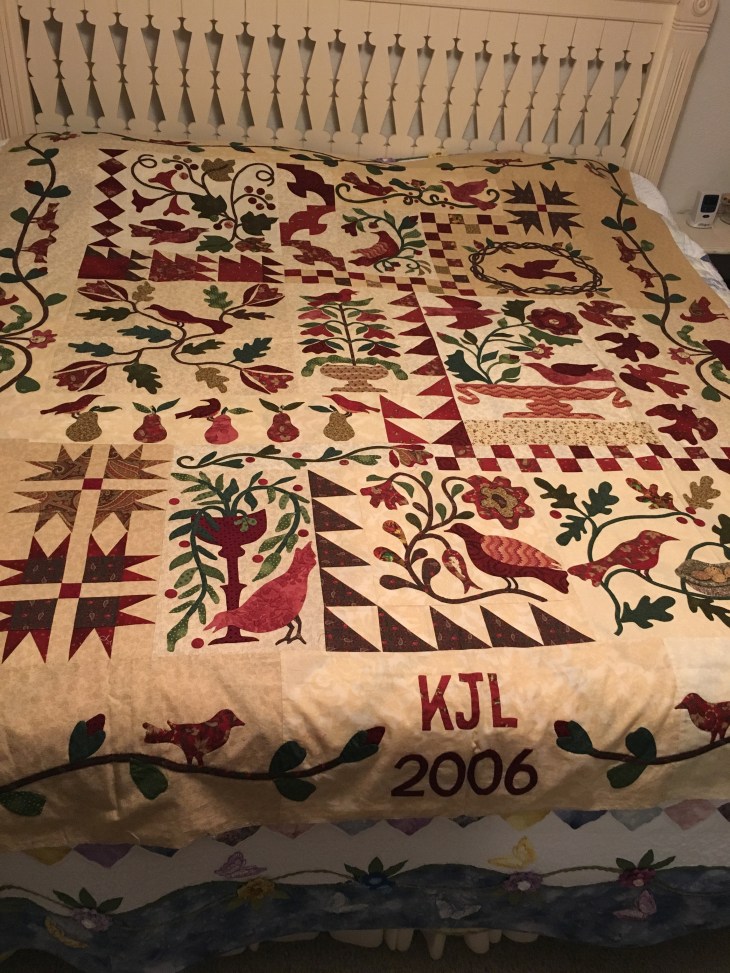
Obviously finished in 2006 this Birds of a Feather by Blackbird Designs quilt top is entirely hand appliqué.

img_4935

***

Another fabulous Stack ‘n Whack quilt top:

img_4932

***

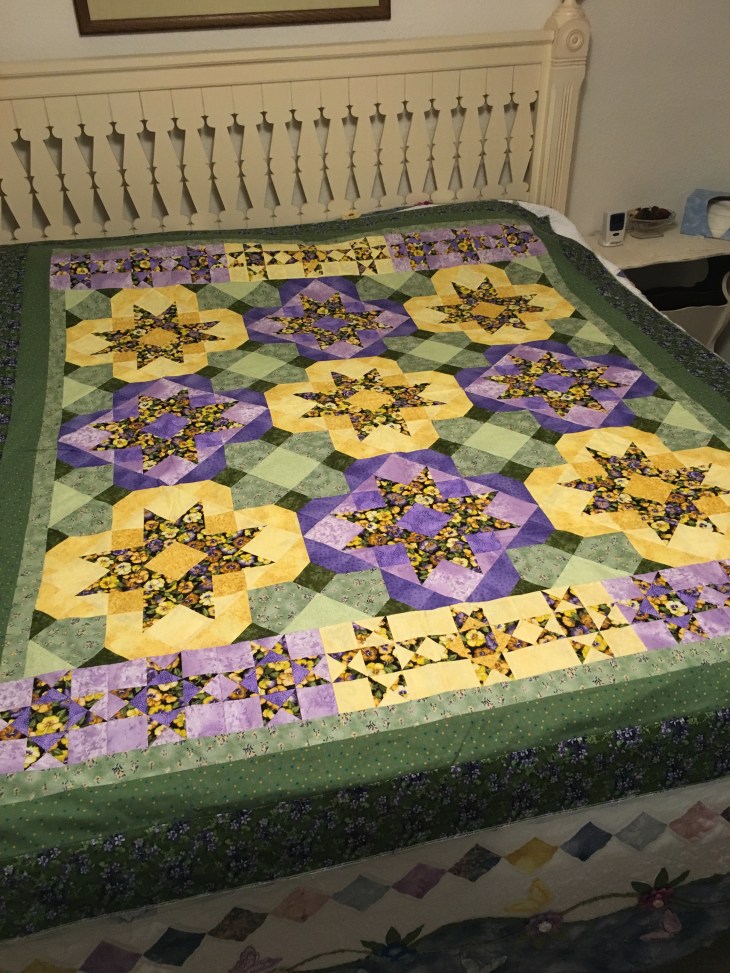
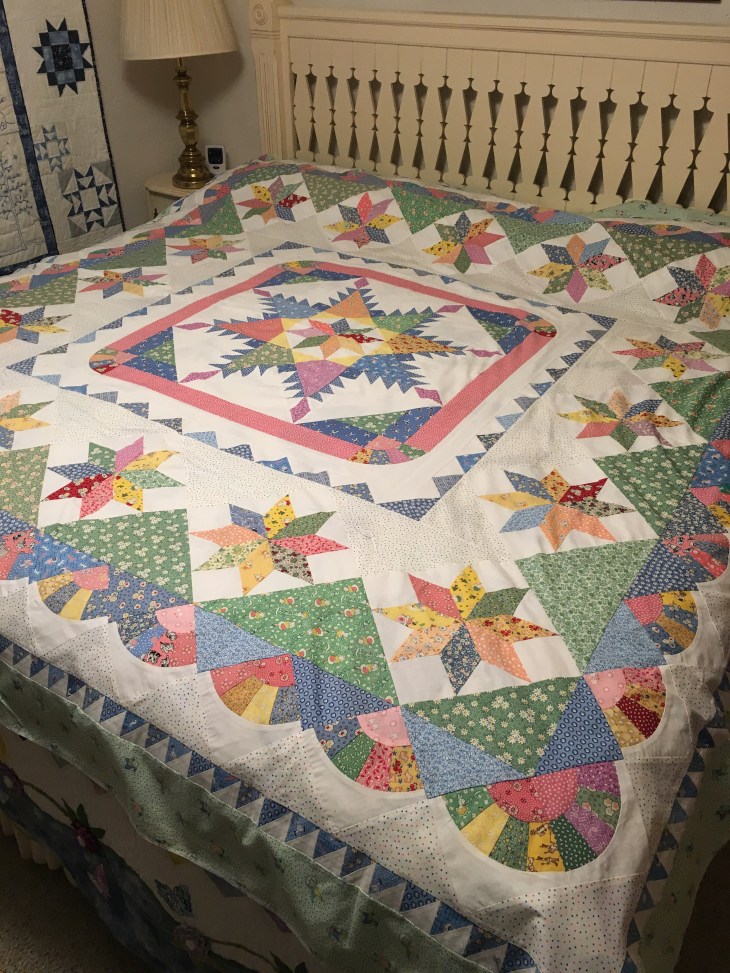
I also brought this quilt top home to Houston with me last week. It is from a pattern by Mackie, Quilt in a Day called Nana’s Garden.

img_4930

***

And the final quilt top that followed me home to be quilted, this Bridal Bouquet/Nose Gay Stack ‘n Whack.

img_4928

***

A quilt top from  Miss Rosie’s Quilt Co.  This pattern is called: Elizabeth.

img_4923

***

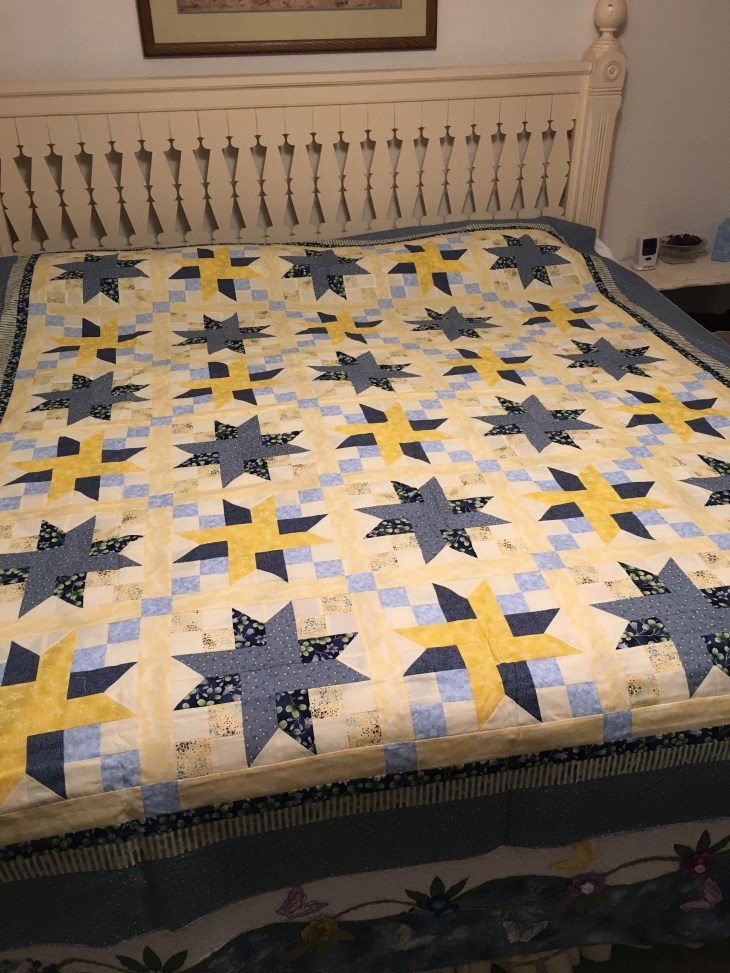
All we remember about this quilt top below is that I searched and searched on the internet to find this pattern. The top and bottom row of stars were her addition to the design.

img_4921

***

Another wonderful hand appliqué quilt top ready to be quilted.

img_4919

***

img_4917

***

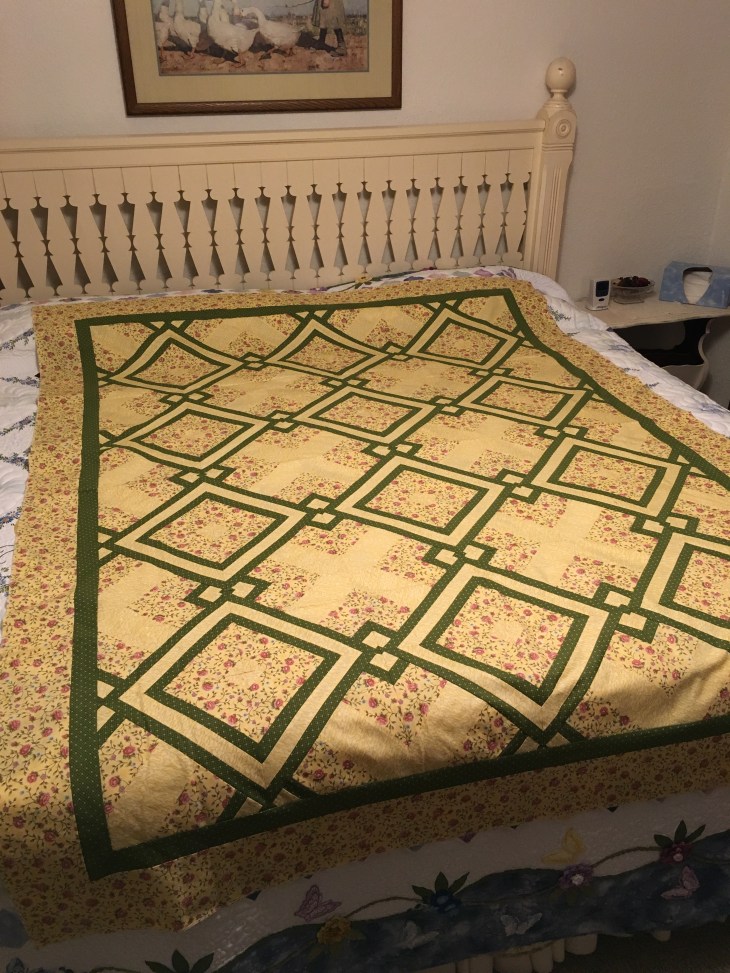
I seem to remember this is of her own design.

img_4915

***

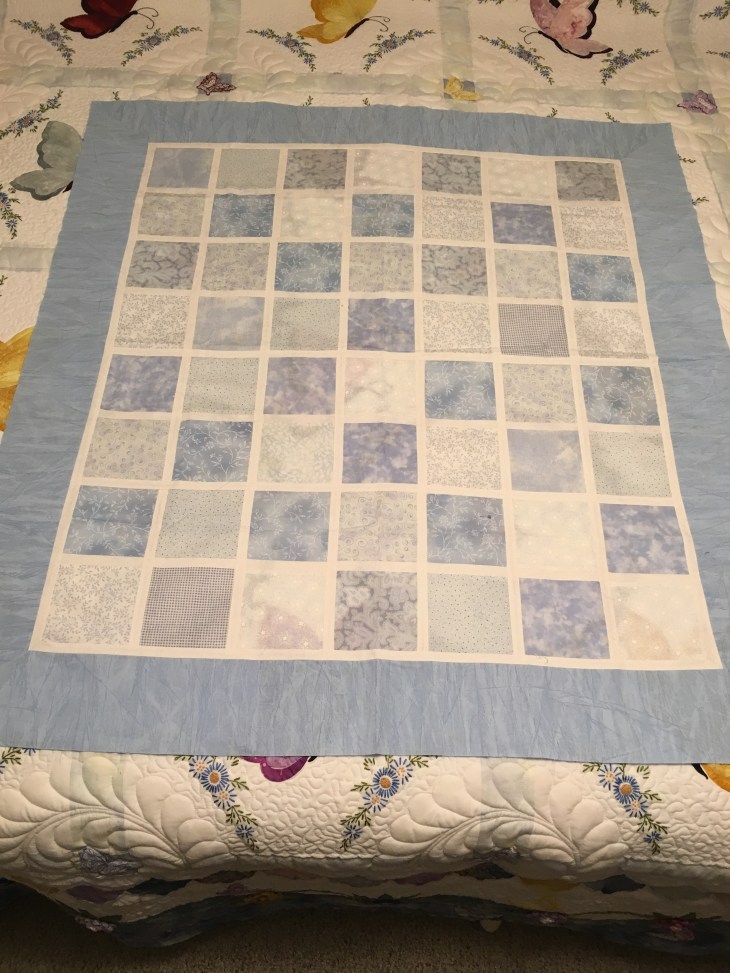
A crib/baby quilt, a simple yet crisp project is ready to be quilted:

img_4912

***

img_4911

***

This is a sashed Disappearing Pinwheel. A tutorial can be found here.

img_4910

***

img_4909

***

img_4907

***

A quilt top of her own design using charm squares and fabric strips.

img_4906

***

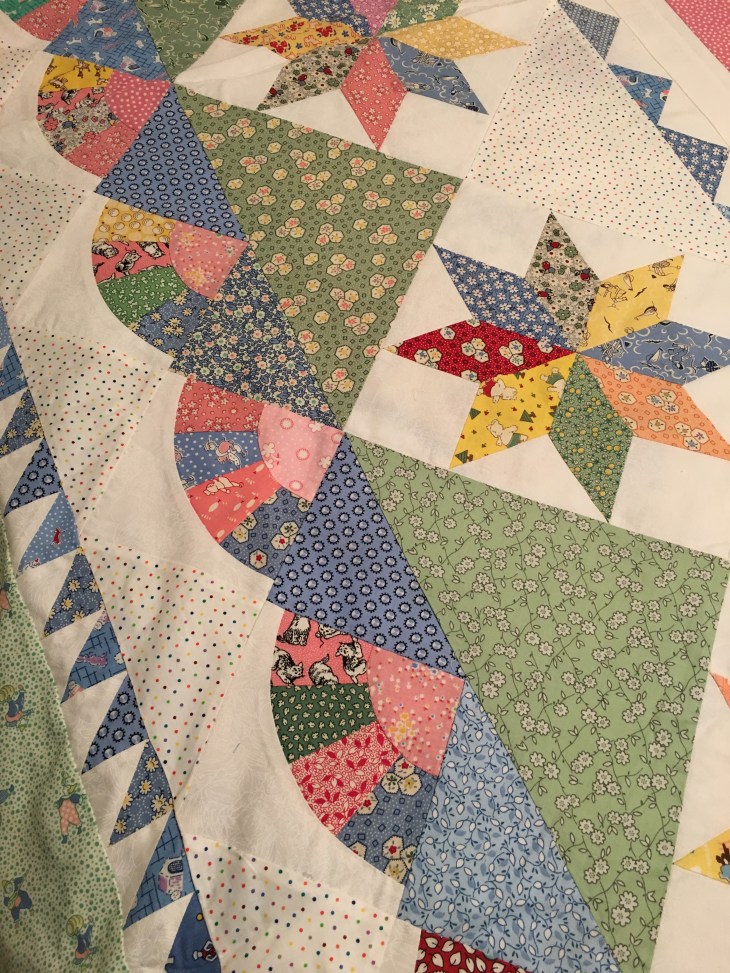
And finally, last but not least this beautiful quilt top using reproduction fabrics. This is a fantastic Marsha McCloskey quilt pattern: Vintage Moments Quilt Pattern

img_4904

img_4905

***

Whew! And can I tell you this is just the tip of the iceberg! Next time I head north I’ll spend some time taking pictures of all the finished quilts lying atop the guest room king bed. Thank you mom for getting me hooked on quilting!

Until later, Happy Stitching!

Rhonda

Happy New Year!

Are you remembering to write 2017 yet? Are you still stunned to realize Christmas is behind us and Valentine’s Day is a month and 2 days away?

I had such great plans for the Christmas holidays…had being the key word. Christmas morning found me sick in bed with the flu. Not just the 2 or 3 day flu but the kind that sticks around for 14 days. Oh the plans I had… But enough about that, I did load a quilt on the longarm. I worked on it every day, just a little bit each day, for very short periods of time. When I looked back over my journal to add up the quilting hours I laughed at the bits of time here and there that all added up to a finished quilt!

This is a Jack’s Chain pattern. If you google and/or search on Pinterest you’ll find many variations of the Jack’s Chain, each one so interesting! It looks complicated doesn’t it? And did you notice that if you squint at the picture, the larger white interlocking circles become more evident? A Jack’s Chain quilt pattern is nothing more than lots and lots of Nine Patches, lots of Equilateral Triangles and a few Hexagons. That’s it! Below is a picture of the quilt top laying across the back of my longarm. It measures approx. 62×90″. I didn’t make this quilt top, that honor belongs to my guild Bee, the Cut-Ups. This quilt will be our donation to the Guild (Quilt Guild of Greater Houston) for the Live Auction part of our 2017 Quilt Show-Joy of Quilting. Planning to be in or around the Houston area the first weekend of May? You could own this quilt! Our show is Friday and Saturday, May 5-6th at The Stafford Center in Southwest Houston. For more information go to:  Quilt Guild of Greater Houston

img_4779

I used Hobbs Batting, a white single Poly-Down and backed it with double wide 100% bleached muslin. I like to use a solid back fabric, that way the quilting can shine as well as the top.

img_4780

I literally had no idea how to quilt this one. I left the top spread out for several days as I contemplated different ideas. I called one of the piecers and picked her brain as to how she’d like to see it quilted. So glad I had that conversation with her, she’s the one that pointed out the larger interlocking white circles, my eyes hadn’t even picked those out. I was too narrowly focused on the hexagons and the nine patches surrounding them.

img_4783

I’m a huge advocate of “Stitch in the Ditch”… every ditch. This quilt has a lot of ditches. Yes, it was tedious but remember, I’m quilting in very short snippets of time when I was feeling like getting off the couch. Tedious but so well worth it!

After the ditch work was complete I needed to decide how to handle three areas.  1. the large hexagons 2. the diamonds formed by two triangles and 3. the individual triangles. If you look closely I purposely chose not to stitch in the ditch where two equalateral triangles joined. I wanted them to read as a single unit from the back.

I look for both hard and soft areas of a quilt top to help me know how to quilt. The hard areas, the hexagons, triangles, diamonds and squares are set together in such a way that they create a soft area: the interlocking circles. So based on this observation I knew both hard and soft quilting designs were needed for continuity. The “hard” quilting was easy, it was all the ditch work, it was the “soft” that required some thinking. Just so you’ll know, I love love love quilting feathers. Free form feathers! They’re fast, they’re easy for me and they can fill up a space in no time flat. But could I stitch feathers in a Jack’s Chain???

Almost forgot: my goal right from the start was to quilt the living daylights out of this top. To quilt it in such a way that the quilting would be an afterthought when looking at the top and make an impact when looking at the back.

I did all the ditch work with white #10000 Glide by Fil-tec, needle and bobbin. I’m not a huge fan of variegated thread but happened to have the PERFECT variegated for the diamonds: Superior Threads So Fine color #704 was a fantastic match. I drew a straight line top to bottom on each of the diamond shapes and free-form stitched the feathers. Like I said, perfect thread! What’s my favorite marking pen? When I’m not using white school chalk I use an EZ International blue marking pen, the kind that disappears by using either water, Sew Clean or white vinegar.

img_4791img_4792

The pic below shows the borders quilted with the undulating feathers. Can’t see them can you! I used a Glide thread again, this time a fantastic purple #42607 Raven. It blends in perfectly with the intense outer border fabric. Later I’ll show you a picture from the back. I used the purple in both the needle and bobbin.

img_4807

At this point I left the project alone for three or four days because I had no idea what to quilt in the hexagons. No idea! Eventually I decided to blue pen mark a smaller hexagon inside the hexagon piece there by creating  the “vein” for a feathered hexagon wreath. This quilting, while very obvious from the back. it hardly shows at all on the top. I used a YLI Smoke monopoly in the needle and the white Glide in the bobbin on the darker hexagons and switched to Superior Threads clear monopoly in the needle for the lighter hexies. And finally, the single equilateral triangles; all they needed was a soft curve stitched point to point to point, again with the variegated thread. This soft quilted curve, when viewed from the back creates the illusion of circular motion around the 9 Patches that surround the hexagons.

So here’s the finished (quilted that is) project below! By looking at the picture can you tell that I put 23 longarming hours into the quilt? Scroll down and look at the back-that’s where every minute of quilting gets to shine! I’ll hand this back to my fellow Bee members to trim, bind, sleeve and label and come May 5-6th, it could be yours!

img_4860-editedimg_4852

Above is the only good picture I have of the purple undulating free form feathers.

img_4853img_4854

I like the way the intense quilt top colors shadow through to the back, it gives the back such a wonderful soft glow.

img_4855img_4856

I have to say this is the first time I’ve ever attempted to have the quilting blend into the top in such a manner than you have to actually look to see the stitching. Best of all is I believe I achieved my goal with this heavy yet unobtrusive quilting.

Thanks for spending time with me in this long post!

Happy Stitching,

Rhonda

***added Jan. 13: Look what I found this morning on Etsy: an opportunity to purchase the pattern! All you need to do is change the fabrics:  Jack’s Chain quilt pattern for sale here!