Class 4, The Double Wedding Ring Quilt, Blog Post #7

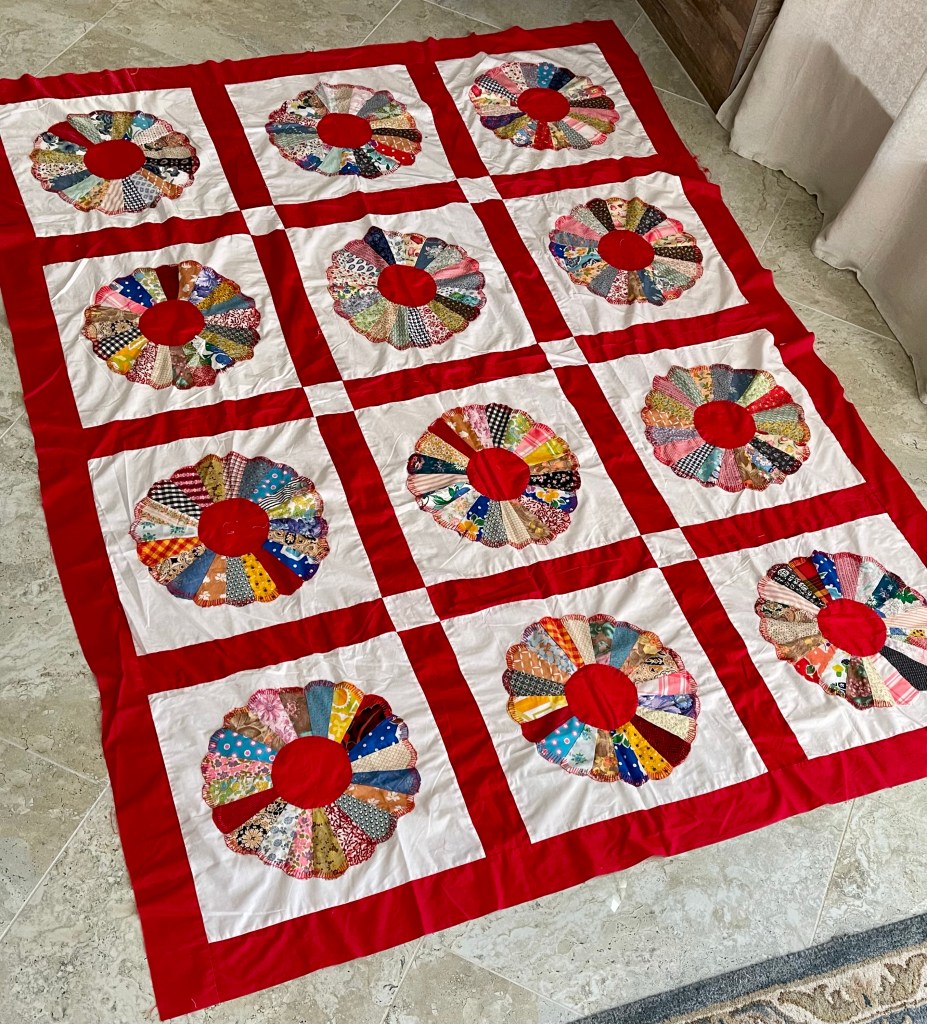
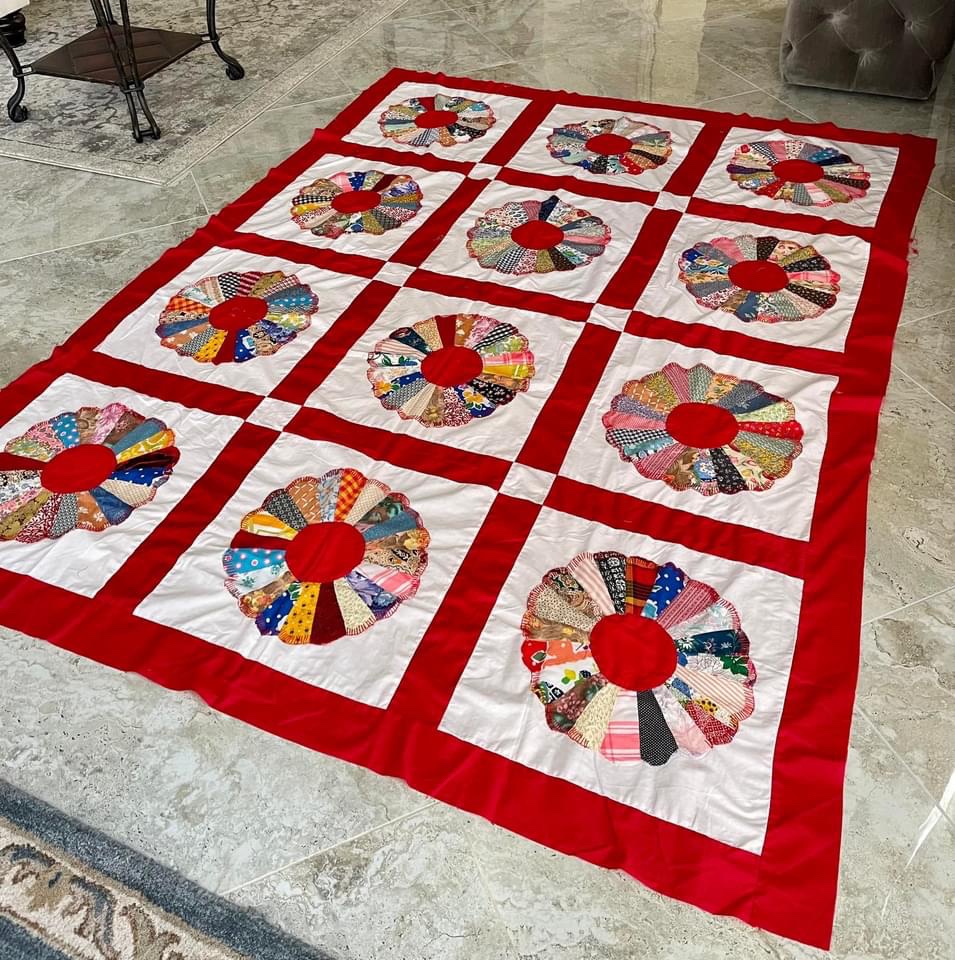
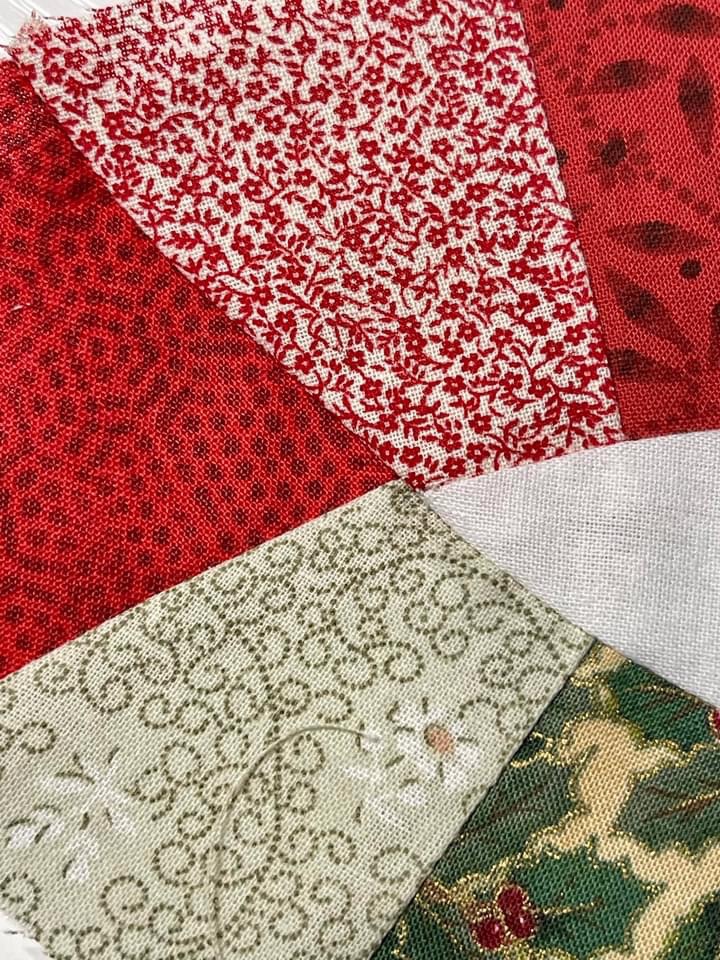
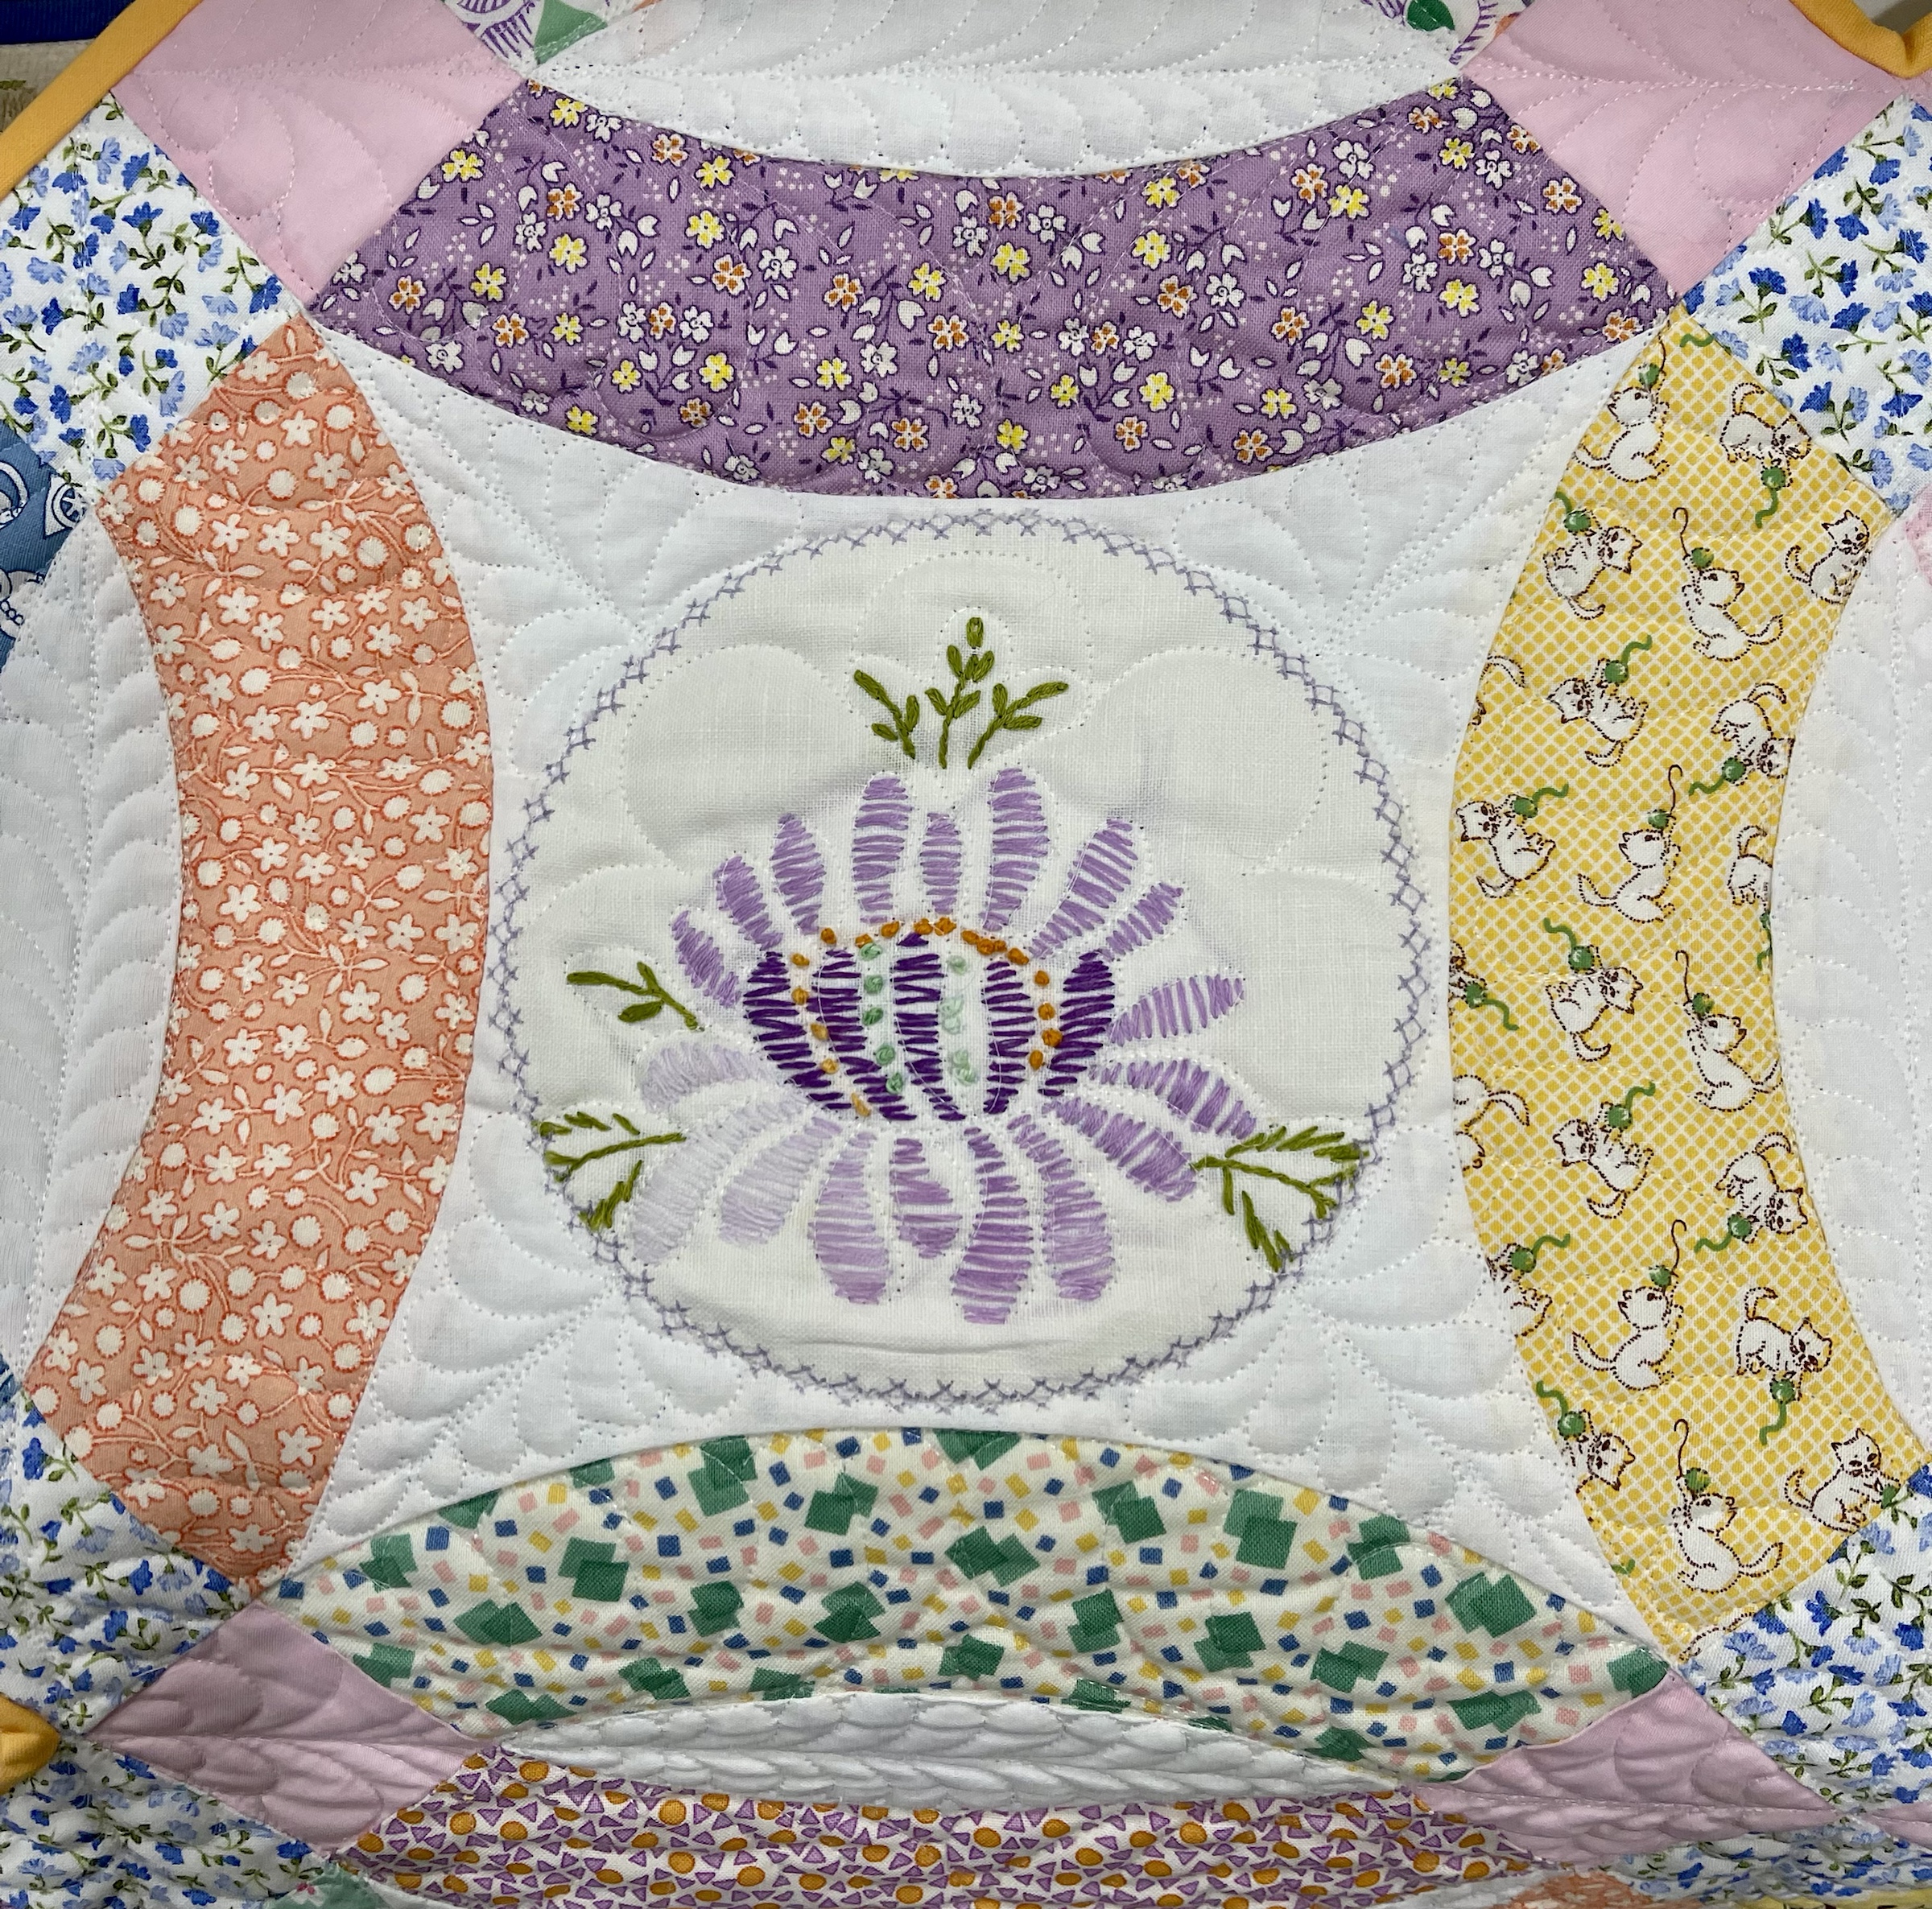
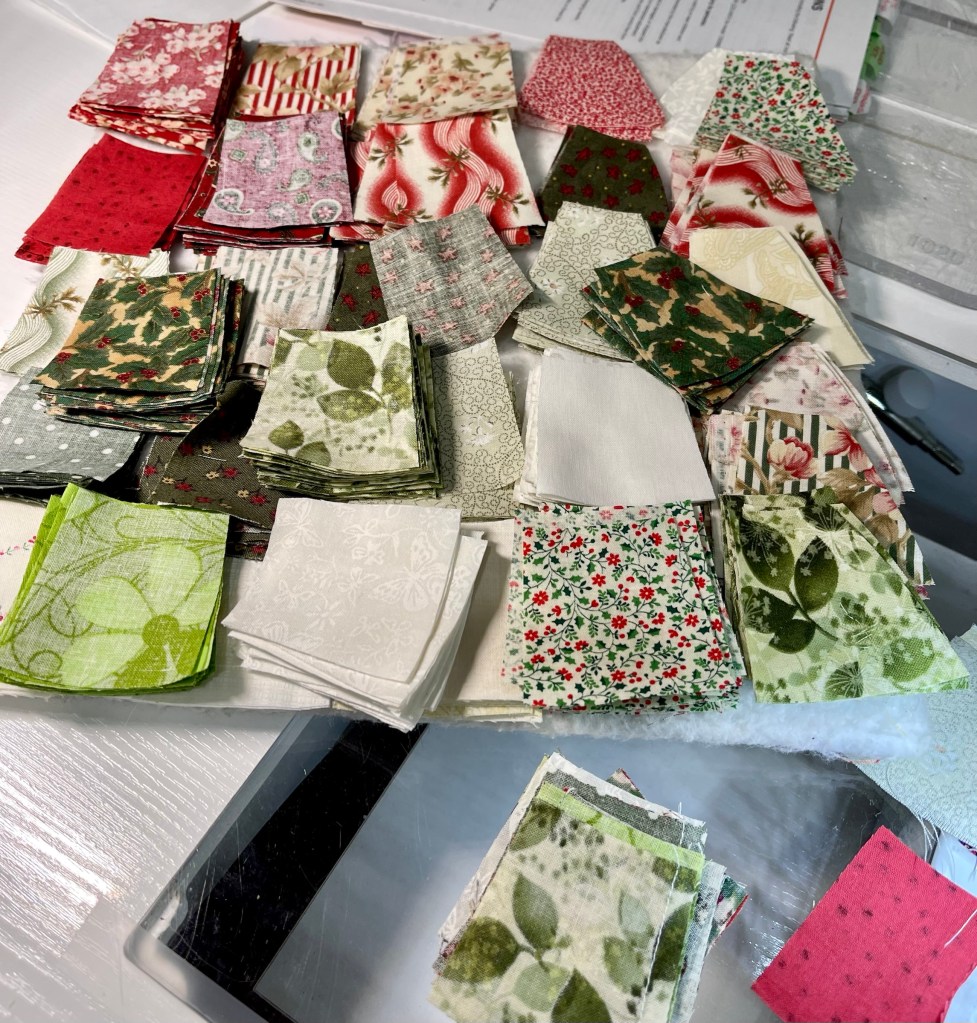
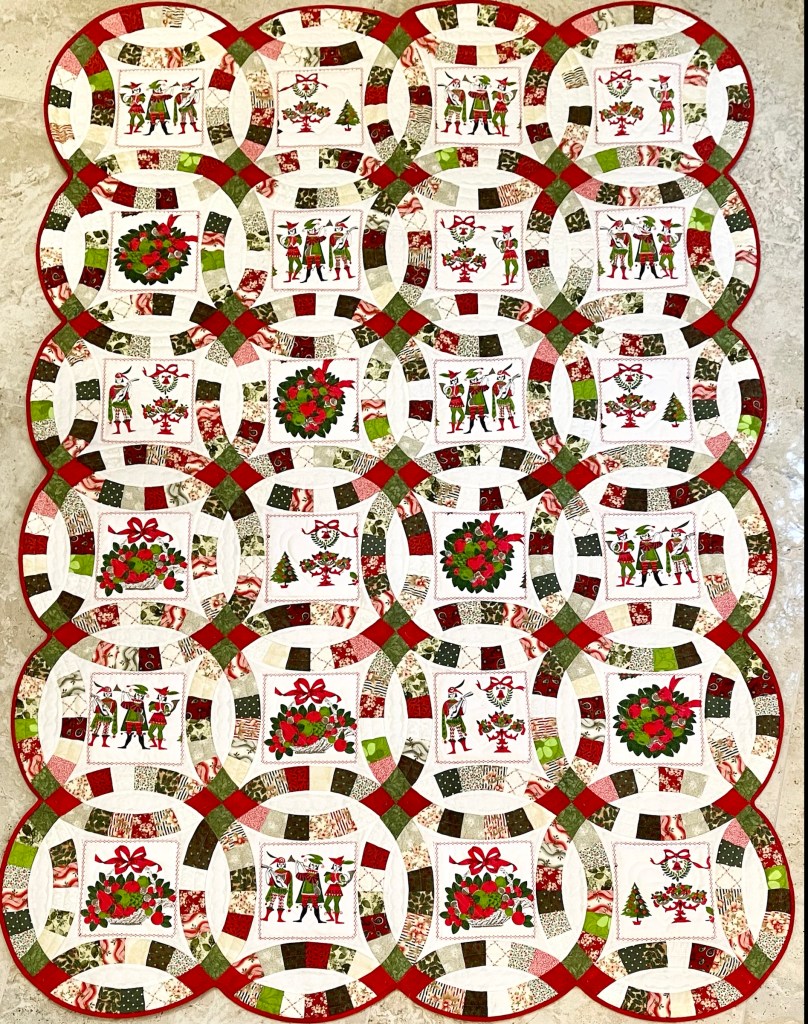
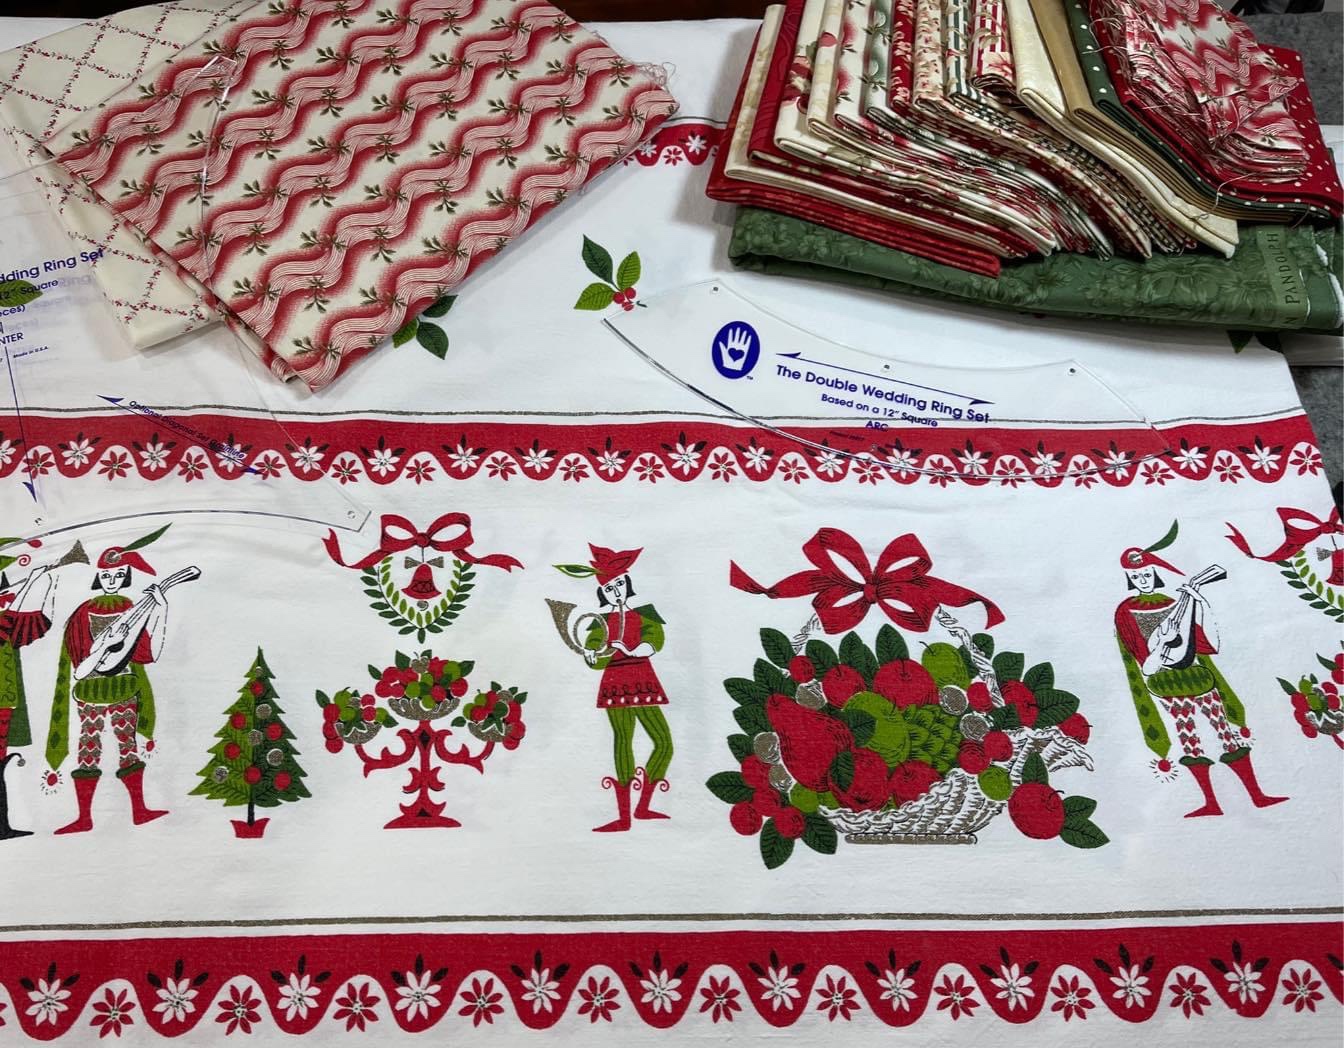
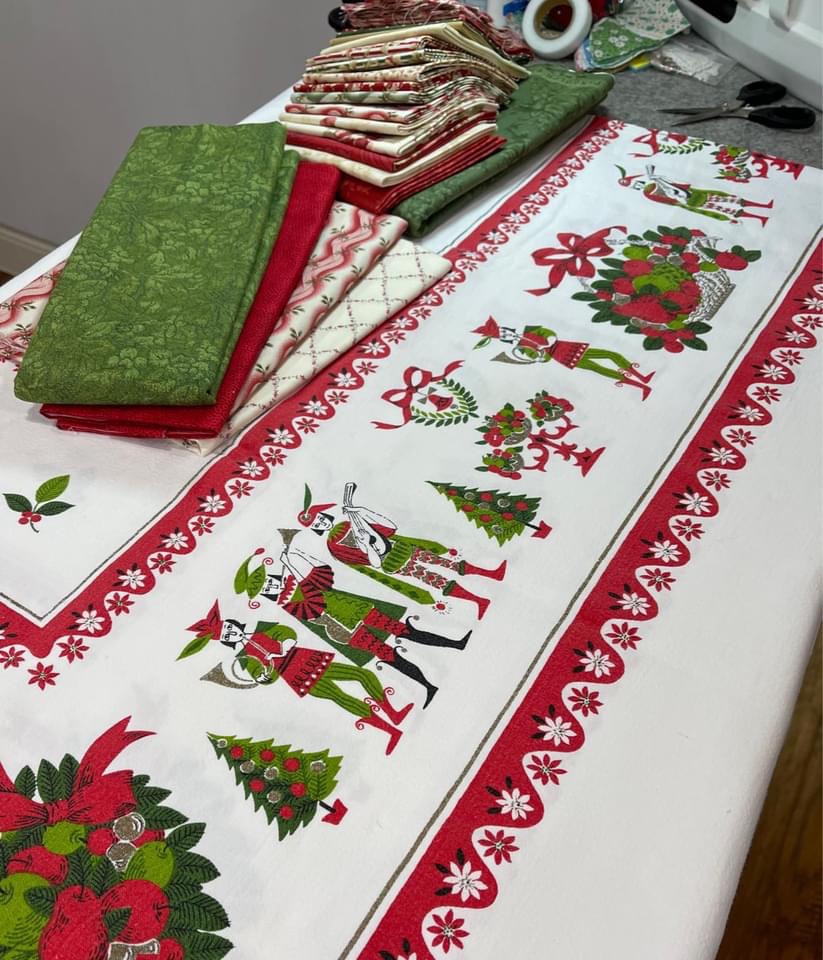
Isn’t it wonderful to see your DWR project coming together! By this point in your construction you have:

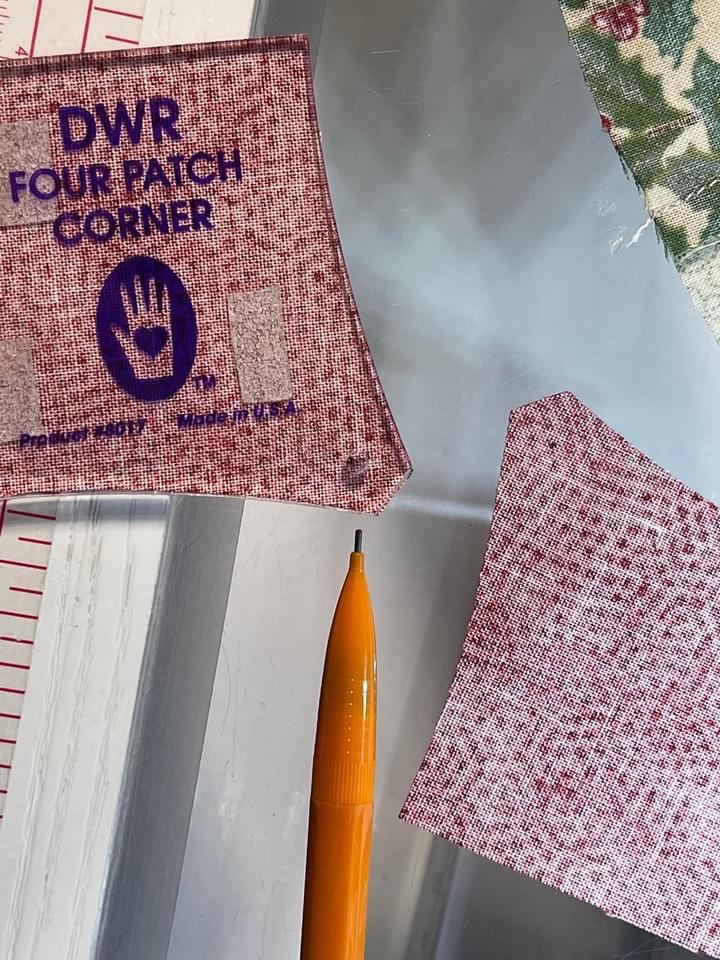
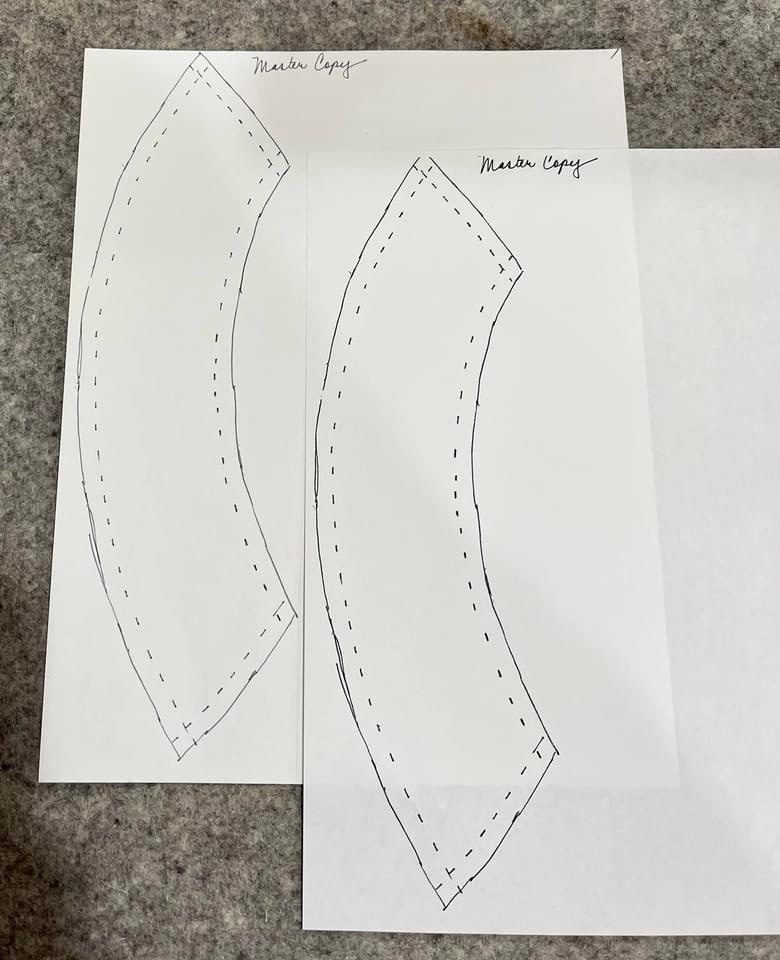
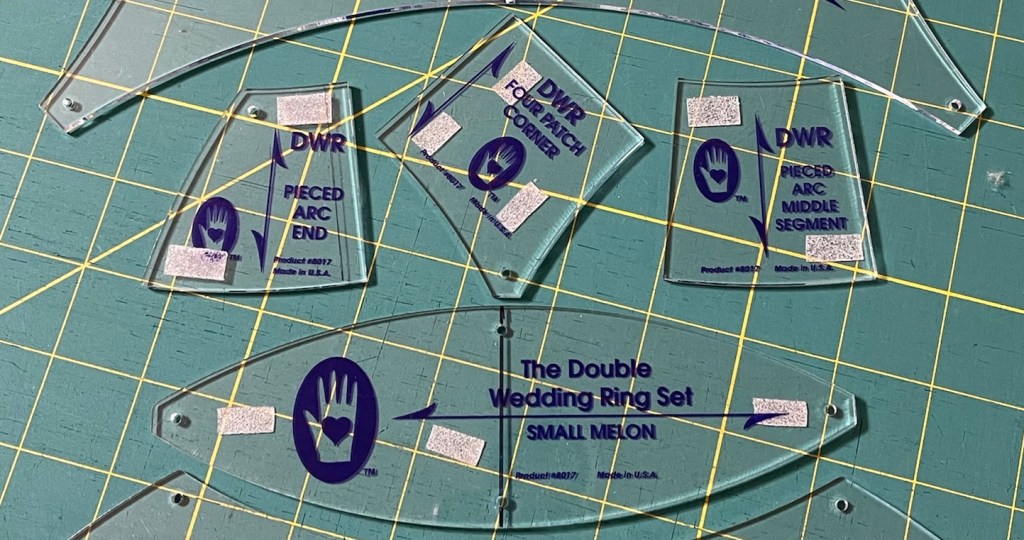
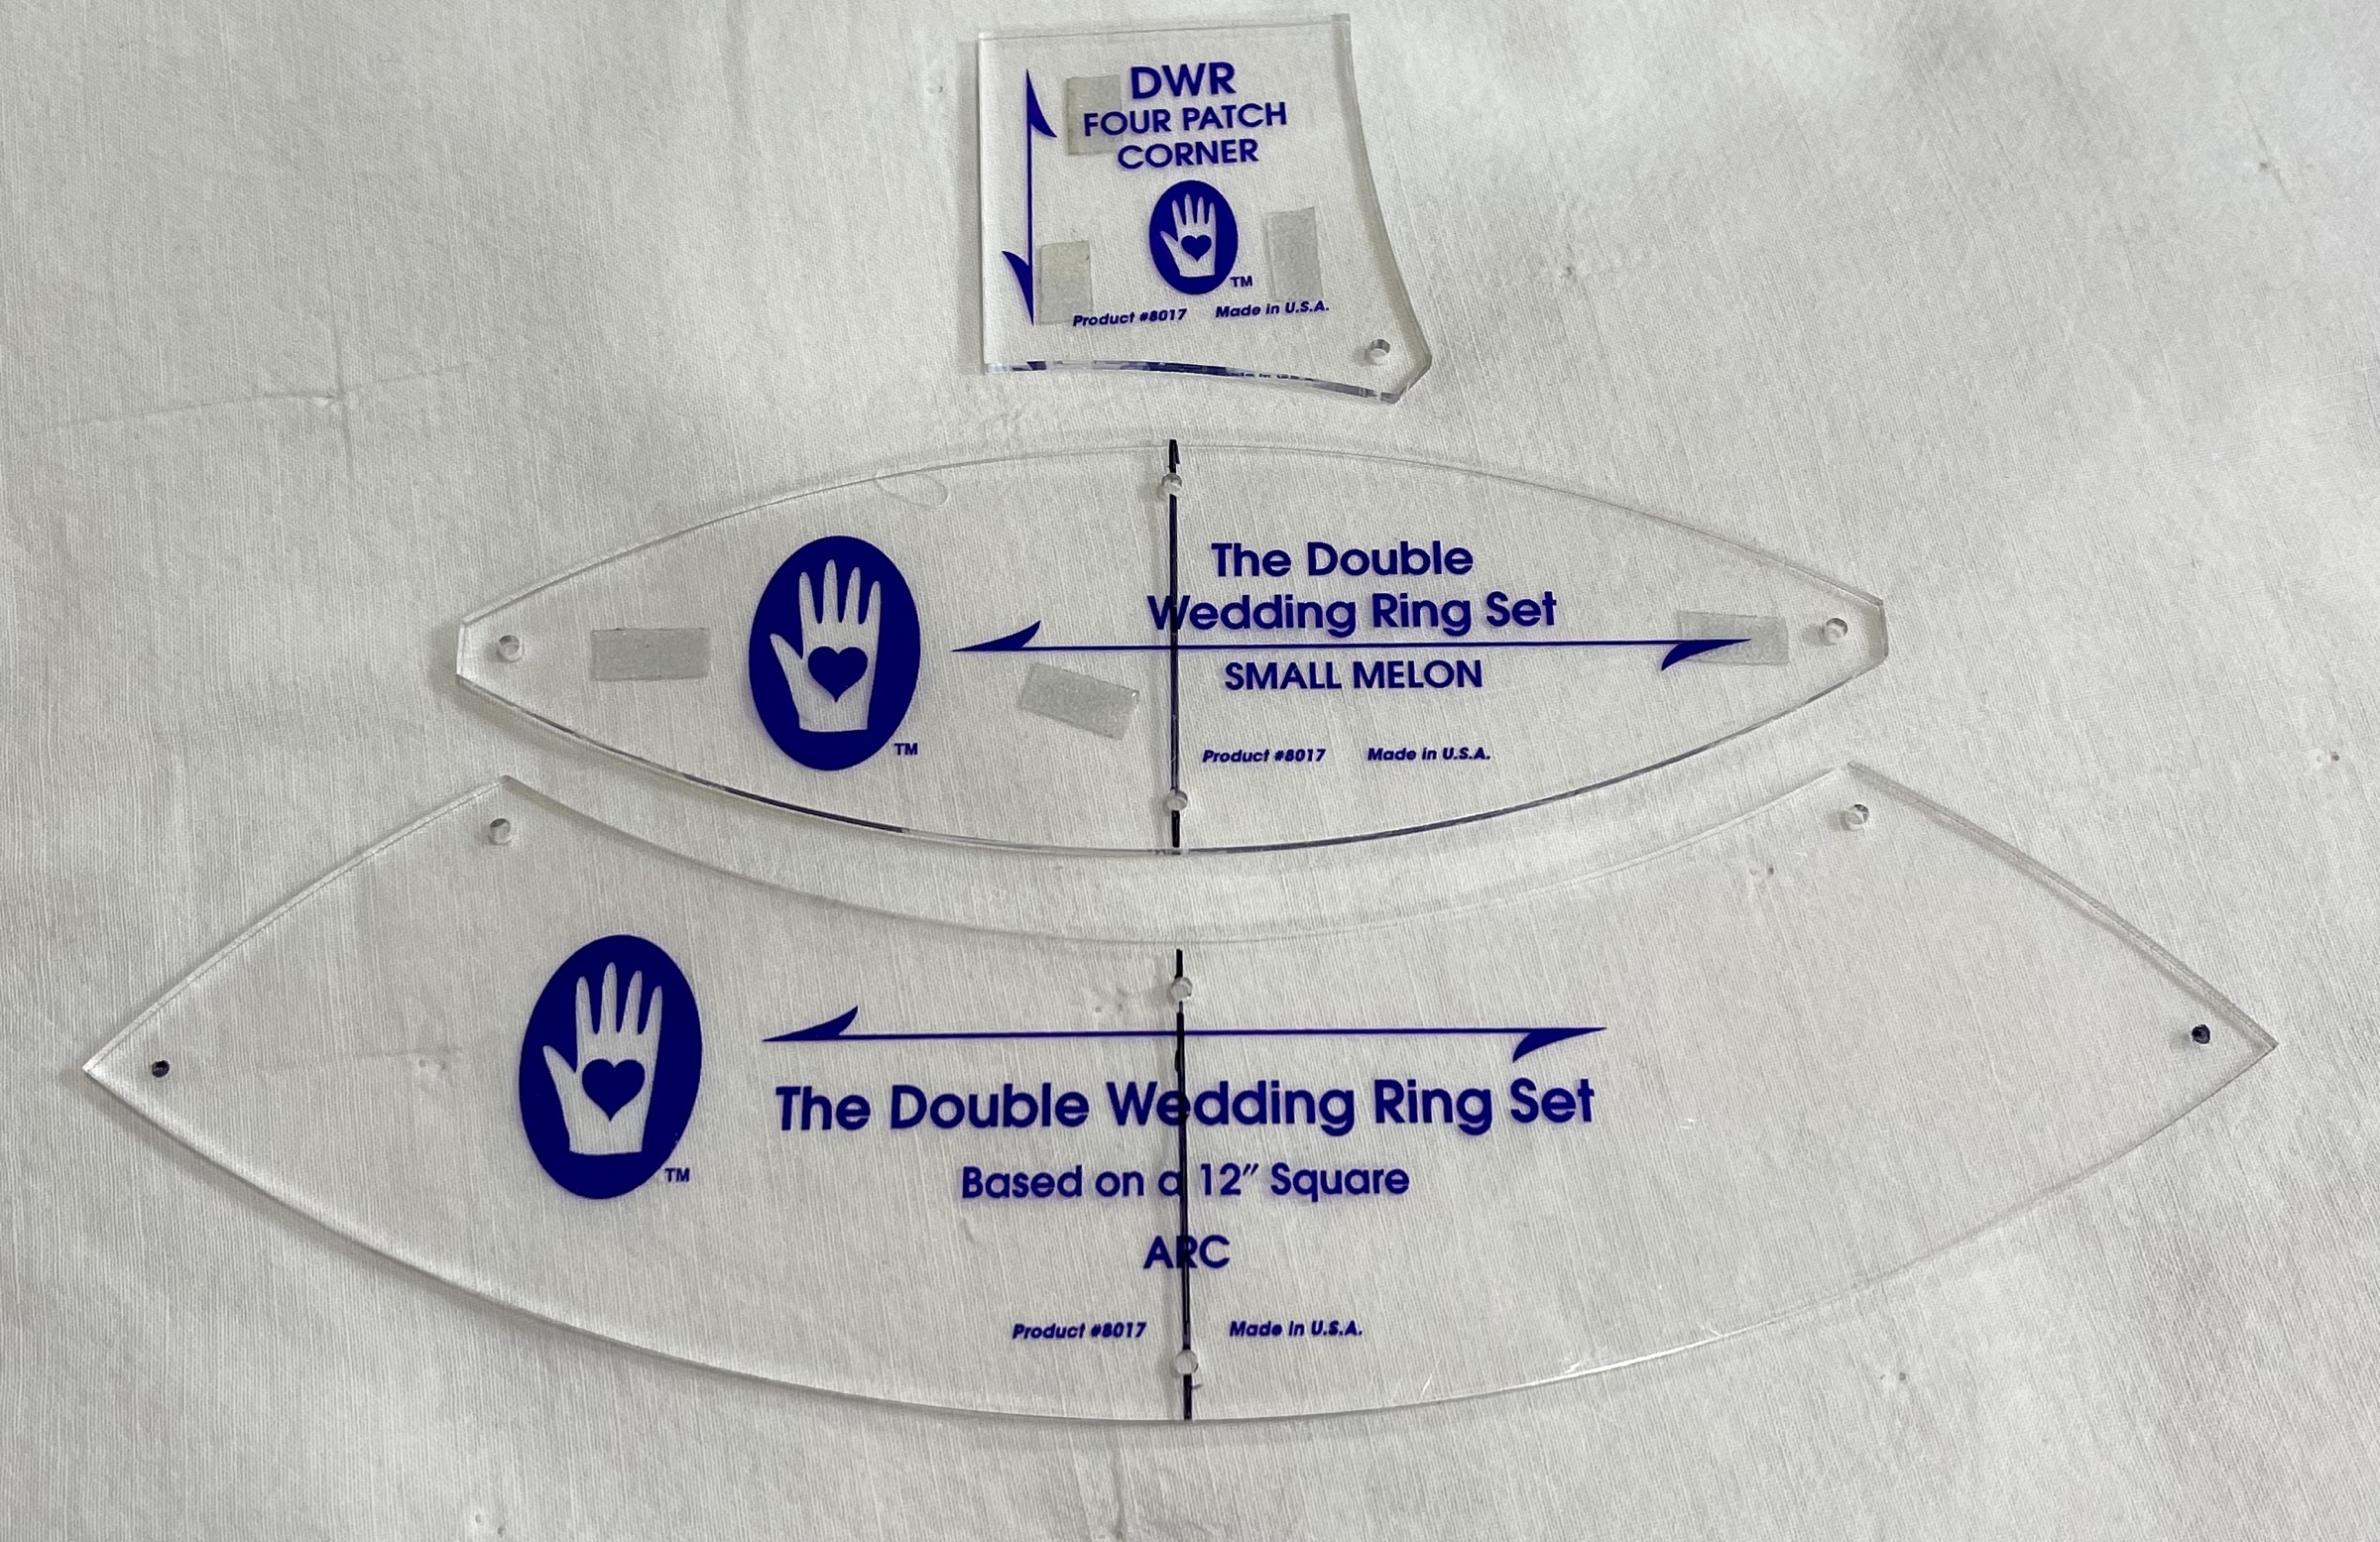
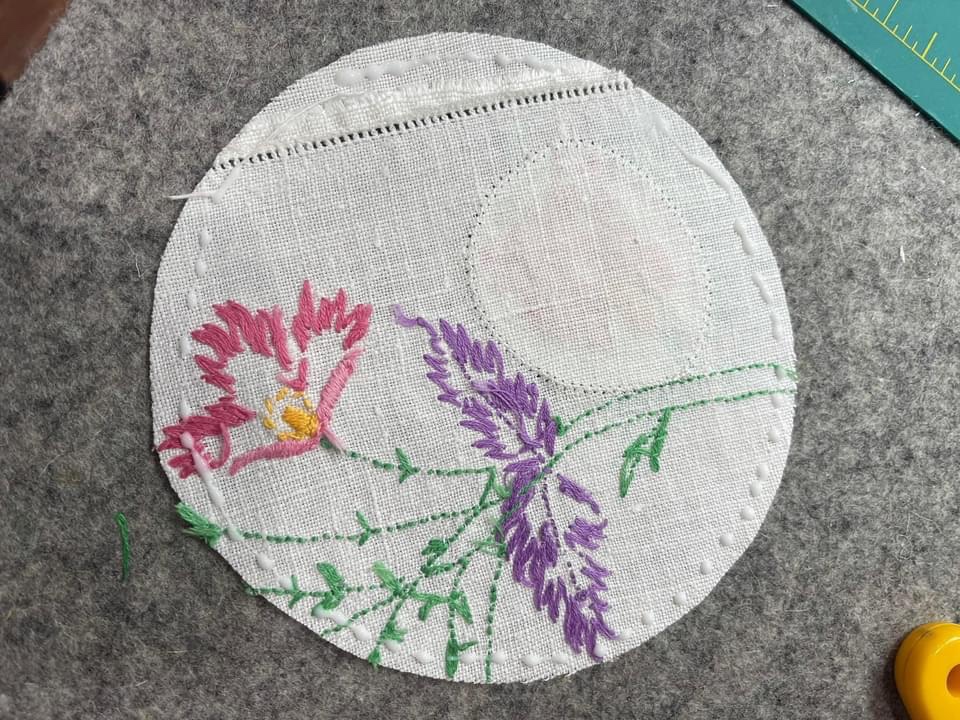
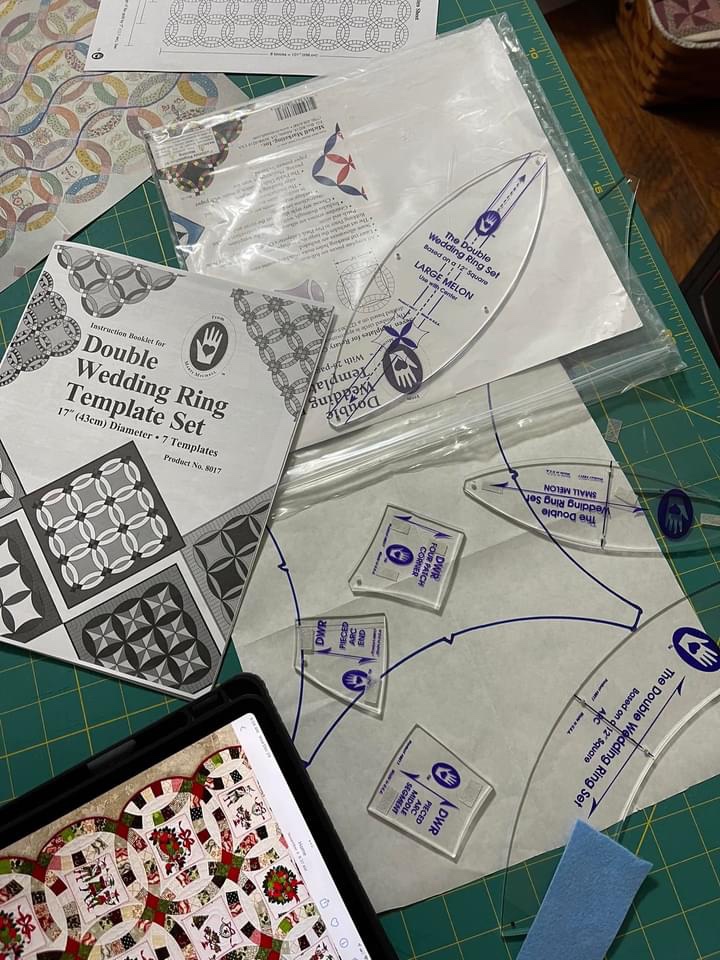
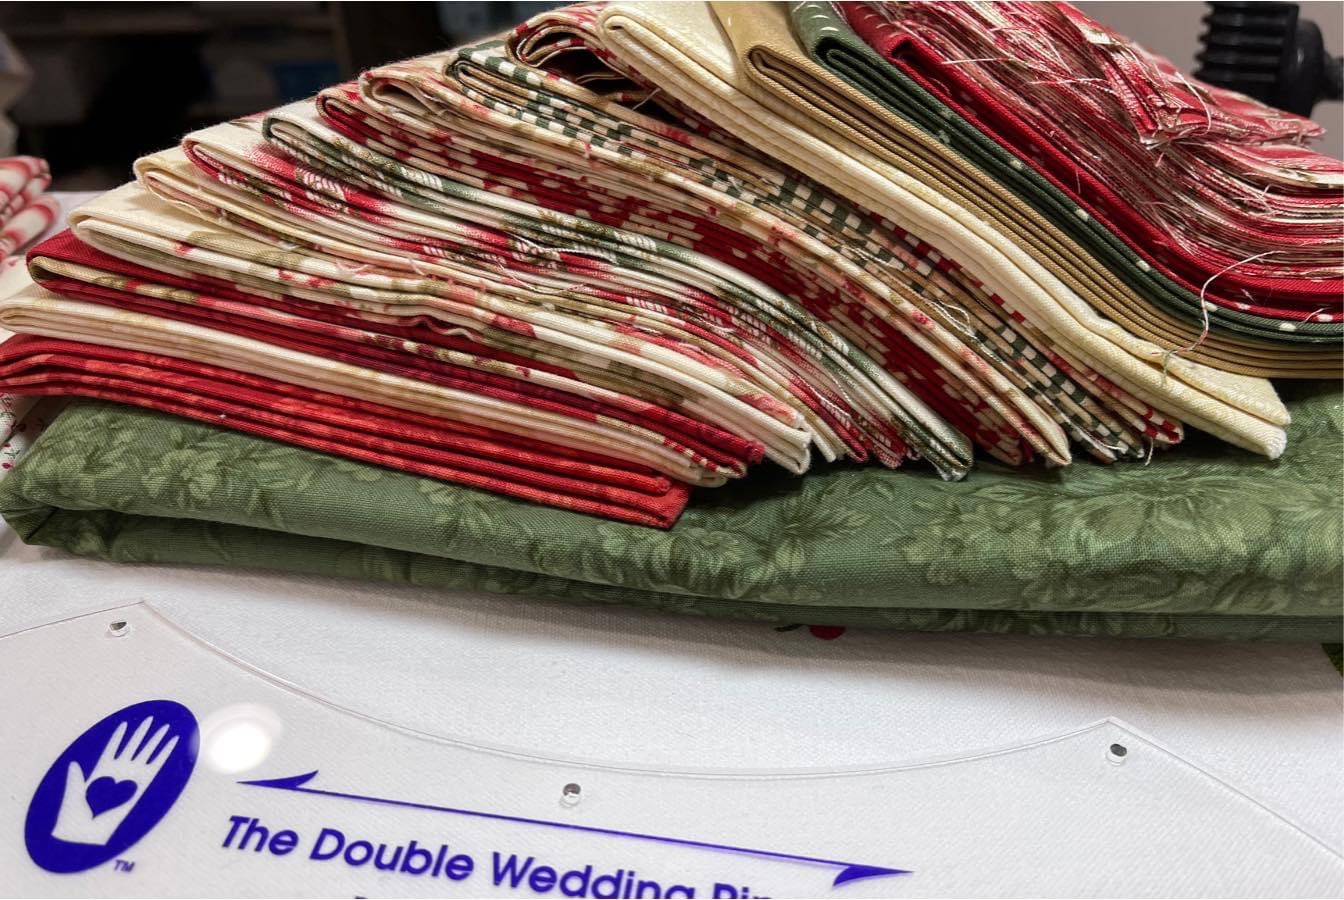
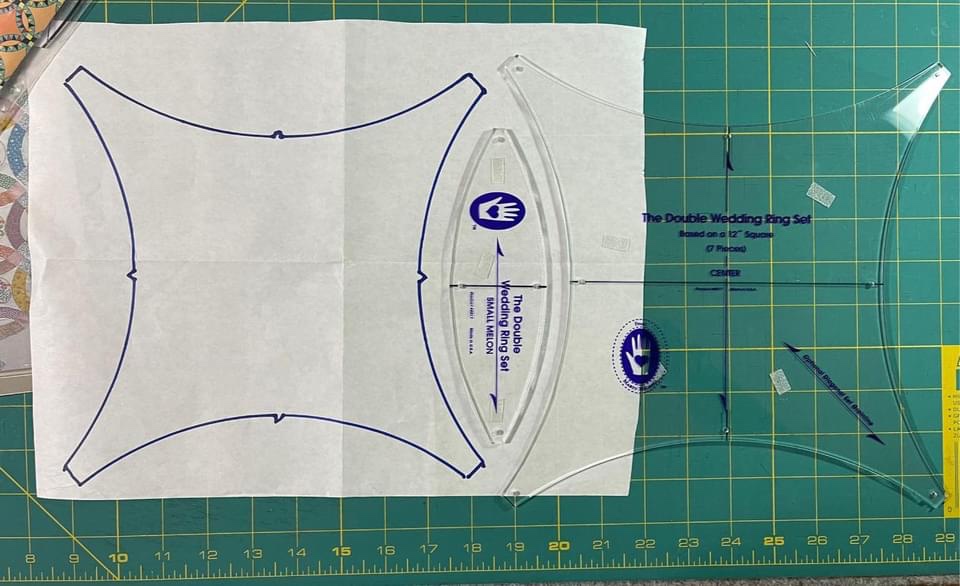
1. Chosen your fabrics, 2. Secured your templates, 3. Selected your vintage linens, 4. Cut your block centers, 5. Attached your vintage block feature pieces, 6. Cut your Arc fabrics, 7. Sewn together your Arcs, 8. Cut your Small Melons, 9. Sewn your Footballs and WHEW! Can you believe it’s only Jan. 27th!

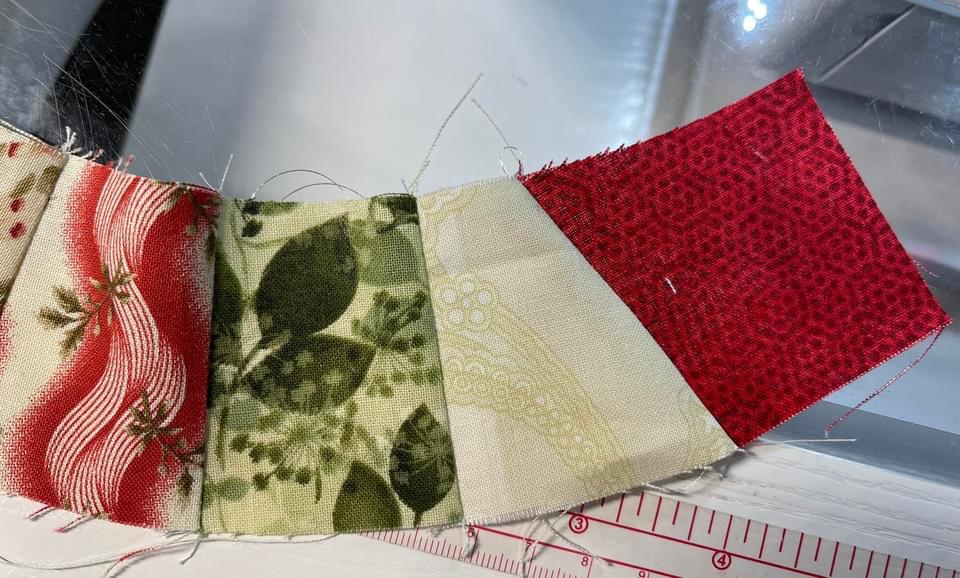
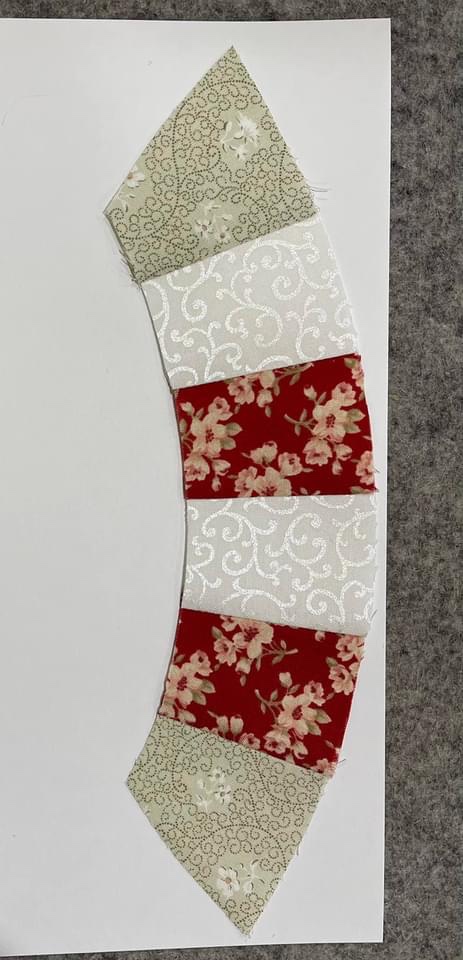
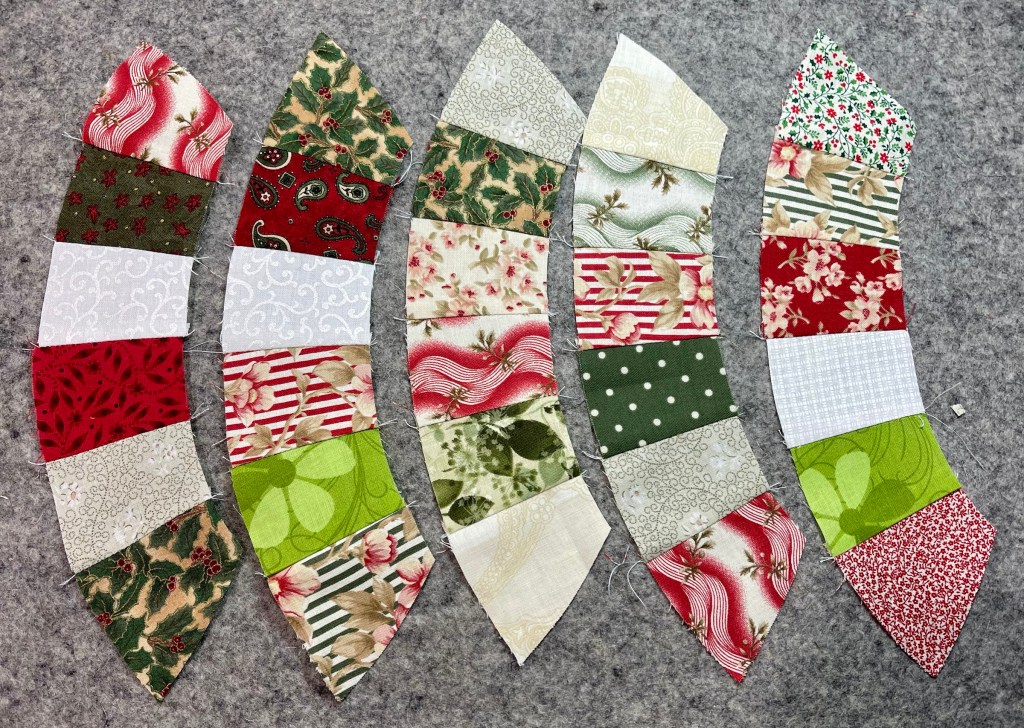
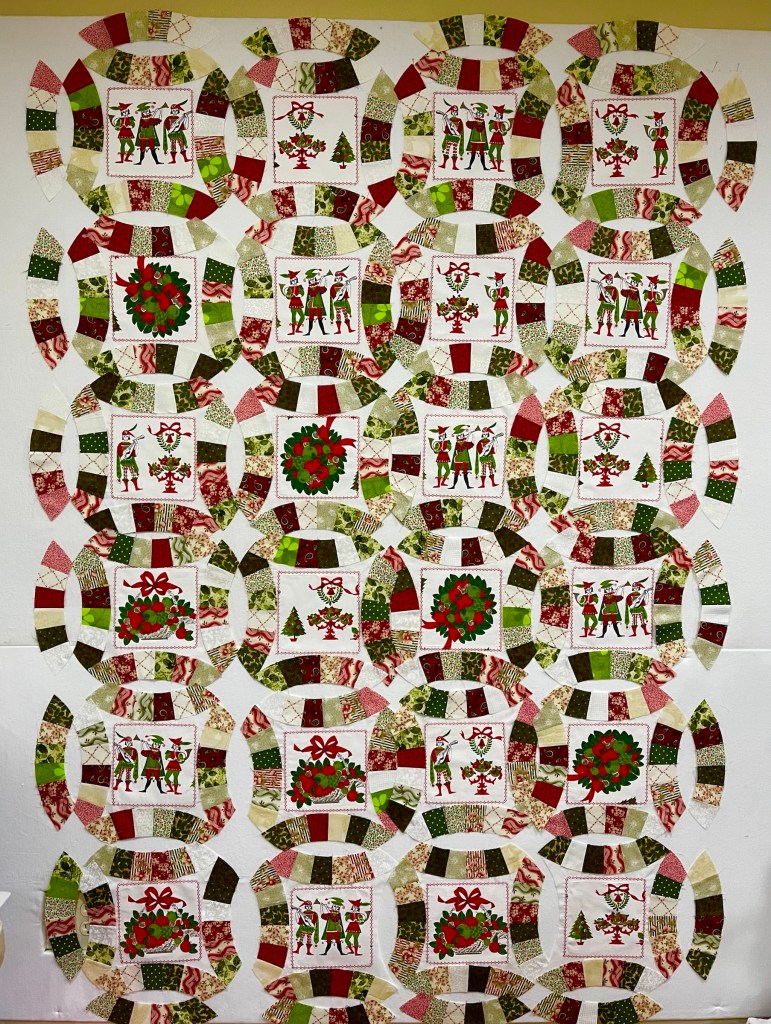
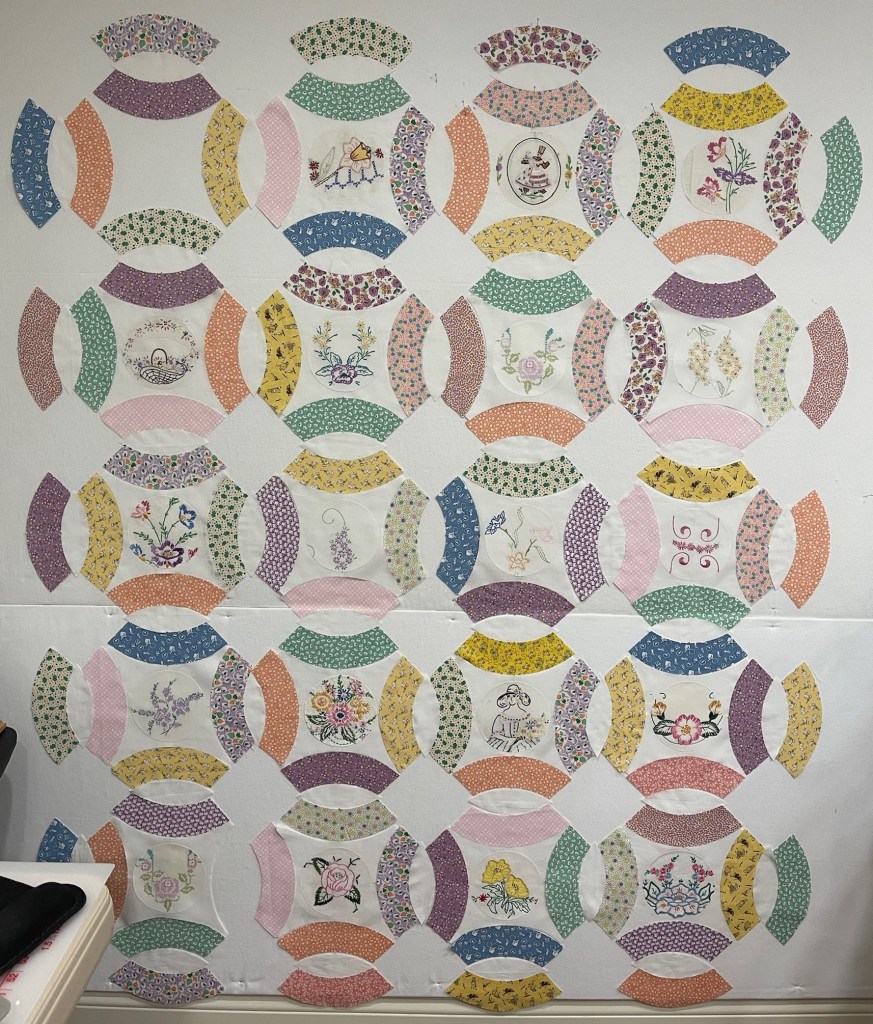
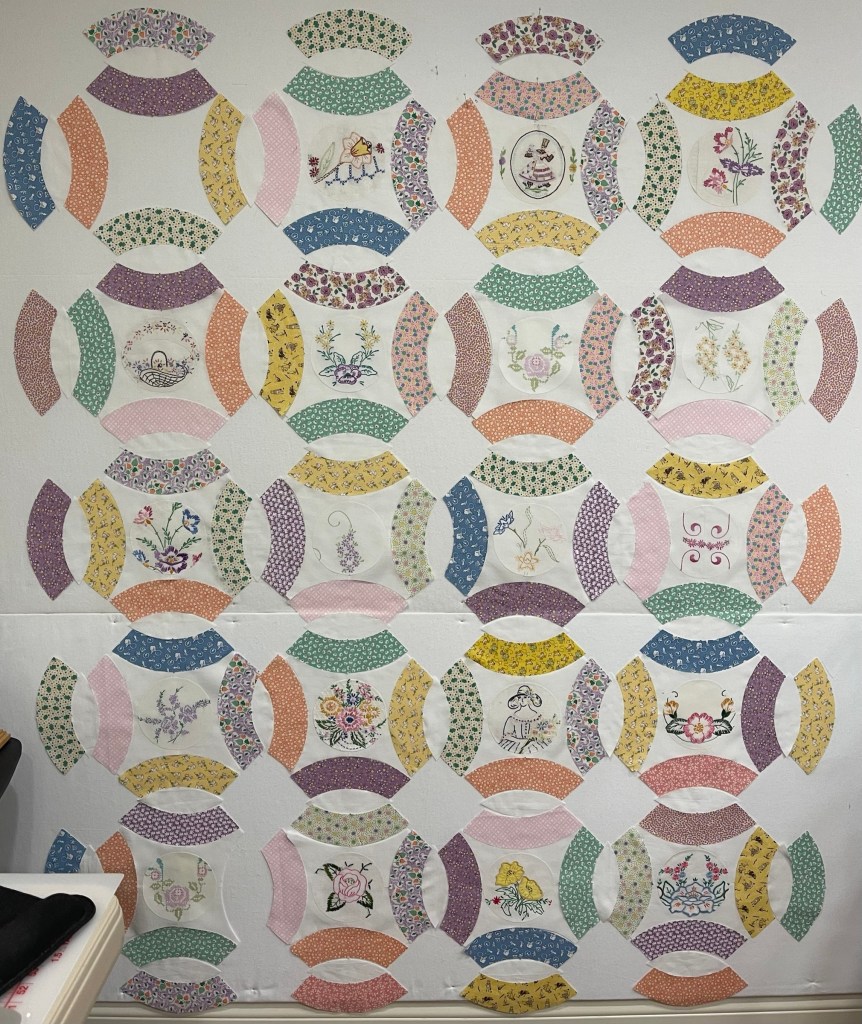
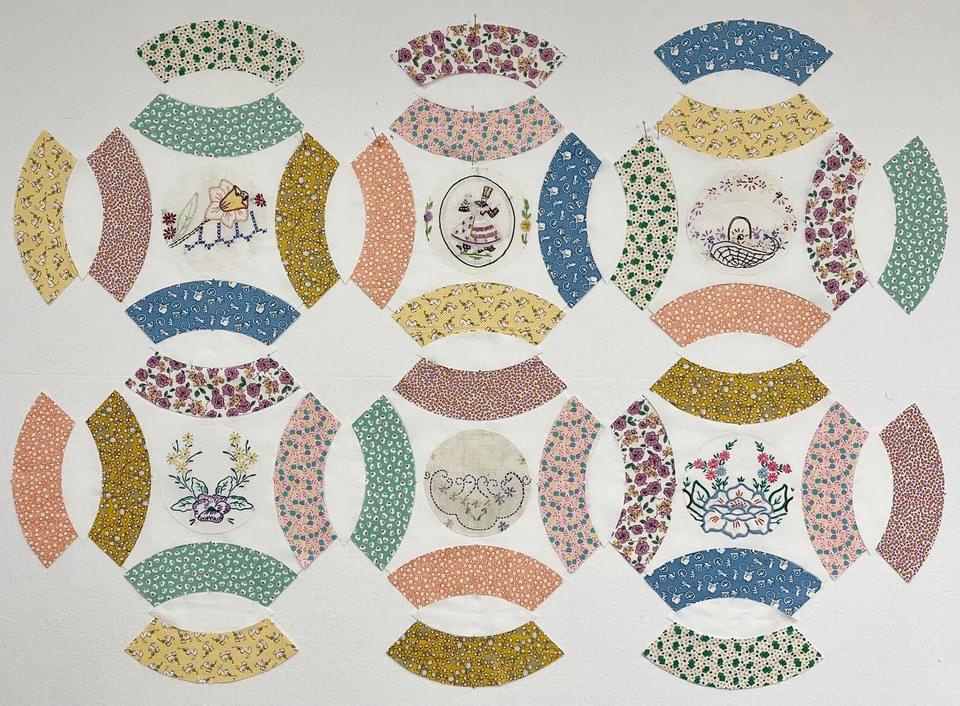
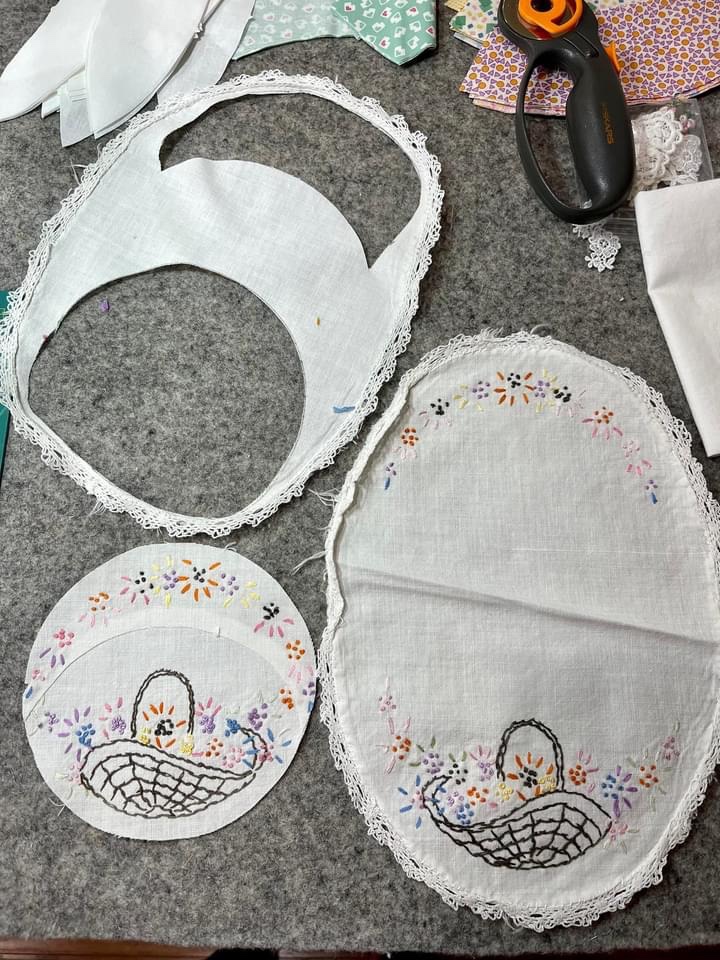
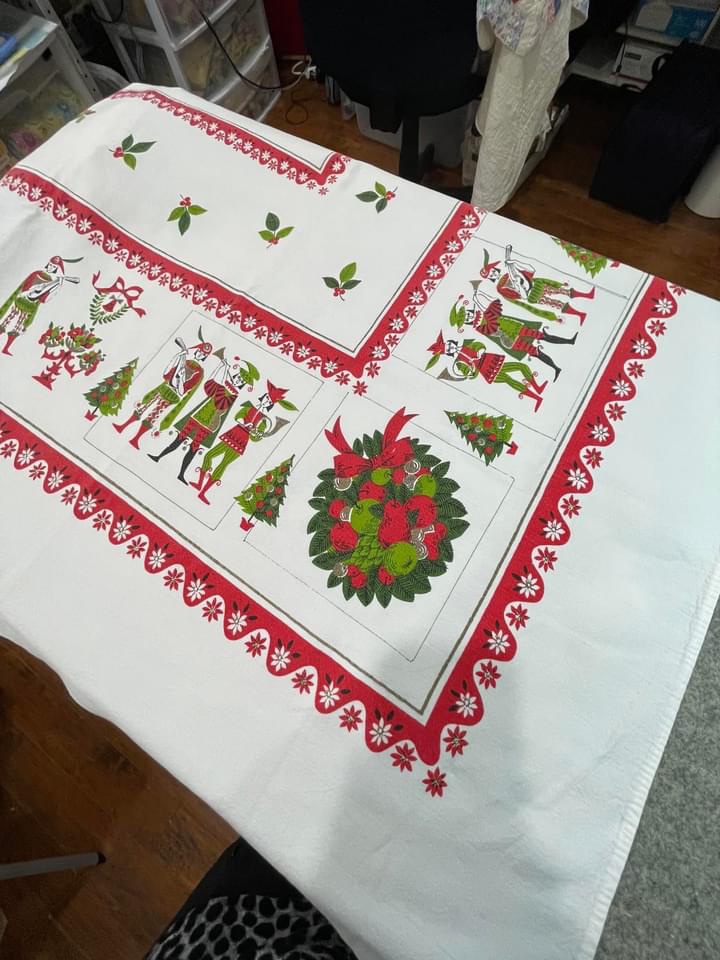
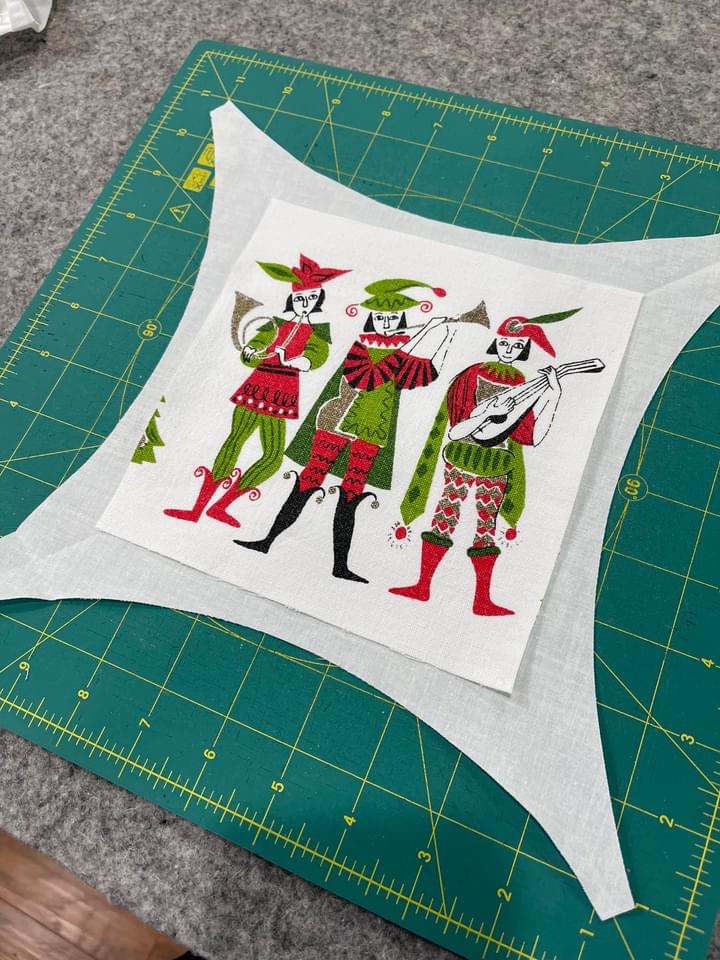
You have everything laid out in some fashion so you can achieve both a color and visual nice balance and are ready to begin sewing blocks together. I’ve sewn together a lot of crazy shaped quilt blocks together before but never anything close to a Double Wedding Ring quilt top!

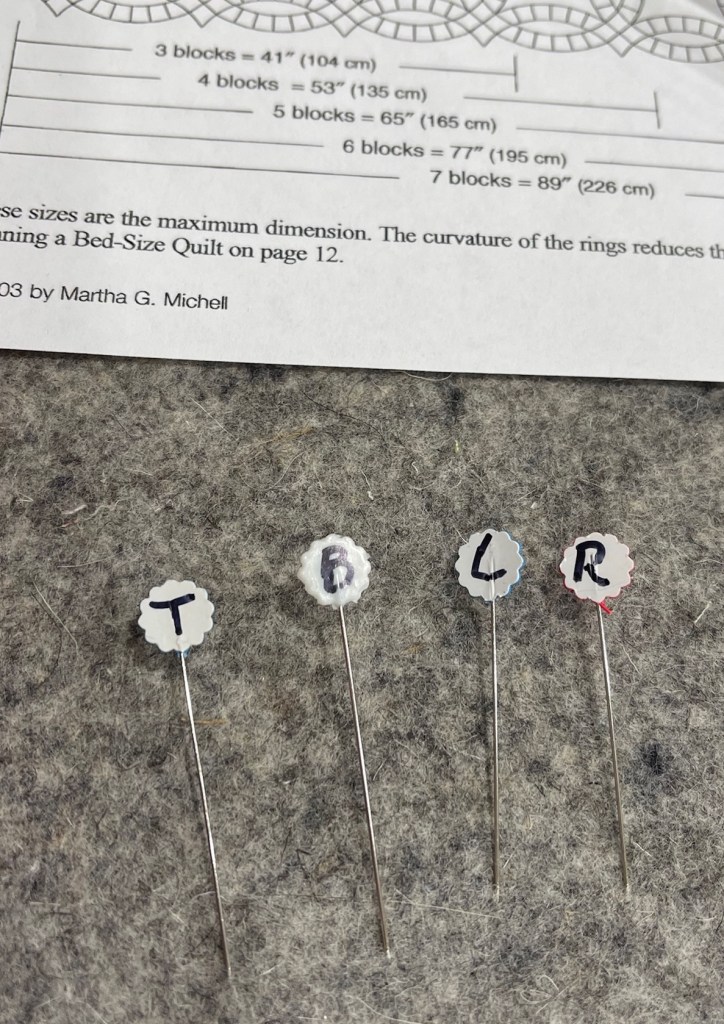
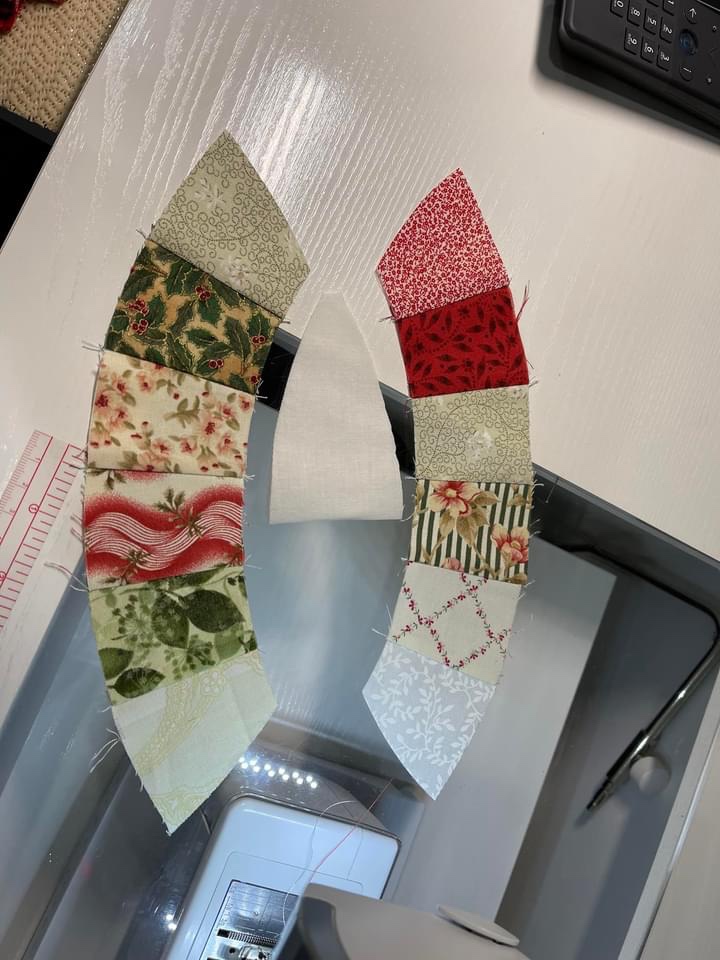
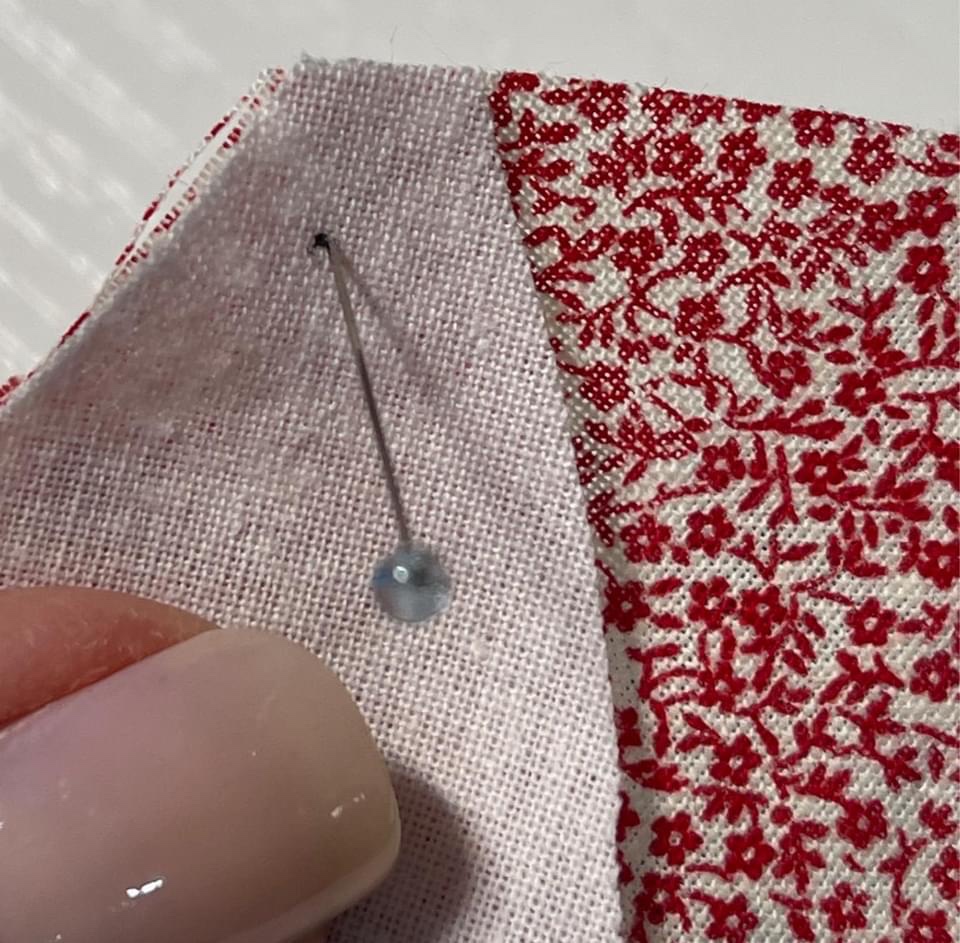
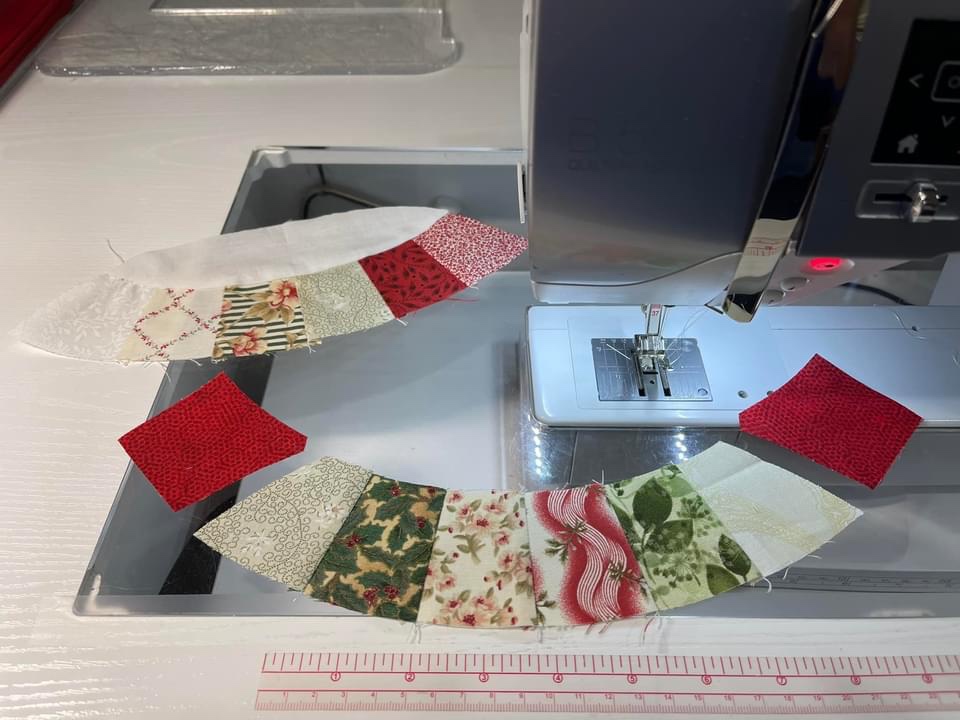
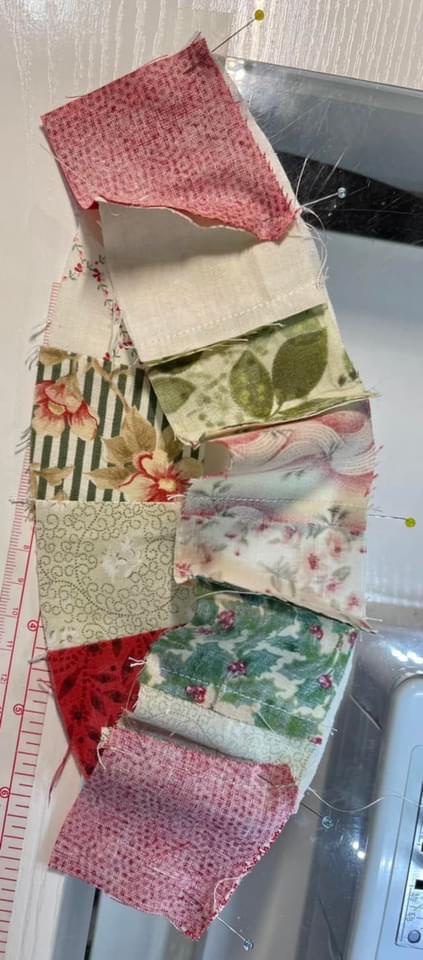
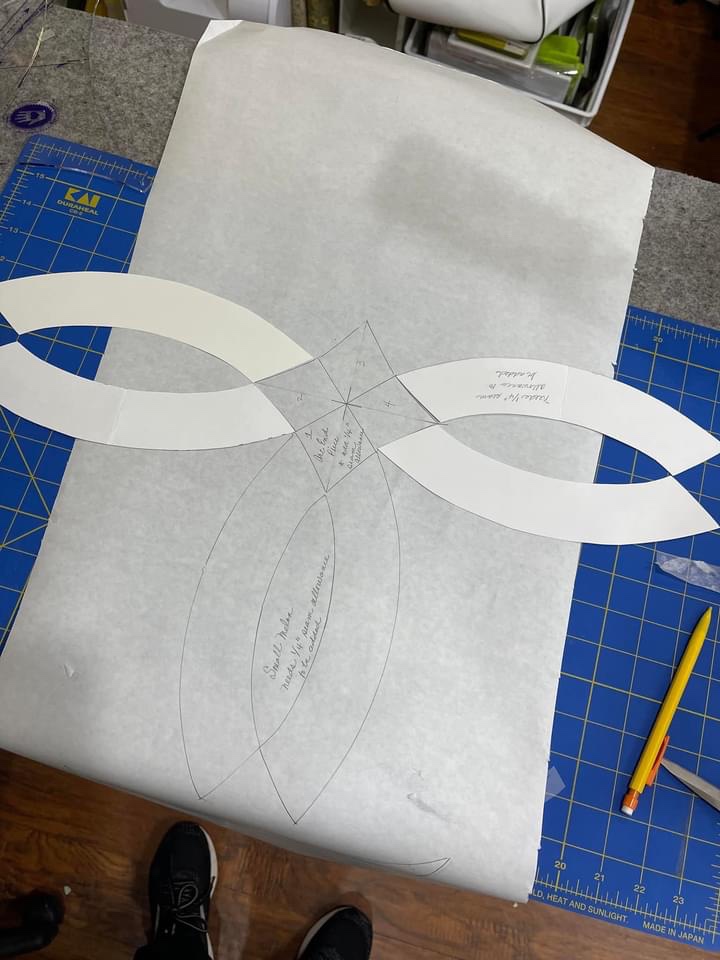
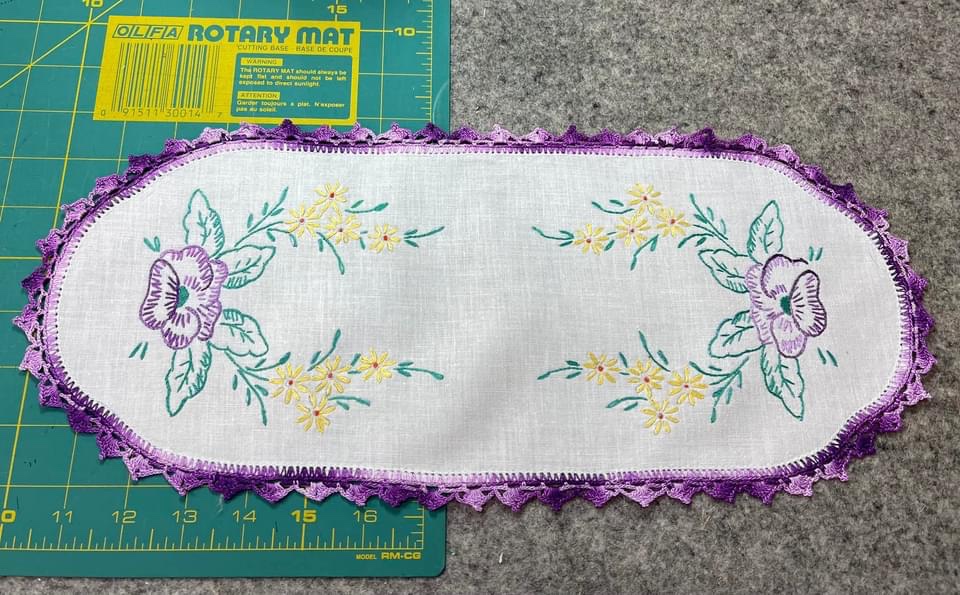
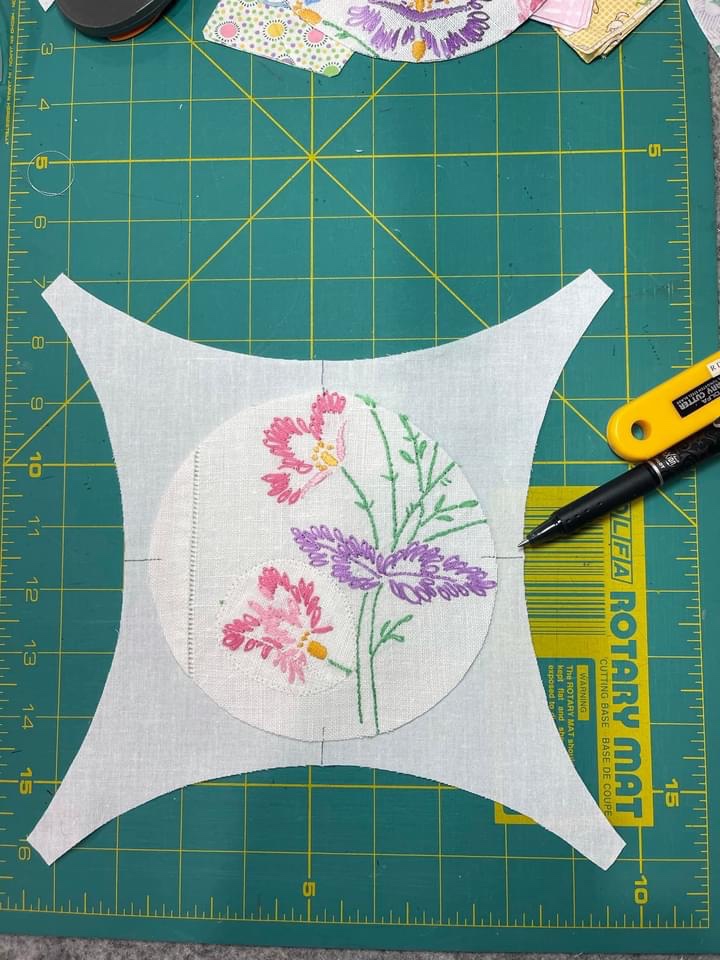
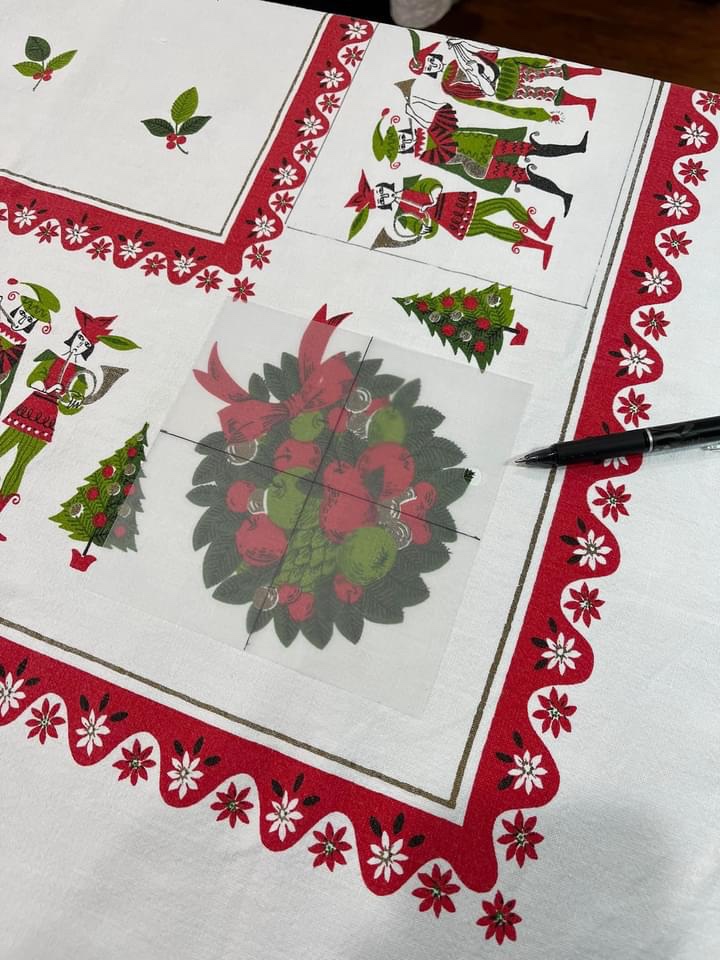
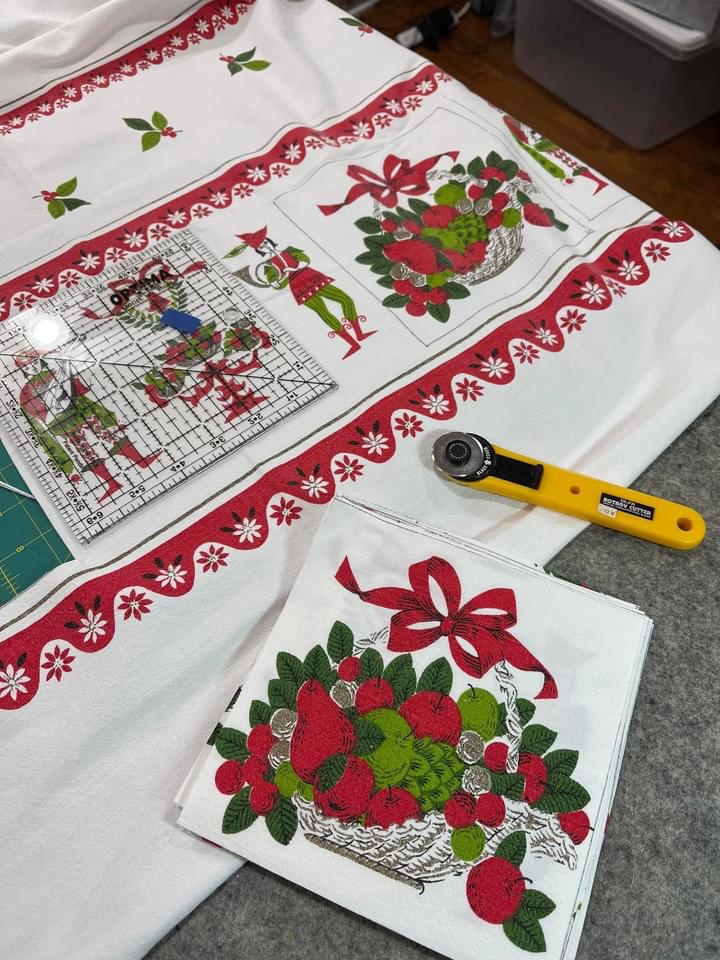
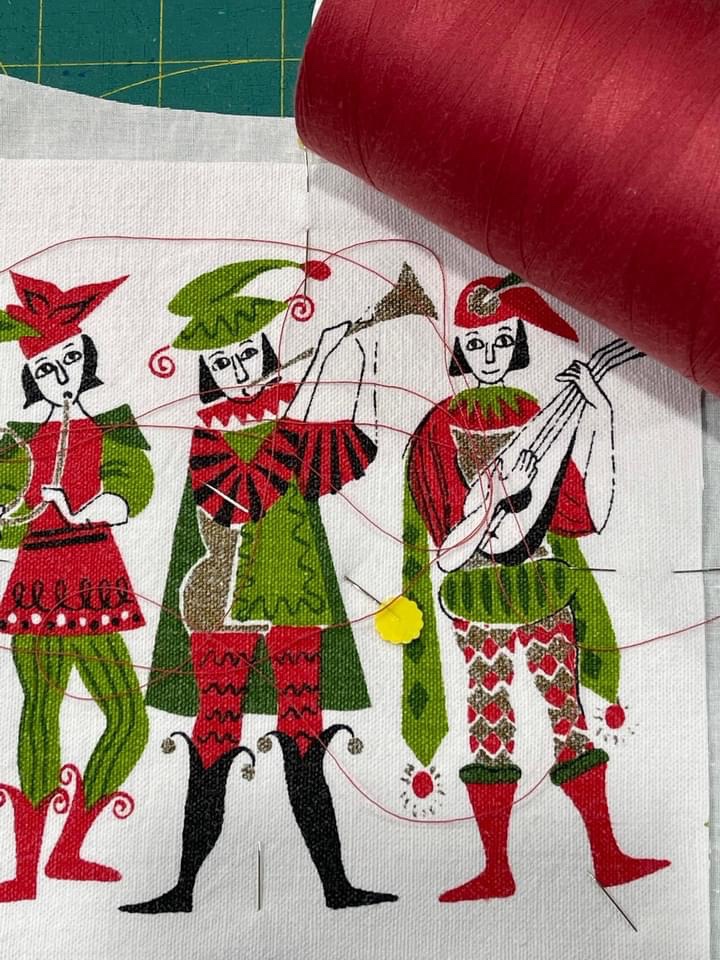
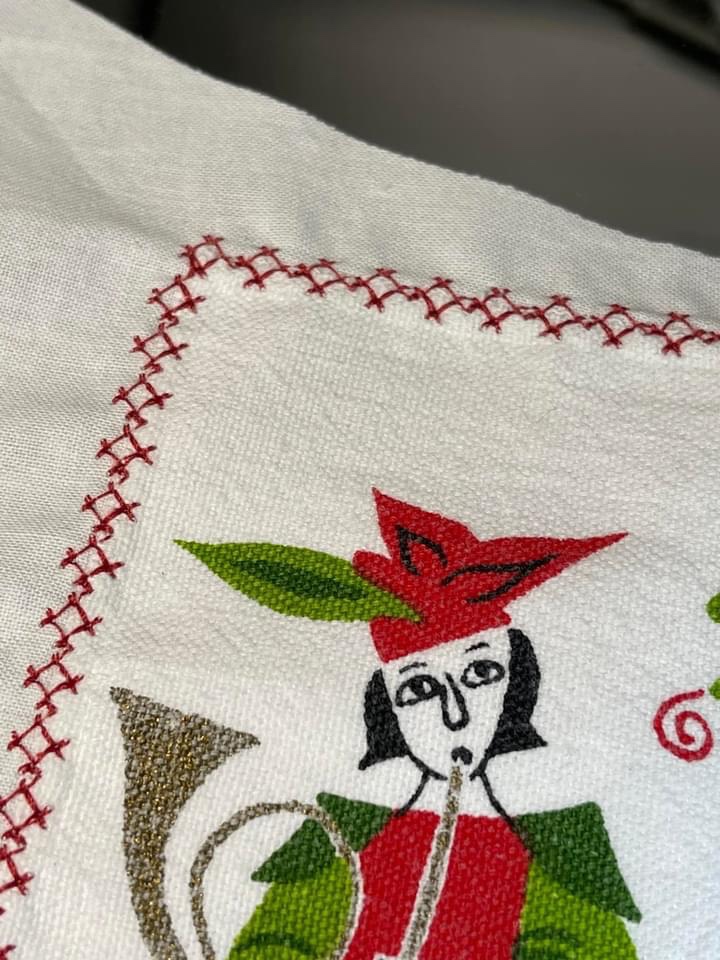
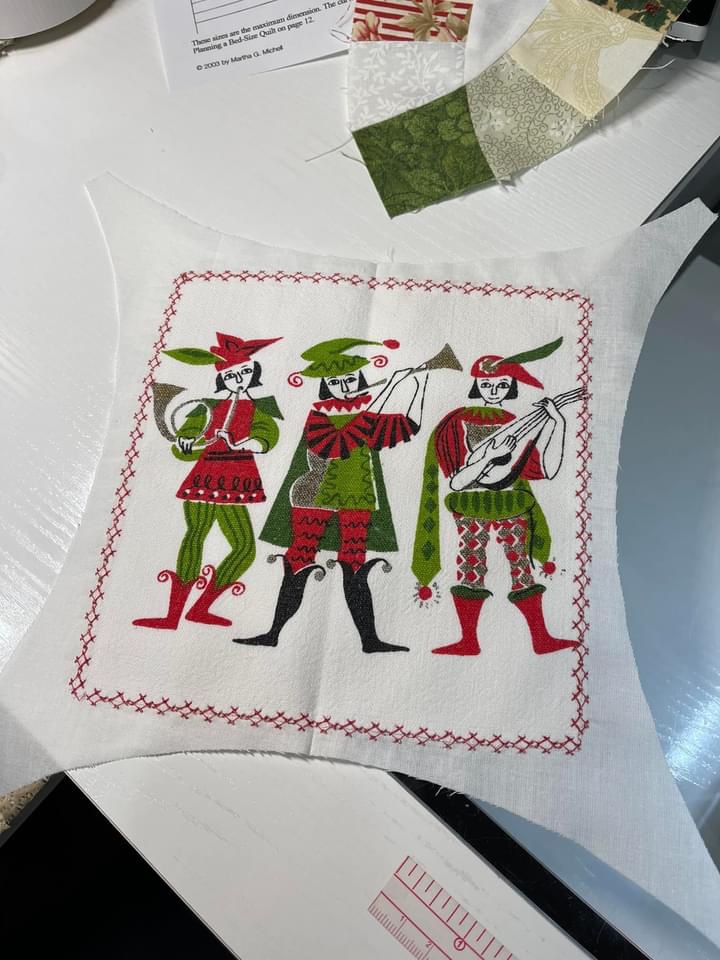
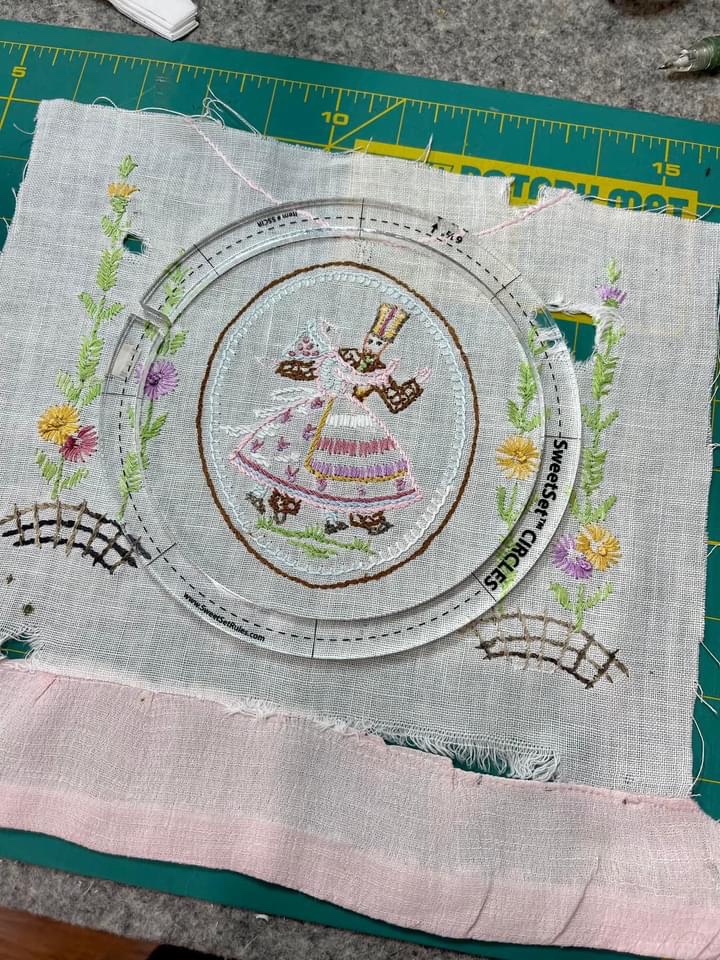
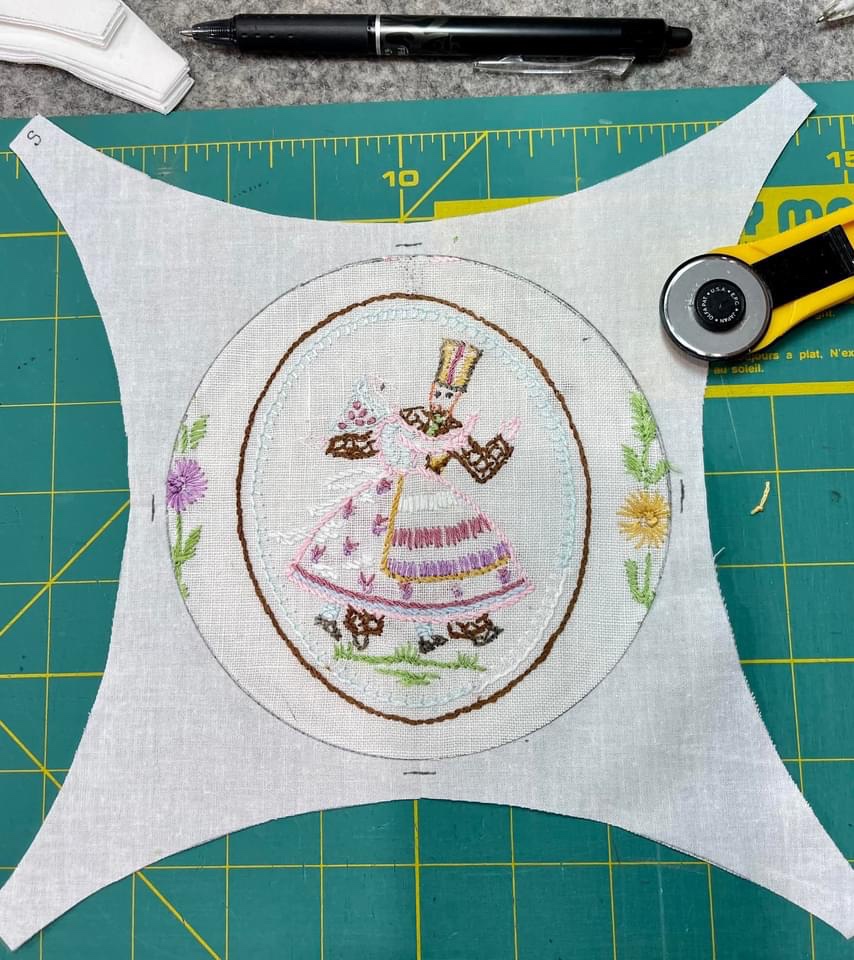
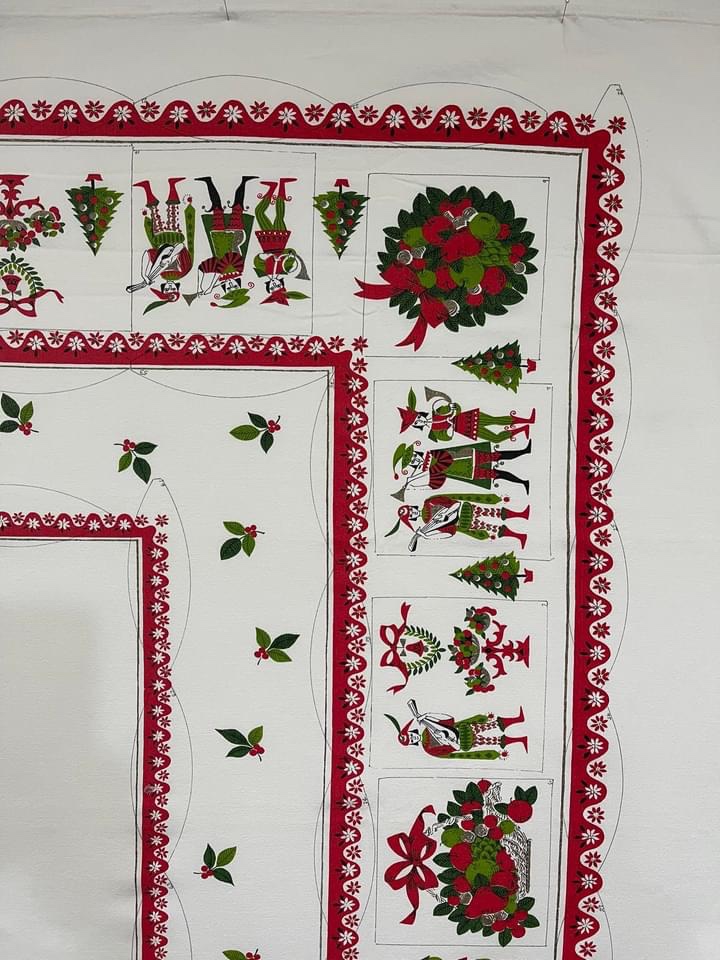
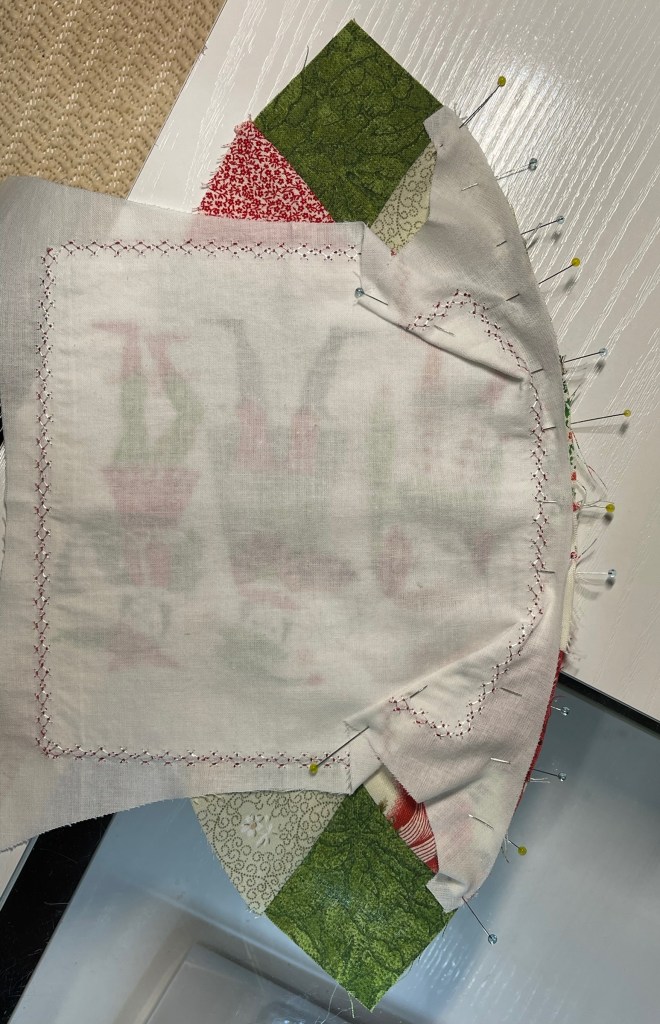
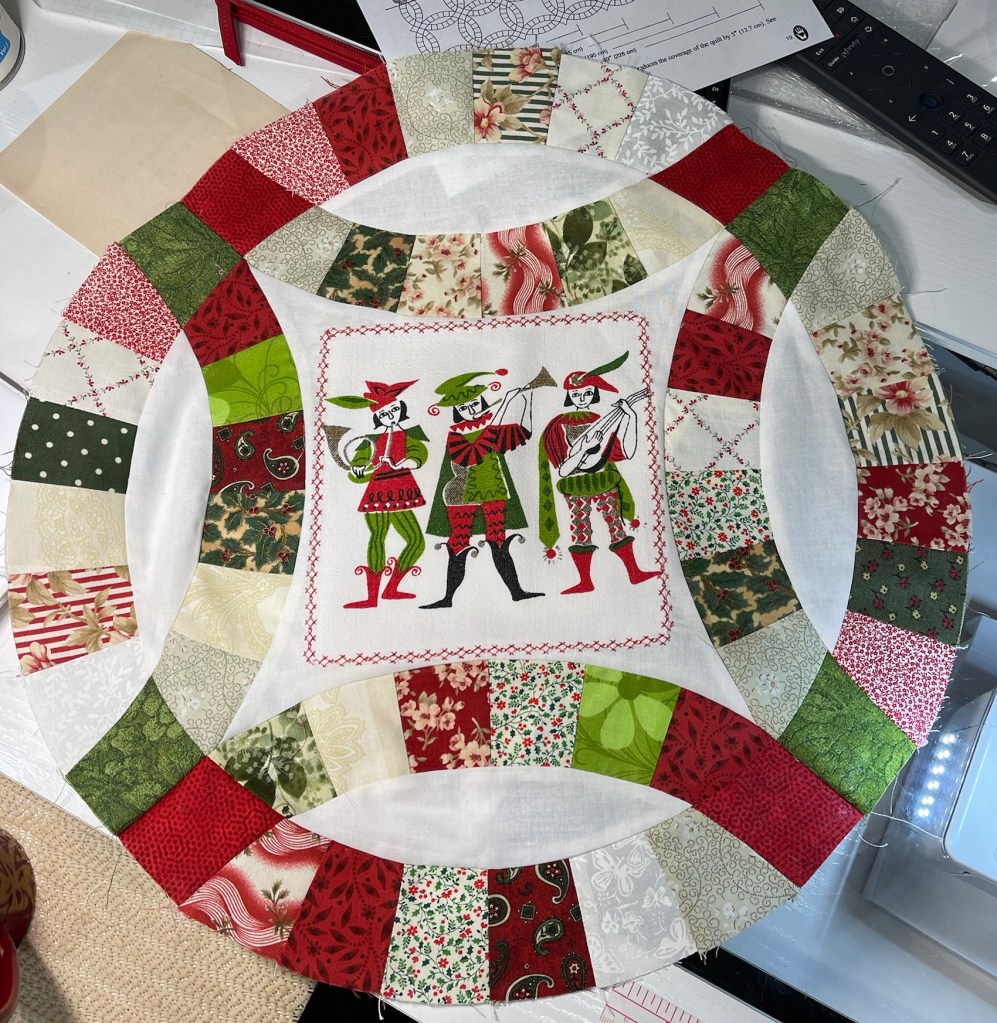
You will need a method of keeping your Football shapes in the correct position when moving them from your layout to the sewing machine. I used 4 Flower Head straight pins. I marked them with T B L R: top, bottom, left and right.

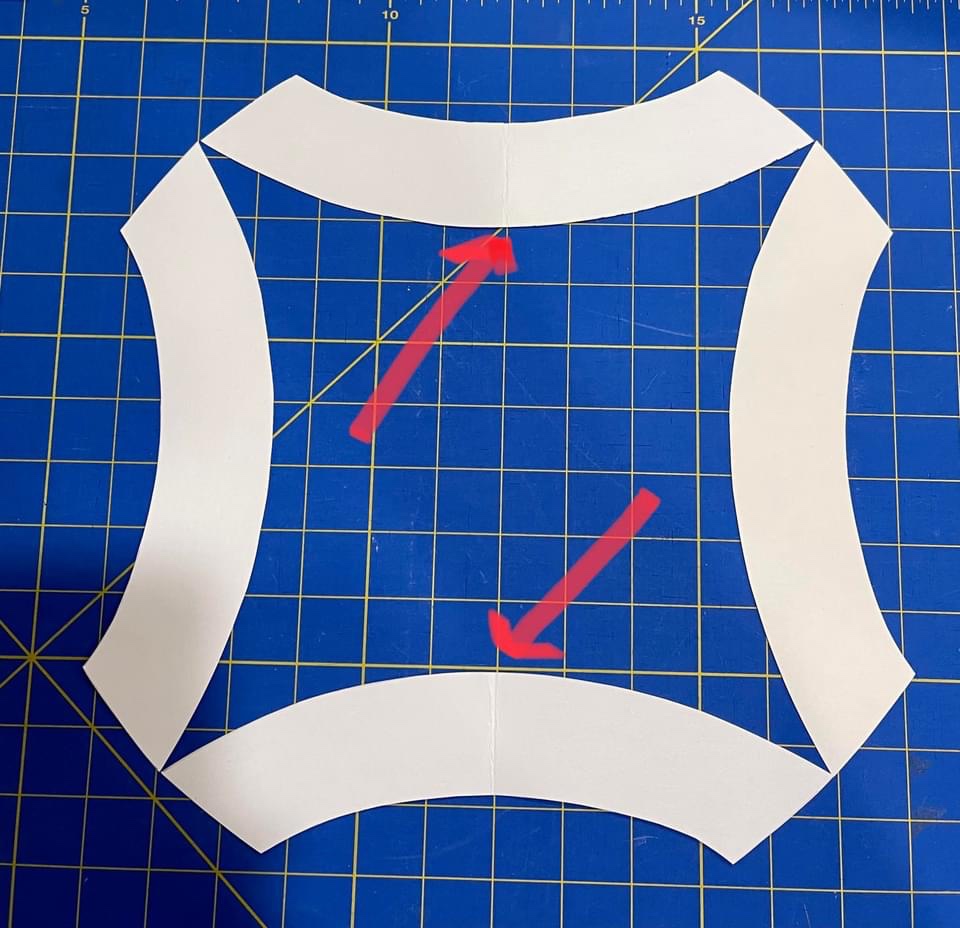
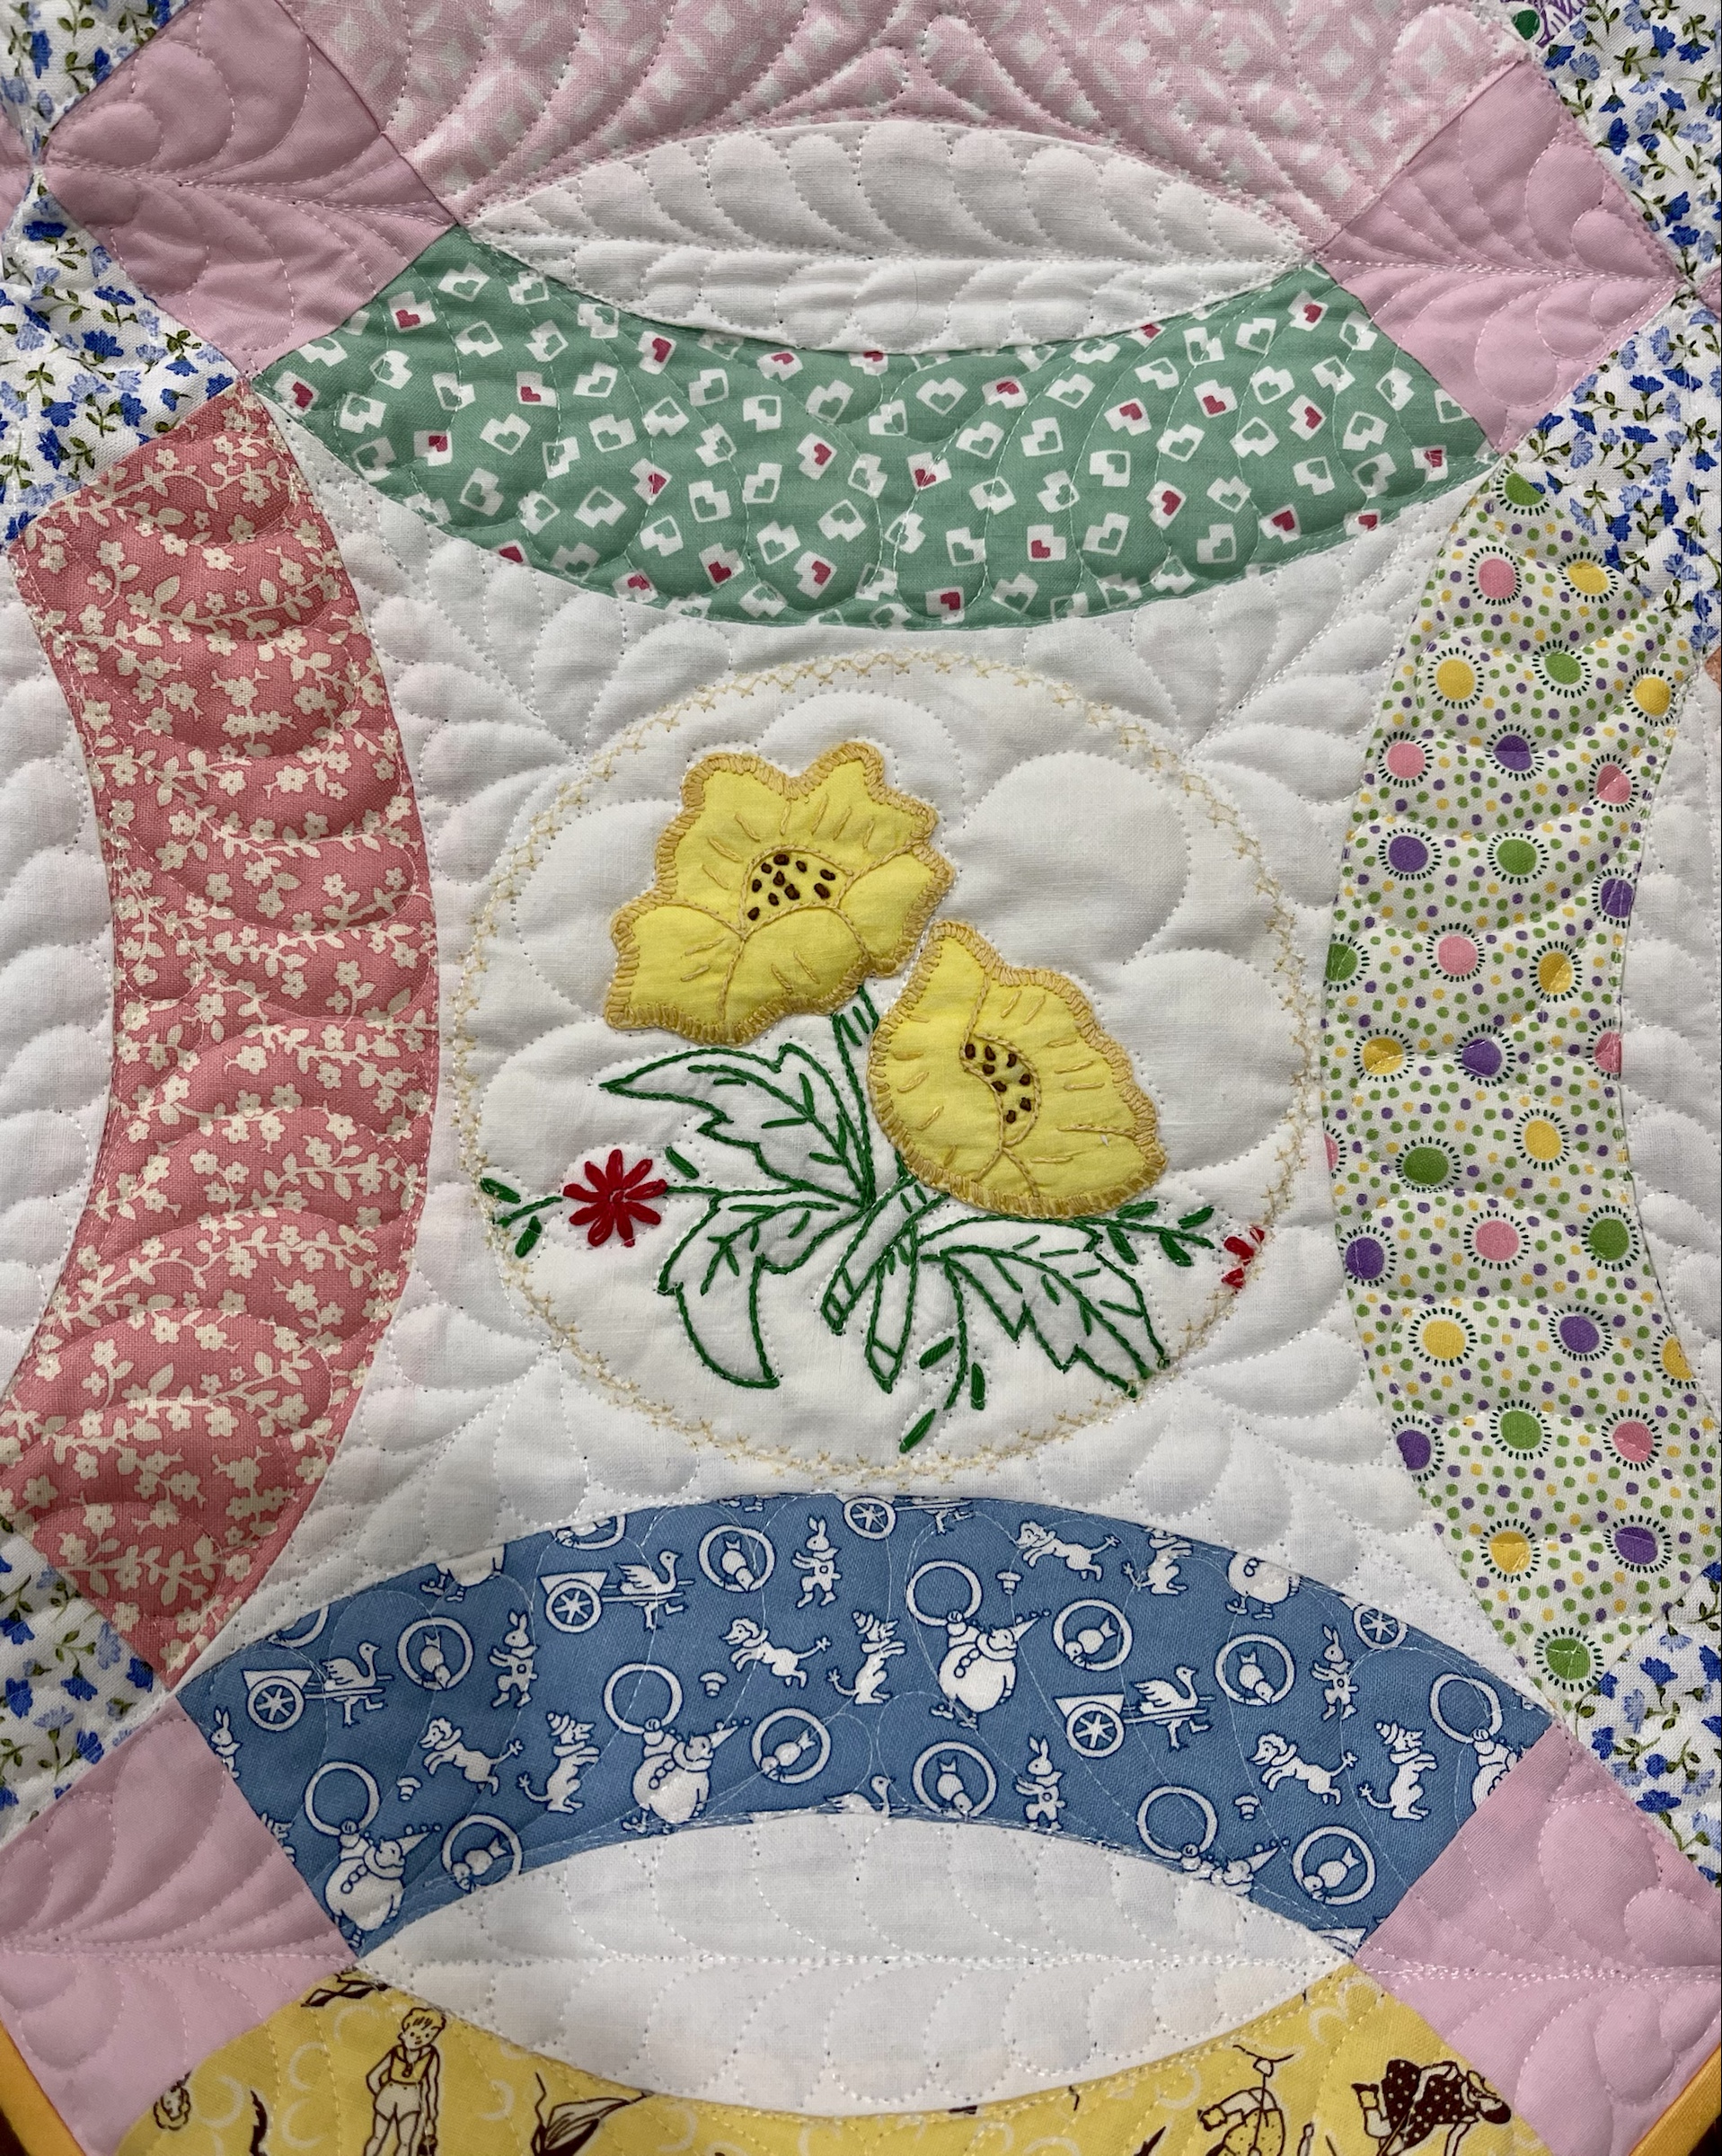
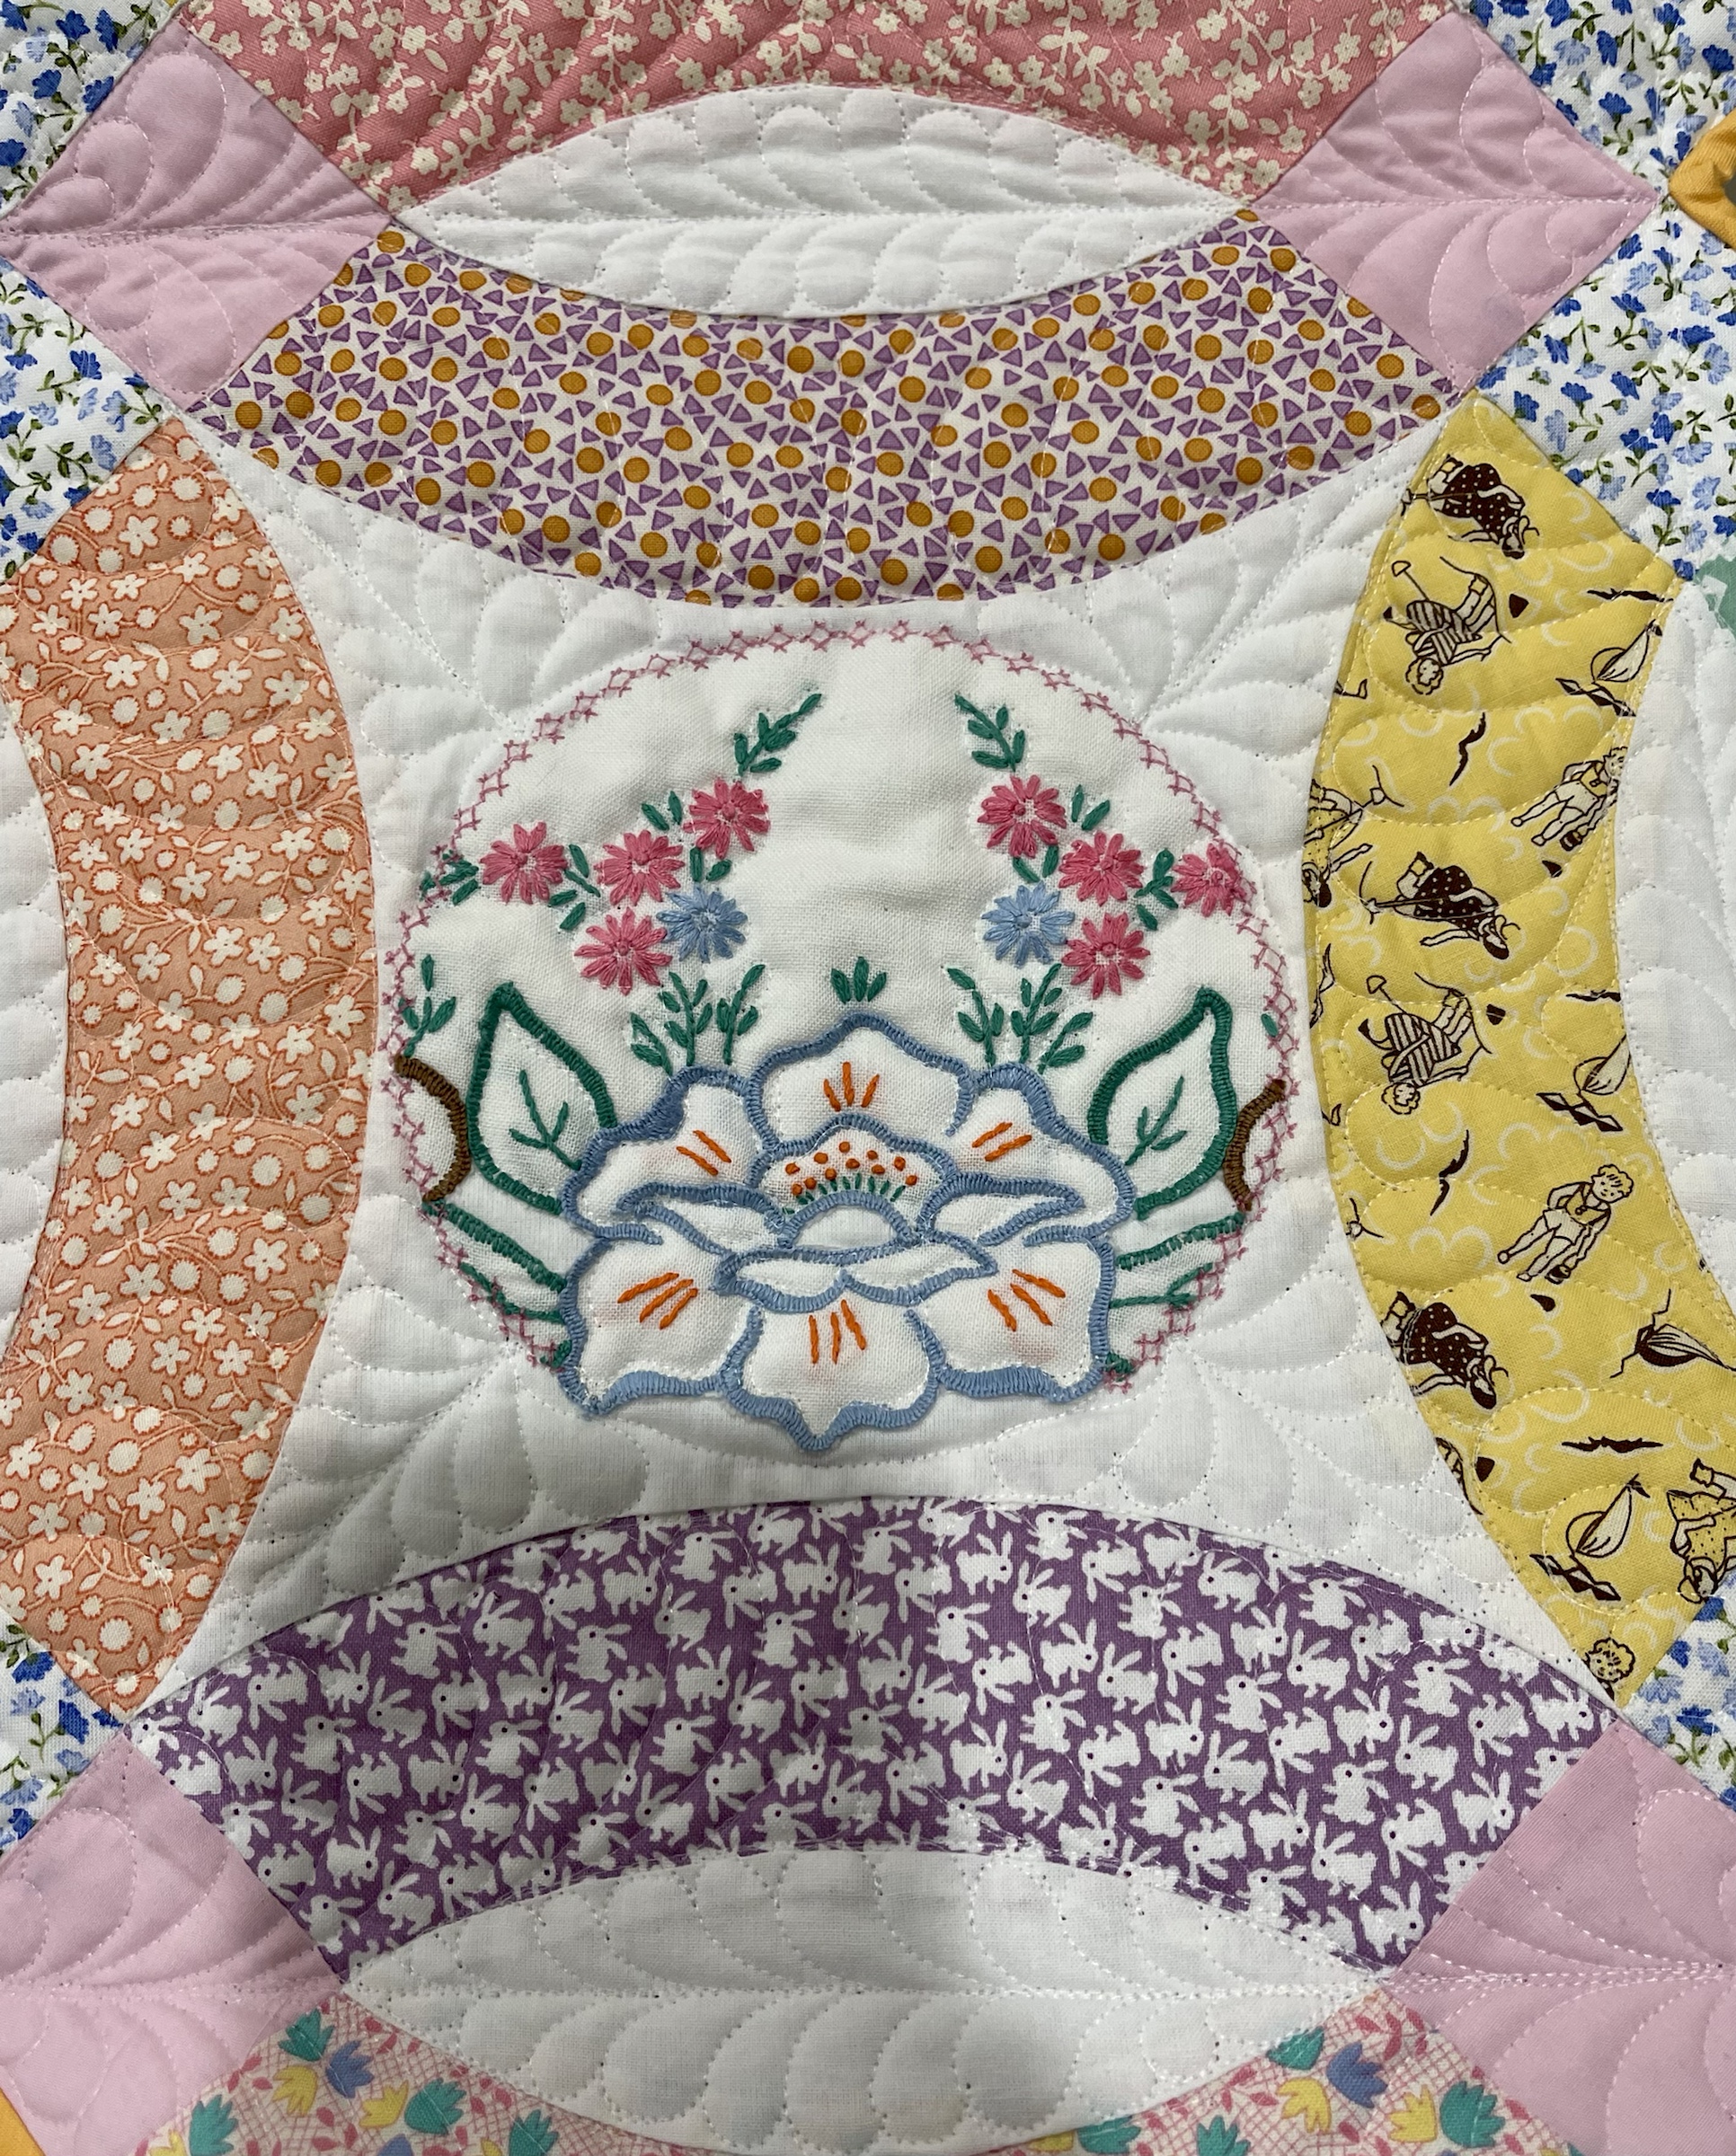
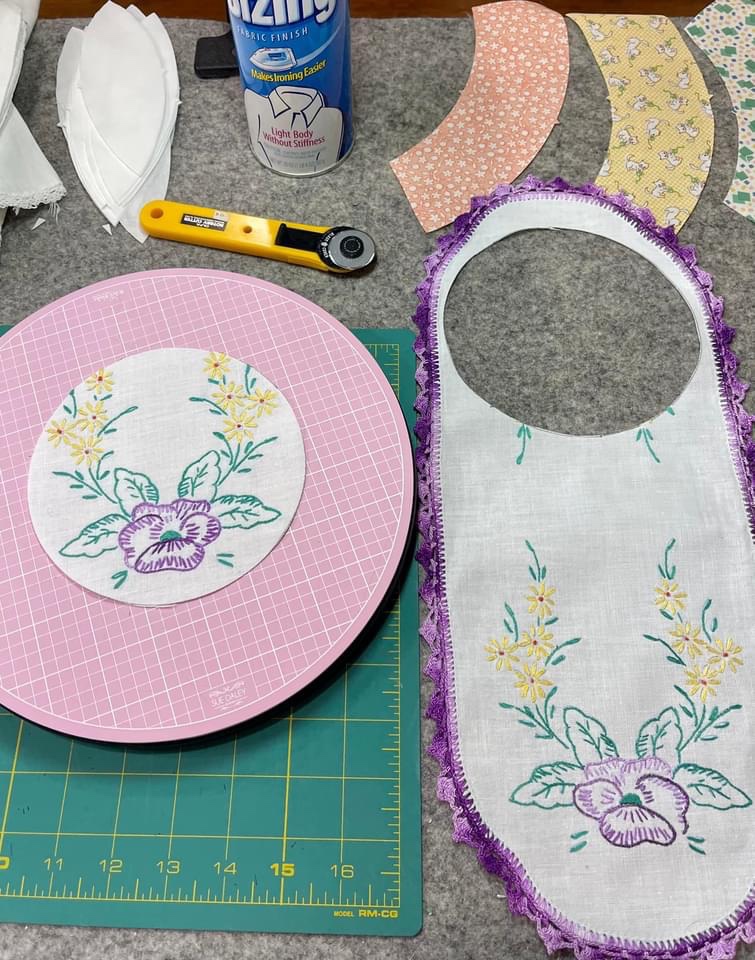
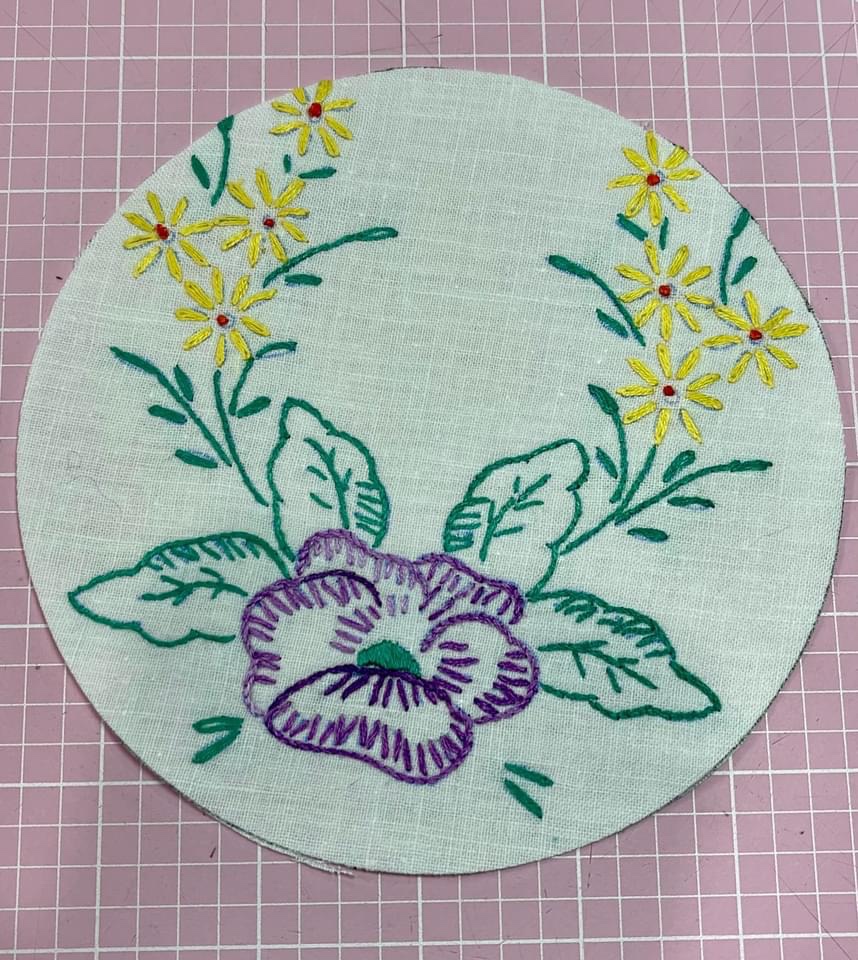
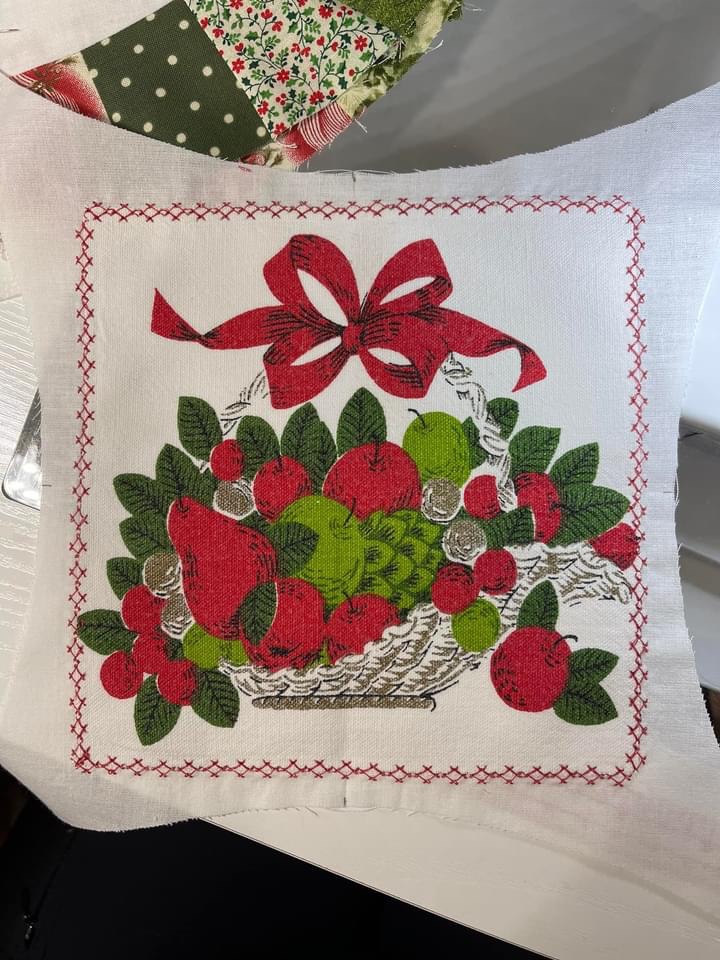
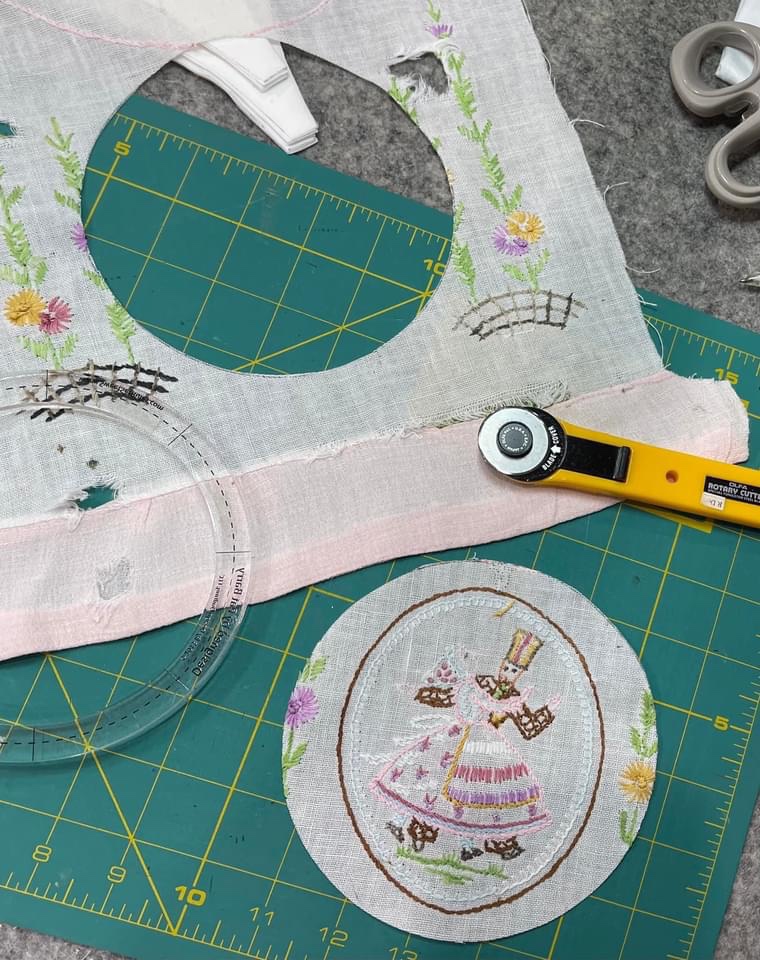
BEFORE I remove a Football shape from my design wall, using one of these 4 pins I position them on the Melon piece. The top of the pin indicates the direction of the Football while the letter on the pin indicates the placement with regards to the block center piece. So in the picture above, the top most football needs to be sewn to the left of the center, the Football on the right…sewn to the right side of the block center.

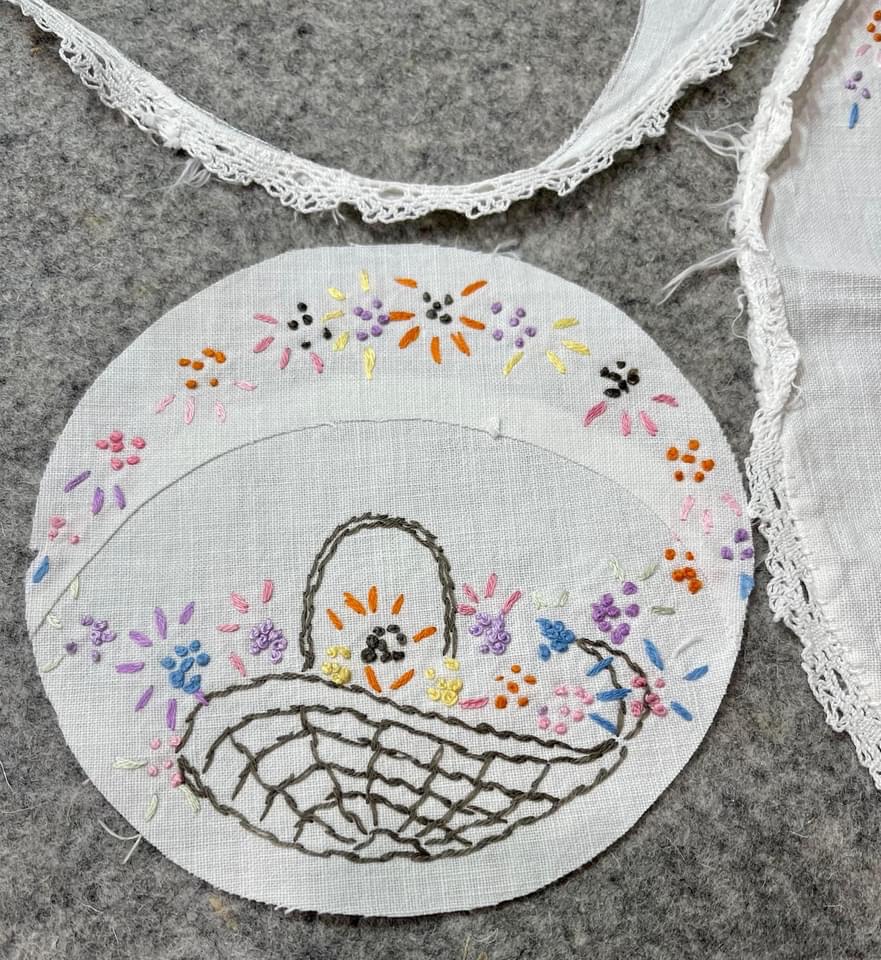
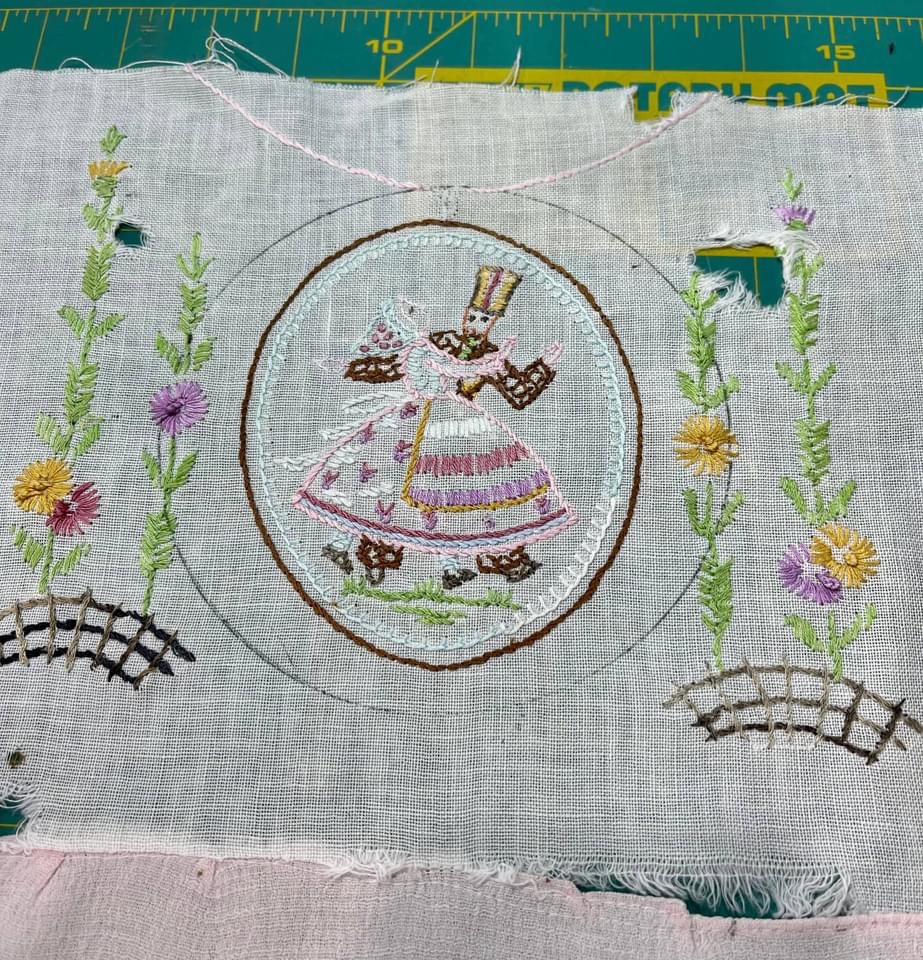
Now…if your Center Blocks are directional, you may wish to create your own system of marking so that when you are stitching you will not have to worry about a center ending up in the wrong orientation.

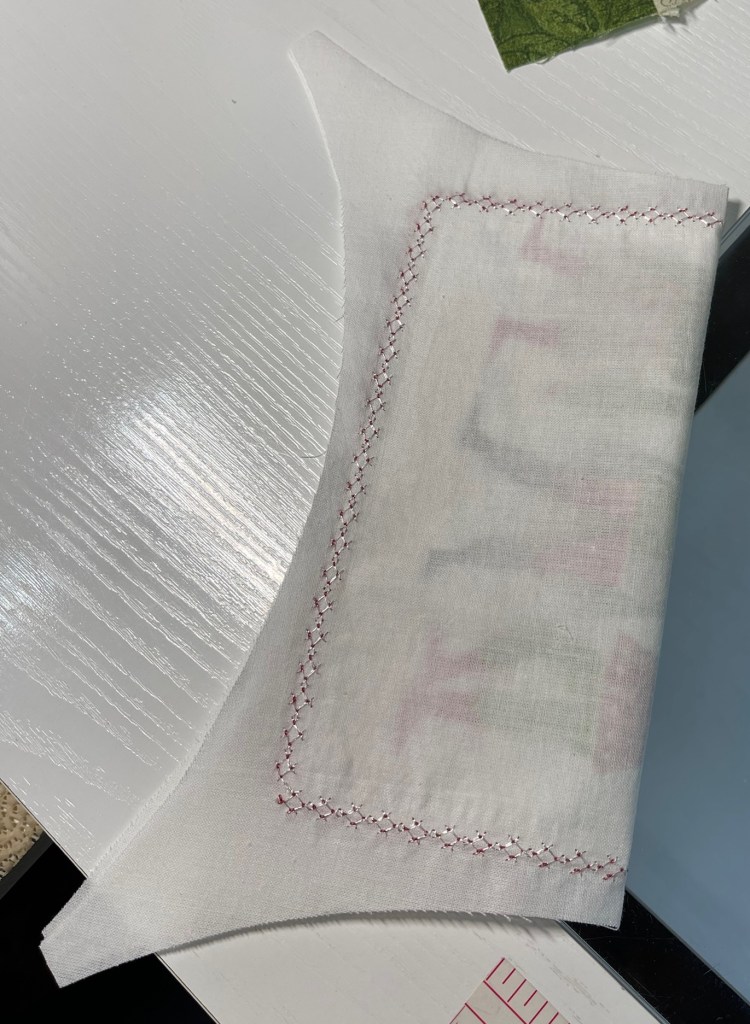
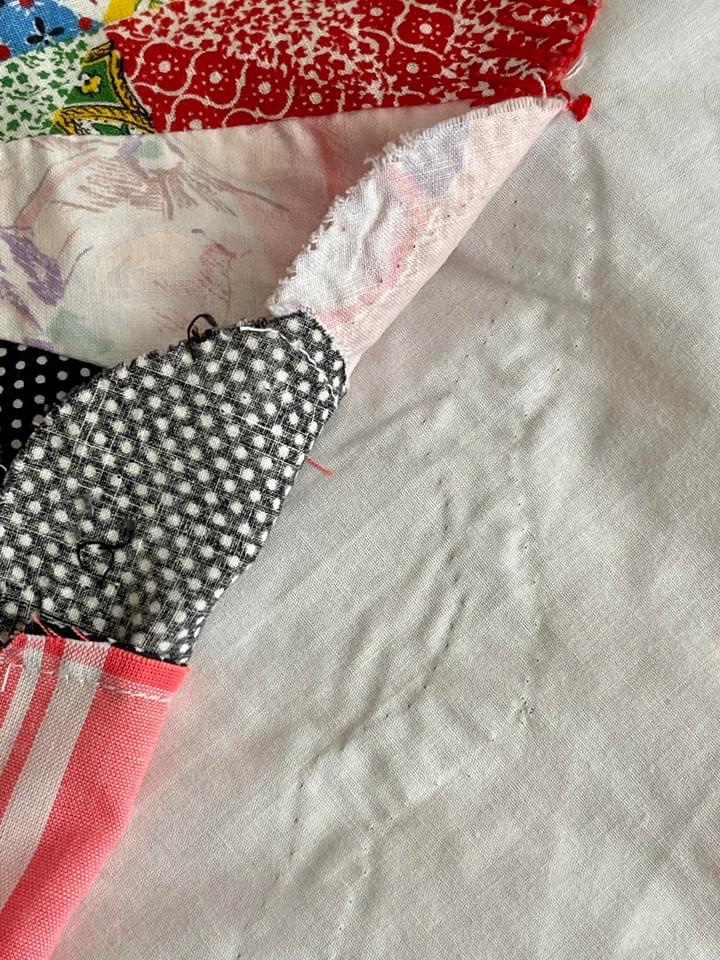
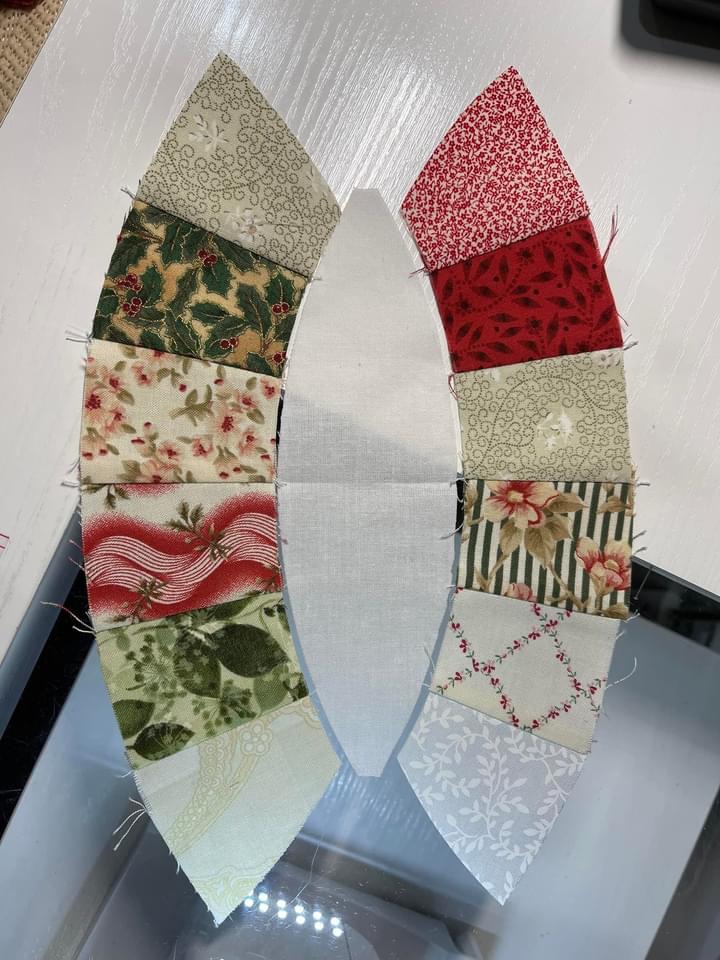
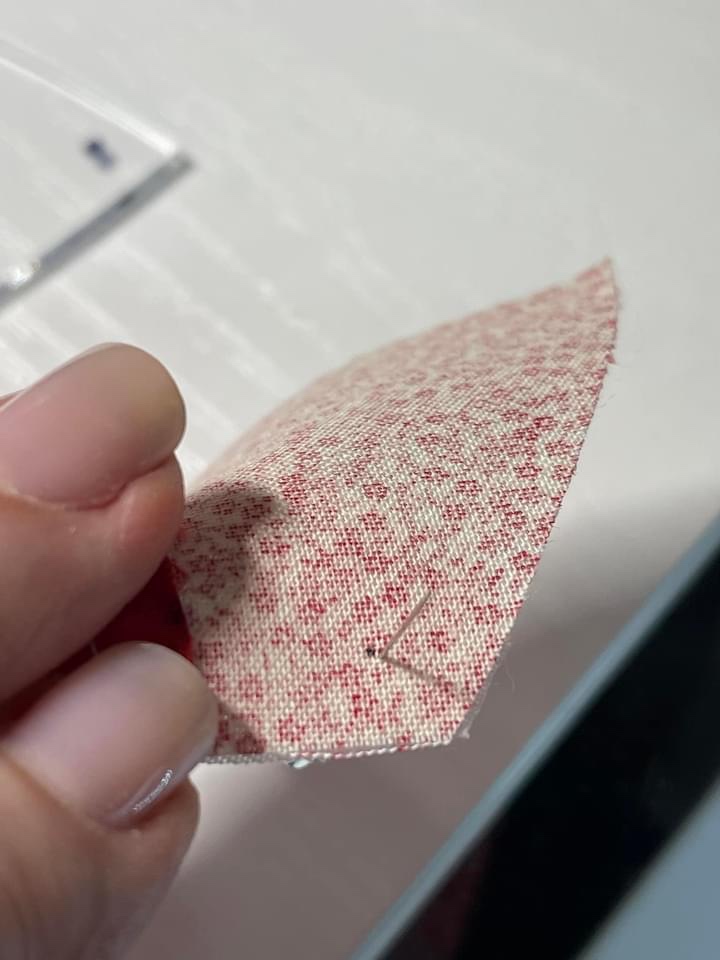
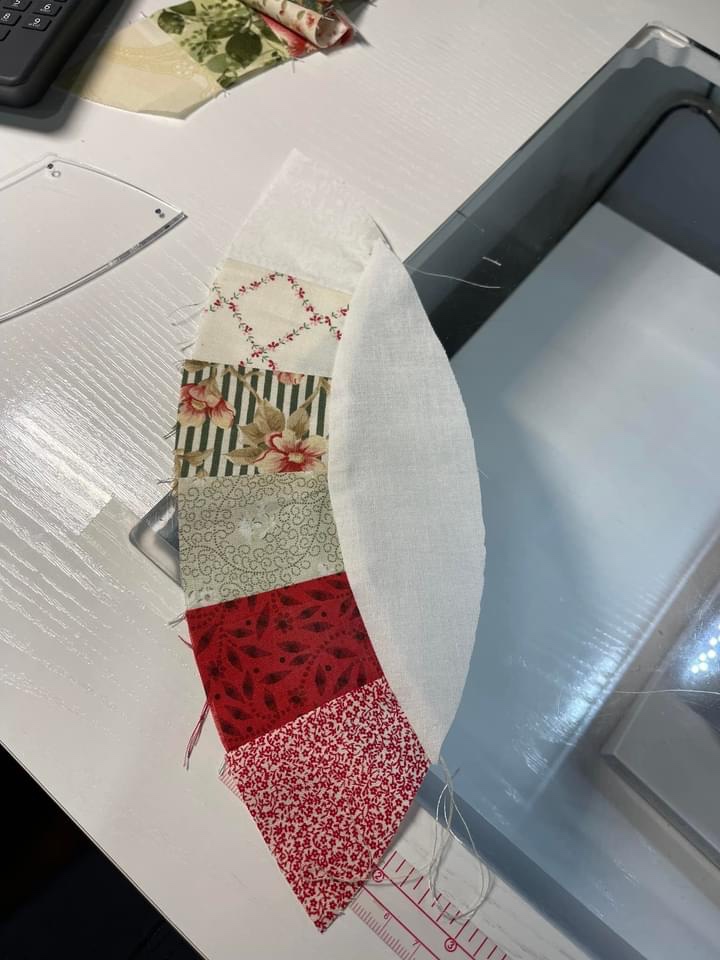
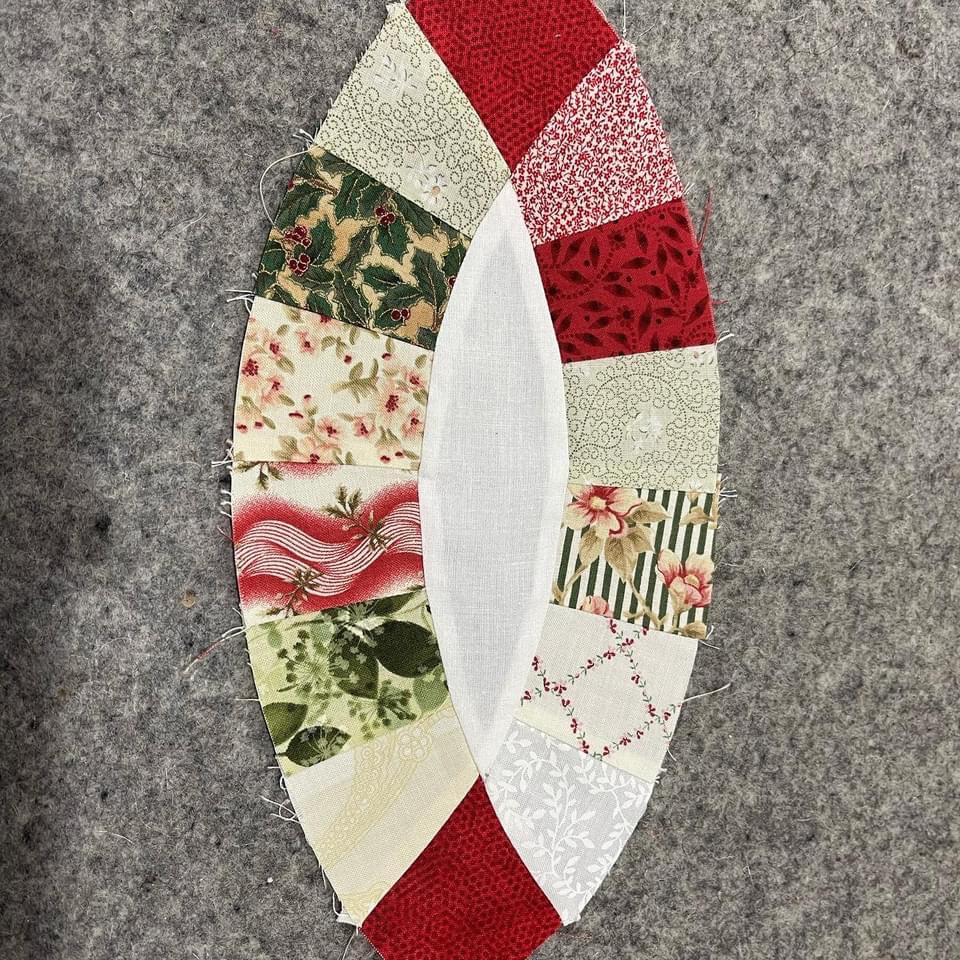
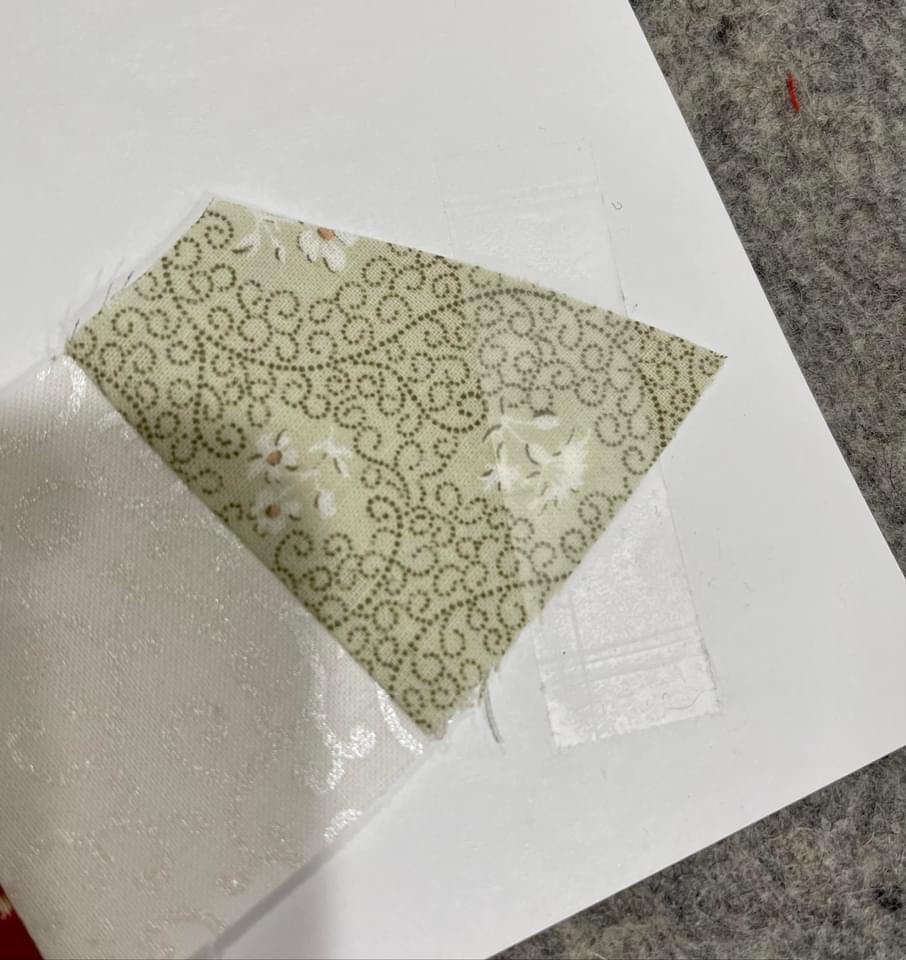
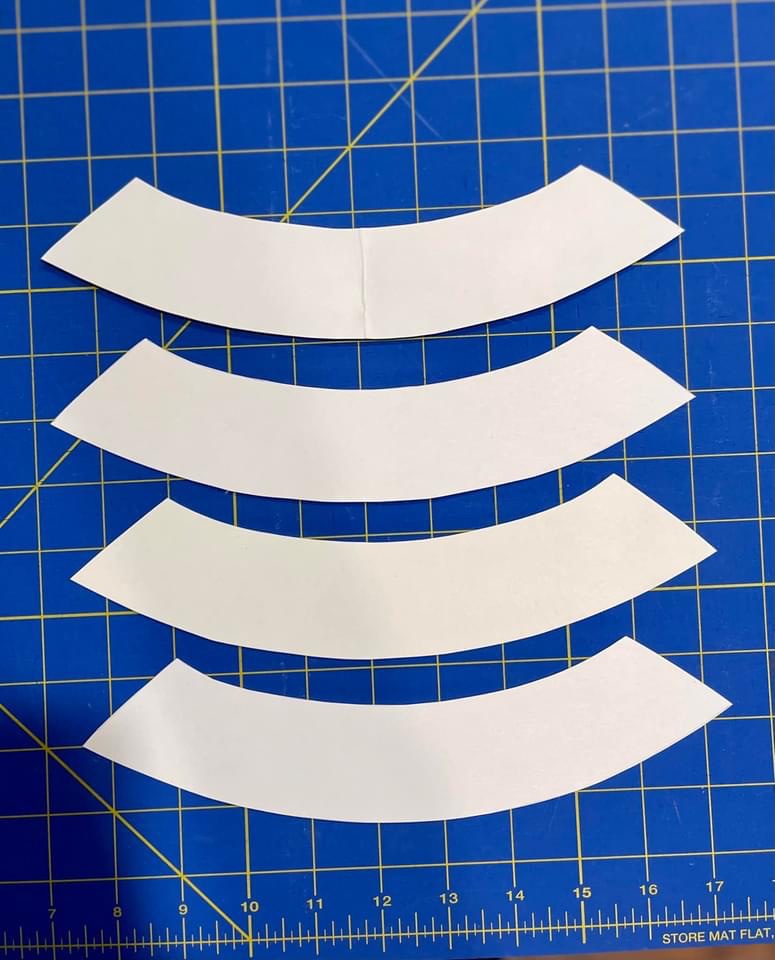
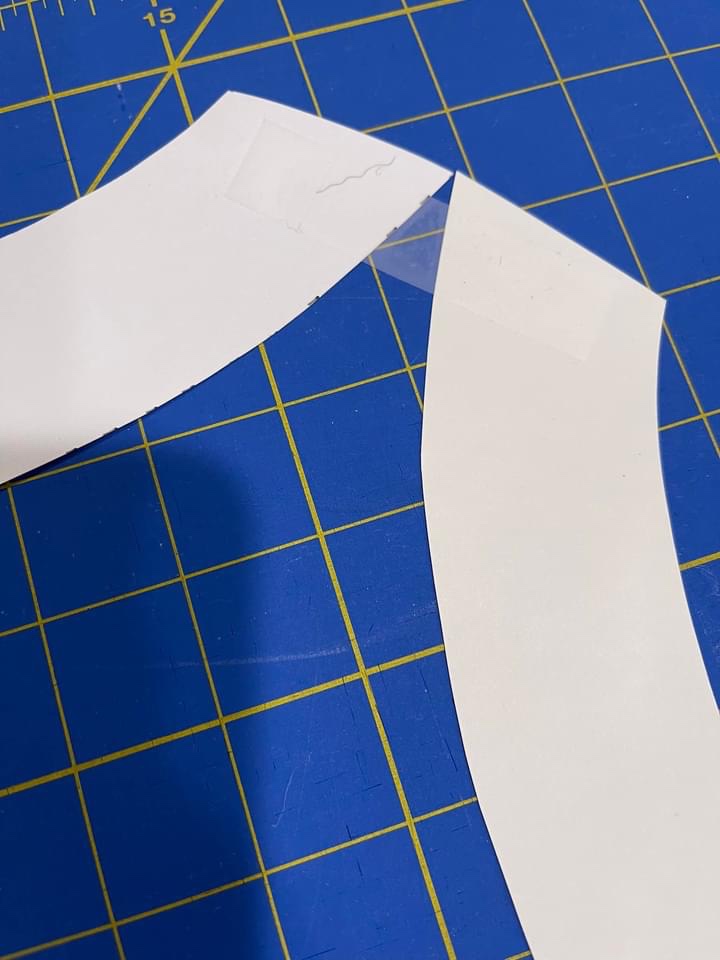
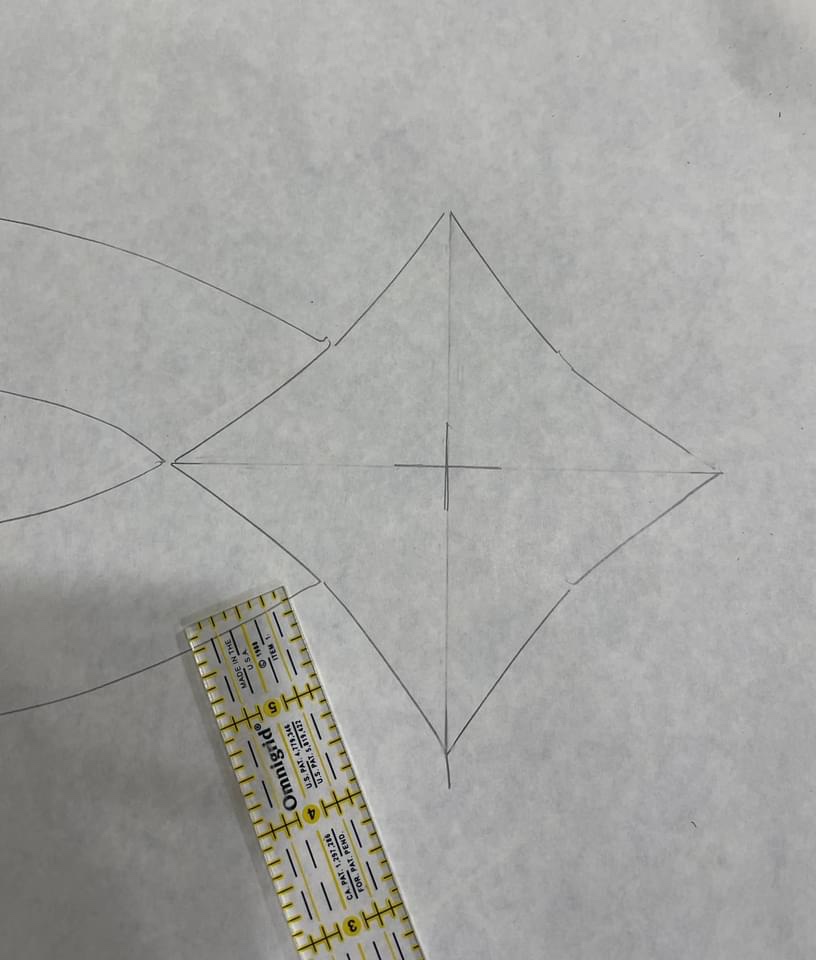
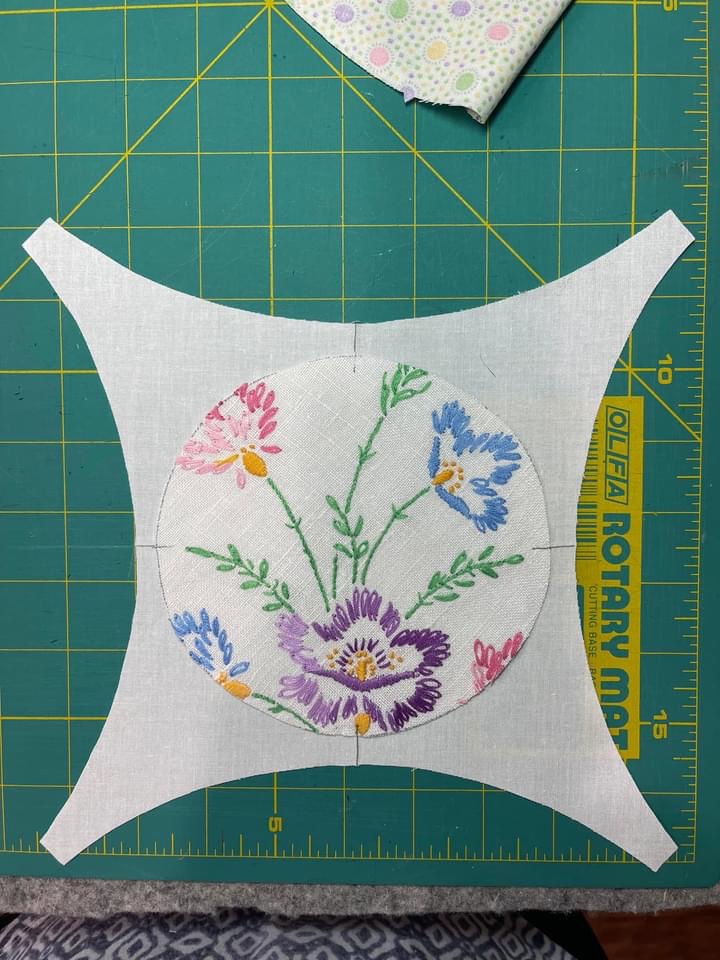
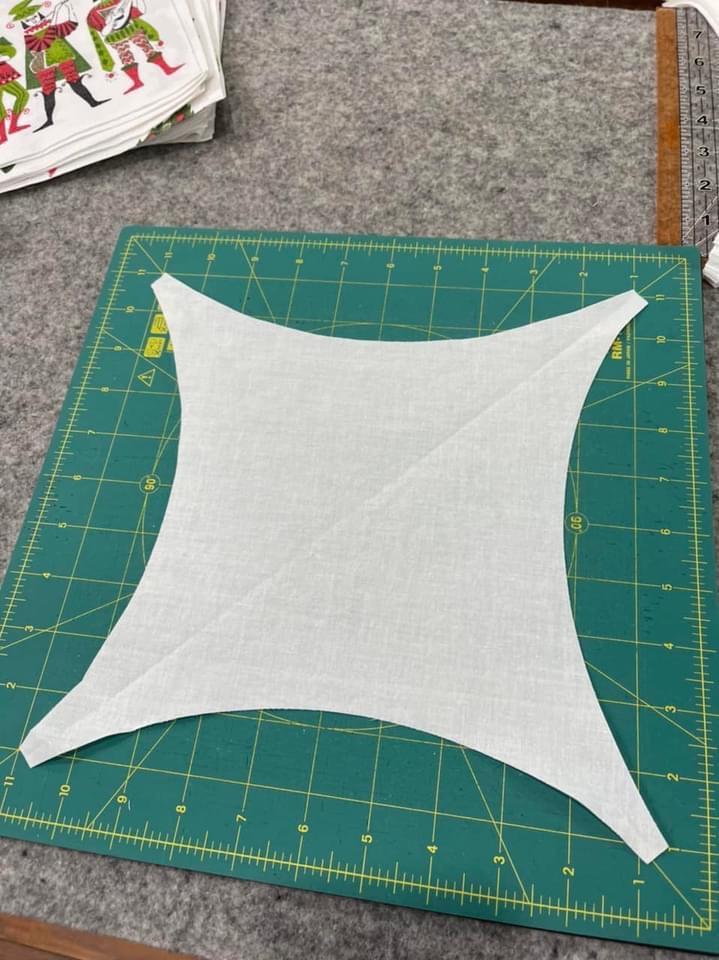
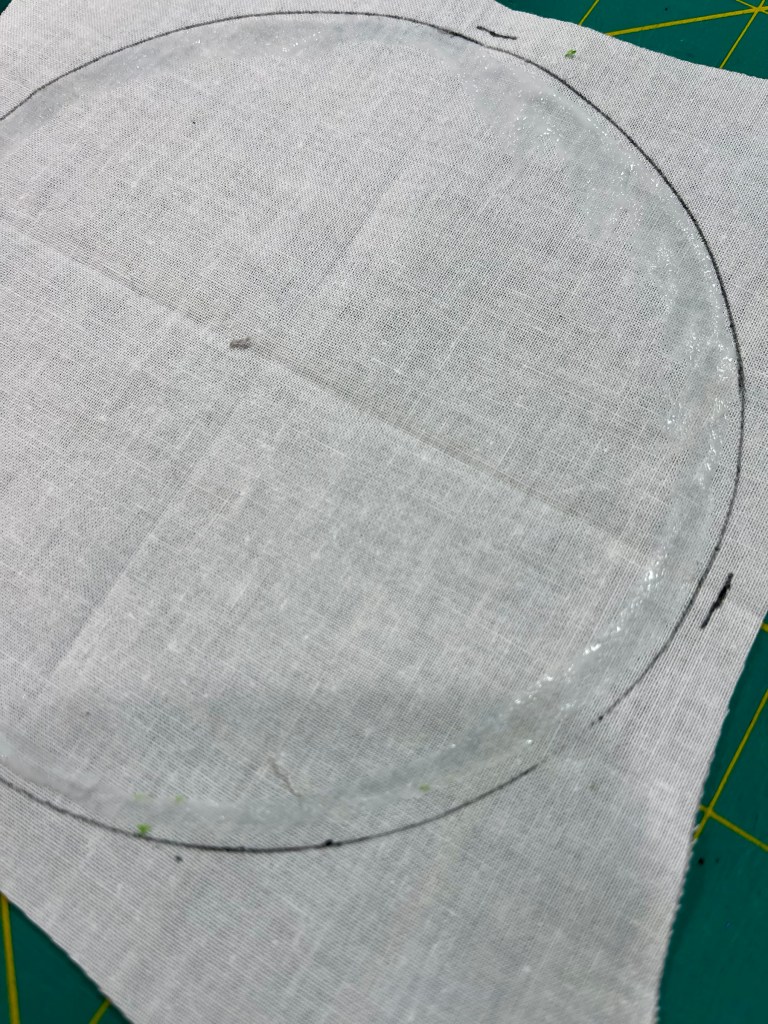
Carefully fold the center in half and finger press. Do this in both directions, horizontal and vertical.

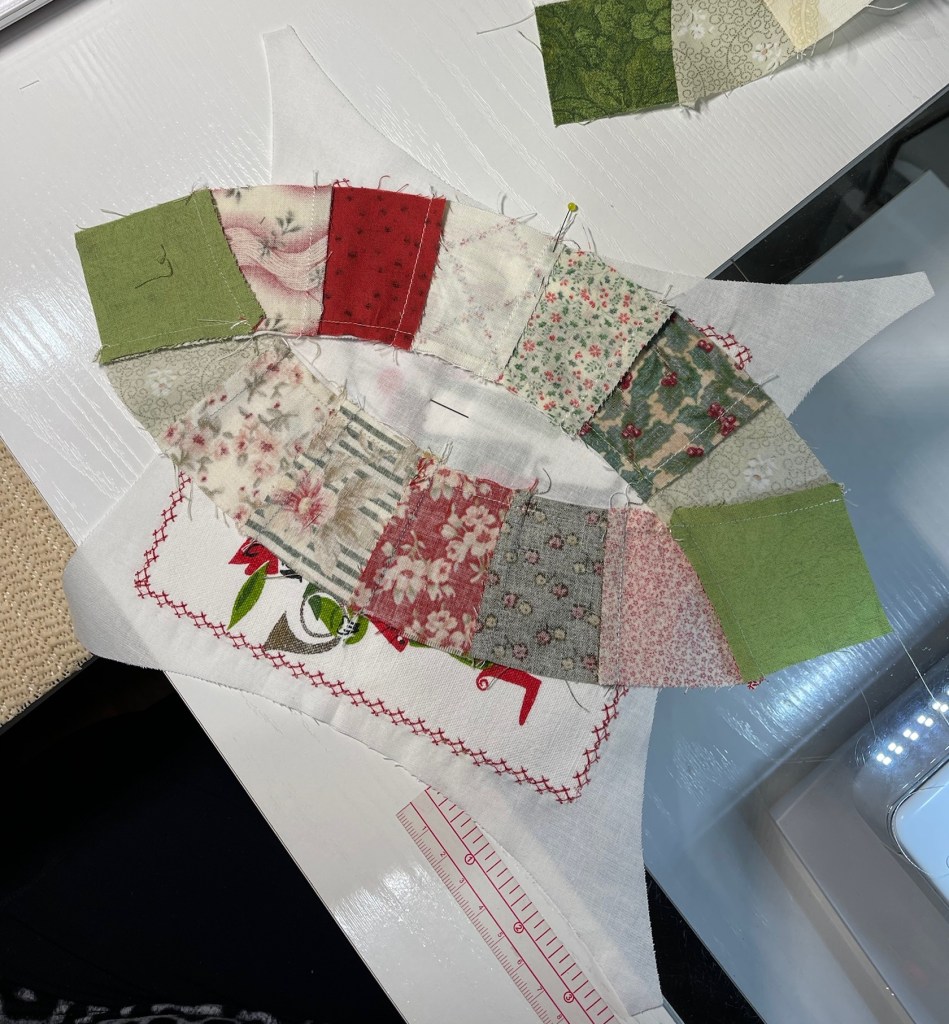
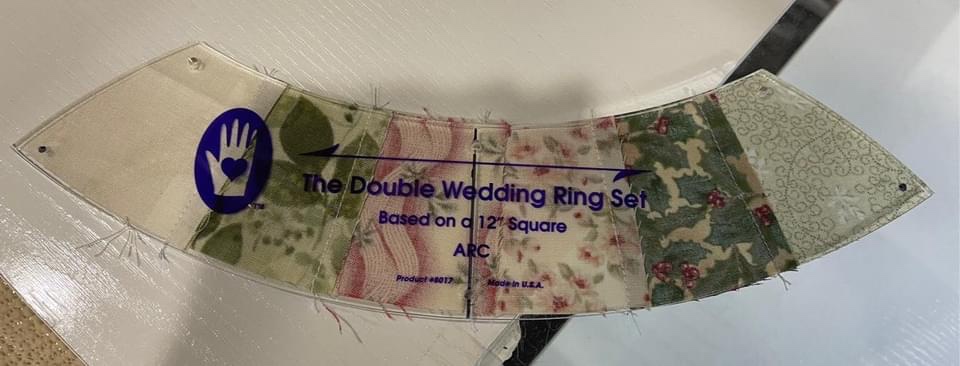
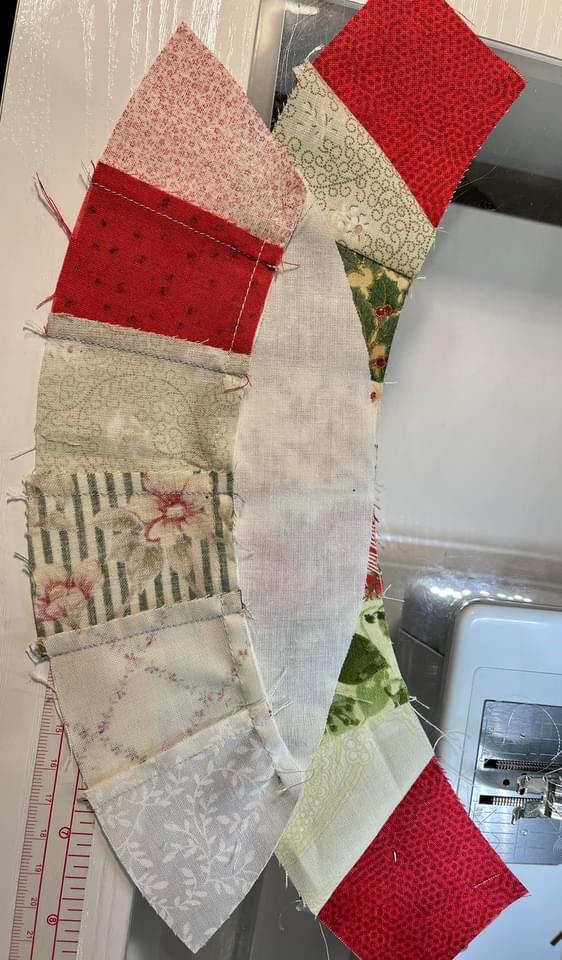
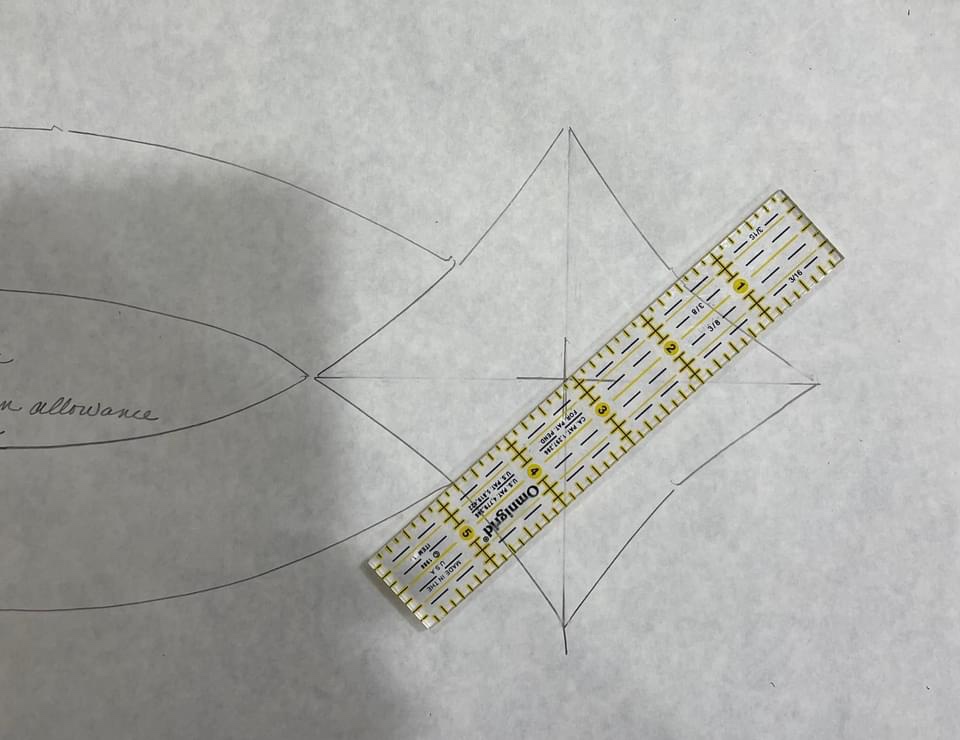
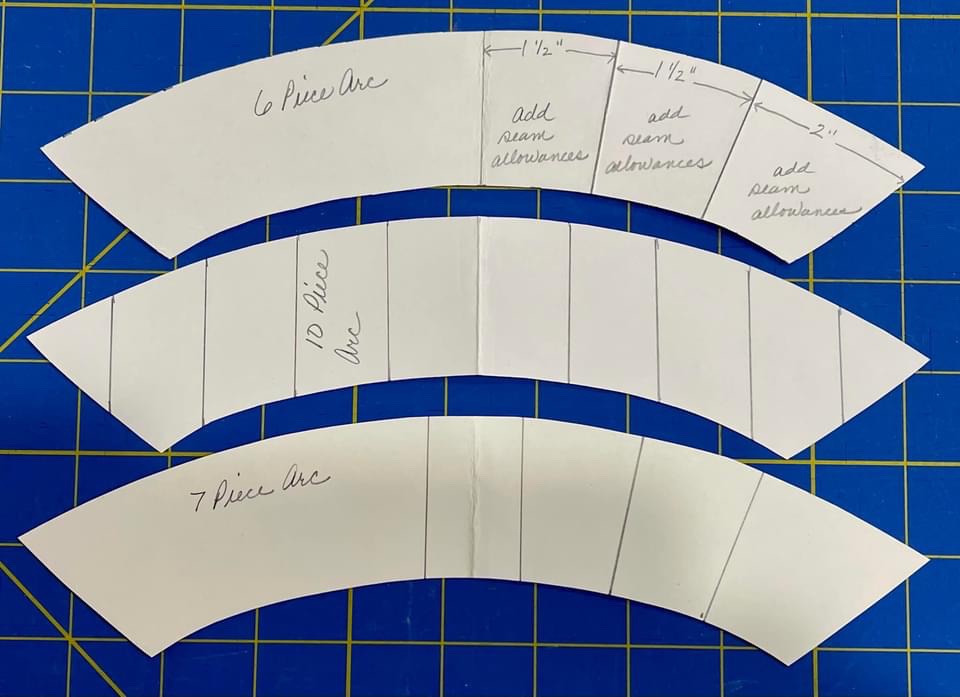
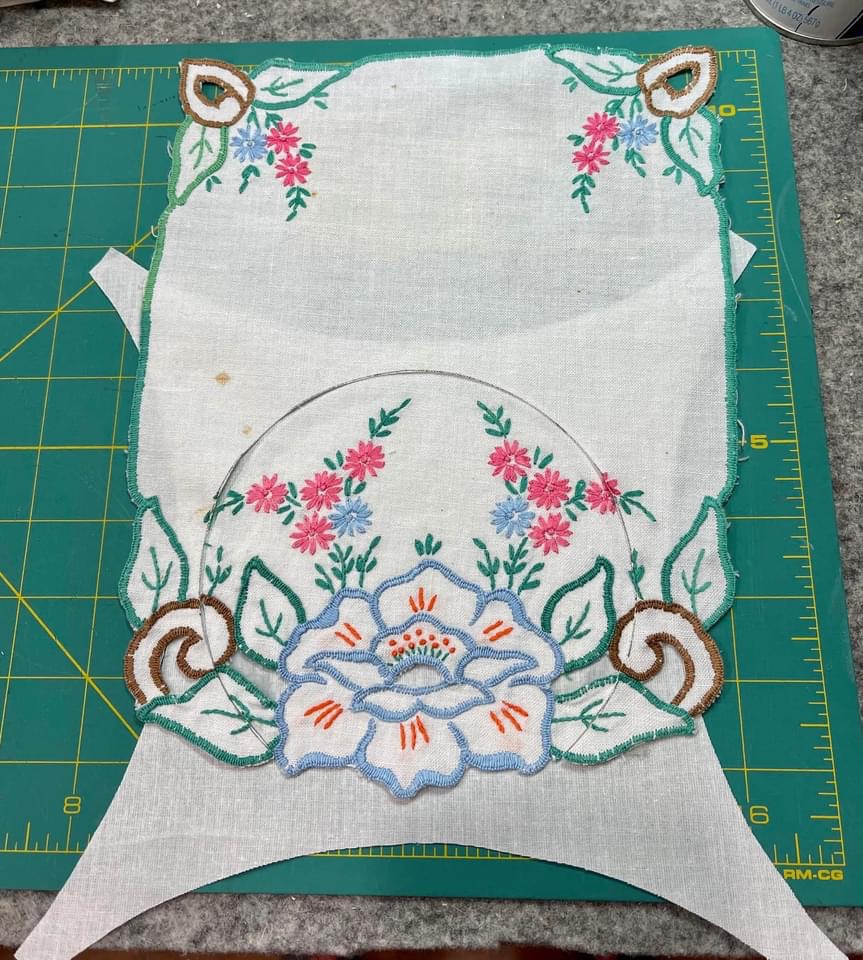
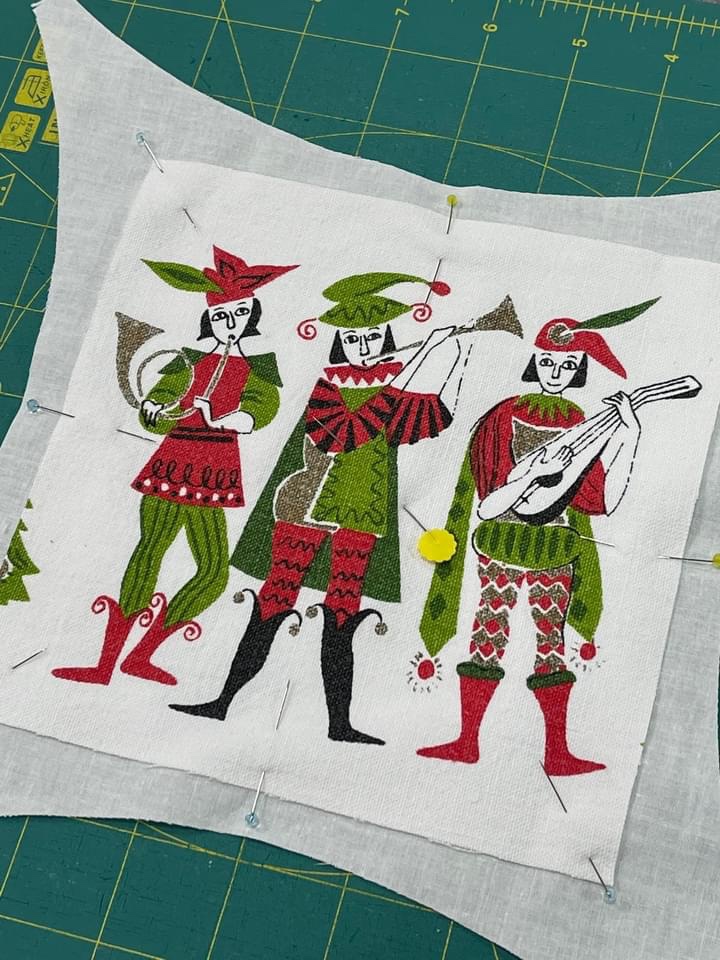
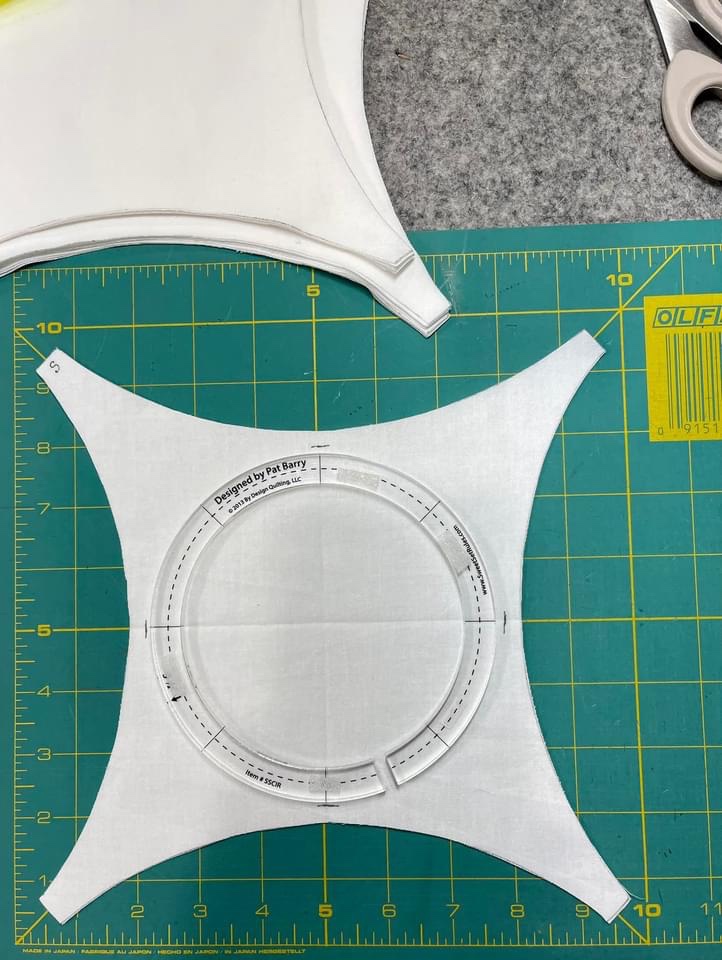
The Marti Michell templates make a 8 piece Arc making it easy to align the center seam of the arc with the finger pressed center mark of the block center piece. Pin to secure the position of the Football piece.

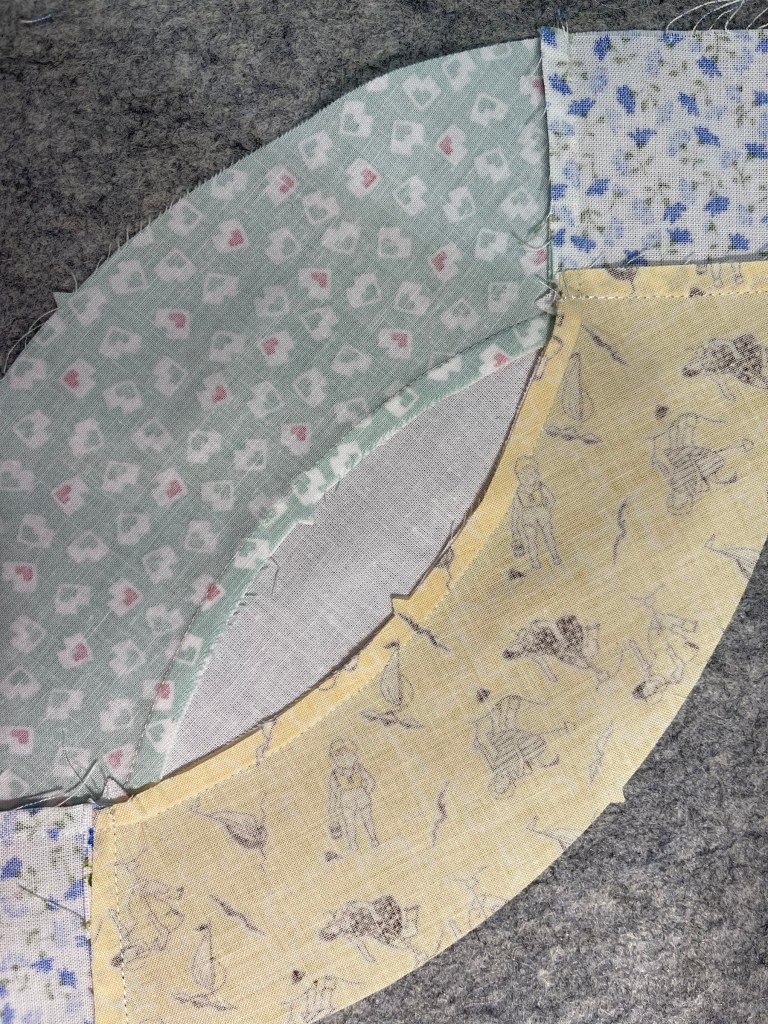
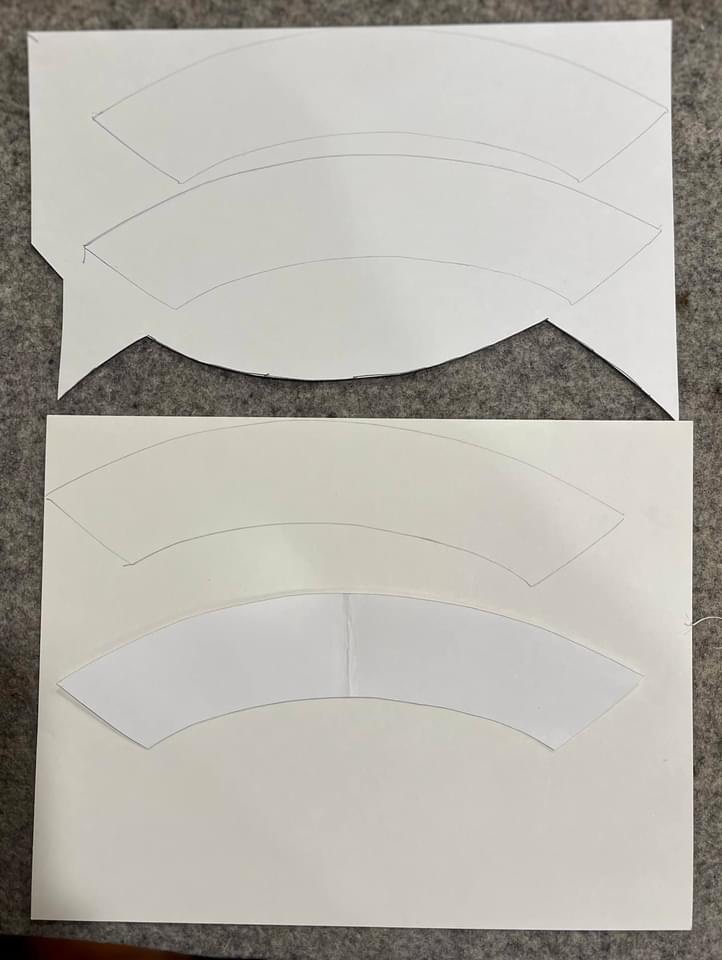
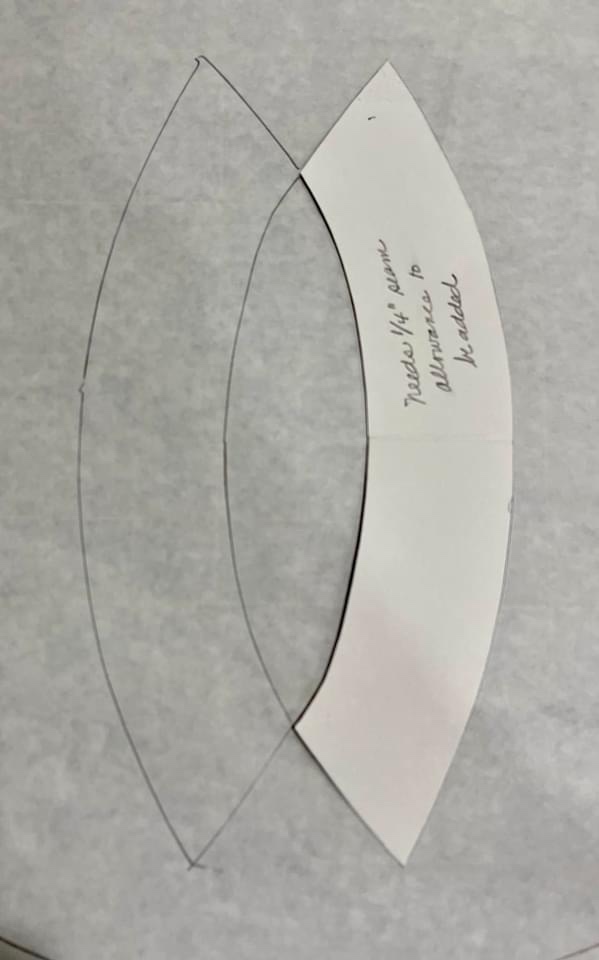
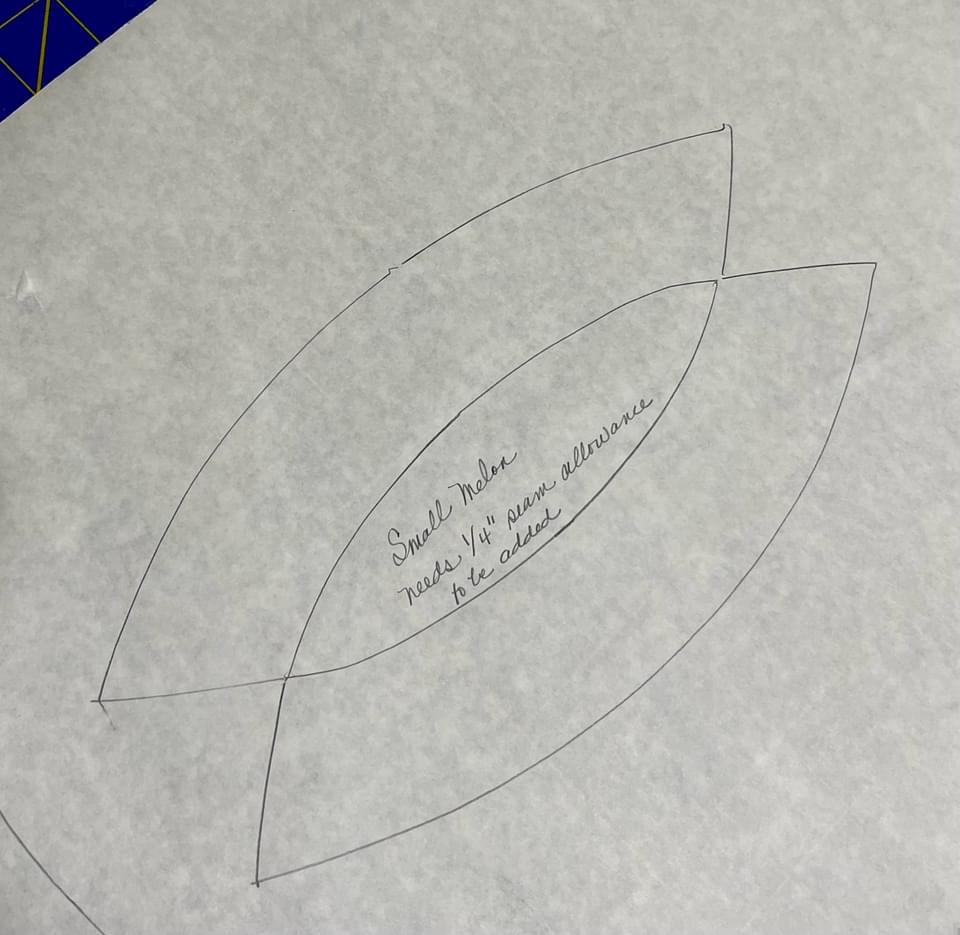
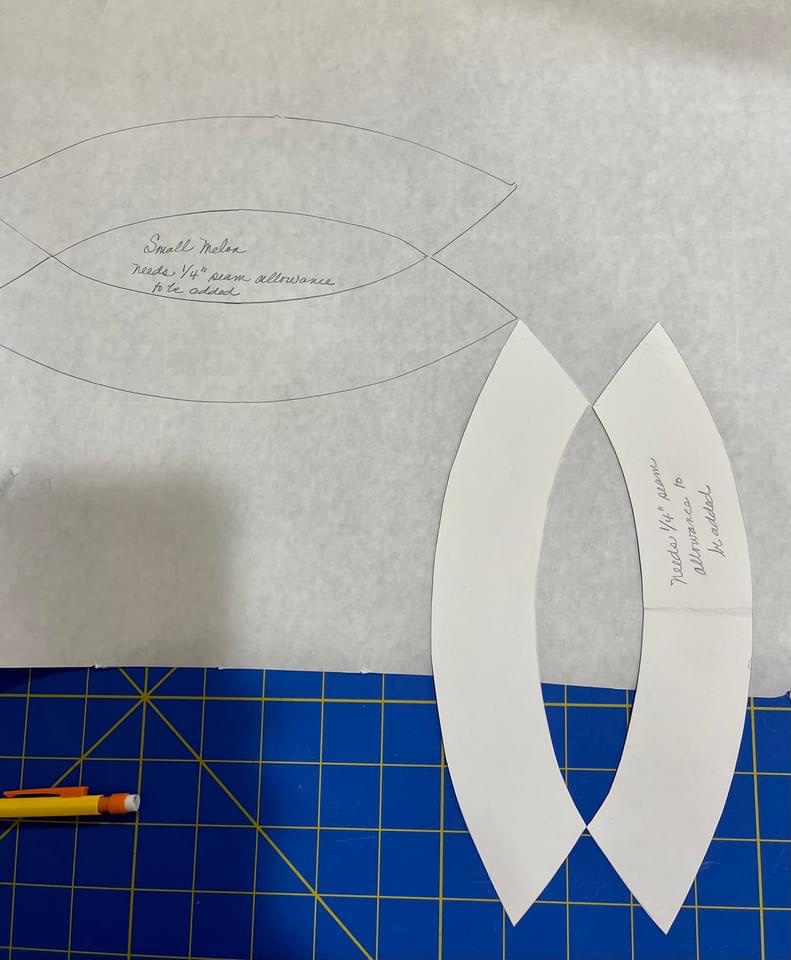
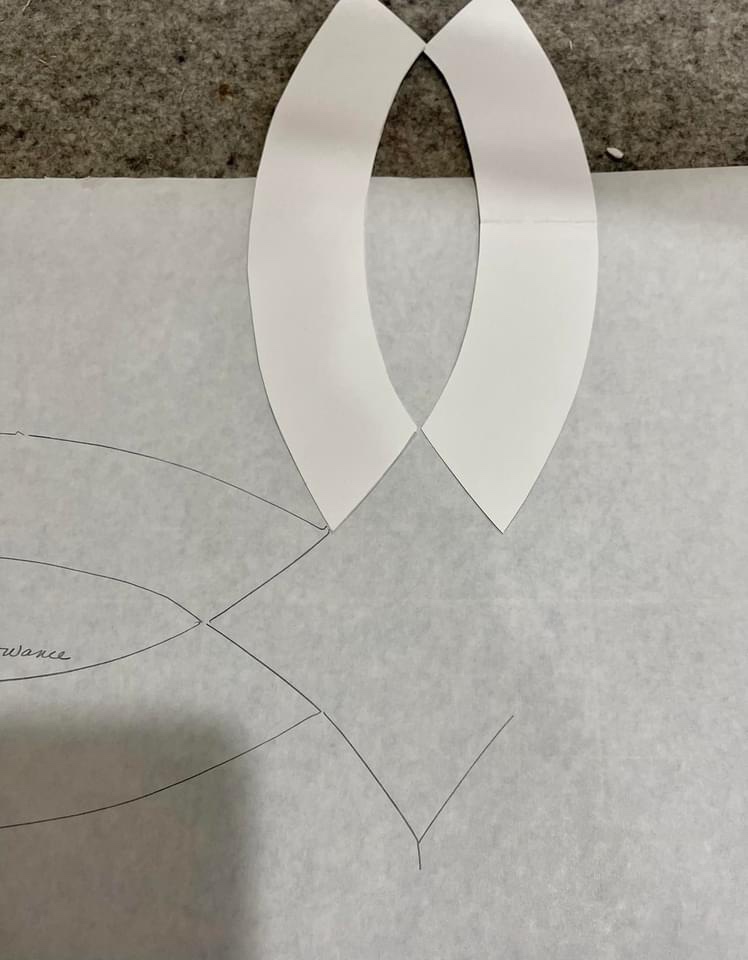
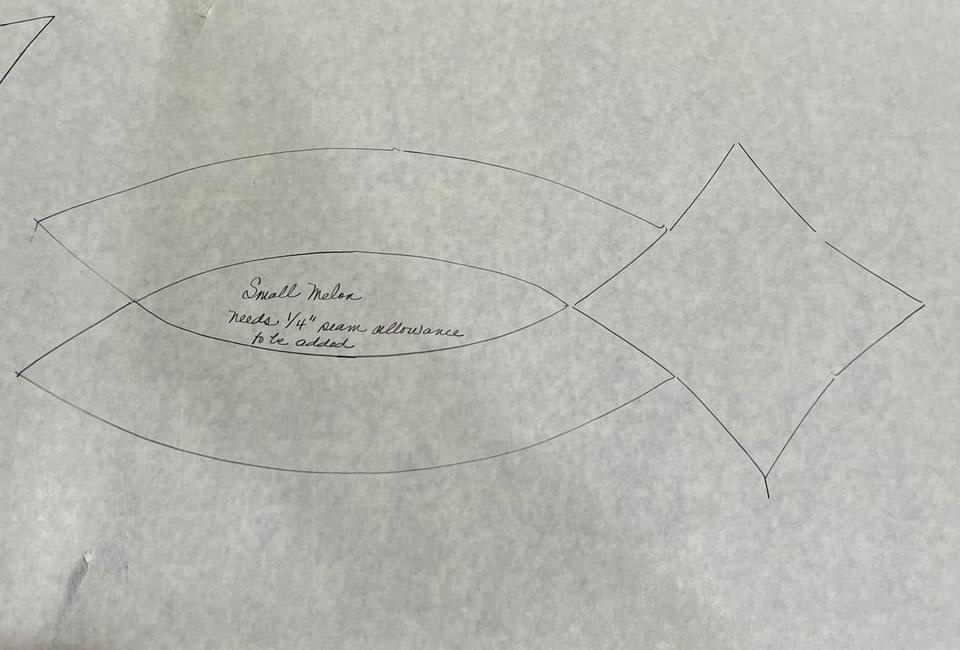
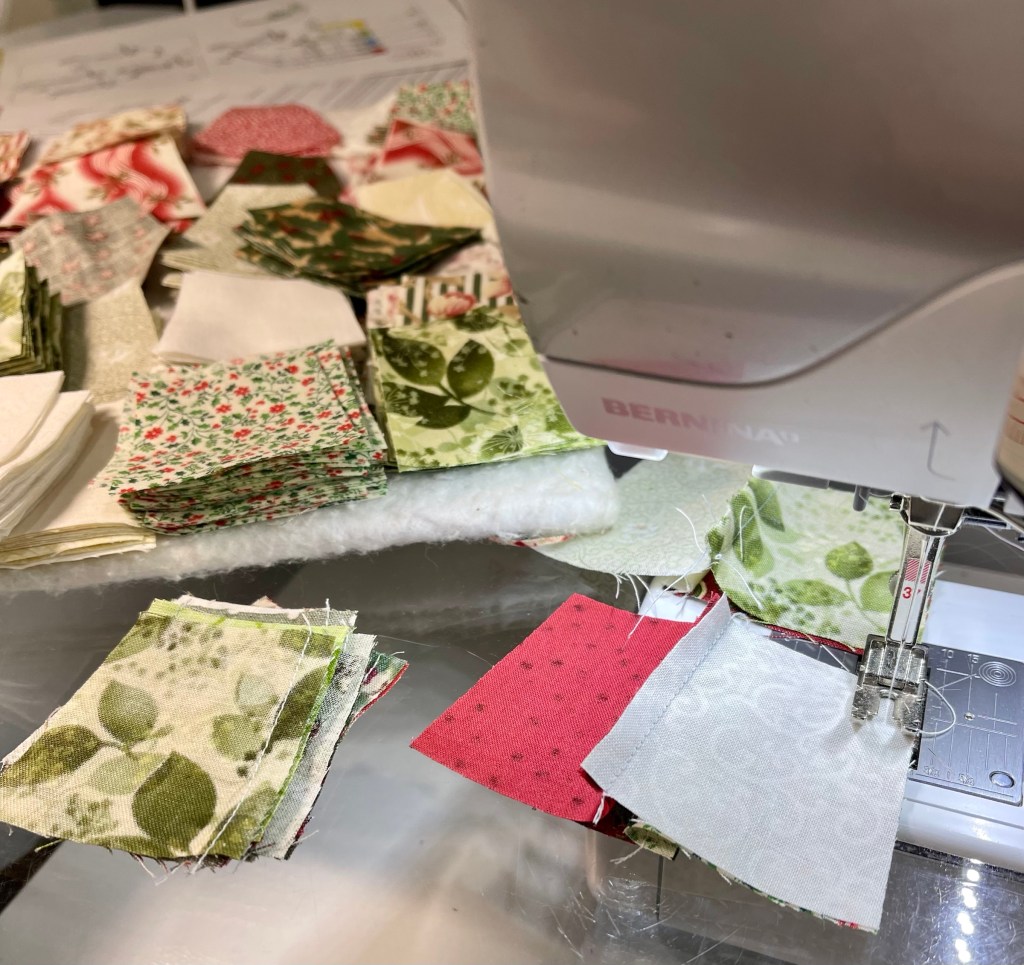
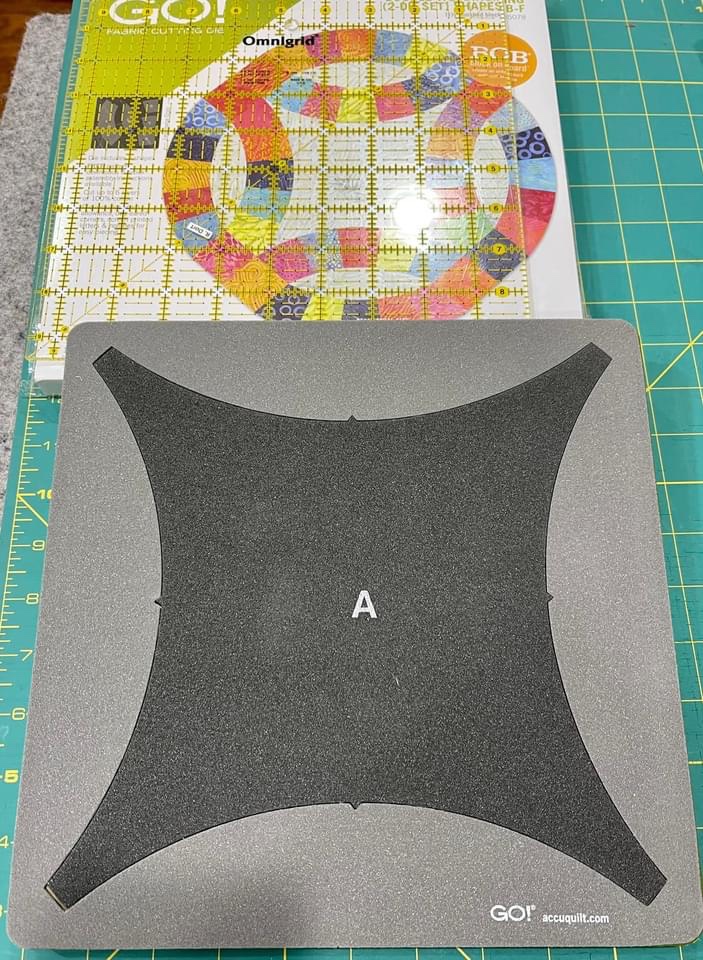
I used my Accuquilt Go and the DWR Dies to cut my solid arc quilt pieces and was fortunate to have the centers marked already by the tiny little wedges.

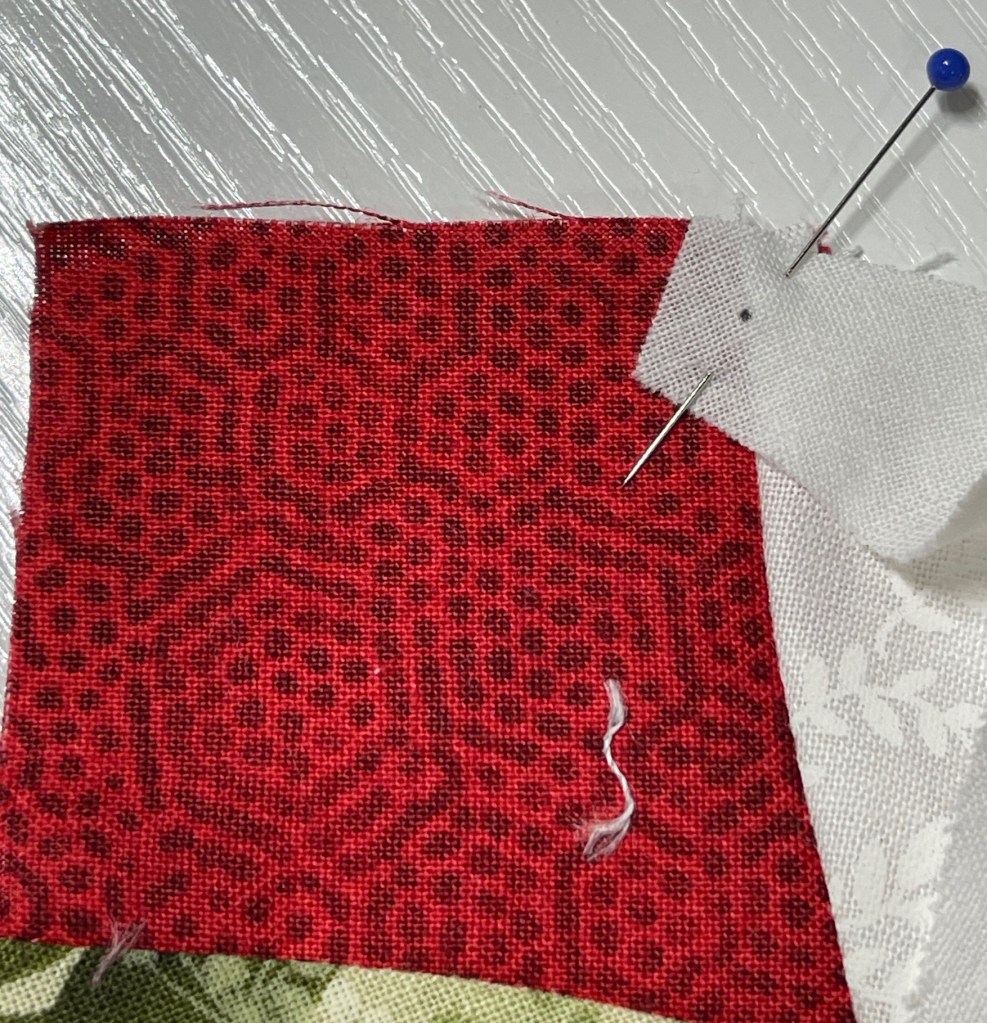
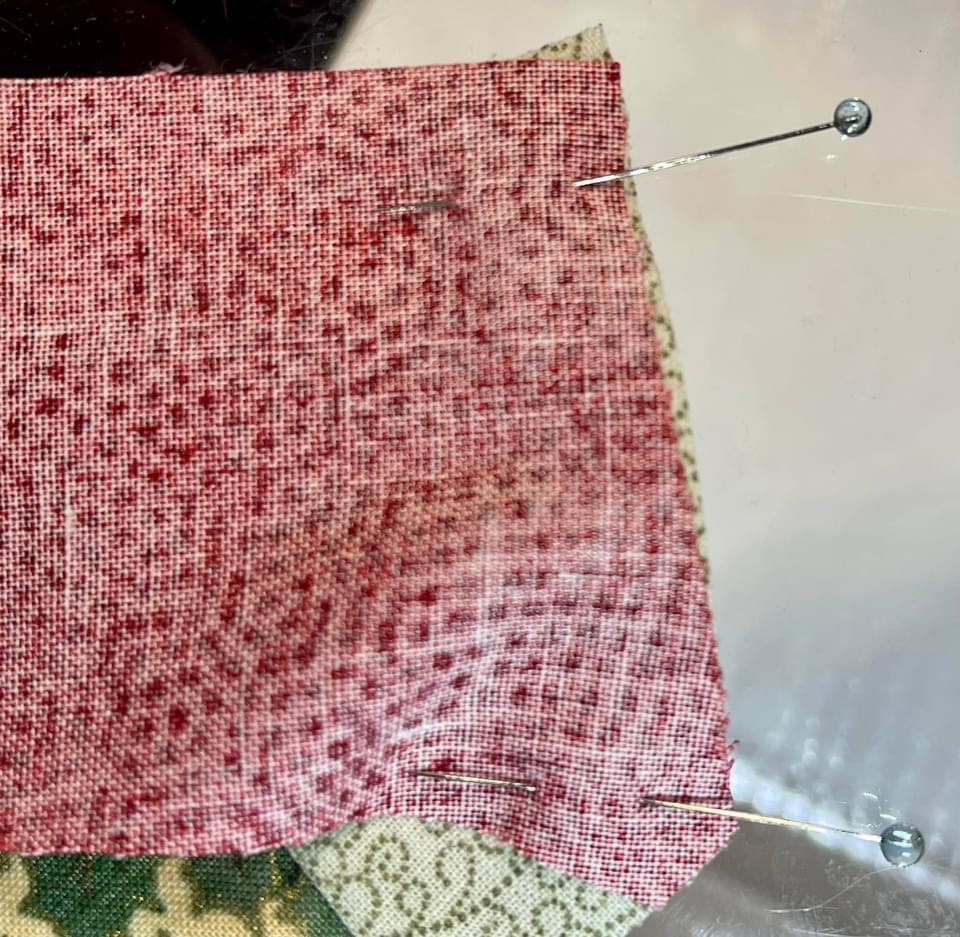
You can use just three pins or a multitude of pins to secure your Football piece to the block center. Do what works for you!

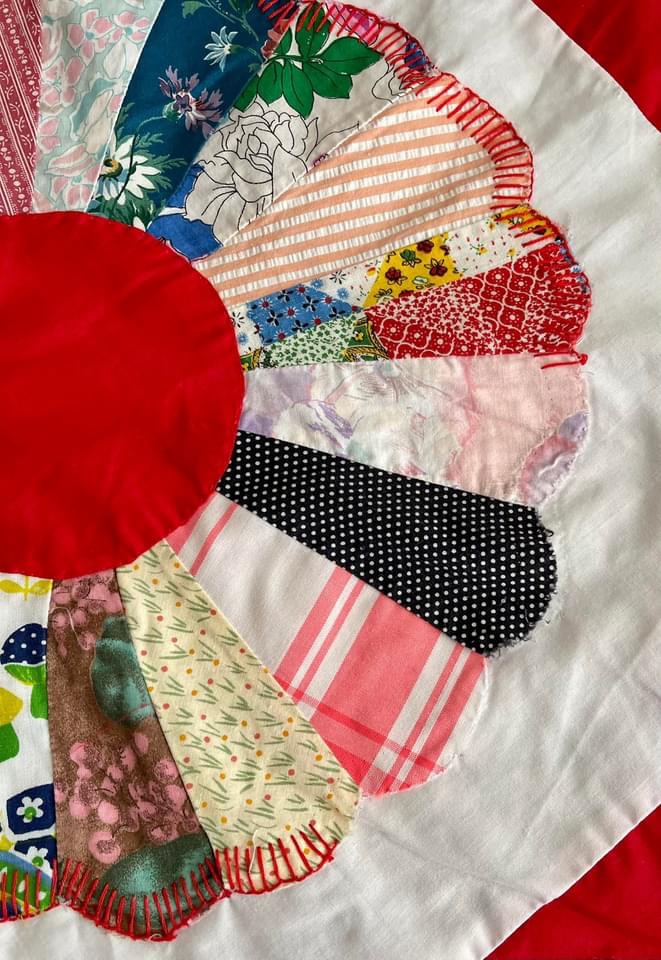
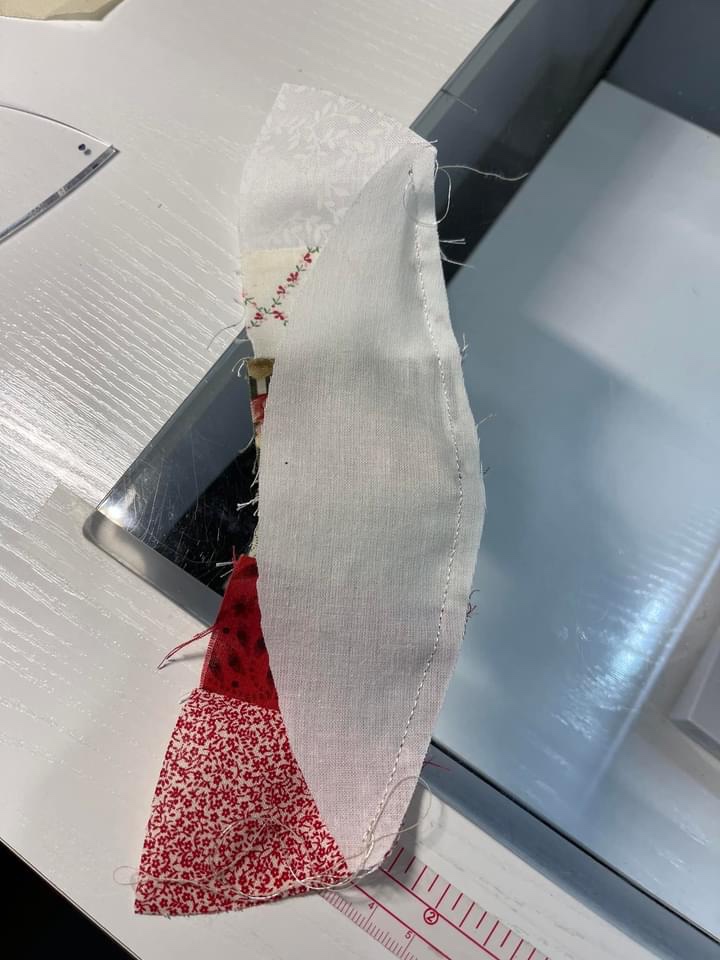
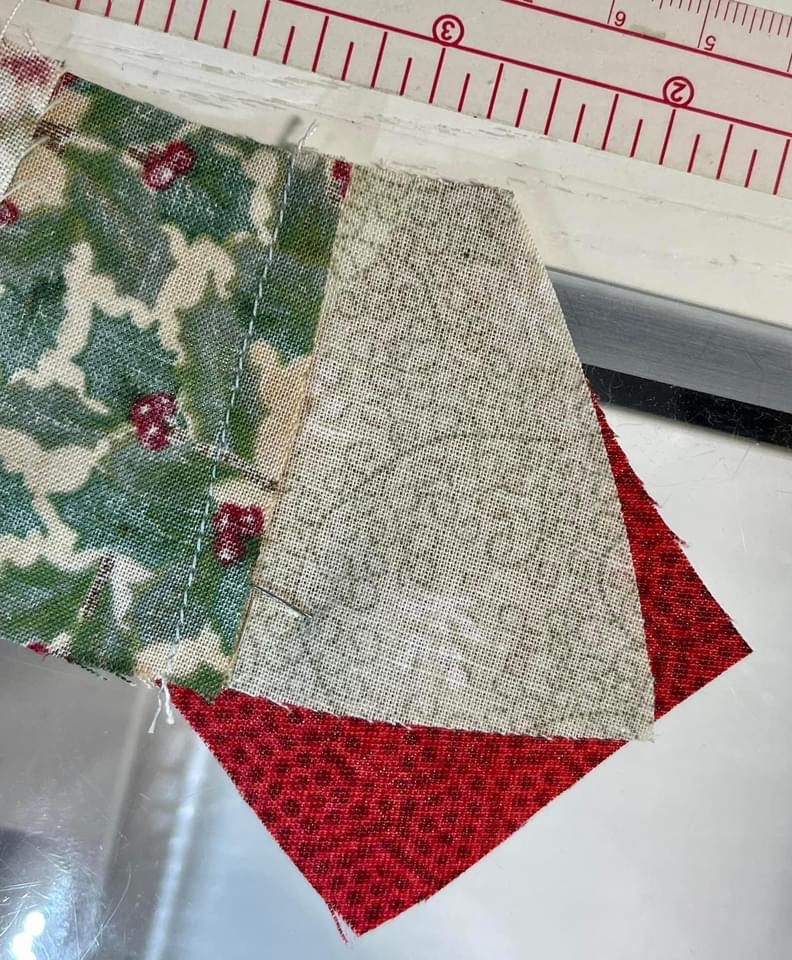
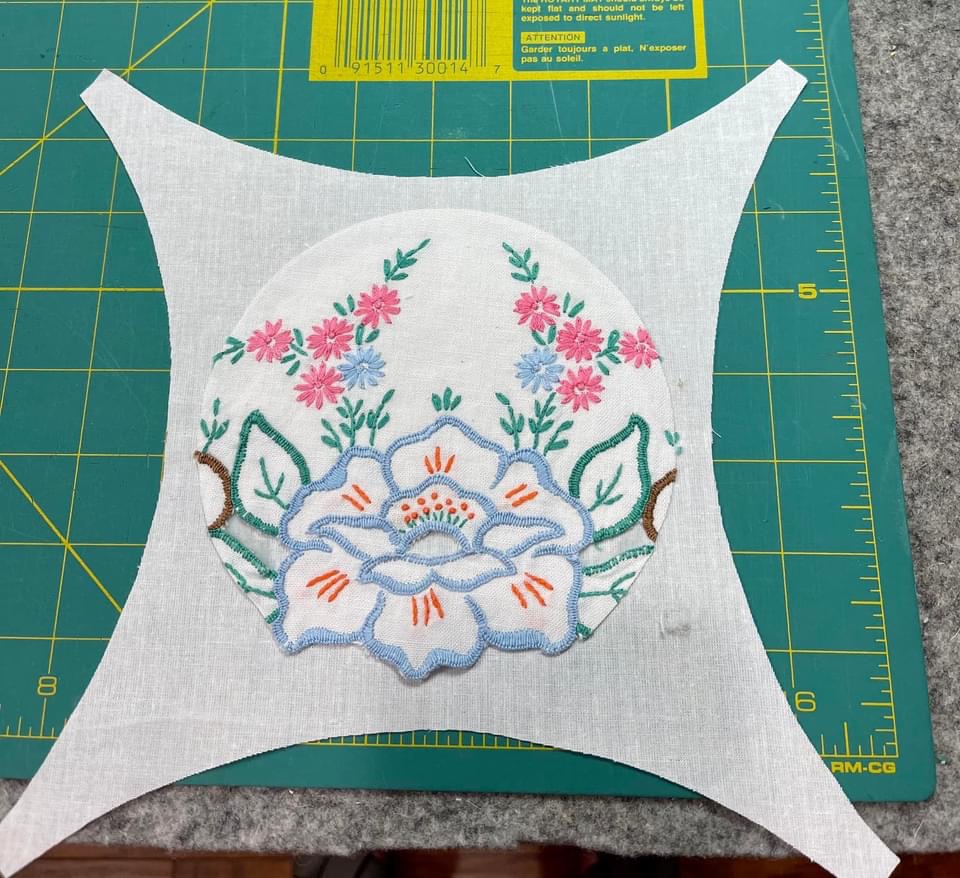
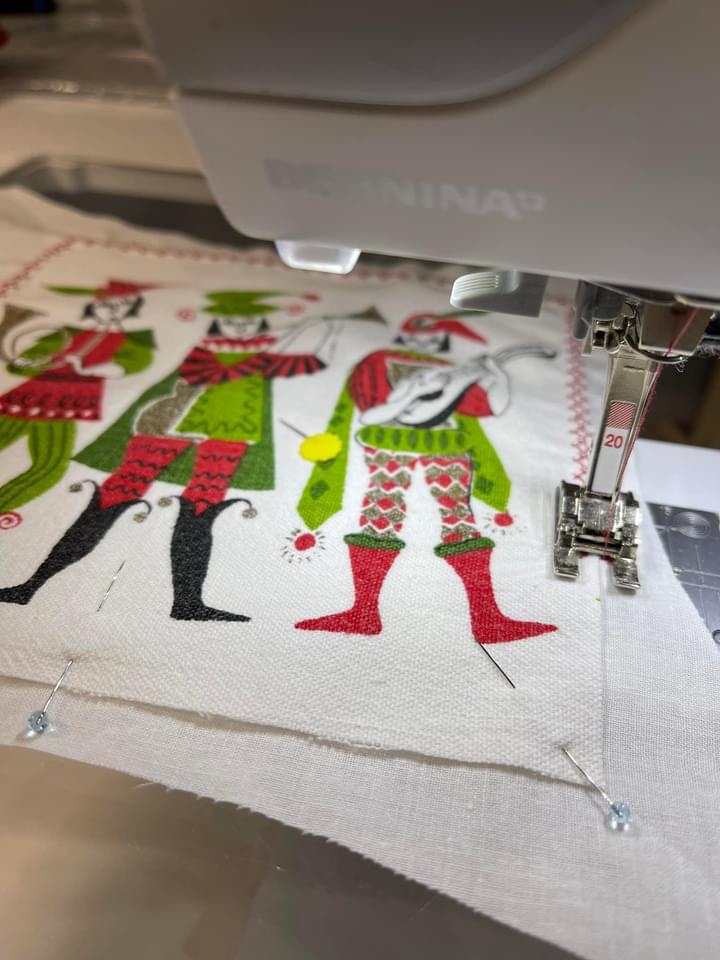
You can stitch football side up or melon side up, again find what you’re comfortable with. I chose football up because it allowed me to be sure that the arc seam allowances stayed in the direction they were pressed.

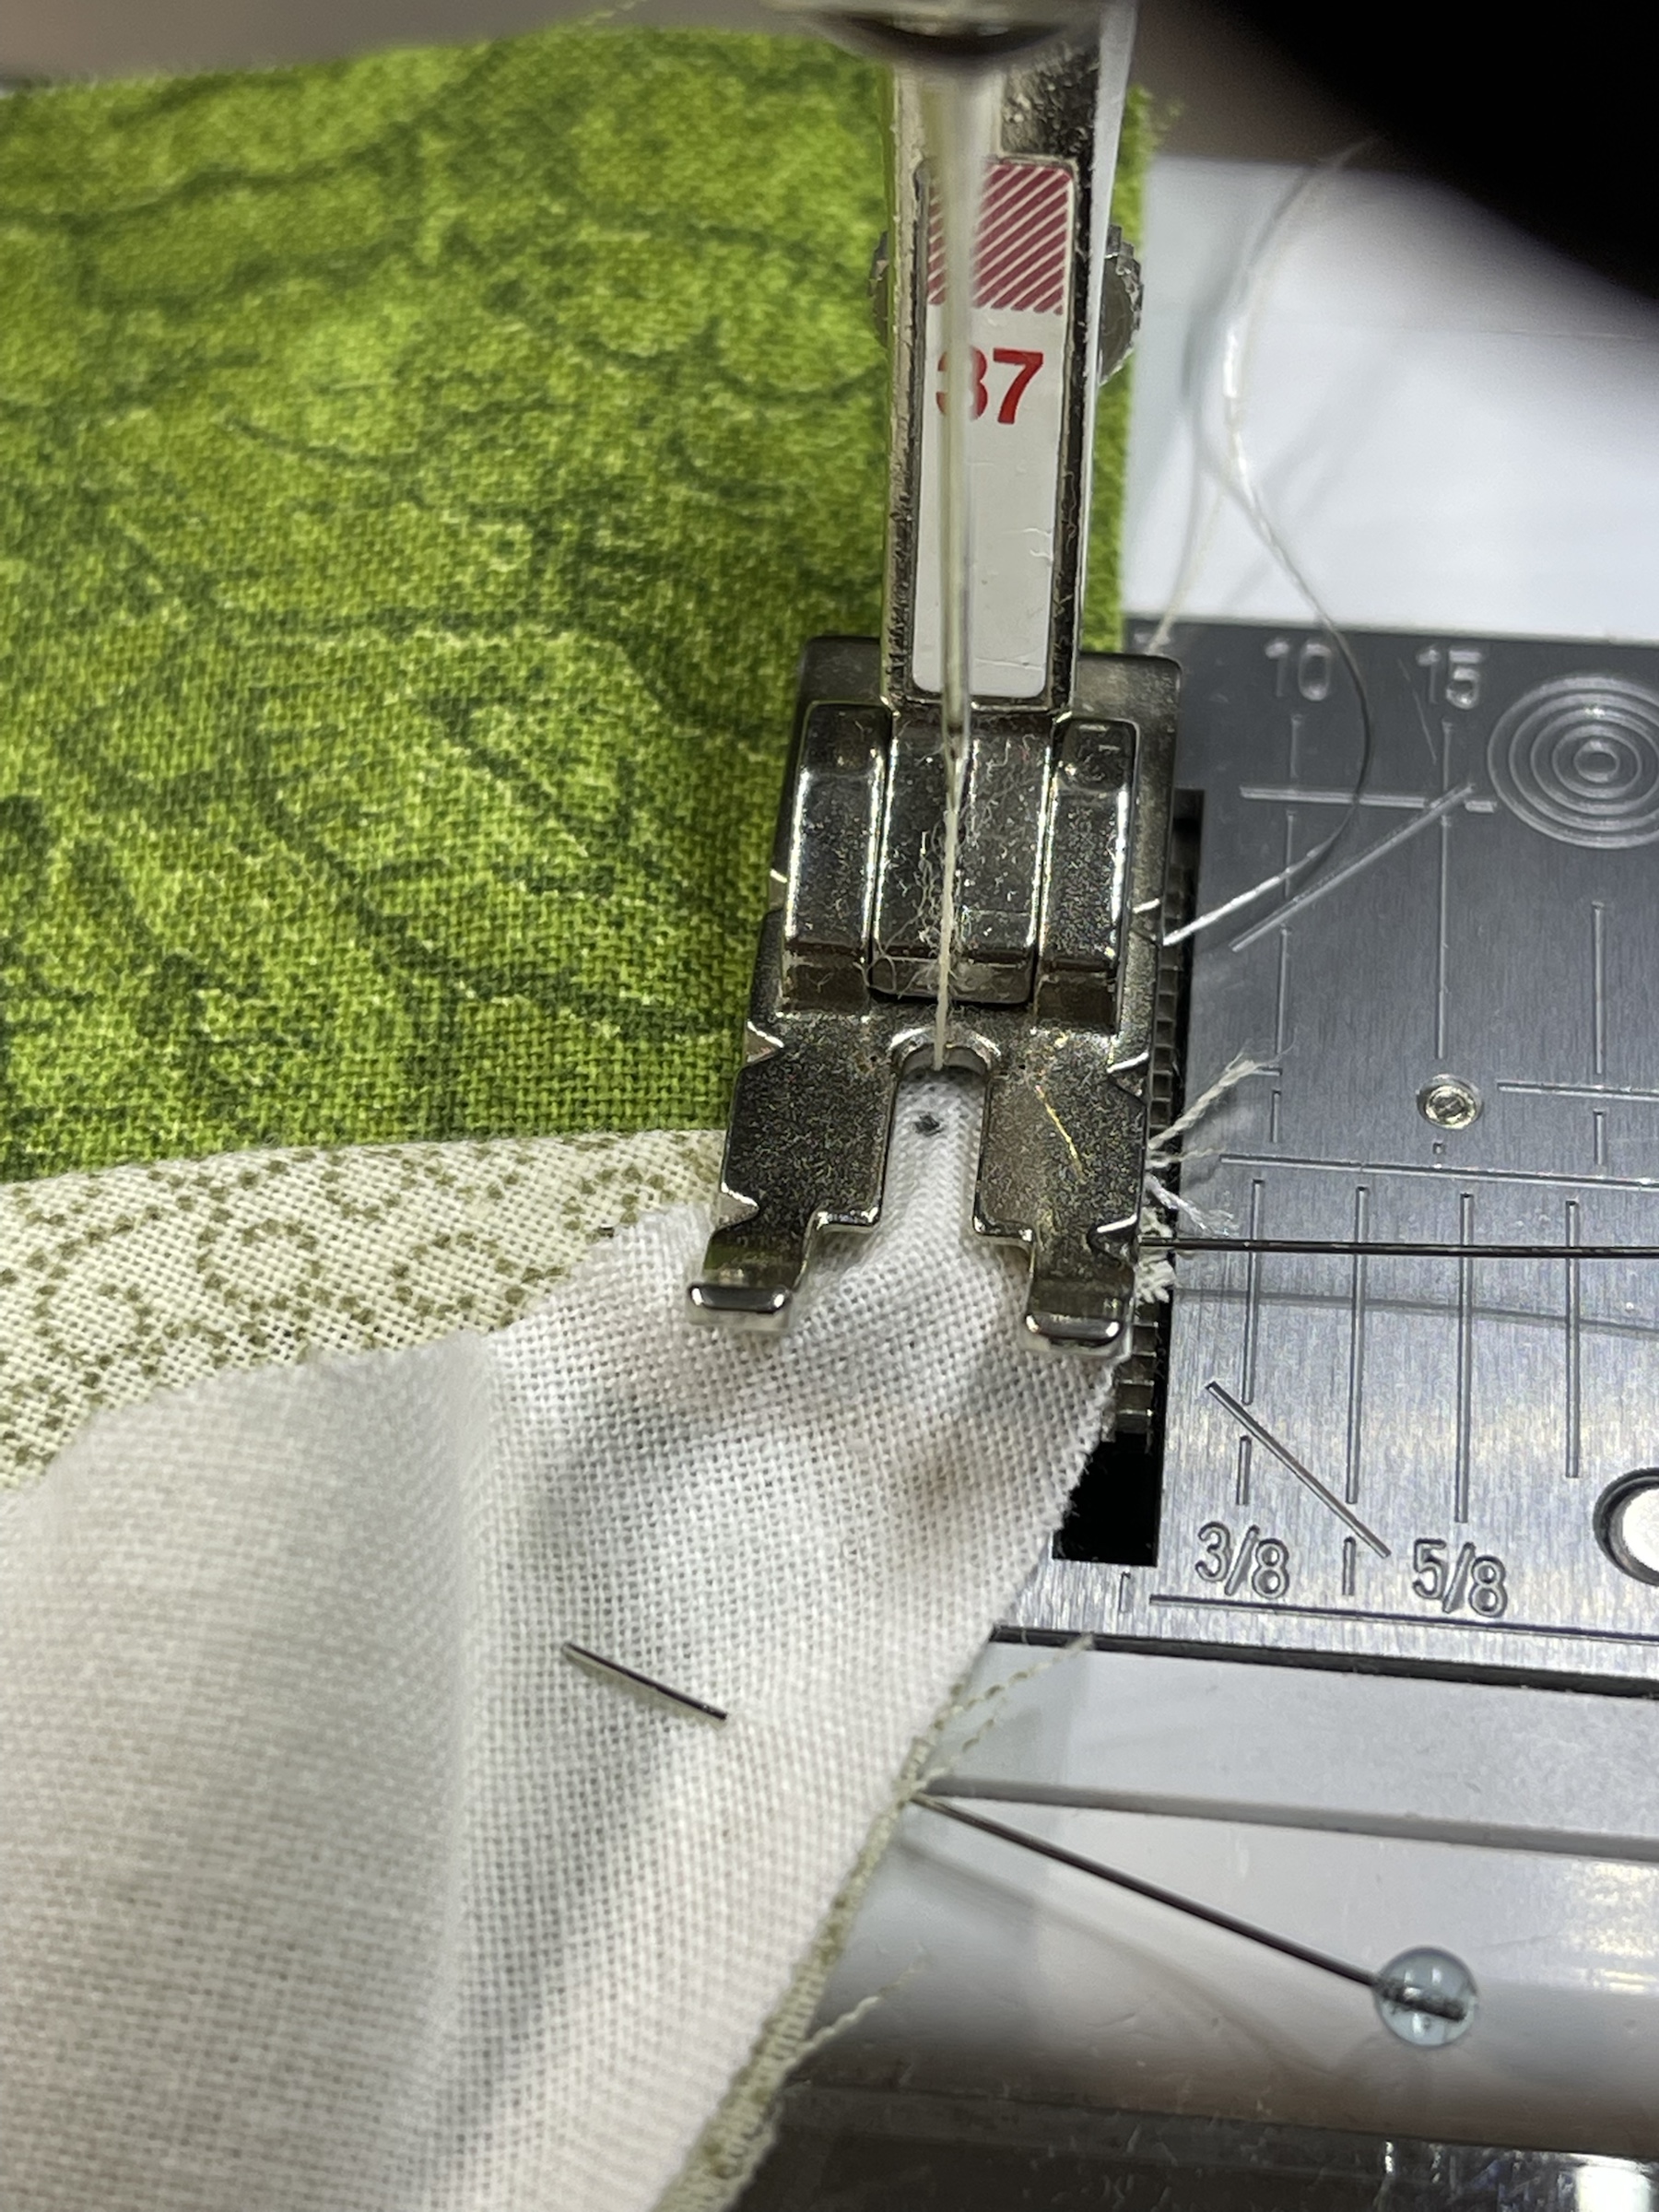
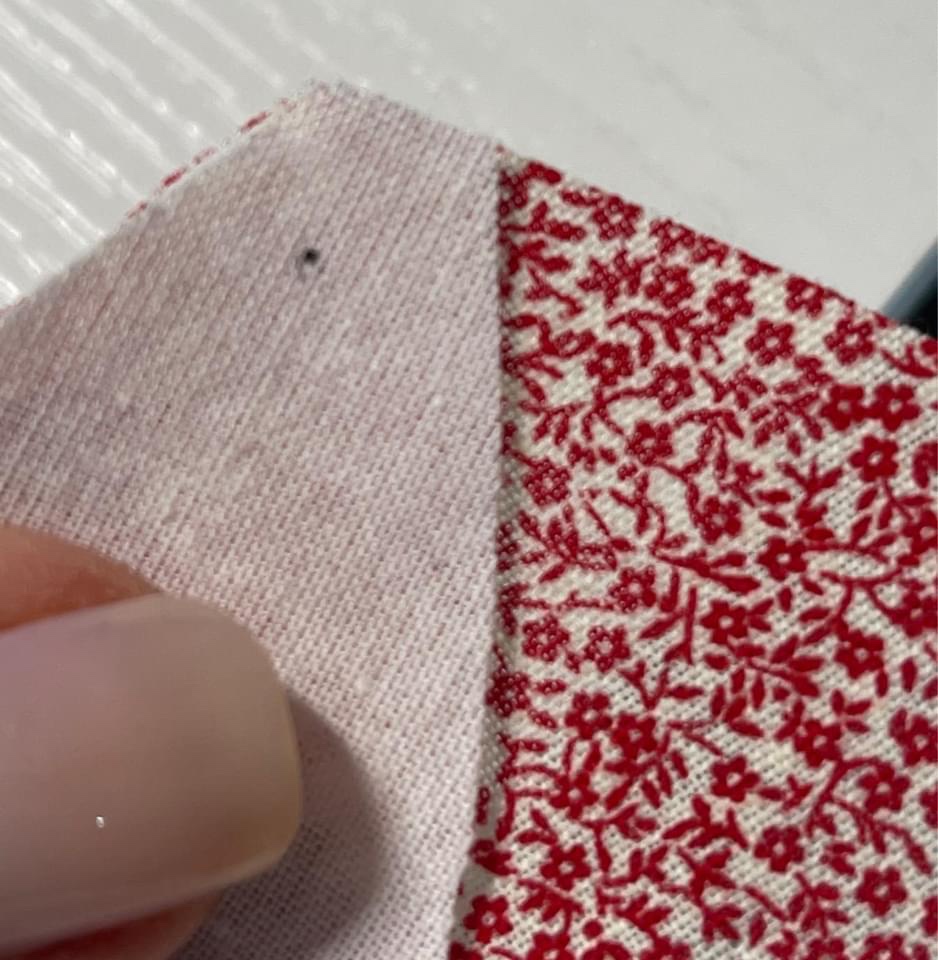
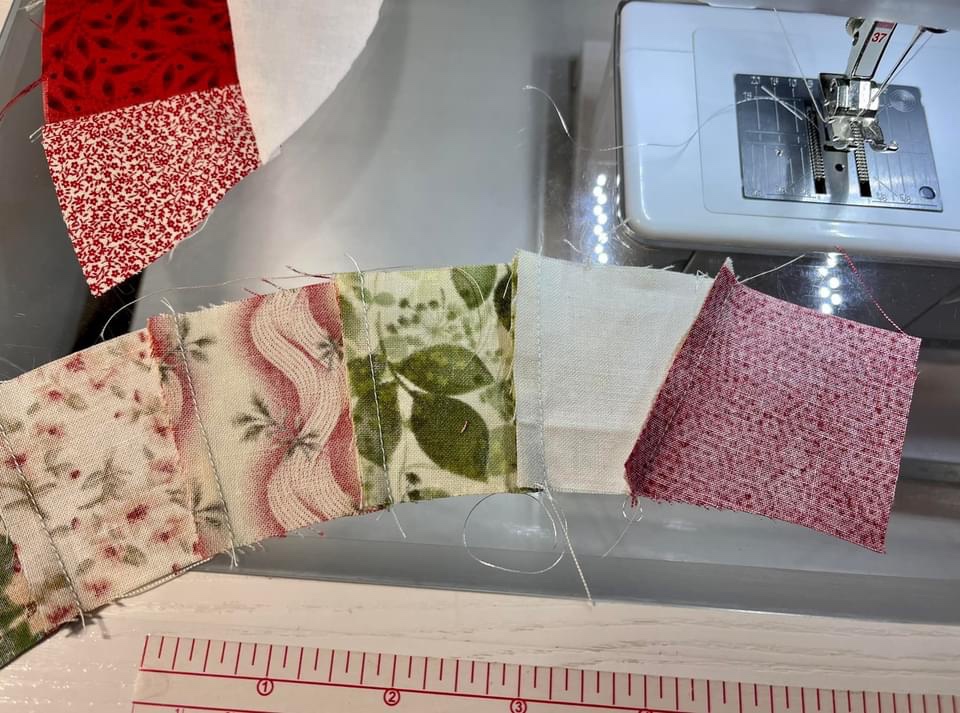
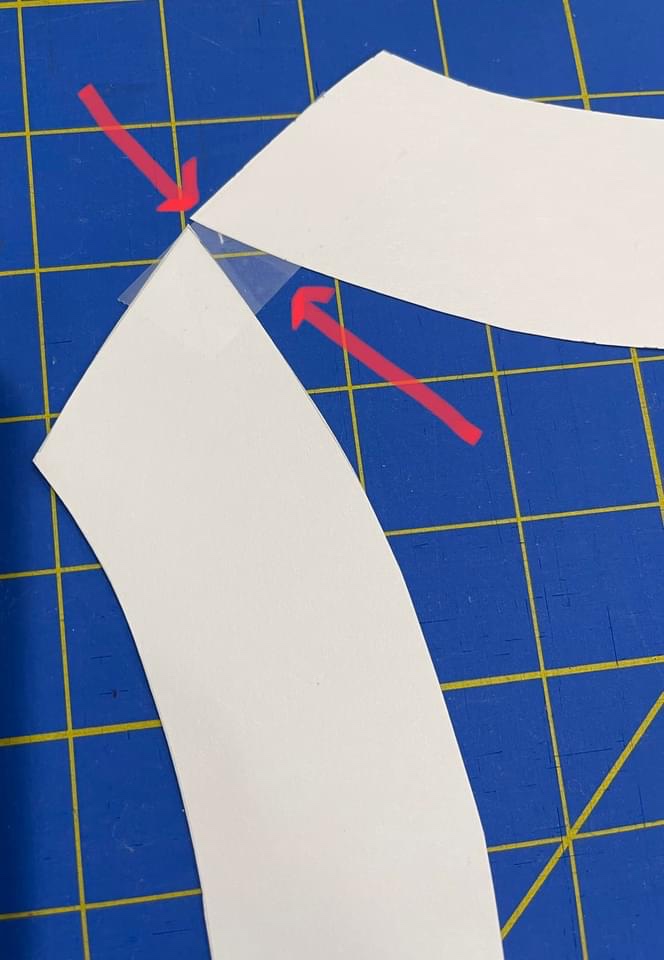
If you are sewing Football side down this is what it will look like as you begin to sew. Remember, begin your stitching at the pre-marked dot from your templates.

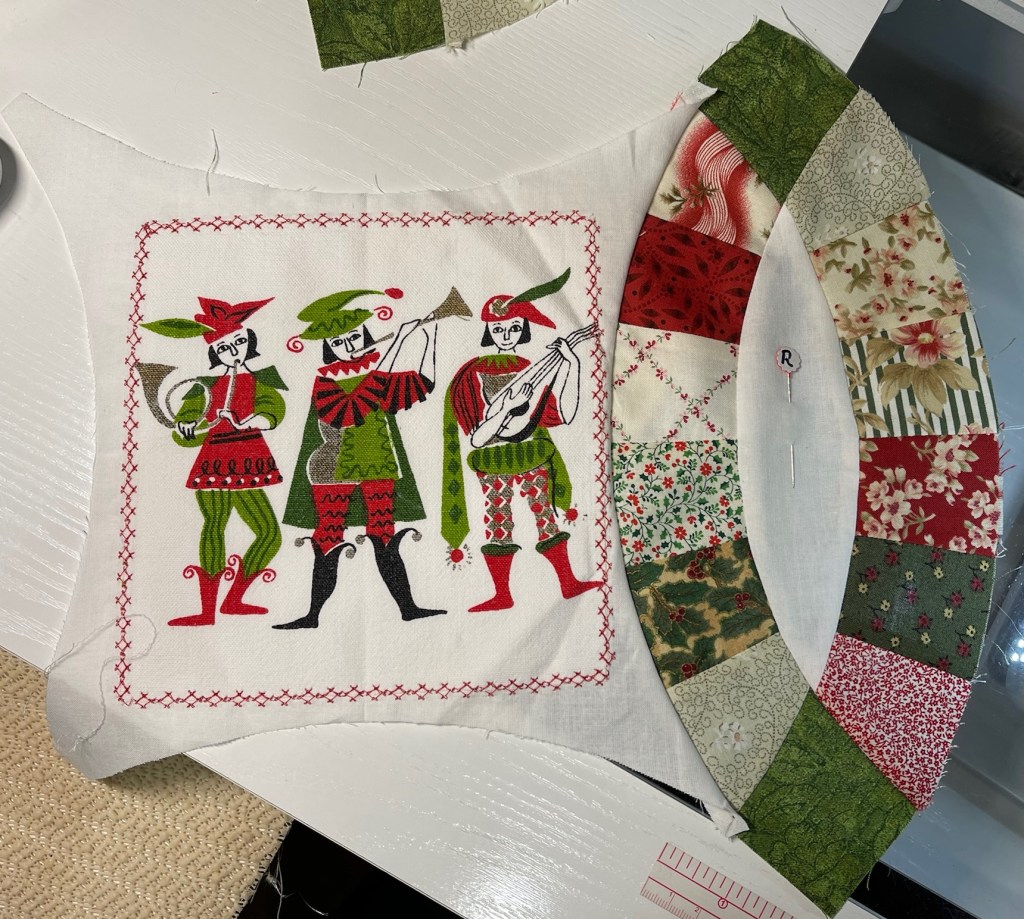
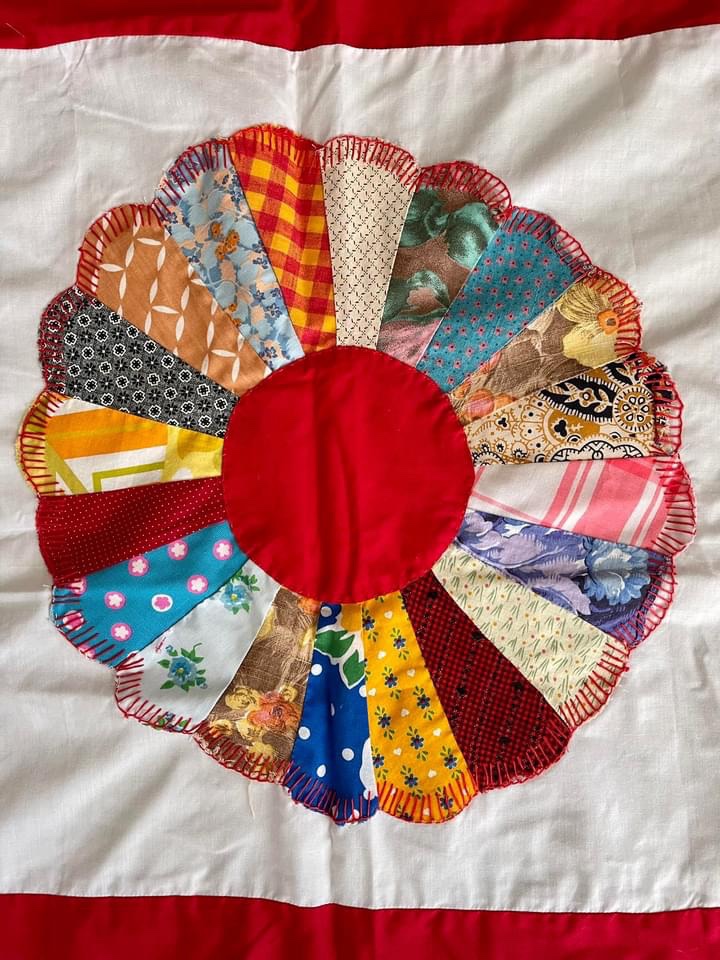
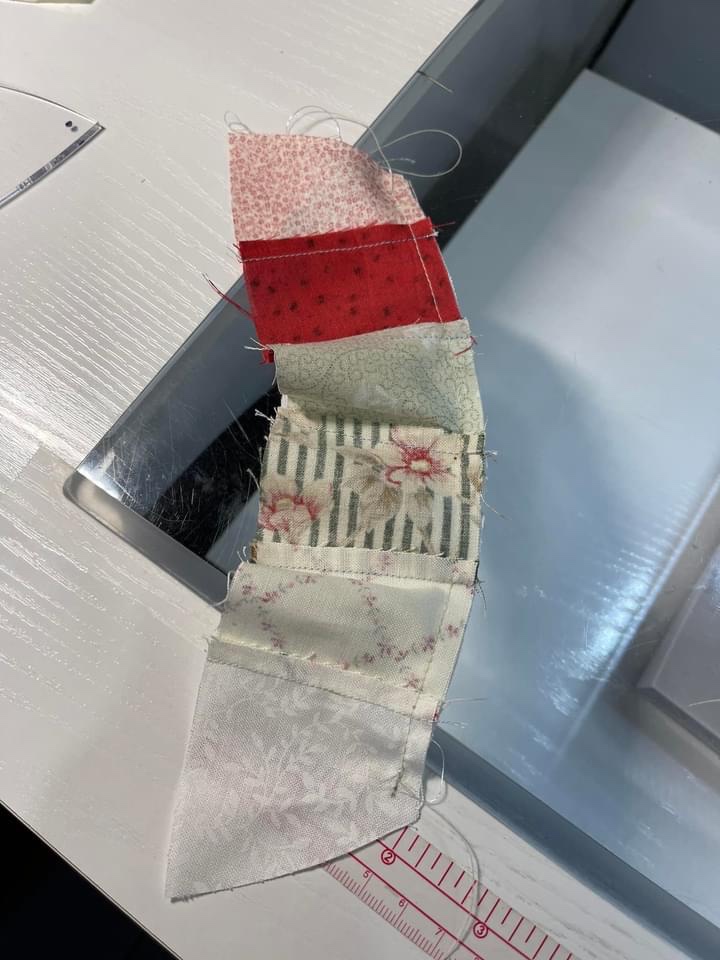
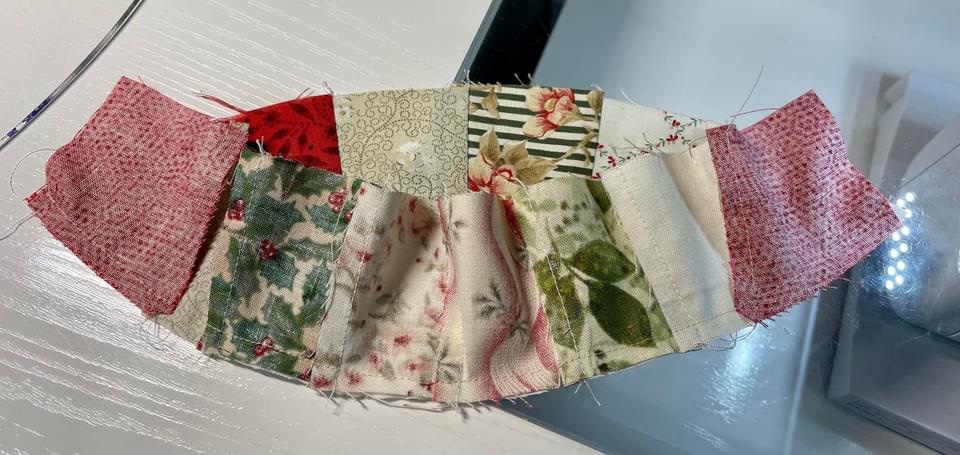
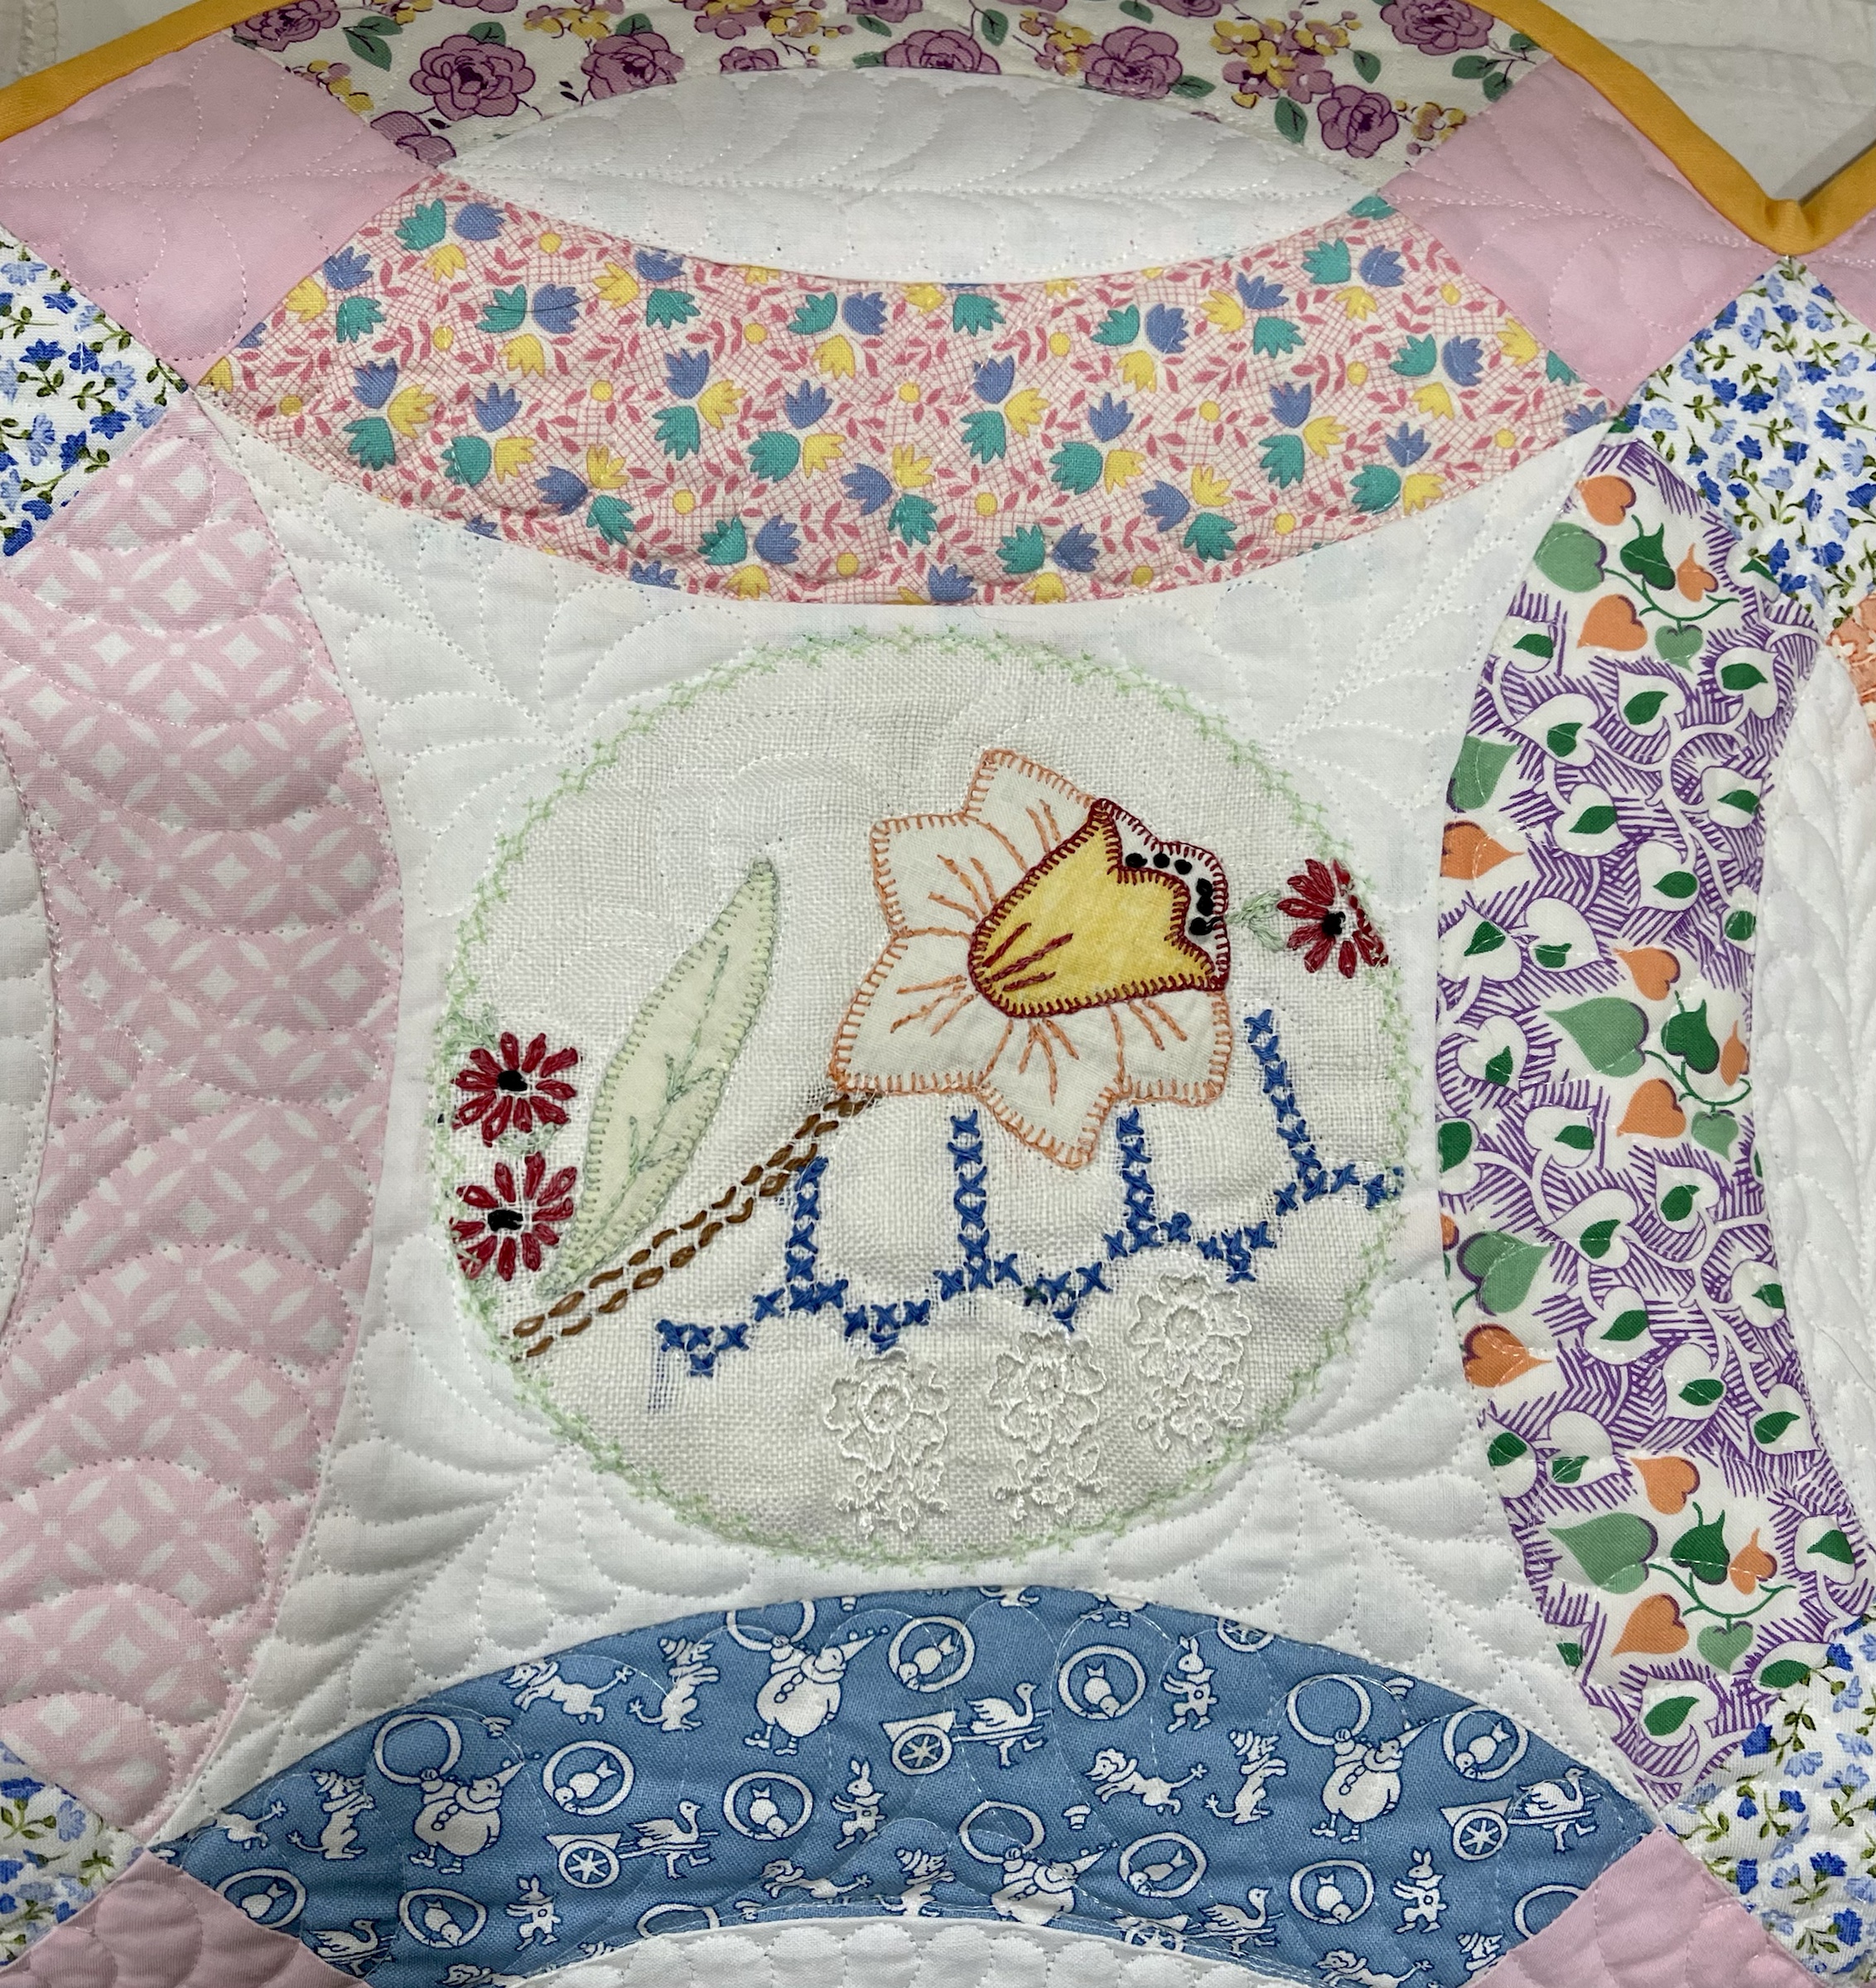
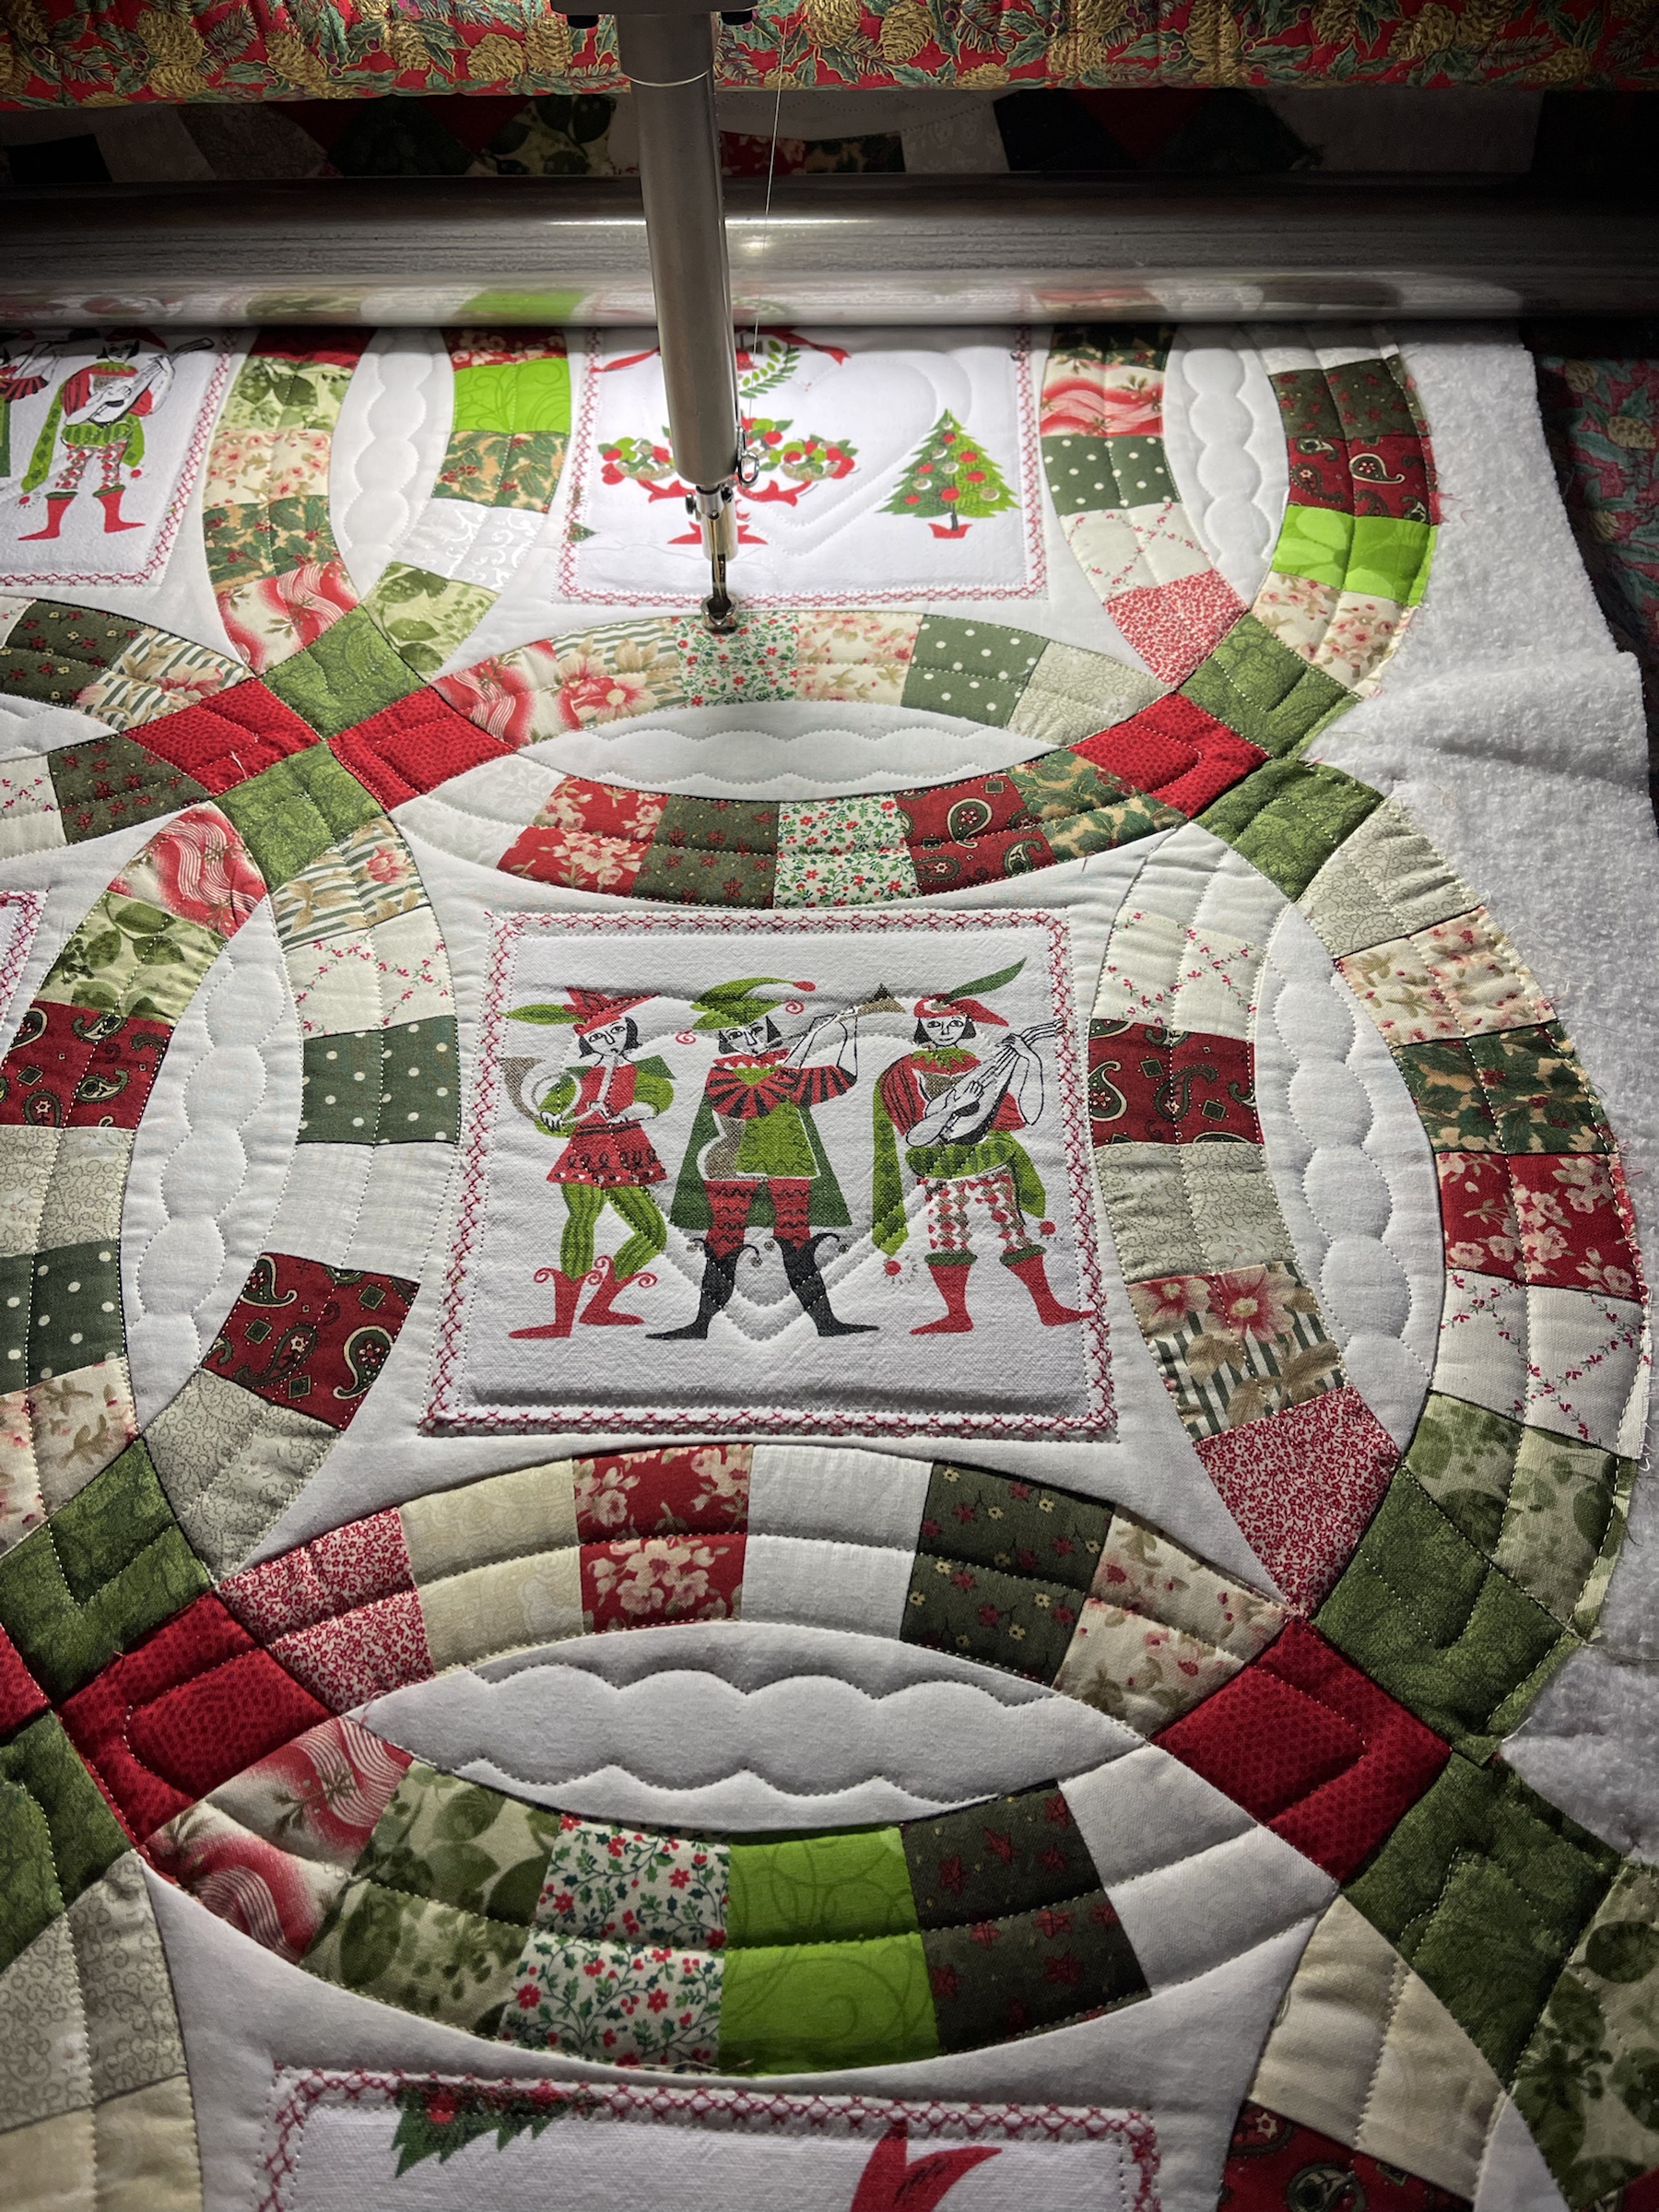
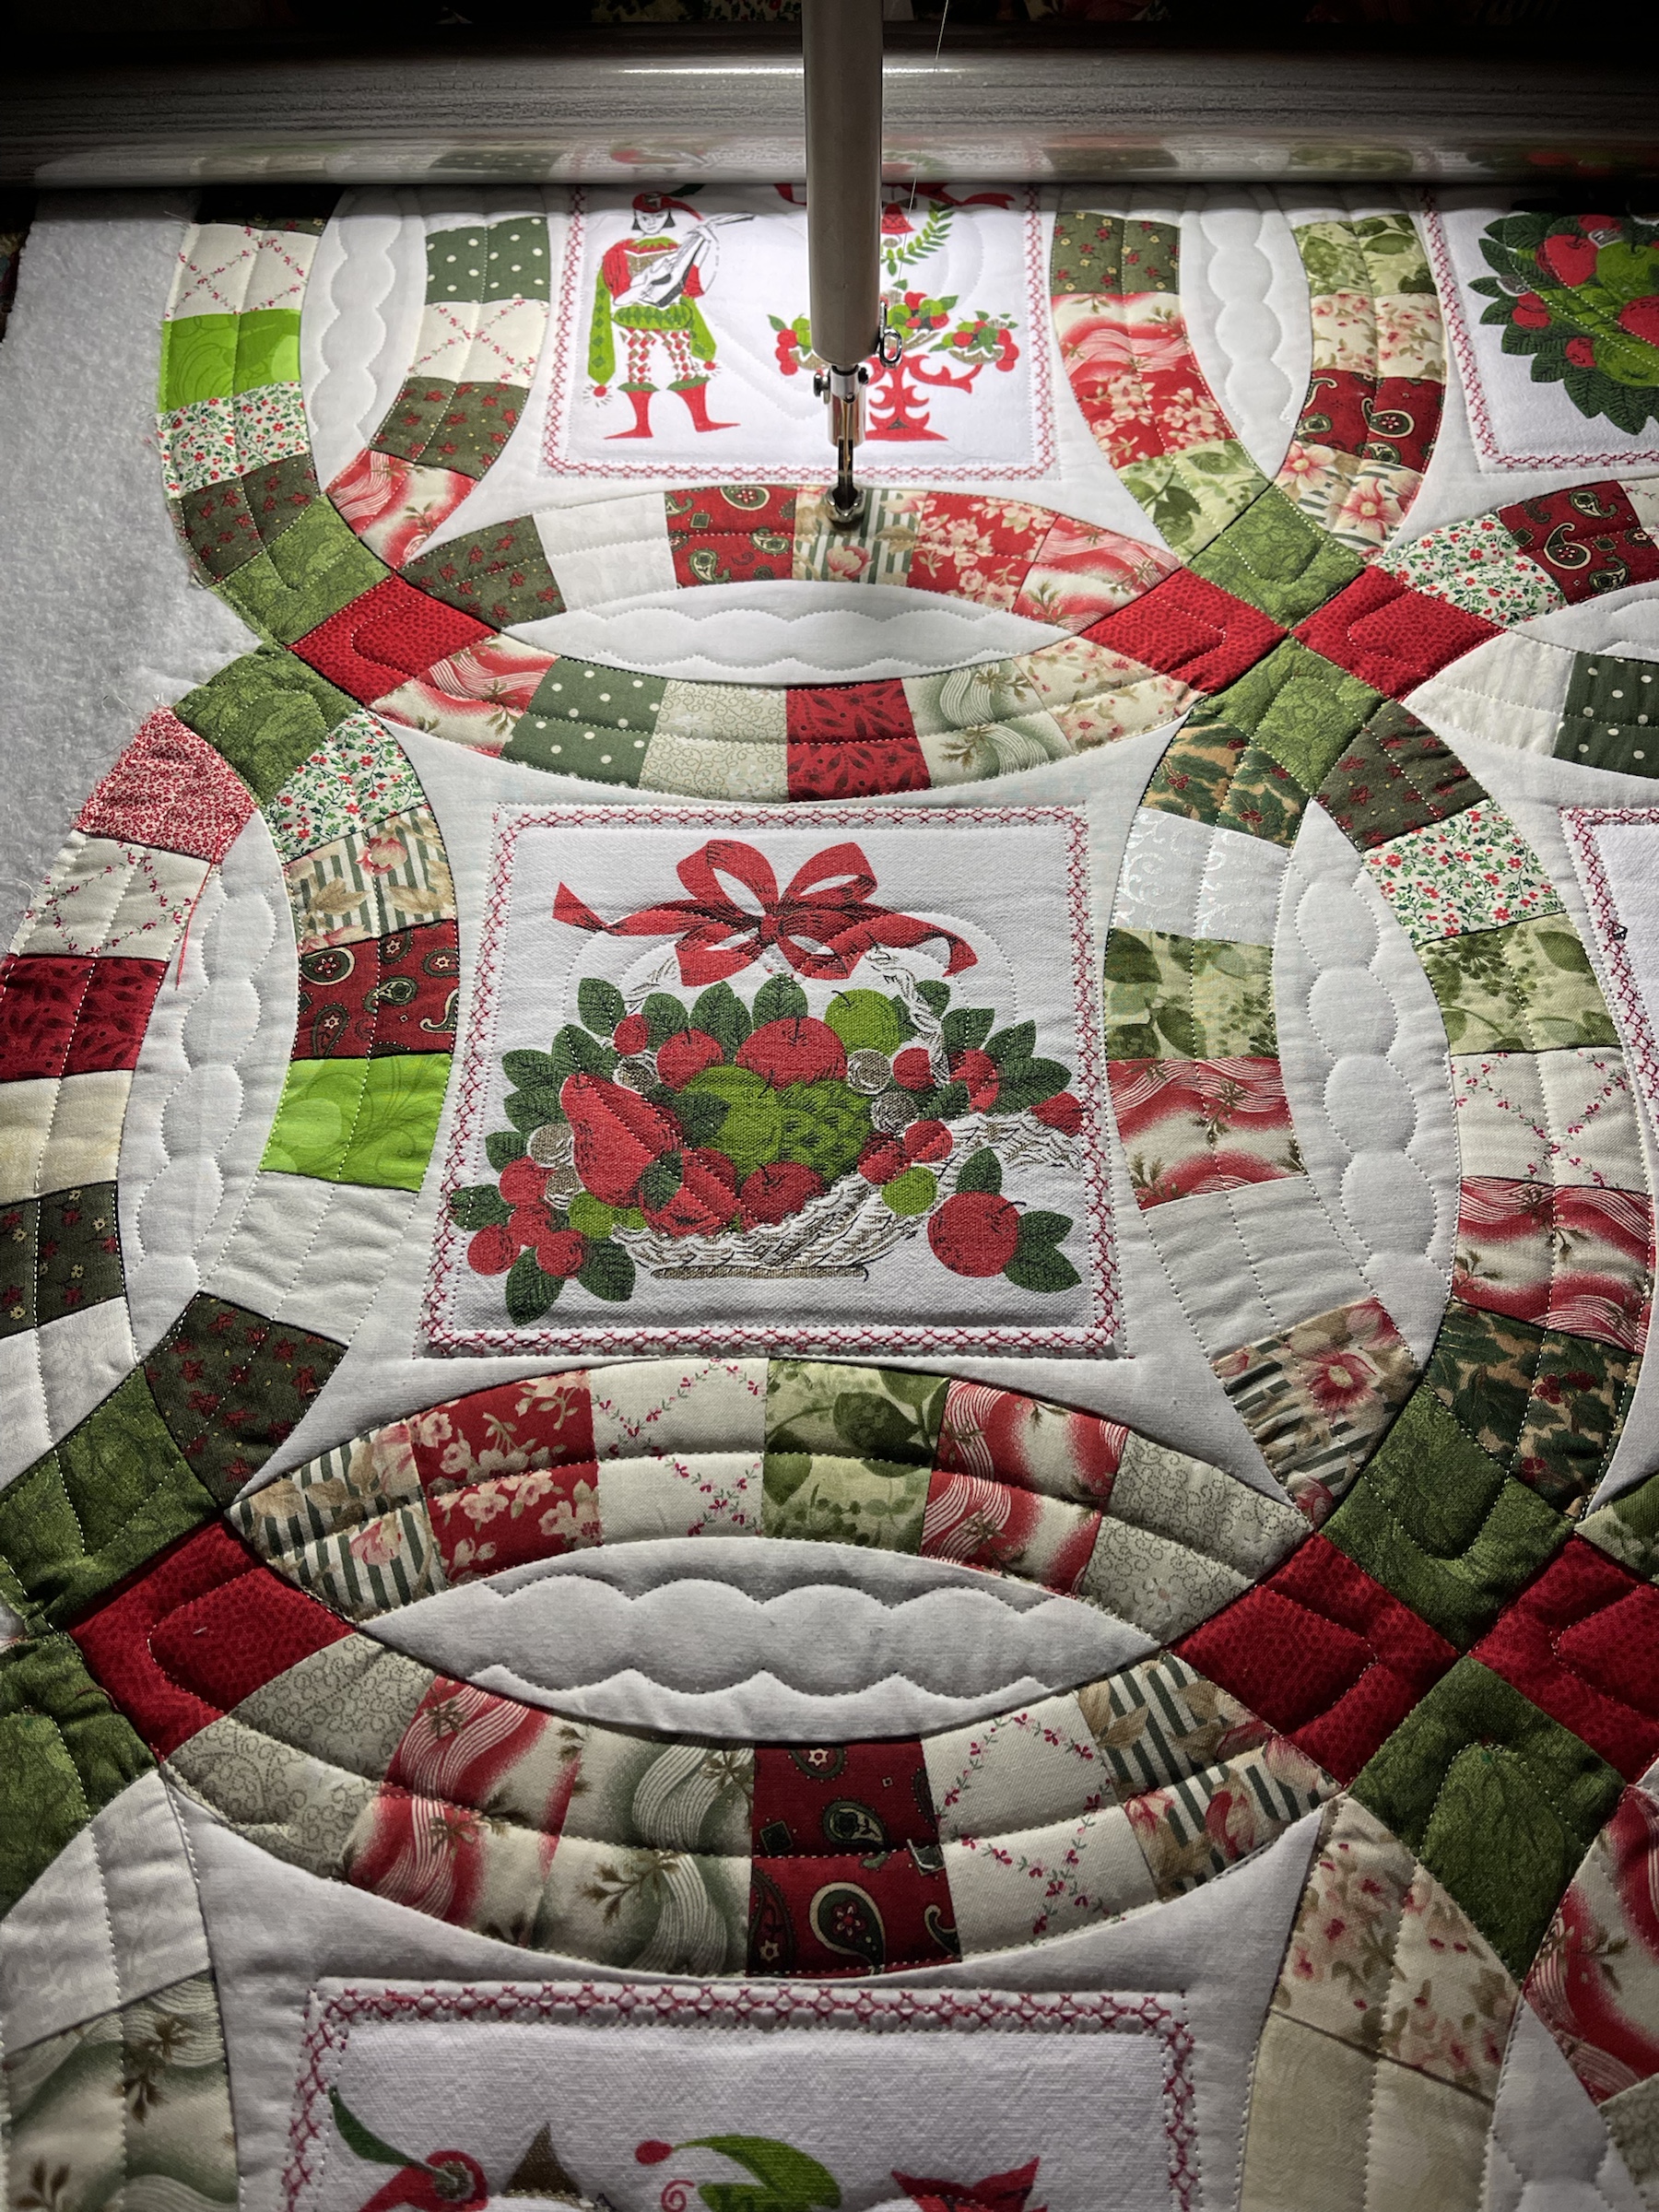
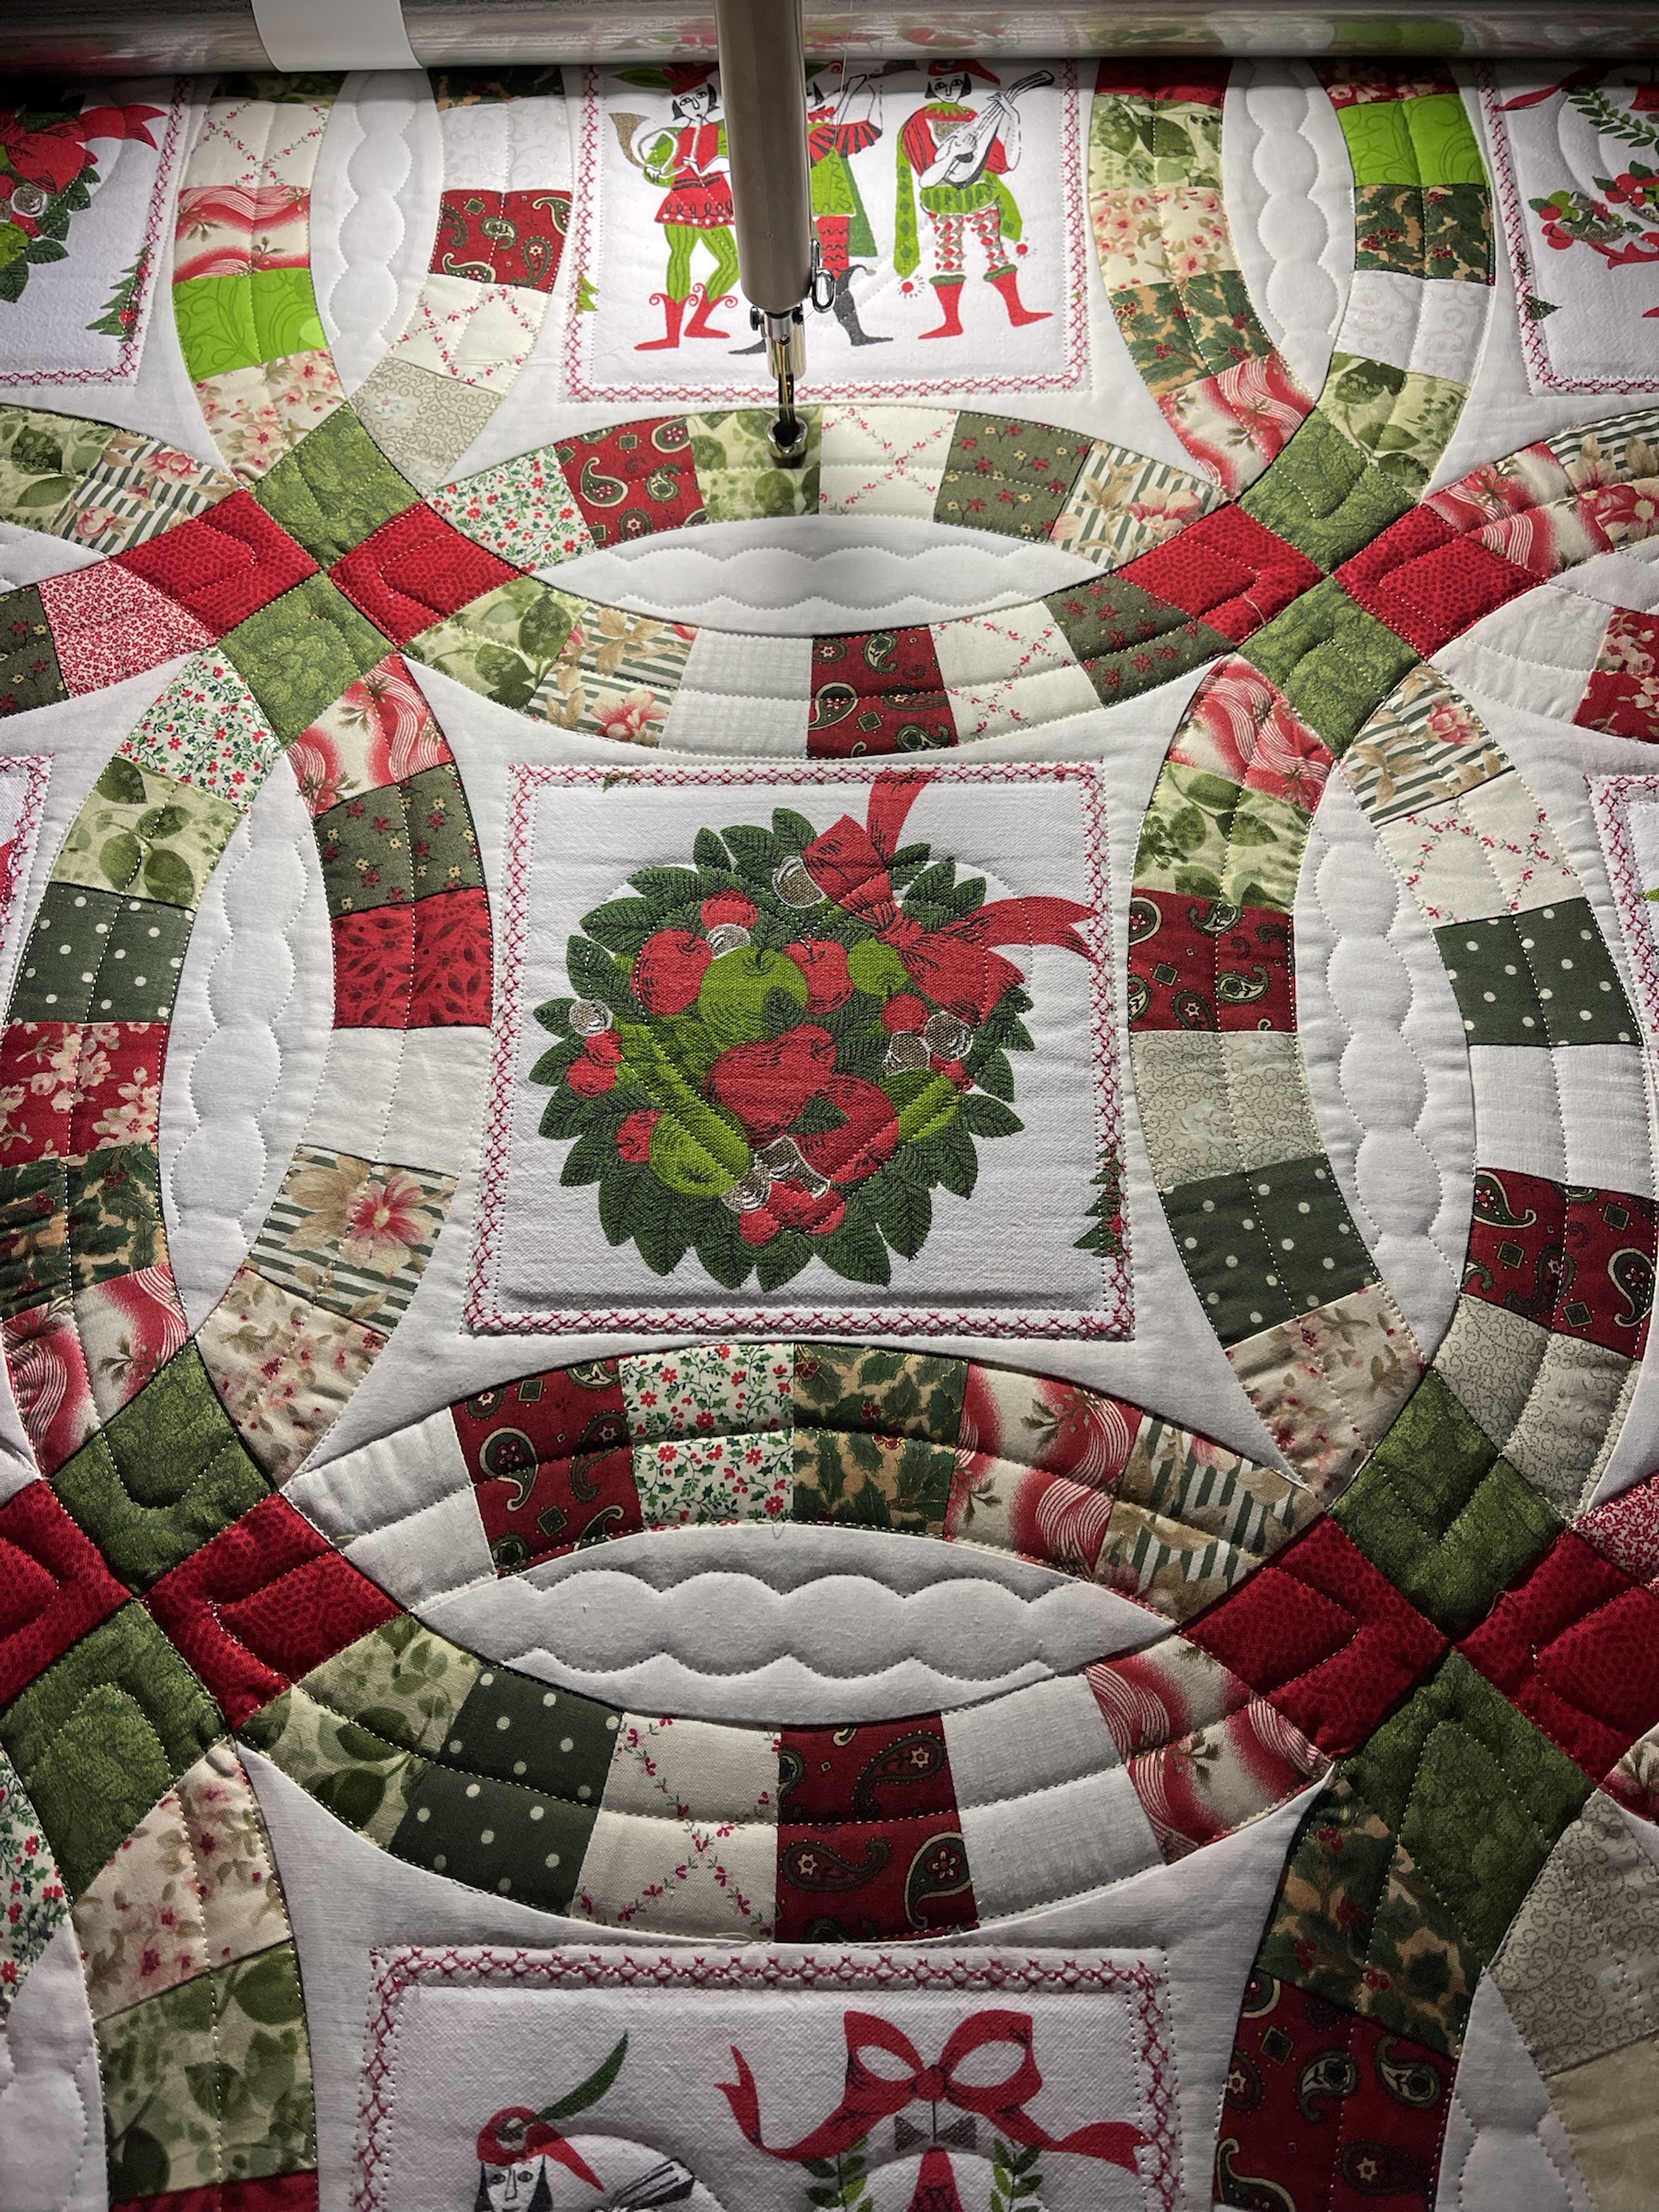
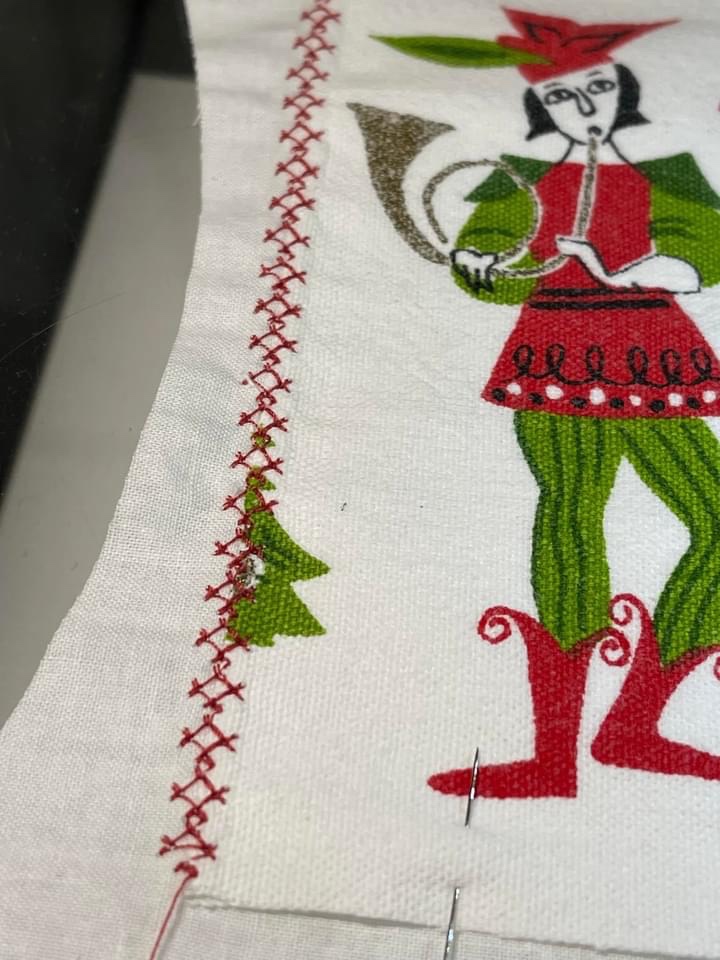
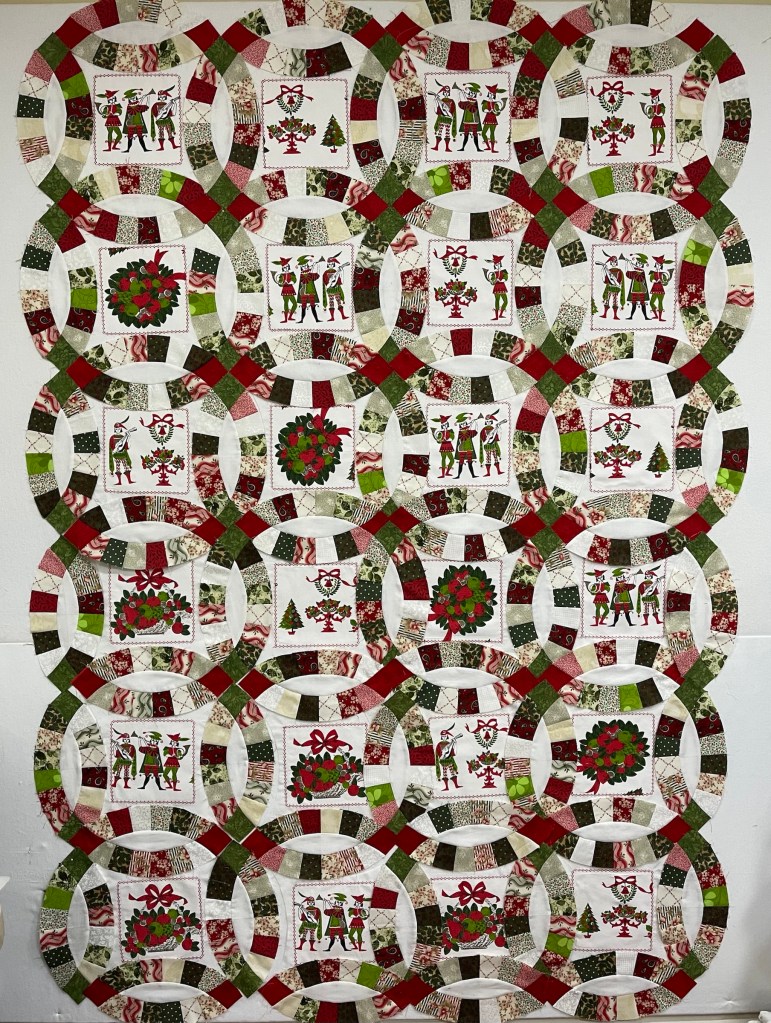
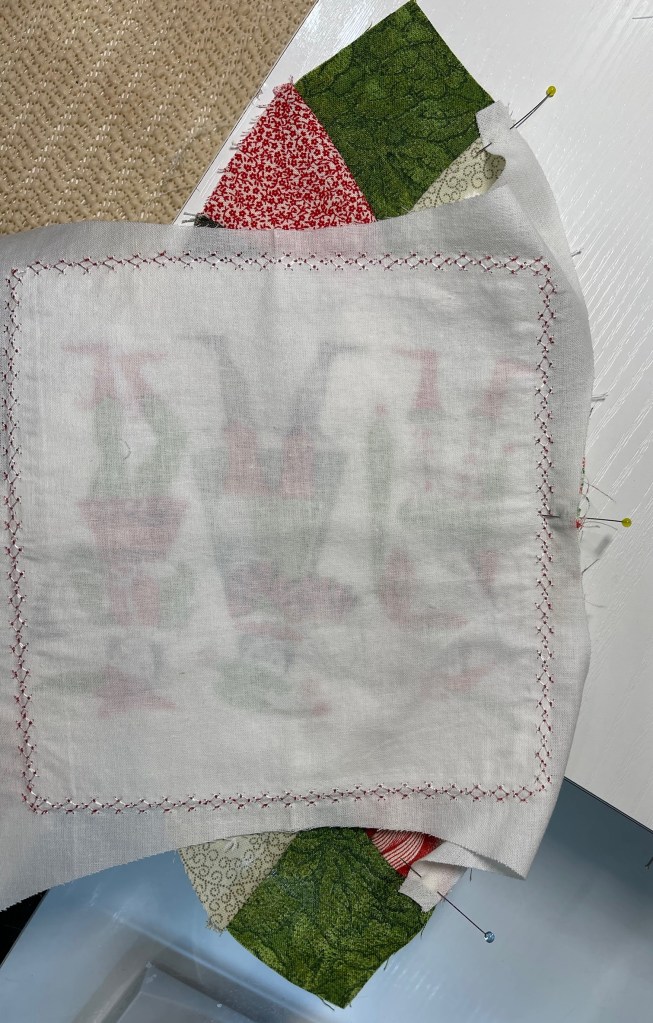
Oh I was giddy when I stitched and then flipped my block over and open!

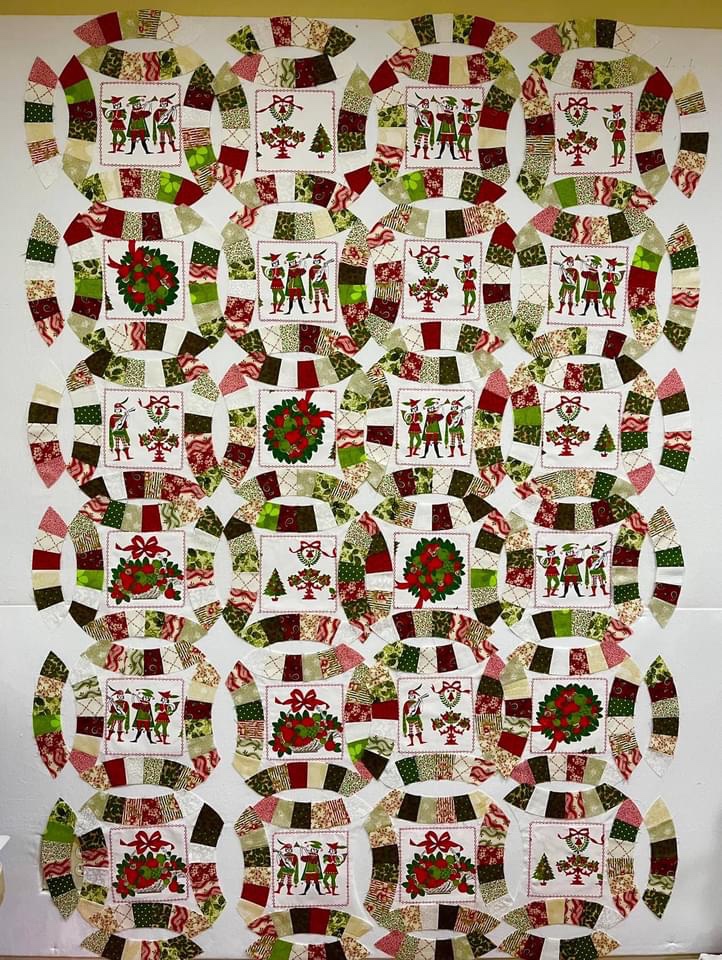
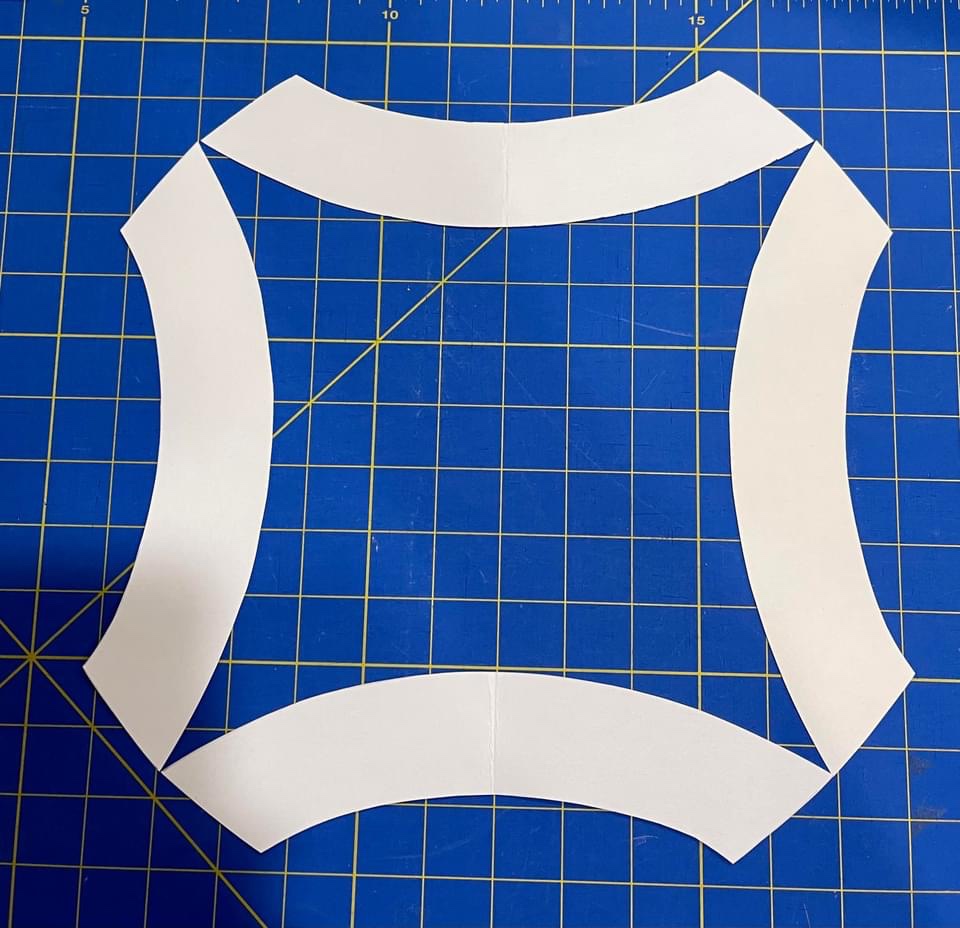
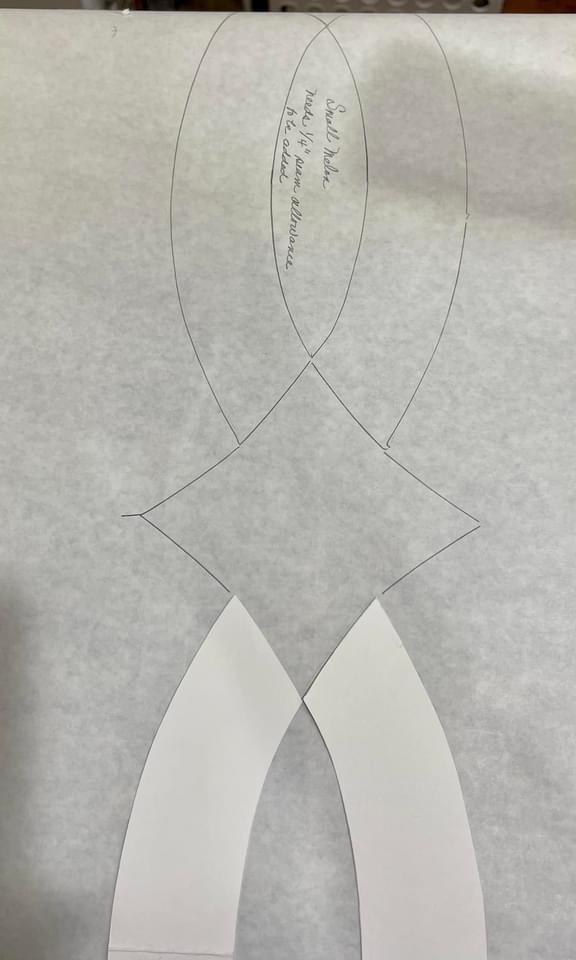
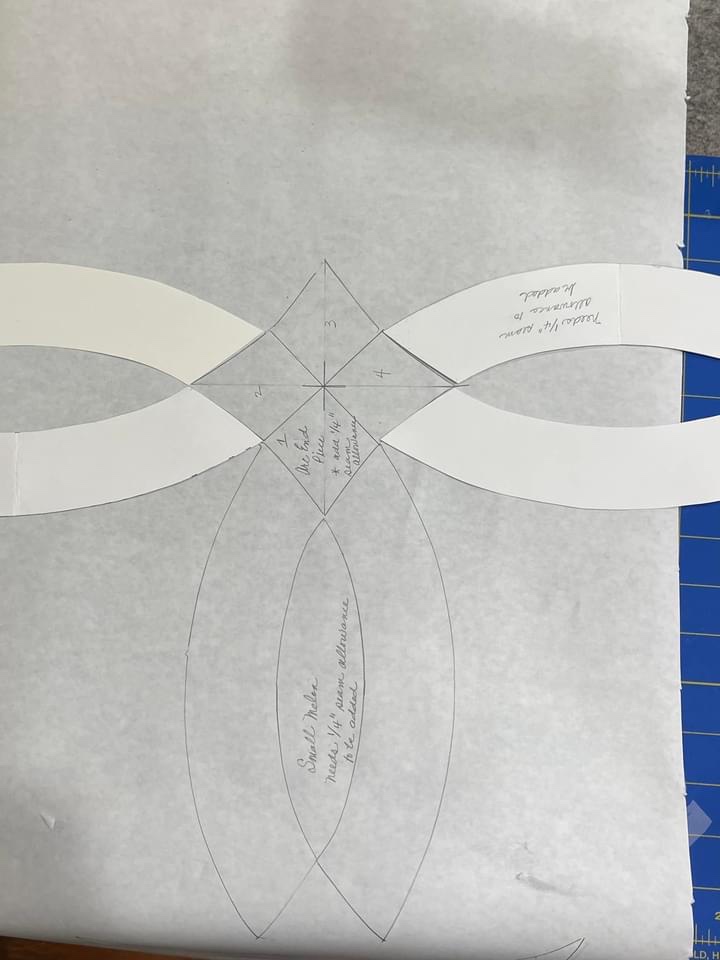
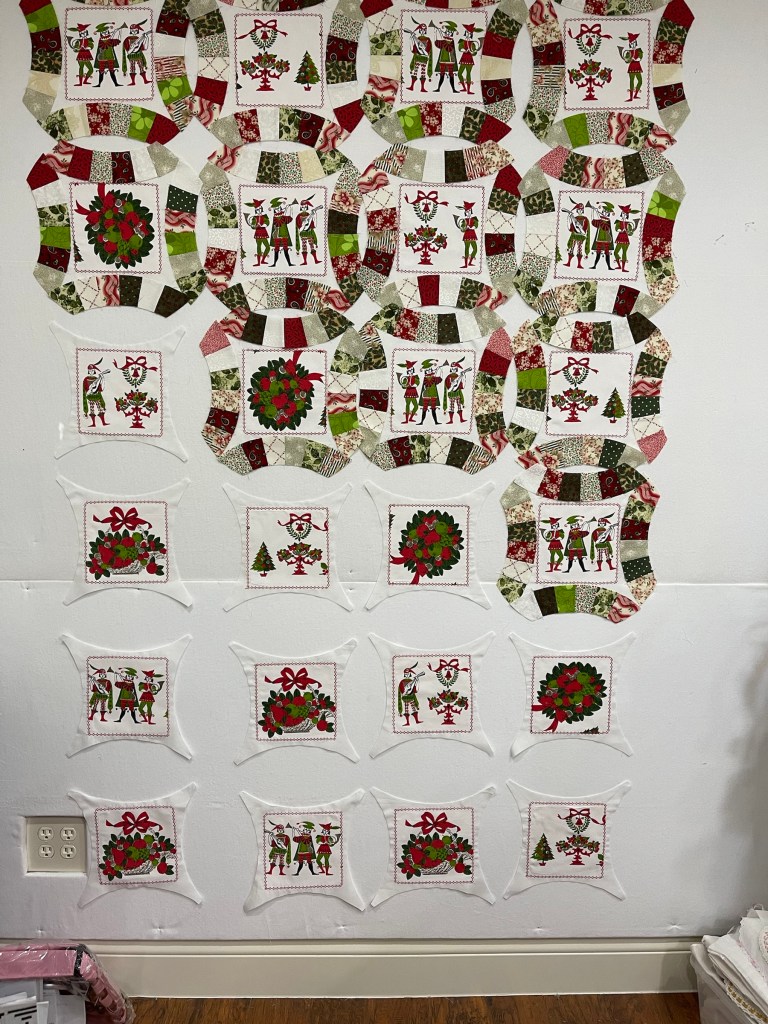
And so it begins! The blocks getting sewn together! This is the first block and the one and only time you will sew together a complete four Football separate block.

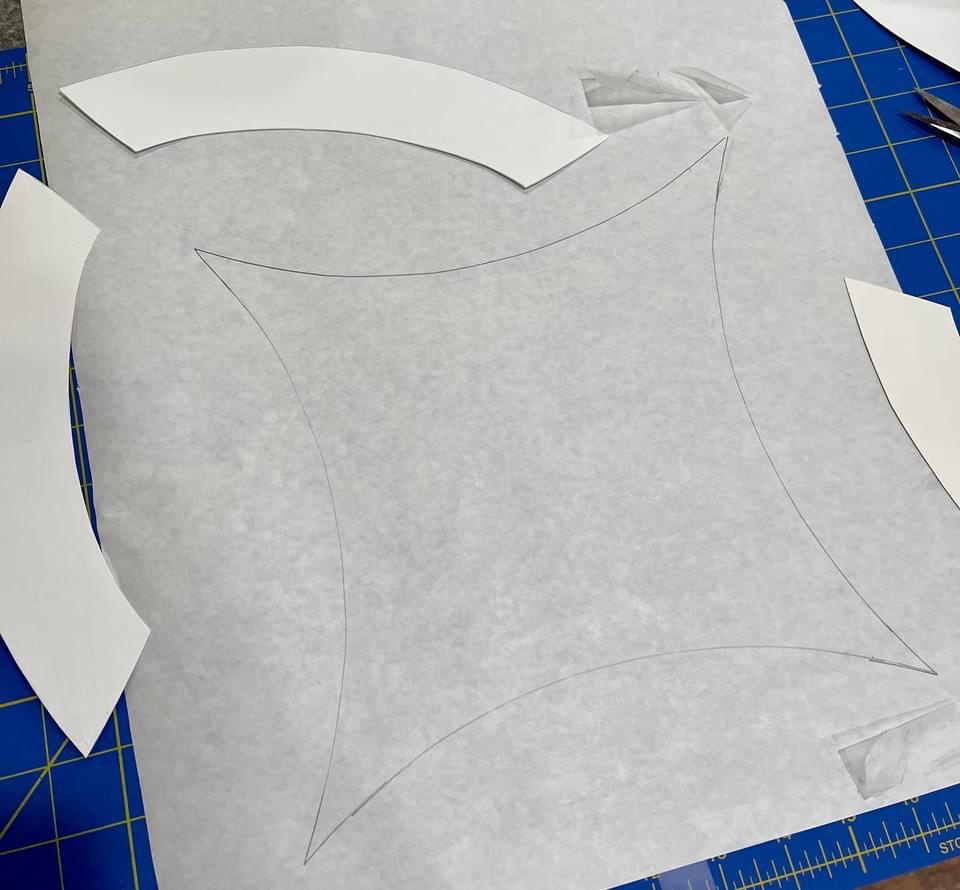
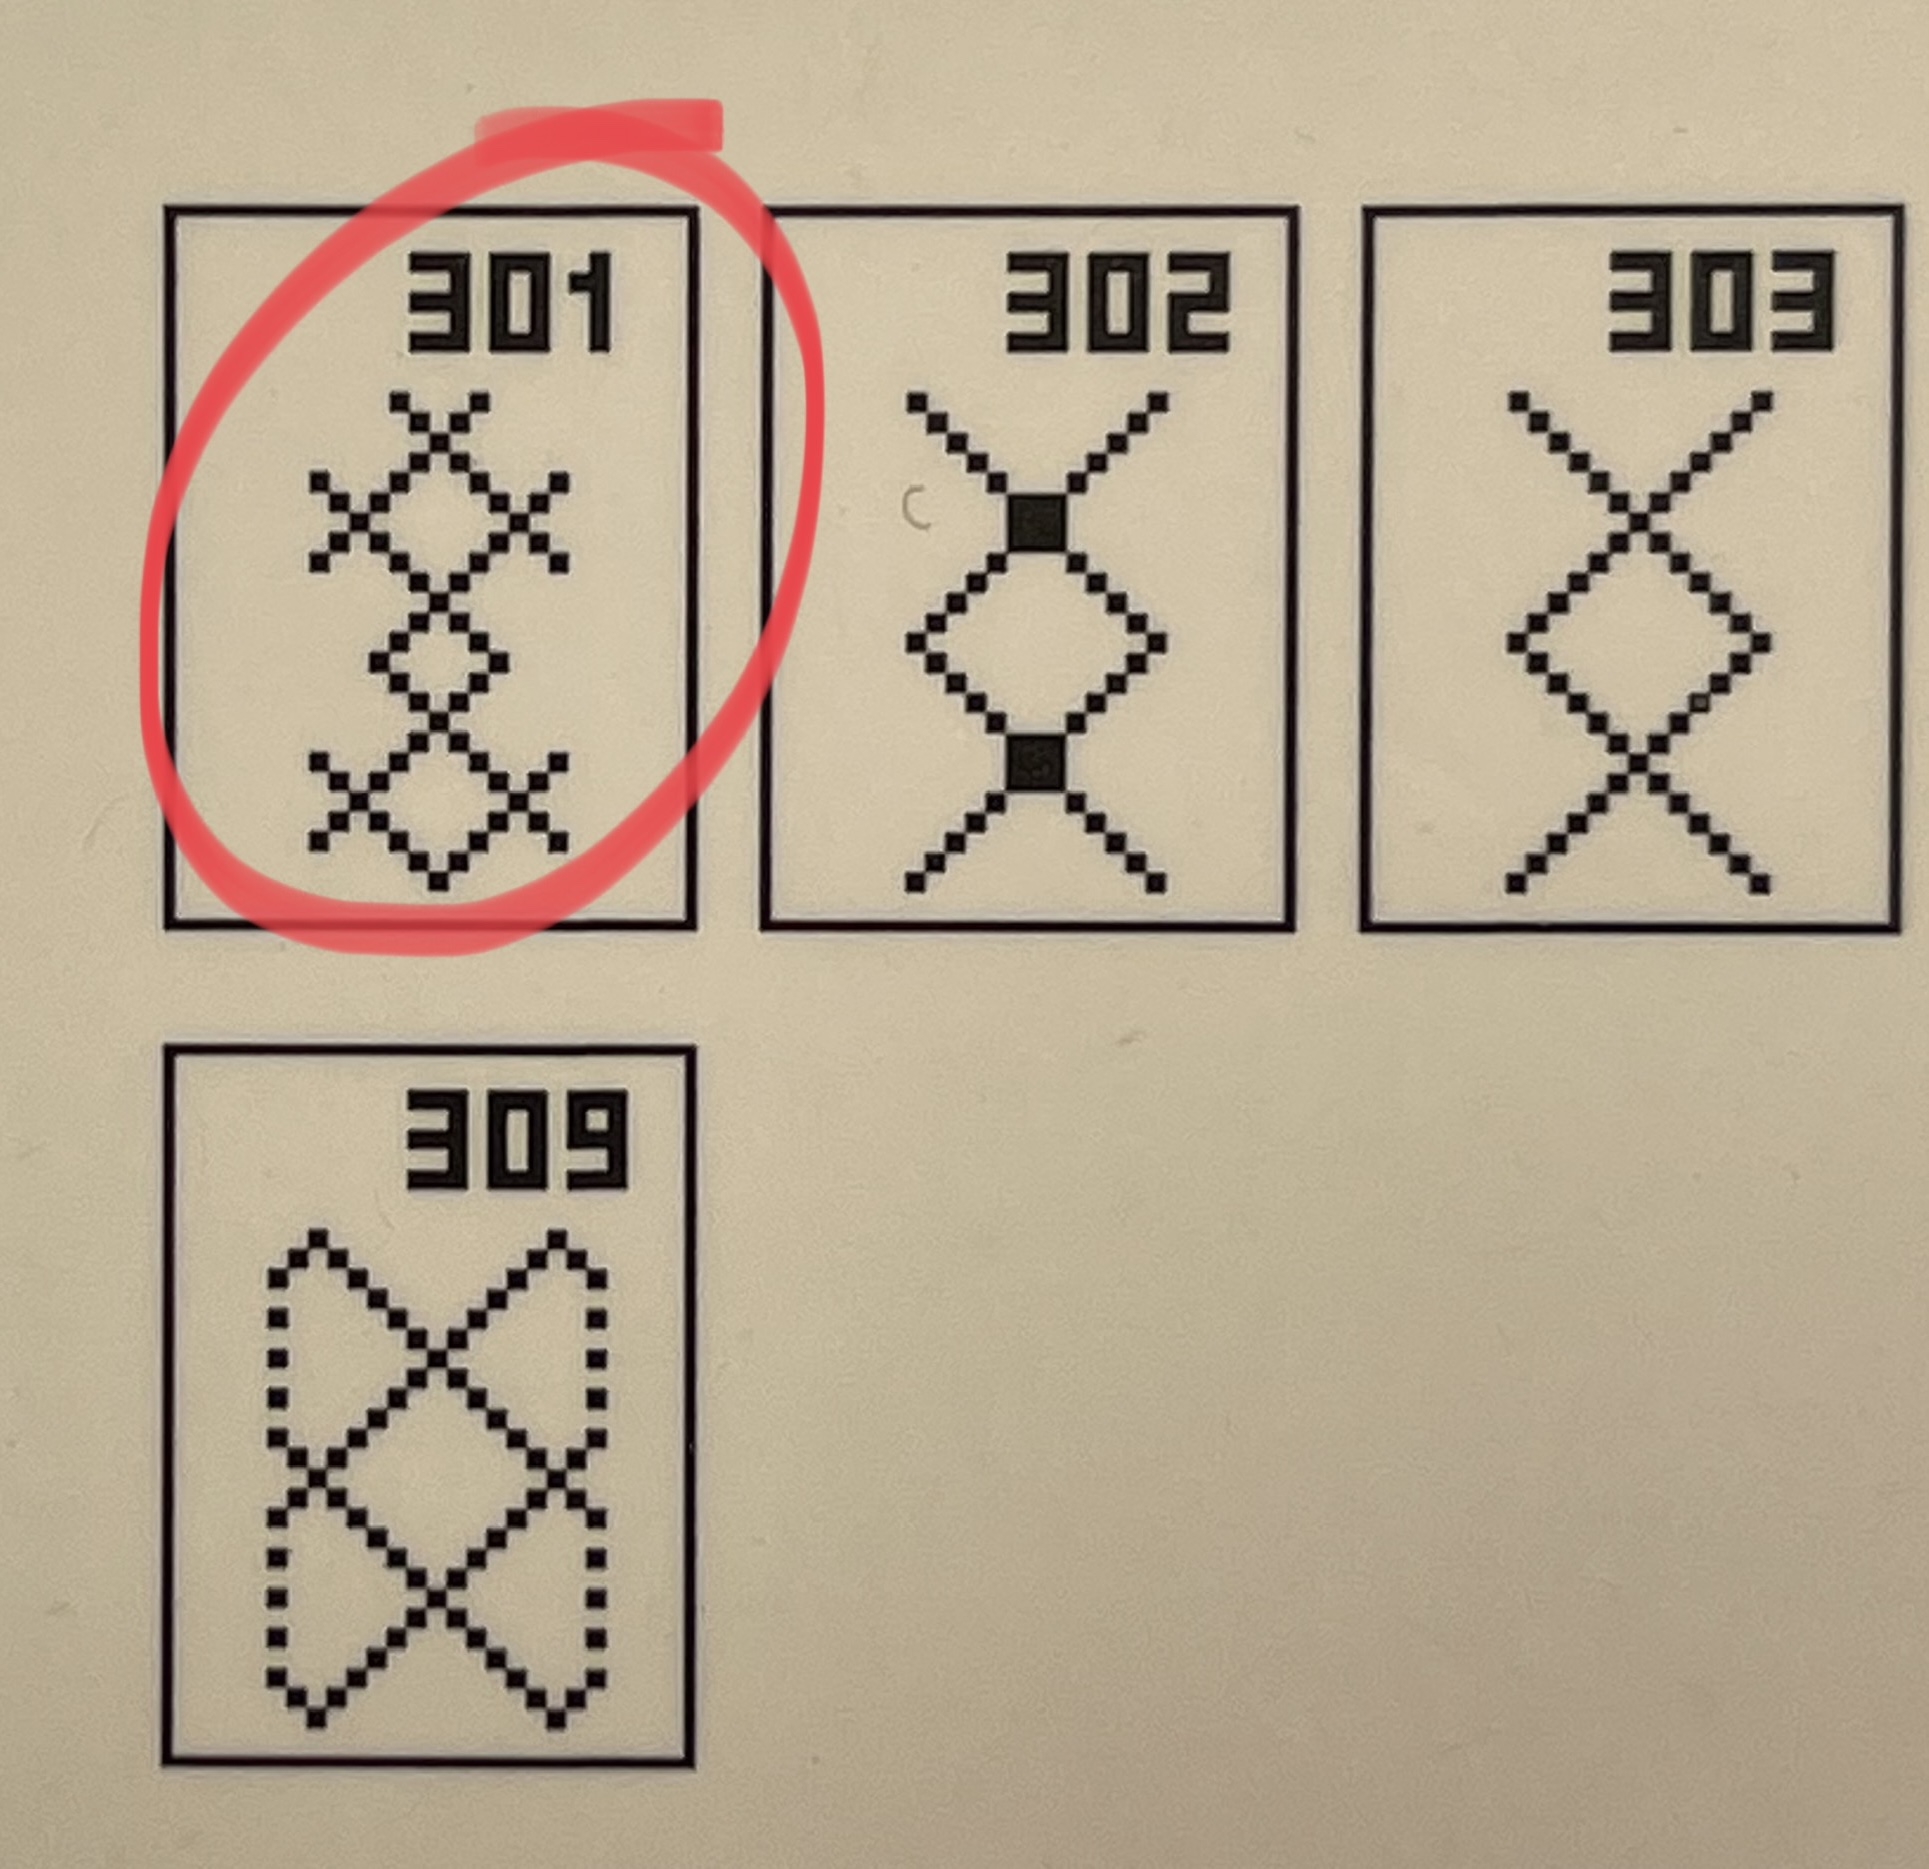
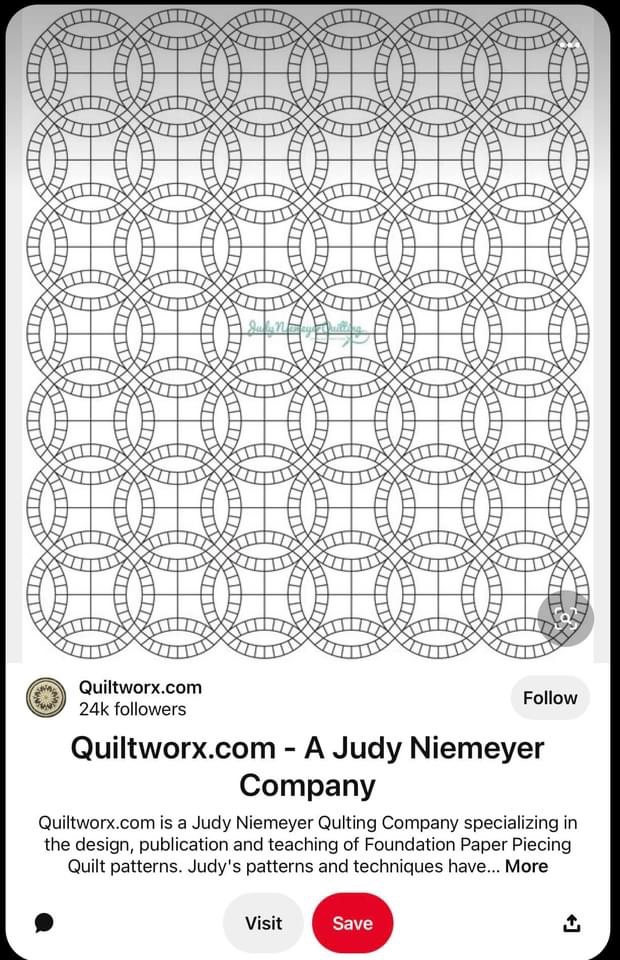
From the diagram (thanks Marti Michell) you can see that after that first and only complete block you will now be sewing blocks that have only three Footballs attached to the center. Does this make sense?

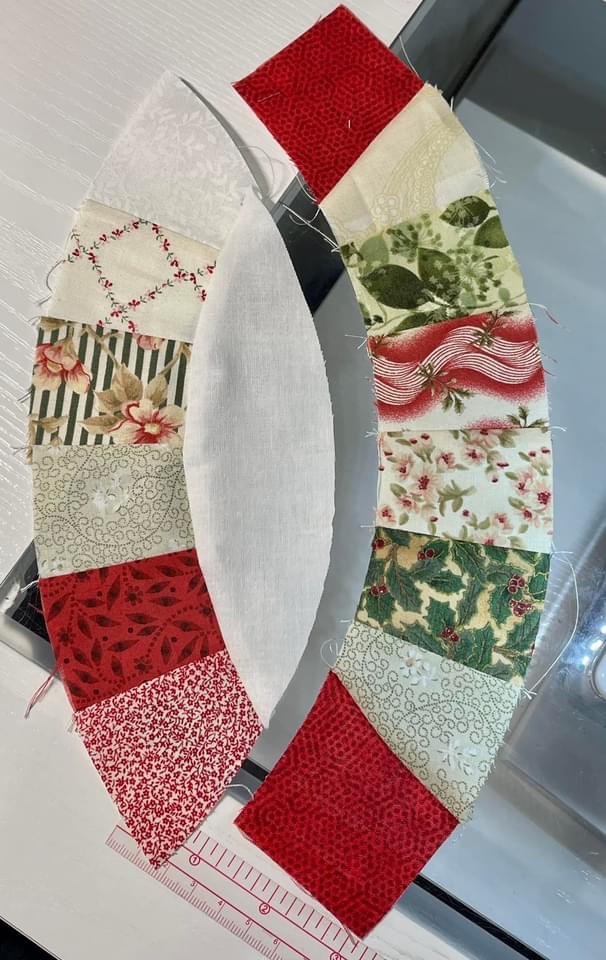
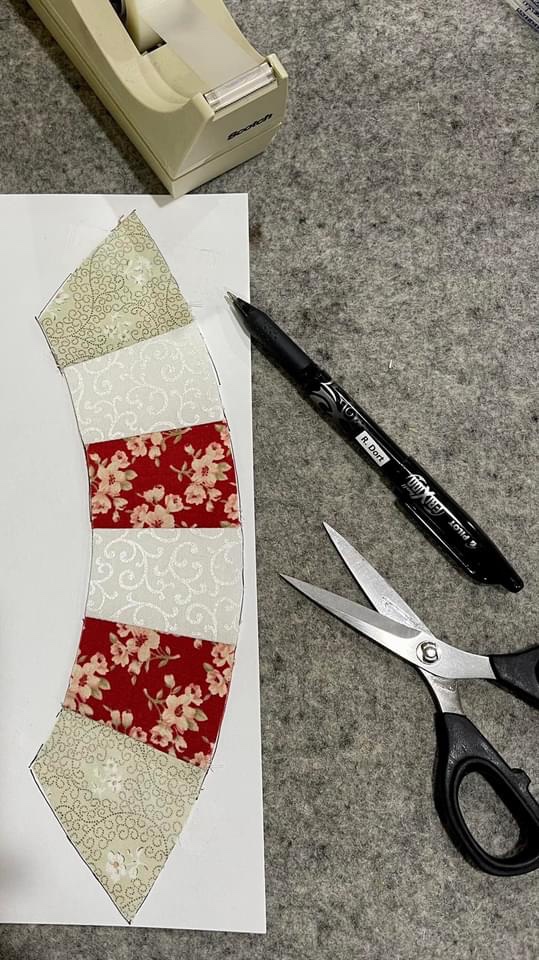
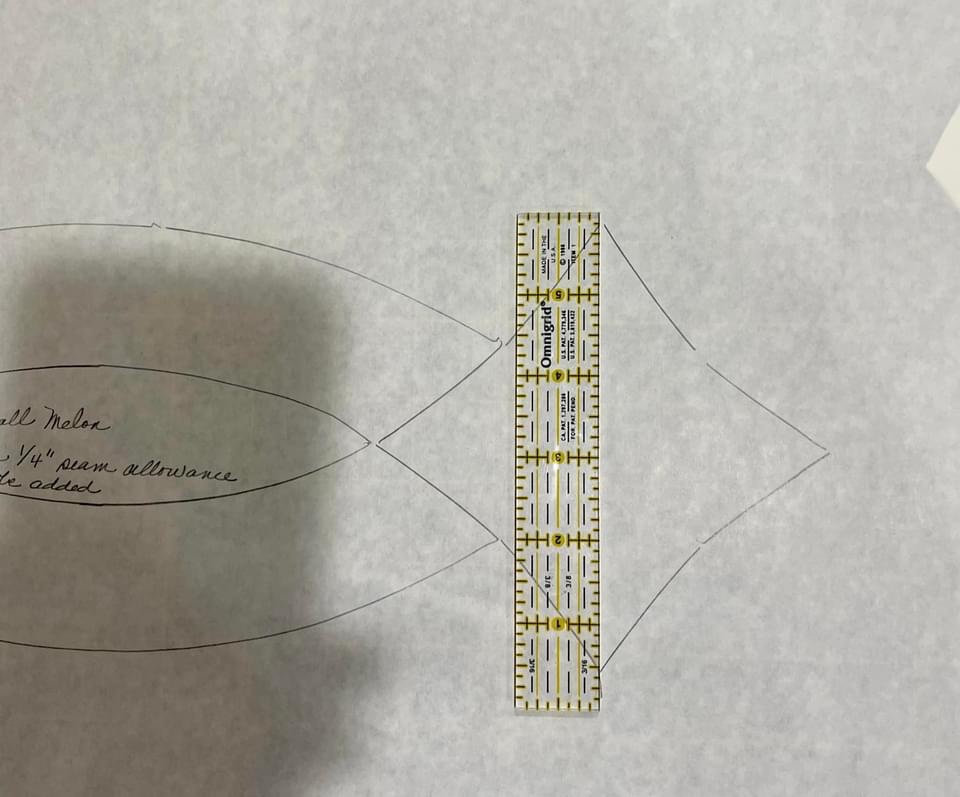
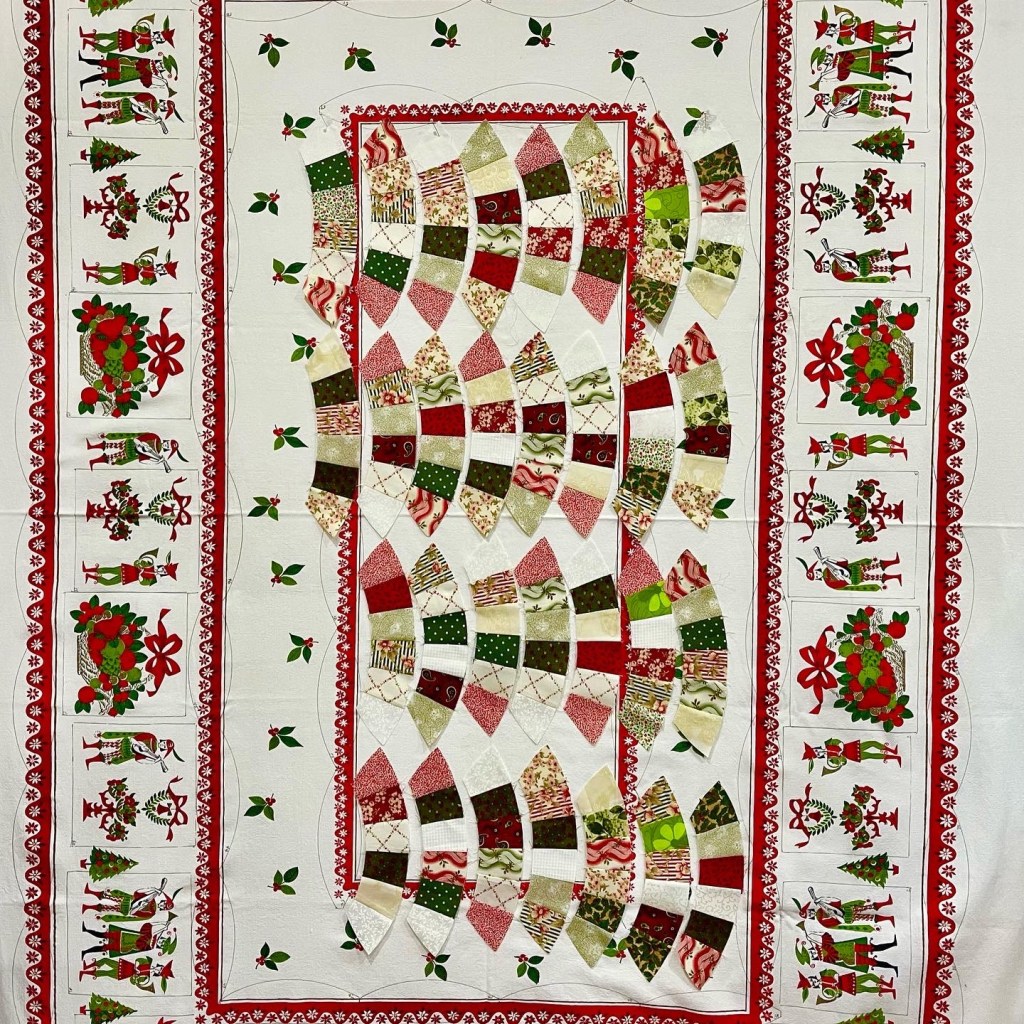
The heavy black curvy line above shows how I will be sewing my block pieces together to form a horizontal row.

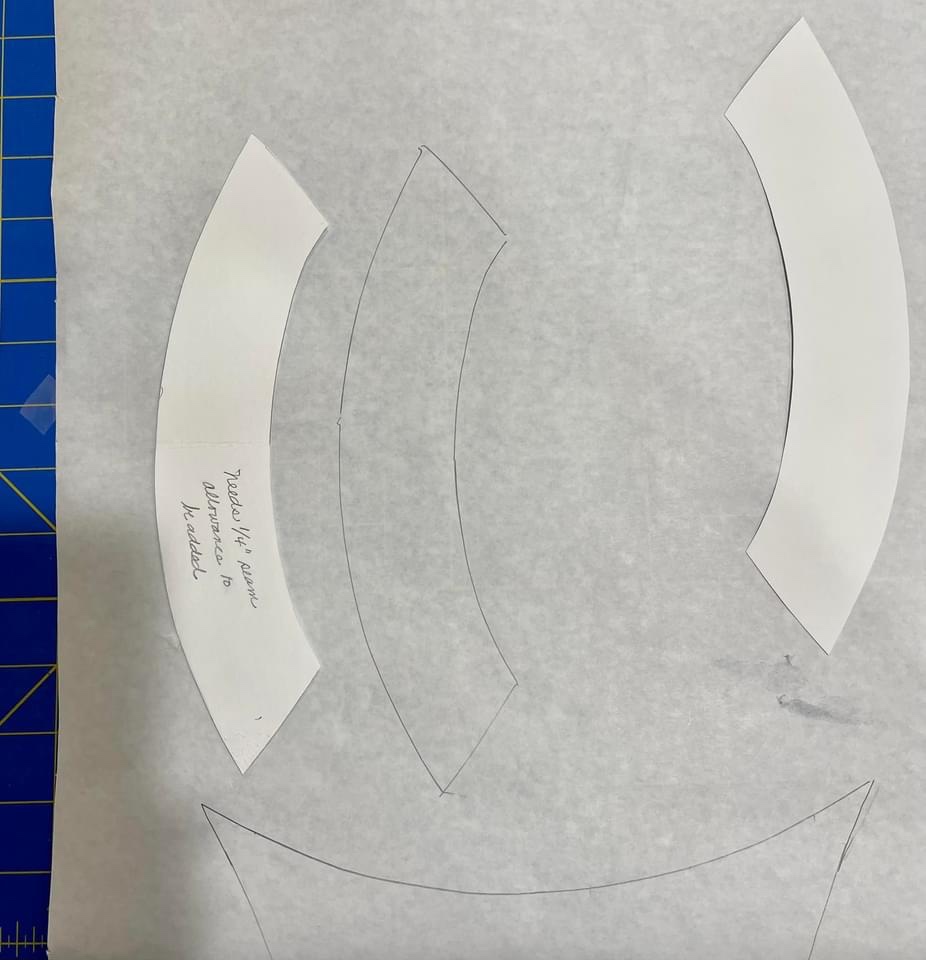
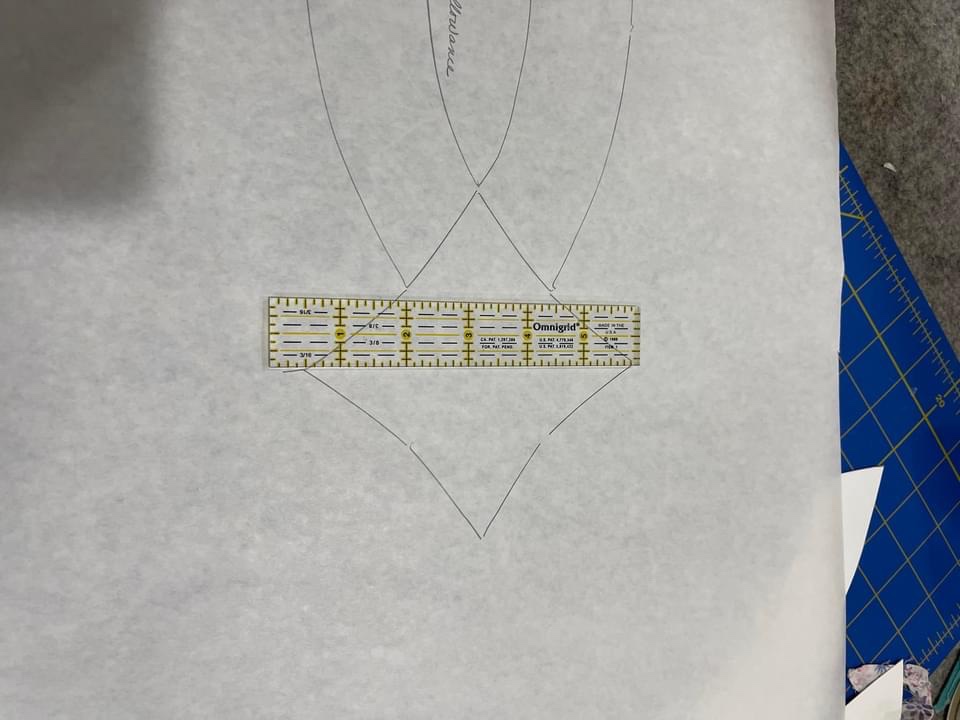
I have my diagram marked showing horizontal blocks 1-4 and vertical blocks 1-6.

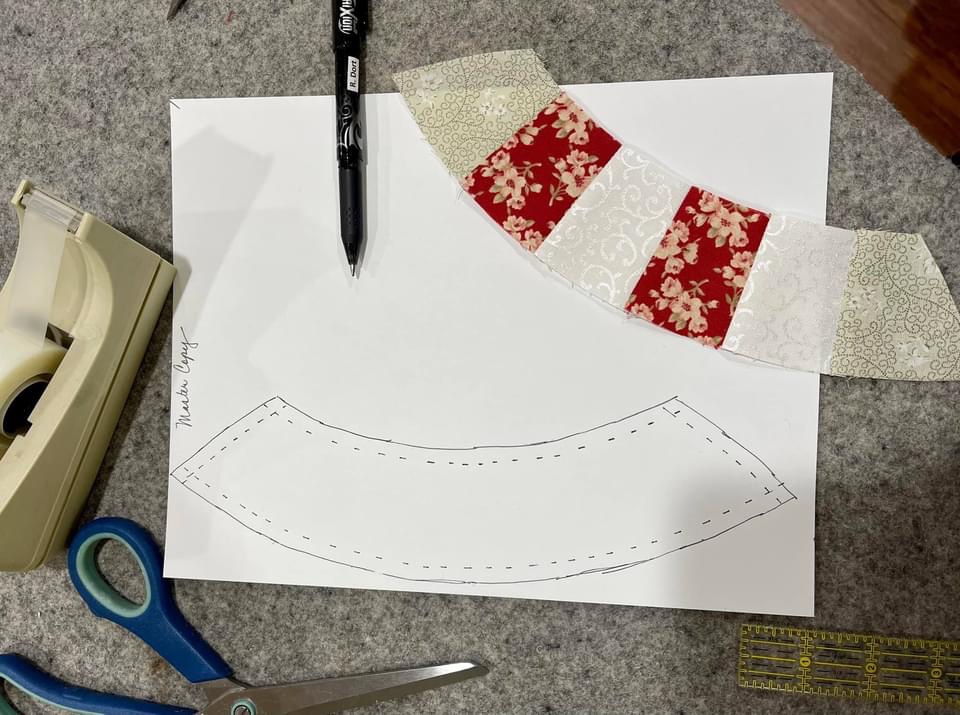
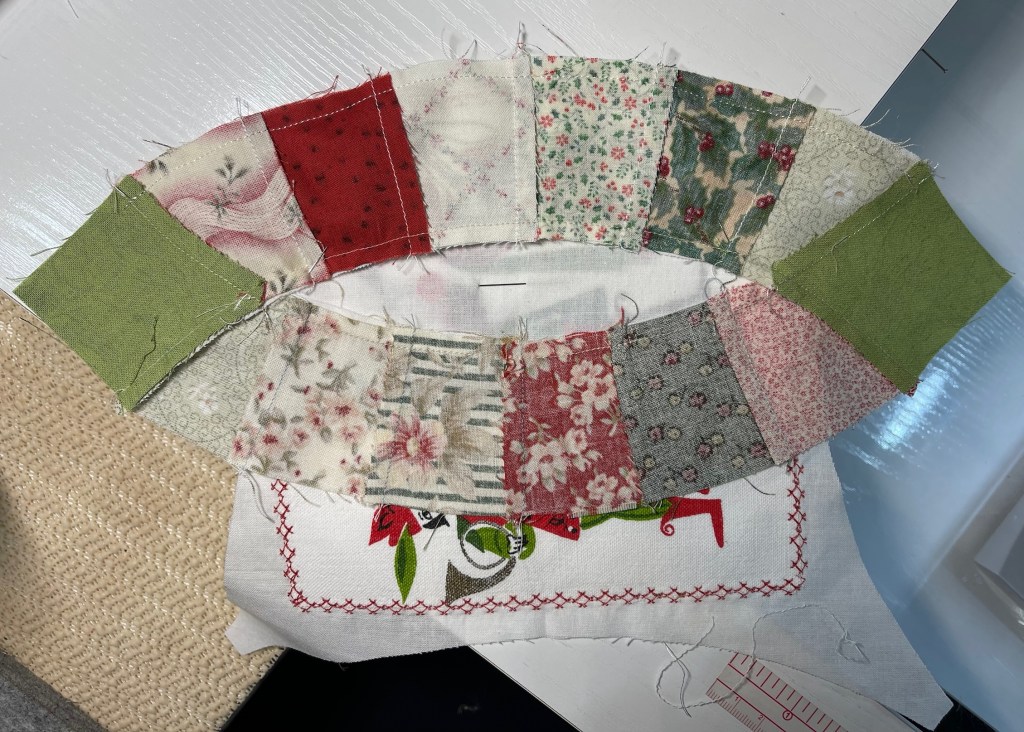
To finish horizontal row one I will sew three more partial complete blocks with a Football shape on the top, the bottom and only the right side.

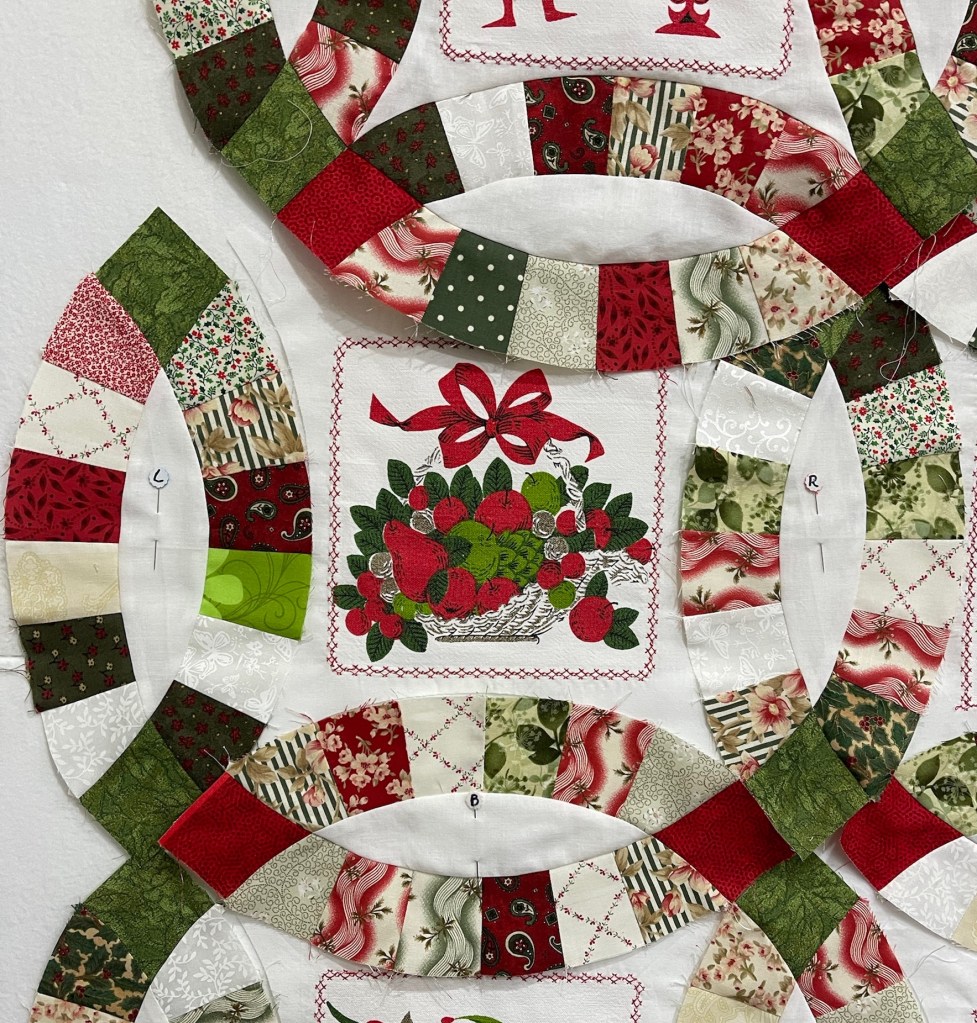
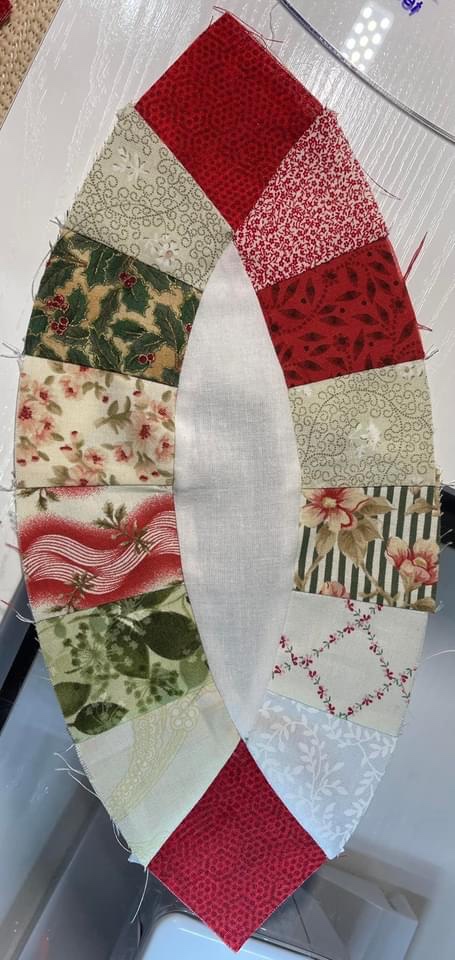
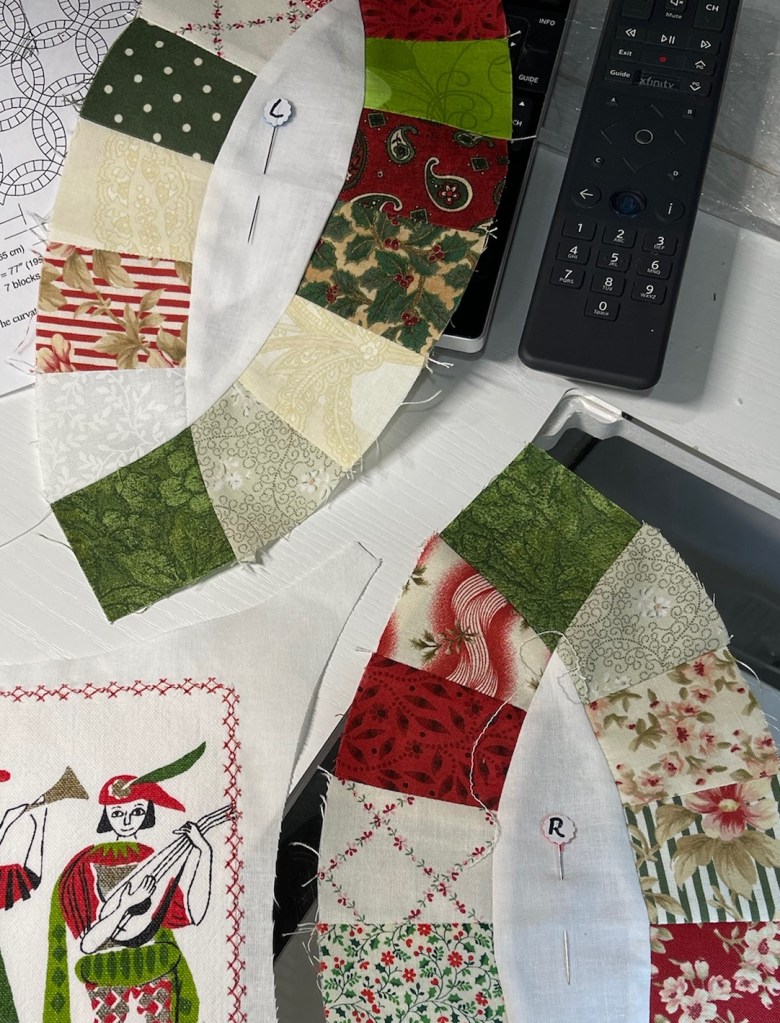
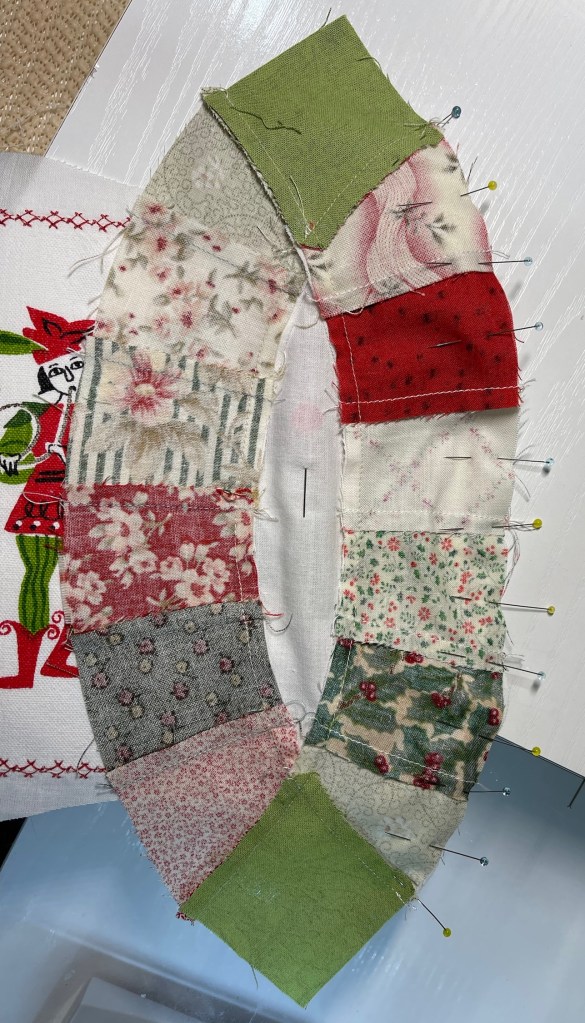
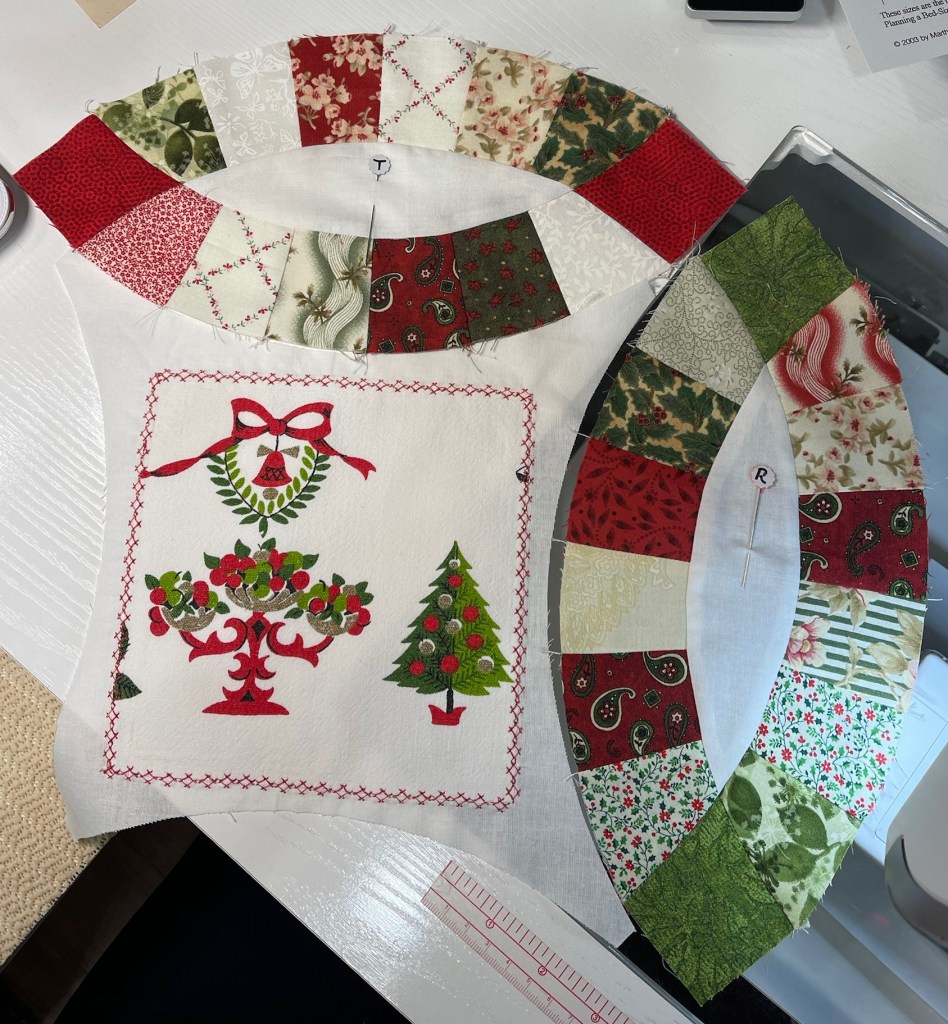
Ready for horizontal row 2? This time I will sew three Footballs, left, bottom and right. See how I have placed my Flowerhead straight pins accordingly? I absolutely need these markers to keep my pieces positioned correctly as I begin to sew. If you’re like me, don’t rely on memory once those Footballs are lifted from the design wall, after awhile they all begin to look the same! 🤣

Row 2 construction technique is how you will finish each additional row of your quilt top. And you thought this was going to be hard!! Easy-Peasy once you understand and are comfortable with the method!

Happy quilting and blessings, Rhonda

Fixing the Red Dresden Plate Quilt Top, Part 1

A new old project underway. I’m thinking the quilt top maker had good intentions and at a glance everything seems great. But a closer look reveals problems that the quilting of this top will not remedy.

Overall measurements are 69×93 with individual blocks measuring anywhere between 18 and 19 1/2” square-ish and sashings are 3 1/2” wide.

The Dresden Plate measures 14 1/2” across and the red center is 5 1/2” in diameter.

The Dresden petals are all raw edge and were secured to the background fabric by these 3 strand embroidery floss buttonhole stitches. Sometimes the floss was knotted on the back, sometimes the front.

It took an amazing amount of time to remove the red floss stitches.

The red centers were also stitched in place with the red embroidery floss but unlike the Dresden Petals, the edge is turned under.

Throughout the quilt top, seam allowances were arbitrary as was sewing machine thread color.

Removing the Dresdens proved easiest when the floss was cut from the back of the block.

This picture shows the idiosyncrasies in the block construction as well as showing that the Dresden center circle was not trimmed to be a bit smaller than the diameter of the red center piece.

Oh, and I forgot to mention that the Dresden fabrics are mostly garment and possibly drapery with a handful of 1960’s or 70’s quilting (?) cottons. The sashing and block background is a poly/cotton blend. I figure I’ve got nothing to lose by redoing/fixing/embellishing this kind of vintage quilt top. This will be an interesting journey.

All the red embroidery floss took about 2 days to remove and for scale, this is a 6 1/2 cup bowl. 💃🏼💃🏼💃🏼

Happy quilting and blessings, Rhonda

Class 4, The Double Wedding Ring Quilt, Blog Post #6

Class 4 Information, FB Post #6

So how are you progressing through your Double Wedding Ring quilt project? Are you ready for some instruction/pictures of how I recommend the Arcs and the Small Melon be joined to form what I refer to as the Footballs.

📌 But first, let’s talk about the 4 Patches. Your decision about the color(s) comes before making the Footballs. For my Christmas themed quilt I chose both Red and Green, two fabrics that I had not used in piecing my Arcs and I was consistent in the placement of the colors: Red was always horizontal and green was always vertical. Your 4 Patches might be all the same color, two colors such as mine or random scrappy. The shape of the 4 Patch piece is symmetrical so you do not need to cut the template from both the “right side up” and the “wrong side up” like we had to do for the Arc End Pieces.

📌 Once your Football shape is finished, be very careful to place it back in the proper place, in the proper orientation.

By this lesson I am assuming you’ve cut your Arc pieces and have sewn them together.

You should have auditioned your Arcs with your center blocks with the goal of achieving a nice visual balance and have taken a picture of your layout.

By changing your picture to black and white you can see the “light” and “heavy” areas. Make the necessary Arc changes until you are pleased with your project.

Take the time to verify that your Arcs and your template match. With a mechanical pencil, mark the two dots at the top edge.

🧨 Super important! Keeping track of the layout, specifically the Arc orientation (which Arc is right, left, and the top, bottom). Fold a Small Melon piece in half and lightly finger press the fold line.

Do you see how this fold line matches perfectly with my center seam of each Arc?

Using the Small Melon template and a mechanical pencil, mark a dot at the top and bottom of the Melon. Lay the melon on the Arc, right sides together.

Send a straight pin through the two layers of fabric at the dot.

Verify on the back side that the pin pierces the dot. Do you see that I had to slightly reposition my fabric? Once you get your dots lined up perfectly, pin to stitch. Do this on both ends and finally place a pin at the fold line of the Melon that you have matched perfectly with the center seam of the Arc.

I used just 3 pins. If you are more comfortable using more then please do so! Next step…take a deep breath and sew an exact 1/4th” seam.

I like to sew with the pieced Arc on top so I can keep track of all the seam alllwances. If you prefer to sew with the Melon on top, then do so.

Whew! My first Arc is sewn to a Melon! So let’s talk about pressing…so many of the DWR tutorials I found online say to not press anything until the entire quilt top is complete. I just couldn’t do it…I pressed my way through the entire process. You do what you are comfortable with.

Because I am constructing a horizontal football shape I choose two of my red 4 Patch pieces.

Again, with my template I mark the dots.

This picture of the wrong side shows our goal once the 4 patch piece is sewn in place.

And the right side of the 4 Patch sewn in place.

But this is a funny piece, it has a slight concave curve and the end piece of our Arc has a slight convex curve. Concave is an inward curve, convex is an outward curve.

On my red fabric it is very difficult to see in this pic where I have marked my dots but they are there. It is these dots that will keep you on track to sew a perfectly lined up block. As you begin to sew you will easily be able to ease or gently nudge the top fabric to the right so that the fabric edges will meet up. Remember…1/4th” seams!

At this point I was giddy!

Remember the melon fold line? Place this fold line at the Arc center and pin to sew.

Continue to line up your dots and as you do, pin to sew. Take note of my second from the top and second from the bottom pins. It is very important to line these up with the seam line on the underneath side. This may take a bit of practice, it did for me.

Use as many pins as makes you comfortable and again, I’m stressing the 1/4th” seam.

I’m showing you this picture so you can see my Arcs didn’t quite meet up as planned. ☹️ Using my seam ripper I picked out about an inch of stitches, re-pinned and was happy with the results.

Again, just a closeup of my seams that needed work.

After 2 tries, I decided I could live with this foolball. I will try for perfection on my next one! 🙂

Once you get familiar with sewing these curve pieces, you will fly through the rest of your Football shapes!
Happy stitching! Rhonda

Class 4, the Double Wedding Ring Quilt, Blog Post #5

Class 4 Information FB Post #5

This lengthy post is all about DRAFTING template pieces when all you have is an Arc to work with. There are lots of pictures, information can be found in most if not all of the picture captions.

📌 Don’t for ANY REASON think this is hard!! It is remarkably straightforward! You can do it! Sharpen your pencils and let’s begin!

One of our Facebook Group Class members (Bonne Riffle) has these wonderful vintage DWR arcs and it looks like a single Small Melon. Initially this looks quite daunting but…very doable! We are going to take a 30+ pic tutorial journey about creating the missing templates for these arcs.

This is my lonely single pieced arc. It needs additional pieces to eventually become part of a DWR quilt. This is the only piece I have and from this single arc we are going to create the remaining pieces. Are you ready? Press and spray starch the arc taking care to not distort the fabrics and arc pieces. Once starched and pressed, lay the arc on a sheet of white card stock.

Using either transparent tape or blue painters tape, secure the arc to the card stock. Just make sure the arc will not move as you prepare for the next step.

With a mechanical pencil or pen of some sort, very carefully trace around the outside of the arc. You will have to carefully remove the securing tape when the shape has been traced.

Carefully fill in the missing areas blocked by the tape. Once you have filled in the 4 small missing line areas stop and think about what you have: a template for an arc to include 1/4th inch seam allowances. We need to carefully get rid of the seam allowances.

Using a quilting ruler, very carefully begin marking the 1/4th inch seam allowance. But first…think about the line you drew around the pieced fabric arc. You drew a line on just beyond the fabric edge so the newly created template shape is ever so slightly larger than it needs to be. Why worry you might ask? If you are making a quilt that has 64 horizontal/vertical seams for example and your template is just 1/64th inch too big…you will be off by an inch in the end ☹️

Place your ruler 1/4th inch mark just on the inside edge of your new paper template piece.

Follow along the entire paper template edge, marking as shown above.

When you have finished marking, take your newly created paper template over to your printer and make a copy. Mark one as: Master Copy, set this Master aside and do not cut it!

Cut out the photocopied paper template along the black line.

Your next step is to very carefully cut away the marked seam allowances.

When finished cutting, carefully fold your template in half. It should be symmetrical. If not, do just a smidge of trimming.

Use this card stock paper template and trace 3 more.

Cut our the remaining 3 card stock arc templates. Fold an additional arc in half.

On a gridded surface, begin to lay out the 4 arcs in this fashion.

The red arrows show that the two previously folded Arcs need to be on the top and bottom. The fold lines need to be lined up with the grid lines. Work with the two side arcs, carefully positioning them so they just touch the edges of the top and bottom arcs. But take a look at the negative space inside the four arcs…do you see what has been created? The DWR block center piece!

When your arcs are perfectly positioned, and without sneezing…carefully tape the edges as shown in the picture.

Tape each of the four places where the arc points touch each other. Once taped, you will ever so carefully lift the 4 arc piece from the grid and …

Place it onto a sheet of white paper. So here’s where I was so excited that I forgot to take a picture. ☹️ carefully lay the 4 arc piece on the paper and trace along the INSIDE EDGE of the taped 4 arc shape.

TAAAA-DAAAAAA You have just created the block center! Yes you will need to add seam allowances but look at what you’ve done!

Speaking of seam allowances, I ALWAYS mark my templates with exact instructions and in this case it’s all about alerting me to the needed seam allowances to be added later!

Sorry this pics a bit blurry. Talk 2 card stock arcs and position them as above, with their points just barely touching. Trace along the INSIDE edge.

Again, TAA-DAA! You’ve just created the Small Melon template!

So what’s happening here? We need to begin to create the 4 Patch template. This time you will trace only the two top peaks these arcs make when positioned like this.

Follow the pictures for arc template placements and markings to make the 4 Patch template.

The final 4 Patch template marking.

You guessed it….taaa-daaa! You now have the makings of a 4 Patch template! If you wanted a solid fabric piece in your DWR you would be finished.

If you want the more traditional 4 Patch piece, begin placing your ruler and marking as shown in the next few pictures.

Make about a 1” like near the center.

Mark a line from opposite points and you will have identified the exact center of this shape.

Set your ruler at the very tip of the arc and at the point where your two lines cross. Draw a line as shown below.

Cut out the photocopied paper template along the black line.

Your next step is to very carefully cut away the marked seam allowances.

Congratulations, you’ve just created the 4 piece 4 Patch templates!

Are you impressed with your drafting skills!?!

It’s totally up to you about how many pieces make up your pieced arcs. Above you’ll see I’ve sectioned out a 6 piece arc.

See the center arc…did you know you can sew a section of strips of fabrics and cut your arcs from this striped fabric?

Do you now see how easy drafting these pattern pieces can be! You now have created all of your templates, all that is left to do is to add the 1/4th inch seam allowances to each created templates. Obviously if you are working with a few vintage arc pieces they will dictate the number of pieces in your additional arcs.

Happy quilting and blessings,

Rhonda

Class 4, the Double Wedding Ring Quilt, Blog Post #4

Class 4 Information FB Post 4

As you are thinking about the decorative stitching around your vintage linen pieces, no matter what their shape, here are 20 close up pictures of my solid arc DWR as well as a picture of the Bernina built in stitch I used.

Do all your decorative stitches need to be the same like mine are? Absolutely no! Do you need to change the color of your thread to match and/or compliment your linen and surrounding fabrics? Again, no! Remember, this is your project, do what makes your heart sing!

And speaking of stitches…do you “test” your stitch before you sew on your treasured masterpiece you are creating? Hopefully your answer is a resounding “Yes!” Using scrap white or light ivory fabrics, fold or layer two or three pieces together. If your machine allows, try different widths and/or lengths of any stitch. When you find a combo you like, jot down the stitch parameters (width and length). Why…well if you’re anything like me you think you will remember but within a few minutes…well you know what I mean! 🤣😂❤️

For my Christmas themed DWR utilizing the vintage tablecloth I used the same Bernina stitch, #301 but because so much was going on visually I chose to use the same decorative stitch thread color throughout.

Happy stitching and blessings,

Rhonda

Class 4, the Double Wedding Ring, Post 3b

This blog post addresses the Double Wedding Ring quilt that has pieced arcs. I’m showing you below the template set I prefer, the set from Marti Michell. In this blog we will be specifically talking about three pieces: the Pieced Arc End, the Pieced Arc Middle Segment and the Small Melon. Just ignore the center template labeled Four Patch Corner, this template will be addressed another day.

Oh, and what are those little white rectangles? Skateboard Grip Tape! They work wonders for keeping my template securely in place while I am rotary cutting. Because I need to flip the Pieced Arc End template I placed the grip tape on both the front and the back. I bought a large roll of this grip tape online. Just google Skateboard Grip Tape. Oh…and whatever you do, DO NOT CUT THE GRIP TAPE WITH GOOD SCISSORS!

For this quilt I used a vintage Christmas tablecloth and found that I had just 27 of the darling motifs I could cut out so I ended up with a 24 block quilt. Your quilt may be smaller or larger.

I spend several hours choosing my fabrics that would work well with the old tablecloth, paying close attention to using both white and ivories, lots of reds and an equal amount of greens. Many of the fabrics are Christmas themed but definitely not all. It was also important to me that I not use the four patch fabrics in the pieced arcs.

To piece a single multi fabric arc I needed 4 Pieced Arc Middle Segments and 2 Pieced Arc End segments for a total of 6 pieces.

But how many of each piece from any or all the fabrics would I need? I had no idea so I cut a minimum of 15 from a whole bunch of fabrics. As I began sewing I found I was cutting lots more pieces!

But…you need to pay close attention to the Pieced Arc End Segments…look closely at the picture below…do you see that while the center four pieces are identical, the two end pieces are mirror images of each other.

In the picture above you can see that I stacked my pieces on a small 14×14” batting covered piece of cardboard. If you need to make yourself a small board such as this I’d suggest making it at least 16×16”. This little board was invaluable for keeping everything organized and while not super obvious, I had all my Pieced Arc End Segments lined up vertically along the right side.

Oh my goodness, at this point I wanted to stay up all night sewing pieced arcs!

Plan to have a nice mix-up of fabrics/colors. I chain pieced most of the center four pieces, joining together two at a time taking care to not have two similar color fabrics next to each other. Once I’d chained maybe 20 or so groups of two I then chained those 20 together making the center portions of 10 pieced arcs. I’m not a huge fan of chain piecing but it worked great for this project.

📌📌📌📌📌 A HUGELY IMPORTANT THING: pay very close attention to sew AN EXACT 1/4” seam allowance!! 📌📌📌📌📌

You need to audition your arcs just like the class participants making the Solid Arc DWR.

Can you hear my heart go pitter-patter as I look at this picture! Having never made a pieced arc DWR before I knew I was hooked!

Once you have all your Pieced Arcs made and you’re happy with the layout, take a picture. Next change the picture to black and white and see if you are still happy with the layout or if some changes or arc swapping needs to happen.

Speaking of pictures, I say take lots and lots of pictures are you work on your quilt. They provide such a nice record of your progress start to finish of your projects!

Again…do not sew footballs! It’s not time yet!

How are you feeling about your Double Wedding Ring quilt project? It’s exciting isn’t it!

Happy quilting and blessings,

Rhonda

Class 4, the Double Wedding Ring Quilt, Blog Post #3a

This blog post, 3a will address only the Double Wedding Ring quilt with solid arcs as shown in the picture above. You can easily see that this is a 4 block x 5 block quilt. What you will also immediately notice is that the blocks share at minimum 2 Footballs or the shape produced when two Arc pieces, two 4 Patch Corner pieces and one Small Melon piece are sewn together.

The picture below shows the Marti Michell templates that would be used to cut these shapes. Your template pieces may not be identical to those shown below but they will be very similar.

For this quilt, it is very important to determine your decorative stitch thread color all the while auditioning fabrics that will surround each of your quilt block center pieces.

Can you see that I have yet to decoratively stitch around any of the vintage linen circles? I need to be absolutely confident of the fabric arcs before I choose a thread color for any one of the circles. And yes, I used many different thread colors!

Once you are satisfied with the layout of your center block pieces, you will find yourself at the point of experimenting with your fabrics. I began this process by choosing reproduction fabrics, many from the Moda Aunt Grace collection. I cut 8 solid arc pieces from each of about 10 fabrics and began randomly laying them out on the design wall taking care to keep an eye pleasing distance between same fabrics.

Did I absolutely love all the fabrics I chose…no. Instead, I chose fabrics that would work well with and/or compliment the vintage pieces they would surround.

It took me a day or two to cut and place my solid fabric arcs. I was constantly taking pictures looking for visual heavy spots that needed to be addressed.

From previous Classes do you remember about the importance of a black and white picture? Our eyes tend not to see unbalance when looking at color pictures but once we change them to black And white balance or unbalance becomes very obvious.

Look at the two identical pictures below, one in color and one in black and white mono tone:

There are a few areas that “read” heavier than others. You will find the correct placement of fabrics depends on the vintage linens circles composition, the appropriate fabric distribution and the results of your black/white picture. And who said quilting isn’t an art! 🙂

When you are completely satisfied with both your fabric and block center placements you will begin to choose the threads and decorative machine stitches. Once you have securely sewn your circles in place you will be very close to beginning to sew your block pieces together.

Are you ready? Happy stitching and blessings to everyone!

Rhonda

Class 4, the Double Wedding Ring Quilt, Blog Post #2b

Class 4 Information, FB Post 2b

Why have I avoided talking about machine decorative stitching over the raw edges of the vintage linen circles? This is how things progressed for me:

Once I had all my circles cut and glued to my background fabric I began to position them on my design wall in what I considered to be a pleasing layout. (And I forgot to take a pic at this point ☹️) I immediately learned a few things, the first being that there was one circle that while upclose looked fine…from a distance looked dirty/stained. See the first two pics below. Before you scroll to pic 2 see if you immediately spot the culprit circle. Even before you cut fabrics for your arcs, lay out your center block pieces to weed out those that just do not enhance your project.

Don’t begin choosing the various colors for your decorative stitches until you’re comfortable with your fabric(s) layout.

Happy quilting and blessings, Rhonda

Class 4, the Double Wedding Ring Quilt, Blog Post #2

Class 4 Information Post 3

From the 1914 Boehm House Vintage Linens Classes Facebook group. Jump over to Facebook and join the group! We are working on Class 4, the Double Wedding Ring quilt.

Have you been busy cutting out your large block center pieces? By this point do you have a quilt size in mind?

Let’s spend a lesson talking about the actual cutting out of the vintage pieces to be showcased in your DWR blocks. Again, you will find information in the picture captions.

Below you’ll find I’m talking about and showing pictures of machine decorative stitching of my Christmas themed quilt..but not my solid arc reproduction fabrics quilt. There’s a huge reason for this! I need to have my blocks and solid fabric arcs layed out on my design wall first. My decorative stitching thread color choices (and there will be many) will be dependent upon both the beautiful embroidery and the 4 different fabrics that will border the block center.

I have two of these vintage pieces so it is easy to show you the “before and after”. I placed my acrylic circle template over the basket, marked the outside of the circle and cut it out. But…it looked a little sad because the top of the circle was just very plain. I put my circle template to use again and placed it over the pretty floral swag at the doily’s top edge.

I like the look of this circle much better with the floral swag added to the top. Can you tell that I trimmed away the basket edge from the back of the floral swag? Not absolutely a necessary step, I just wanted to reduce the bulk.

This doily has an embroidered flower petal edge but this does not stop me from using it! I forgot to take a pic after I marked the circle and before I cut it out.

Did it jump out at you that this featured piece is not a complete circle? It works doesn’t it!

Another doily ready to be featured.

But did you notice…when I marked and cut out the circle, I did not cut through the beautiful hand crocheted edging? Save your crocheted edgings, they may come in handy in your next vintage linens quilt project.

Just another example of a circle cut from a vintage piece. This was cut from a nice guest towel and I had a bit left over with some nice embroidery…but nothing I could cut a nice circle from…too much empty areas left over.

But what’s up with this circle? Can you see that it was cut from the same hand towel as the picture previous? Look at the left side of the circle, look for the vertical row of tiny little open squares. Can you picture the guest towel now? But there’s more…do you see the bottom pink flowers has stitching around it?

This is the back side. Can you see the stitching on the slightly oval patch? The guest/hand towel was needing something else, at least in my opinion so I cut a pink flower from another area and machine zig-zagged it to the circle. You can also see I’ve run the glue around the circle so it’s ready to be centered on the background piece.

So, from one guest towel I was able to get two very nice vintage linens circles for my quilt!

But what if you are cutting your featured block center pieces from something like a vintage tablecloth? (As a side note, someone asked why I had melon pieces marked on the tablecloth. I initially thought about using these designs in the center of the “footballs” but came to my senses realizing how chaotic it would look.)

Because I had done my measuring as advised in Post 2, I could cut a translucent plastic template of the exact size needed. This template allowed me to precisely center the underlying motif(s) because I marked half way registration lines with a black fine line Sharpie pen.

I marked the entire tablecloth. I needed to be absolutely positive that I had enough center block motifs for a 4×6 block quilt.

I marked the cutting lines with my newly created plastic template but did the actual cutting with a slightly larger acrylic quilting ruler. All I had to do was reposition the quilting ruler as I cut around the marked square.

I just love these minstrels! You can see I’ve pinned the square in place in anticipation of the upcoming mchine decorative stitching.

But how do I know the little square is EXACTLY centered?

Remember from Post 1, we reviewed the diagonal folding and finger pressing? IF you folded and finger pressed properly and IF your newly cut square is truly a square…then at each of the four corners…they will line up EXACTLY with your finger pressed diagonal fold lines.

***Personal thought here…nothing bothers me more than when we don’t take time to be precise where precision is needed because it will be very obvious if our feature motifs were WONKY…but that’s just me… 🤪

What’s happening here? I’m auditioning thread. I want to know if the color is the best I can find. Pull off a foot or two from your spool/cone and lay it all helter-skelter on top of your motif. Seriously, this is called “puddling the thread”. Do you like it? Does it play well with the motif colors? Will it work with the various fabrics you’ve chosen.

A close-up.

You can Elmer’s Washable School Glue your squares to the background piece if you wish, I chose to just pin and stitch.

This is a built-in sewing machine decorative stitch directly over the raw edge of my tablecloth motif square.

Don’t freak out at the corners..just do your best. I find that if I try to turn the corner when stitching I usually have a mess. I stop and start at the end of a side and at the beginning of the next side.

And the raw edge decorative stitching is complete!

And here’s another one of the tablecloth motifs just for fun!

Whew! We’re finished with Blog Post #2 of the Double Wedding Ring quilt! ❤️👍🧨💃🏼💃🏼💃🏼🧨👍❤️

Blessings, Rhonda

Class 4, the Double Wedding Ring Quilt, Post #1

Class 4 Information

The Double Wedding Ring quilt class begins! I’m teaching this class via Facebook at: the 1914 Boehm House Vintage Linens Classes group. So why the posting here also? I’ve found many of the participants find it easier to print from this website than from Facebook. It would be my preference that all questions/comments be posted via the Facebook group, thanks in advance.

This post is loaded with pictures and below all but a few you will find information.

For some of you we will be moving slow, for others the pace will be crazy fast. Just keep in mind these instructions will be here in this Blog post maybe for years to come.

Keep up with your reading and remember, quilting is supposed to be fun!!! 😵‍💫❤️😵‍💫🤣🤣🤣

Read through everything at least once BEFORE you begin. BEFORE! NOT AFTER!! 👍 You’ll thank me later…

But how big will your quilt be? This is your decision! It can be as small or a large as you wish. The graphics at the end of this post will help you to determine how many blocks you will need to make.

No matter what kind of DWR you are making, you need to make your block center pieces first, well before cutting any of your beautiful quilting fabrics!

Now…let me say…you may want to wait for a few weeks to do your decorative sewing machine stitching around your vintage linens motif shapes. This is totally your call. I knew exactly what I wanted on the Christmas quilt so I decorative stitched them immediately, the vintage linen circles, I waited until I and all my fabrics cut out and placed.

For my pieced arc Christmas themed quilt top I’ve chosen to use the acrylic DWR templates from Marti Michell.

One of the two dies with the Accuquilt DWR template set I used to make the solid arc reproduction fabrics quilt.

I knew I wanted to fussy cut the various motifs found in this vintage Christmas tablecloth. I chose my fabrics to compliment the tablecloth as well as carry out the Christmas red and green theme. Of note: the tablecloth background is white but I chose a variety of fabrics with both white and ivory.

I’m not crazy about what I will call the “lime green” but because it was used extensively throughout the tablecloth I knew I needed it to make an appearance in the fabrics.
The next step will be to choose the fabric for the block centers as well as the “football” melon shaped centers. Football??? When the two arcs are sewn to the center melon the resulting piece reminds me of a football.

My next step was to cut out the DWR center piece. 📌 Remember!!! It is very important to cut this piece out on the “straight of grain” of your fabric!! Wonder what straight of grain means? Google it for more info. Fold opposite corners together and finger press the fold. Repeat with the other two opposite corners. You now know the exact center of your DWR center piece. If you plan to applique vintage linens to this center piece you will need to perform this “fold and press” step to each of your block center pieces.
Because you have cut the block center on the straight of grain, the diagonal folds will be on the bias. 📌 Use caution so as not to stretch the block as you finger press these two fold lines.

There’s lots going on in the picture above. First, I’m showing you that the Accuquilt template outline on the left is smaller than the Marti Michell acrylic template on the right. This is just one example to illustrate why you should never mix templates from different manufacturers. Second I’m showing you that if you are using the right side template, use care as you layout and cut the large piece because the melon piece can easily be cut from what looks like waste fabric left behind!

Here’s an example of my comment earlier about cutting out the large center piece and having enough left over fabric to cut out the football melon. 📌 SAVE YOUR SCRAPS!

Have you decided how large your quilt will be? A project 4 blocks wide by 6 blocks long will require 24 blocks. As you cut out your center pieces, keep track of them. In this picture above I’ve stacked my pieces in groups of 10.

If you plan to applique vintage linens circles to your quilt block, the next few pictures are important for you. Remember from above how to find the exact center of a symmetrical block piece? Fold to opposite corners and/or sides. My longarm circle templates comes in handy because it has registration marks at 3, 6, 9 and 12.

Using a Frixion Pen I drew around the acrylic circle and then using a ruler, I made marks at 3, 6, 9 and 12 showing there the quarter inch seam allowance will fall. Because I planned to use a built in sewing machine decorative design to applique my “raw edge” circles to the block center, I needed to know the outer most limits so as to not catch the applique stitches in the seam.

Using the same acrylic circle template, I begin auditioning vintage linens to see what will fall within the circle confines all the while looking wonderful.

Once happy with the placement of the circle template I drew around the OUTSIDE of the template with my Frixion Pen.

Elmer’s Washable School Glue once again is the best for a project like this! I run a small amount of glue all around the INSIDE of my marked circle. Using my finger or the glue bottle orange top I smear the glue a bit.

I lay the vintage linens circle directly onto the large block center piece and YES!!! I’m very happy with the look.

But what if you’re using something like my vintage Christmas tablecloth for your center motifs?

You will measure side to side at the narrowest point of your center block piece, both horizontally and vertically. This will determine the size of square that will fit your block center. Just like above, you will need to take into consideration your quarter inch seam allowances. I prefer to work with squares so for easy math let’s say the narrowest measurement is 6 inches. We know we will need to account for quarter inch seams so the largest square we can use will be 5 1/2”.
Do you see the finger pressed diagonal fold lines above? They are absolutely key to properly centering your square feature motif. Each of the four square points must match up exactly with the diagonal fold lines.

One final thought for today if you are using a vintage tablecloth…if you need 36 blocks but you only have 30 motifs…you’re in trouble. This is where planning ahead comes in. If I would have needed more blocks I could have easily cut squares of the holly, pieced them together in a 4 Patch and used that in my block center. PLAN AHEAD, PLAN AHEAD, PLAN AHEAD! Don’t reach the “almost end” and realize you don’t have enough to finish! 🙂❤️☹️❤️🙂

If you purchased the Marti Michell template set you will have already received some excellent DWR black and white layout graphics. If not, my search of the internet found these two pictures above you may find useful.

Whew! Is all this more than you bargained for on day one? Take your time! Like I said a few weeks ago, Class 4 will progress slowly!

Blessings to all for a wonderful New Year, for health and happiness and for a TOTALLY FABULOUS DOUBLE WEDDING RING QUILT! ❤️🙂❤️

Rhonda