
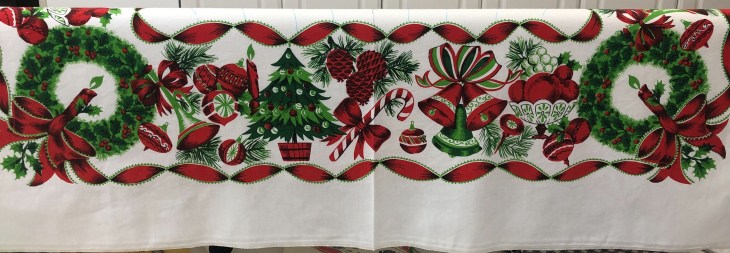
What’s not to love about a mid-century vintage silk screened Christmas tablecloth in near perfect condition? Purchased on eBay about a year ago, I decided it was time, back in February, to get this quilted.
The particulars: backed with 100% cotton bleached muslin, double batted with Hobbs white 80/20 and Tuscany Poly on top, needle thread is Wonderfil Specialty Threads Invisafil color #105 and Gutermann Skala 240 color #111 in the bobbin.
I longarm on a 26″ Innova with Lightening Stitch. As I do not have a computer on the longarm, everything I do is hand guided free-motion with an occasional ruler when necessary.
The marking pens are: blue by EZ International company and purple by Leonis.
The finished bound size is: 51 x 70 and it took 23 hours and 15 minutes to complete the quilting.
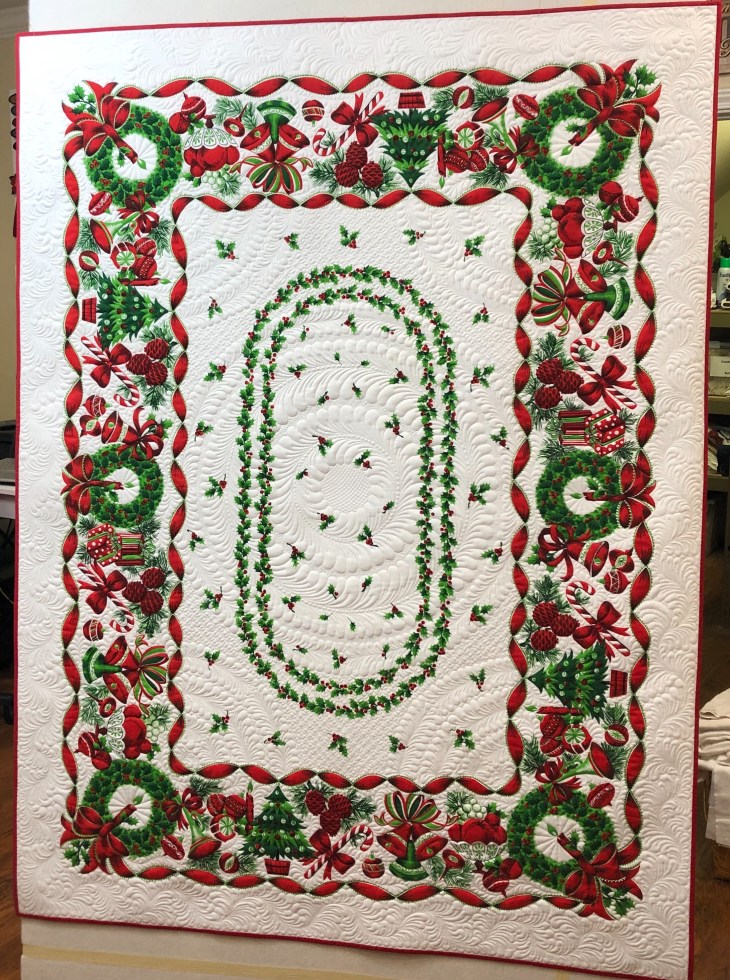
Let’s start with a picture of the finished quilt and then we will walk through the process step by step:

Here’s what the tablecloth looked like right before I loaded it onto the longarm.


I bought this large stencil years ago from The Stencil Co. To the best of my knowledge they still stock this item. It’s a fantastic stencil because it can be used in so many different ways! For this tablecloth project I relied on the marked circles as registration lines to determine the size of my various Feather Wreaths.
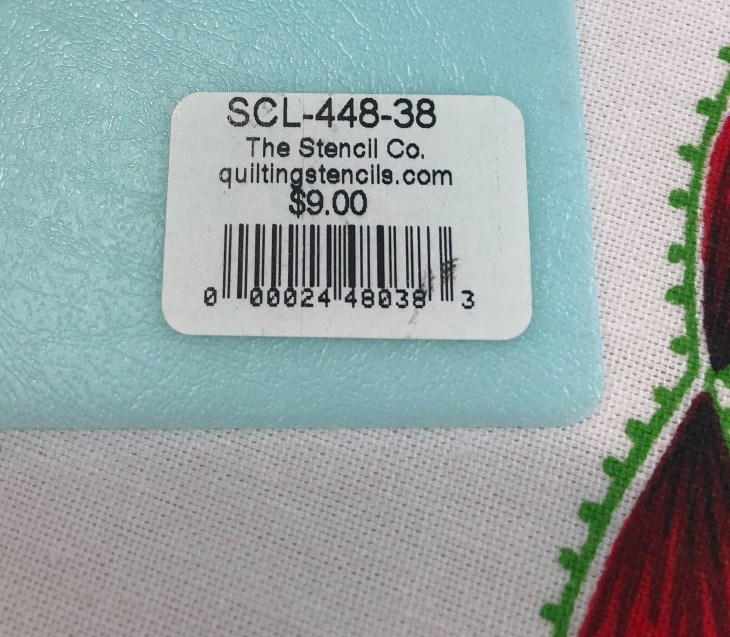
The stencil is 1 quarter of the final design.

You might have noticed I’ve marked the horizontal and vertical center lines with a purple pen. It’s a Leonis air and water erasable marker. I determined the marked lines by folding the tablecloth in half lengthwise, mirror image matching the motif placements as best I could. I pinned the tablecloth once the above and below motifs were lined up and using a steam iron I hard pressed a fold. I then repeated these steps to press a fold line horizontally. After the cloth had cooled and using a straight ruler I marked over these hard pressed fold lines with the purple Leonis pen.
Are you freaked out just a little bit about these hard pressed fold lines? Scroll back up to the first pic and see if you can find the pressed folds.

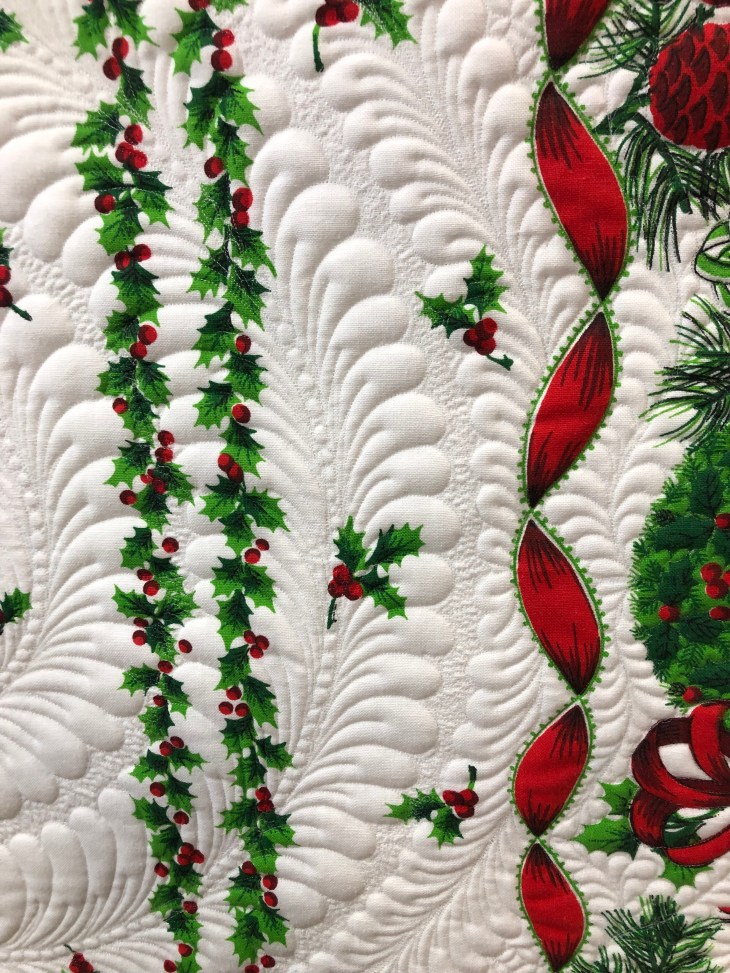
It’s always a challenge for me to quilt what essentially is a Whole Cloth Quilt. I’m a firm believer in Stitch In The Ditch (SID) but for this project there are no seams (ditches). I take the approach of treating the printed designs as appliqué and carefully quilt around these when possible. Below you can see I am outlining both the inside and outside red edge of the undulating ribbon.

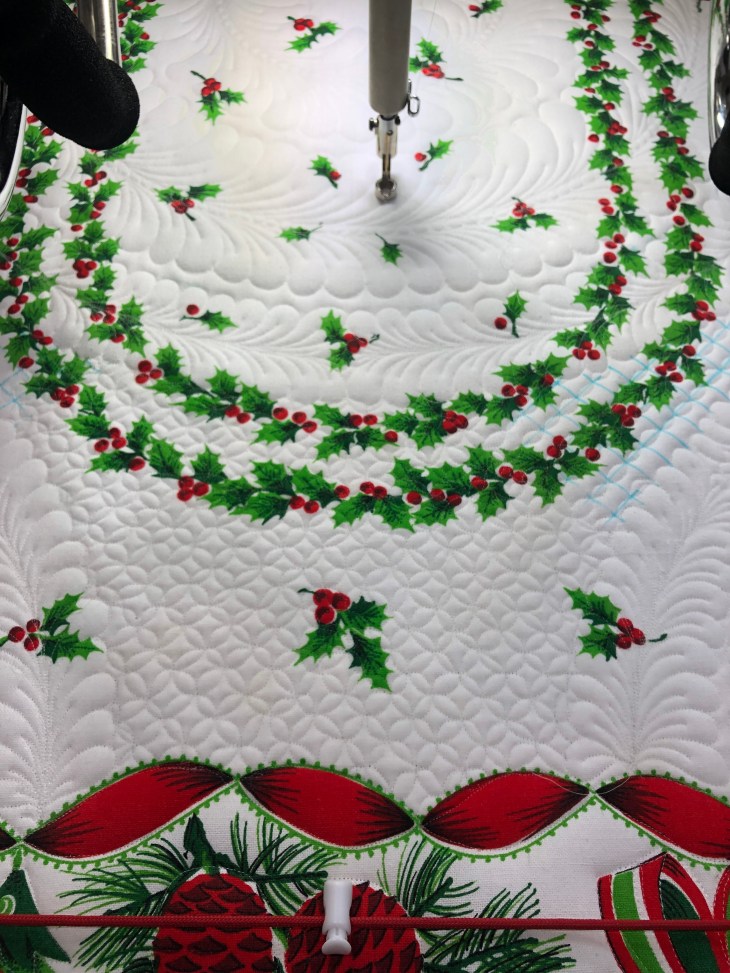
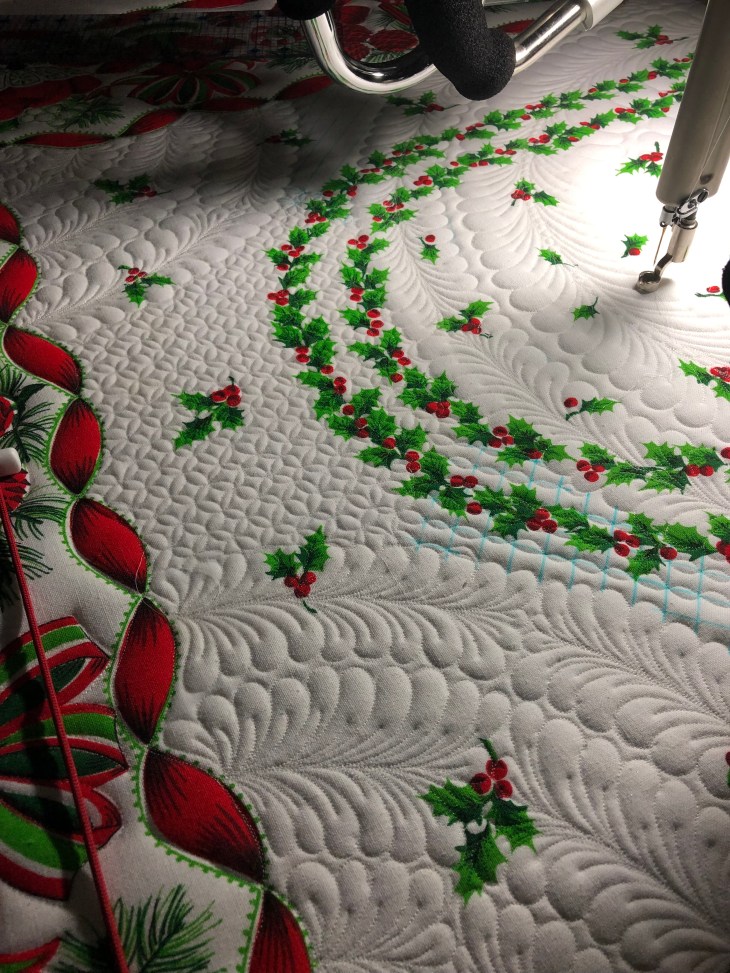
Fast forward (also known as: I forgot to take progression pictures…). Once I feel comfortable that the tablecloth quilt top is stabilized it’s time to tackle the large Feather Wreaths in the center of the project. I used the blue registration lines to guide me as to the parameters of each wreath and the small spaces between the blue lines guided the size of my quilted 1/4″ Pearls and/or Pebbles in the wreath feather stems.


The picture above shows that I’ve quilted the feather wreaths and outlined most of the printed border motifs.

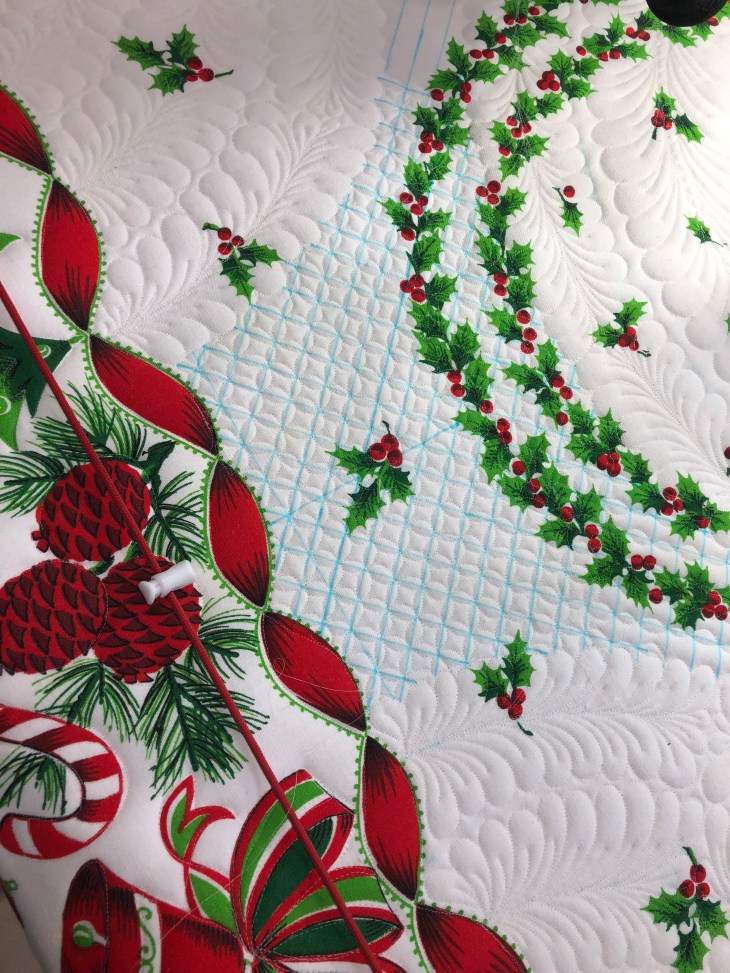
After marking a diagonal grid in the negative spaces left by the Feathered Wreaths I set about lulling myself into a quilting stupor by doing a small Orange Peel design… oh I was such a happy quilted when this step was finished!


In both the pictures above and below you can see what a difference the micro quilting made when stitched in the space between the large wreaths. It took forever but I think it was well worth the effort.

I used 2 different techniques in the micro stippling, one area has scribbling and the other has very tiny overlapping ribbon candy. I think I like the ribbon candy best and I also think it went faster.

If you’ve read any number of my past blog posts you already know I love love love an undulating quilted feather border. This quilting project is no exception!

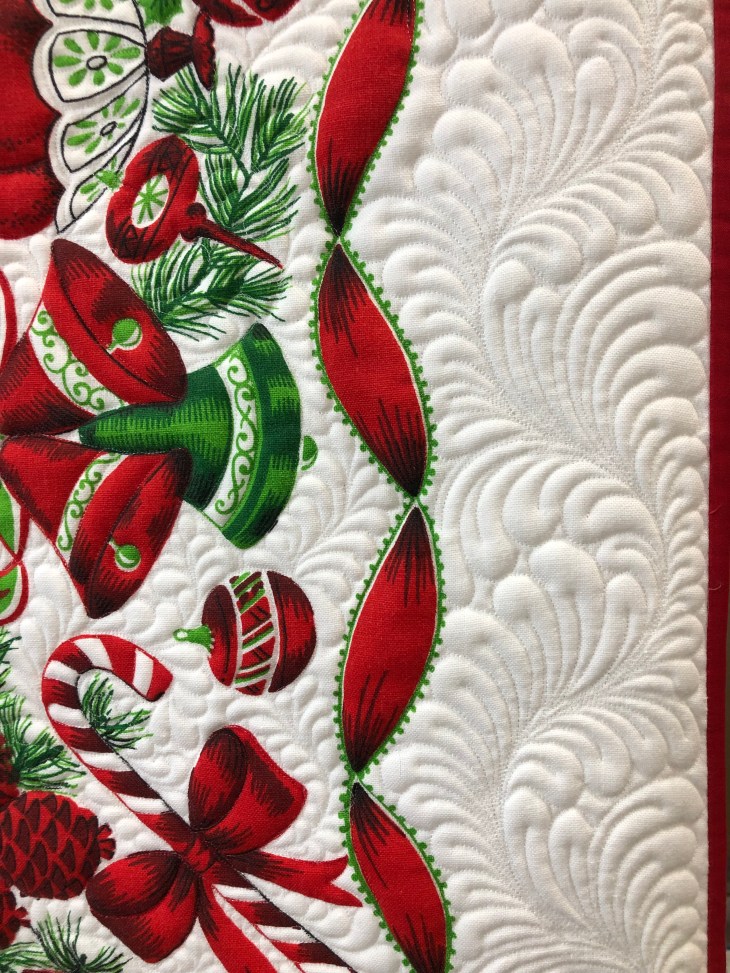
How to handle all the negative spaces in the printed borders? Lots and lots of little elementary swags and arches.

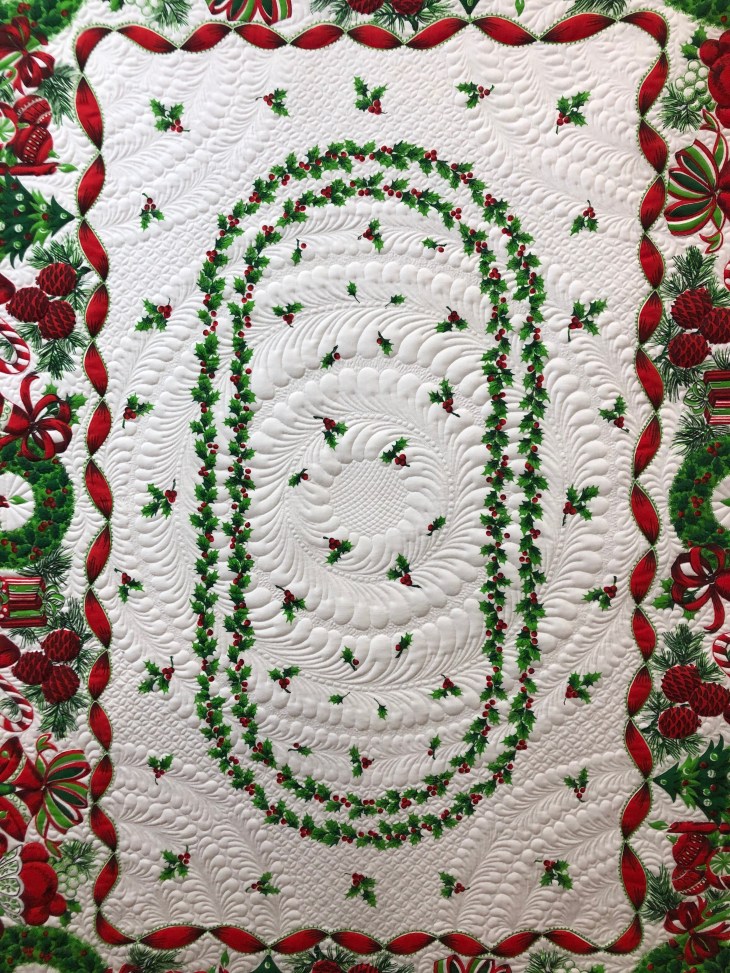
The center of the tablecloth gets 1/4″ spaced curved crosshatching.


Below you’ll find more close up pics:


Have you noticed? Does it bother you? The tablecloth has a very large double holly elongated oval printed in the center. I quilted a very large circle in the center. I felt as though it would be an unexpected surprise. Apologies right now to all my OCD friends.
Thanks for reading this far! Hope you enjoyed this blog and next time you see all those beautiful mid-century tablecloths in second hand/antique shops think about buying one in decent condition and quilting it! I can either hang this on a wall or use it as a tablecloth, after all, it’s been laundered on many occasions and still looks great!
Blessings and Happy Quilting,
Rhonda

