Second Chances, my hexagon quilt, was a work in progress from May 28, 2014 to July 4, 2015. I worked furiously on this piece in spurts, sometimes requiring several weeks of involvement in a completely different project to give myself a break from beading, ribbons, vintage linens and such.
You should know I have an addiction to Pinterest. If you’re wanting to see what others people are doing, get some serious inspiration or just pass the time, Pinterest is just the ticket!
While on one of my scrolls through pins I came across Sarah Lizzies Handmade. Check out her blog and while you’re there scroll way back to May 9, 2013 and prepare to be amazed!
Here’s the picture that – for me – started everything:

I couldn’t wait to start! I had a nice size collection of vintage linens, doilies, handkerchiefs, buttons, ribbon and trims. I estimated her hexagons were approx. 10-12″ flat side to flat side. I knew I wanted to start small so I rummaged through my templates and found just the right size in this collection: Omnigrid Pandora’s Box by Sharlene Jorgenson. I’ve searched and searched Omnigrid to put a link to this collection of templates but it appears it’s not something that’s available any longer. Here’s a picture of my rose colored template:


I’d never really worked with hexagons before, they’ve always kind of intimidated me. Well, no more! I jumped right in and began to cut and audition and stitch and embellish and in general had a blast!
I’m going to take you through the first 3 hexagons on Second Chances. Lots and lots of pictures so grab a beverage and let’s get going!
Hexagon #1:
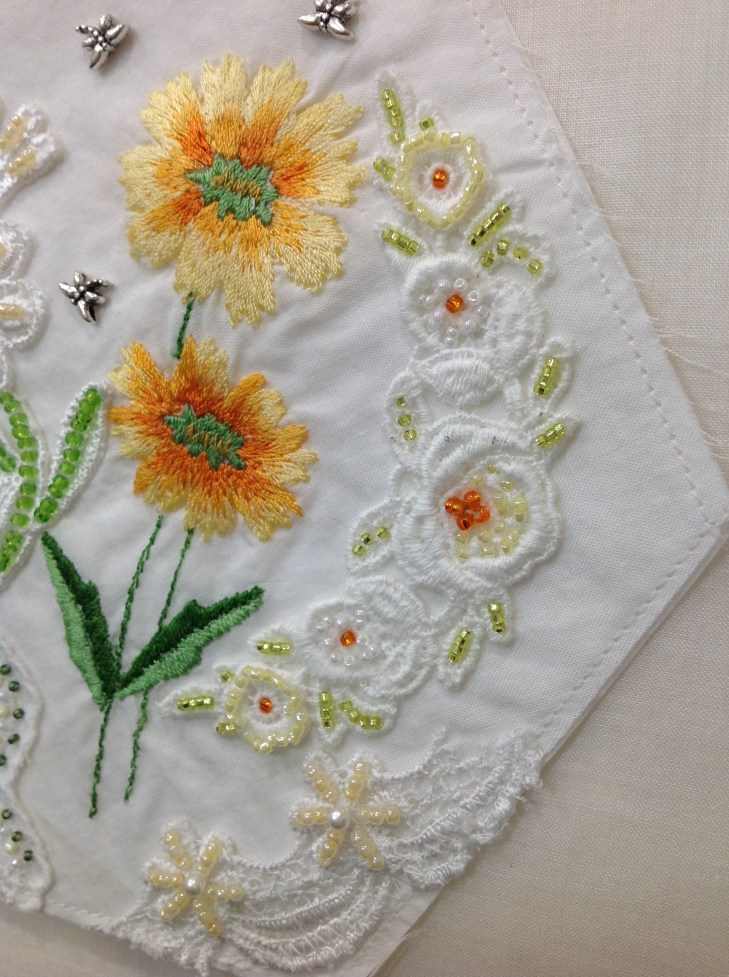
The yellow/orange machine embroidered flowers are from a ladies handkerchief. I laid my acrylic template directly on the hanky and, using a rotary cutter, cut out the entire shape of the hexagon. I then cut a single layer of machine embroidery cut-away stabilizer, weight 2.5. The weight of the stabilizer is very important. Don’t choose a stabilizer that is light weight, it will not provide the “stability” you’re looking for. At this point my hexagon layer is: white stabilizer, bleached muslin and the handkerchief cut to size. I then began to lay various pieces of white trims and eyelet lace directly on the hexagon. After moving them around a bit I was pleased with the arrangement so by hand I tacked them in place using white thread. For all the beading work to come I use a #10 bead needle and Nymo white or ivory medium to light weight beading thread.
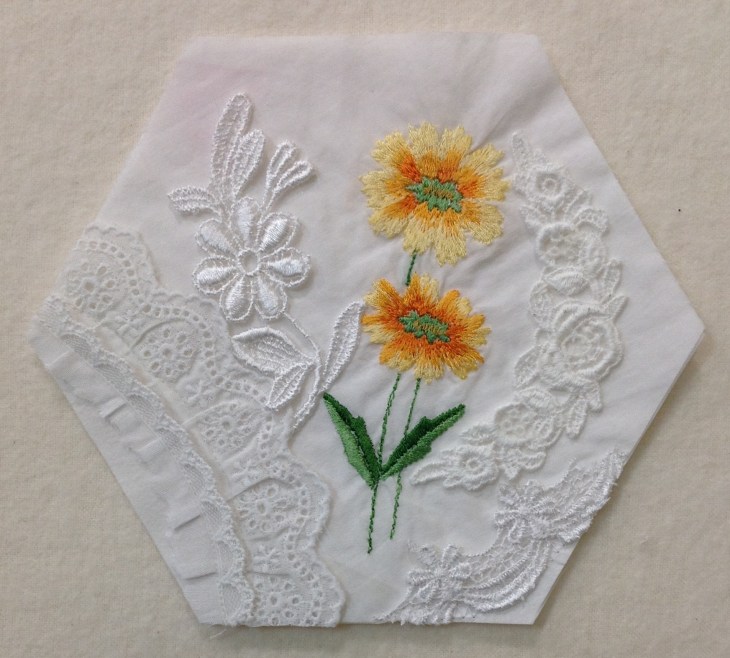
In the next picture you’ll see lots has happened: I’ve embellished the stems and leaves of the white floral trim on the left with seed beads, I’ve embellished the eyelet trim on the lower left with seed beads and pearls and I’ve added a row of machine heirloom or decorative stitching to the area on the left of the pearls.

Here’s a close up of the lower left side of the hexagon. Notice that the row of white beads are not all the same, I’ve alternated a white ceylon bead with an ivory.

The bead embellishing continues with the addition of beads to the all white floral trim on the right of the handkerchief flowers as well adding the tiny metal dragonfly charms.


Here’s the finished hexagon. Once all the embellishing/stitching etc. is finished, I back the piece with a single layer of 50/50 cotton poly batt (that I have preshrunk with a steam iron) and a layer of 100% cotton bleached muslin. I lay the acrylic template on the fabric and mark very lightly all the way around with a mechanical pencil. I then cut the backing muslin 5/8″ larger on each side. I center the embellished hexagon and batting on the back fabric, iron the back fabric edges once into the hexagon so that the raw edges of the muslin just barely meet the raw edges of the hexagon. Do this for each of the 6 sides. Fold the back fabric once more to the front of the hexagon, lightly set with an iron and hand stitch the edge down as you would a quilt binding, using care to miter each of the 6 points.

So, from the bottom up here’s a recap of the layers:
- bleached muslin
- 50/50 poly cotton batting
- machine embroidery 2.5 weight white cut away stabilizer
- bleached muslin
- vintage ladies handkerchief
- various trims/laces
- beads, pearls and charms
Almost without exception this is the layering I used on each hexagon throughout the entire quilt.
Hexagon #2:
I got so excited to begin embellishing that I forgot to take a true “before” picture. The picture below does give you an idea of what the green cross stitch edge of the luncheon napkin looked like before I began to add beading. I chose three different white trims to add to the napkin.

Using an oval template I lightly drew around the cross stitched floral bouquet. Knowing there was probably no way I could evenly space the irridescent and the pink seed beads around the oval, I laid the white lace trim over a small part of the oval as a perfect distractor.
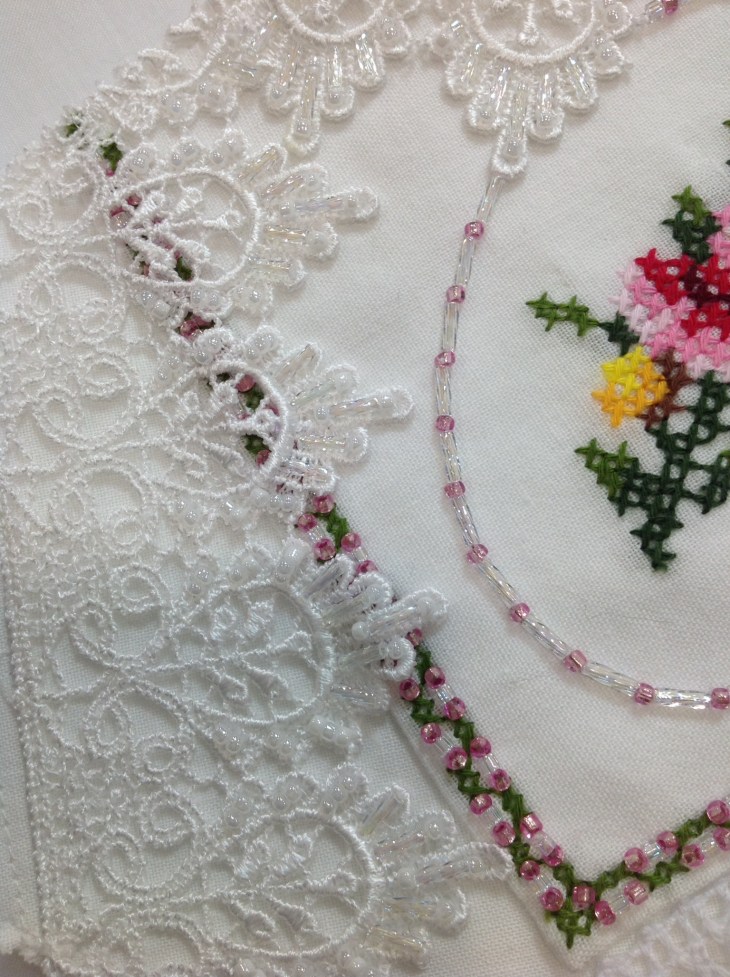

I tried to repeat colors for continuity. There is one blue flower in the bouquet so I used blue beads on parts of the white trim. I repeated this concept for the additional bouquet colors.


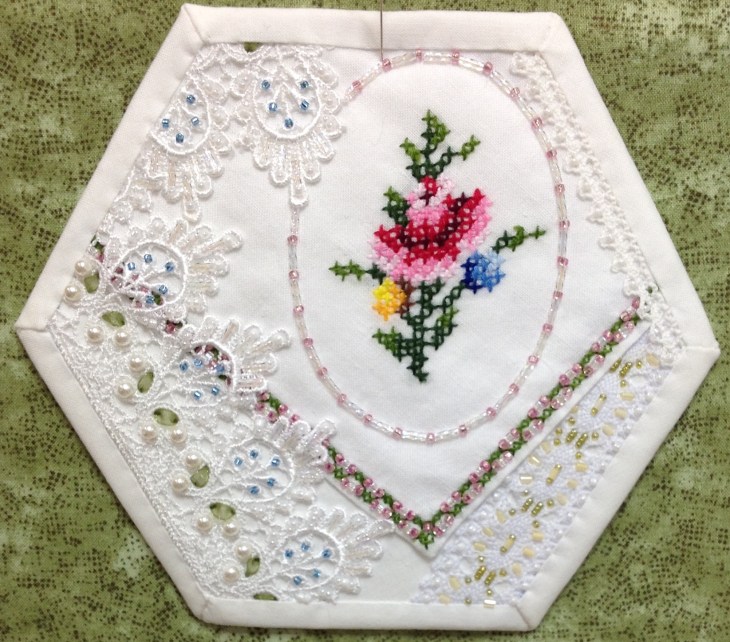
And here’s the finished hexagon!
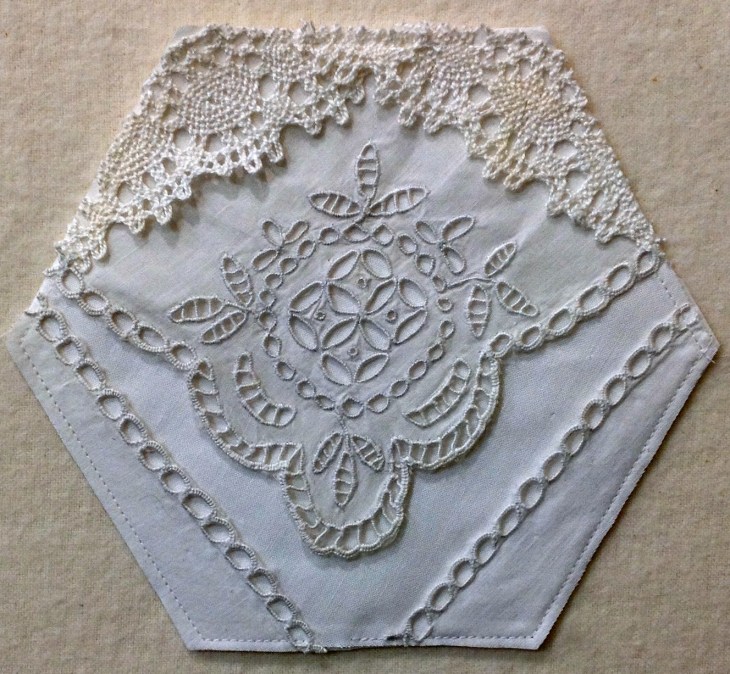
And finally, Hexagon #3:
Look closely and you’ll see that the trim I’ve used on the upper right edge is stained. Keep in mind for your own creations, it won’t be noticed. Again, I’ve used a vintage napkin, this time one with cut-work. I used the decorative corner on the napkin as well as two sections of edging. The decorative edge is placed point side down and centered on the white muslin and the edge work is inverted along both the botton right and left edges of the hexagon. Remember, save your little pieces, they can come in very handy to fill in a spot or two on your current or a future project.

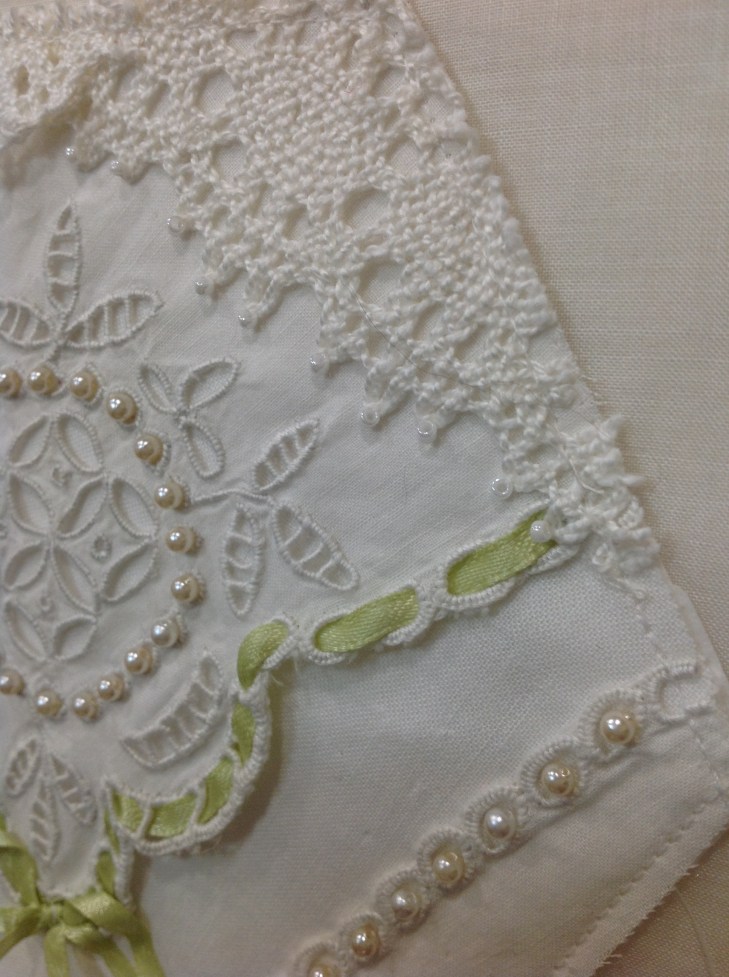


The picture below brings up an important point. Remember to mark 1/4″ all the way around your hexagon before you begin to embellish. You don’t want to try to make your final fold over binding/frame look polished if there are pearls, beads, ribbons, etc below. This 1/4″ is your guide: don’t embellish beyond this point!


And finally, you don’t notice that stained trim in the upper right anymore do you! While initially it may have caught your eye, the embellishing now takes center stage. Can you see how the sky’s the limit when it comes to creating blocks from vintage linens, trims, etc!
Until next time, happy stitching,
Rhonda
ps: If you’ve made it this far and are wanting to know RIGHT NOW what the remaining hexagon blocks look like, if you’ll go to my Pinterest boards, look for the one titled: My “Second Chances: hexagon quilt… you’ll find 139 detailed pictures taking you through the entire process. Happy scrolling!