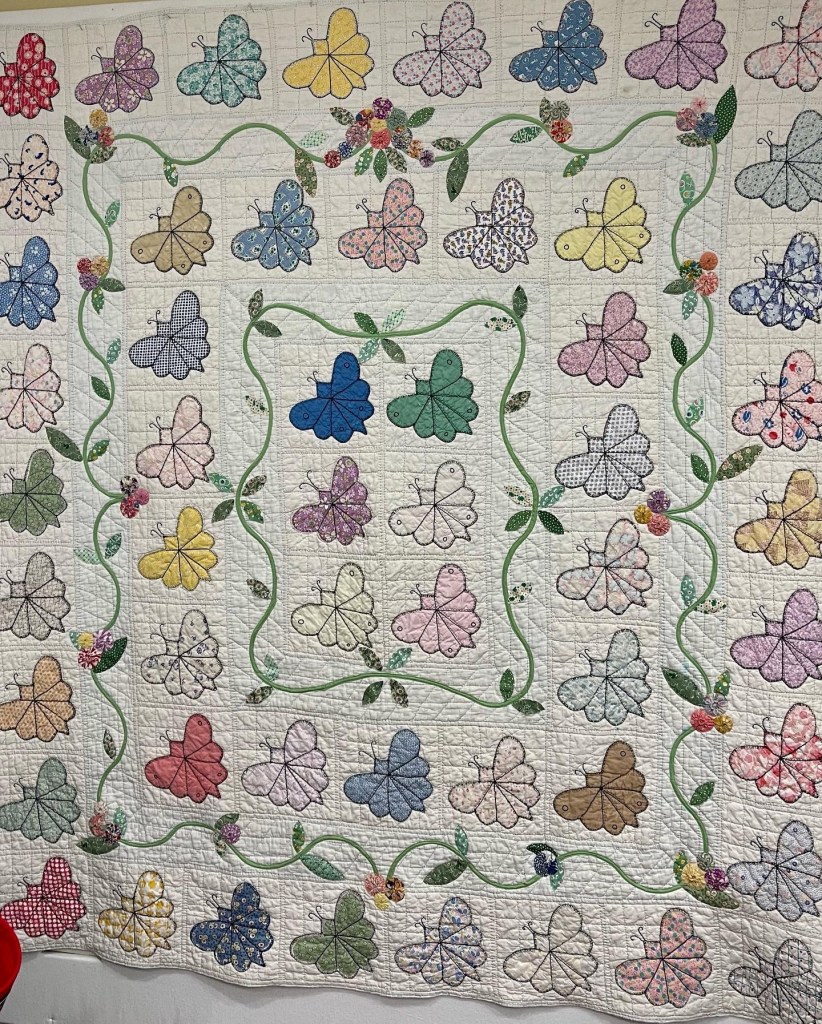
The original vintage quilt (minus the raggedy outer border) hung on my design wall for over a month while I mulled over what I could do to save/repair/fix this beauty.
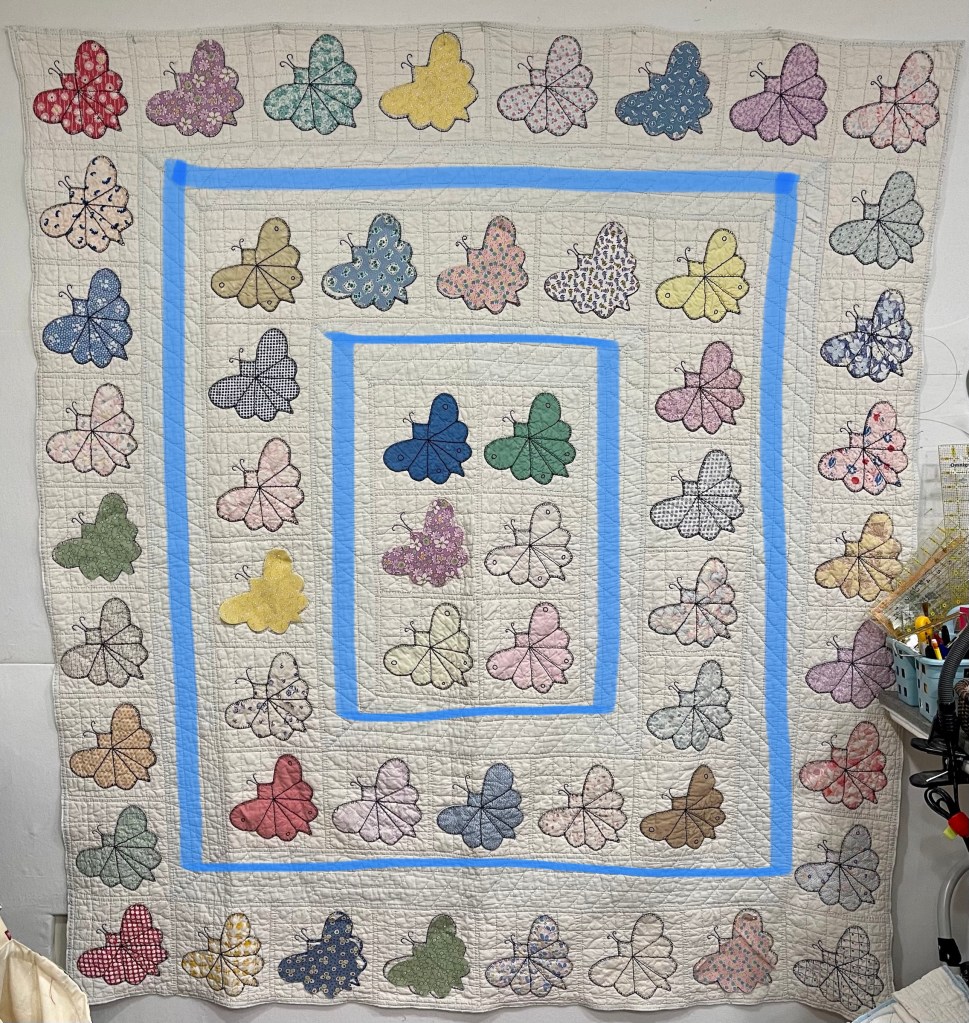
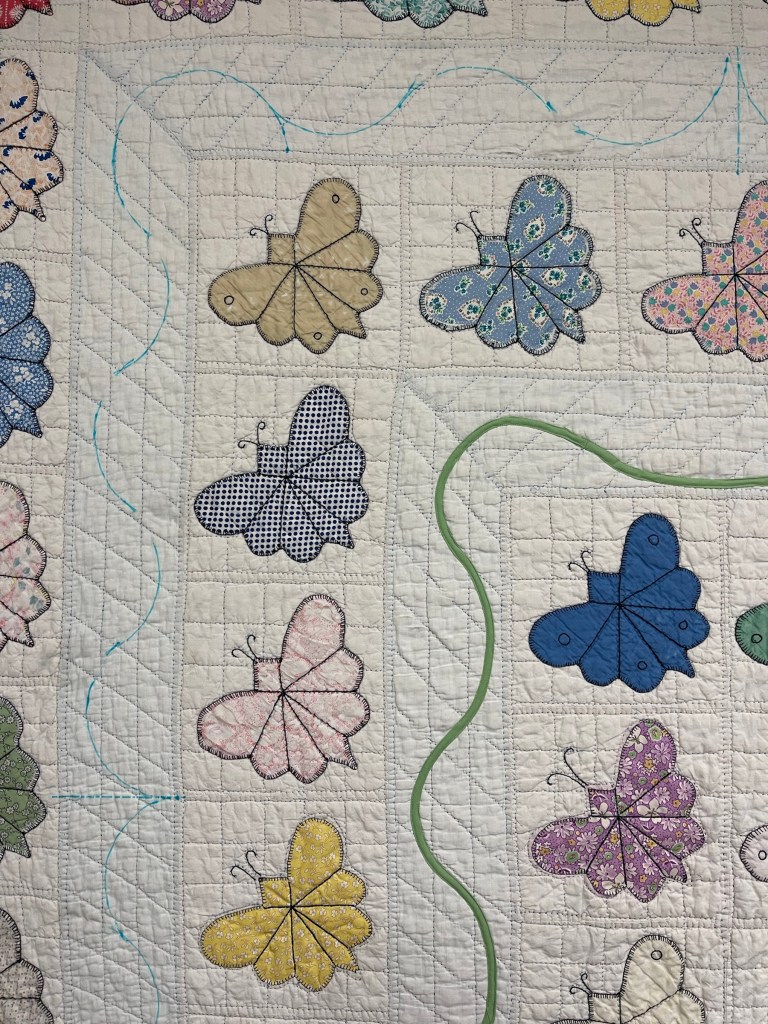
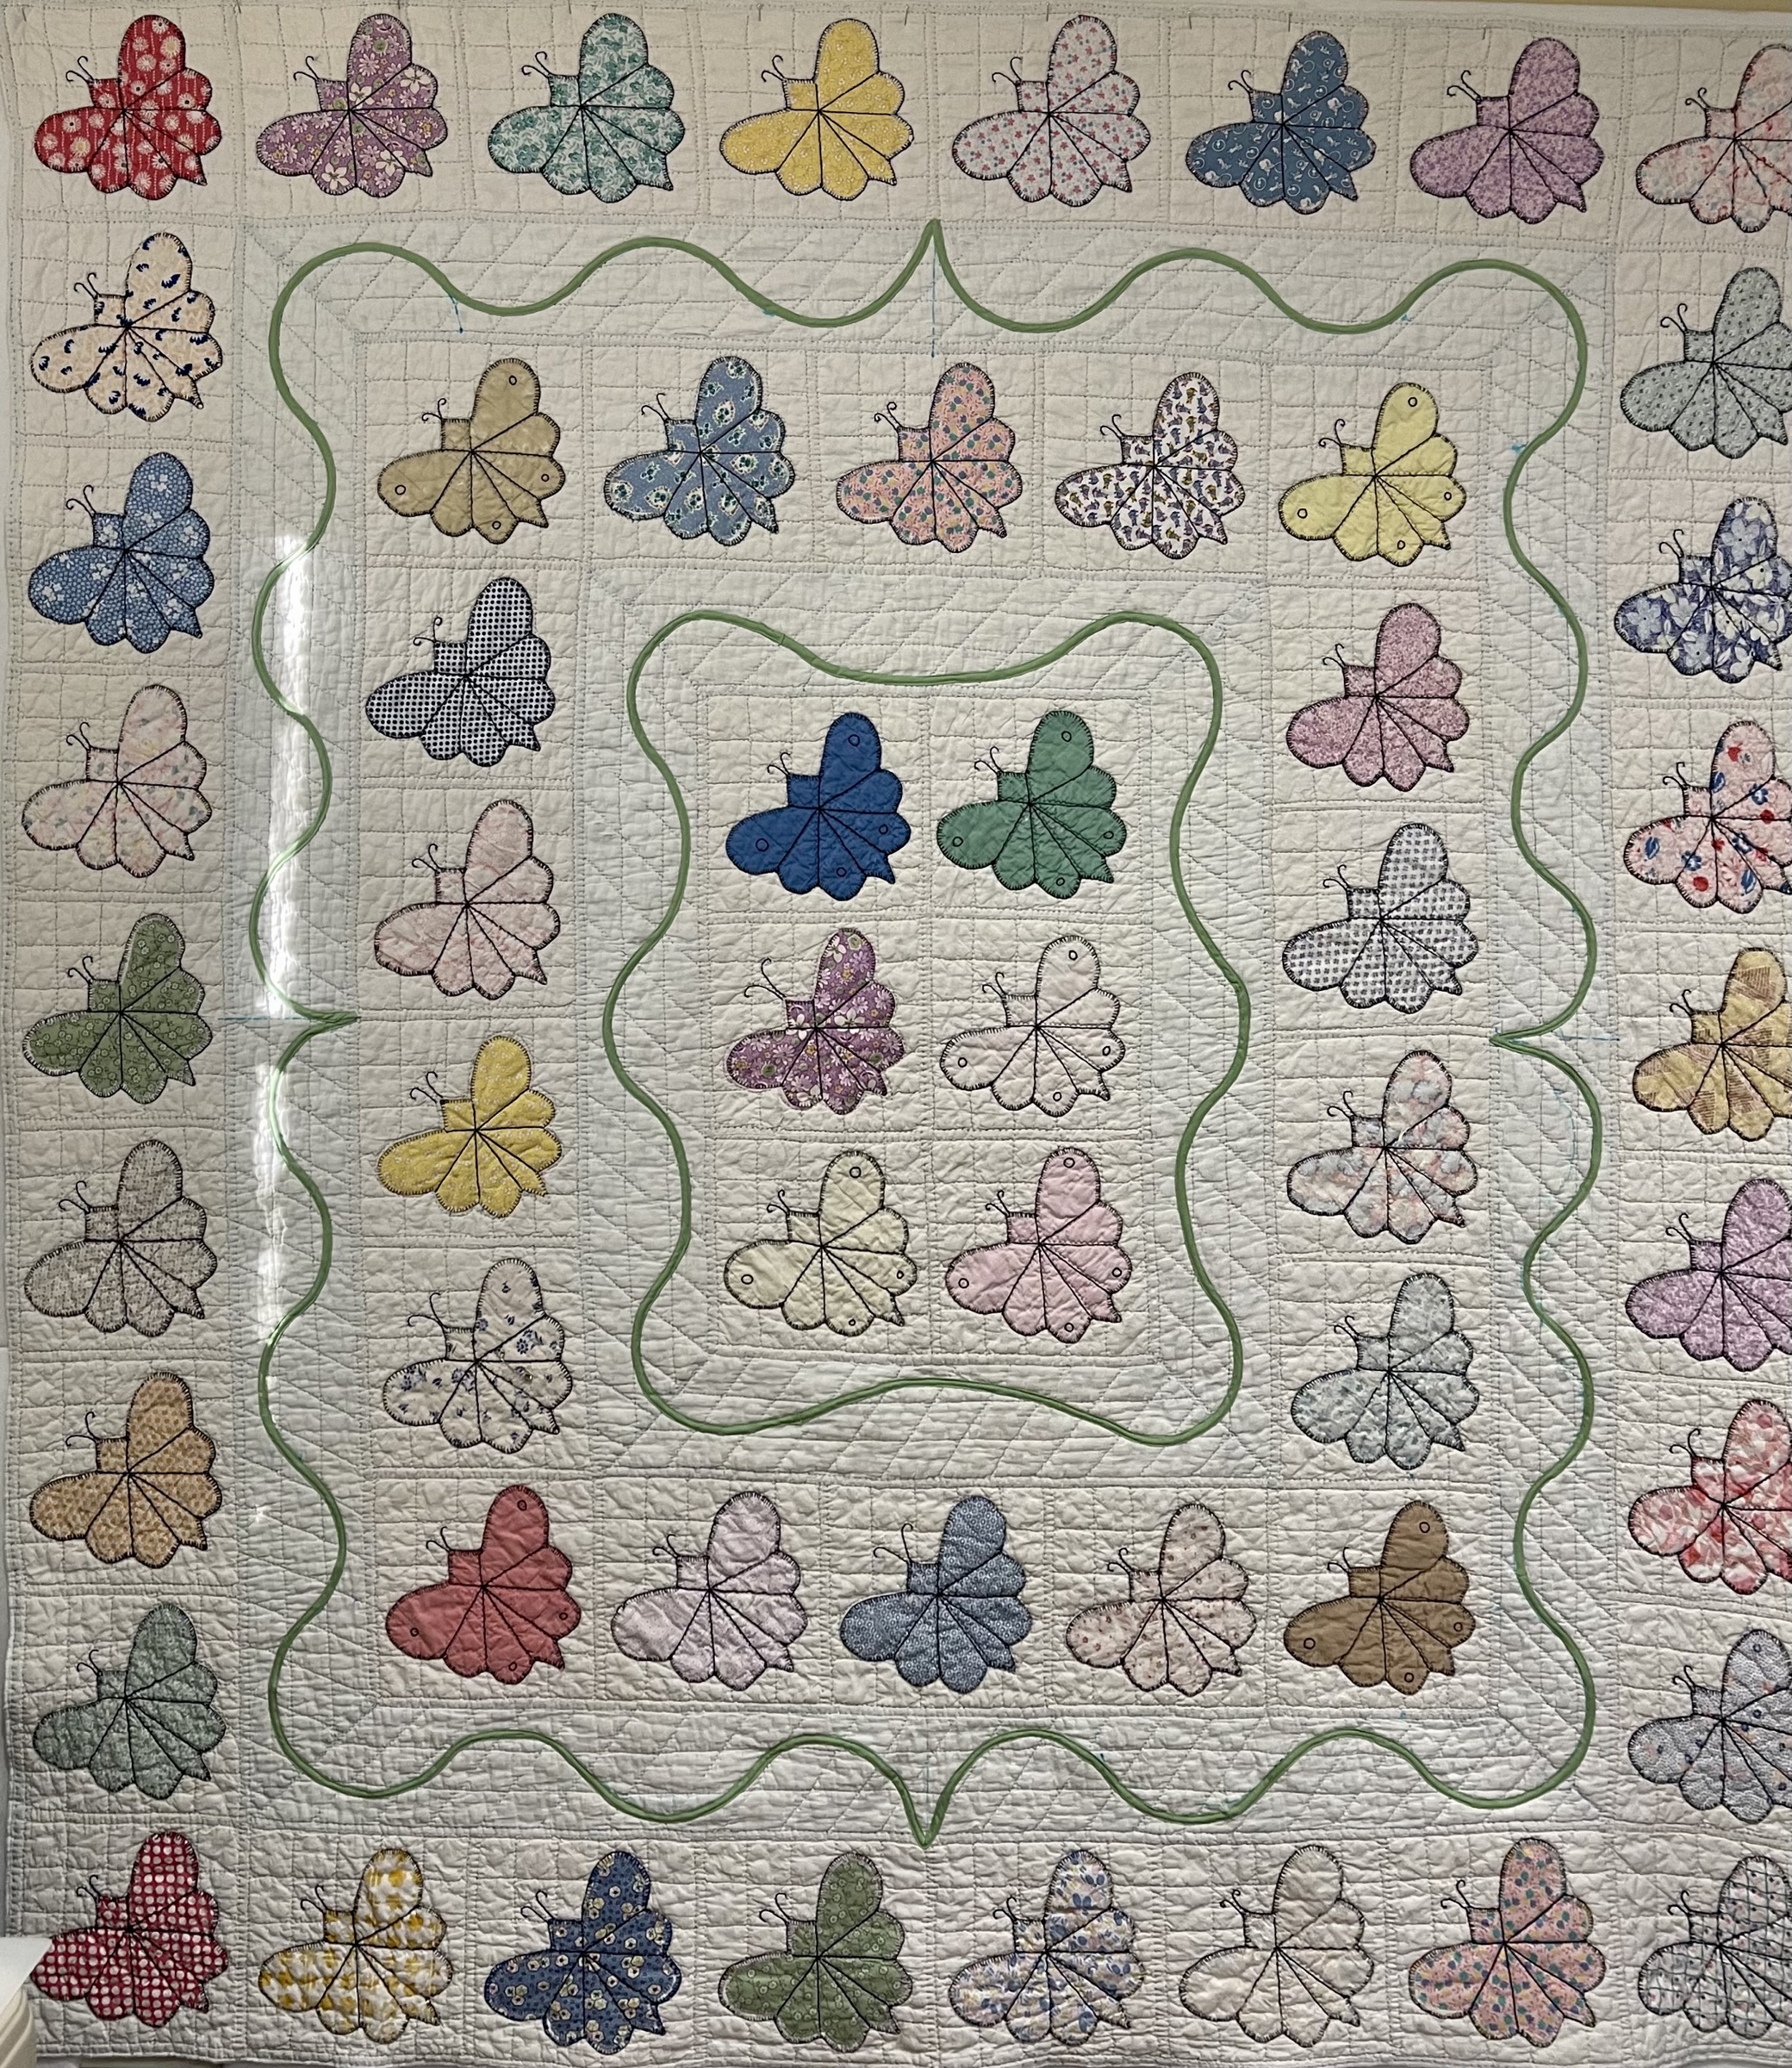
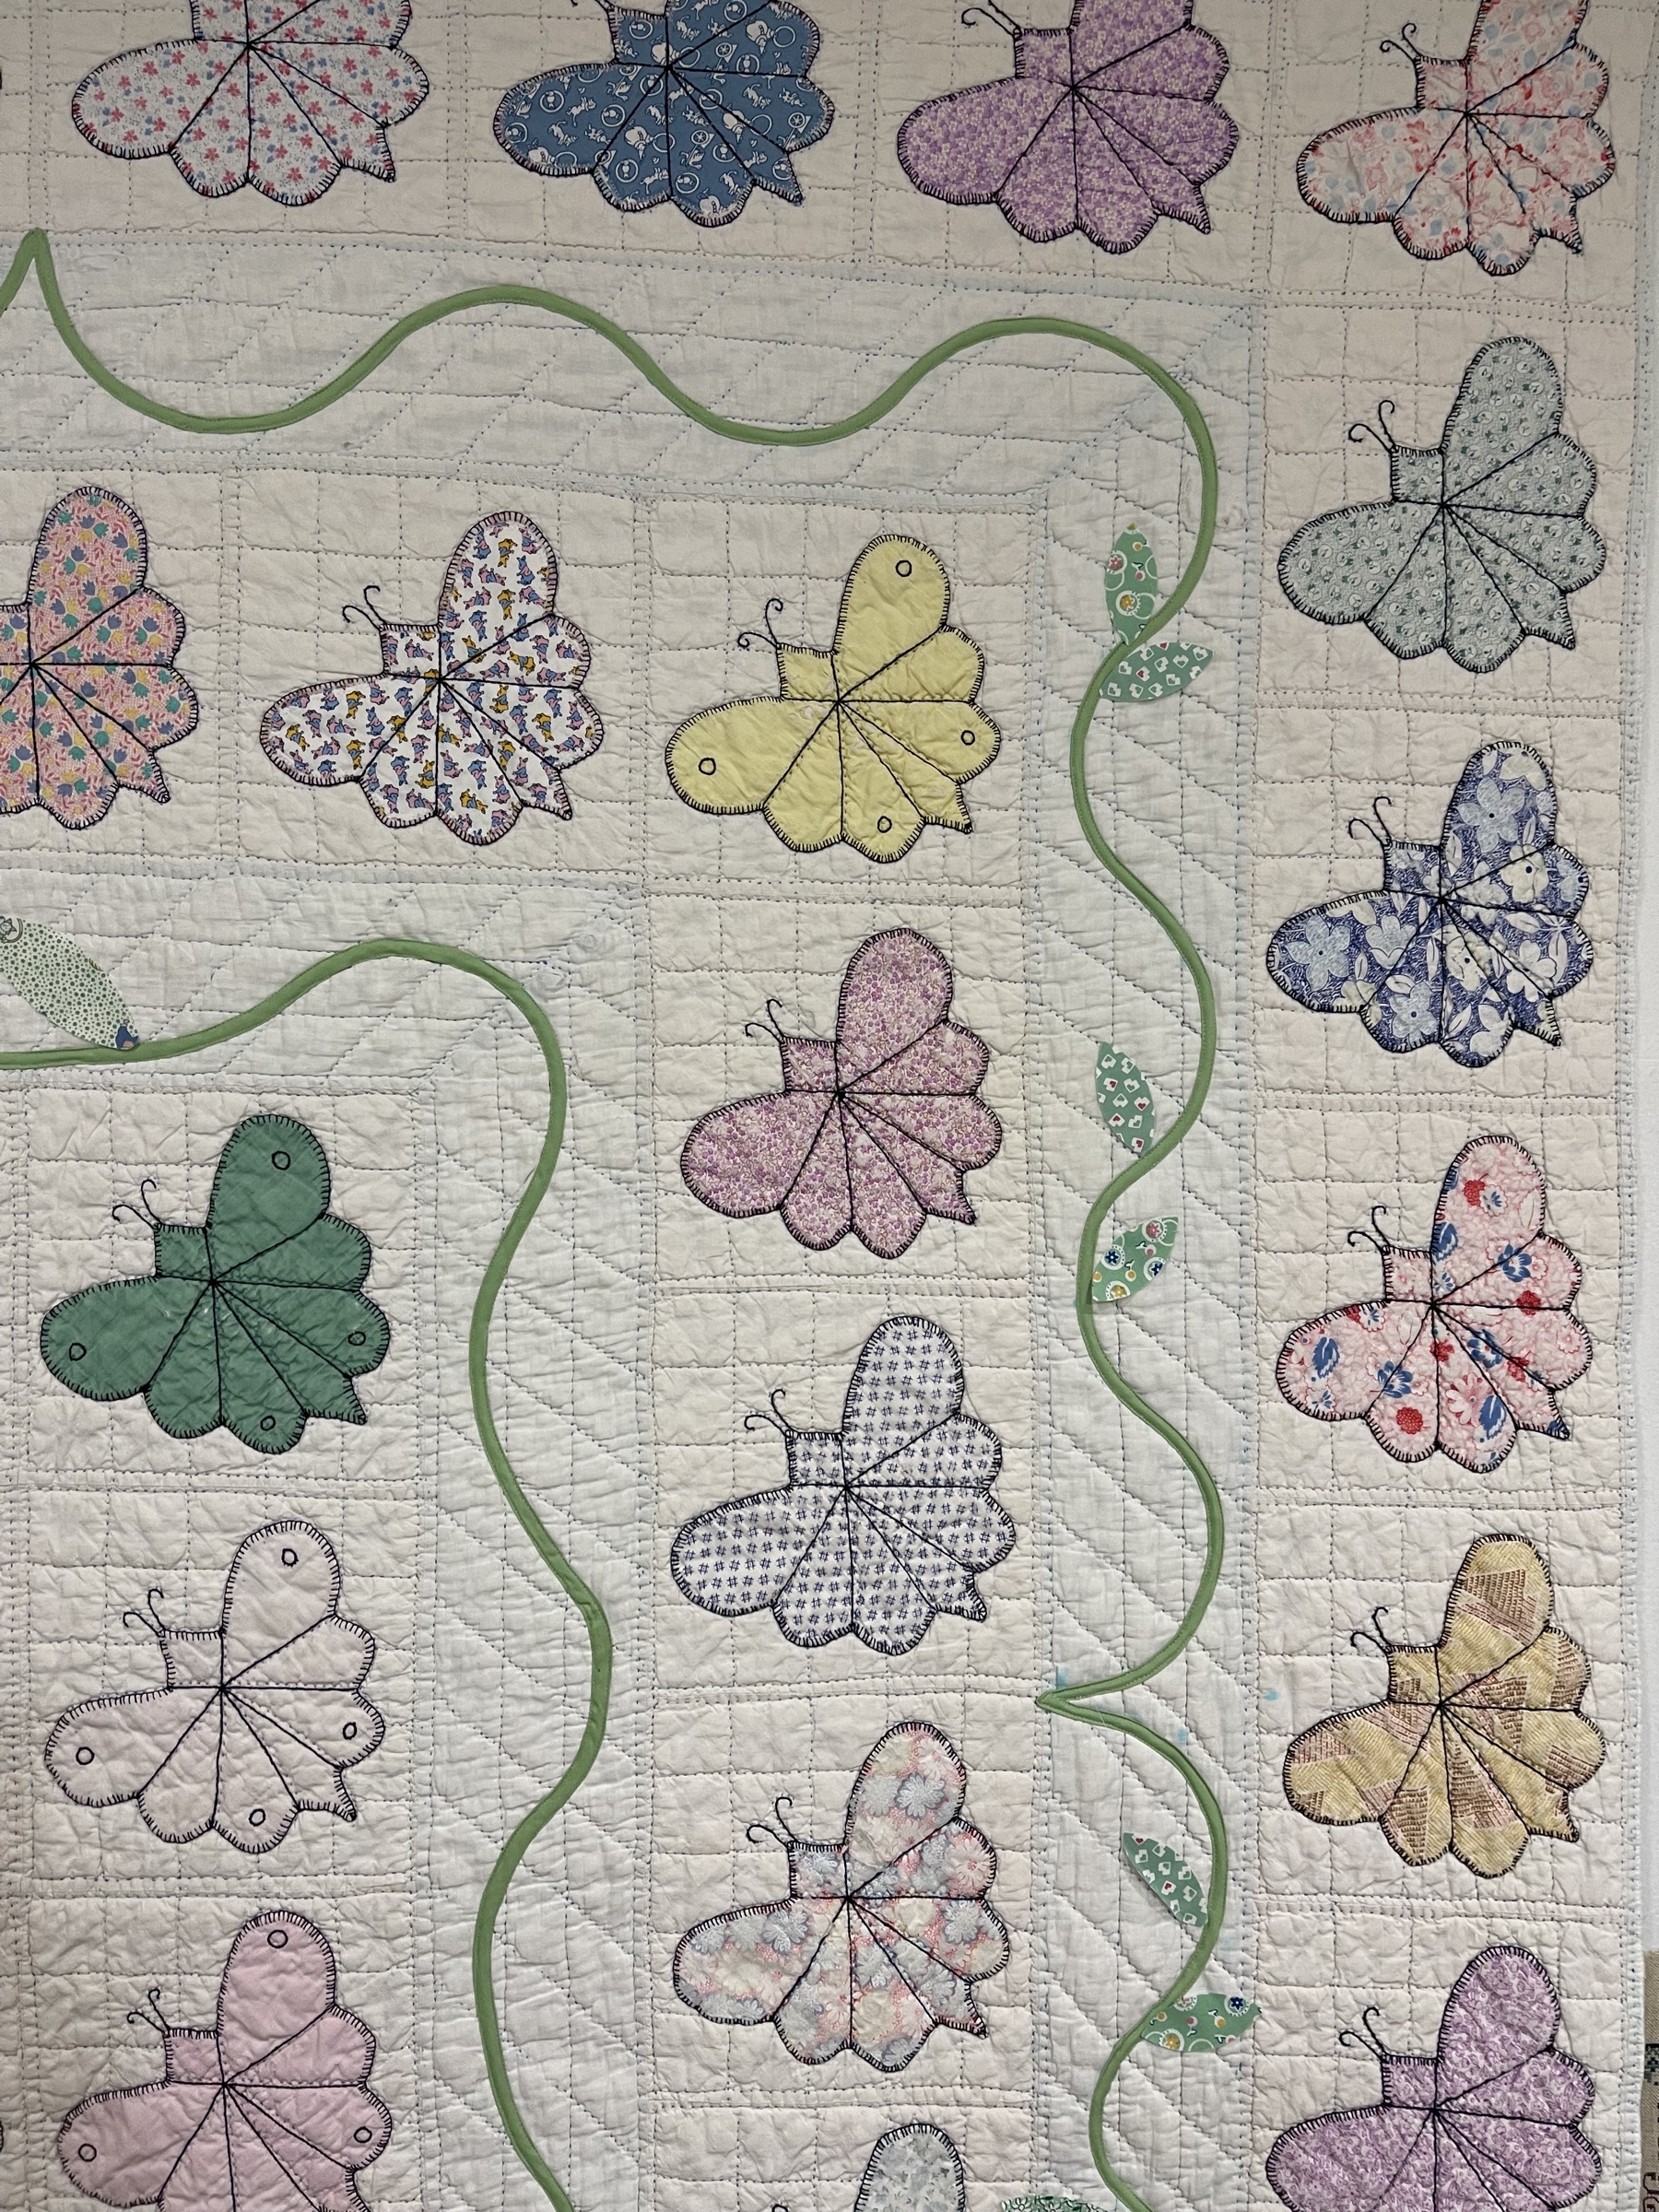
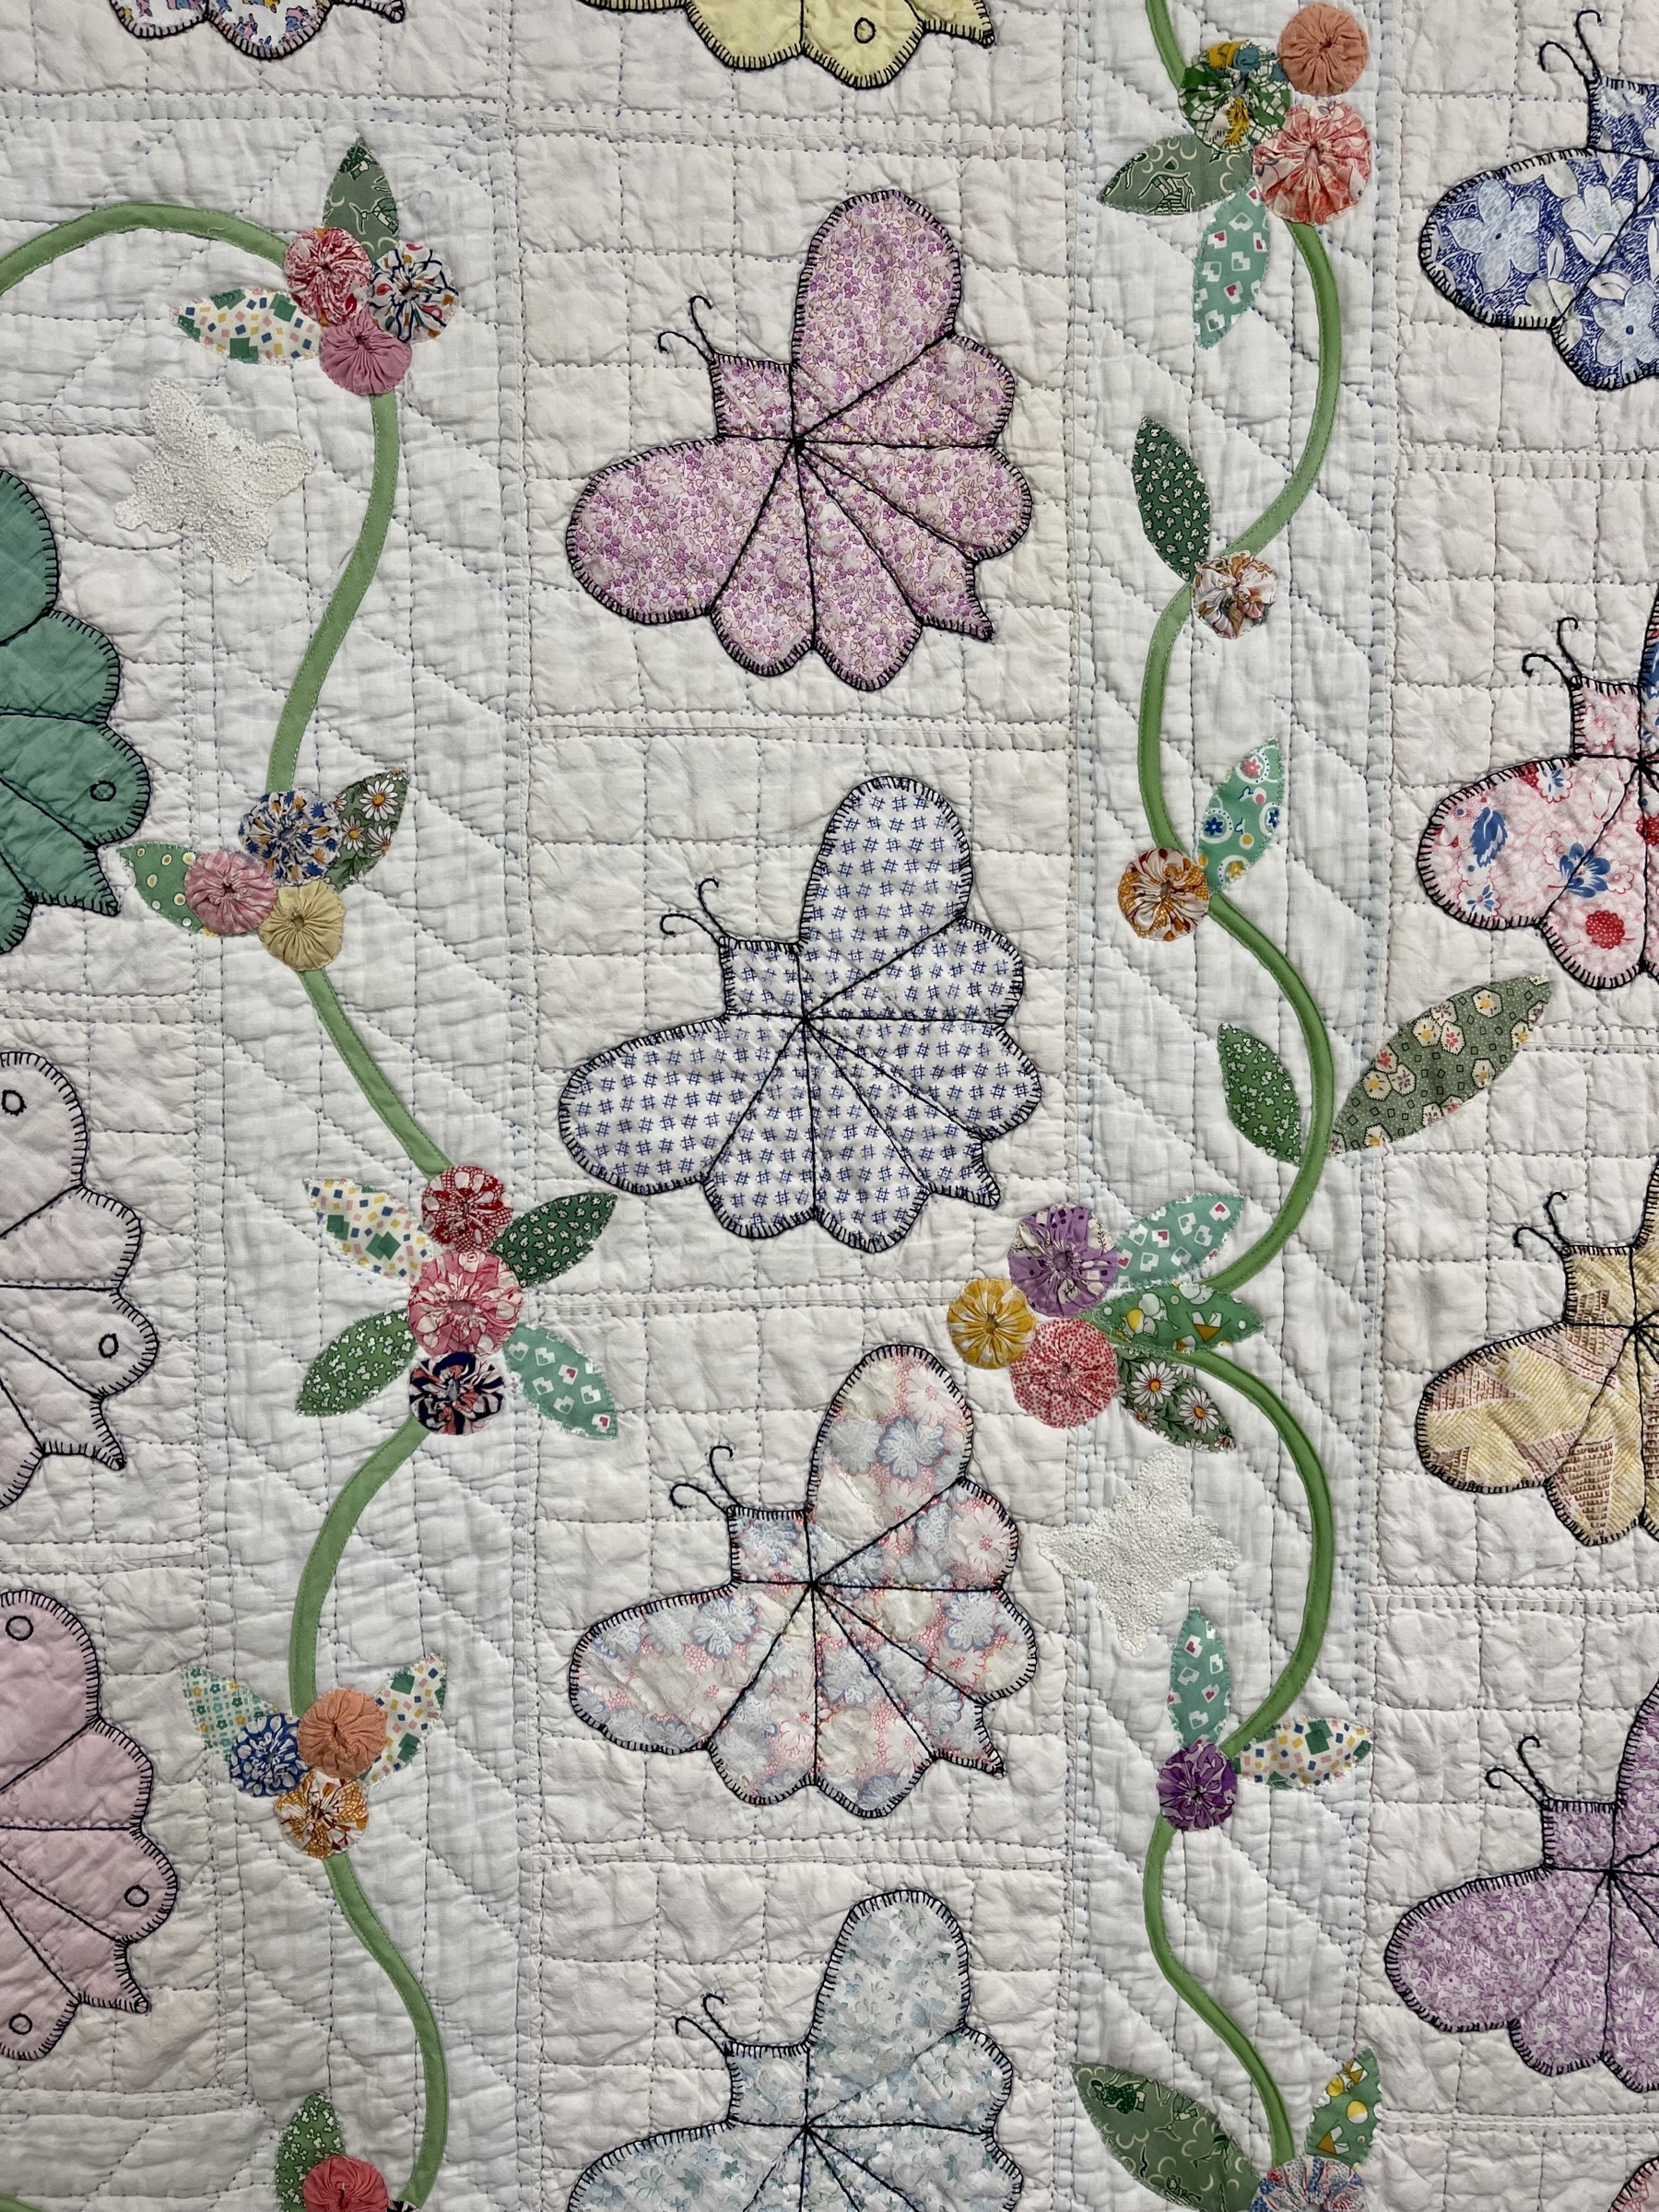
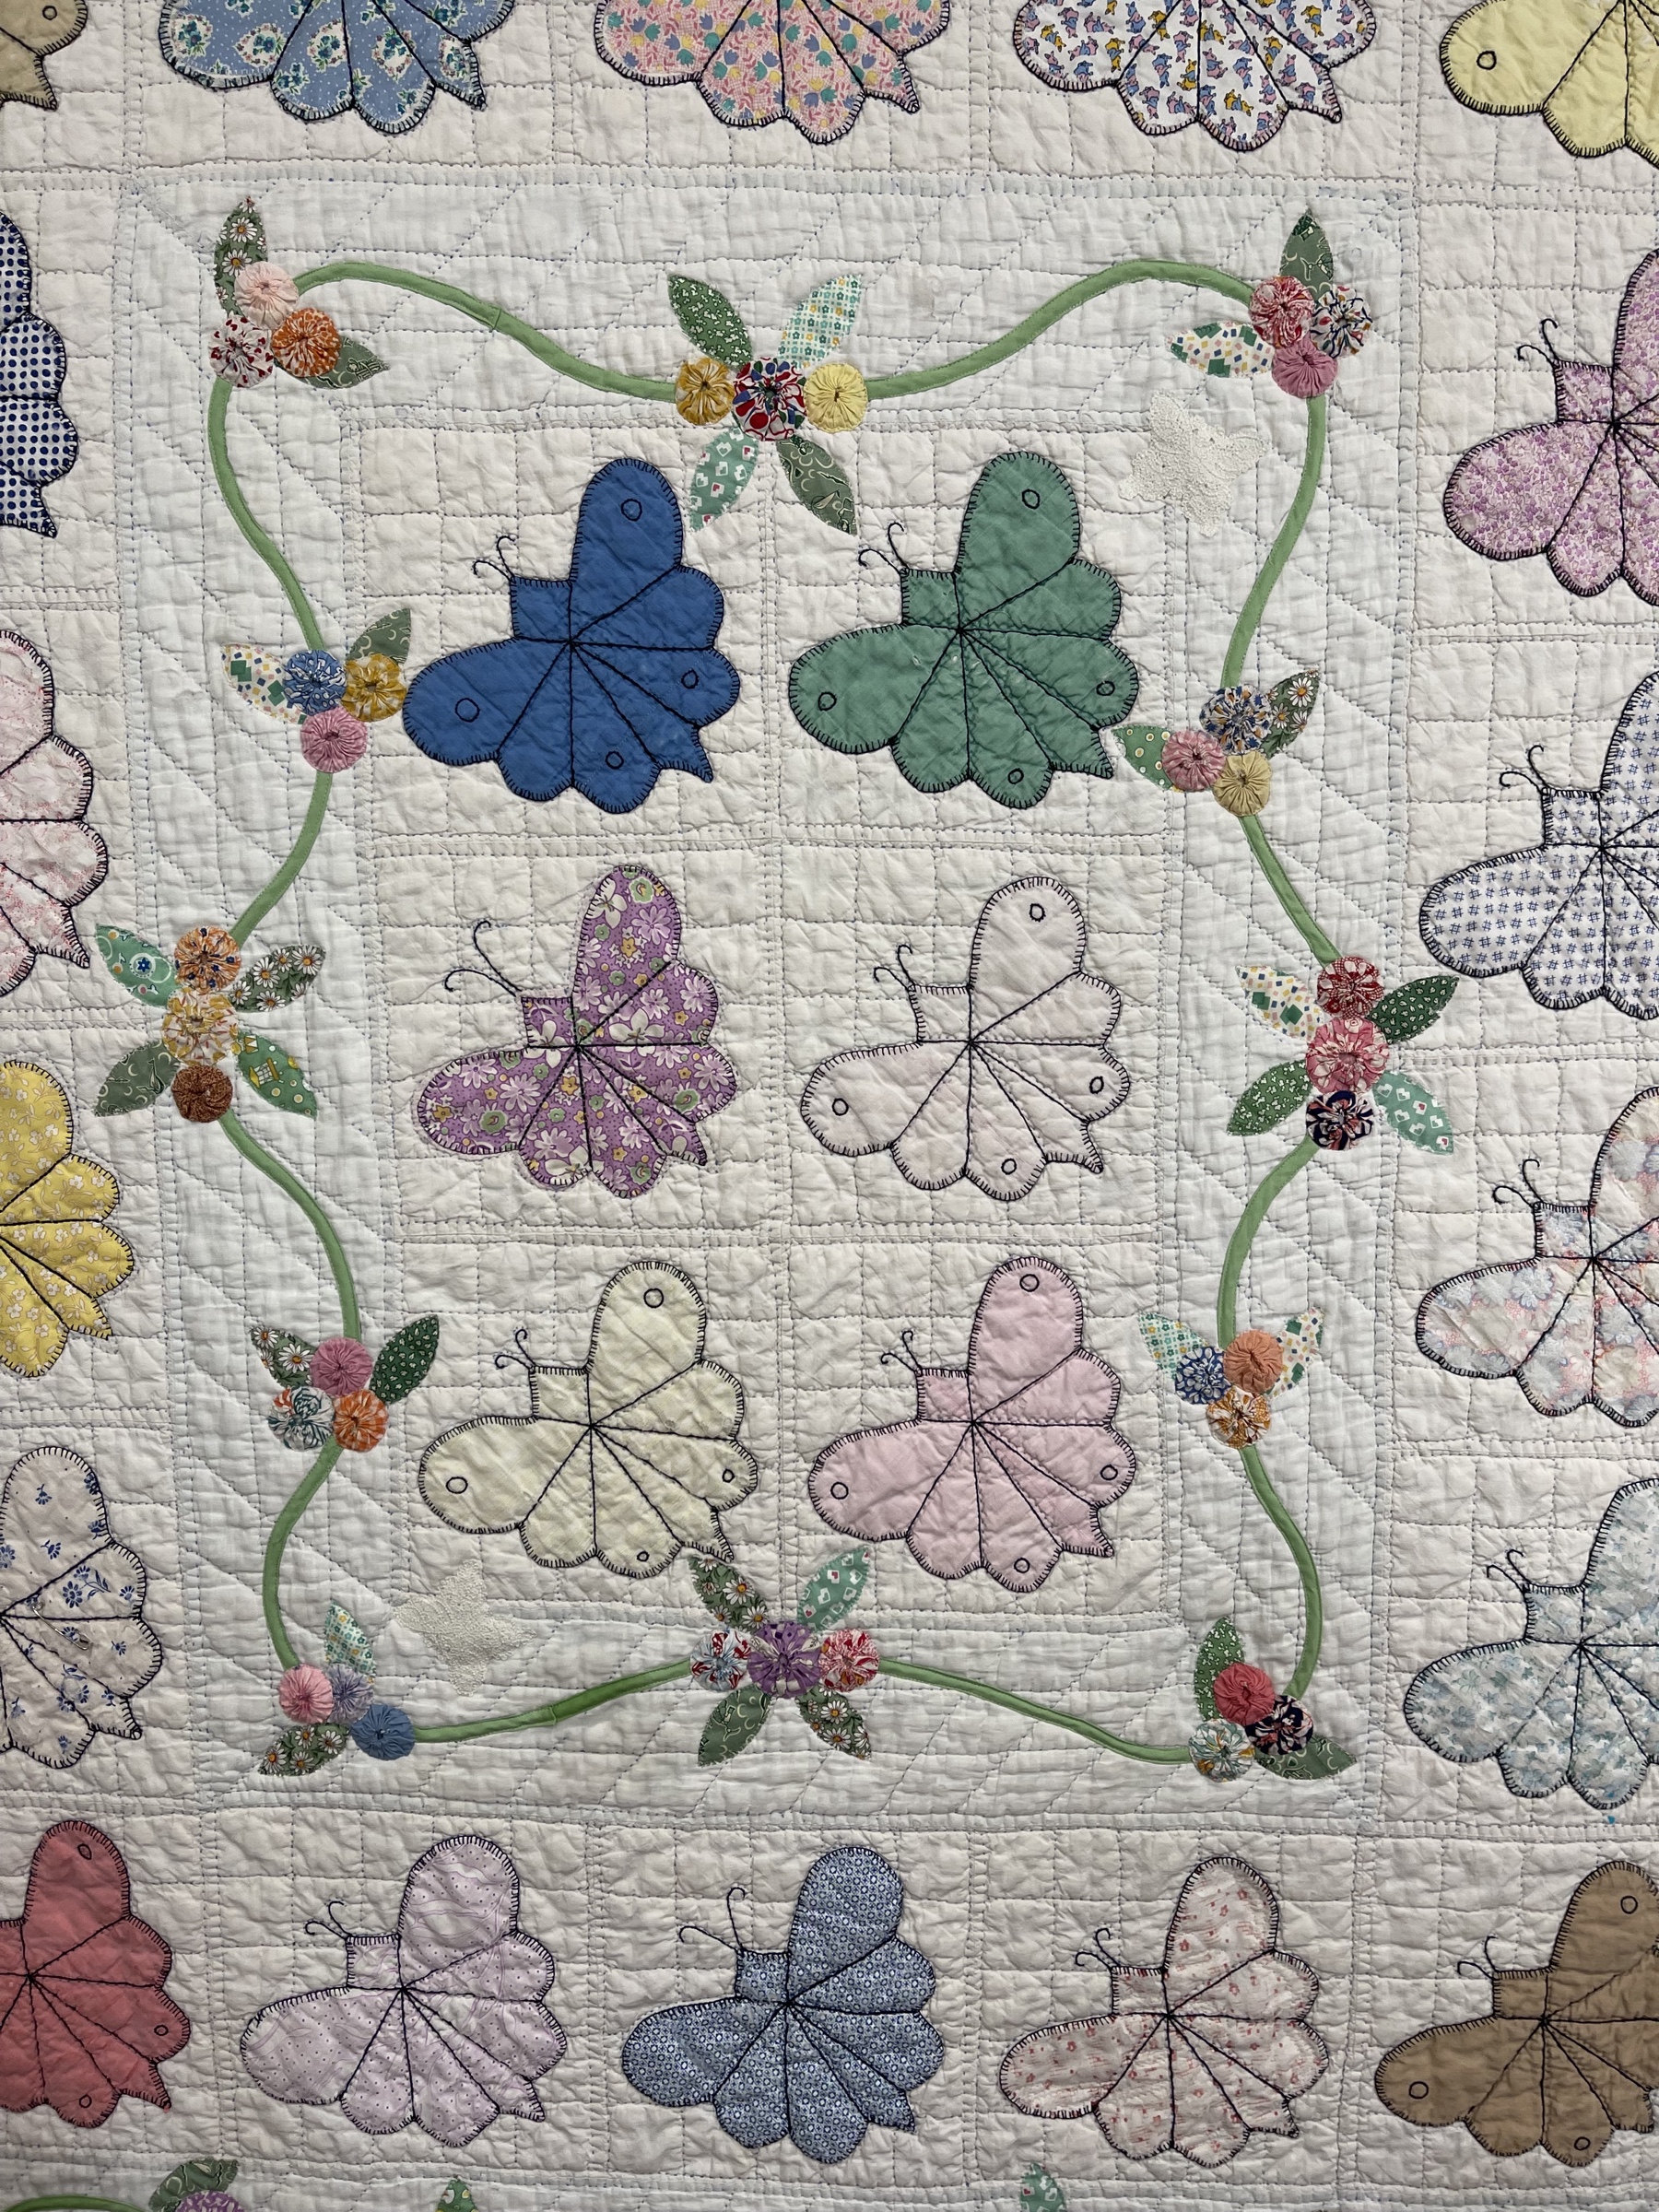
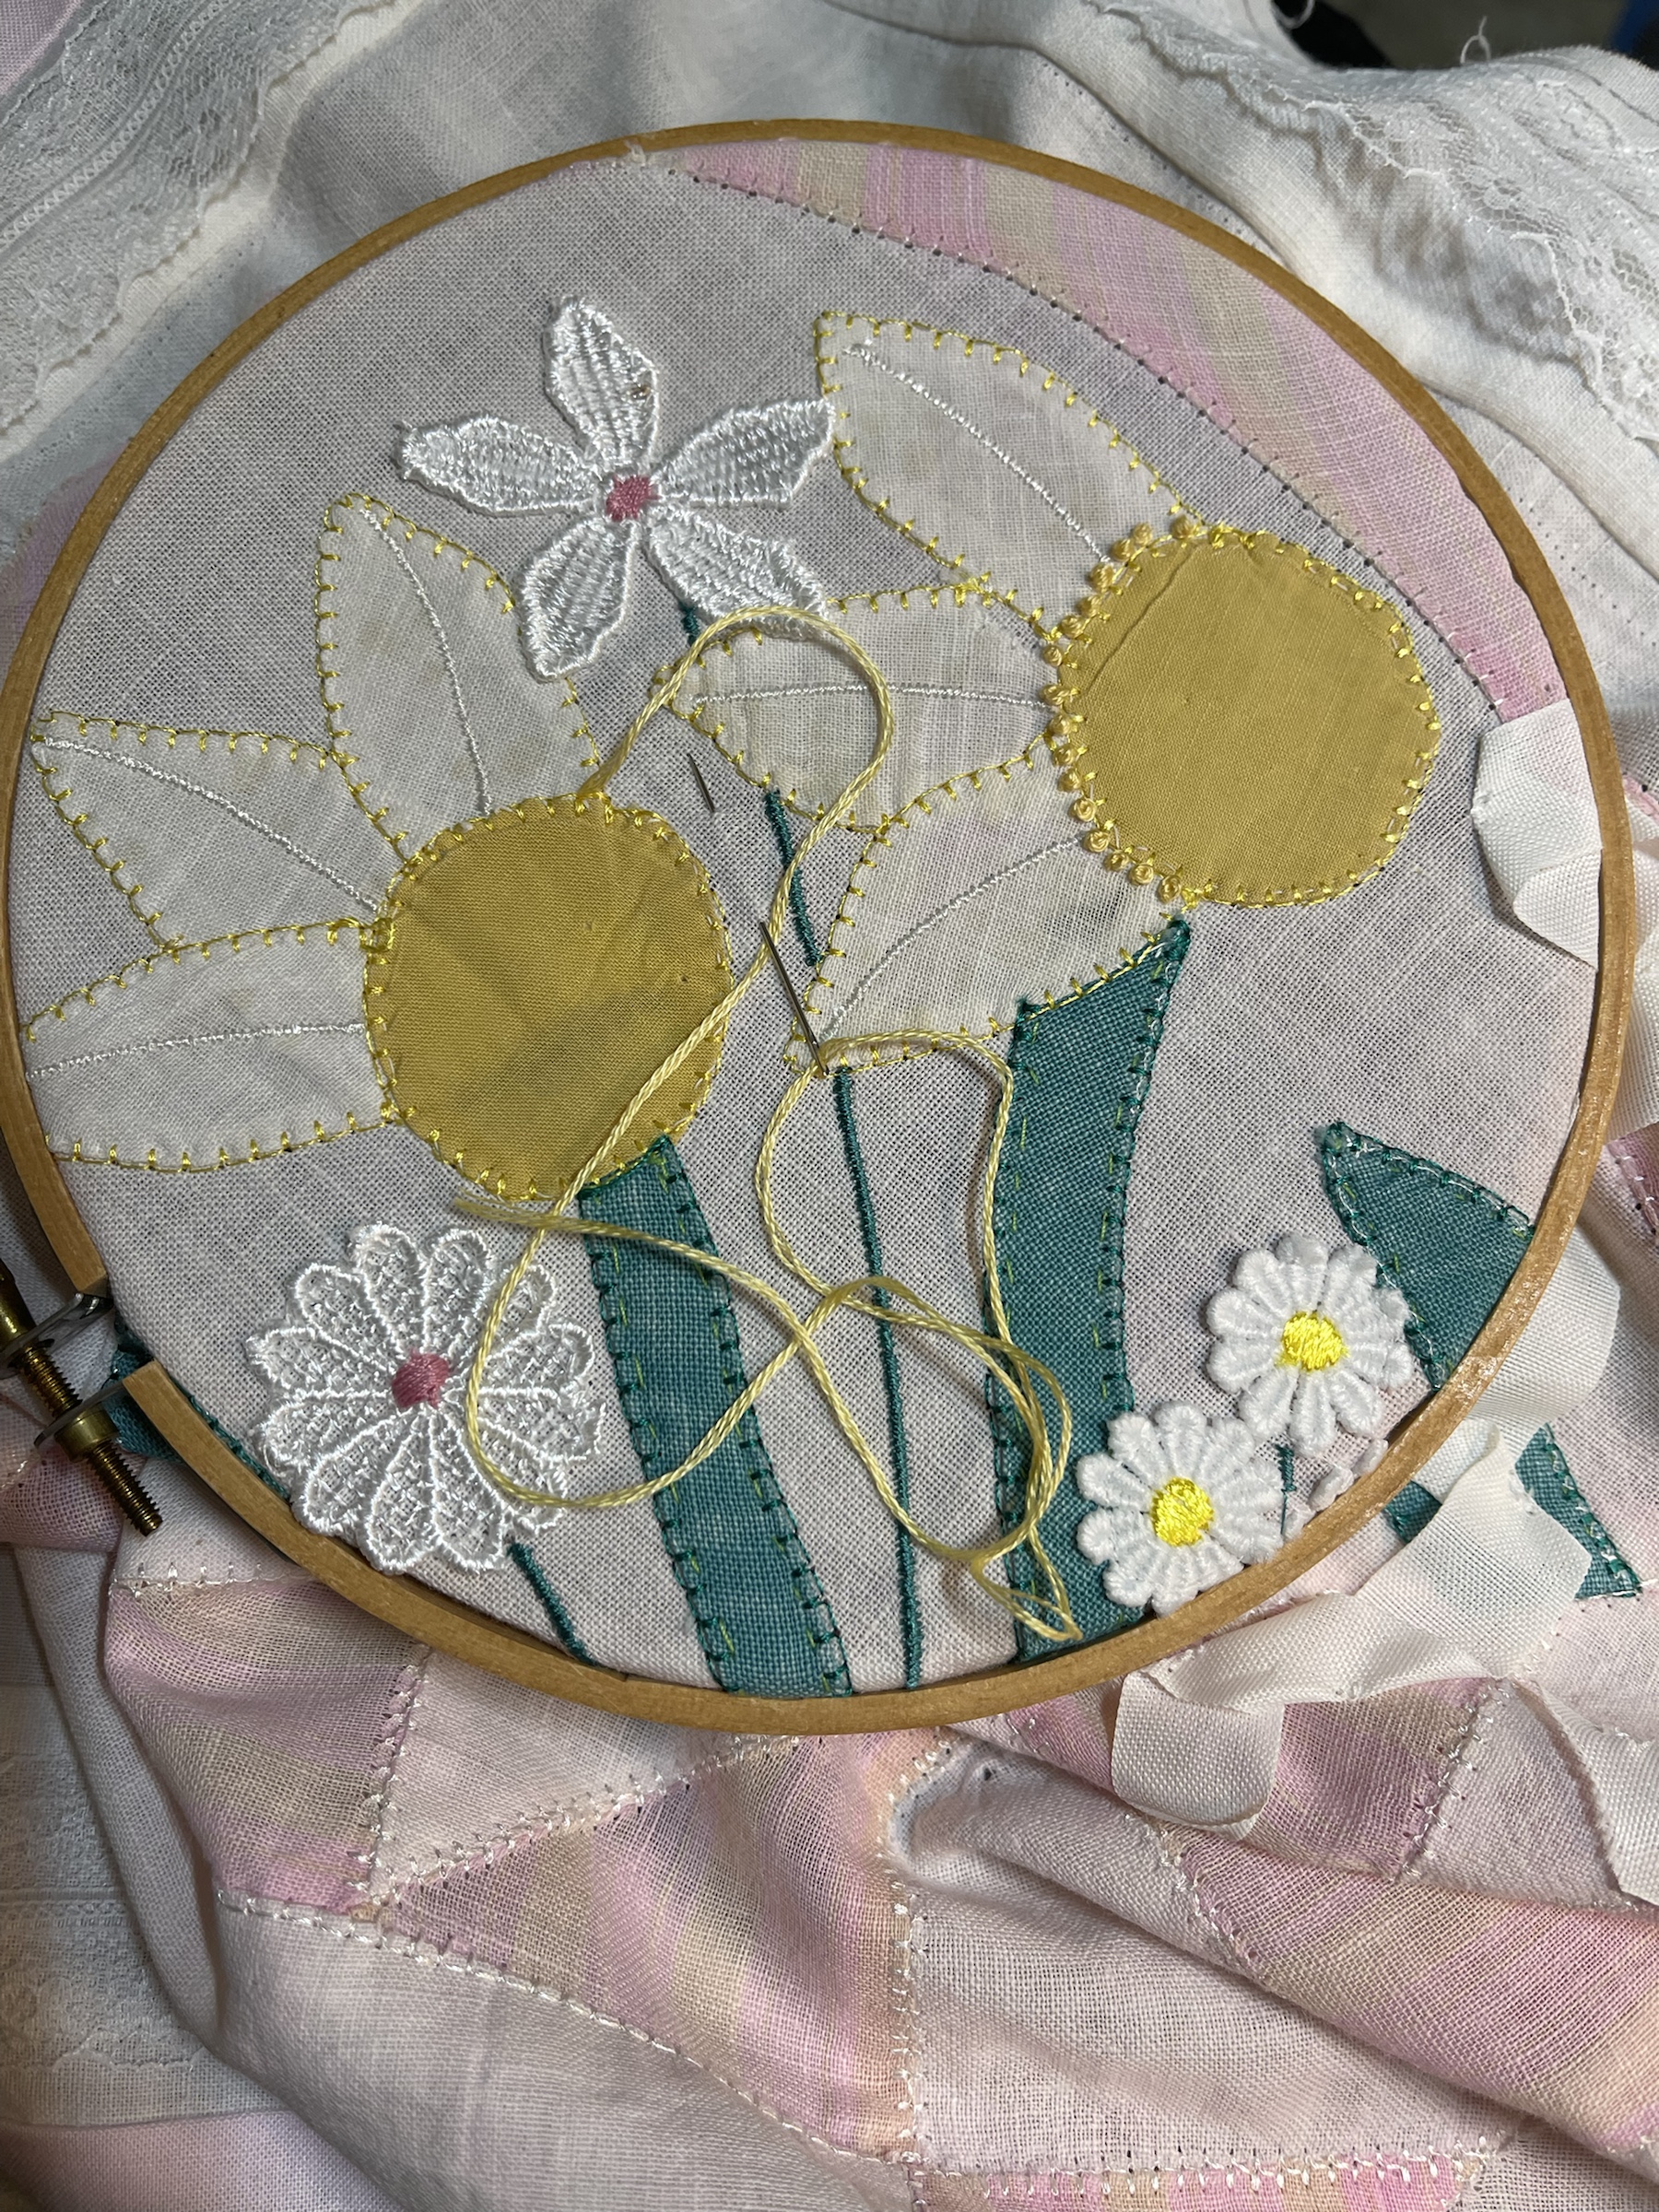
I’ve drawn blue lines on the what were once pale blue inner borders. I decided these faded to almost white borders would be perfect for embellishing.
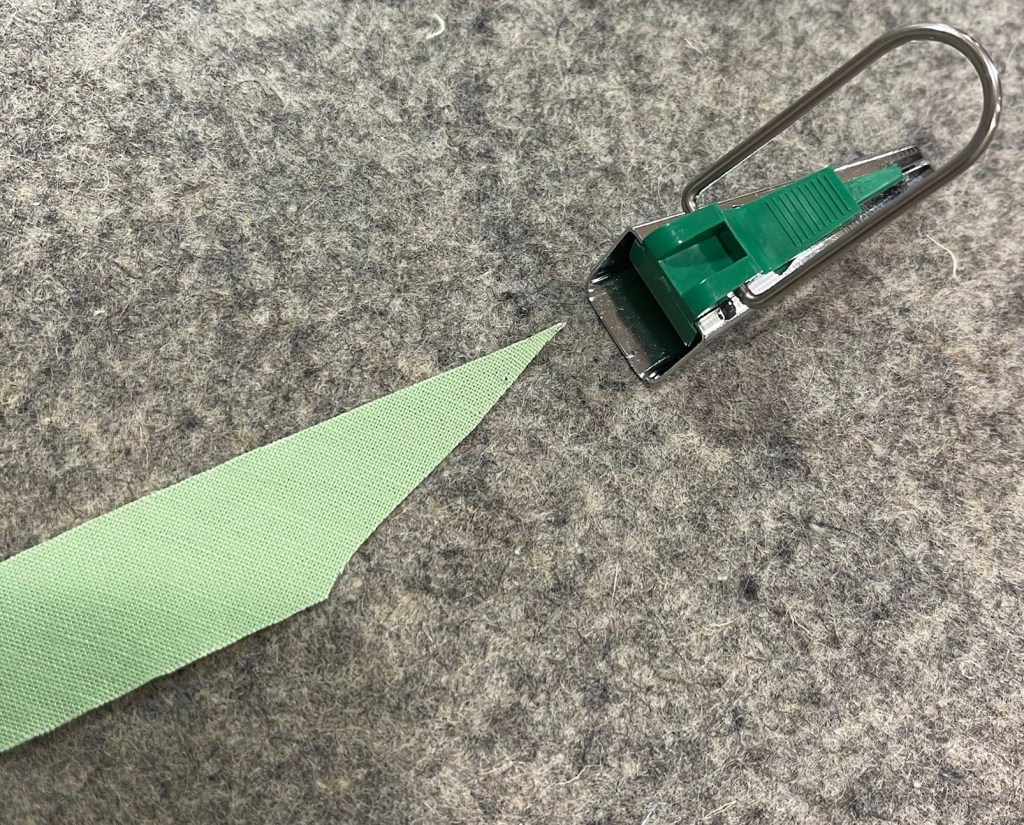
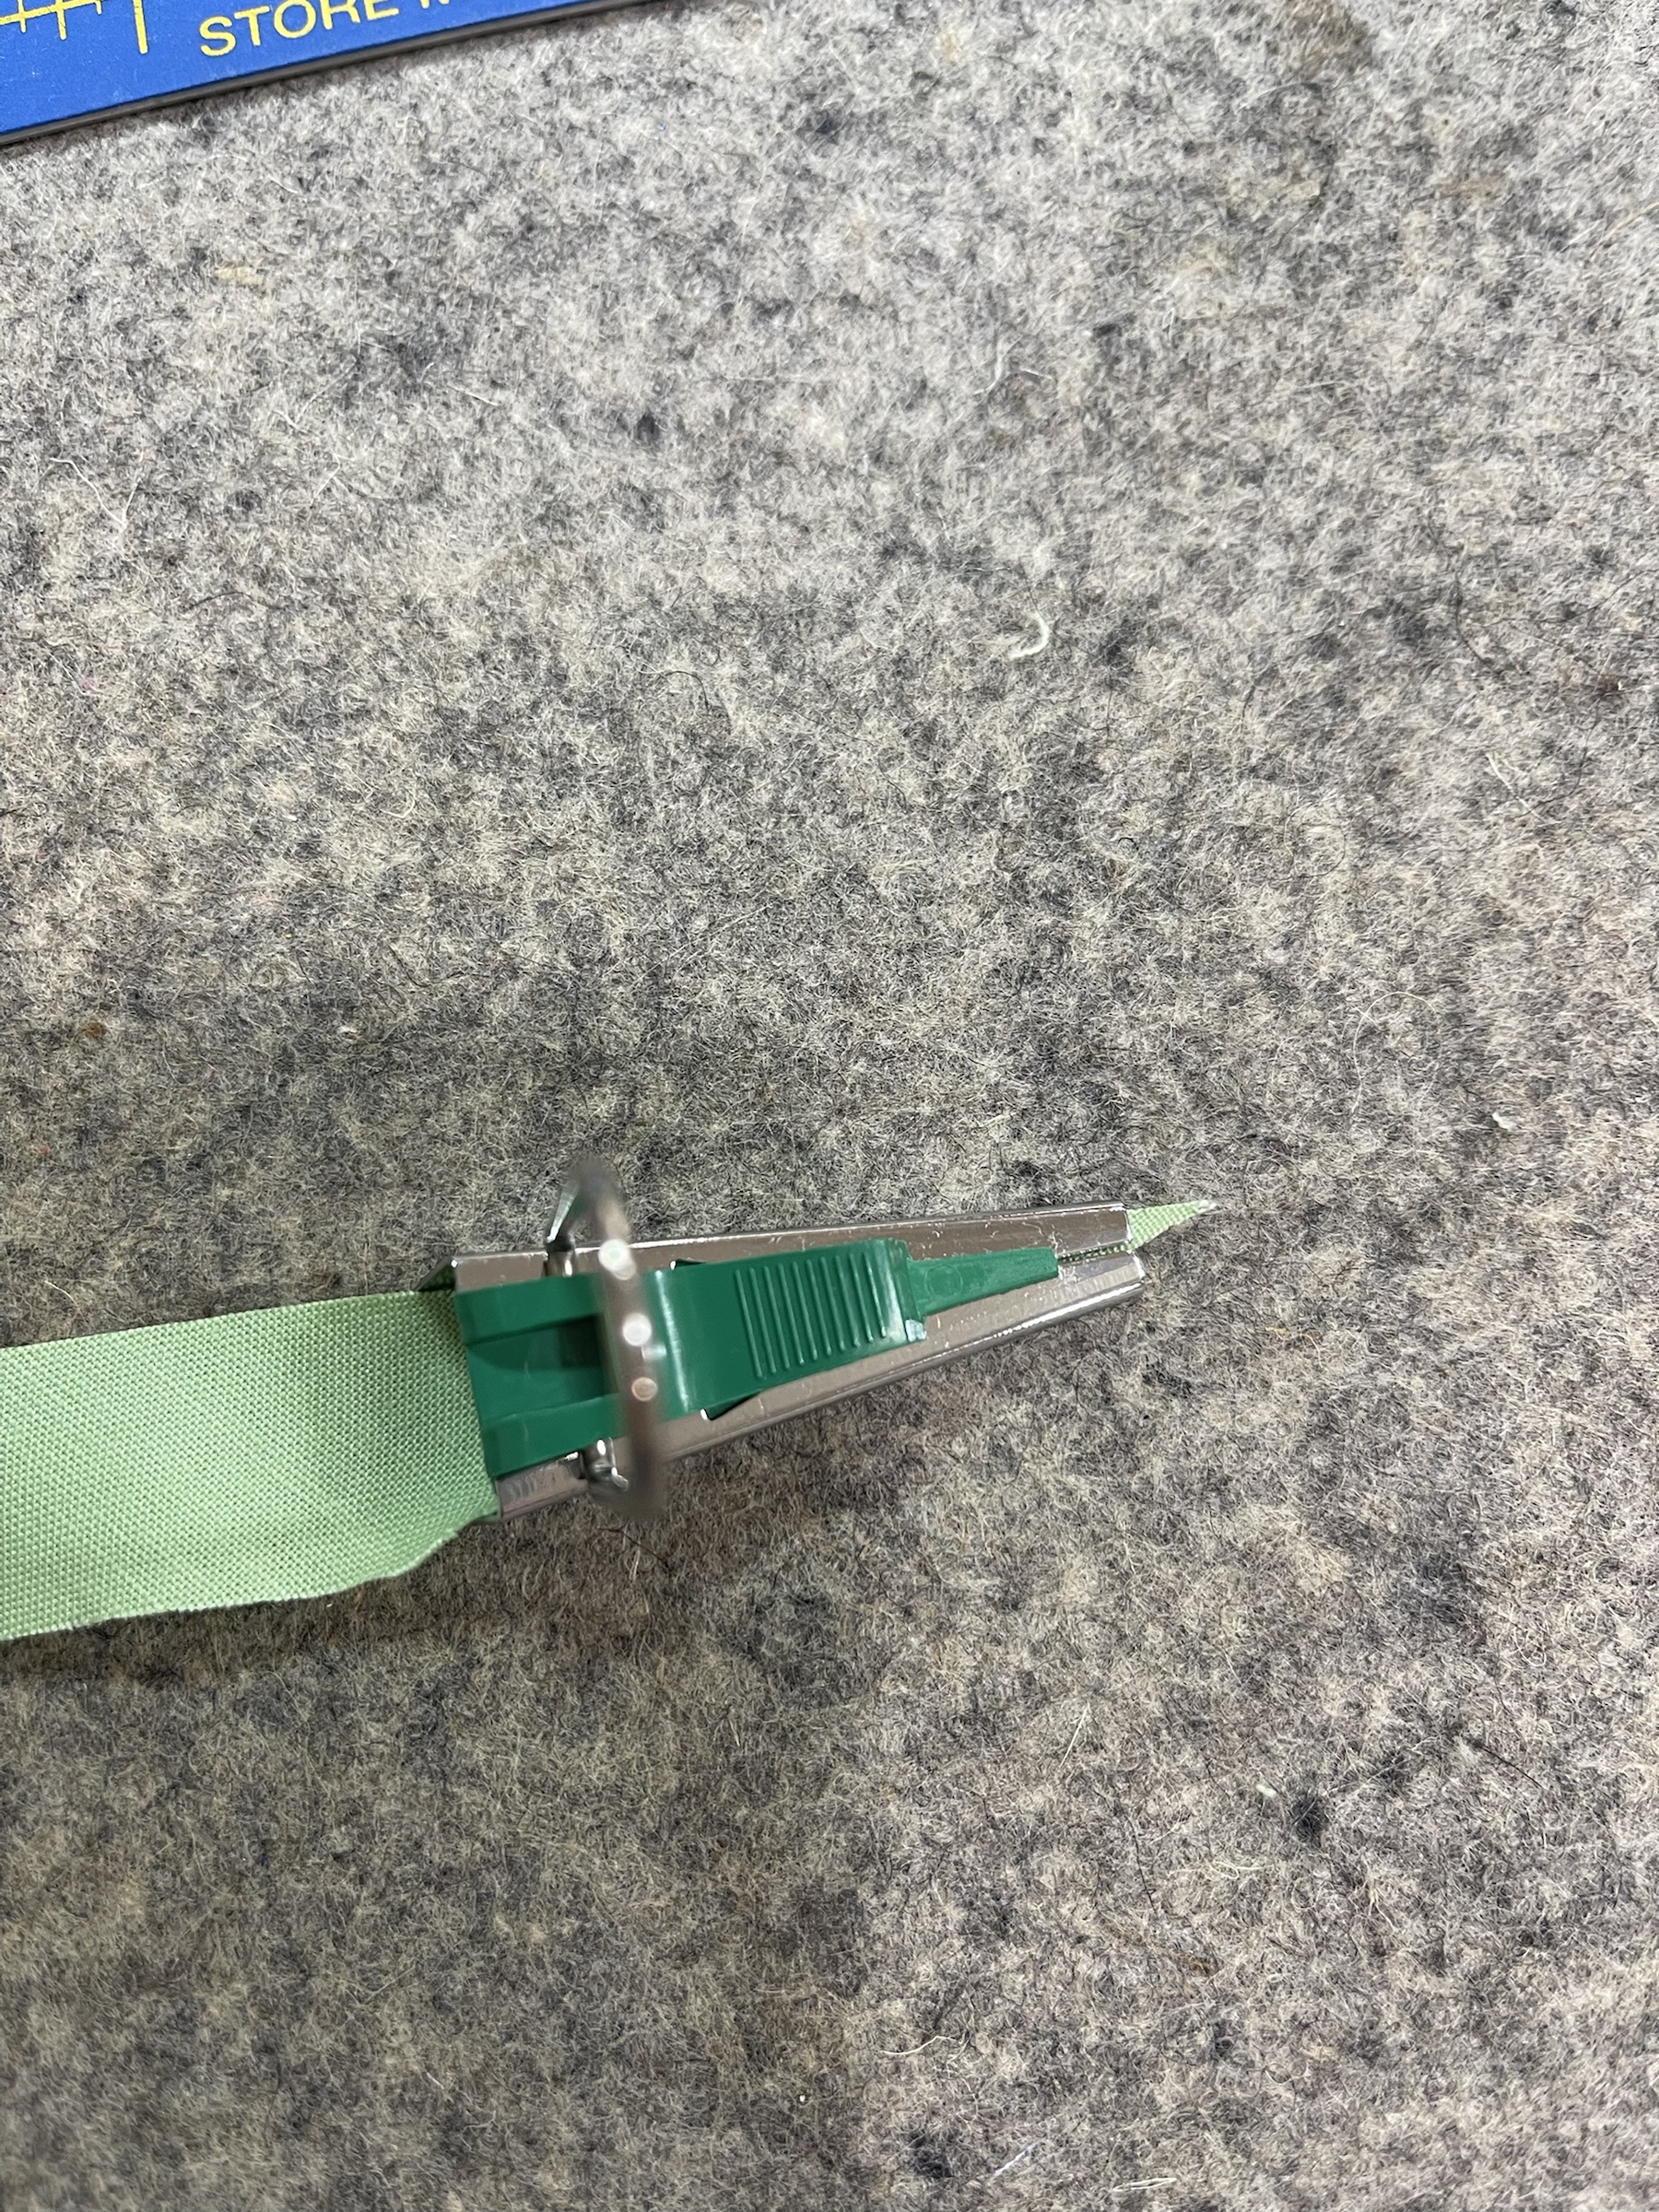
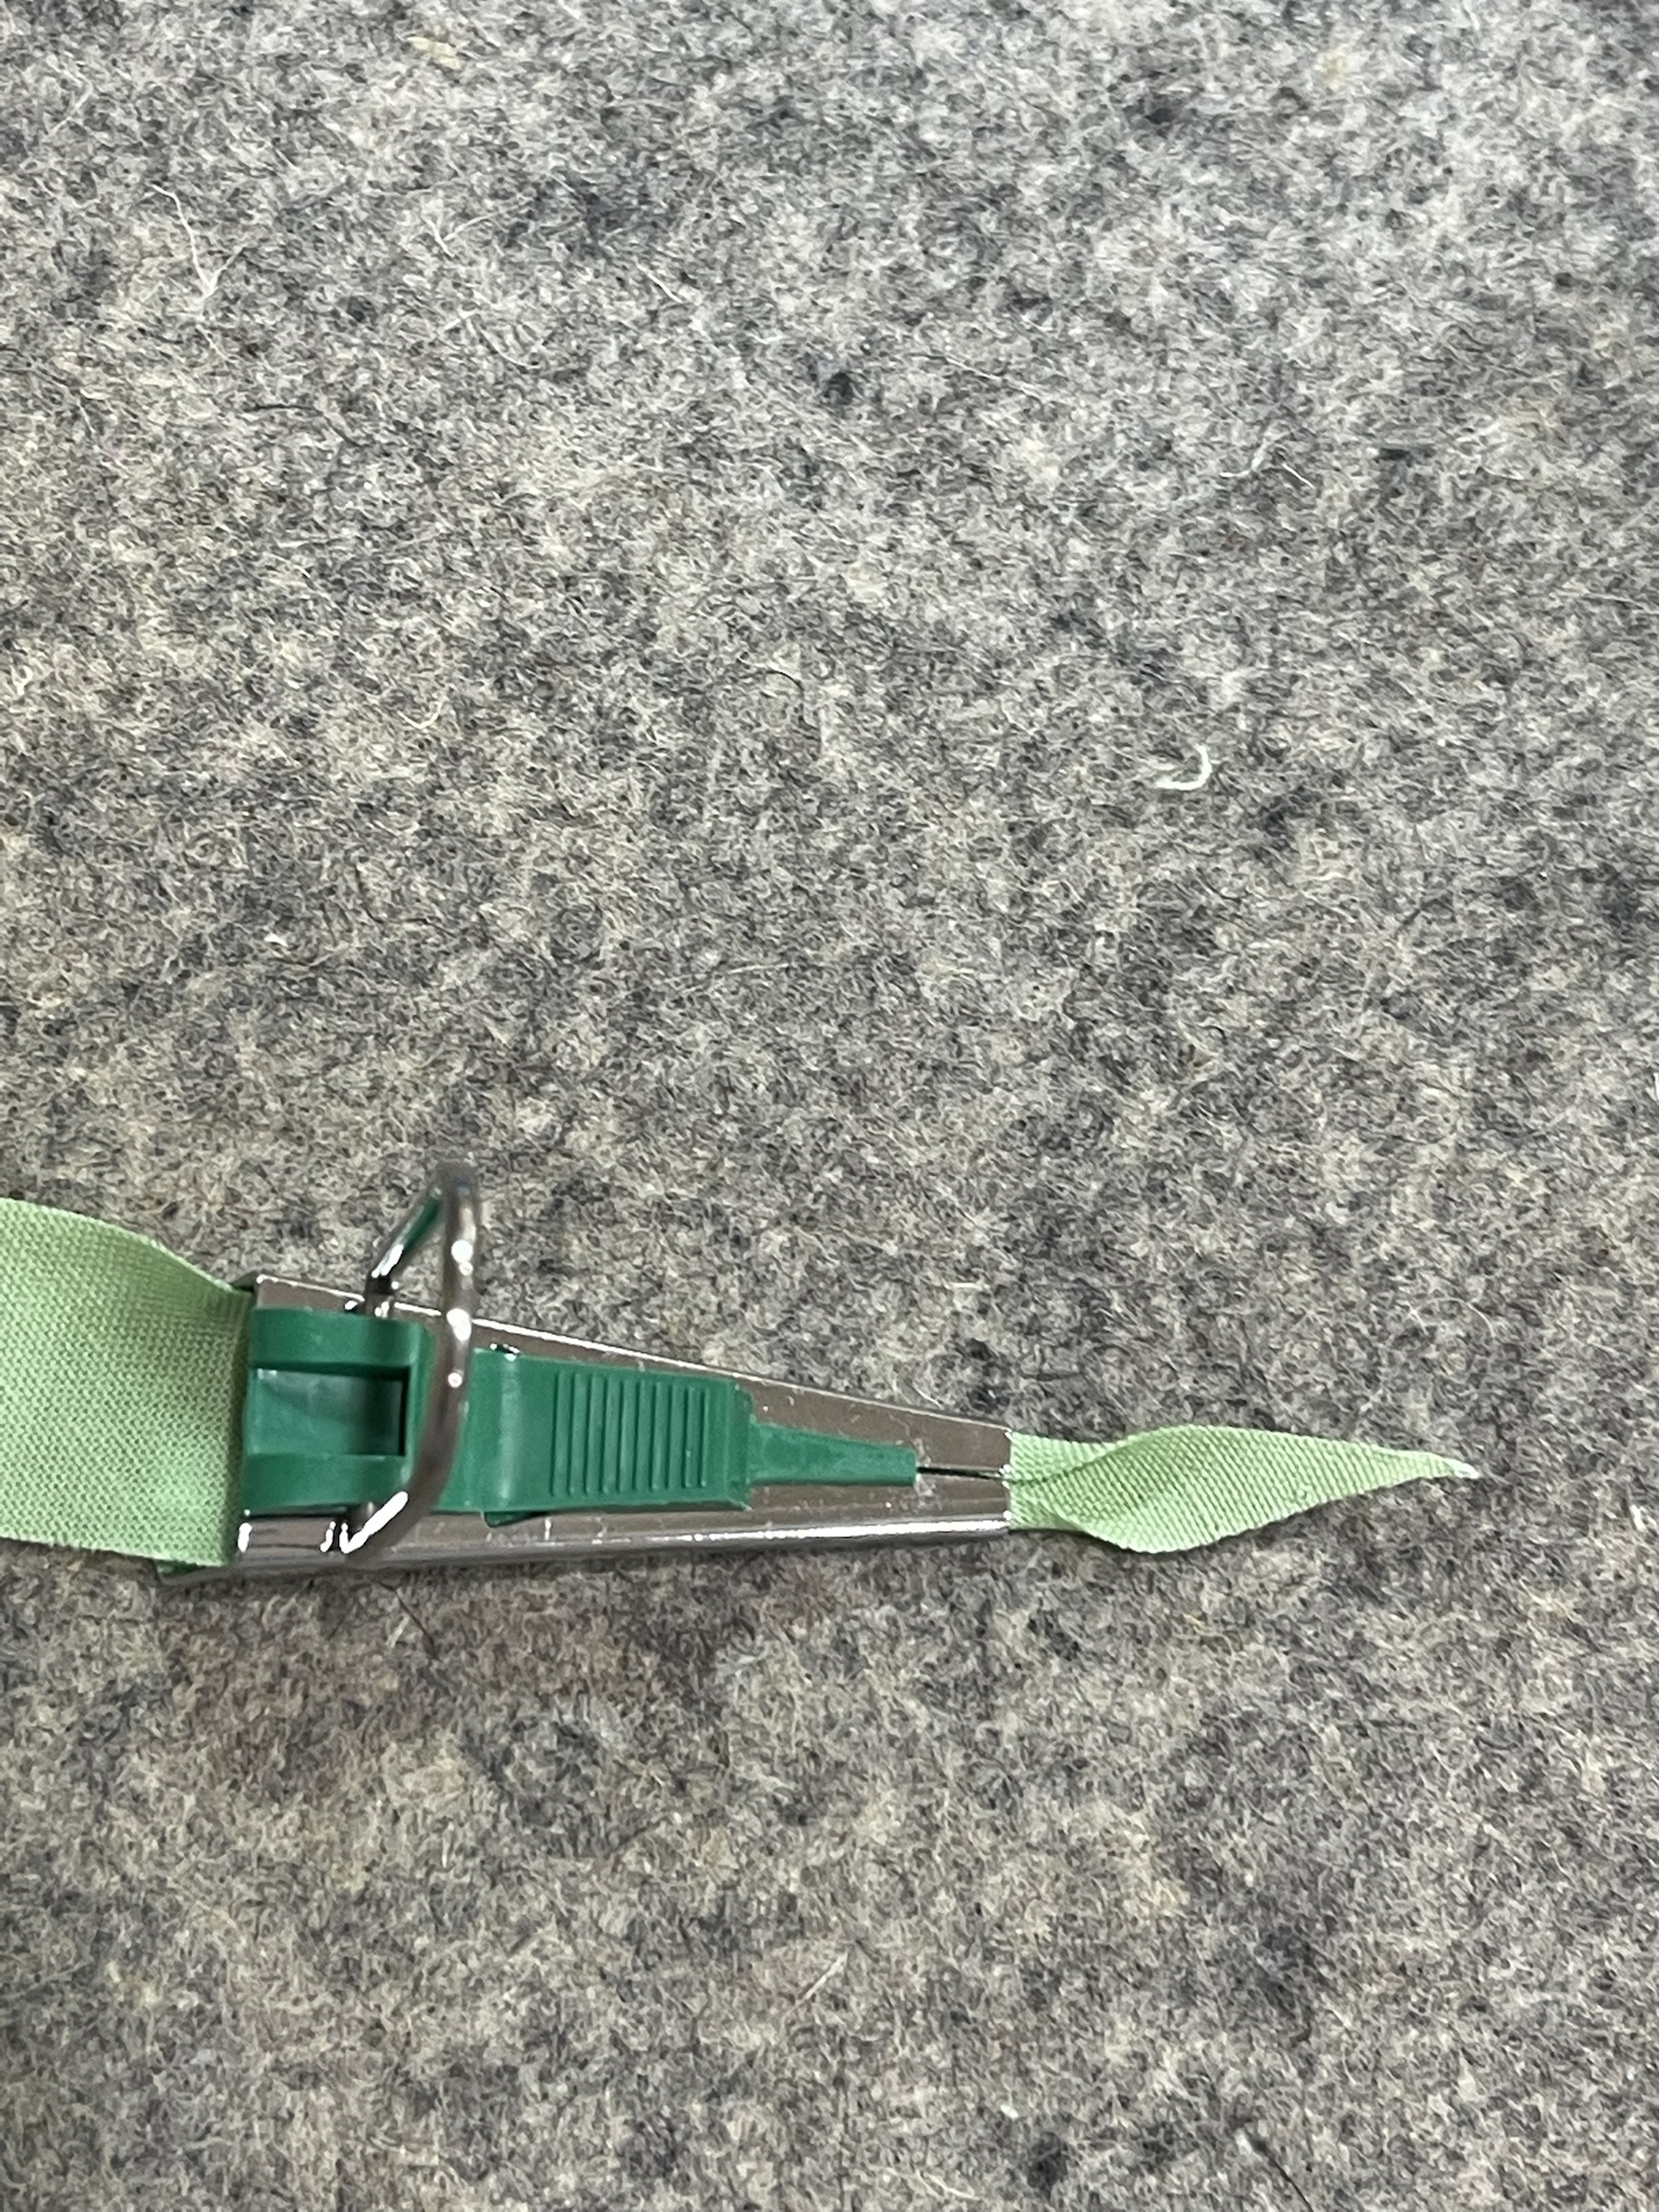
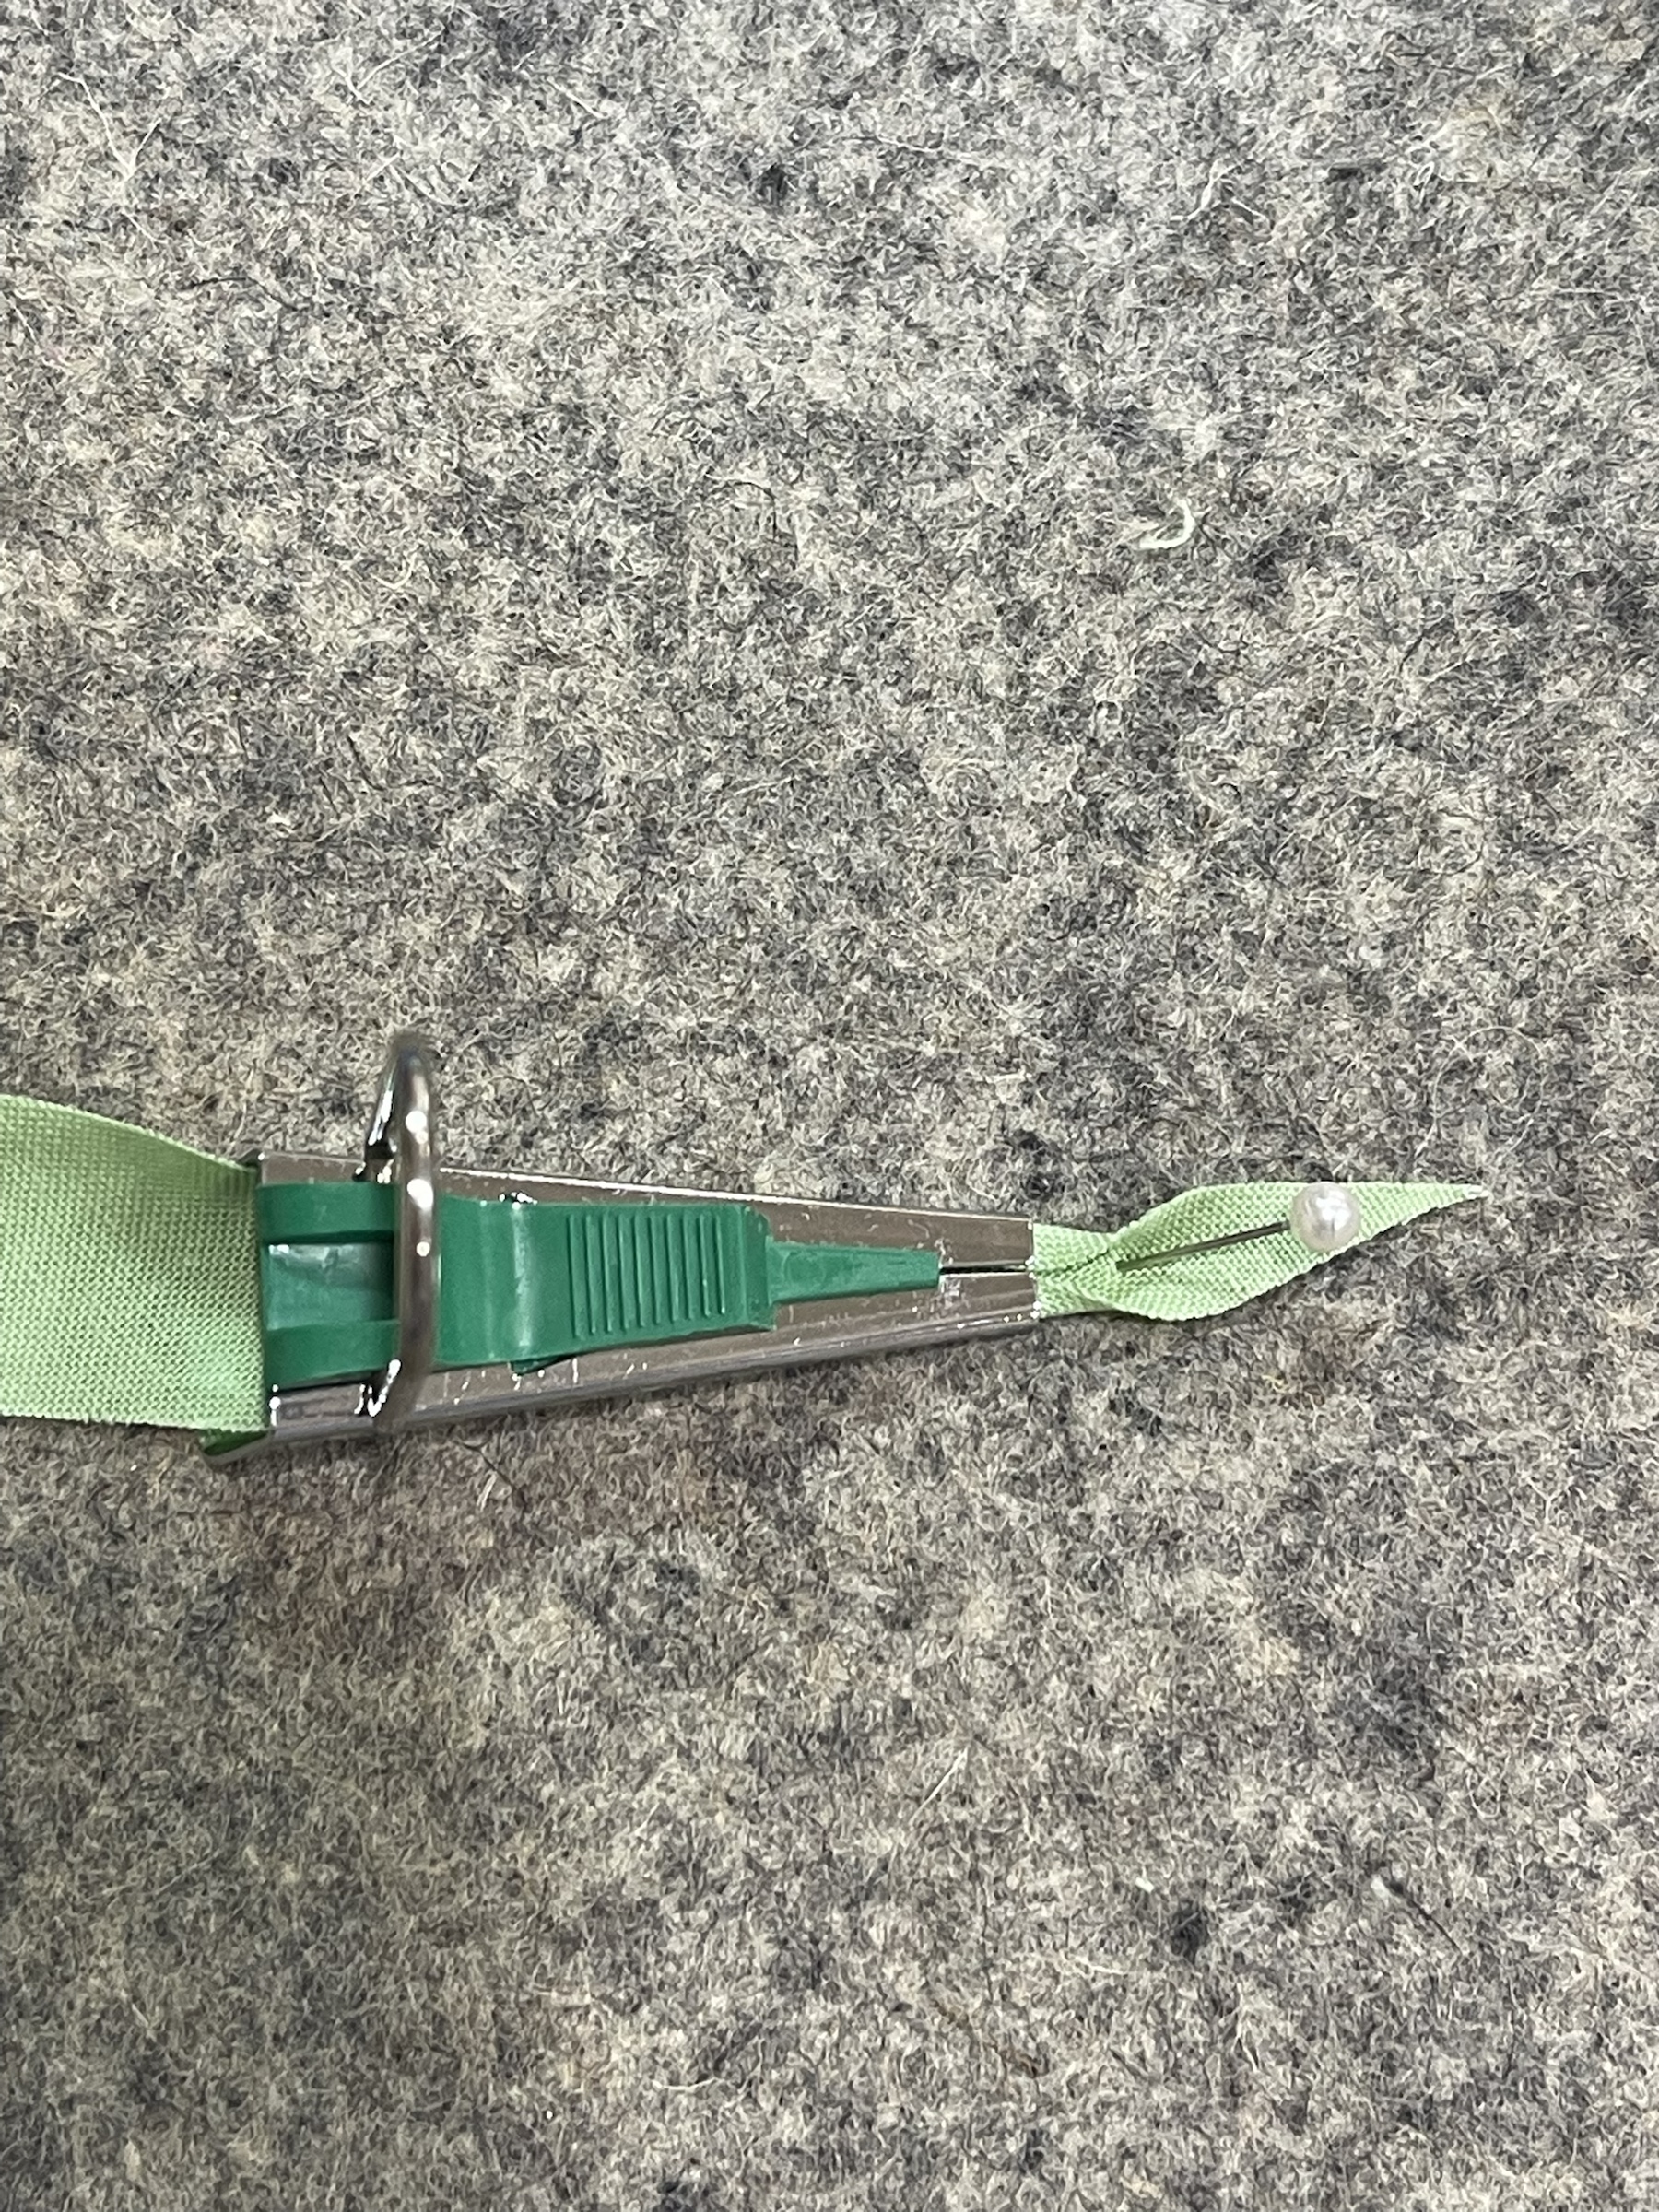
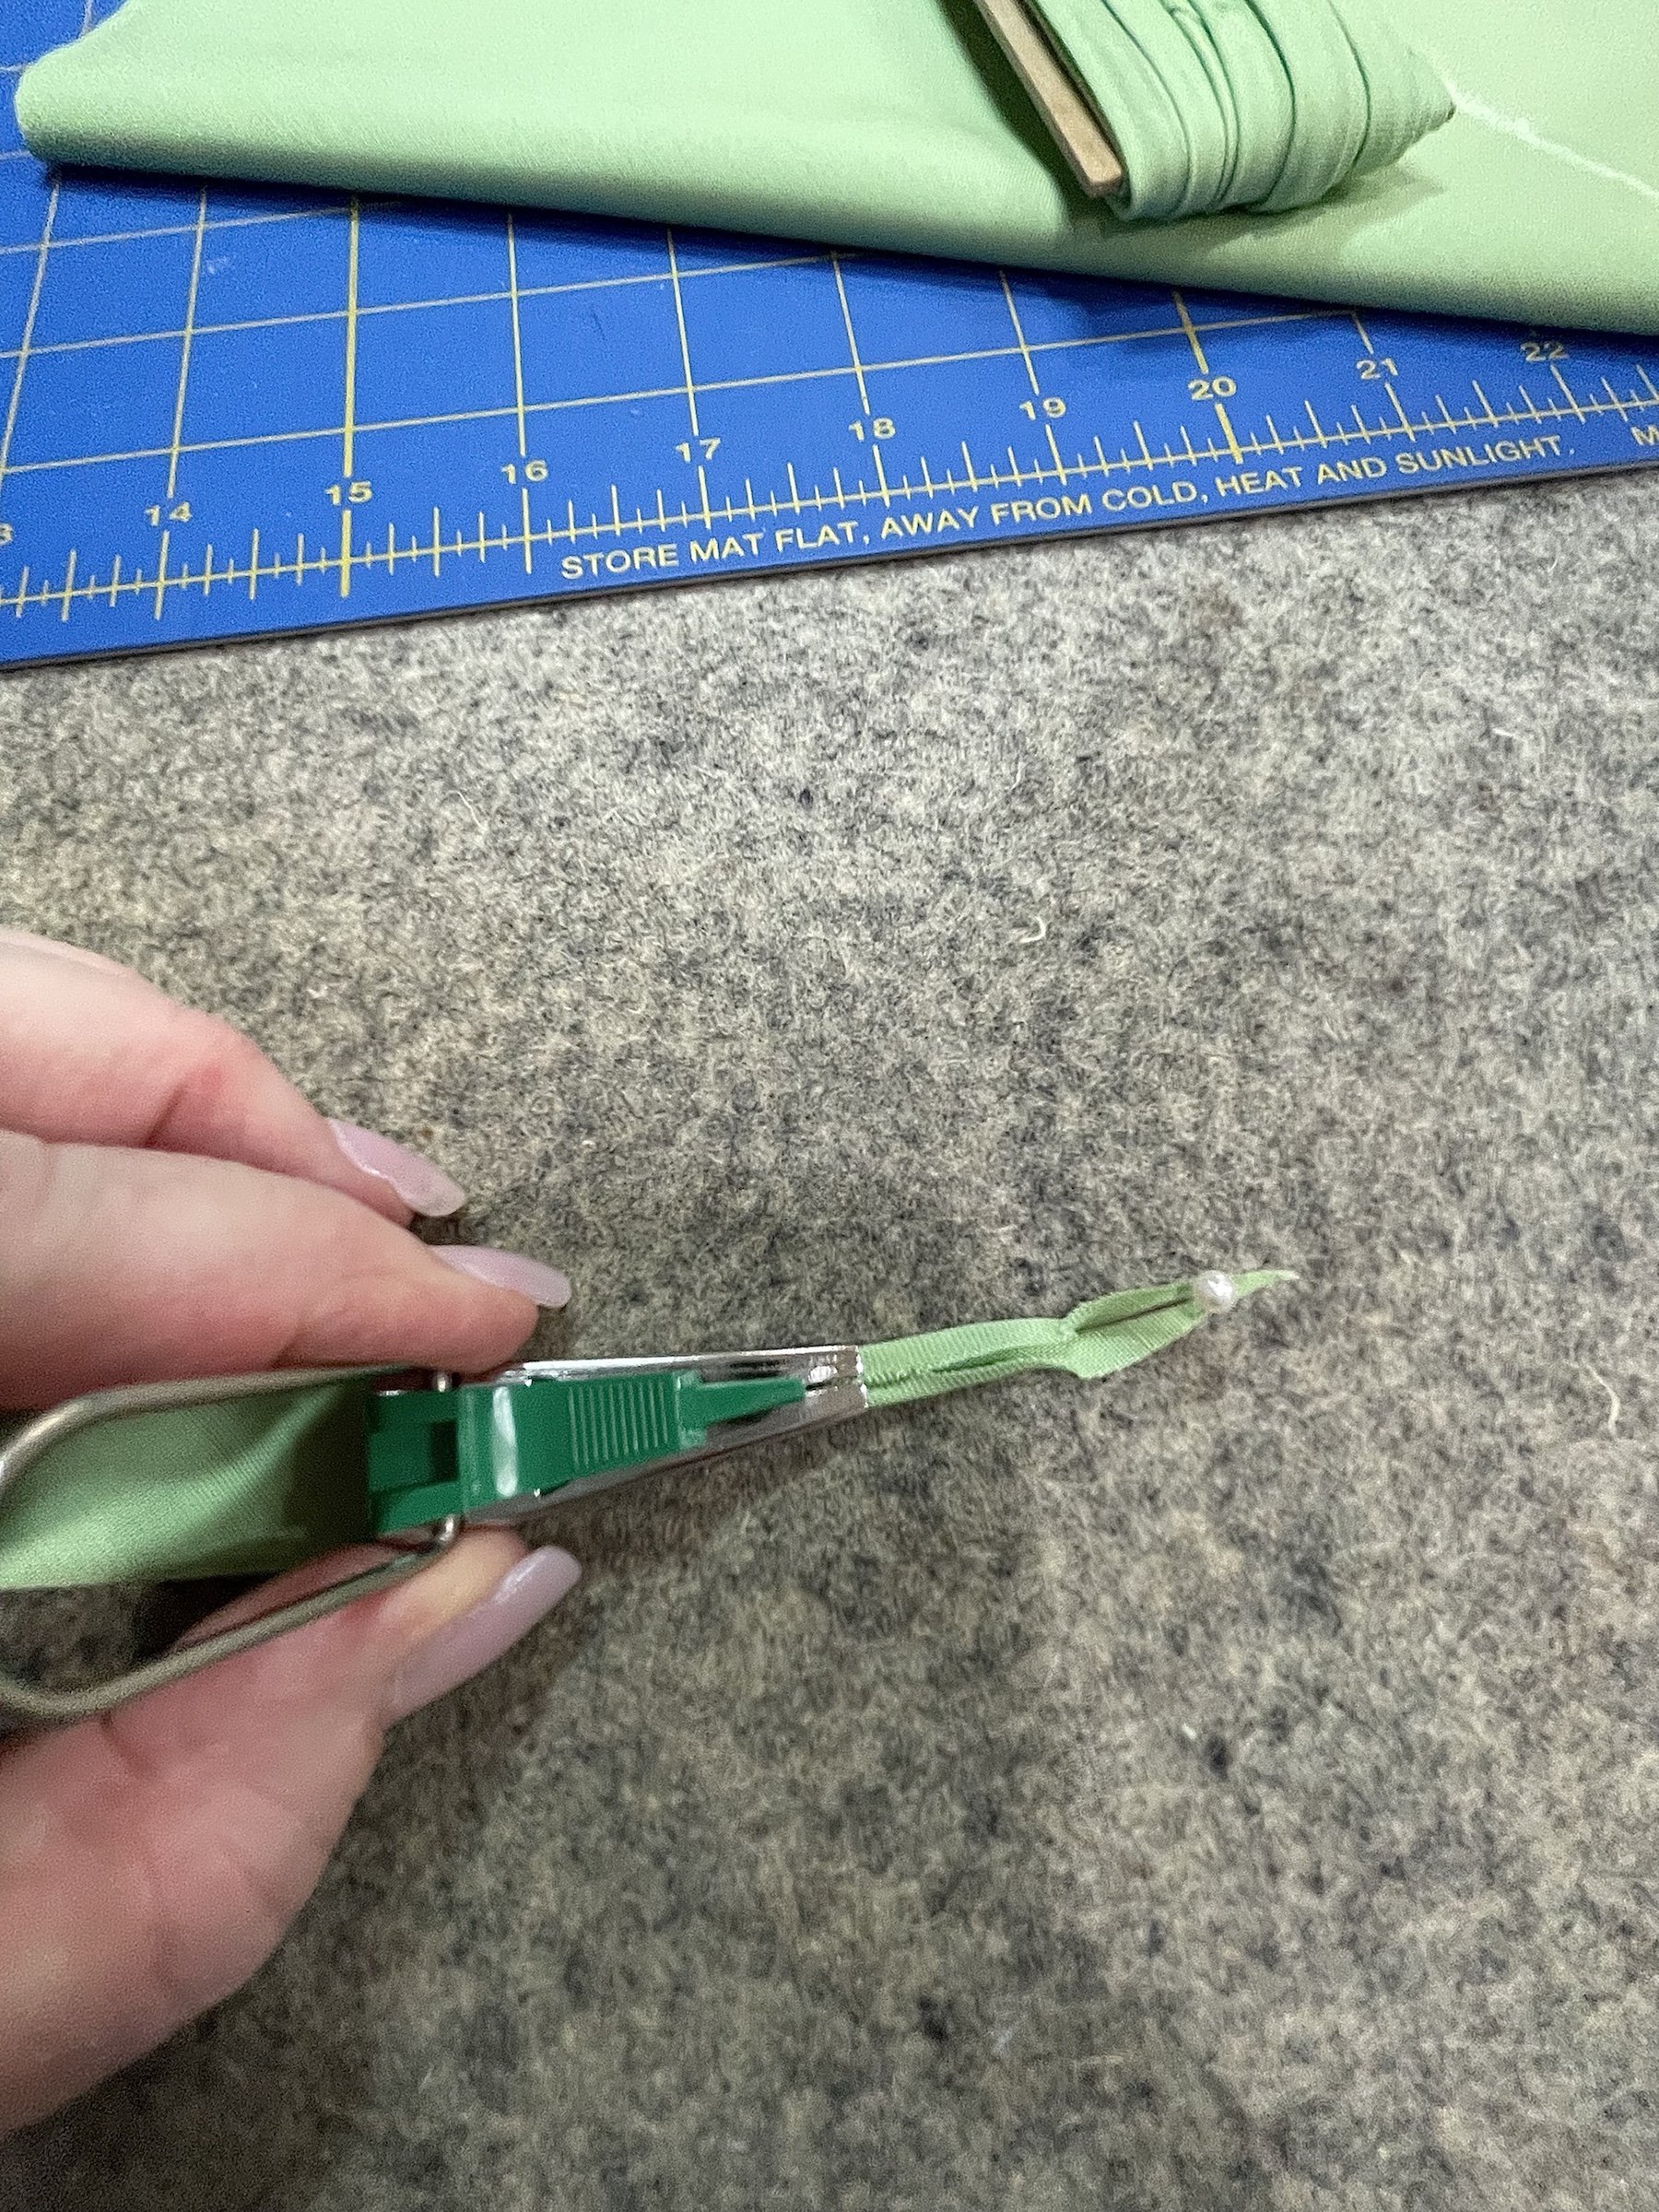
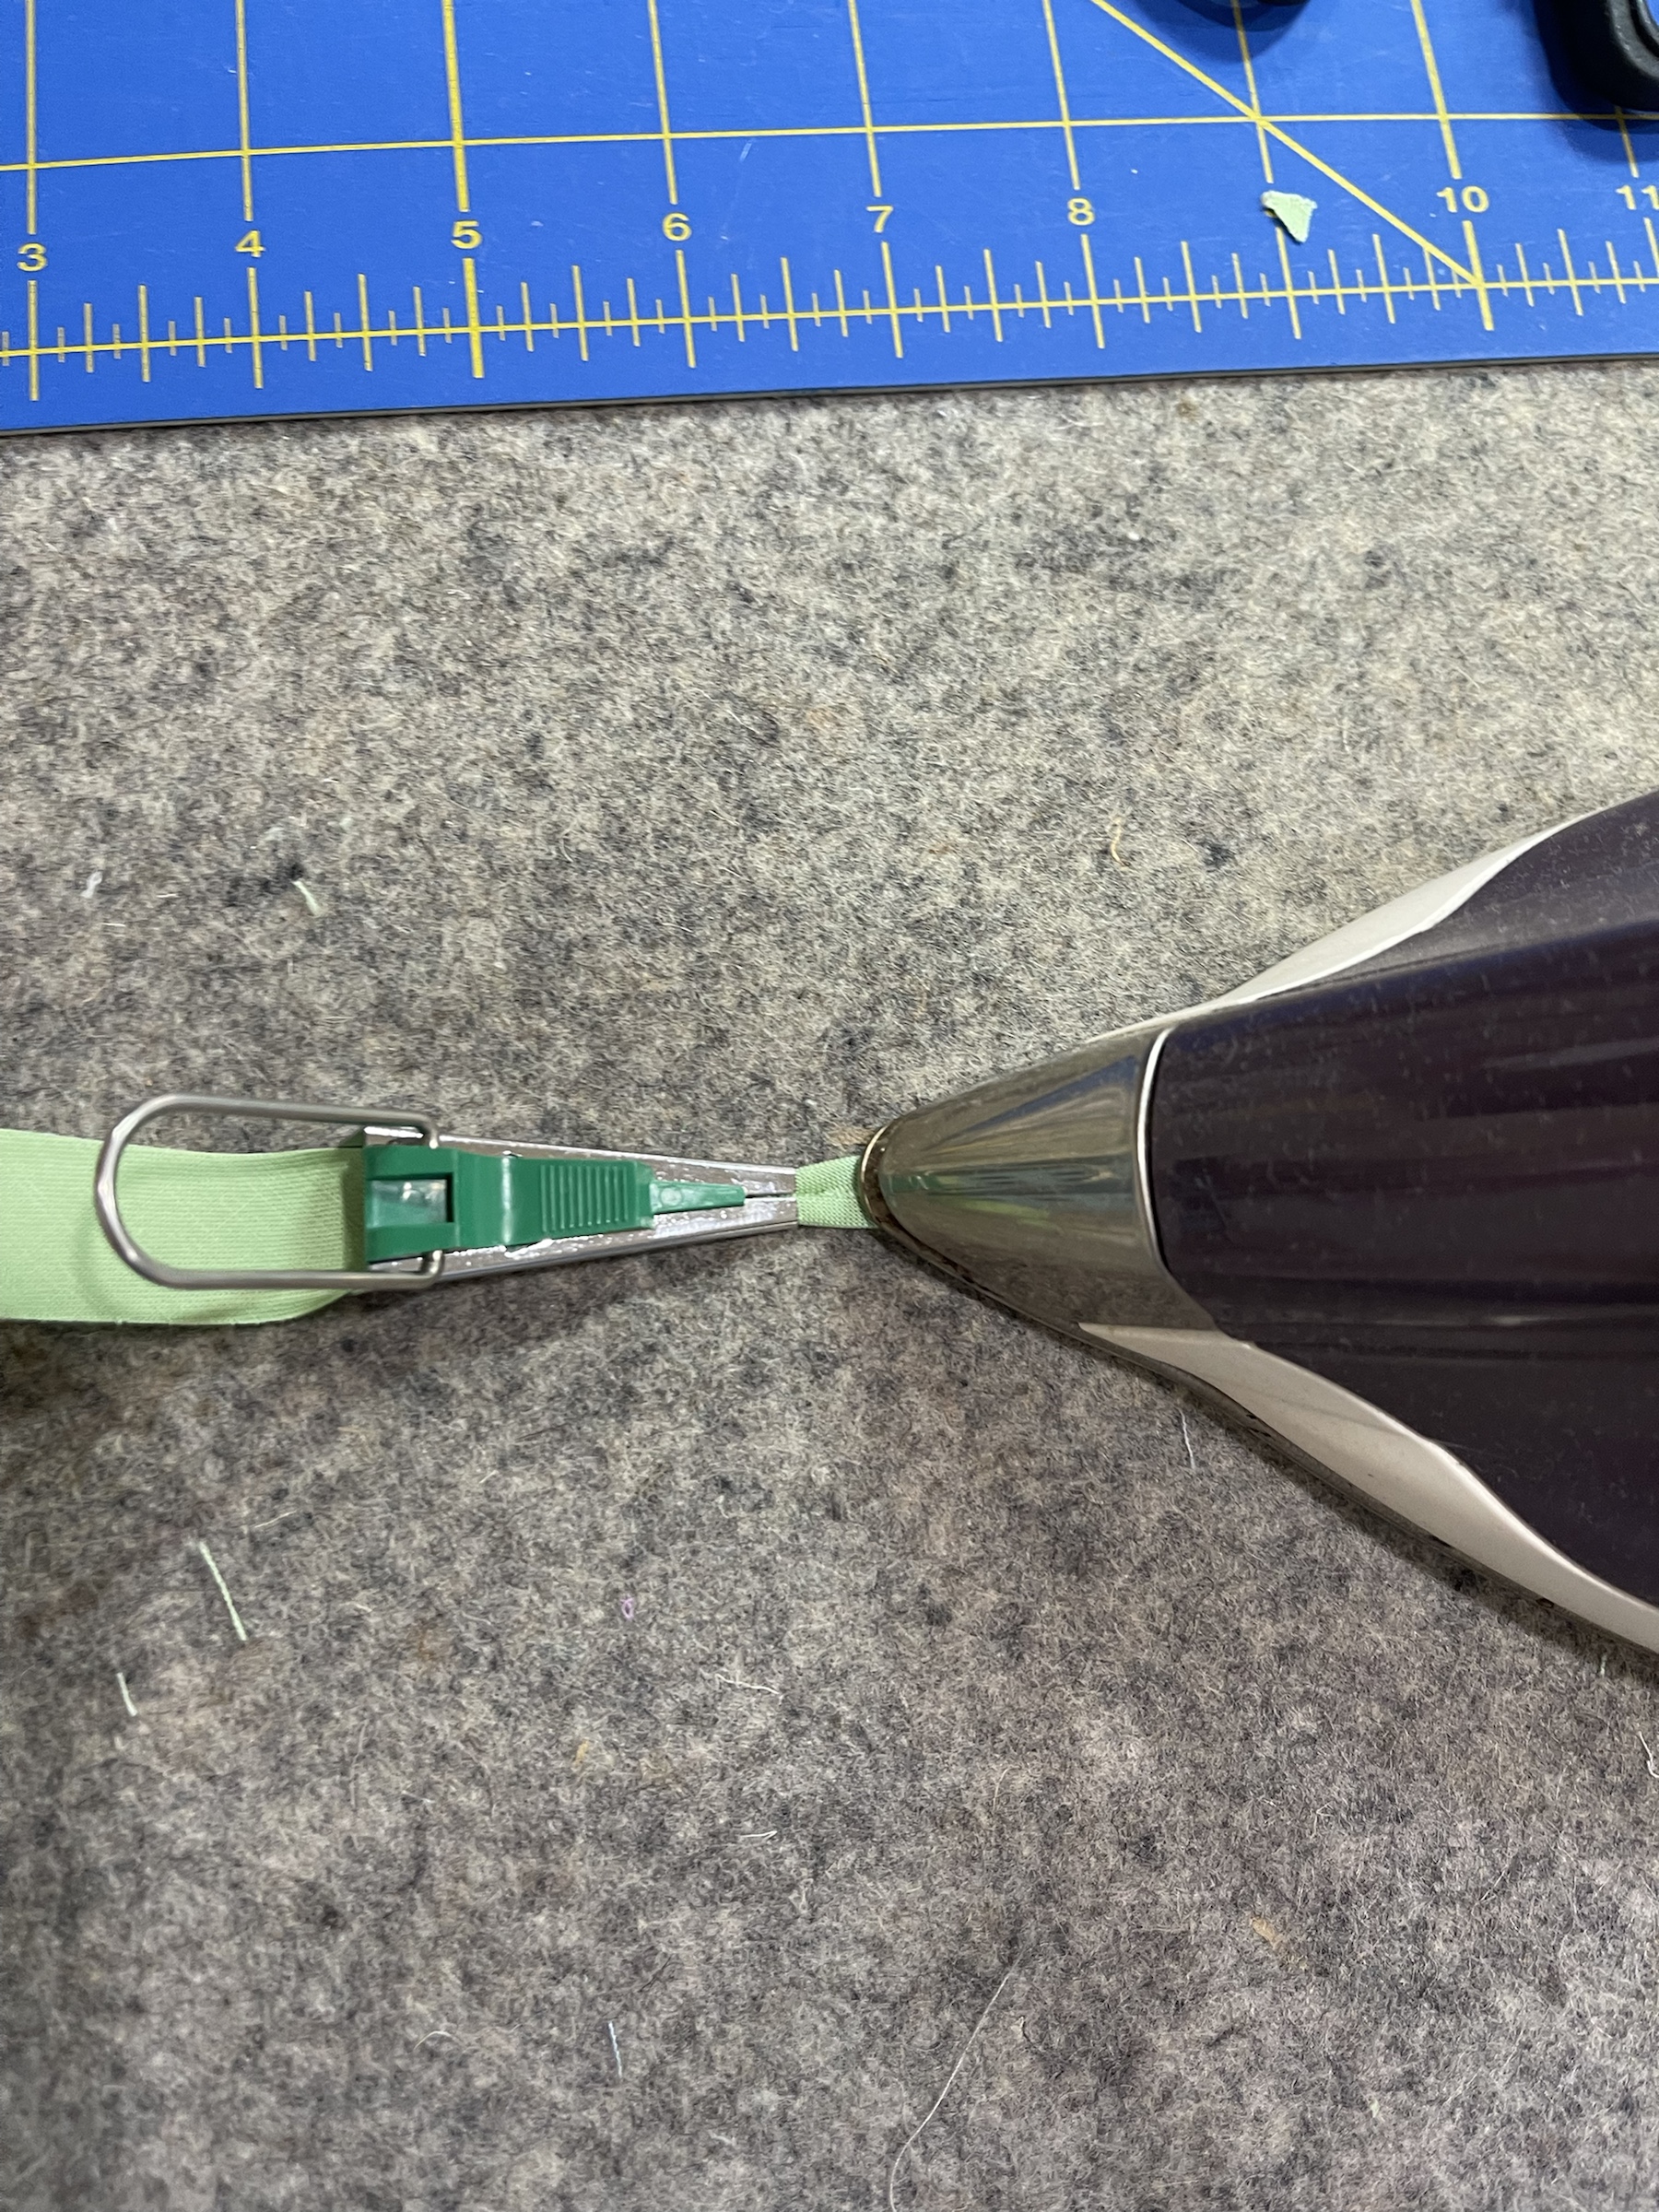
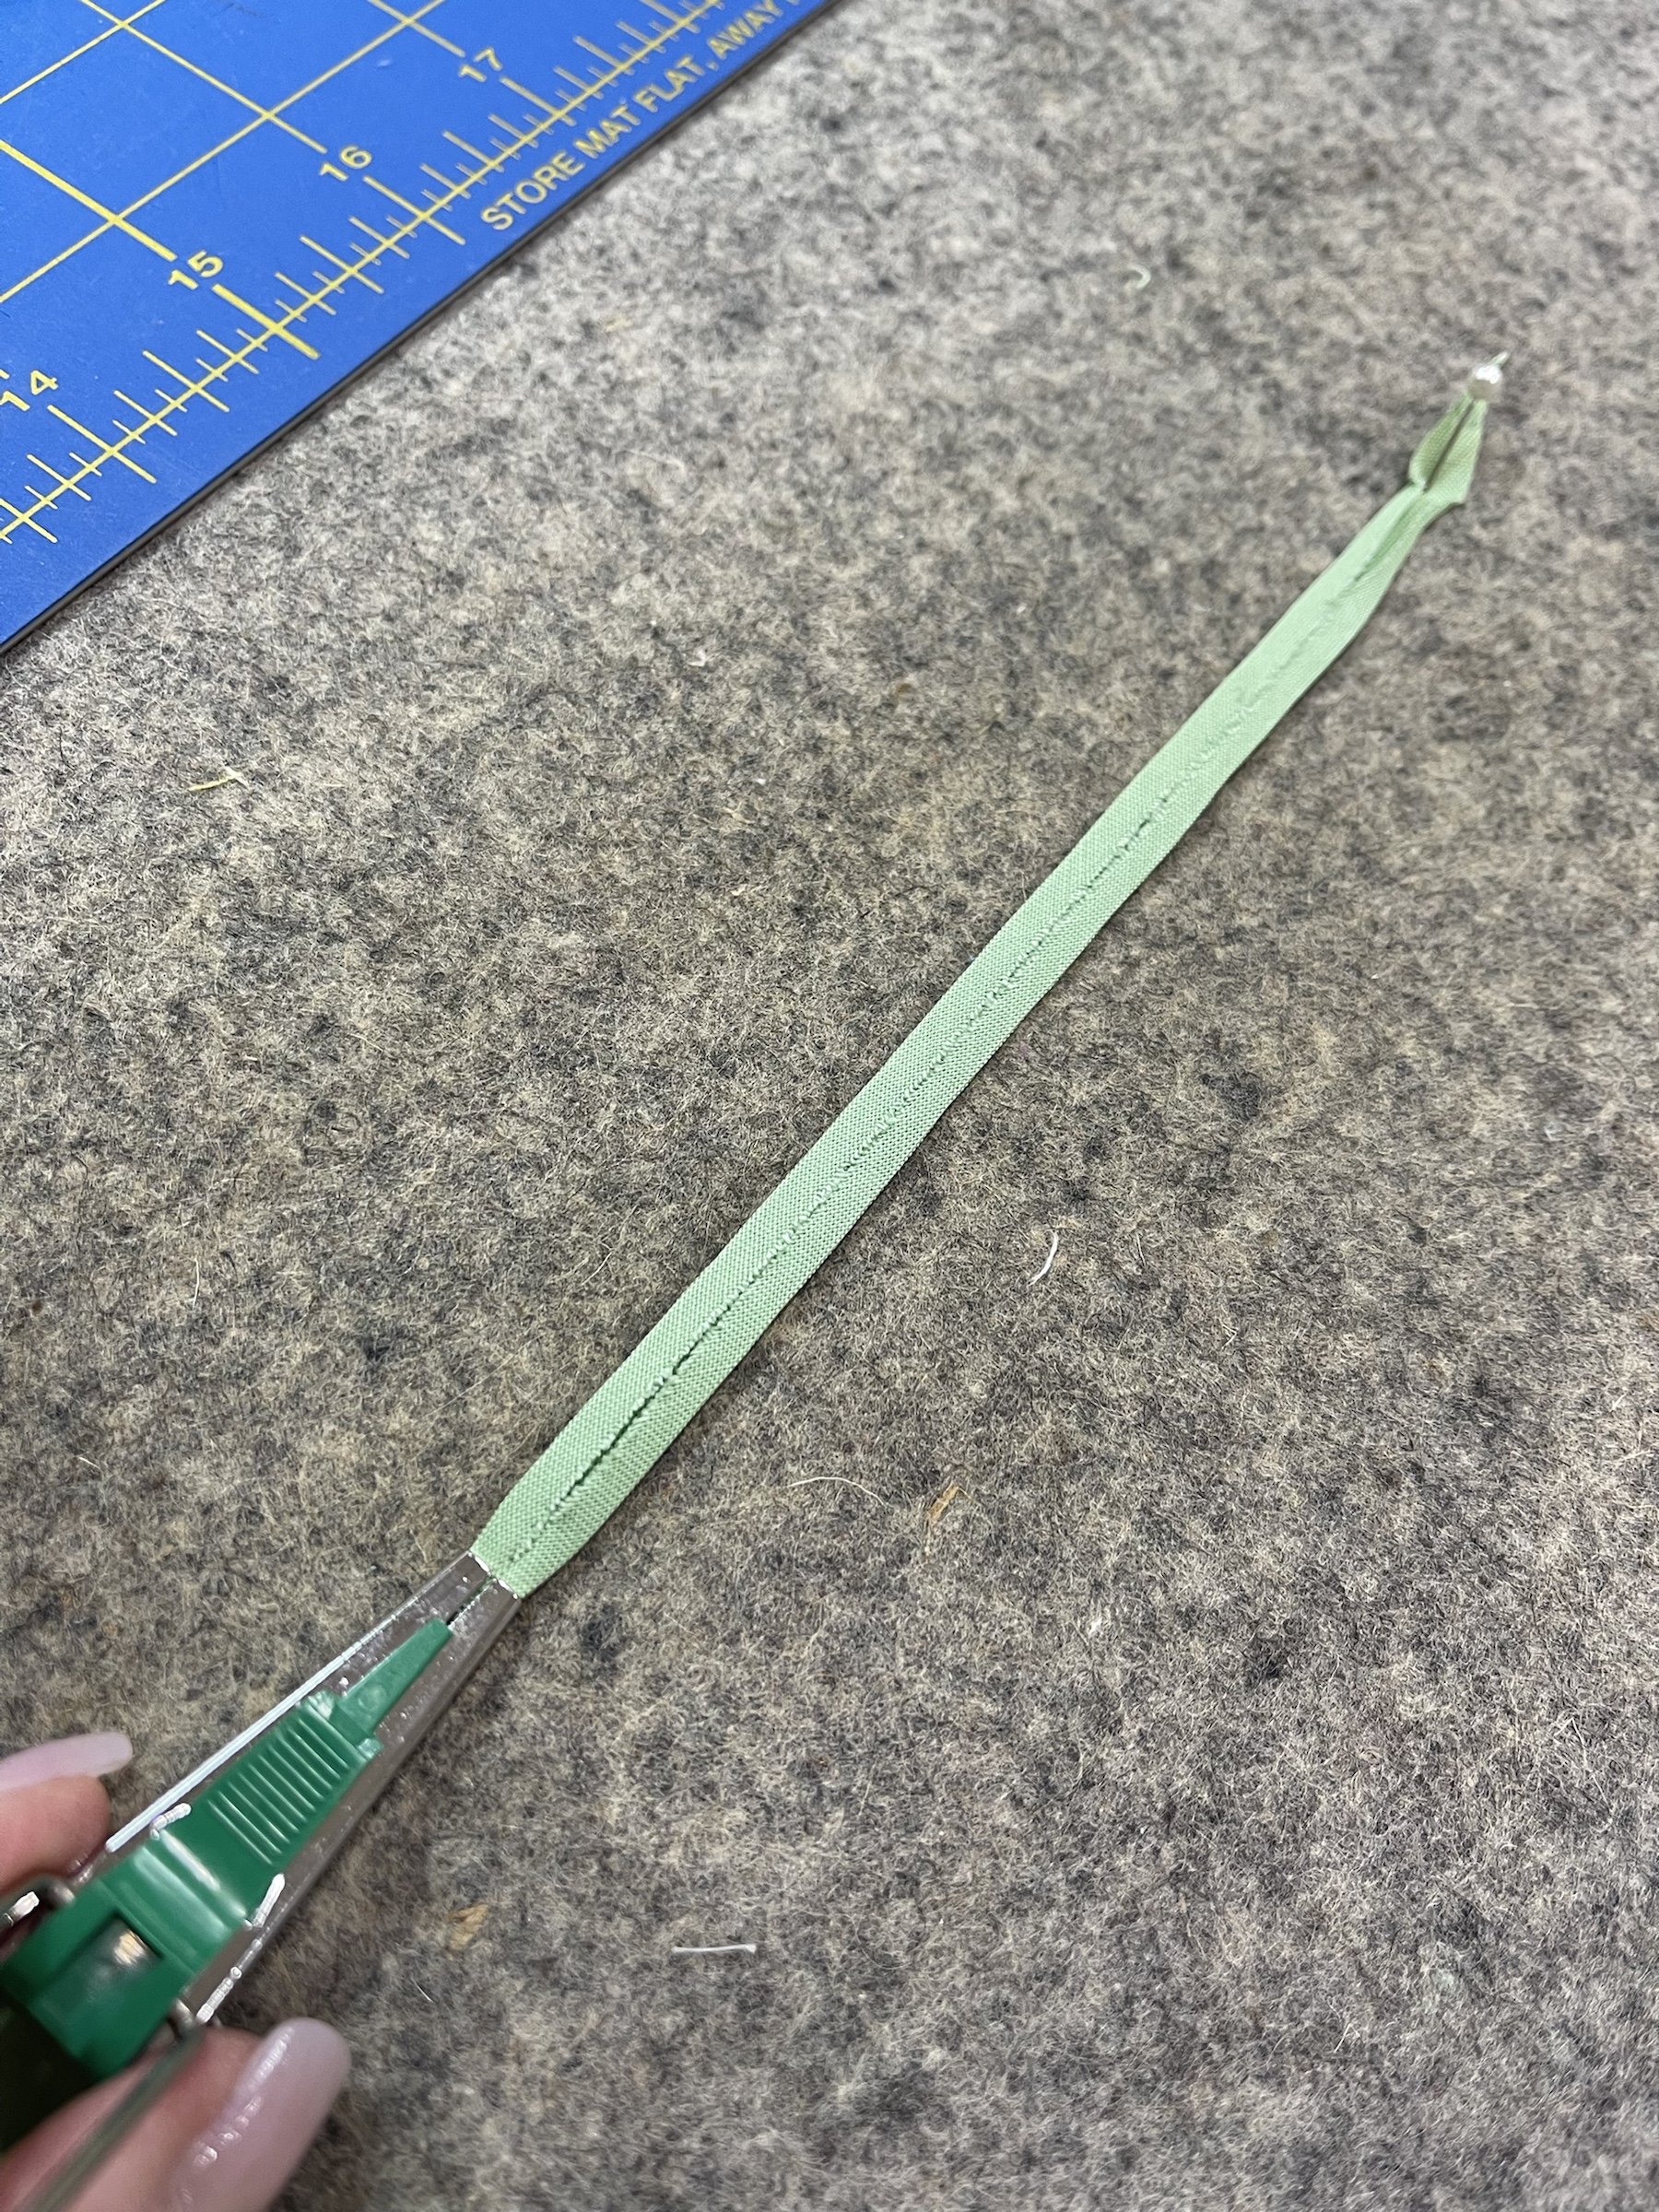
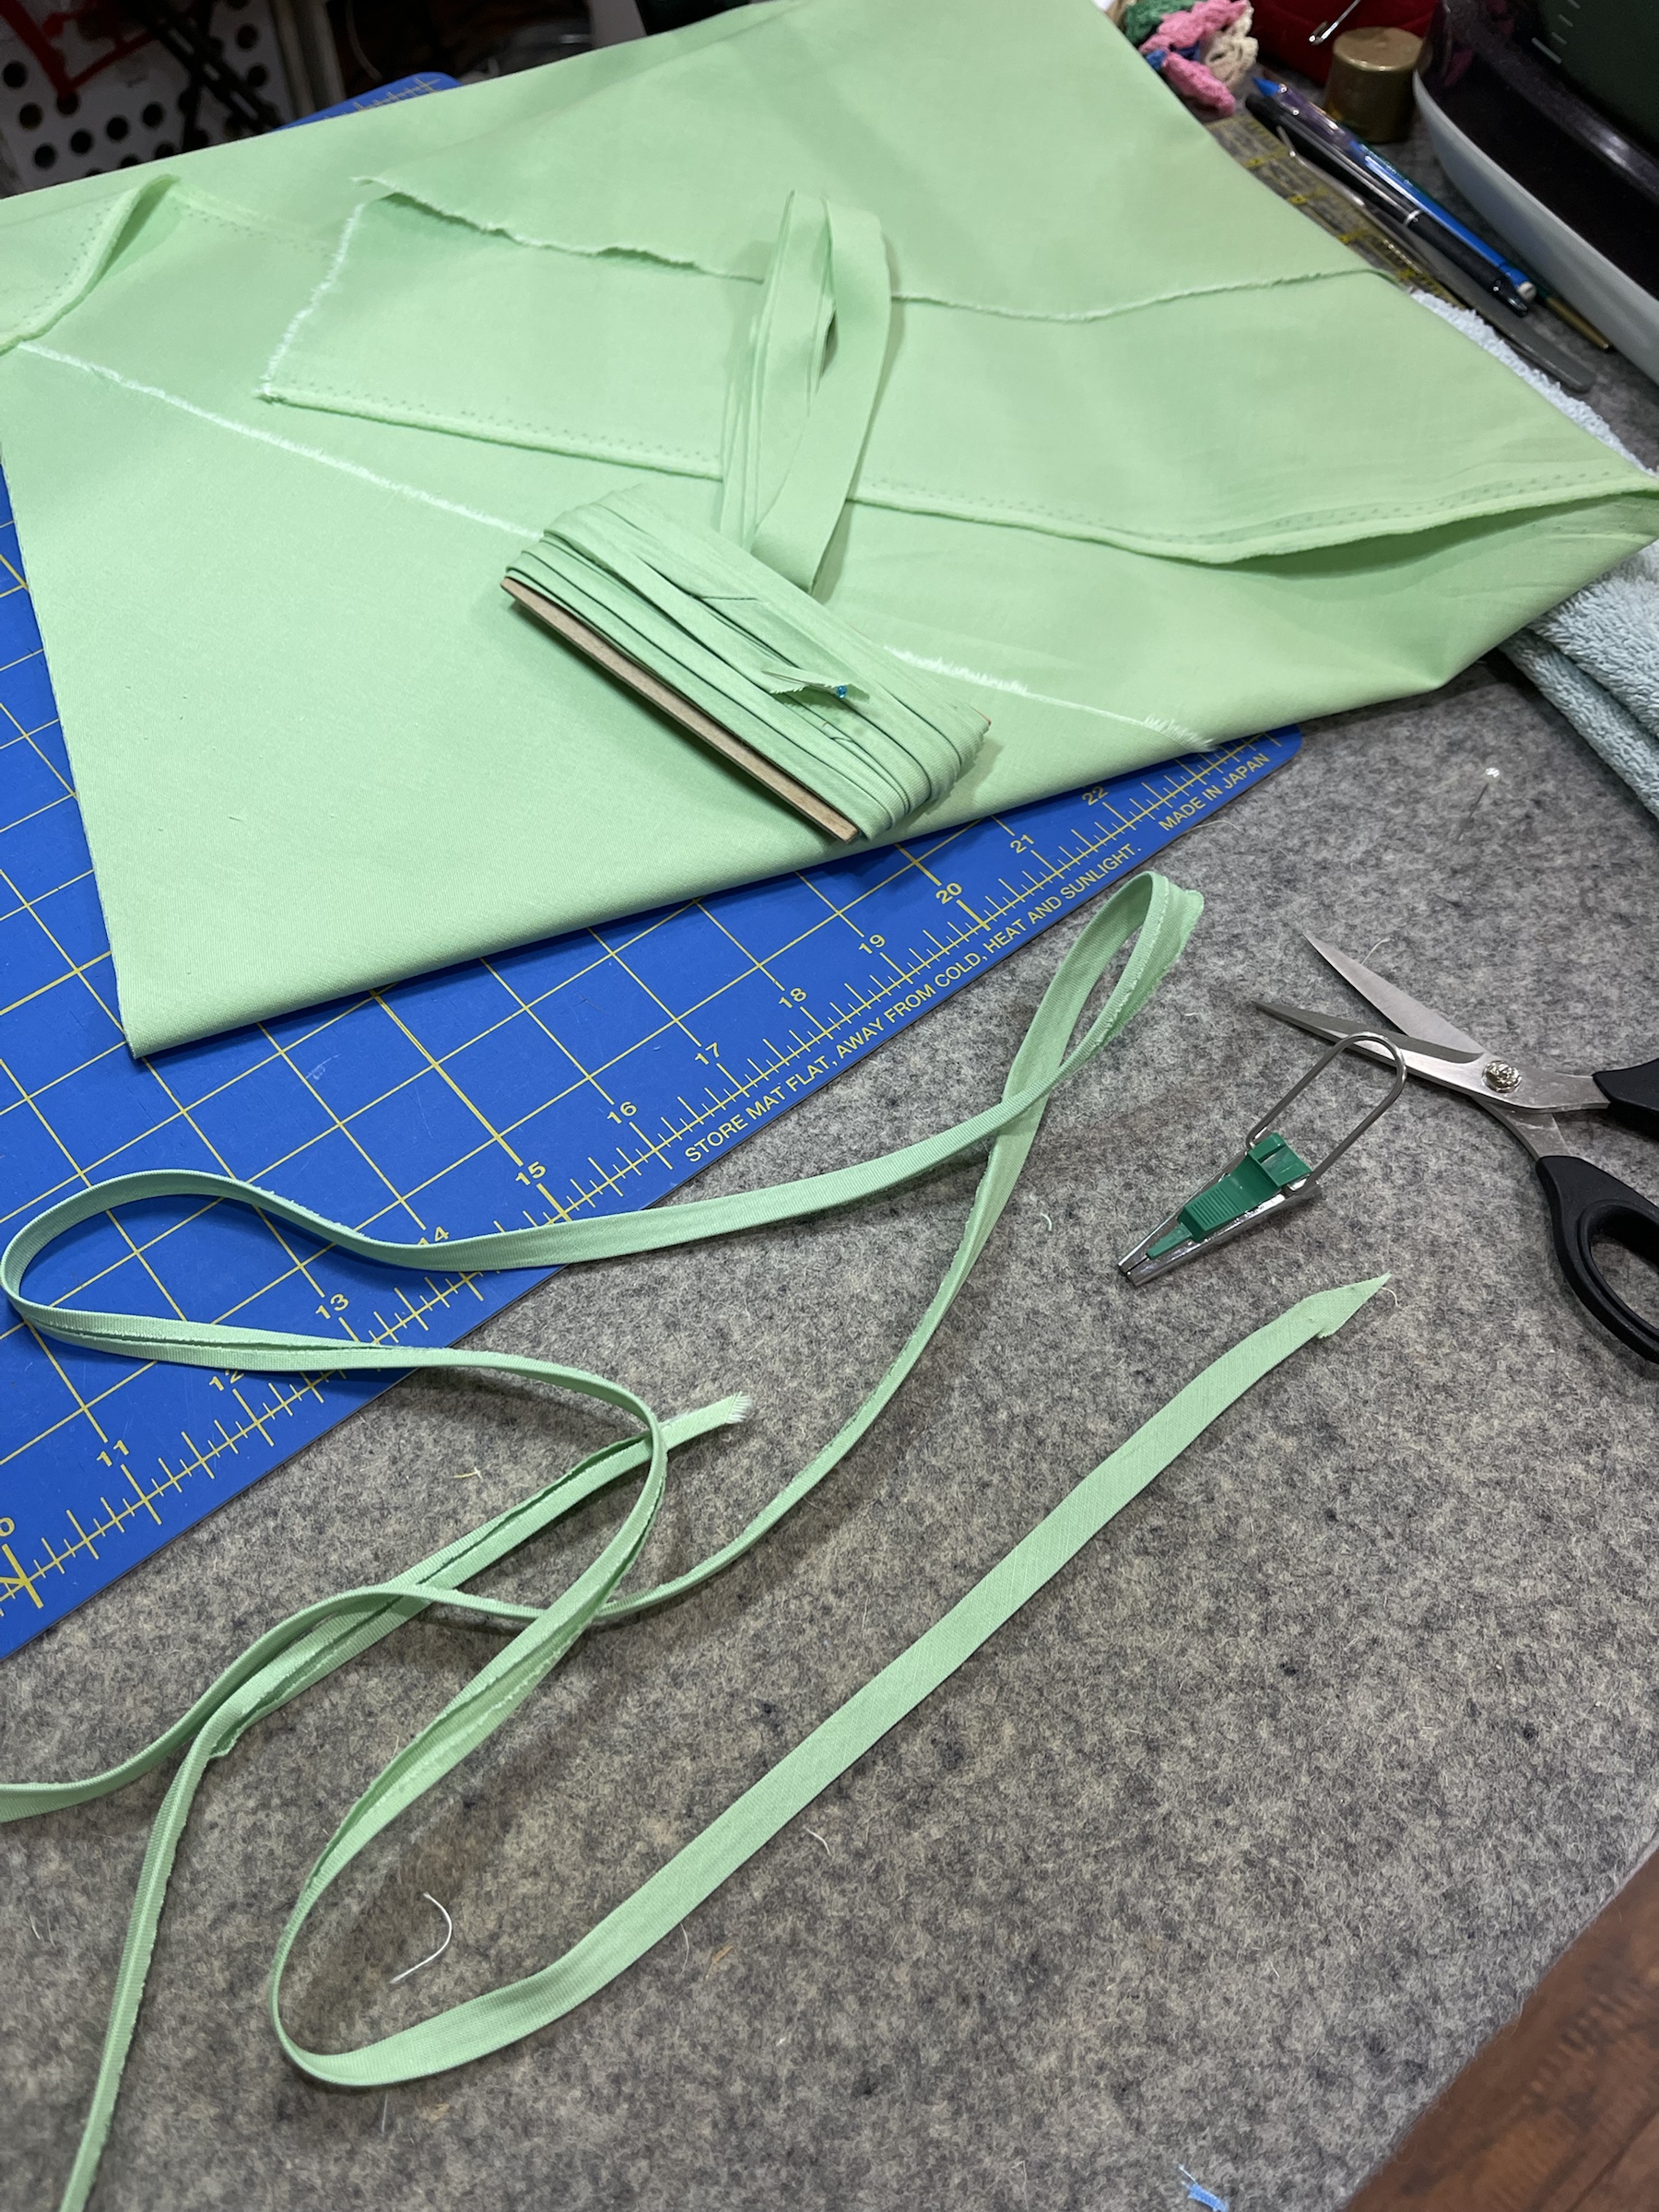
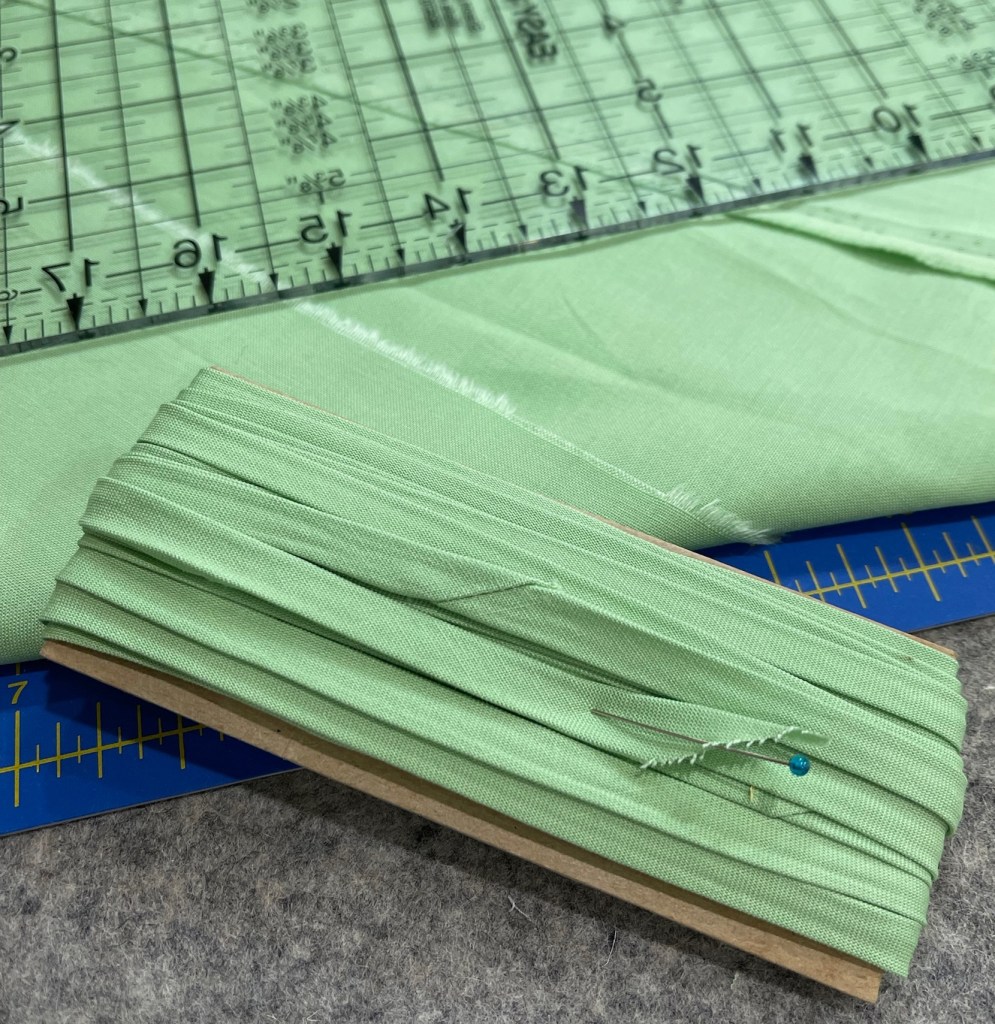
Have you ever made your own bias binding? This was the first time for me and I’m telling you…it’s easy! Very easy! How much bias binding did I make? I forgot to measure before I began winding it on this small cardboard rectangle. Let’s just say I made at least 5 yards.
I cut my bias fabric strips 3/4” wide that finished 1/4” as it came out of the folding tool. At this tiny width and on the bias I knew I could easily achieve flat curves.
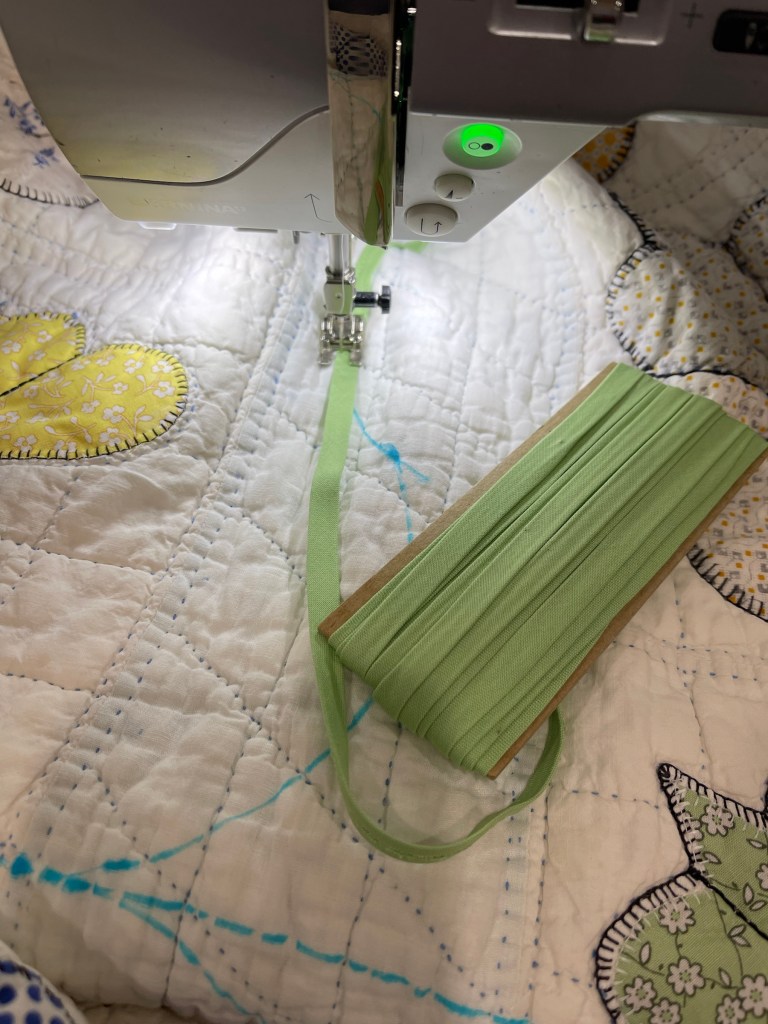
I did not take the time to pin before stitching, instead I just followed my pre-marked vine lines. I’m using my Open Toe (Bernina #20) foot. How did I mark my lines? Using a 6” clear acrylic round template I first marked the corners of the inner border. Yes…I forgot to take a picture but did remember a pic of the marked additional border. See the picture below.
A sliver of late afternoon sun making its appearance on the design wall. The undulating vines are finished, machine straight stitched on each edge of the 1/4” bias binding.
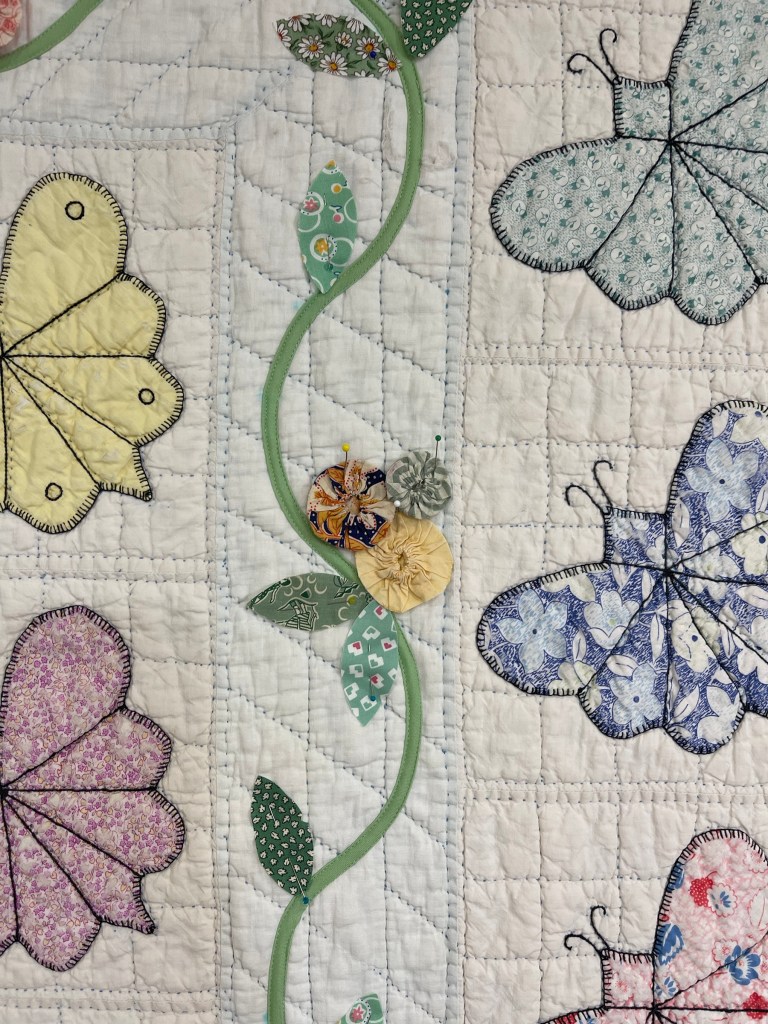
I have an Accuquilt and used it to cut about 80-90 leaves in 2 different sizes.
I begin placing leaves on the vine, kind of random placing, kind of not…if you have been following me for any length of time you know I try hard to design “random” but I finally had to admit I’m very “structured” 🤪
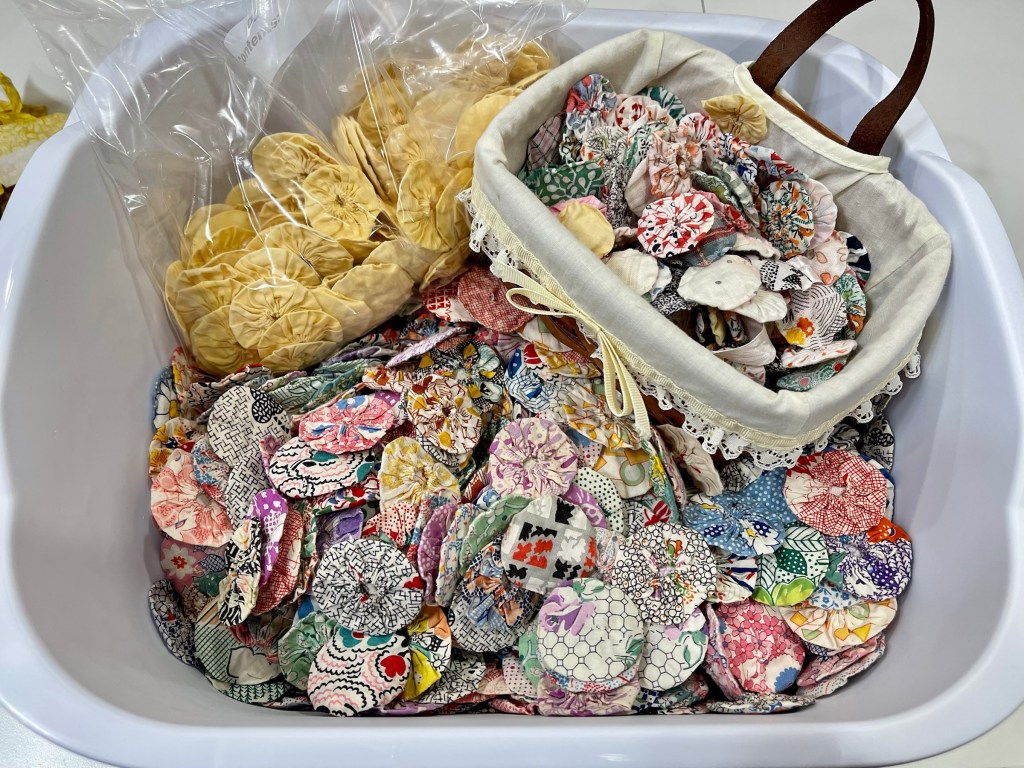
I bought a very damaged Yo-yo quilt several years ago. Over several weeks I deconstructed the quilt, soaked and then laundered the Yo-yos. Yes, I put them through both the washing machine and the dryer.
The soaking and then the laundry process worked wonders on the smell, the dirt and grime, and the stitch holes where the yo-yos were tightly sewn together.
These very clean vintage yo-yos will become my flowers. Luckily I have them in 2 different sizes, 1 1/4” and 1 5/8”.
I’m making progress. The leaves are sewn in place by machine using the Applique stitch. The yo-yo flowers are sewn using a very tiny zig-zag stitch.
Stay tuned for one more blog post in a few days, the post that will wrap up the “saving” of this beautiful soft and cuddly vintage quilt.
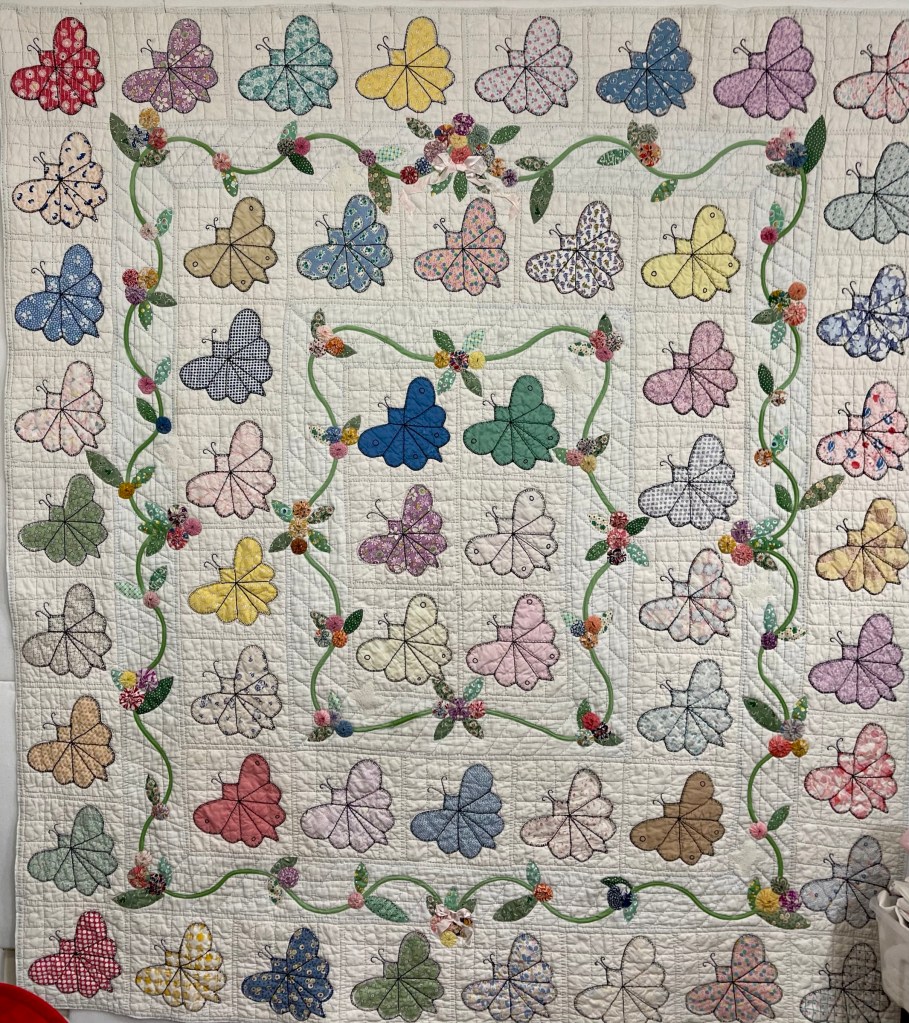
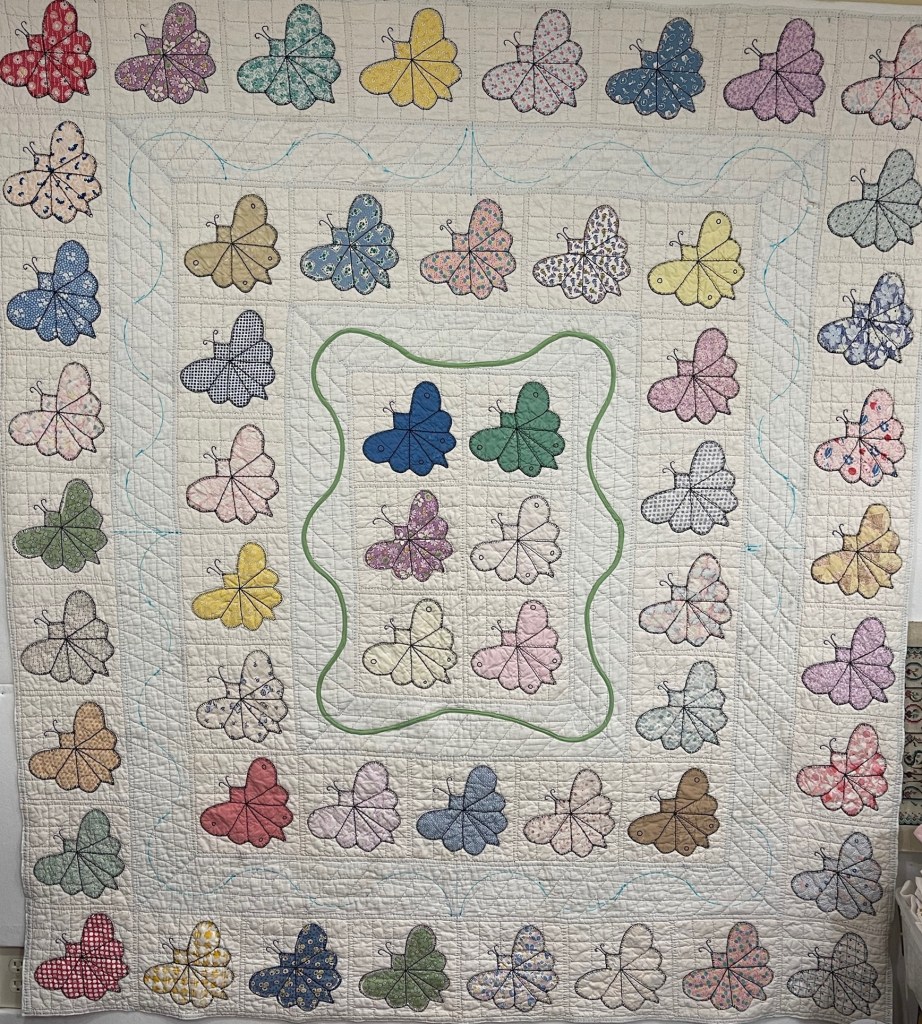
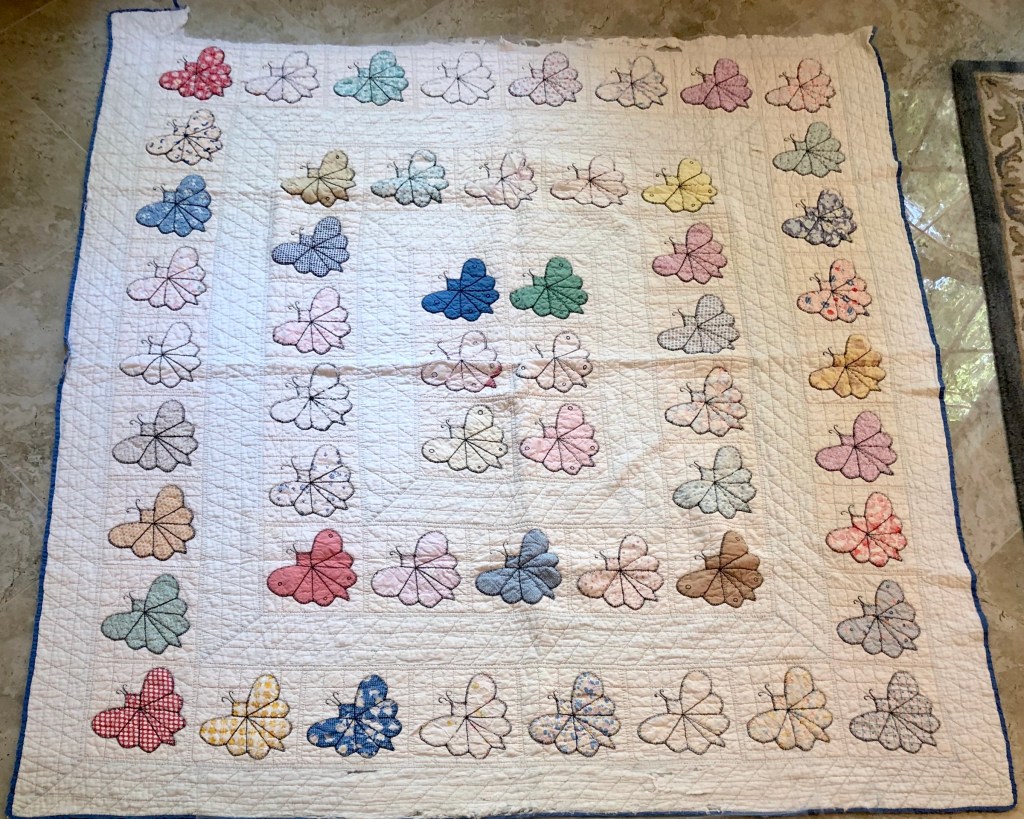
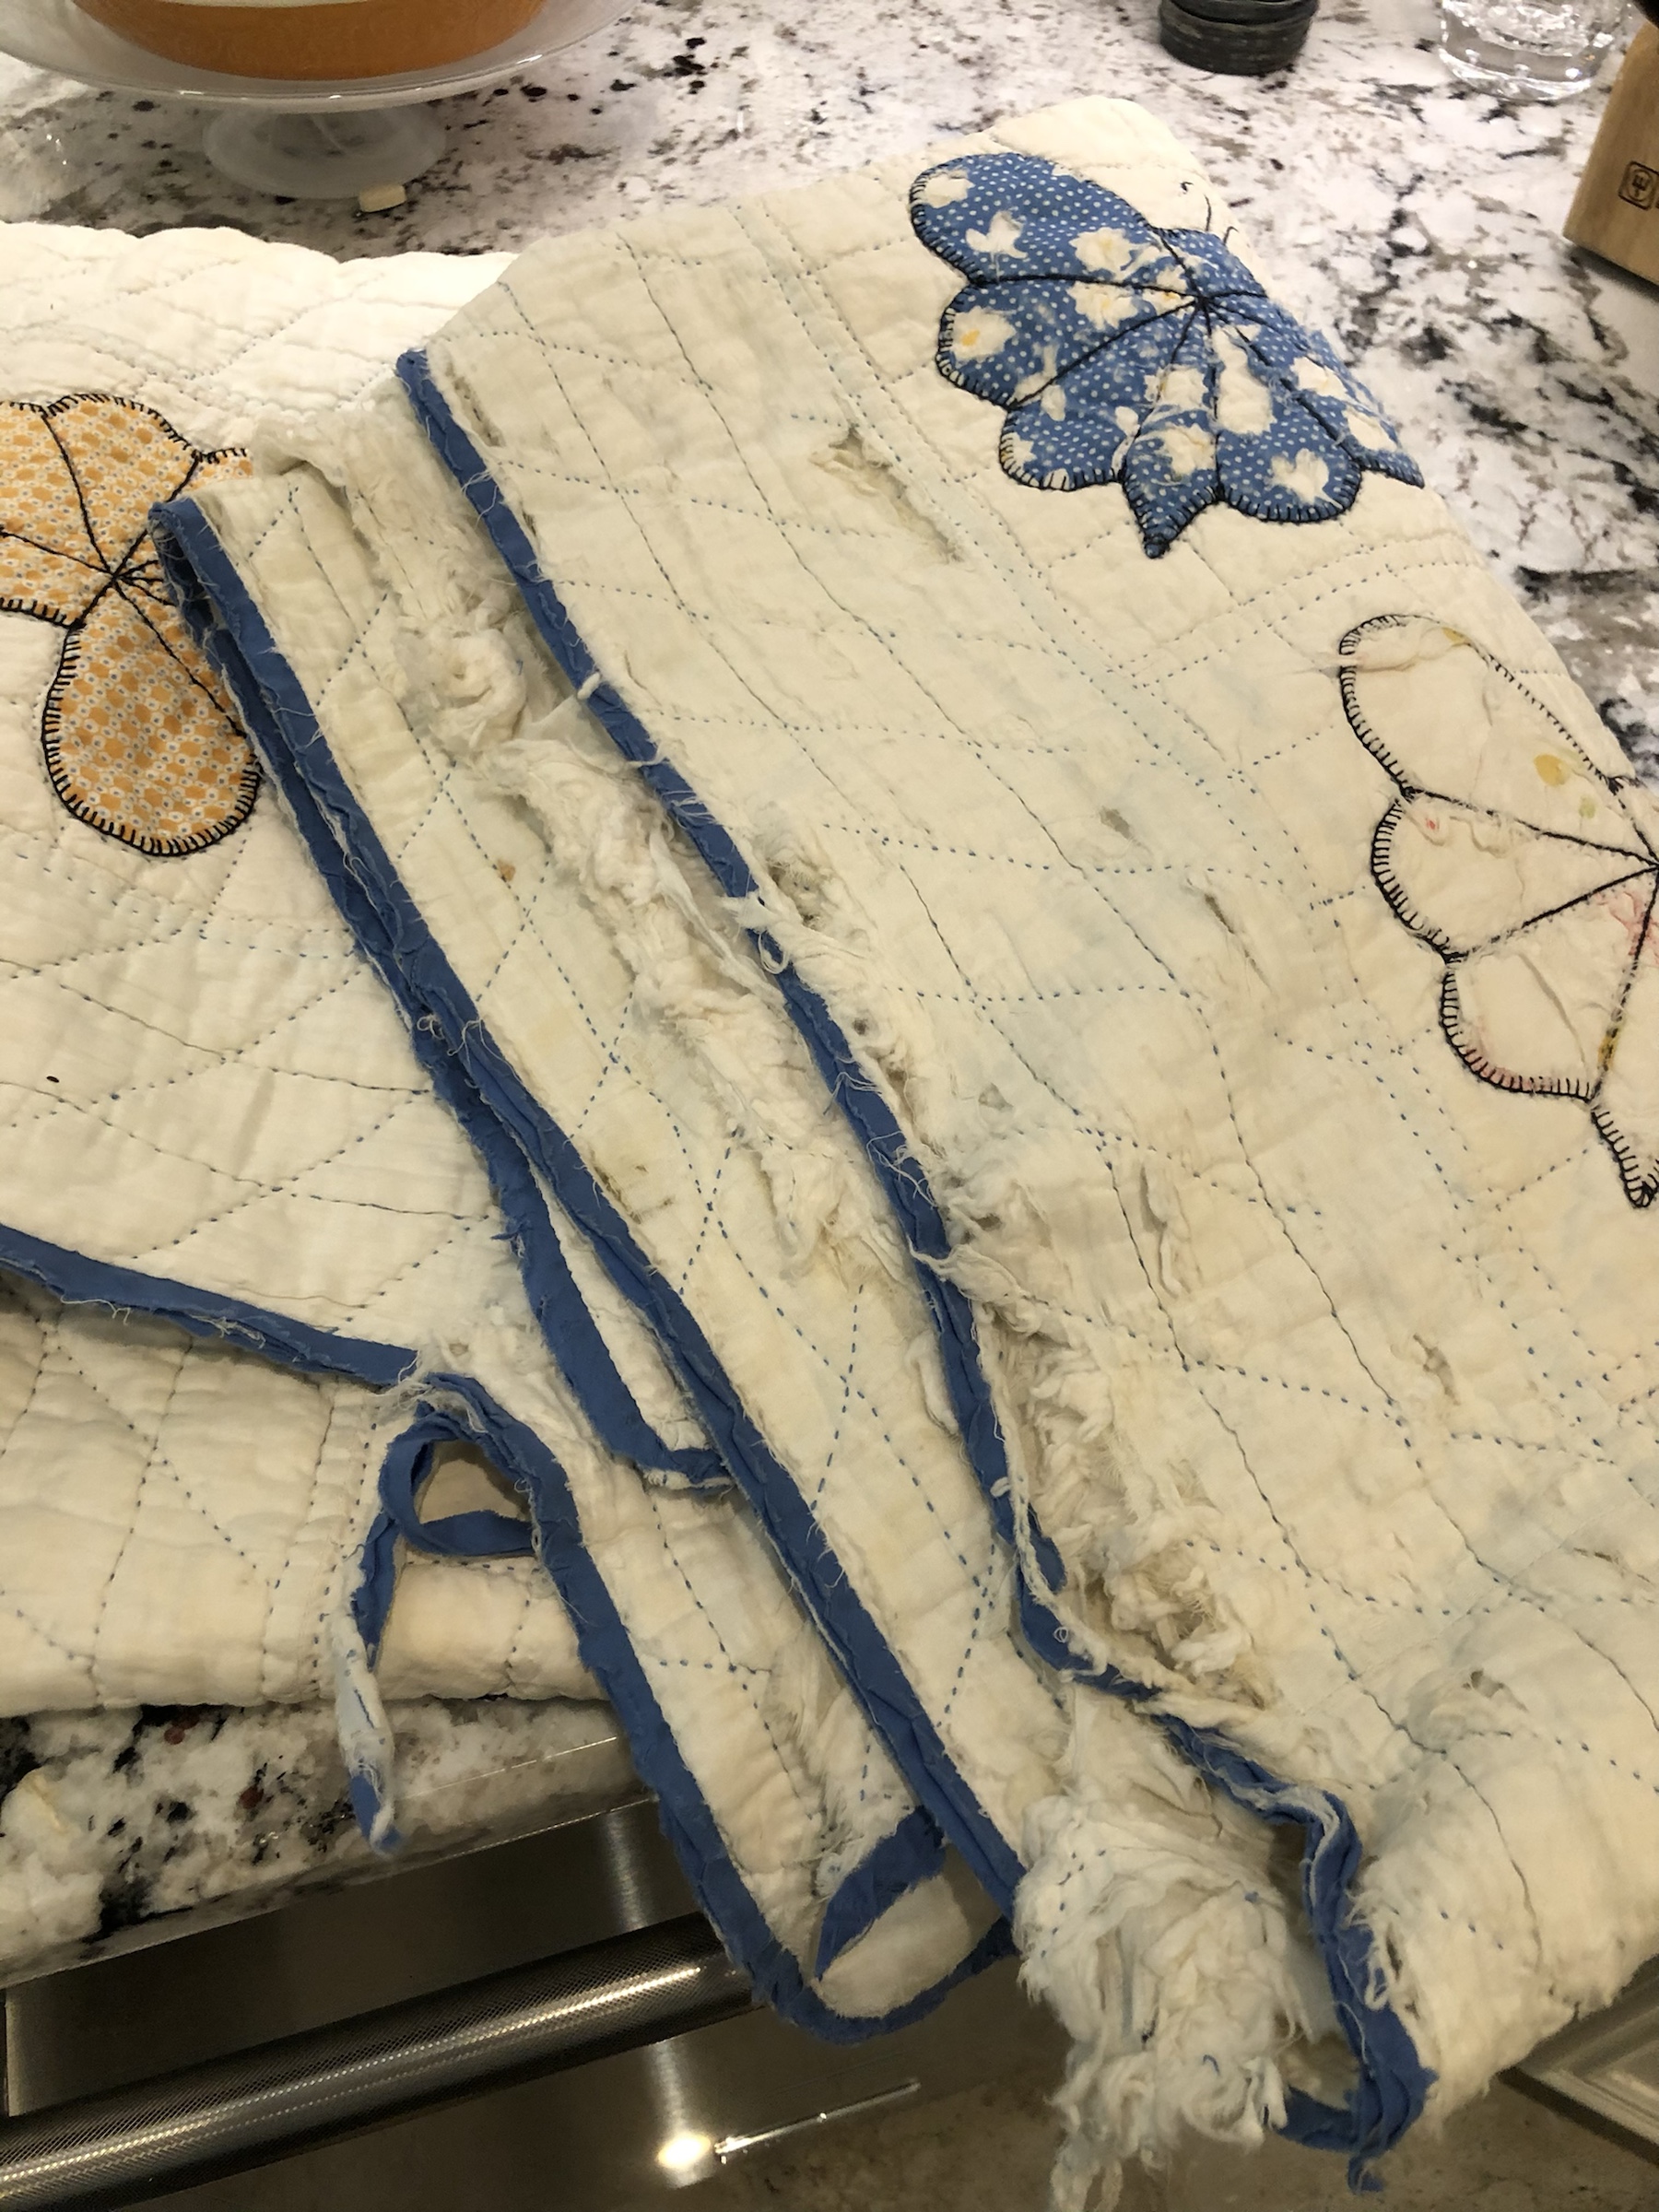
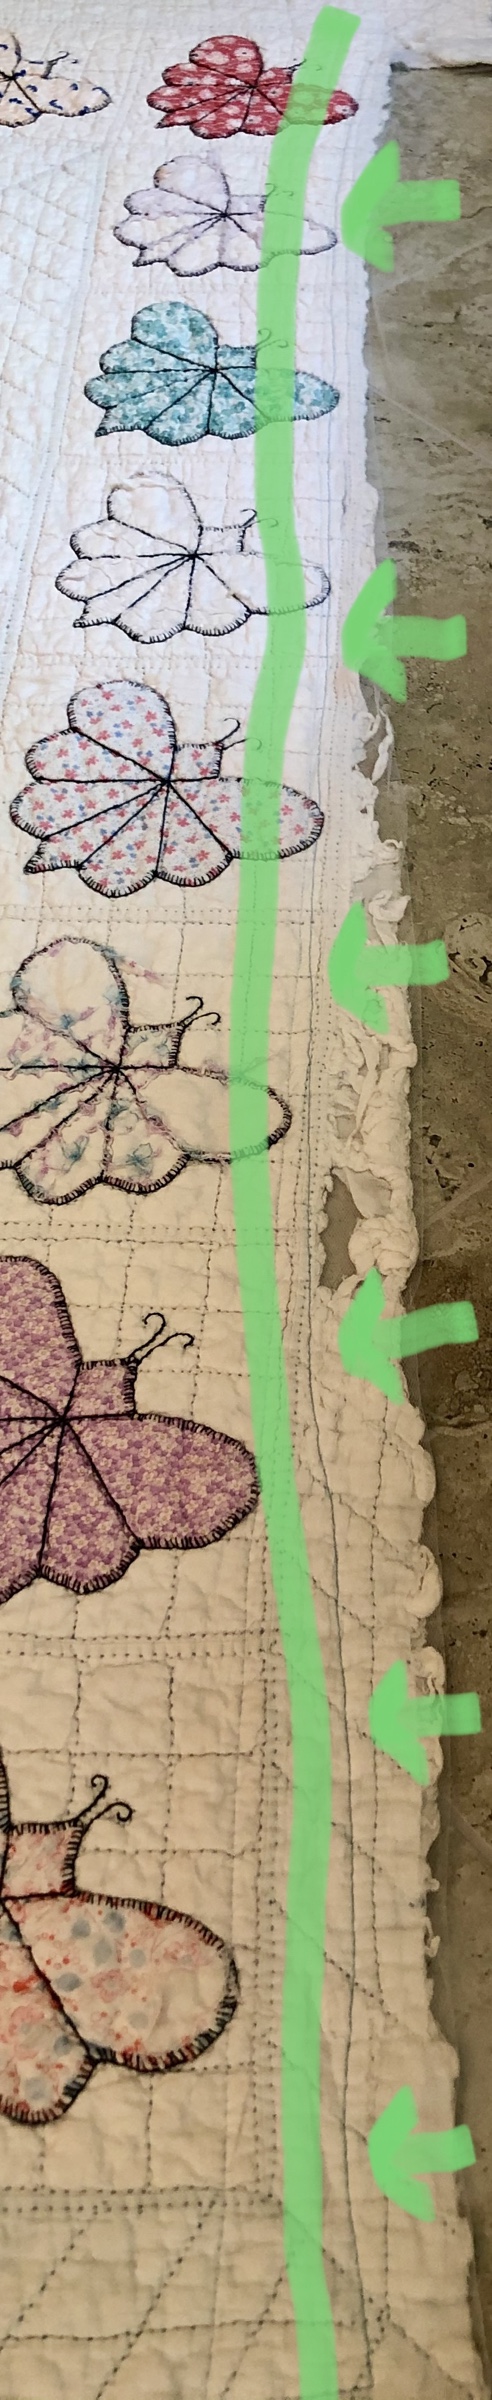
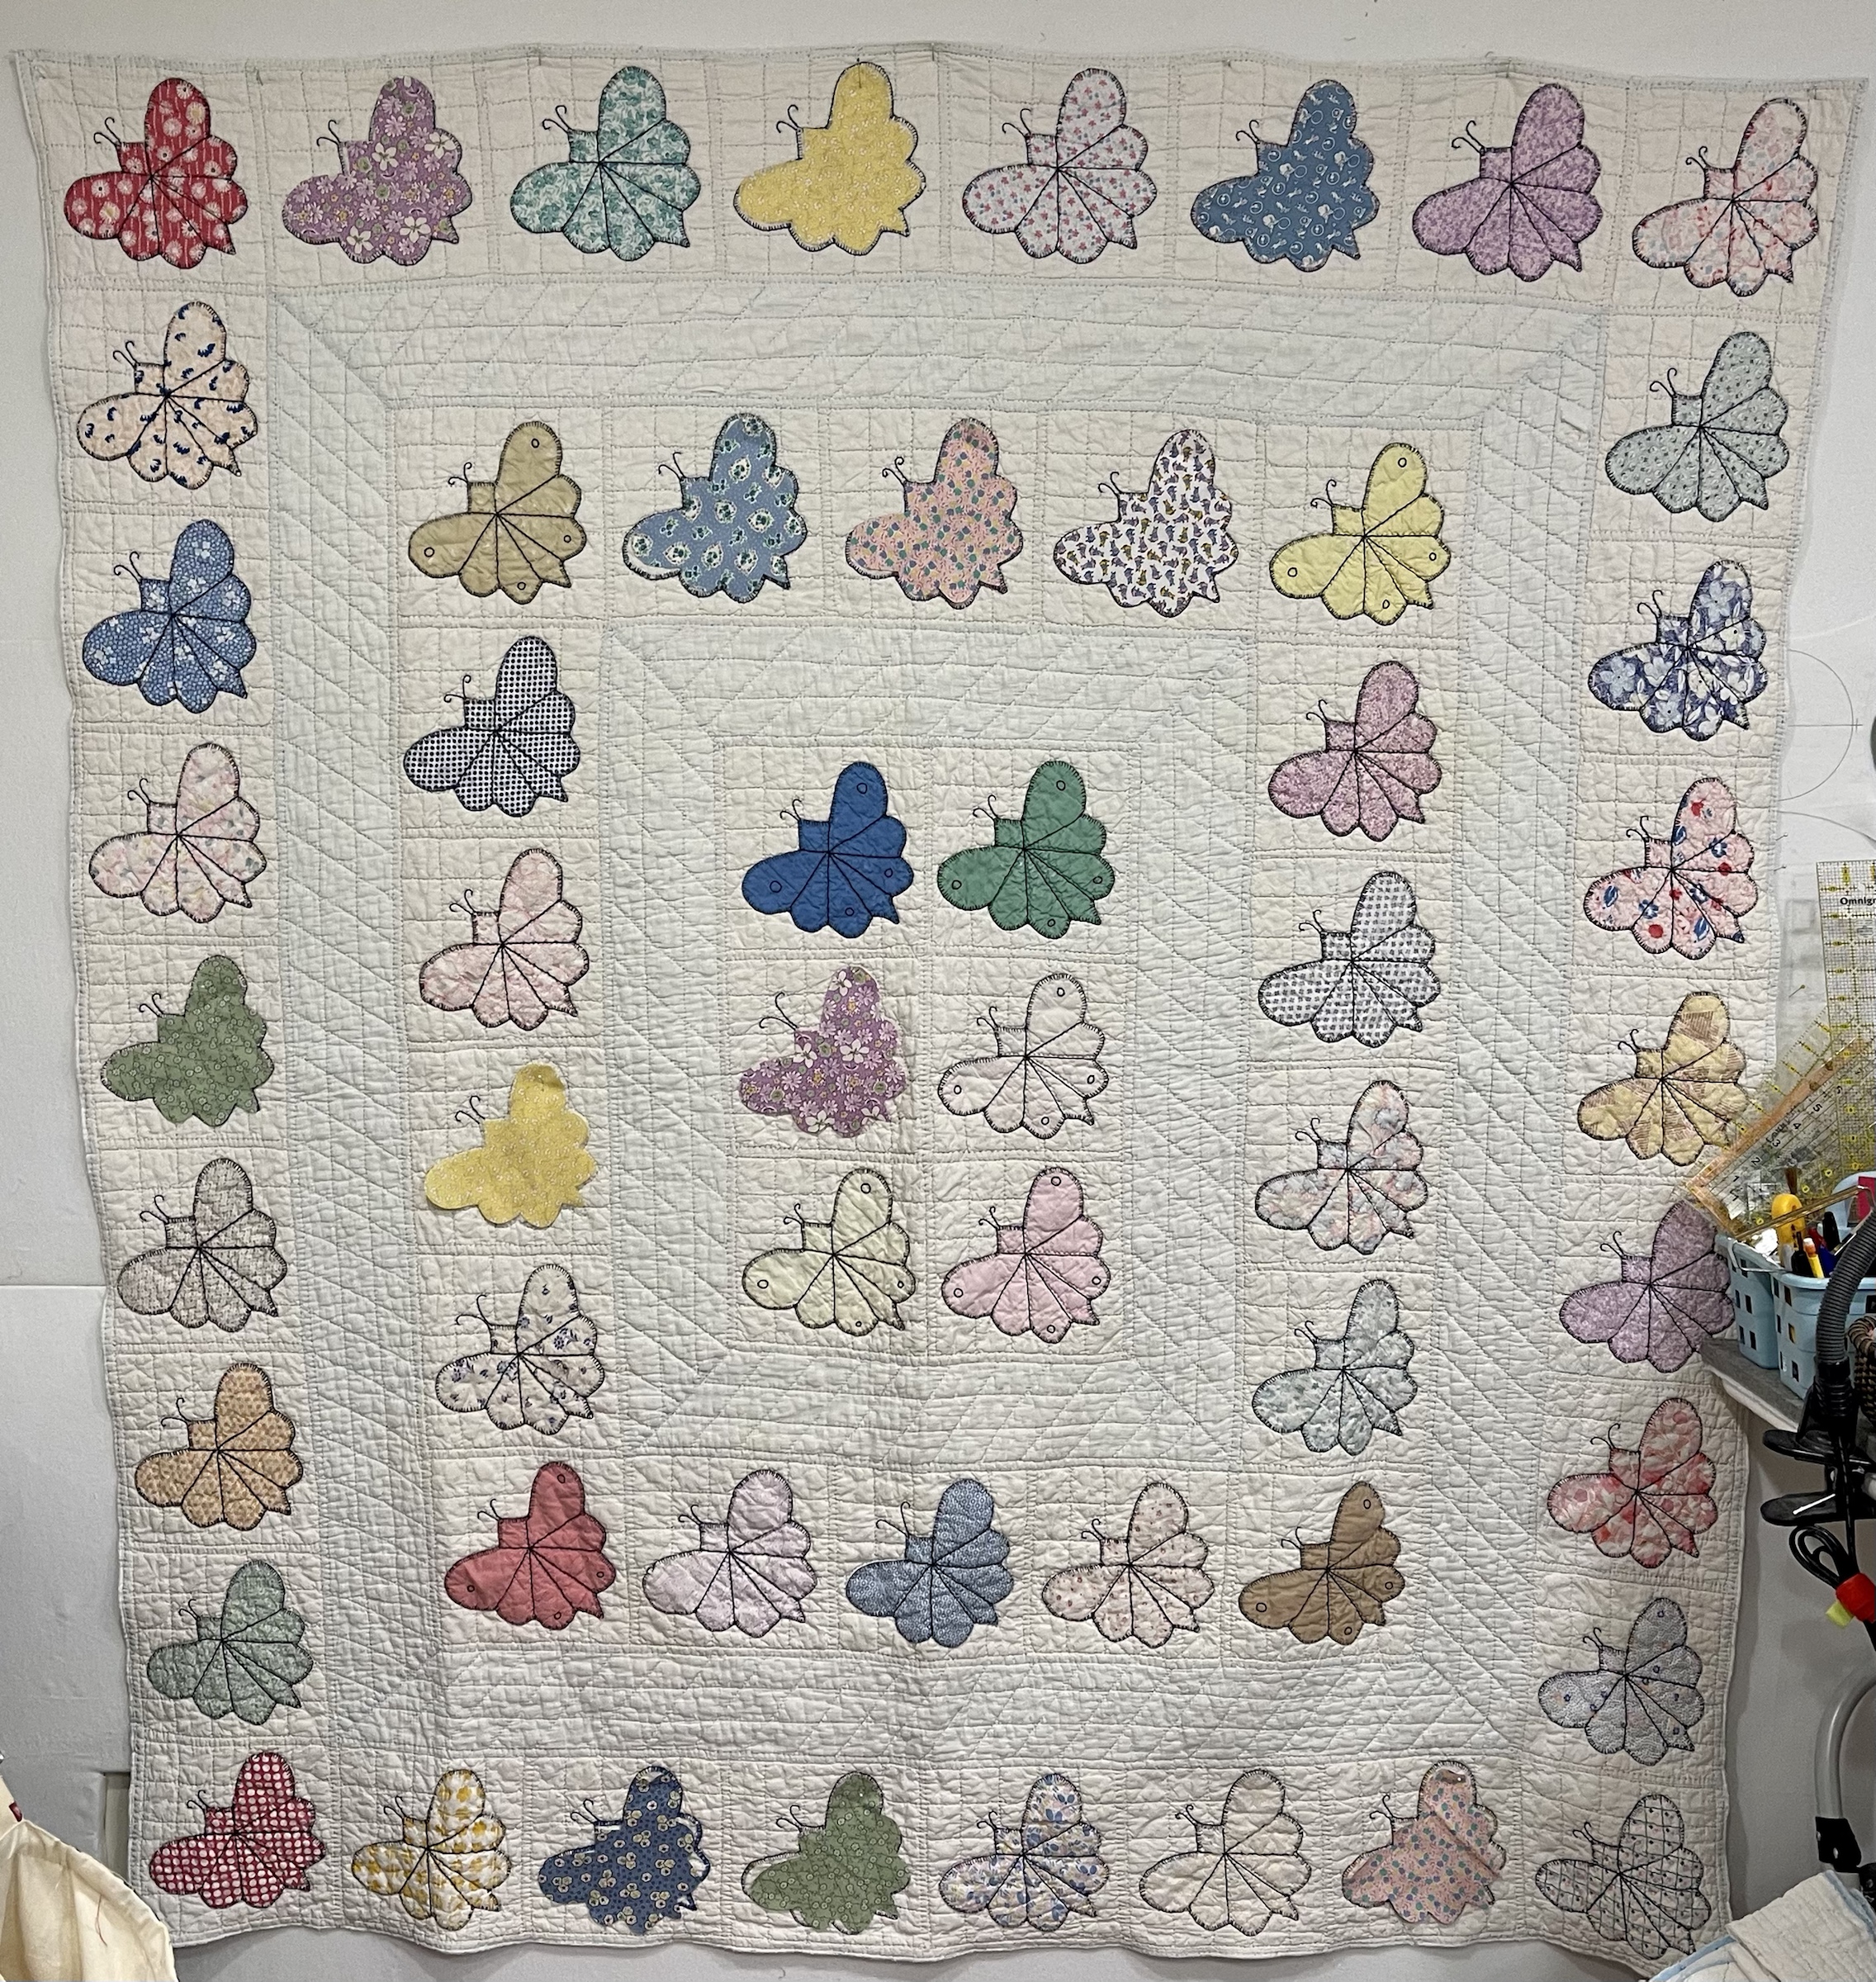
When the wonderfully soft and well worn vintage butterfly quilt arrived I knew I’d made an excellent eBay purchase. Not everyone would have looked at this quilt with the same perspective. It was ragged, worn, torn, faded and missing almost the entire top border.
What does it look like as of a few hours ago? All I have left to do is decide on the binding fabric:
But how did I get from the pic below to the pic above? If you’re interested in saving an old quilt the way I do then follow along.
What I do is definitely not quilt restoration but rather I take an old well loved quilt and try my best to make it pretty and useable once again. I call the process “Saving” an old quilt.
This is what it looked like when I opened the shipping box.
Oh my! I knew the edge was bad but this is really bad!
But before any “beautification” takes place I need to address the “sneeze factor” that comes with almost every old quilt I purchase. I need to send the quilt to the Dort Day Spa but when edges are as bad as this quilt, that can mean problems.
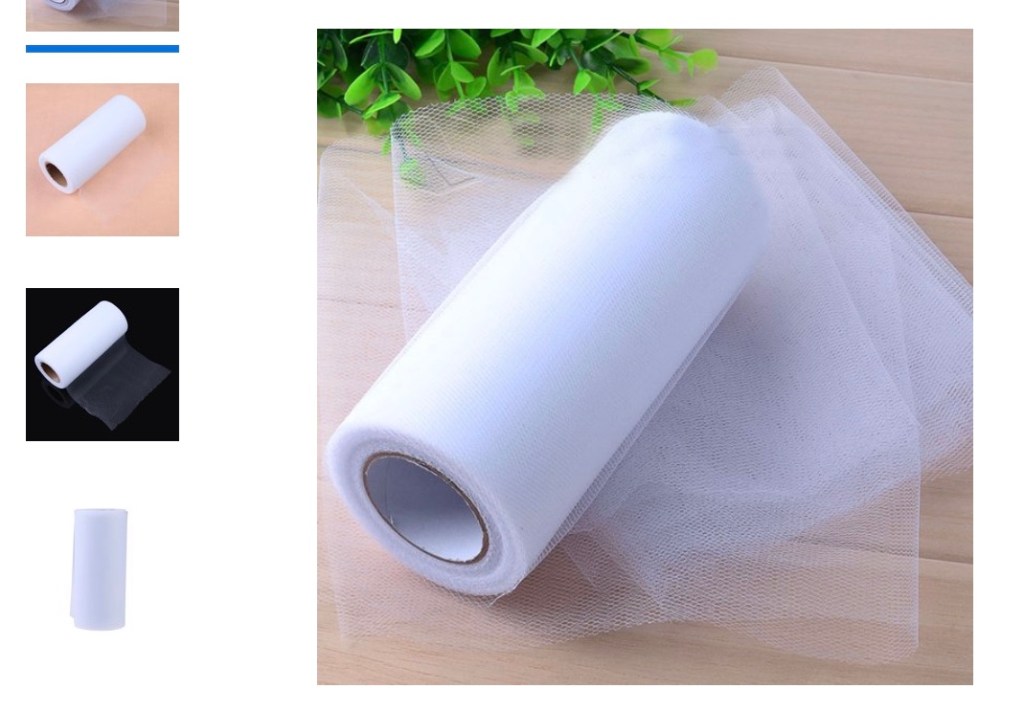
How can a ragged edge be successfully soaked, rinsed, take a trip through the washing machine and then the dryer? Tulle!
Not the hard scratchy netting but instead the soft pliable tulle found on rolls at most craft stores as well as Amazon. At 6” wide and generally about 40 yards long, this single roll will last a very long time.
White tulle on a white-ish quilt is hard to photograph! Do you see the solid blue wonky sewing/stitching line to the left of the arrows and to the right of the solid green line? I folded in half a length of the white Tulle. By slipping the ragged quilt edge into the folded tulle, I could machine stitch, using a long stitch length and a contrasting thread, this tulle to the quilt, catching both the front as well as the back in one pass. This way the bad quilt edge(s) is secured and ready to be laundered. Why the contrasting thread? The first time I used this method I machine stitched with white thread and it took FOREVER to unstitch once the quilt finished in the dryer. Lesson learned…
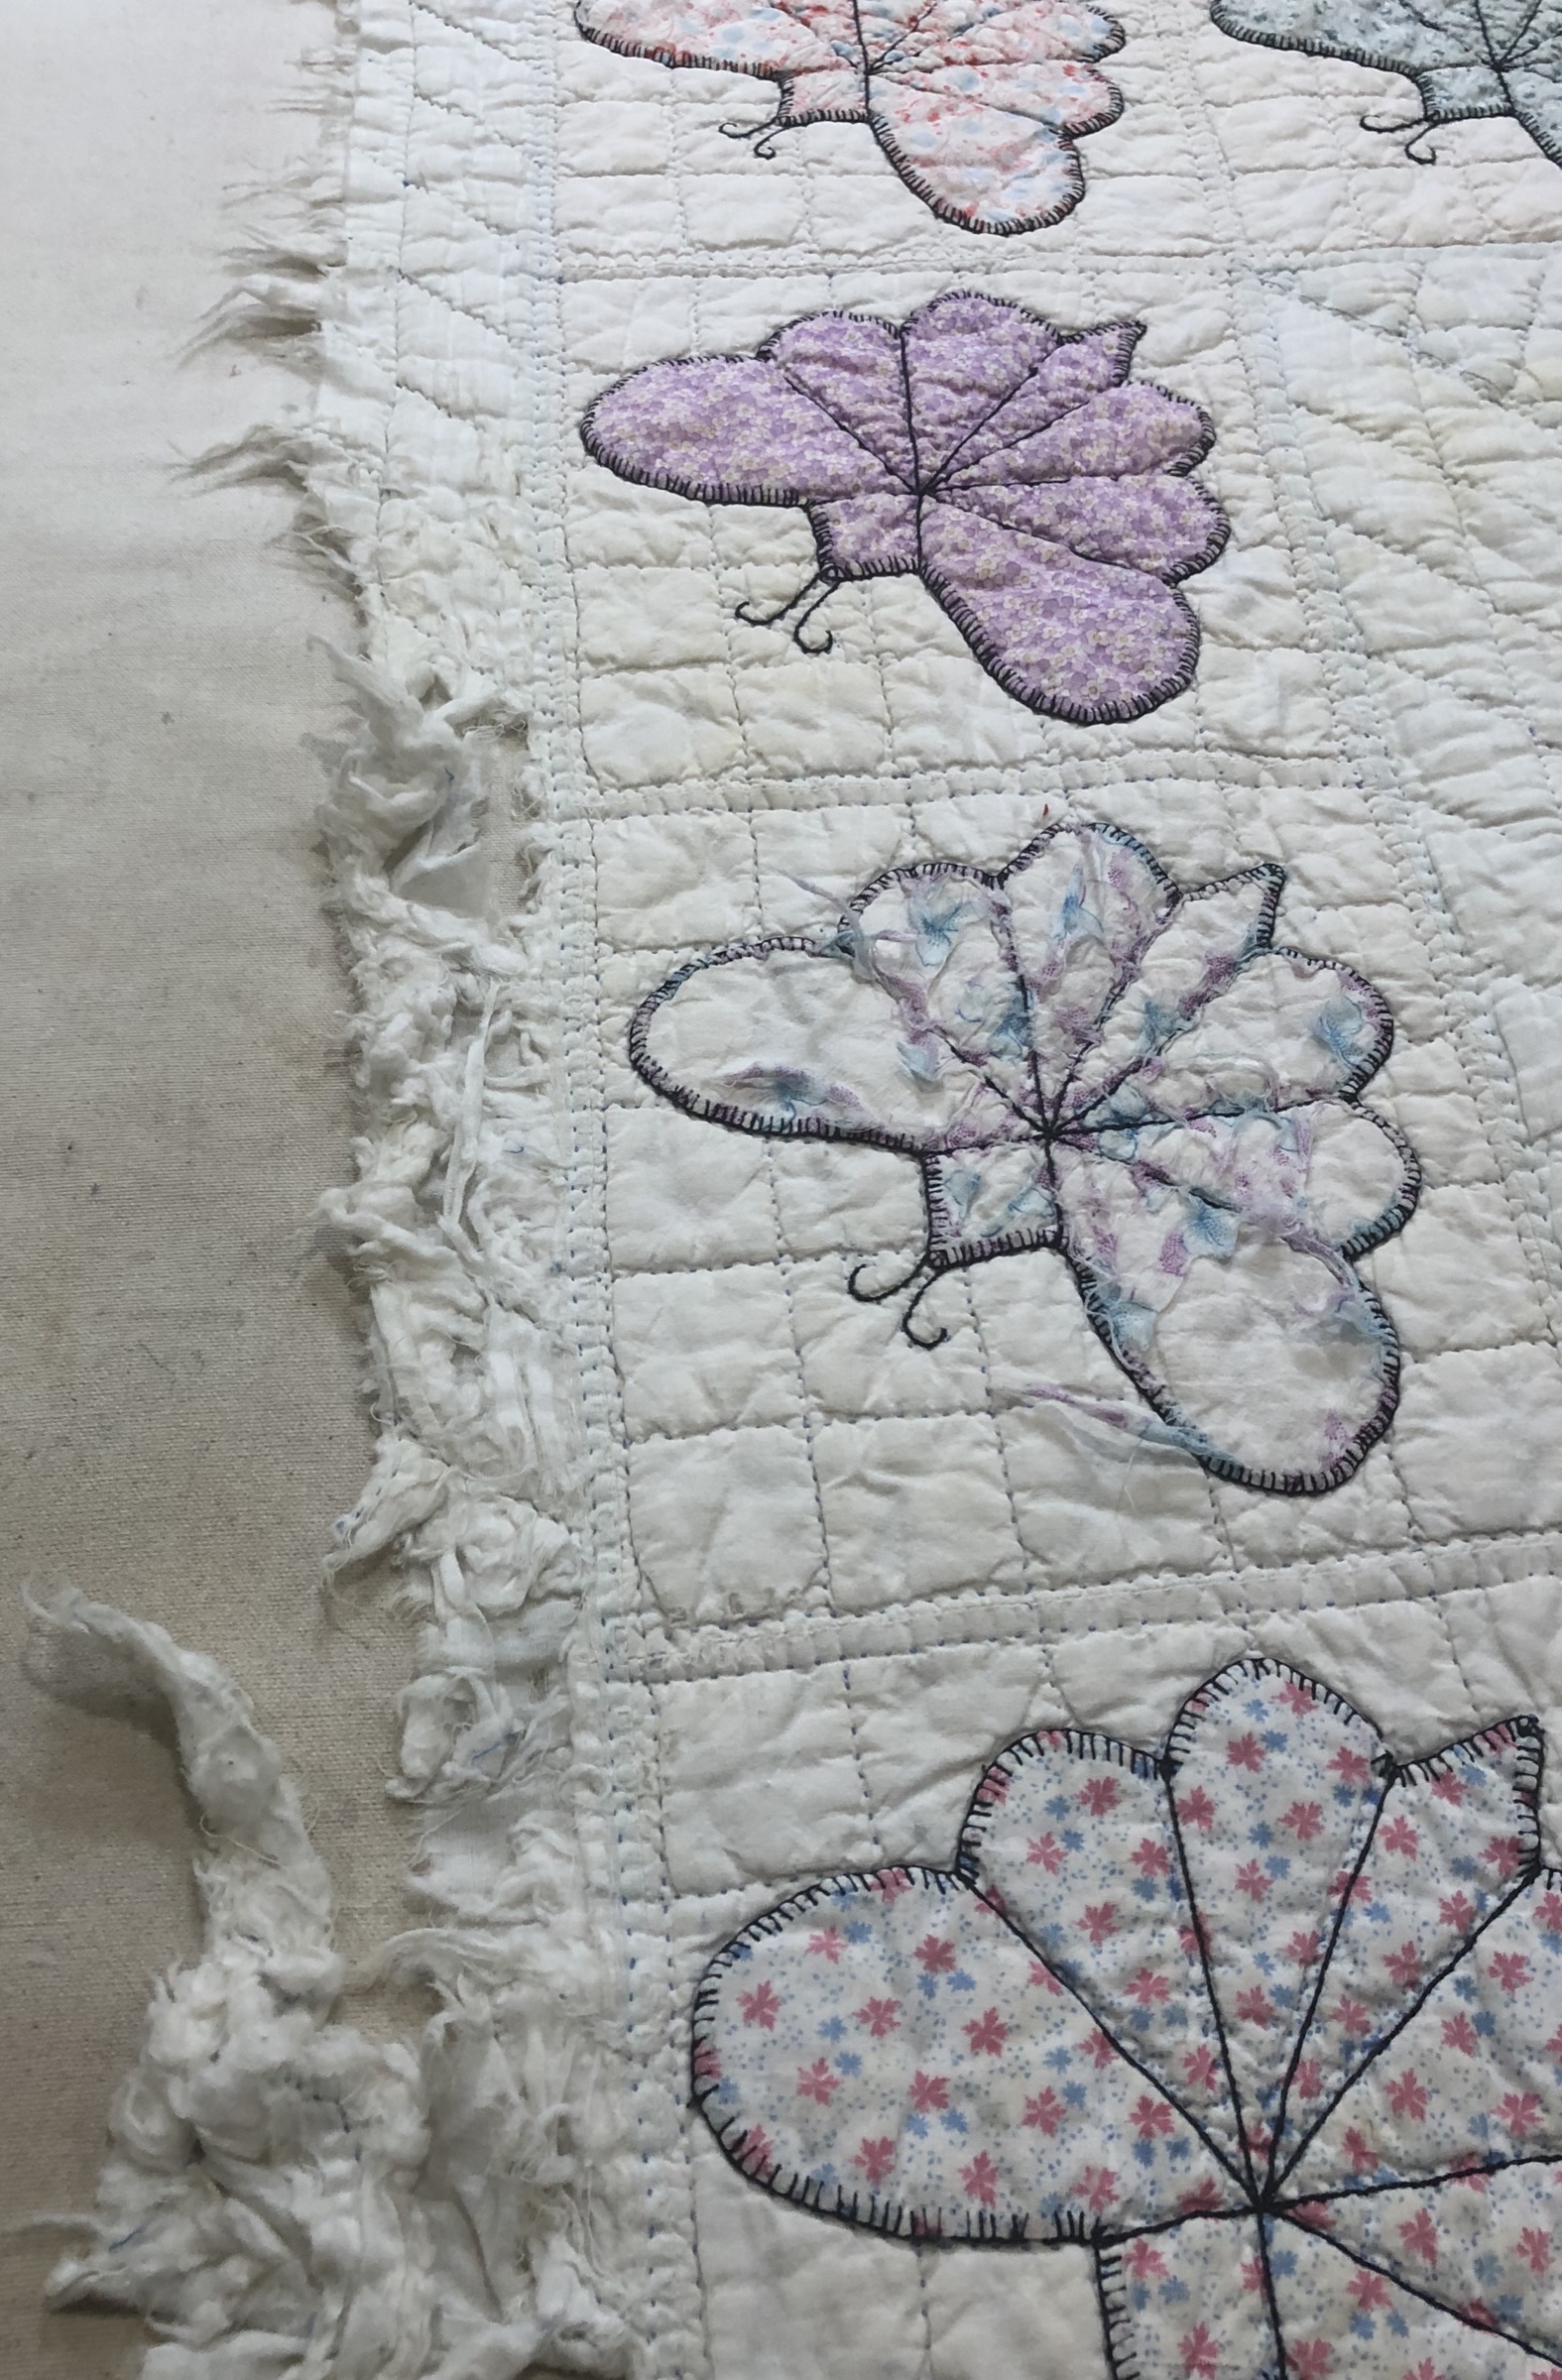
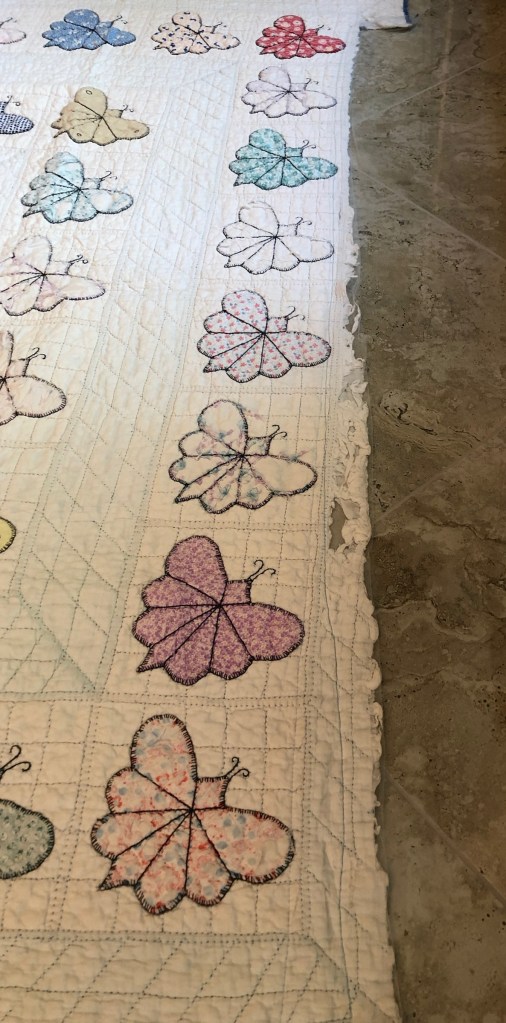
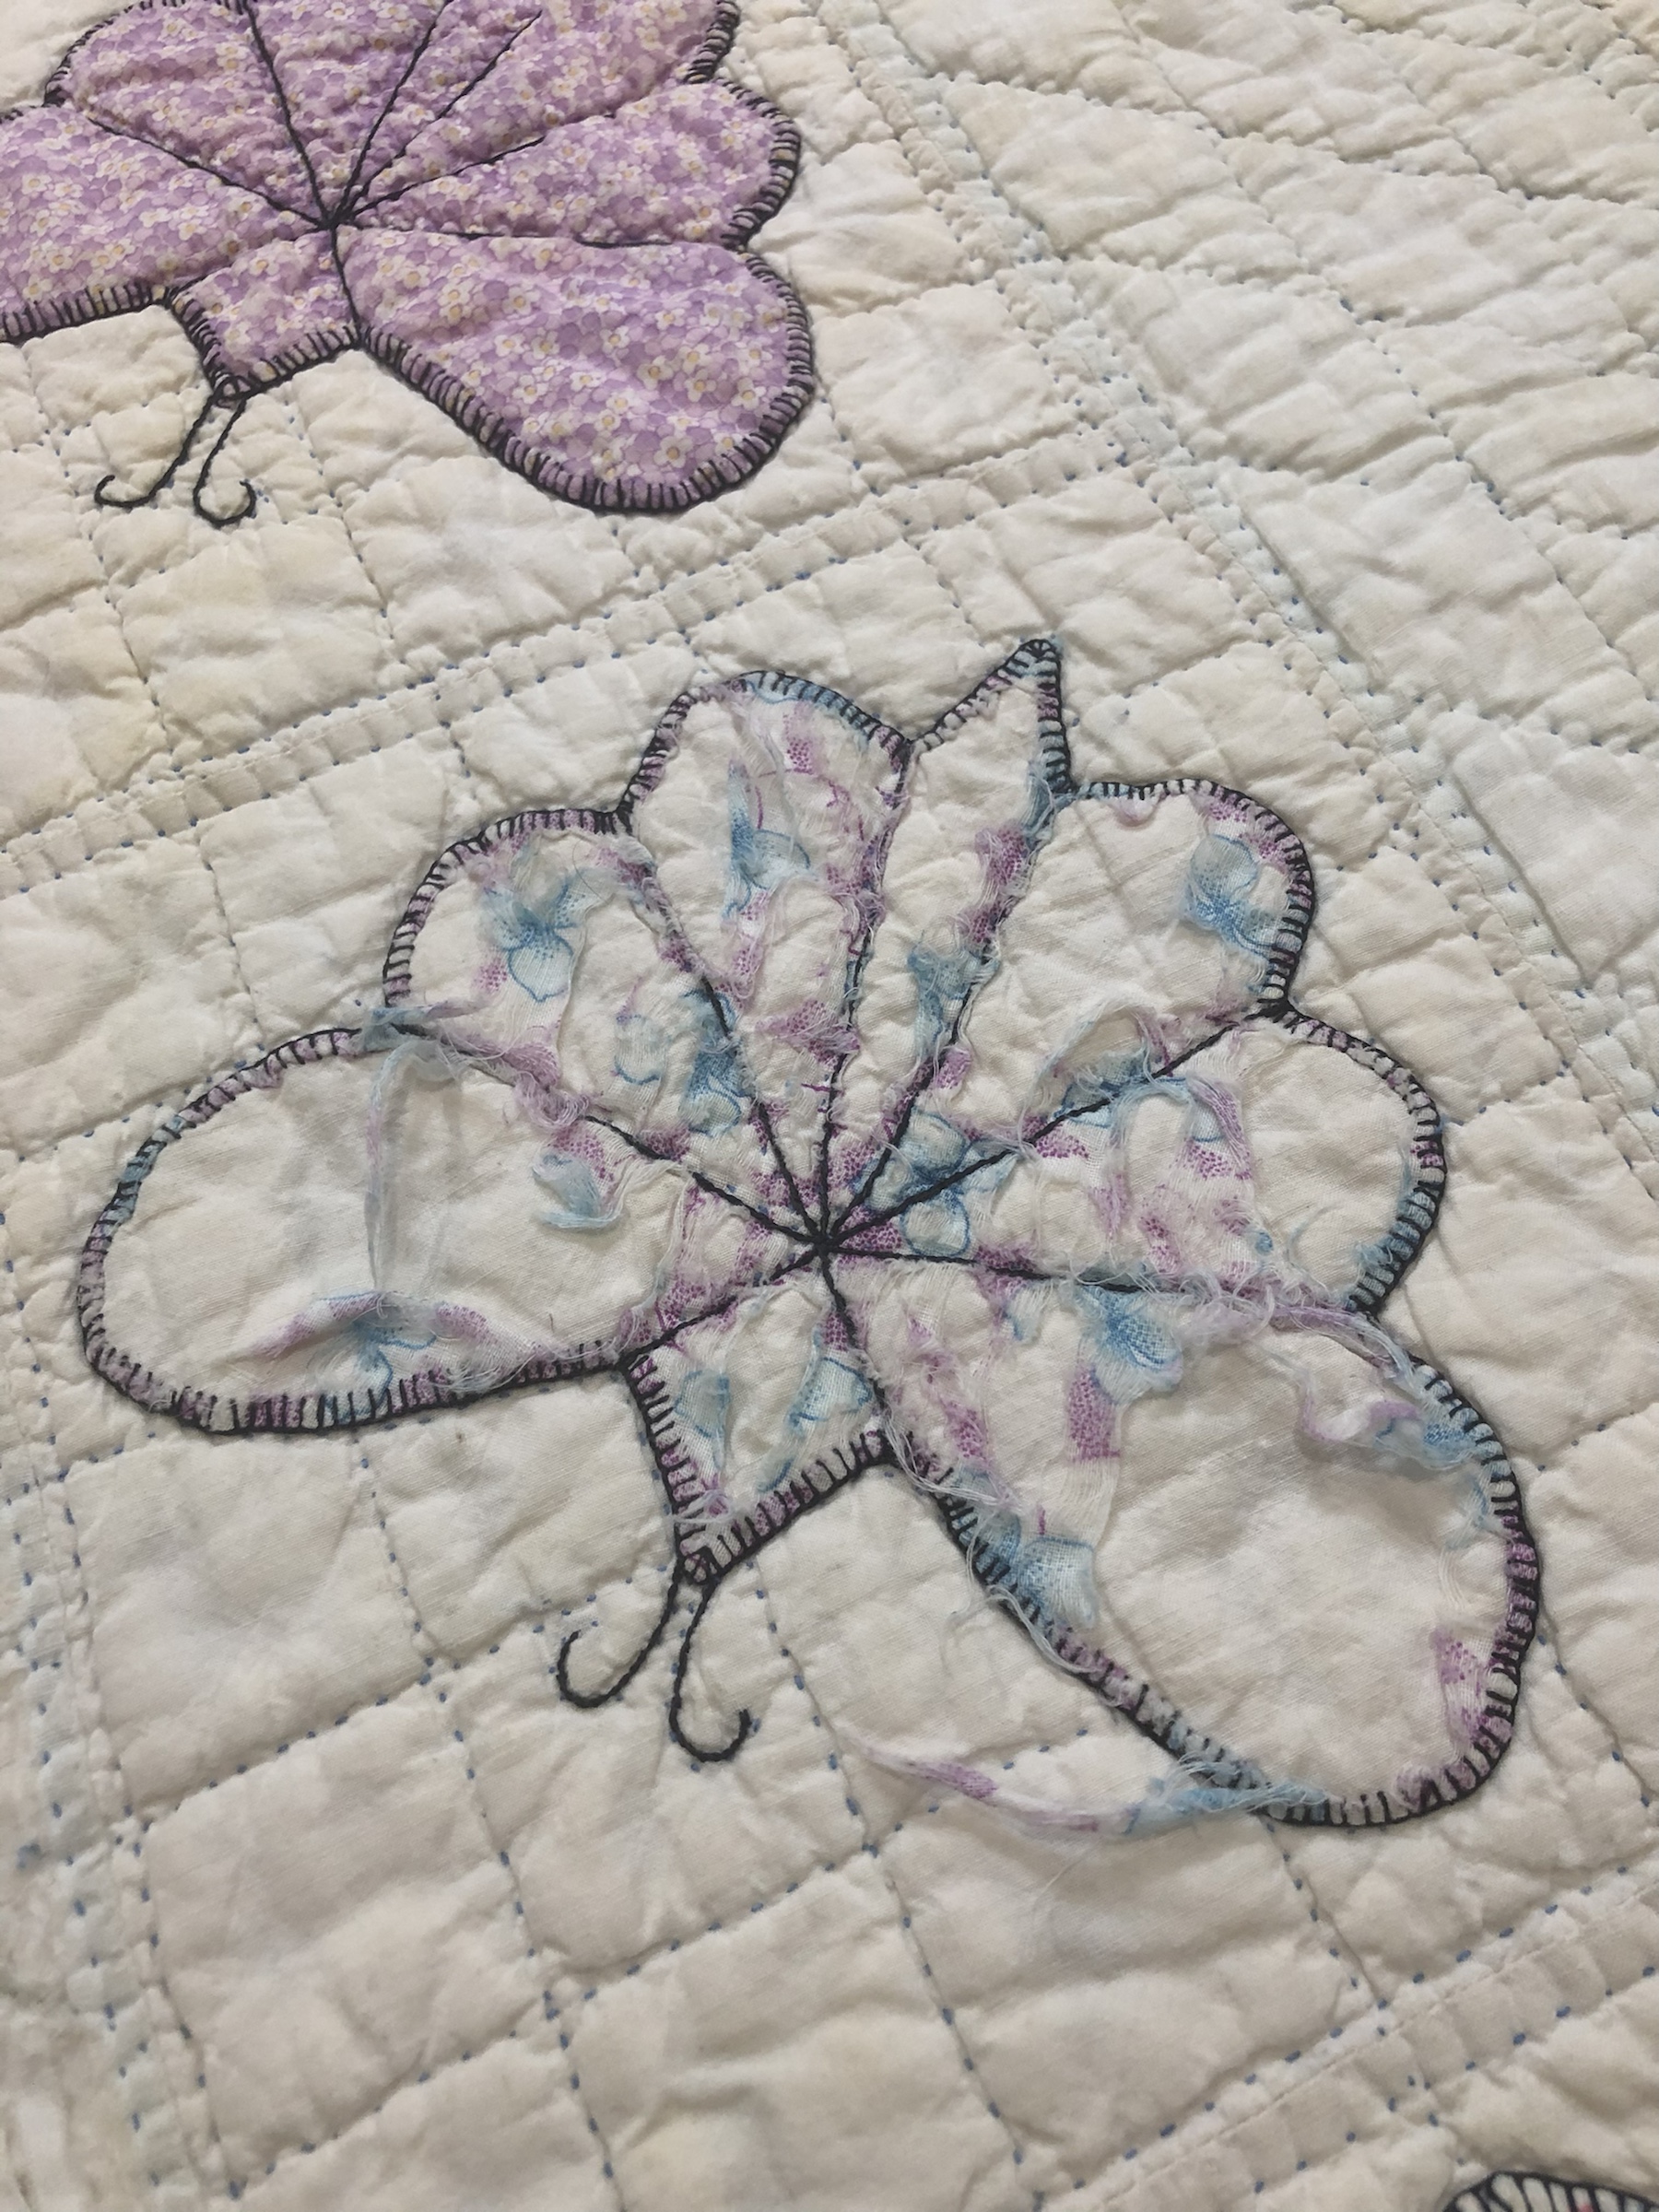
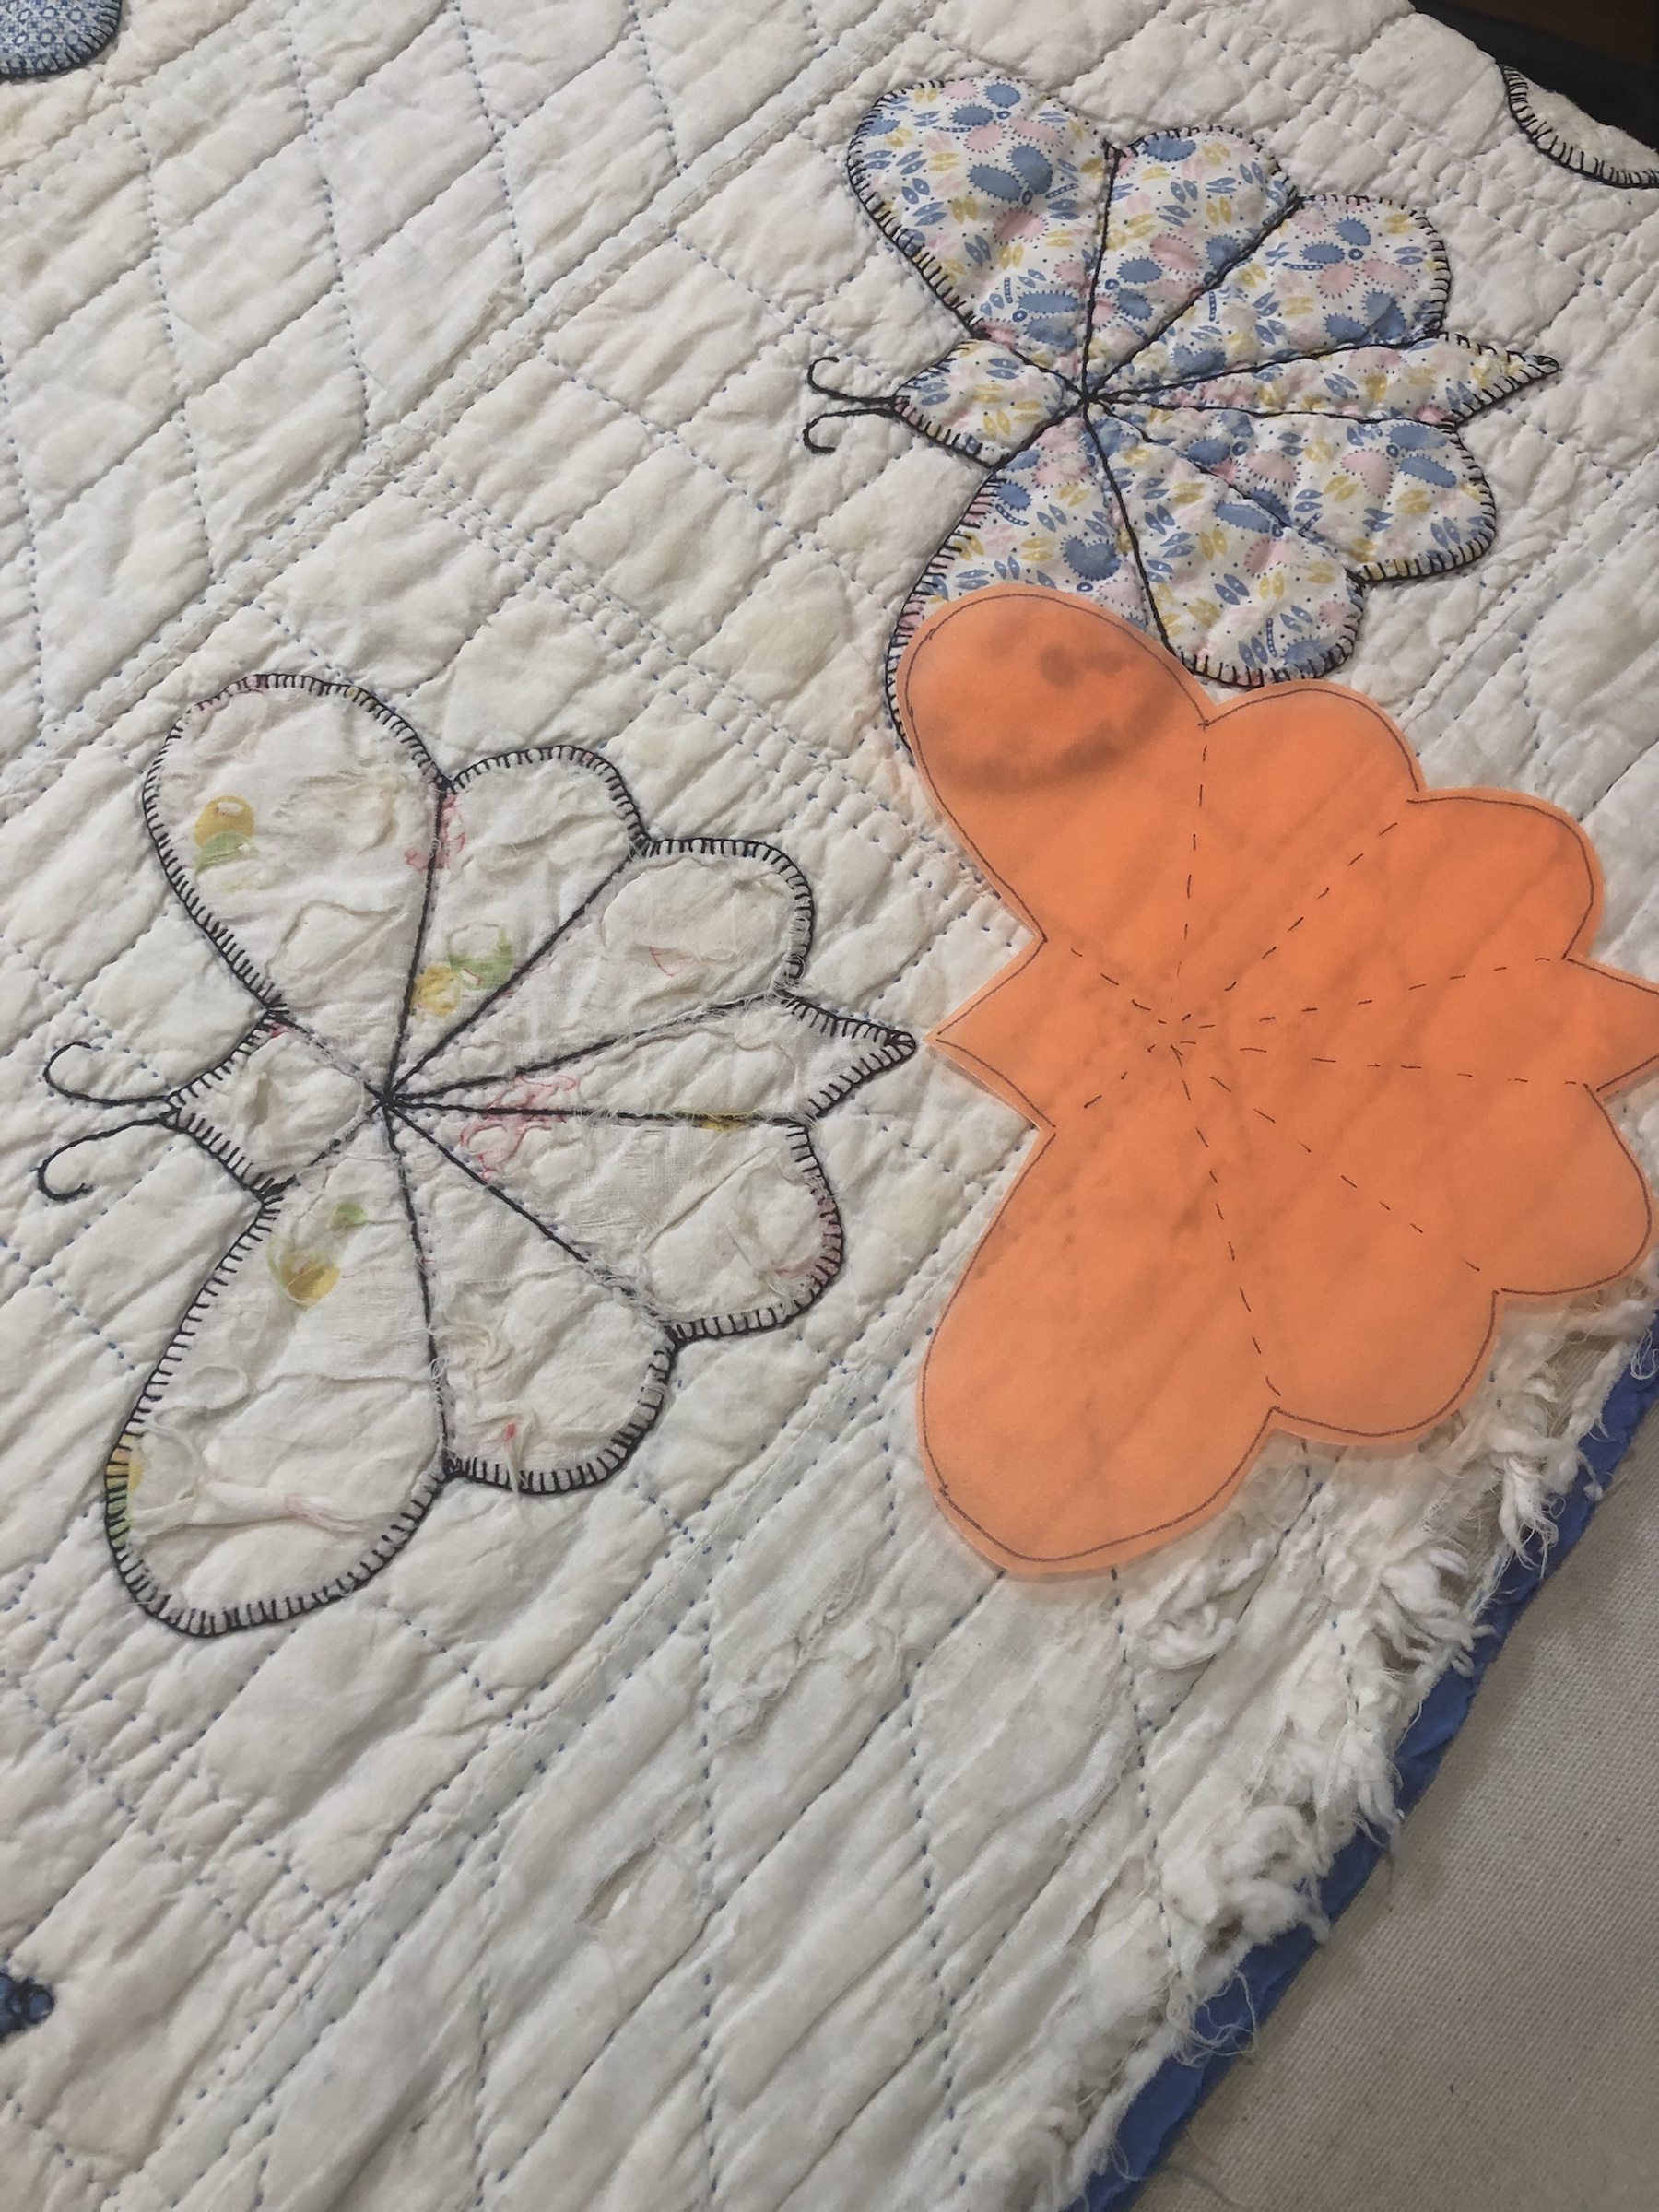
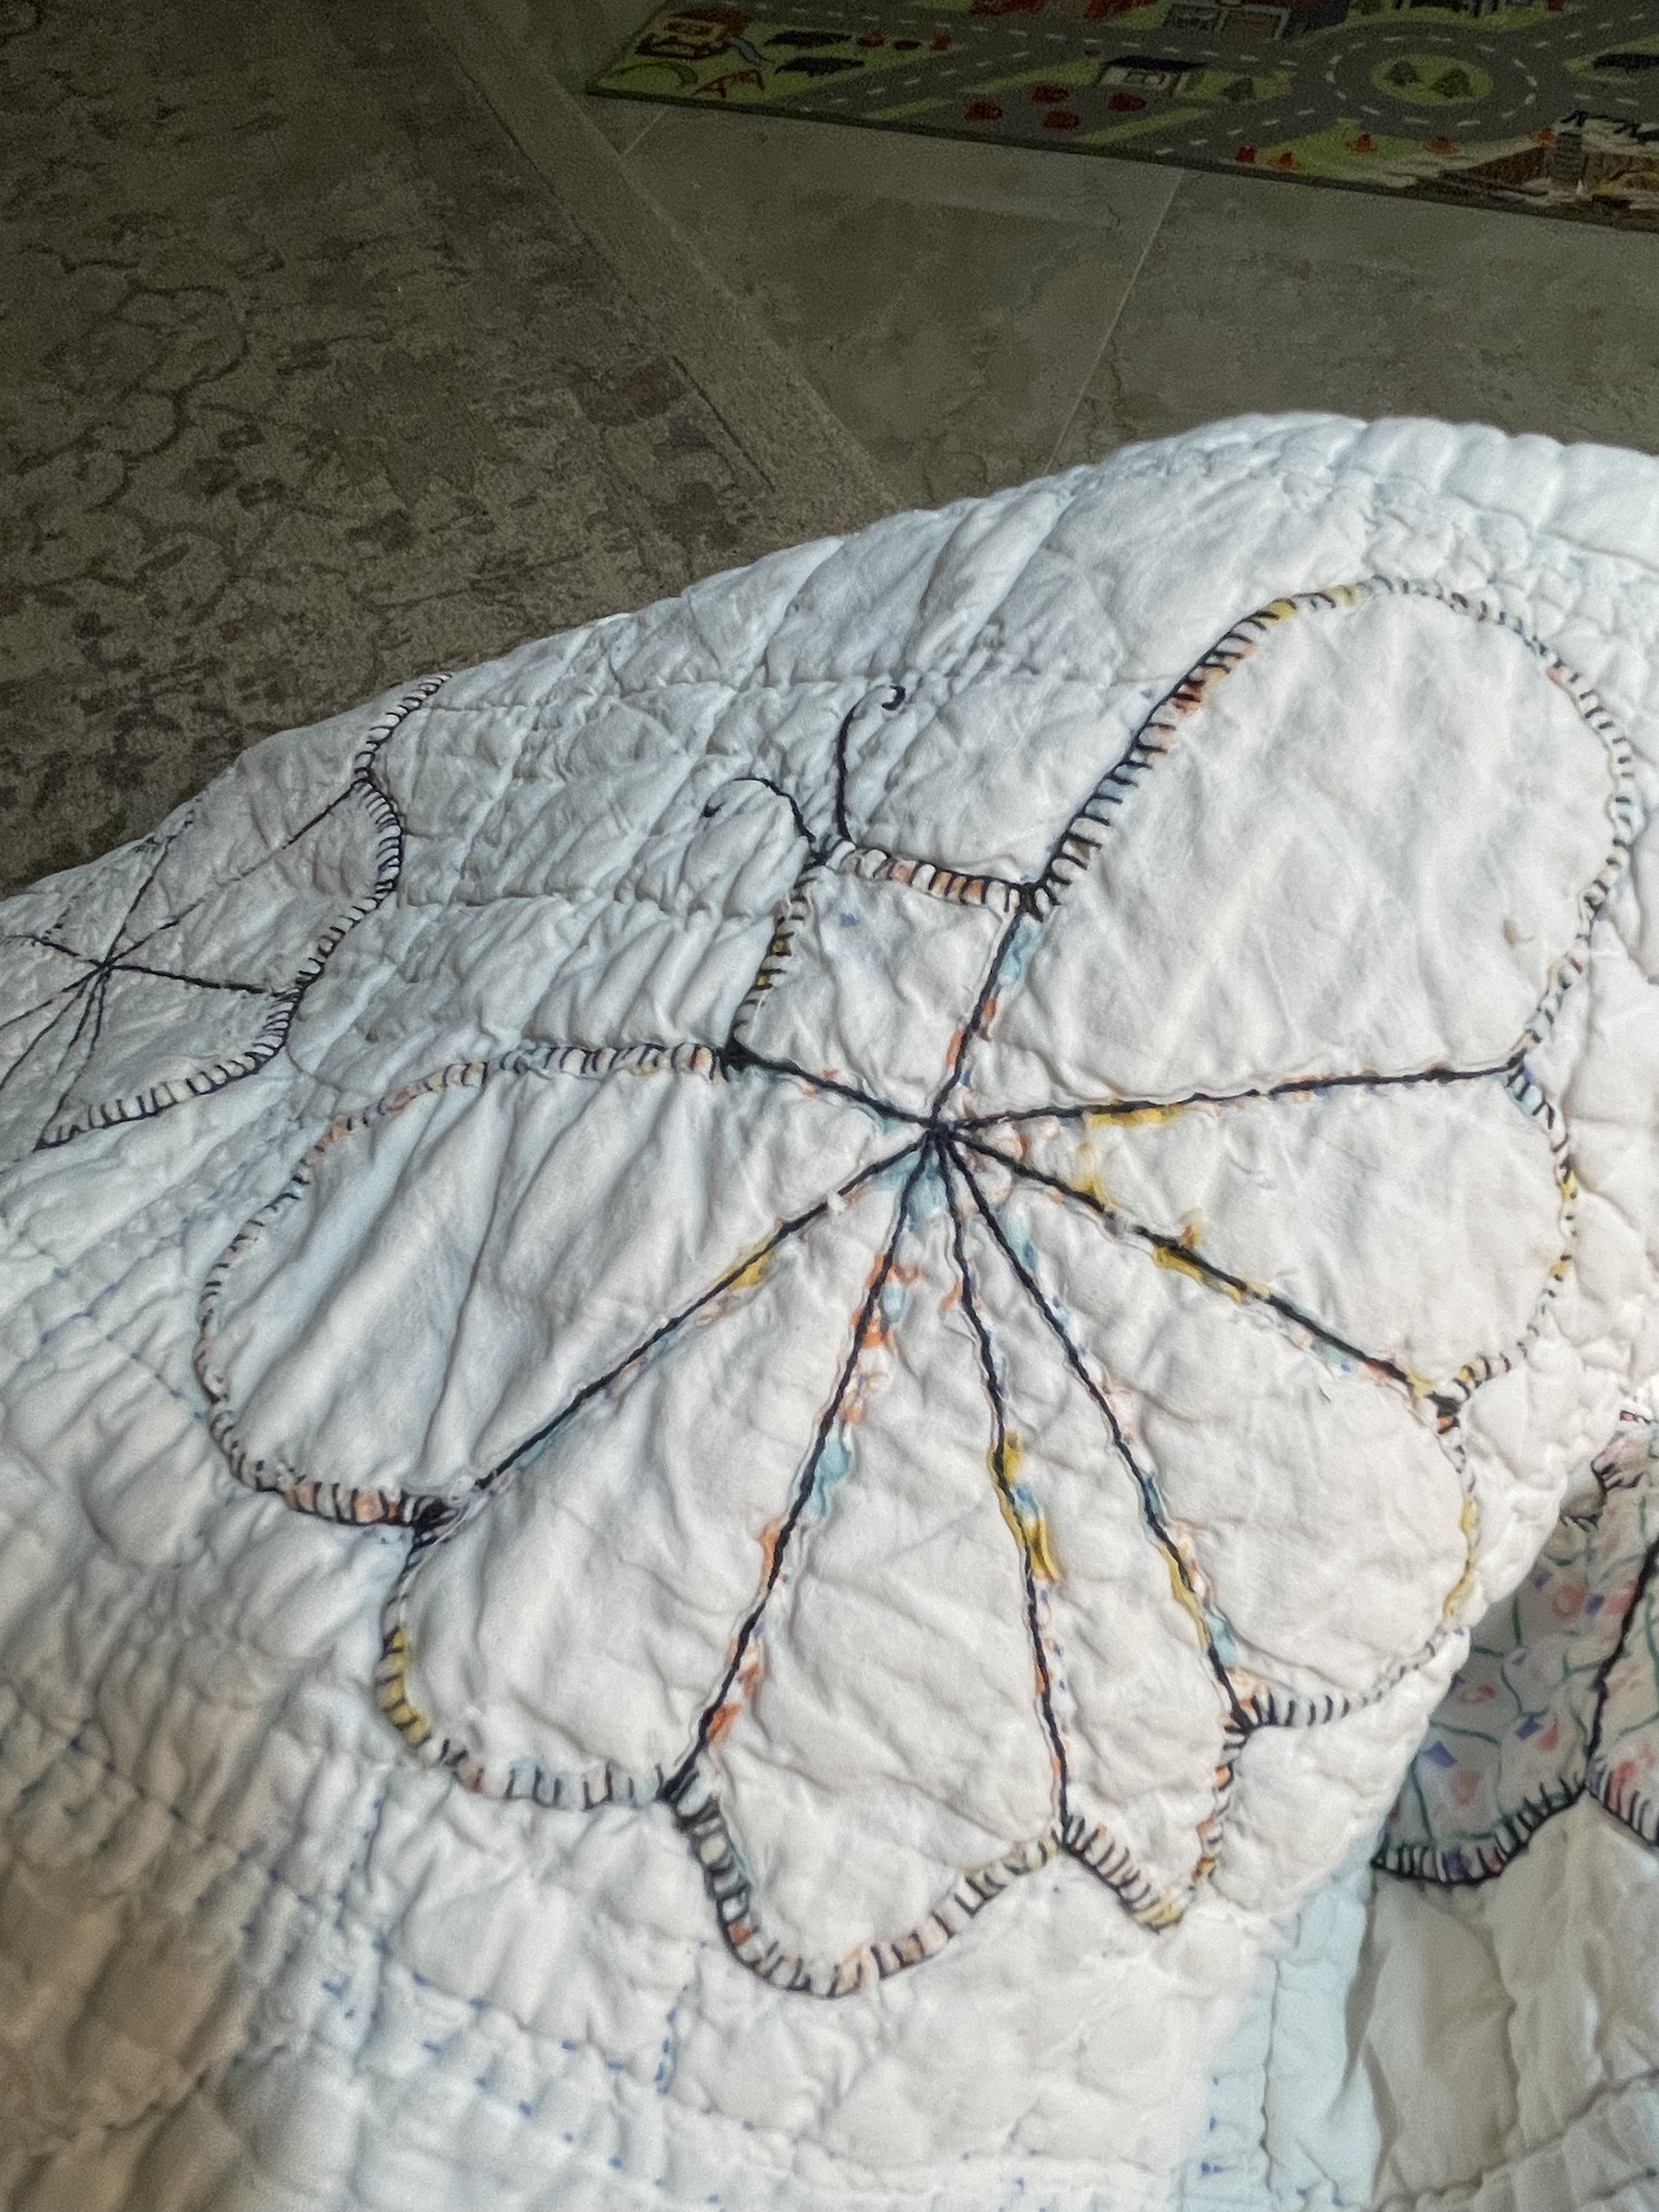
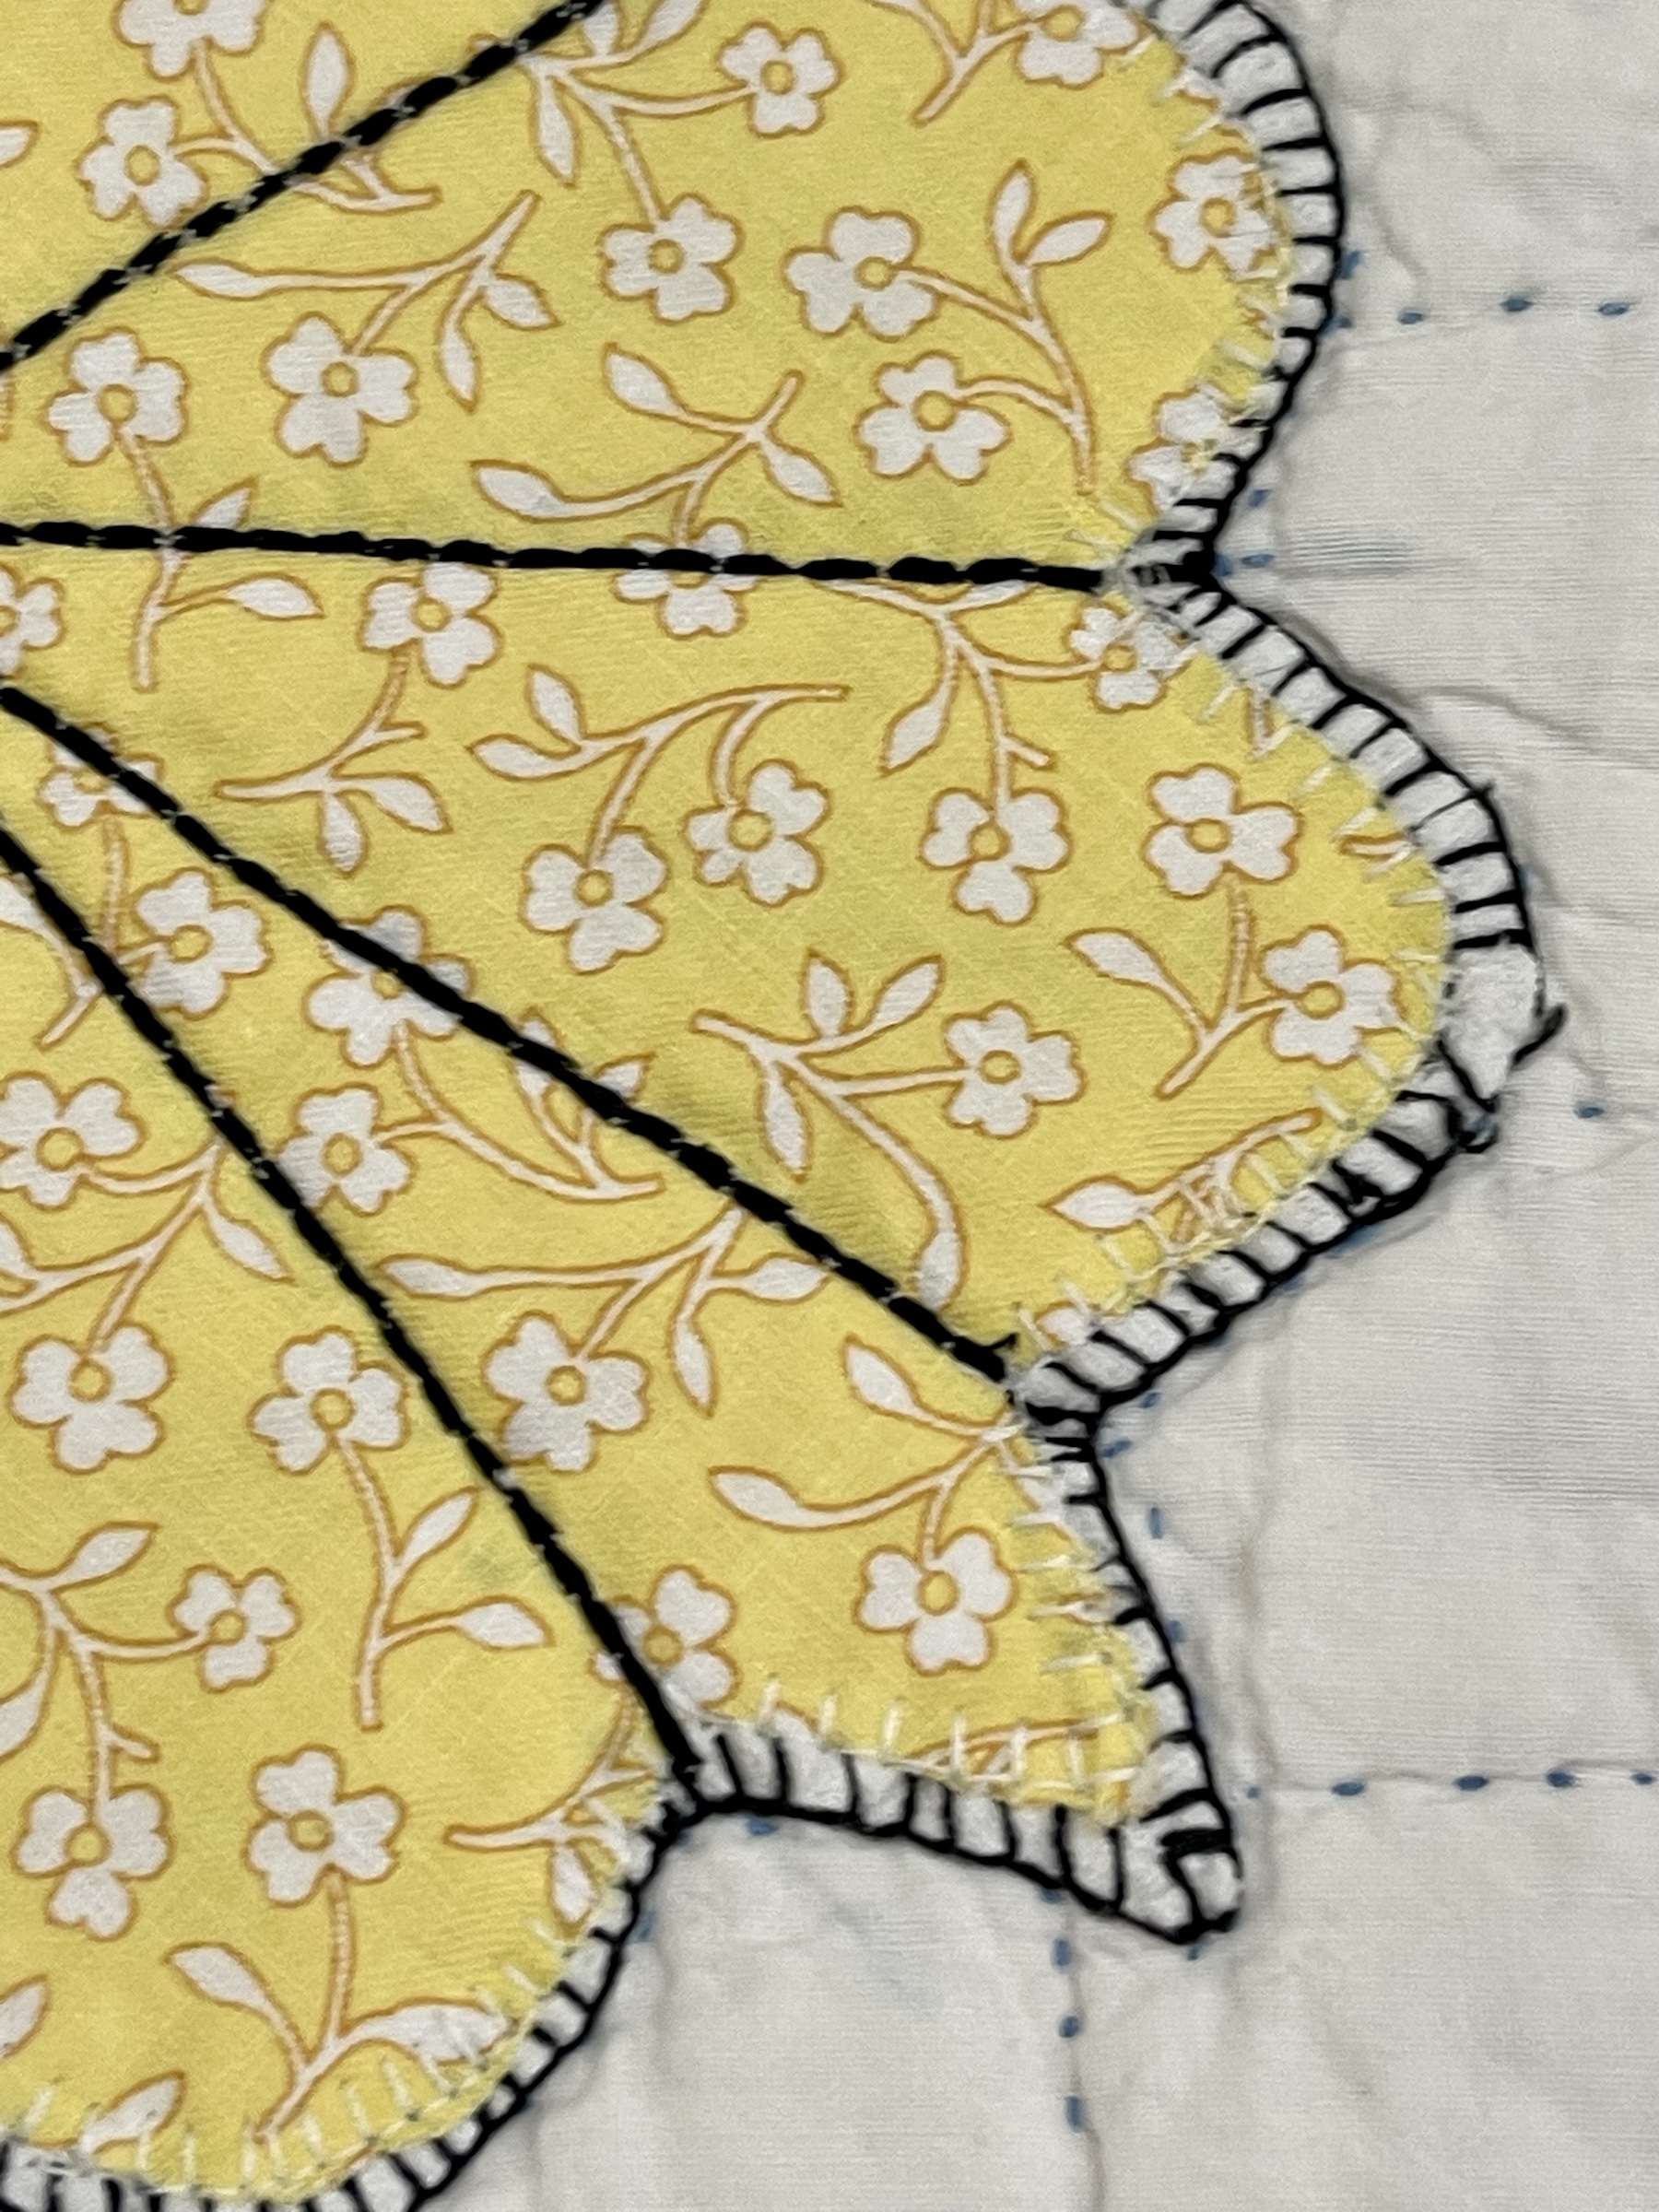
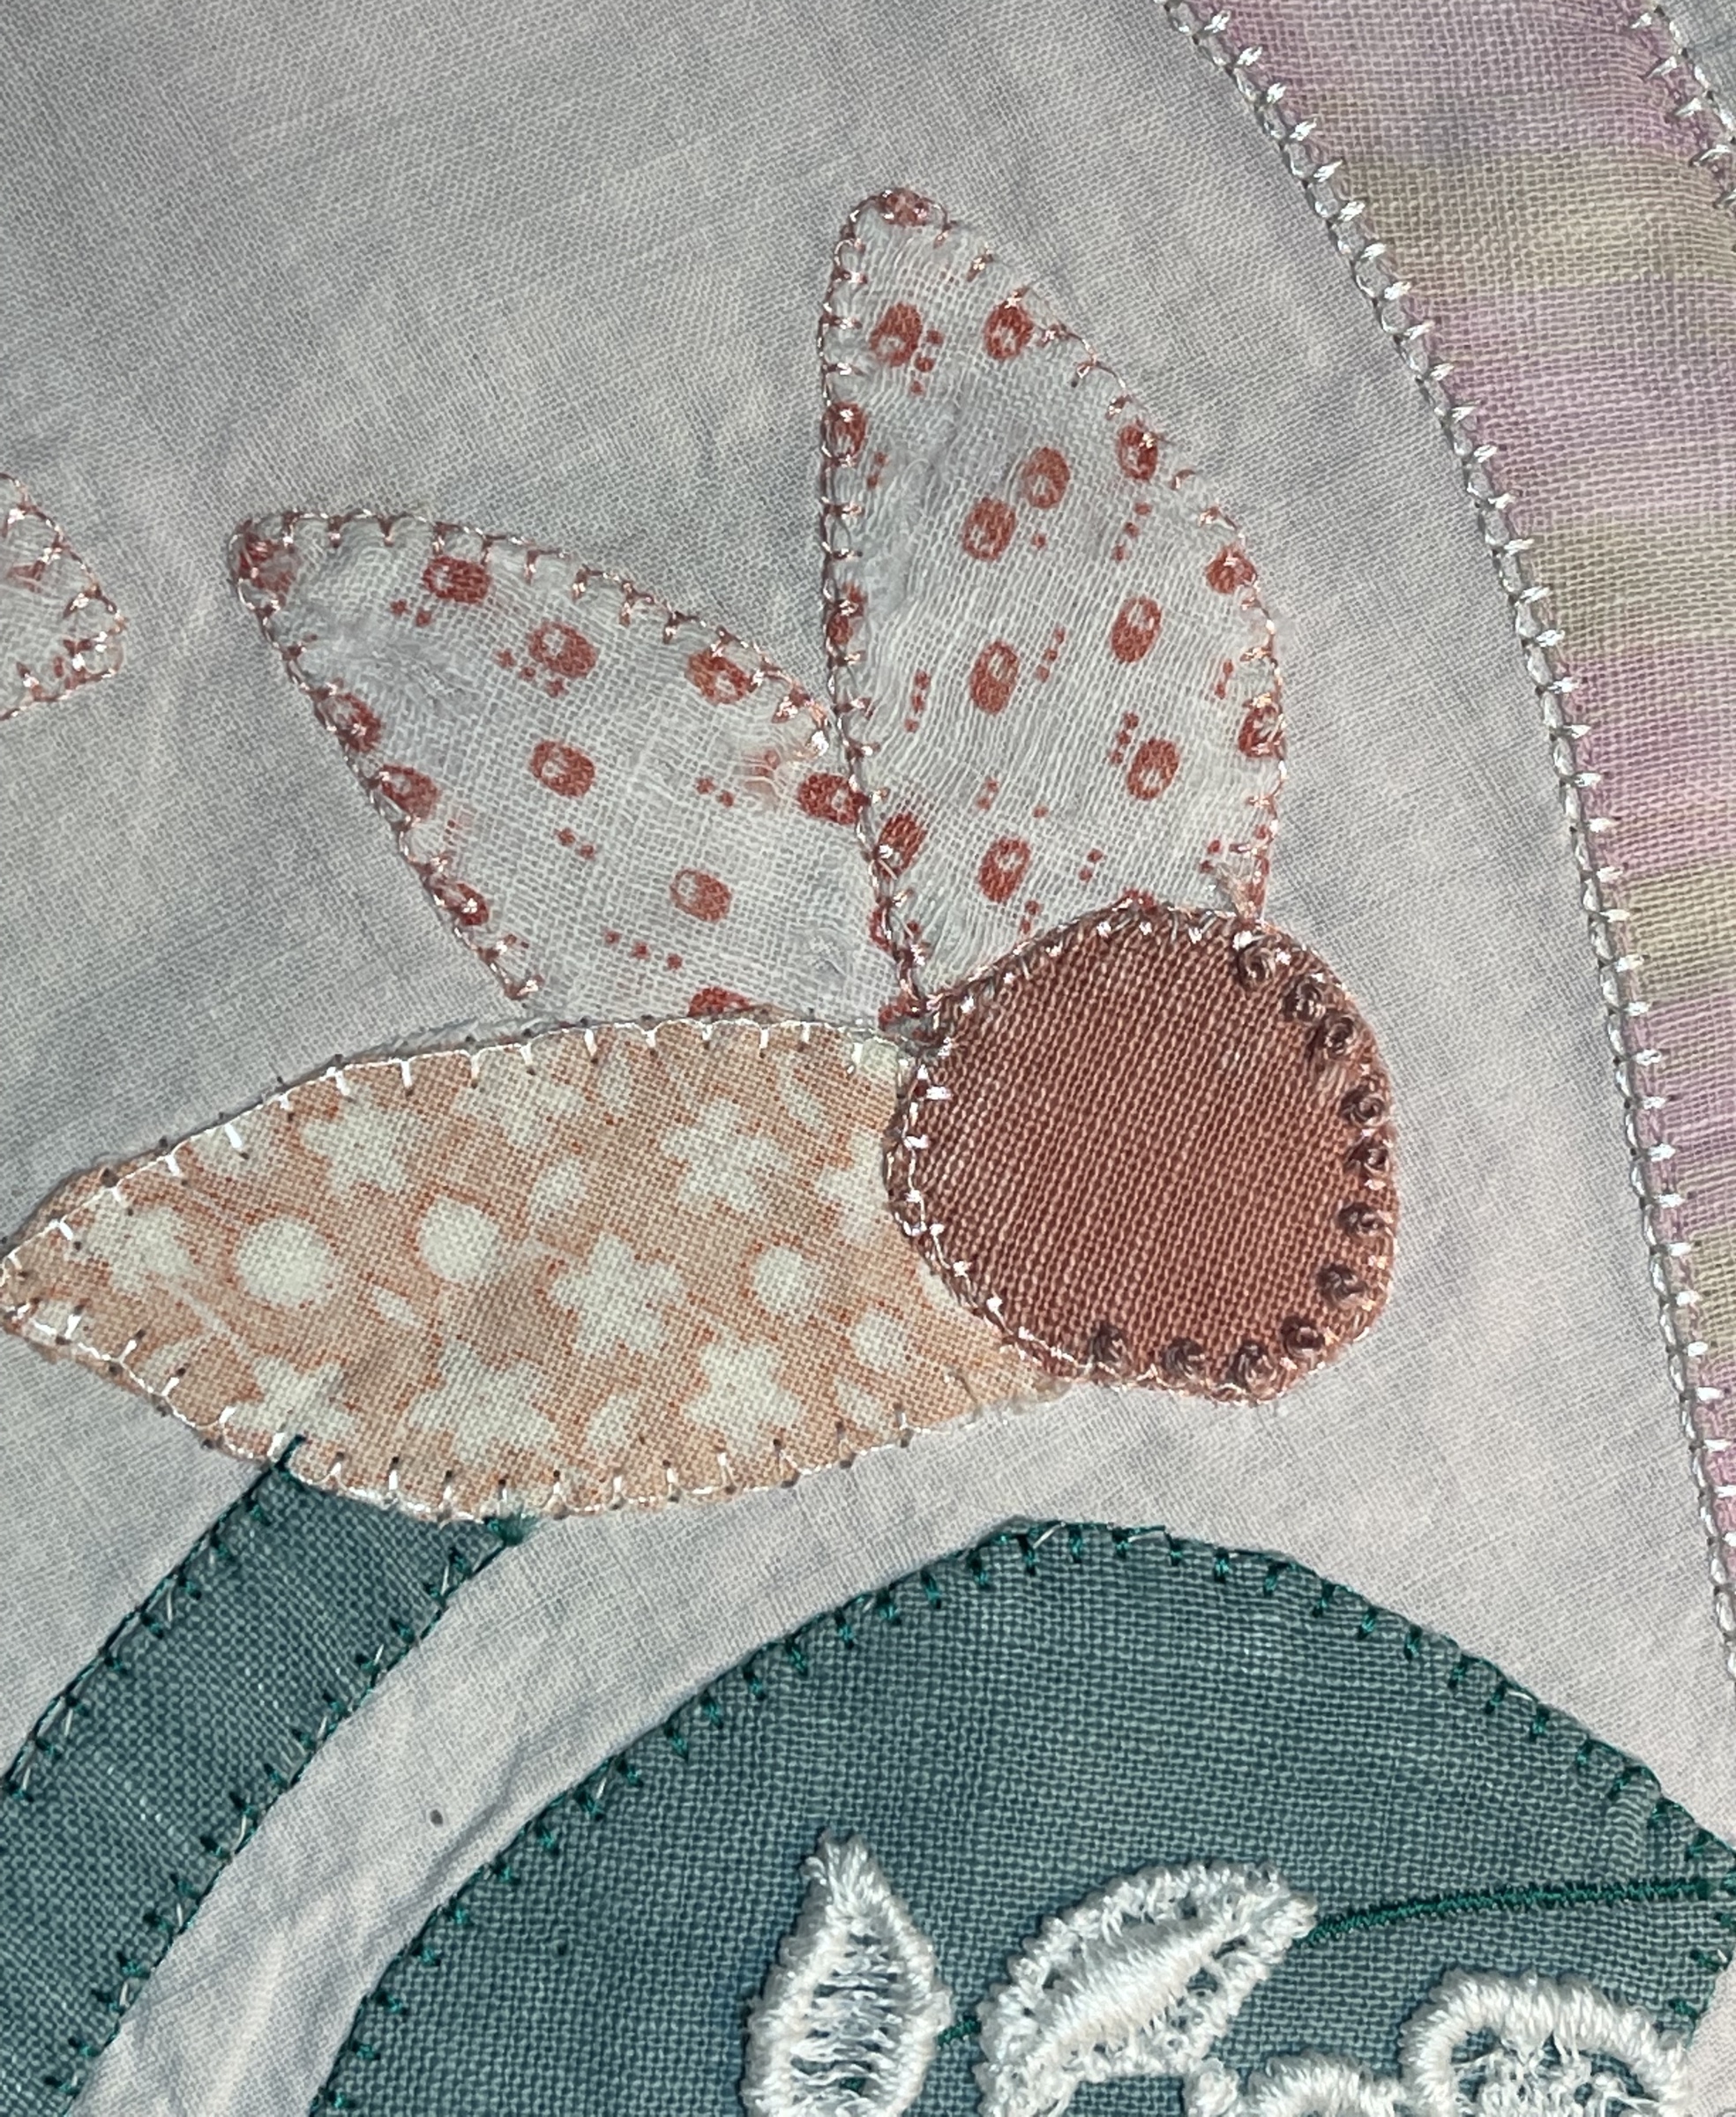
The quilt has 54 butterflies, I replaced 12. I could have replaced many more but part of me likes the idea that some of the original parts stay with the quilt.
Here’s two more butterflies that were desperate for a makeover.
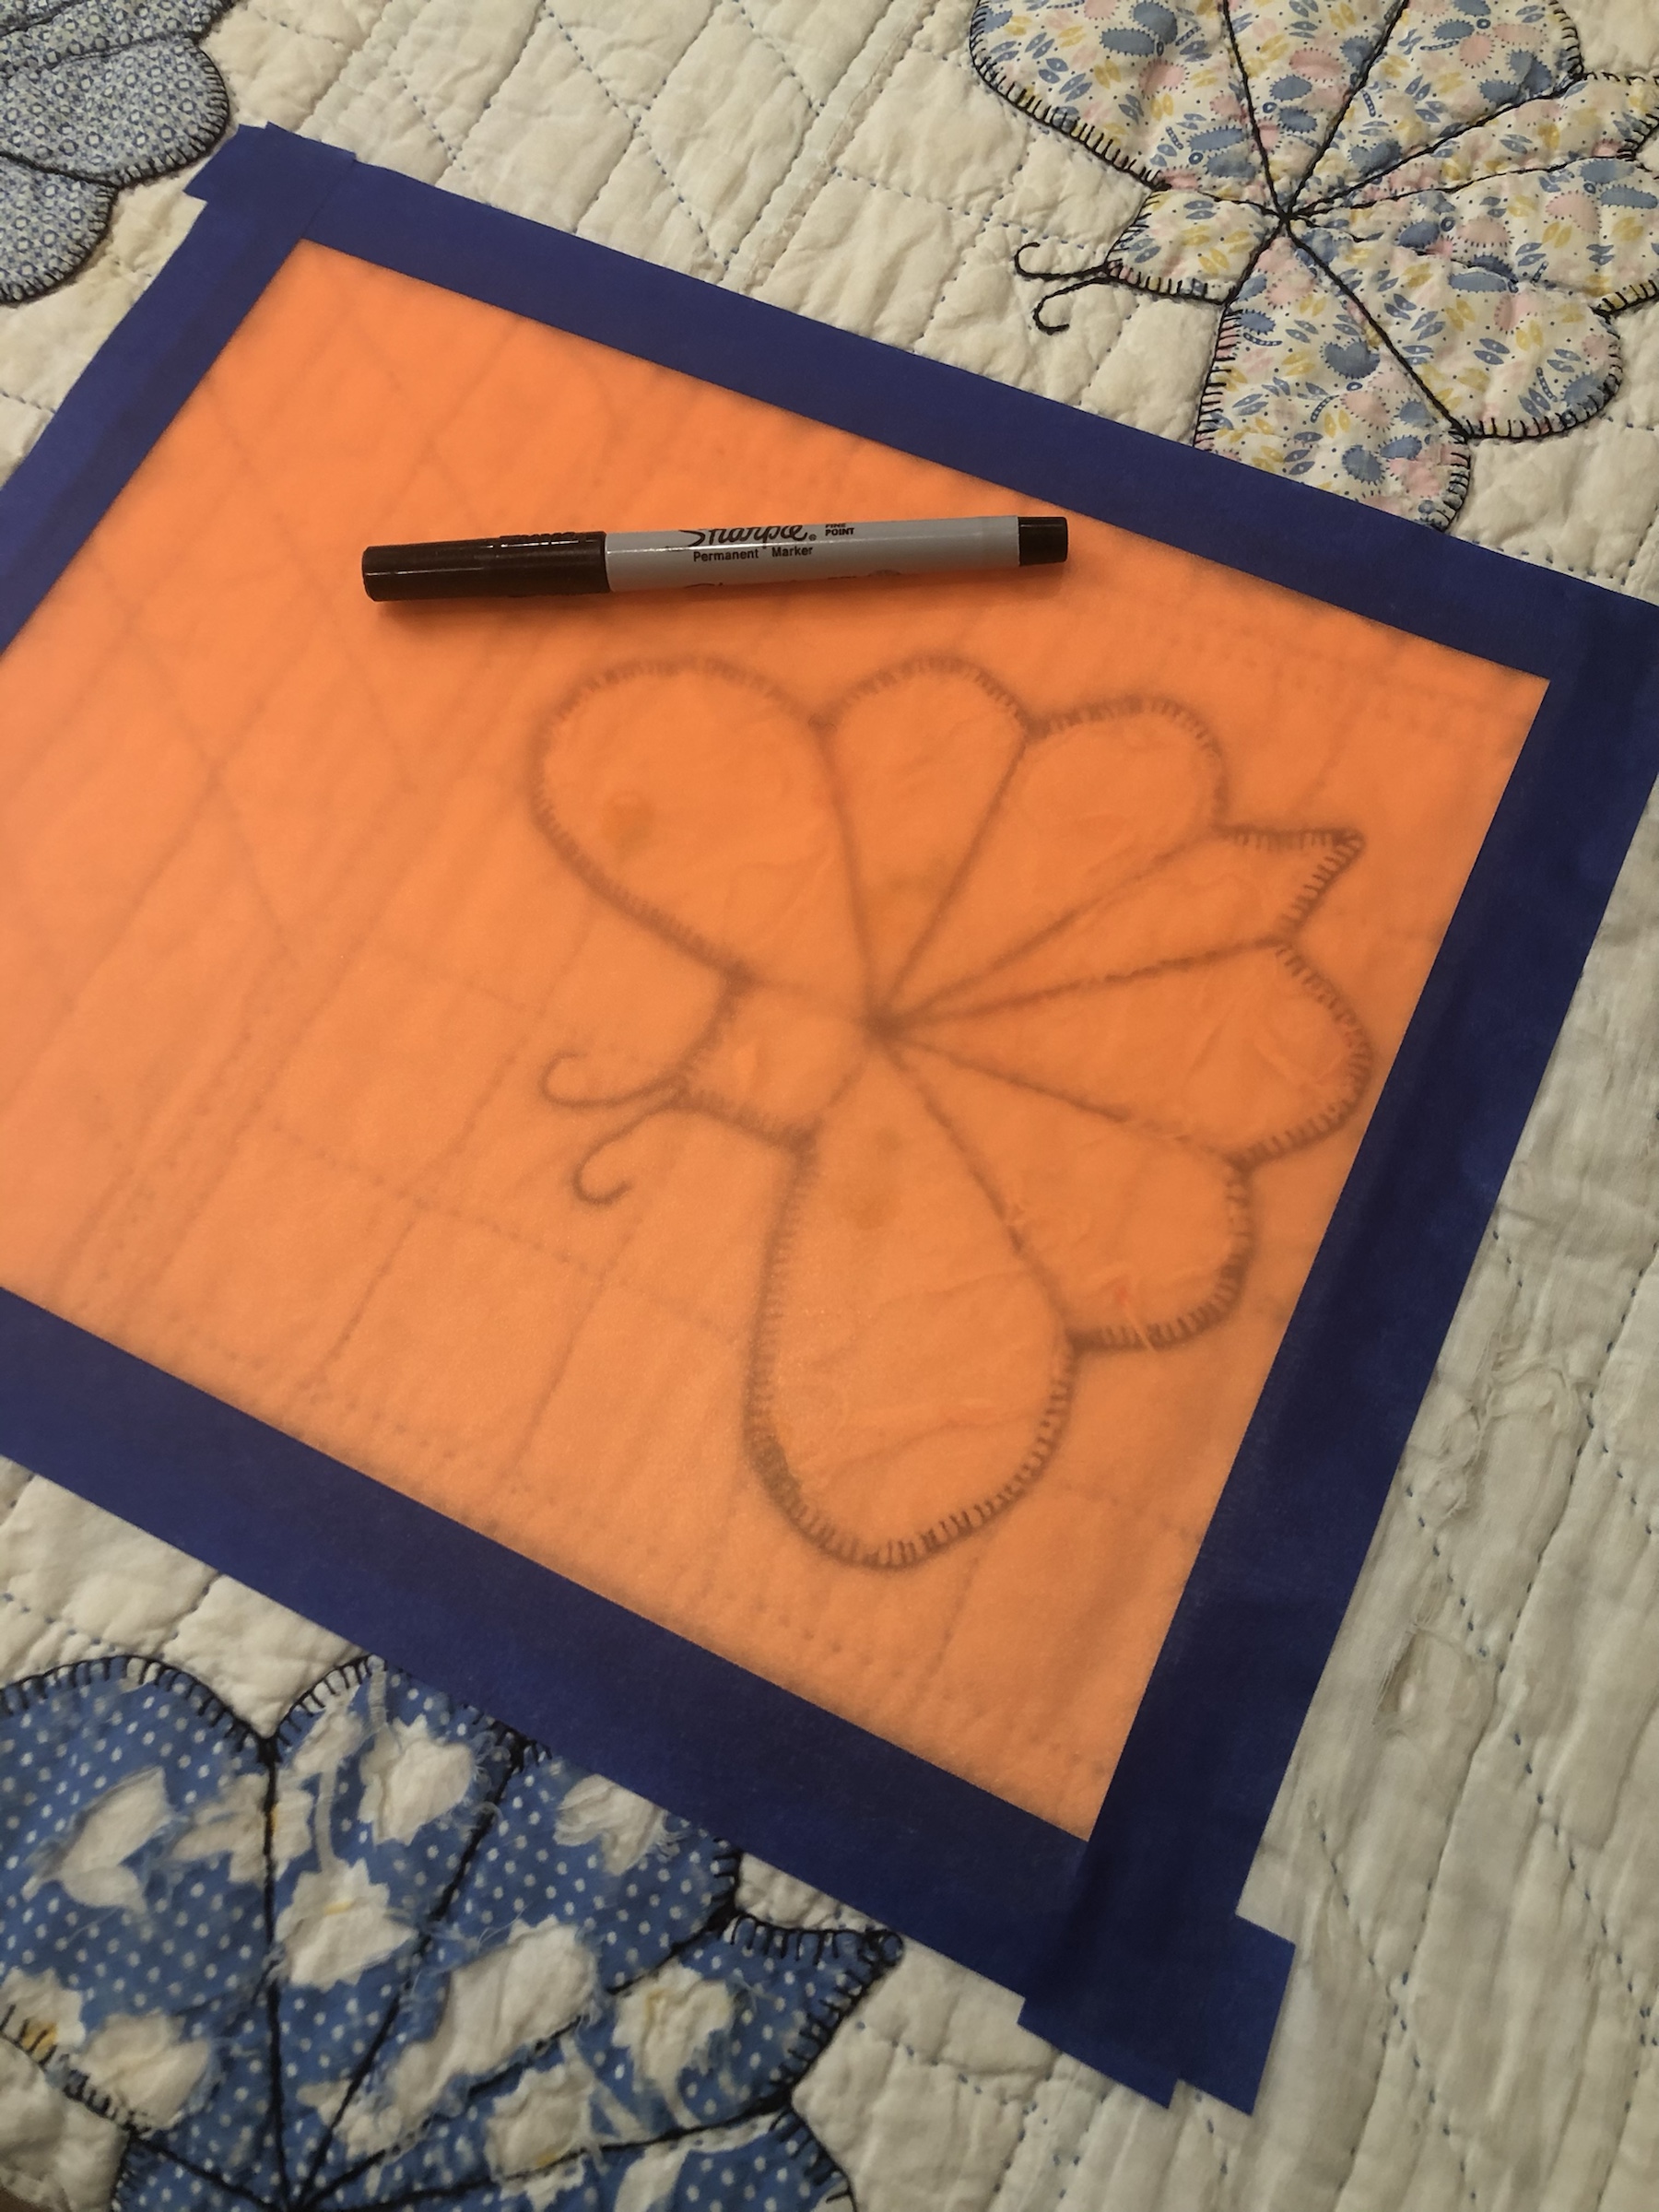
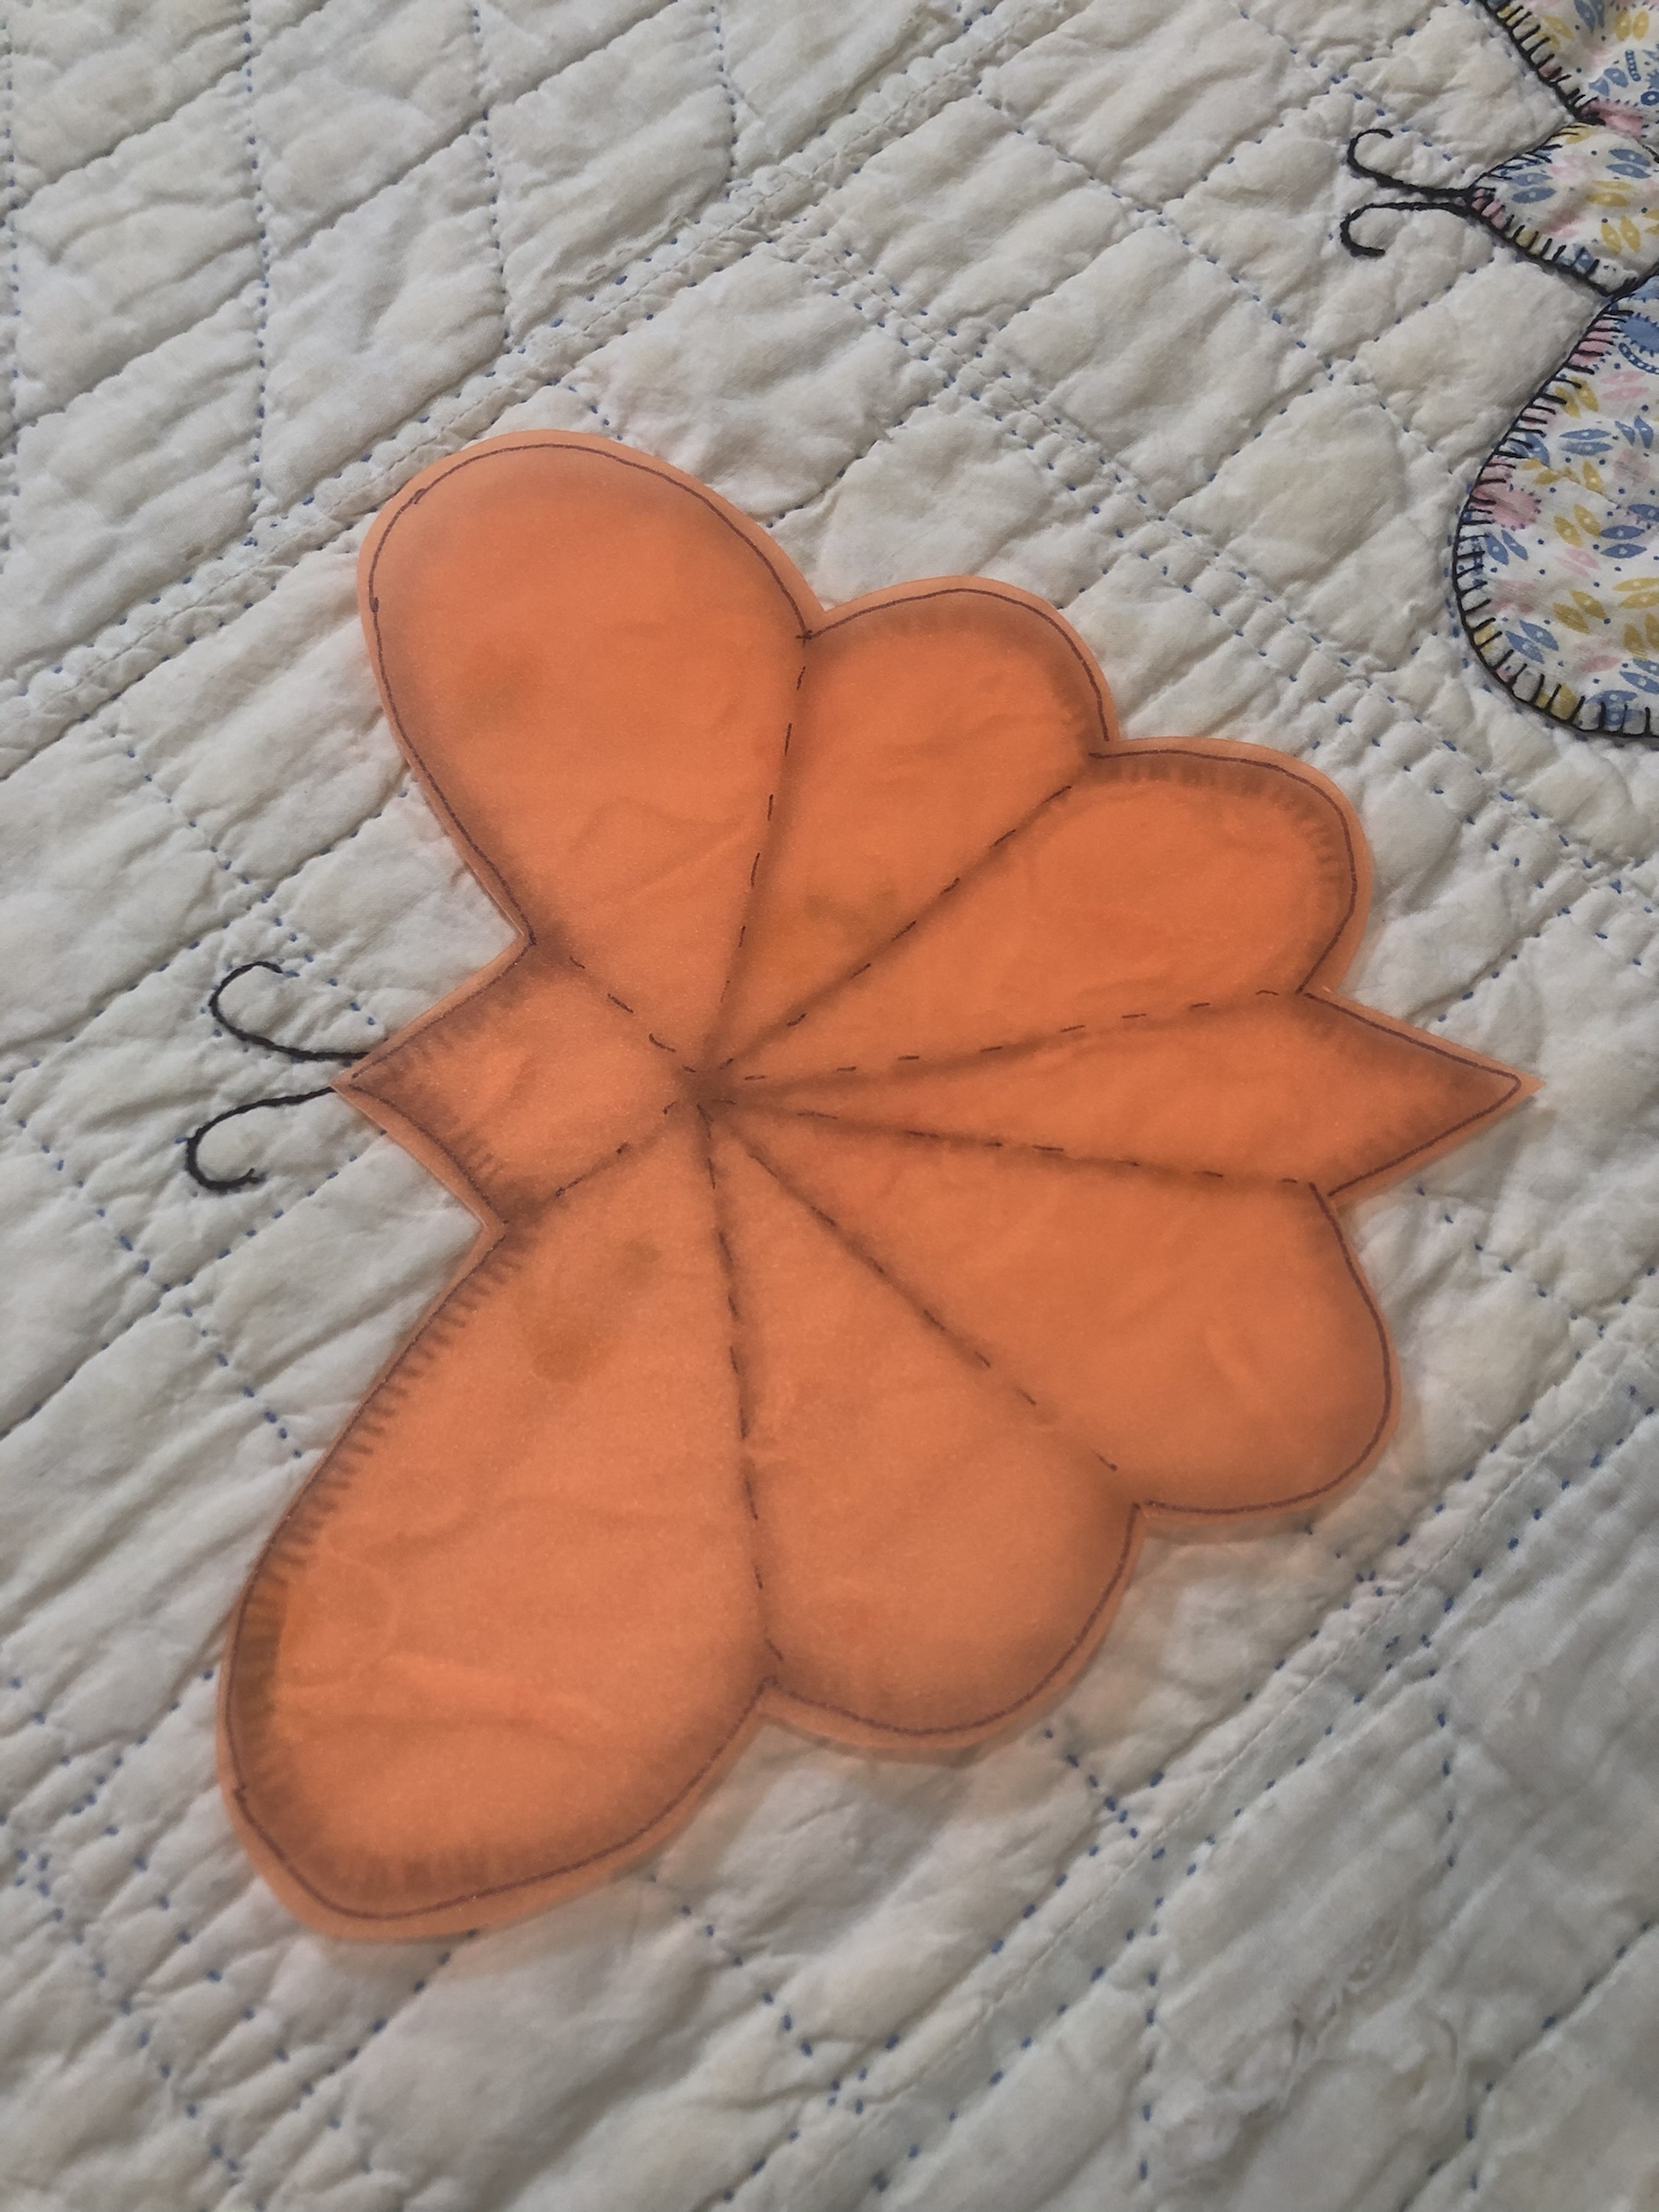
A quick visit to the Dollar General and I have the perfect material to make a plastic template. I used the front (or the back) of a $1.00 three ring binder. Just cut away the front and the back of the binder a.ong the fold lines. Remember to choose a color that you can easily see through. Using blue painters tape, I secure the orange plastic to the quilt.
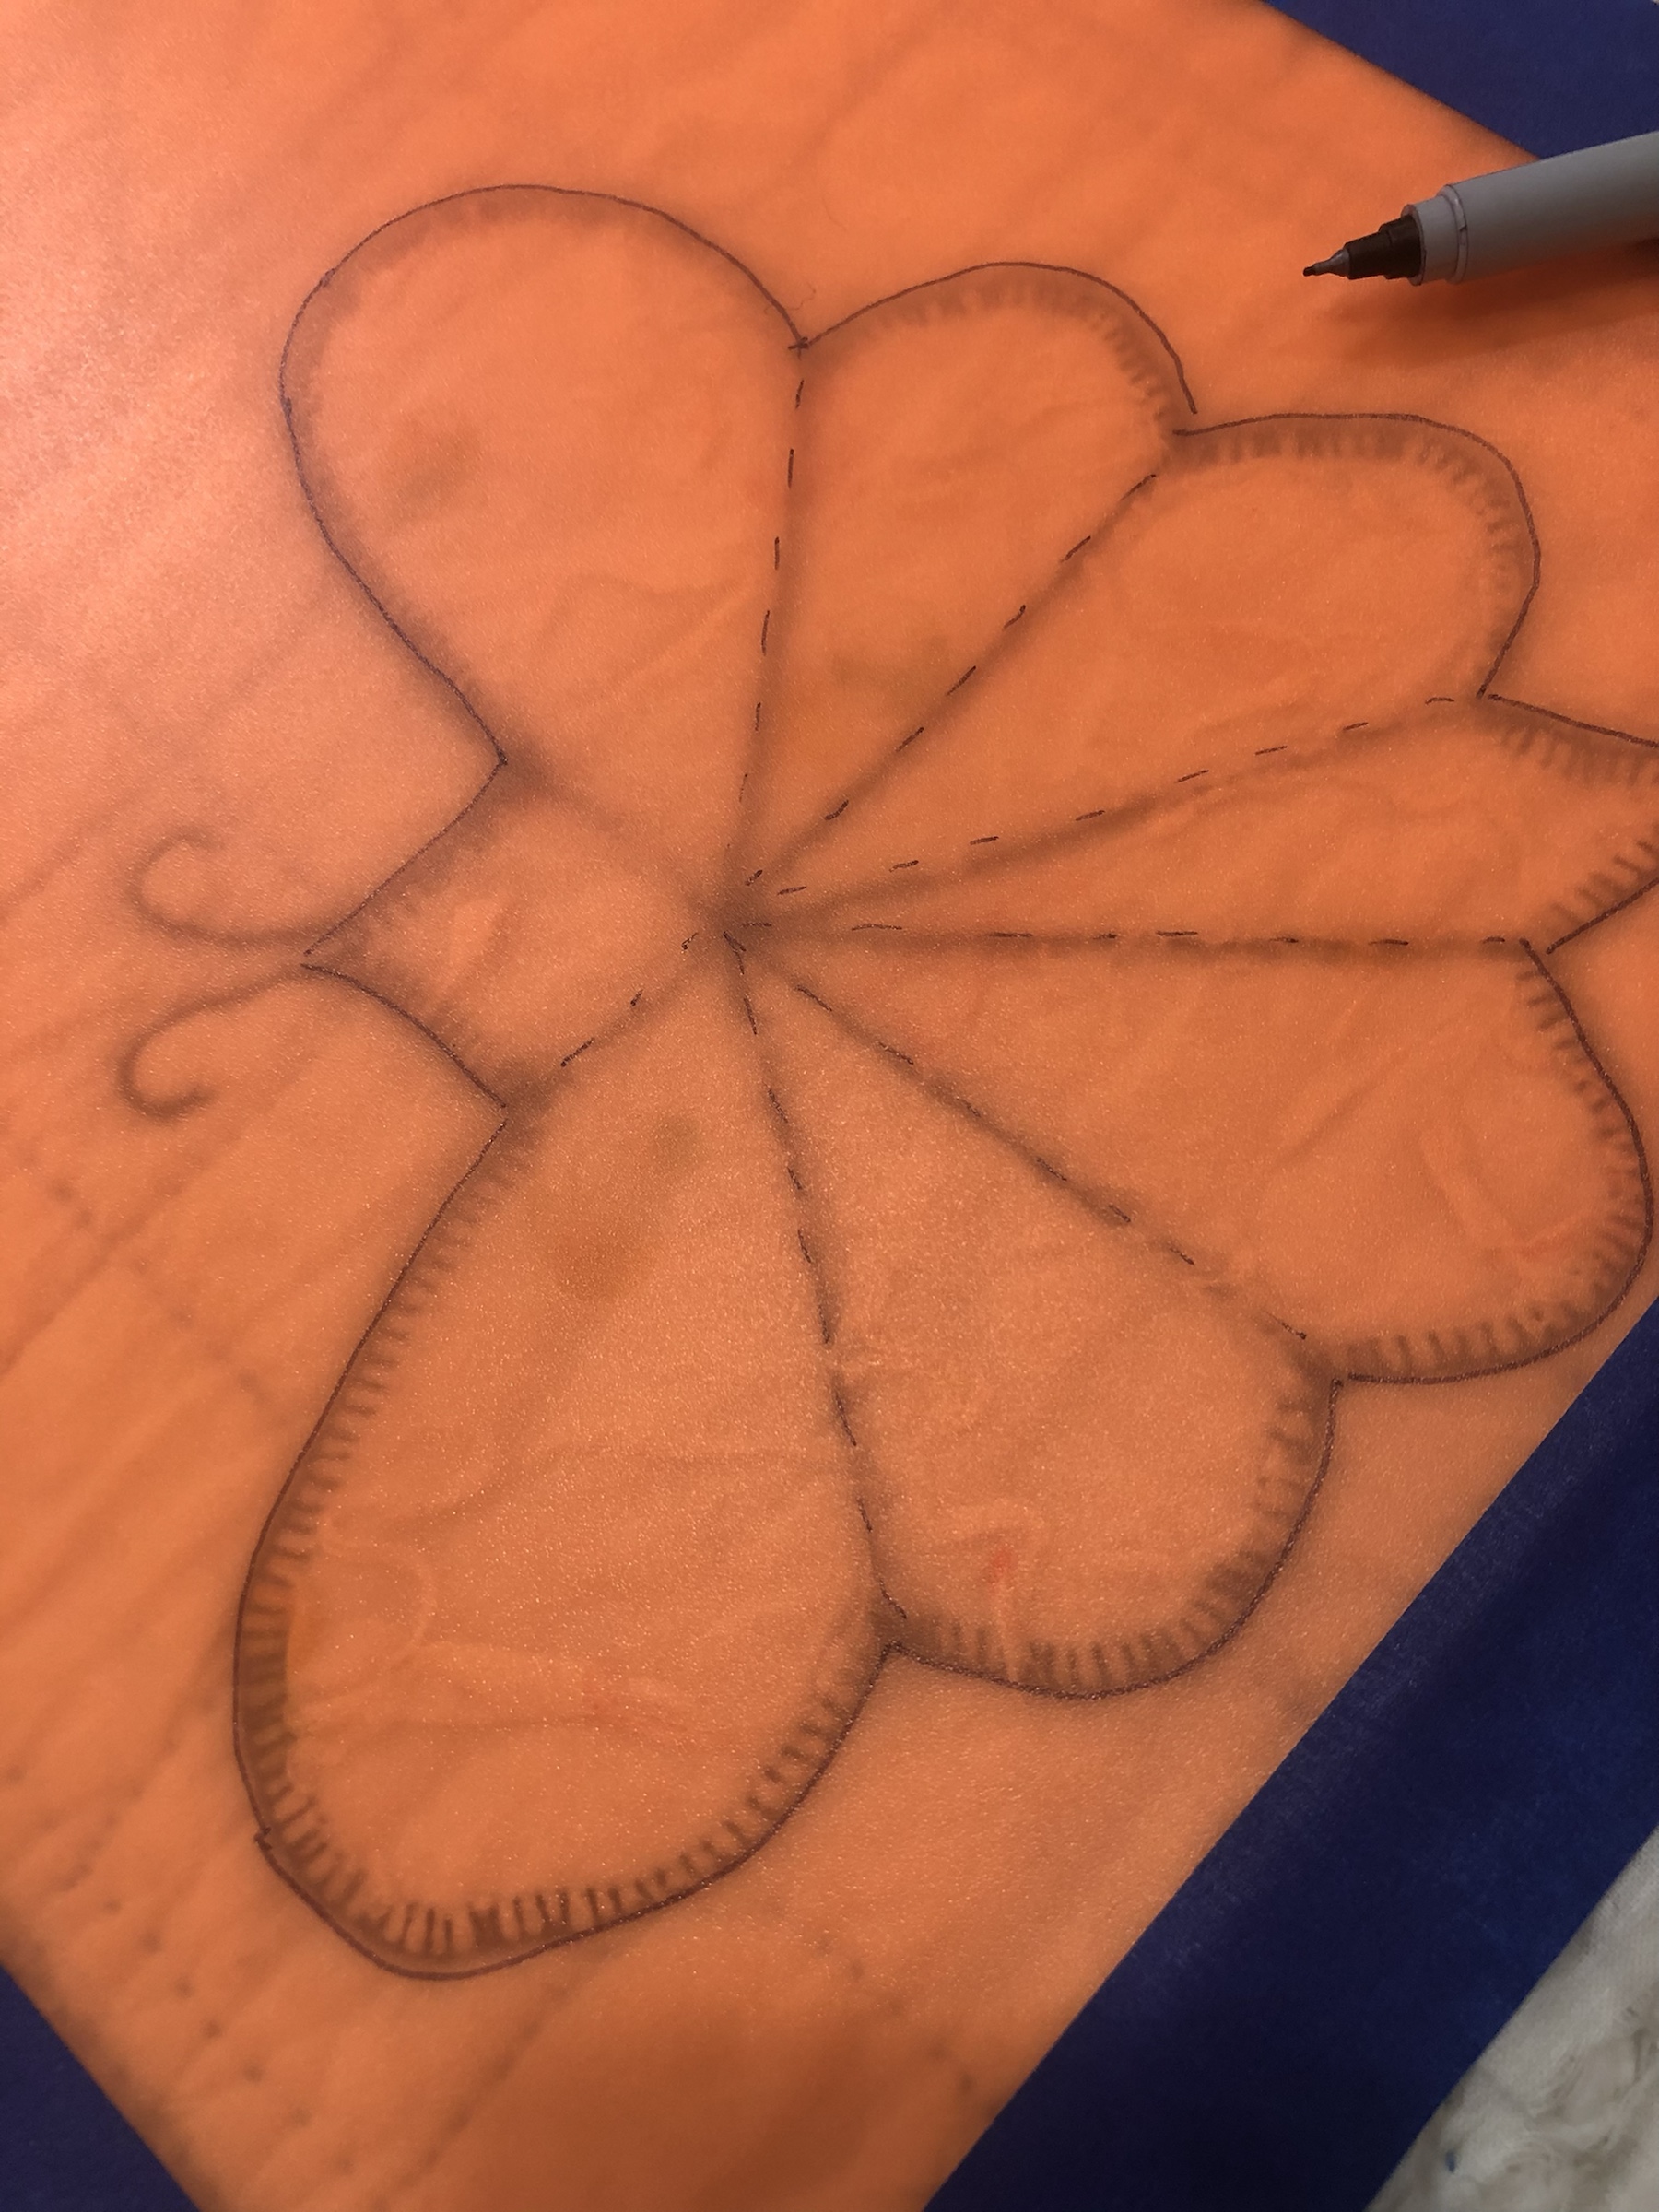
Very carefully with a fine line Sharpie I trace around the outside of the butterfly. For good measure I also mark the hand embroidery stitching lines.
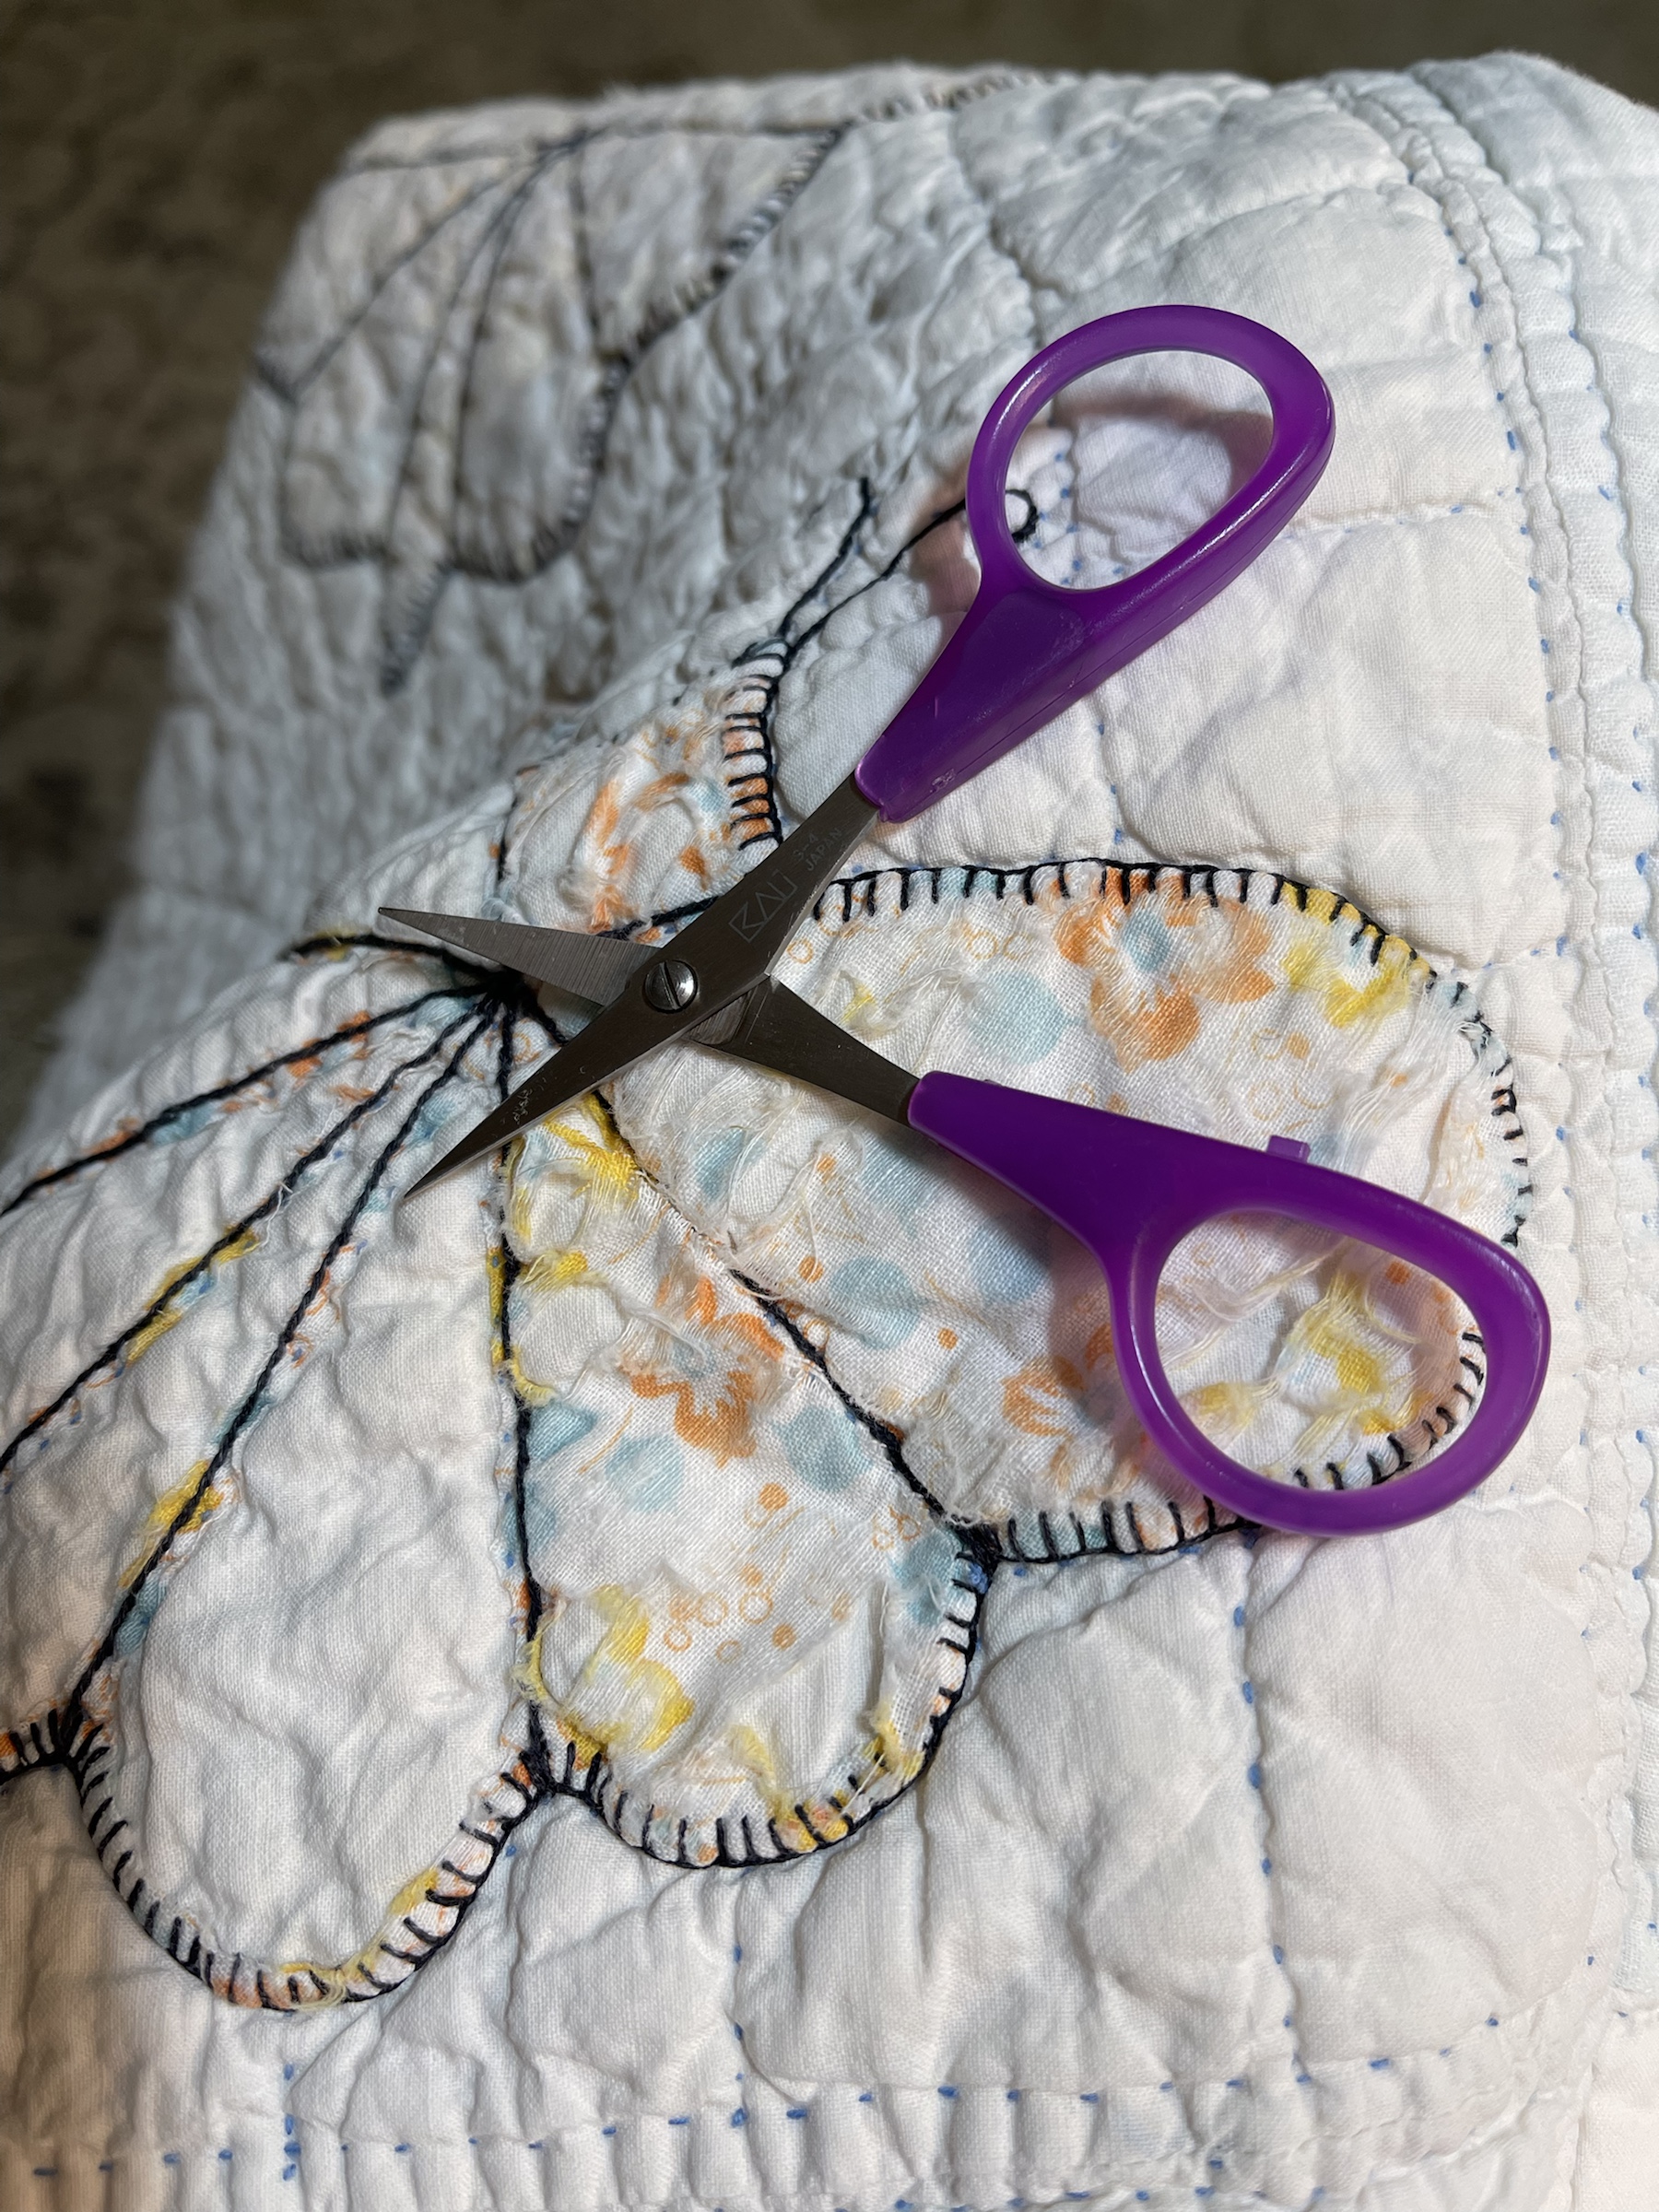
Using my “Anything Utility” scissors I cut out the template about an 1/8th” beyond my traces line.
Taaaa-Daaaaa!
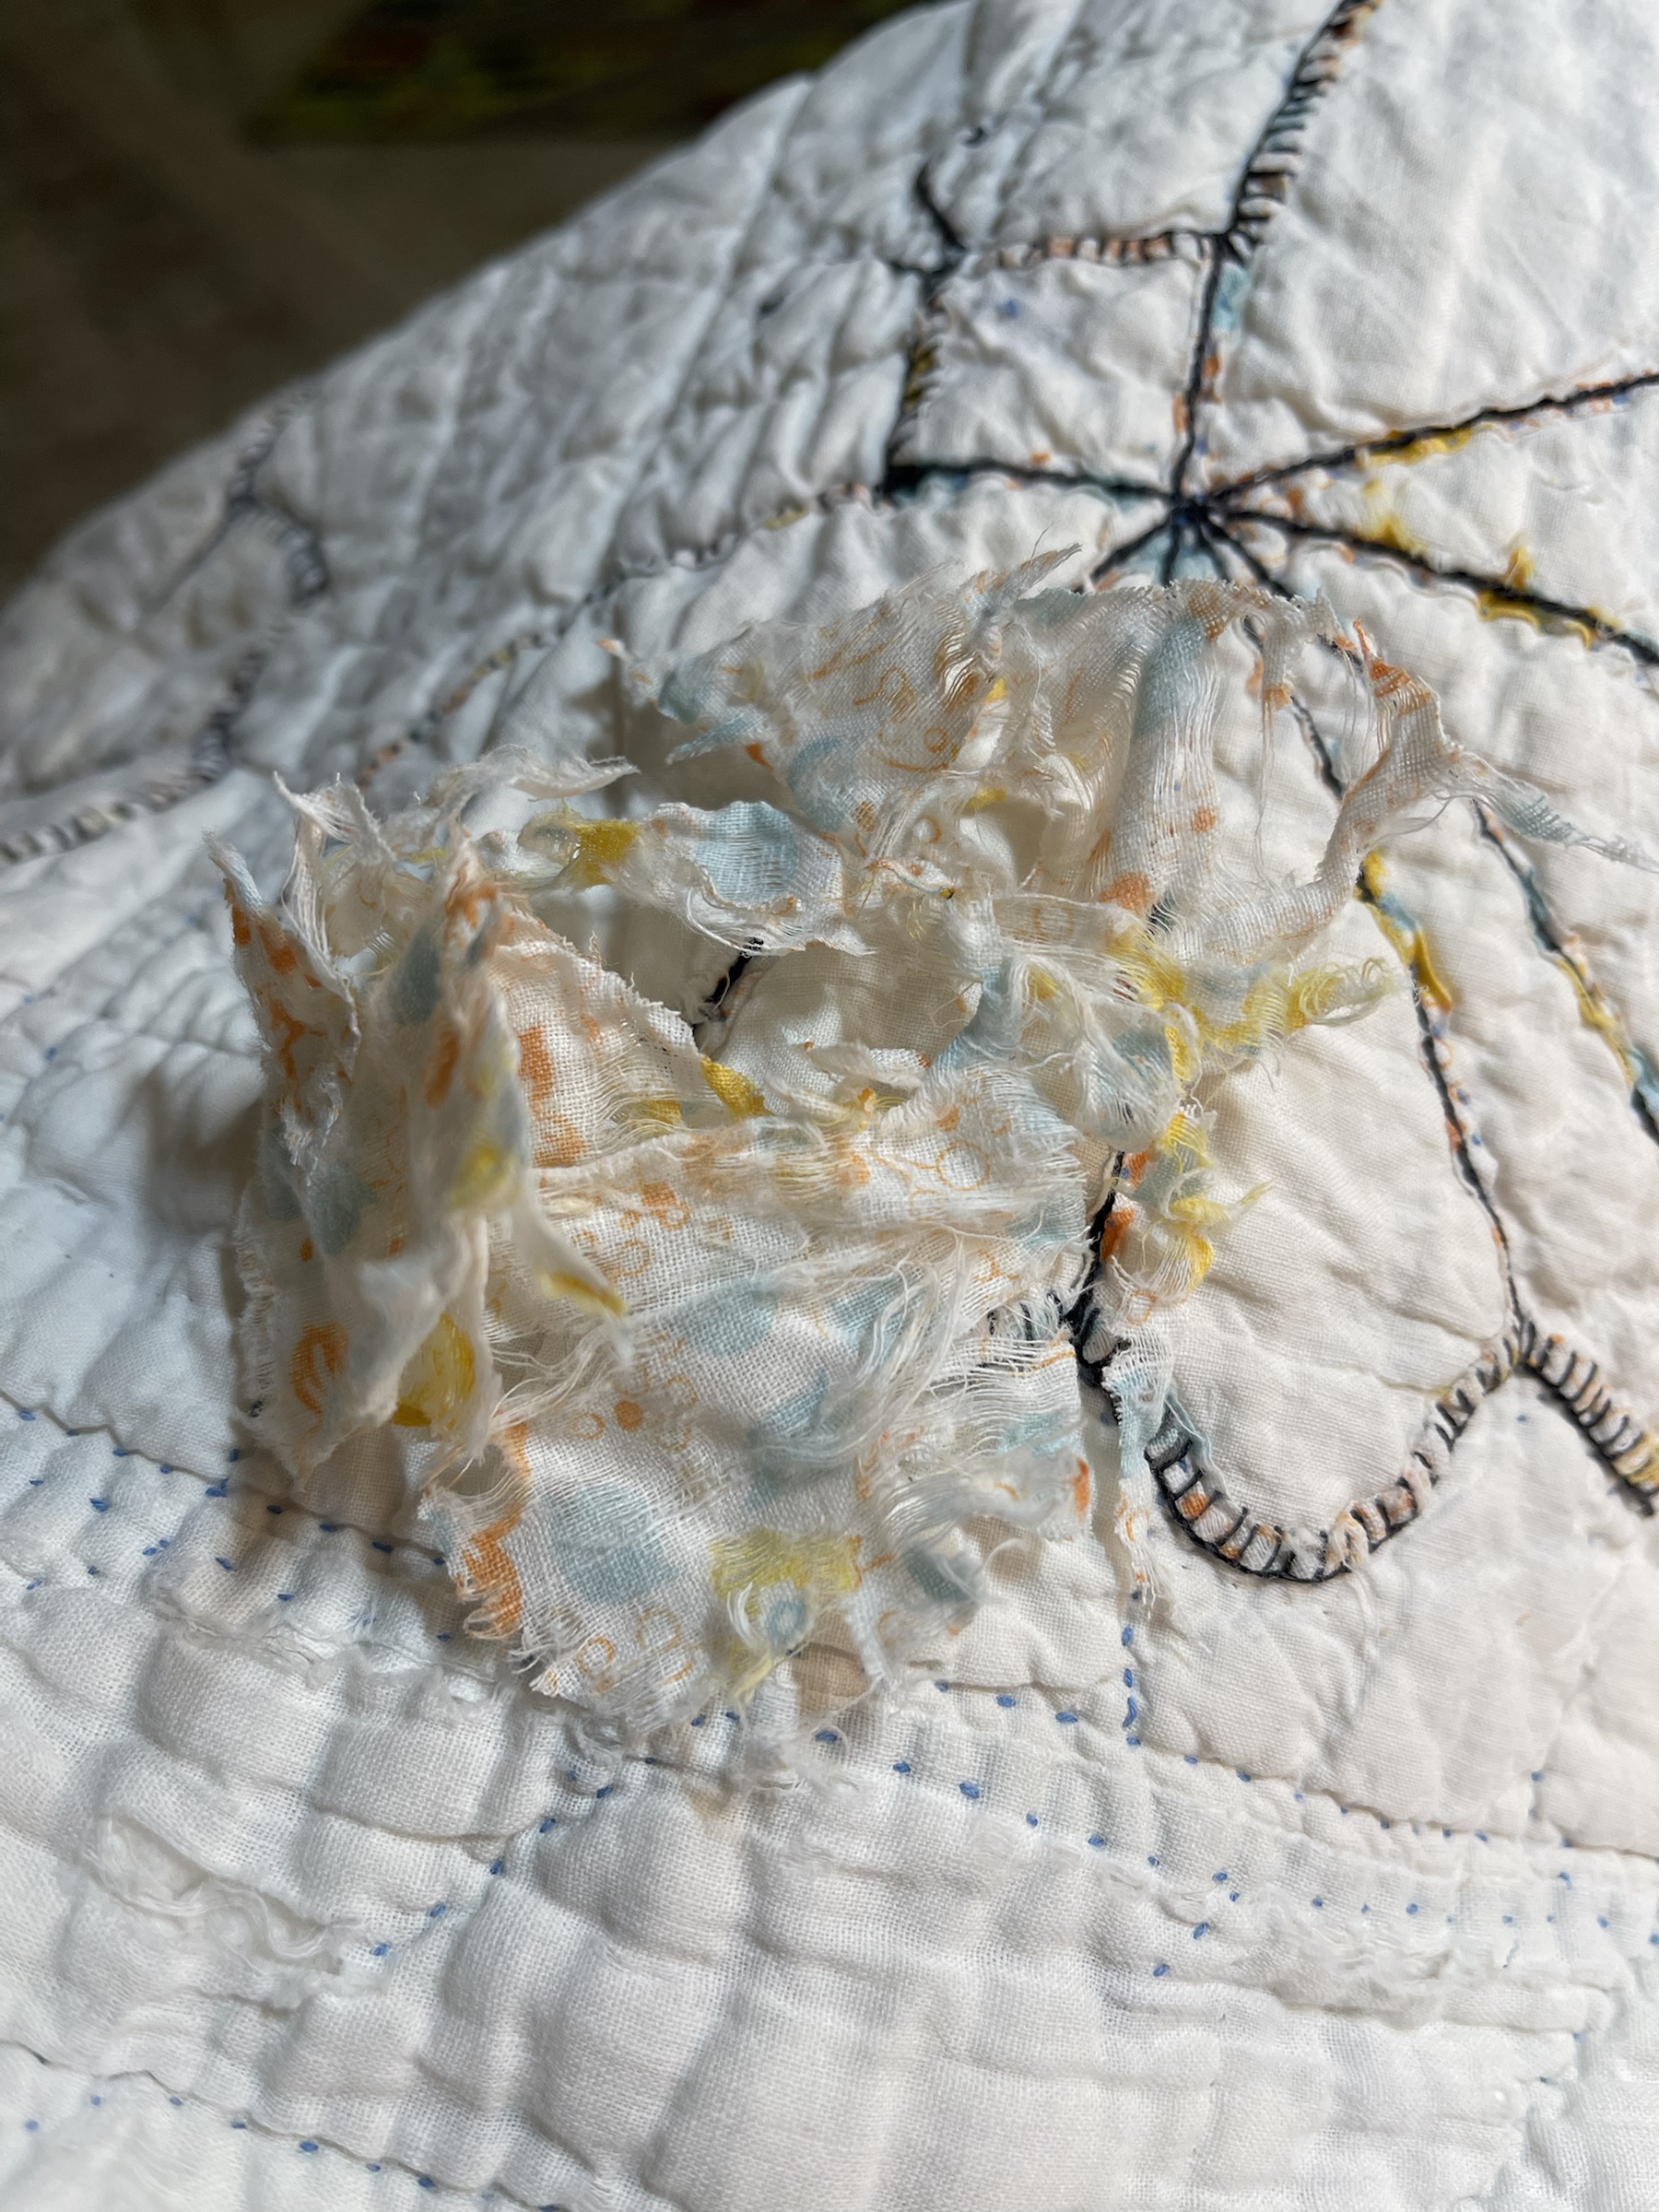
I trimmed away what was left of the original butterfly fabric. Looking back I realize this step was not necessary as all of the replacement reproduction fabrics would have easily covered and disgusted the ragged fabrics beneath.
Once I realized I did not want to attempt to replace the top border I held my breath and cut away the remaining three. The trimmed quilt now measures 64×72”.
Why is the above template red? Some how from one day to the next I lost the orange one! Good grief! I quickly made another one, this time chose a red binder front plastic sheet. I realized there was no reason to mark the hand embroidery stitching lines on the second template.
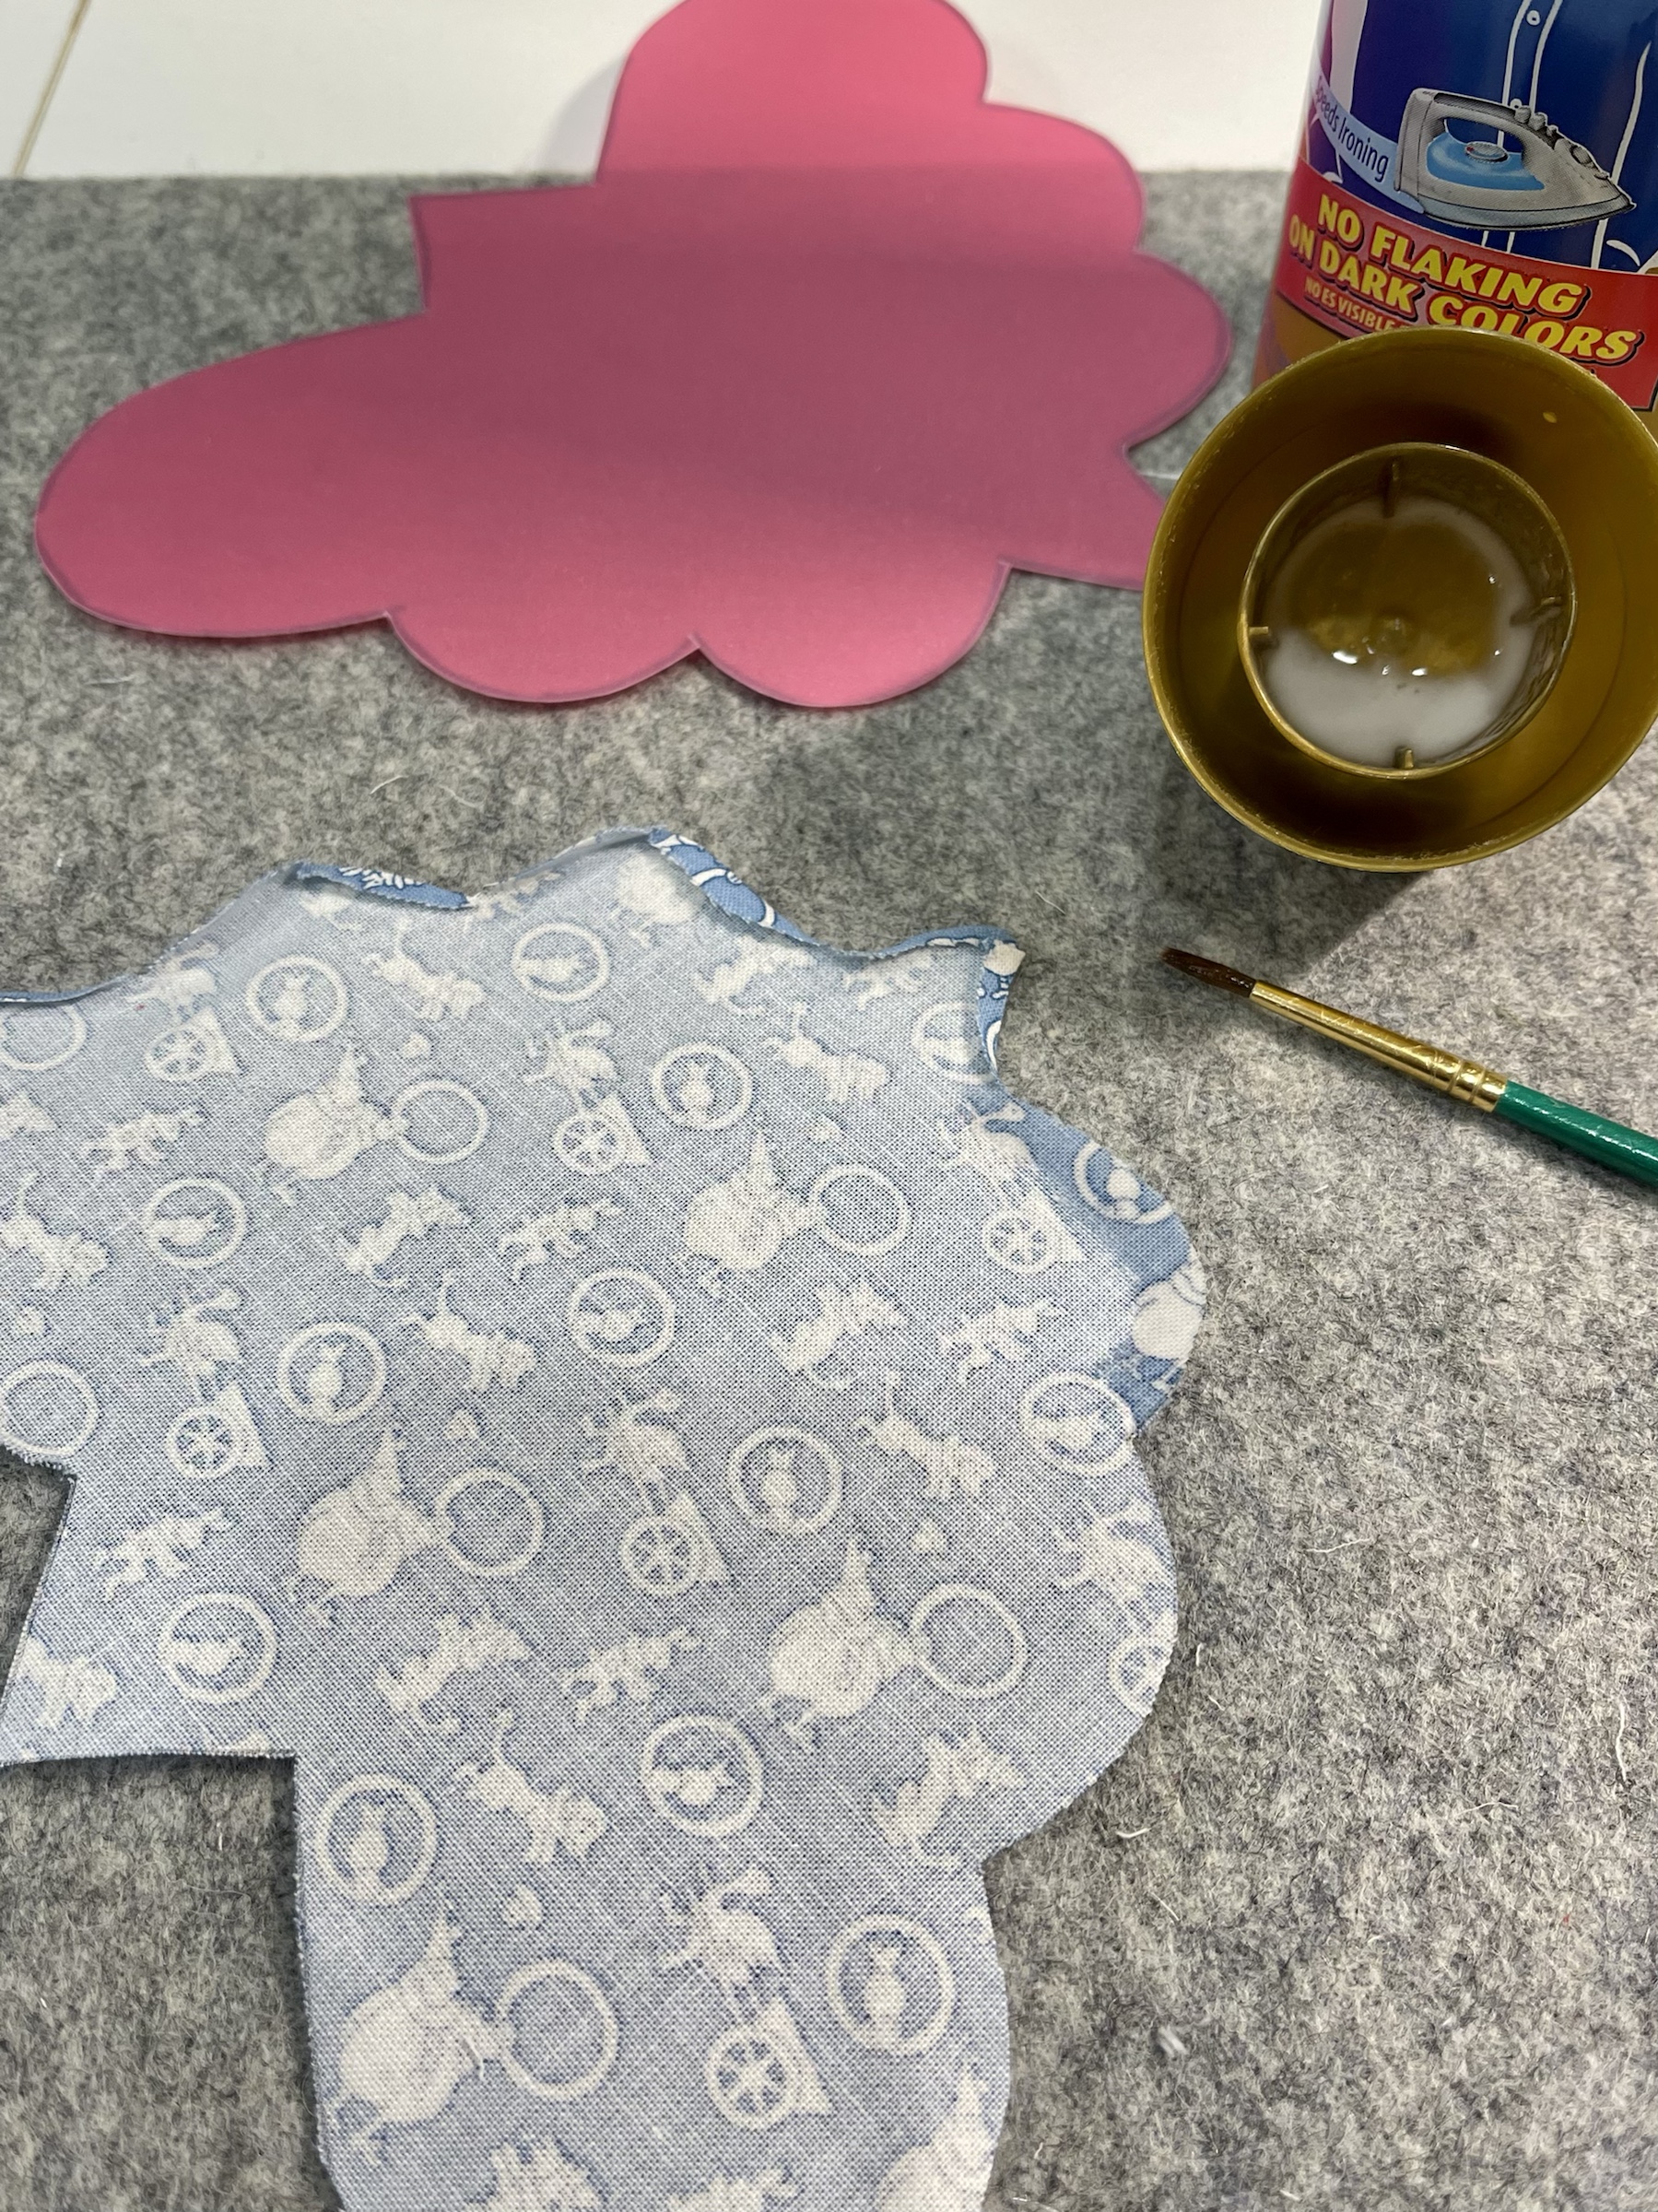
Using my spray starch and a small paintbrush I carefully dampen the outer fabric edge and press to the wrong side of my fabric.
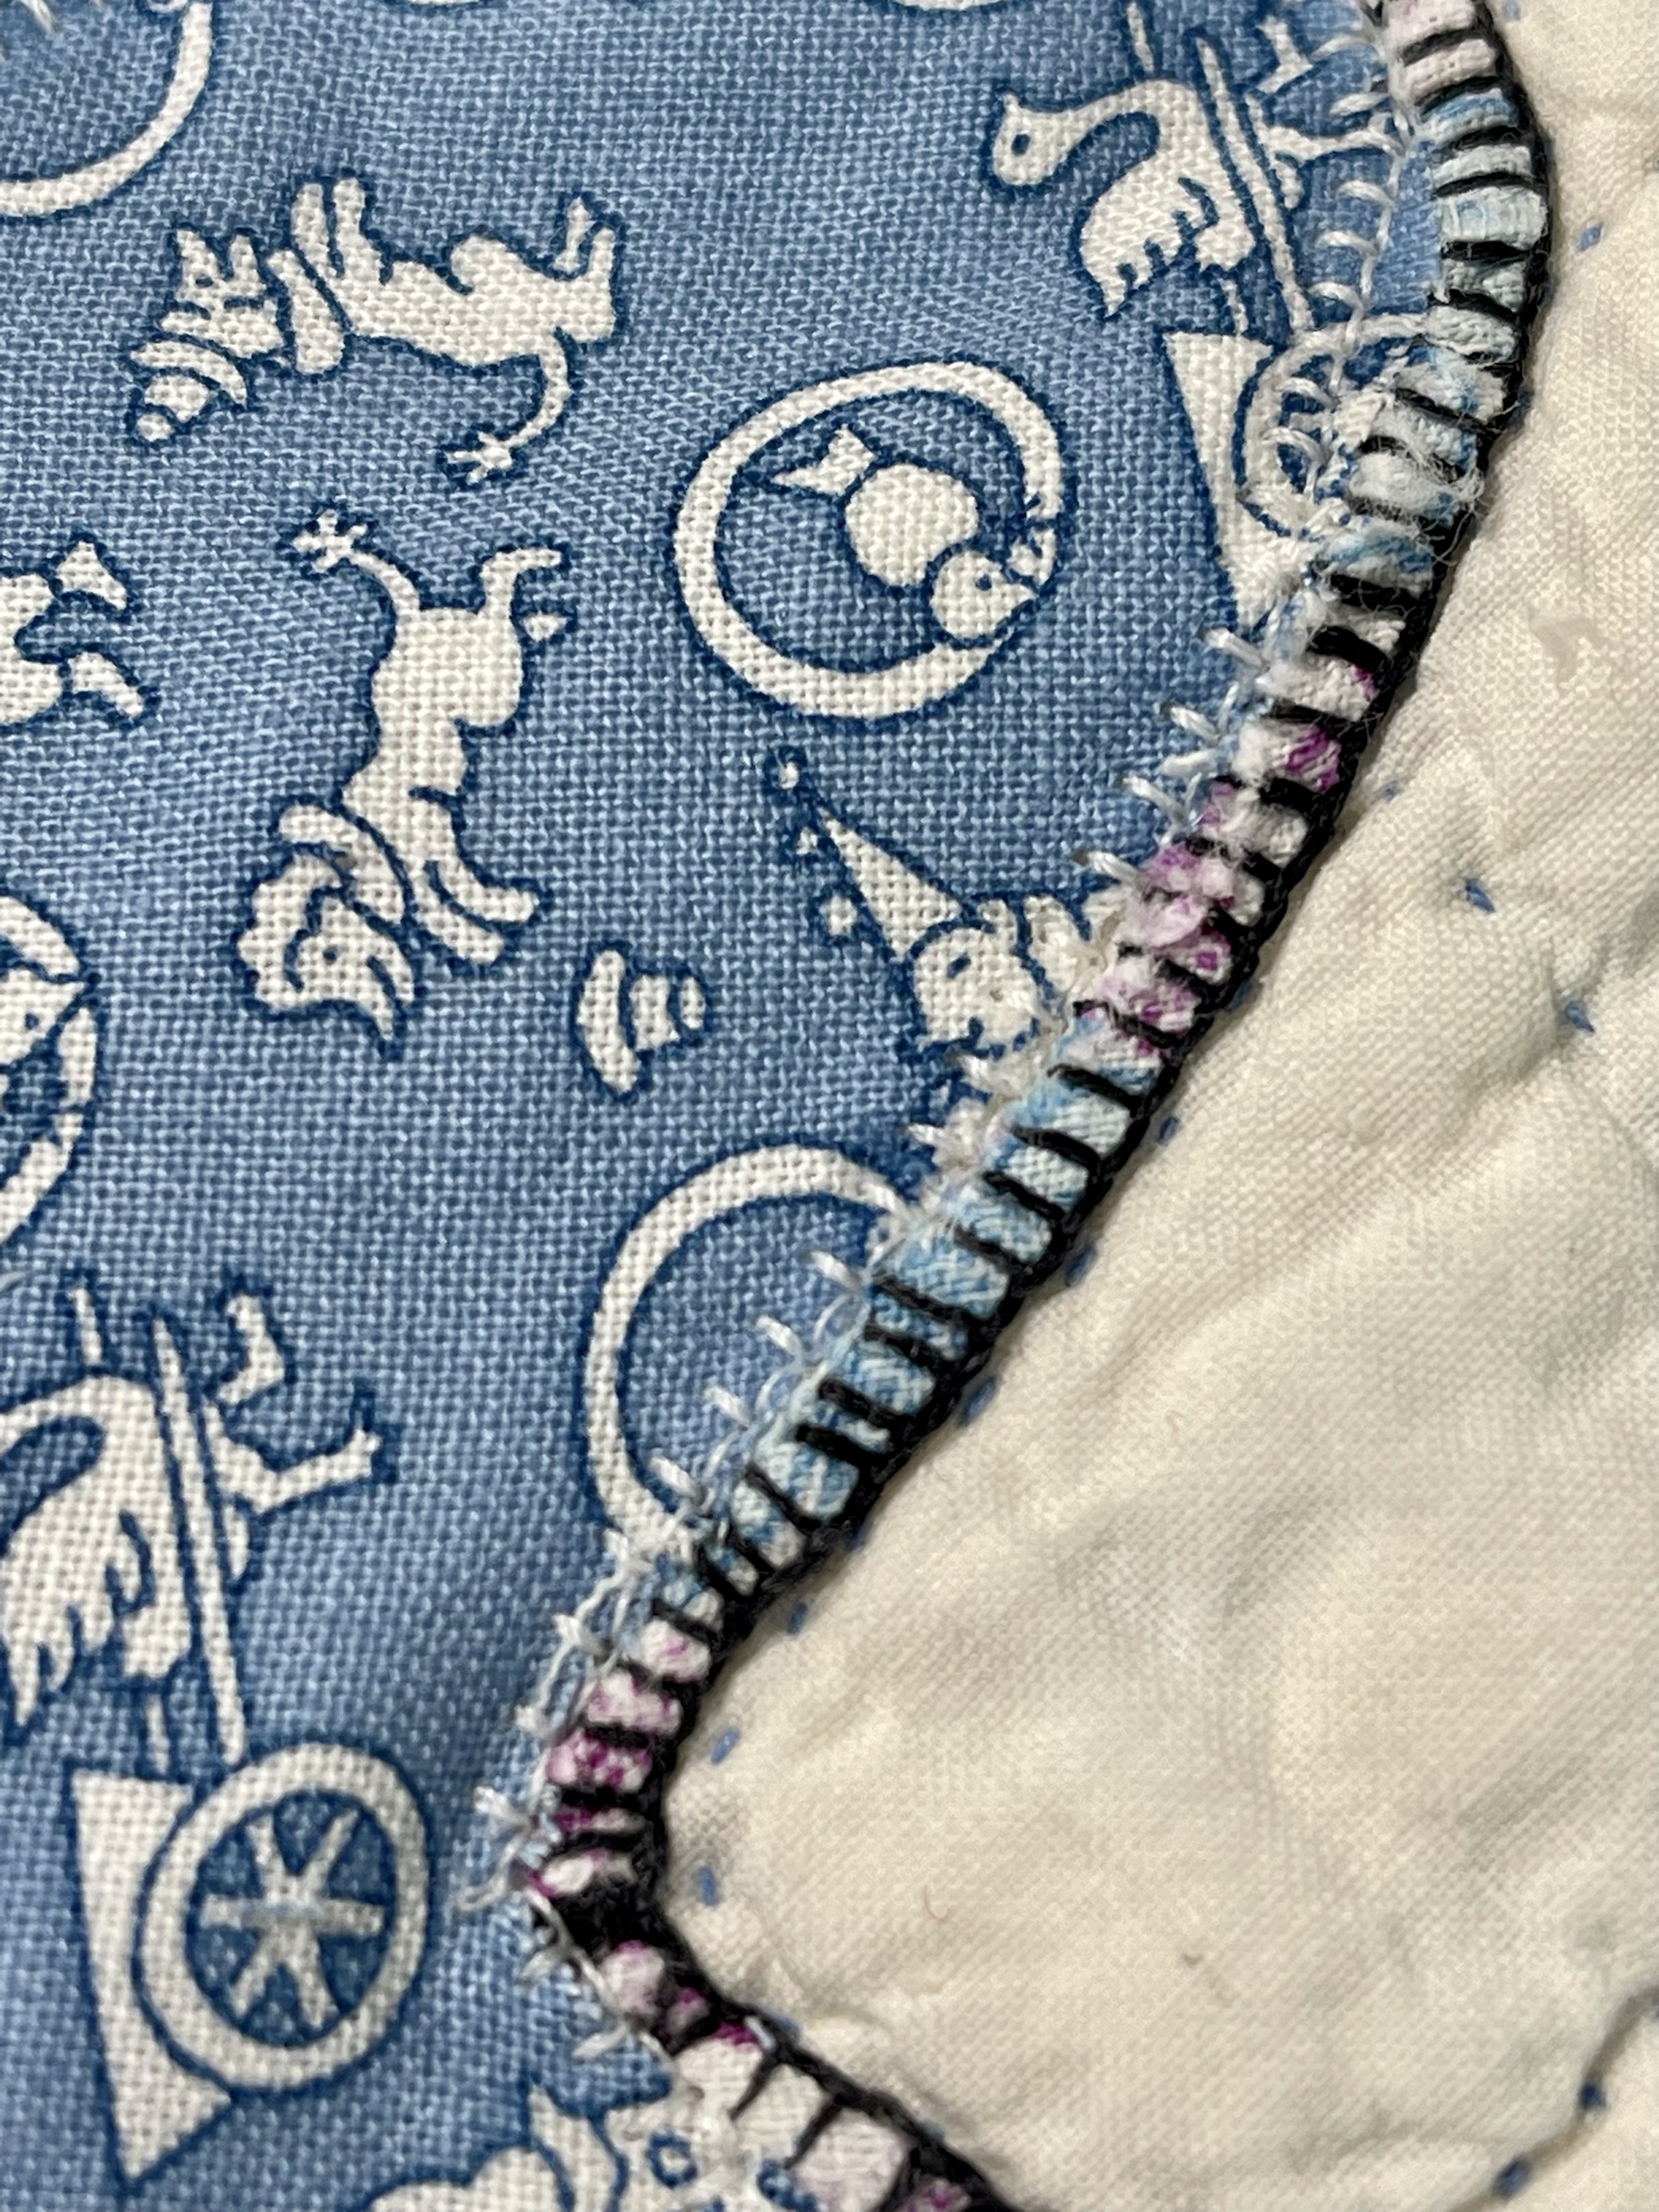
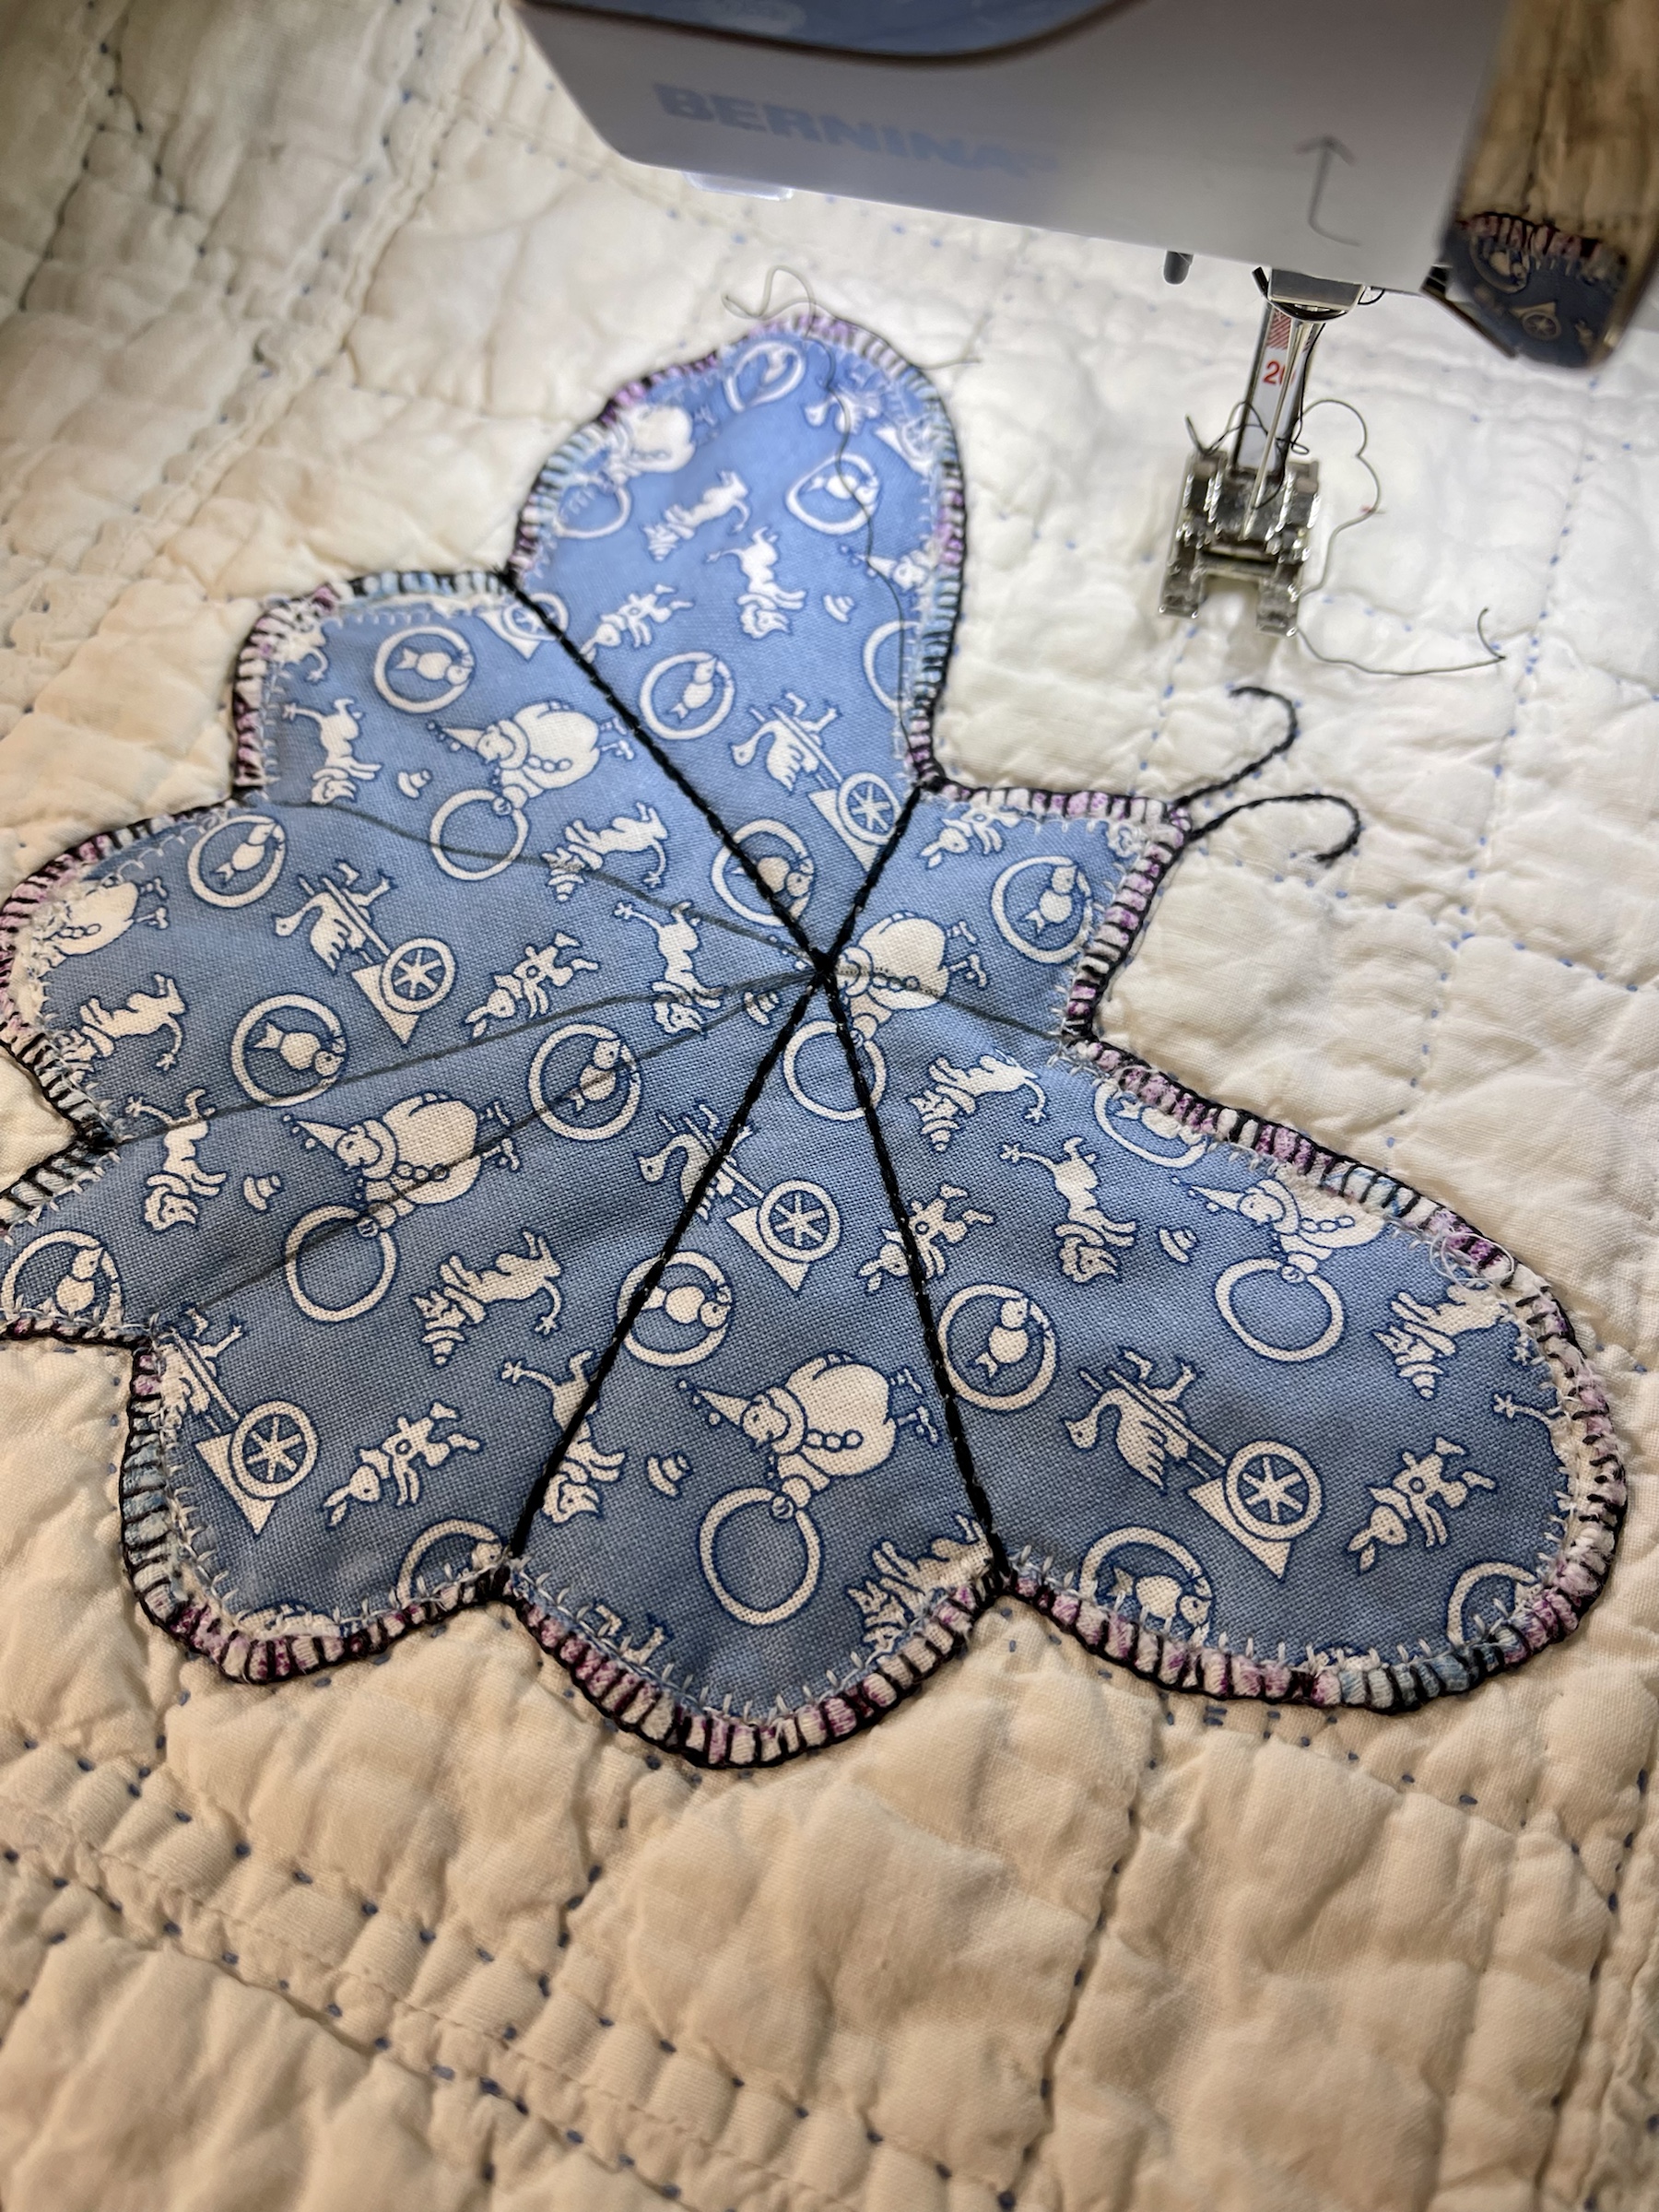
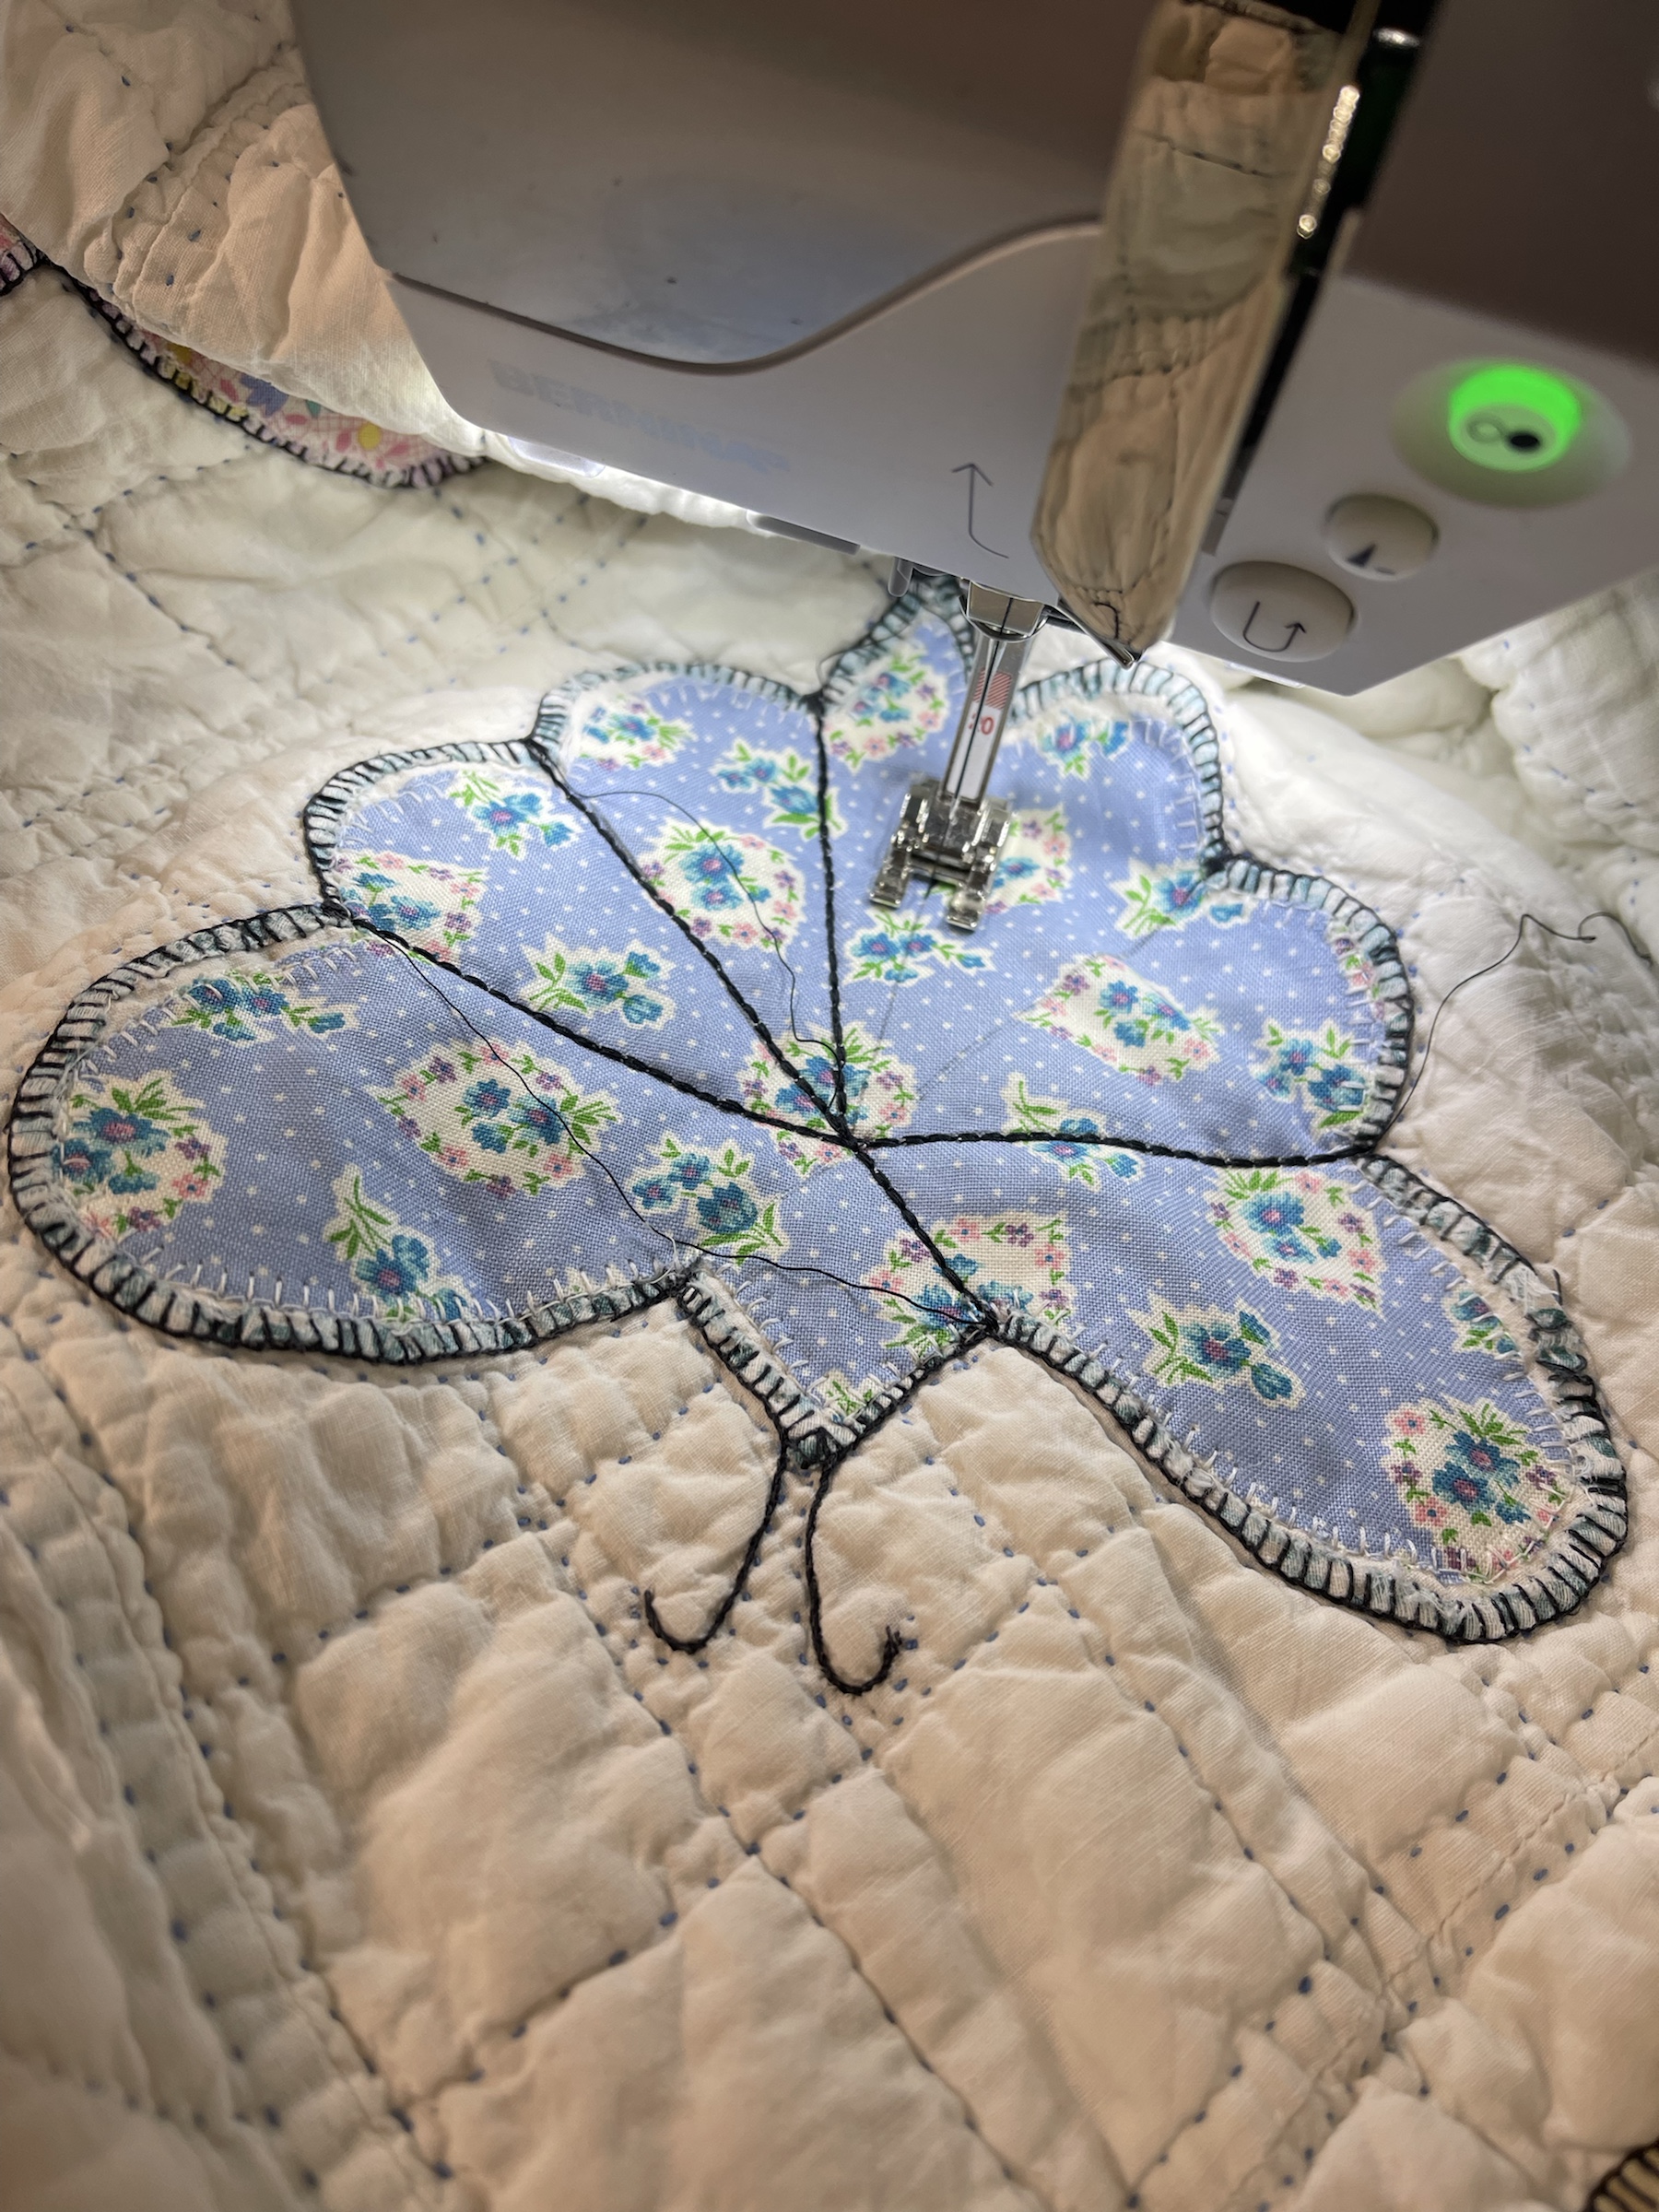
Do you see that where I have left the original hand applique stitching intact? I positioned the new butterfly in place and with a white thread machine appliqued the turned edges.
Look at the above and below pics. Would you have readily noticed this technique if I hadn’t pointed it out? If I can achieve an acceptable look by machine I’ll do it every time! I marked the stitching lines with a black Pilot brand Frixion Pen.
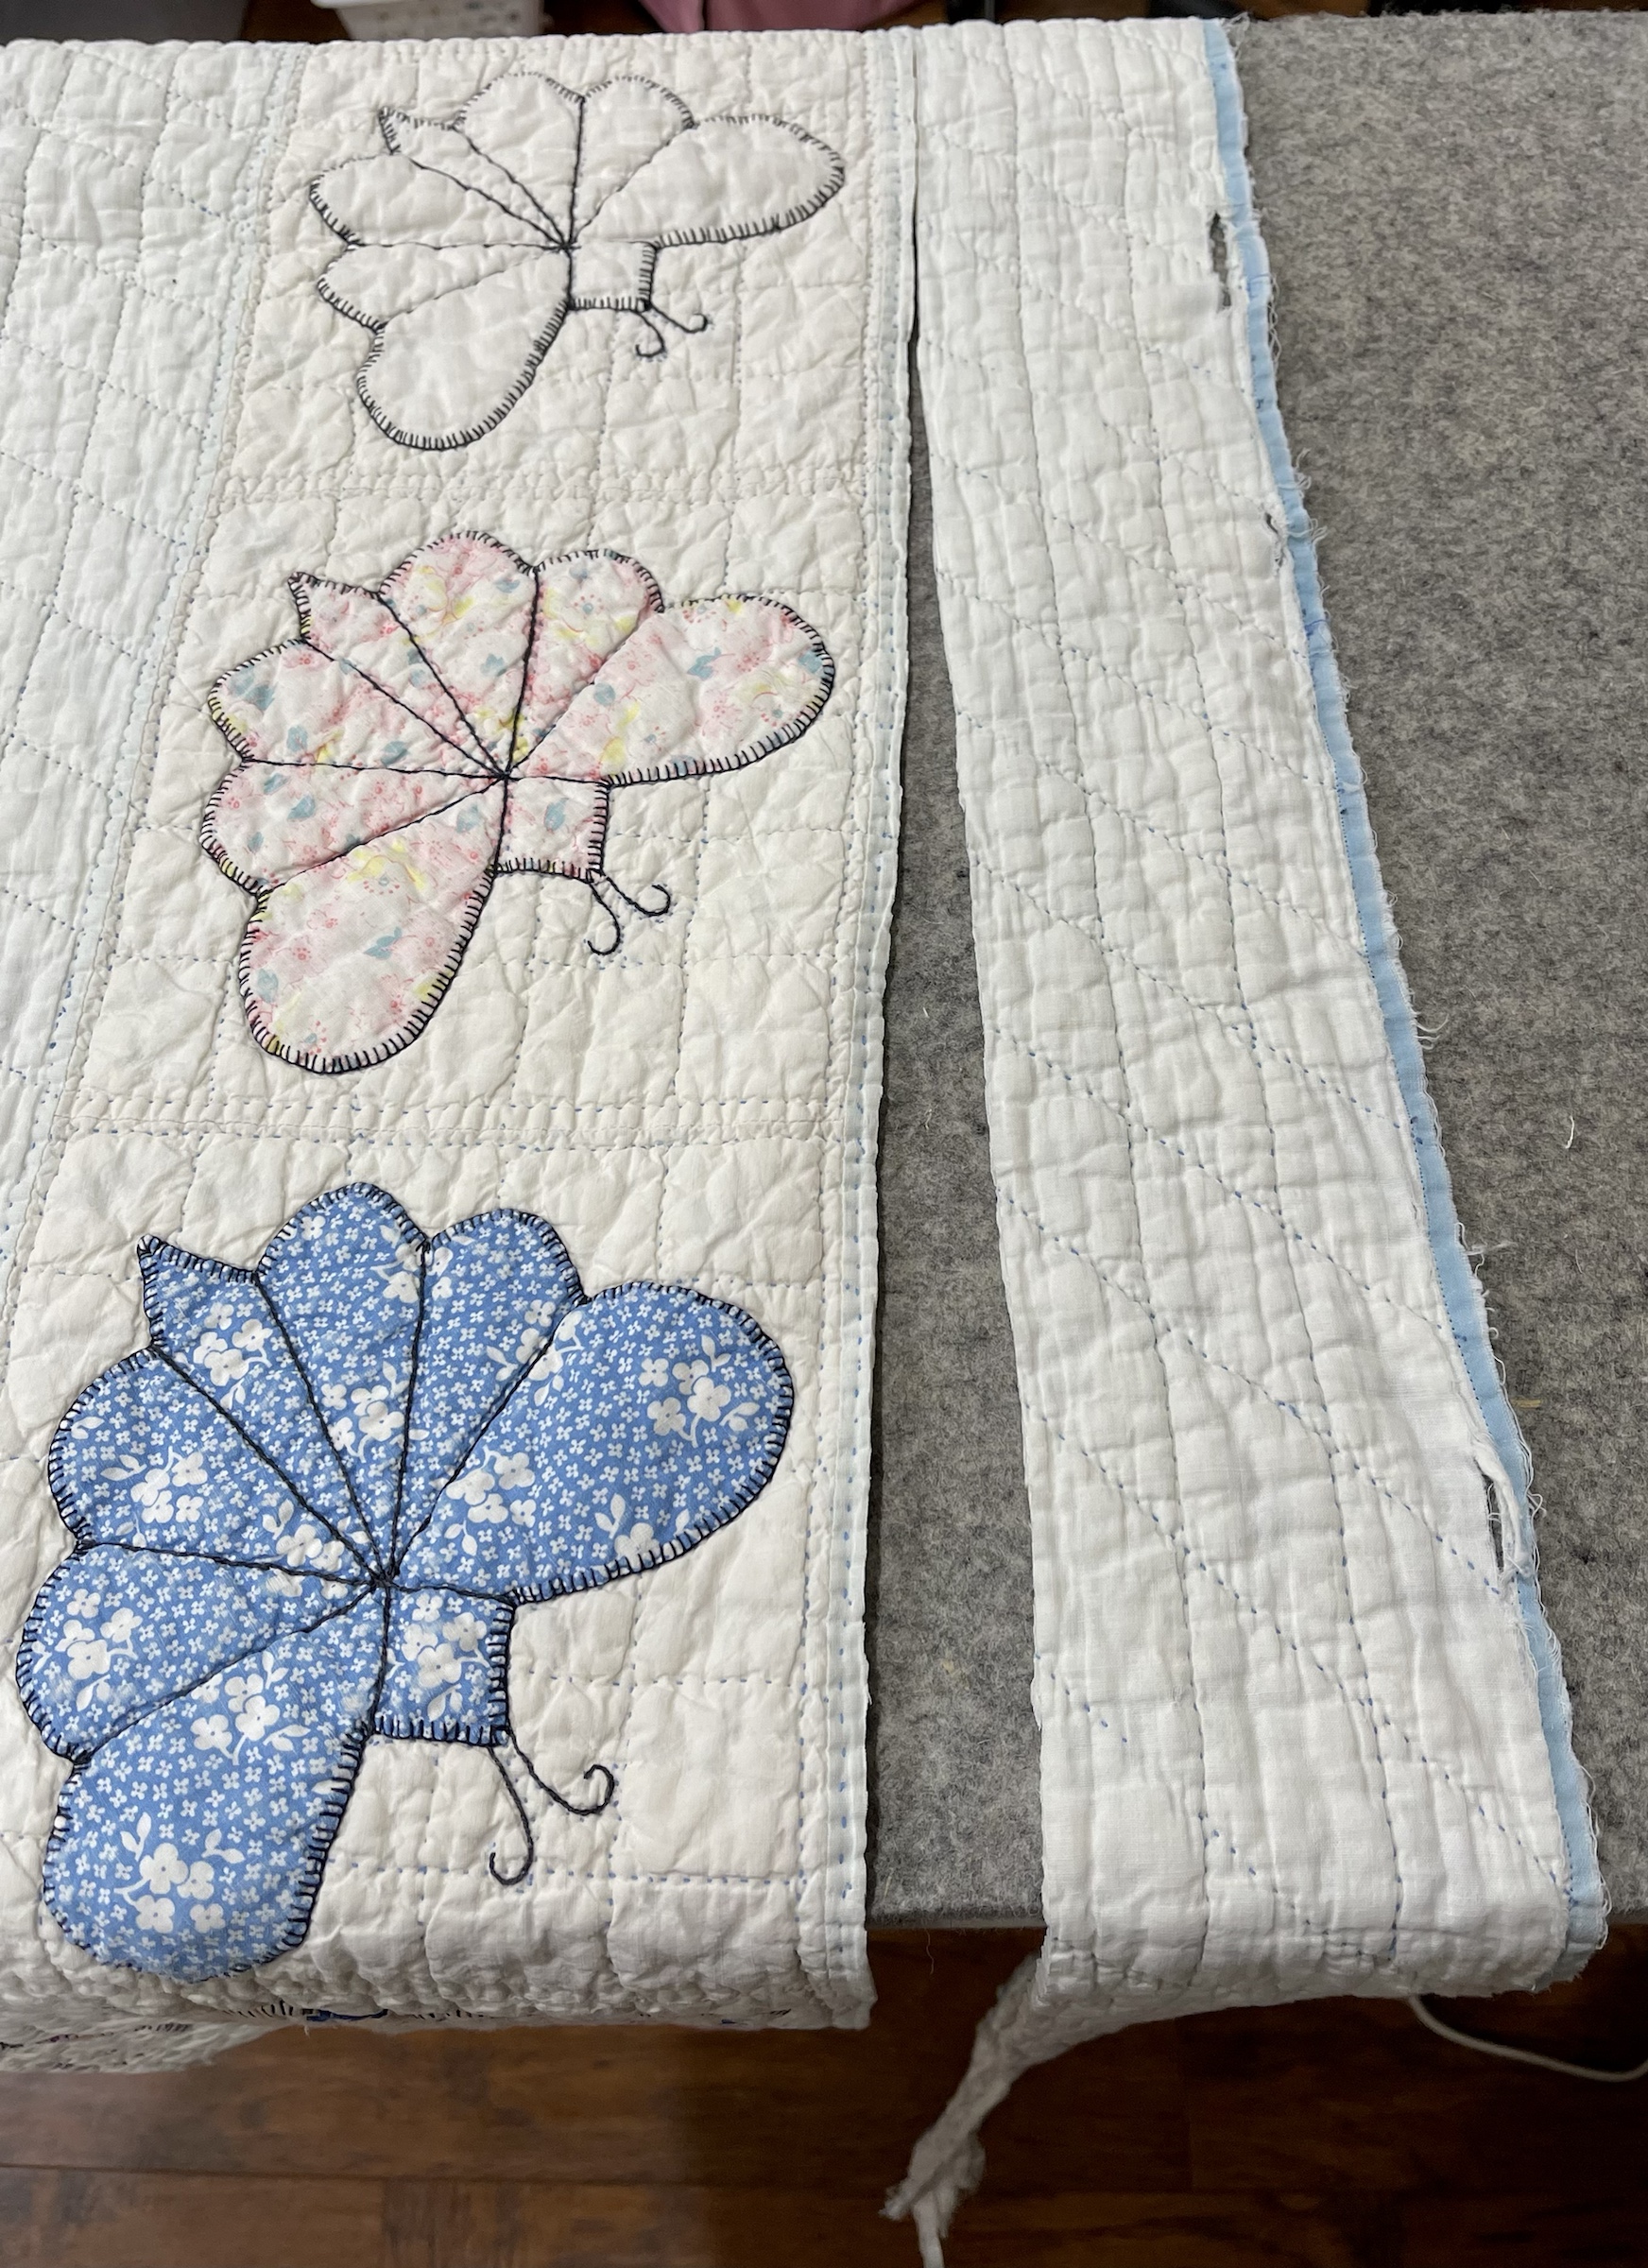
My newly dressed blue butterfly is finished but how did I do the straight interior lines? By machine!
I bought a spool of 30 wt. black cotton sewing thread and used the triple stitch on my trusty Bernina 550. Remember the weight of thread increases as the numbers decrease. 40wt is generally regular sewing thread, 100wt is very thin…think silk. Check your machine manual, specifically the utility stitches, most machines come with a triple stitch. I purposely have white cotton thread in the bobbin and with a scrap piece of fabric folded into 4 layers, I stitch and slowly tightened the needle thread tension until a bit of the bobbin thread was pulled up, enough to give this machine stitch a “hand done” look.
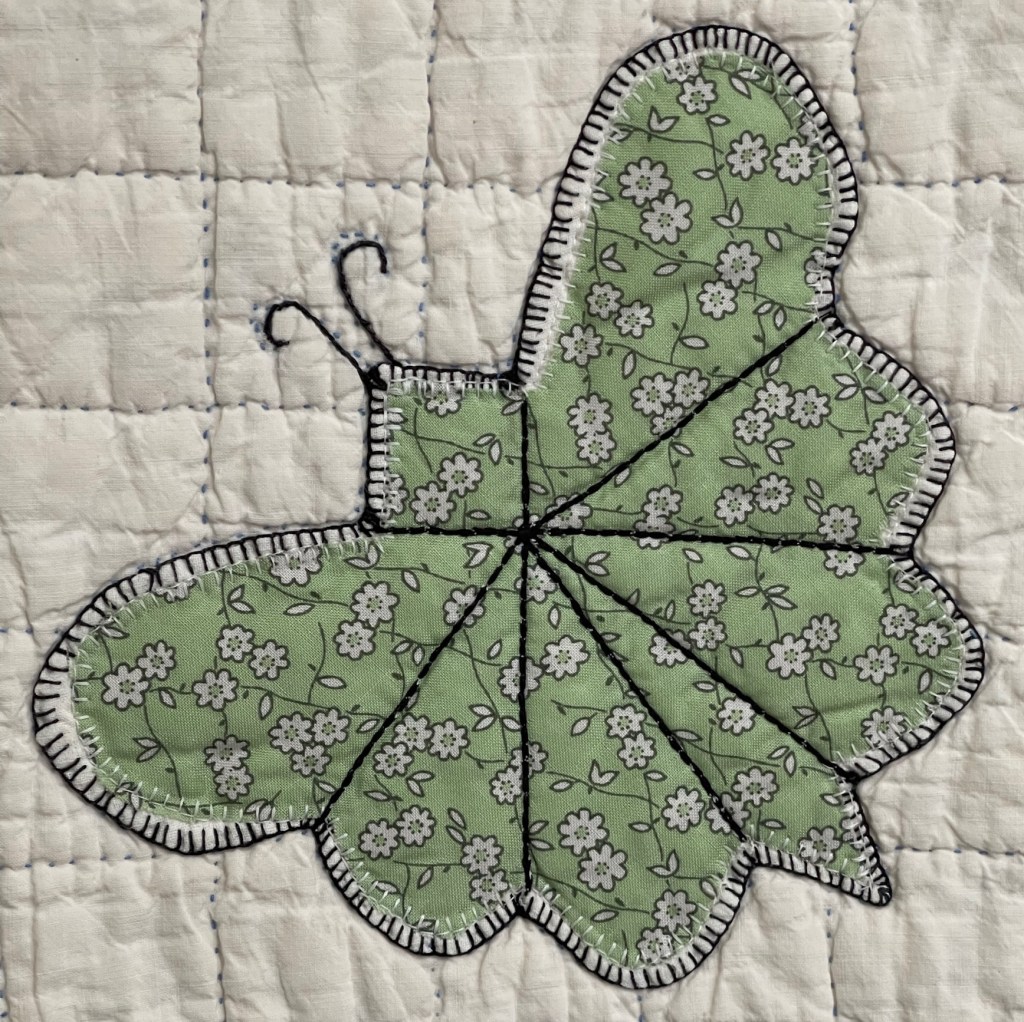
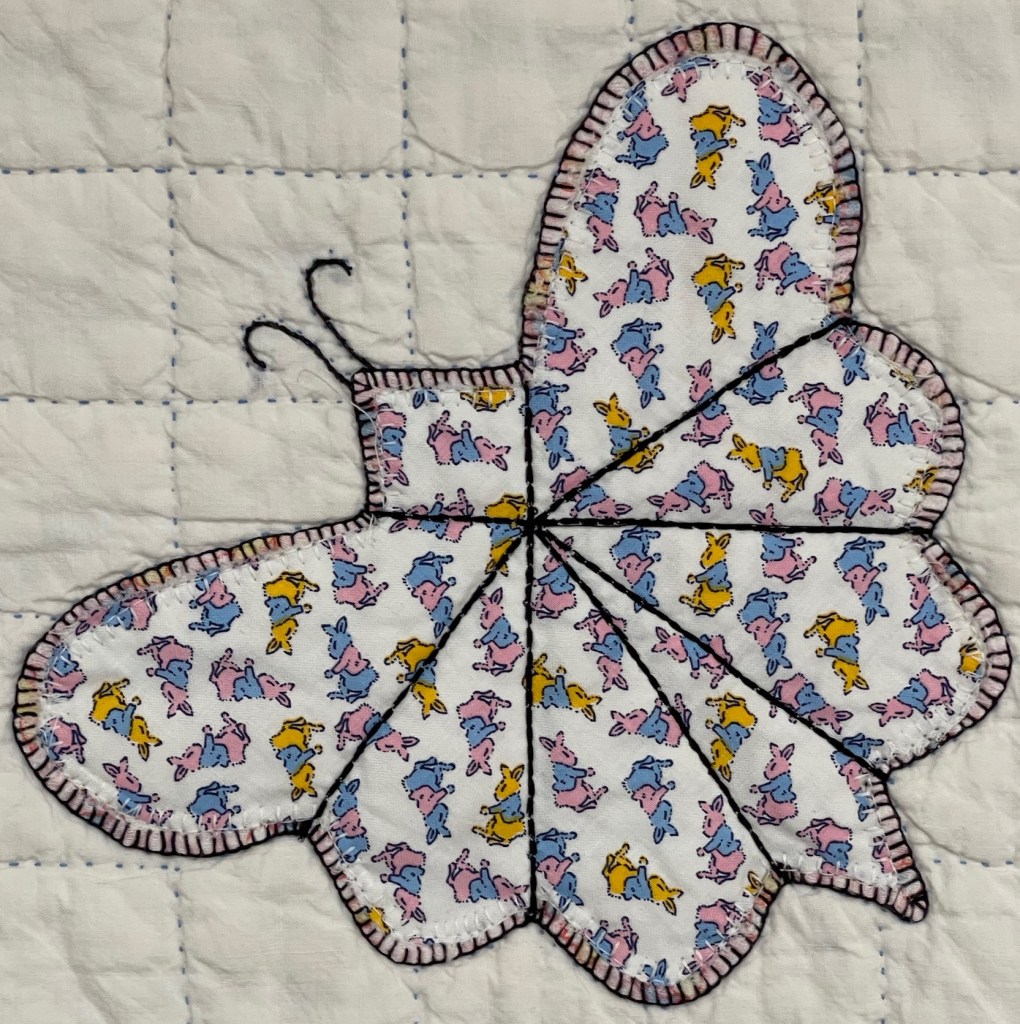
Another new.y dressed butterfly.
And another.
Don’t be afraid is leaving a bit of the old to work with the new.
Here I am auditioning two yellow fabrics, I love that I have lots of Aunt Grace by Moda reproductions to choose from!
Stay tuned, when I post again I will go into detail about all the embellishing that happened to achieve the look of the first picture way above at the top. Such fun!!
Blessings to all and happy quilting, Rhonda
Ps: if you’re so inclined, scroll back a few days to March 10th and read my post about making quilt blocks for Ukrainian refugee children! Such a worthy cause! 💙💛
In the last blog post I talked about how 18 minutes of free motion quilting turned into 9 hours of “un-quilting”…
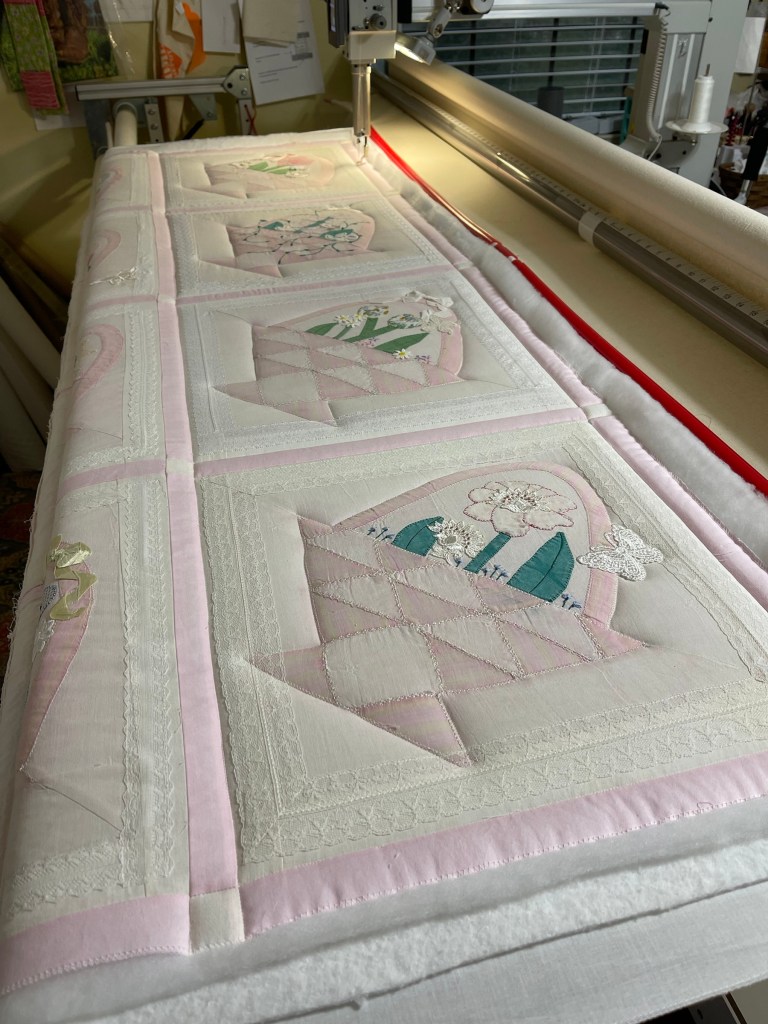
I loaded the quilt sandwich using two layers of batting, Hobbs white 80/20 with Hobbs Tuscany Poly-Down on top. I also purposely chose a light ivory thread for the needle and bobbin. I’ll update this info with thread manufacturer color and weight when I return home in a few days.
If you’ve followed me for very long you know I think quilted feathers are the solution to just about every quilt top loaded on my longarm. This quilt top was no exception. That is…until I was about 18 minutes in.
All of my basic Stitch-in-the-Ditch work was finished first.
I began quilting feathers in the top right block. Right away I knew I wasn’t thrilled with the look.
I felt that the quilting competed with the pieced and appliquéd block
I’m thinking to myself: I really don’t like this…but maybe I will like it with a bit more quilted…
Nope, I’m still not liking it.
Talk about distracting! I hate the quilting. Hate it! Hate it enough that my next step was to unload the quilt, hunt up a sharp seam ripper, find a good Acorn tv series to watch (but mostly listen to) and set about un-quilting.
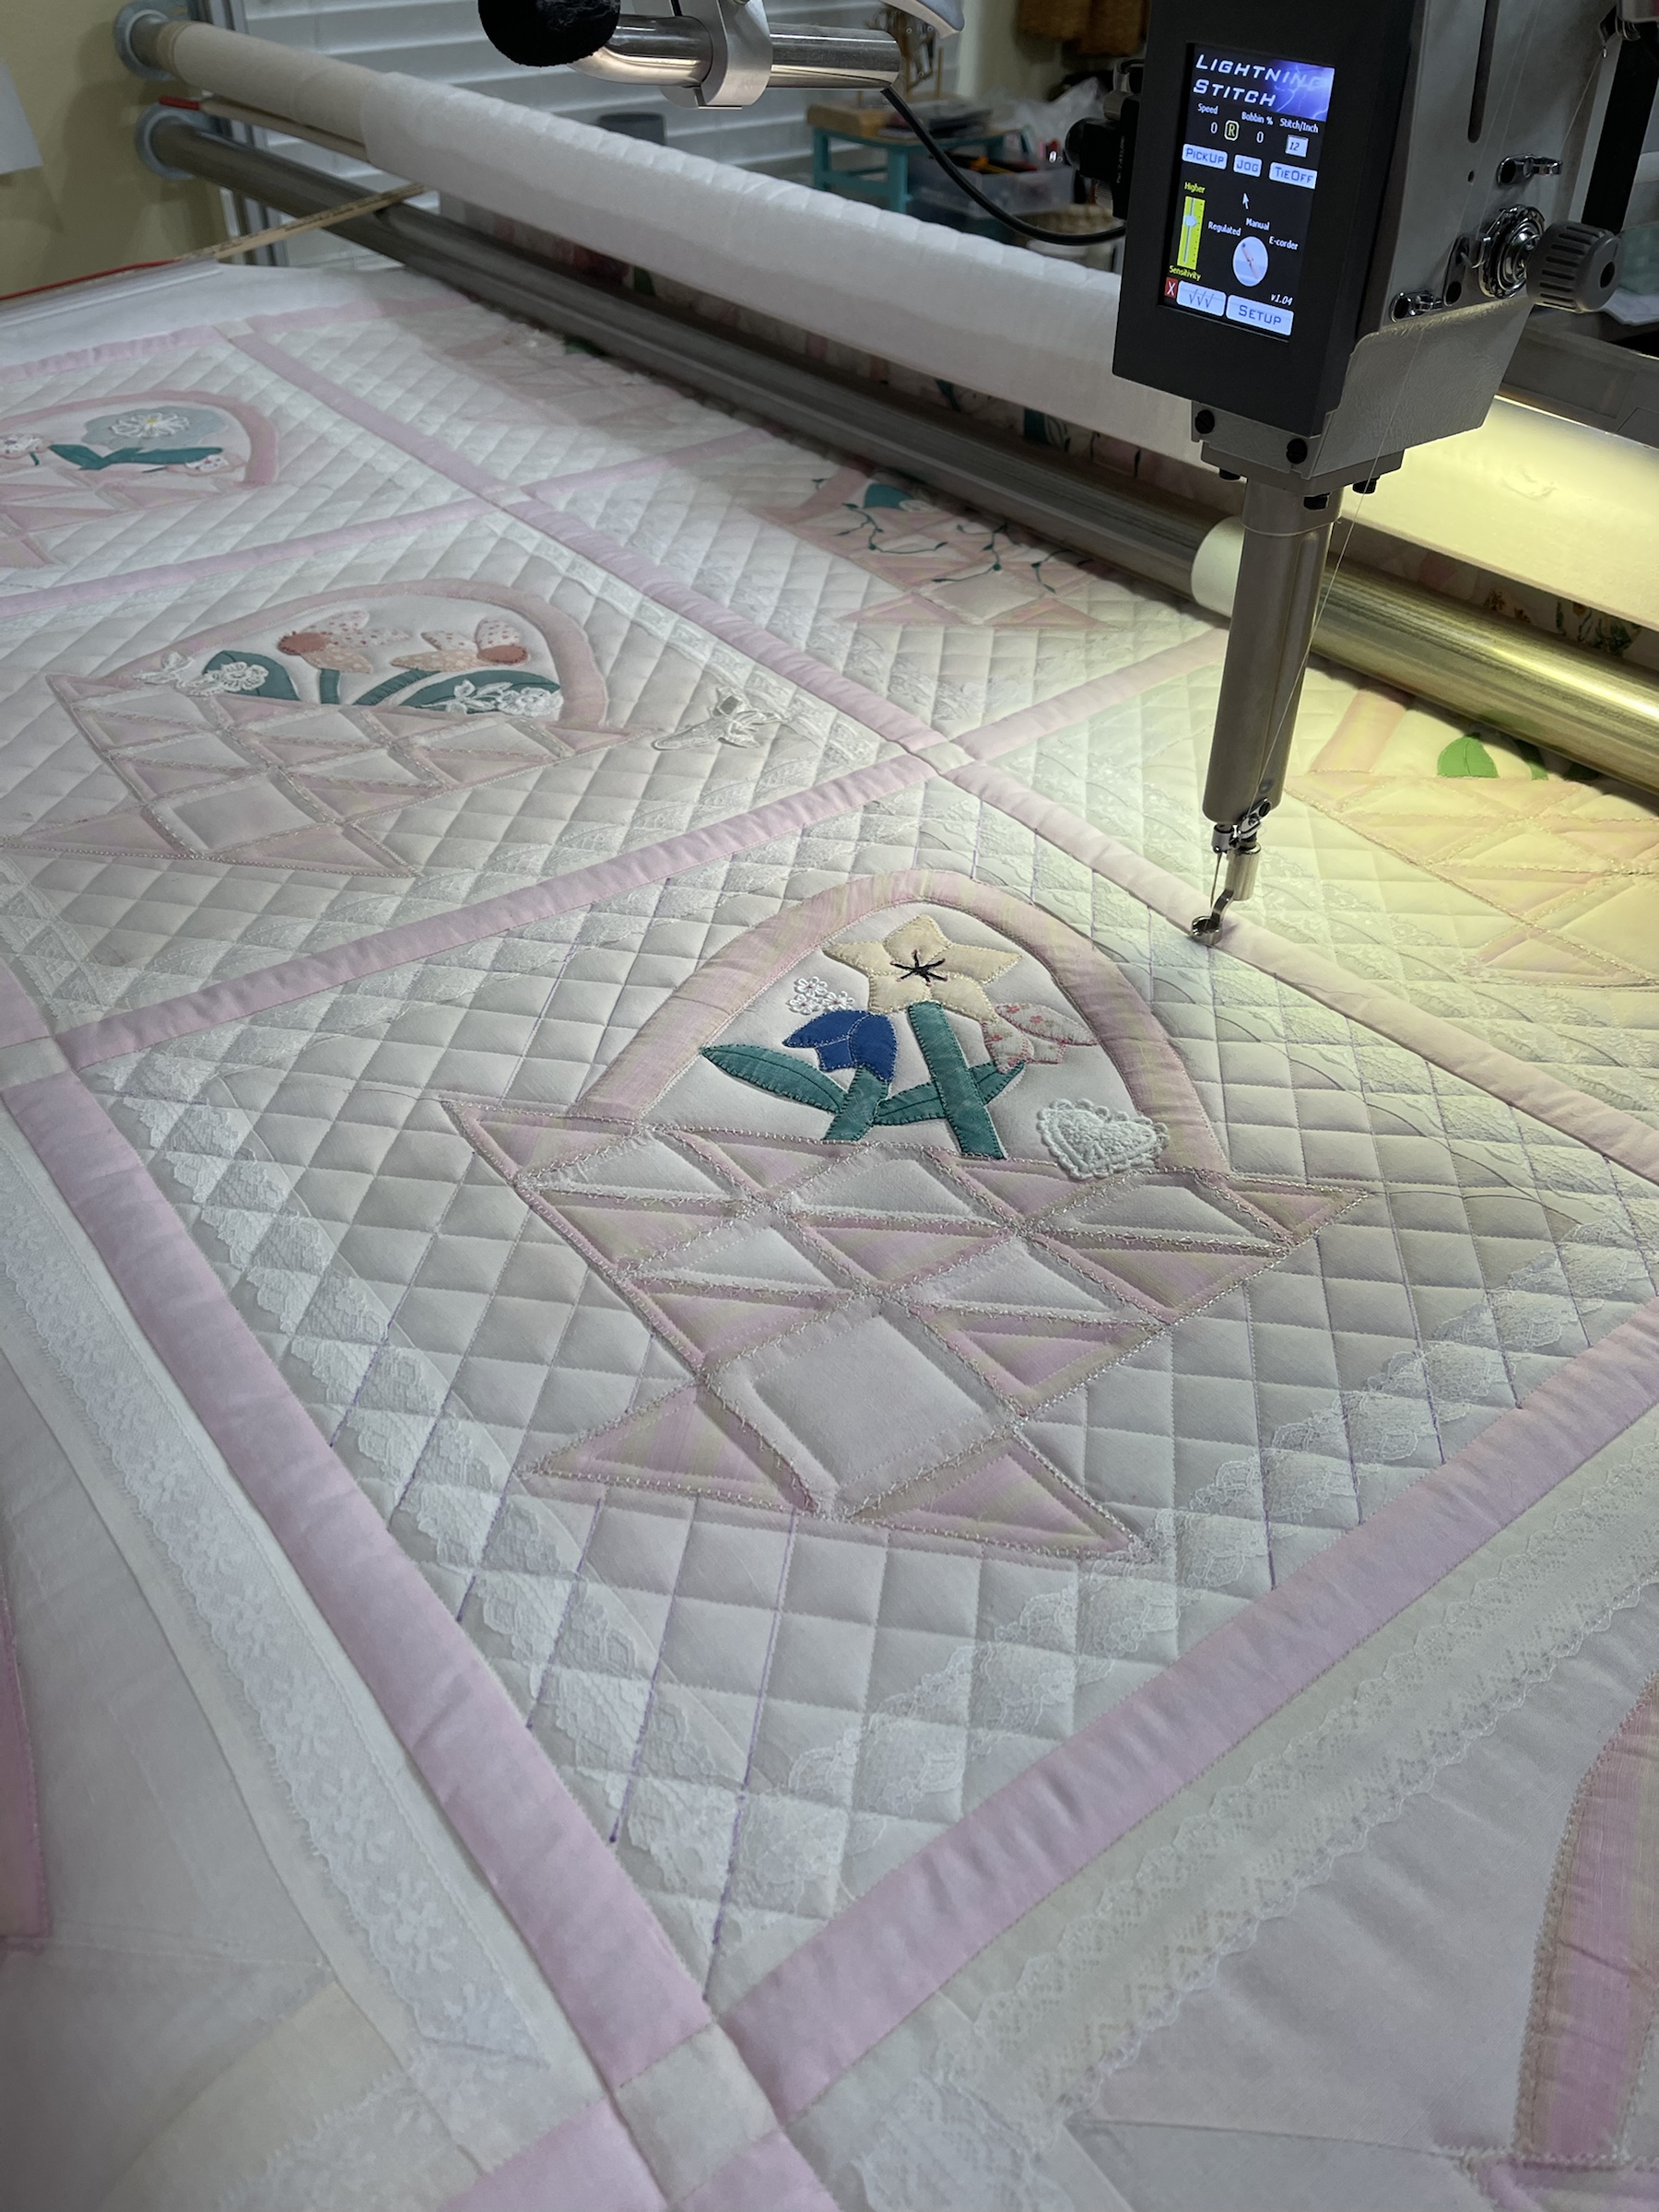
I figured I had 3, maybe 3.5 hours to get the task done…but no! 9 hours! I quilt Bump Back feathers. Bump Backs have lots and lots of stitching over top previous stitching.
Thank heavens I had my stitch regulator set to 12 instead of 14 stitches per inch!
And just let me add…see this lace? The lace was the reason I had to remove the quilt from the longarm. It was too risky to pick out the quilting stitches from the front side of the quilt. It was so easy to damage the lace by accident no matter how careful I was trying to be. ☹️
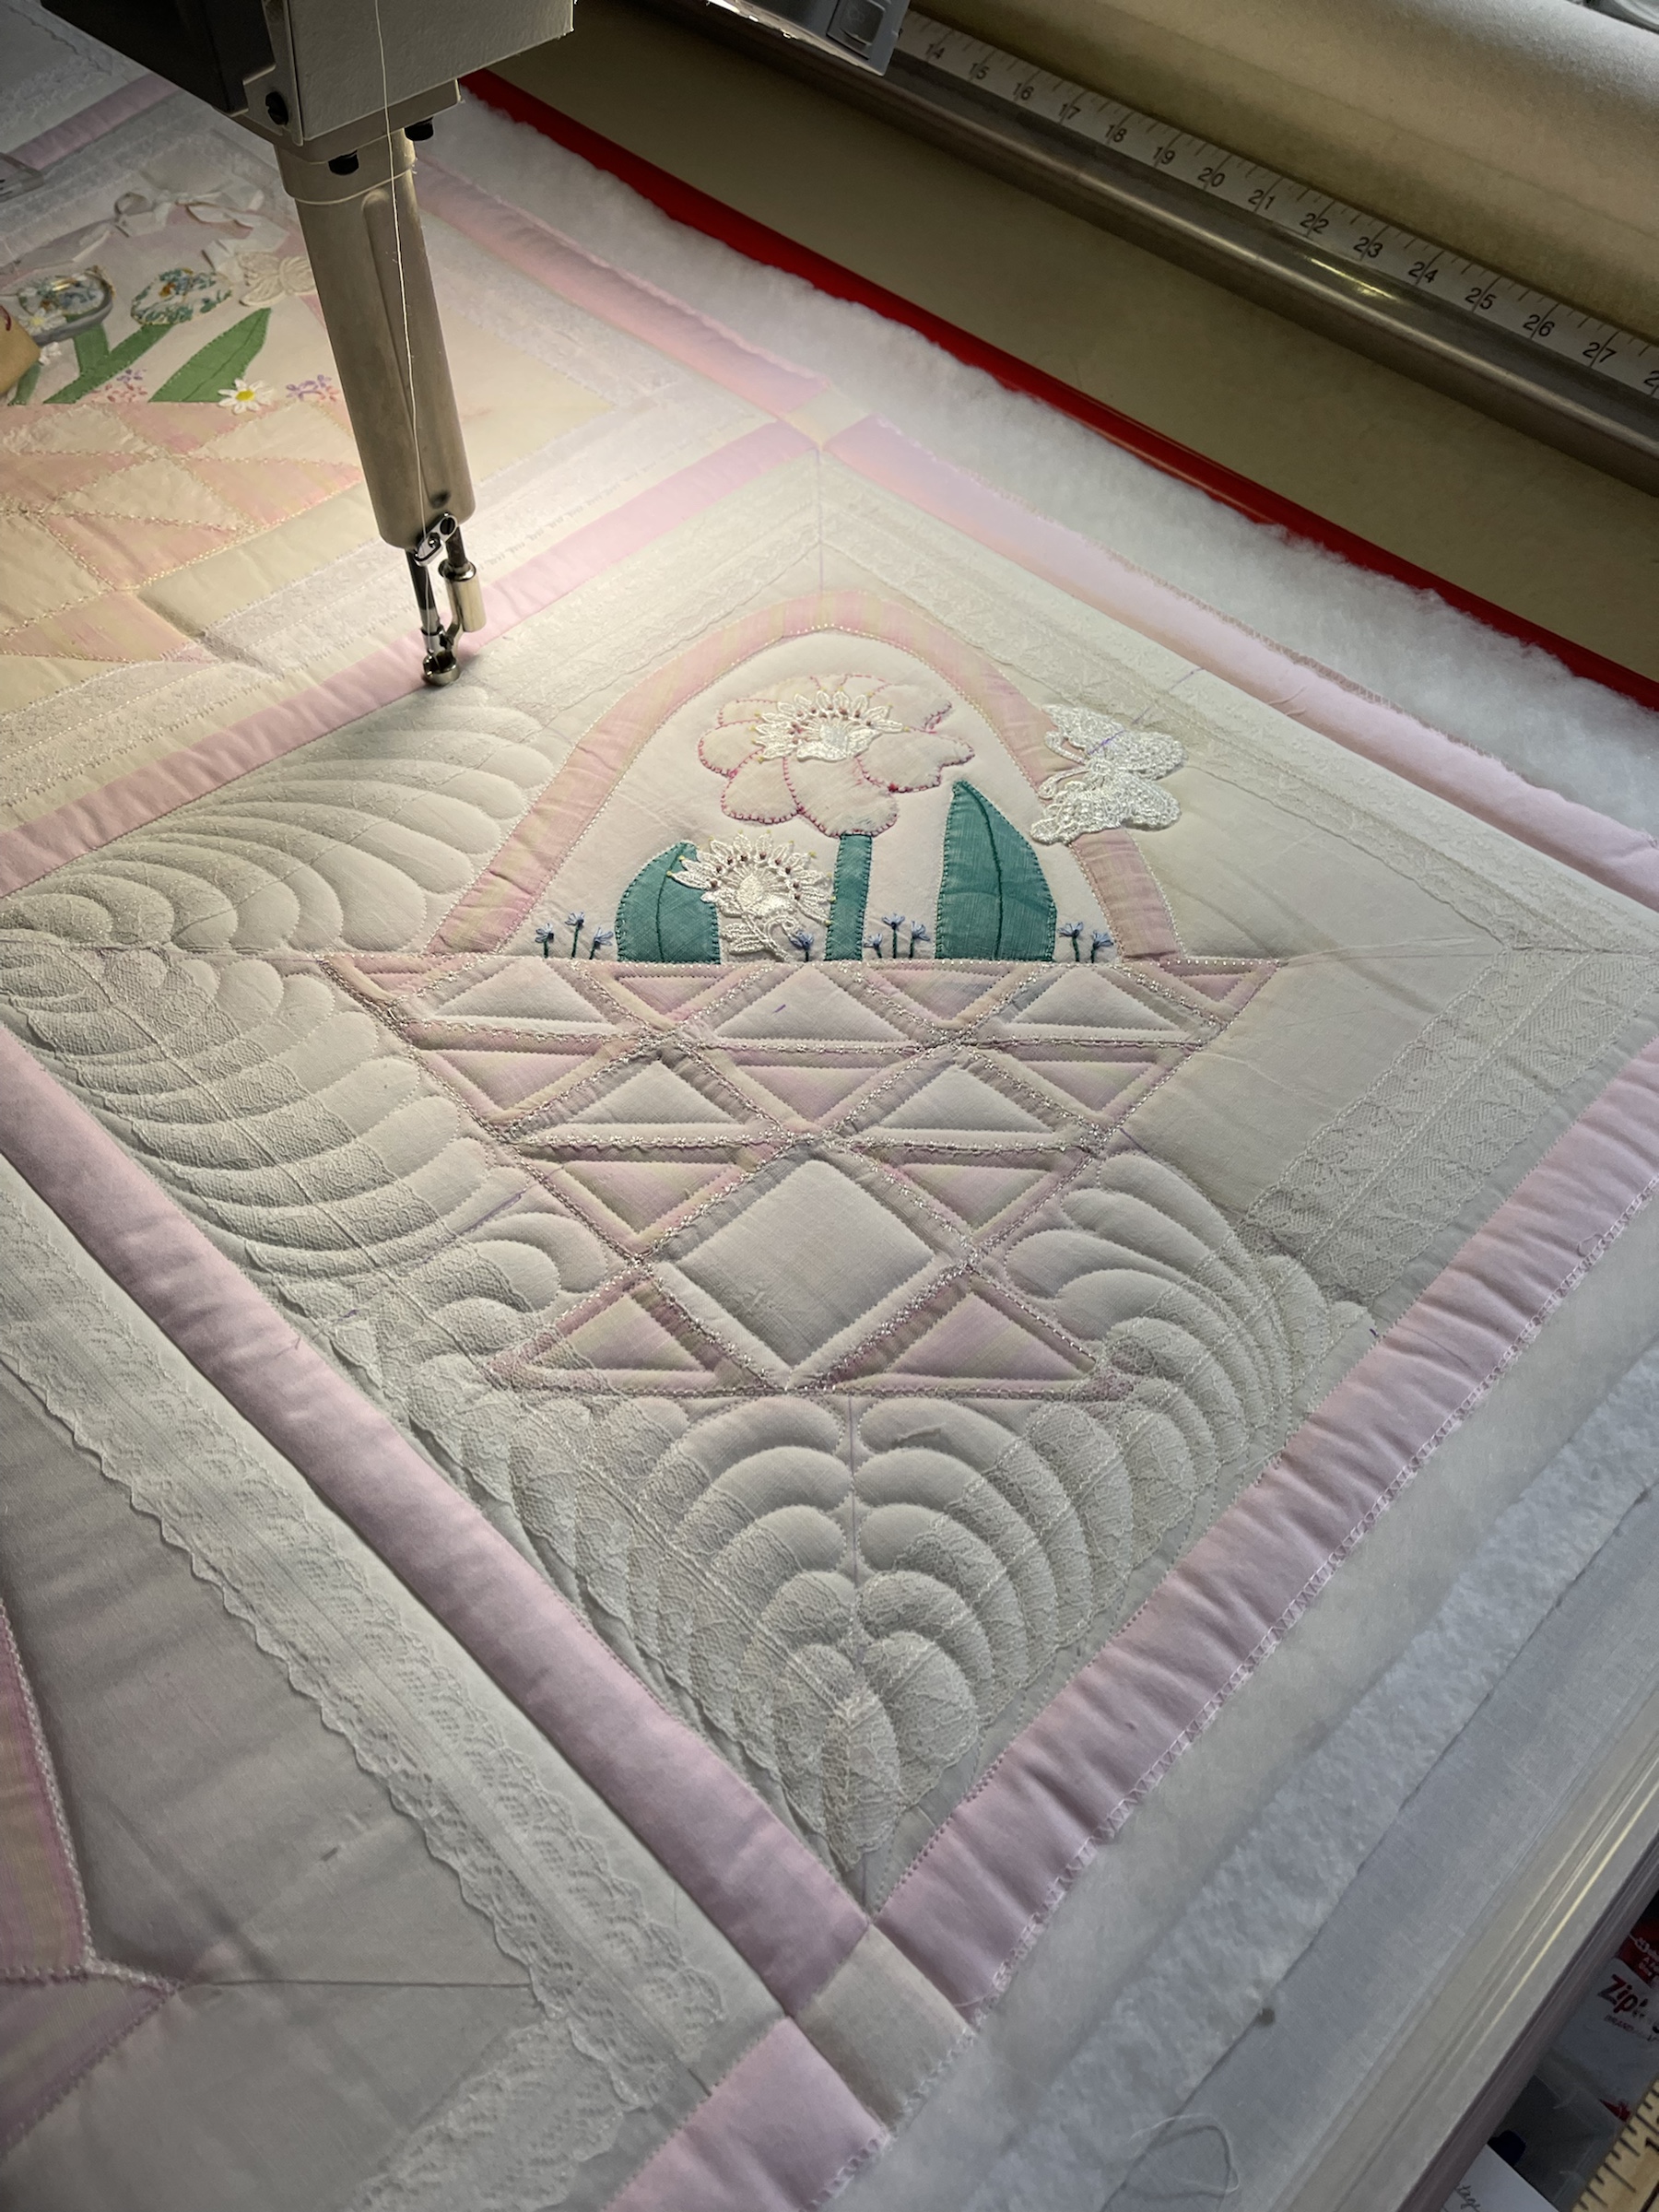
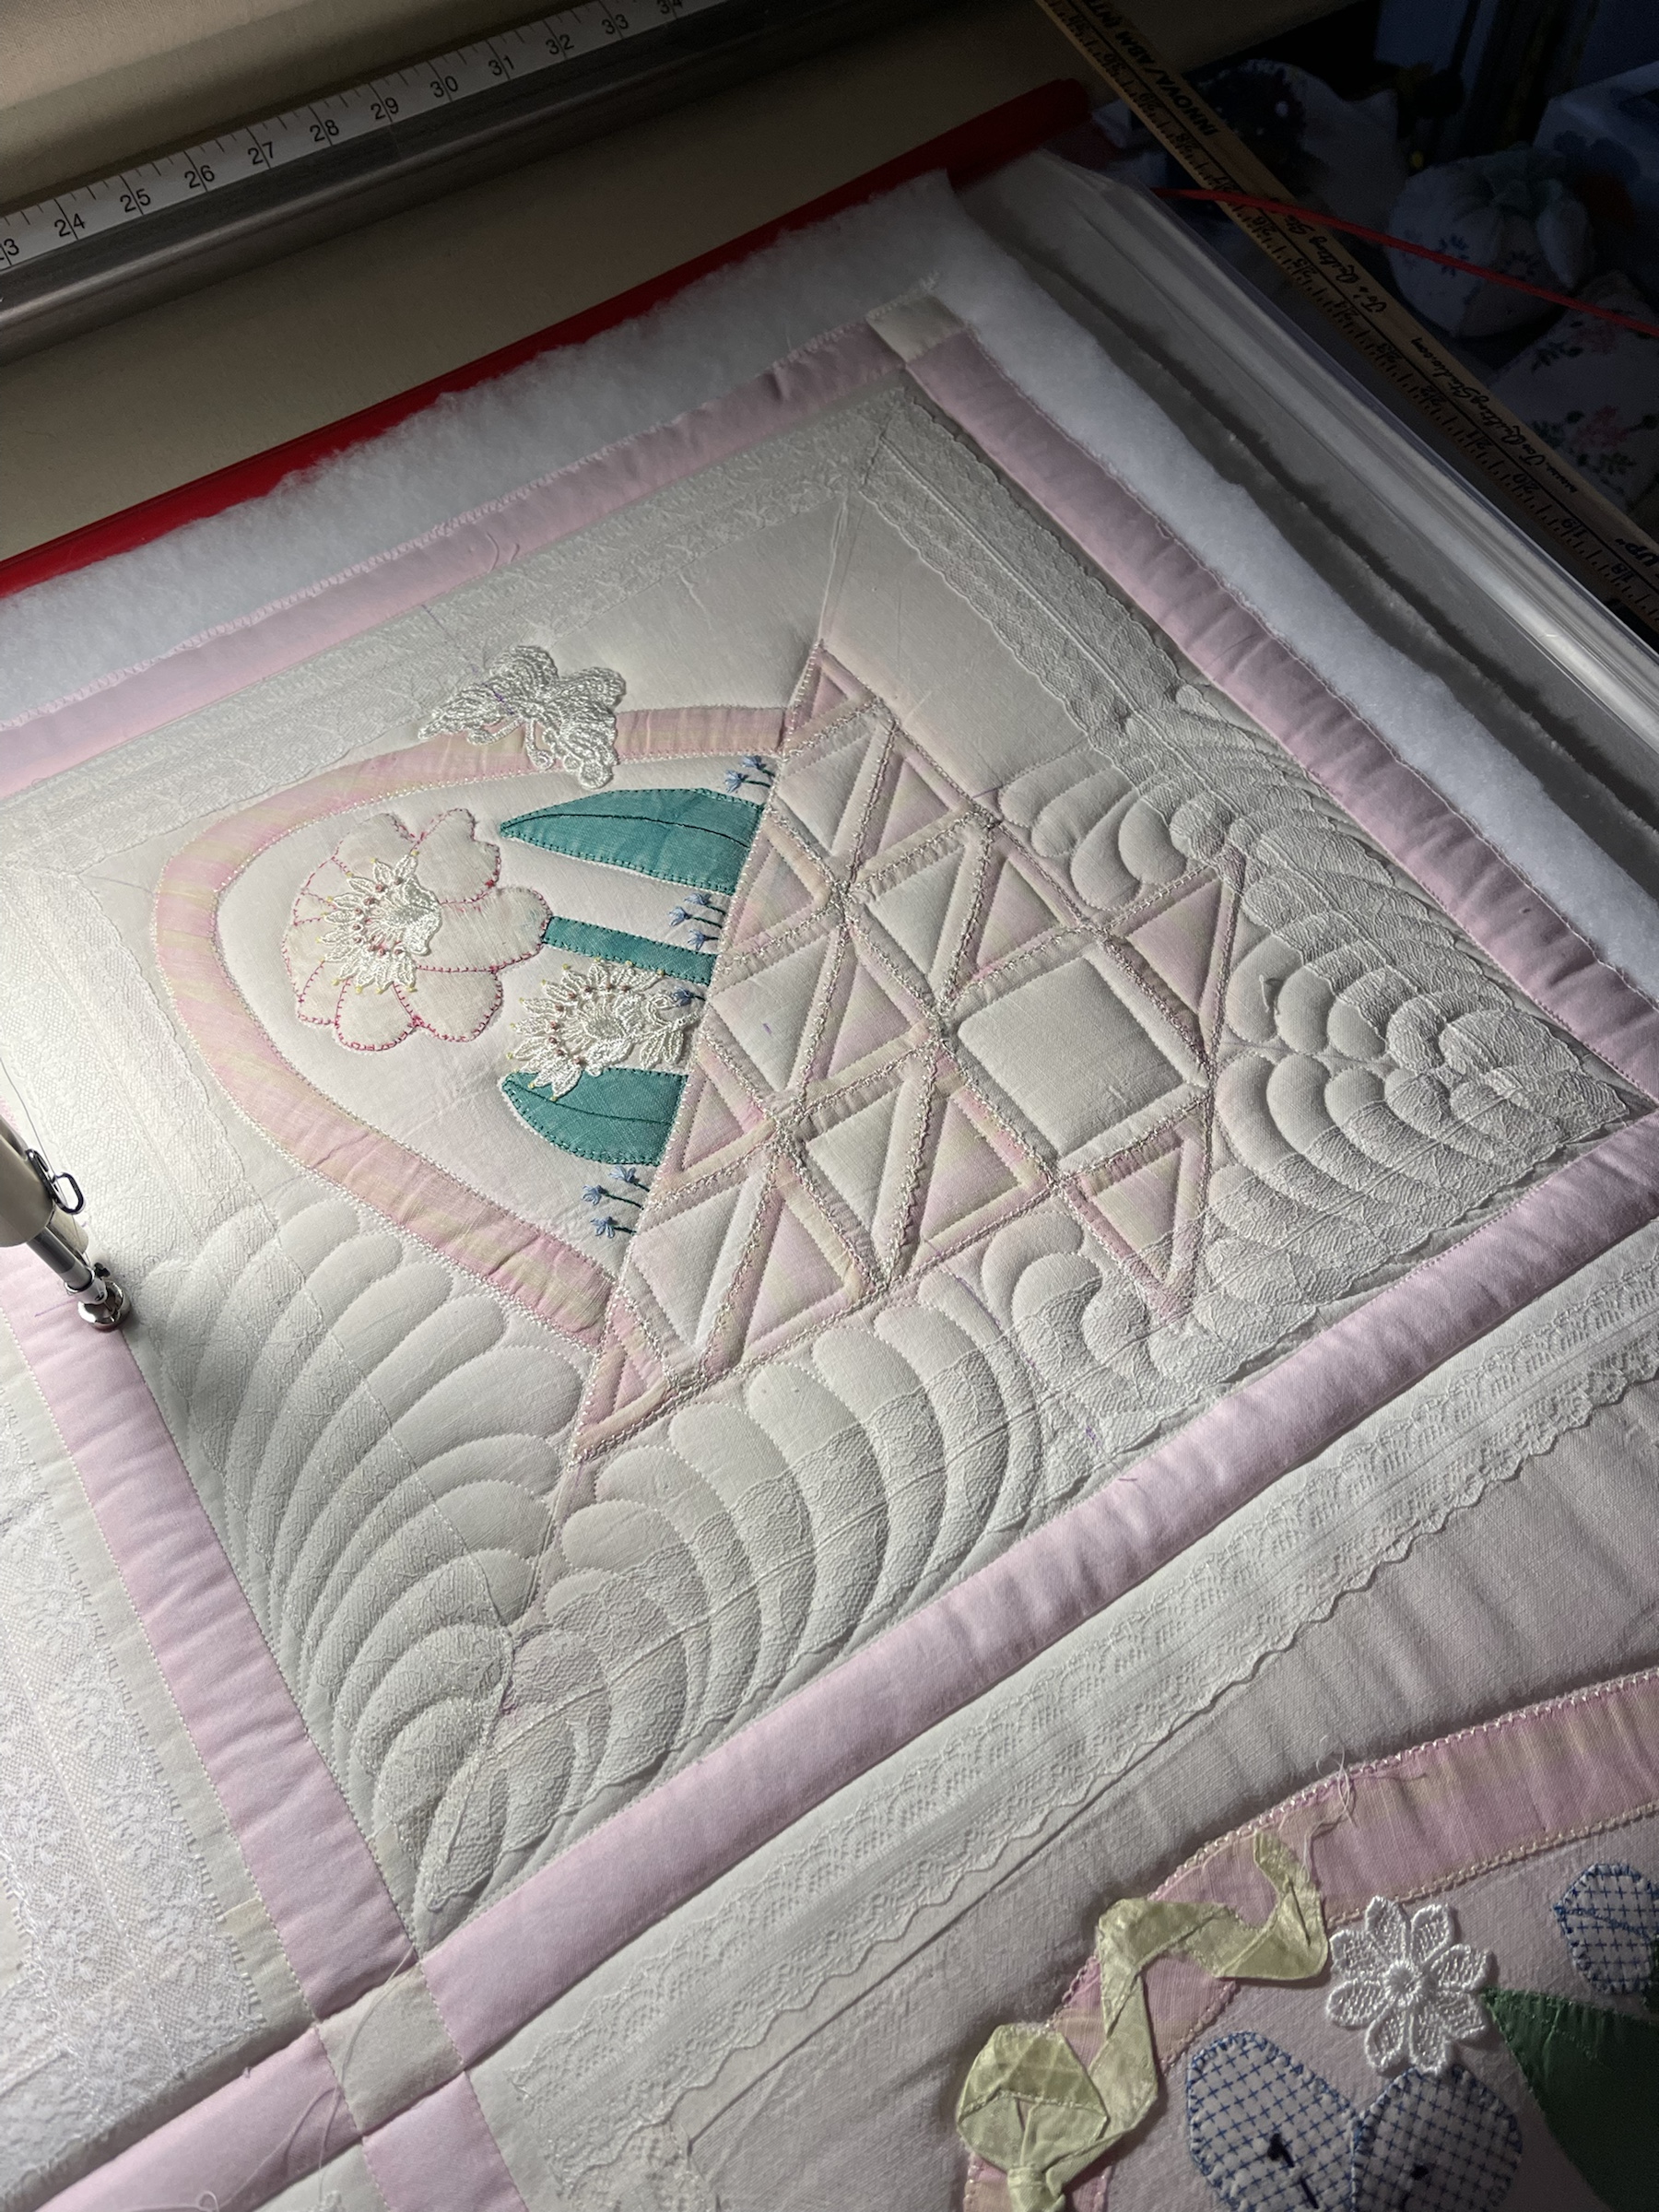
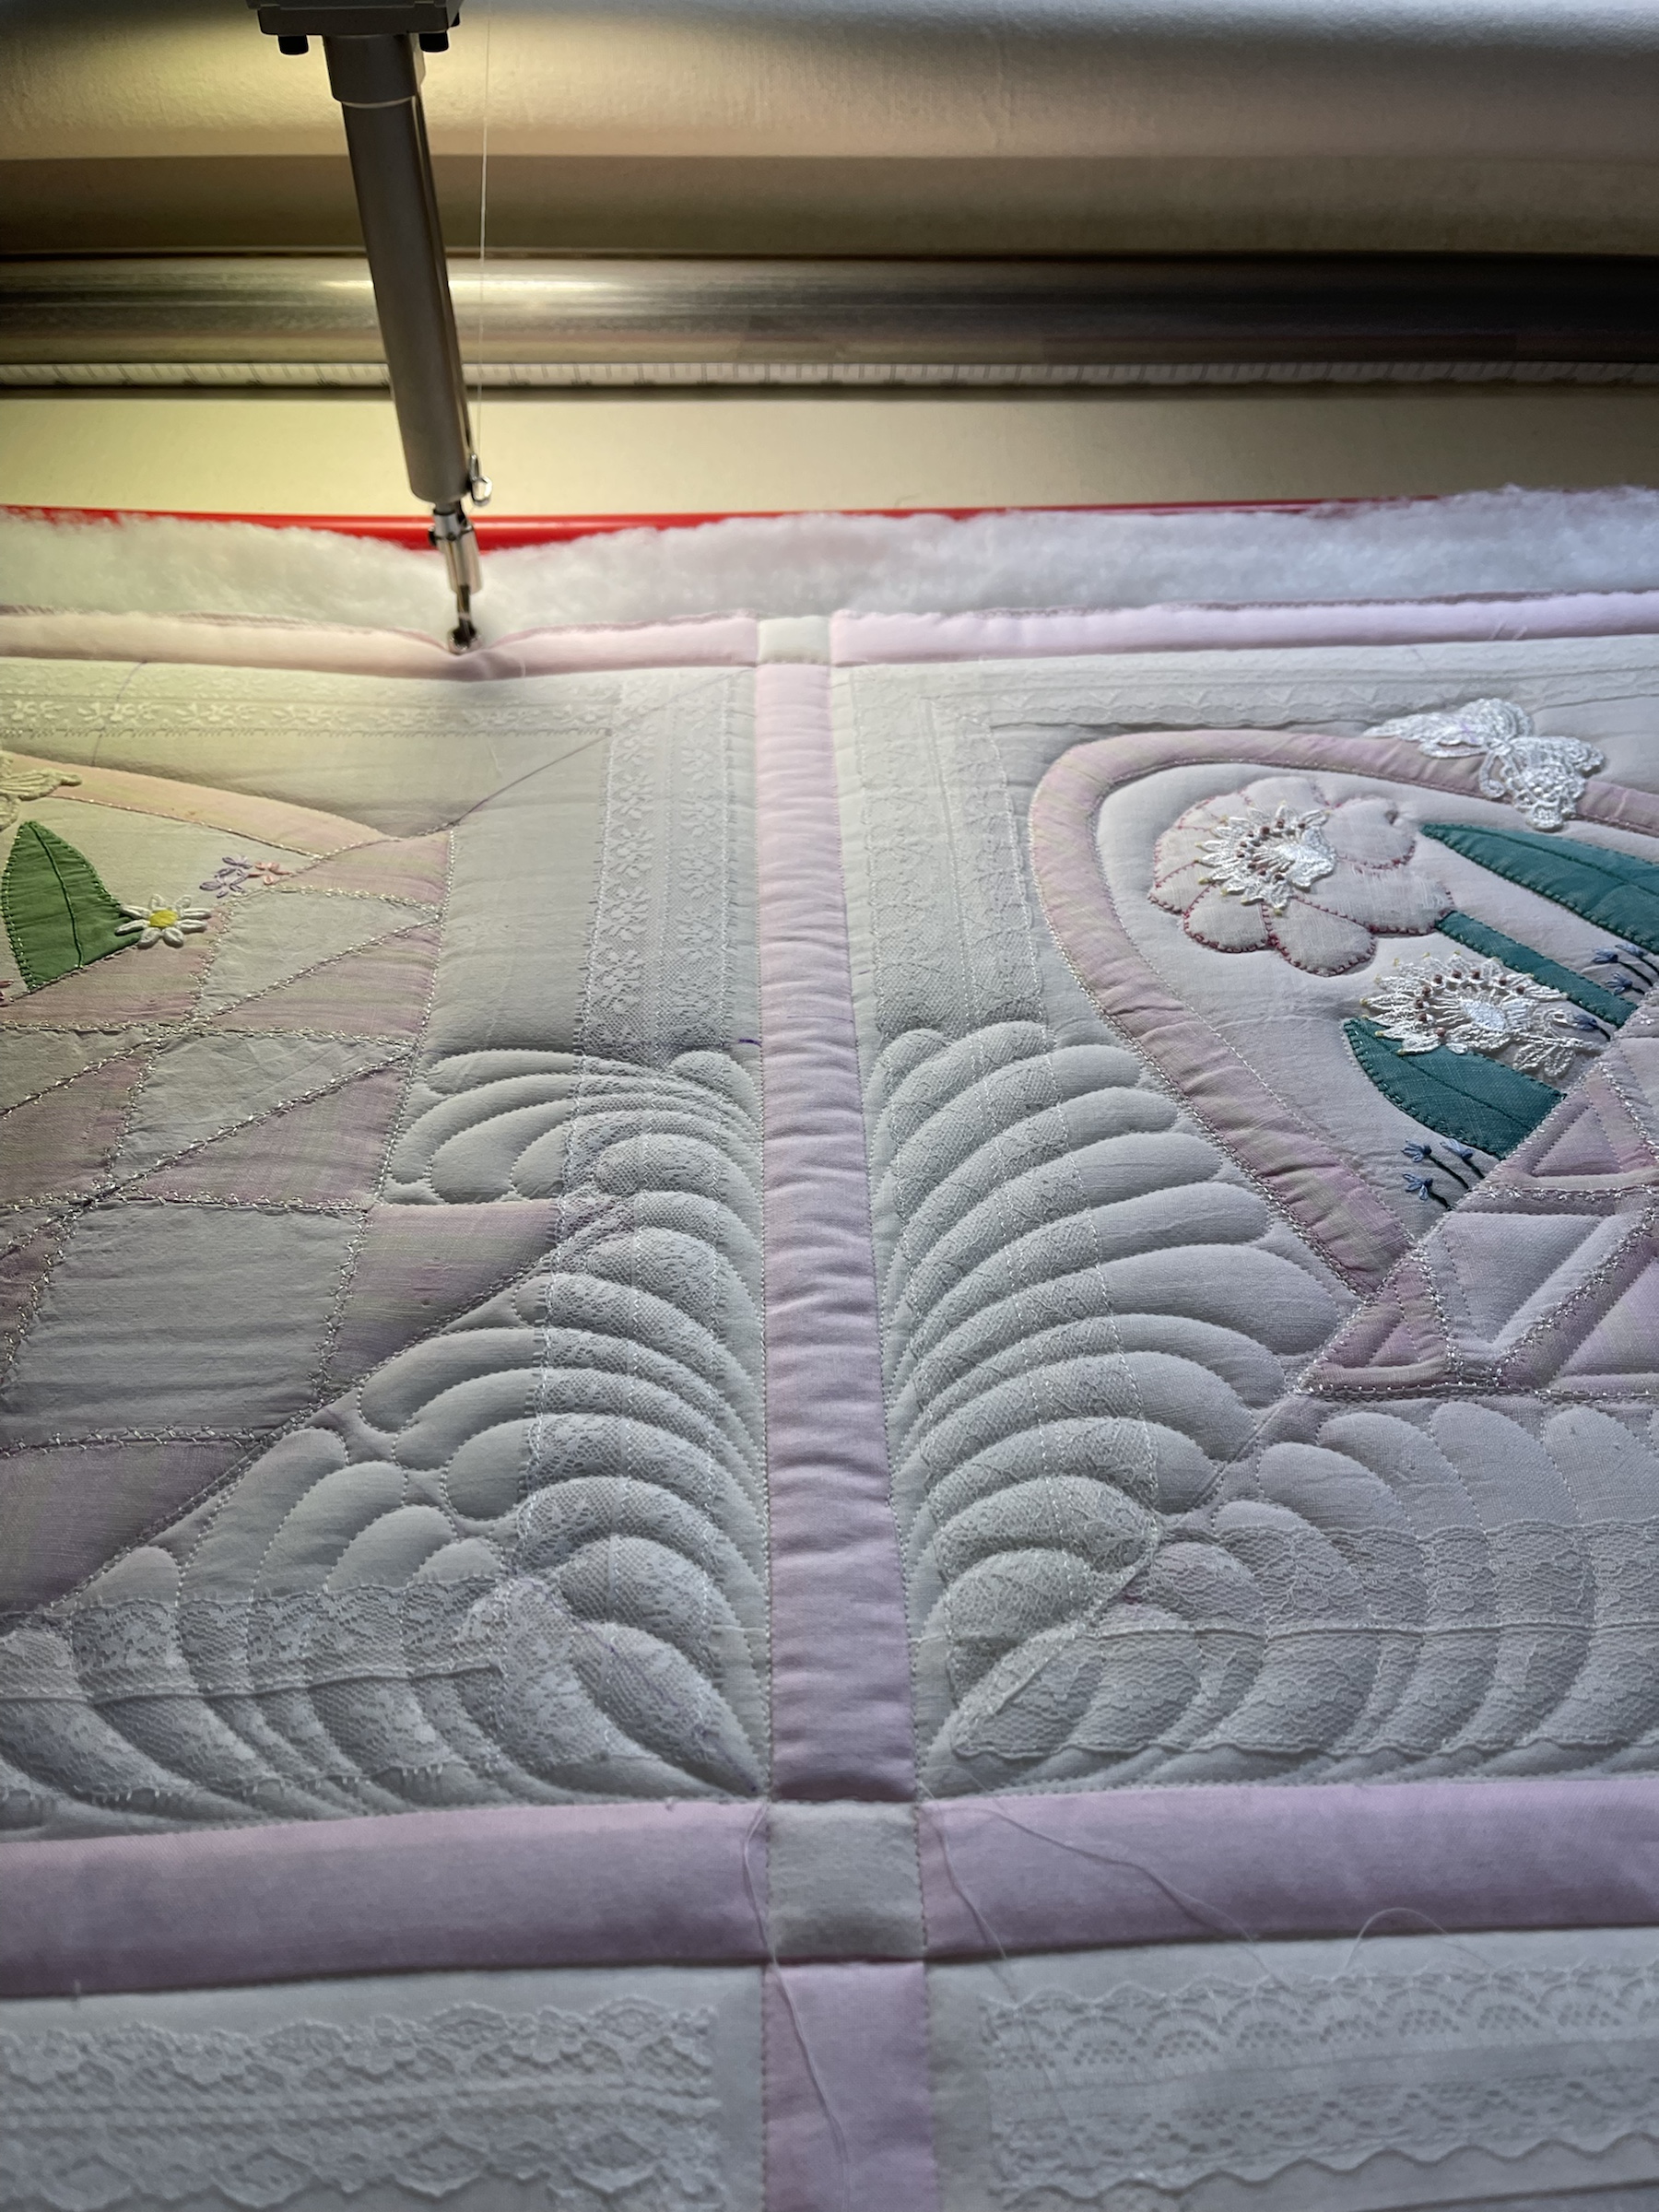
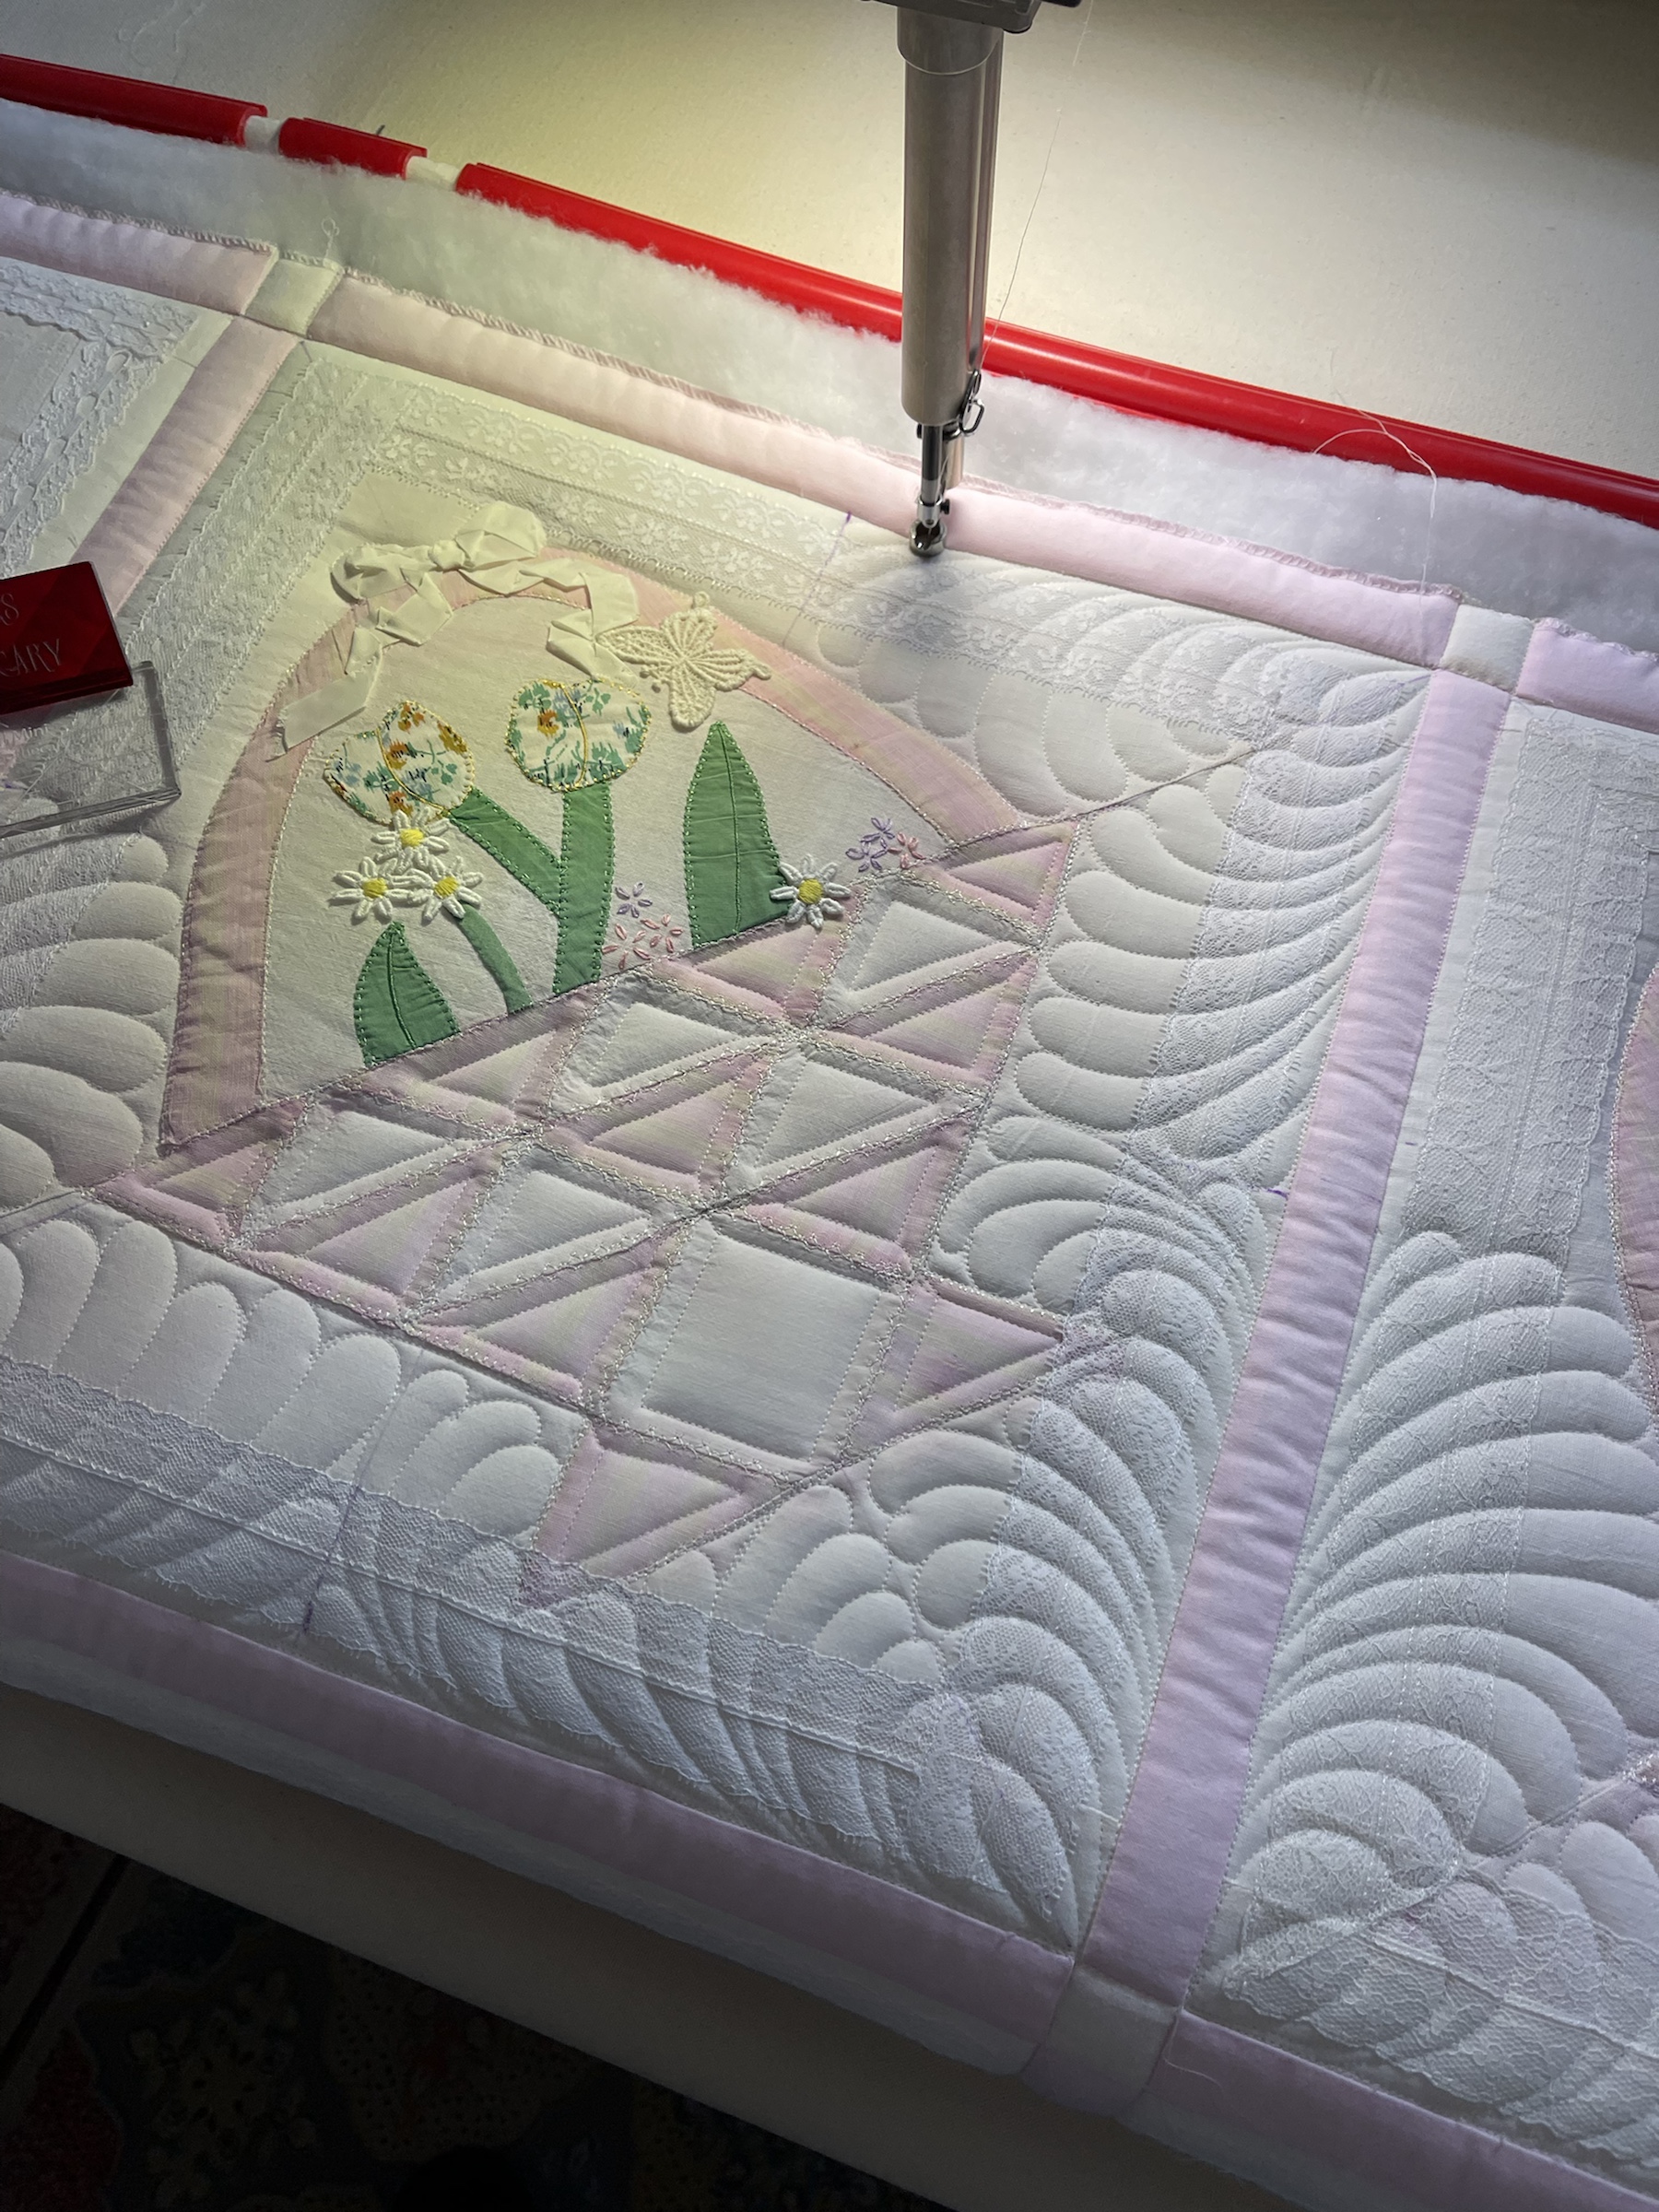
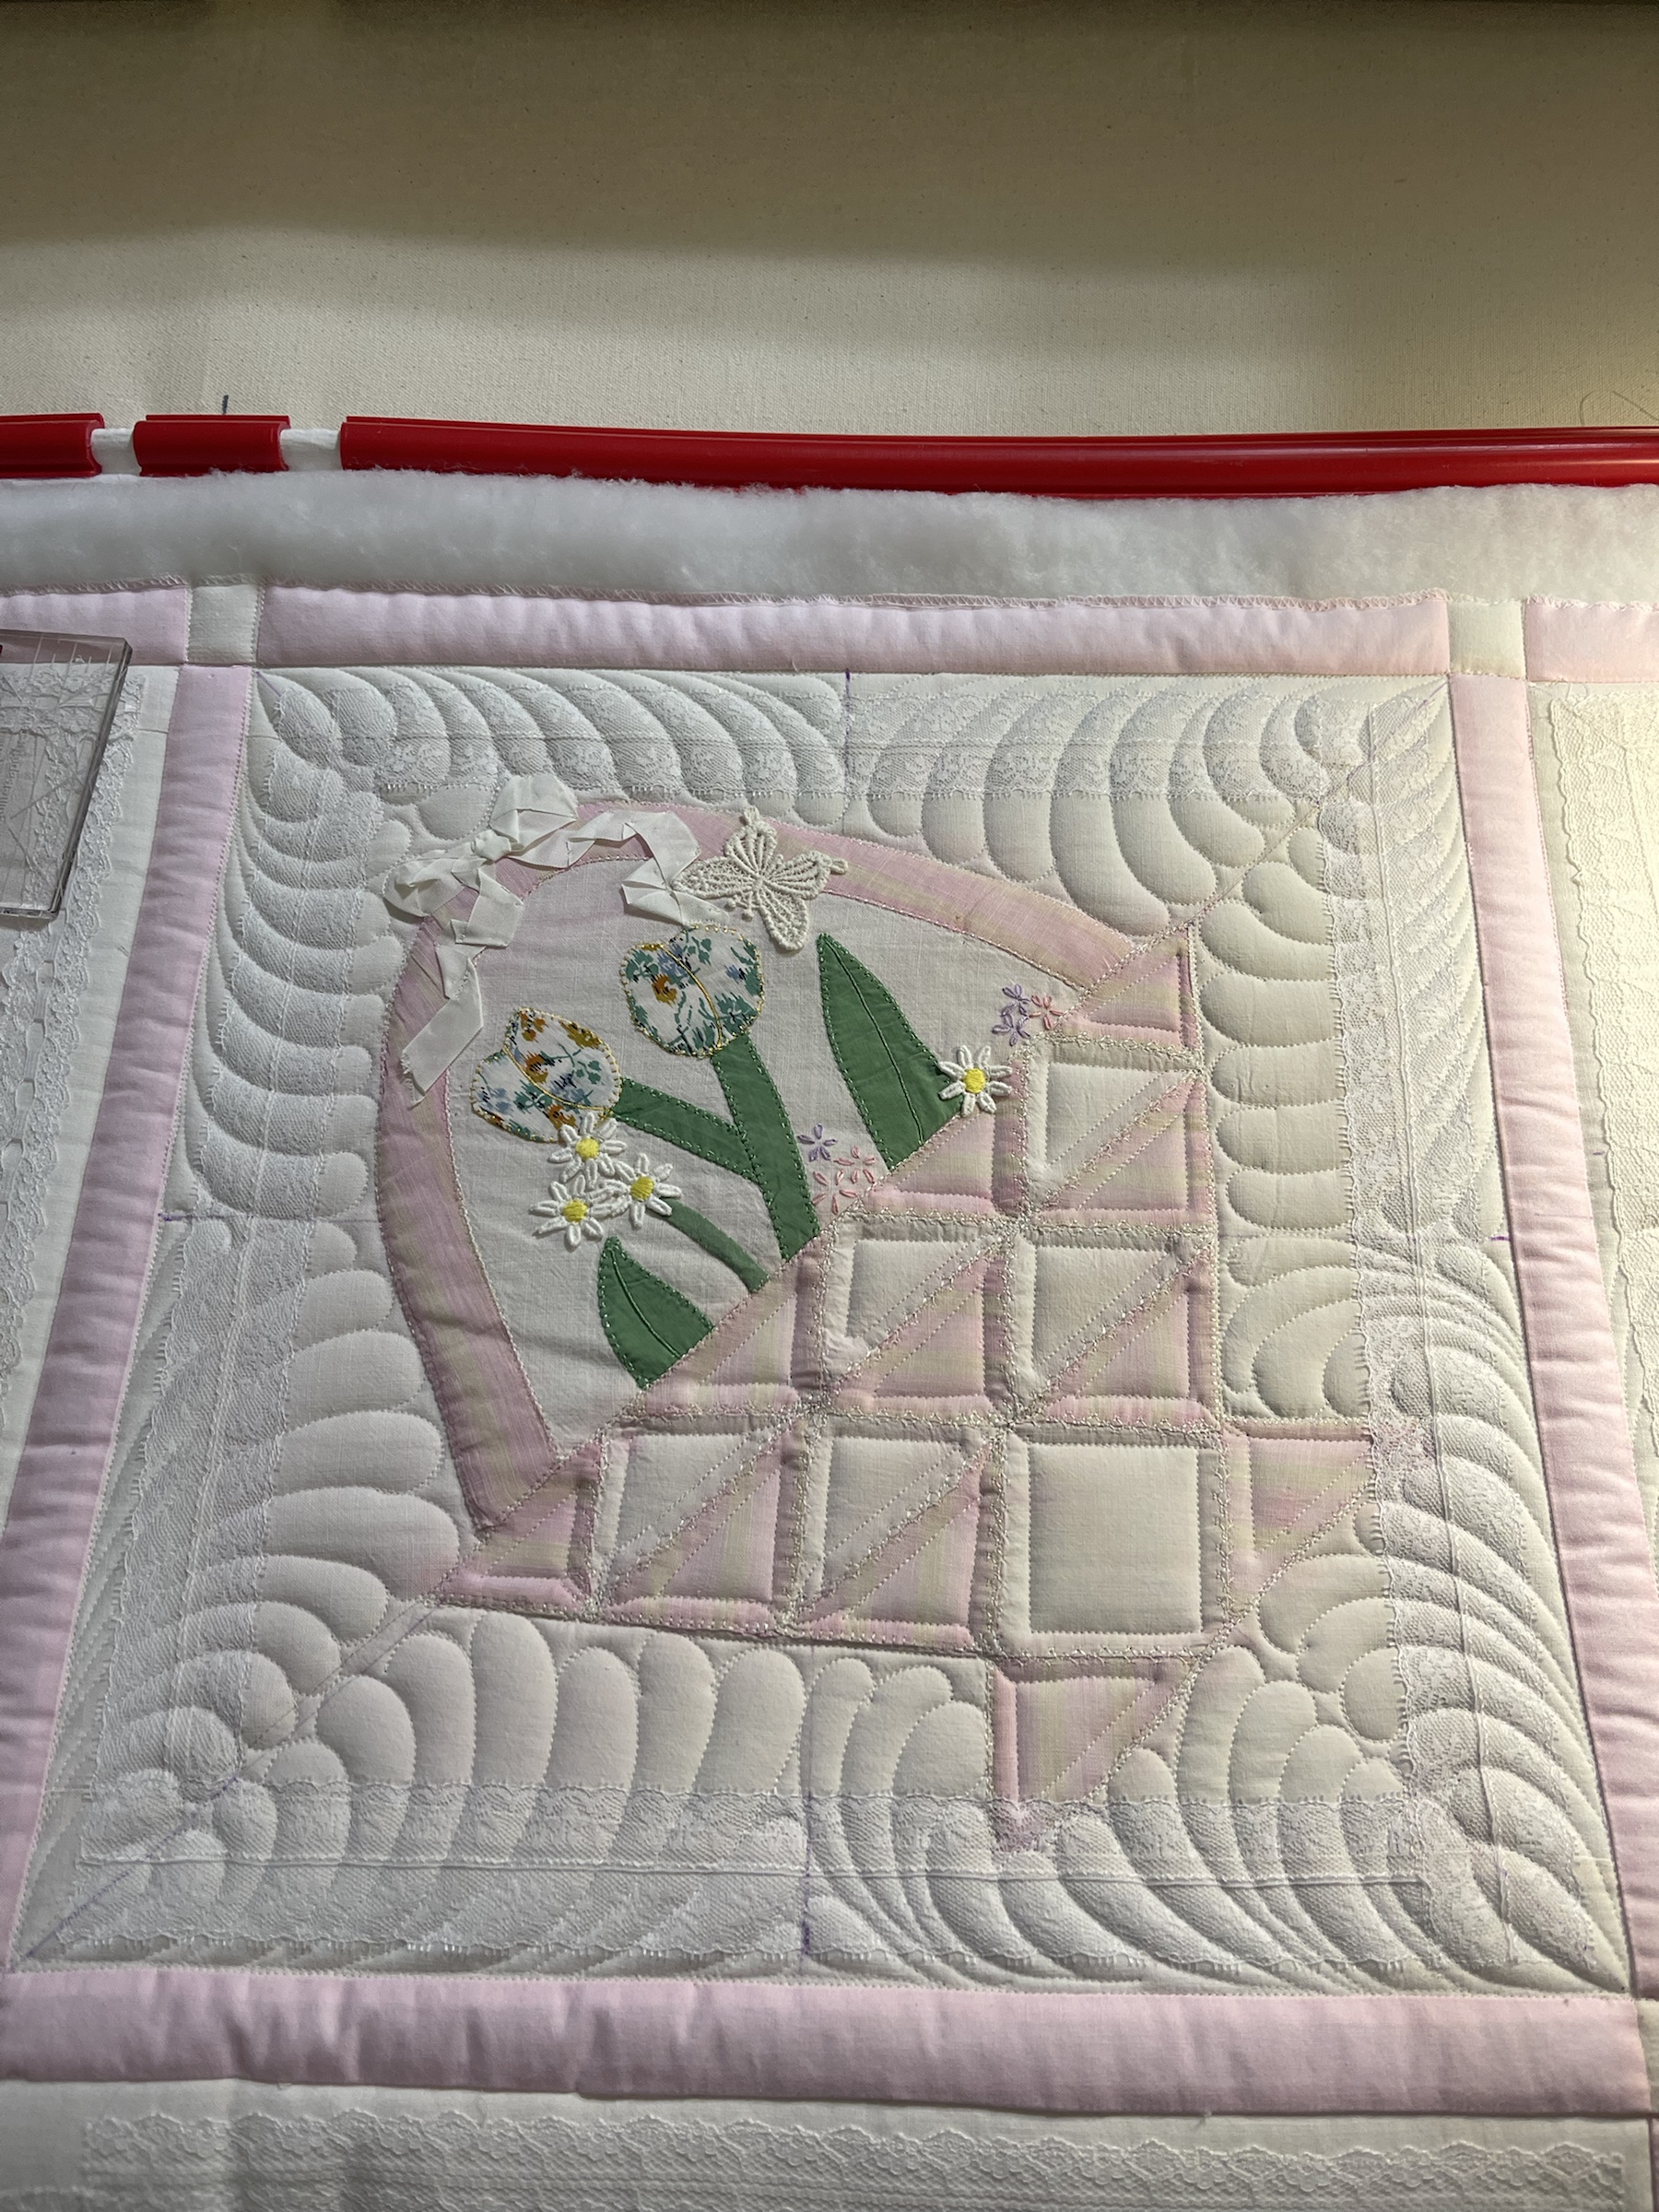
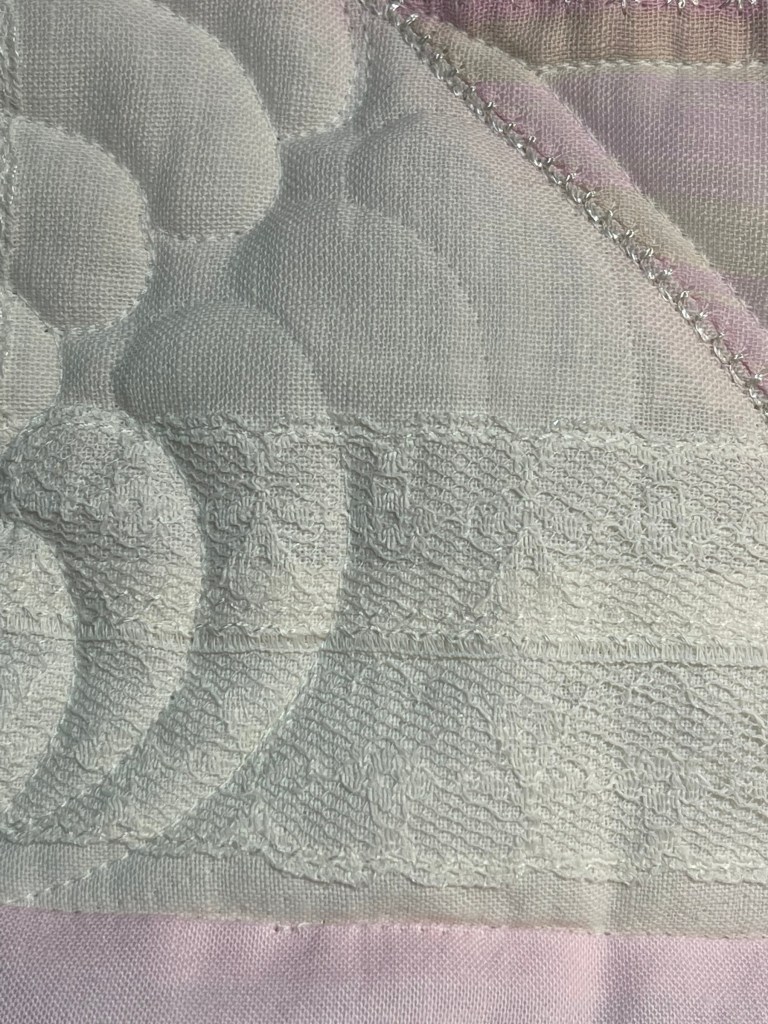
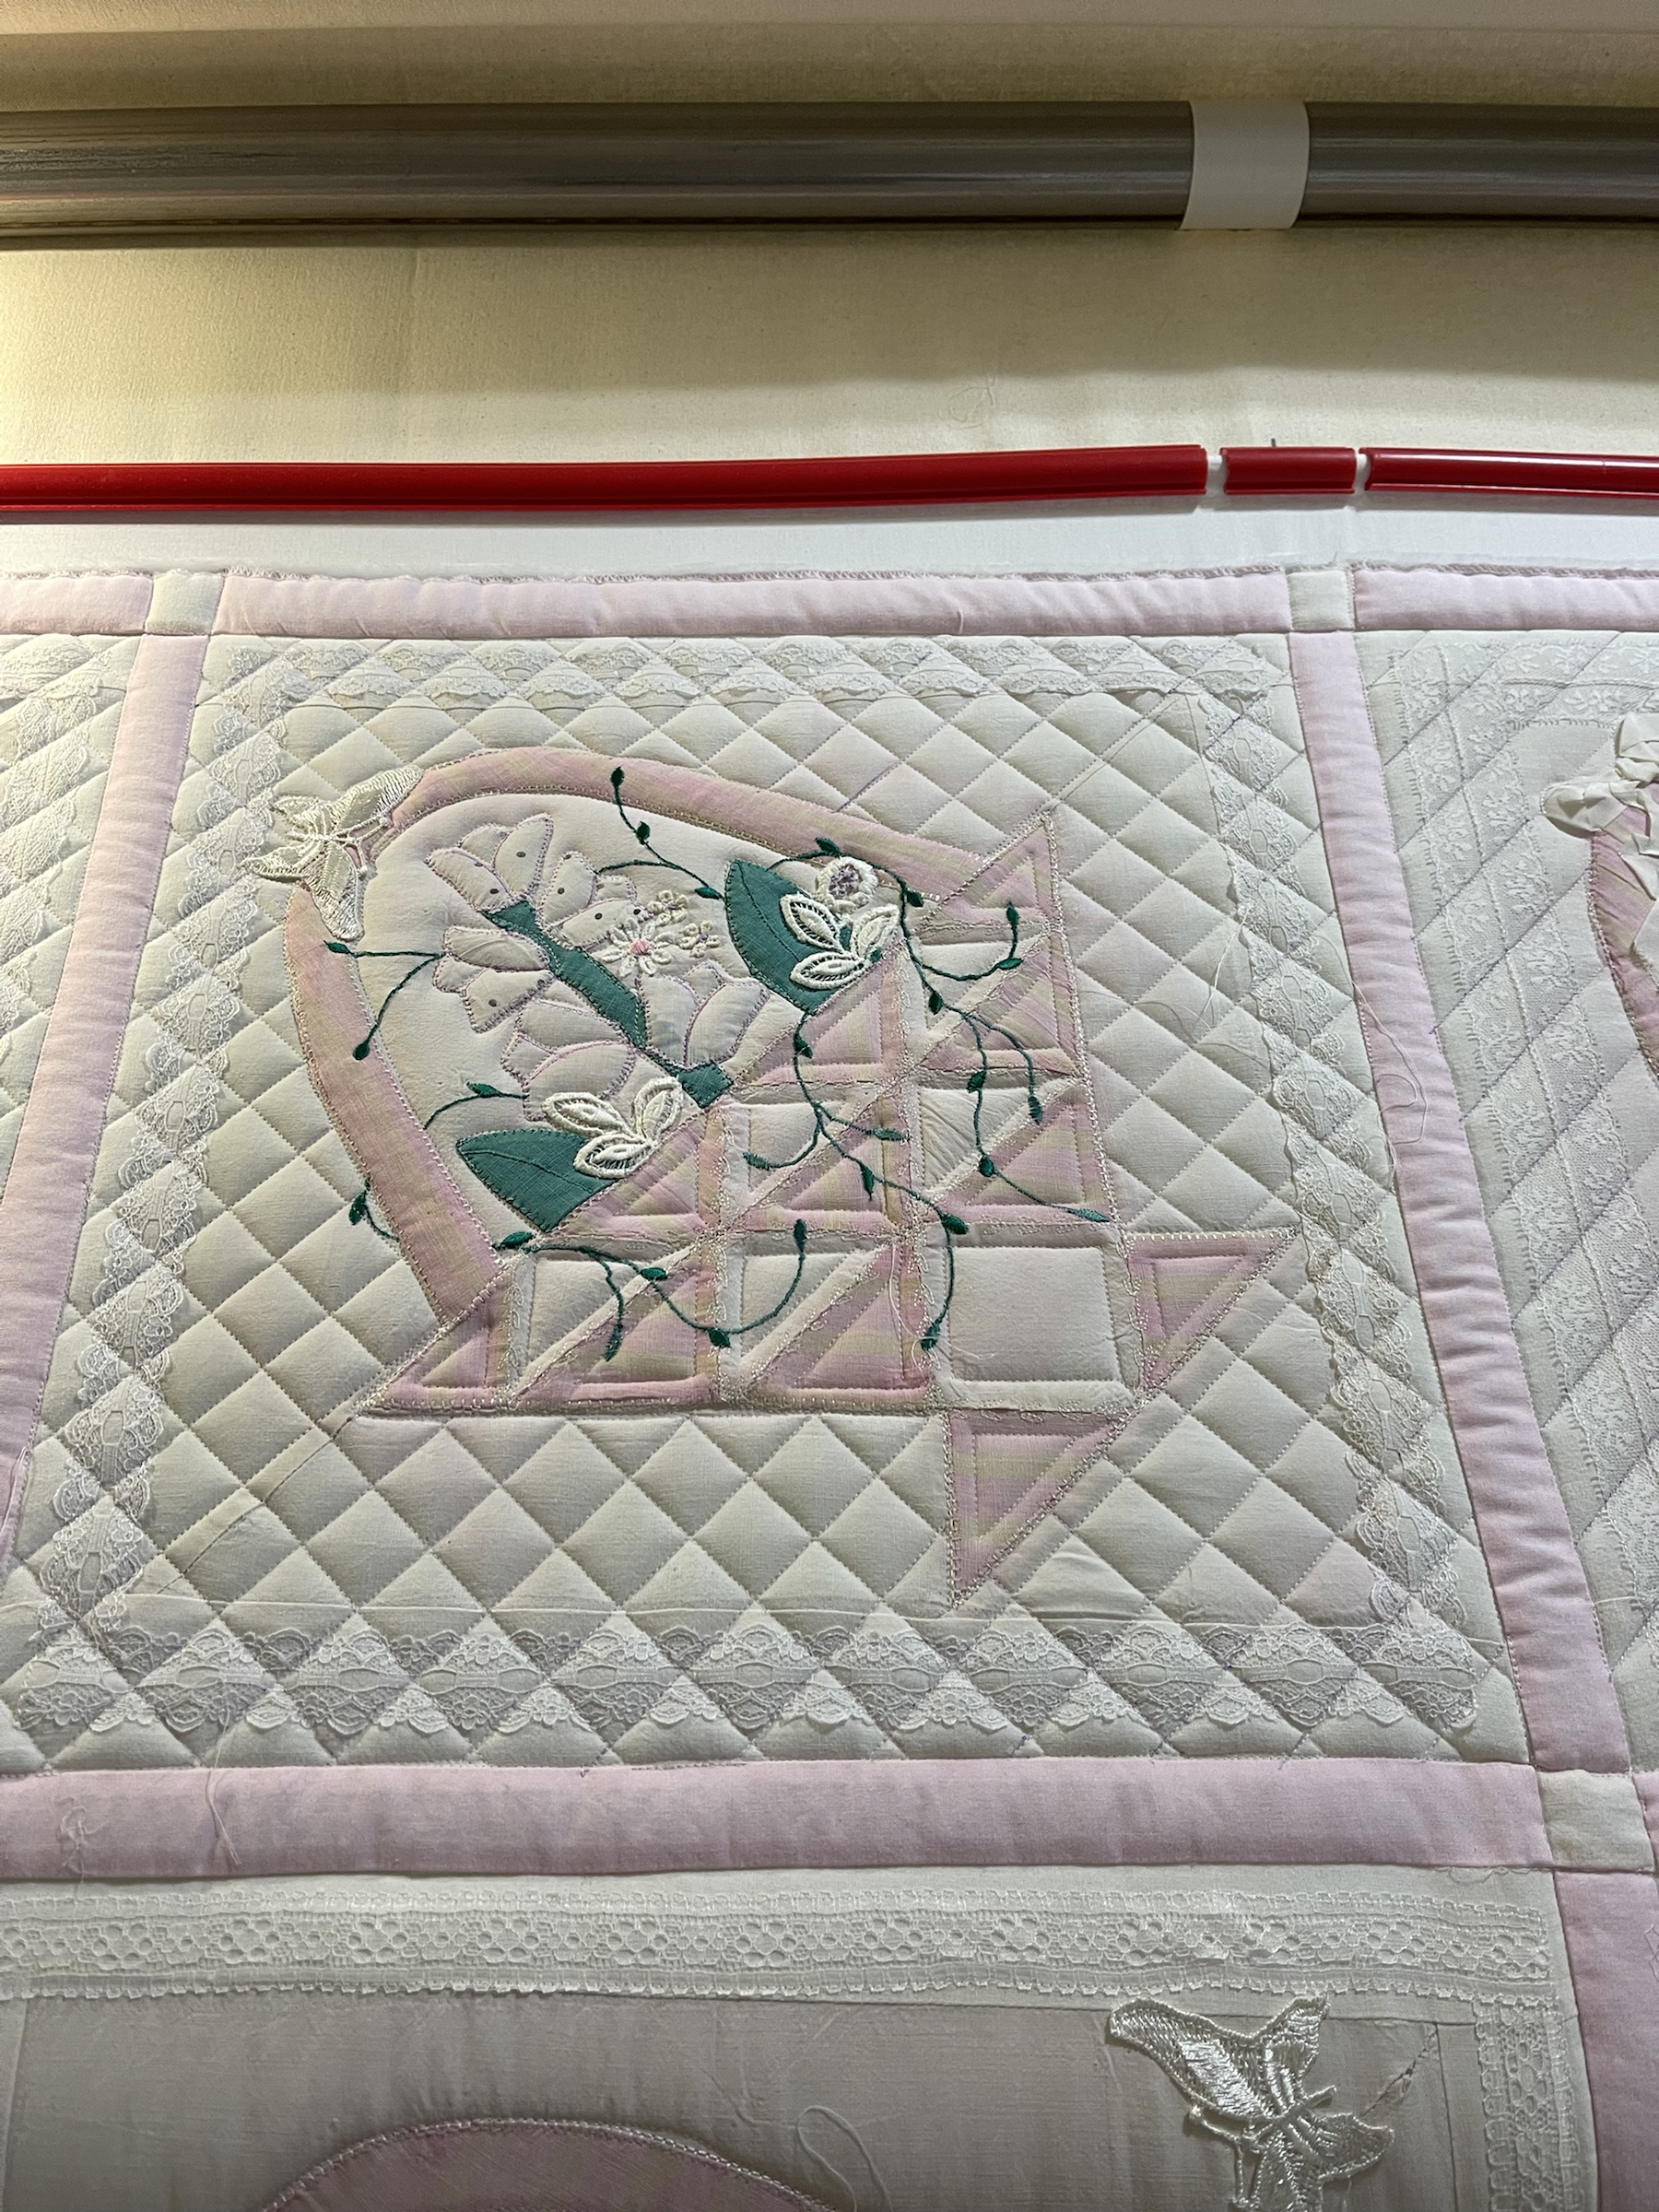
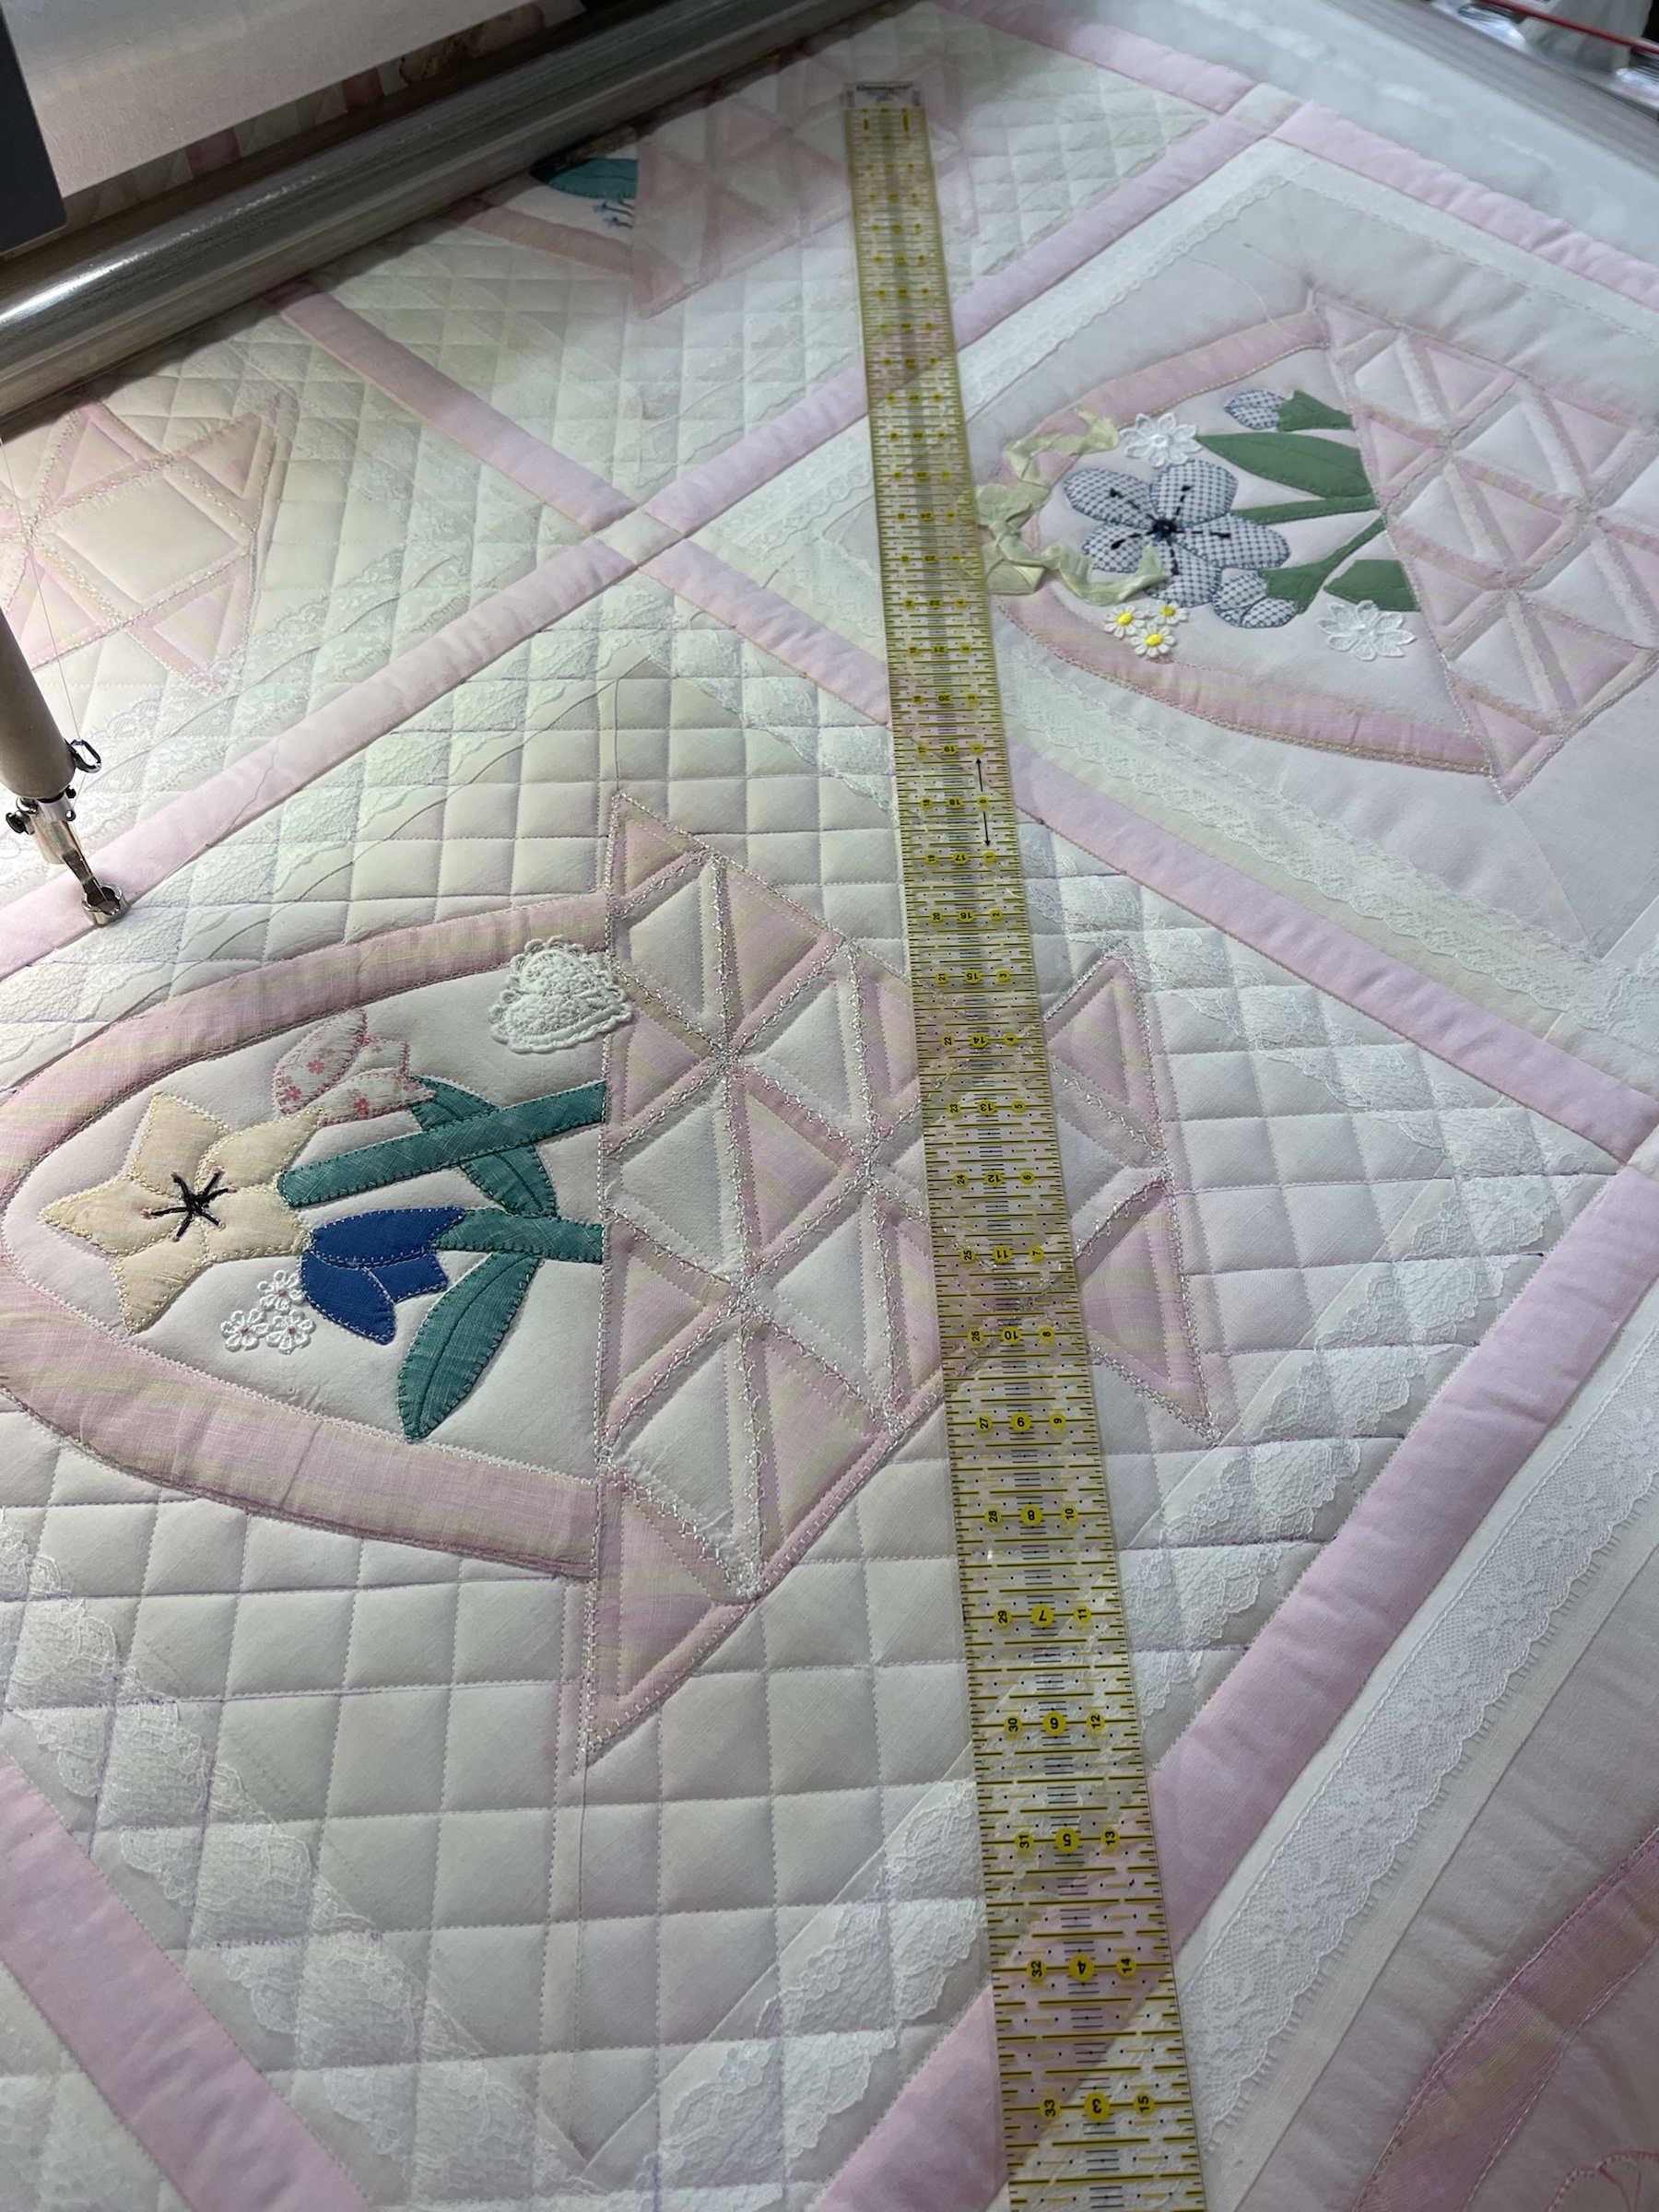
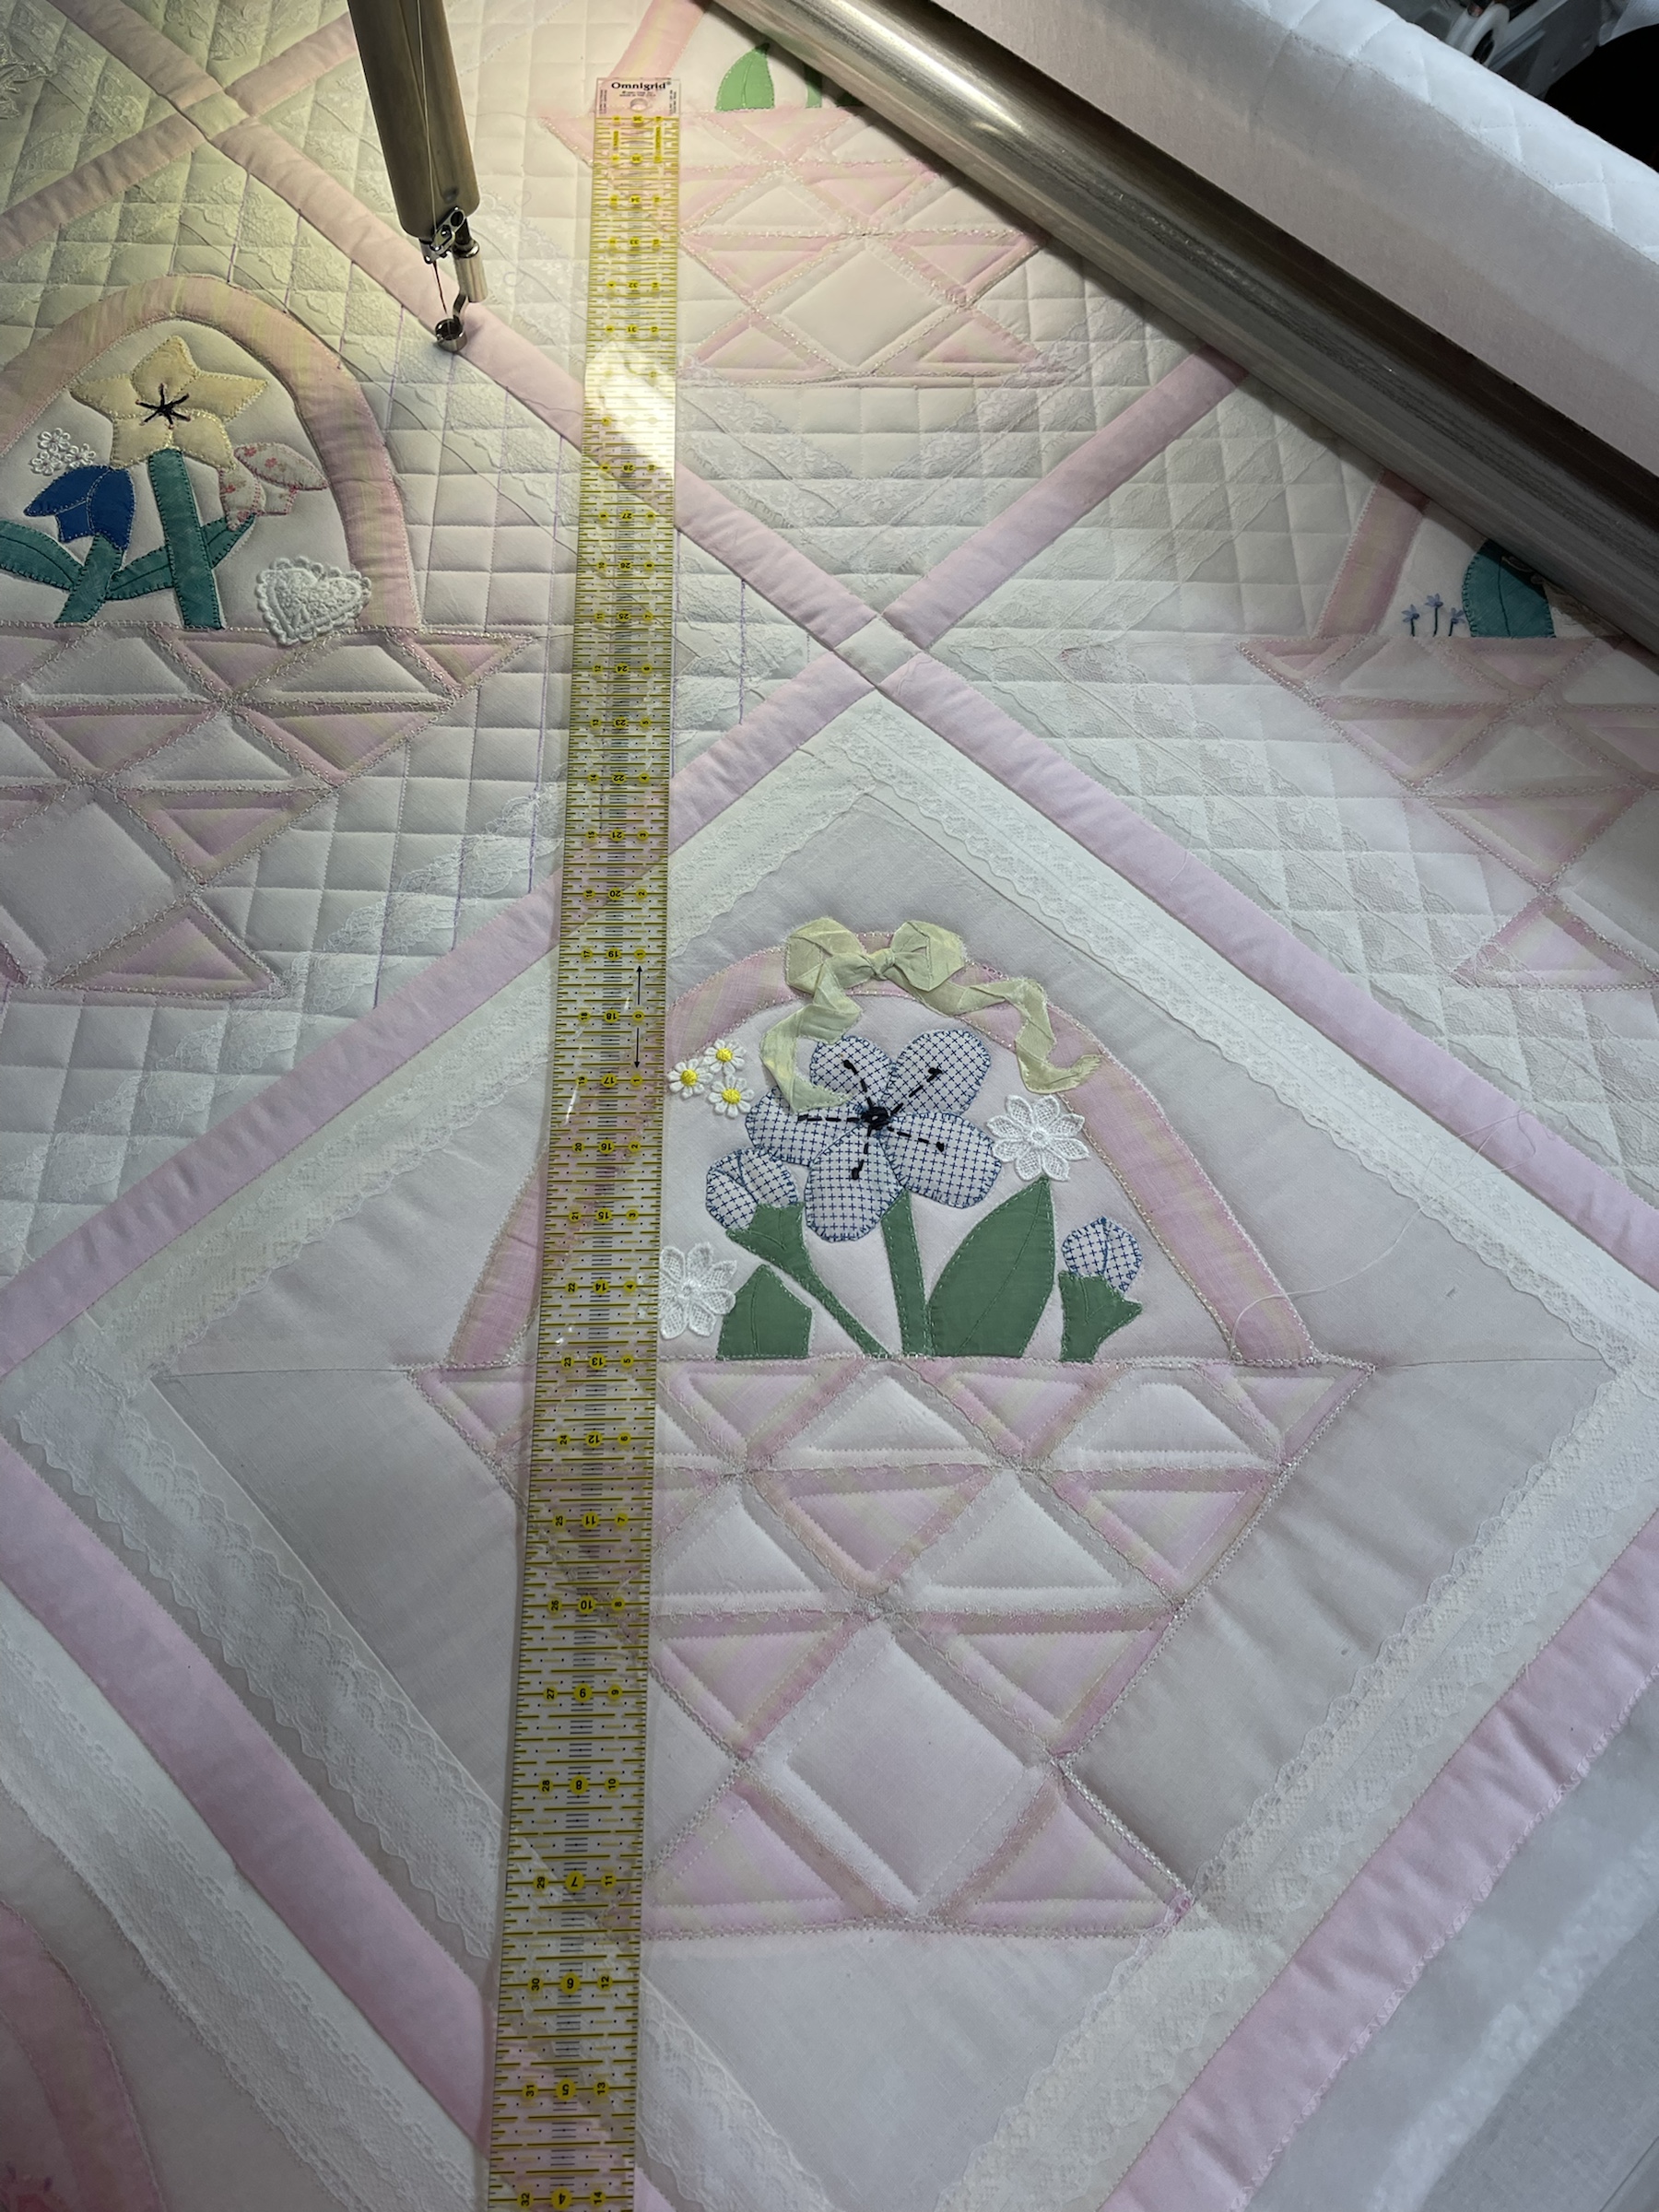
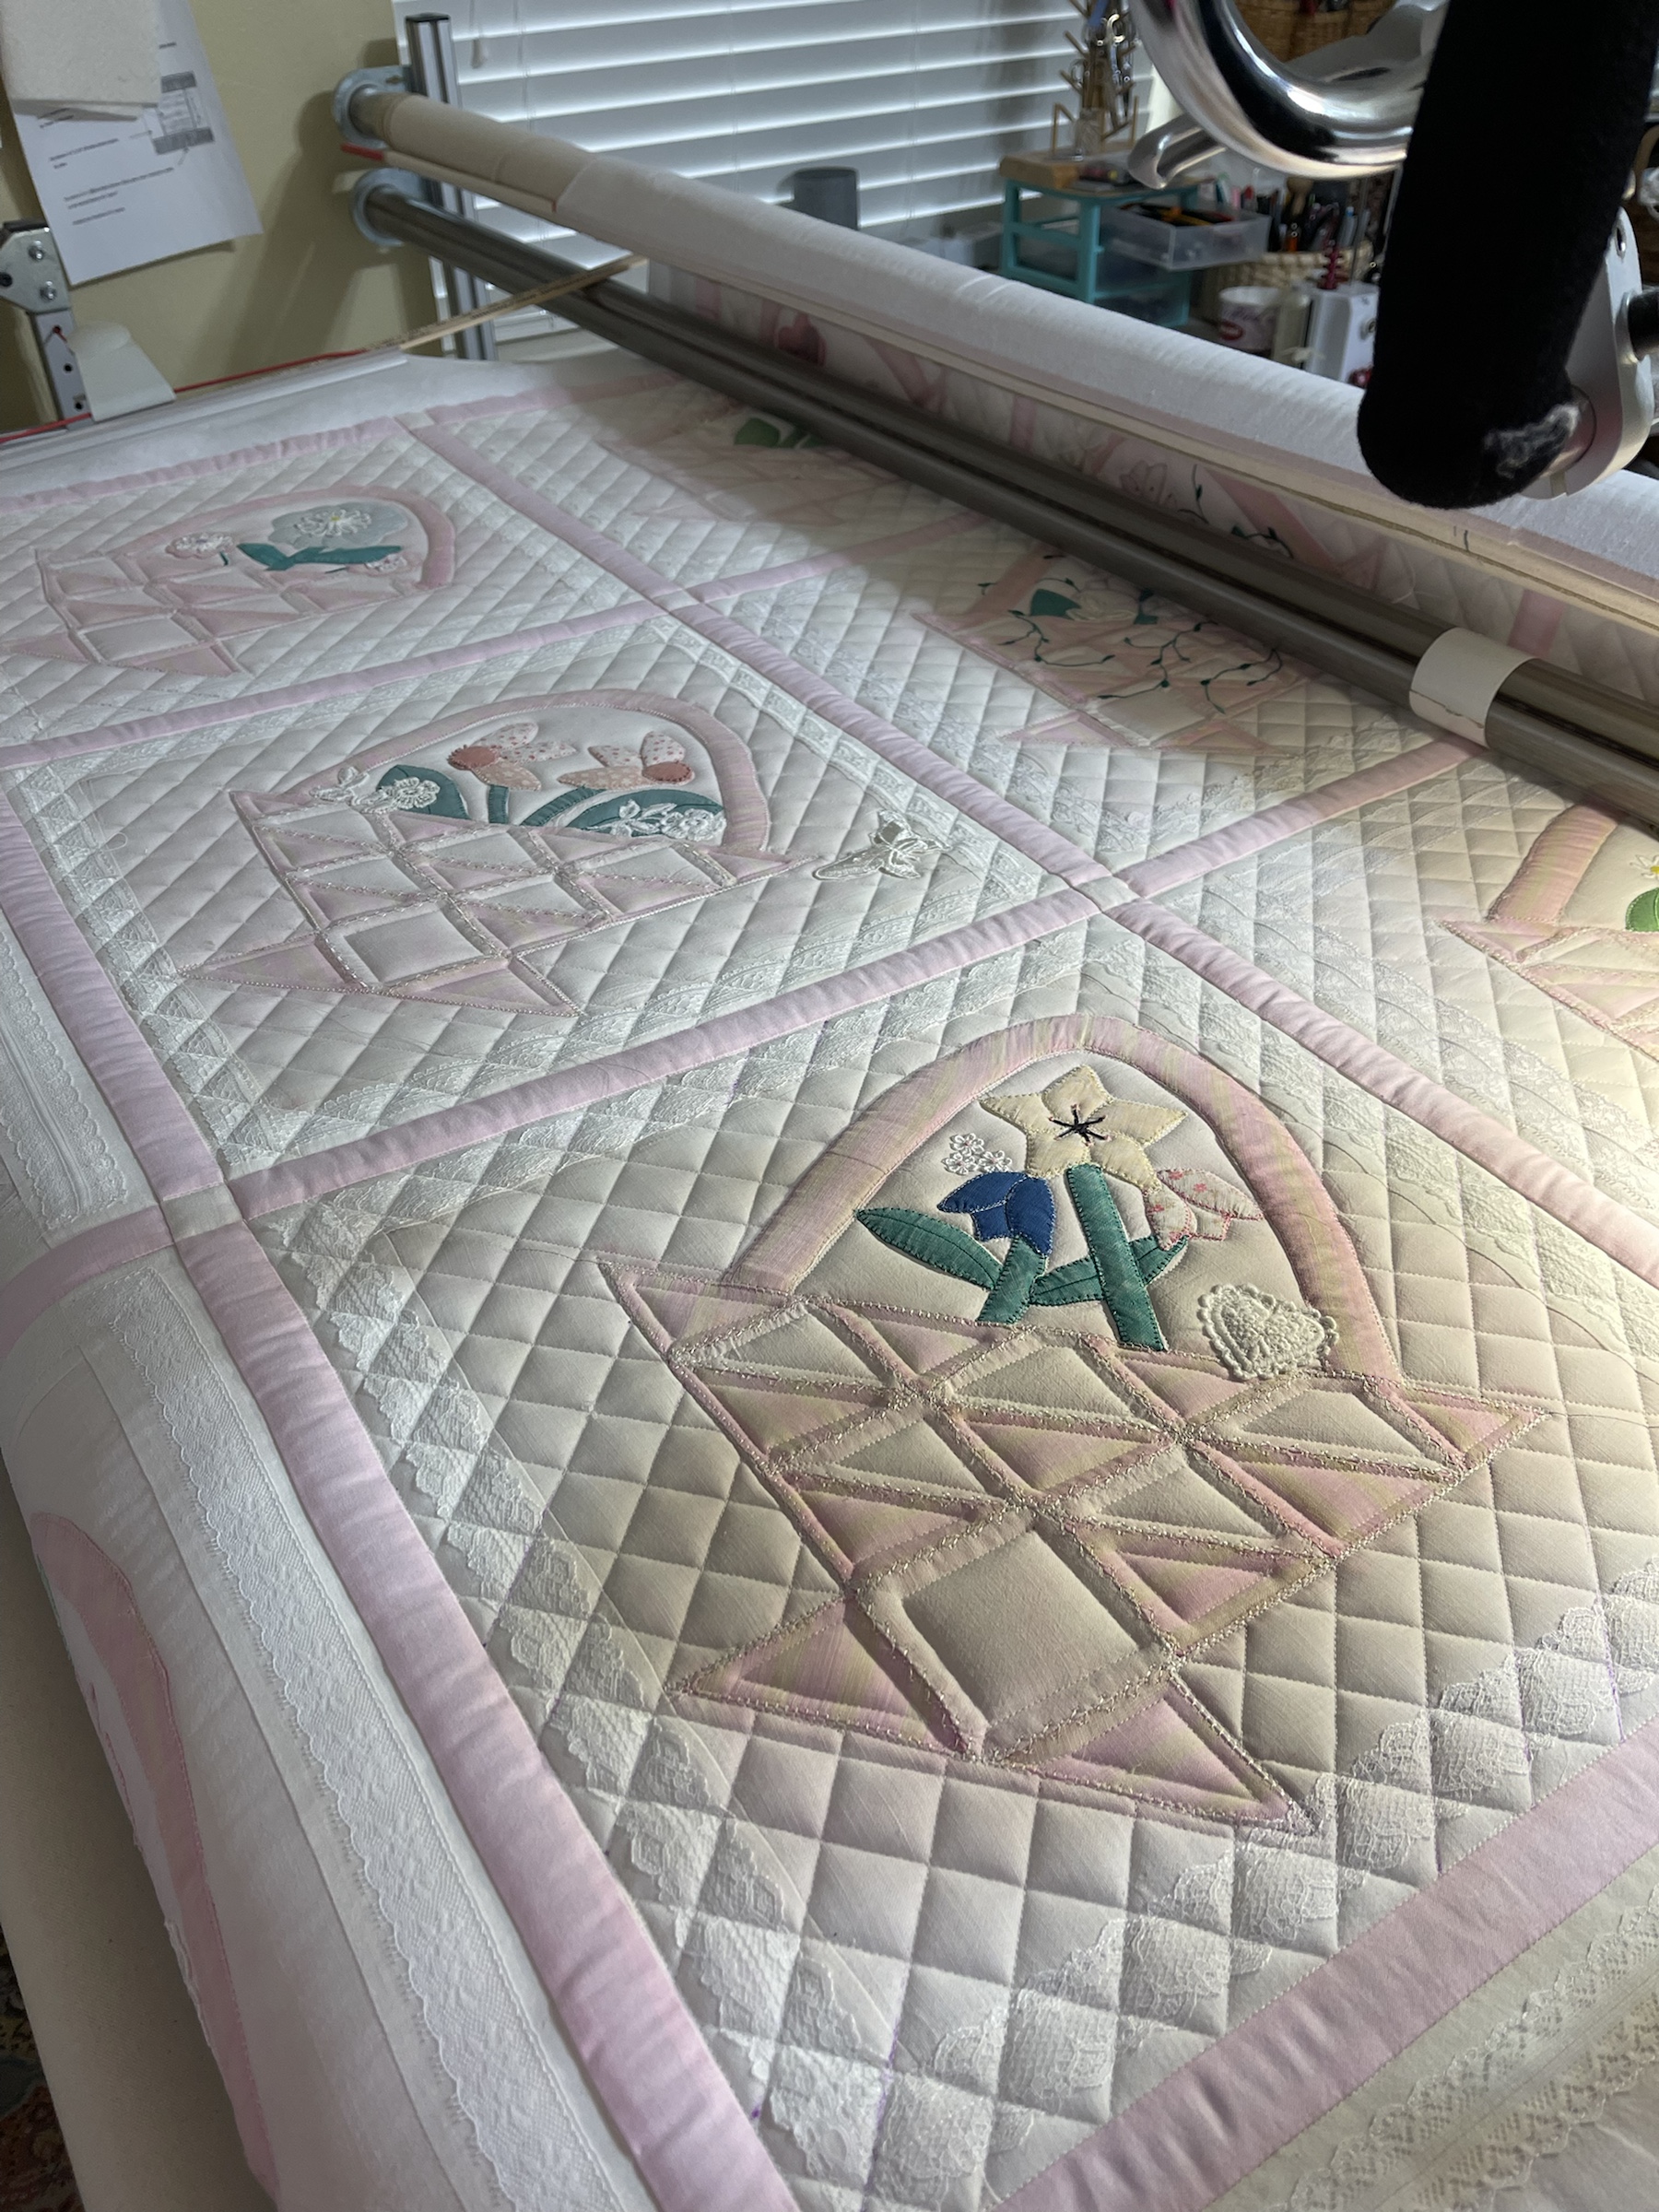
My solution: a very basic no frills diagonal cross-hatch with stitching lines 1” apart. I am marking my lines with a Leonis air and water erasable purple ink pen.
Maybe I was in a bad frame of mind at this point but when I started round 2 of quilting I really was underwhelmed with the straight lines.
After I had 2 blocks quilted I liked the quilting a bit better.
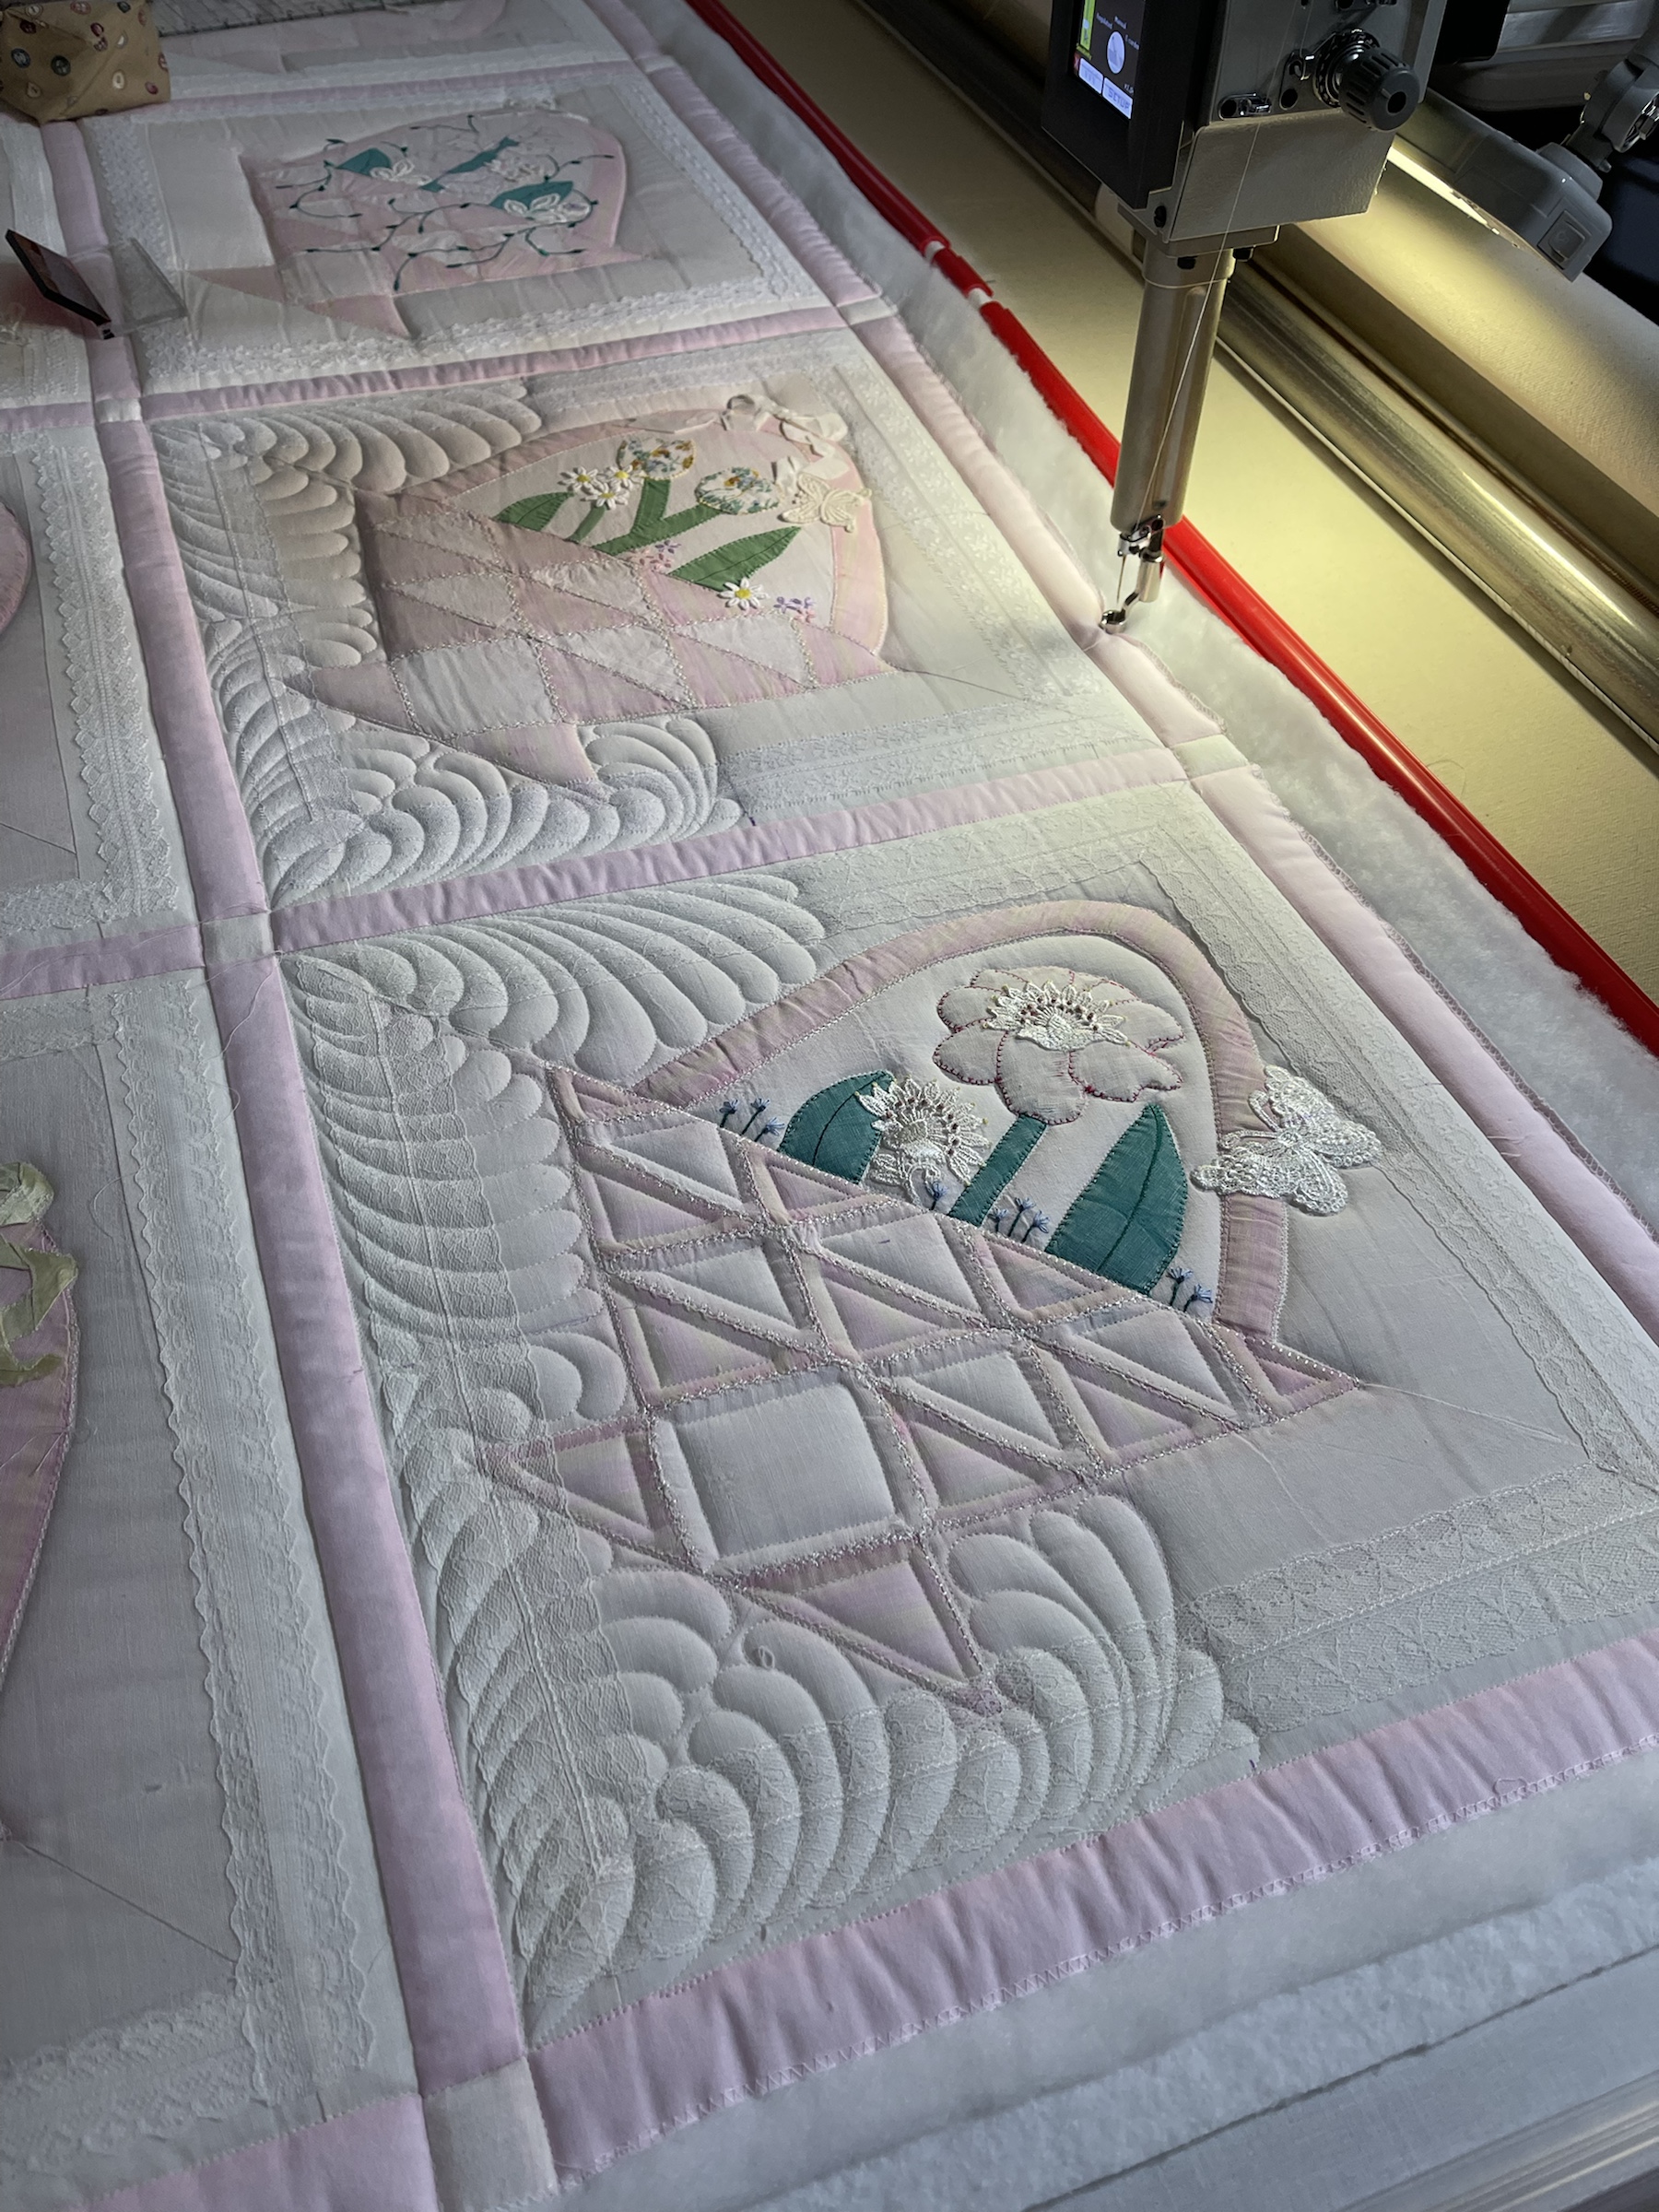
Remember way back a few blog posts ago when I added the wonky strips to each side of the wonky vintage blocks? Then I added the lace to visually distract from the wonky-ness of it all? In the block above the seams for the added side strips are very visible but unless you know what to look for they do not distract! Yay!
Slowly (and I do mean slowly!) the quilting is starting to look ok.
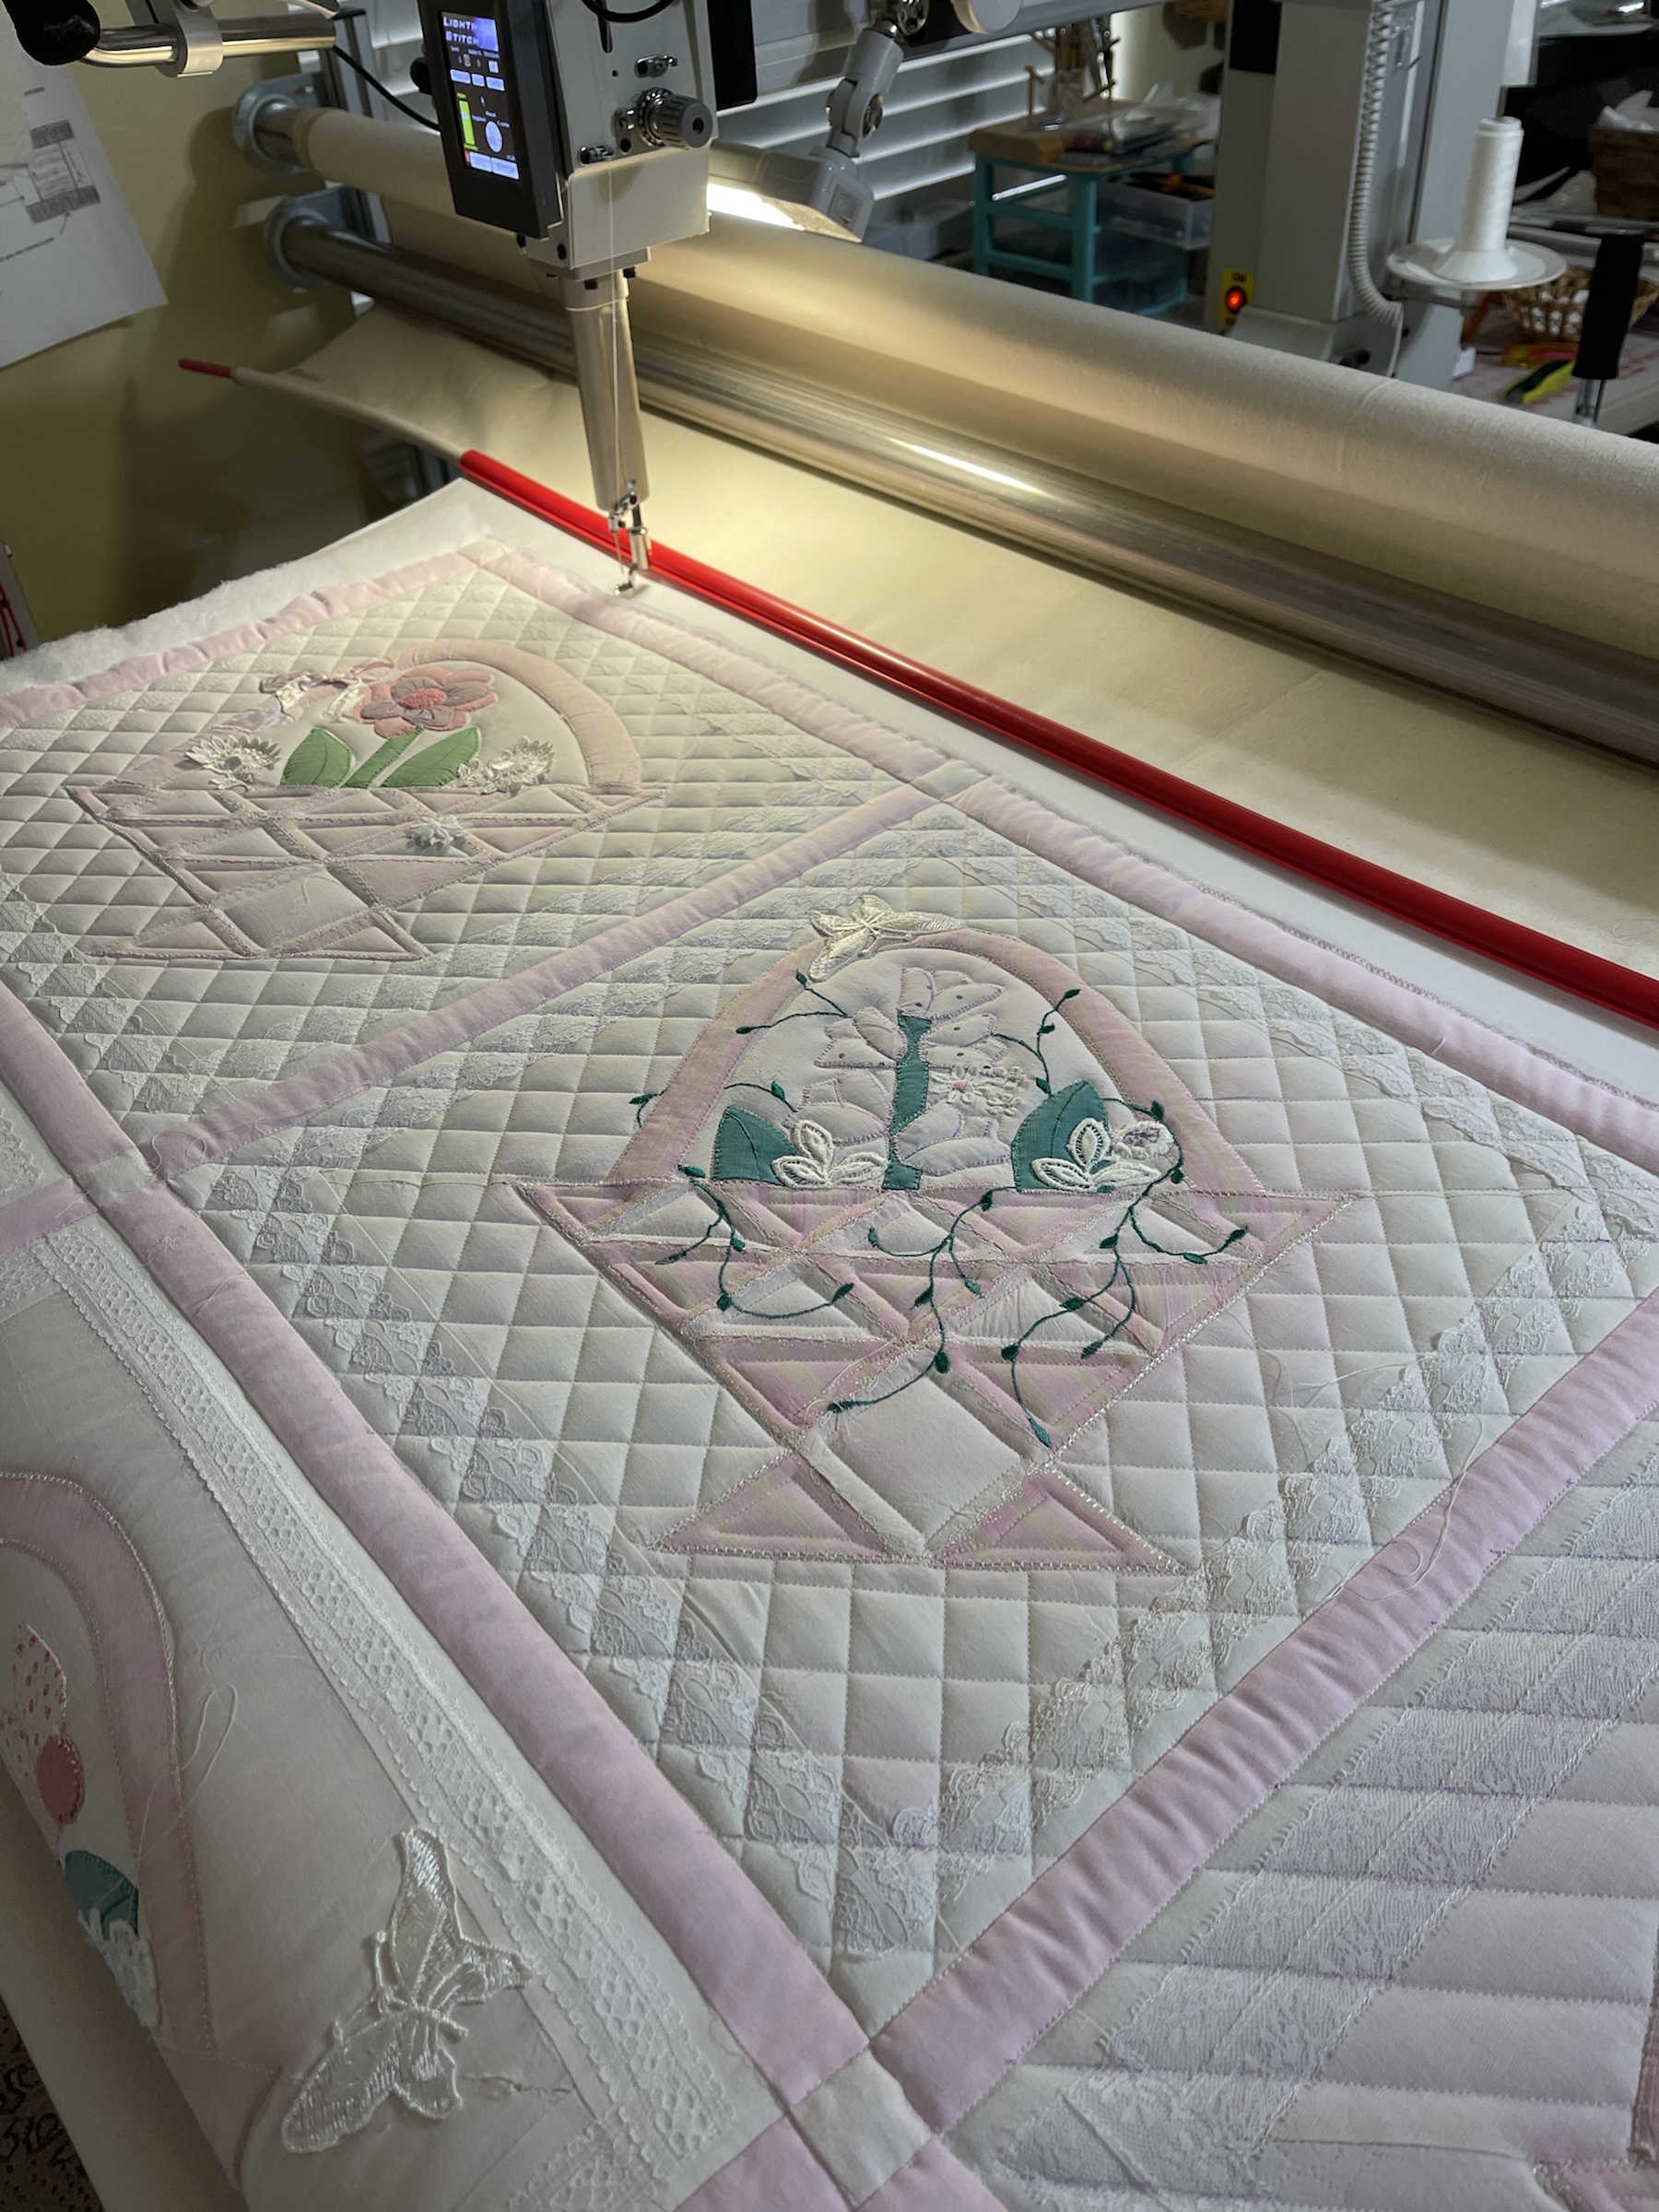
Slowly…never in a million years did I think that straight line ruler work would take so long! I timed a few blocks and just the ruler work takes 30-35 minutes per block!
So what’s that acrylic yard stitch doing? Unless you want to get vertigo looking at the finished quilt, the lines from block to block need to line up.
So this is where I am currently. My longarming has come to a sudden stand-still, all caused by the appearance of grandson #2! Can you think of a better reason to put quilting on the back burner? ❤️🙂❤️
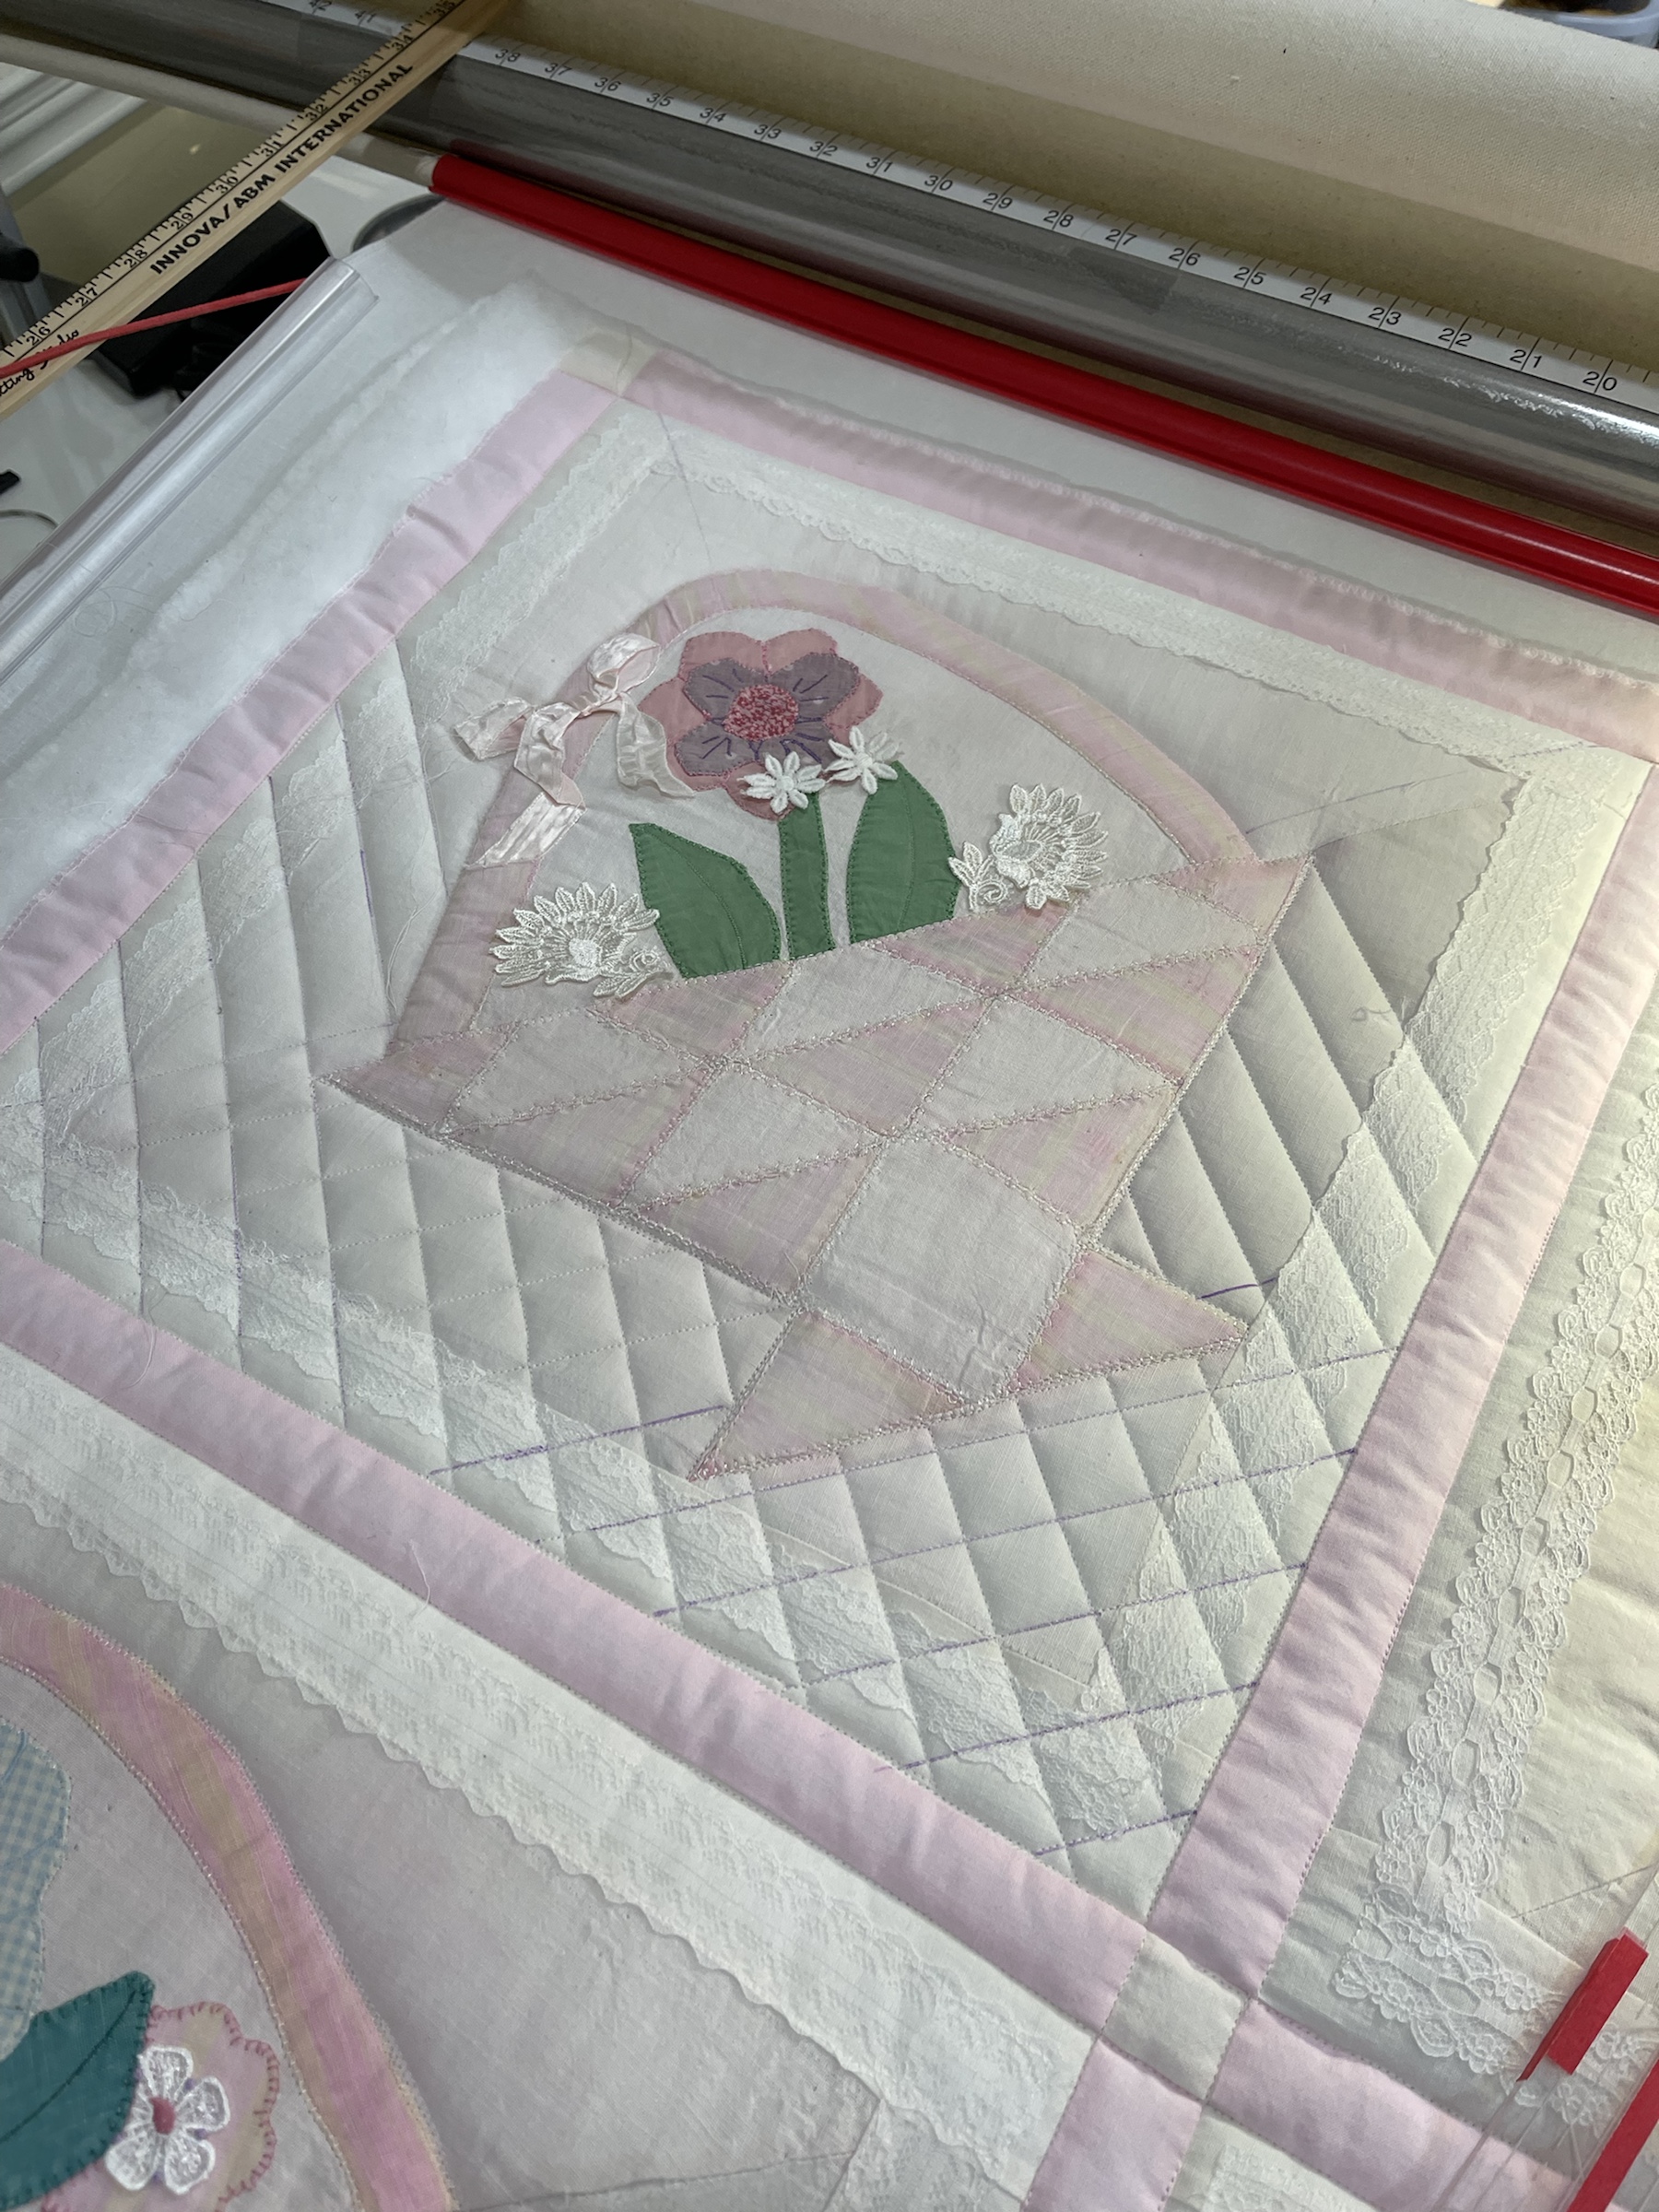
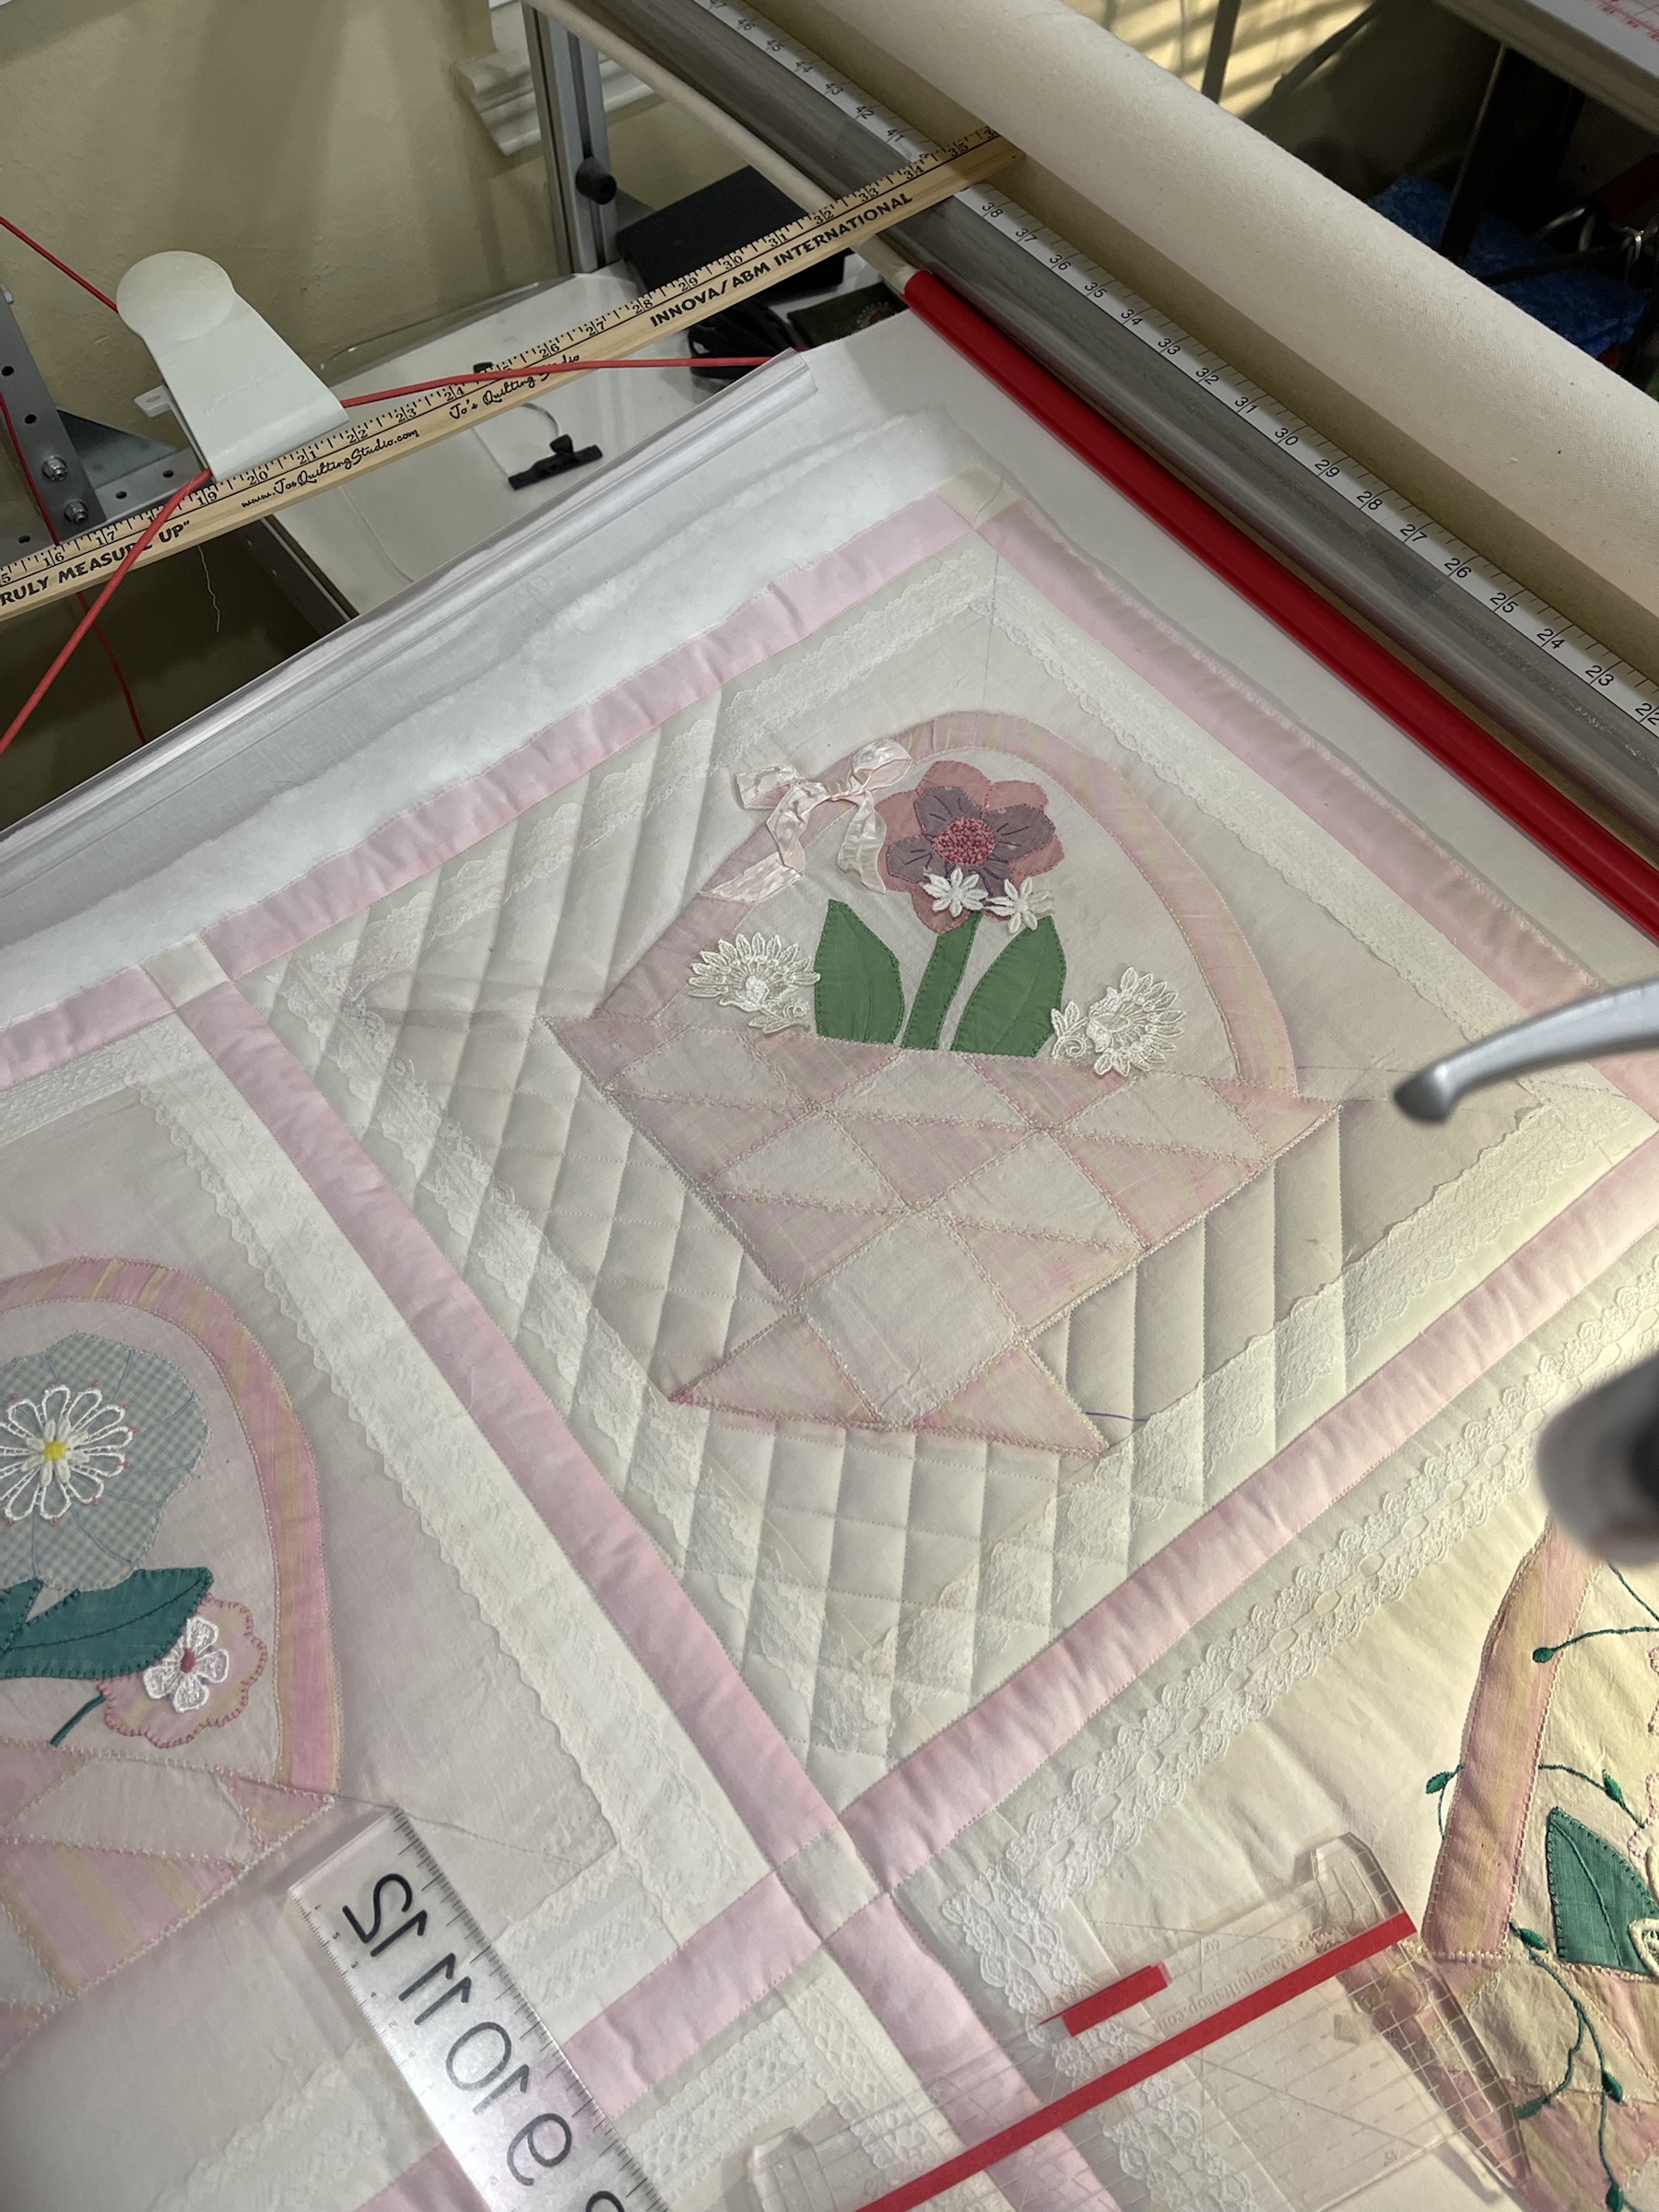
This project, this 100% experiment has moved along quickly and I’m happy with how things have progressed. I hope everyone understands my desire to save and bring honor to the original quilt maker. This is one of those quilts that very well might have ended up in the rubbish bin and what a loss that would have been!
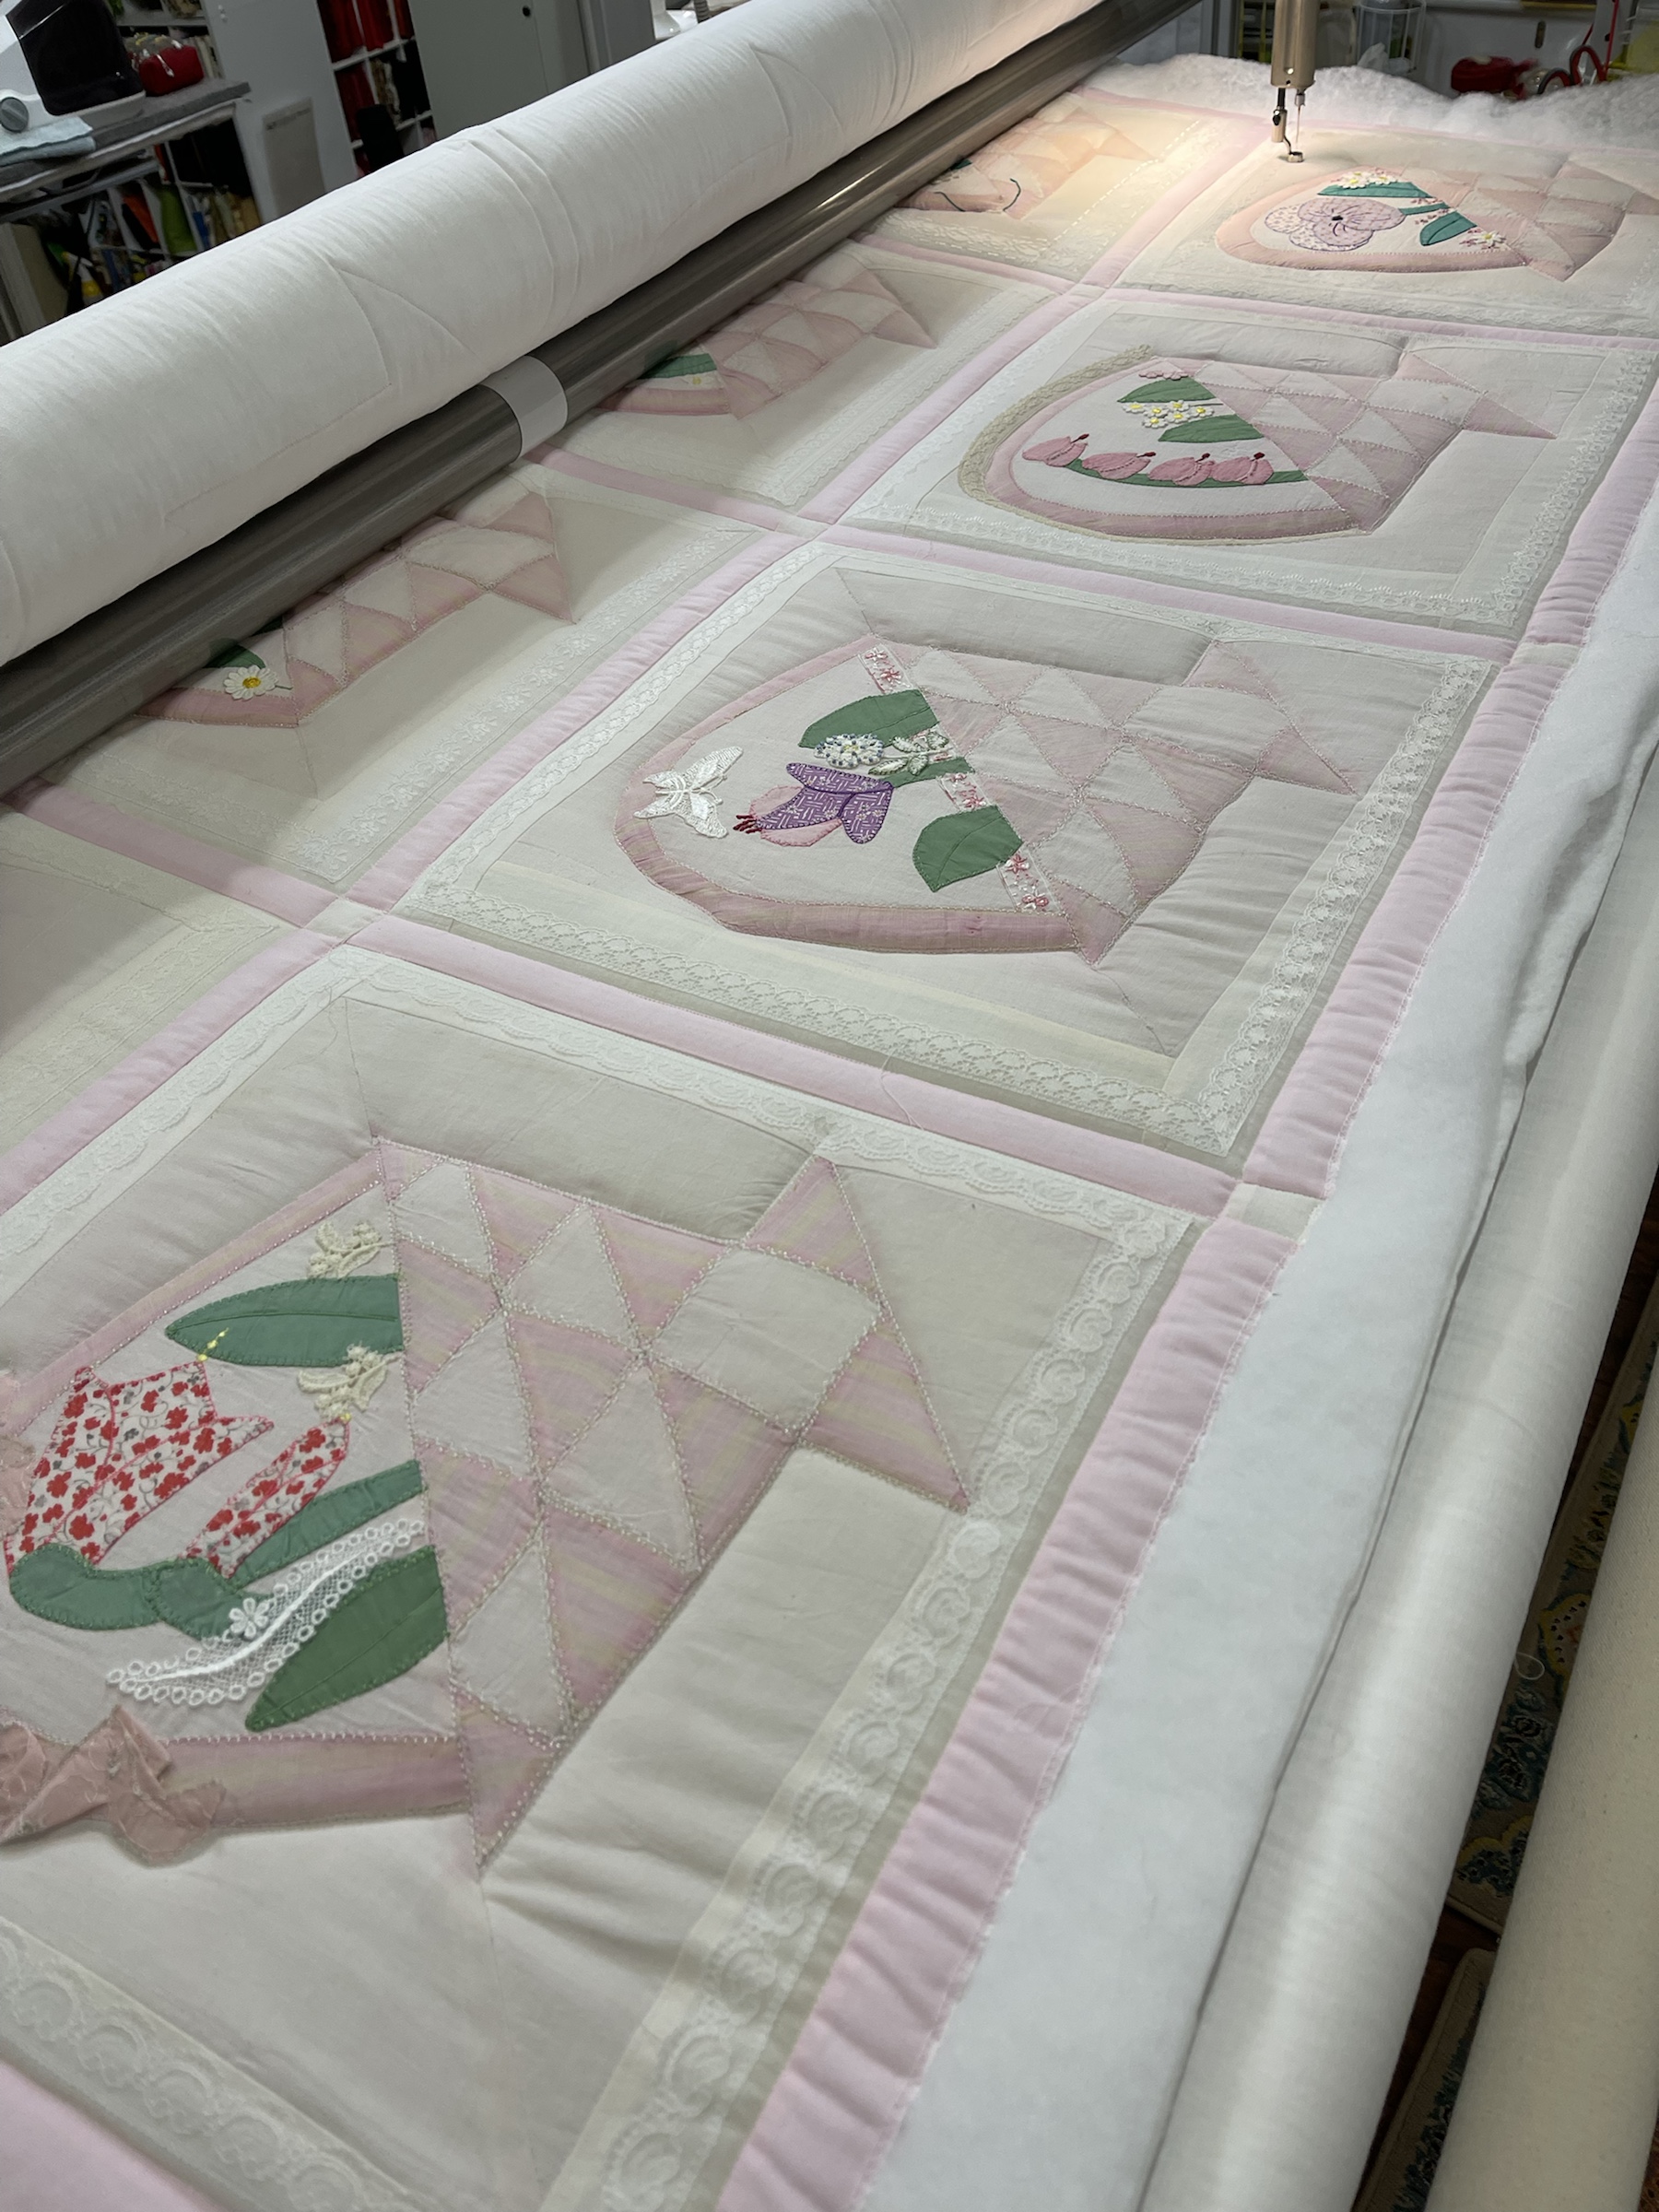
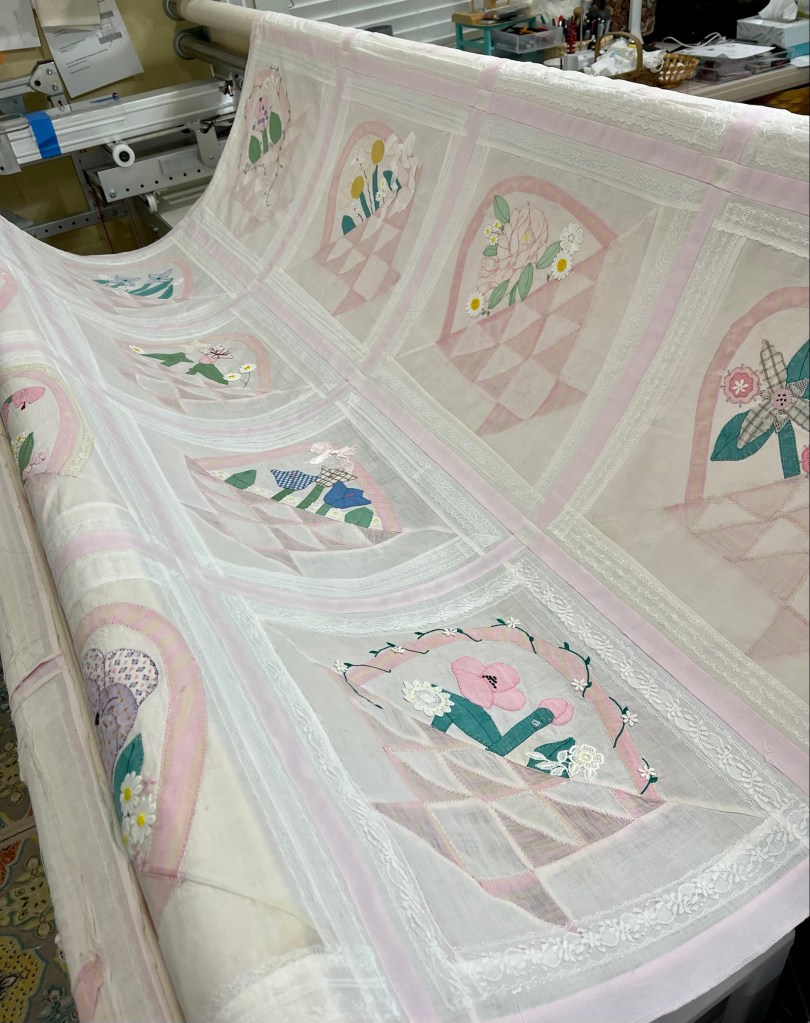
I do find it fascinating to think about the quilt maker and how her creativity found its way into these 20 pink baskets. Having found many of the original block patterns, I can see she made most, if not all the blocks to her liking, similar yet different from the patterns. This is sooooo me! I like to tweek quilt patterns (or just about anything) to make them my own.
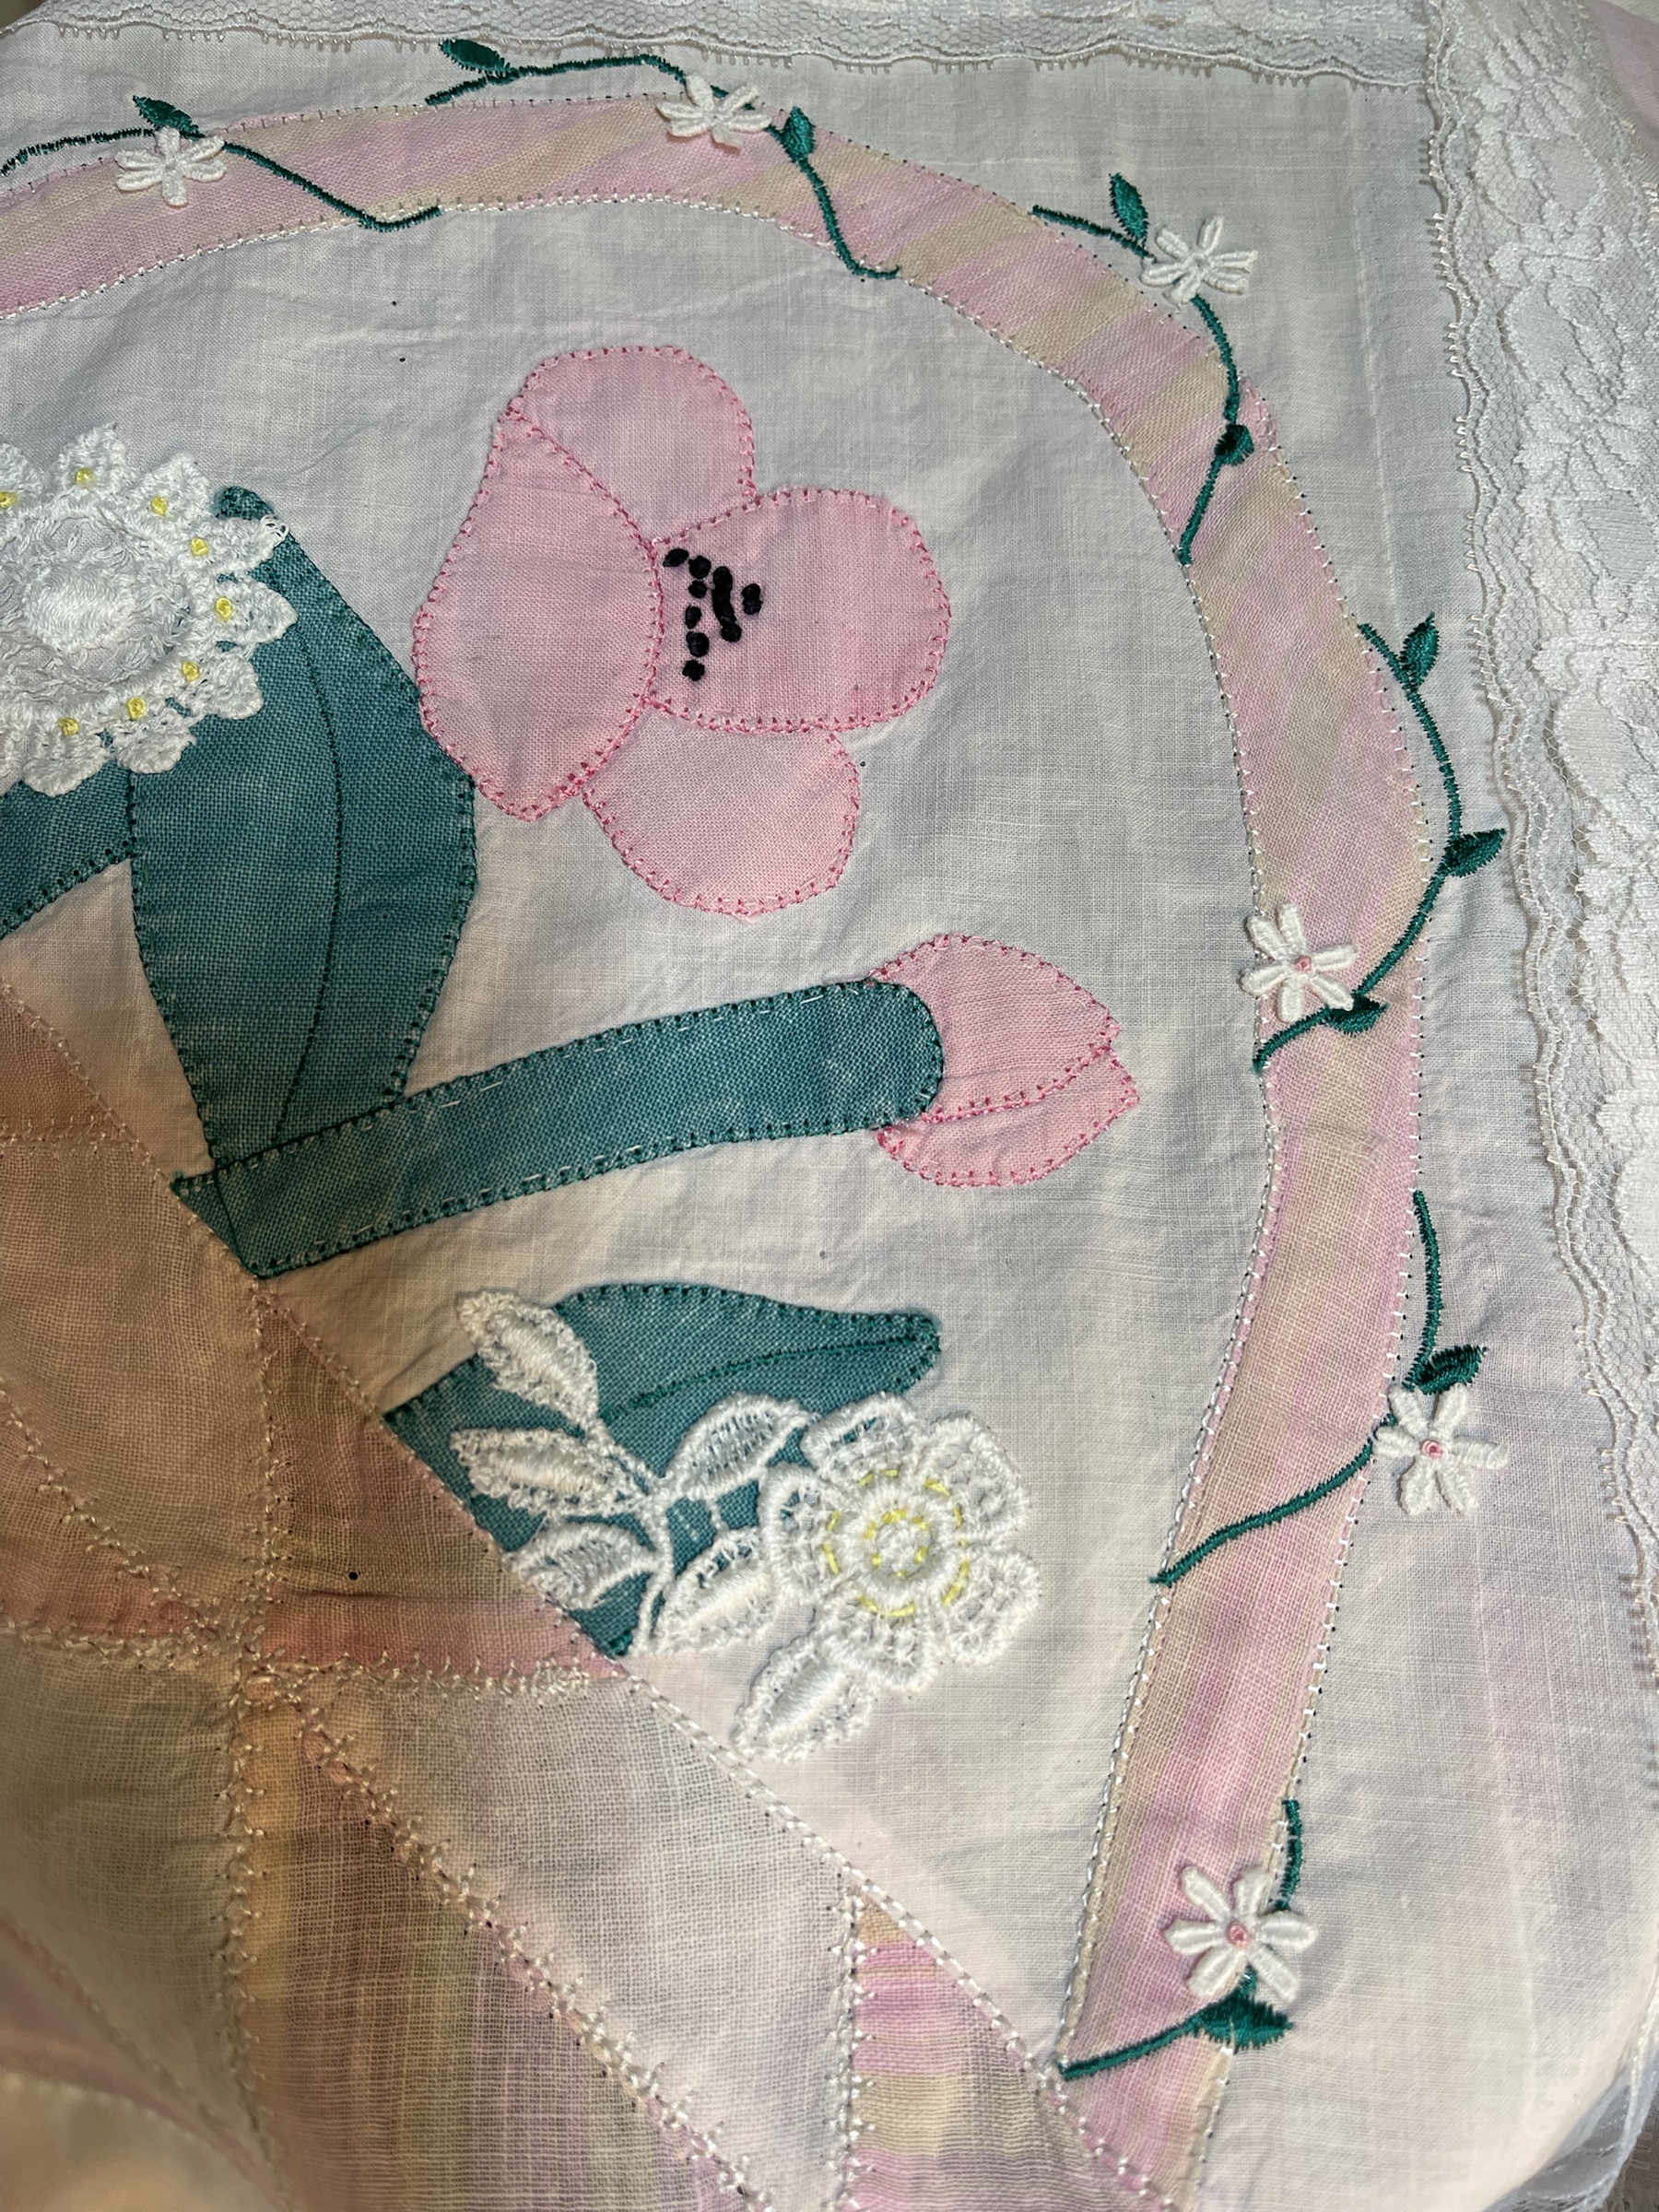
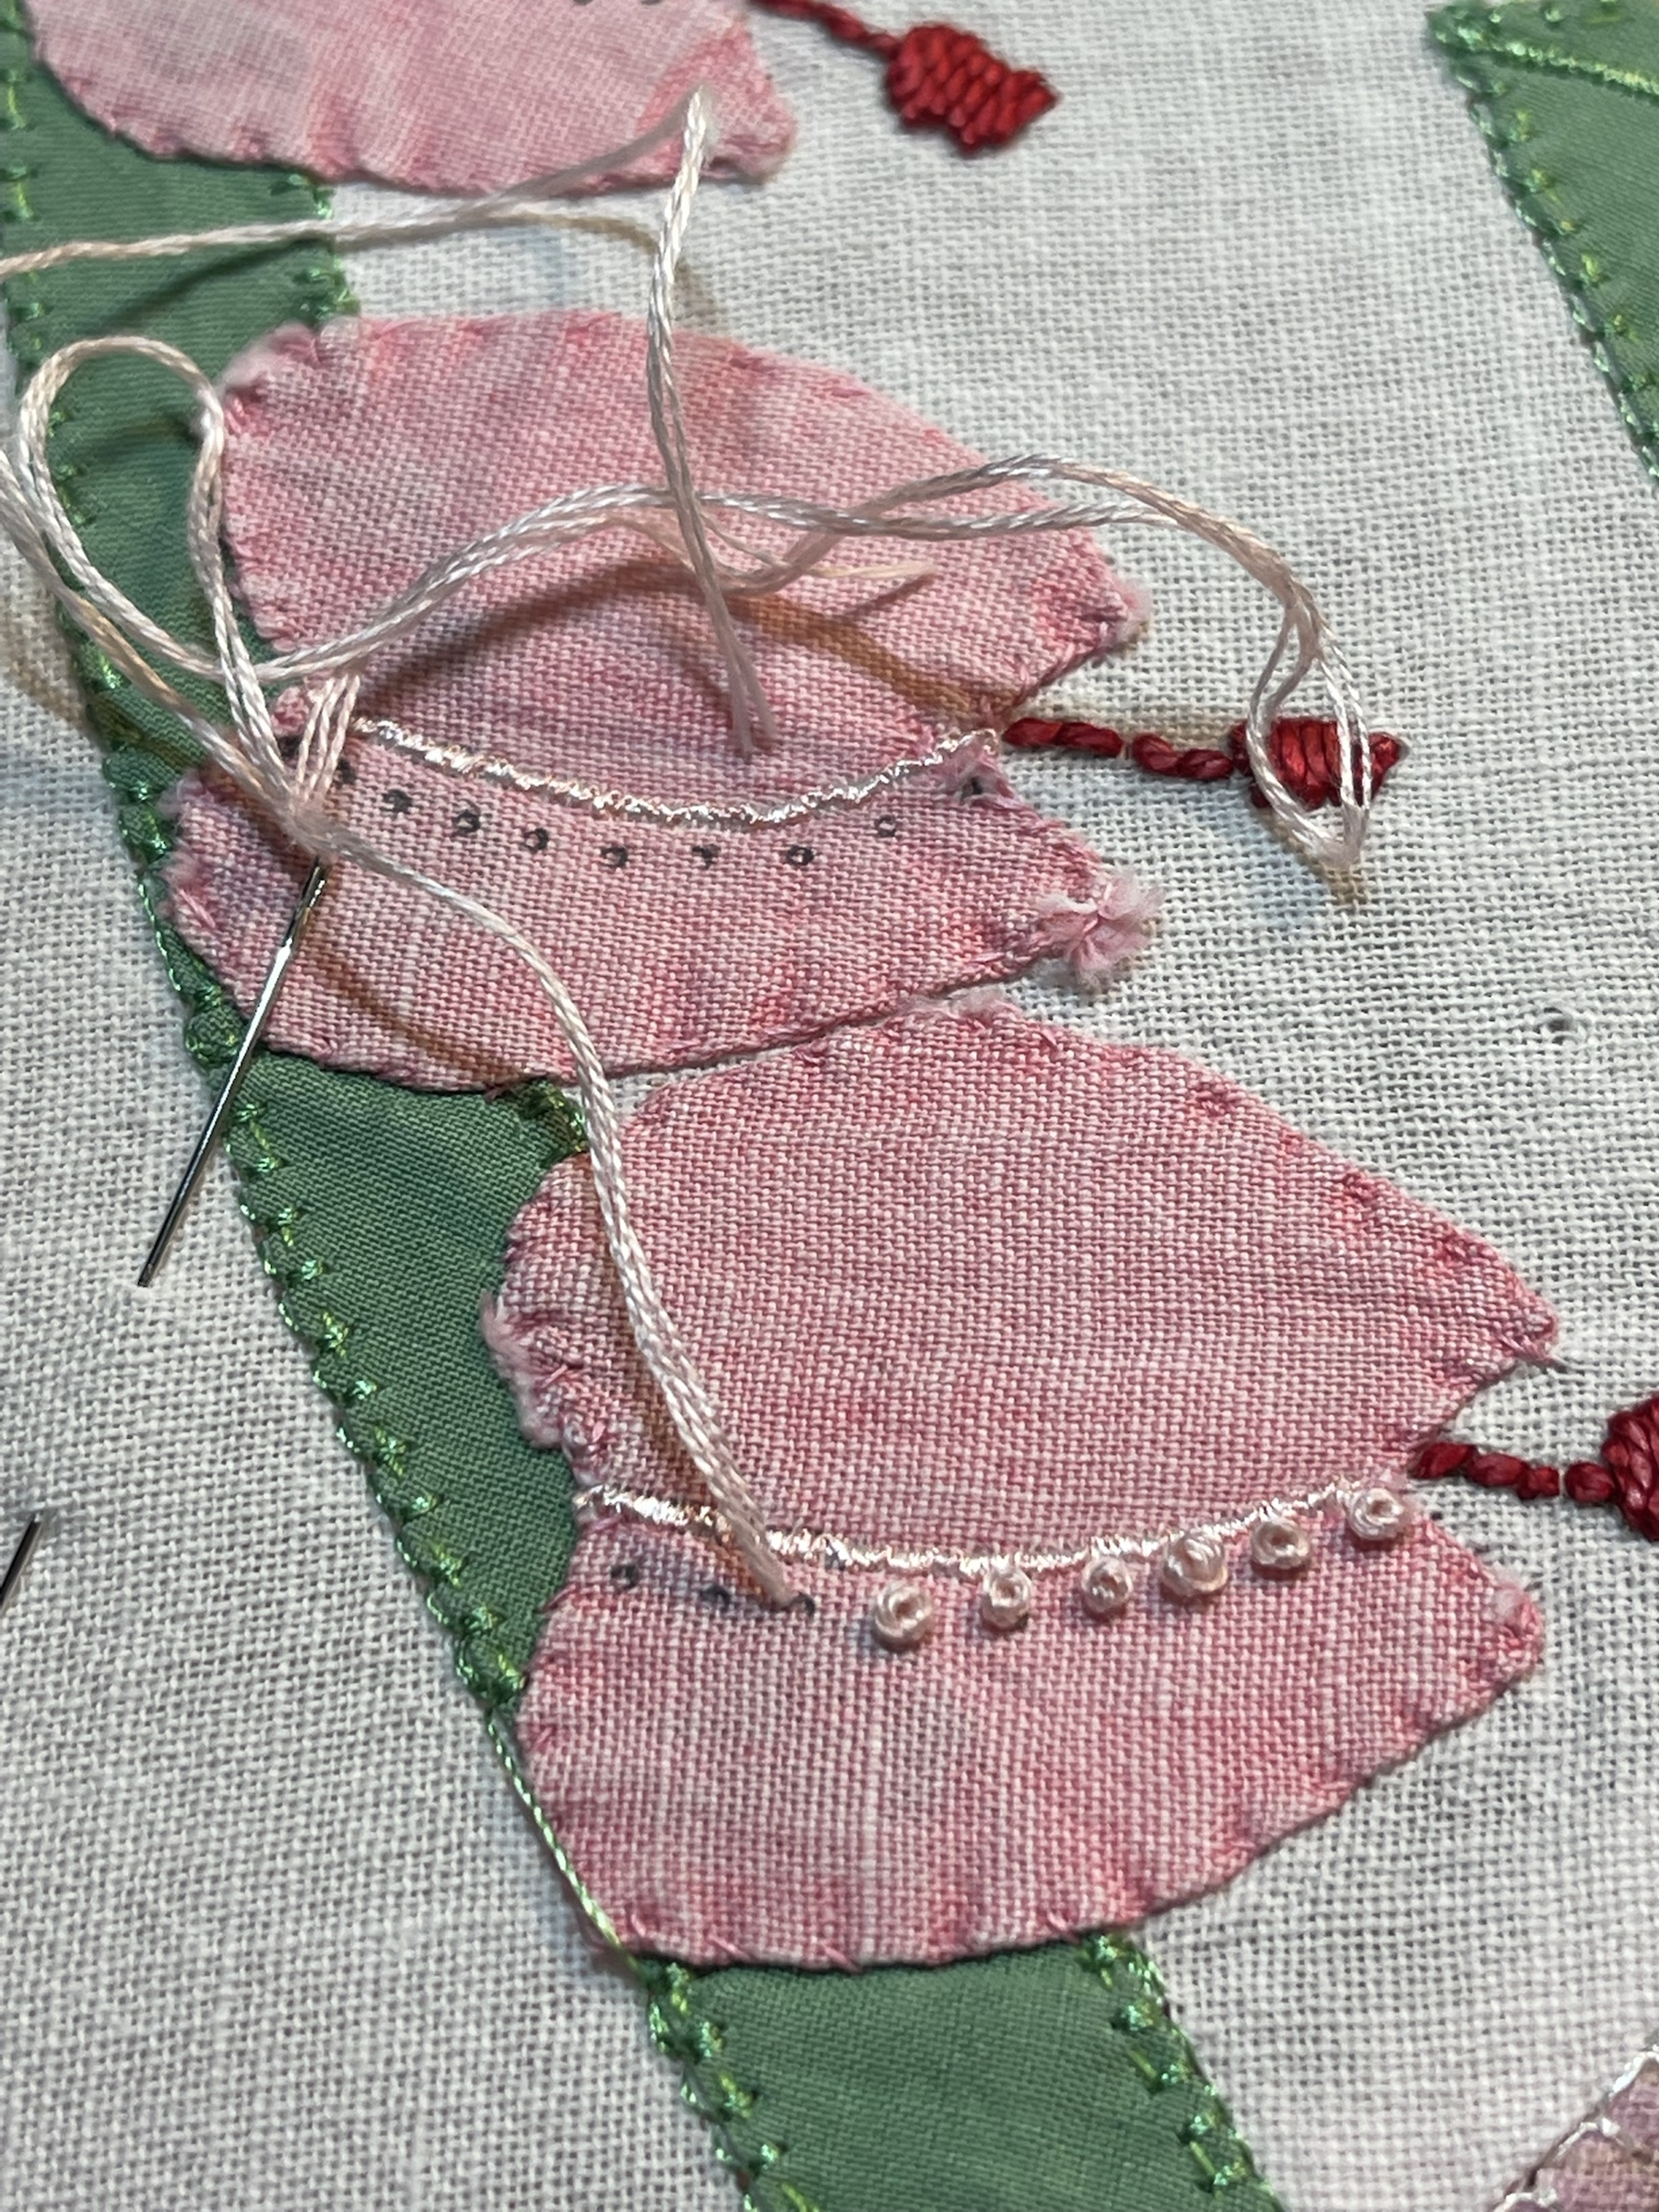
Besides all the machine decorative stitching, I did quite a lot of hand work on the blocks.
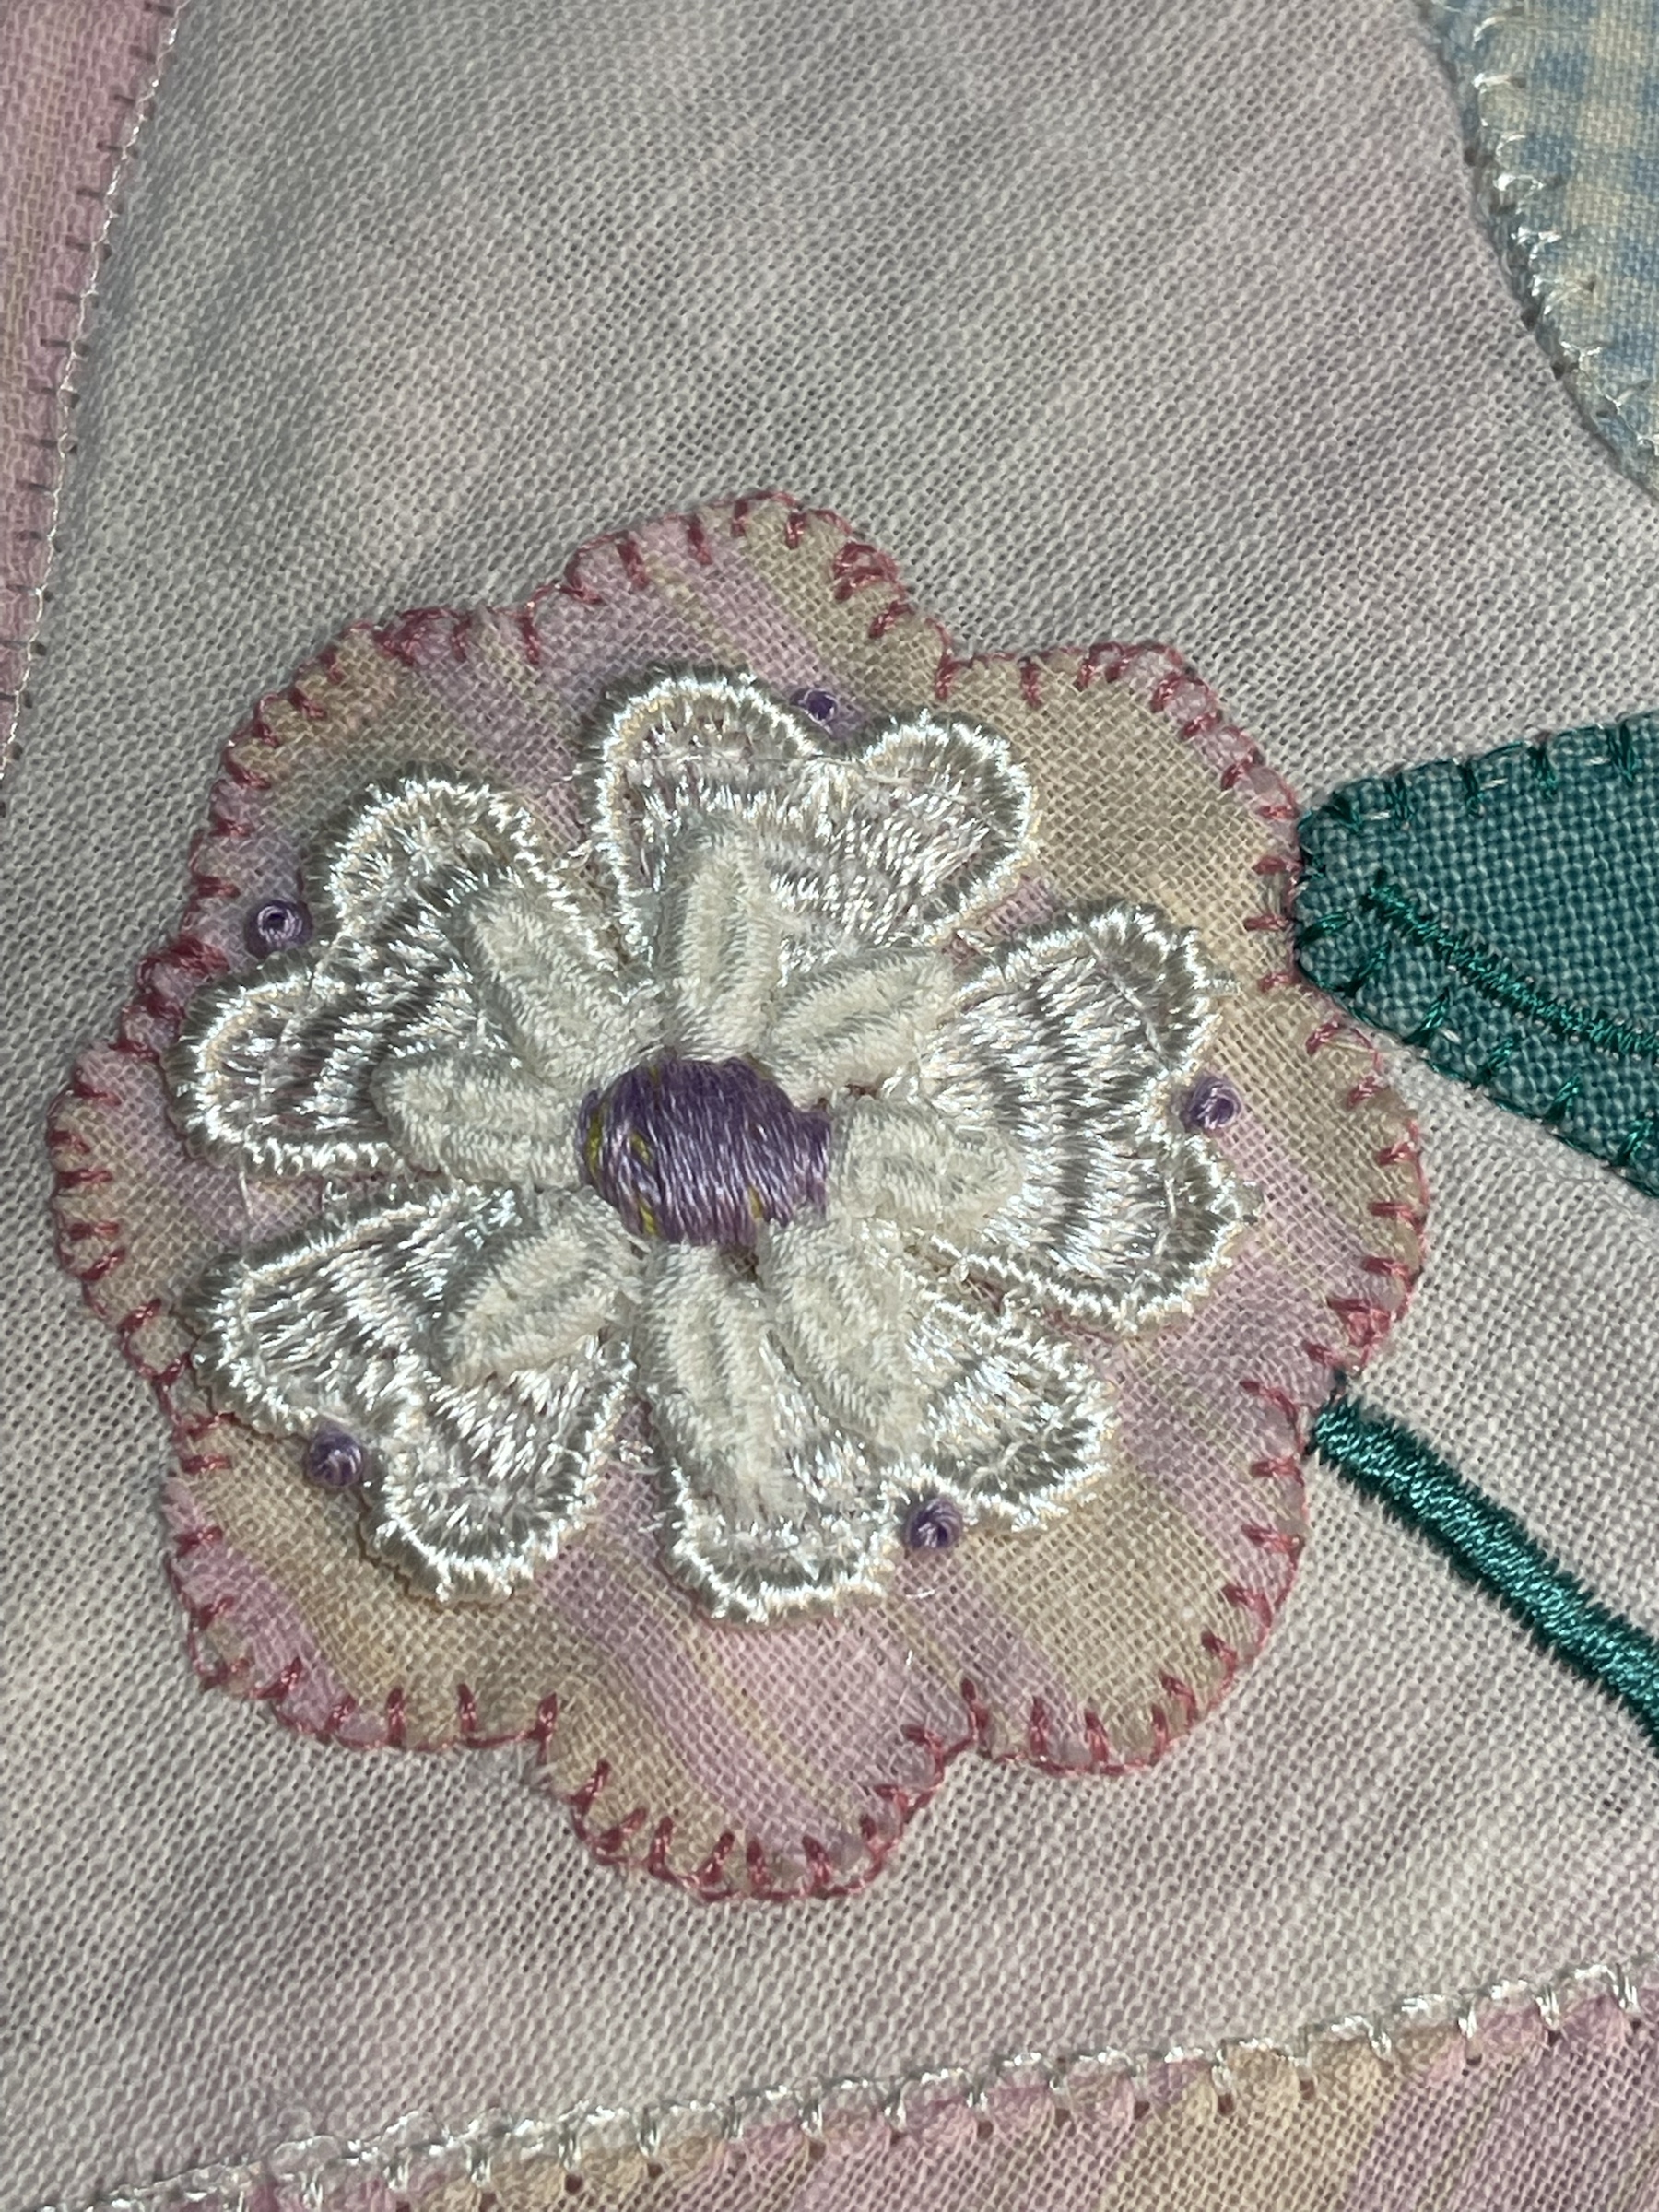
I’m a huge fan of French Knots.
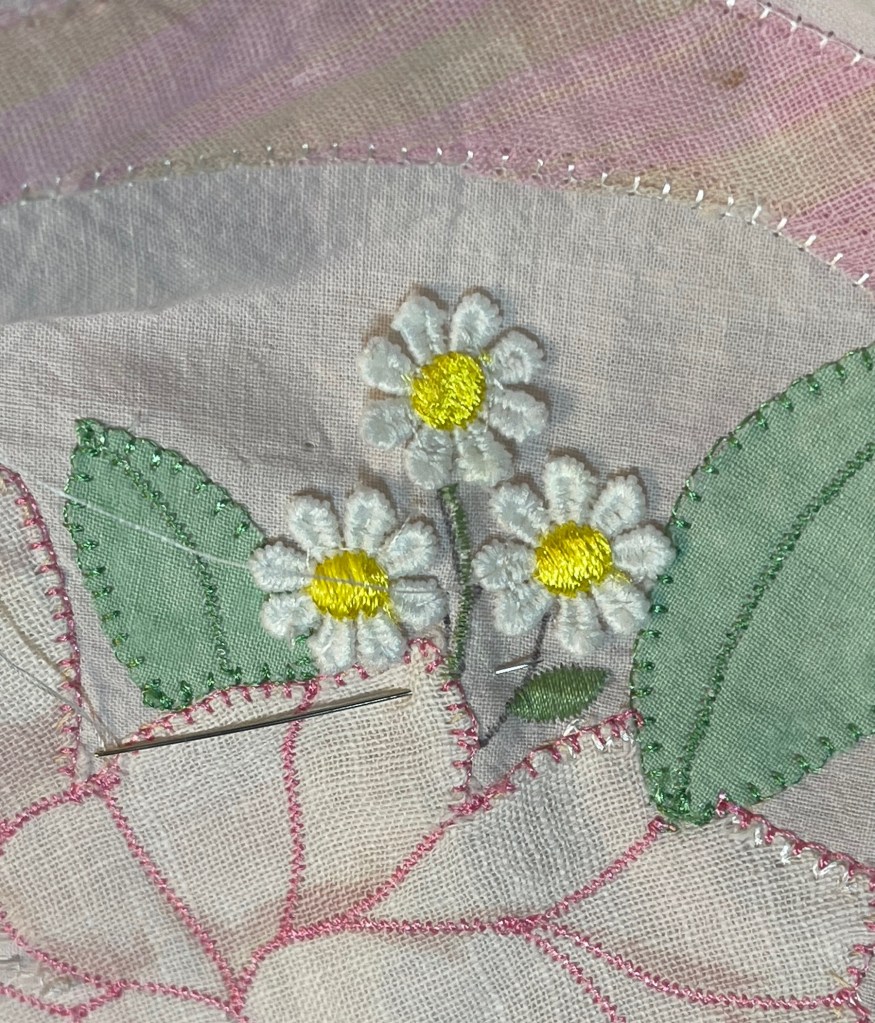
Each of the tiny white flowers intertwined around the basket handle got a tiny pink French Knot center.
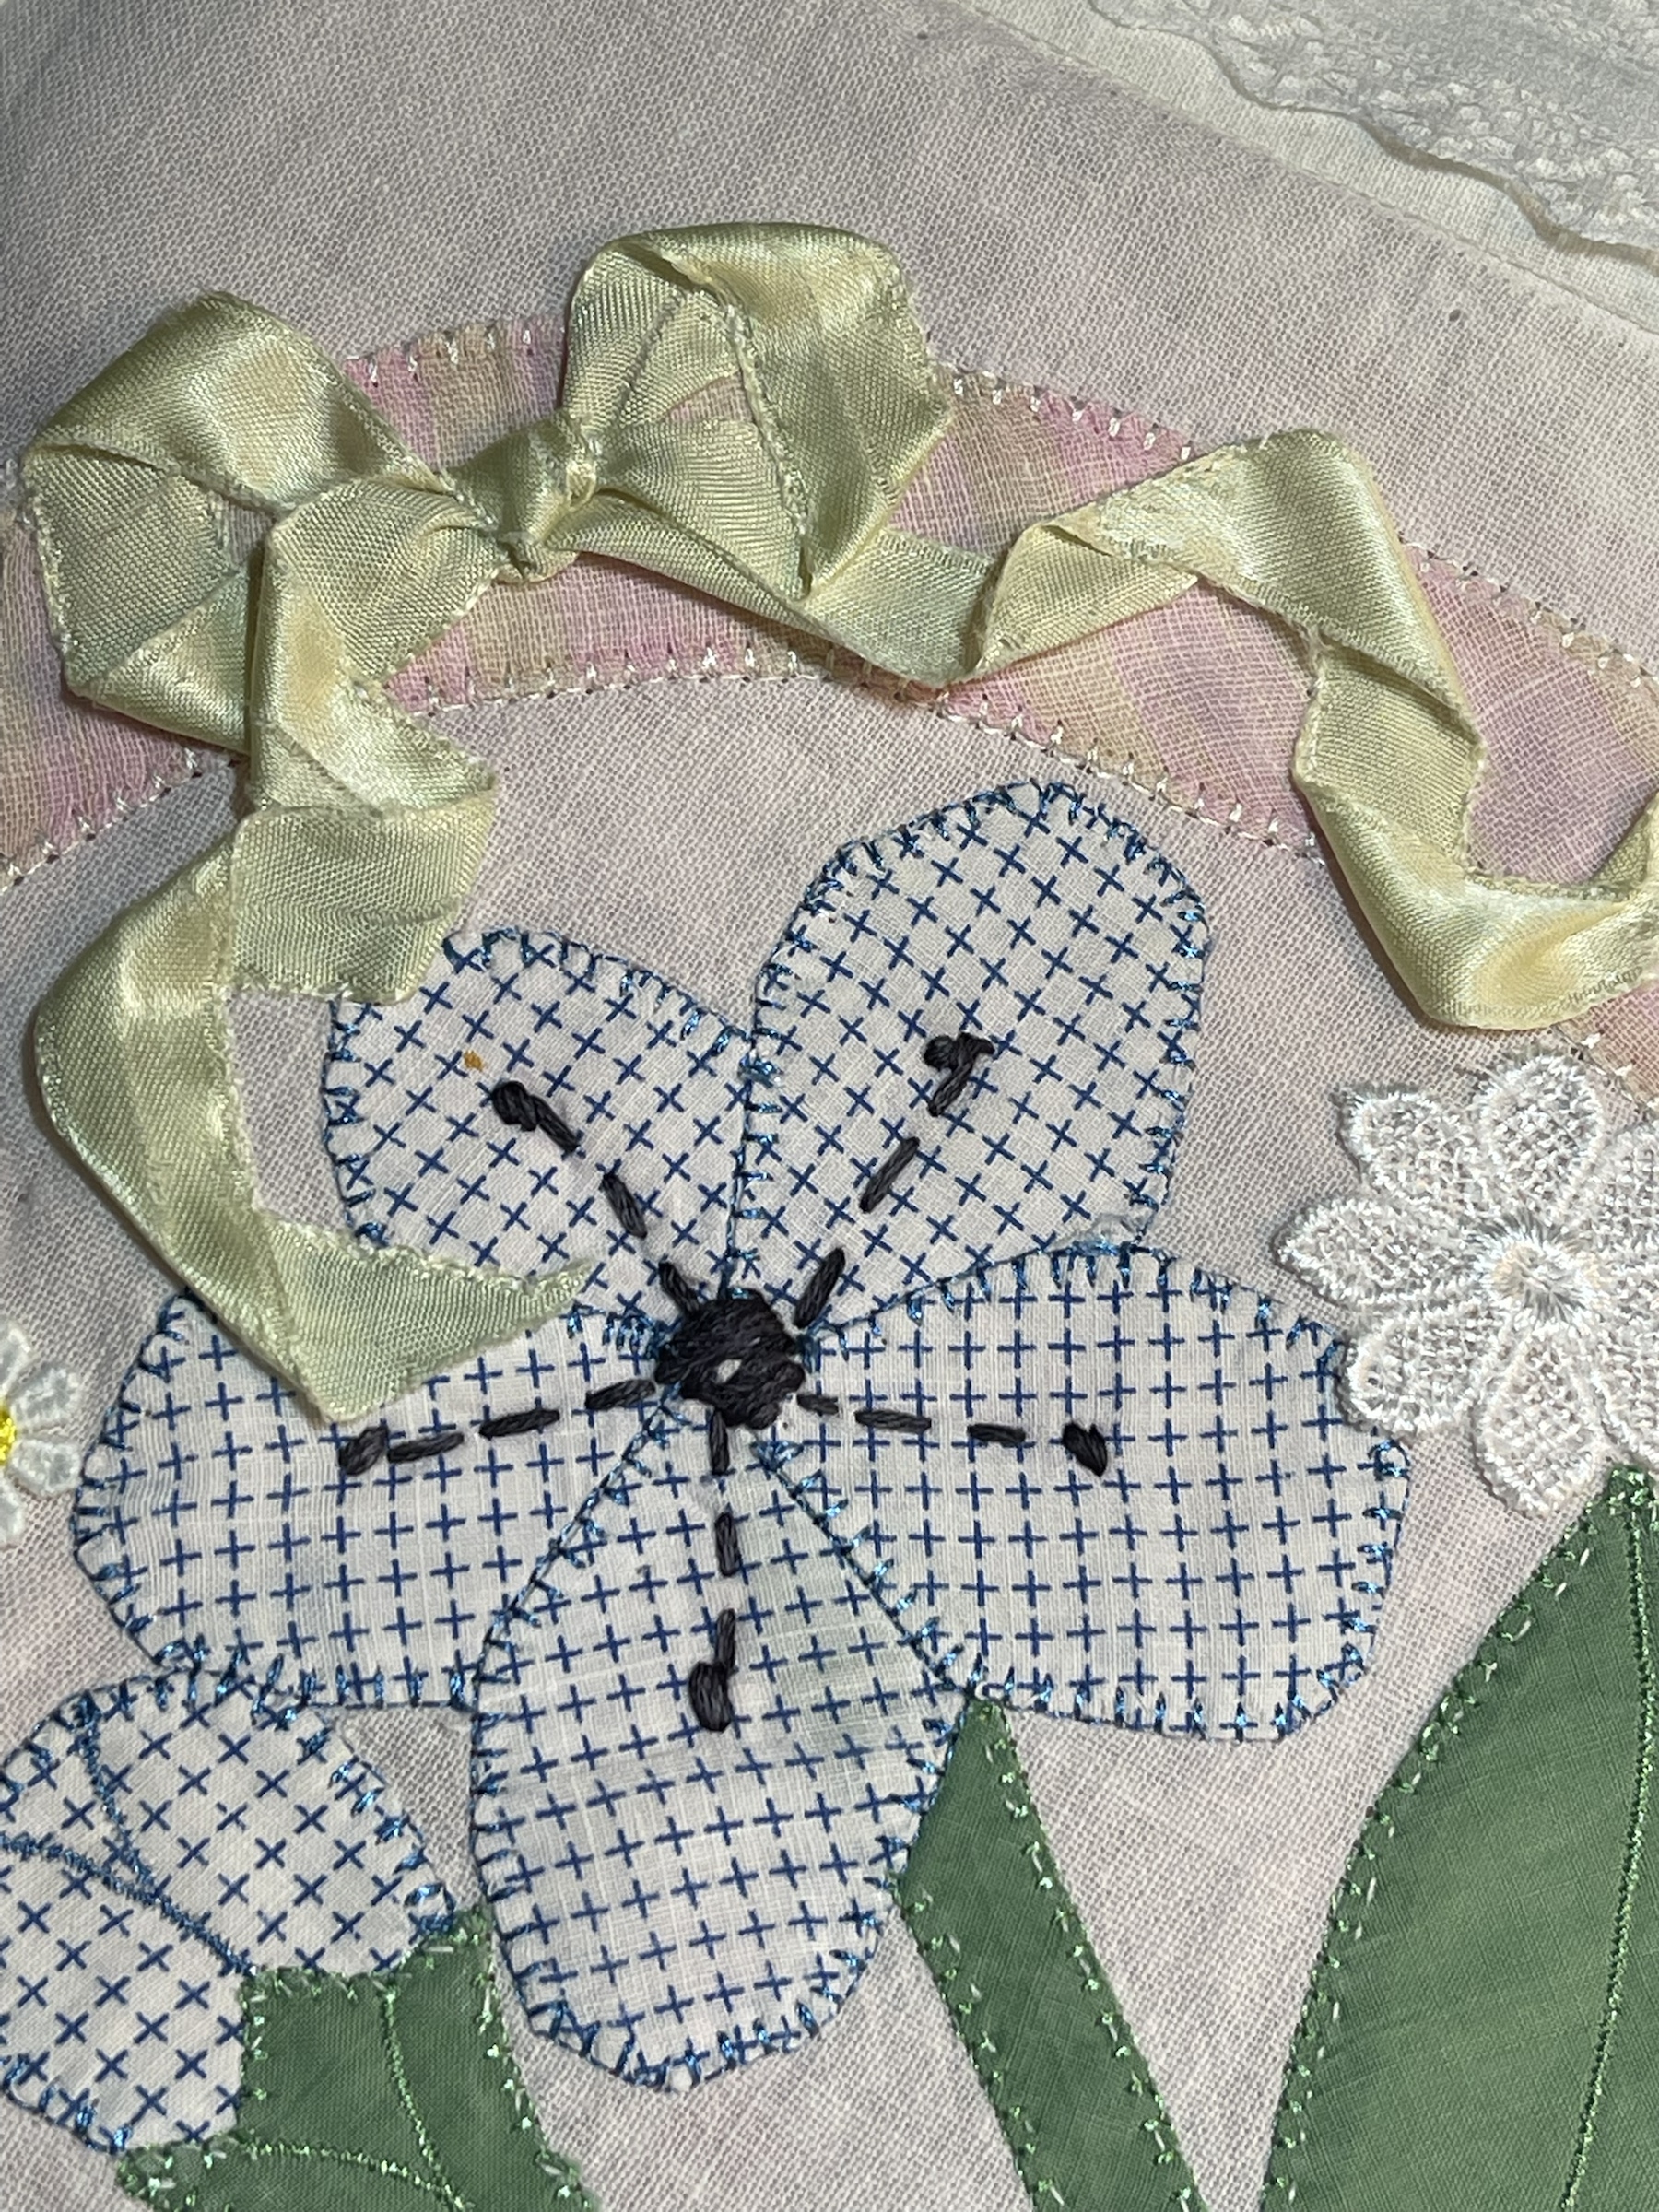
Lots of 5 petal lazy-daisy flowers will find their way into the blocks.
Larger yellow French Knots around the left half of the flower centers as well as pink satin stitching directly over the manufactured yellow centers of two larger white flowers.
Did I mention I like French Knots?
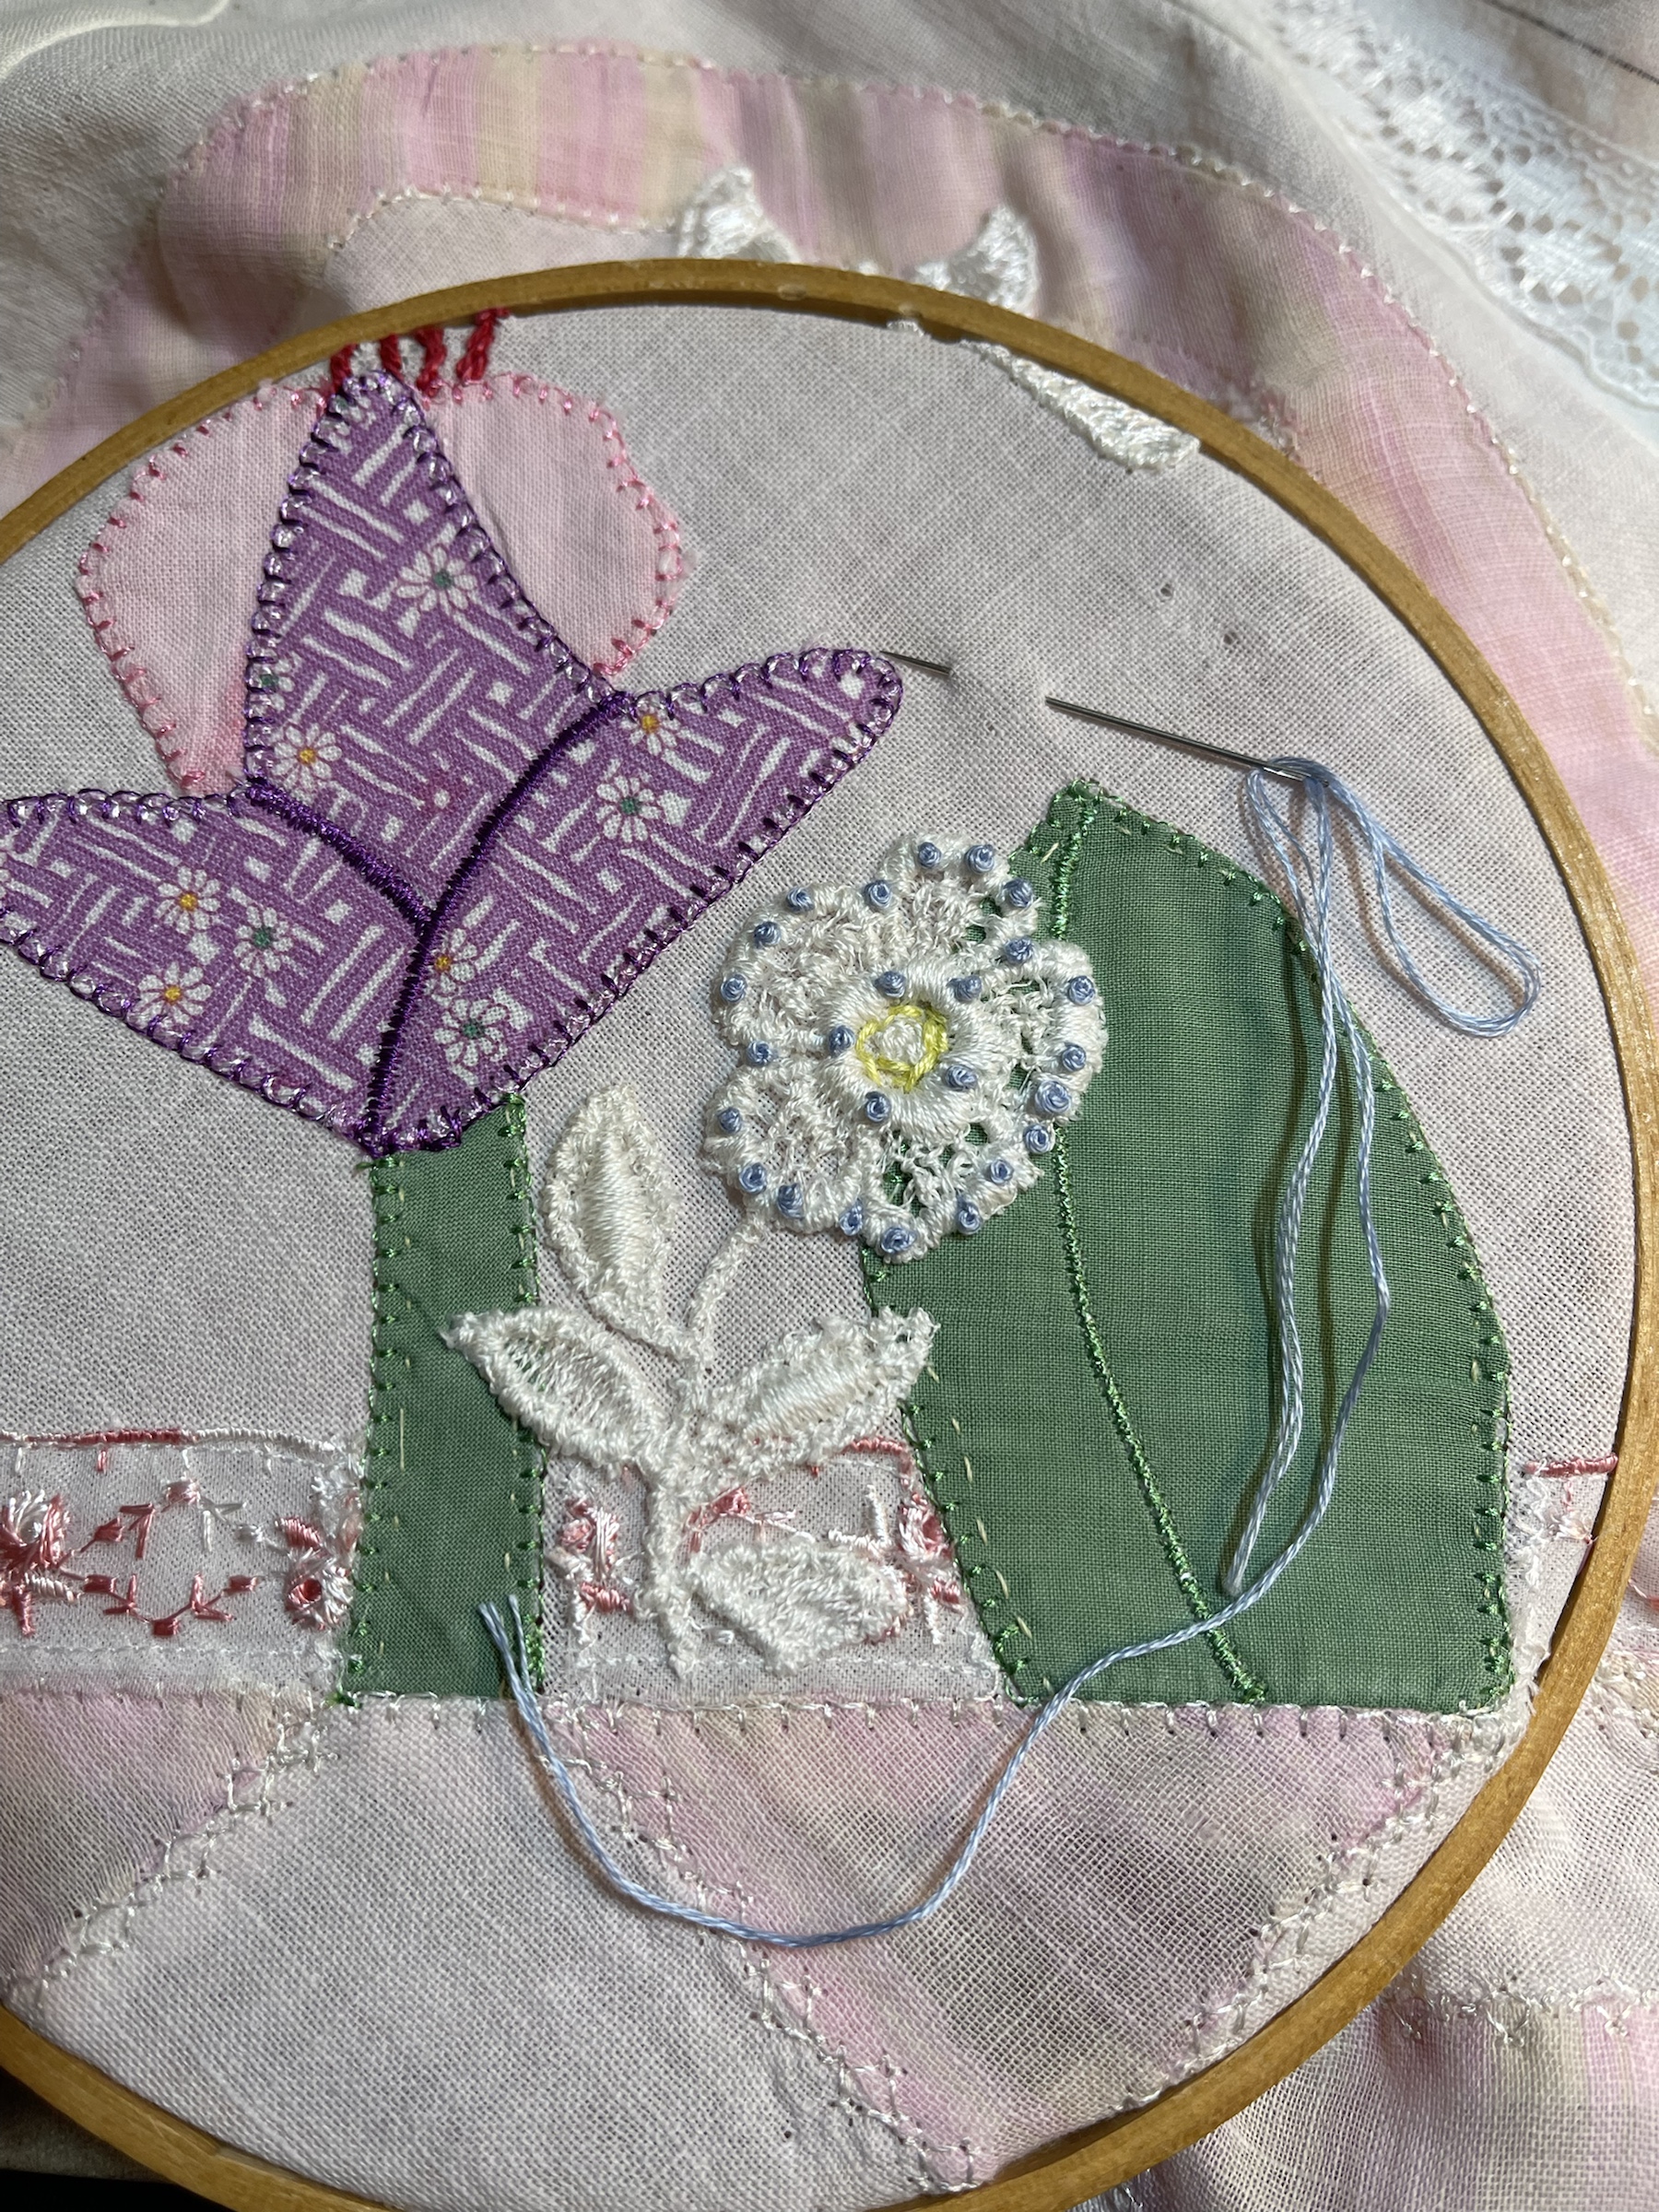
The pale green ribbon is quite old, something I pulled from my stash.
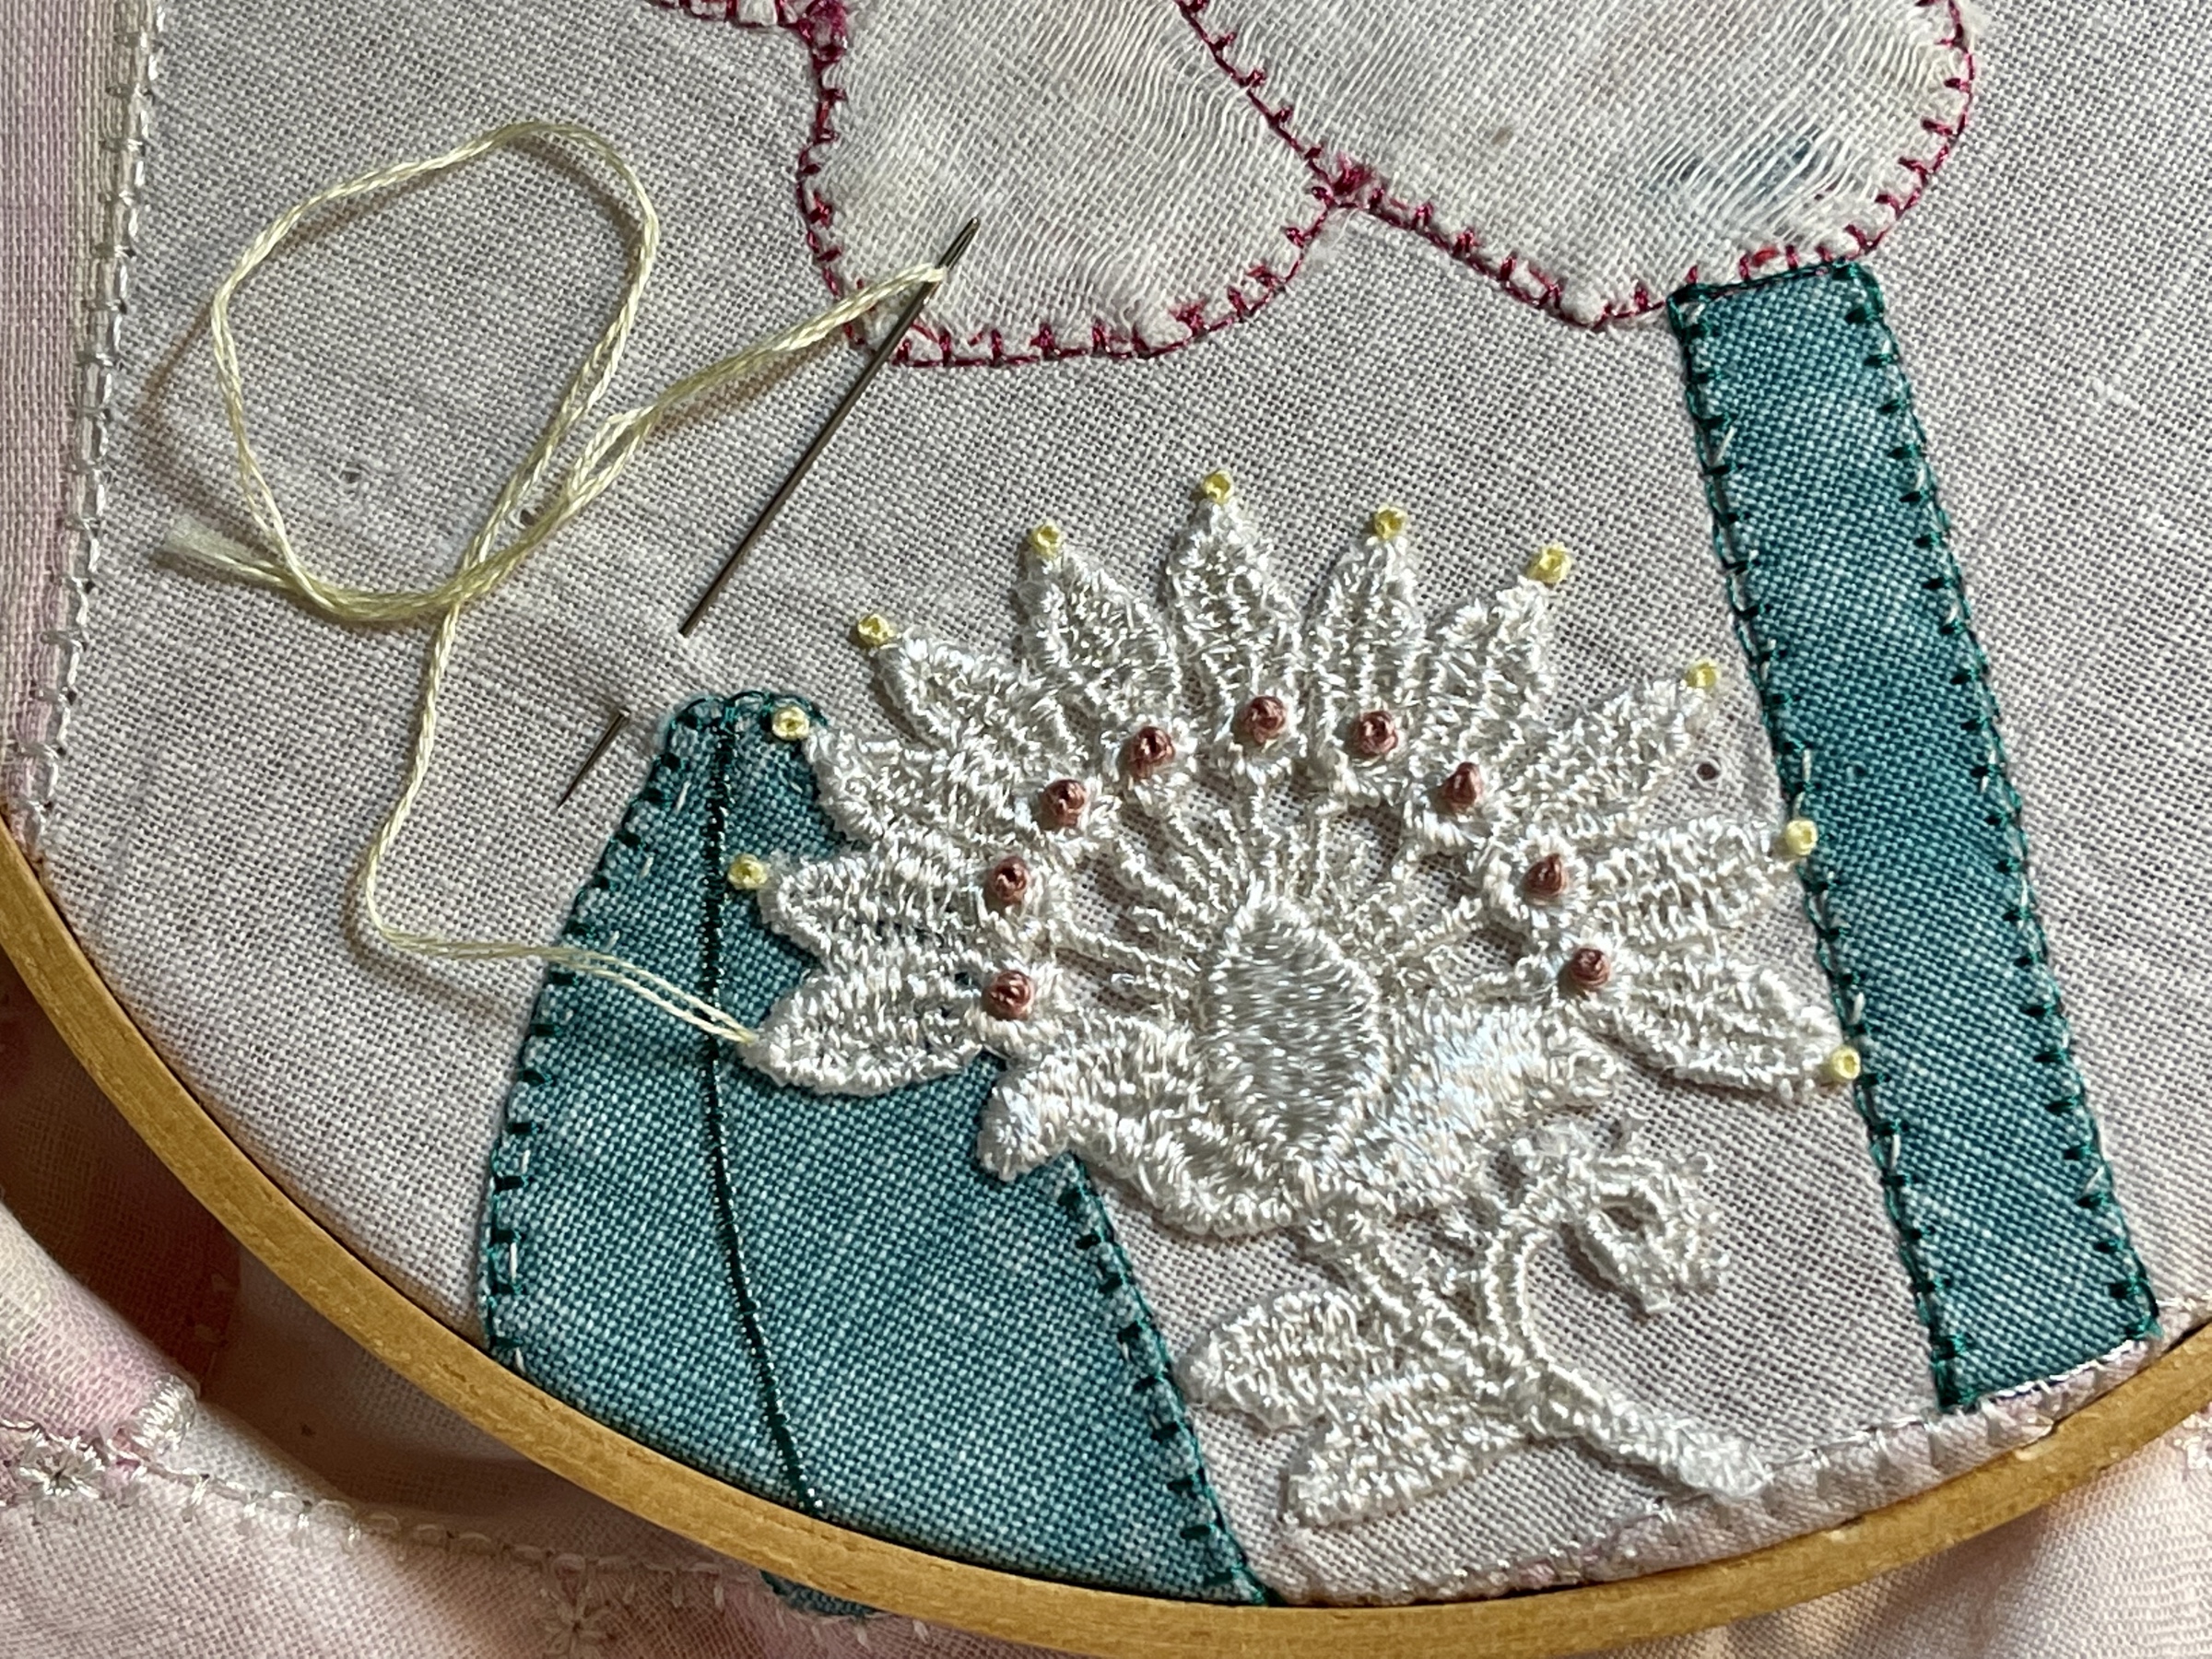
This pale ivory flower motif is a new piece.
A little hand stitching was needed to secure these tiny little flower petals.
All the blocks are finished, the quilt top is complete and has been loaded onto the longarm. In blog post #9 I will detail how 18 minutes of quilting turned into 9 hours of “un-quilting”. ☹️