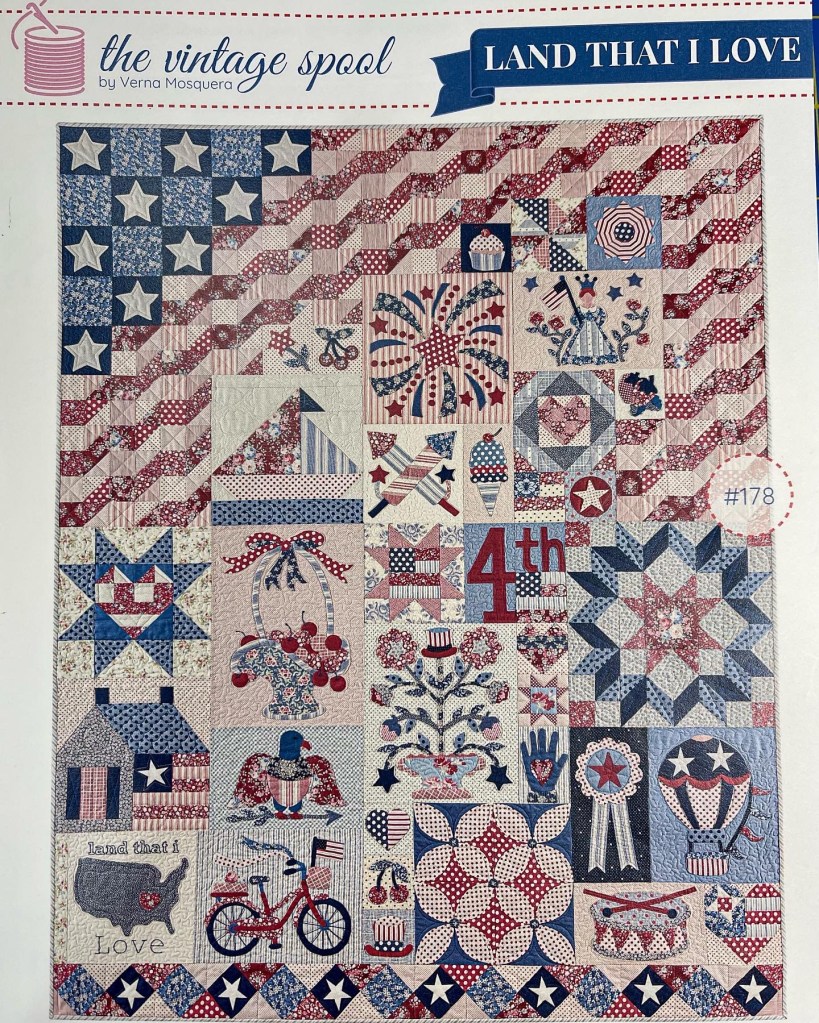
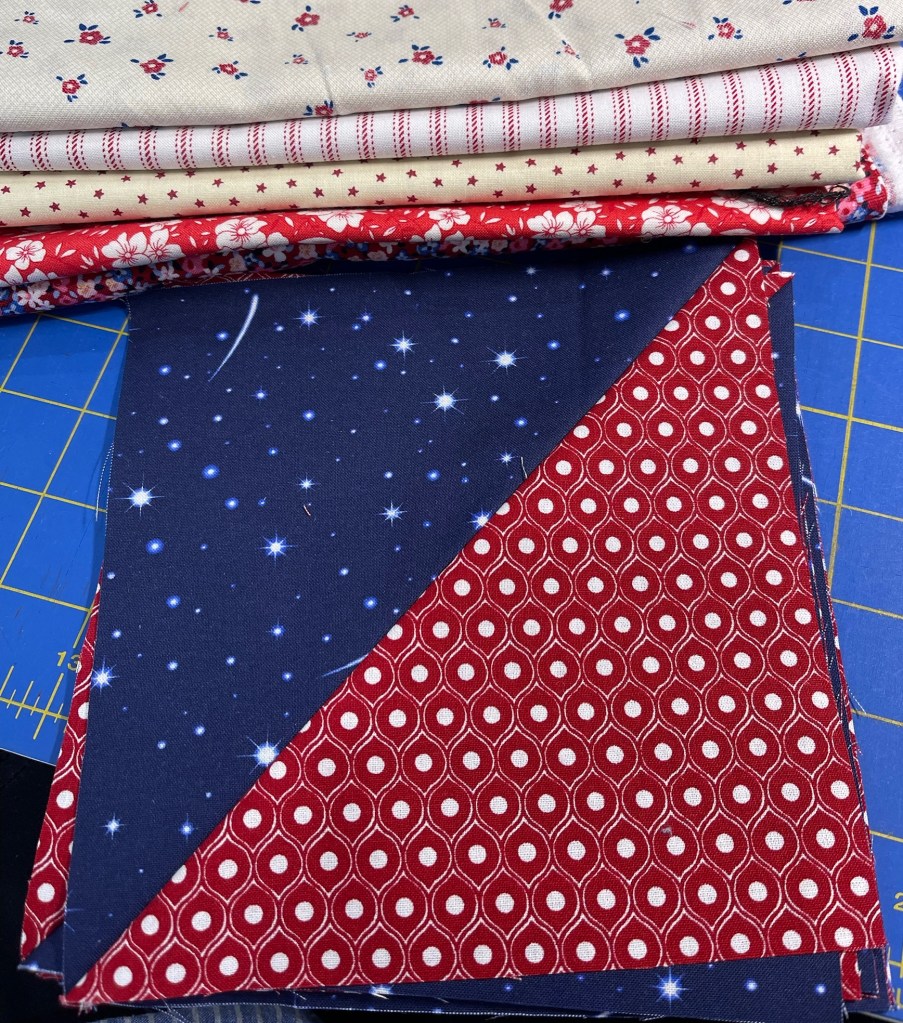
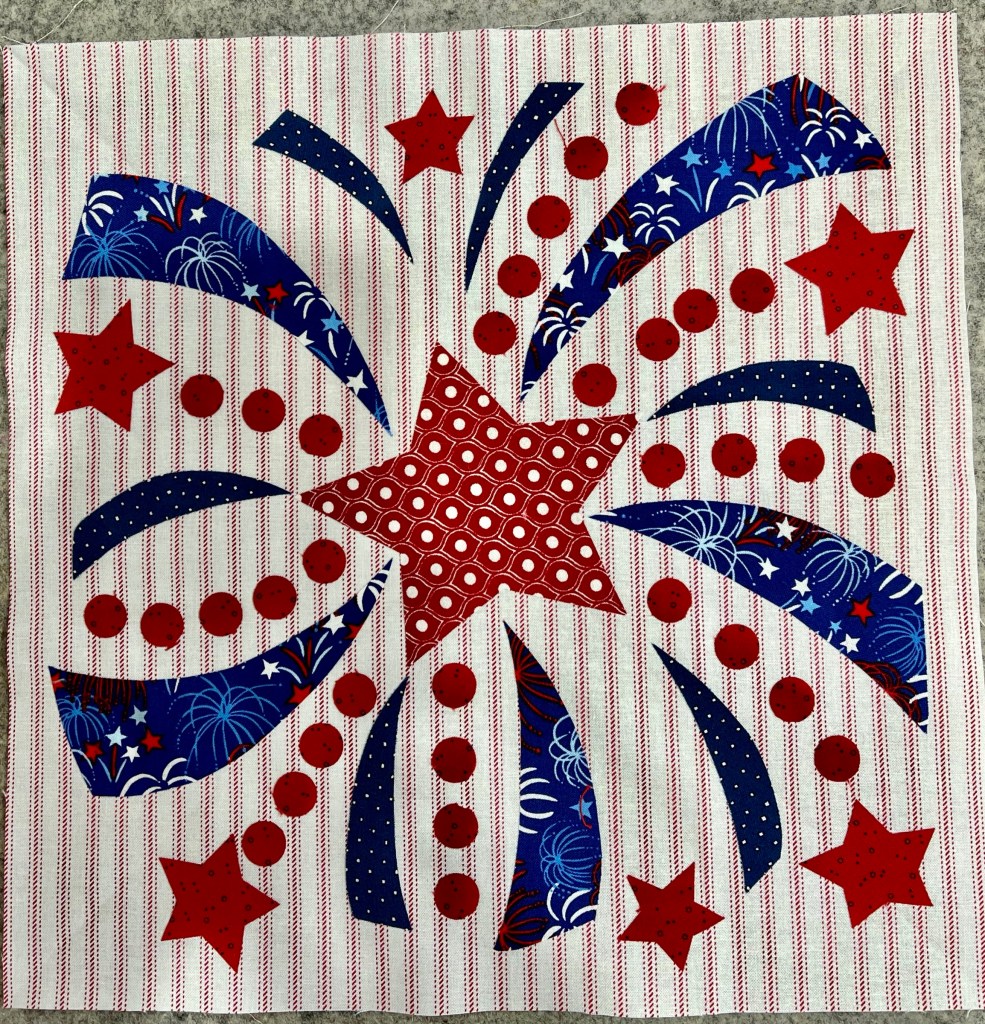
Taking a step away from vintage, just look at this quilt pattern! I fell in love at first sight!
My friend Diana showed me the pattern and suddenly things escalated, we devised a plan: she’s not crazy about doing applique and I’m not crazy about piecing so by combining our efforts we are making two quilts, I’m the doing the applique and she’s the piecer.
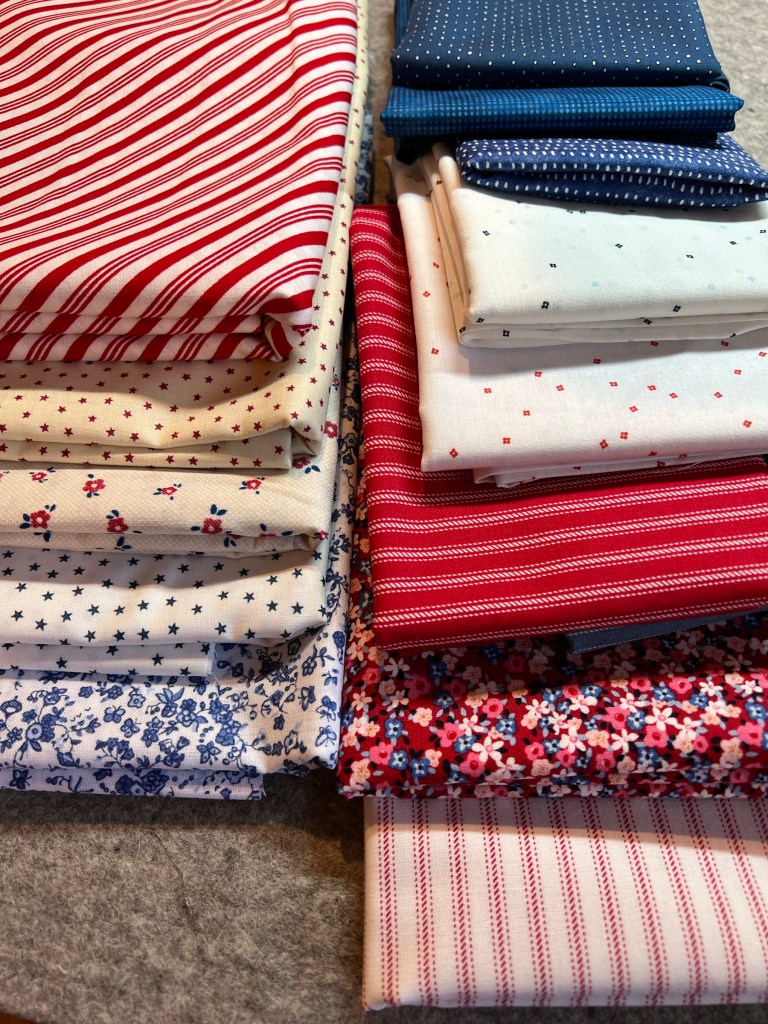
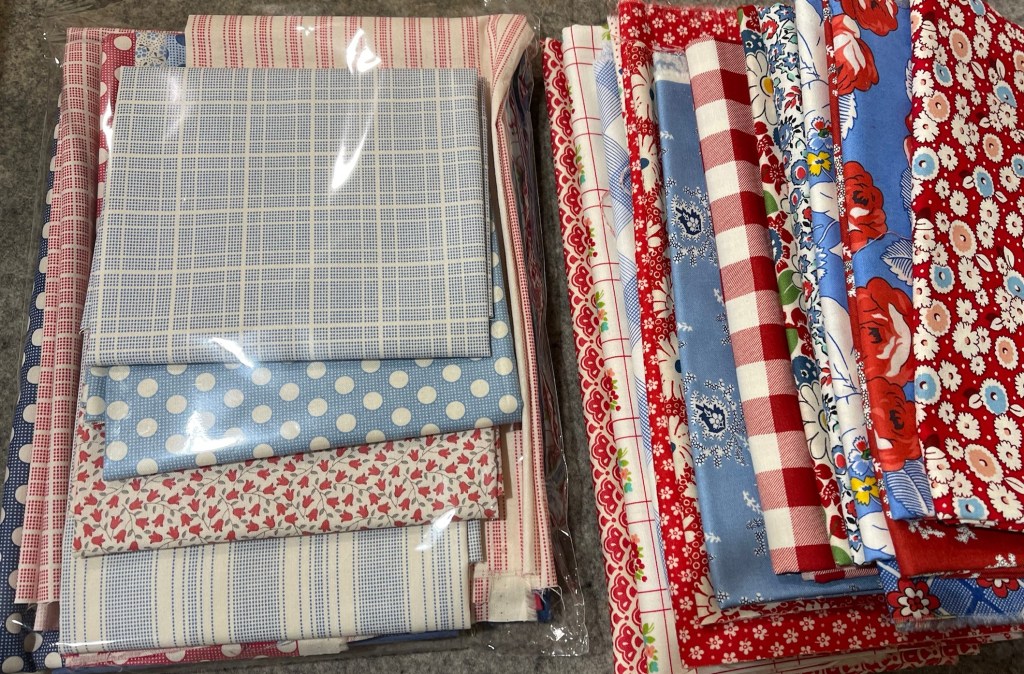
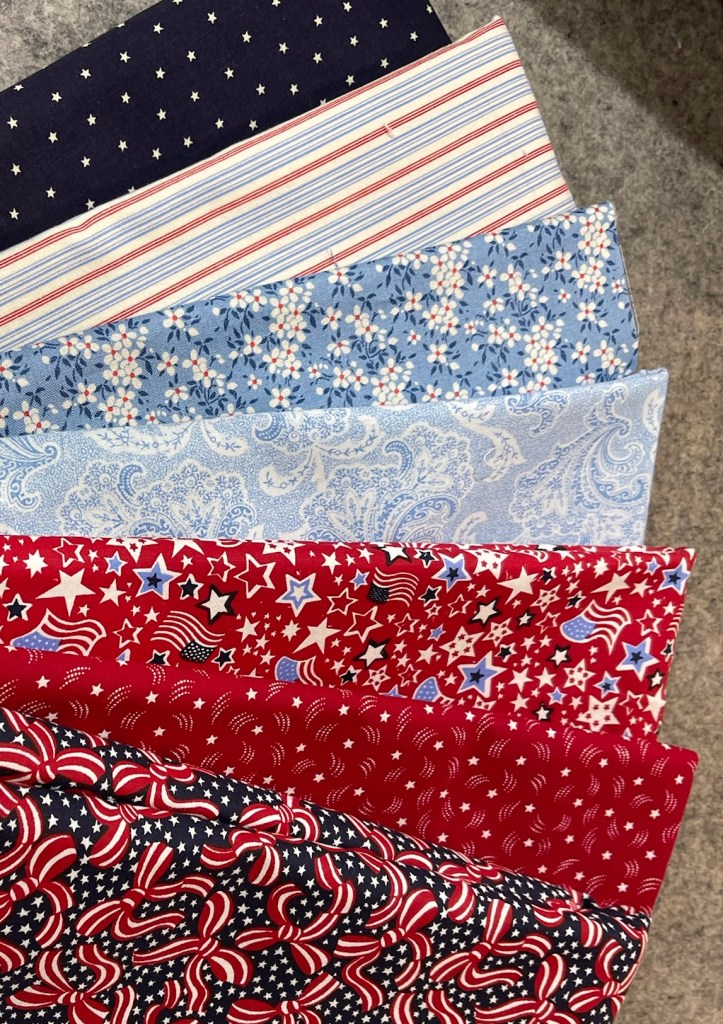
We’ve raided our respective stashes, spent a few hours together reviewing blocks and choosing fabrics.
We realized we have enough red/white/blue/ivory fabrics to make 50 quilts! 🤣🤪
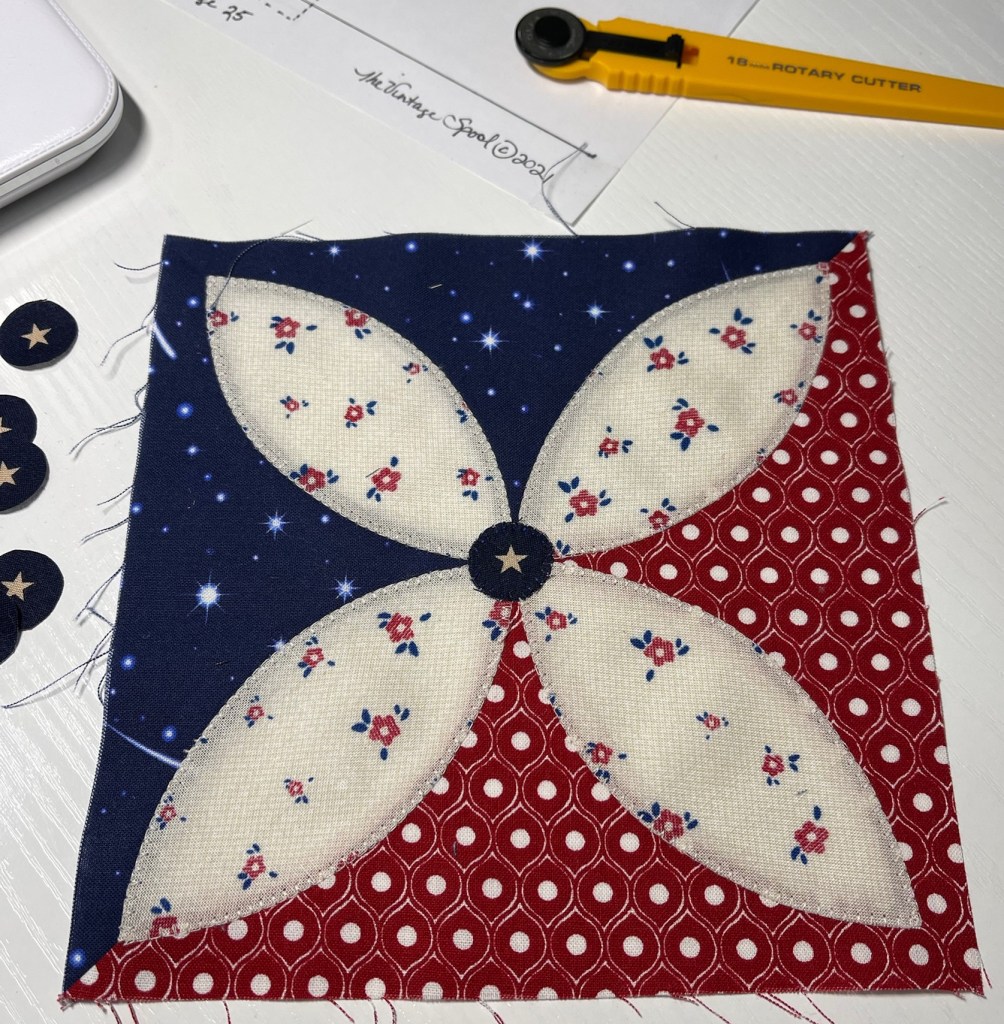
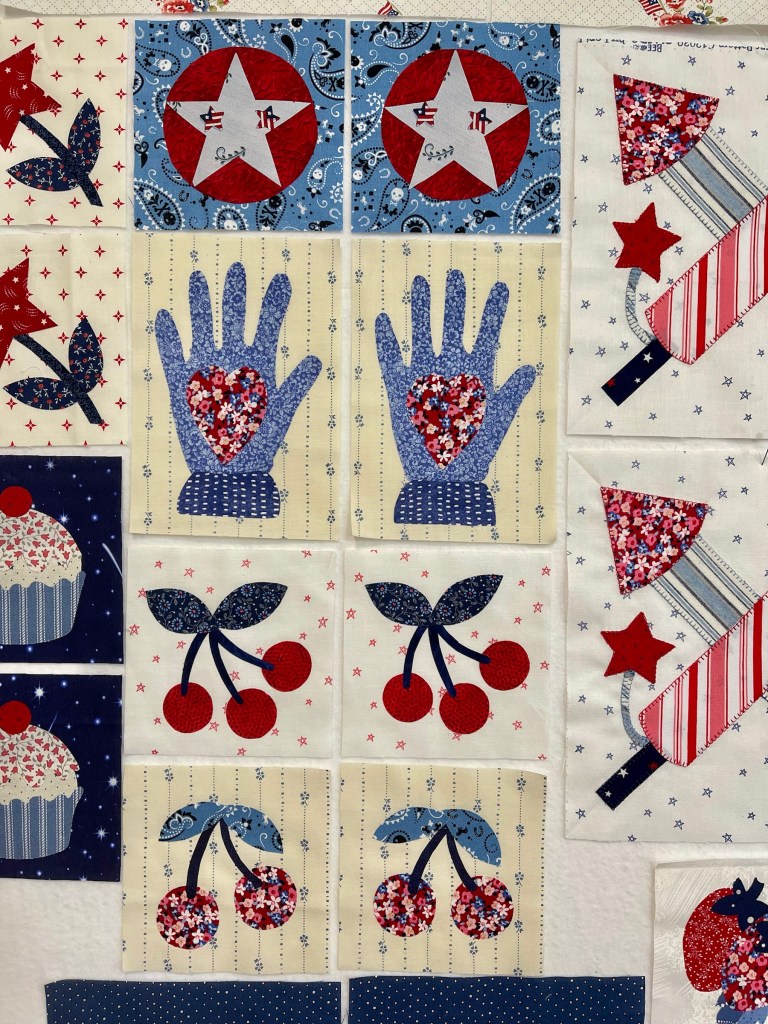
And the first block is born!
I thought about doing needle turn applique but came to my senses a day or two later. This project is going to be raw edge machine applique all the way.
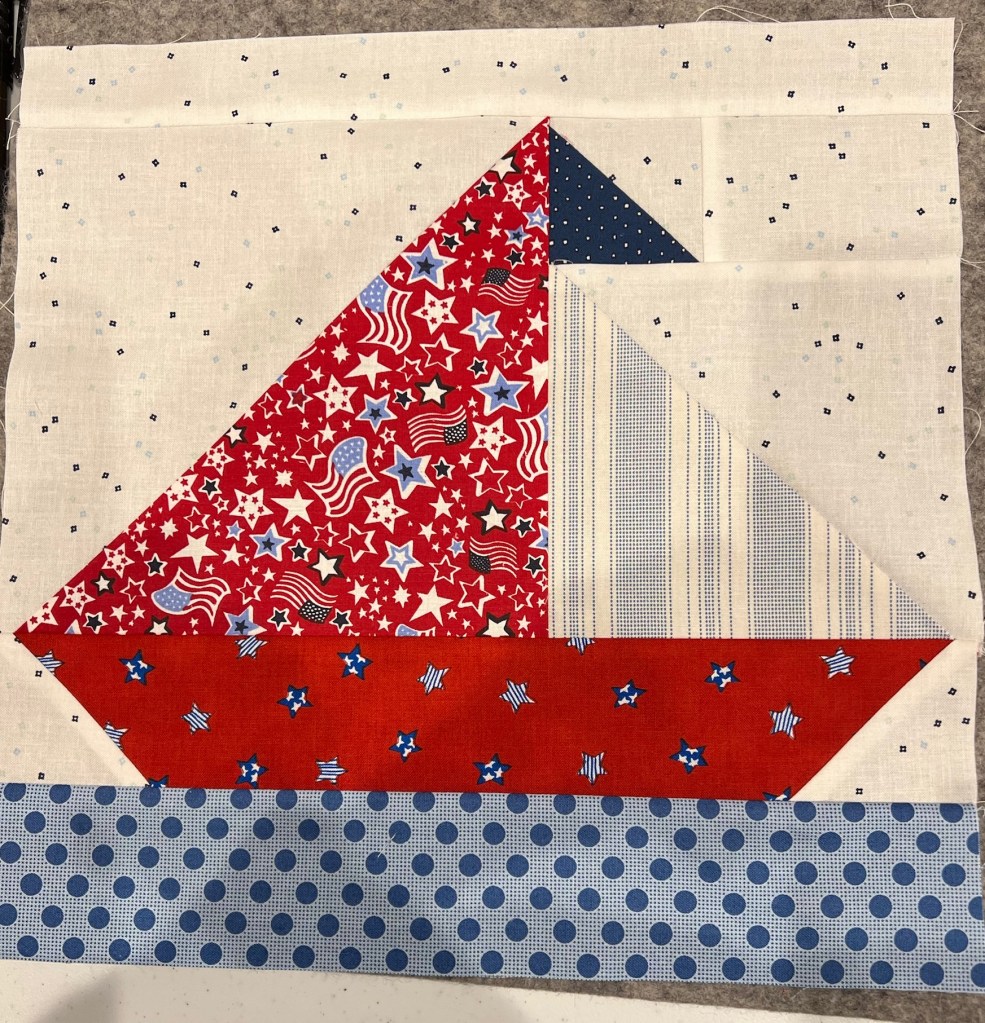
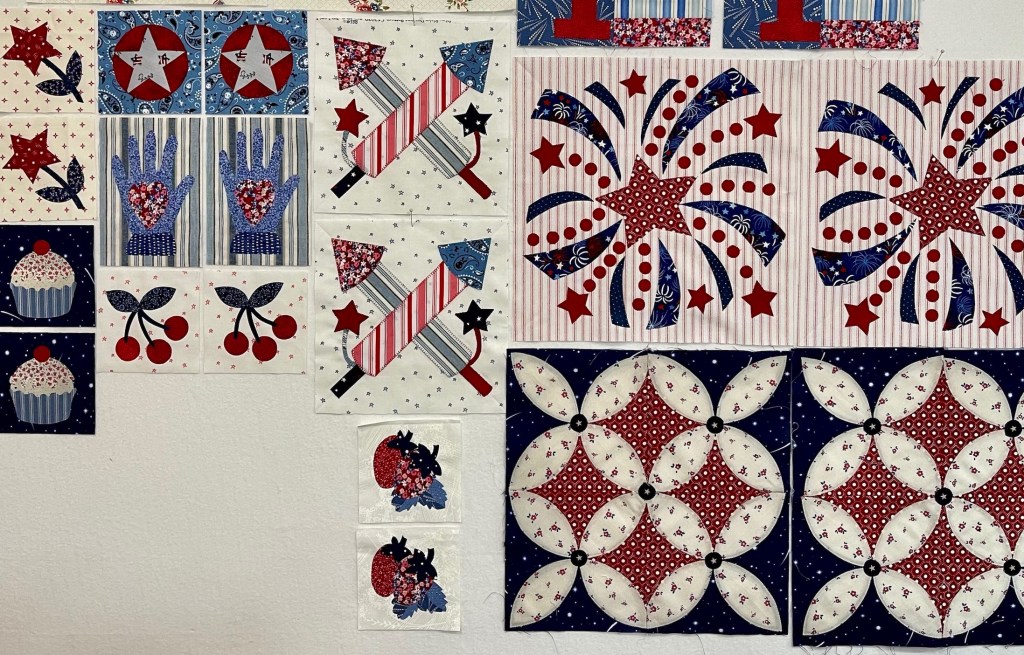
How cute is this sail boat!
Oh I’m loving this one!
The tiny red circles…33 of them…two identical blocks means I’ve got 66 of these to machine applique! Yikes!!
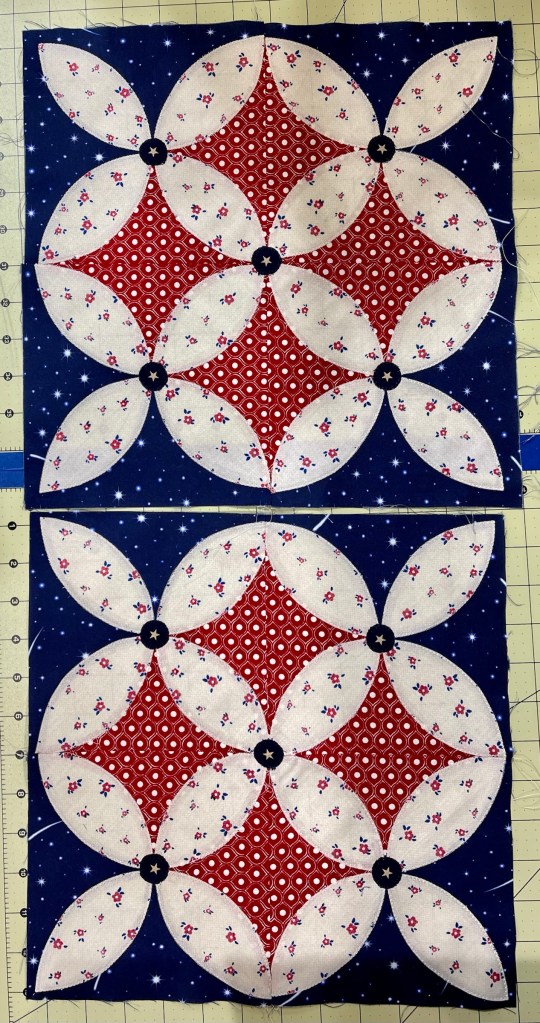
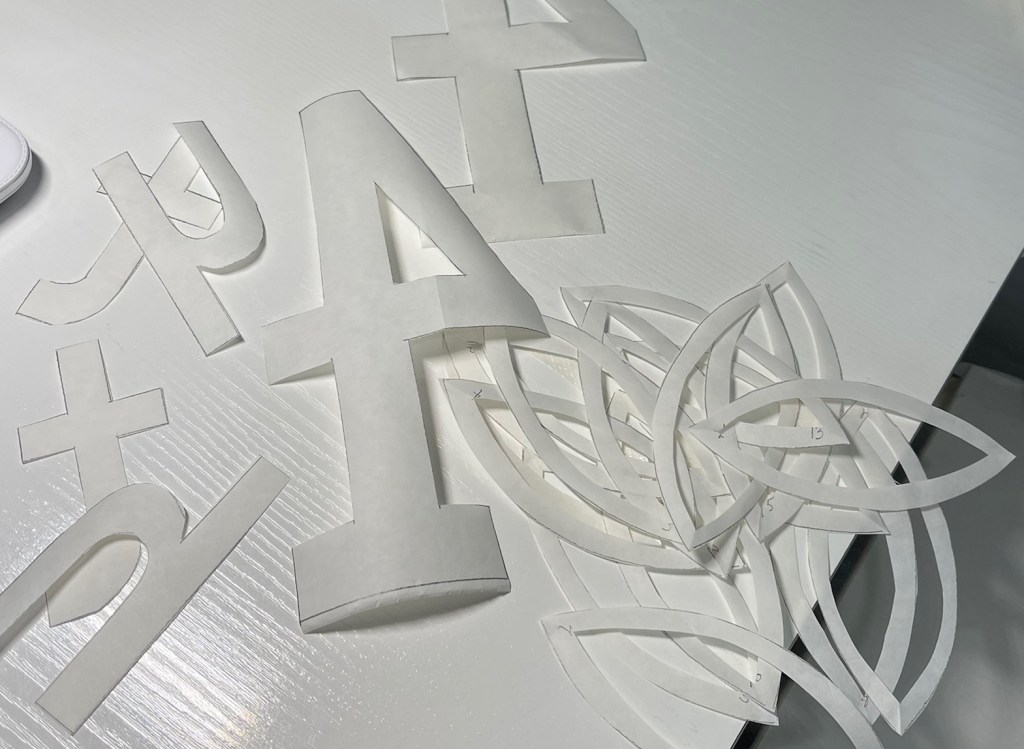
But what are the prep steps for my machine applique? I’m a big fan of Heat ‘n Bond Lite fusible. I buy it by the bolt (with a coupon) at JoAnn Fabrics. When my fusible is more than 3/4” wide I “donut cut”, see the melons above and the number 4 below.
Why “donut cut”? It greatly reduces bulk, especially when there are overlapping applique pieces.
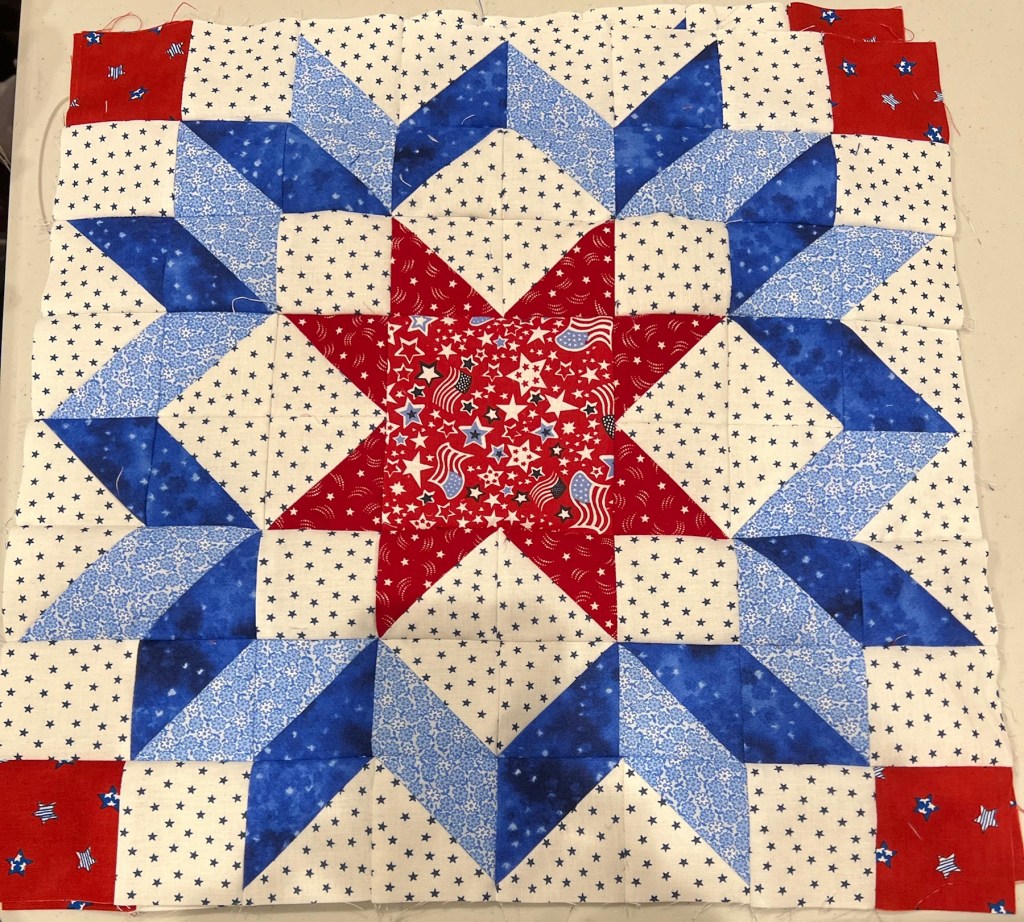
The fabulous Carpenter’s Square block!
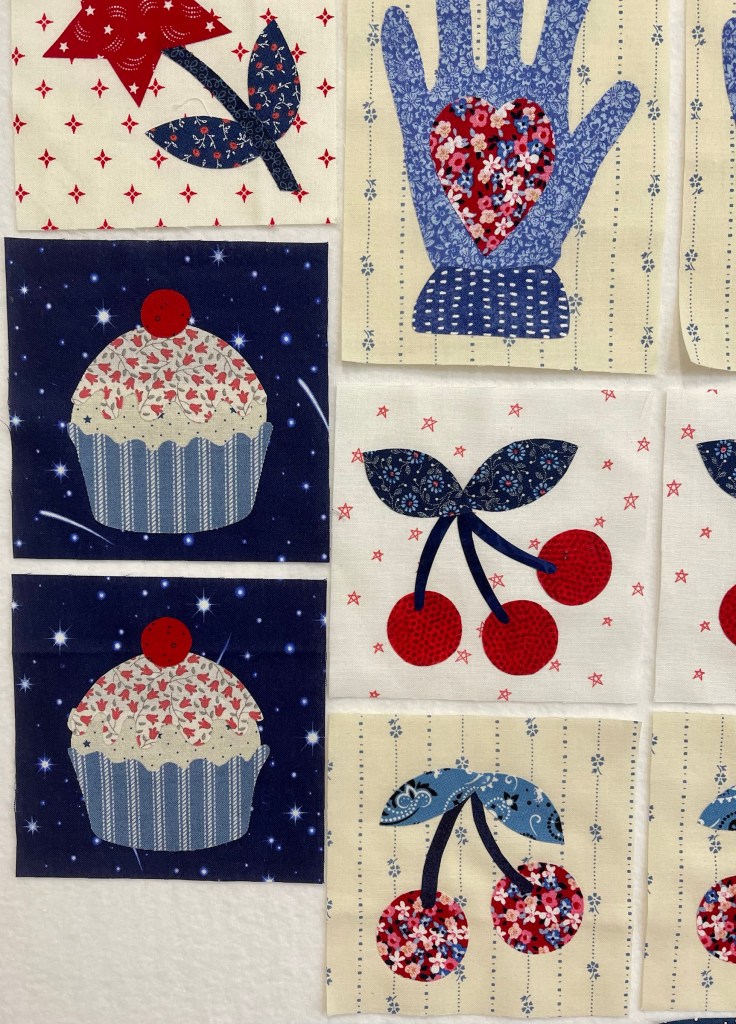
If you look carefully at the above and below pictures you’ll notice I changed the background fabric for the Heart in Hand block.
These blocks are going to be so much fun to machine applique!
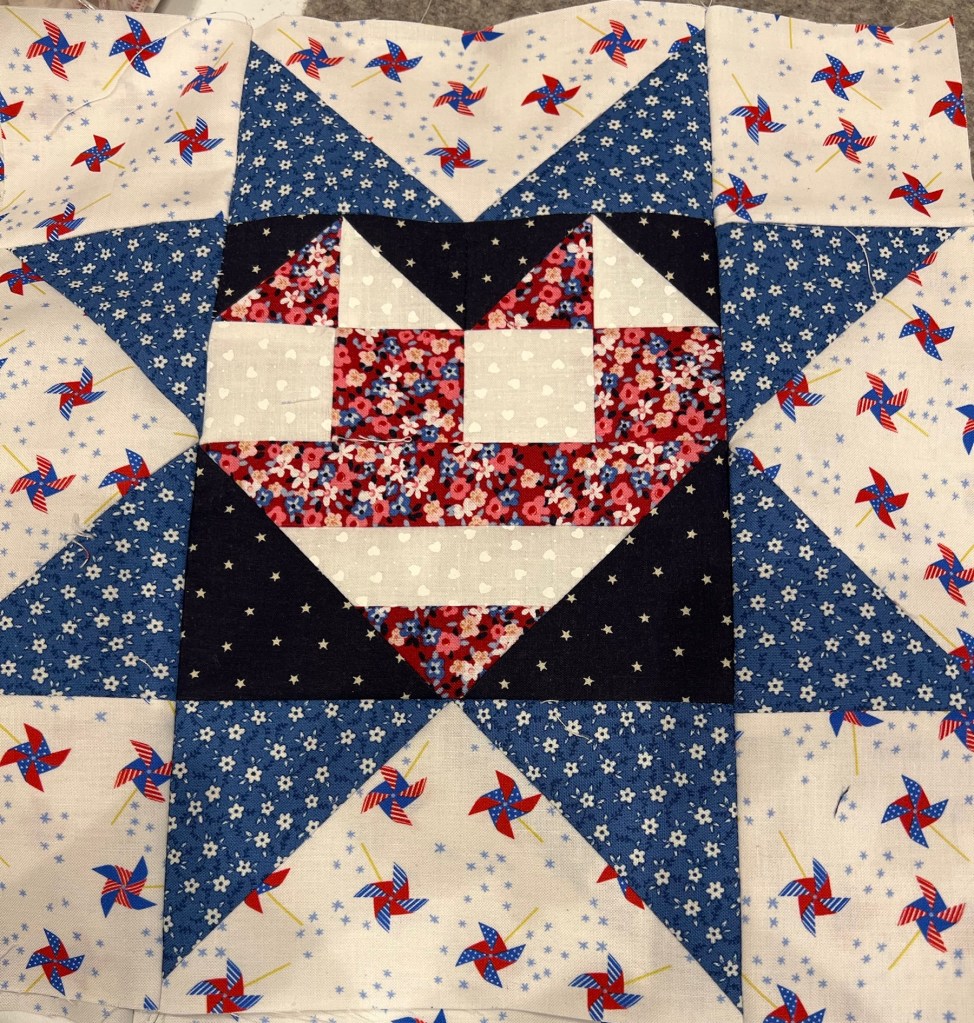
This is the Heart in Star block:
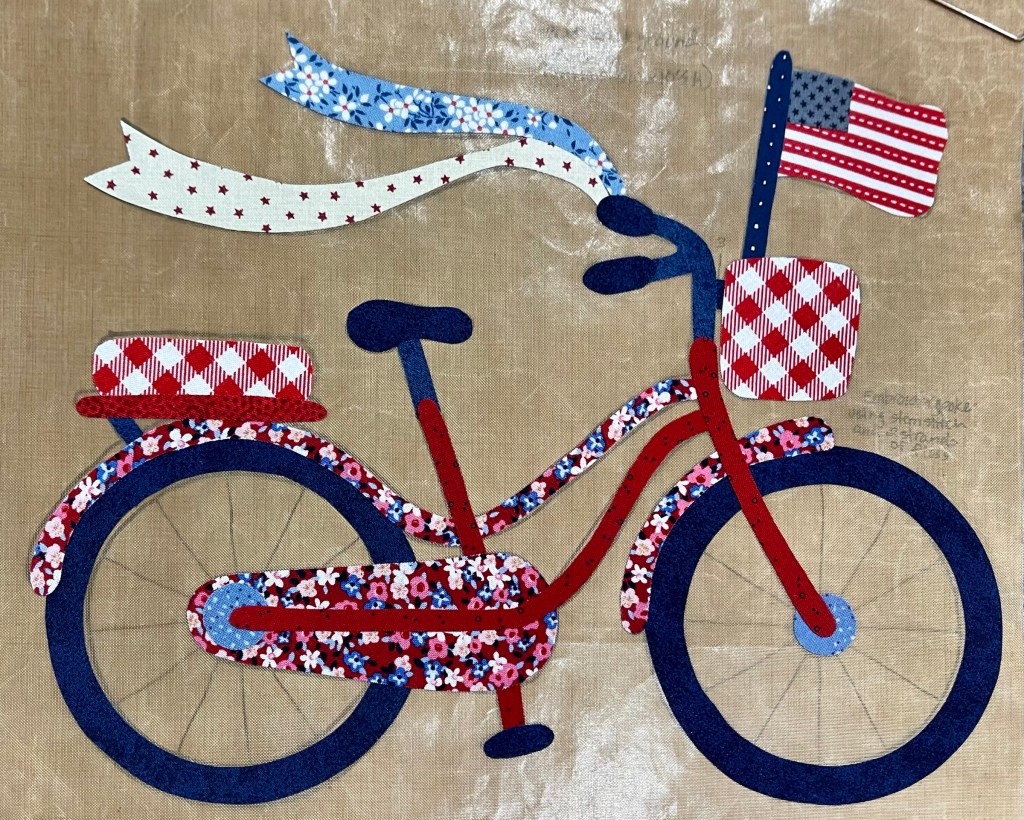
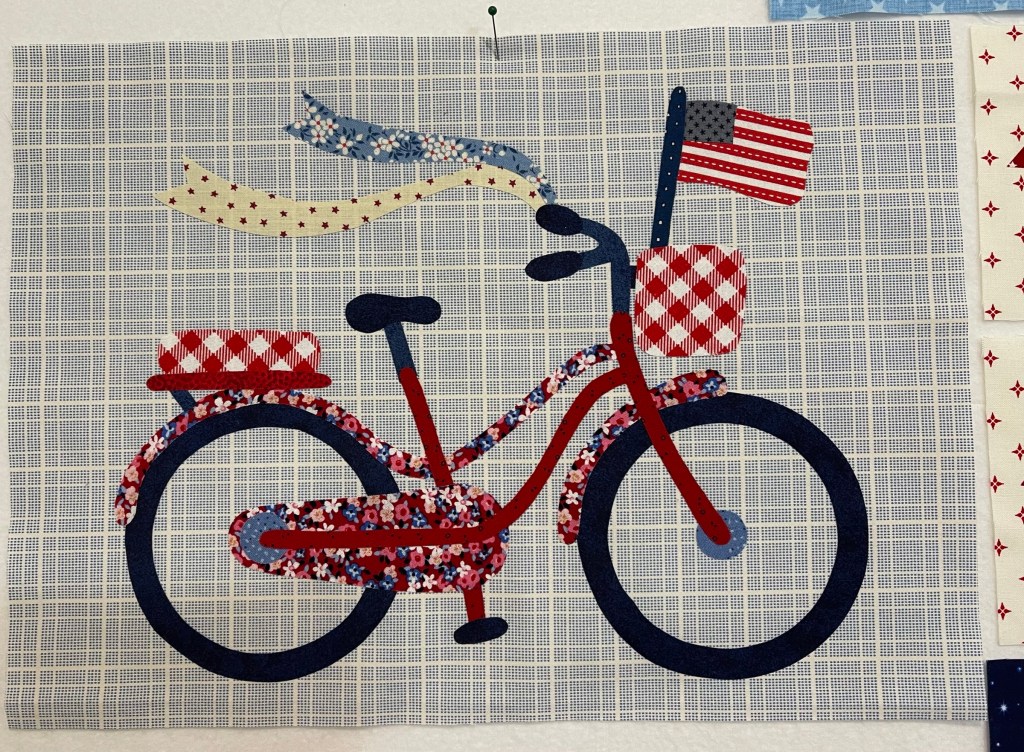
And oh be still my heart…just feast your eyes on this bicycle block:
I’ll add the tire spokes later.
Once the star is appliqued in the cabin window this block will be finished!
What’s up next? The block below has 50 applique pieces! I’ve got all the fusible pieces traced and cut out, now it’s on to choosing the fabrics!
Yes this is a huge project but when you break this down into manageable segments things progress nicely!
Stay tuned for future updates… Happy quilting and blessings,
This quilt “save/rescue was one of the most challenging projects I’ve worked on in a long time. I had offered the quilt to 2 of my different retreat groups and with no takers I decided to work on this worn out piece myself. A great decision!
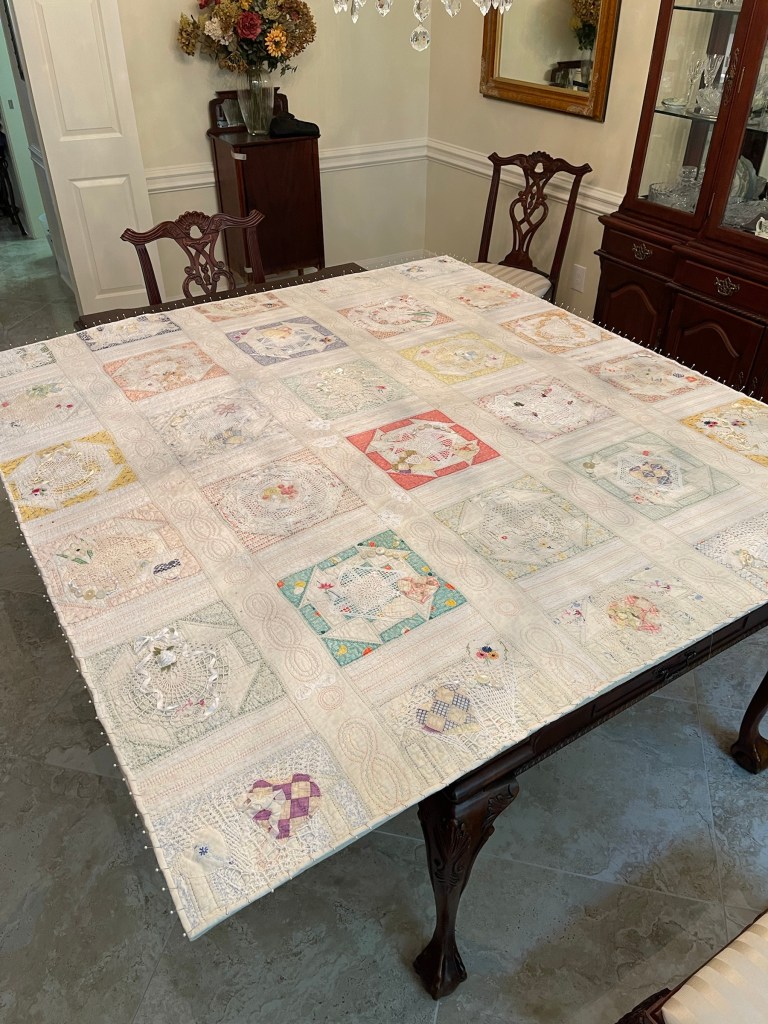
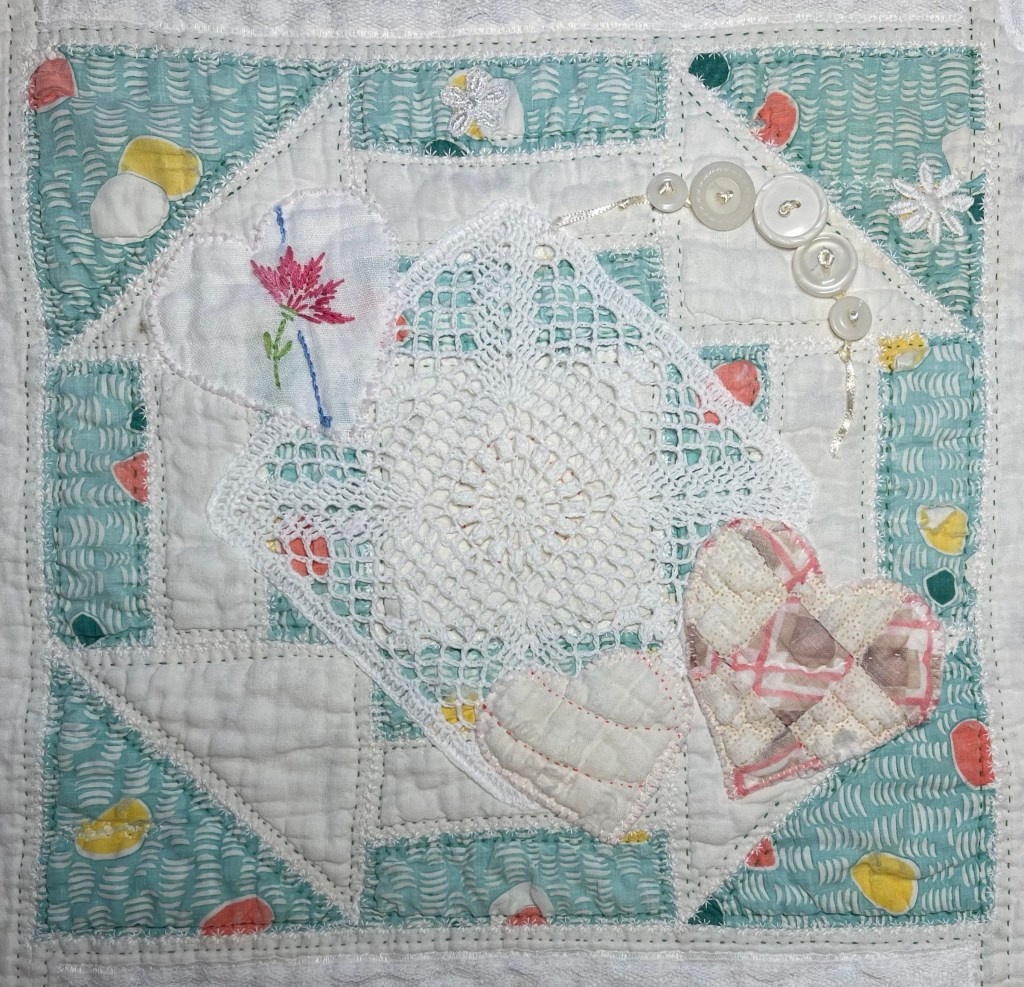
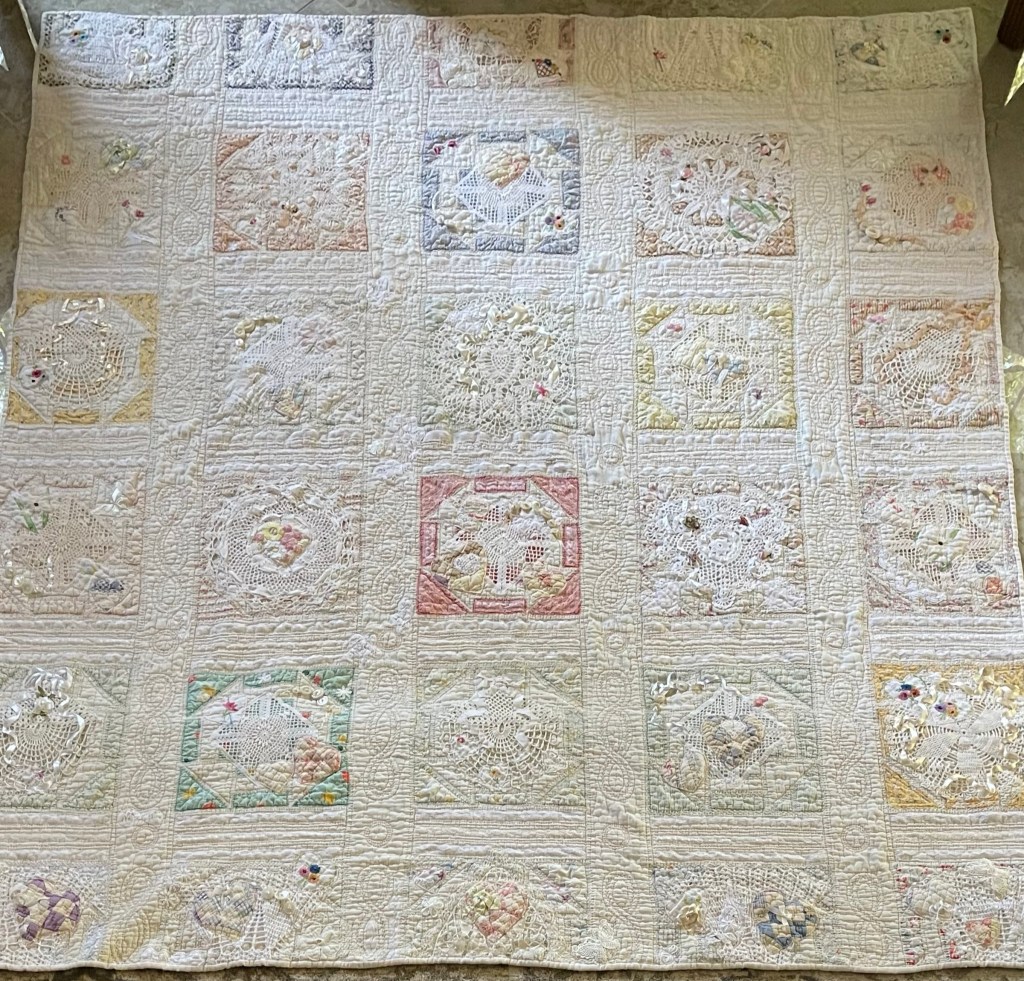
Let’s start with a picture of the finished project:
You will remember from the previous blog post, I addressed the necessary fixes to all the seams in the quilt so this post will be all about the items added to further embellish the blocks and sashings. Also as a reminder, I’m doing all the work on my sewing machine, nothing by hand.
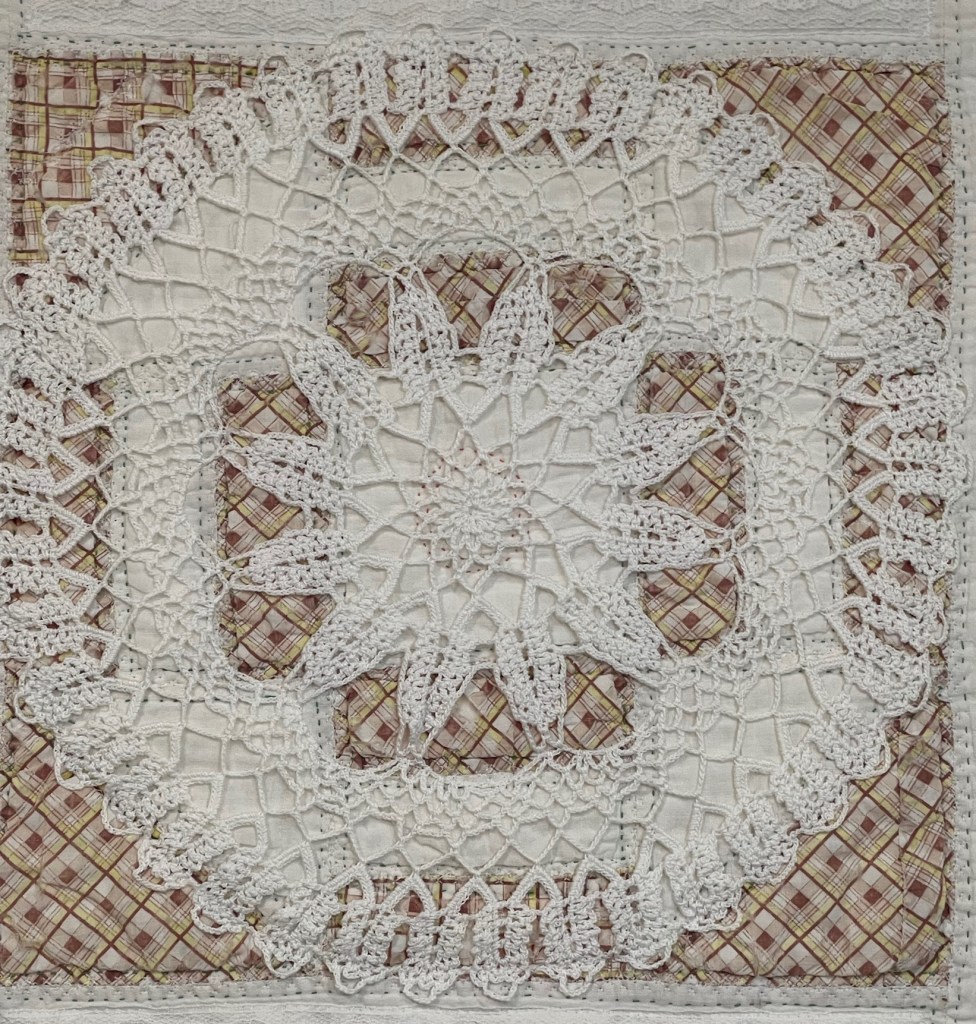
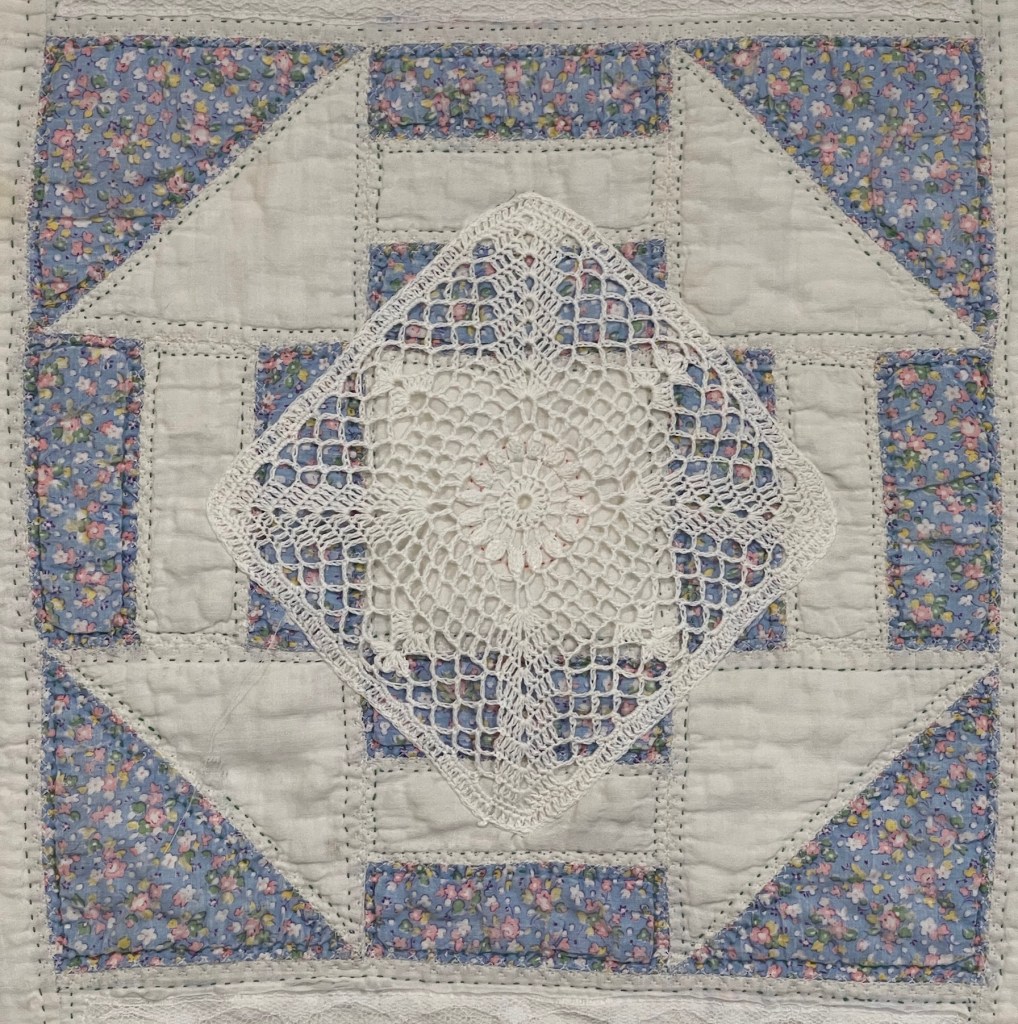
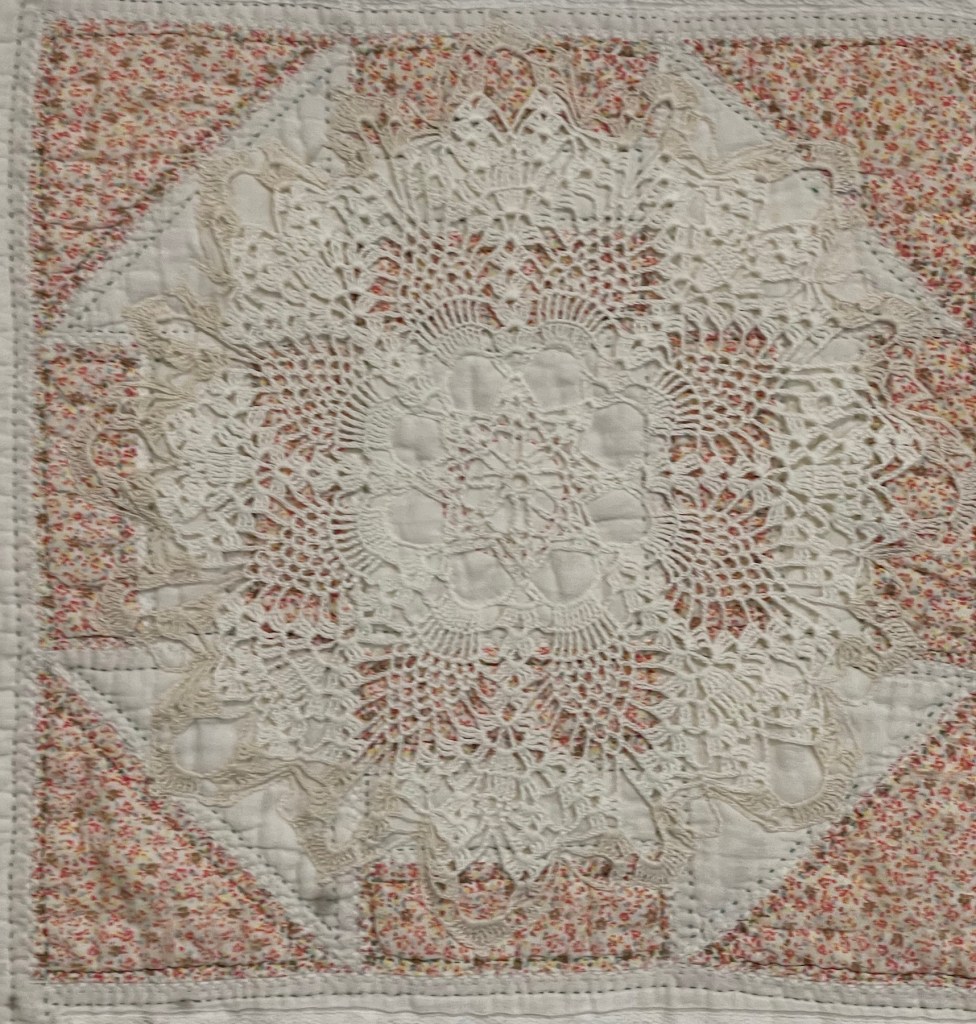
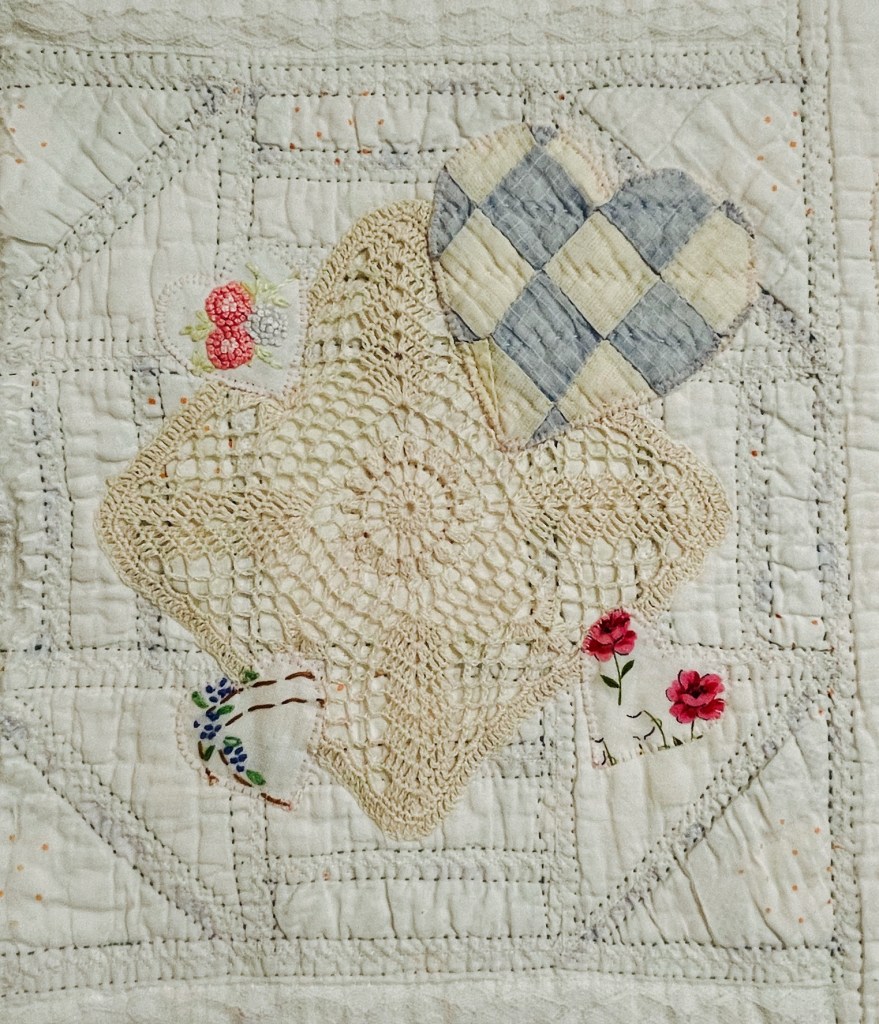
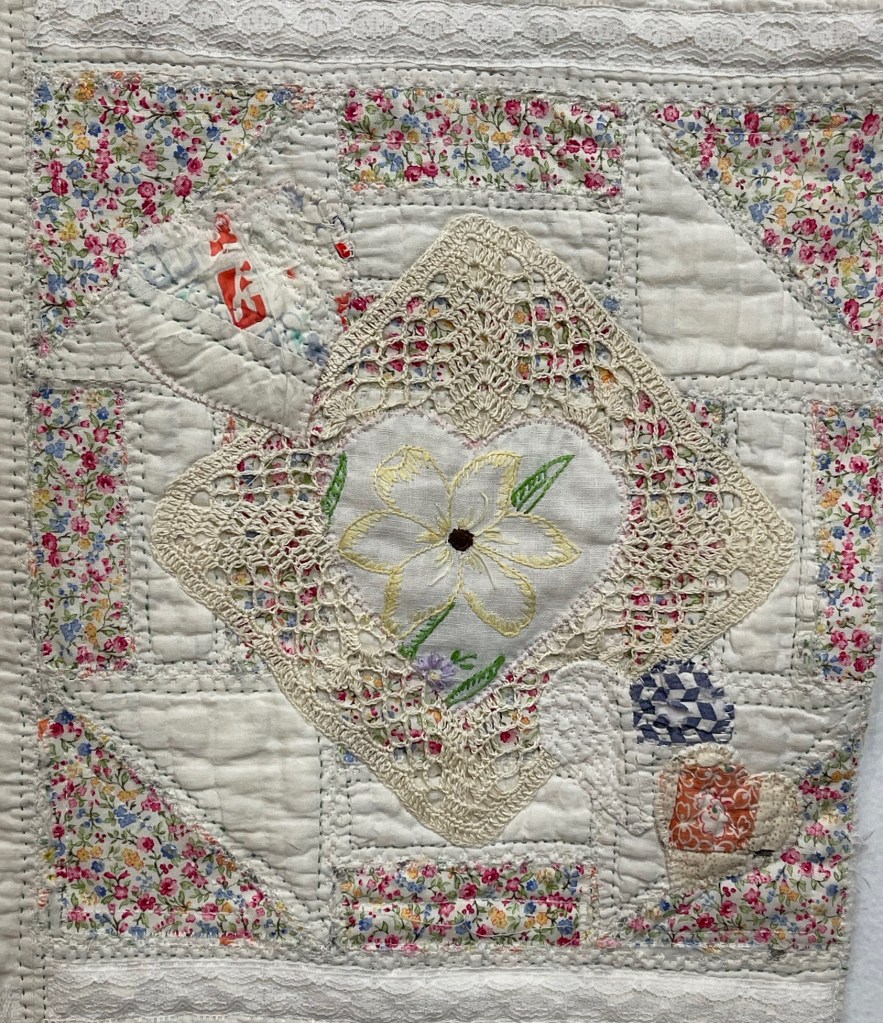
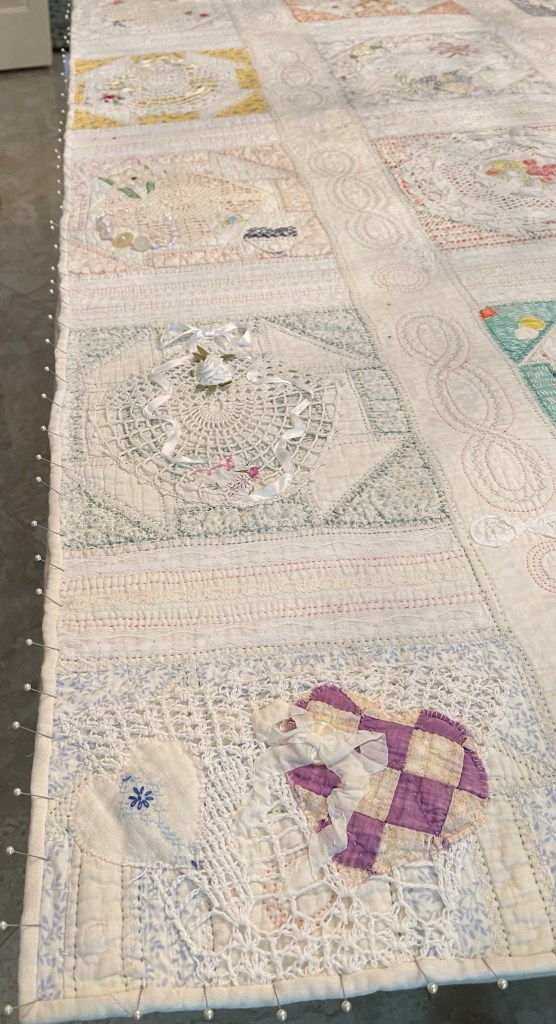
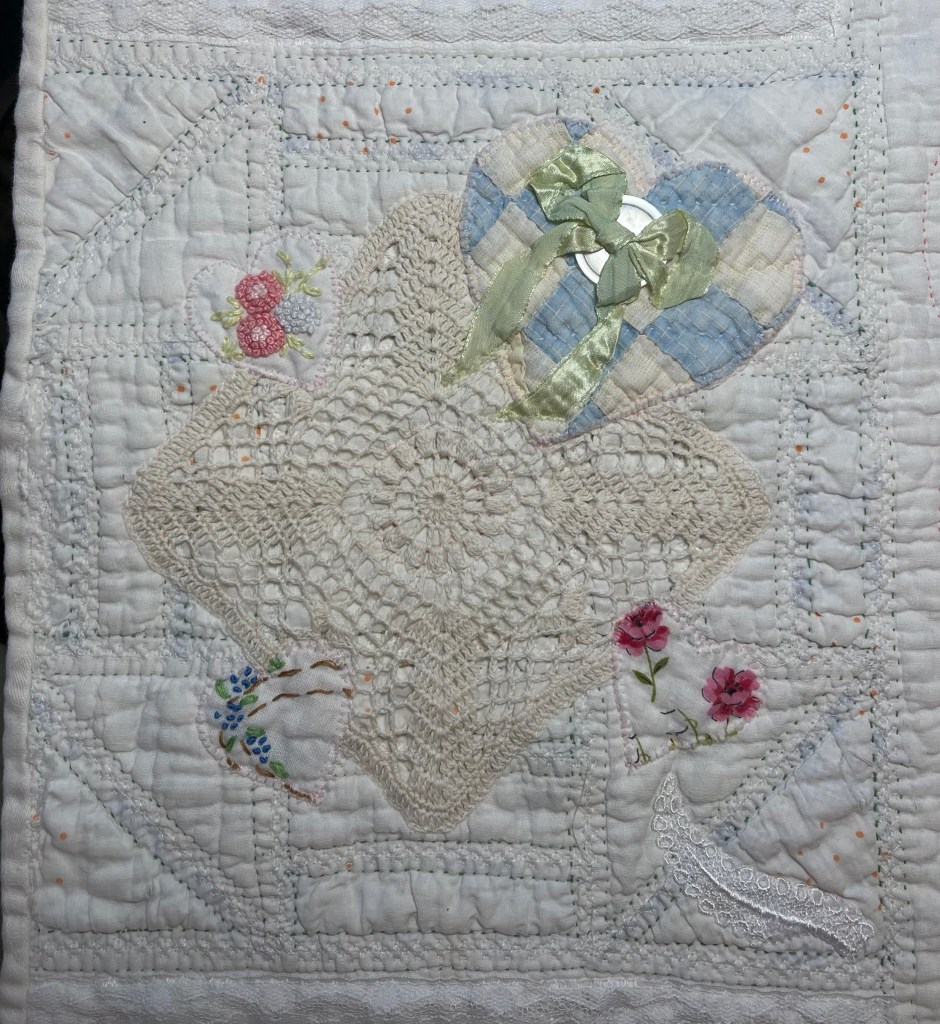
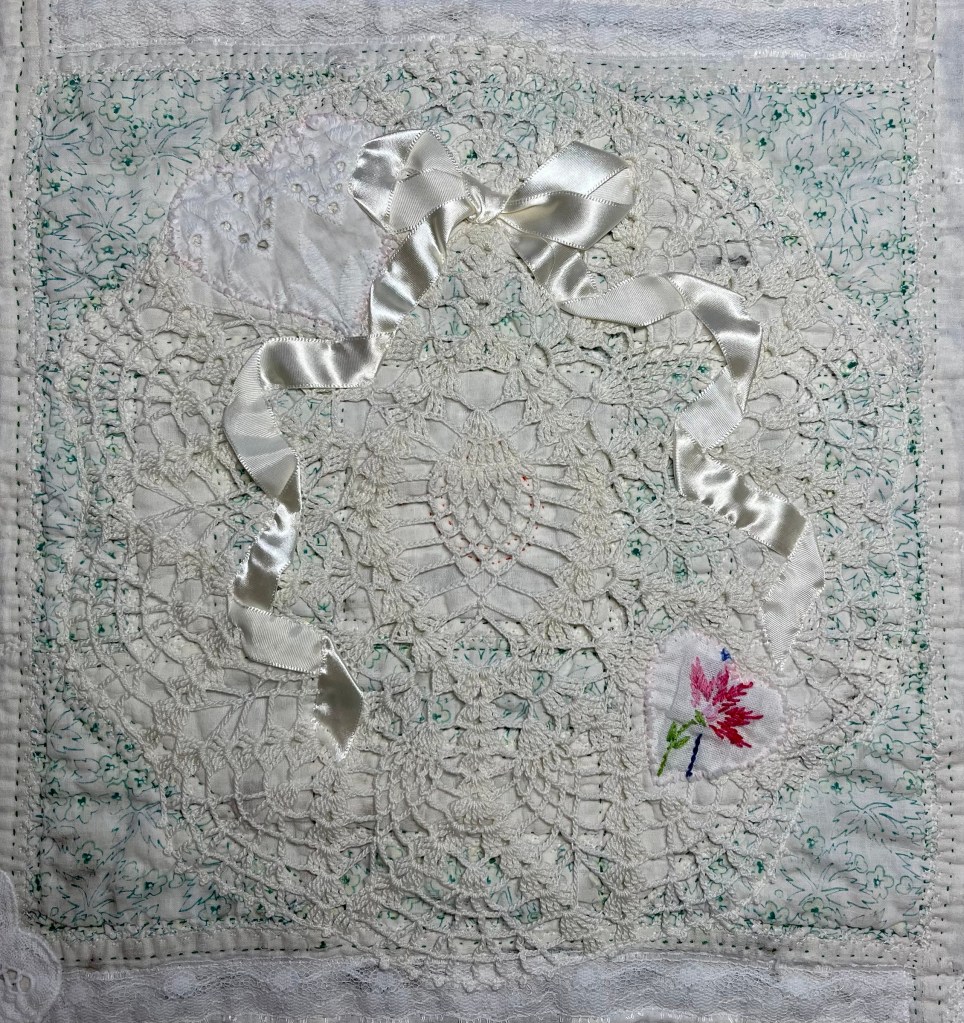
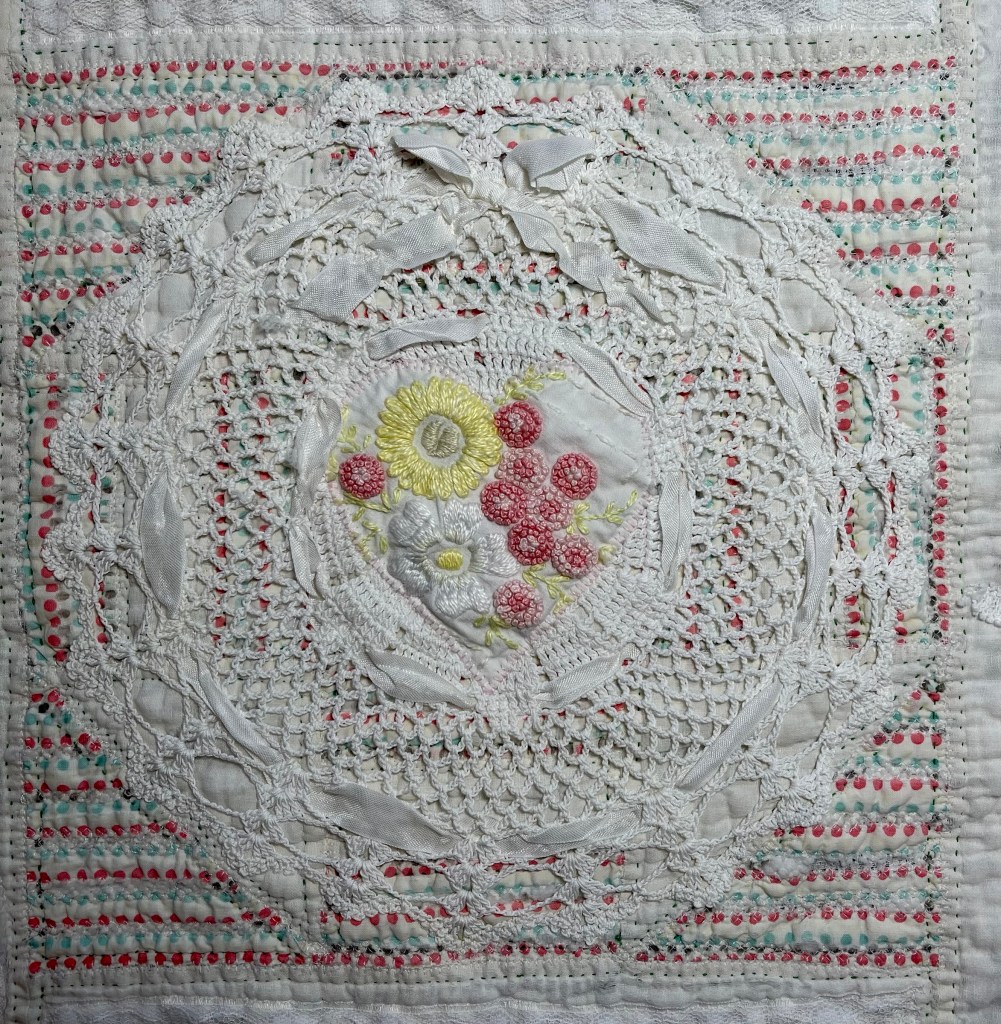
I alternated traditional shaped and square on-point doilies.
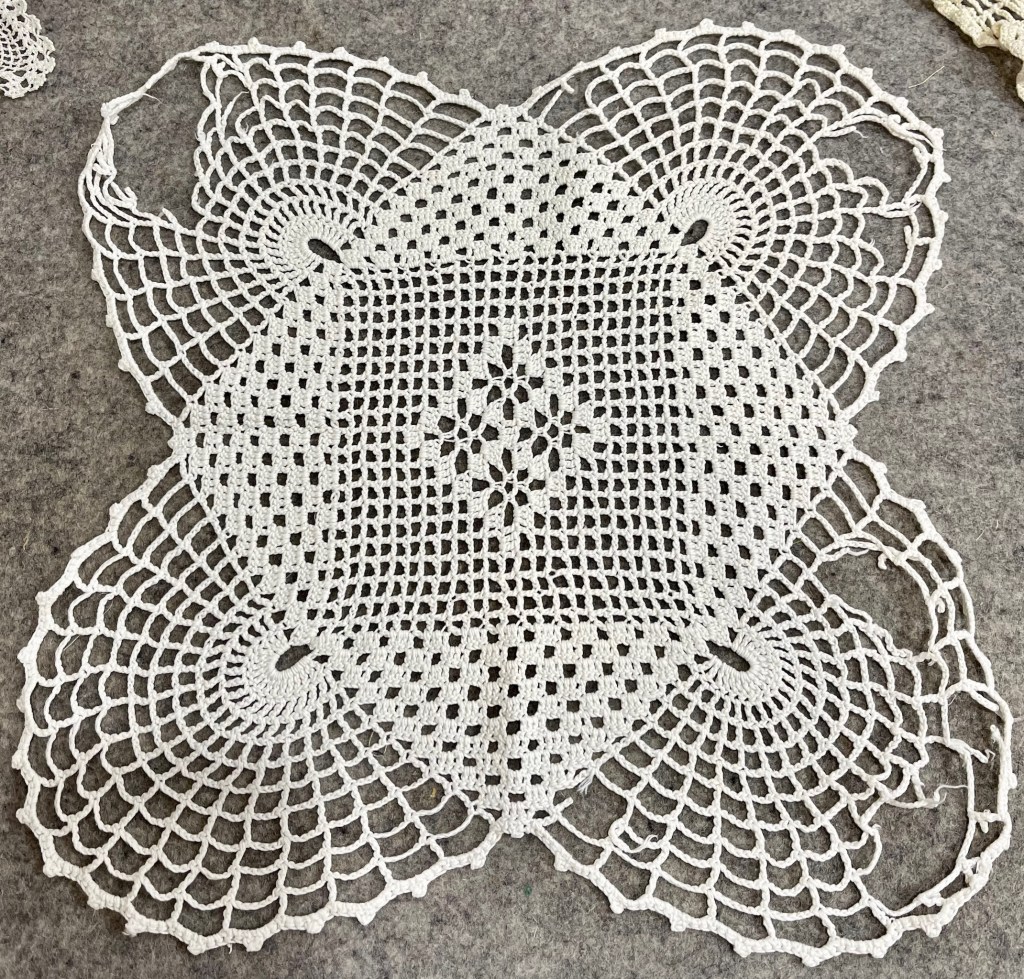
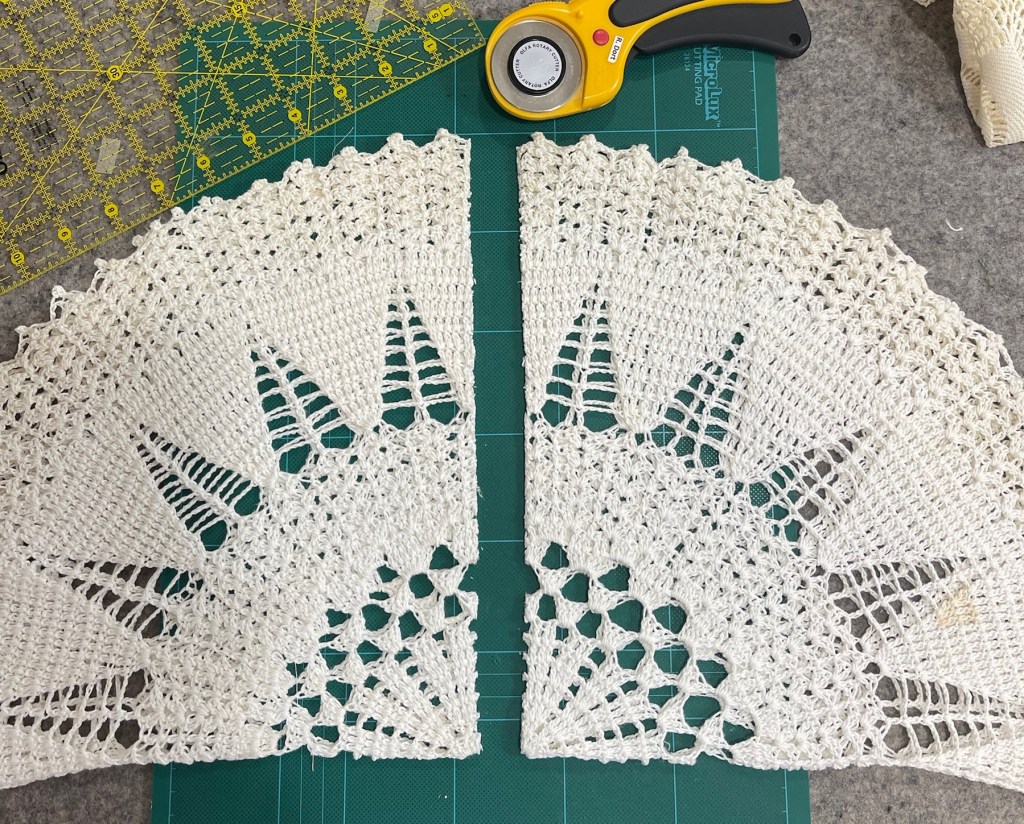
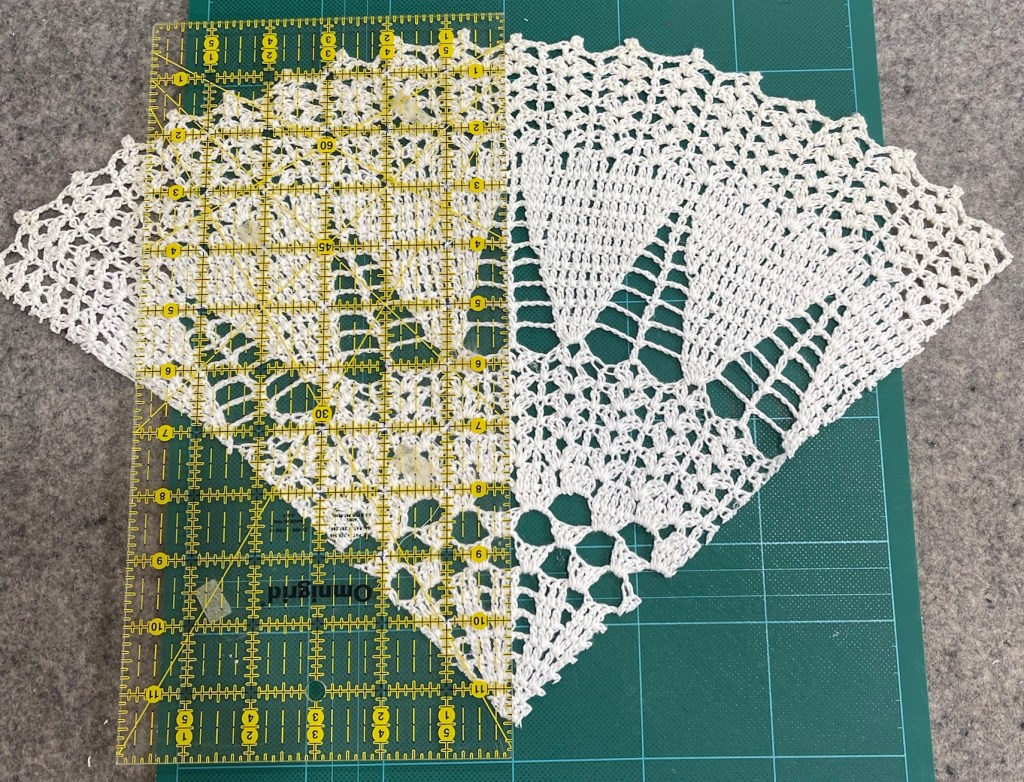
Then there was this unusual shaped doily. The first picture shows you the extensive damage and the size is far too large for this quilt. I decide I’ve got nothing to lose by experimenting and cutting it apart into 4 sections.
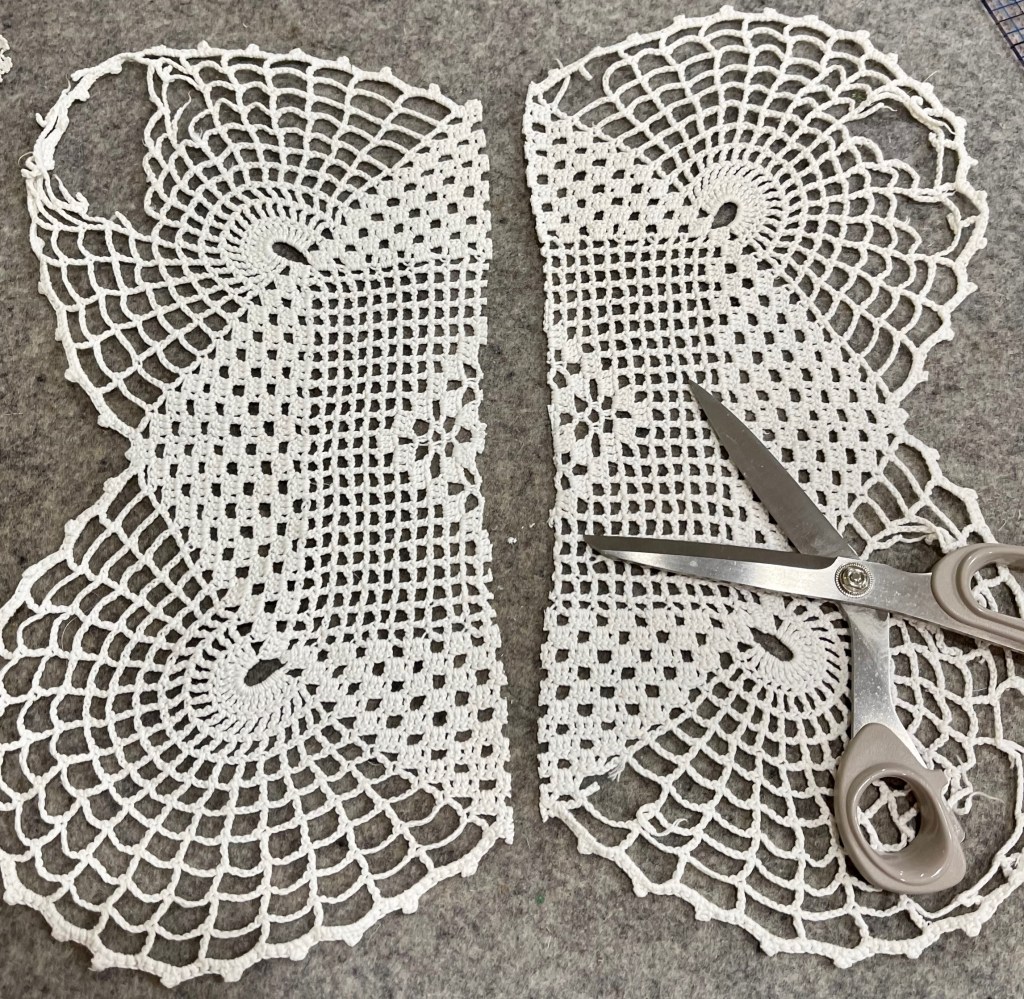
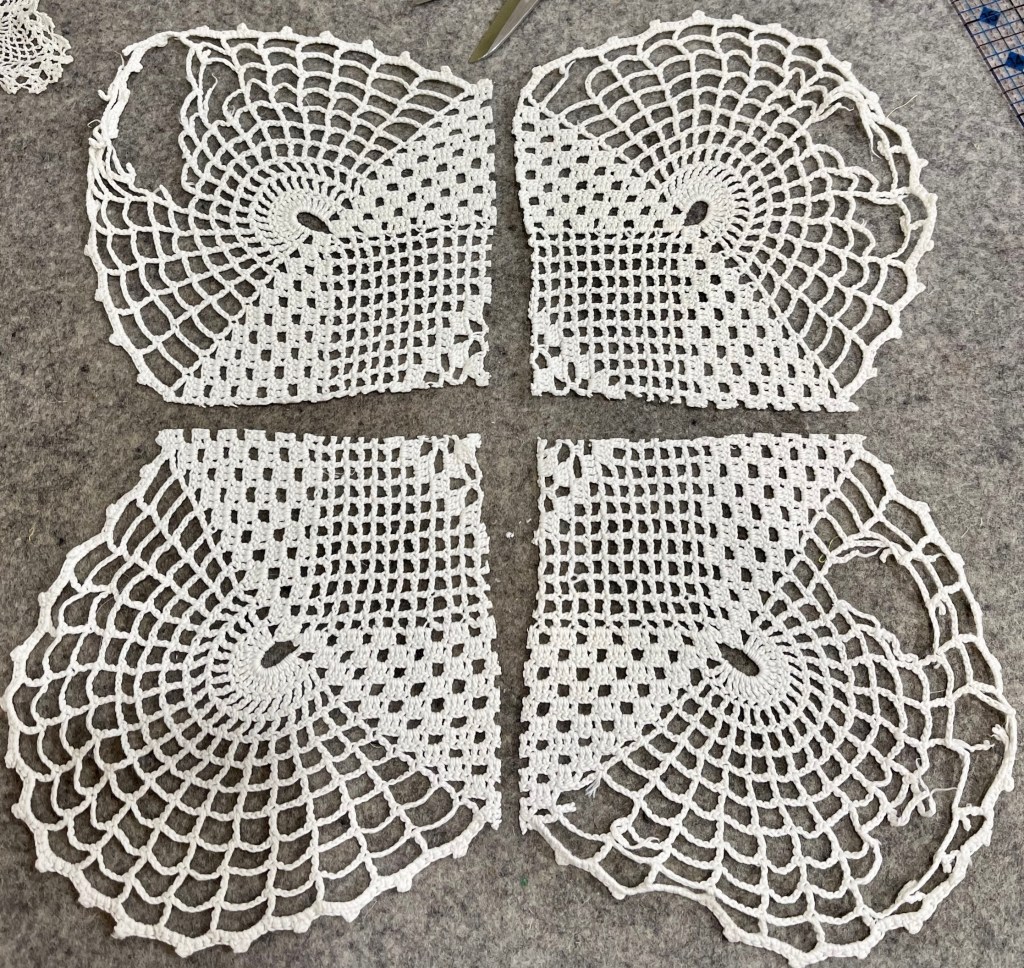
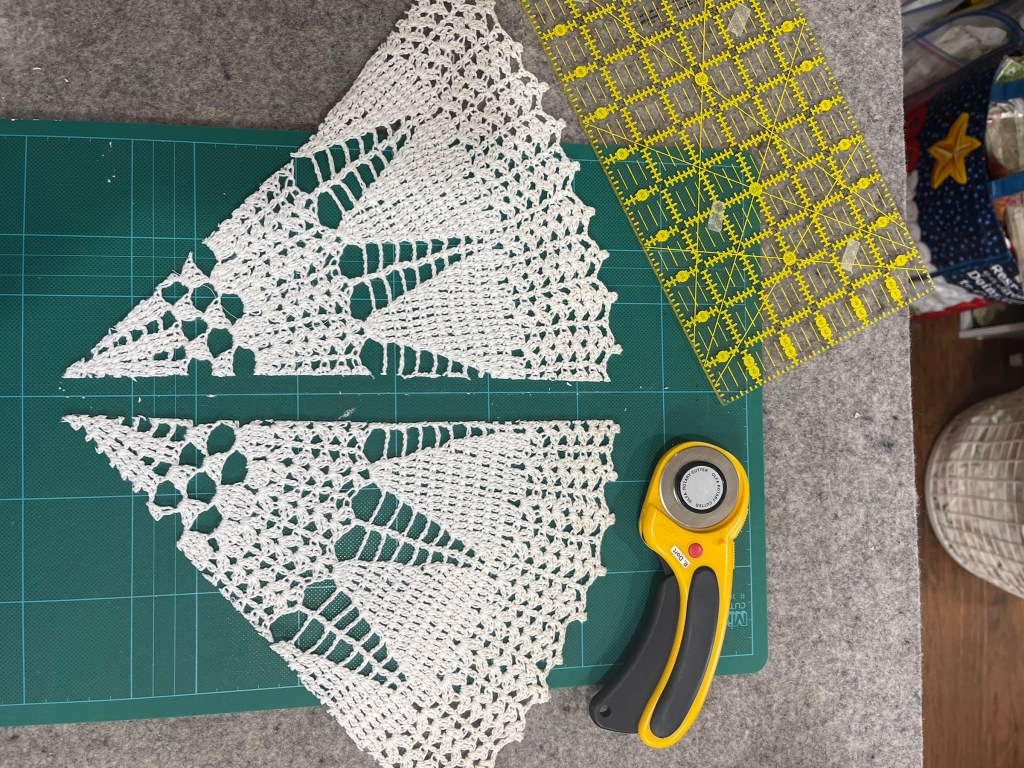
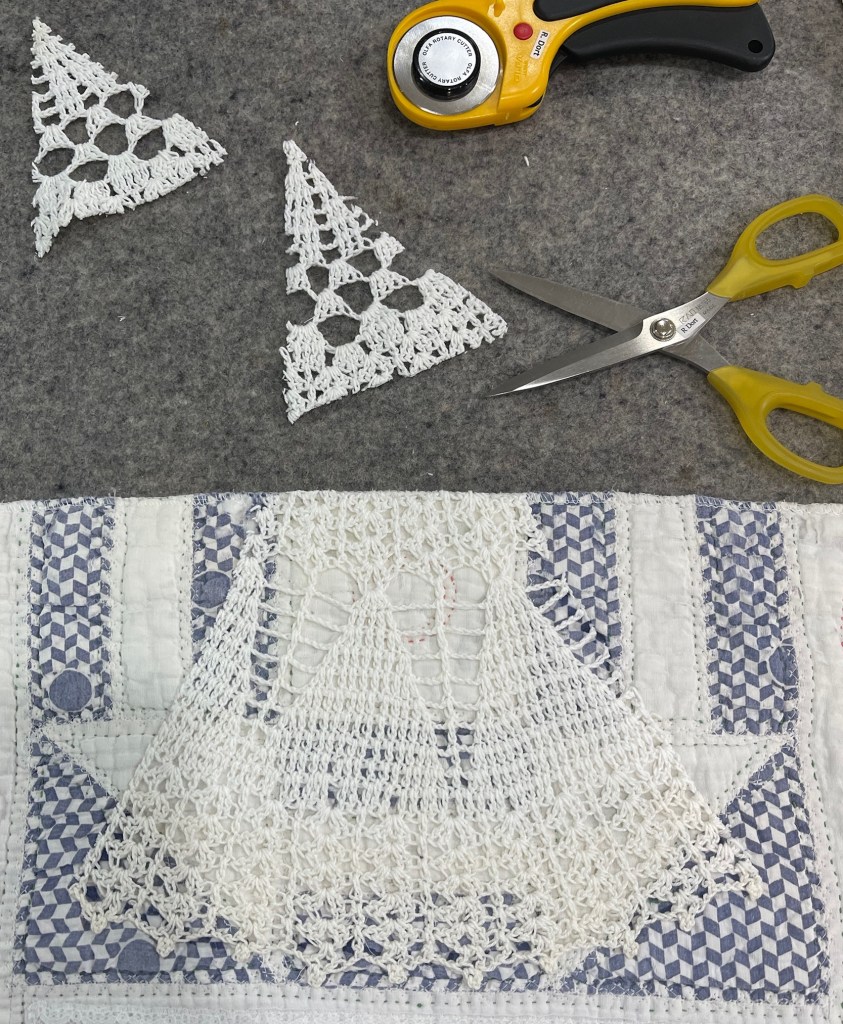
I’ve now got 4 unusual shaped doilies from one large damaged piece. In order to keep any of the crochet from unraveling I apply a liberal bead of Elmer’s Washable School Glue to the cut edges and either allow the glue to dry naturally or set with a dry iron. Why a dry iron? Had I used steam I would be adding liquid to a liquid and the glue would take much longer to dry. What about the damaged areas? They will be covered in the next step by applique hearts.
The two cut edges are top right and left. A very small machine zig zag stitch both attaches the doily to the quilt and secures the cut edges nicely. If you’re still worried about the cut edges, stitch 2 rows of zig zag stitches instead of just 1.
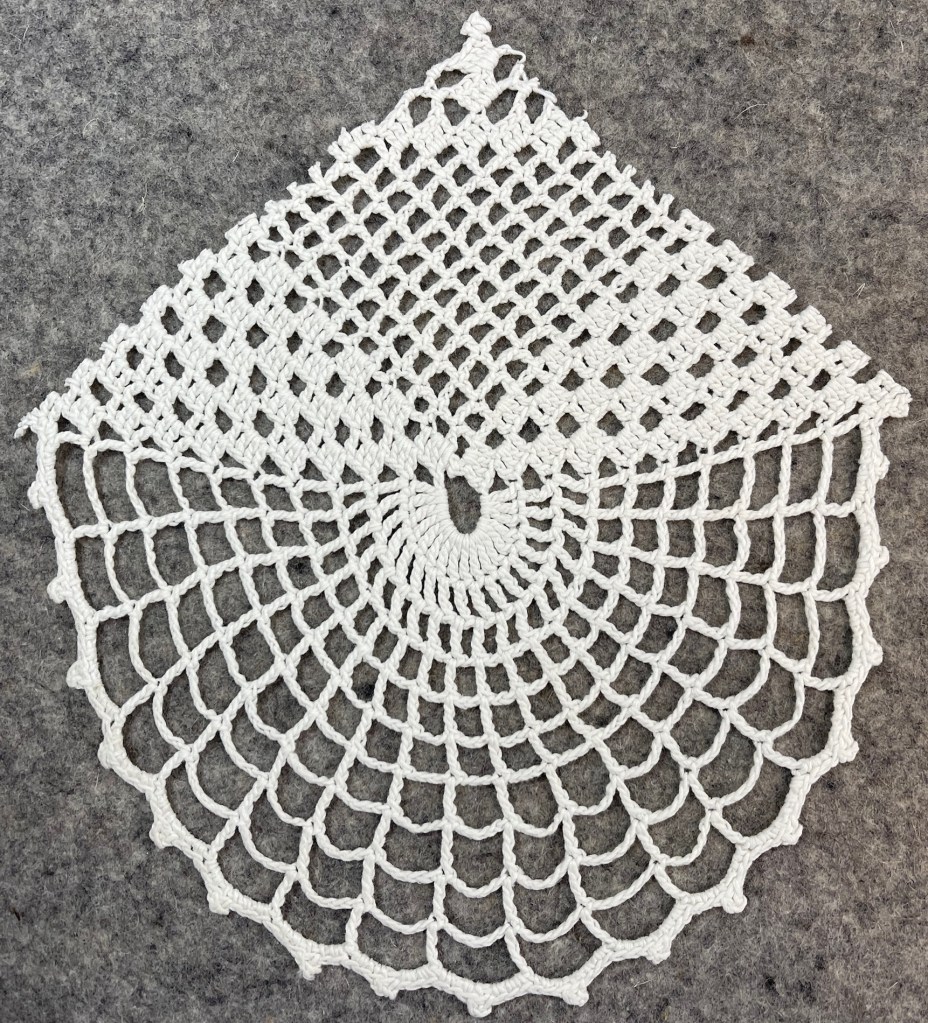
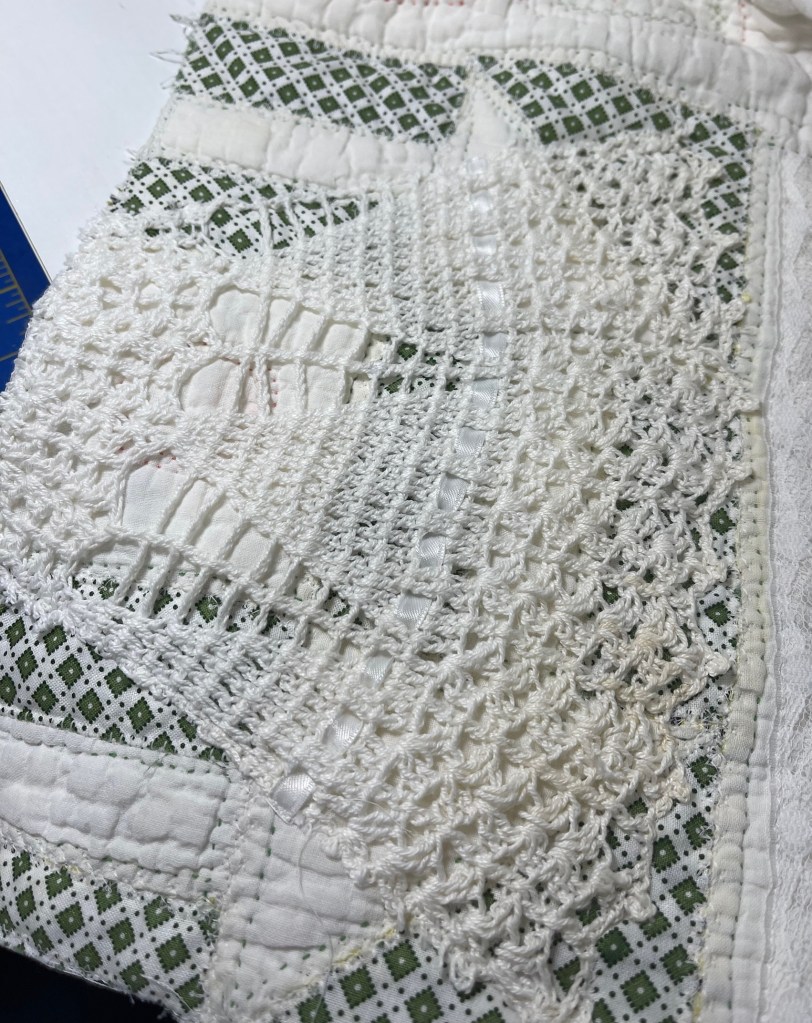
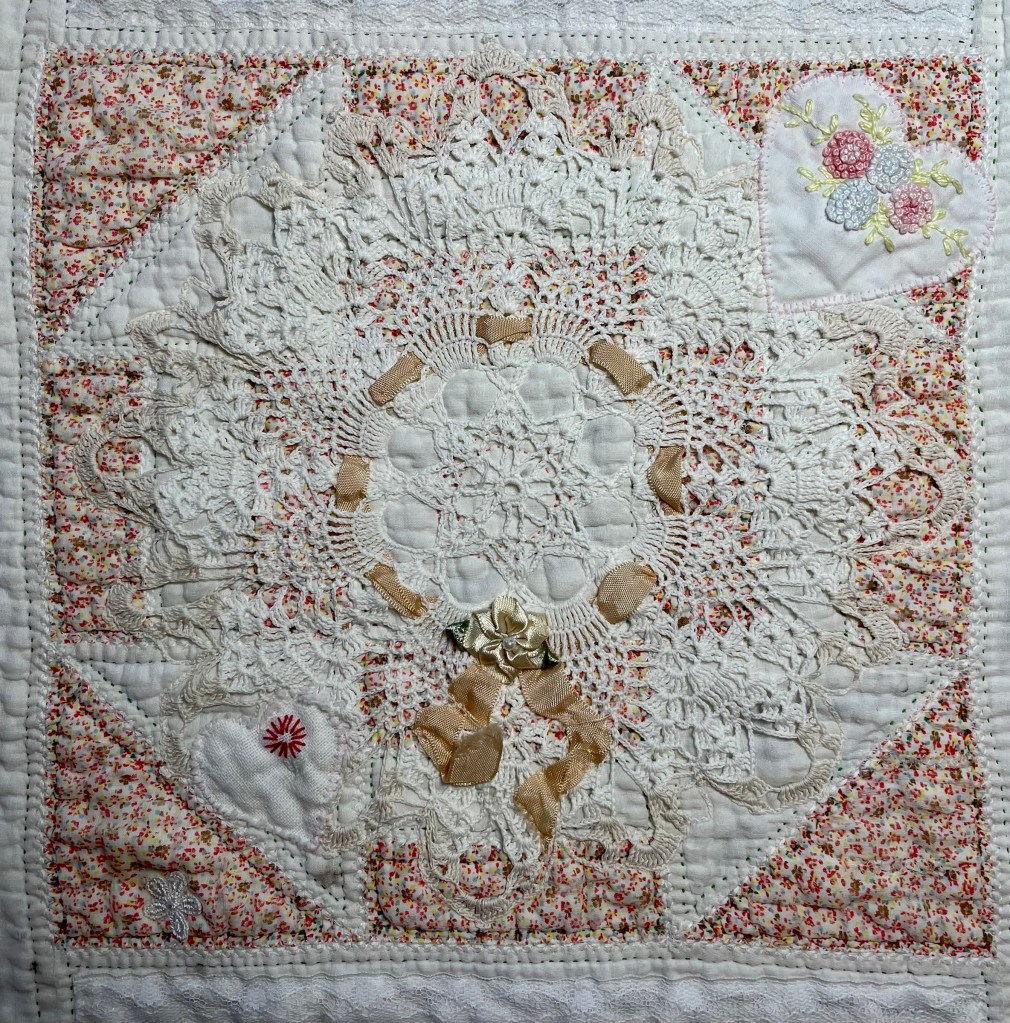
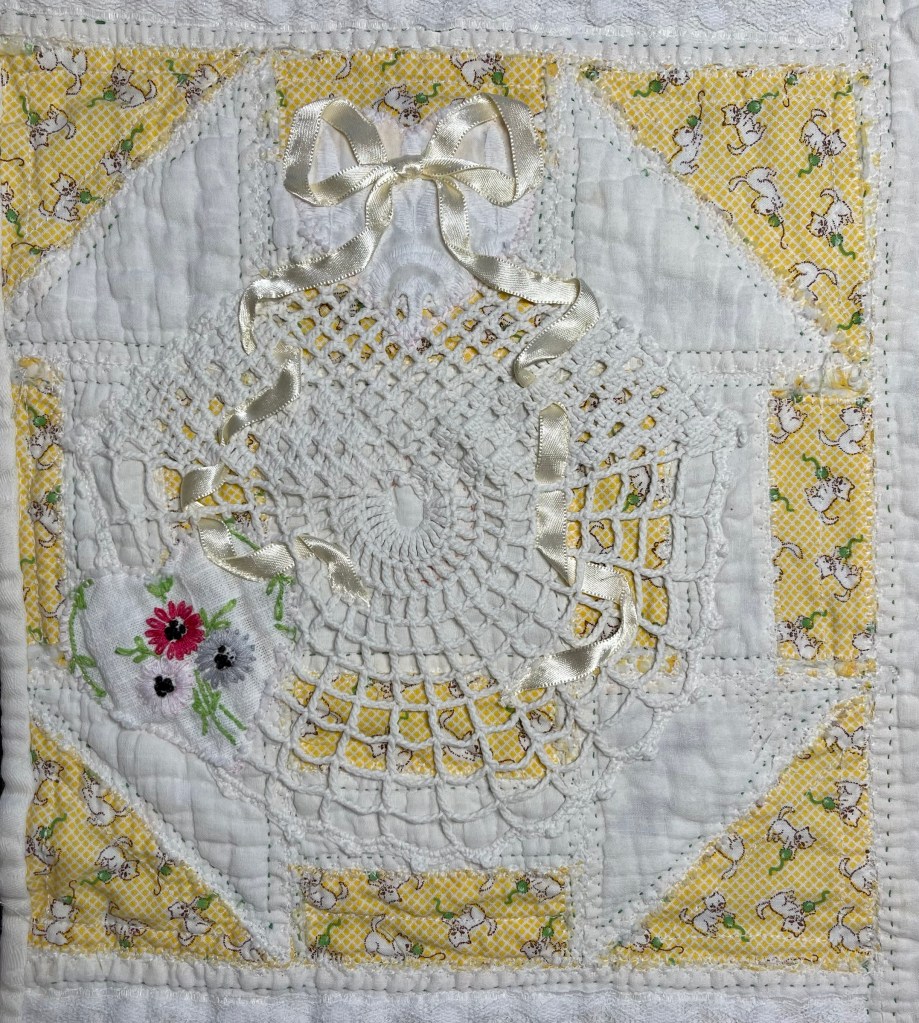
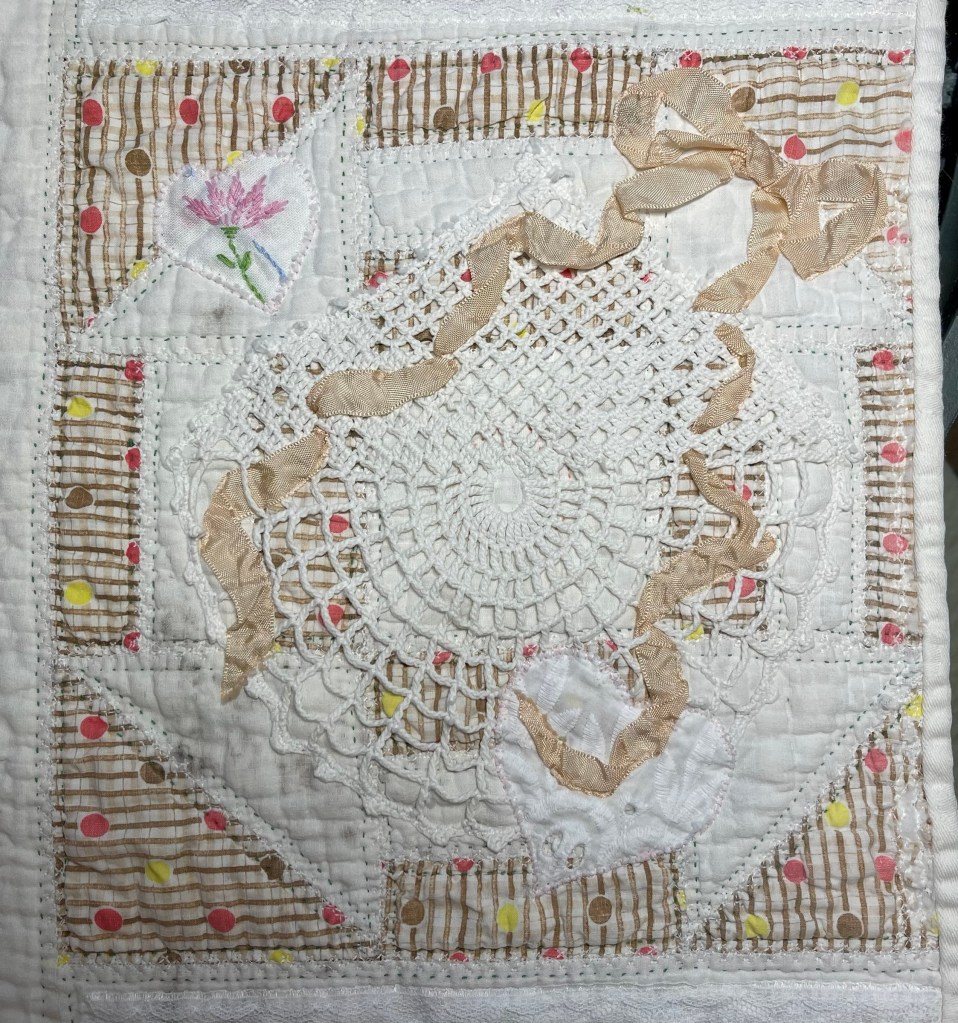
The 10 partial blocks (5 top and 5 bottom) present another challenge. I had a very large and in my mind a very unattractive white doily to experiment with. Why unattractive? If you’ve ever crocheted you will know the look you get when you use a crochet hook a bit too large for the crochet thread. I think that’s the case with this 12” doily:
Folded in half I’m ready to make the first cut on this approx. 12” round doily.
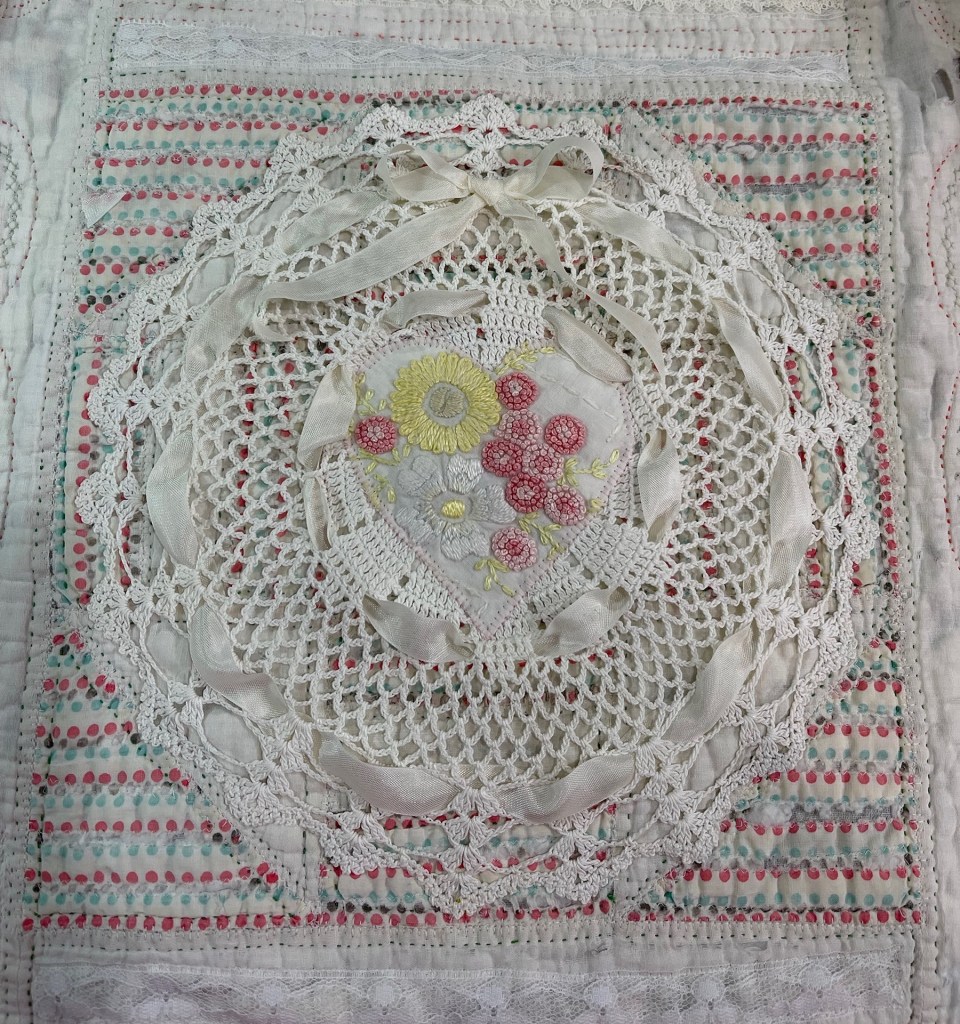
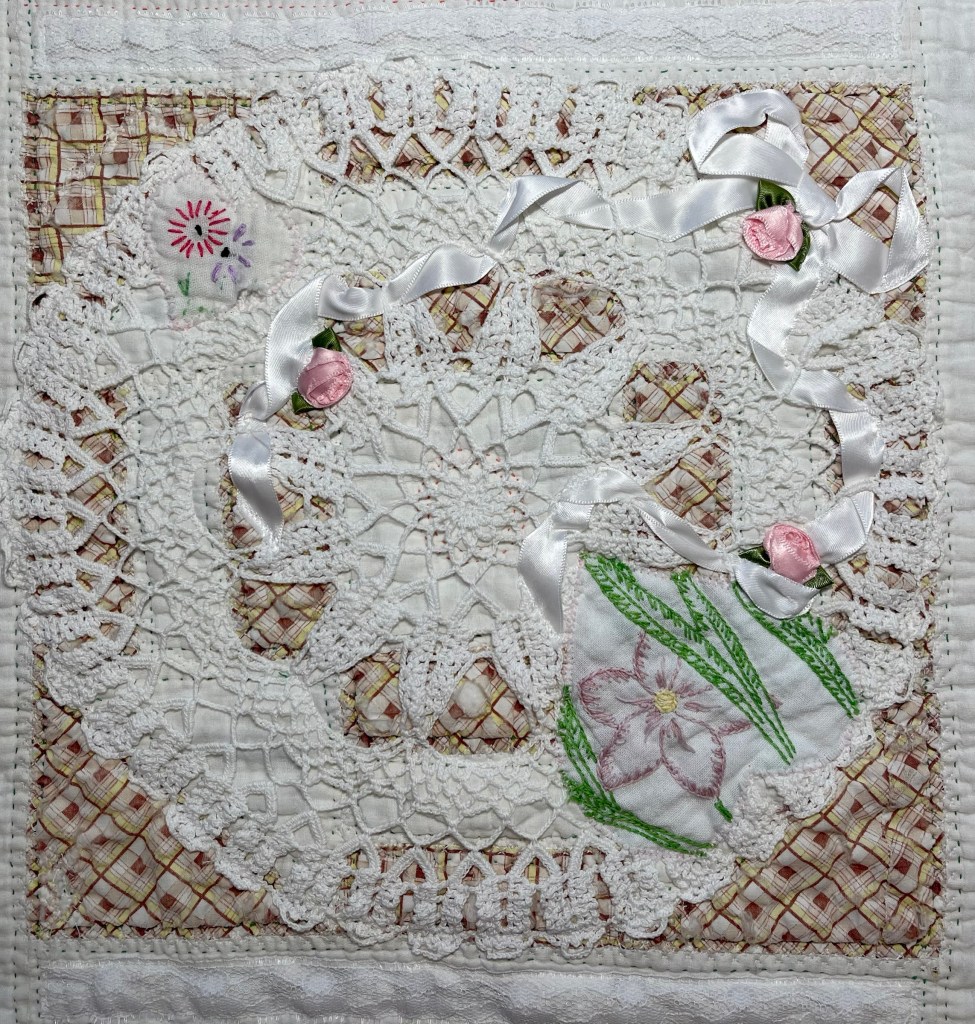
For added interest I wove a quarter inch white satin ribbon into the cut doily and as before, I machine stitch this piece to the quilt with a very small zig zag stitch. From this 12” round doily I was able to cut 8 pieces. But if you remember, I have 10 partial blocks that need doilies.
Not the best picture, but this shows an ivory oval doily I cut in half. I placed 1 piece in the center top partial block and the center bottom partial. Worked perfectly!
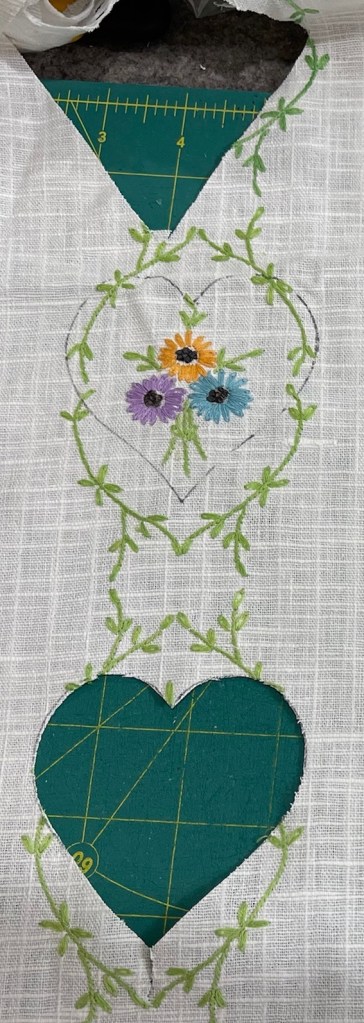
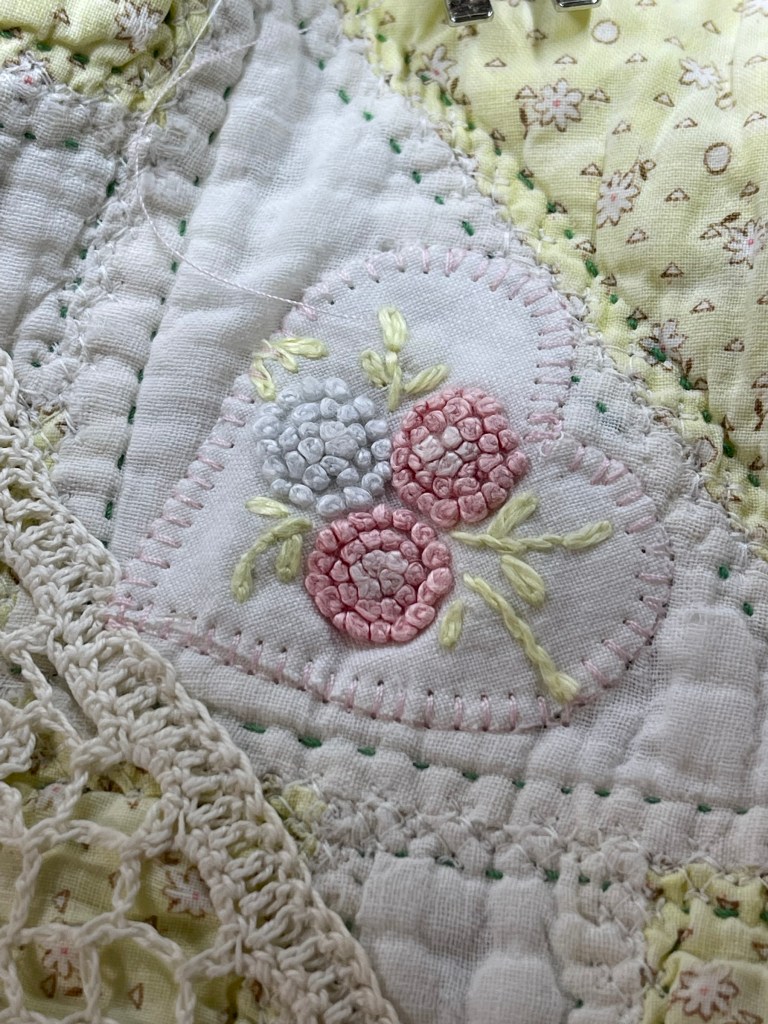
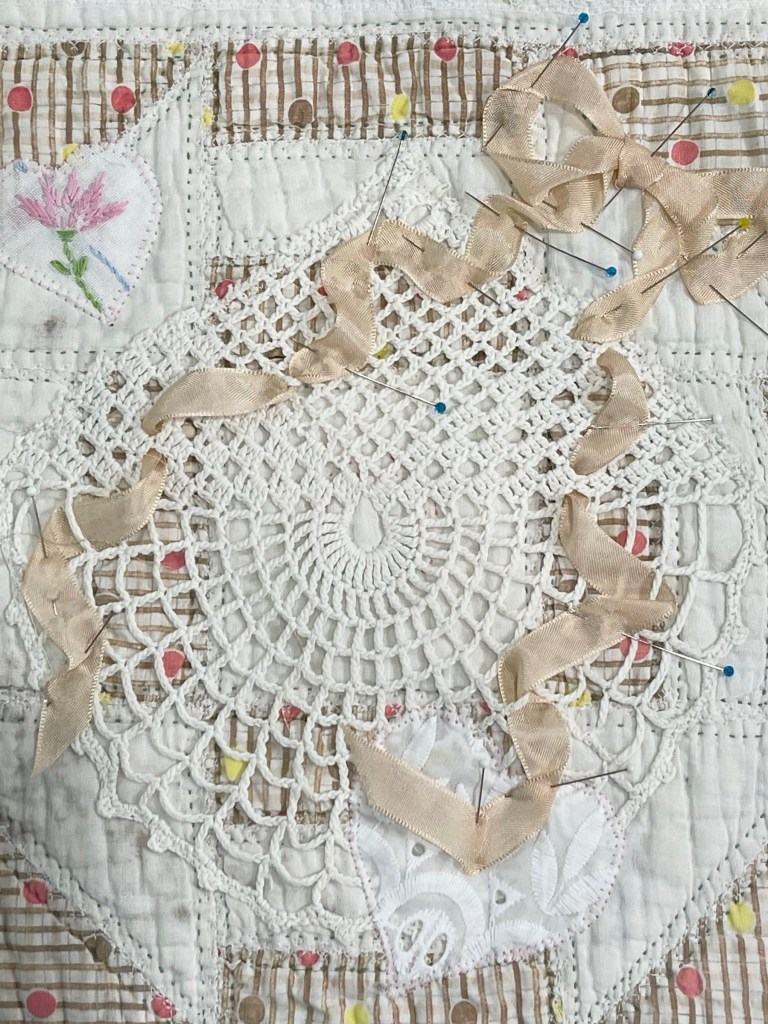
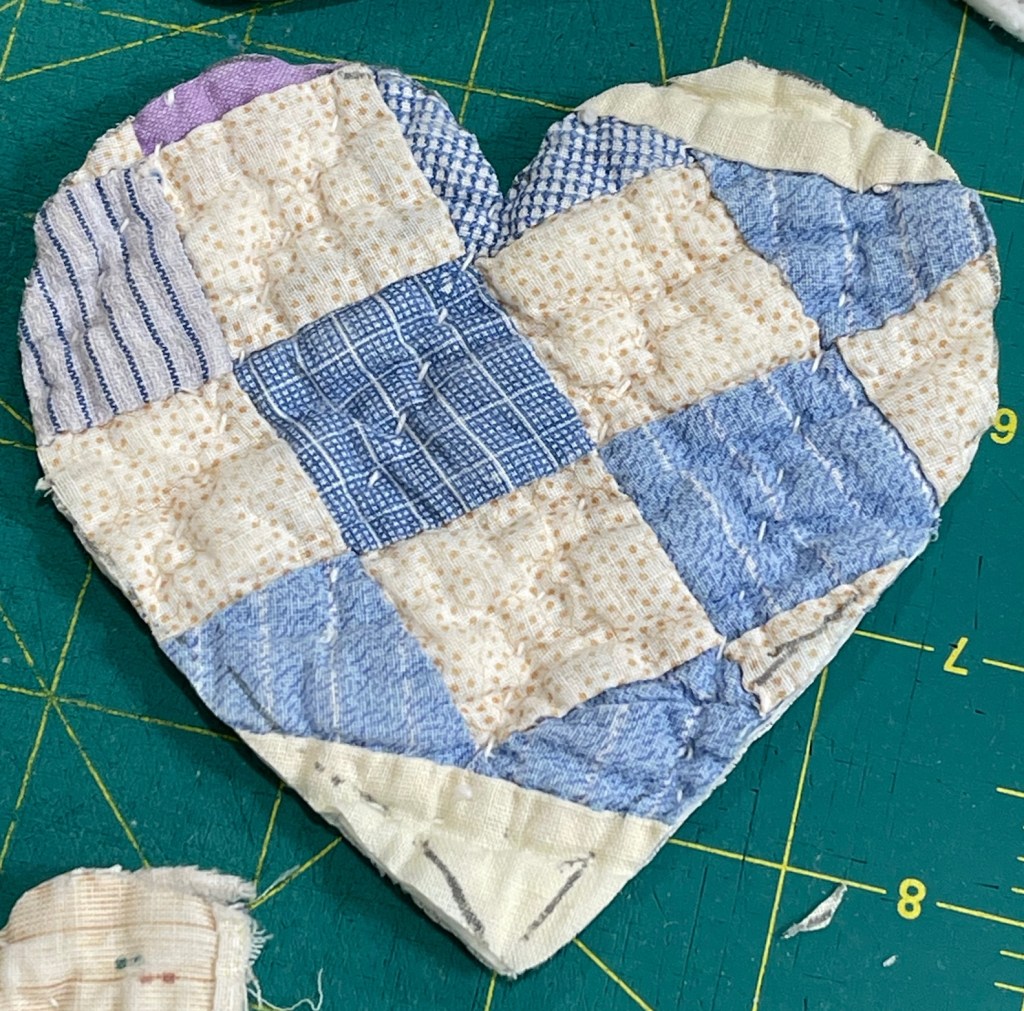
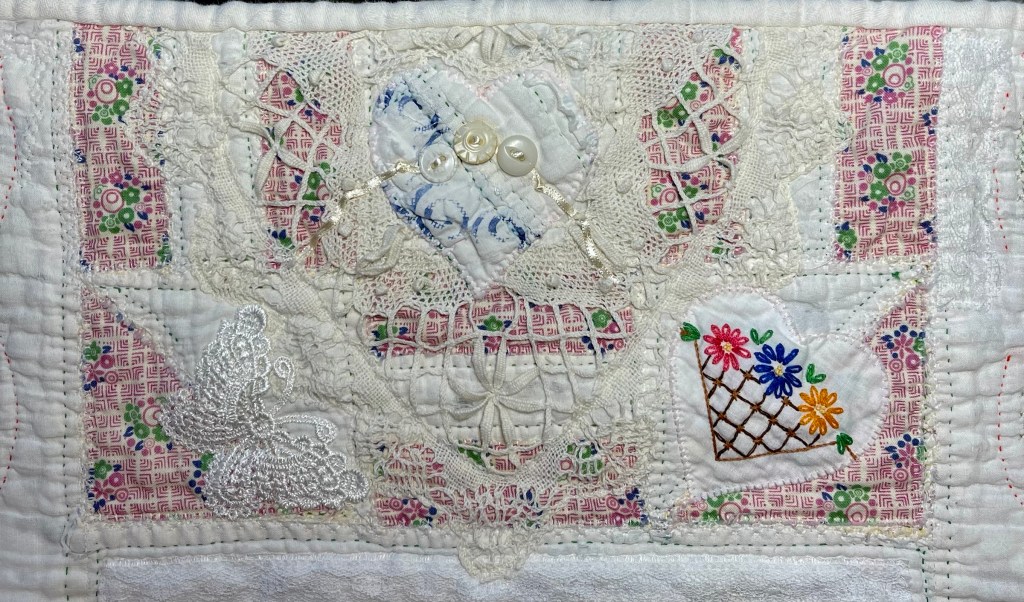
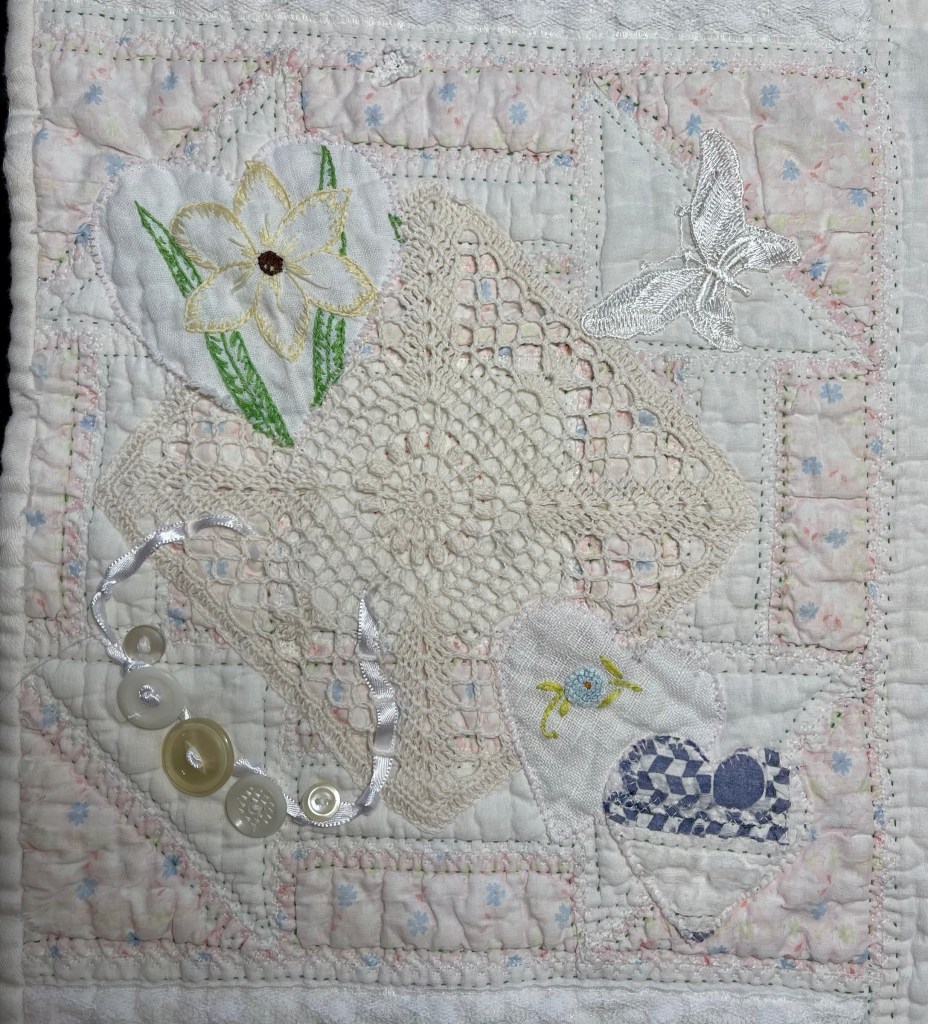
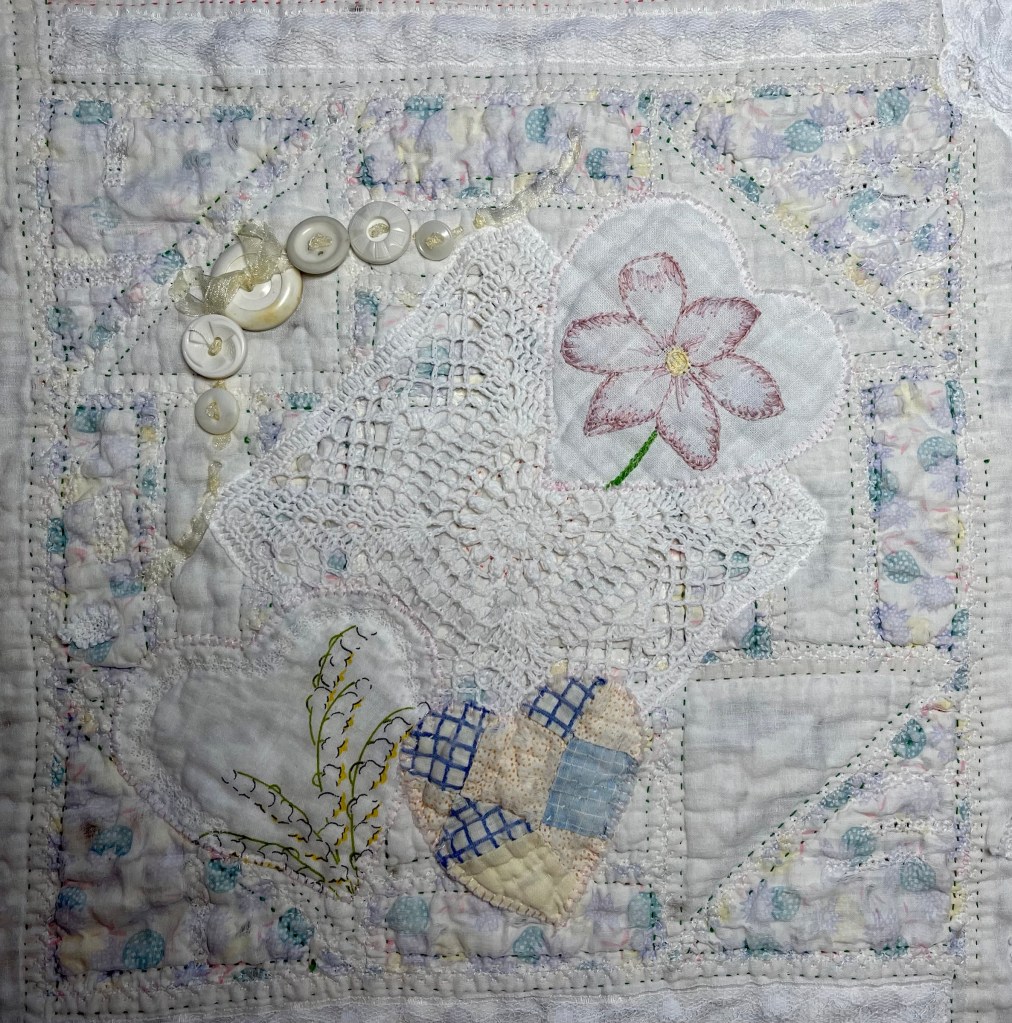
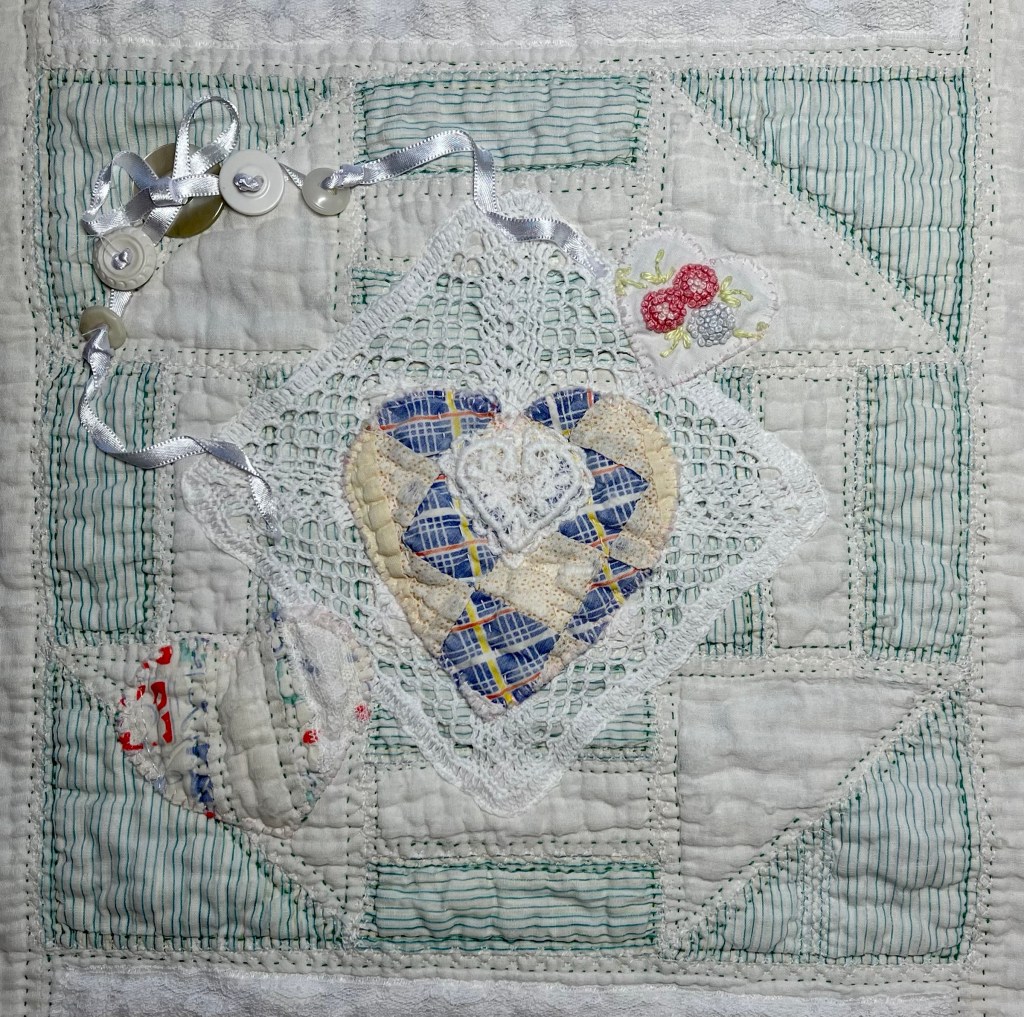
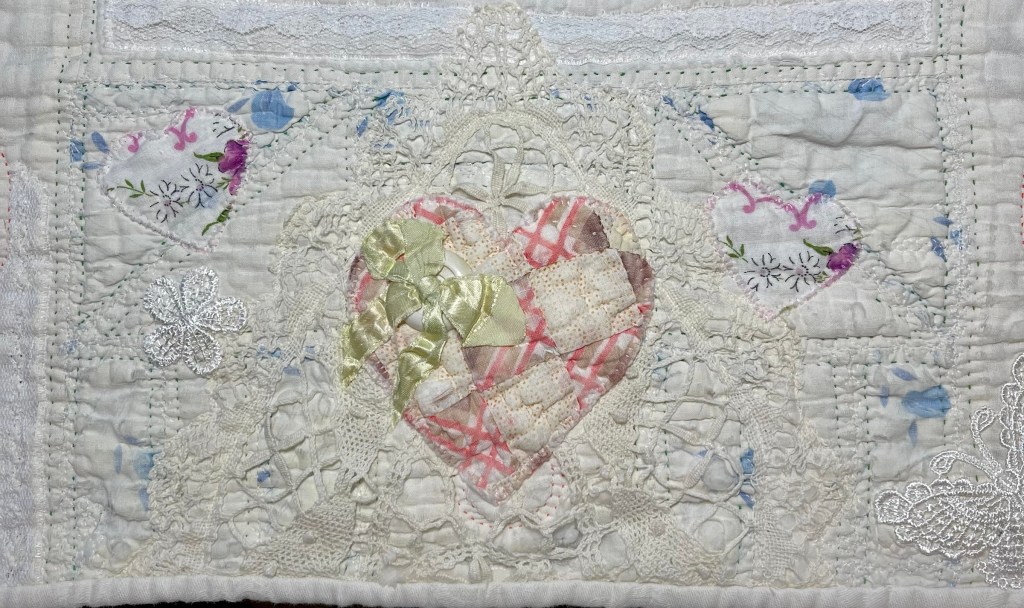
I always keep bits and pieces of previously used vintage linens and in this case this piece will allow me to cut several heart shapes.
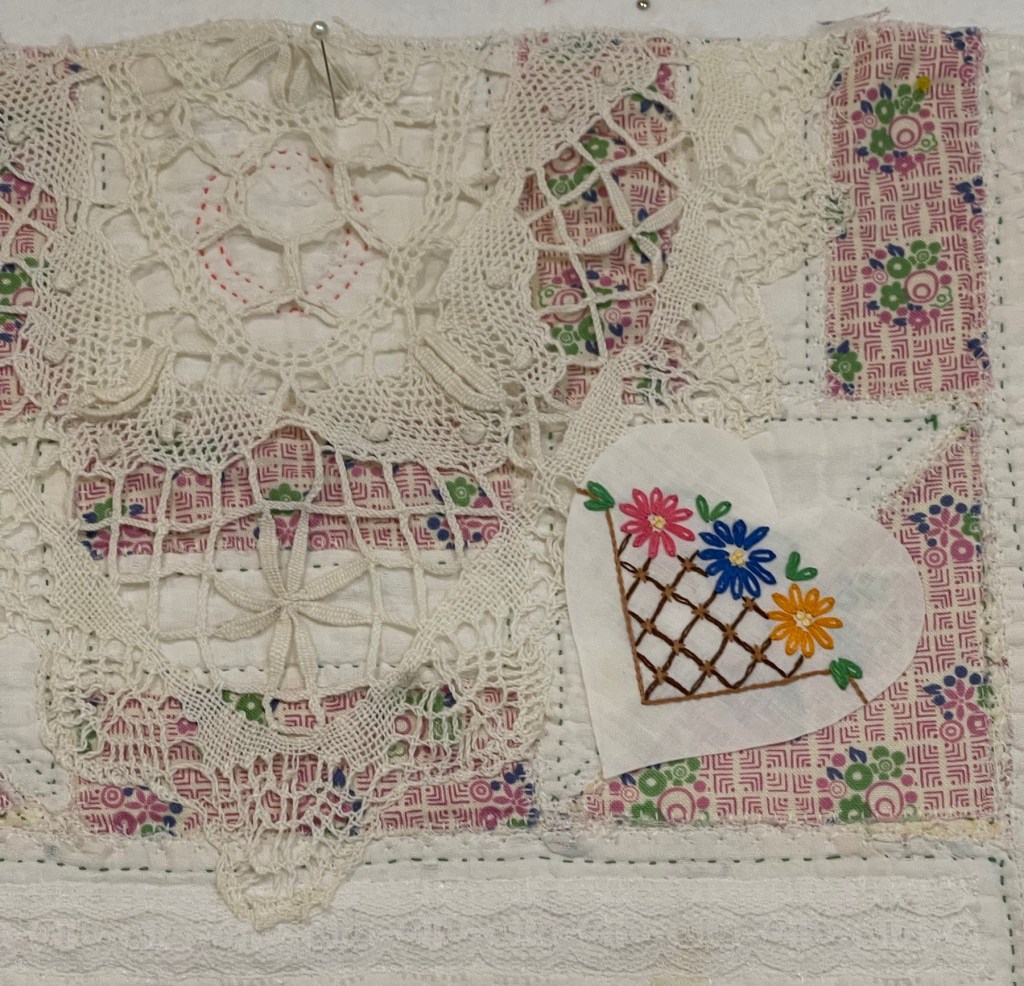
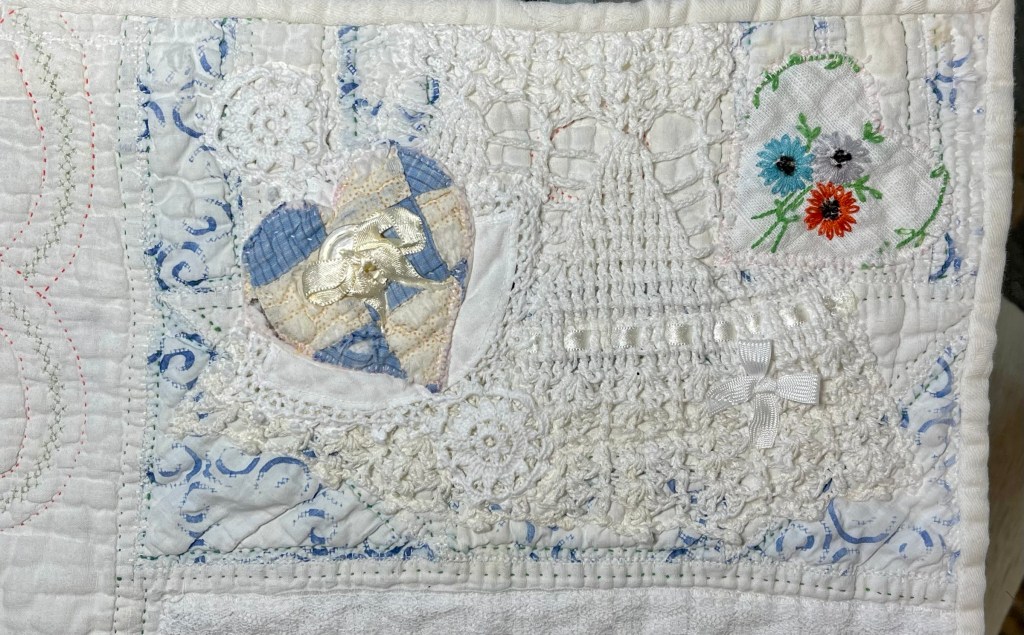
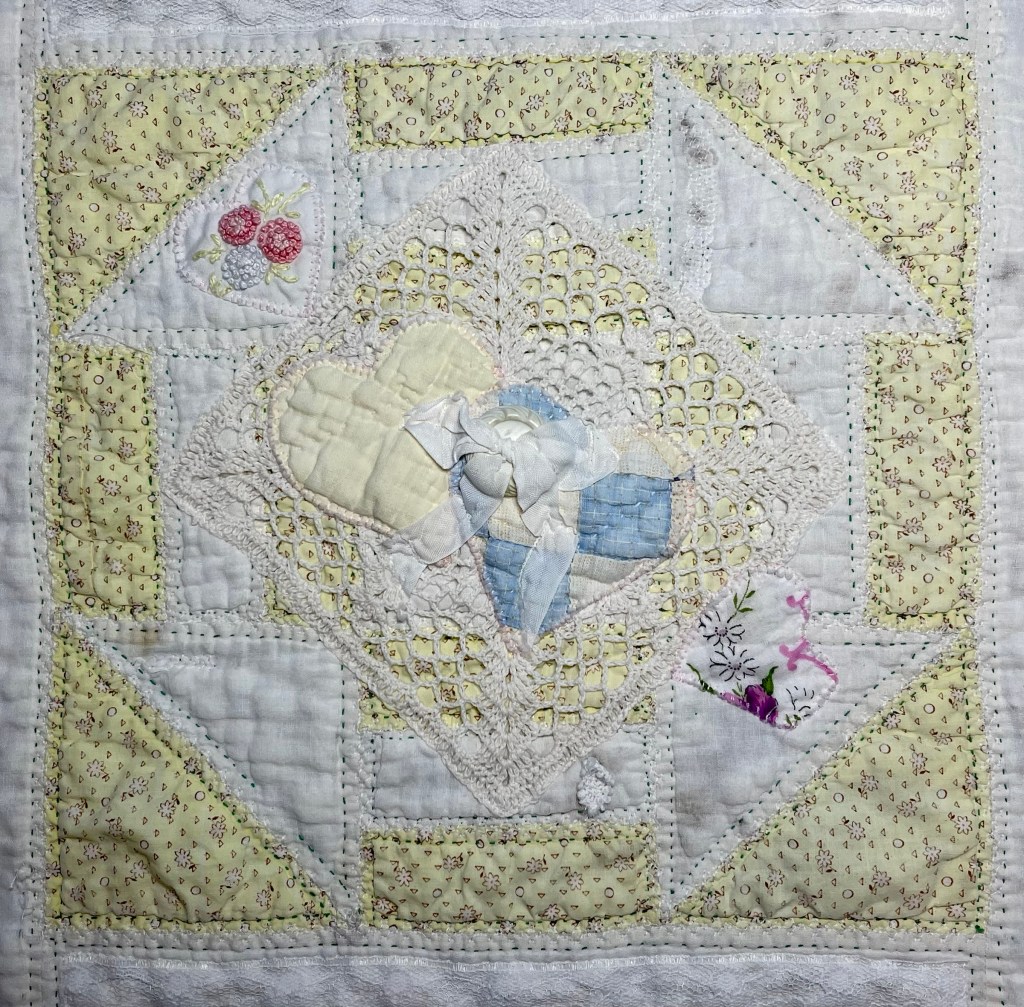
Just to give you an idea of the size of these hearts. You can also see that I have machine applique stitched this heart to the quilt. I was so excited to stitch down my first heart that I forgot to change the needle thread to a nice medium pink color… to remedy this I, without removing the white stitches, stitched directly over them later with pink thread
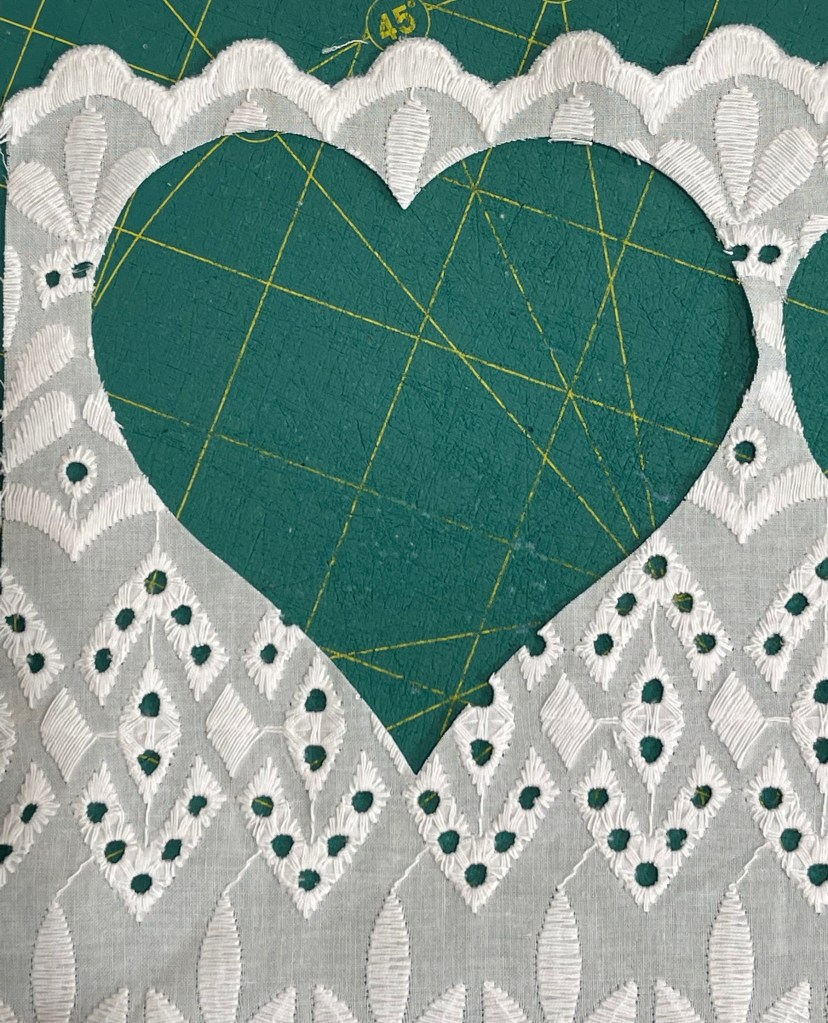
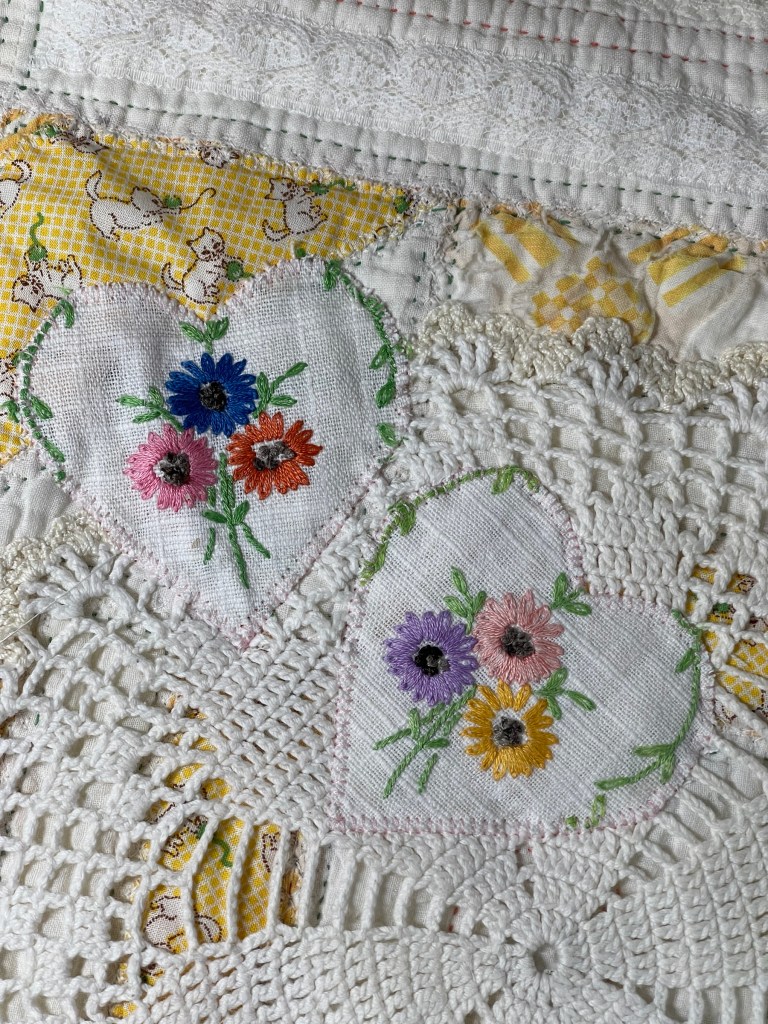
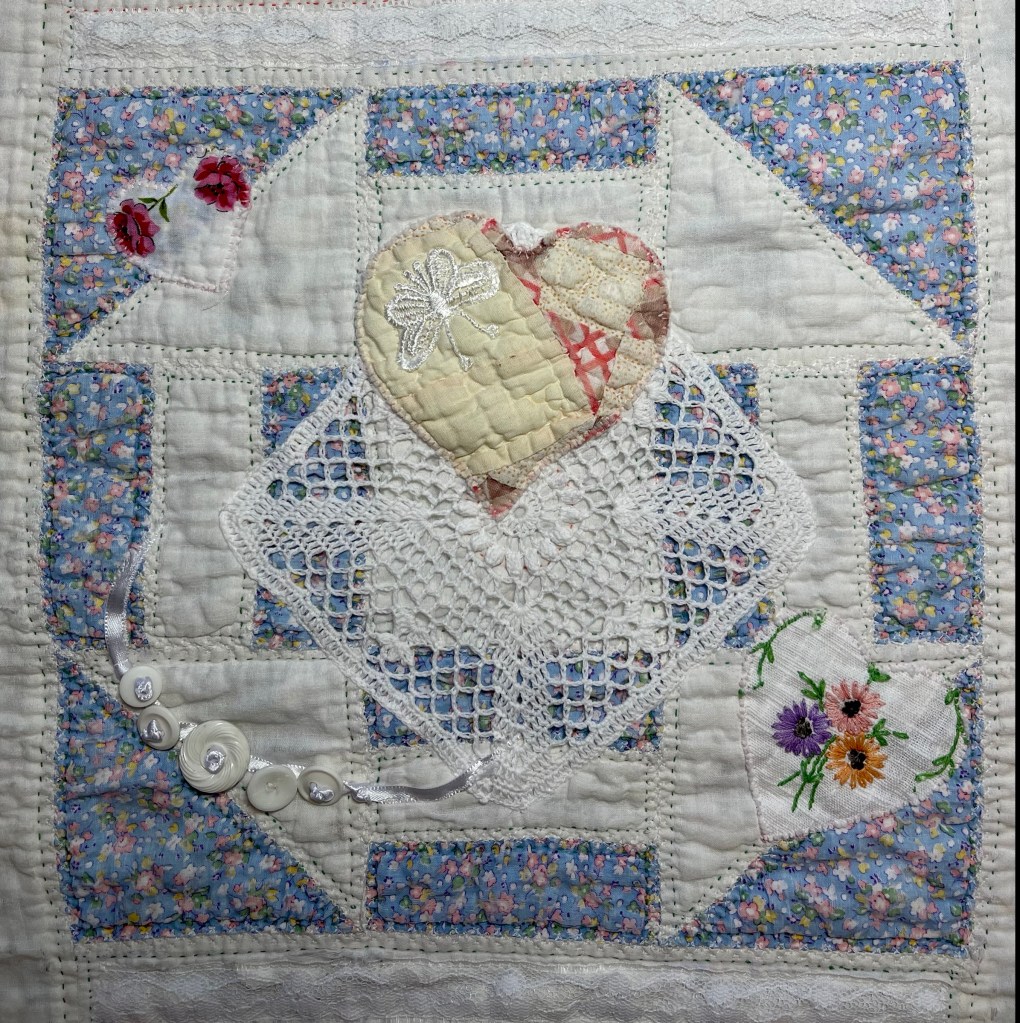
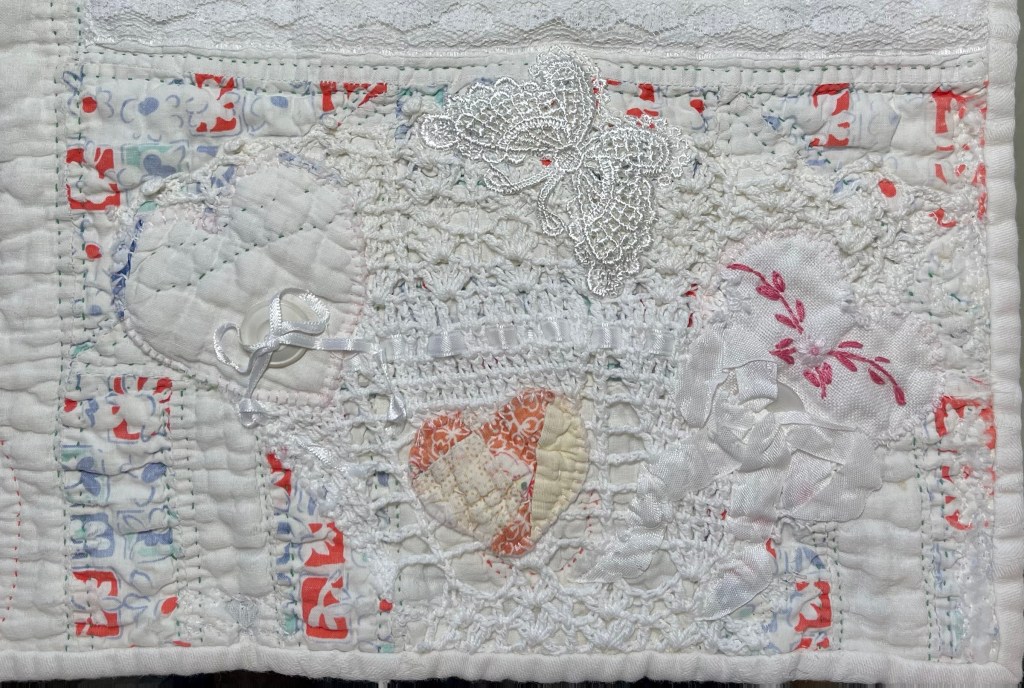
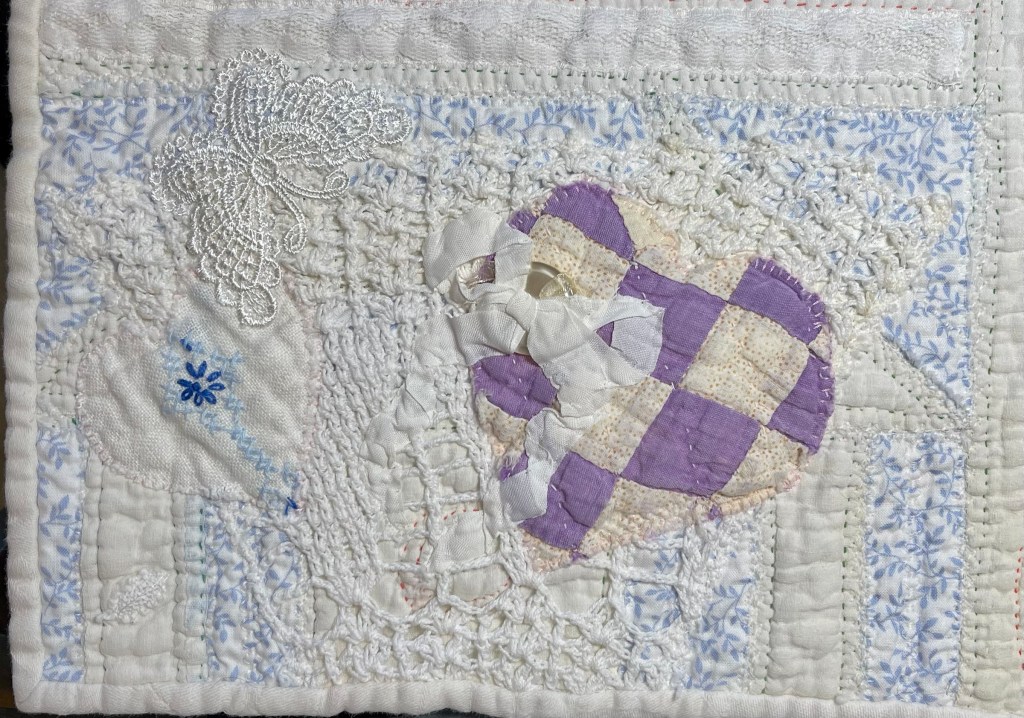
I also cut a few hearts from a lovely white embroidered fabric I purchased at JoAnn Fabrics a year or two ago.
Now you can easily see the nice medium thread I used to stitch down the heart.
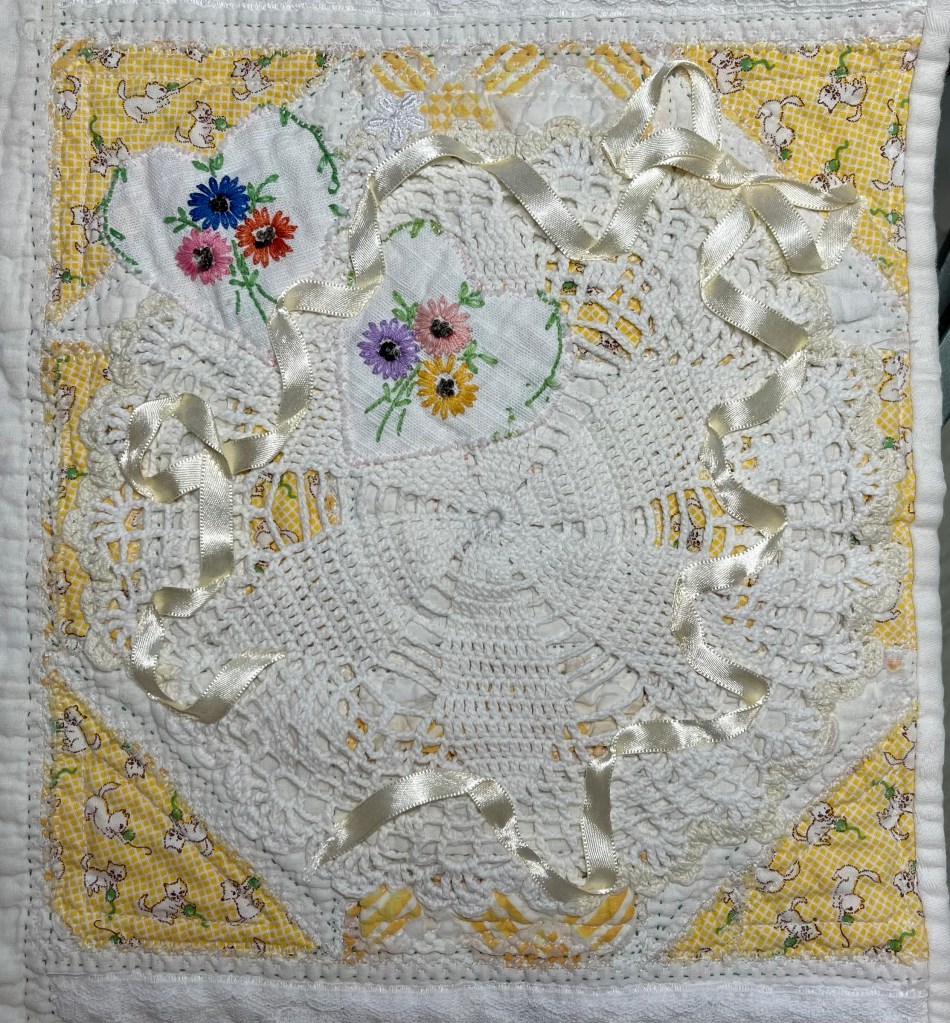
The project is taking shape! I’ve sewn hearts to every block, hung the quilt on my design wall and have begun to plan my next step: ribbons!
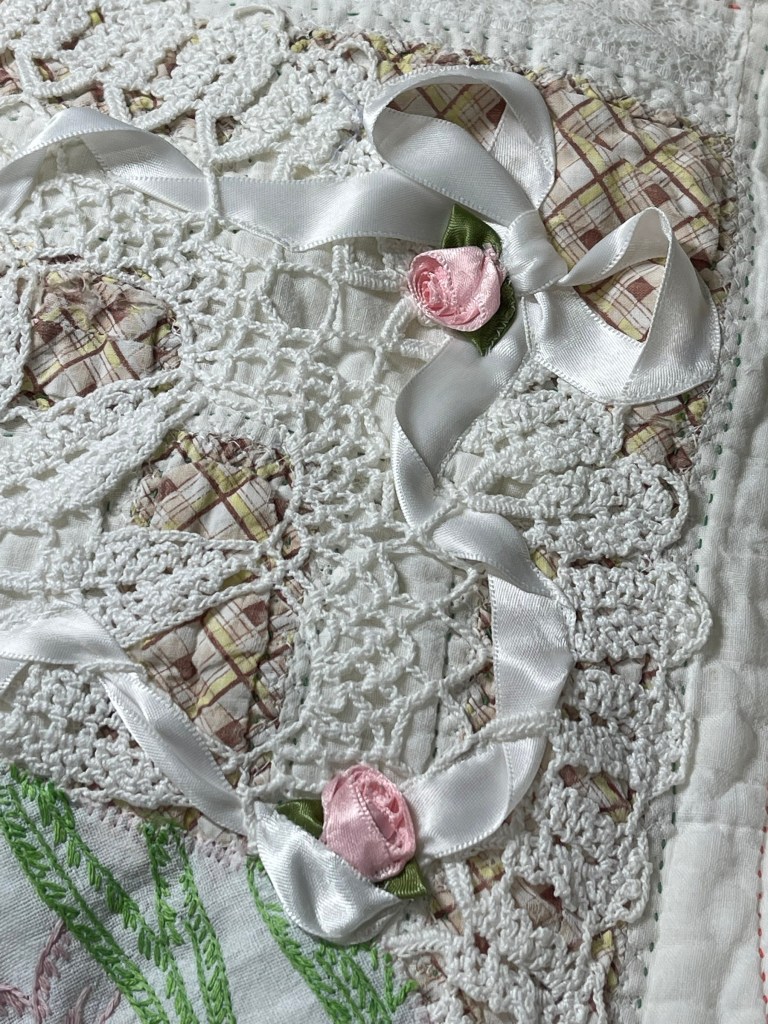
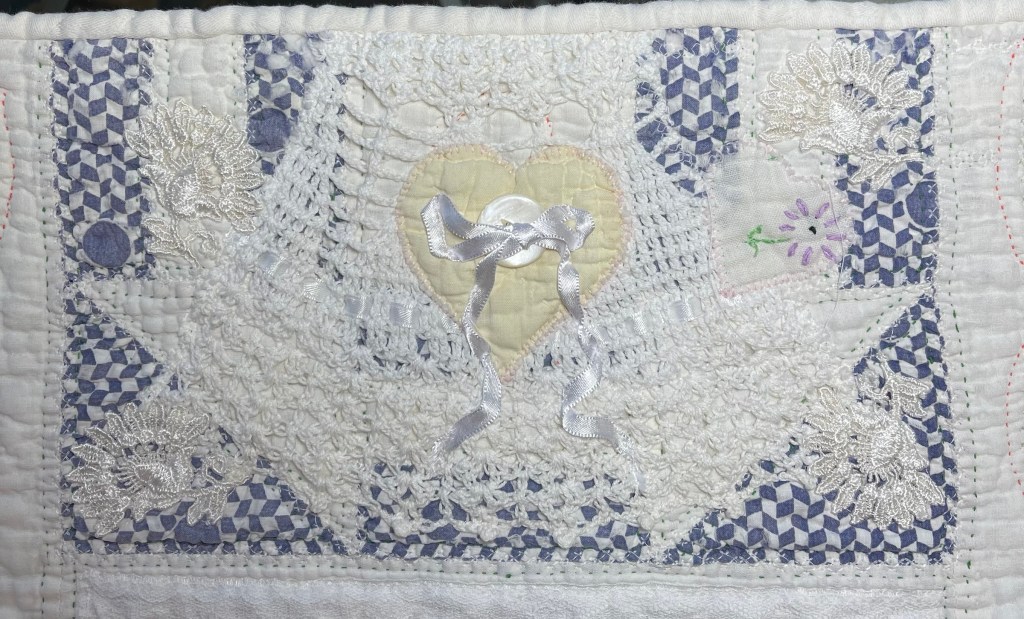
While not actually ribbon, this Snug-Hug seam binding makes a lovely ribbon substitute.
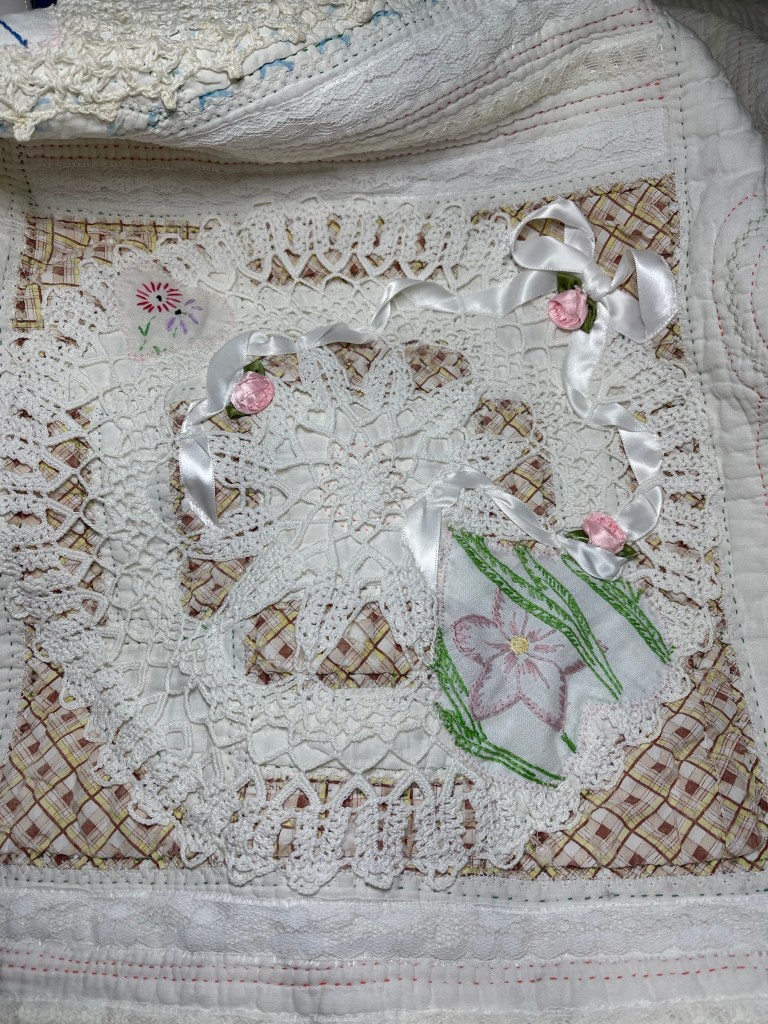
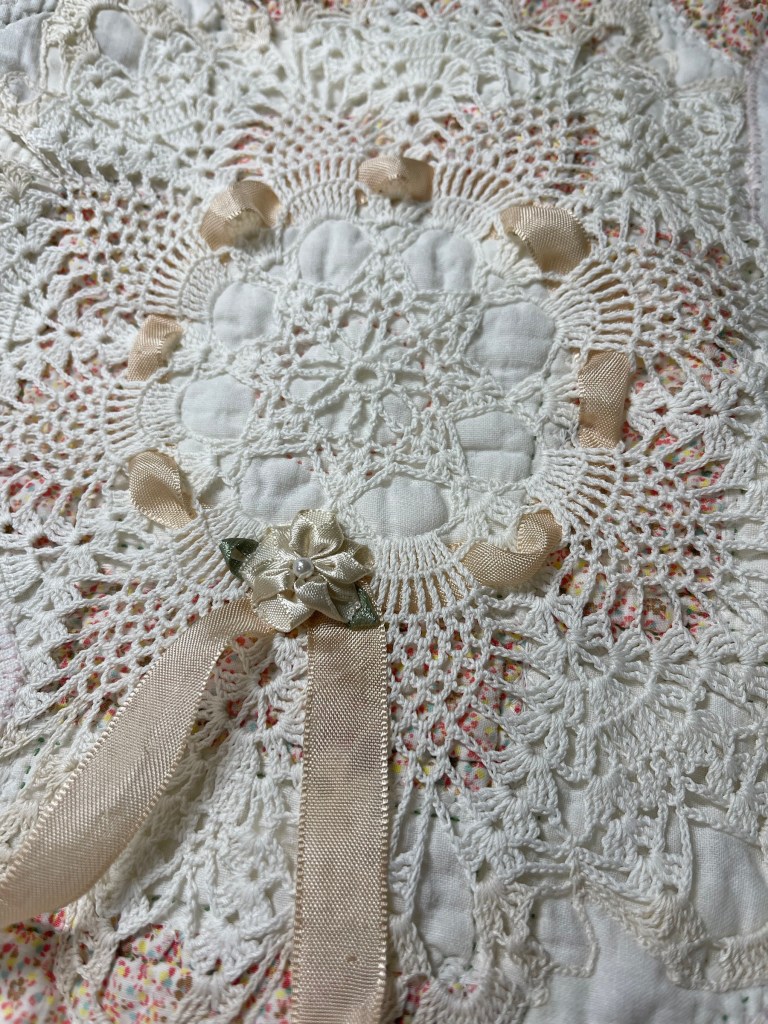
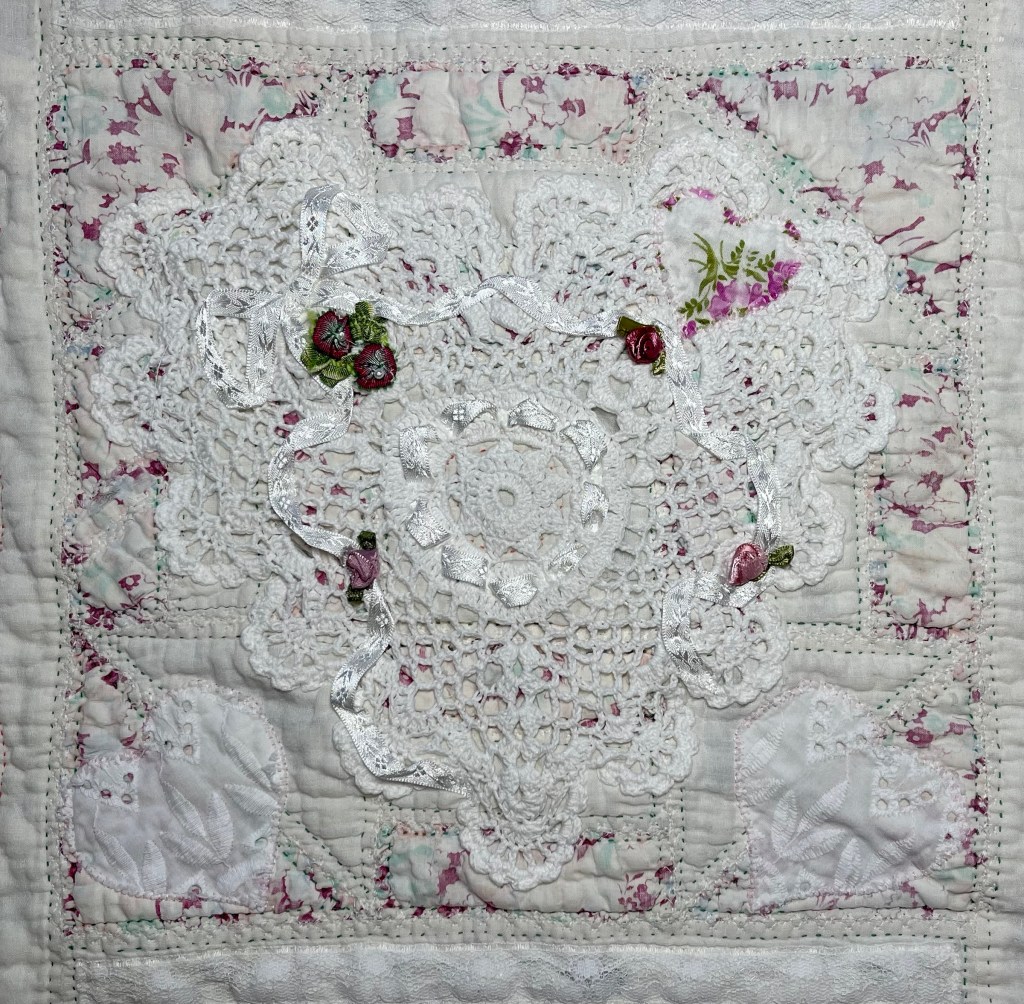
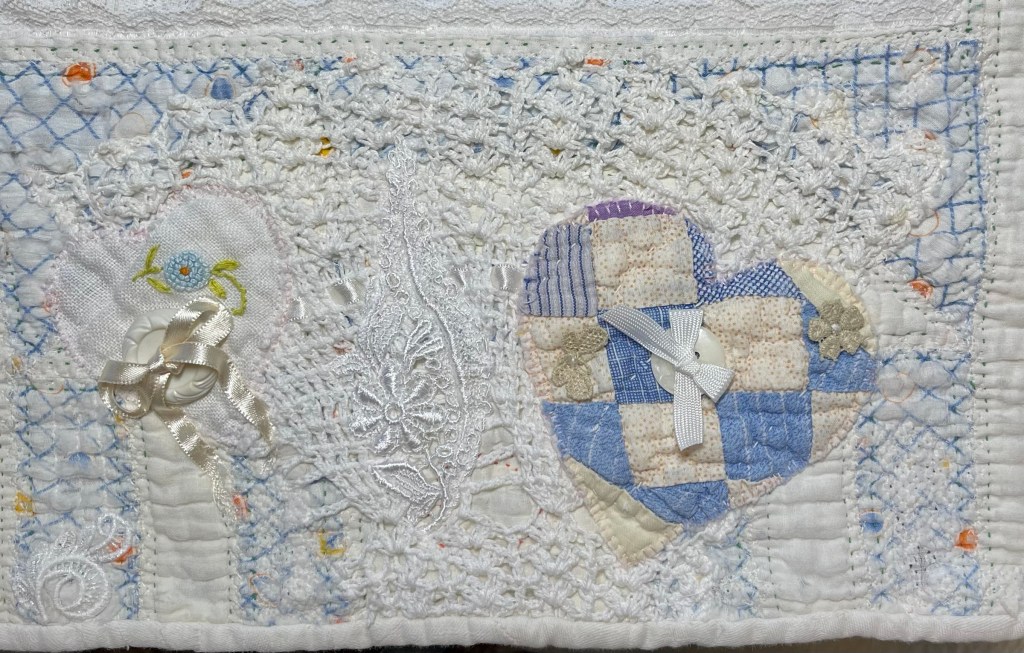
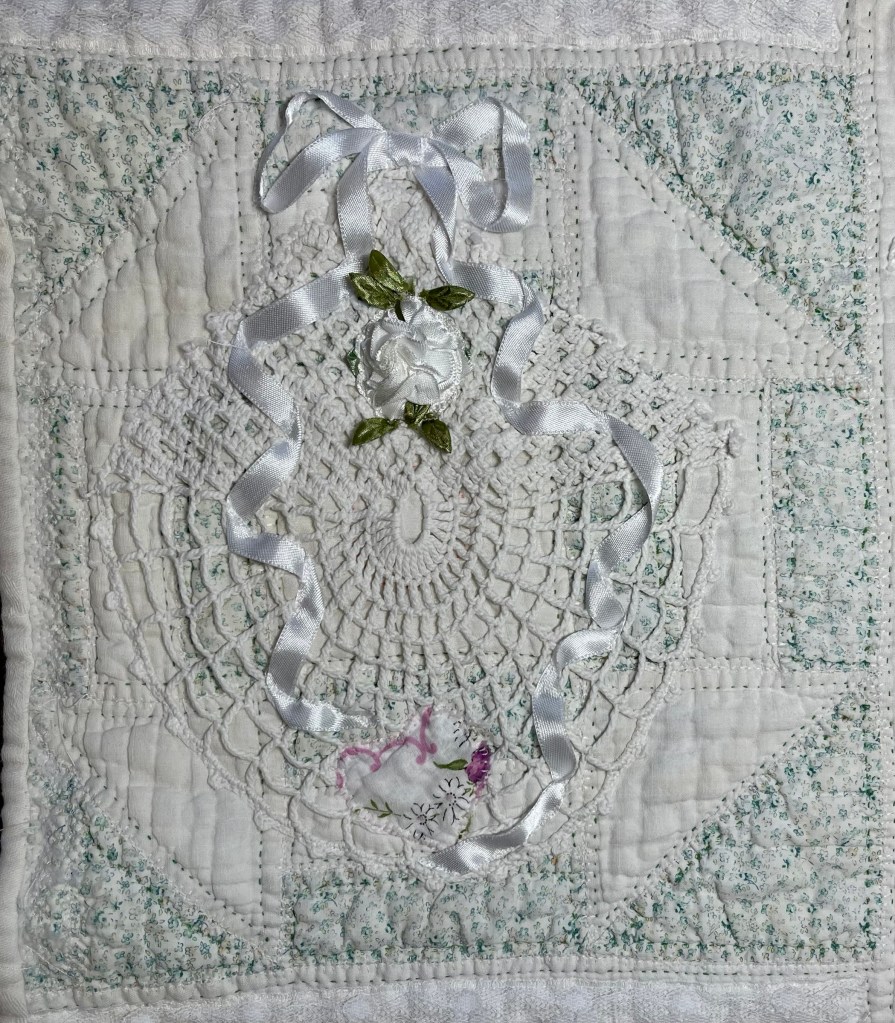
For added interest I attached a commercially produced ivory ribbon rose .
More commercially produced ribbon roses. To give them a more vintage look I flattened them with a steam iron before machine stitching them to the quilt.
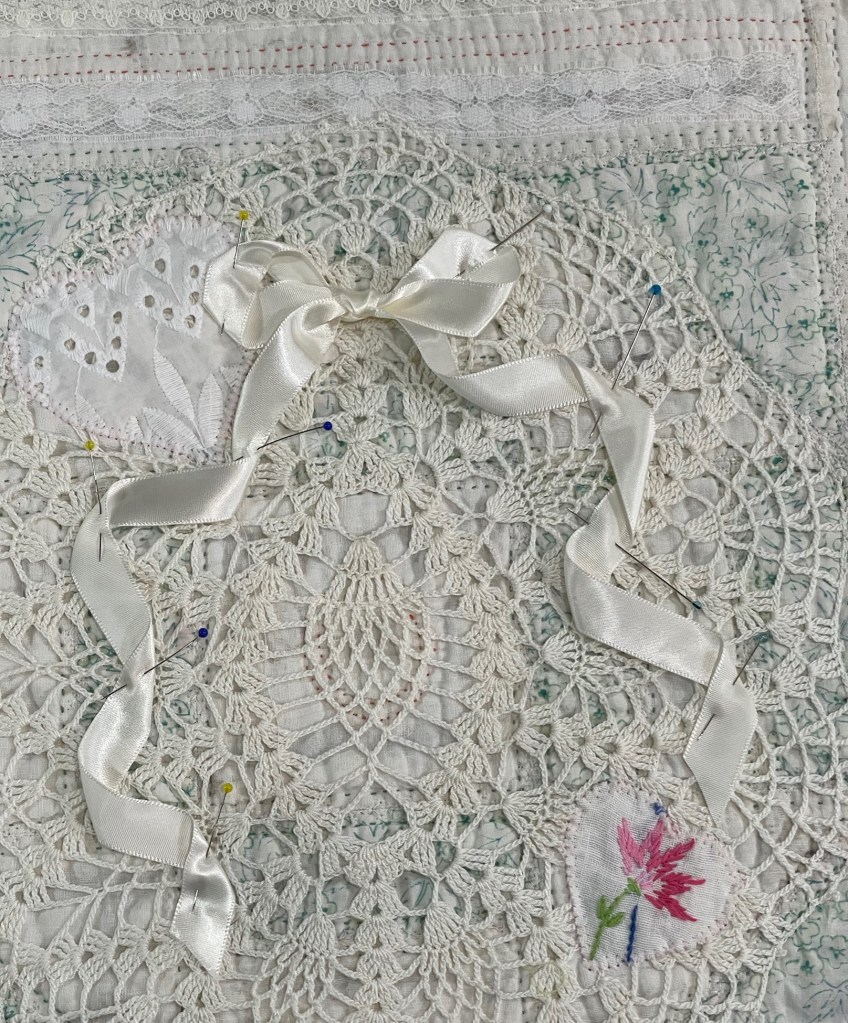
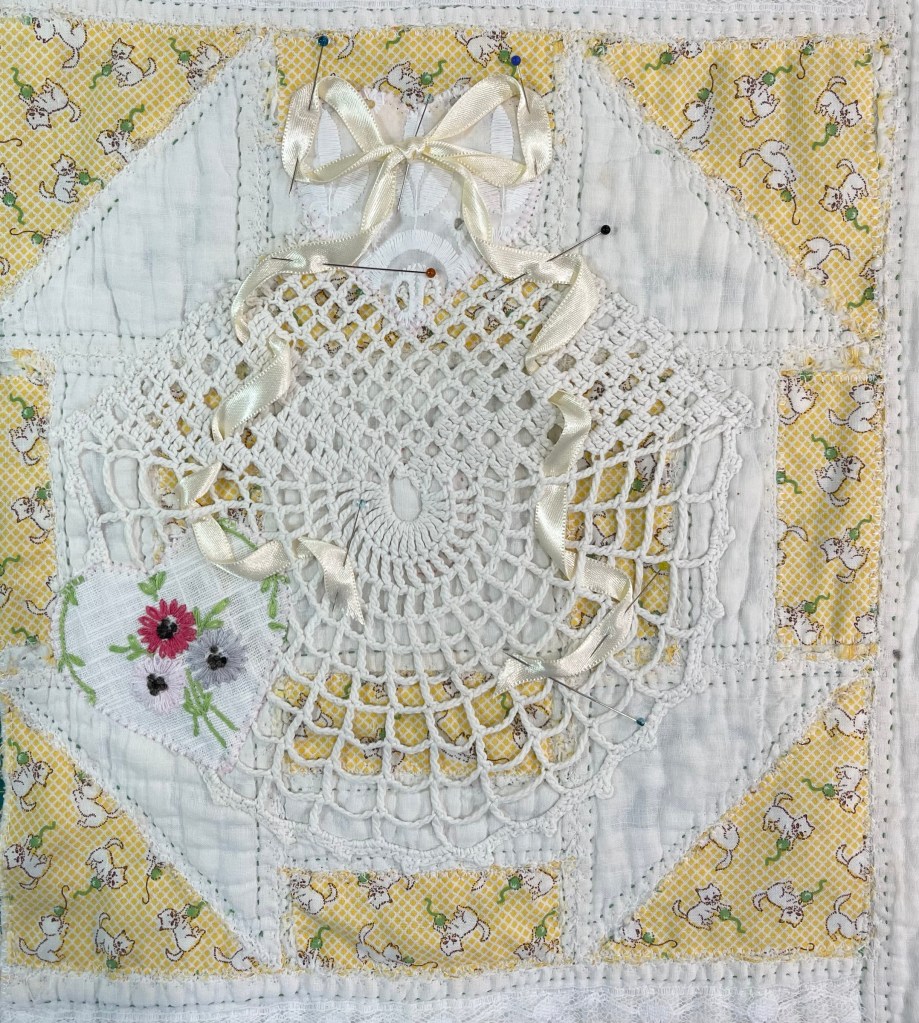
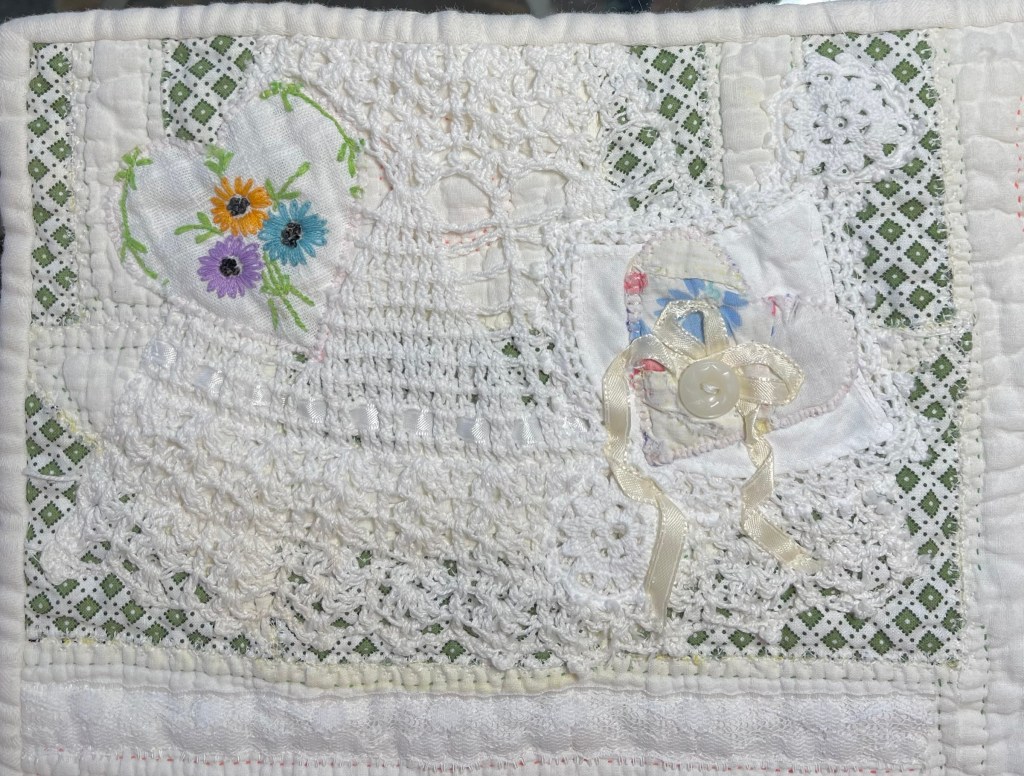
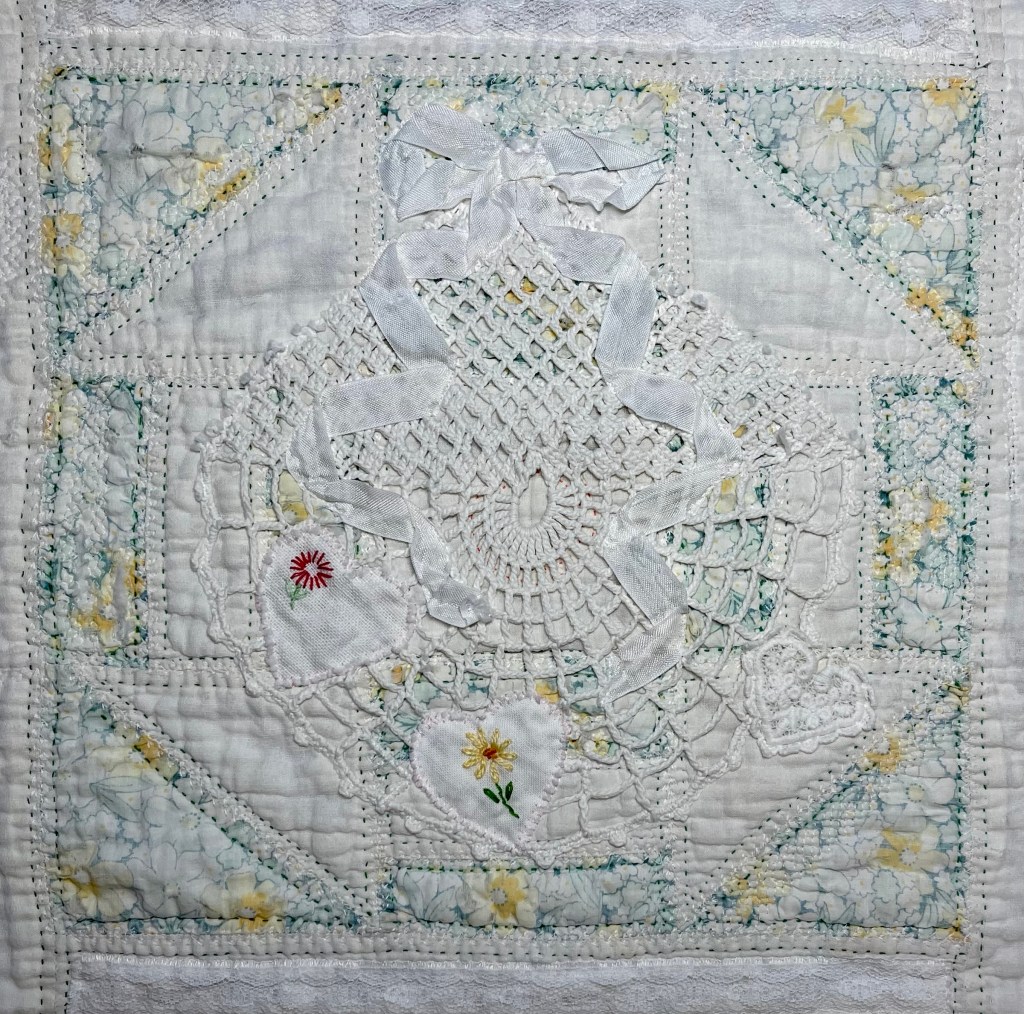
Each of the “other than on-point square” doilies got a ribbon bow with streamers.
An eBay purchase, these cut up vintage quilt scraps will be perfect for cutting heart motifs of all sizes.
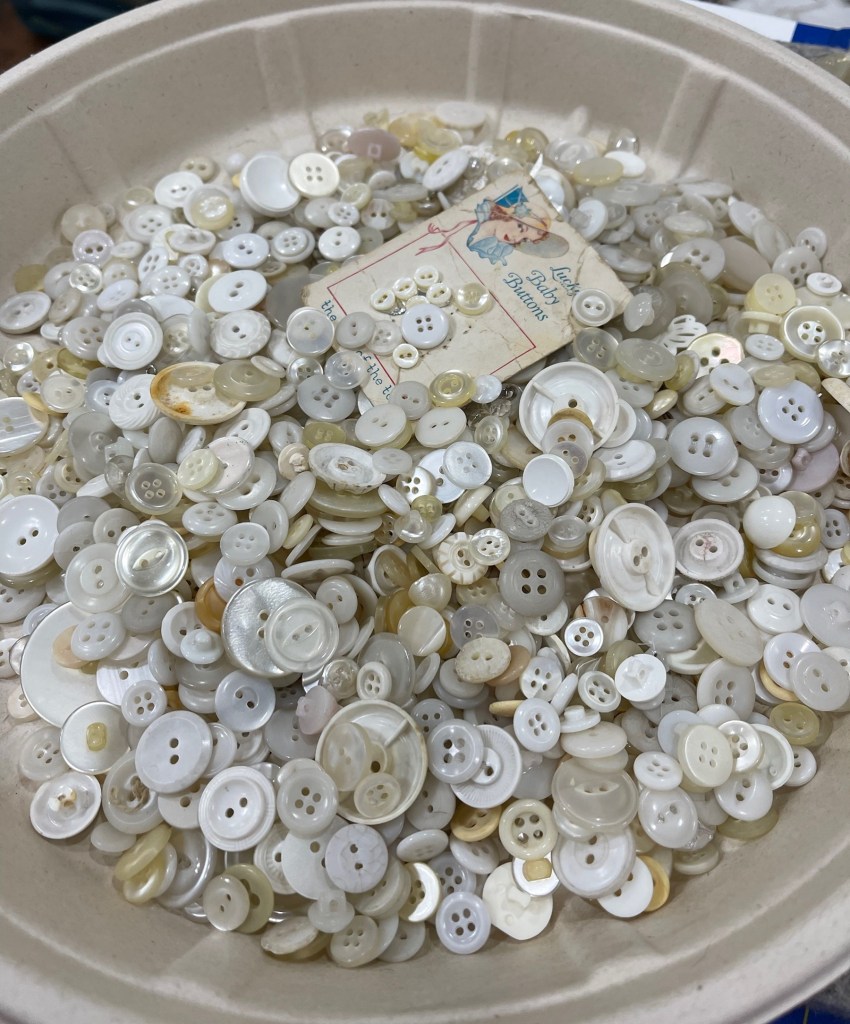
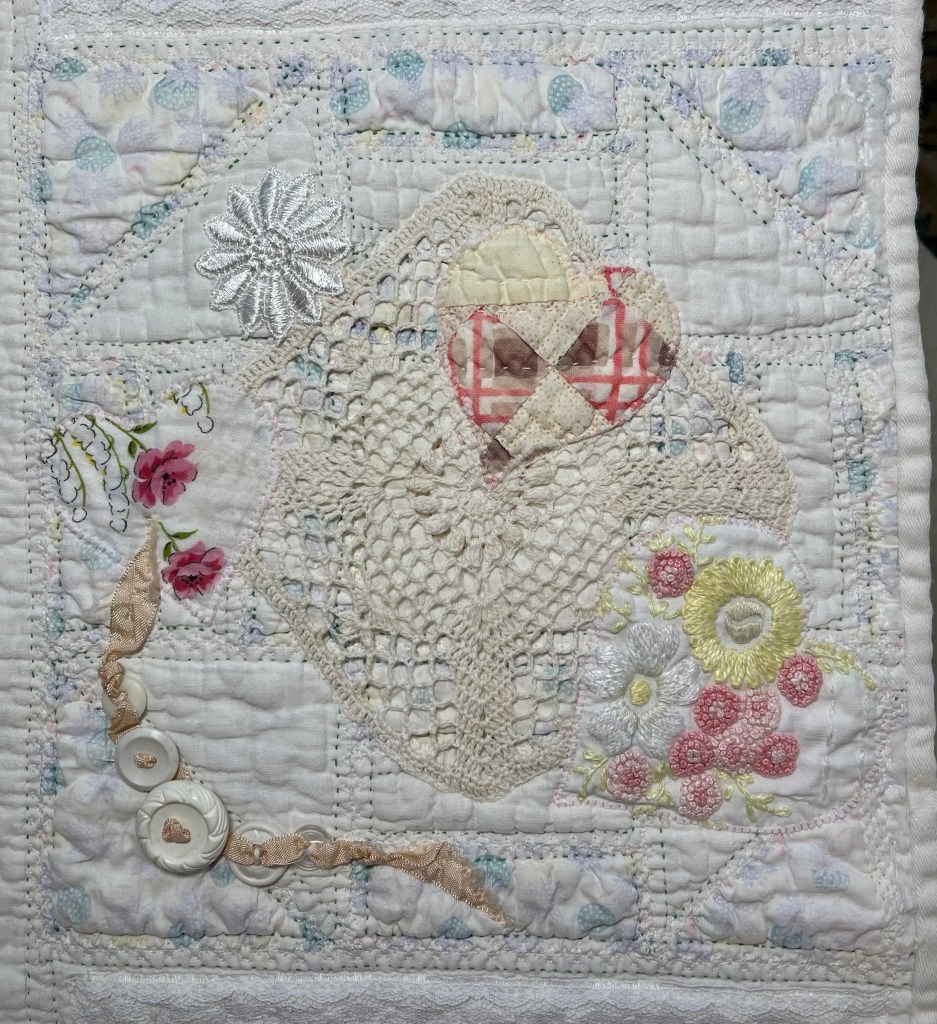
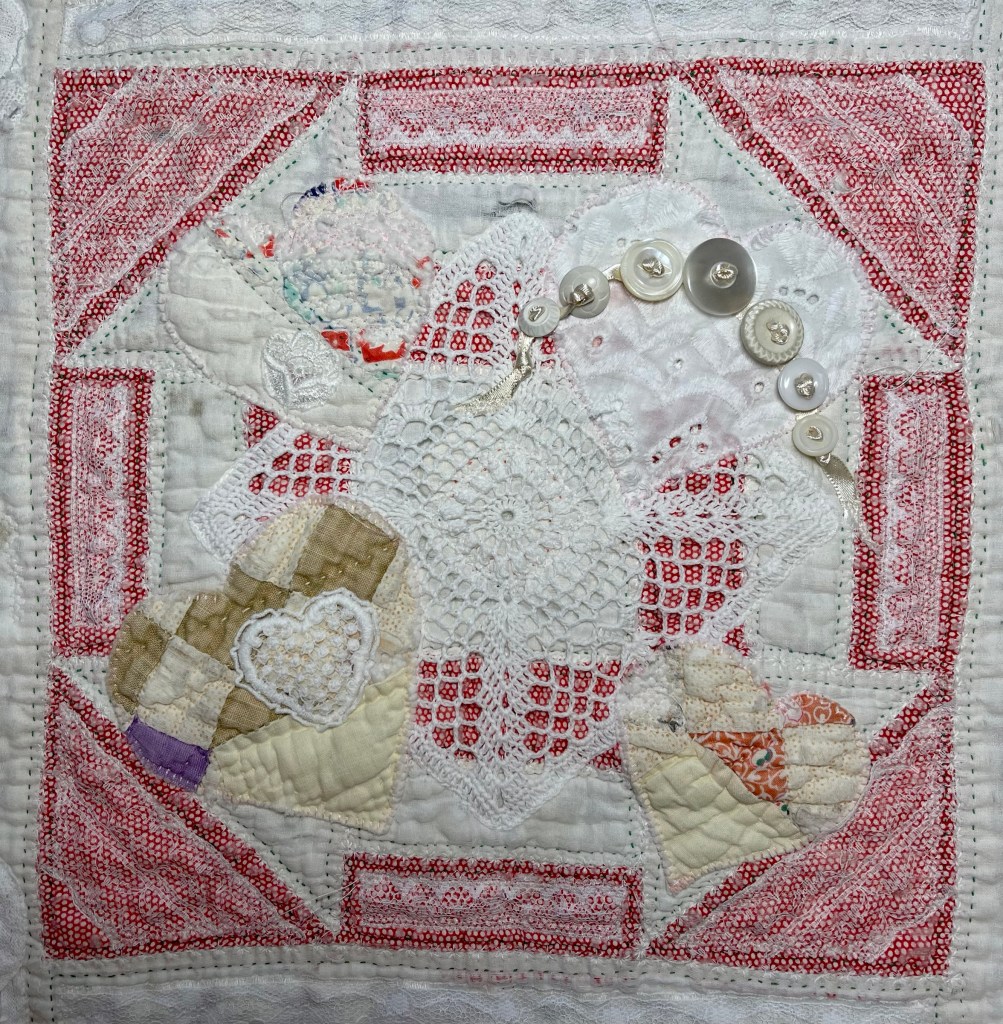
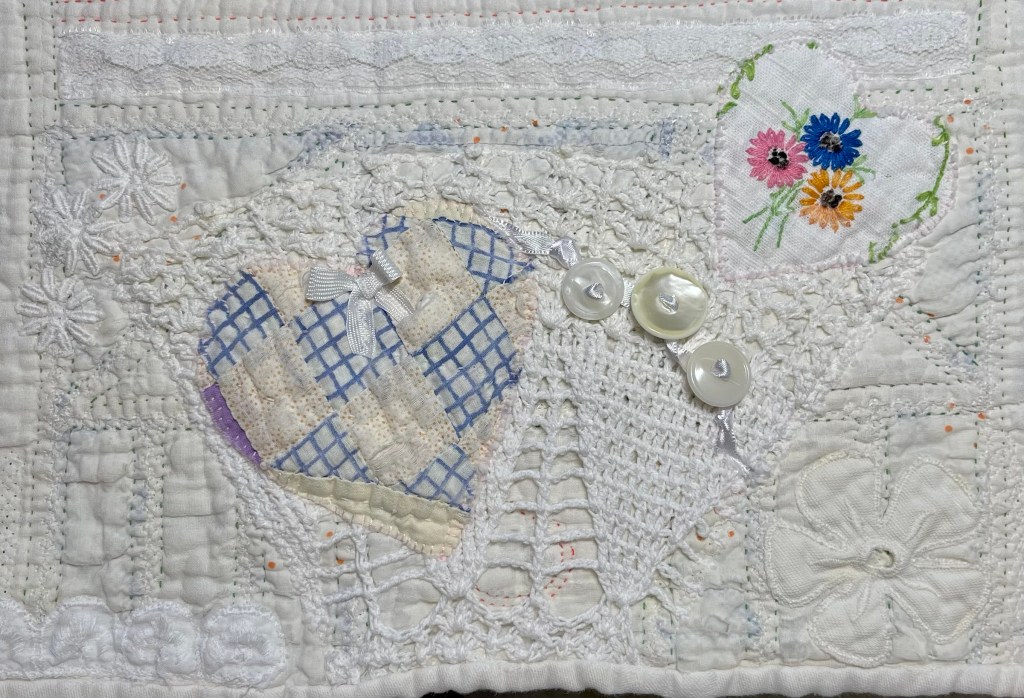
Next step: buttons!
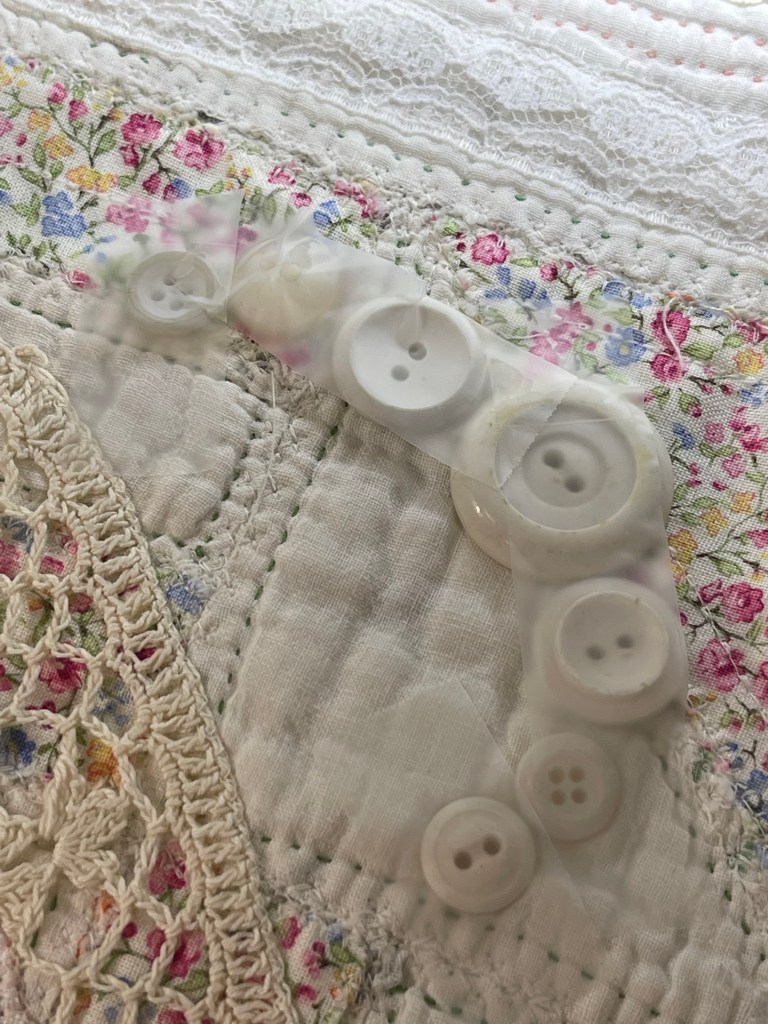
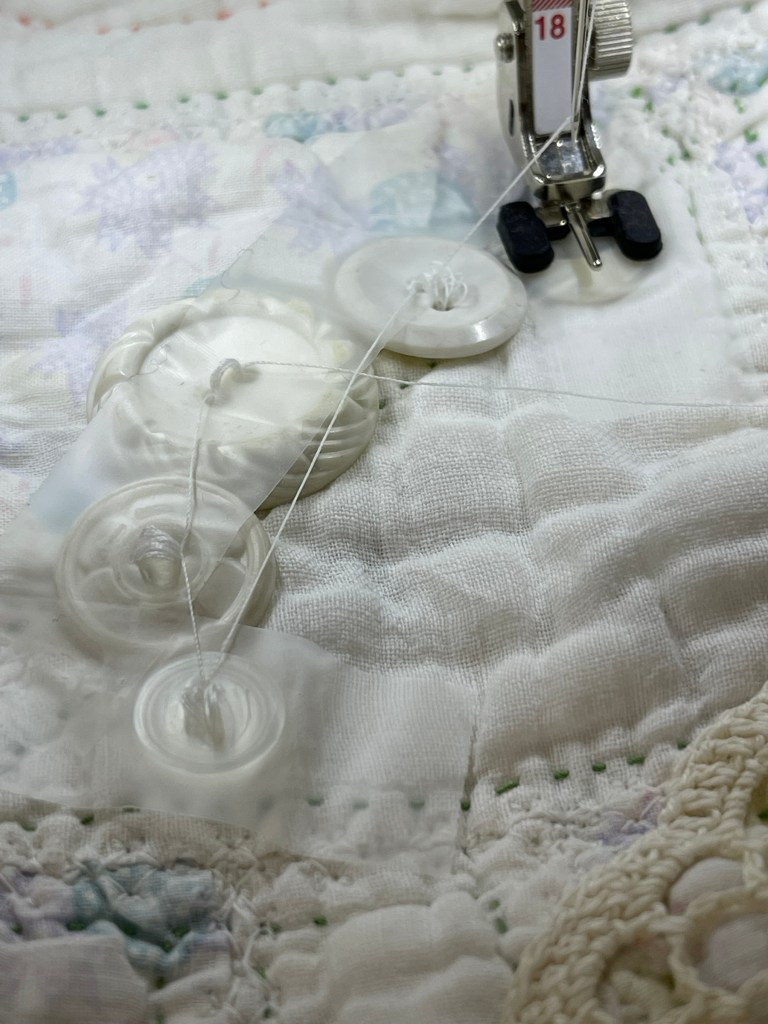
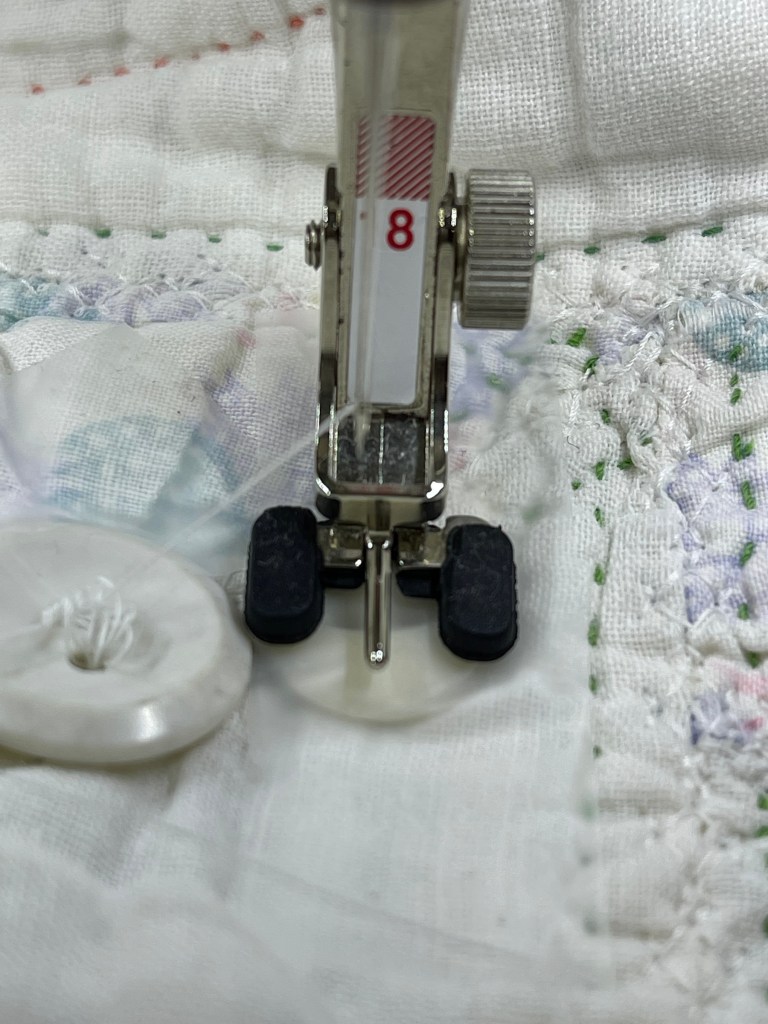
Have you ever sewn buttons using your sewing machine? I sew on a Bernina so the Button Foot is the #18. There is a very specific stitch found with the sewing machines buttonhole stitches. By taping the buttons in place first, I don’t have to worry that they will shift out of place.
See the little metal bar between the black toes of the #18 foot? This little bar adds a “thread shank” to the button. I need this thread shank! Without it the button would be sewn tight to the quilt and weaving in the ribbon shown below would be difficult.
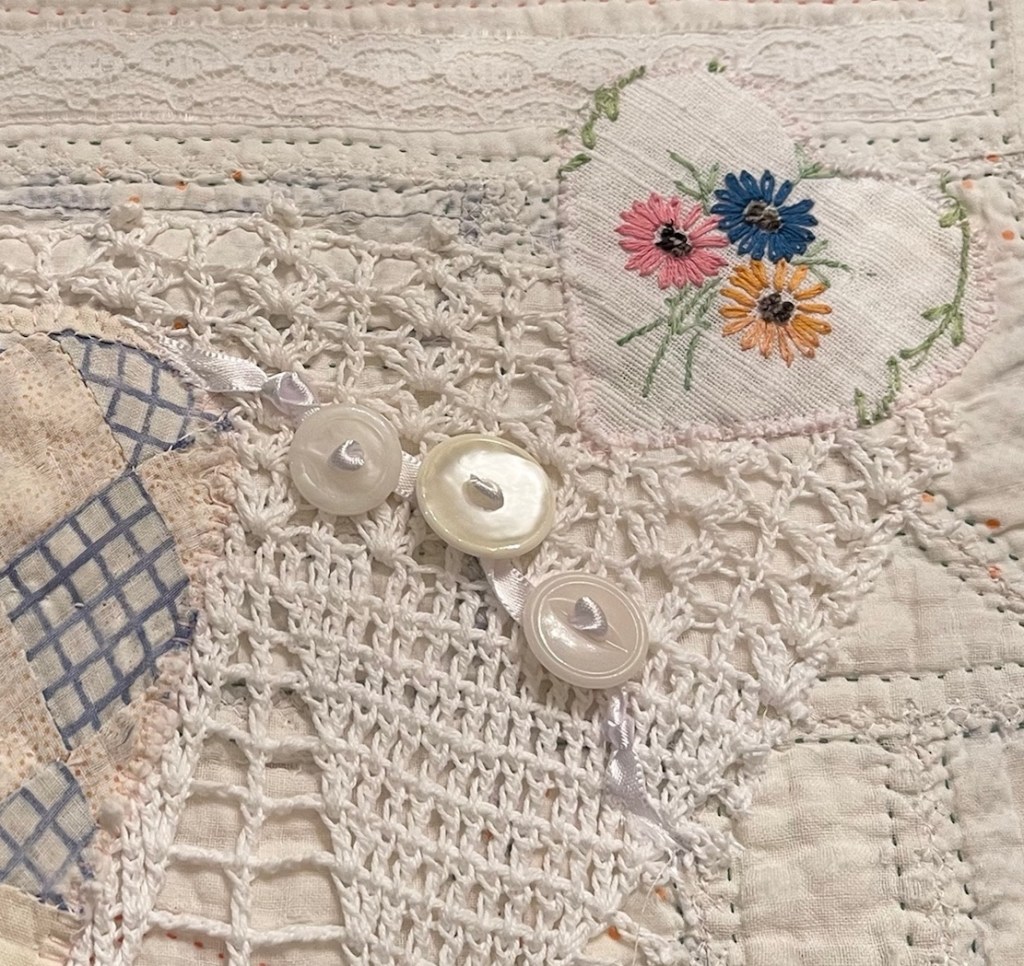
Once my button swags are stitched I can then add narrow ribbon button to button. To add interest I often will knot the ribbon both at the start and finish of the button swag as well as in the middle of each button.
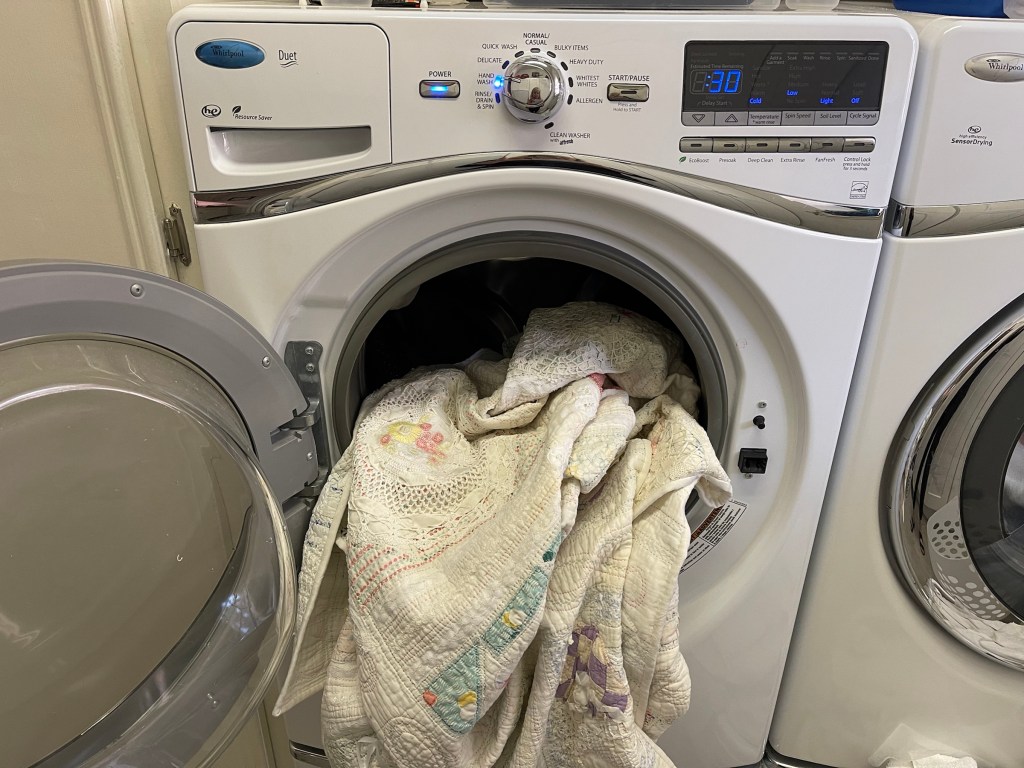
A trip through the washing machine and the quilt is ready to be blocked. Why block? The quilt I started with is old, well used and well laundered. As such it has shrunk a bit. When I machine stitched the vintage light ivory damask tablecloth binding to the quilt, the very act of stitching and the presser foot causes the quilt to slightly stretch out to more of its original size. Does this make sense? As such, the body of the quilt remains slightly smaller while the edges are now closer to the original quilt size. The result: wonky/wavy quilt binding edges.
By washing and then blocking the quilt you will be able to tame this misshapen quilt. If I am blocking a Show Worthy Quilt I block pin at least every 1/2”. For this fun utility quilt I pin about every inch.
I did an experiment yesterday with this quilt. After it was blocked and 110% dry I didn’t like the overall feel. It wasn’t super soft and snuggly so I sent the piece through the washer again and then on to the dryer with wool dryer balls and half a sheet of unscented fabric softener. Ooooohhhhhh it came out perfect and the edges were not wonky!
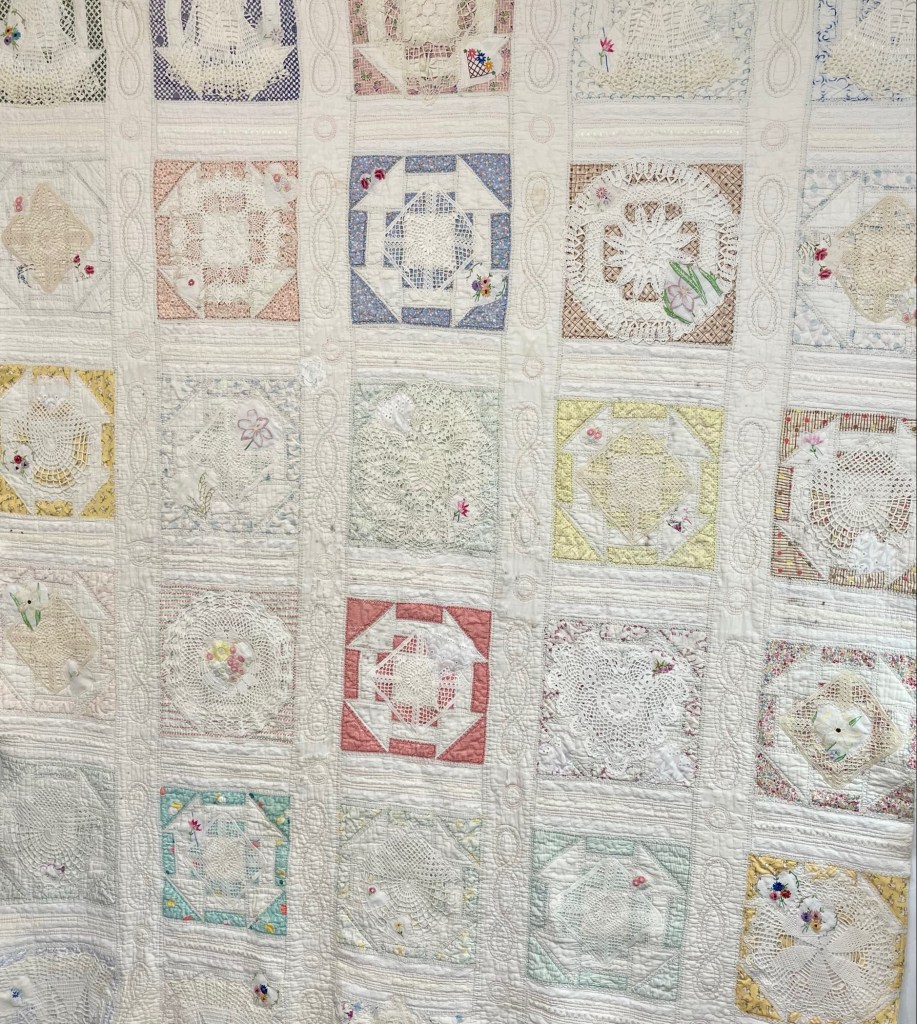
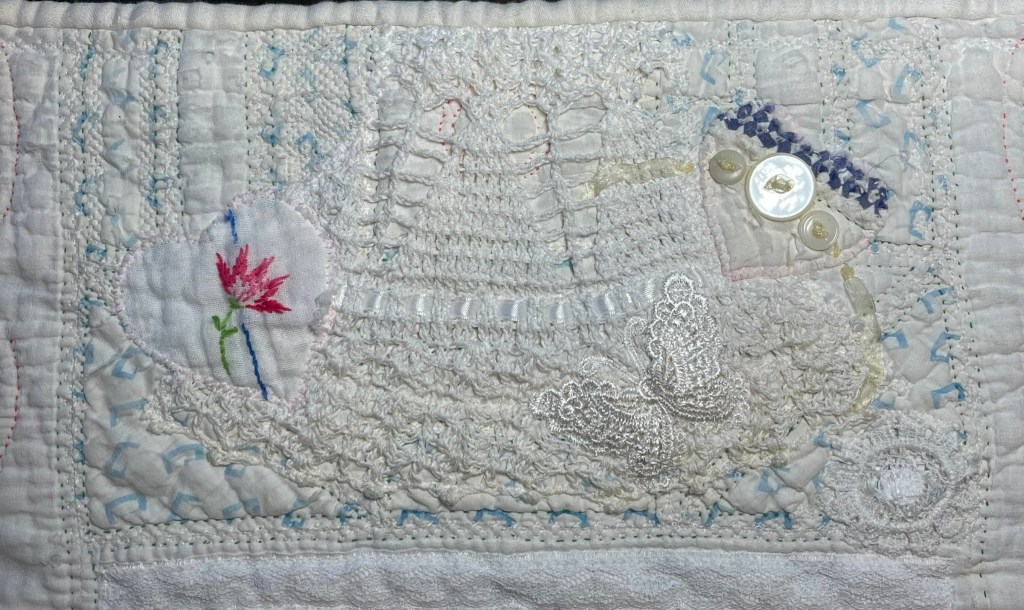
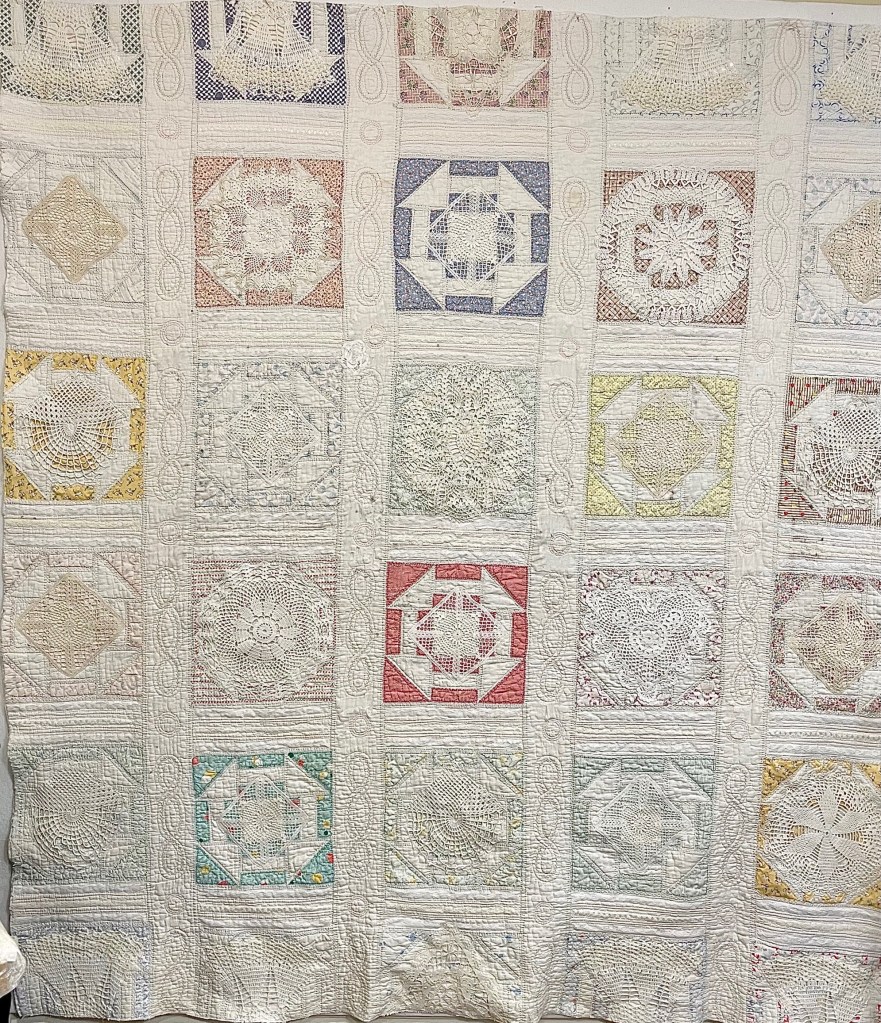
Ready for close-ups of the 30 finished blocks?
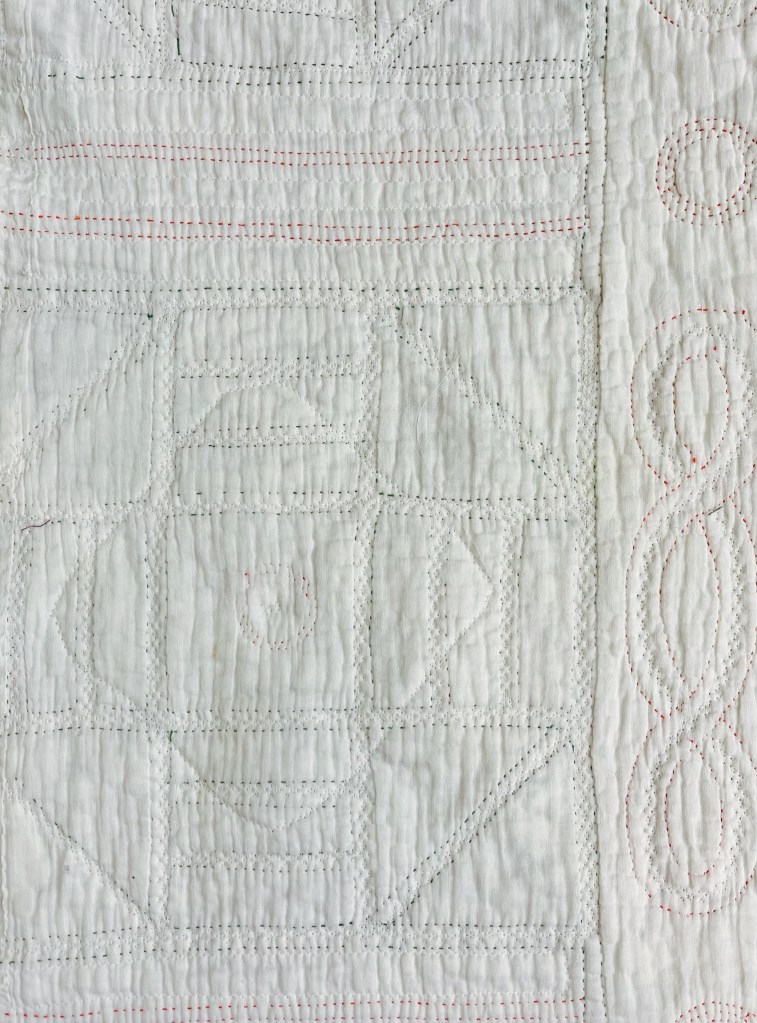
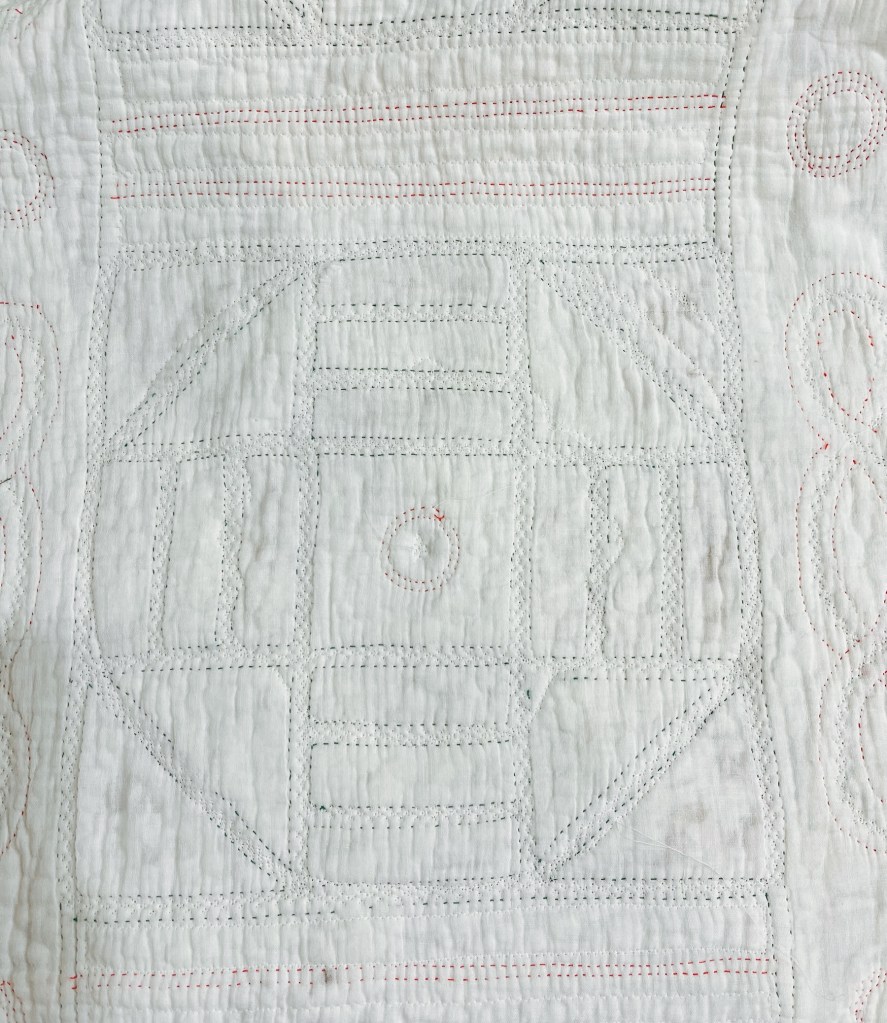
And the back? Remember in blog post #1 I said I was super careful to use thread that matched the back fabric? This is why, I wanted the green and the orange original quilting thread to remain the focus of the quilt back:
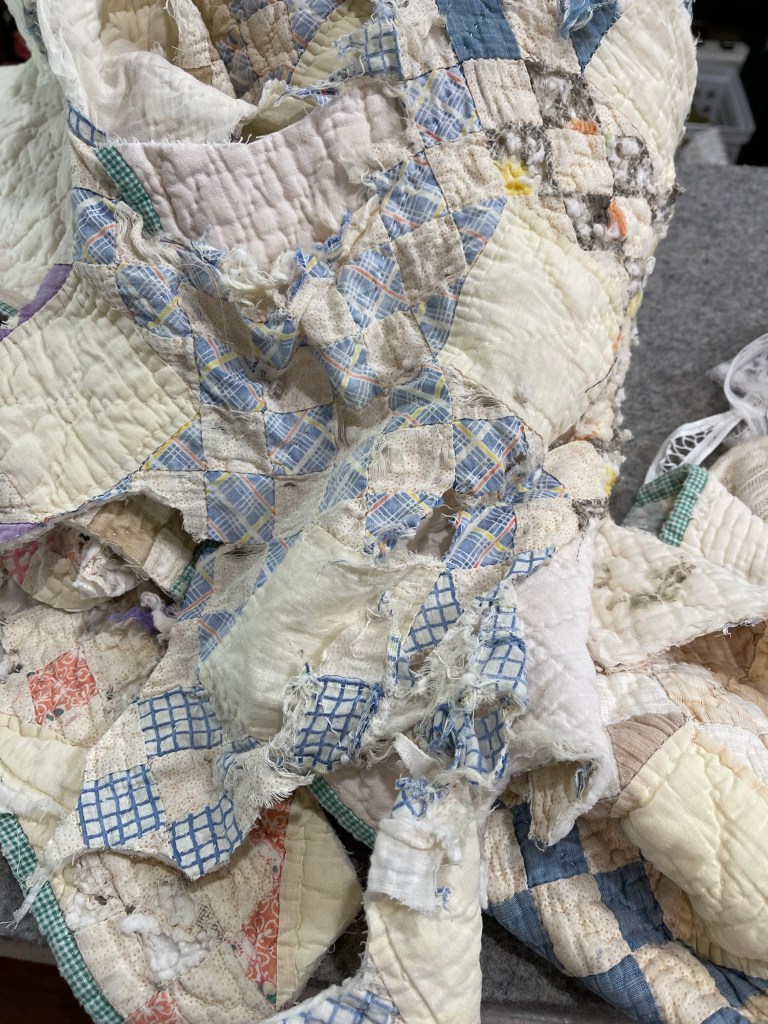
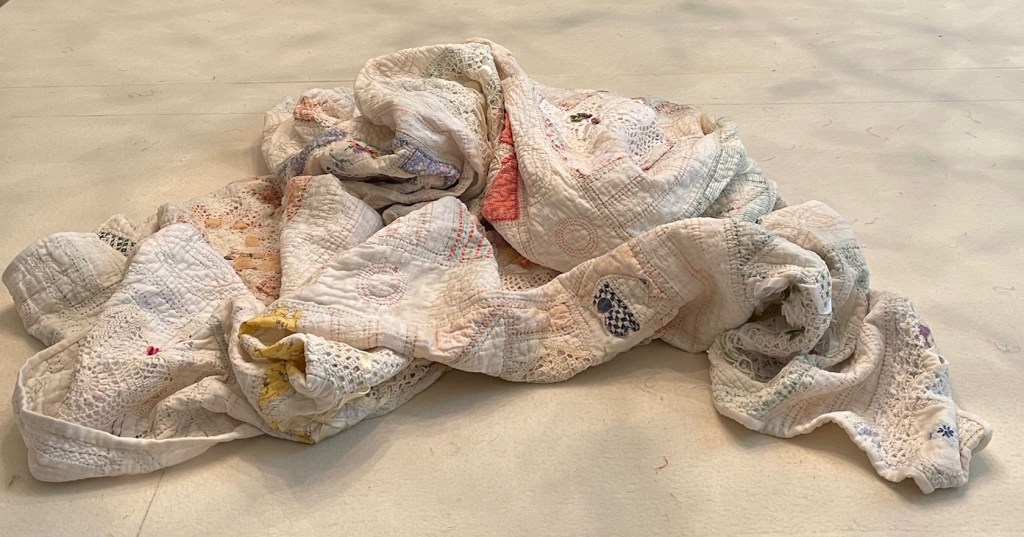
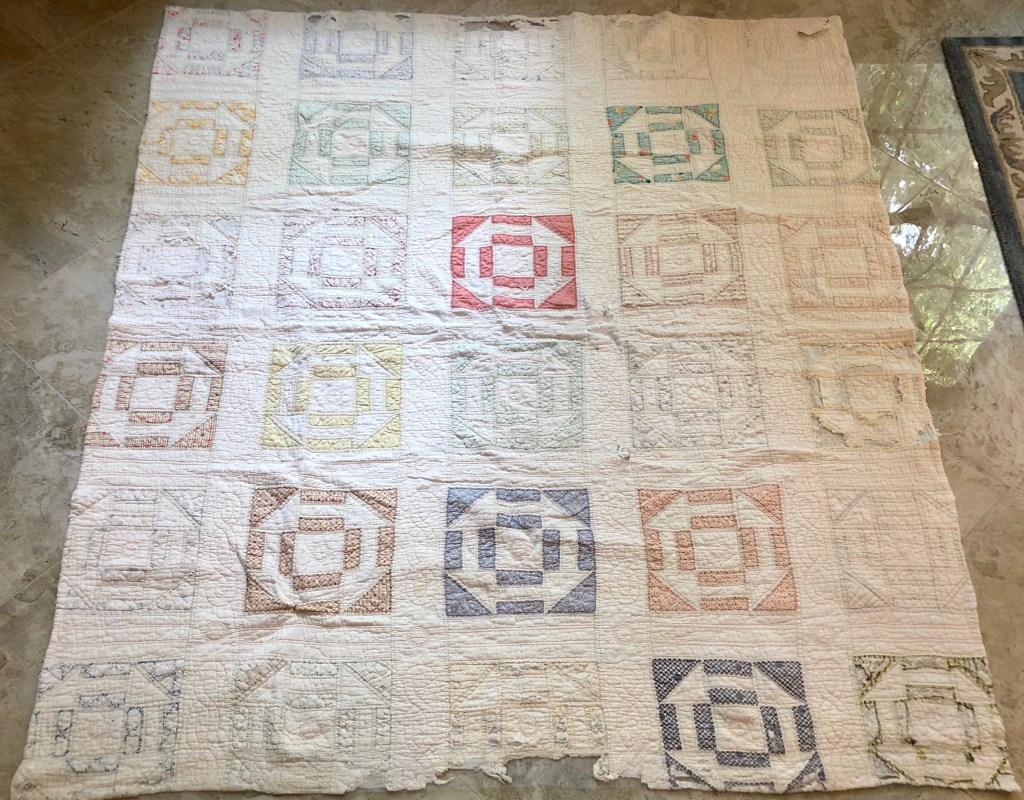
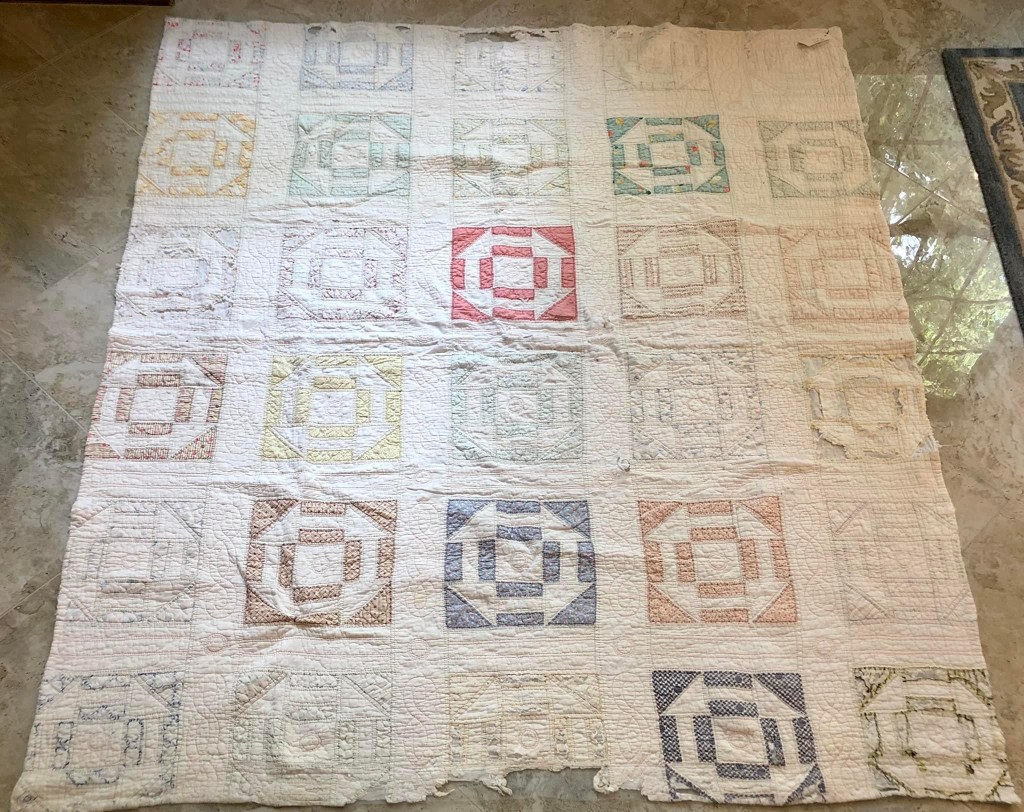
As a reminder, above is the original sad but well loved quilt and below is the finished piece:
I made this piece to be used (or sometimes termed a Utility Quilt) and I’m hopeful that will happen.
Are you challenged to save/rescue a quilt? I sure hope so! Blessings and Happy Quilting, Rhonda
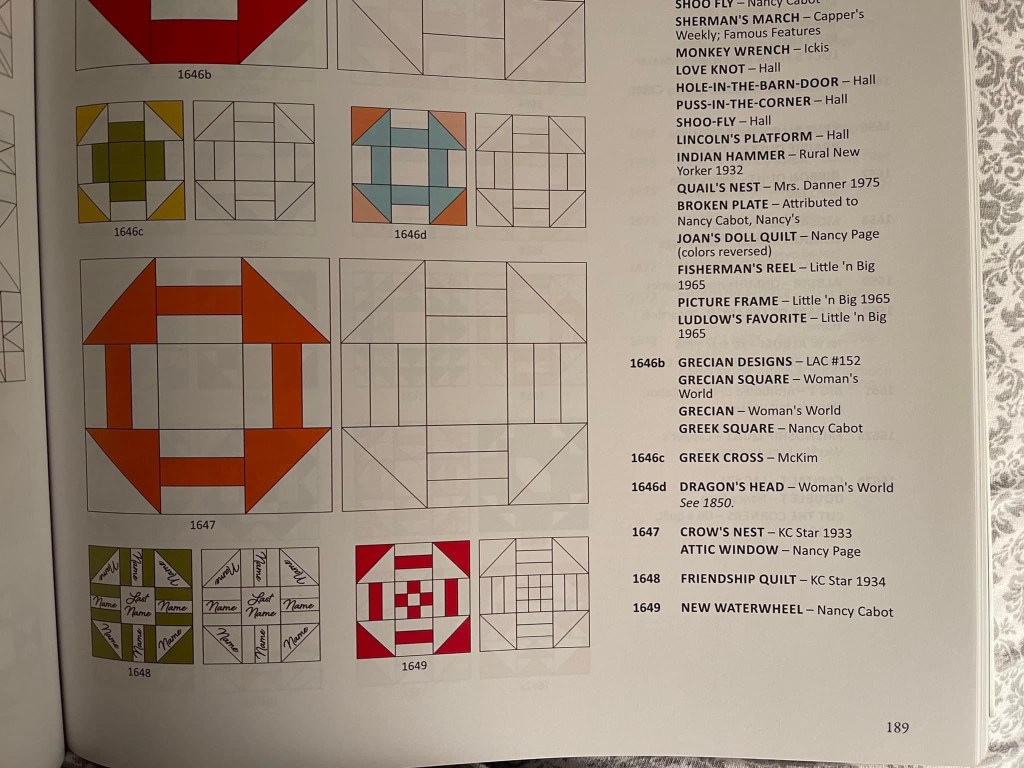
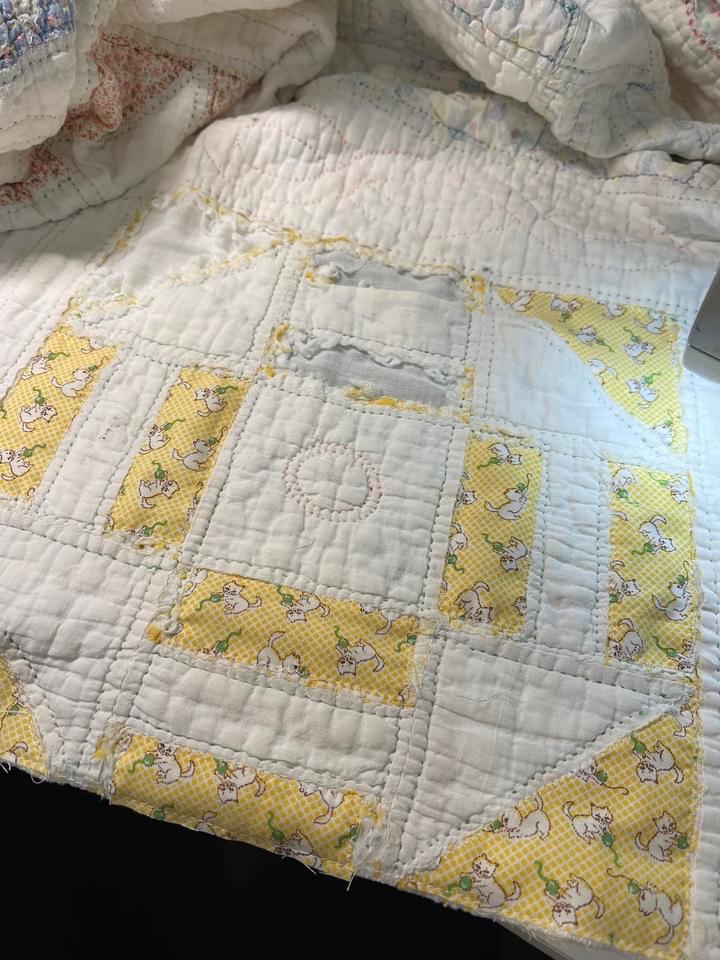
I’ve had this vintage quilt for about 2 years, offered it twice to my retreat groups for purchase but with no takers I decided to take on the “save” challenge myself. Checking Barbara Brackman’s Encyclopedia of Pieced Quilt Patterns I believe this pattern is called either Crow’s Nest or Attic Windows.
Want to know more about this amazing quilter/author?
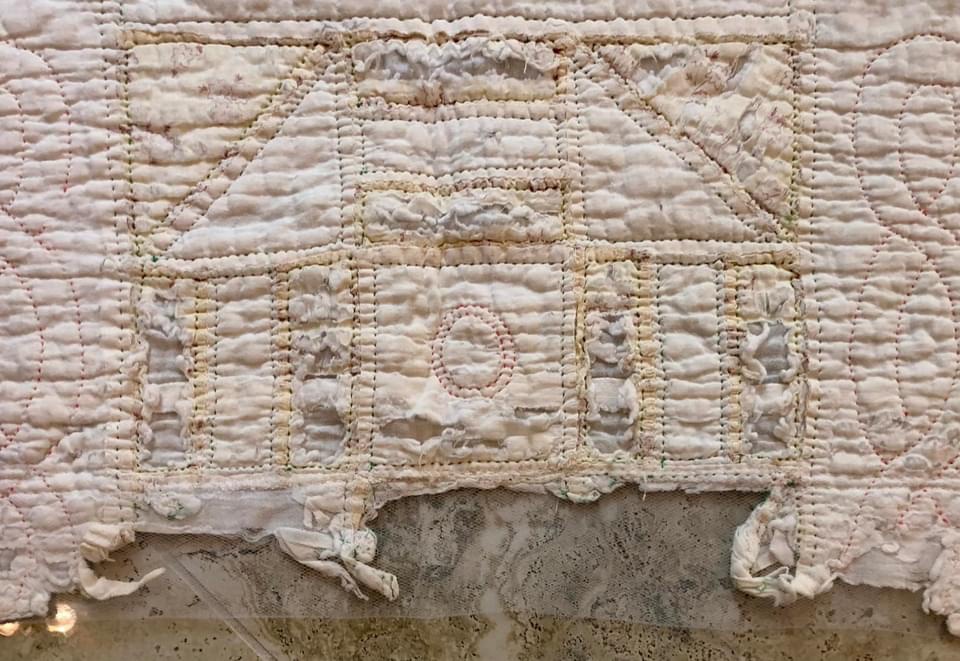
Yes, this is a very rough quilt…but it has potential! I encased the bad areas in tulle before sending this piece to a 2 day soak and the front load washer and dryer. I first contemplated repairing both the top and bottom edges but in the end I trimmed them away.
I am replacing fabric with some of my stash, most from the Marcus line named Aunt Grace. By machine applique stitching the raw edges of the fabric down to the quilt the bad or missing fabric areas of the quilt are quickly repaired.
This quilt will get miles and miles of machine stitching directly through all three layers. For this reason I chose Superior Threads So Fine color #401. This thread matches perfectly the solid slightly off white backing and quilt front fabric. It also has a mat (or not shiny) finish.
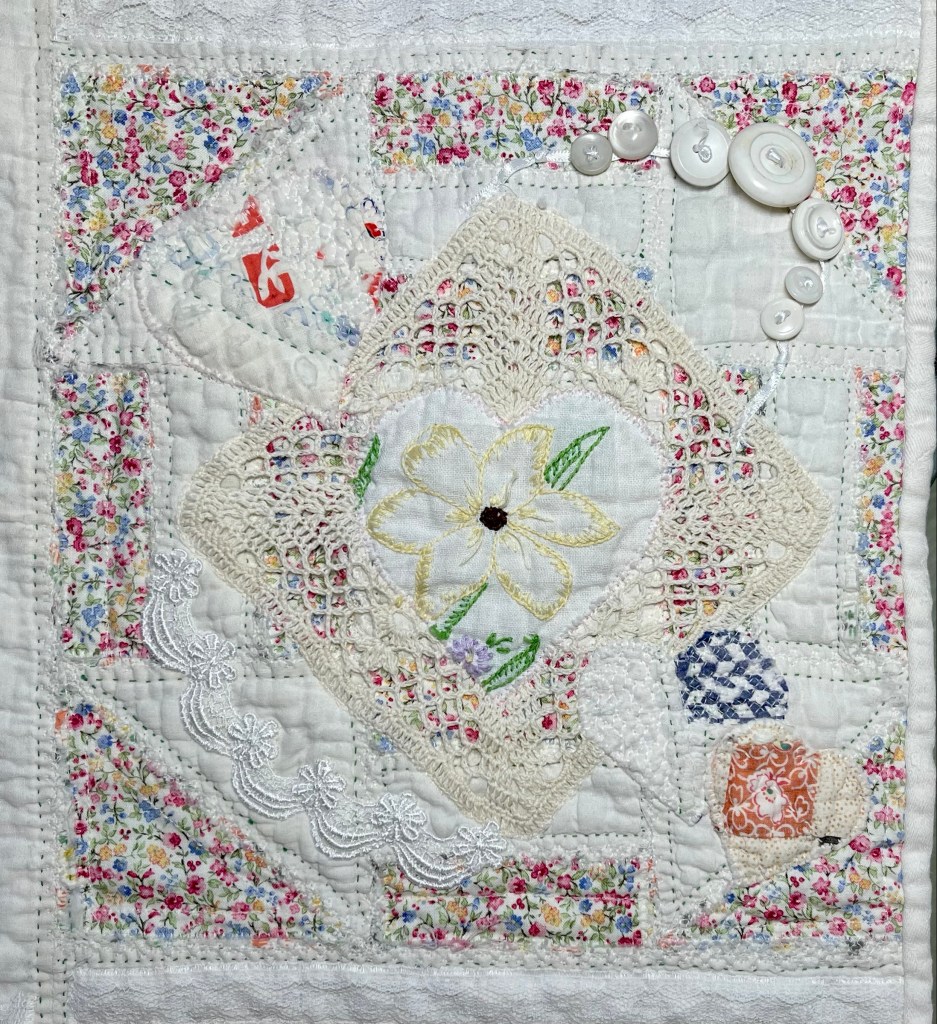
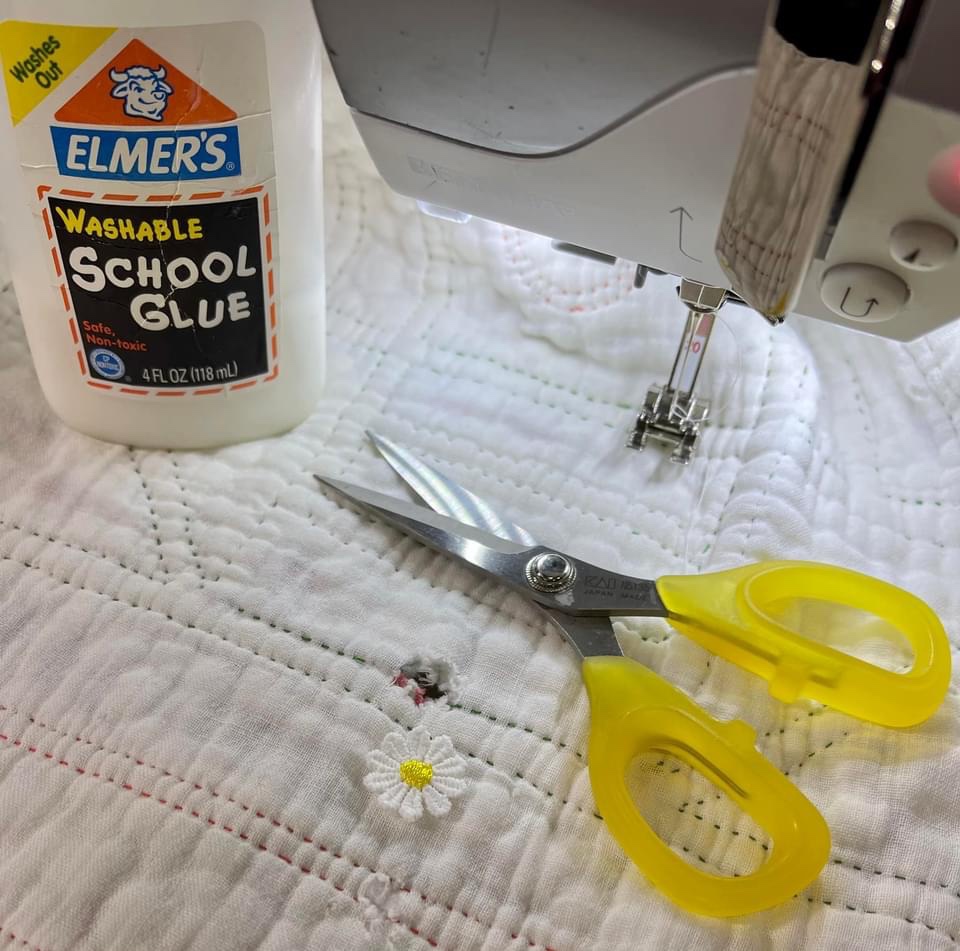
What to do about an index finger sized hole straight through the quilt? Elmer’s Glue and a commercially produced daisy flower will mask the hole from the back side.
The daisy is first glued into place, the glue is dried with an iron and then stitched in place, machine straight stitch. I will place a slightly larger “something” on the quilt front later.
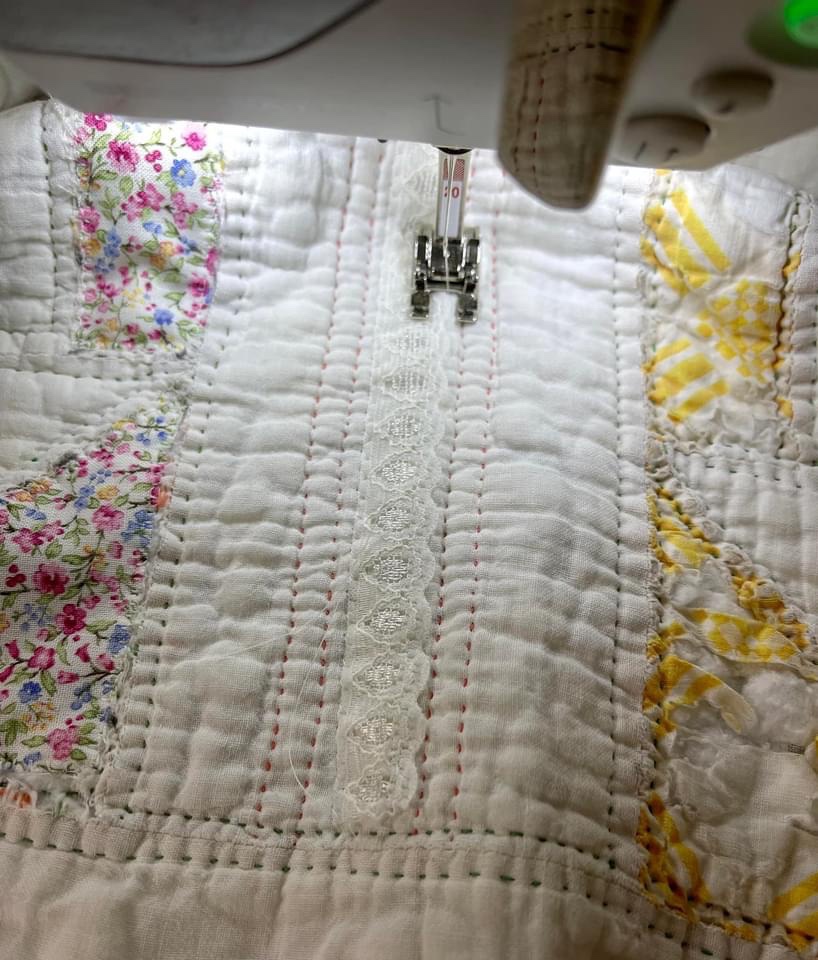
Lots and lots of vintage commercially produced flat trims/laces are up next. I machine stitched the trim in place, most often using a very small zig-zag.
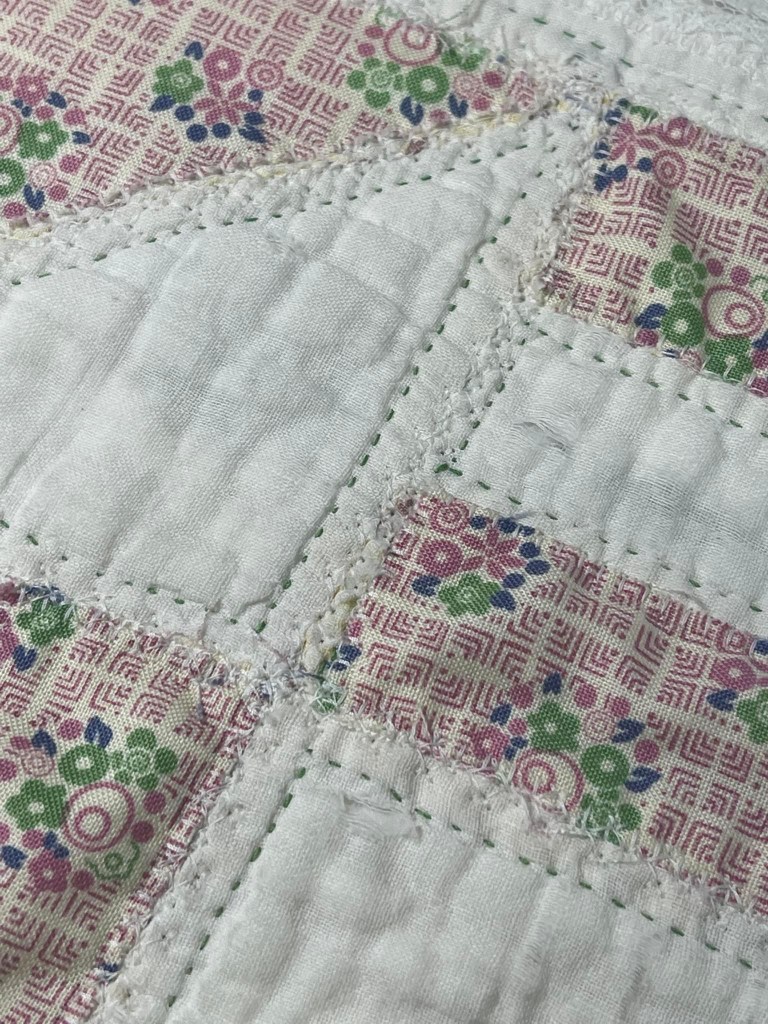
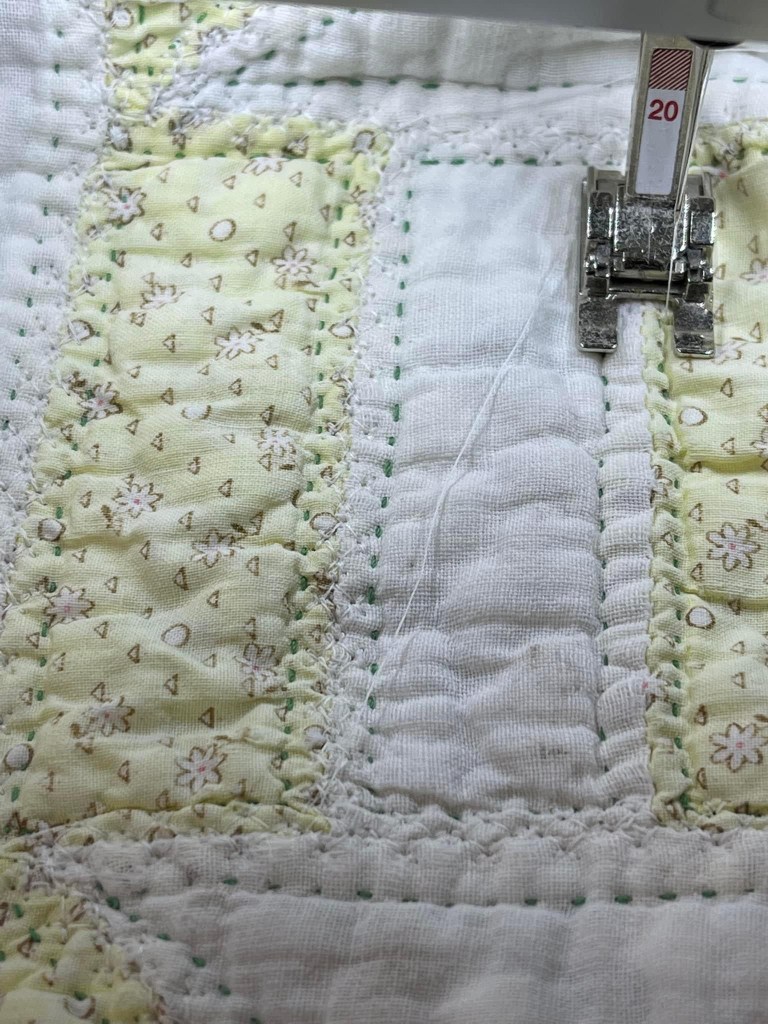
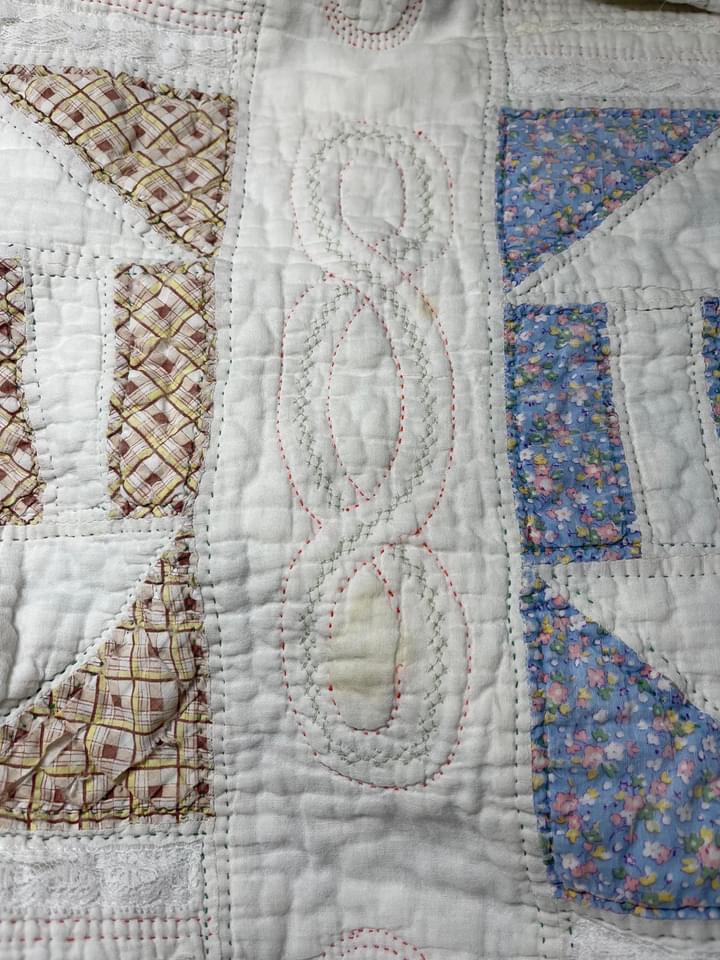
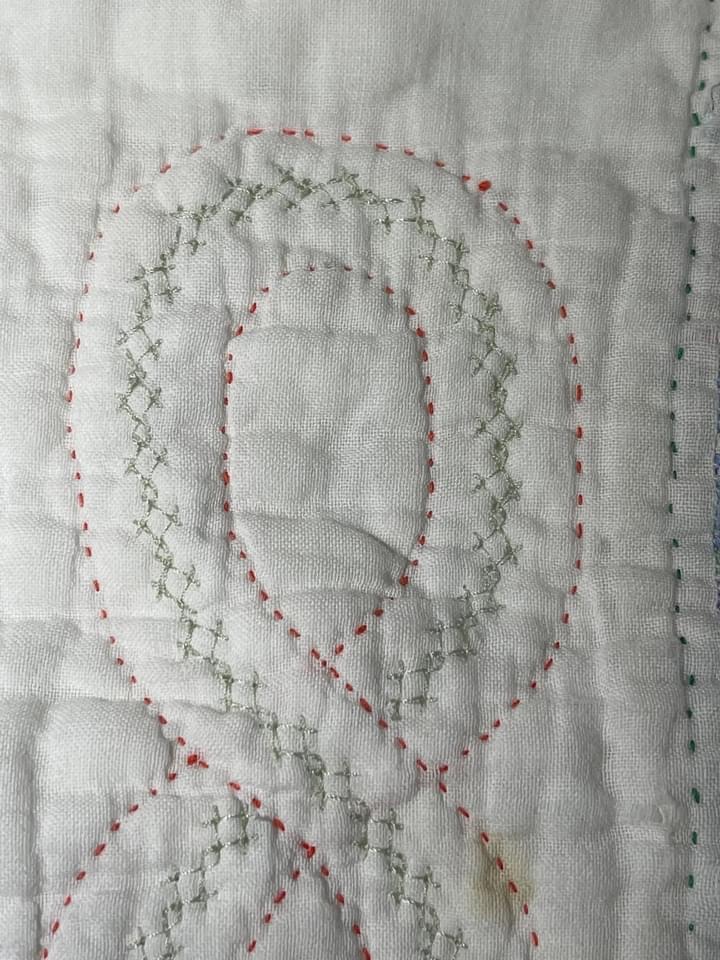
My quest to “save this vintage quilt” continues. I’ve secured EVERY single seam by stitching directly over the seam line with machine decorative stitches. Yes it took forever but well worth the effort. I like the soft feathery look this stitching created.
I also did a machine decorative stitch in the sashing swirls choosing a thread that matches the original green hand quilting found throughout the quilt.
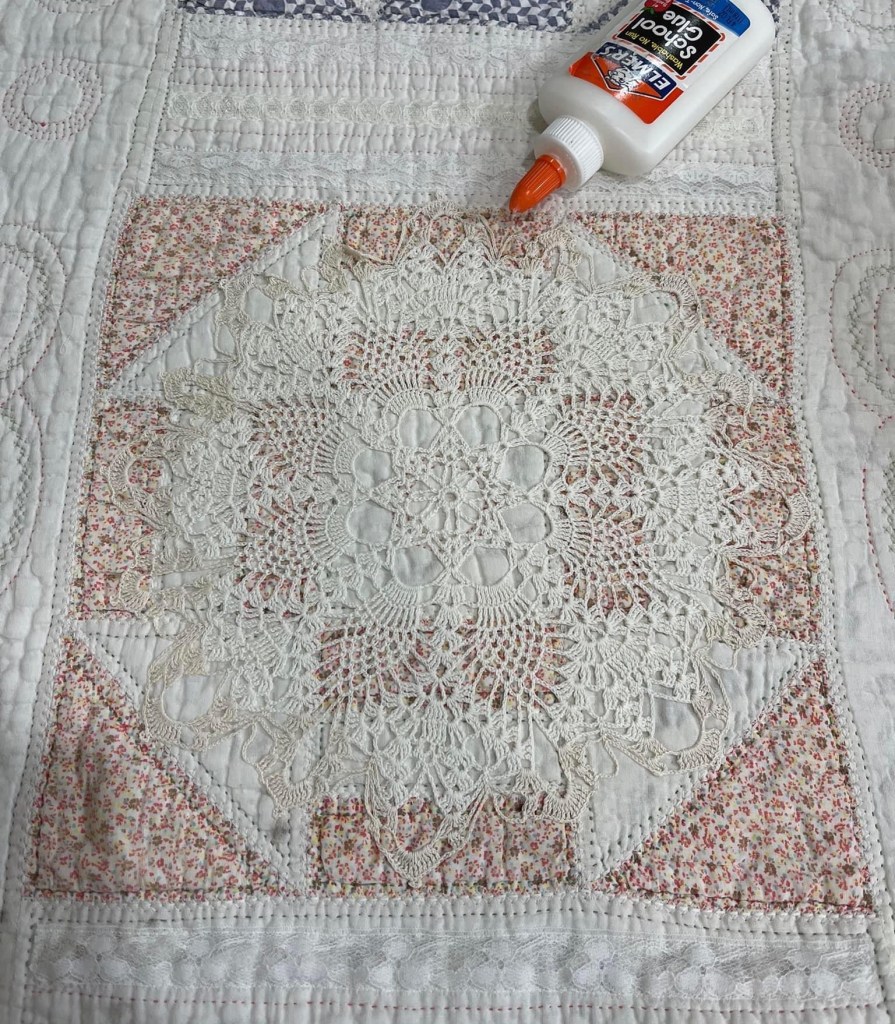
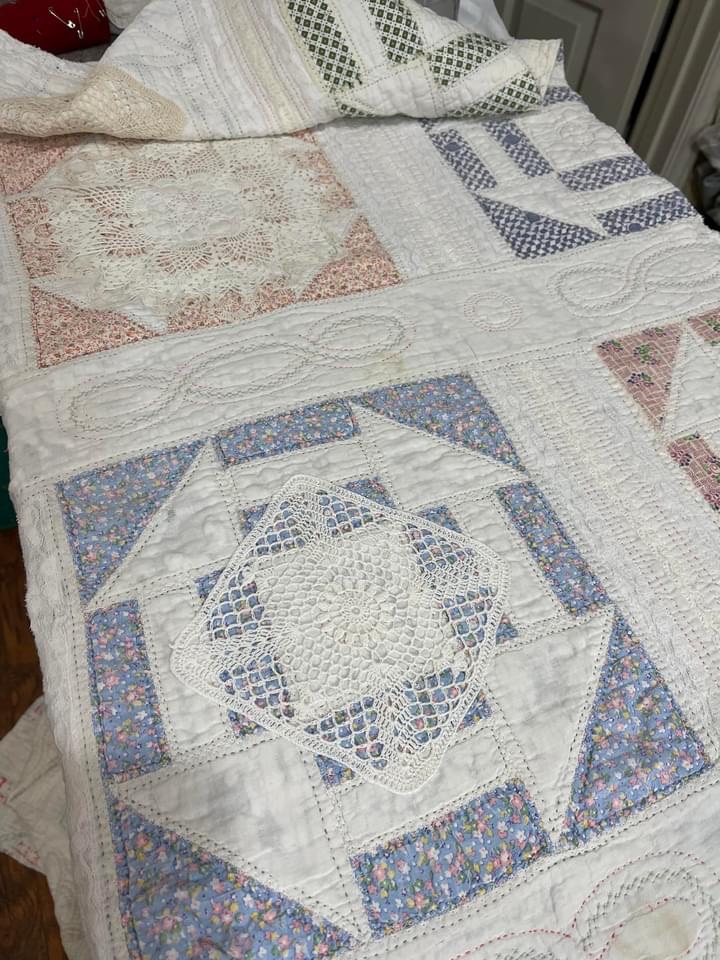
And now onto attaching (by machine) the vintage hand crocheted doilies, the really fun part. Each doily was secured to the quilt using Elmer’s Washable School Glue. I ran a bead of glue around the entire edge of the doily and then dry pressed it with my iron. Because this quilt will be laundered when I am finished, and because this glue is “washable” I know (with hands on experience) that no glue will remain in the finished quilt. If you were wanting to hand stitch the doily to the quilt, skip the glue and hold the doily in place with straight pins. Why? It is quite difficult to hand stitch through the dried glue.
I have quite a few of these square crocheted doilies in both white and ivory. I’m planning to use these doilies on every other quilt block, randomly choosing between both colors.
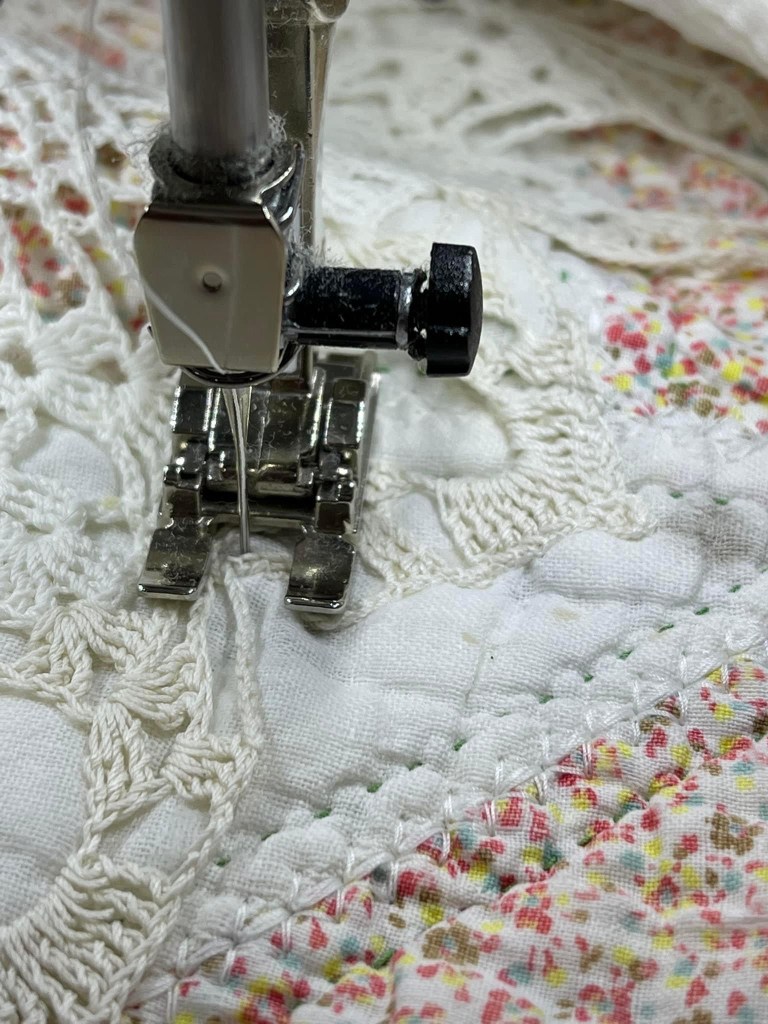
Here’s a close-up to show the doily being machine stitched to the quilt. I am sewing on a Bernina 550, the zig zag stitch set to a very narrow width.
This project is moving along quickly with the machine stitching and the added doilies giving it a wonderful soft look. Stay tuned for more info as I continue working with this lovely very old quilt.