

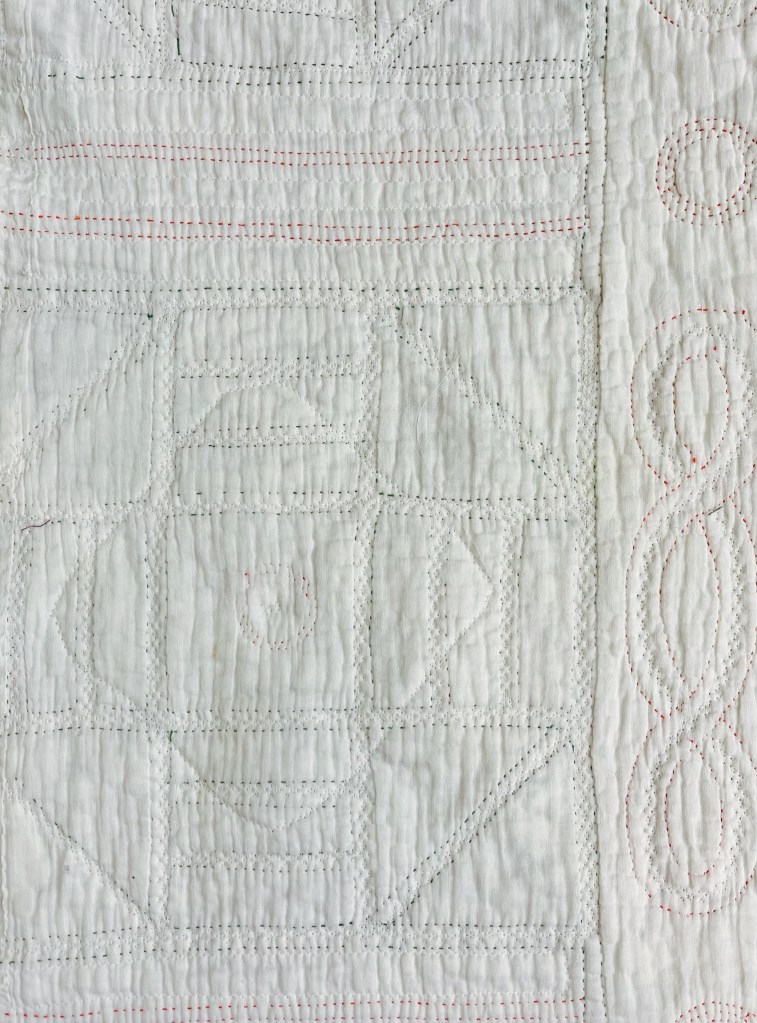
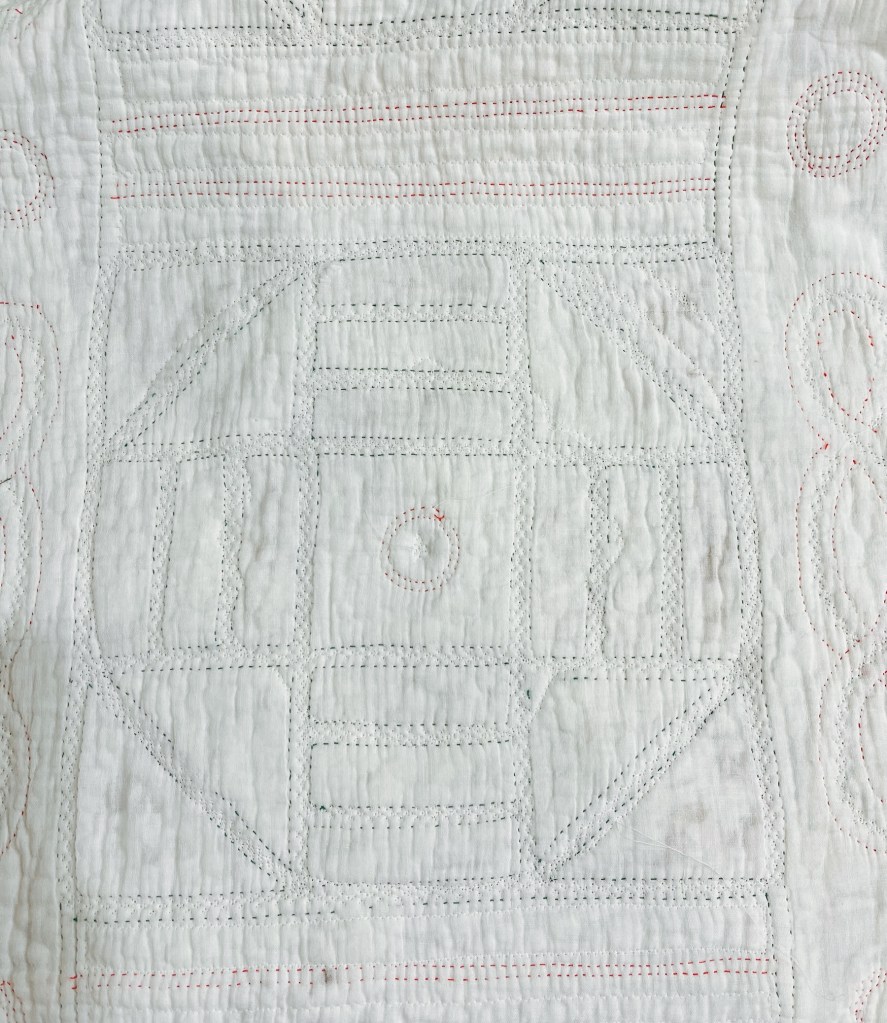
This quilt “save/rescue was one of the most challenging projects I’ve worked on in a long time. I had offered the quilt to 2 of my different retreat groups and with no takers I decided to work on this worn out piece myself. A great decision!
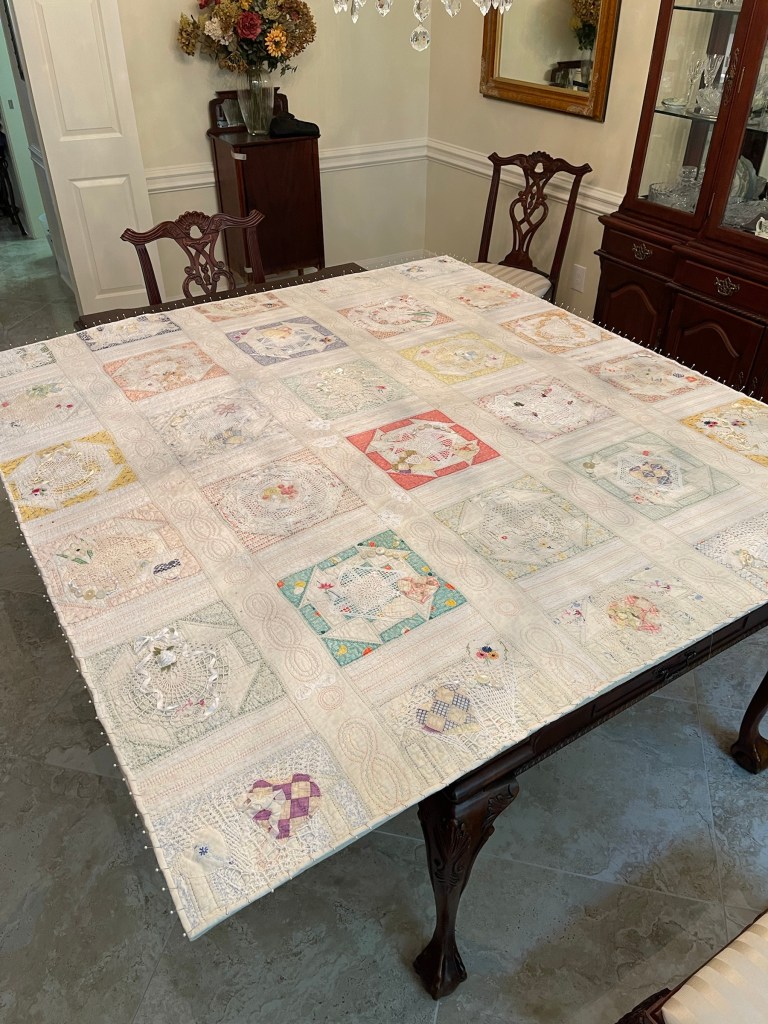
Let’s start with a picture of the finished project:

You will remember from the previous blog post, I addressed the necessary fixes to all the seams in the quilt so this post will be all about the items added to further embellish the blocks and sashings. Also as a reminder, I’m doing all the work on my sewing machine, nothing by hand.
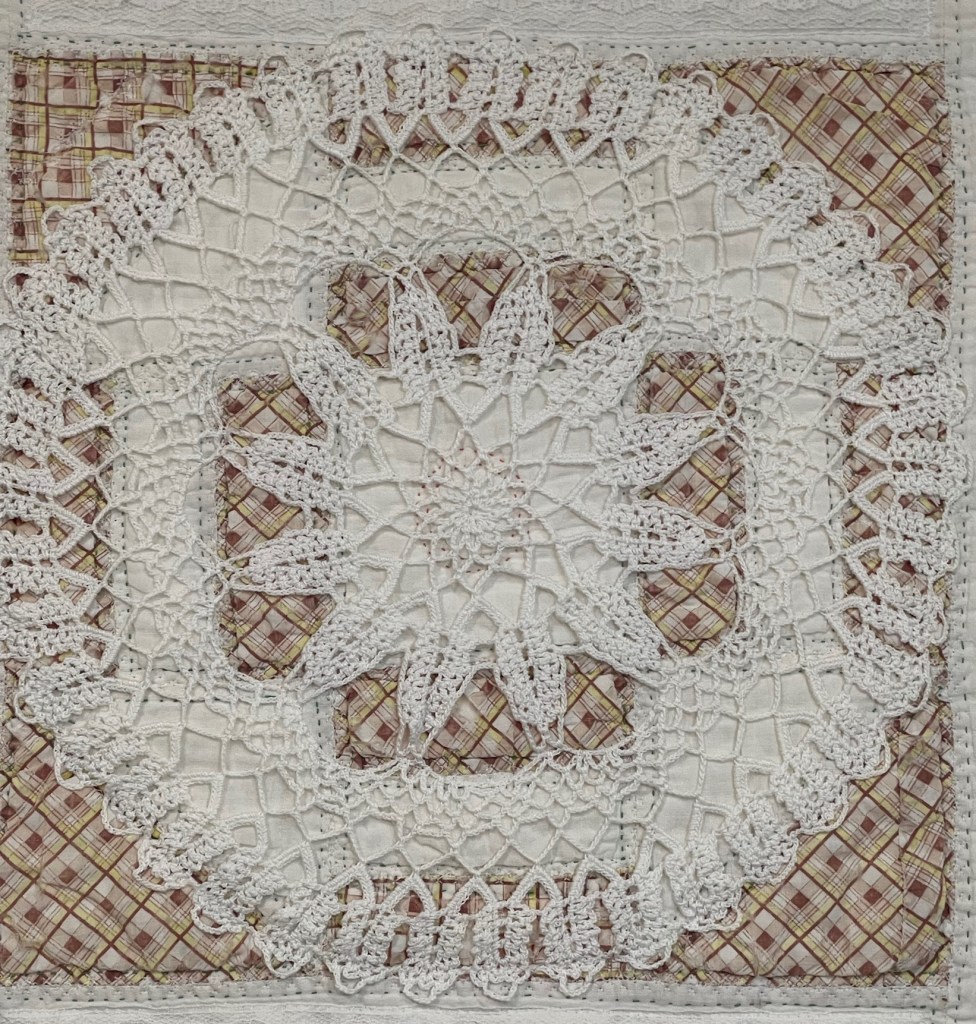
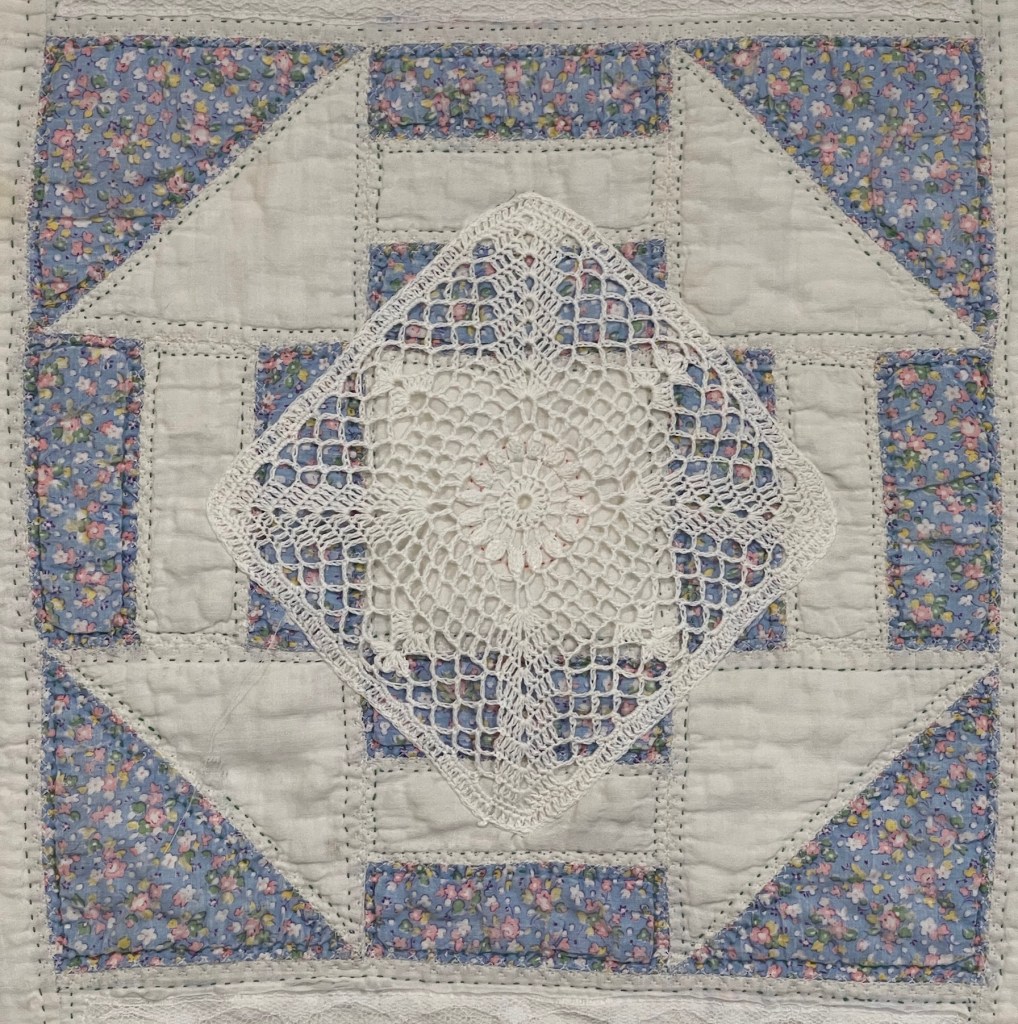
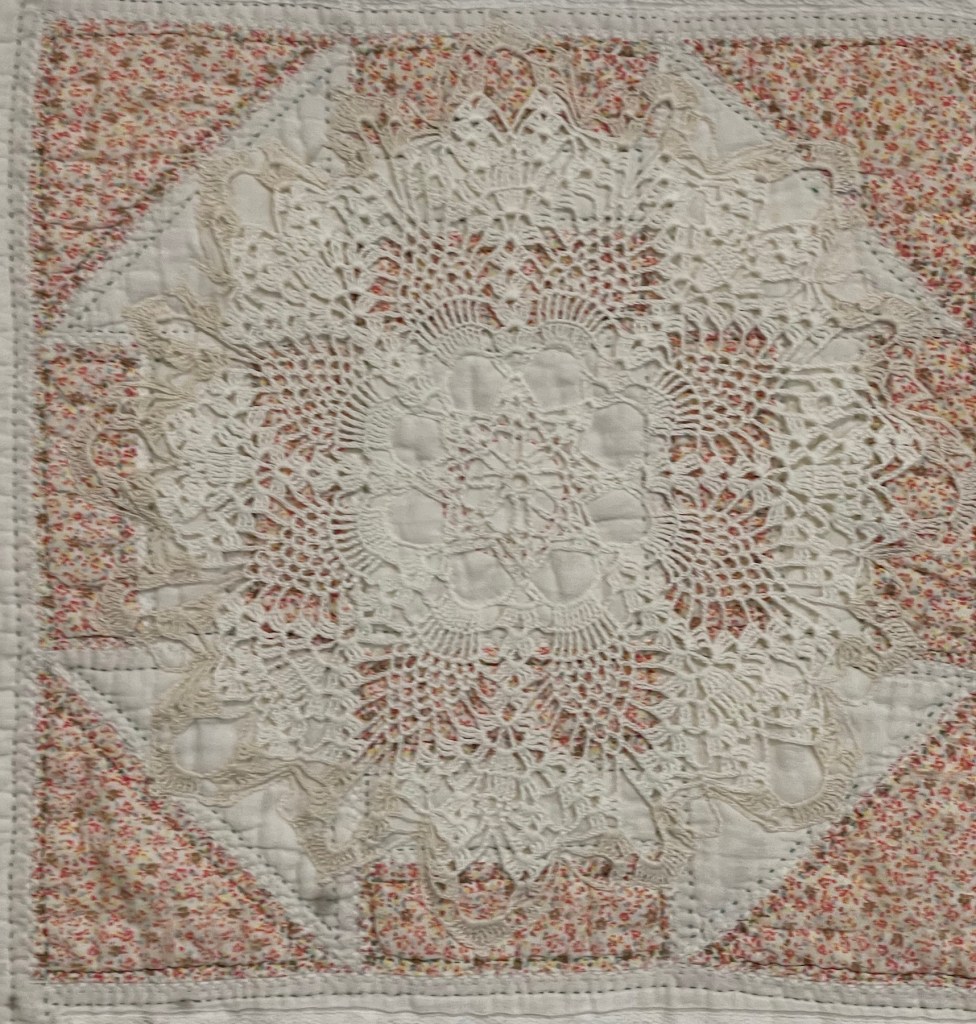
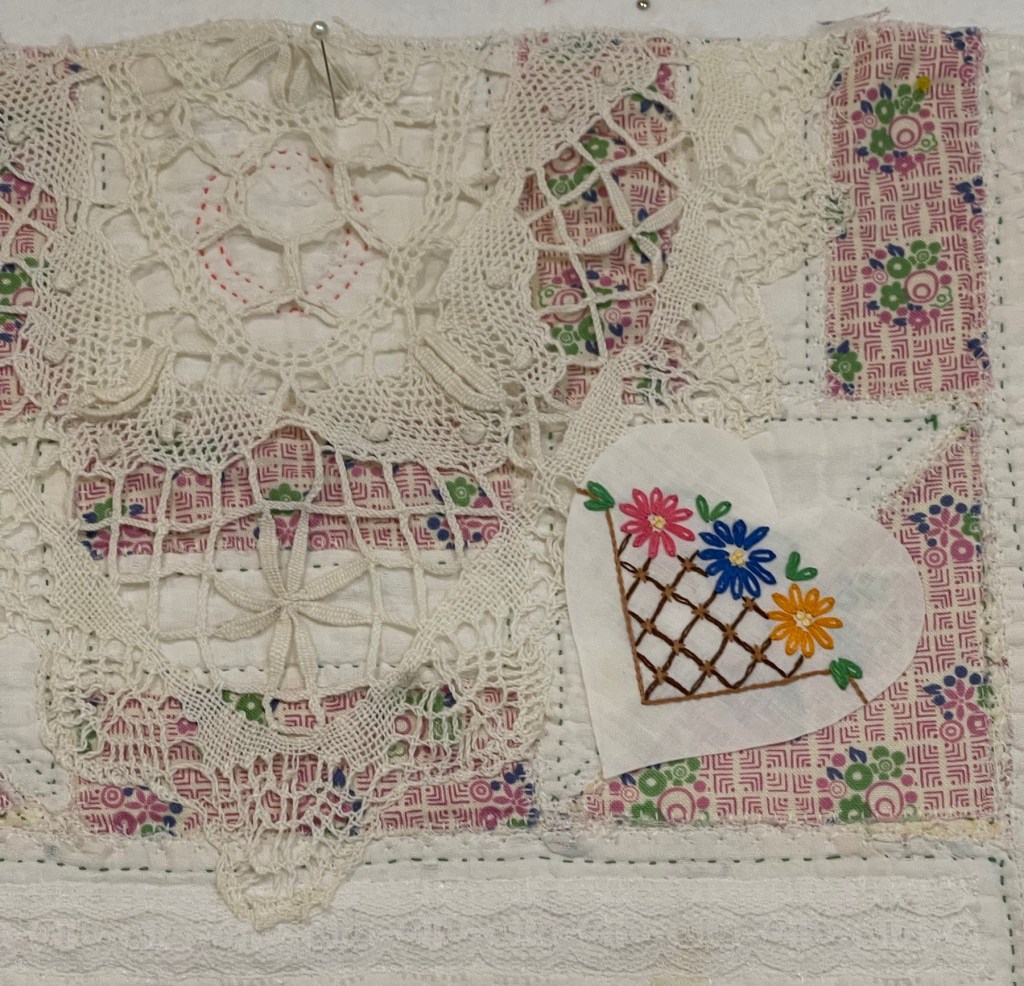
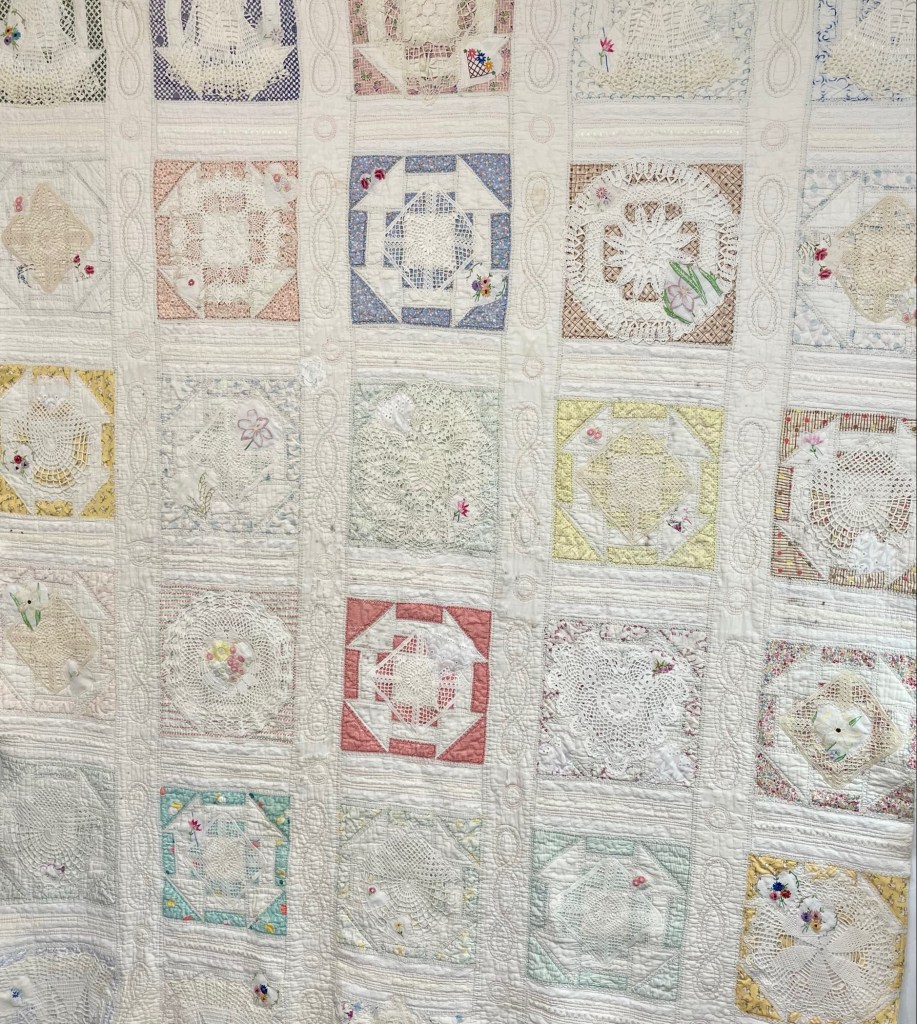
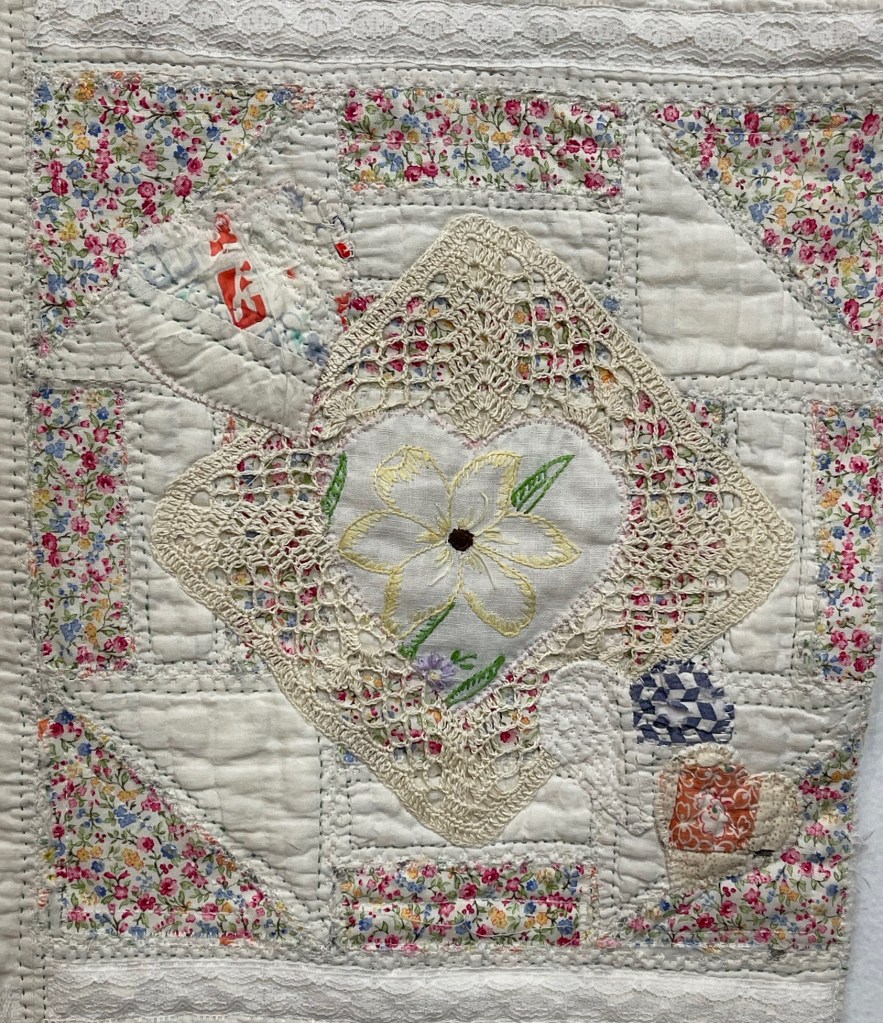
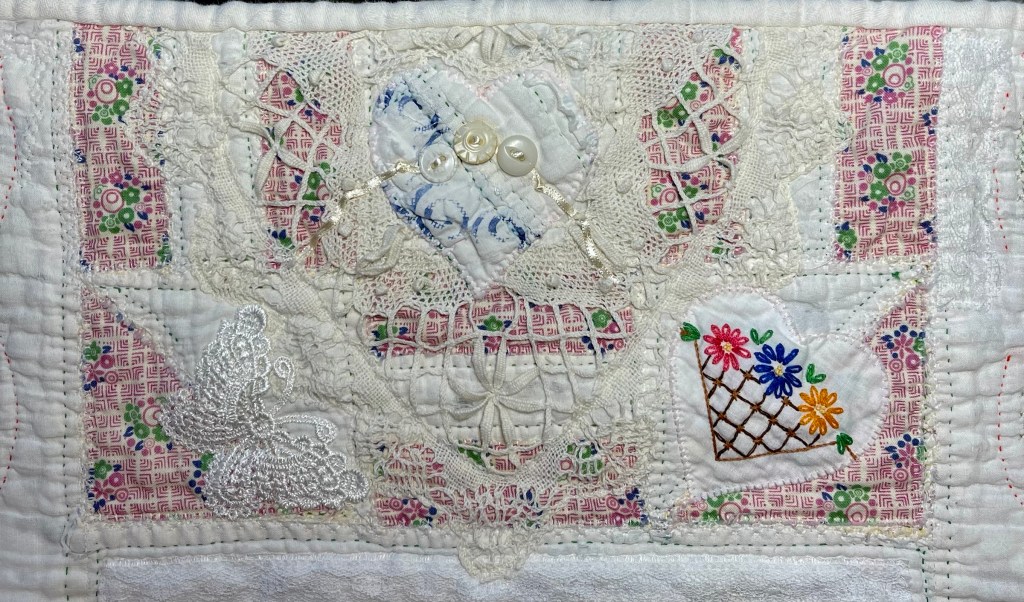
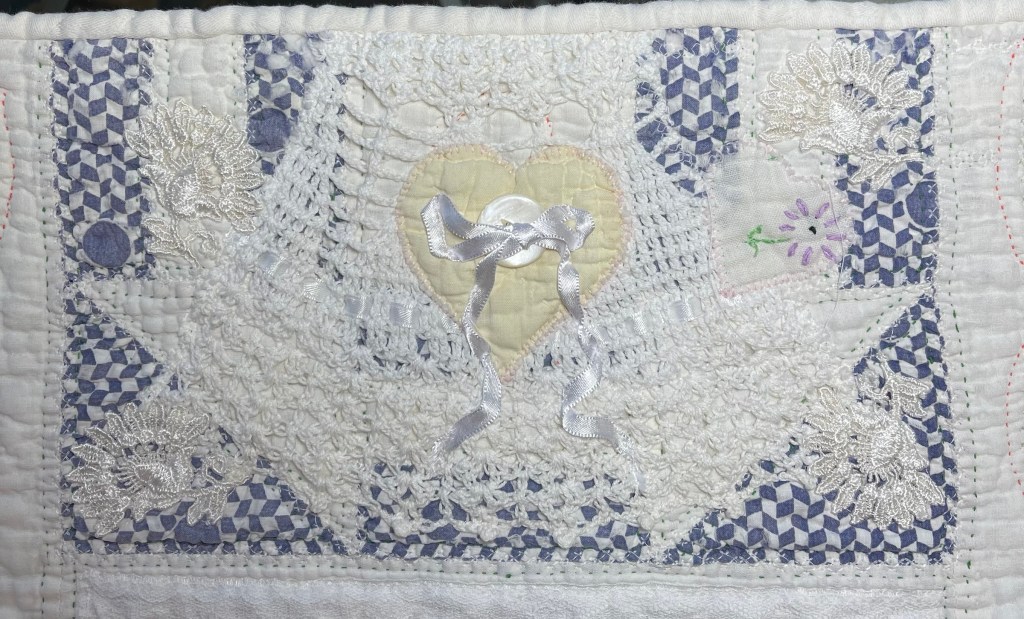
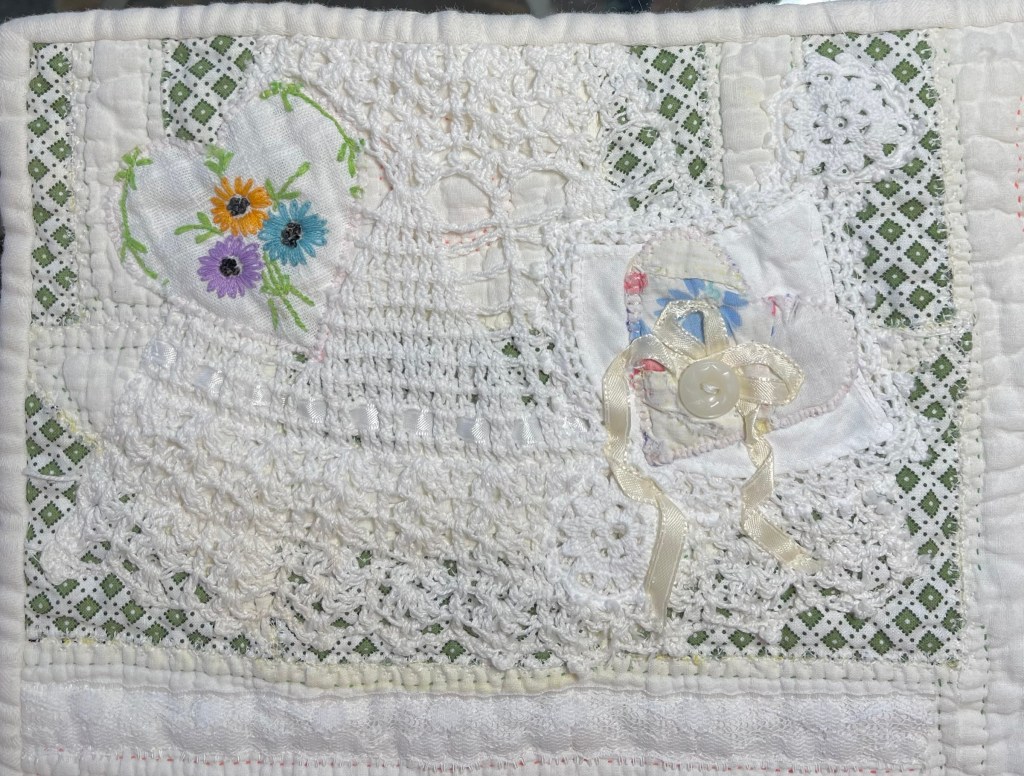
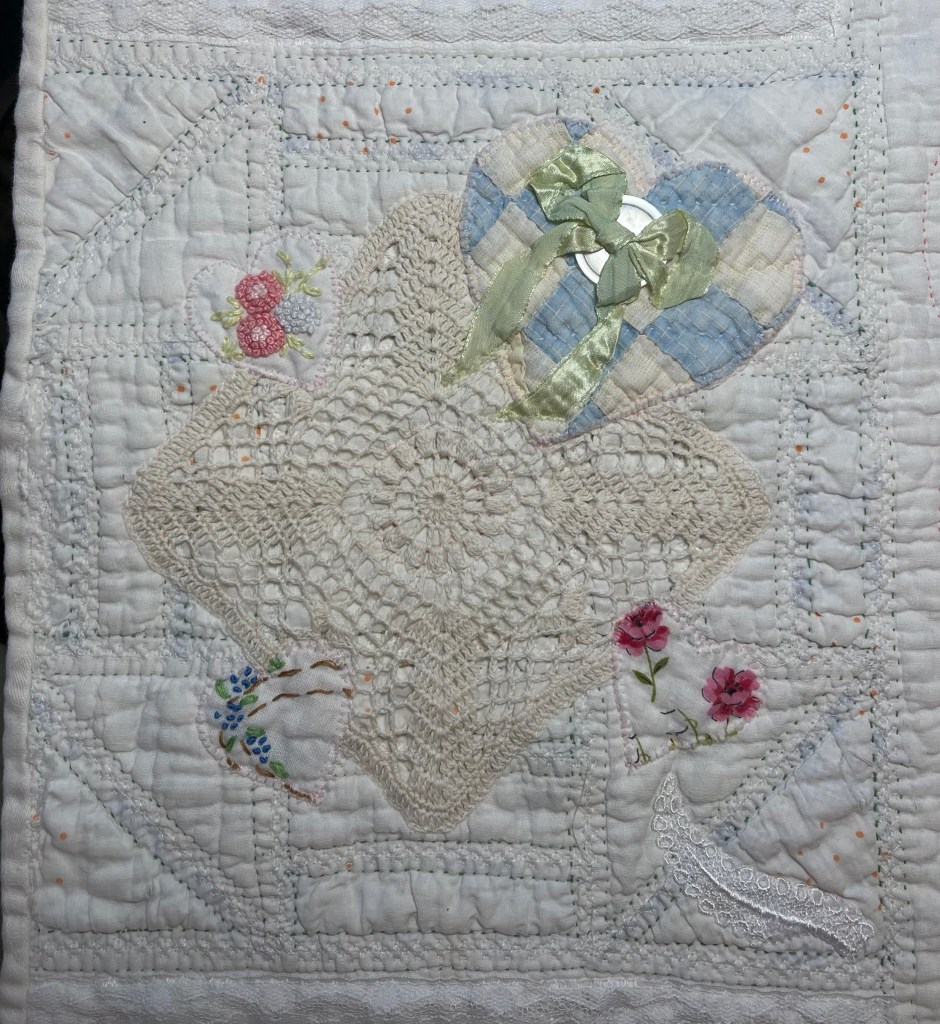
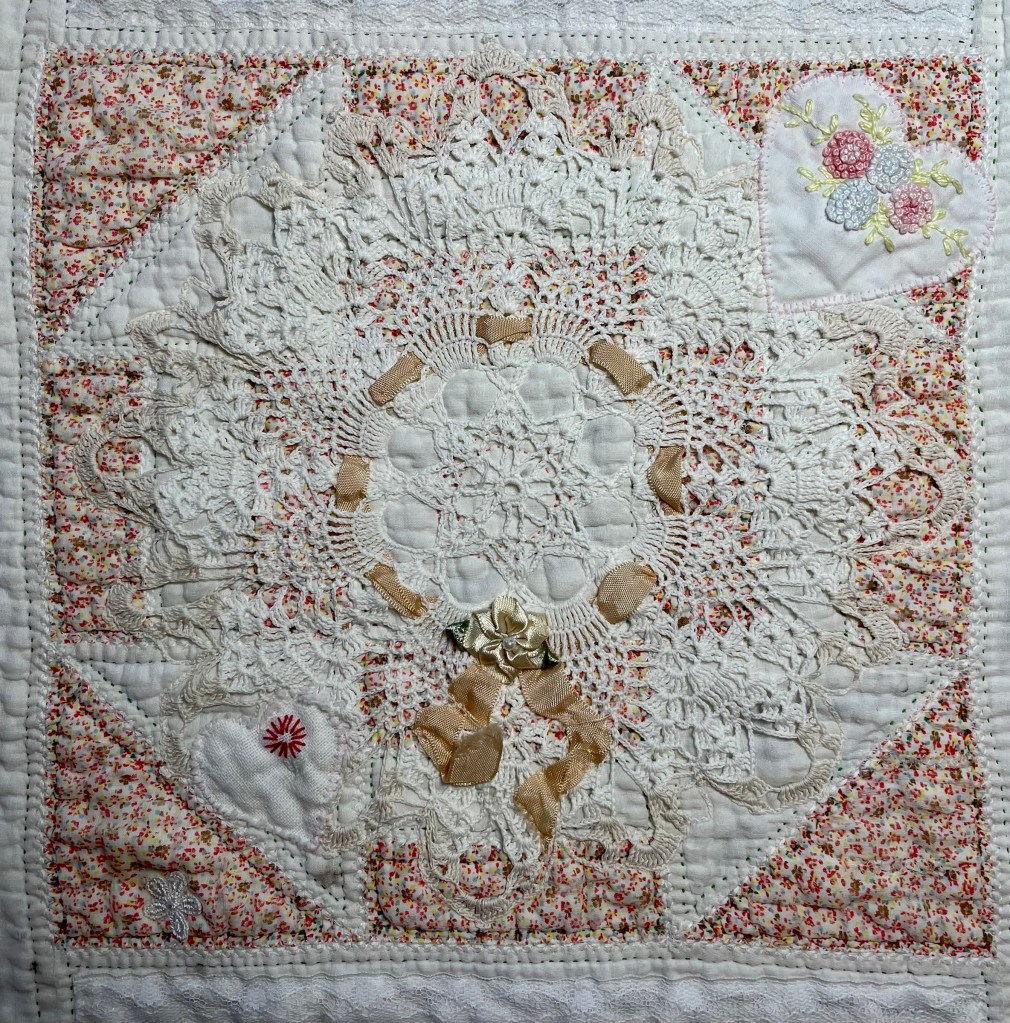
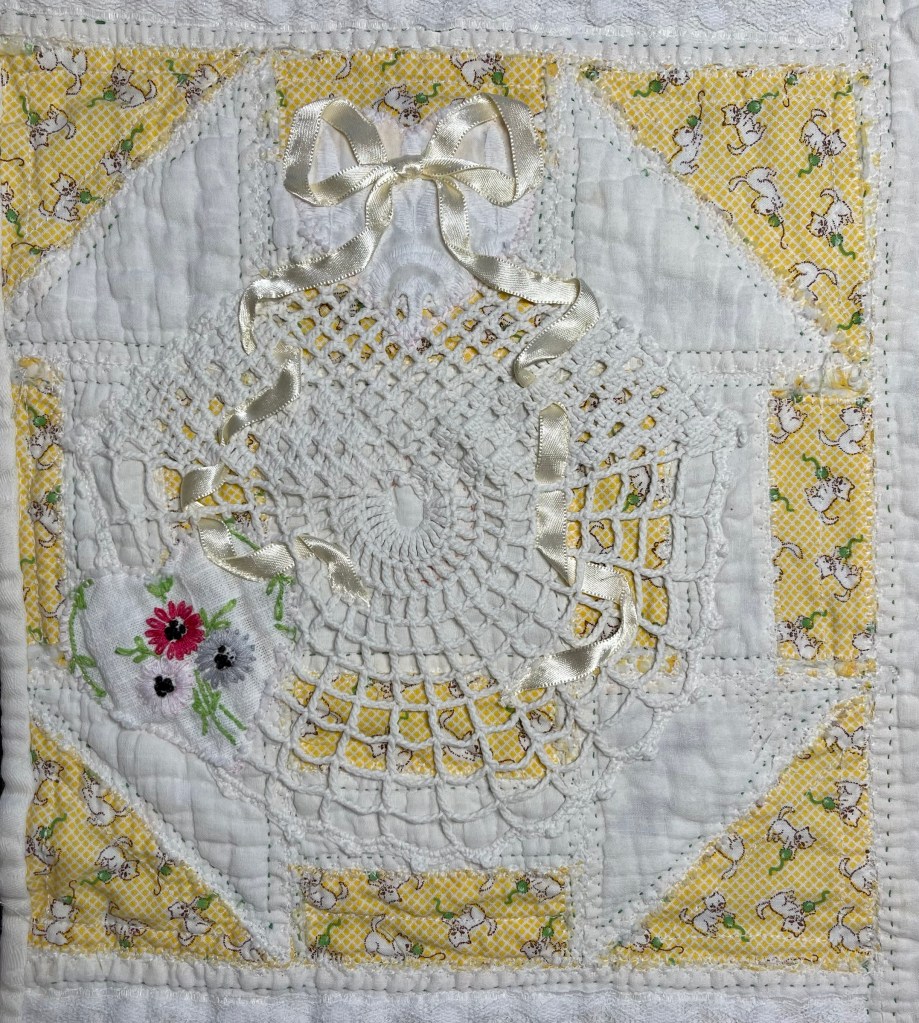
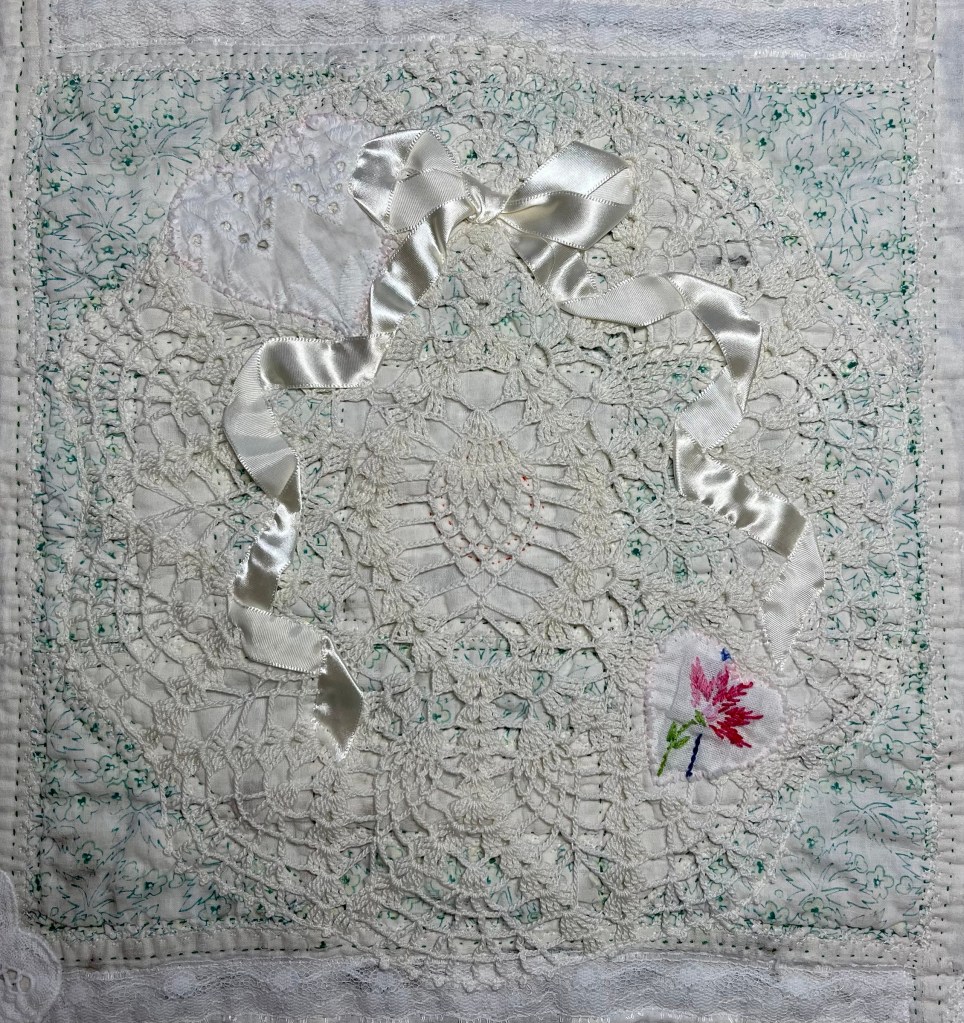
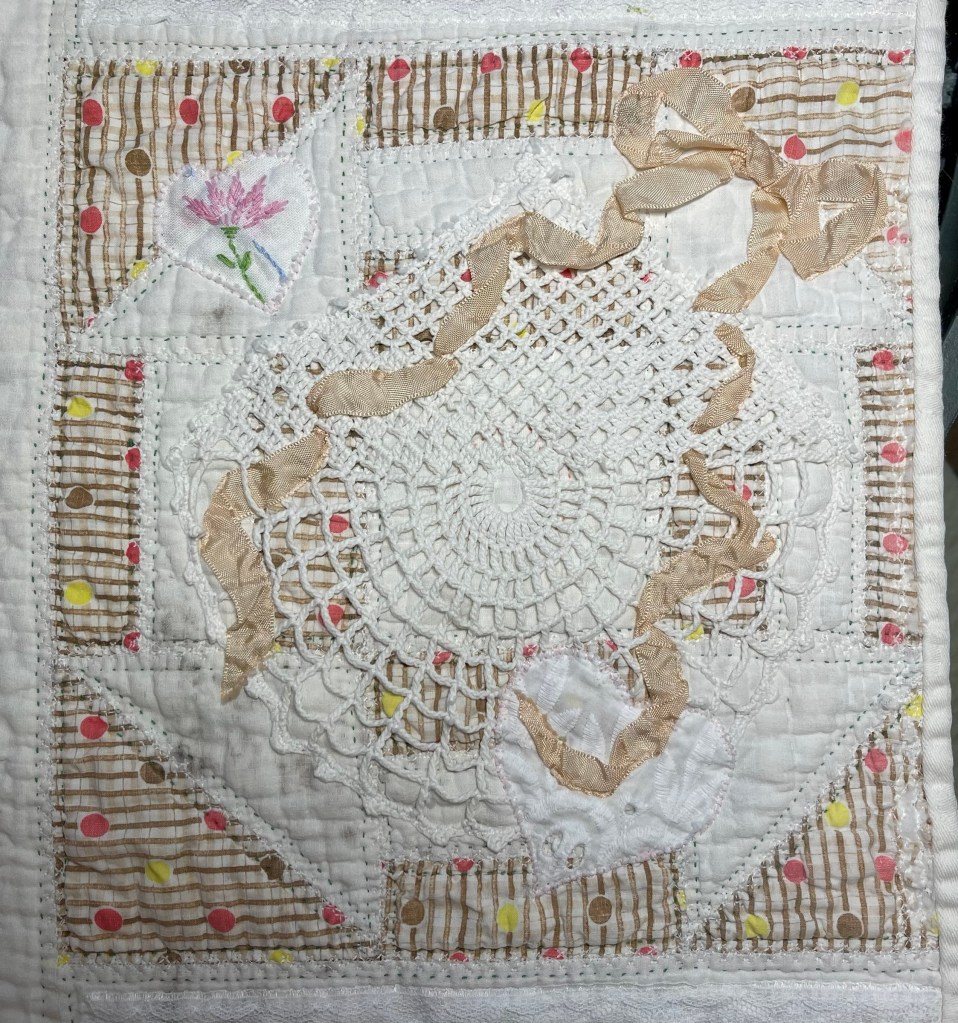
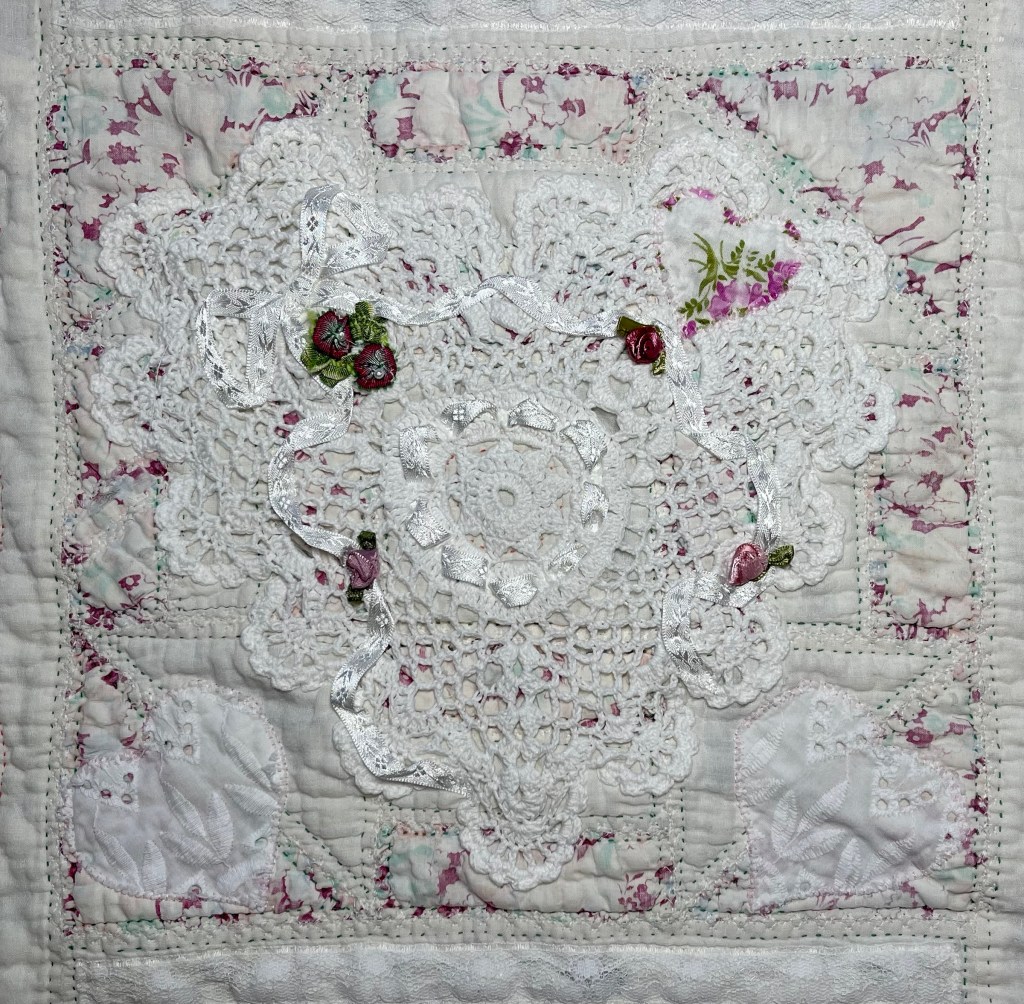
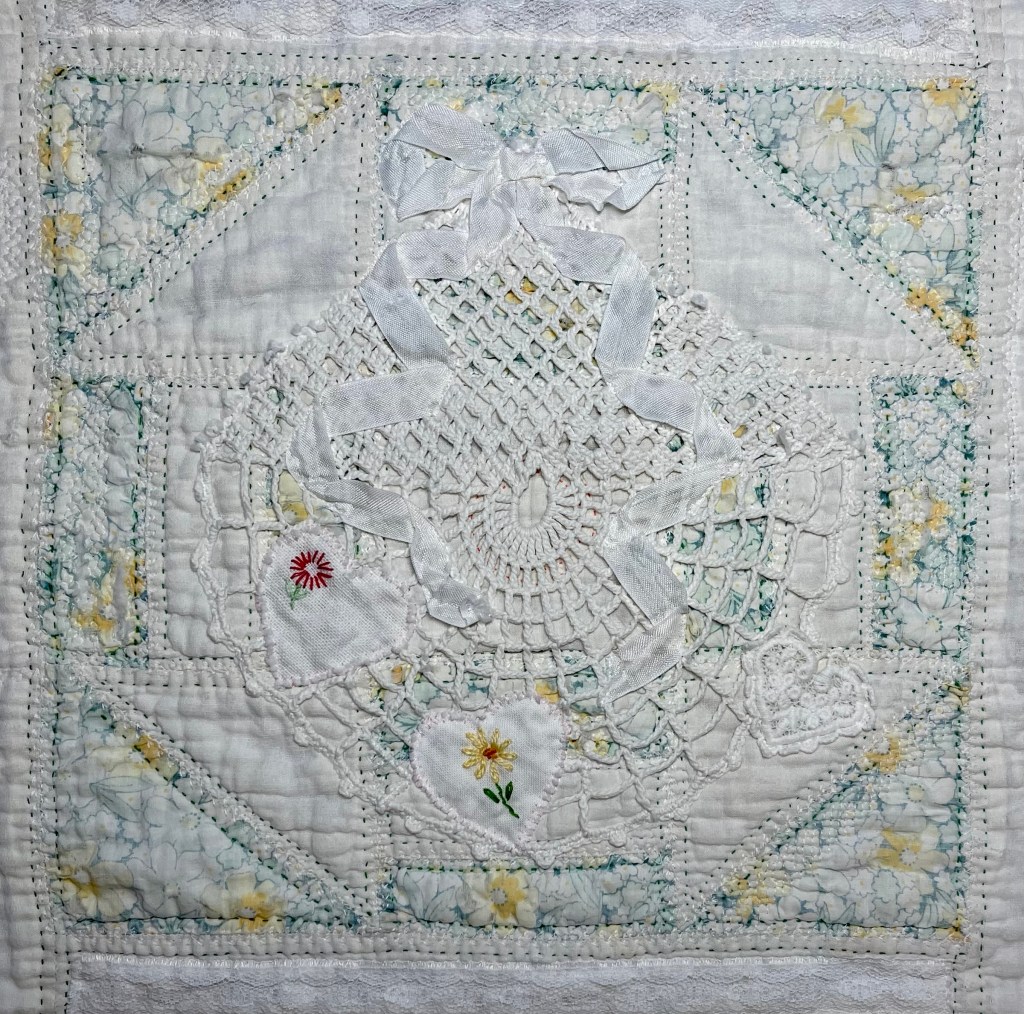
I alternated traditional shaped and square on-point doilies.
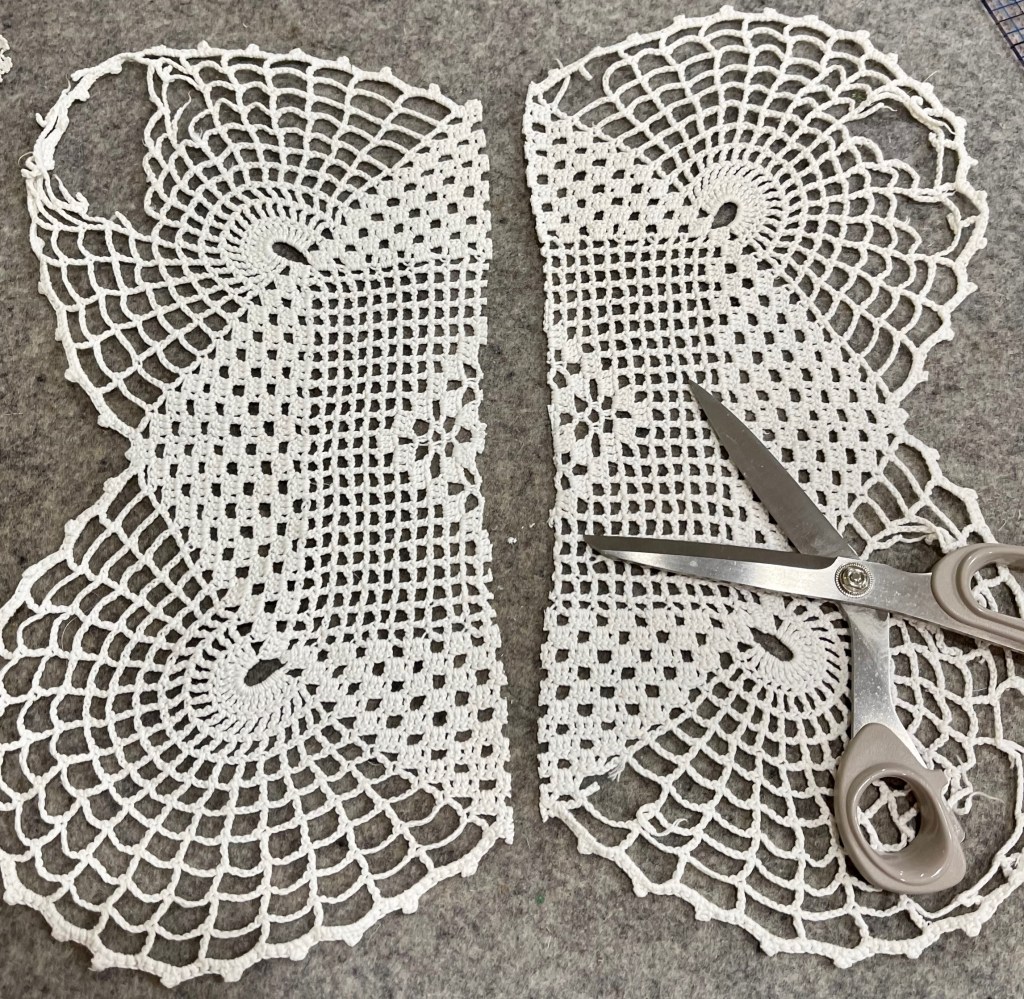
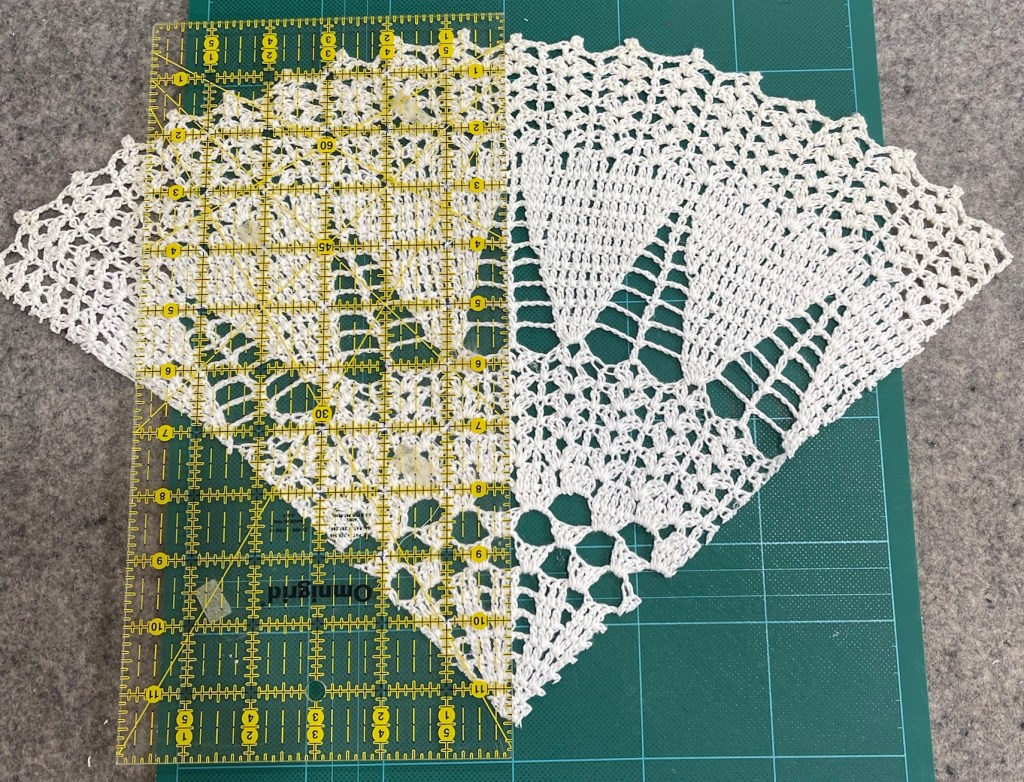
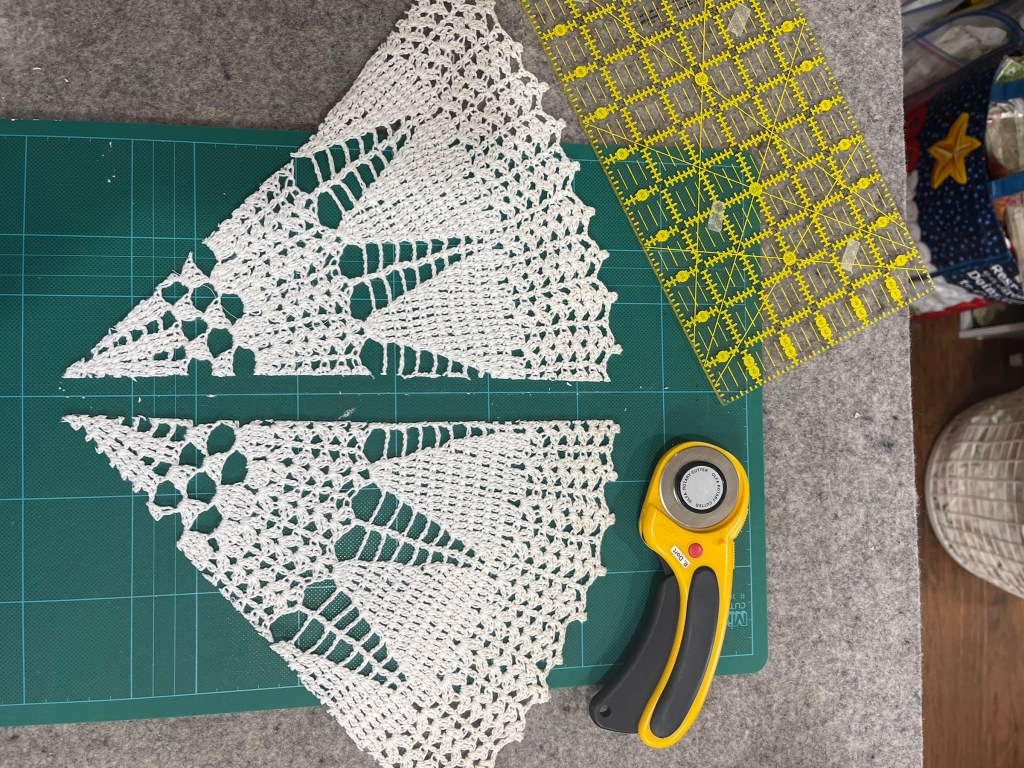
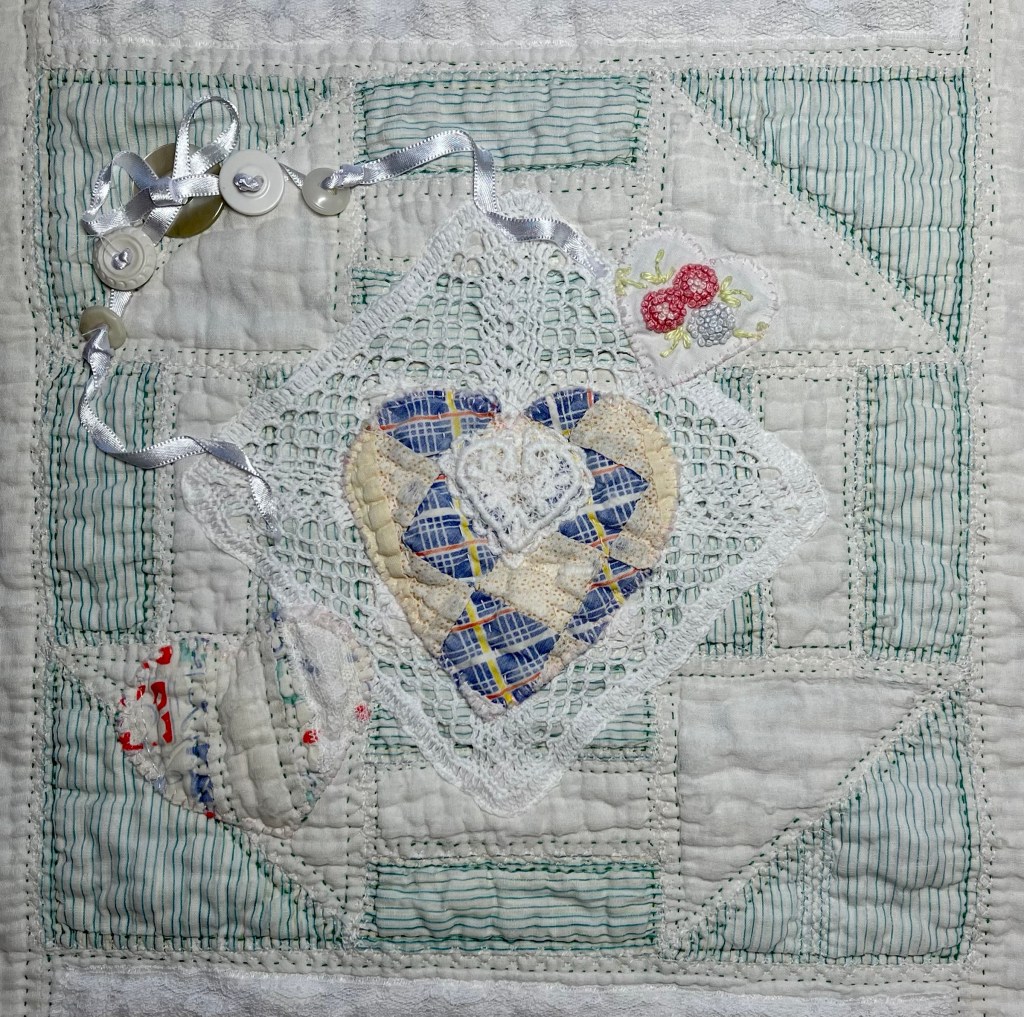
Then there was this unusual shaped doily. The first picture shows you the extensive damage and the size is far too large for this quilt. I decide I’ve got nothing to lose by experimenting and cutting it apart into 4 sections.
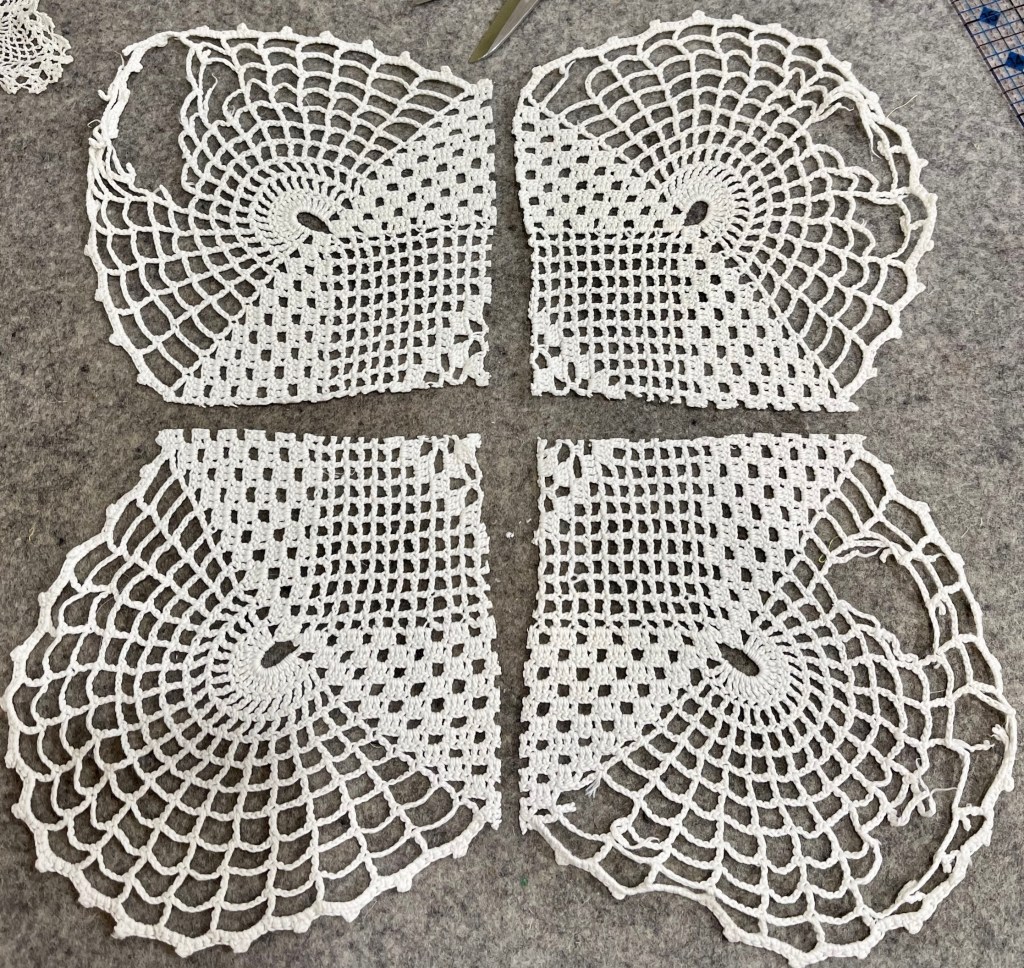
I’ve now got 4 unusual shaped doilies from one large damaged piece. In order to keep any of the crochet from unraveling I apply a liberal bead of Elmer’s Washable School Glue to the cut edges and either allow the glue to dry naturally or set with a dry iron. Why a dry iron? Had I used steam I would be adding liquid to a liquid and the glue would take much longer to dry. What about the damaged areas? They will be covered in the next step by applique hearts.

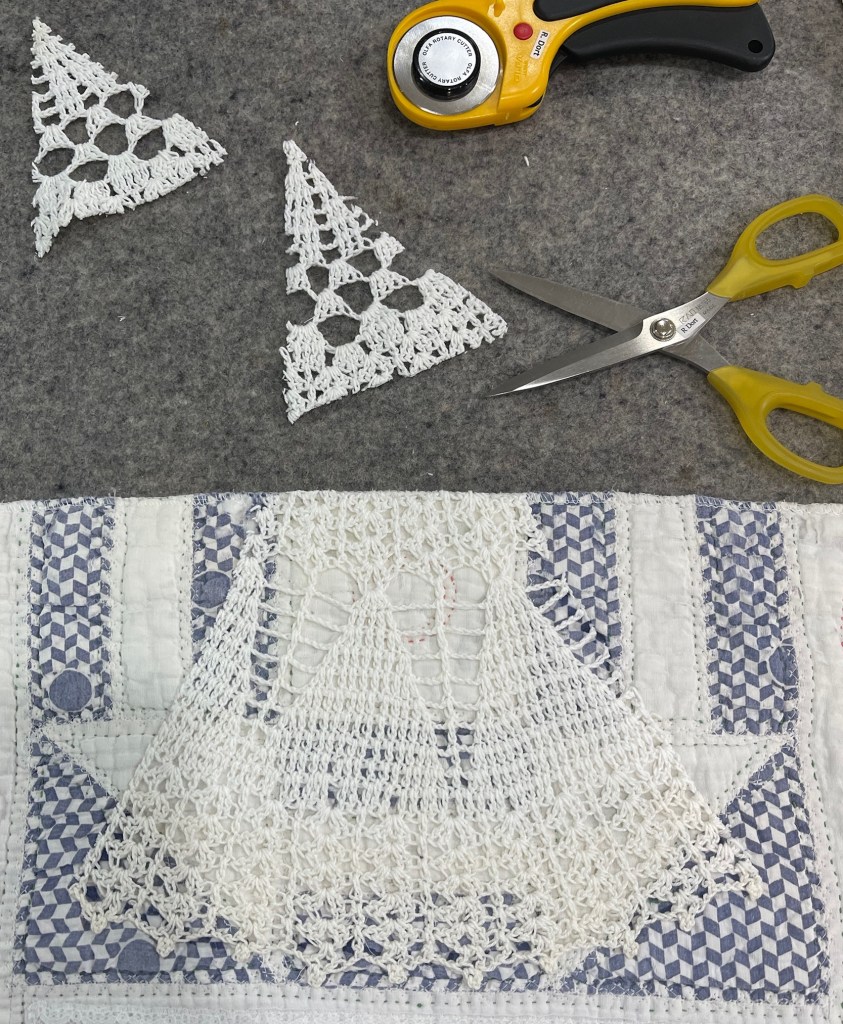
The two cut edges are top right and left. A very small machine zig zag stitch both attaches the doily to the quilt and secures the cut edges nicely. If you’re still worried about the cut edges, stitch 2 rows of zig zag stitches instead of just 1.
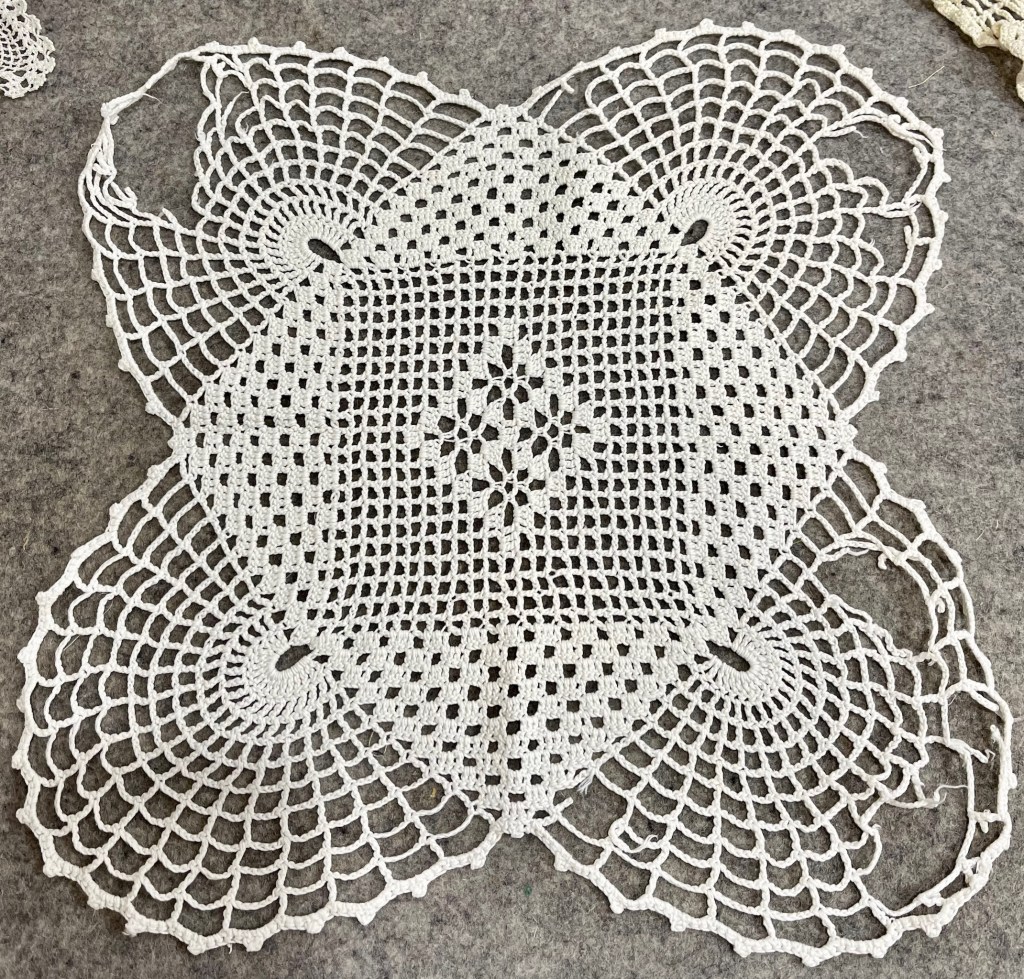
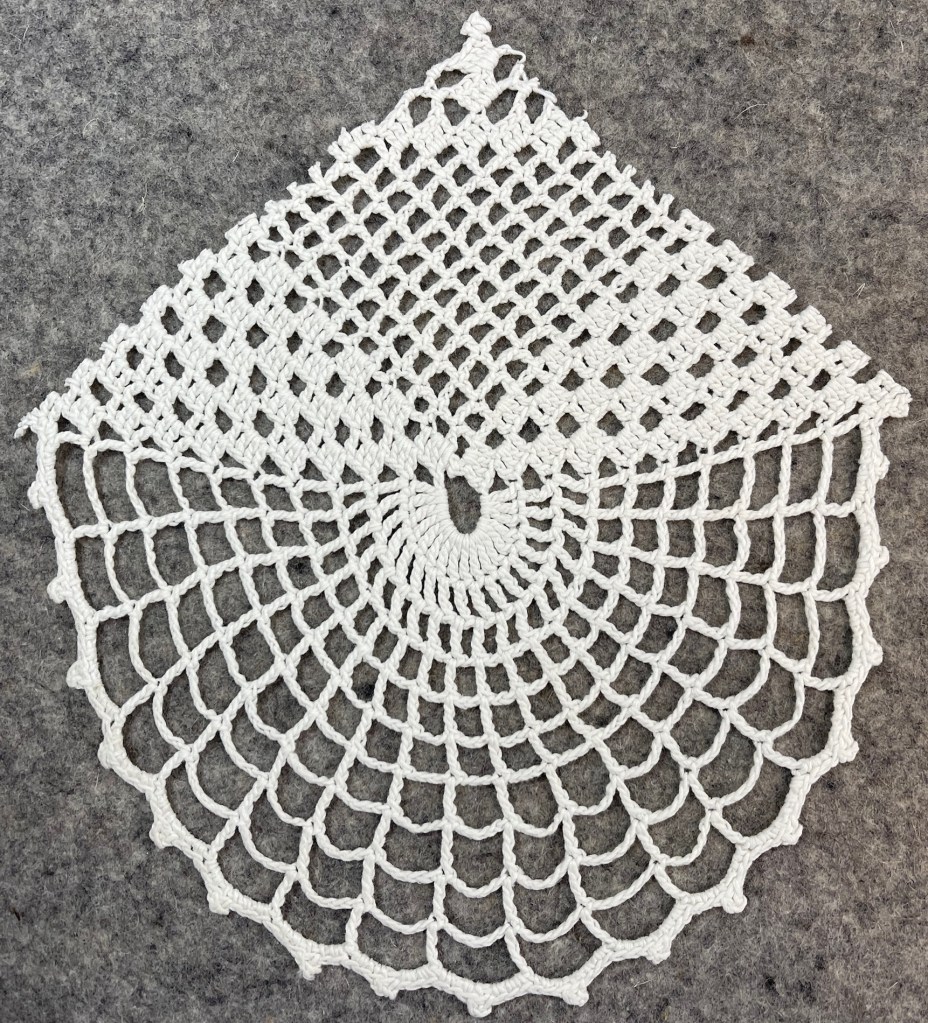
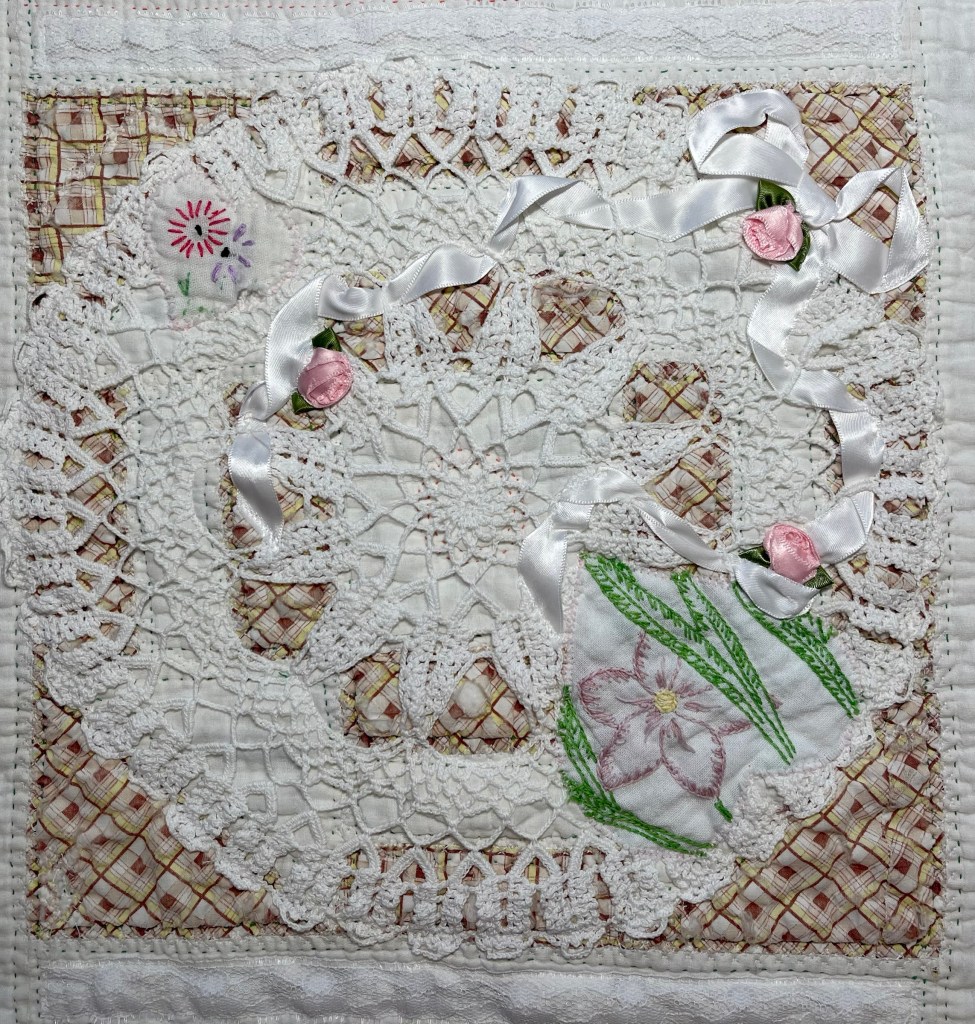
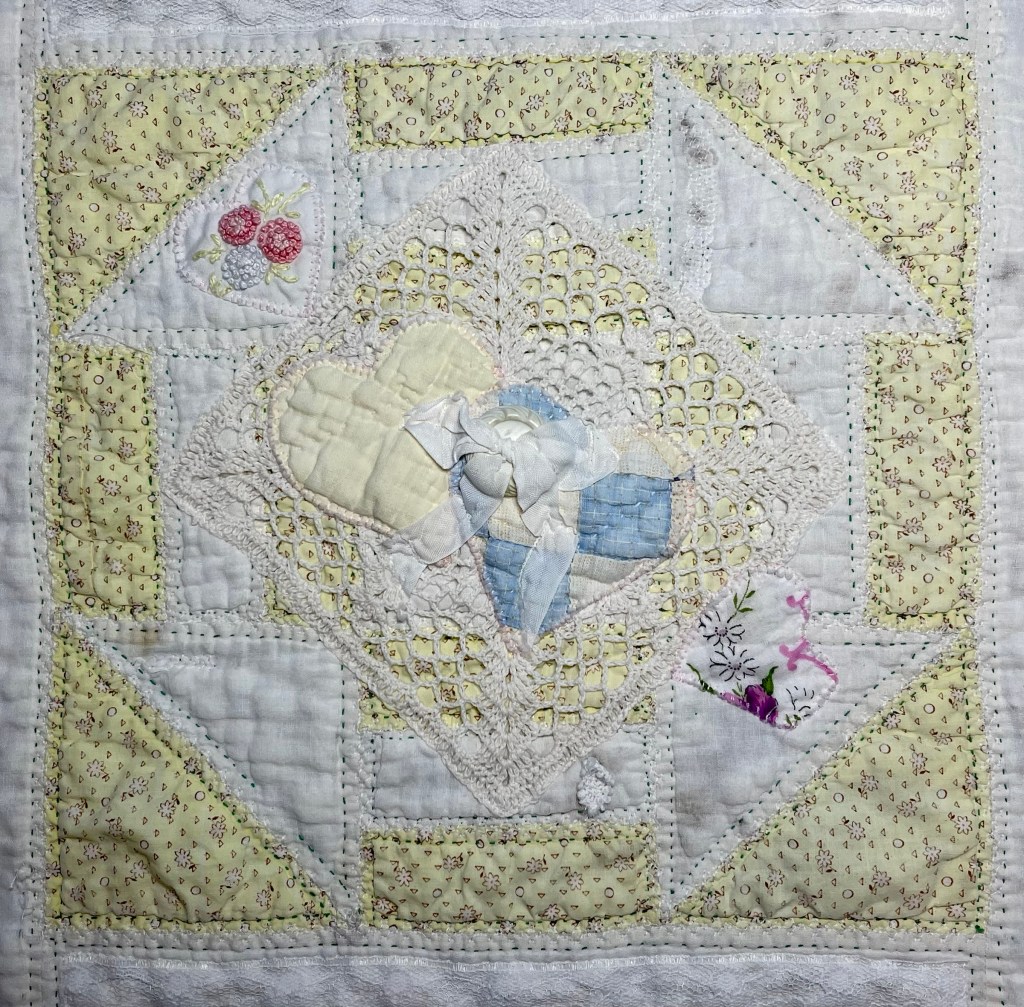
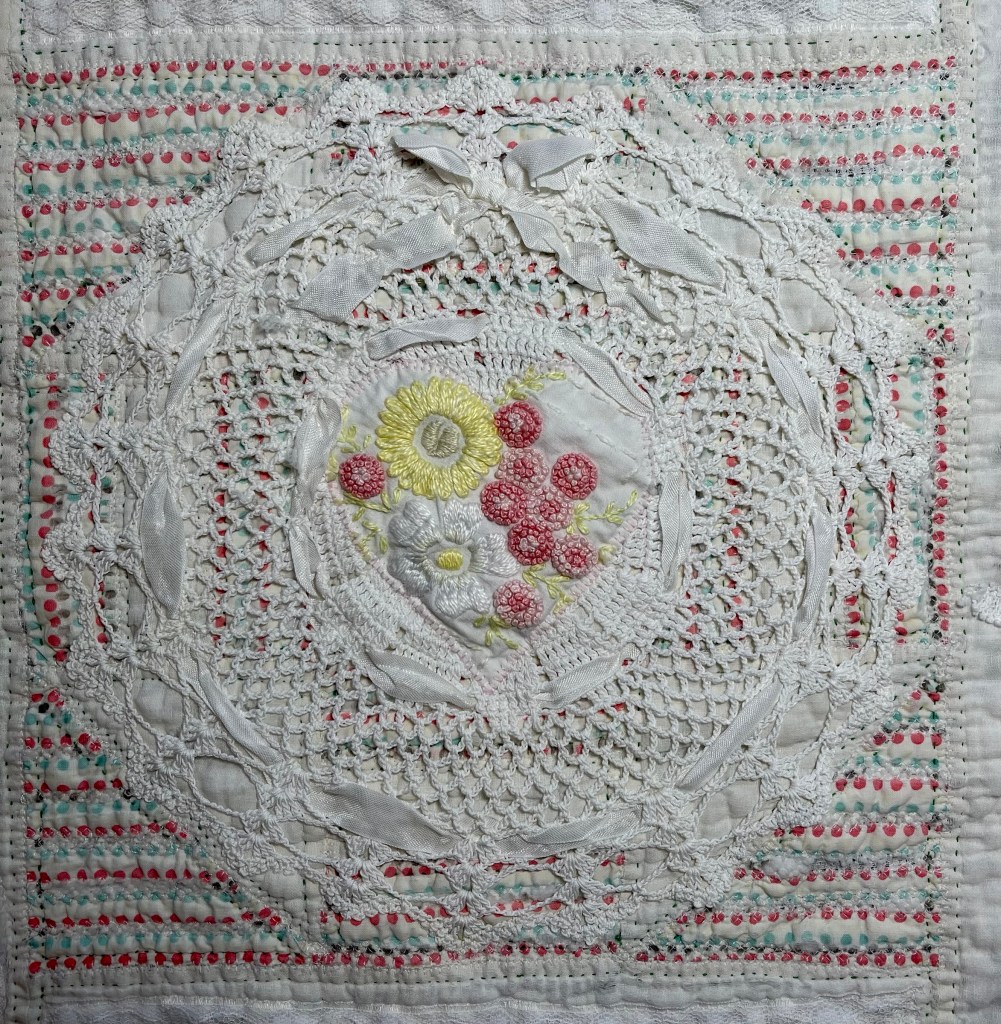
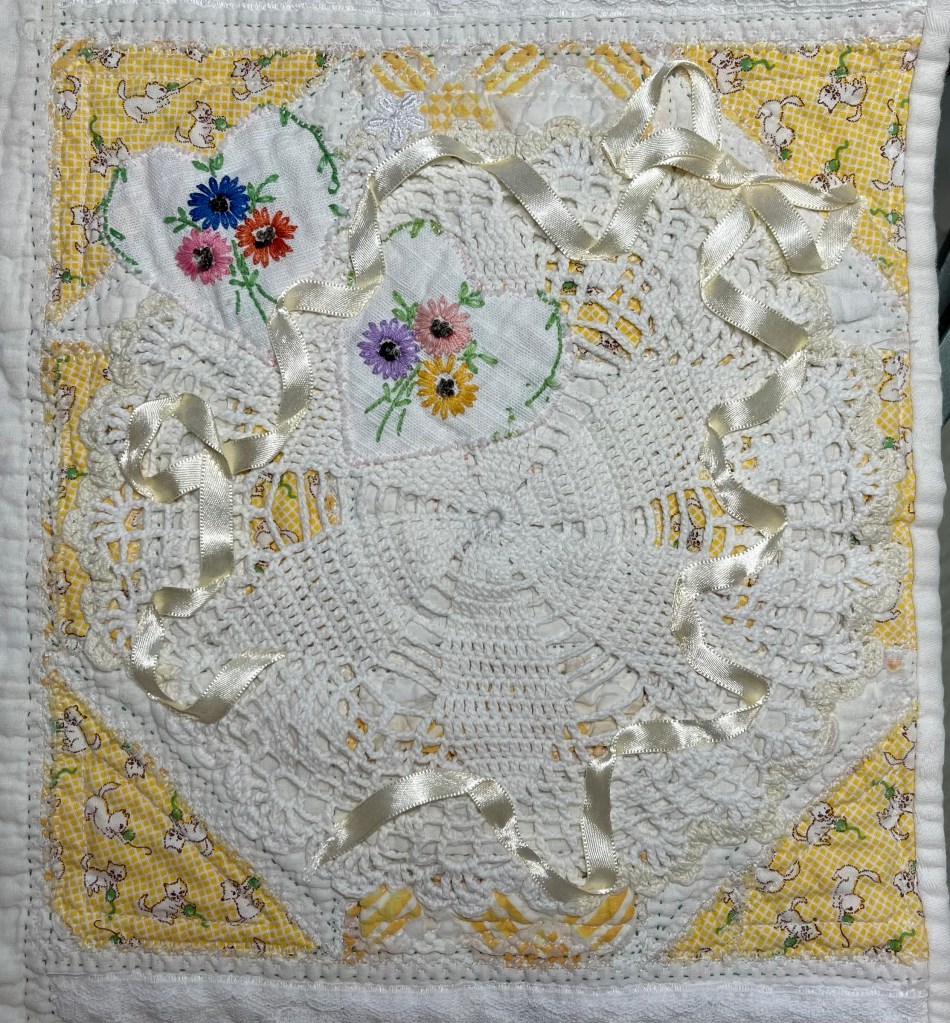
The 10 partial blocks (5 top and 5 bottom) present another challenge. I had a very large and in my mind a very unattractive white doily to experiment with. Why unattractive? If you’ve ever crocheted you will know the look you get when you use a crochet hook a bit too large for the crochet thread. I think that’s the case with this 12” doily:

Folded in half I’m ready to make the first cut on this approx. 12” round doily.
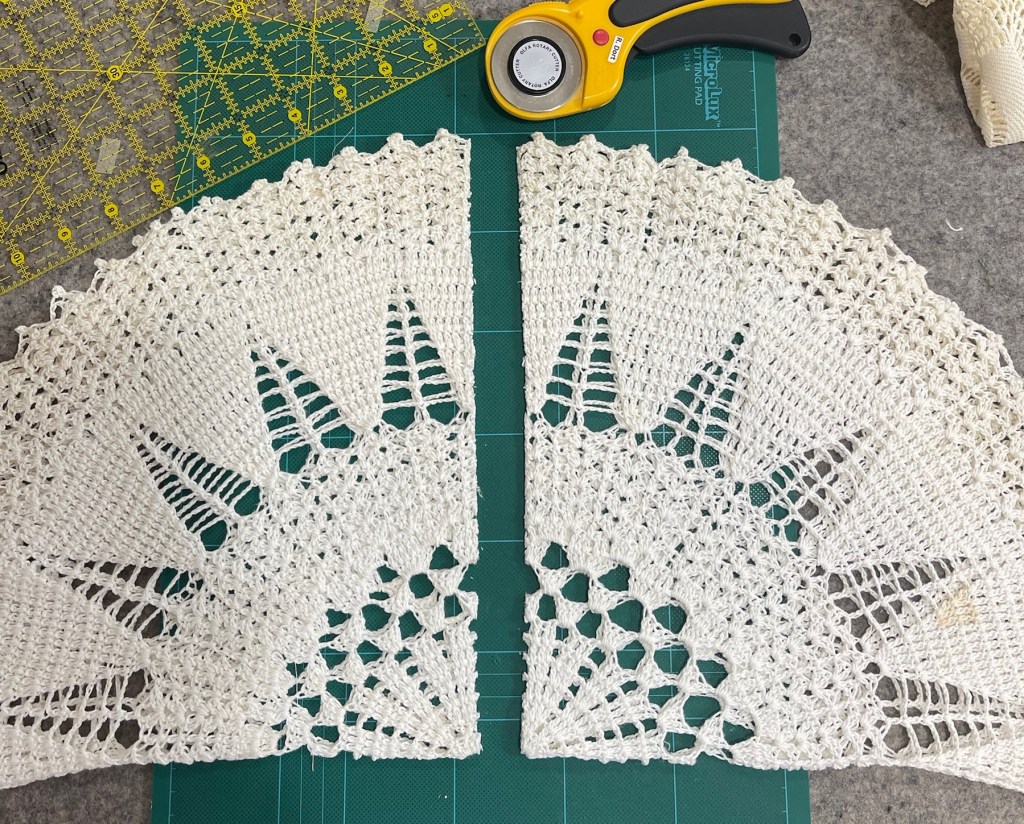
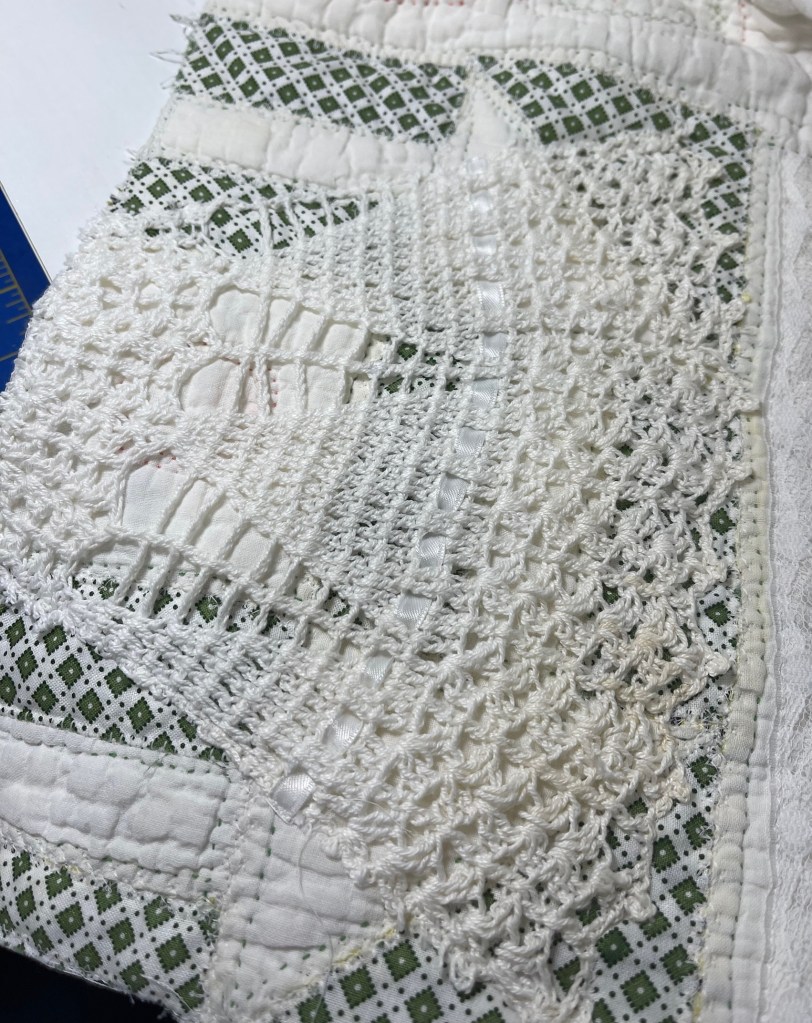
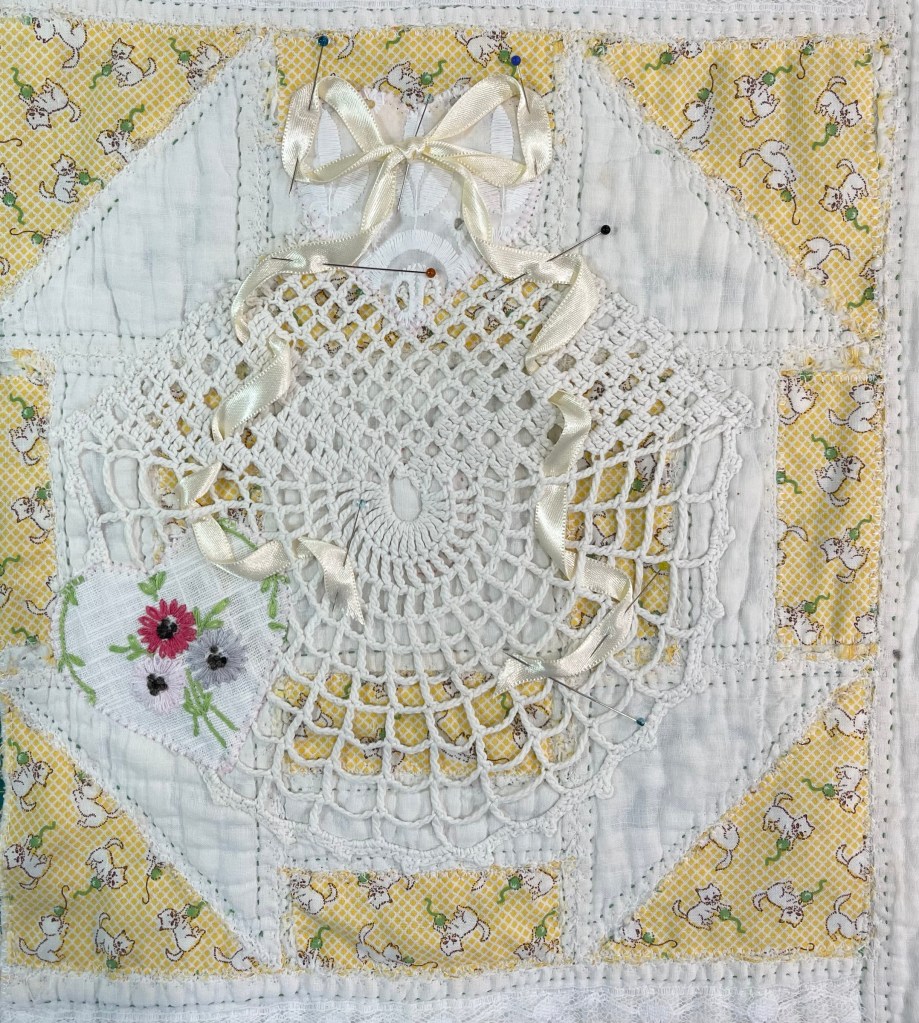
For added interest I wove a quarter inch white satin ribbon into the cut doily and as before, I machine stitch this piece to the quilt with a very small zig zag stitch. From this 12” round doily I was able to cut 8 pieces. But if you remember, I have 10 partial blocks that need doilies.
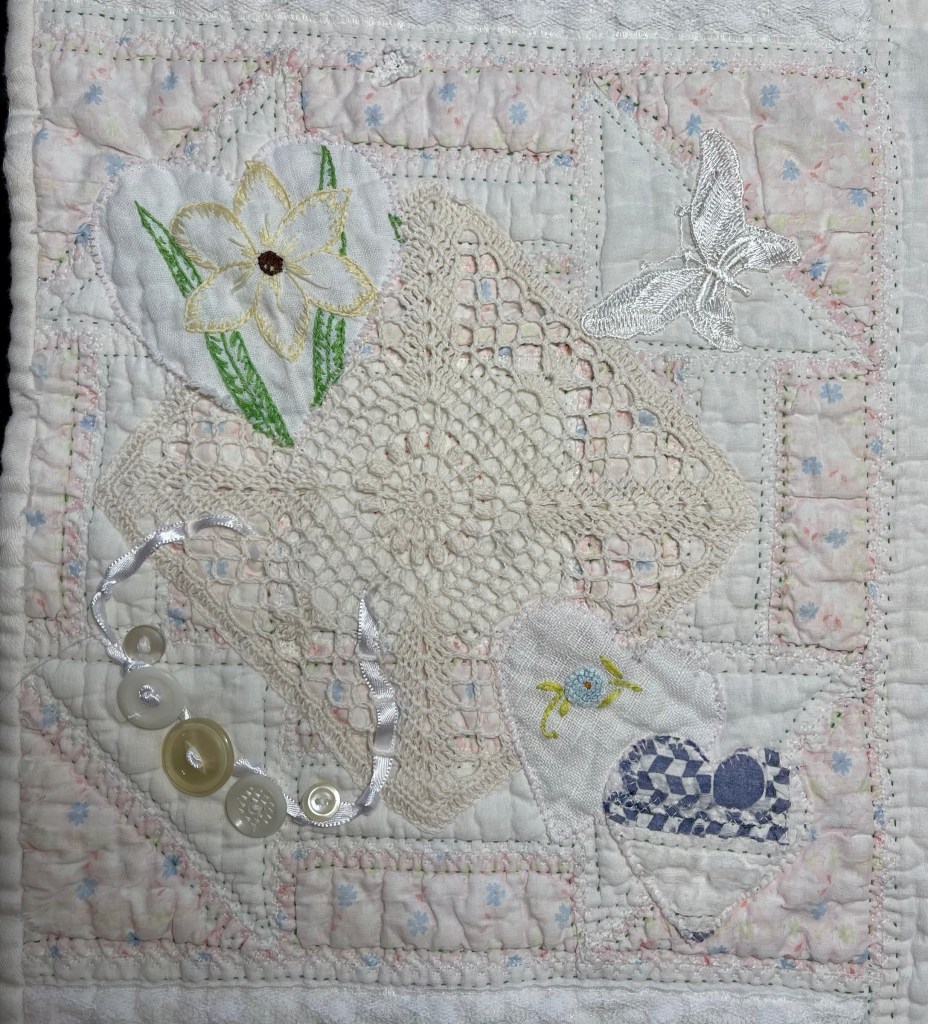
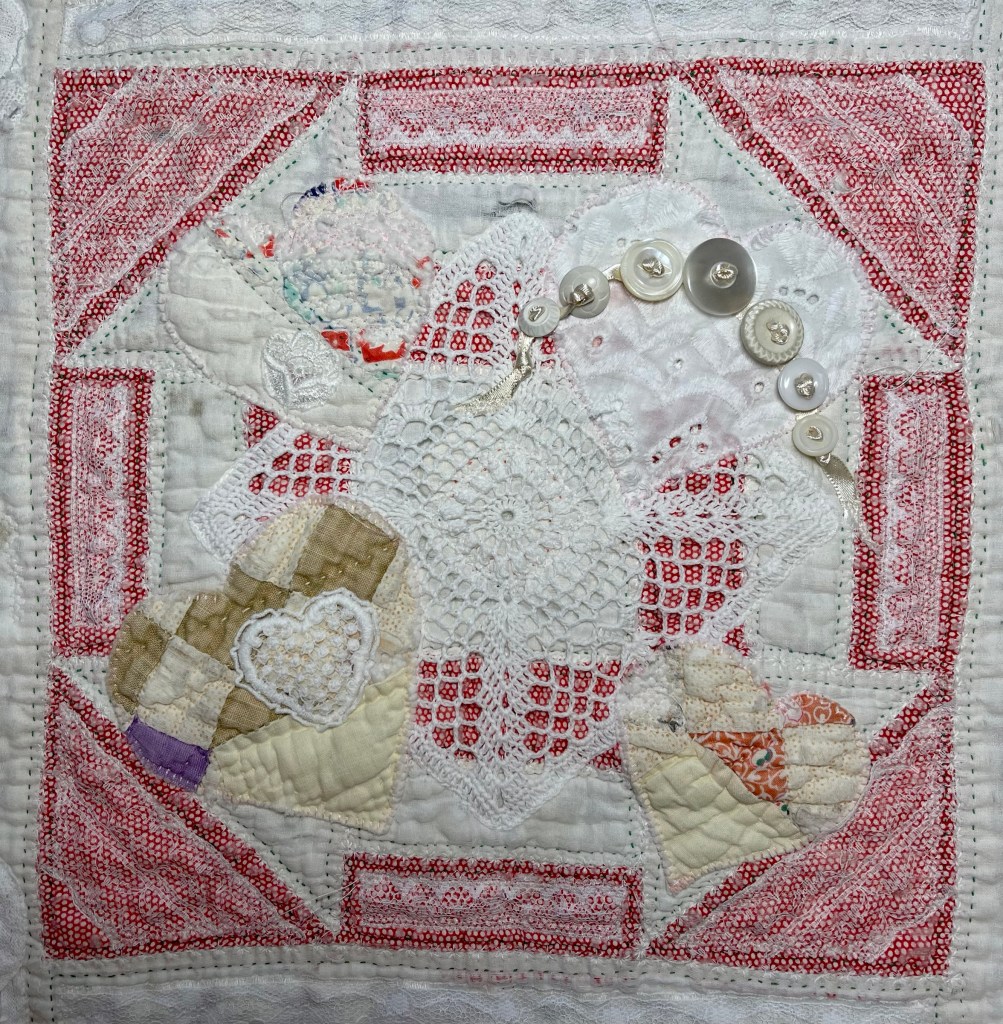
Not the best picture, but this shows an ivory oval doily I cut in half. I placed 1 piece in the center top partial block and the center bottom partial. Worked perfectly!
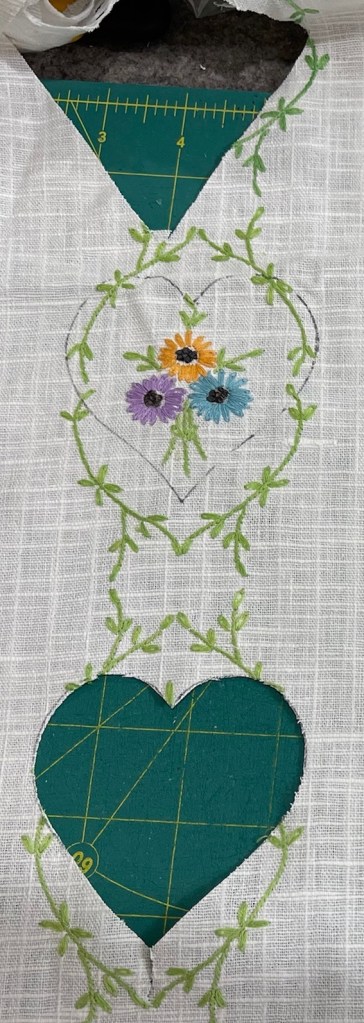
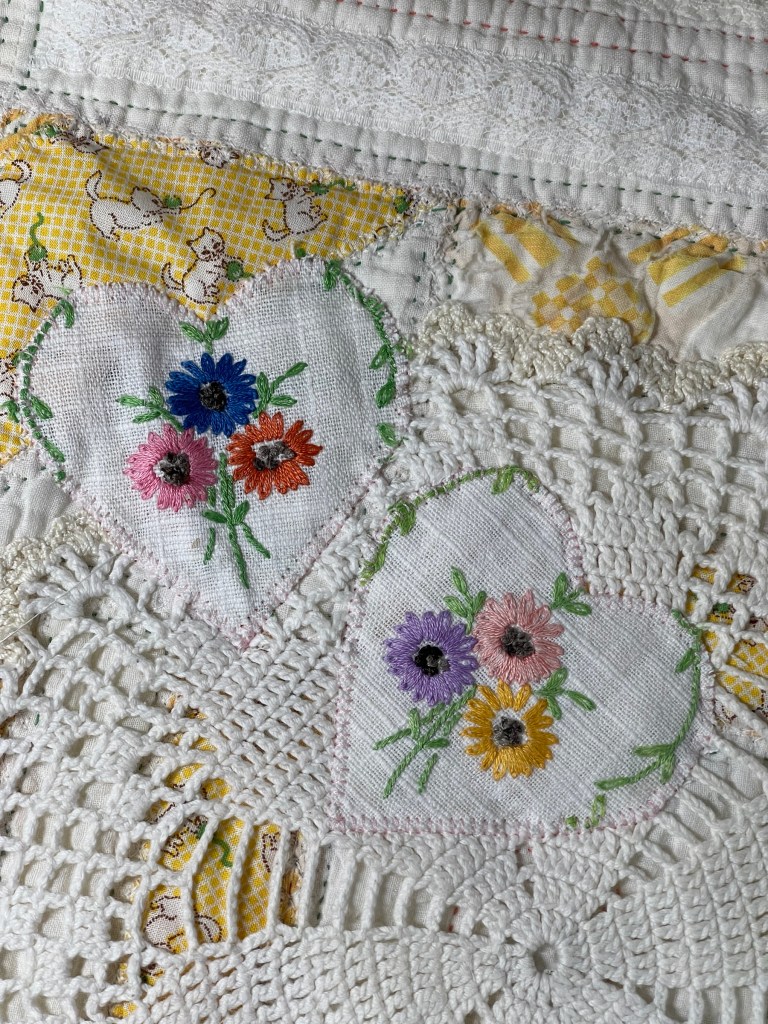
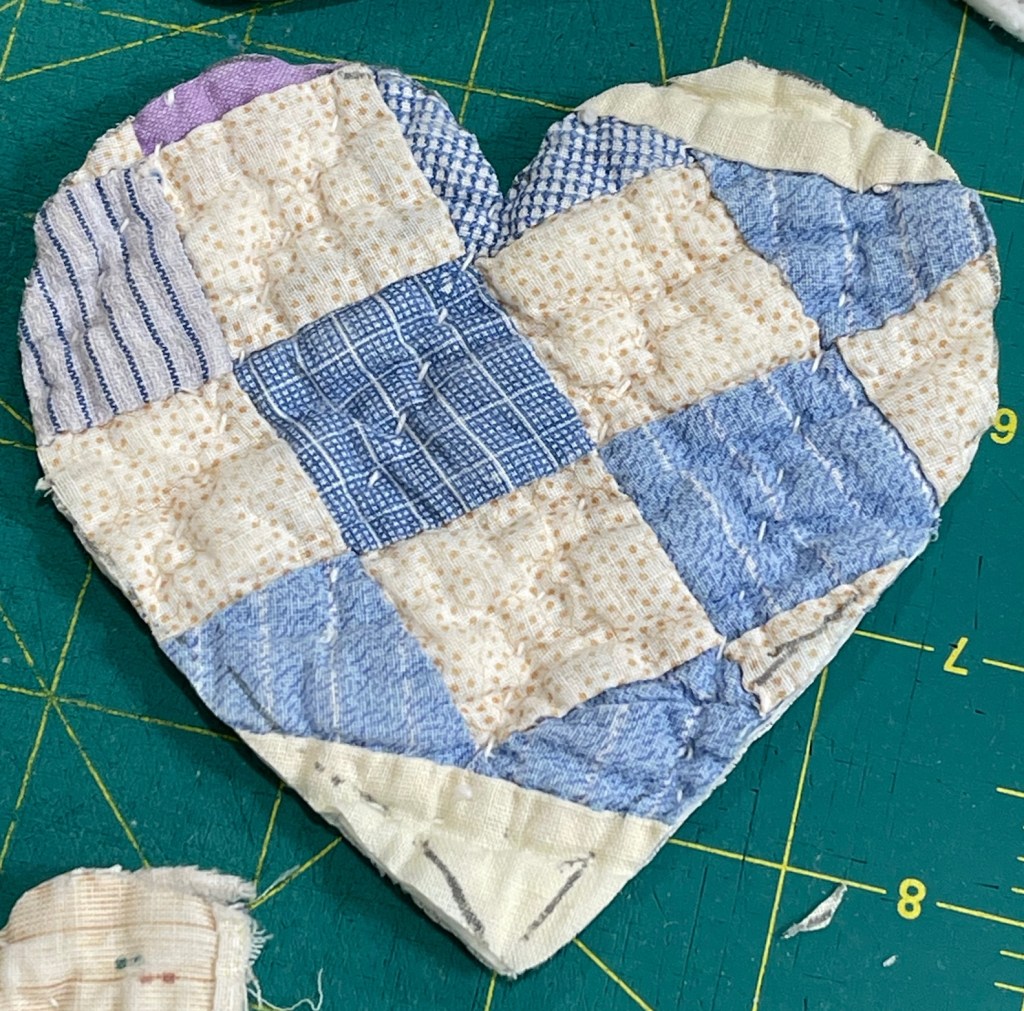
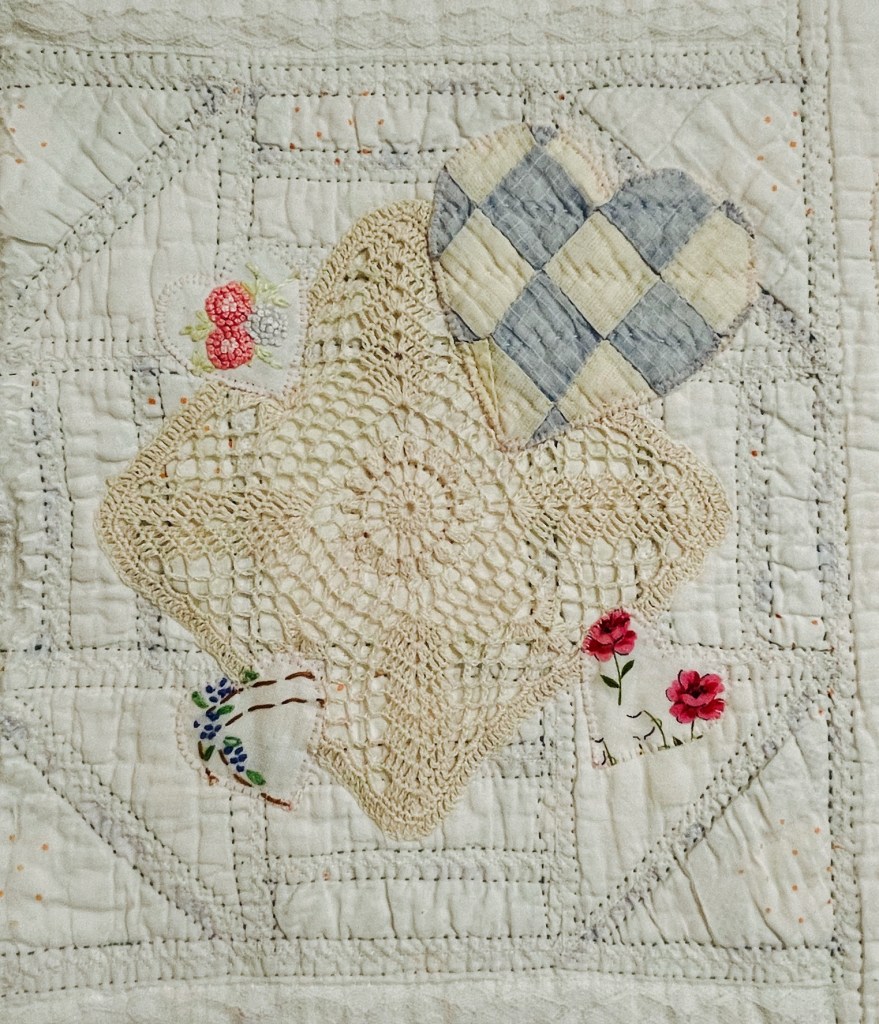
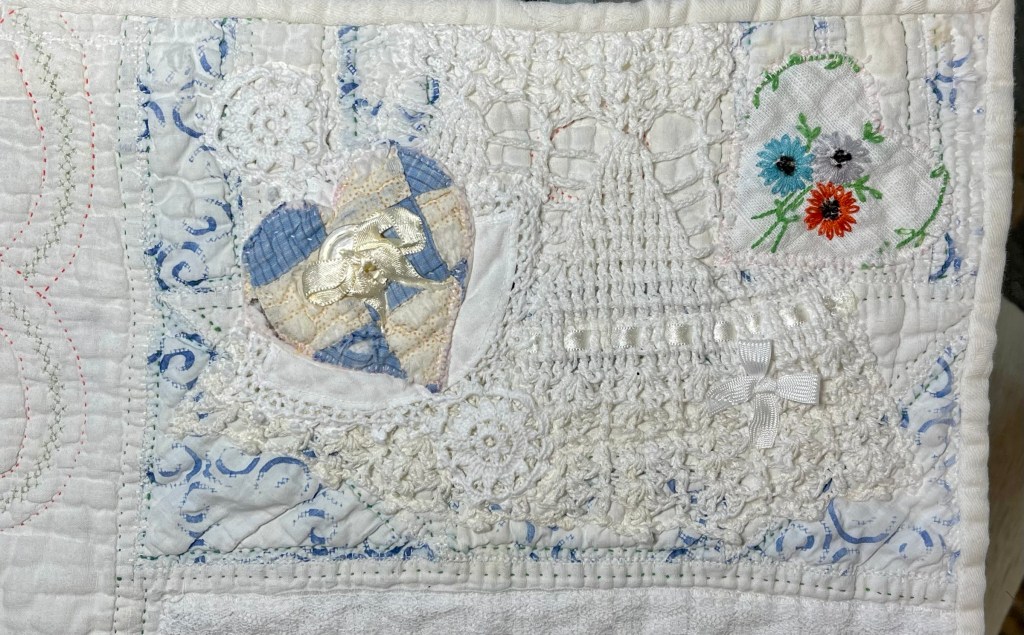
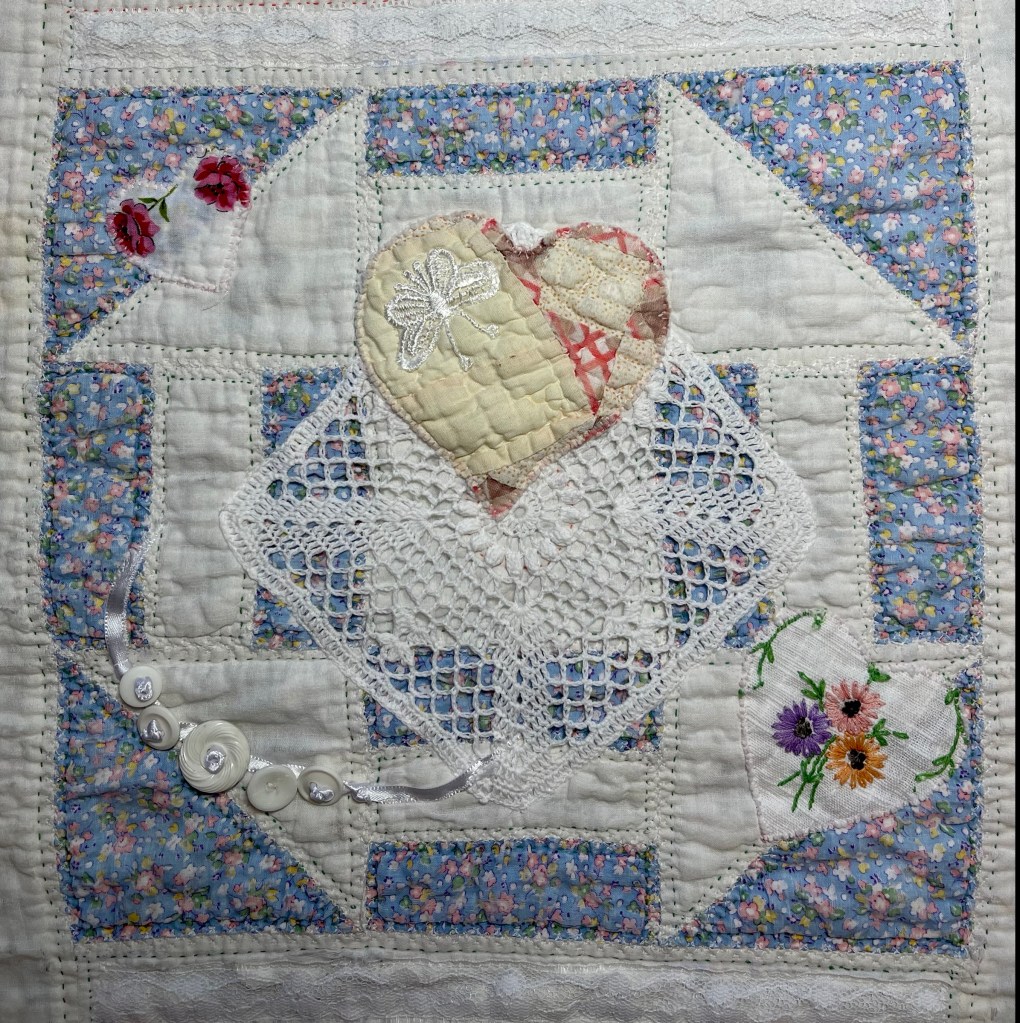
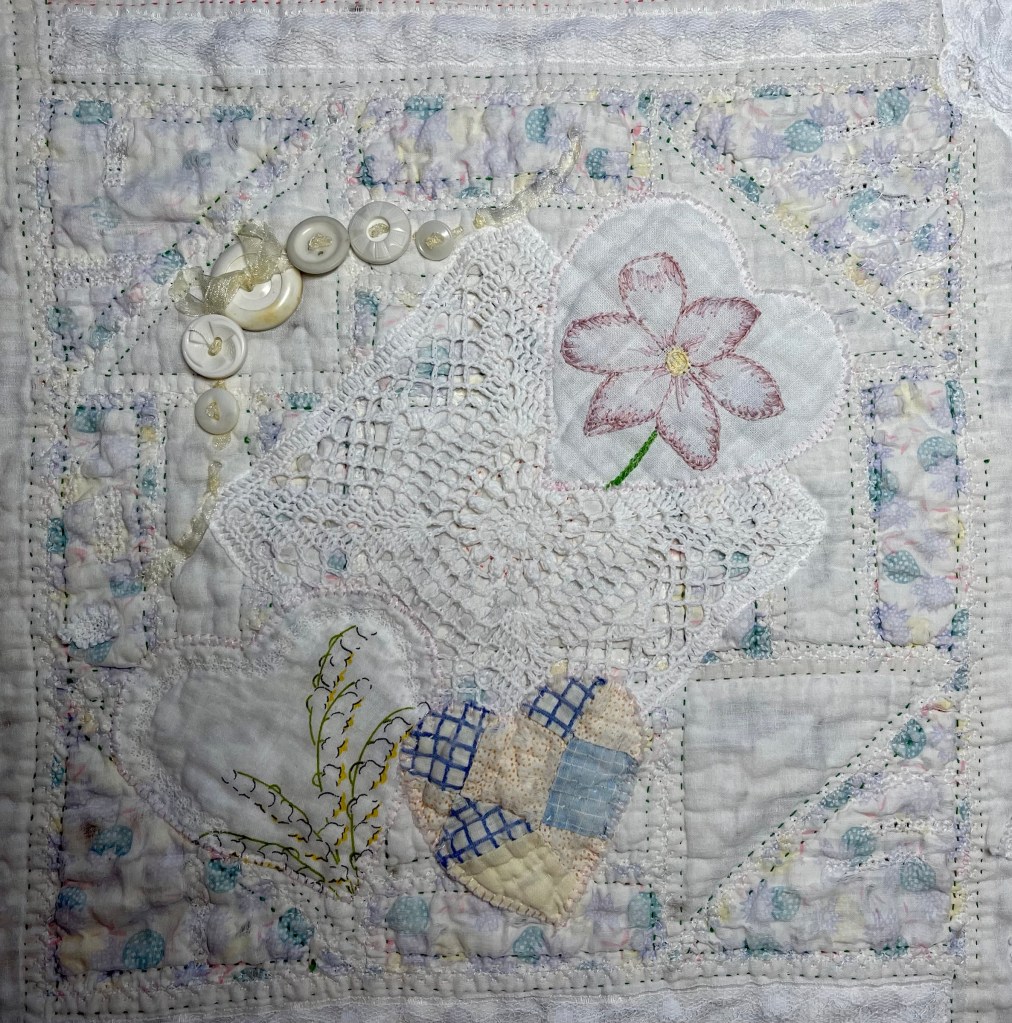
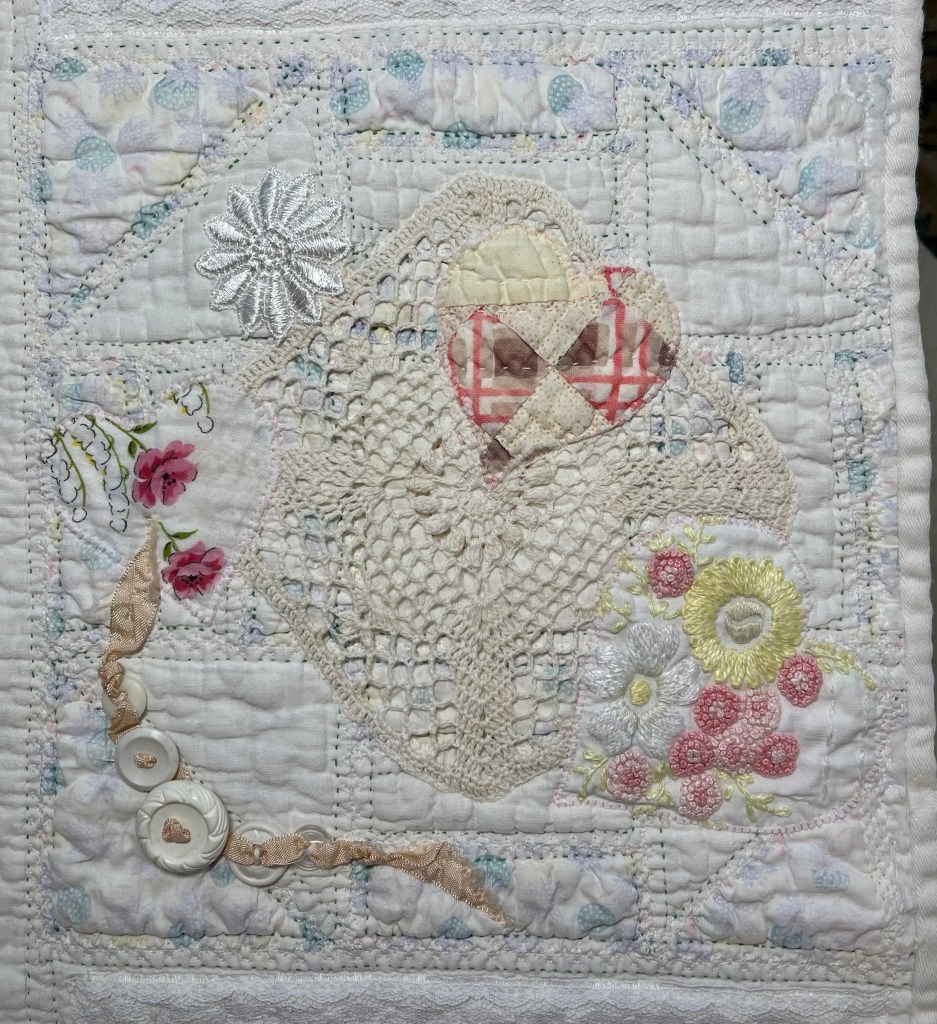
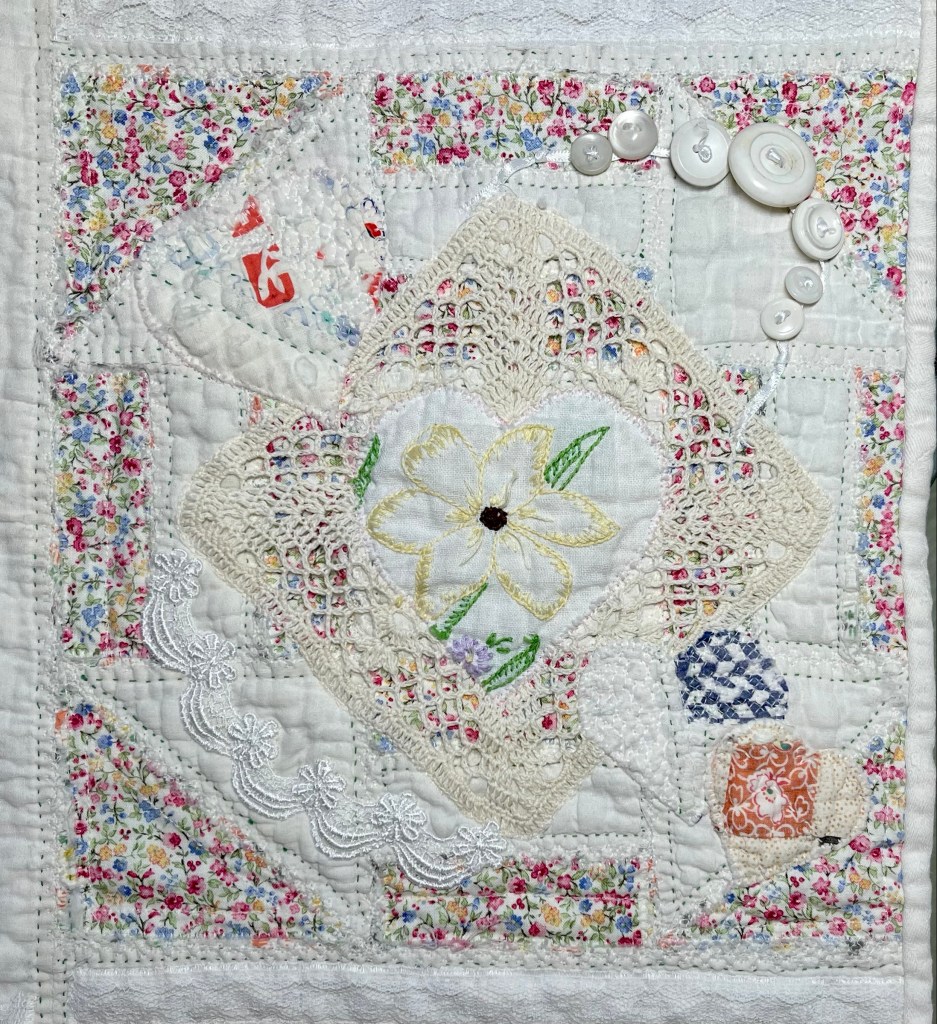
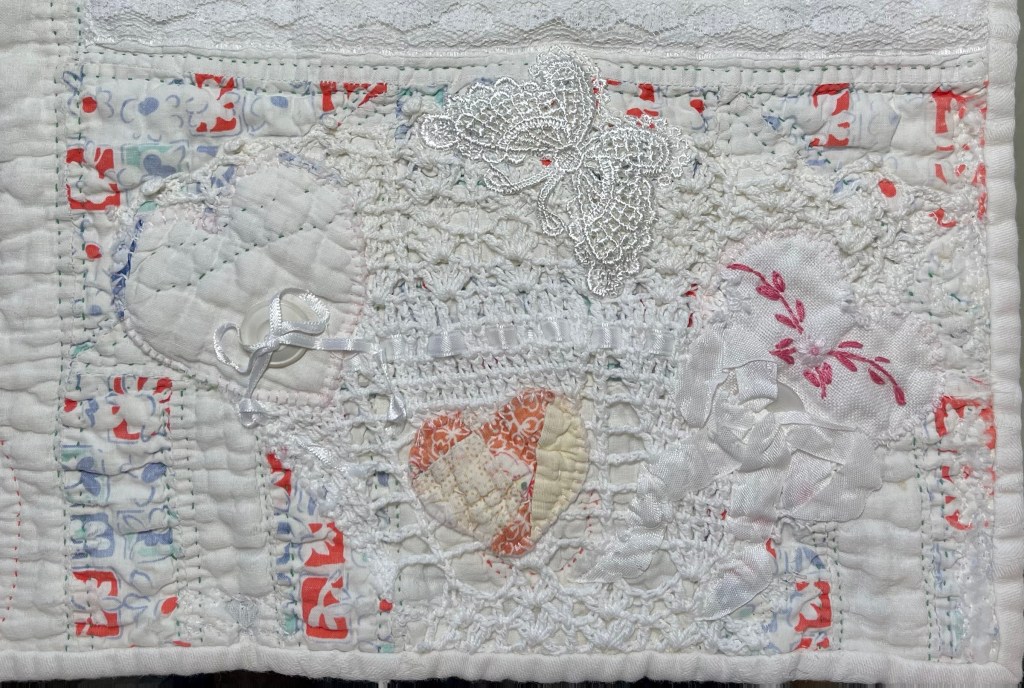
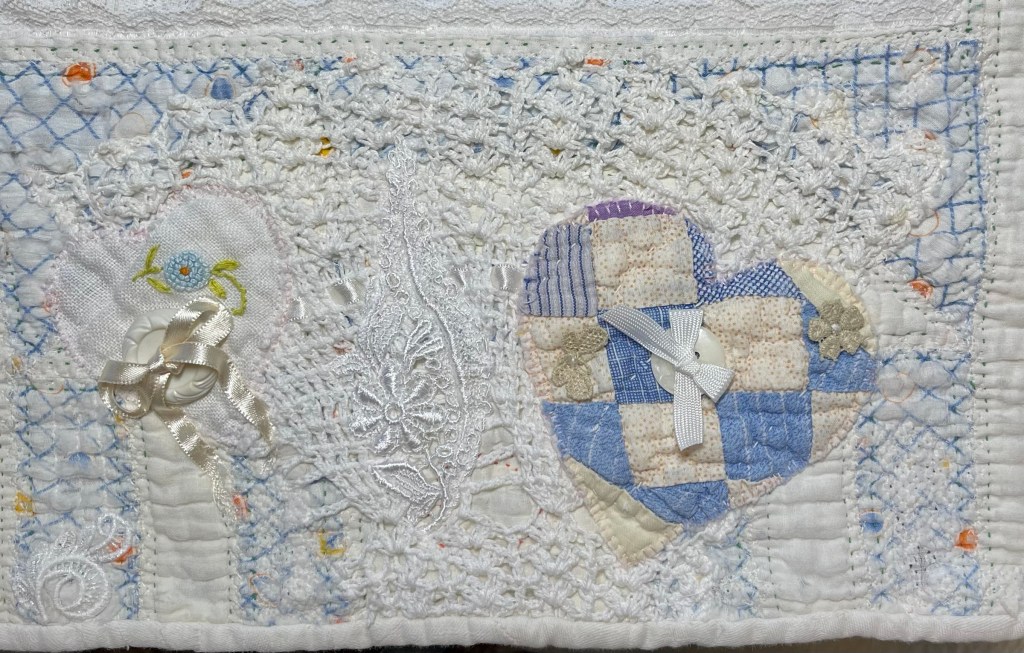
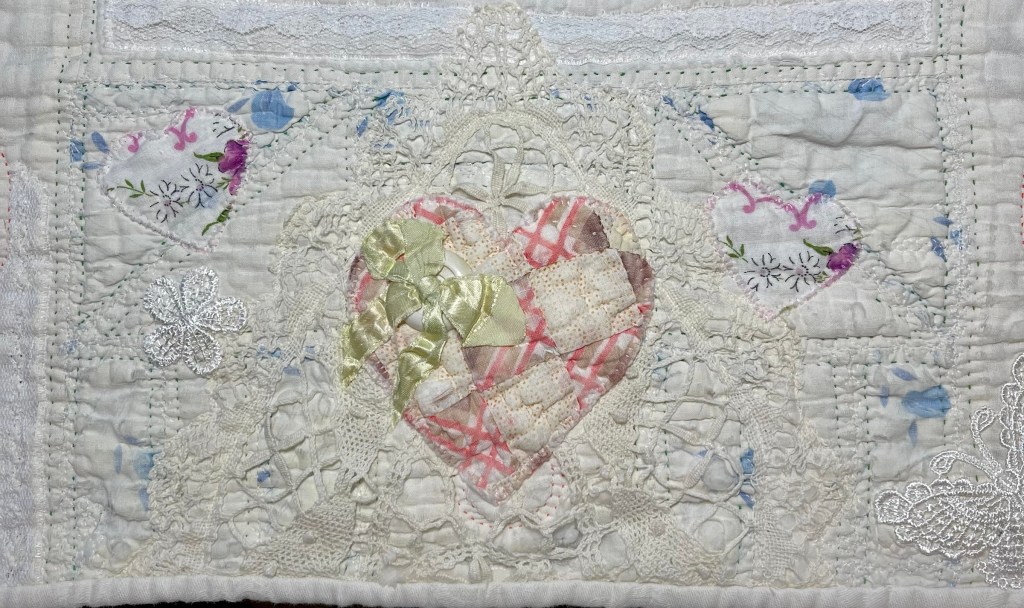
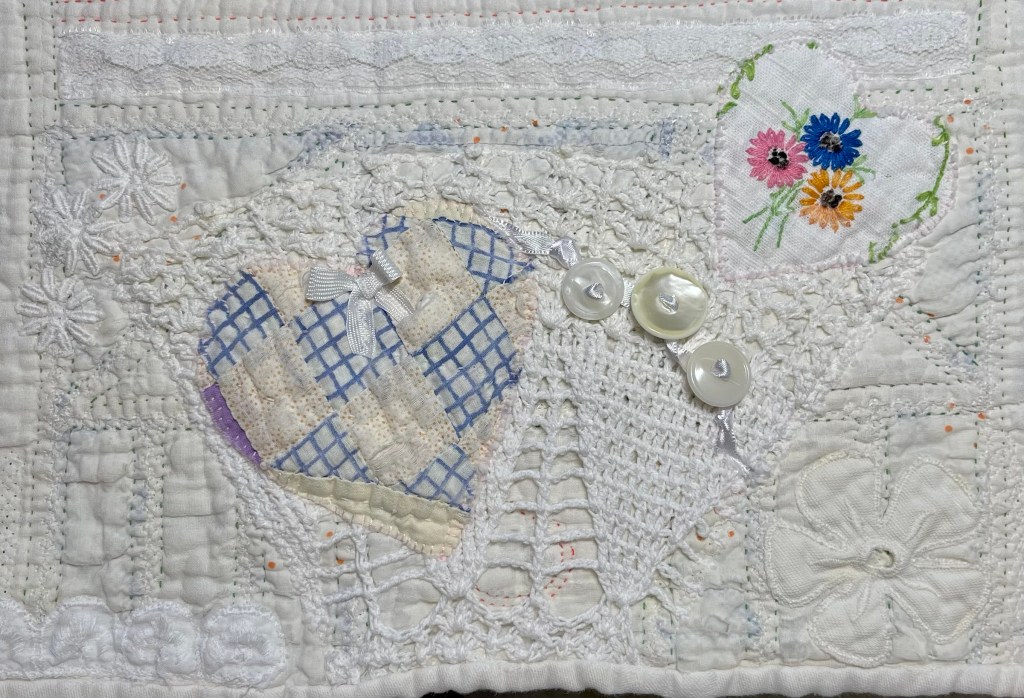
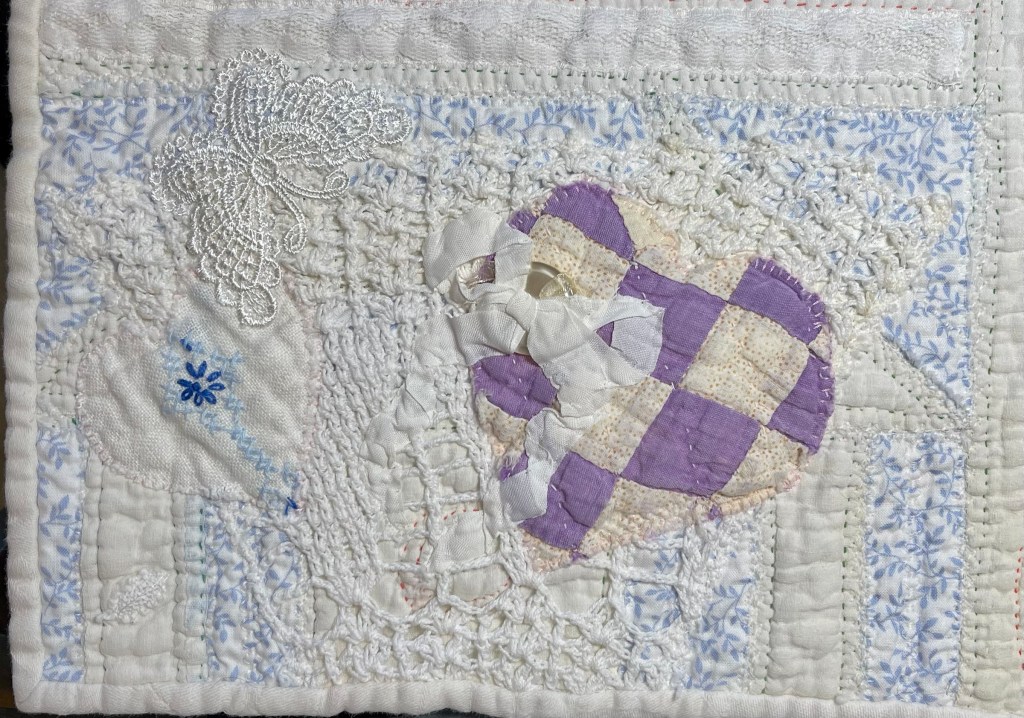
I always keep bits and pieces of previously used vintage linens and in this case this piece will allow me to cut several heart shapes.

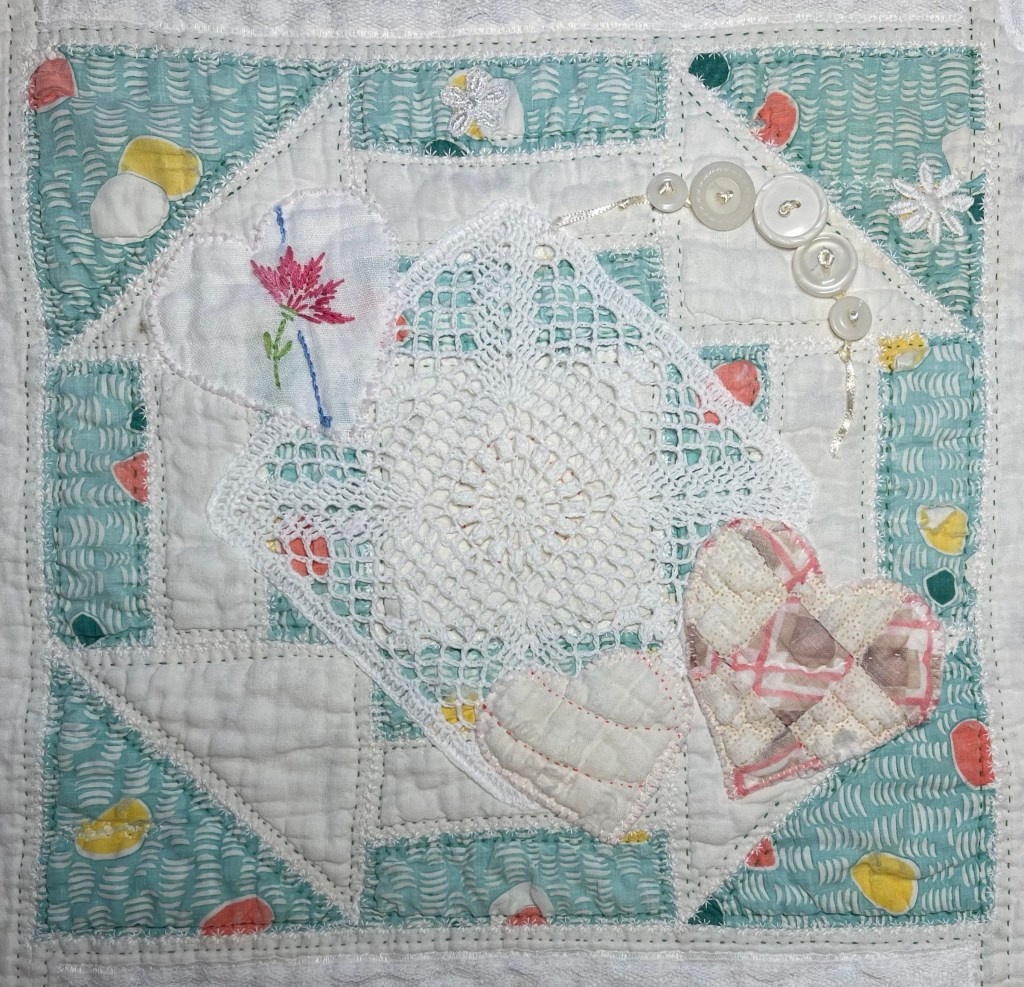
Just to give you an idea of the size of these hearts. You can also see that I have machine applique stitched this heart to the quilt. I was so excited to stitch down my first heart that I forgot to change the needle thread to a nice medium pink color… to remedy this I, without removing the white stitches, stitched directly over them later with pink thread
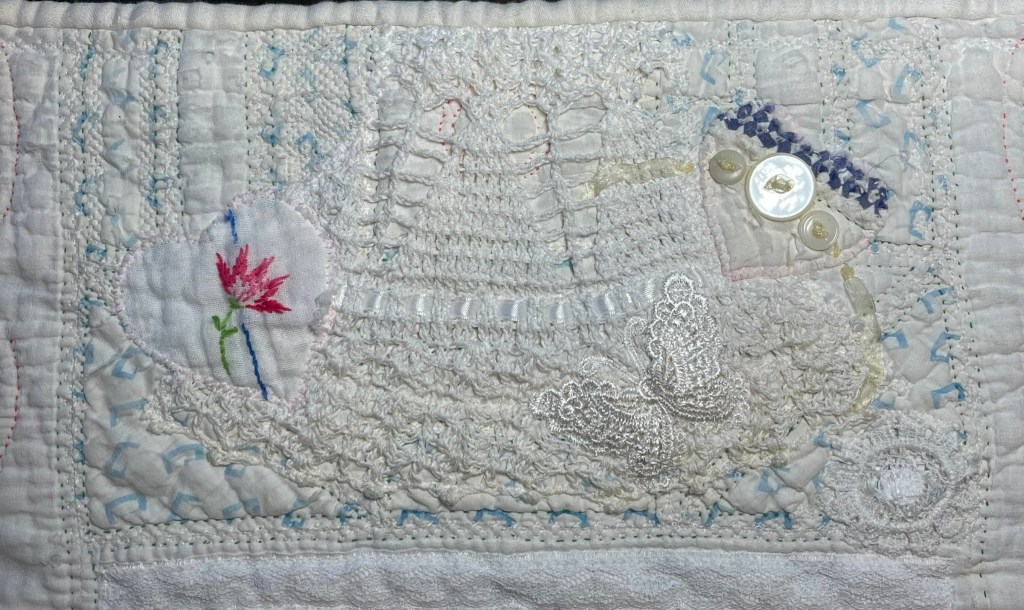
I also cut a few hearts from a lovely white embroidered fabric I purchased at JoAnn Fabrics a year or two ago.
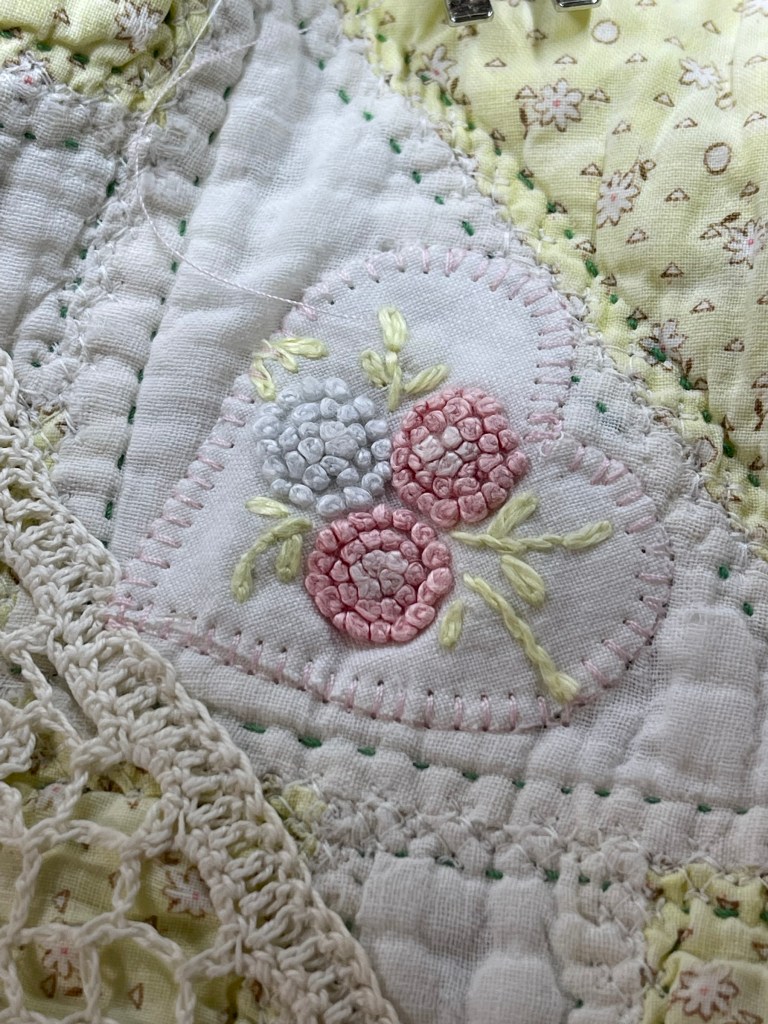
Now you can easily see the nice medium thread I used to stitch down the heart.
The project is taking shape! I’ve sewn hearts to every block, hung the quilt on my design wall and have begun to plan my next step: ribbons!
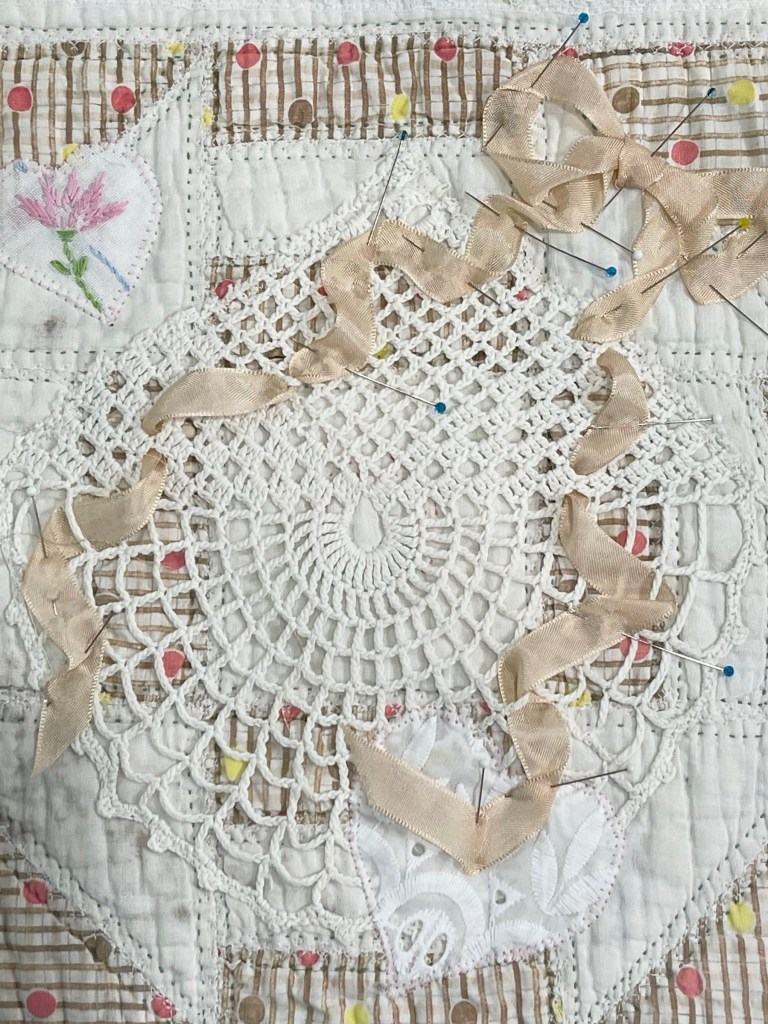
While not actually ribbon, this Snug-Hug seam binding makes a lovely ribbon substitute.
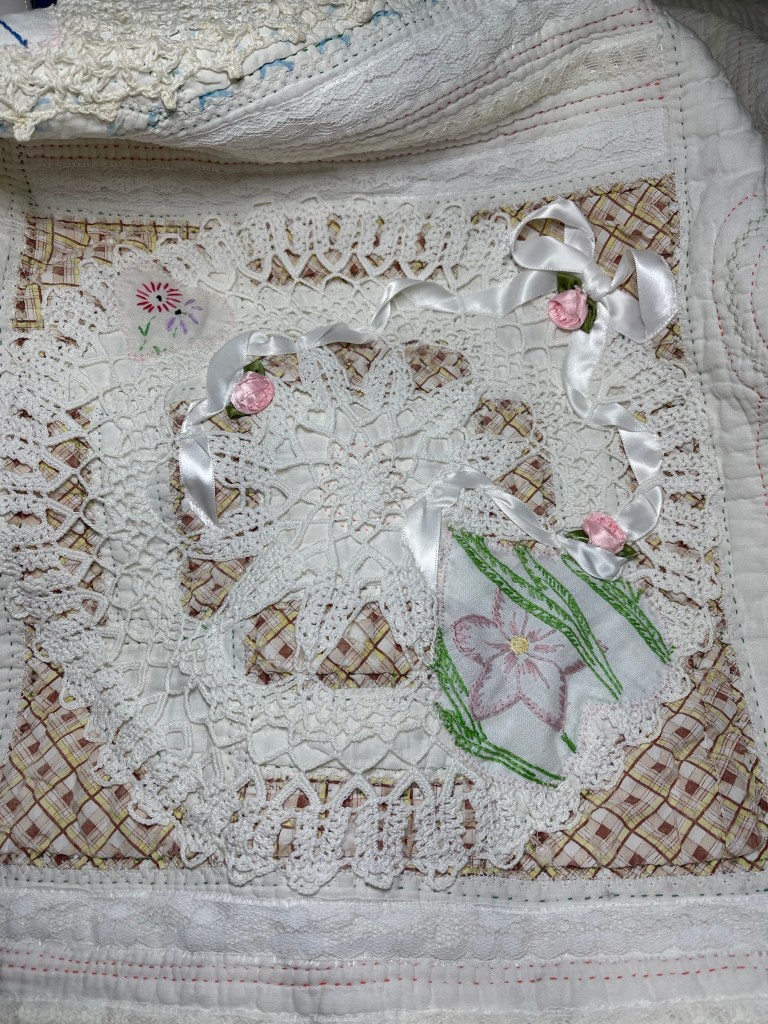
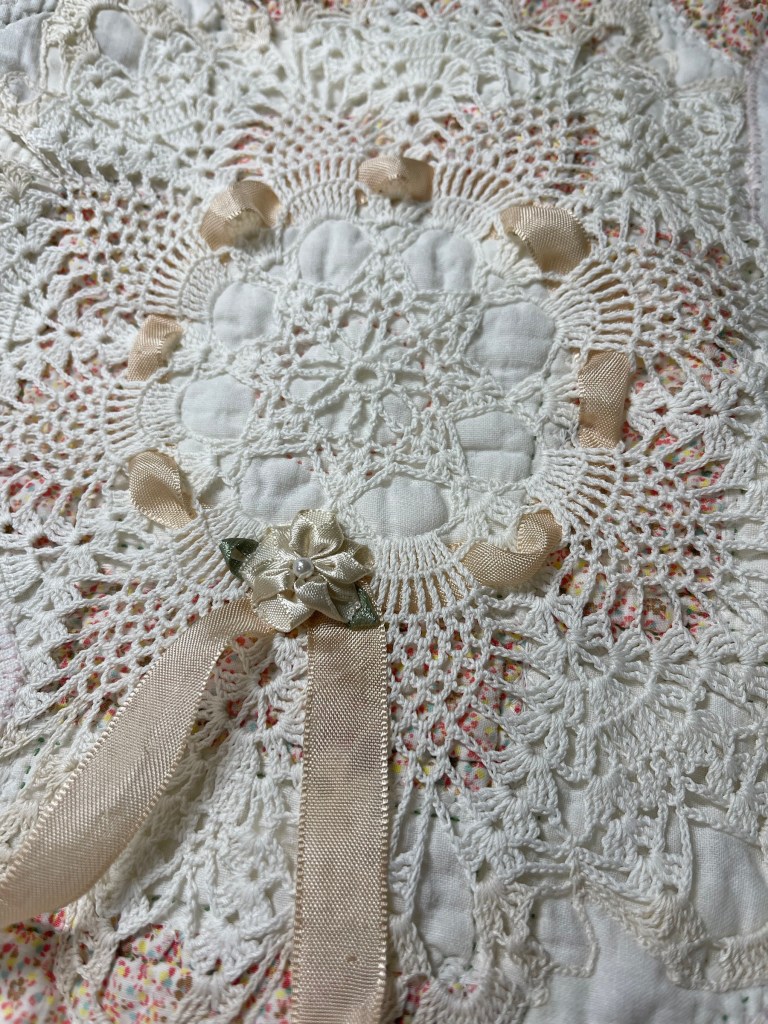
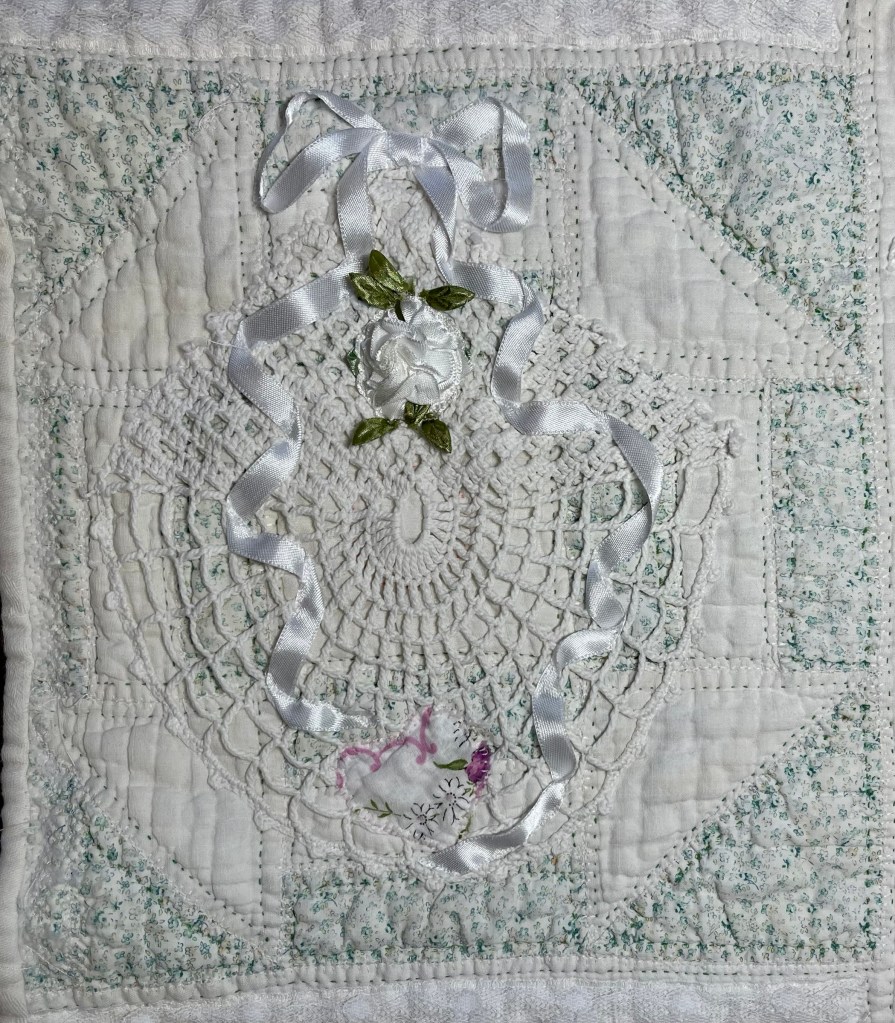
For added interest I attached a commercially produced ivory ribbon rose .
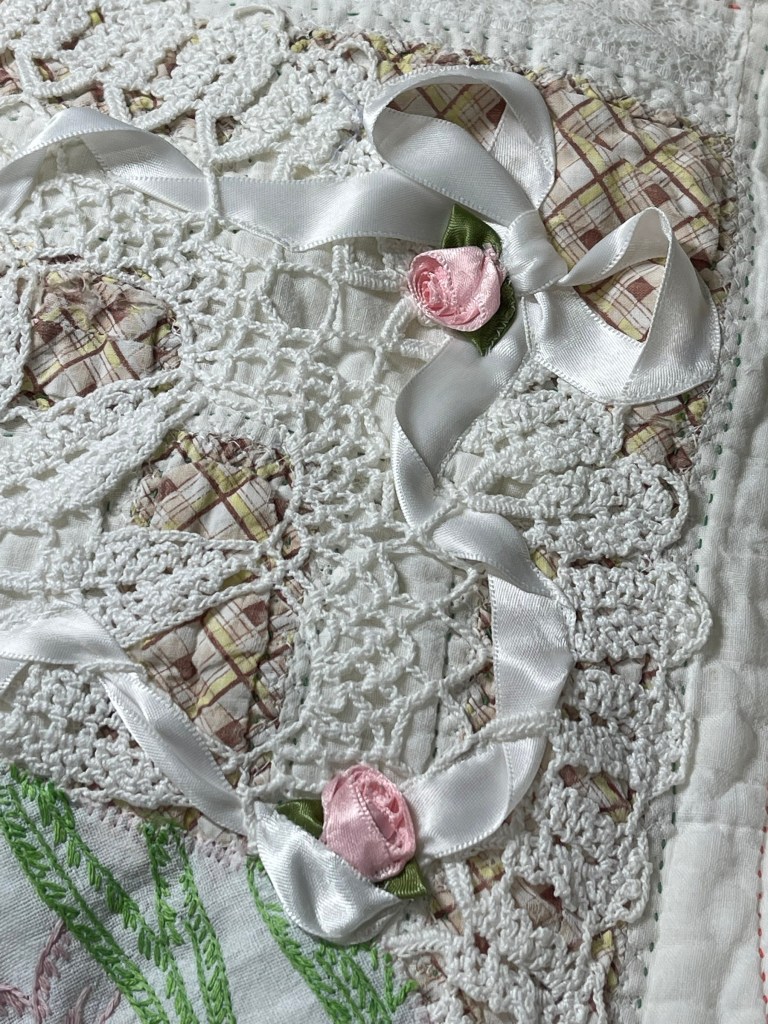
More commercially produced ribbon roses. To give them a more vintage look I flattened them with a steam iron before machine stitching them to the quilt.
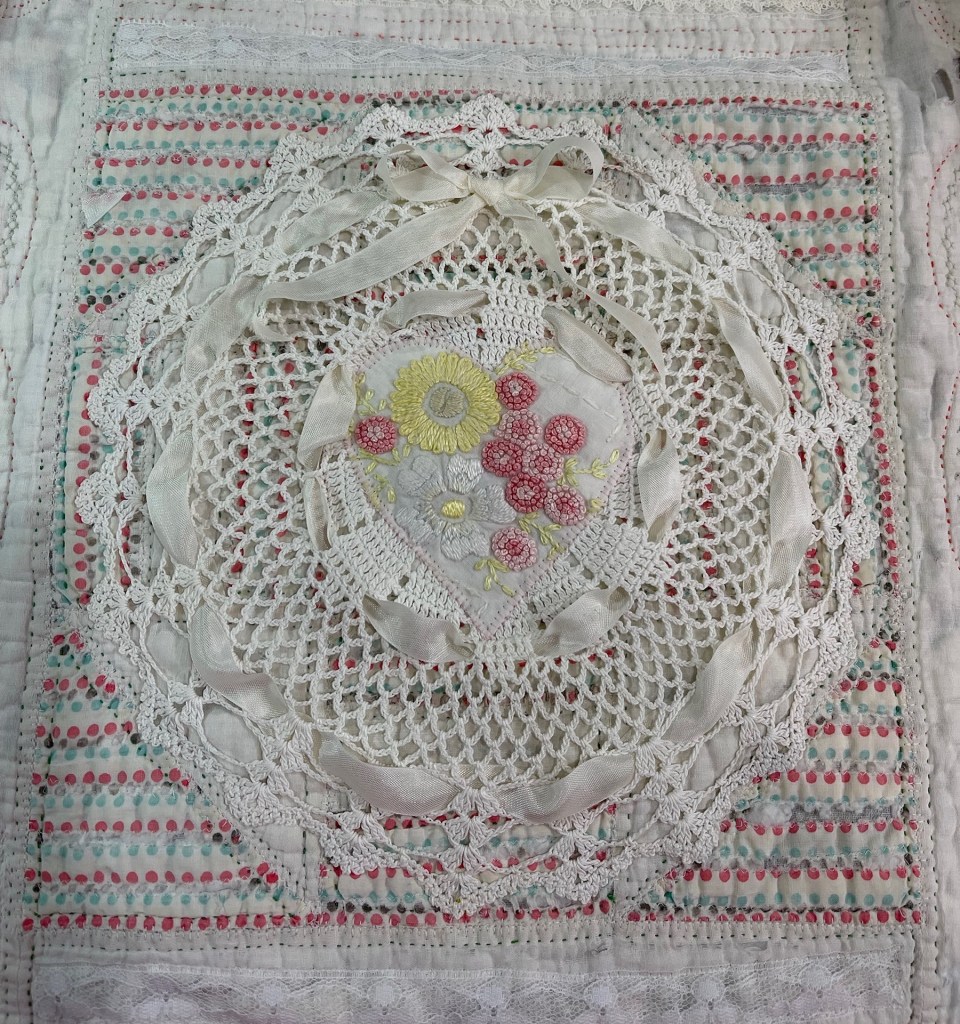
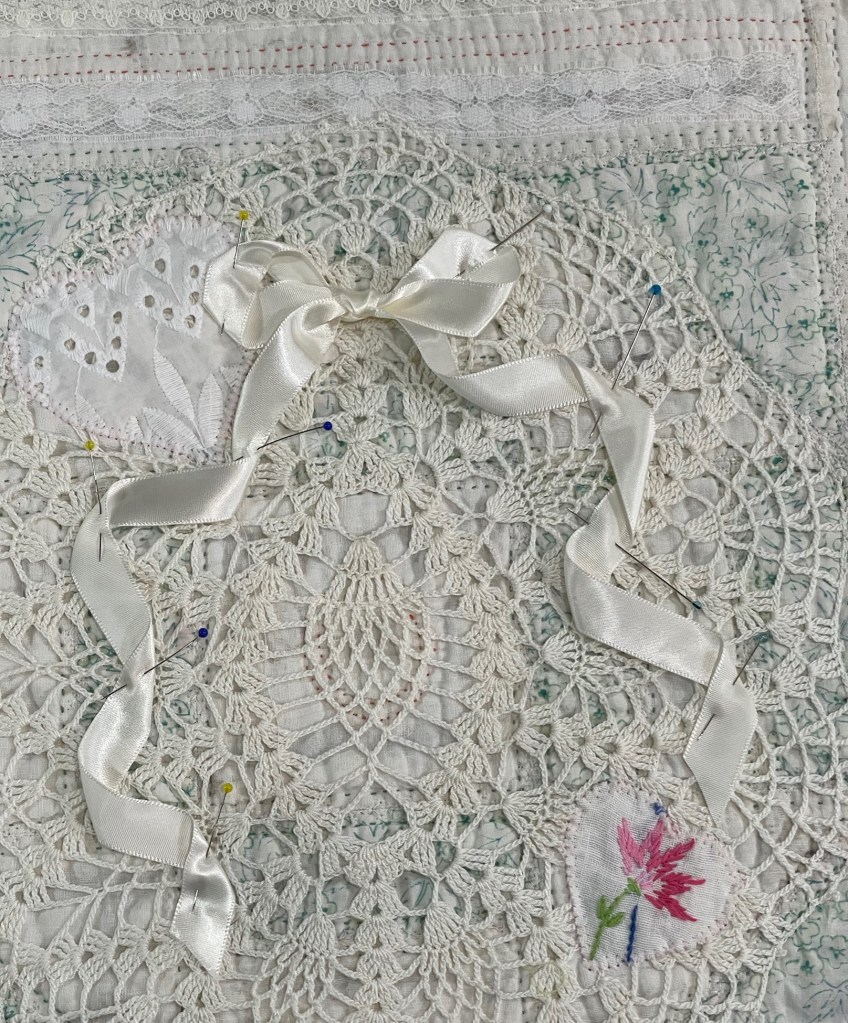
Each of the “other than on-point square” doilies got a ribbon bow with streamers.
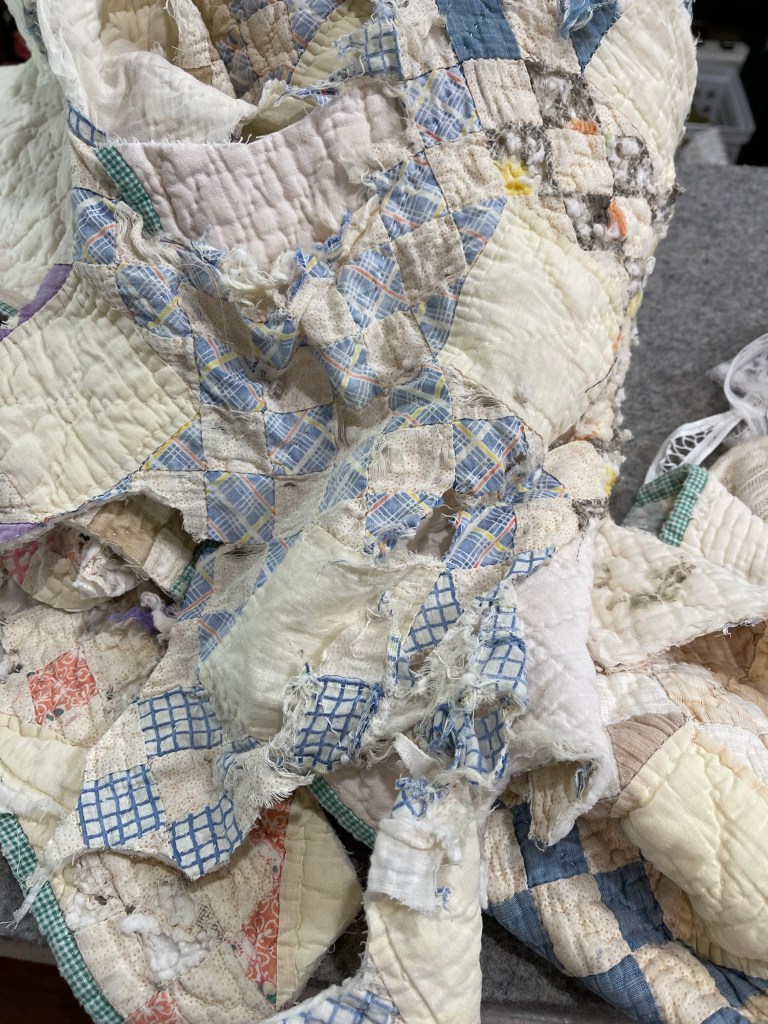
An eBay purchase, these cut up vintage quilt scraps will be perfect for cutting heart motifs of all sizes.
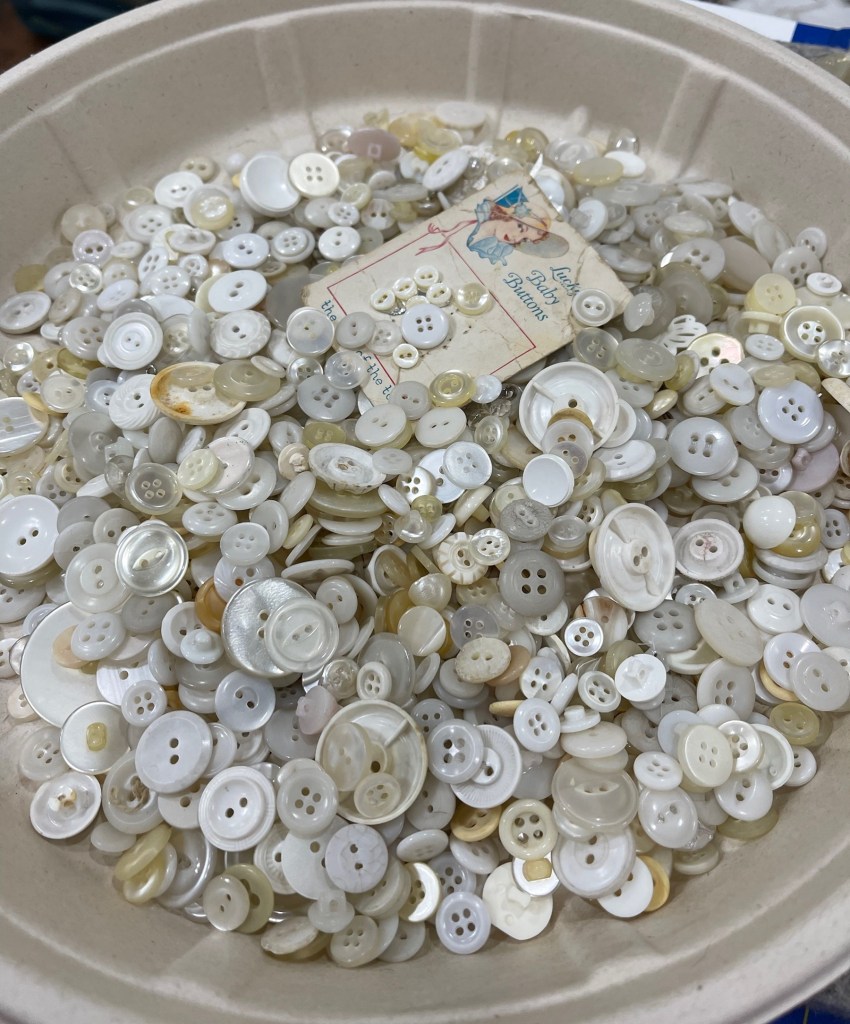
Next step: buttons!
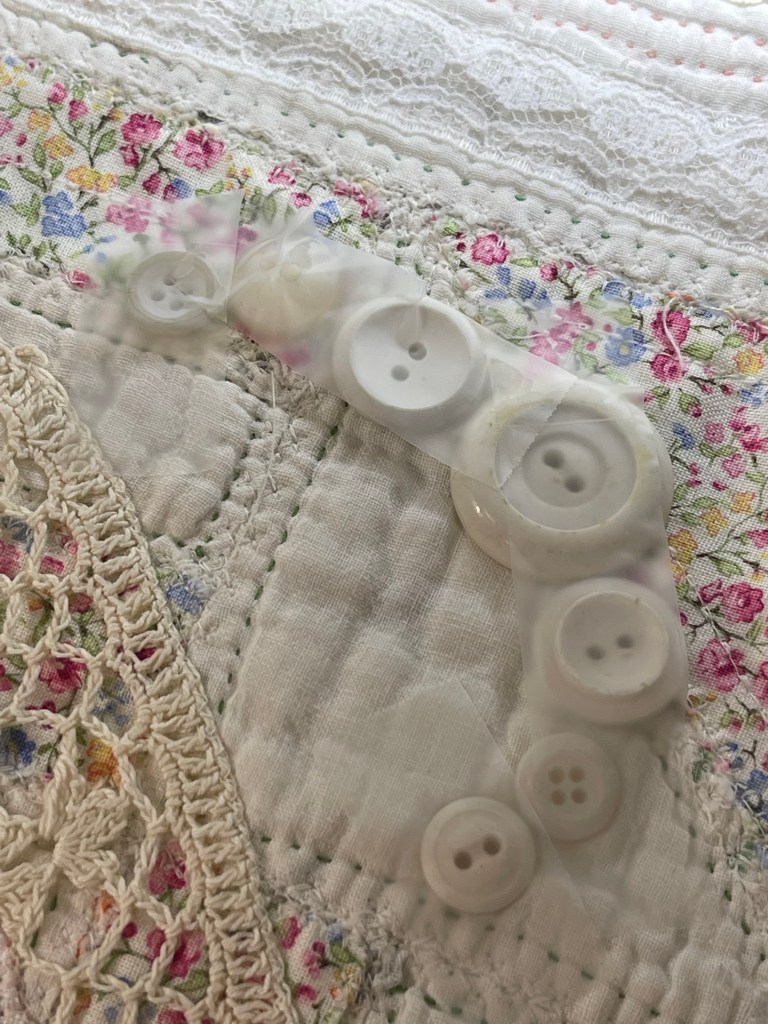
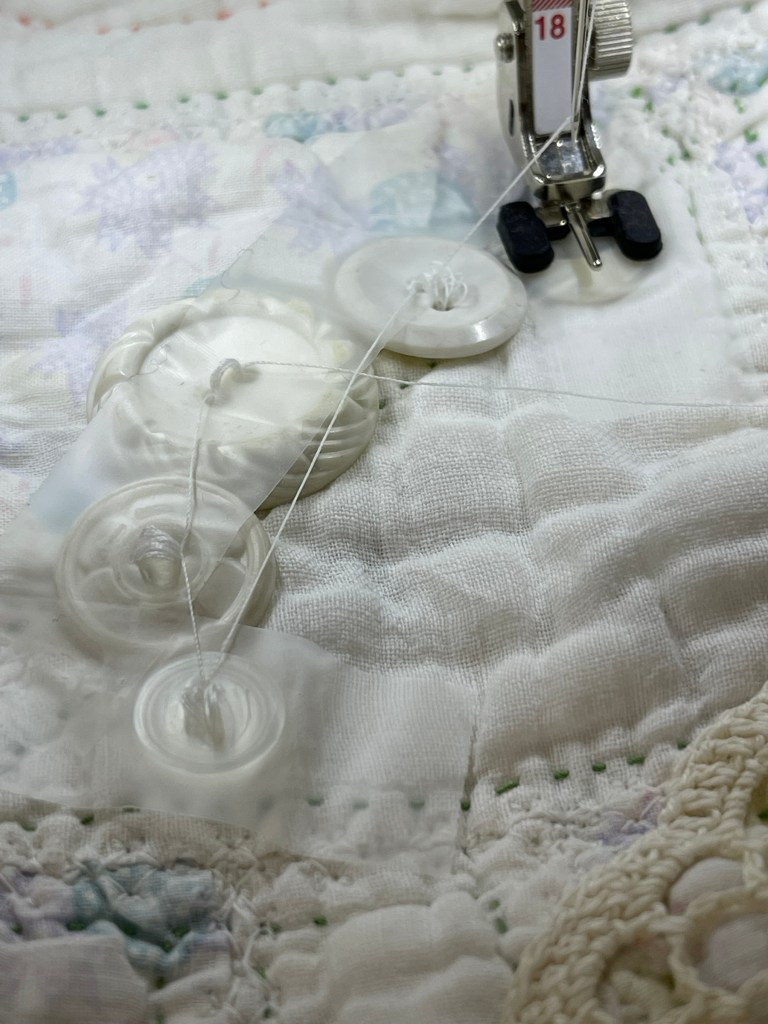
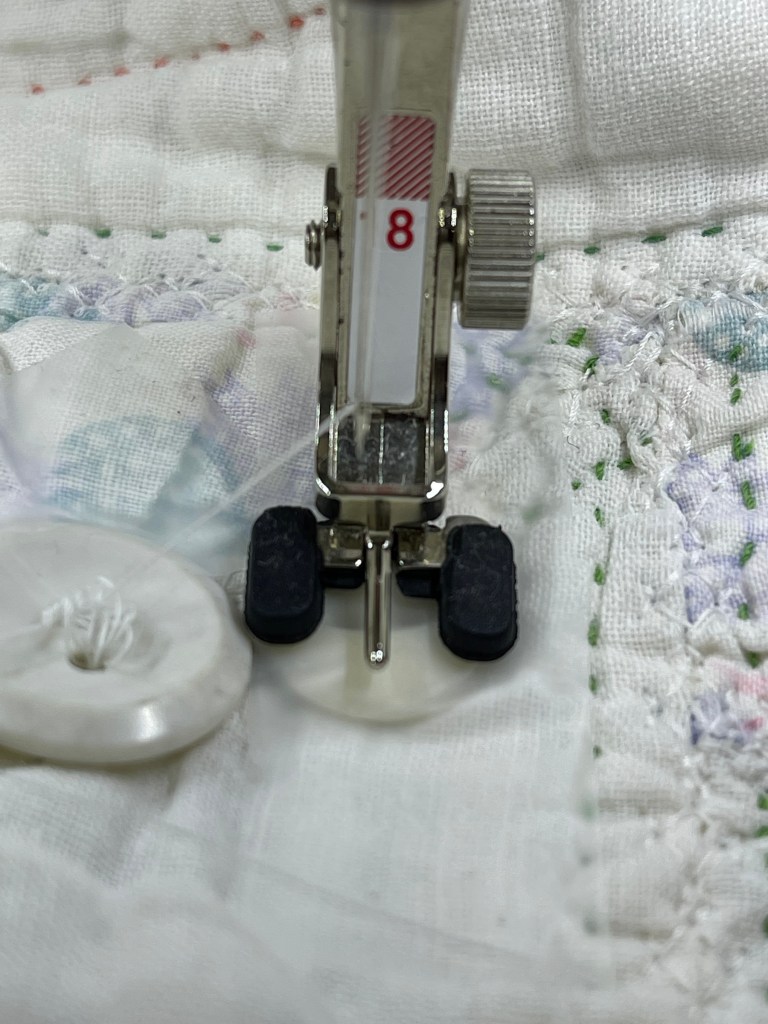
Have you ever sewn buttons using your sewing machine? I sew on a Bernina so the Button Foot is the #18. There is a very specific stitch found with the sewing machines buttonhole stitches. By taping the buttons in place first, I don’t have to worry that they will shift out of place.
Here’s a very good video clip about using your machine to sew on buttons: https://www.youtube.com/watch?v=xGOJnaiOMII
See the little metal bar between the black toes of the #18 foot? This little bar adds a “thread shank” to the button. I need this thread shank! Without it the button would be sewn tight to the quilt and weaving in the ribbon shown below would be difficult.
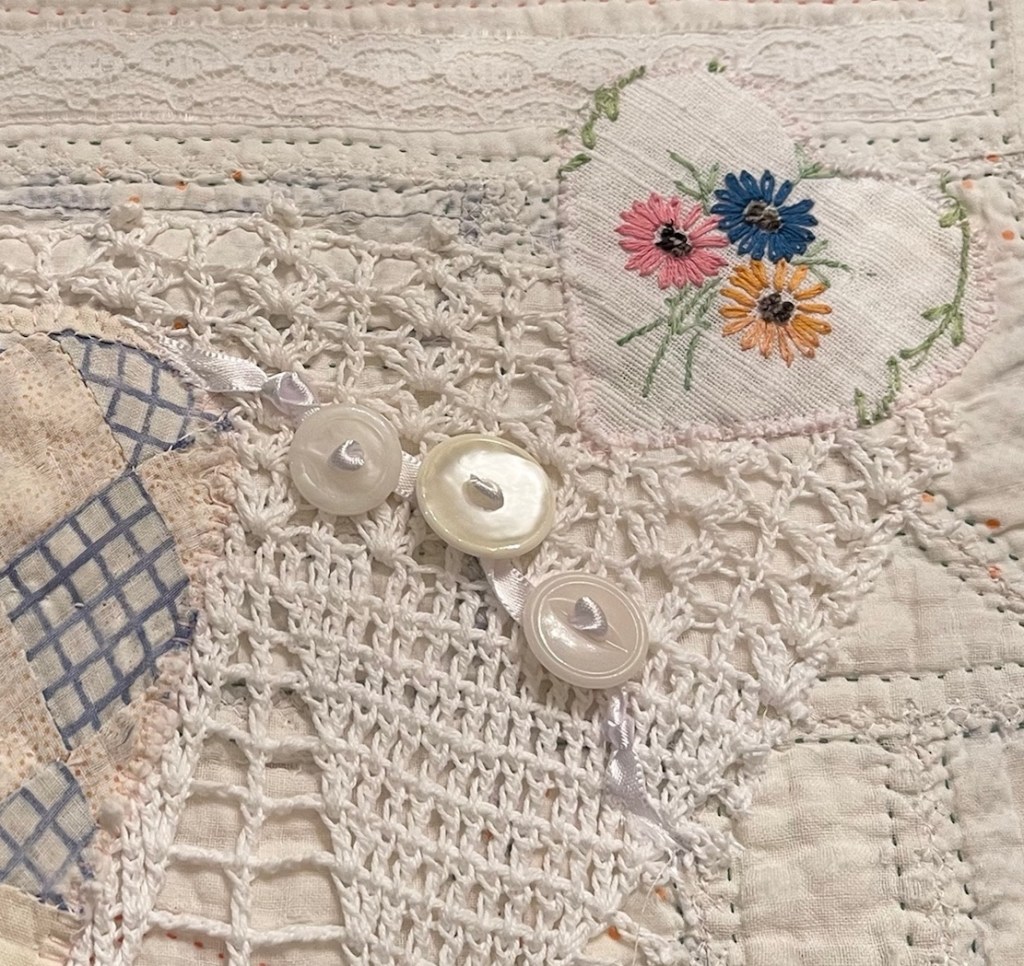
Once my button swags are stitched I can then add narrow ribbon button to button. To add interest I often will knot the ribbon both at the start and finish of the button swag as well as in the middle of each button.
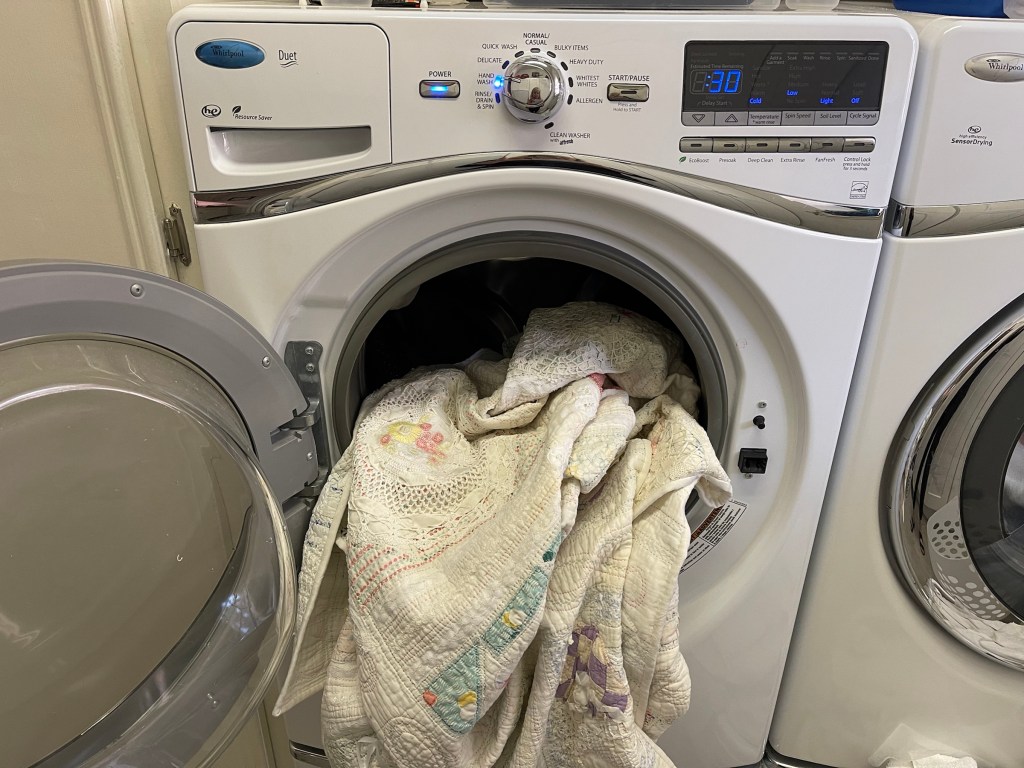
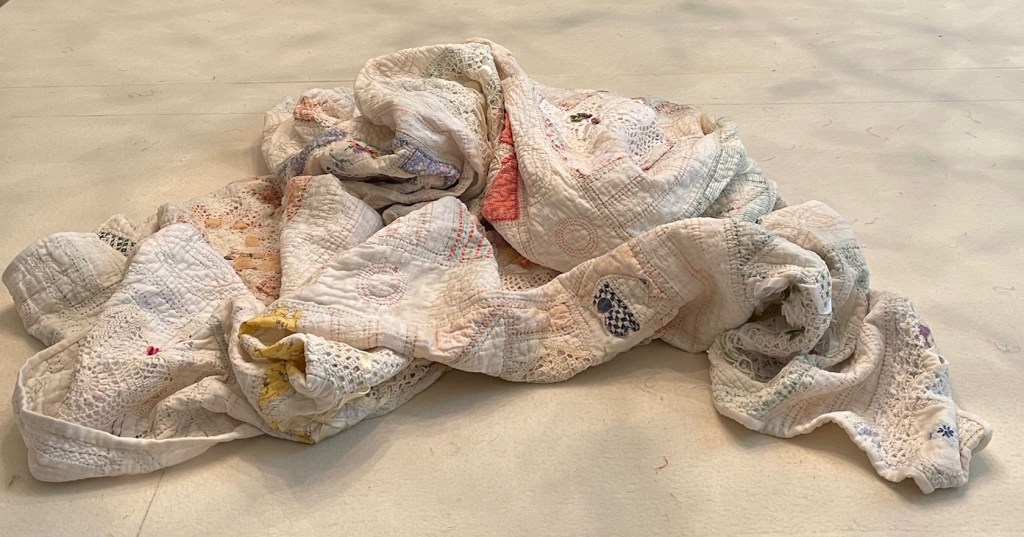
A trip through the washing machine and the quilt is ready to be blocked. Why block? The quilt I started with is old, well used and well laundered. As such it has shrunk a bit. When I machine stitched the vintage light ivory damask tablecloth binding to the quilt, the very act of stitching and the presser foot causes the quilt to slightly stretch out to more of its original size. Does this make sense? As such, the body of the quilt remains slightly smaller while the edges are now closer to the original quilt size. The result: wonky/wavy quilt binding edges.
By washing and then blocking the quilt you will be able to tame this misshapen quilt. If I am blocking a Show Worthy Quilt I block pin at least every 1/2”. For this fun utility quilt I pin about every inch.
I did an experiment yesterday with this quilt. After it was blocked and 110% dry I didn’t like the overall feel. It wasn’t super soft and snuggly so I sent the piece through the washer again and then on to the dryer with wool dryer balls and half a sheet of unscented fabric softener. Ooooohhhhhh it came out perfect and the edges were not wonky!
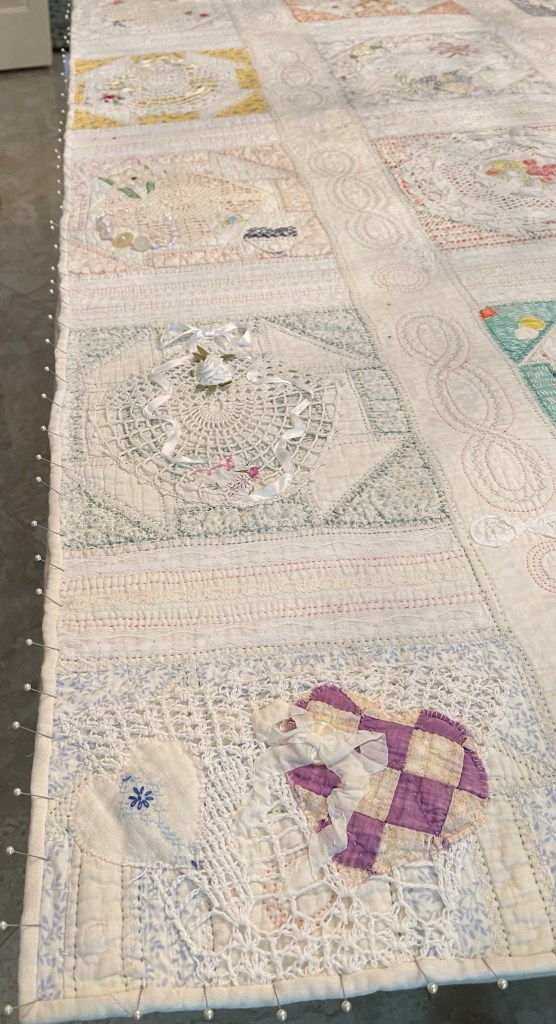
Ready for close-ups of the 30 finished blocks?
And the back? Remember in blog post #1 I said I was super careful to use thread that matched the back fabric? This is why, I wanted the green and the orange original quilting thread to remain the focus of the quilt back:
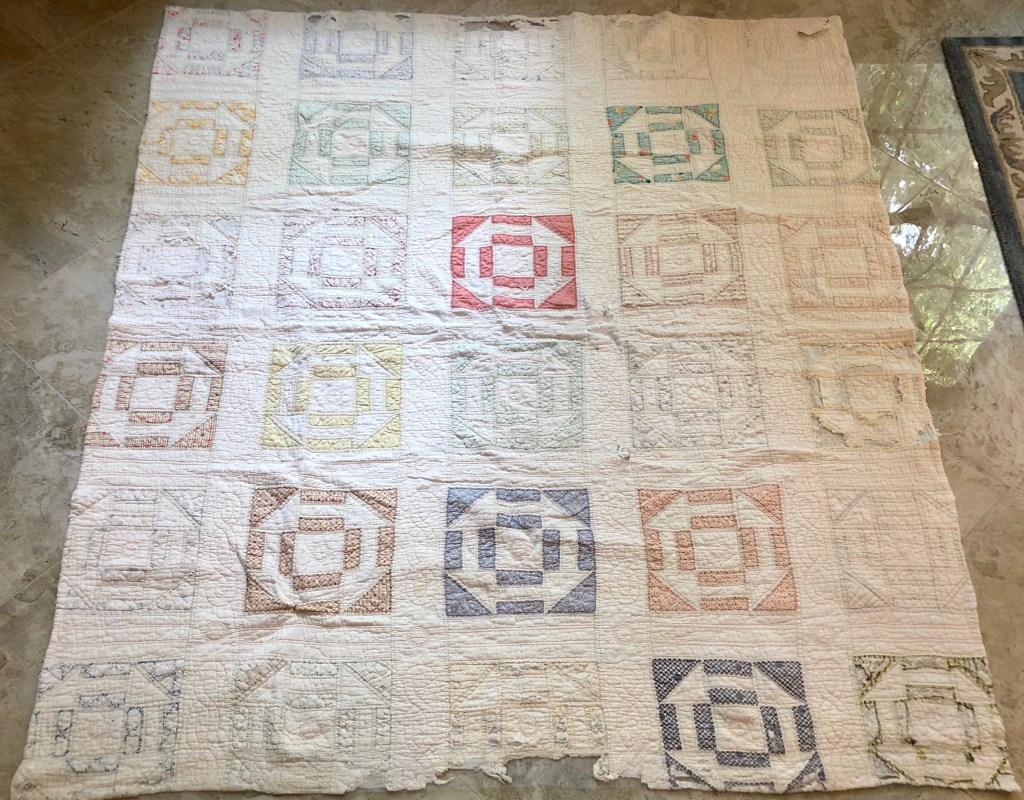
As a reminder, above is the original sad but well loved quilt and below is the finished piece:
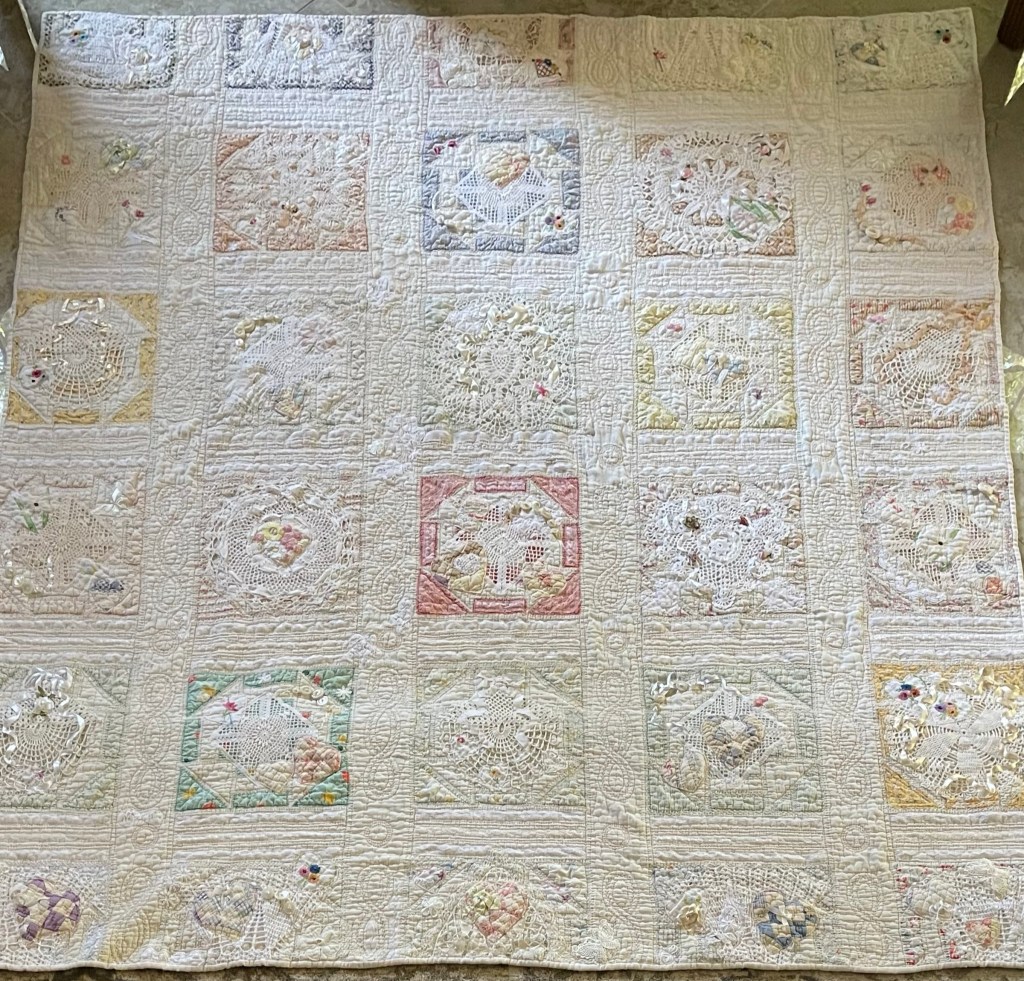
I made this piece to be used (or sometimes termed a Utility Quilt) and I’m hopeful that will happen.
Are you challenged to save/rescue a quilt? I sure hope so! Blessings and Happy Quilting, Rhonda

Hi Rhonda, I love this! I have all my grandmother’s crocheted doilies and my husband’s grandmothers hand quilted quilts. I would love to do this with them. You have so many tips and I love that you did this on the machine. Can’t wait to get started on my family heirlooms. Good job and gorgeous work!
LikeLiked by 1 person
❤️
LikeLike
Amazing, you are such an inspiration. I absolutely love old linens.
LikeLiked by 1 person
I am always in a trance when I read about your work. I started trying to recuse old quilts by going out a buying old quilts from Goodwill and getting home with them and say to myself “have you lost your mind”. I have purchased several. Still in bags. Afraid to try. I say to myself you are old (80+) an no one cares about them like you. I have ALL materials needed (vintage- handkerchiefs, scares, ribbons, lace, buttons etc) but just don’t have the willpower to get started. After reading your articles I think I can do anything but falling short the next day. Maybe if I rereads your post again I can get the courage to try. I am not going to give up. Waiting on the next rescue. Thanks for sharing.
Hastle Murray
Houston, Texas
hastlemurray@yahoo.com
LikeLiked by 2 people
hi from England! This is the most beautiful thing I’ve ever seen online – thank you for sharing! Jan
LikeLiked by 2 people
❤️
LikeLike
I love all of your inspirations!!! They are beautiful. I hope sometime I’ll have time to do something like this! It is my goal!
LikeLiked by 1 person
Thank you for your kind words! ❤️
LikeLike
Love it!! I think this is my favorite of all!!! I have lots of doilies, handkerchiefs, embroidery and odd quilt pieces that were my grandmother’s and my mother’s and some from strangers. Have been working on how to work all these together you have given me great ideas. Thank you!
LikeLiked by 1 person
Thank you for your kind words!!
LikeLike
WOW!!! it’s an amazing improvement!
LikeLiked by 1 person
Marvelous, Rhonda. You saved another quilt; thank you. Your vision when it comes to ‘old’ pieces and quilts is incredible. What a purpose!
LikeLiked by 1 person
Thank you!
LikeLike
Absolutely beautiful. Would this be something you enter at the big show in Paducah?
LikeLiked by 1 person
Thank you! To the best of my knowledge Paducah does not have a category that would fit this type of quilt??
LikeLike
As always I am in awe of how you not only save but re-imagine these well loved quilts! Thanks for sharing your process with us – it is inspirational! I have a few quilt tops (not quilted yet) that need some repair. I hope to do them justice to give them new life, but they sure won’t be as beautiful as yours!!
LikeLiked by 1 person
Thank you! ❤️
LikeLike
Rhonda, your sharing of the details, with pictures, is so gratefully appreciated. For those of us who are hesitant to jump in and try something different, you give us the confidence that we can do it. Because, it’s all layer out, in examples, one step at a time!! Thank you so much for sharing your talent!!
LikeLiked by 1 person
Thank you!! ❤️
LikeLike
Absolutely beautiful. Wonderful ideas to save a old quilt.
LikeLiked by 2 people
Thank you! ❤️
LikeLike
What an inspiration! I recently purchased a quilt on an online auction. When I picked it up it was heavy with dirt and dust. That should have been my first clue, right? I soaked it in my bathtub for two days using Oxyclean changing the disgusting brown water both days. As one can imagine, it was twice as heavy taking it out , trying to squeeze out as much water as I could. I carried it to the washer soaking myself and the floor, lol. Unfortunately, it was a terrific mess after washing it! Some of the fabric was rotten, batting fell out , the edges are frayed, ugh! I hung it out to dry in the sunshine anyway though I was tempted to just throw it out. There is some very pretty fabric left and you have shown me that I can salvage that. Thank you so much! Your creativity is amazing and gives me hope. Thank you again! Dee Dee
LikeLiked by 1 person
Wonderful! Thank you for your kind words! I know what’s it’s like to try and clean a super dirty quilt! So glad you’re planning a “save/rescue”!
LikeLiked by 1 person
You’re amazing!!! Beautiful work!
LikeLiked by 1 person
Thank you!
LikeLike