
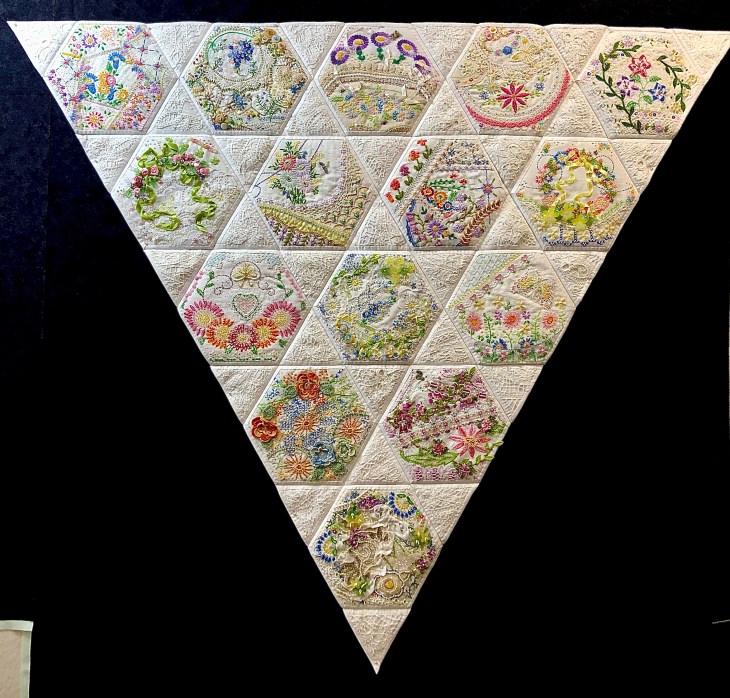
I might name this “The Project That Went On Forever” quilt. I started this in 2015 as part of the international CQJP group, the Crazy Quilt Journal Project. The idea was to make one block each month and then post the finished picture to the group. I kept up for the first 4? months and then life got in the way. If you go back to the post of 10/31/2016 you’ll see some early on pictures of how this project began. Slowly but surely I worked my way through all 15 embellished hexagons and 31 embellished equilateral triangles. Both the hexies and triangles are constructed in the same manner, backing fabric that wraps around to the front to form a 1/4″ white border/frame making each of the 46 fully finished stand alone pieces. I hand stitched them right sides together in the fashion of EPP (English Paper Piecing) using a thin strong white thread making tiny whip stitches.
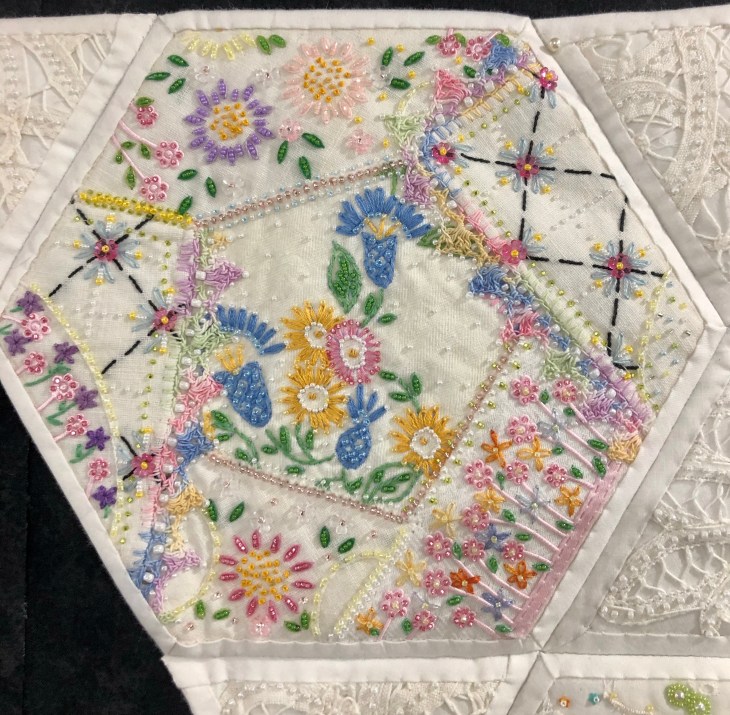
The hexagons vary, each one completely different, the white triangles are uniform in appearance. This hexie above, while 6 sided is made by sewing strips to each of the 5 sides of the center pentagon.
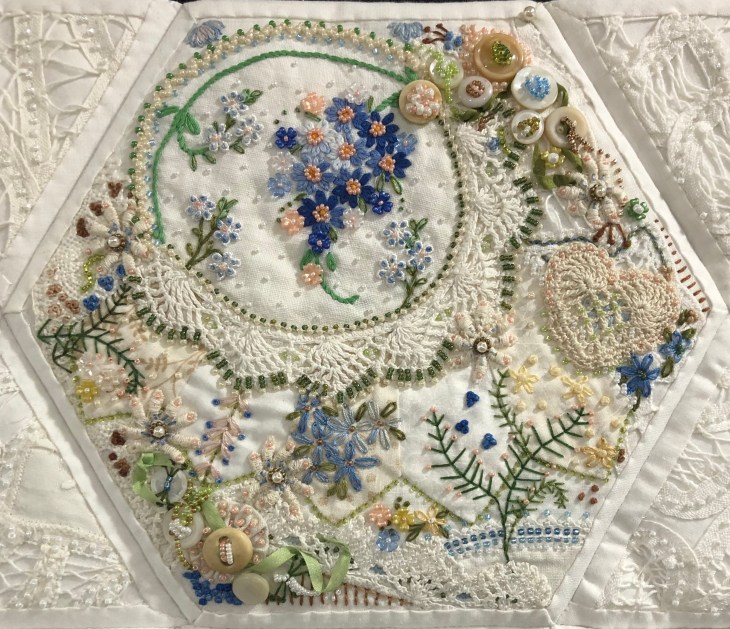
This piece features a vintage embroidered flower spray doily with an ivory hand crocheted edging. The remaining embroidery was done my your truly to enhance the vintage work. Look closely and you can pick out the ivory Dresden Plate.
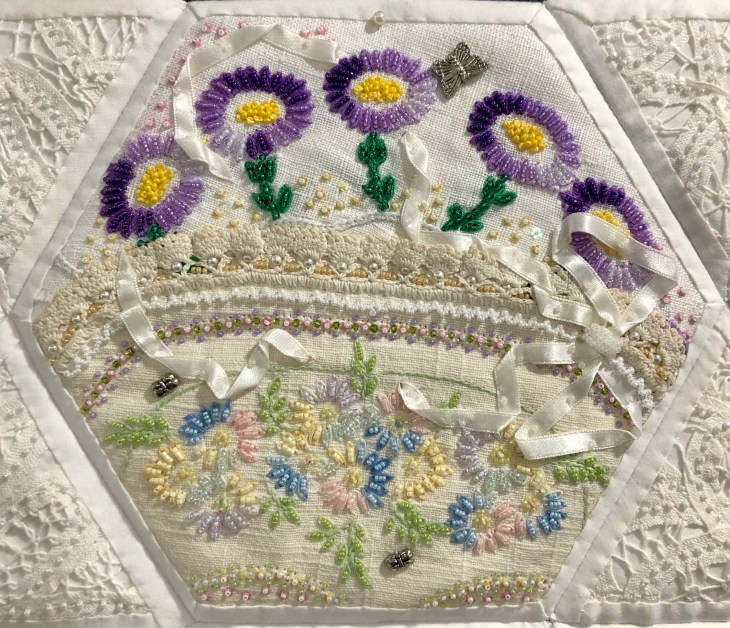
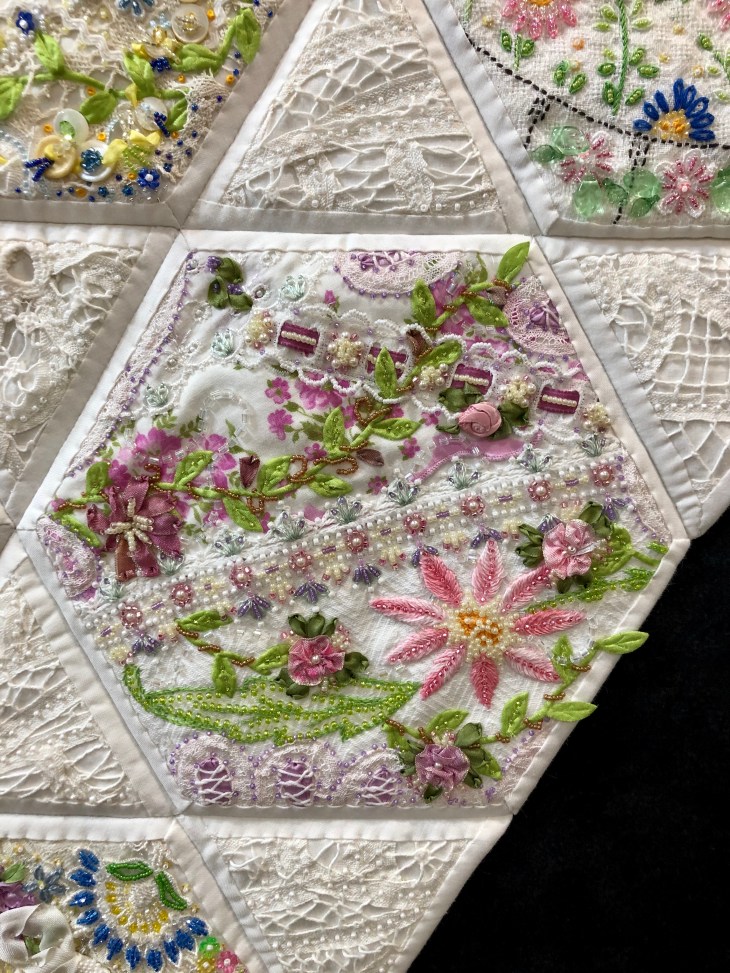
Beautiful purple/lavender flowers crown this hexagon. They were cut from a seriously damaged vintage table-topper I found at an antique shop in Huntsville, TX. Visually they are very strong and needed a softer base on which to sit. The band of ivory trim separating them from the soft flowers beneath give the eye a place to find comfort.

An old pink and white edged doily became the focal point for this piece. The dressed up ivory butterfly is a new piece but it blends in nicely with all the other old things. This piece is visually “bottom-heavy” with the large pink flower commanding center stage. All the pieces above the flower serve to compliment and draw the eye away after it’s had enough pink!

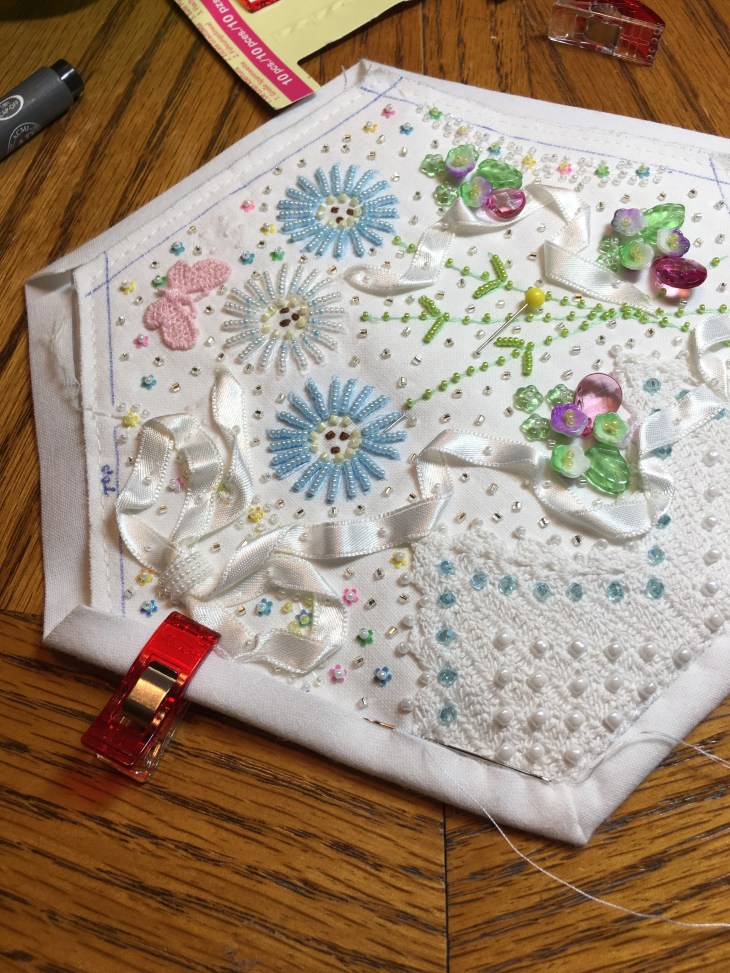
Here’s another example of a center 5 sided pentagon fashioned into a 6 sided hexagon with the addition of side panels. The green ribbon leaf vine is new, from a craft store.
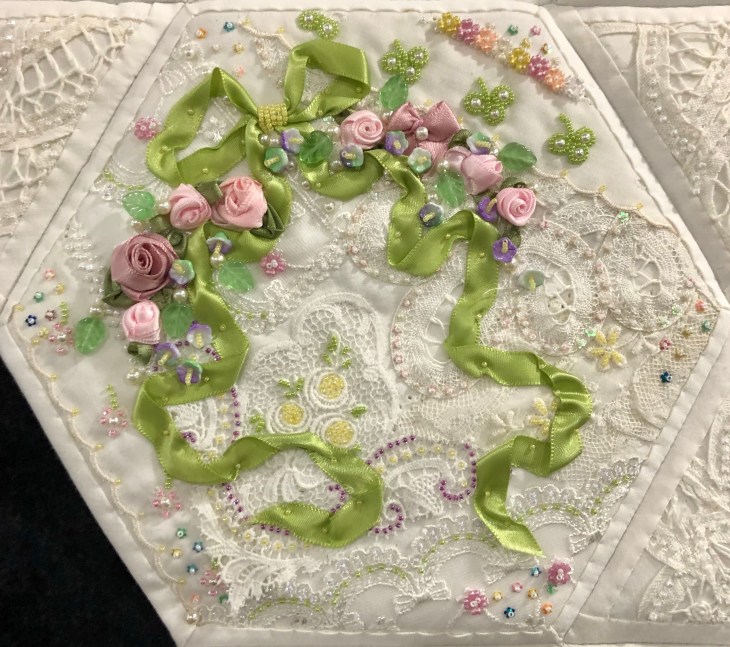
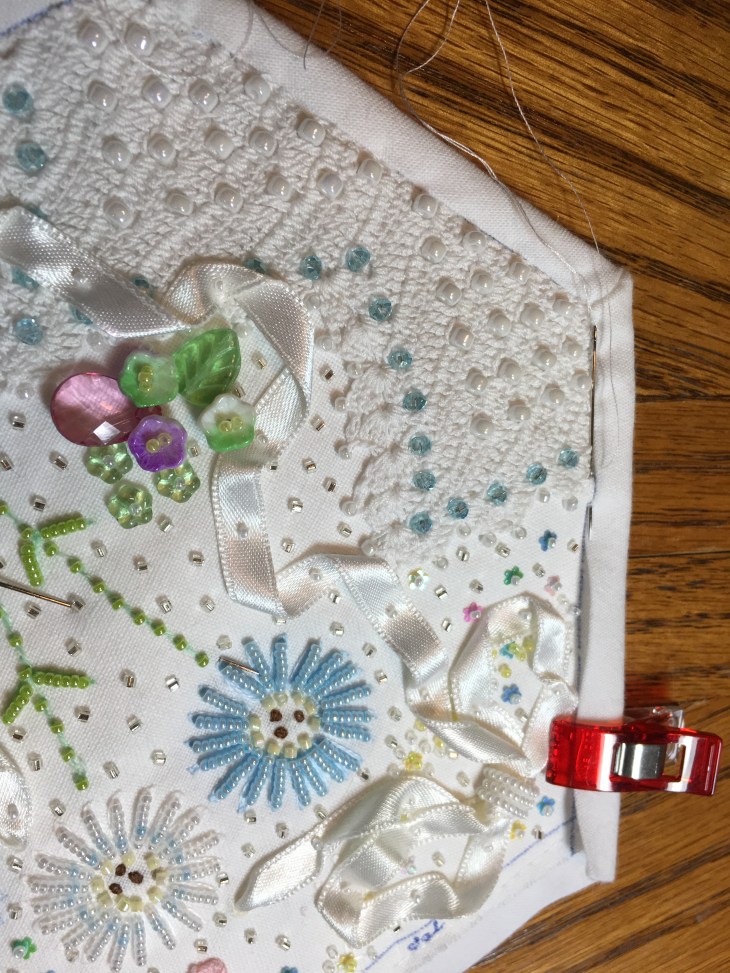
Battenburg lace, white wedding handkerchiefs, commercial new and vintage white trims provided a wonderful base to be embellished with beautiful spring green satin ribbon, new silk roses, tiny glass lavender/green and white flowers. The tiniest little multi color flowers with the size 15 Ceylon white beads are sequins!

I added lots of hand embroidery to this piece. I used a strong pink to couch the dark blue lines of embroidery, added the yellow wheat looking sprays, learned how to do a bullion stitch (never again…..) added the spring green leaves and the yellow french knots to the flower centers. See all the other embroidery? I did that too. This piece needed a lot!

The above hexagon is one of my favorites! It’s just jam-packed with visuals in each of the 6 sections.

Have you ever worked with Lucite flowers? They were in the jewelry section of my long gone favorite bead shop. They add such depth to a piece!

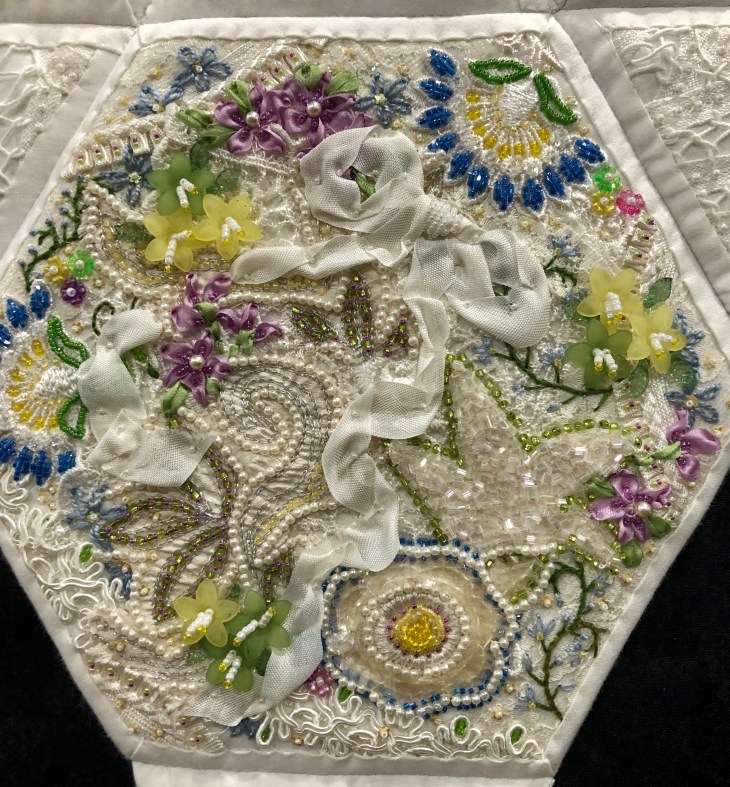
Speaking of symmetry, this piece is the epitome of! Both the heart and the butterfly are new pieces I embellished.

I don’t know what to say about this piece except I love it!

Above, the butterfly is new, the flowers are part of a vintage table topper.
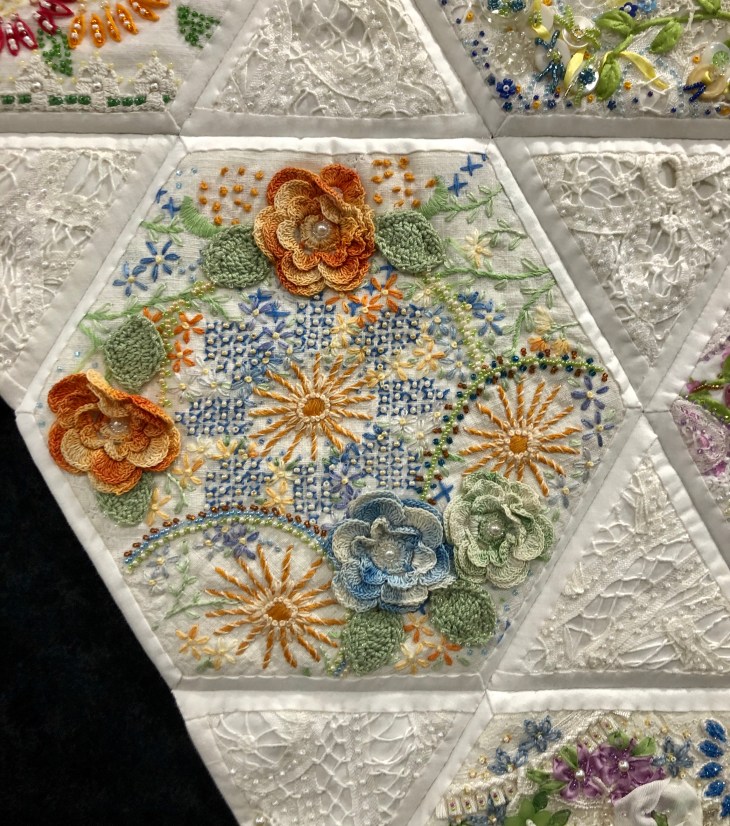
This orange and blue hexie took forever but I feel it was worth the time and effort. I’m not a blue or orange person but after having worked with this for so long I came to understand how they work so well together. The crochet flowers were saved from a very damaged doily.
I think in almost every project I have a fav and a not-so-fav… The above is the latter. This piece just never spoke to me. I spent hours on it, gave it some serious attention but like I said, it fits nicely, just not my fav…
And finally, this is Kim’s wedding jacket, or at least parts of it cut up, re-positioned and embellished. This piece was entirely ivory before the bead explosion.

While this hexagon is not part of this particular quilt, its a good exploded example to show you the 5 layers to each of the 46 pieces. 1. the front to be embellished 2. white cotton muslin 3. white medium weight machine embroidery cut away stabilizer 4. white 50/50 cotton poly quilt batting 5. again, white cotton muslin. Just so we’re all on the same page, please know that the stabilizer is cut away, not tear away and it stays in the hexagon sandwich. As you embellish the front of your hexagon you are stitching through the front, the muslin and the stabilizer.
The embellishing is done through the first three layers. Once the final do-dad had been added, a layer of batting and the backing fabric are set in place.
The backing fabric is cut 5/8″ larger on all sides. It is folded once to meet the raw edge of the embellished hexagon and the final fold will take it over the edge to the front where it frames the hexagon nicely and is hand stitched in place.
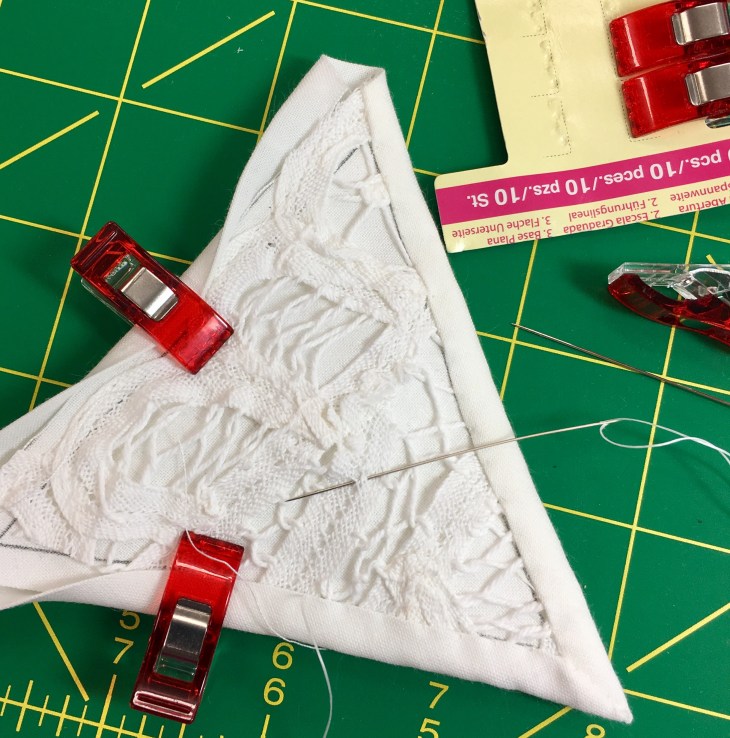
The triangles are done in exactly the same manner. You might notice this little piece has no tiny white beads… At first I felt that embellishing the triangles would draw attention away from the hexagons so I made all of them without beading. Well, I changed my mind so I had 31 of these little babies to bead after they were basically finished! Oh well… these things happen…
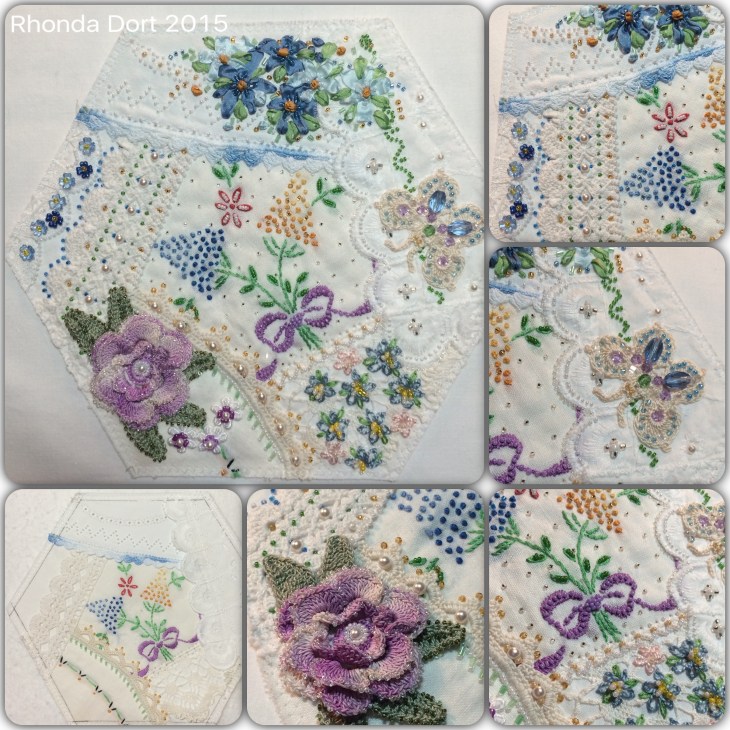
This final hexagon picture collage is in honor of the fully finished piece I lost while speaking to a Guild. I was carrying my project (before it was stitched together) on a display board from my car into the hotel when a huge storm hit! A gust of wind sent everything flying. It wasn’t until a few days later I discovered I had not recovered all the hexies. I was heartbroken 😦 sob sob…
All stitched together this giant triangle of embellished pieces measures 47 1/4″ on each of the 3 sides. So is it finished? No, I still have to attach a label and the sleeve, might just very well happen next week!
Thanks for reading this far! Let me know if you have questions!
Blessings to all and Happy Quilting,
Rhonda

