

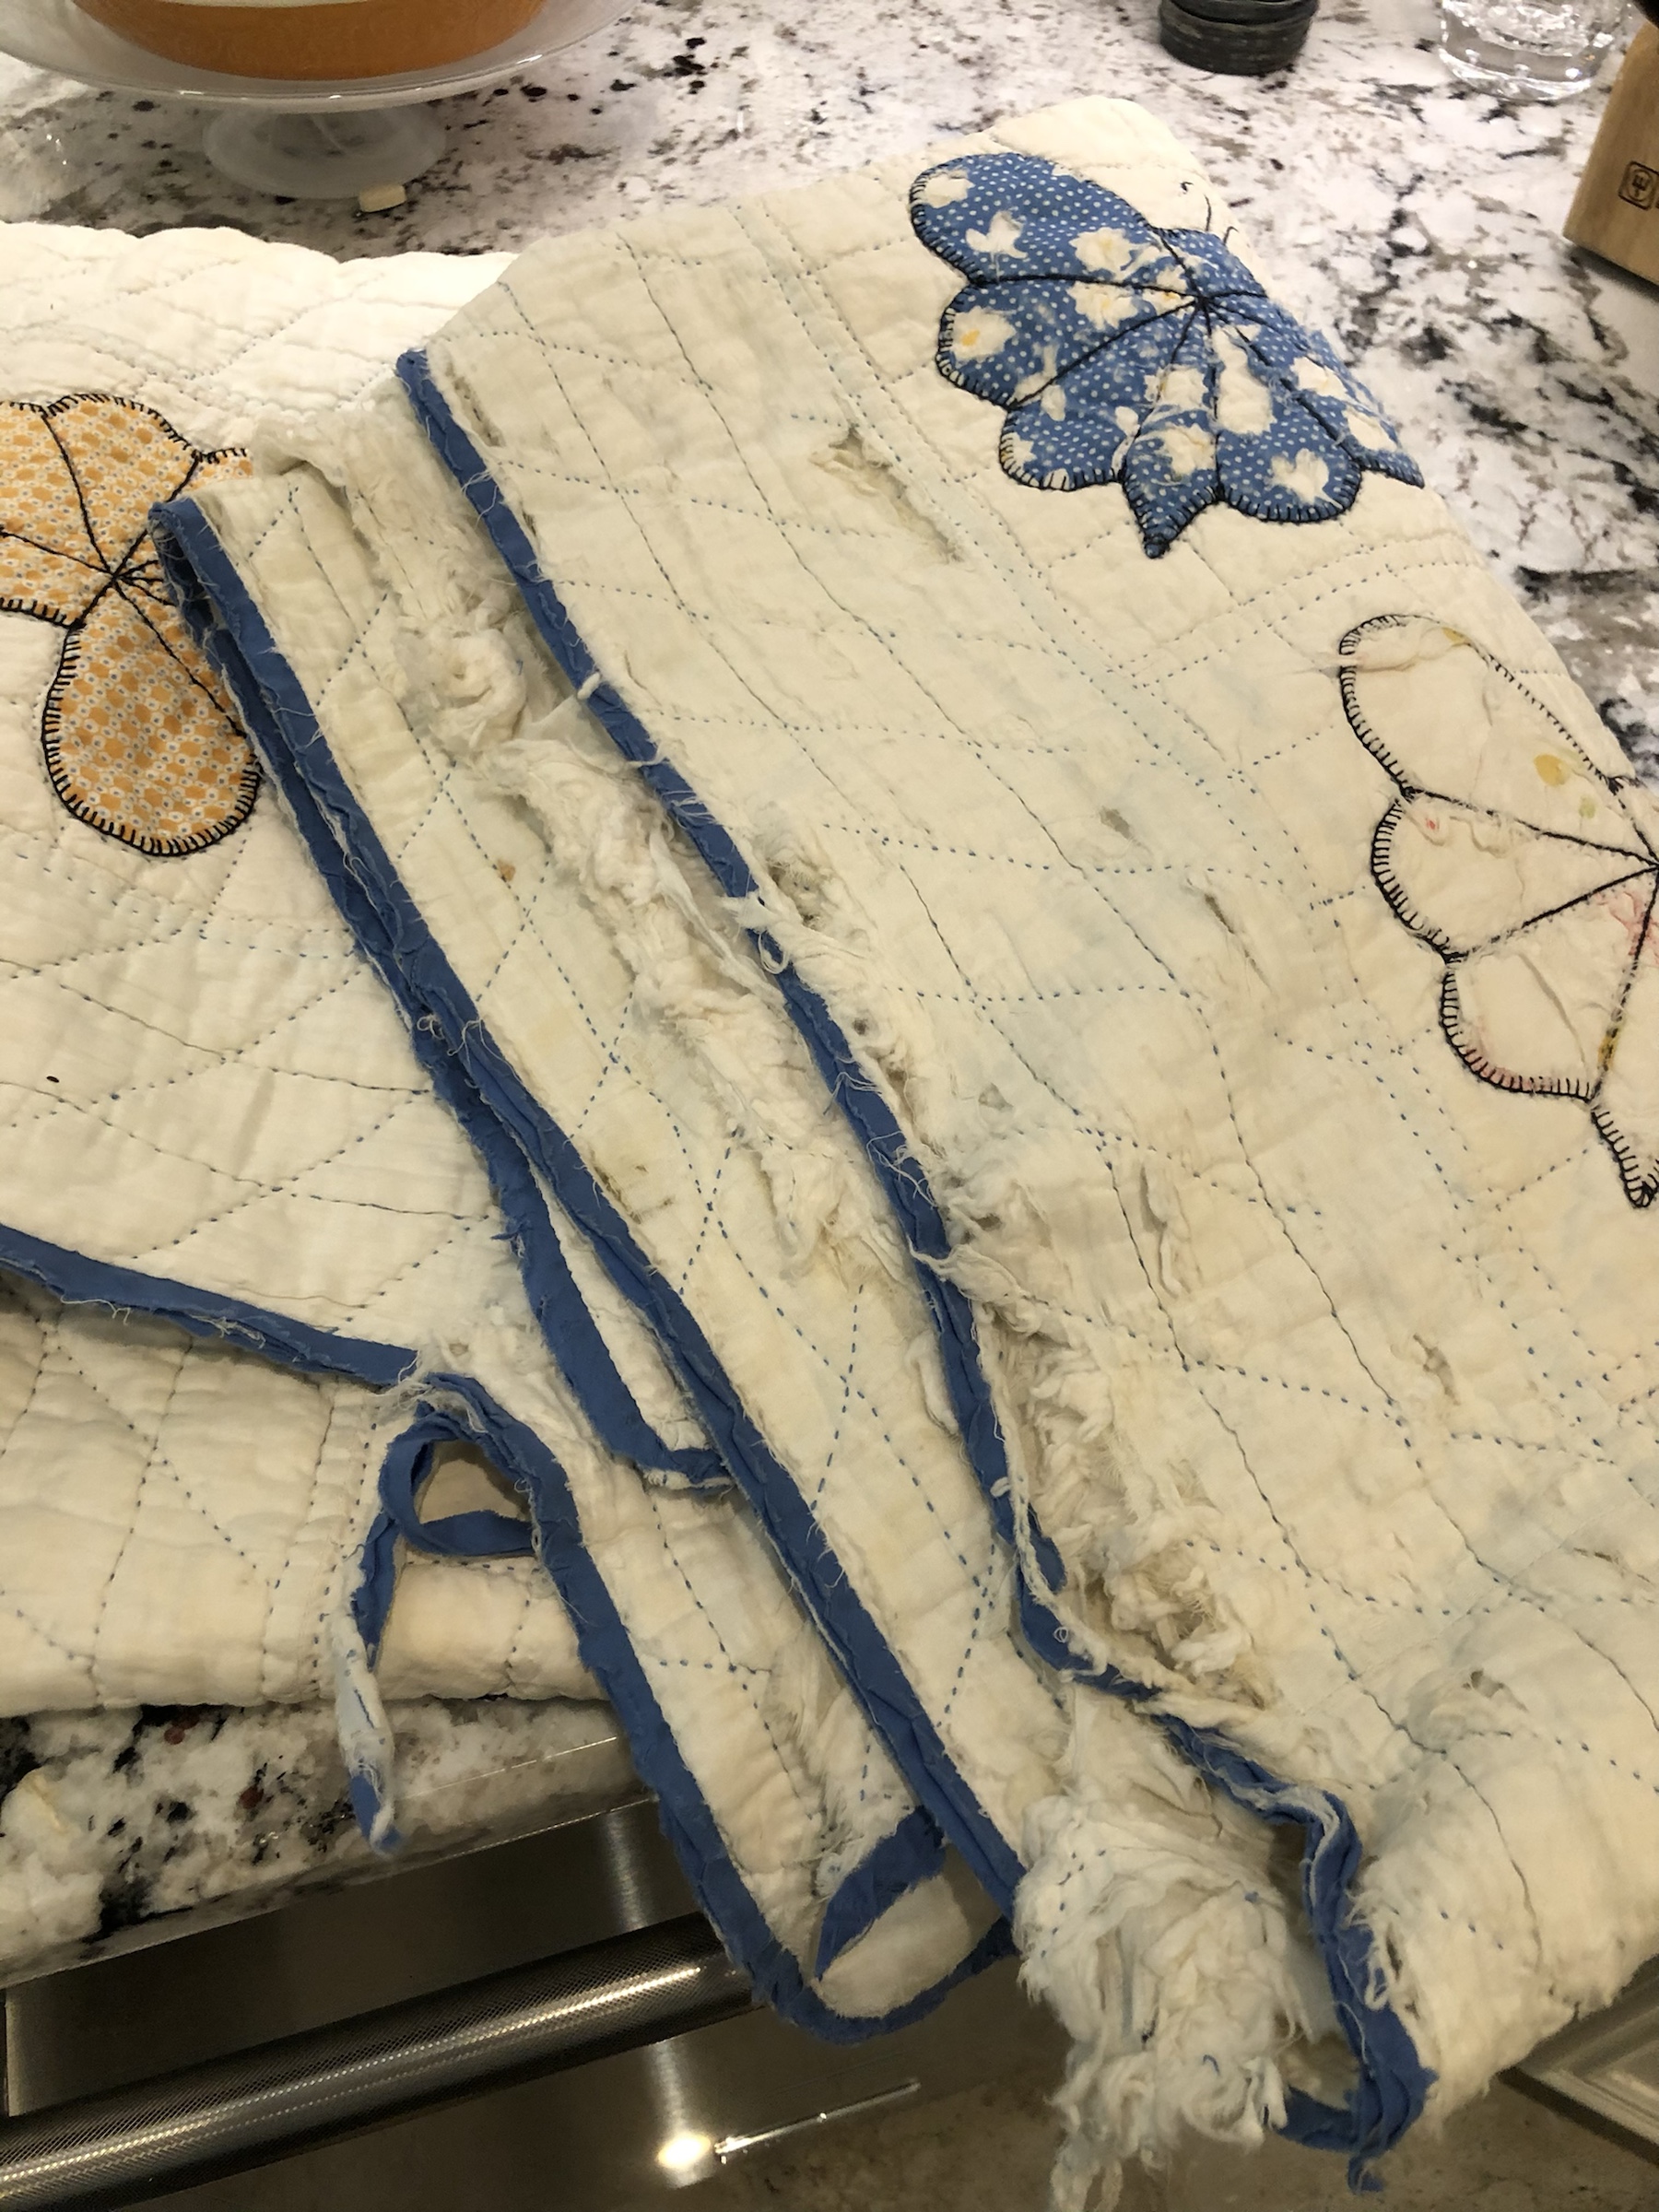
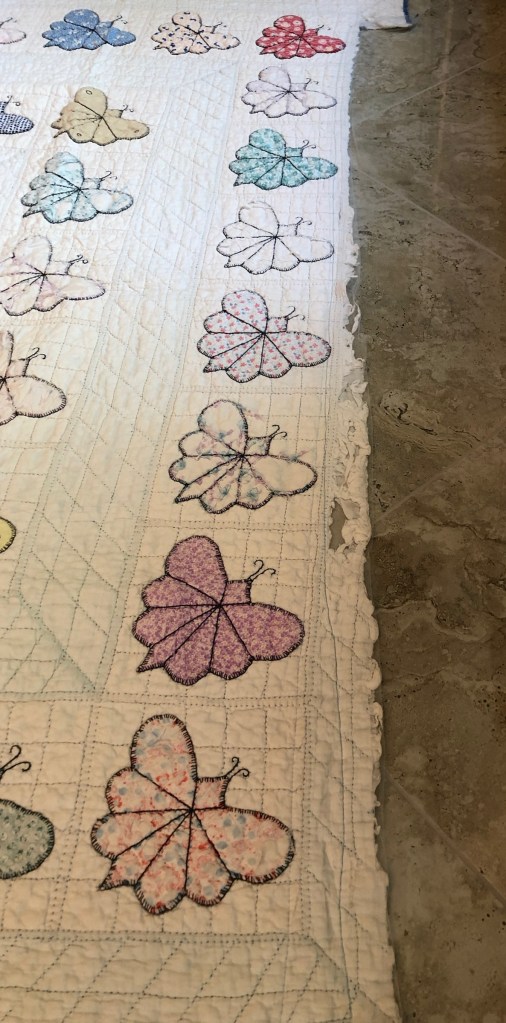
When the wonderfully soft and well worn vintage butterfly quilt arrived I knew I’d made an excellent eBay purchase. Not everyone would have looked at this quilt with the same perspective. It was ragged, worn, torn, faded and missing almost the entire top border.
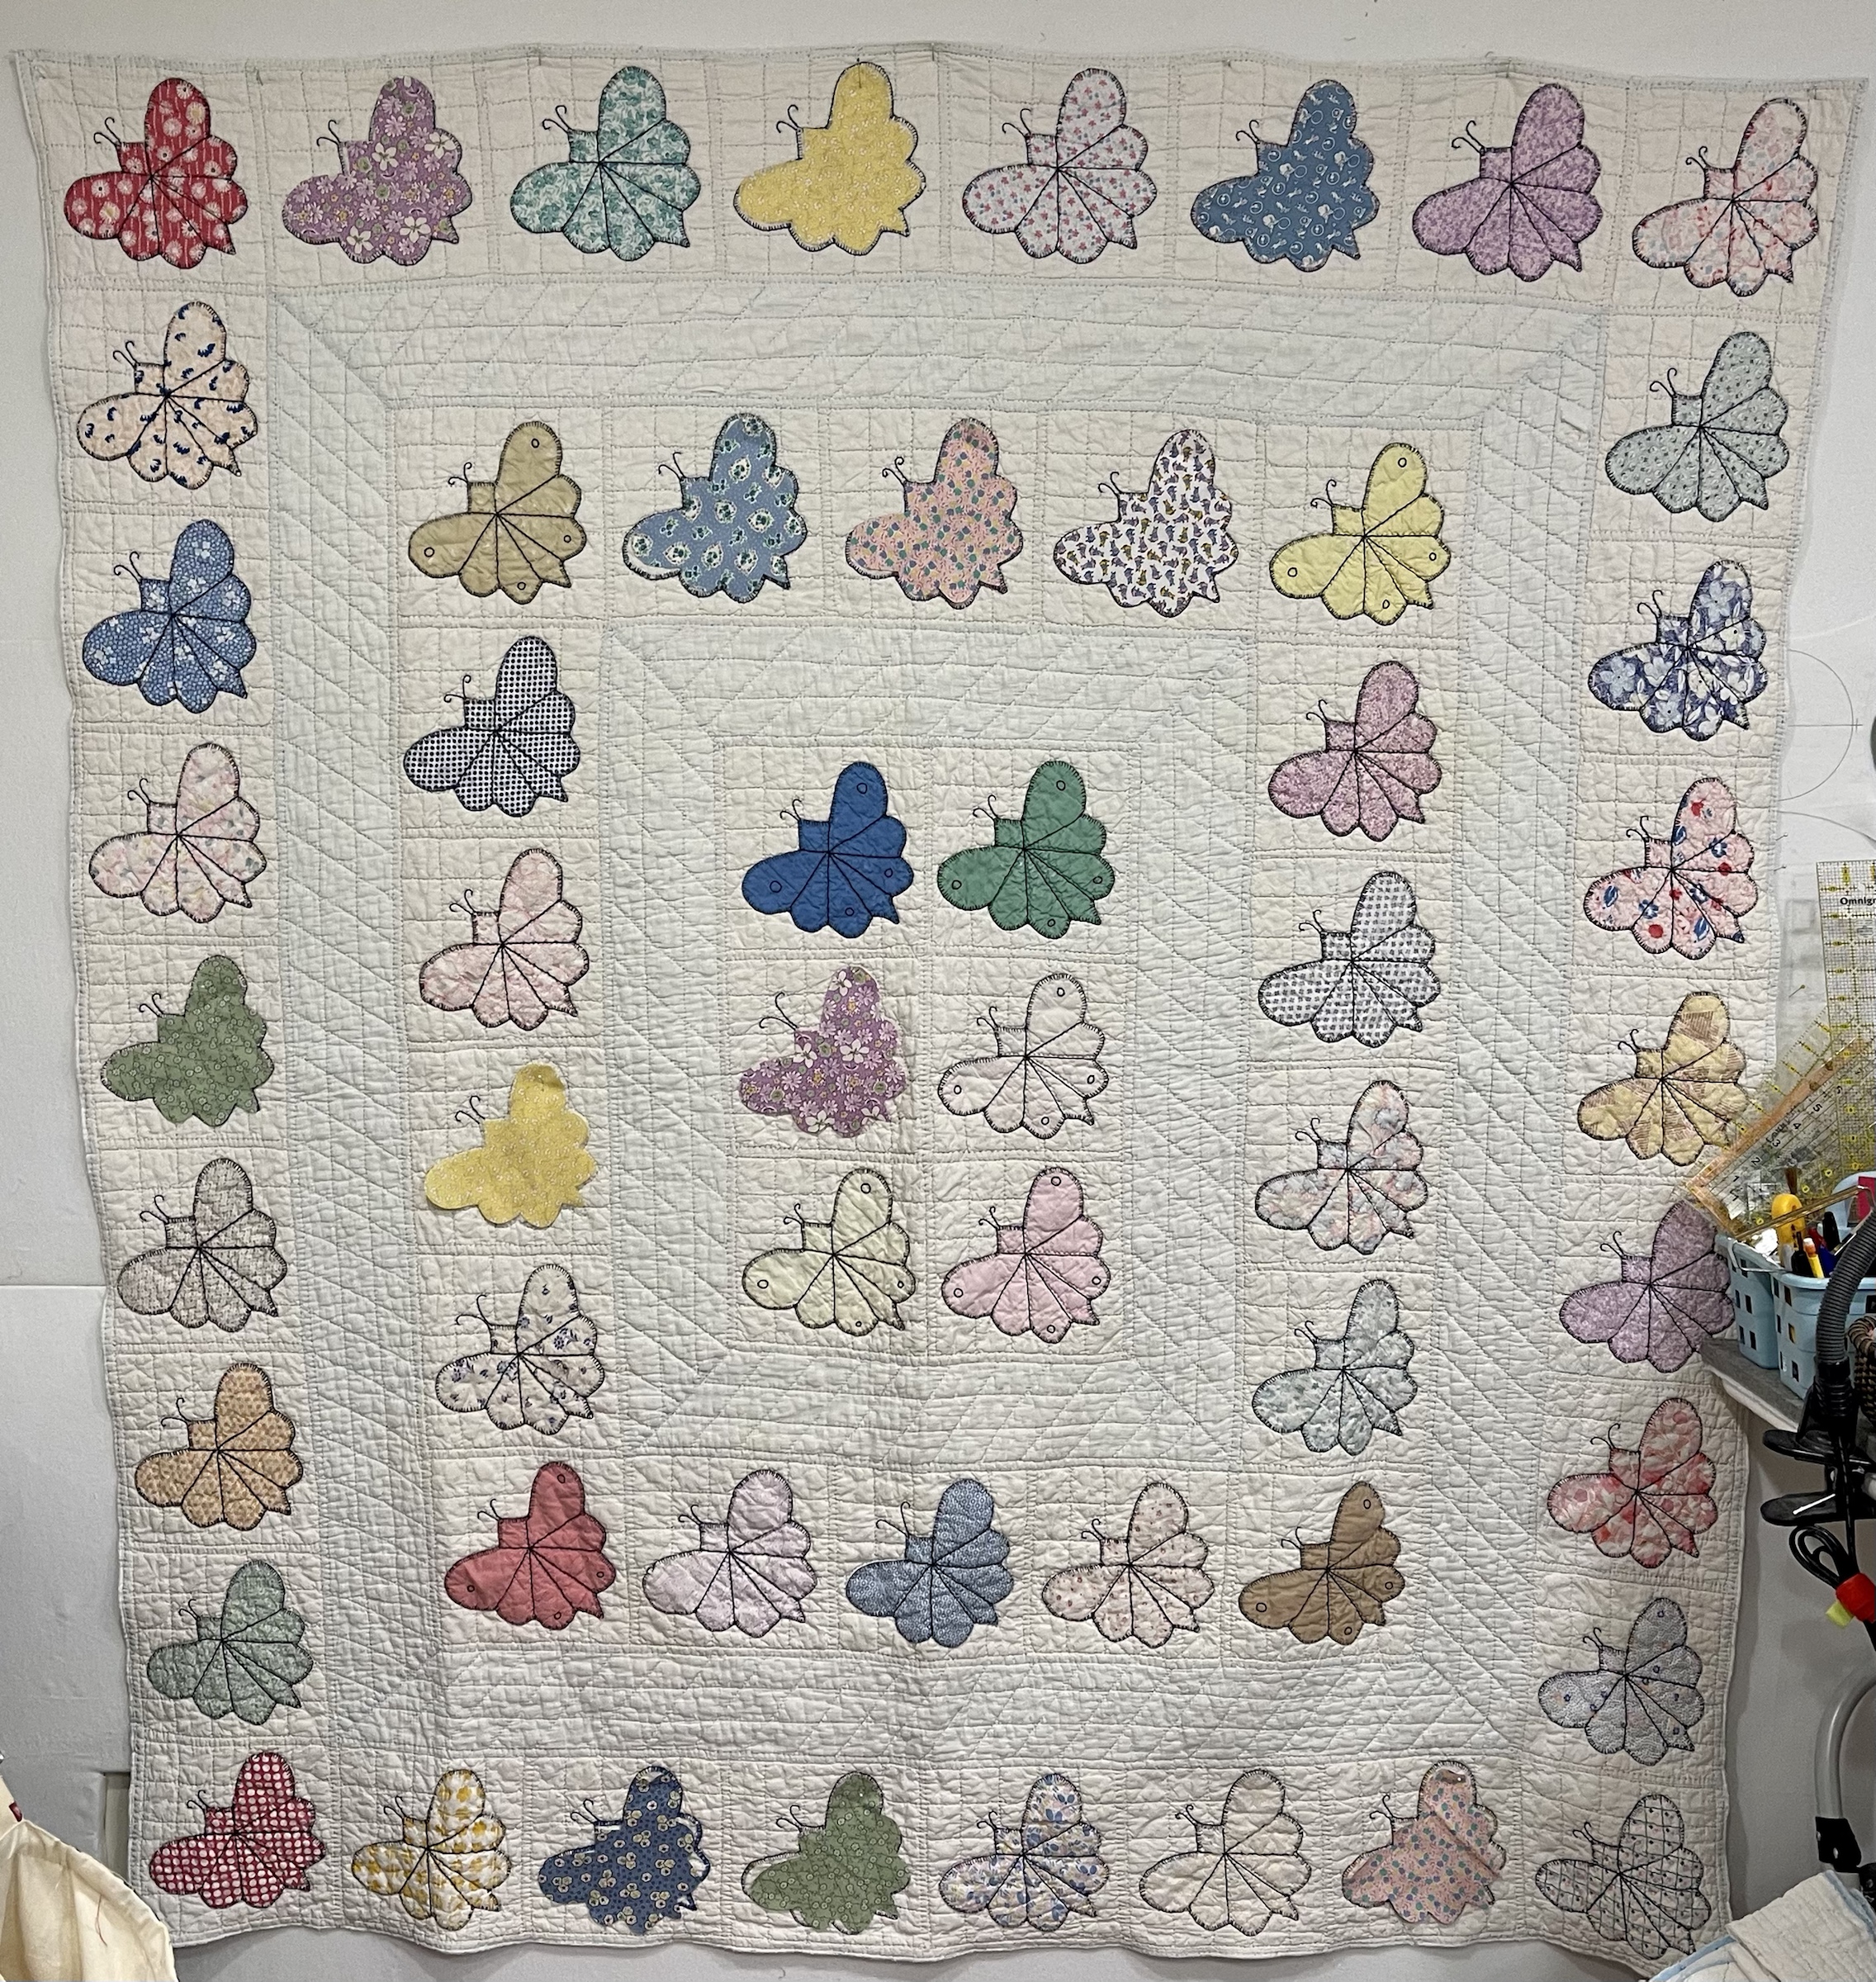
What does it look like as of a few hours ago? All I have left to do is decide on the binding fabric:
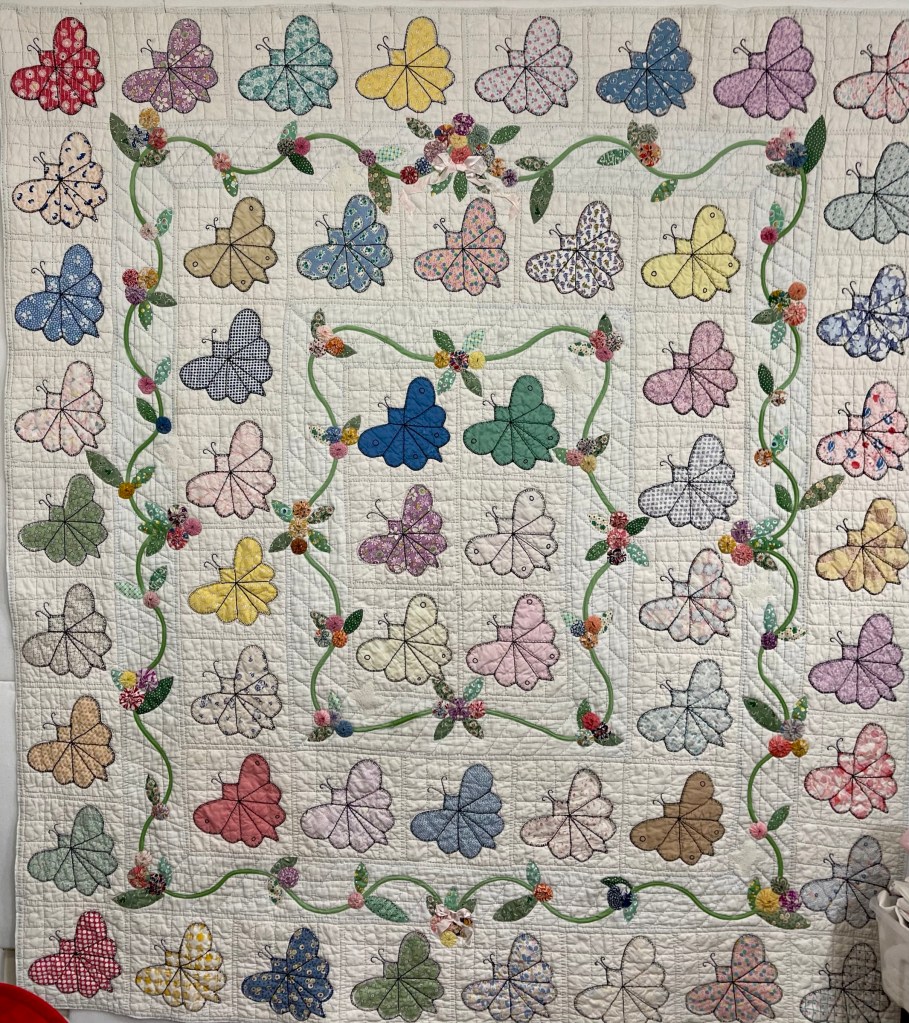
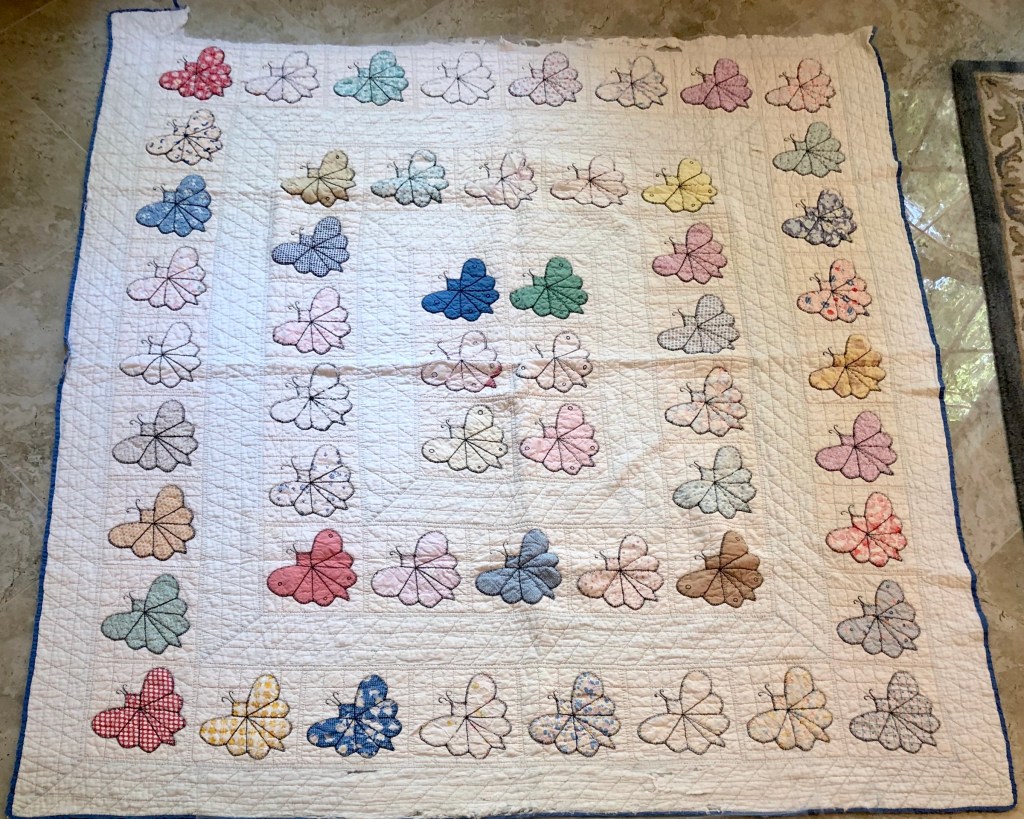
But how did I get from the pic below to the pic above? If you’re interested in saving an old quilt the way I do then follow along.
What I do is definitely not quilt restoration but rather I take an old well loved quilt and try my best to make it pretty and useable once again. I call the process “Saving” an old quilt.
This is what it looked like when I opened the shipping box.
Oh my! I knew the edge was bad but this is really bad!

But before any “beautification” takes place I need to address the “sneeze factor” that comes with almost every old quilt I purchase. I need to send the quilt to the Dort Day Spa but when edges are as bad as this quilt, that can mean problems.
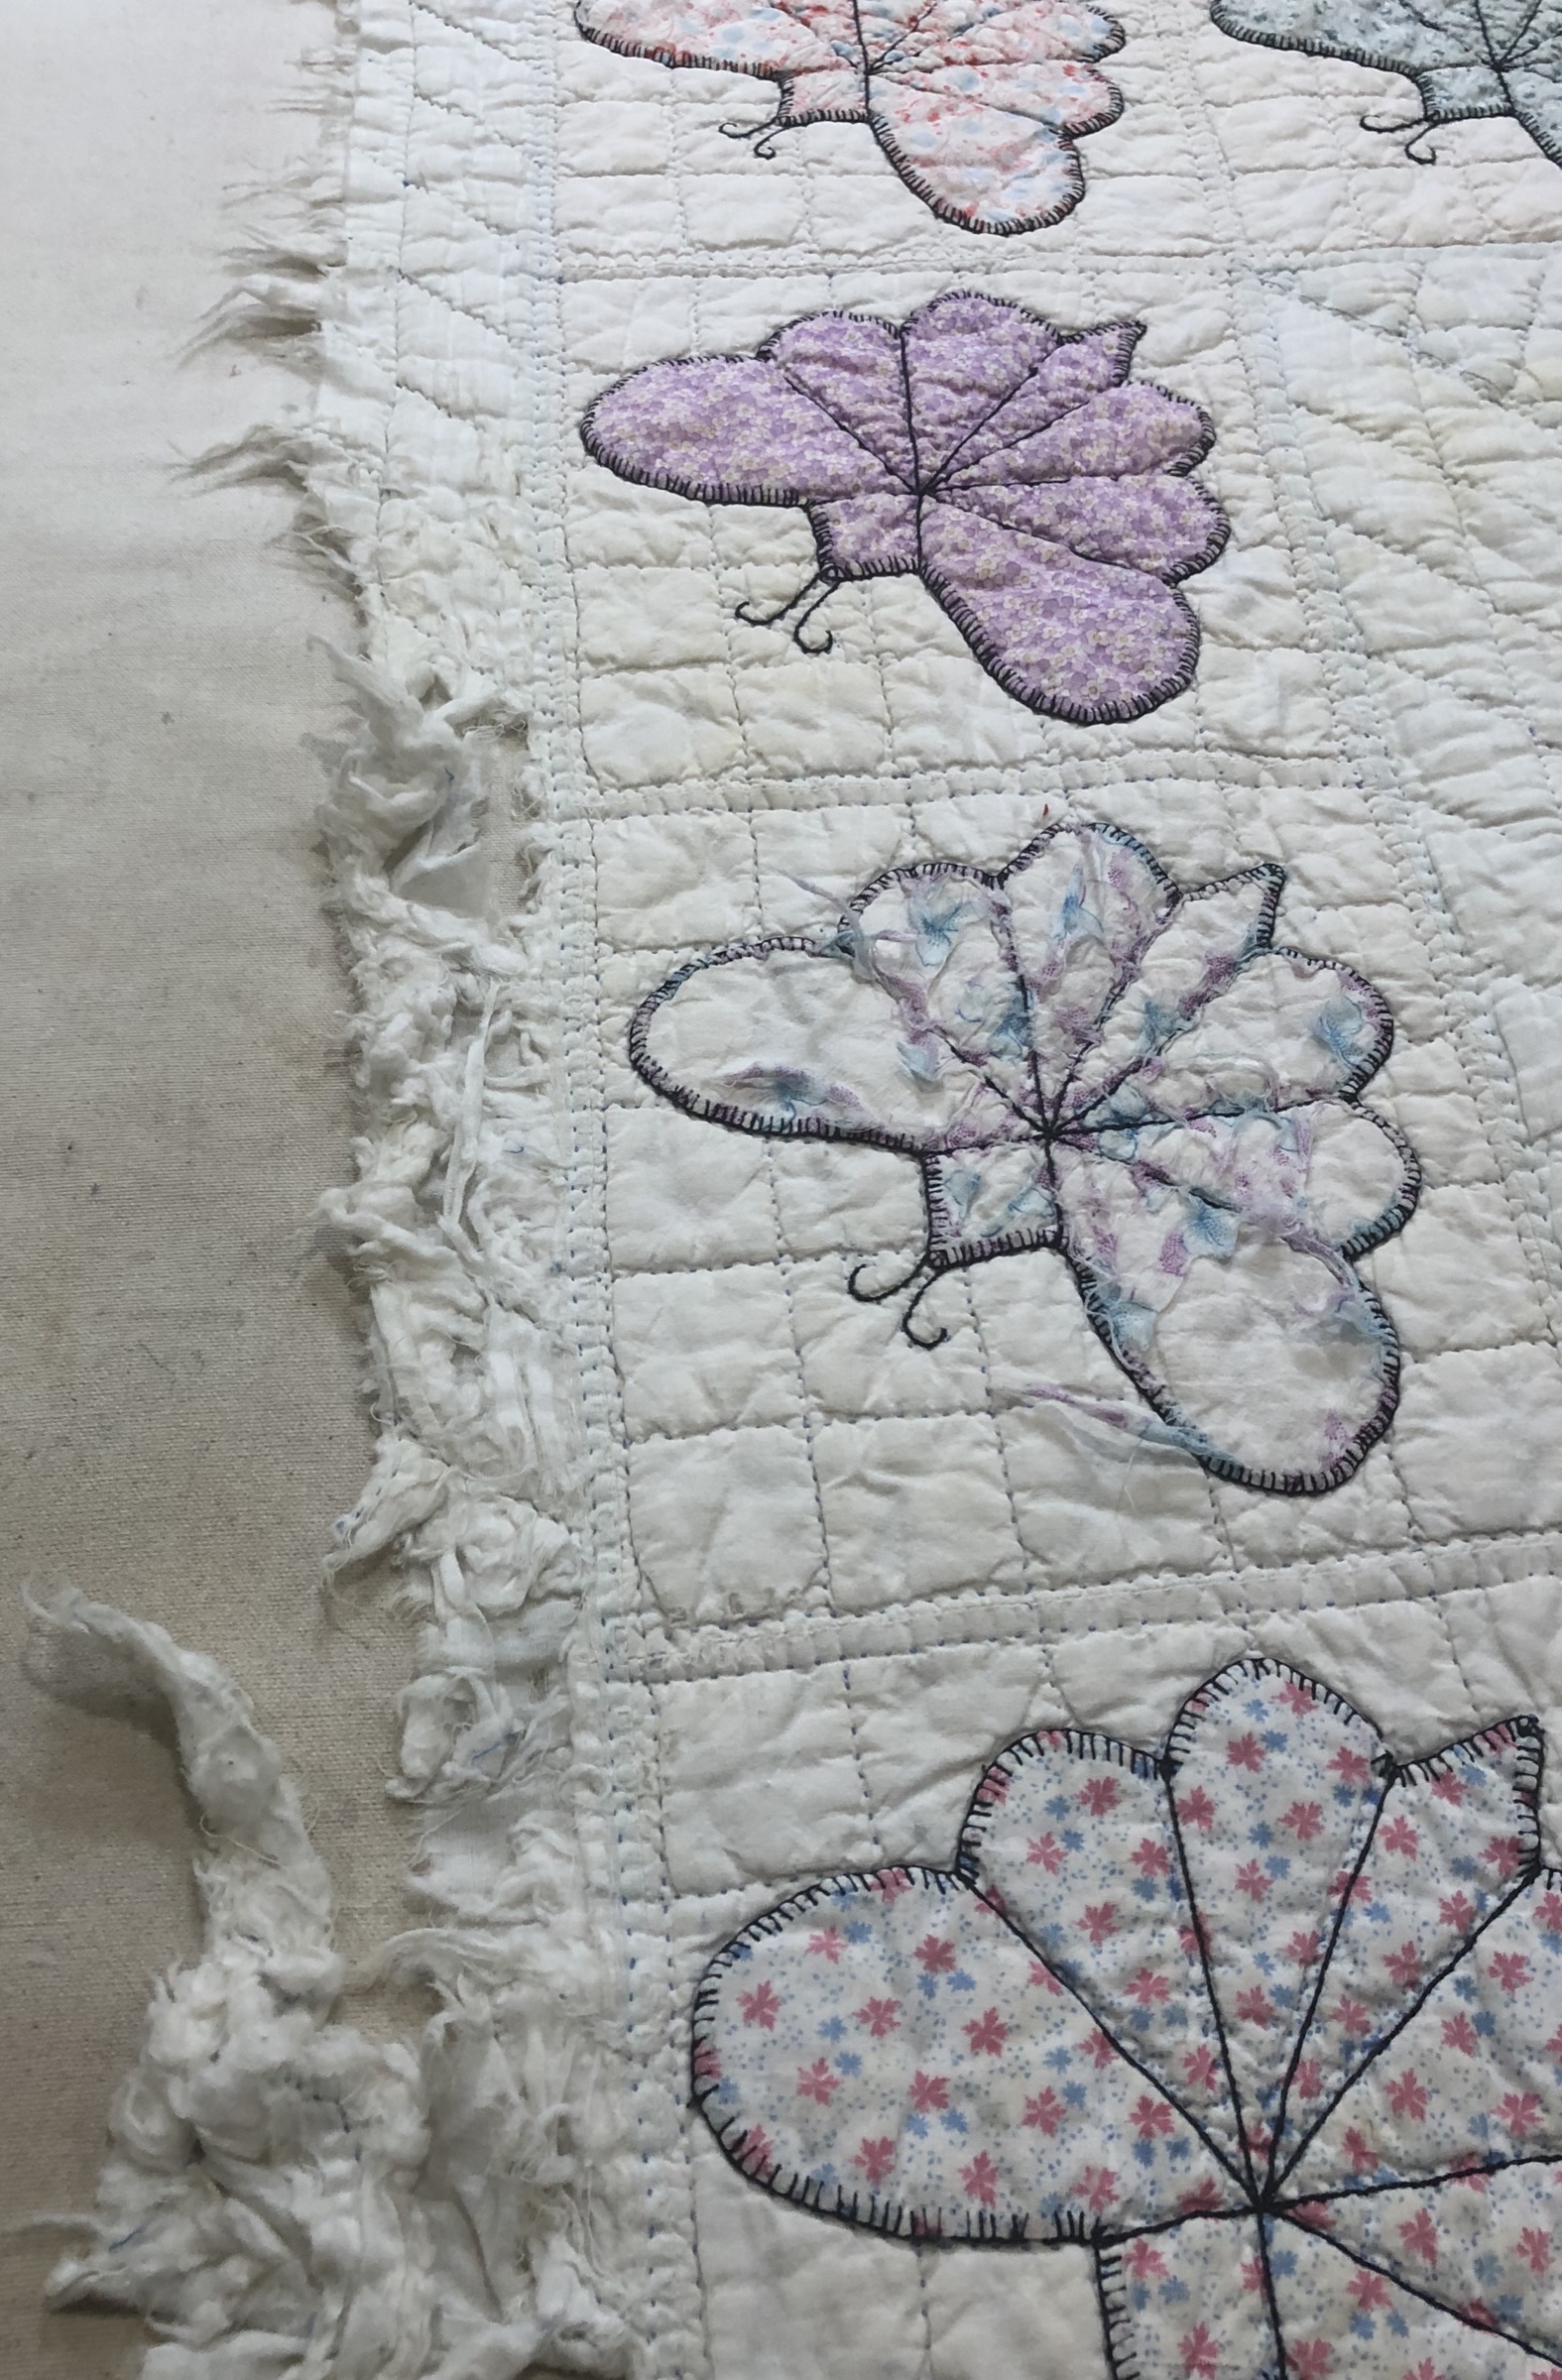
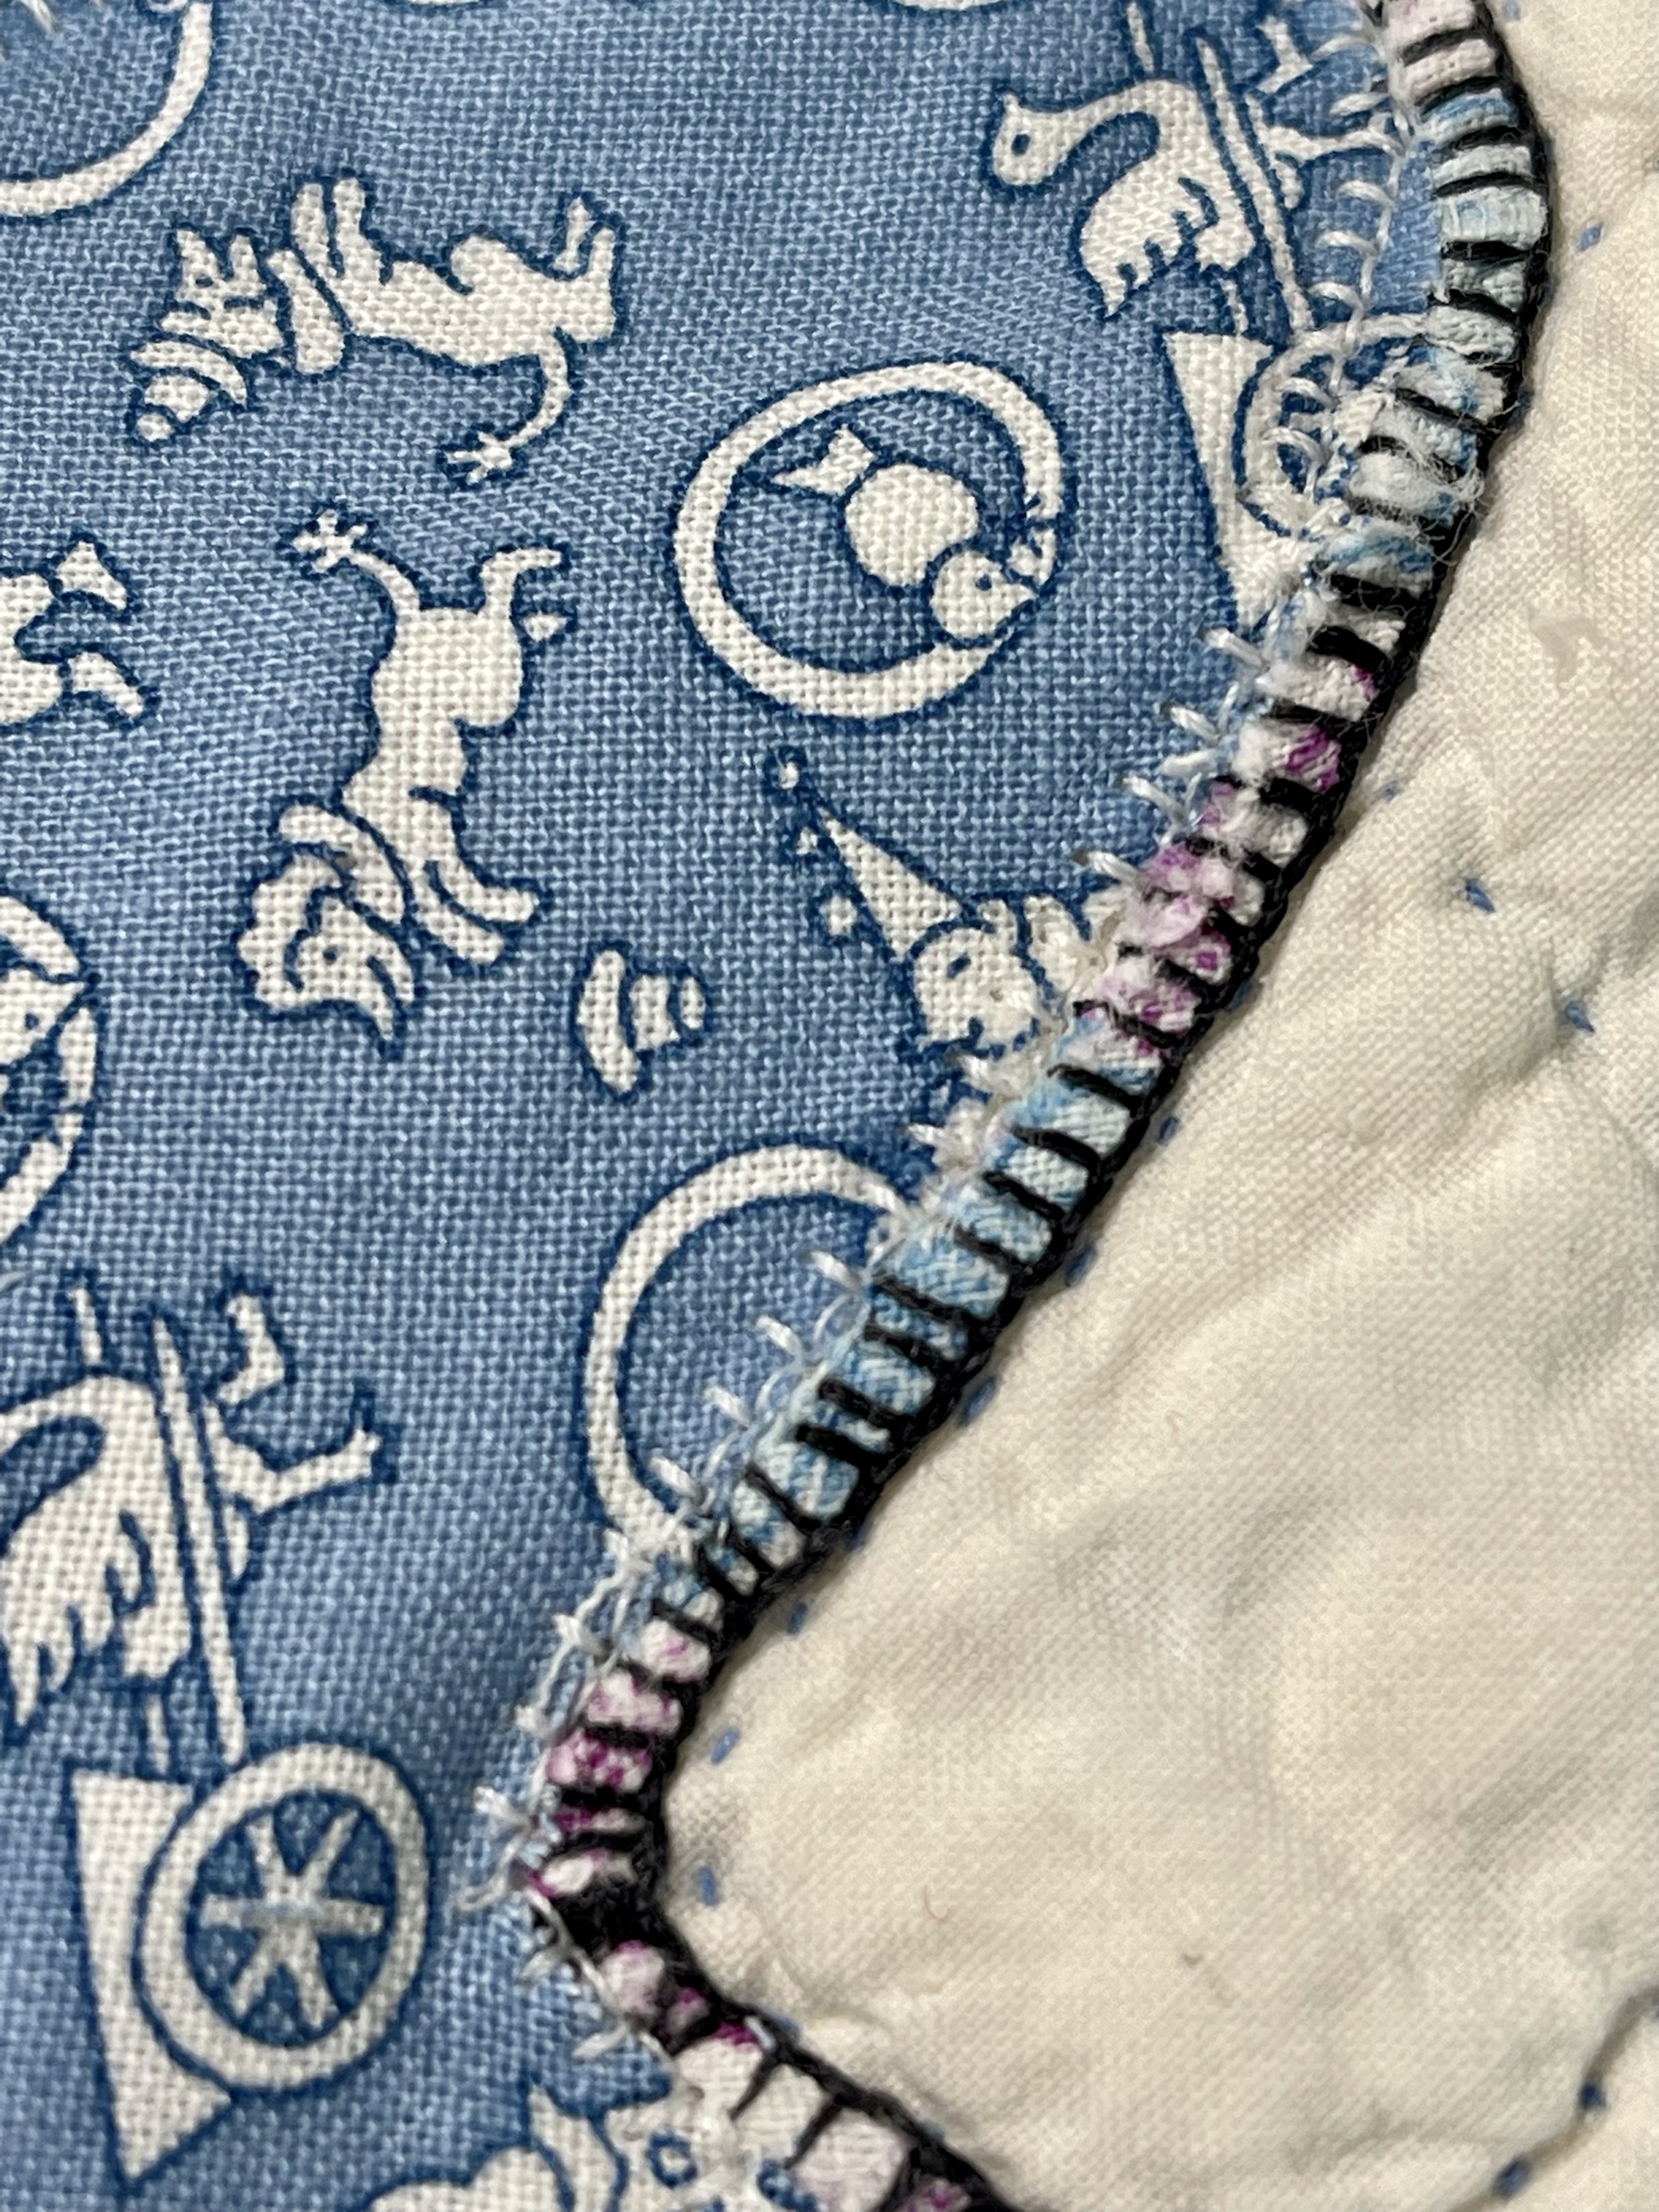
How can a ragged edge be successfully soaked, rinsed, take a trip through the washing machine and then the dryer? Tulle!
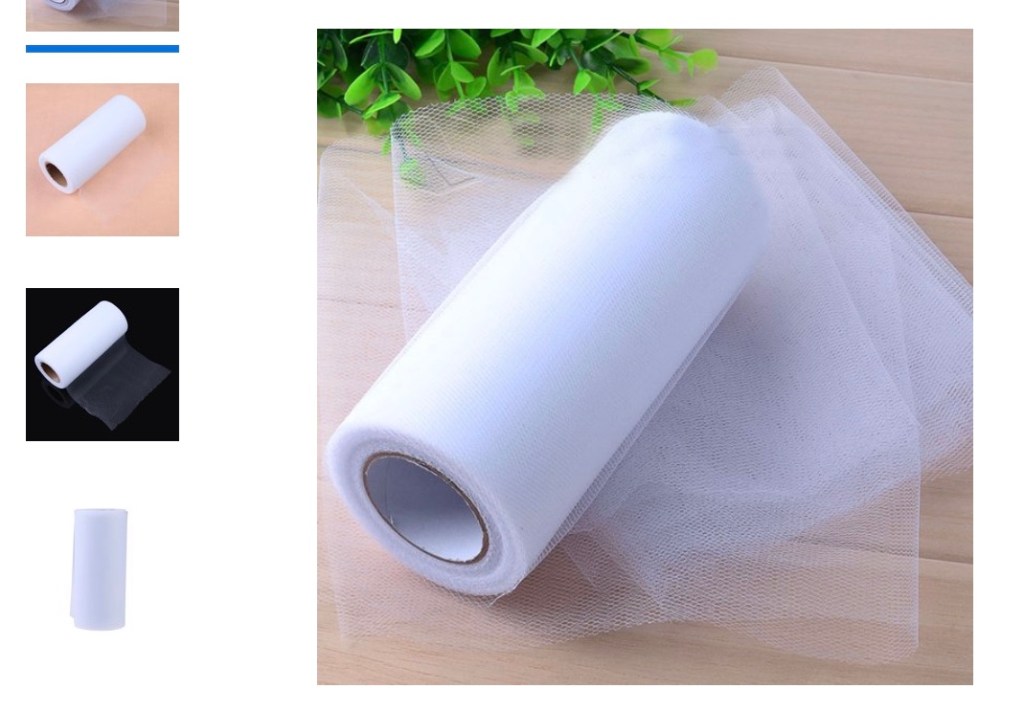
Not the hard scratchy netting but instead the soft pliable tulle found on rolls at most craft stores as well as Amazon. At 6” wide and generally about 40 yards long, this single roll will last a very long time.
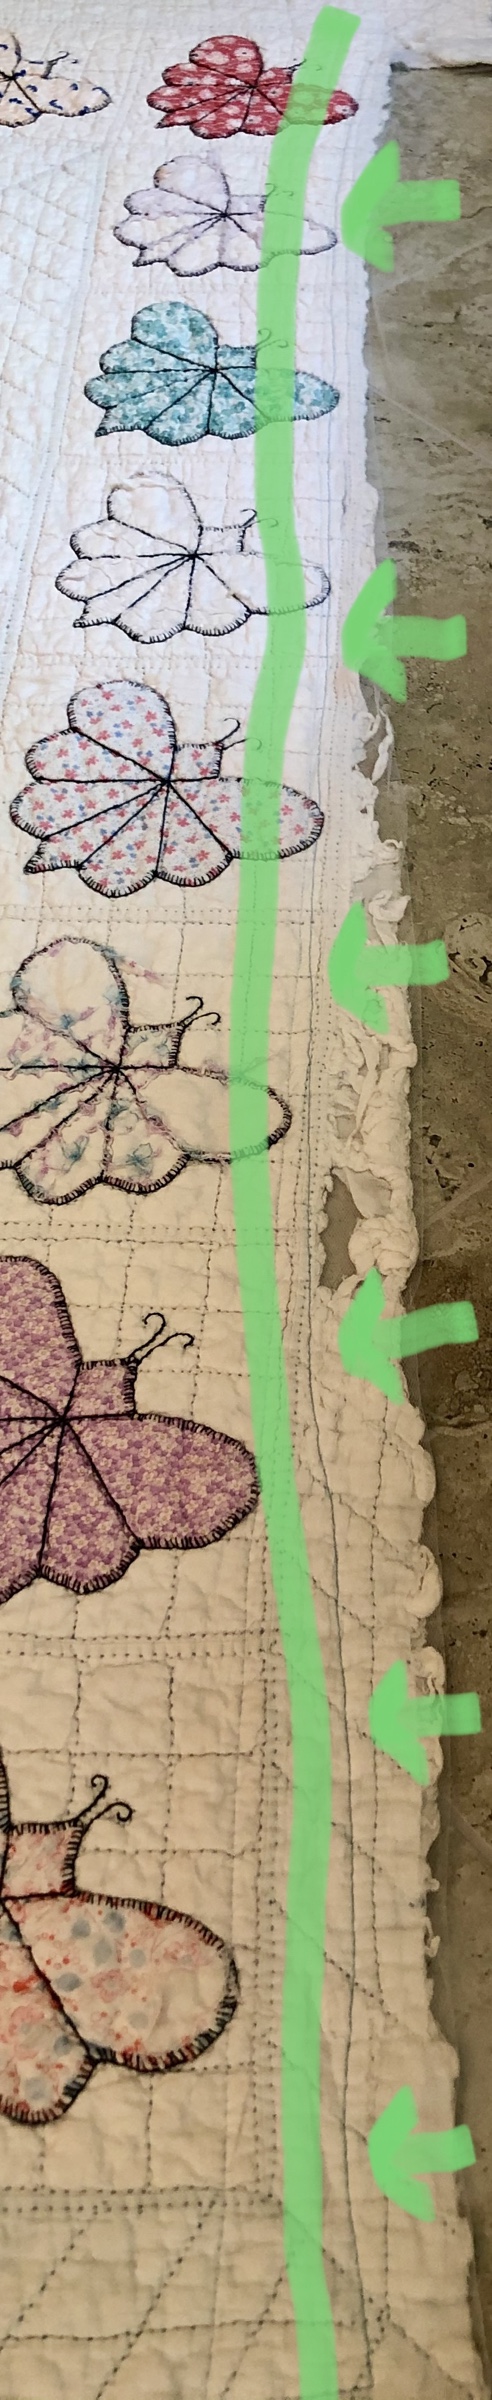
White tulle on a white-ish quilt is hard to photograph! Do you see the solid blue wonky sewing/stitching line to the left of the arrows and to the right of the solid green line? I folded in half a length of the white Tulle. By slipping the ragged quilt edge into the folded tulle, I could machine stitch, using a long stitch length and a contrasting thread, this tulle to the quilt, catching both the front as well as the back in one pass. This way the bad quilt edge(s) is secured and ready to be laundered. Why the contrasting thread? The first time I used this method I machine stitched with white thread and it took FOREVER to unstitch once the quilt finished in the dryer. Lesson learned…

The quilt has 54 butterflies, I replaced 12. I could have replaced many more but part of me likes the idea that some of the original parts stay with the quilt.
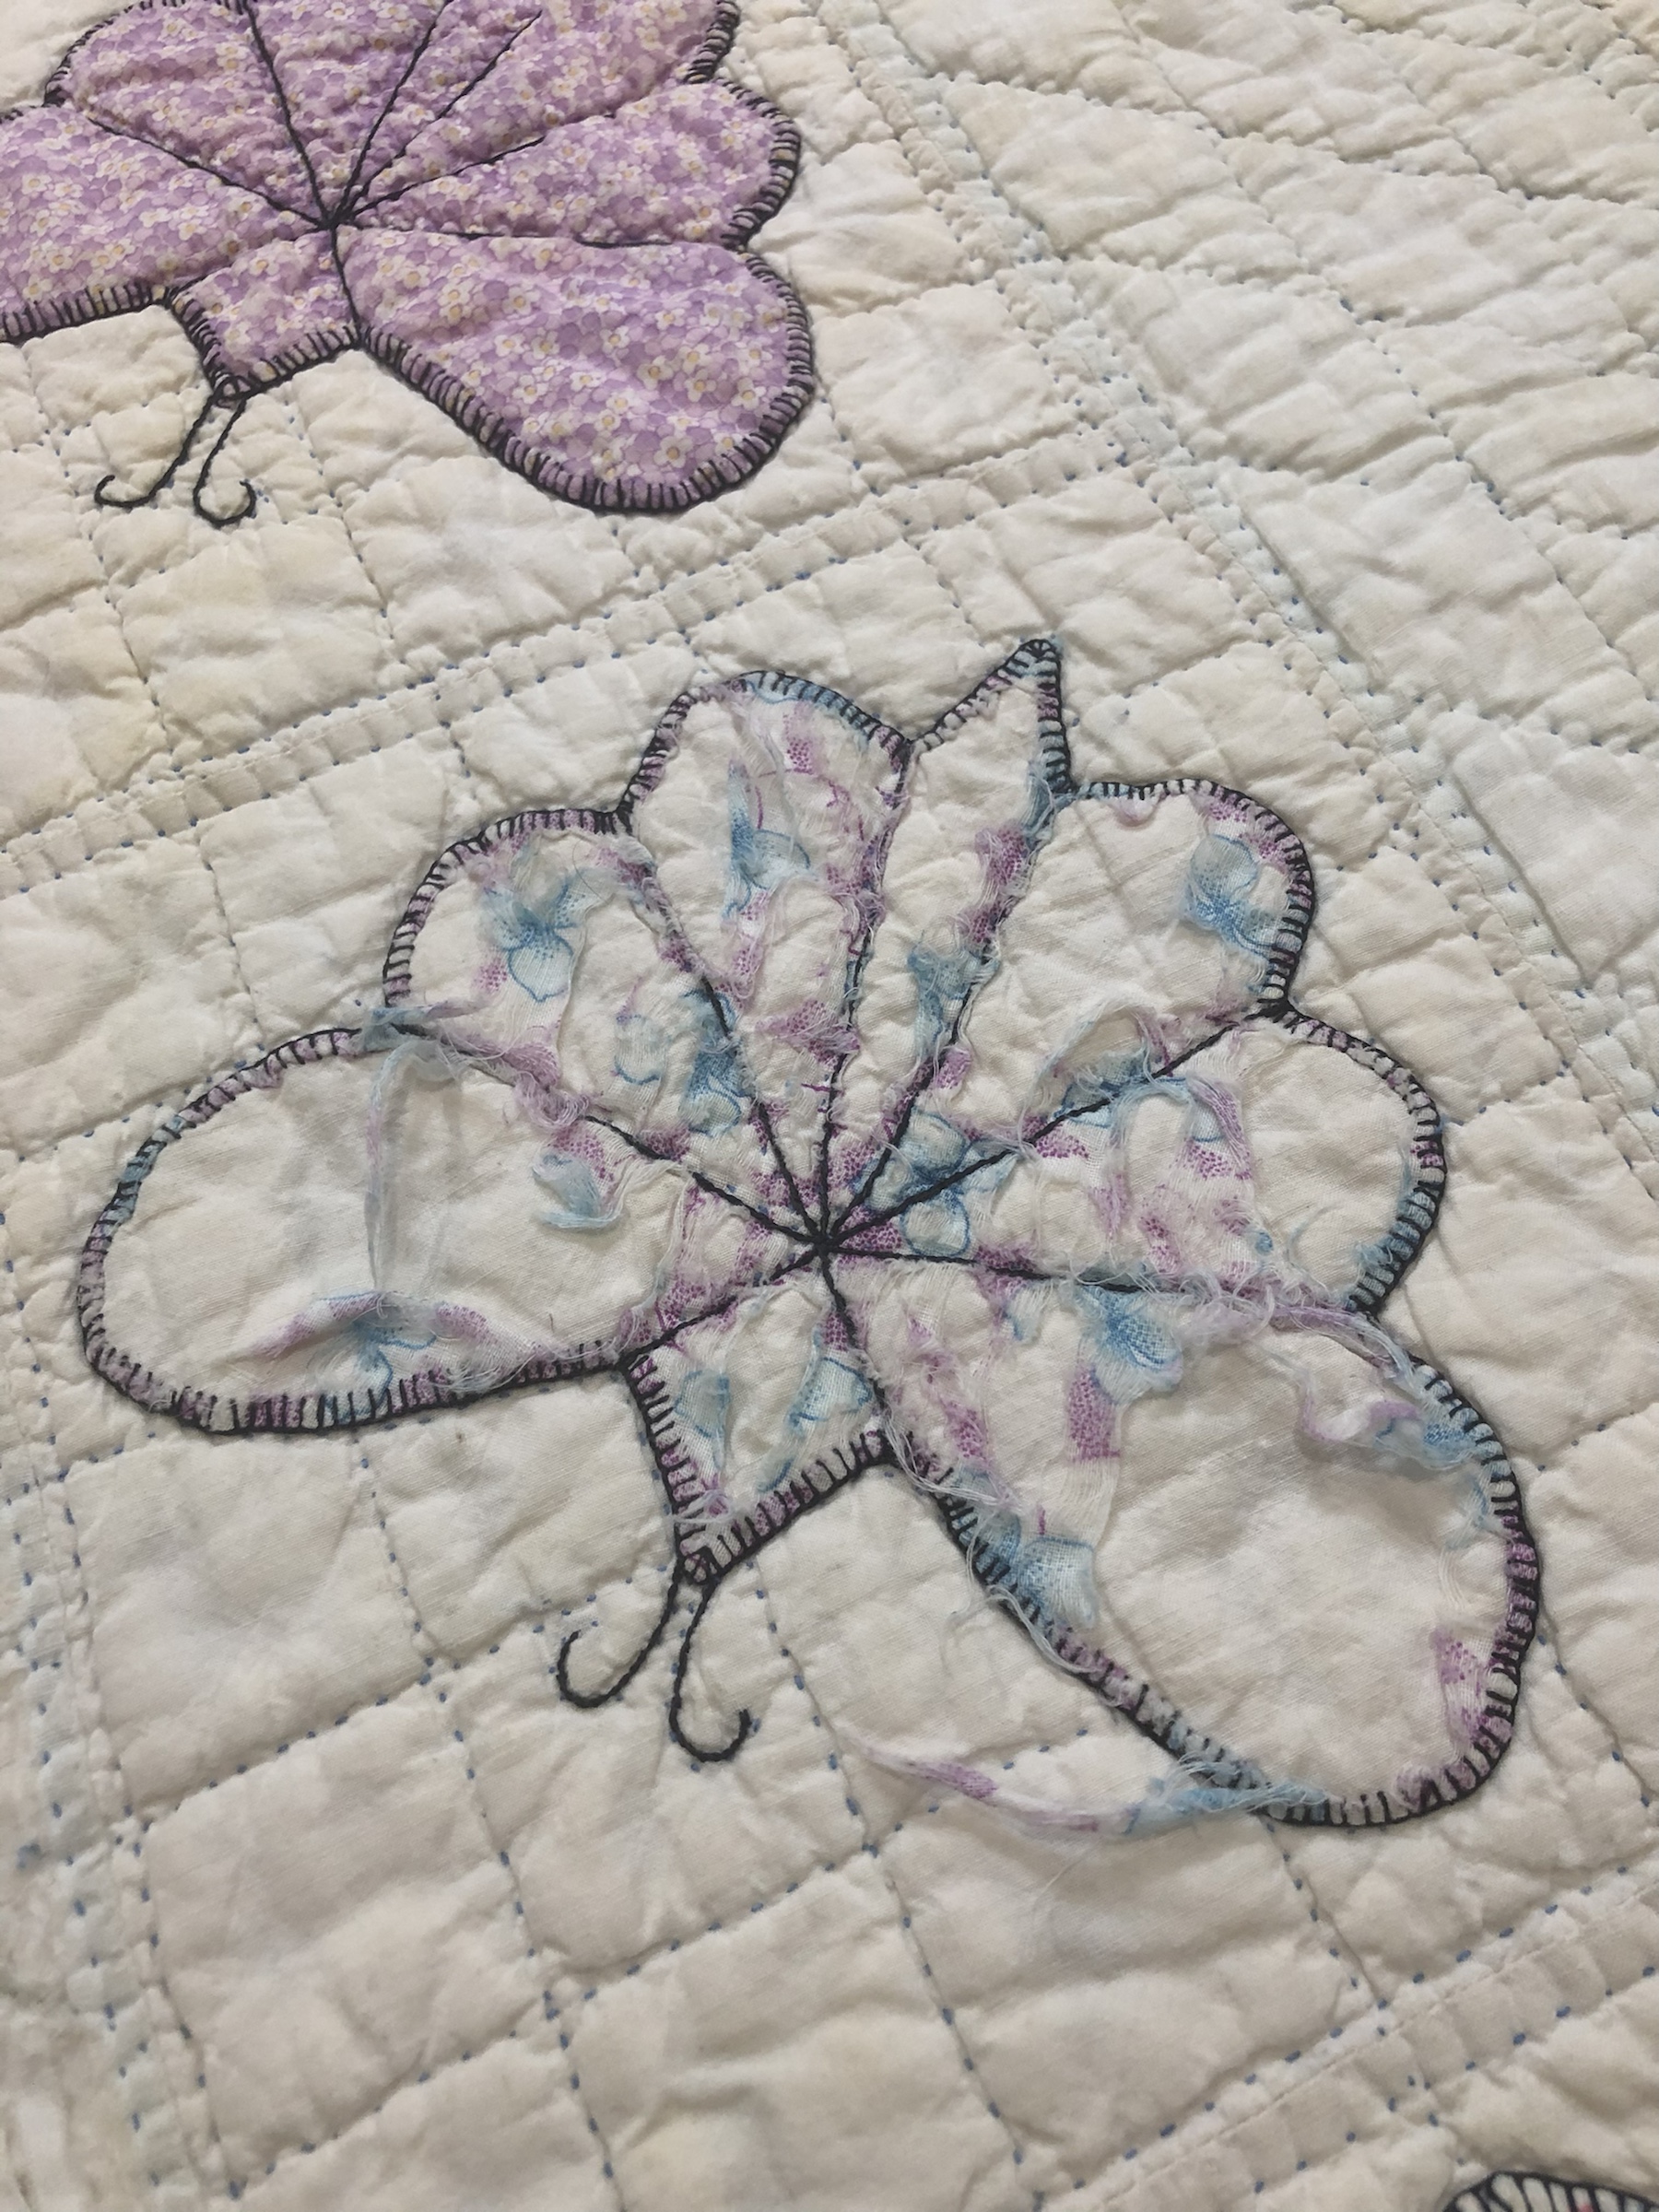
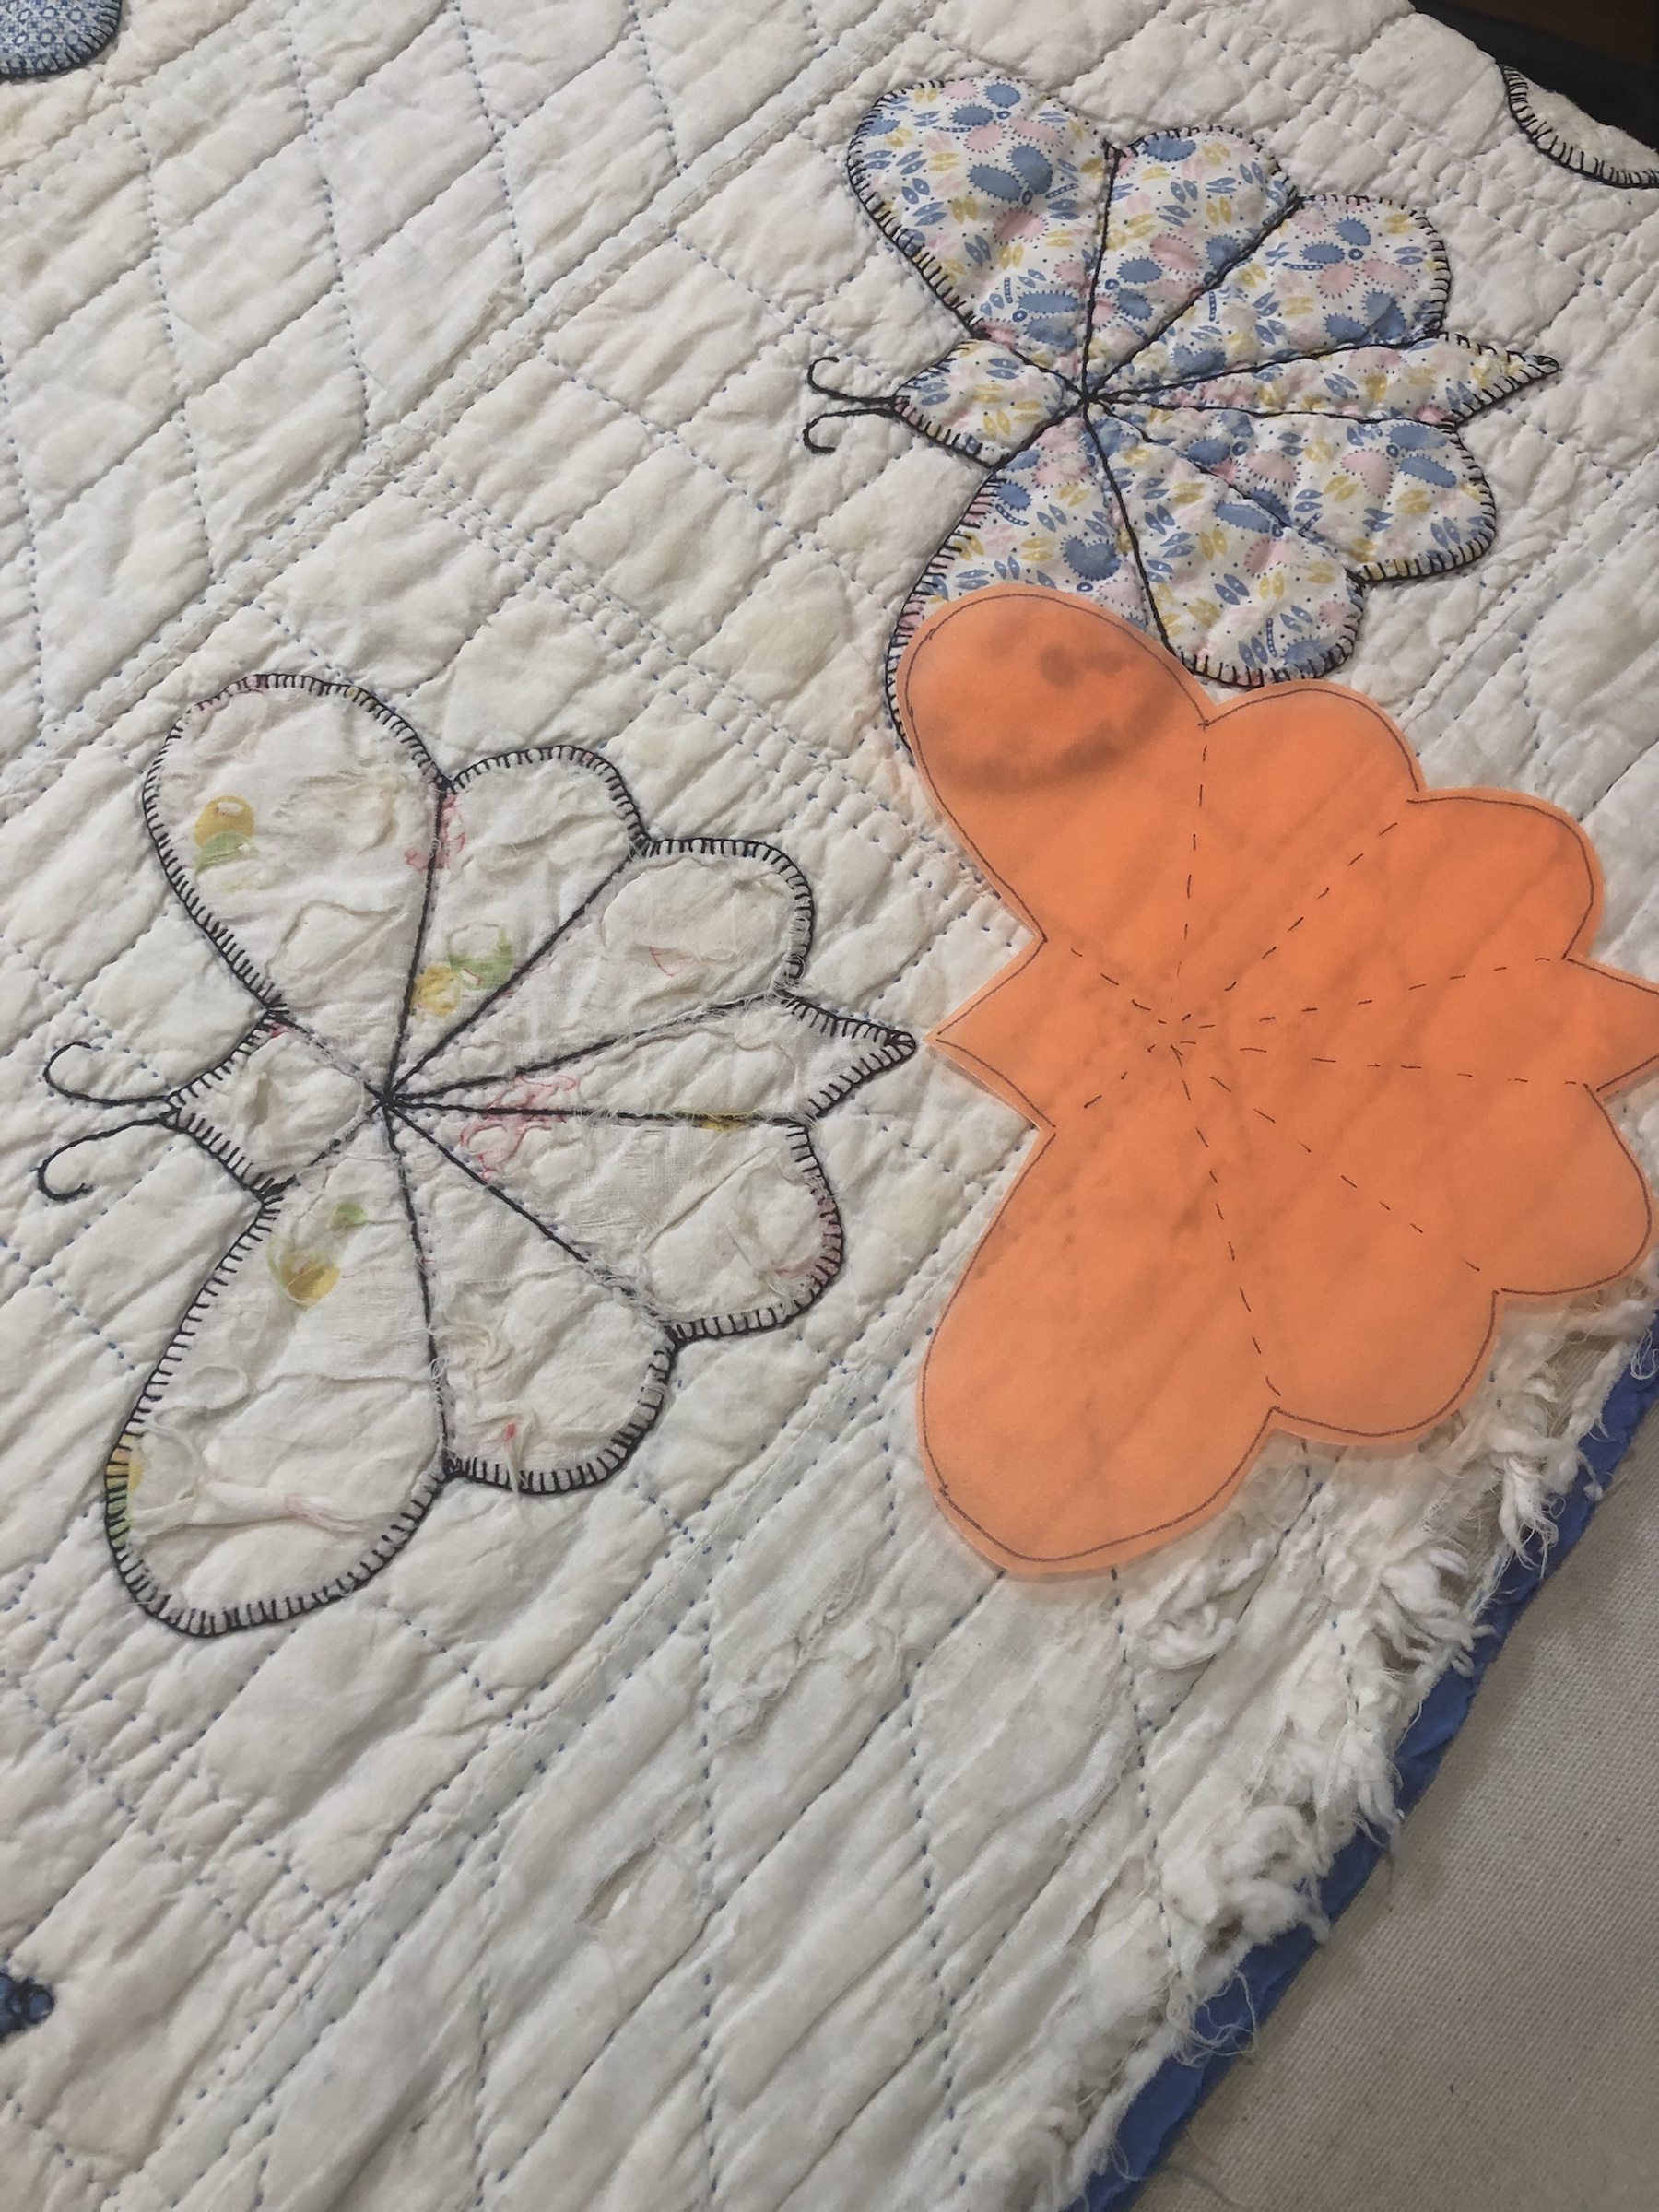
Here’s two more butterflies that were desperate for a makeover.

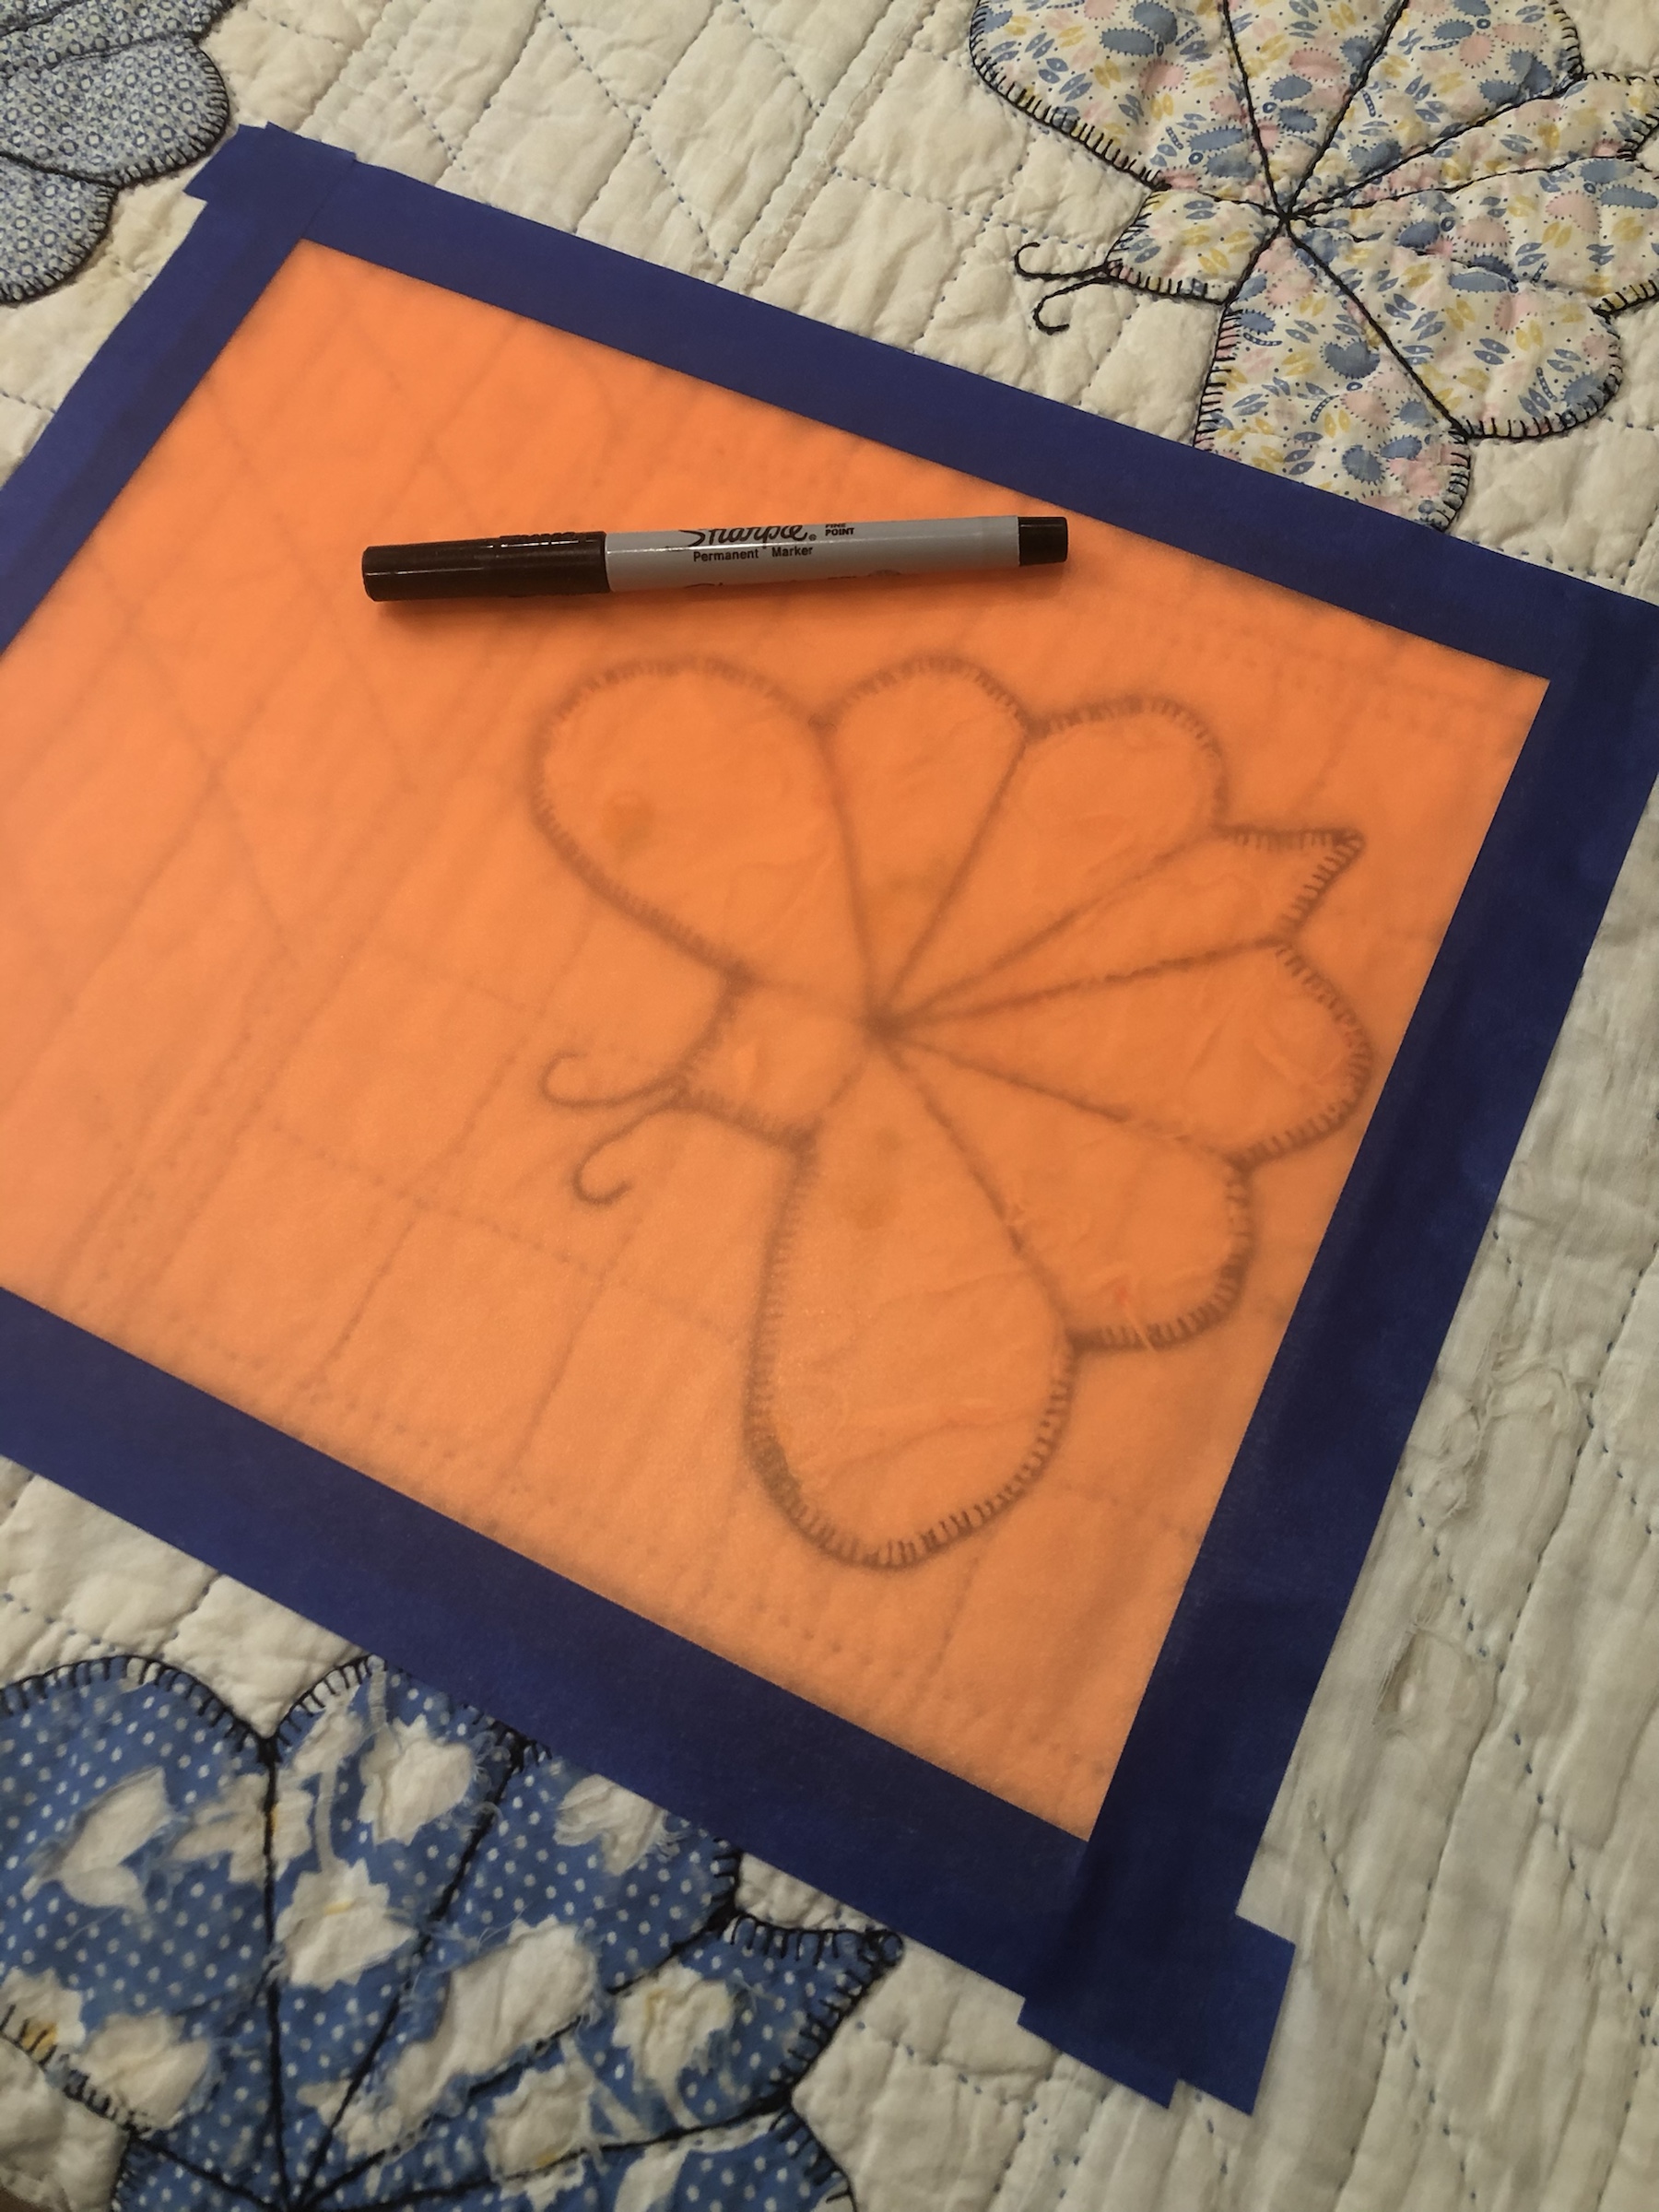
A quick visit to the Dollar General and I have the perfect material to make a plastic template. I used the front (or the back) of a $1.00 three ring binder. Just cut away the front and the back of the binder a.ong the fold lines. Remember to choose a color that you can easily see through. Using blue painters tape, I secure the orange plastic to the quilt.
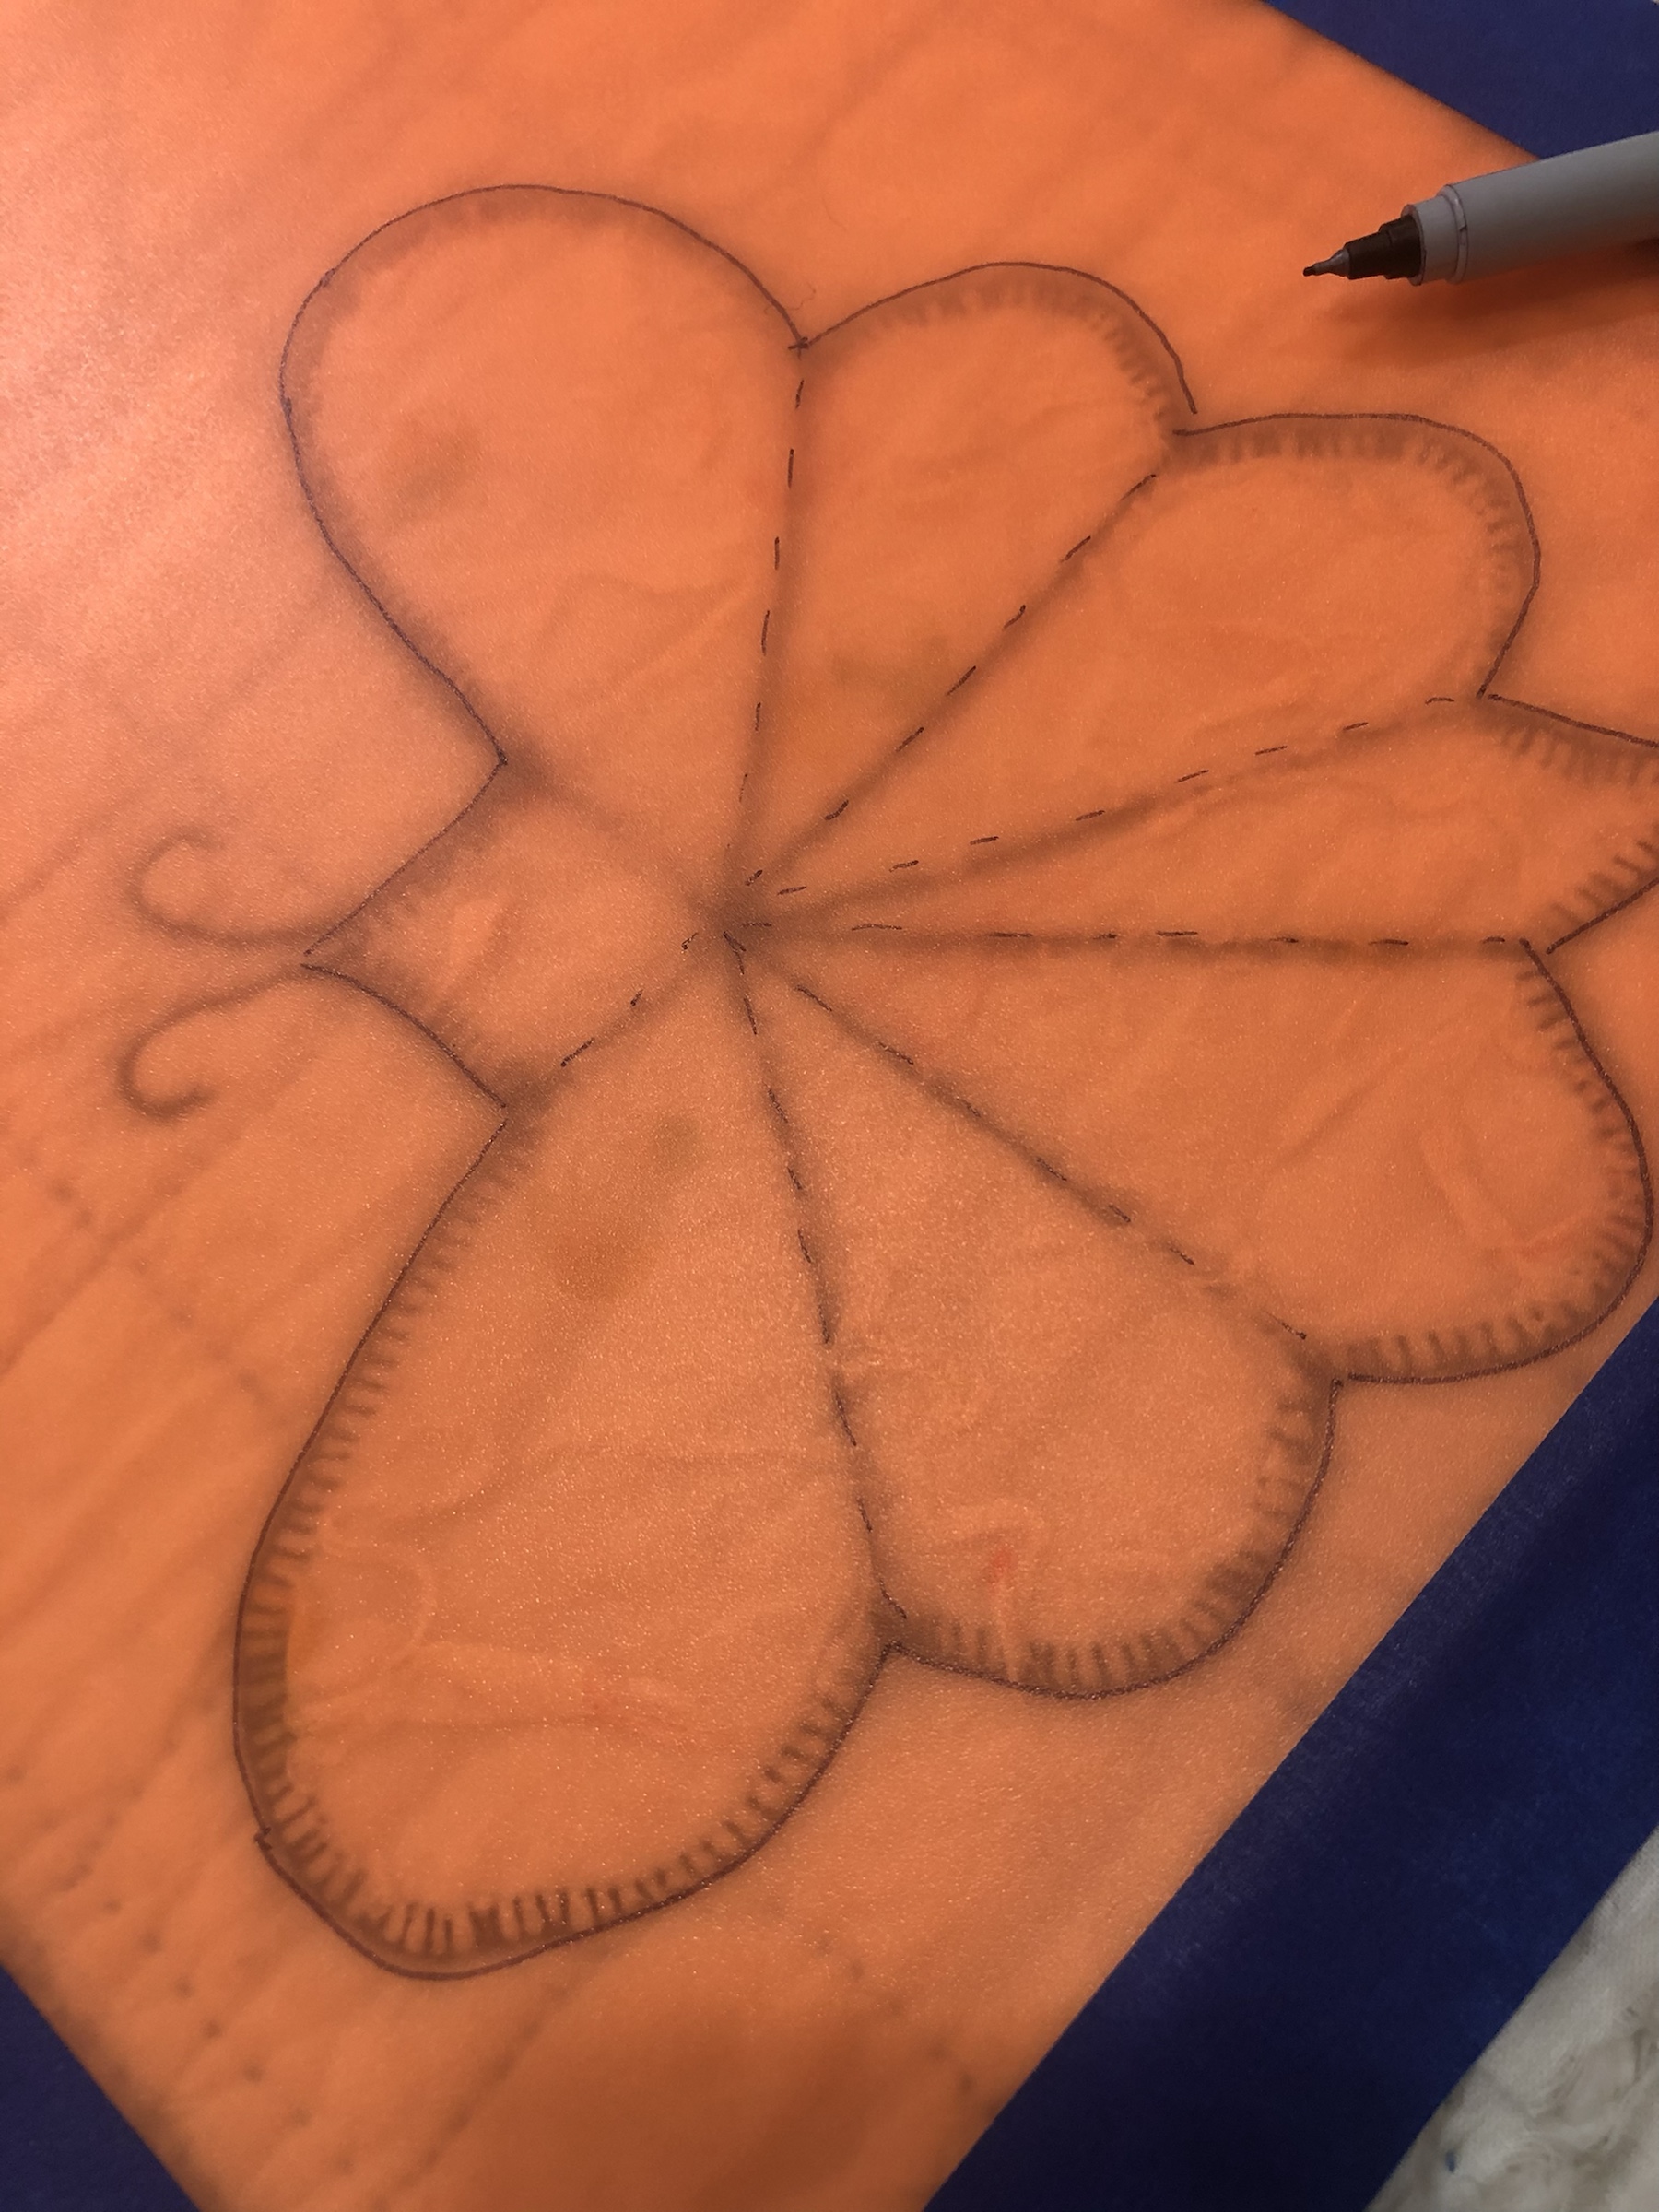
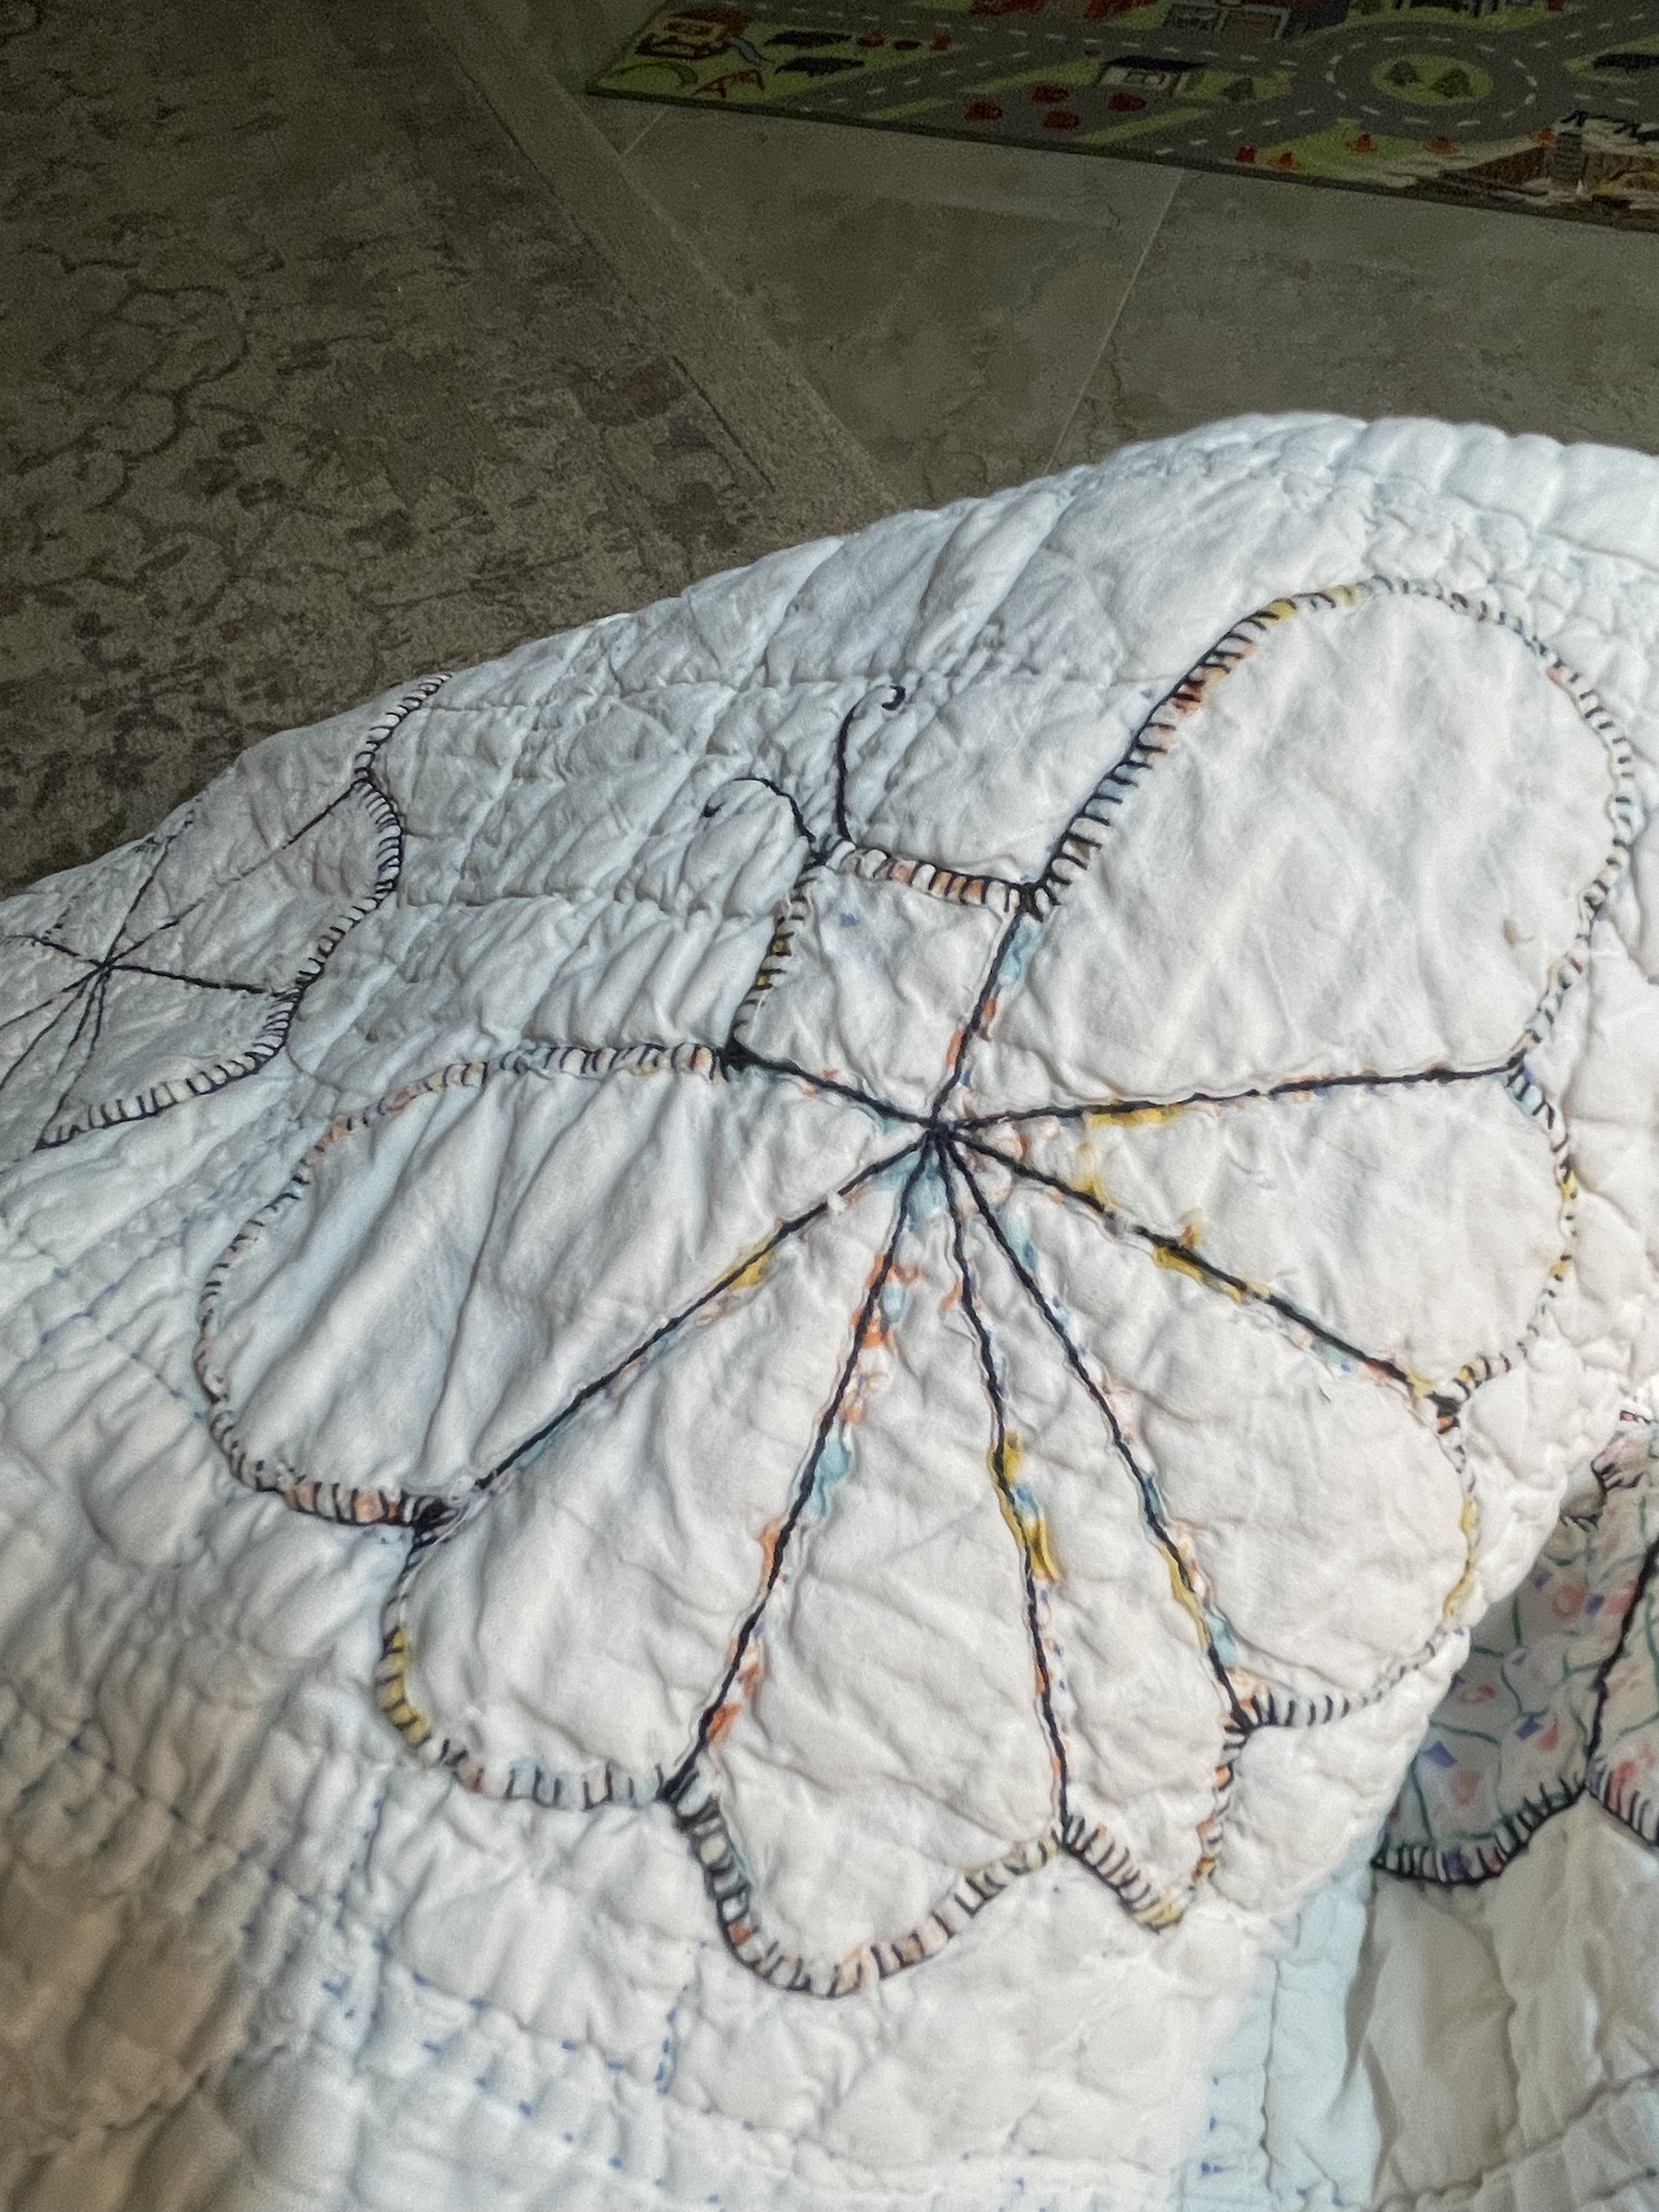
Very carefully with a fine line Sharpie I trace around the outside of the butterfly. For good measure I also mark the hand embroidery stitching lines.

Using my “Anything Utility” scissors I cut out the template about an 1/8th” beyond my traces line.
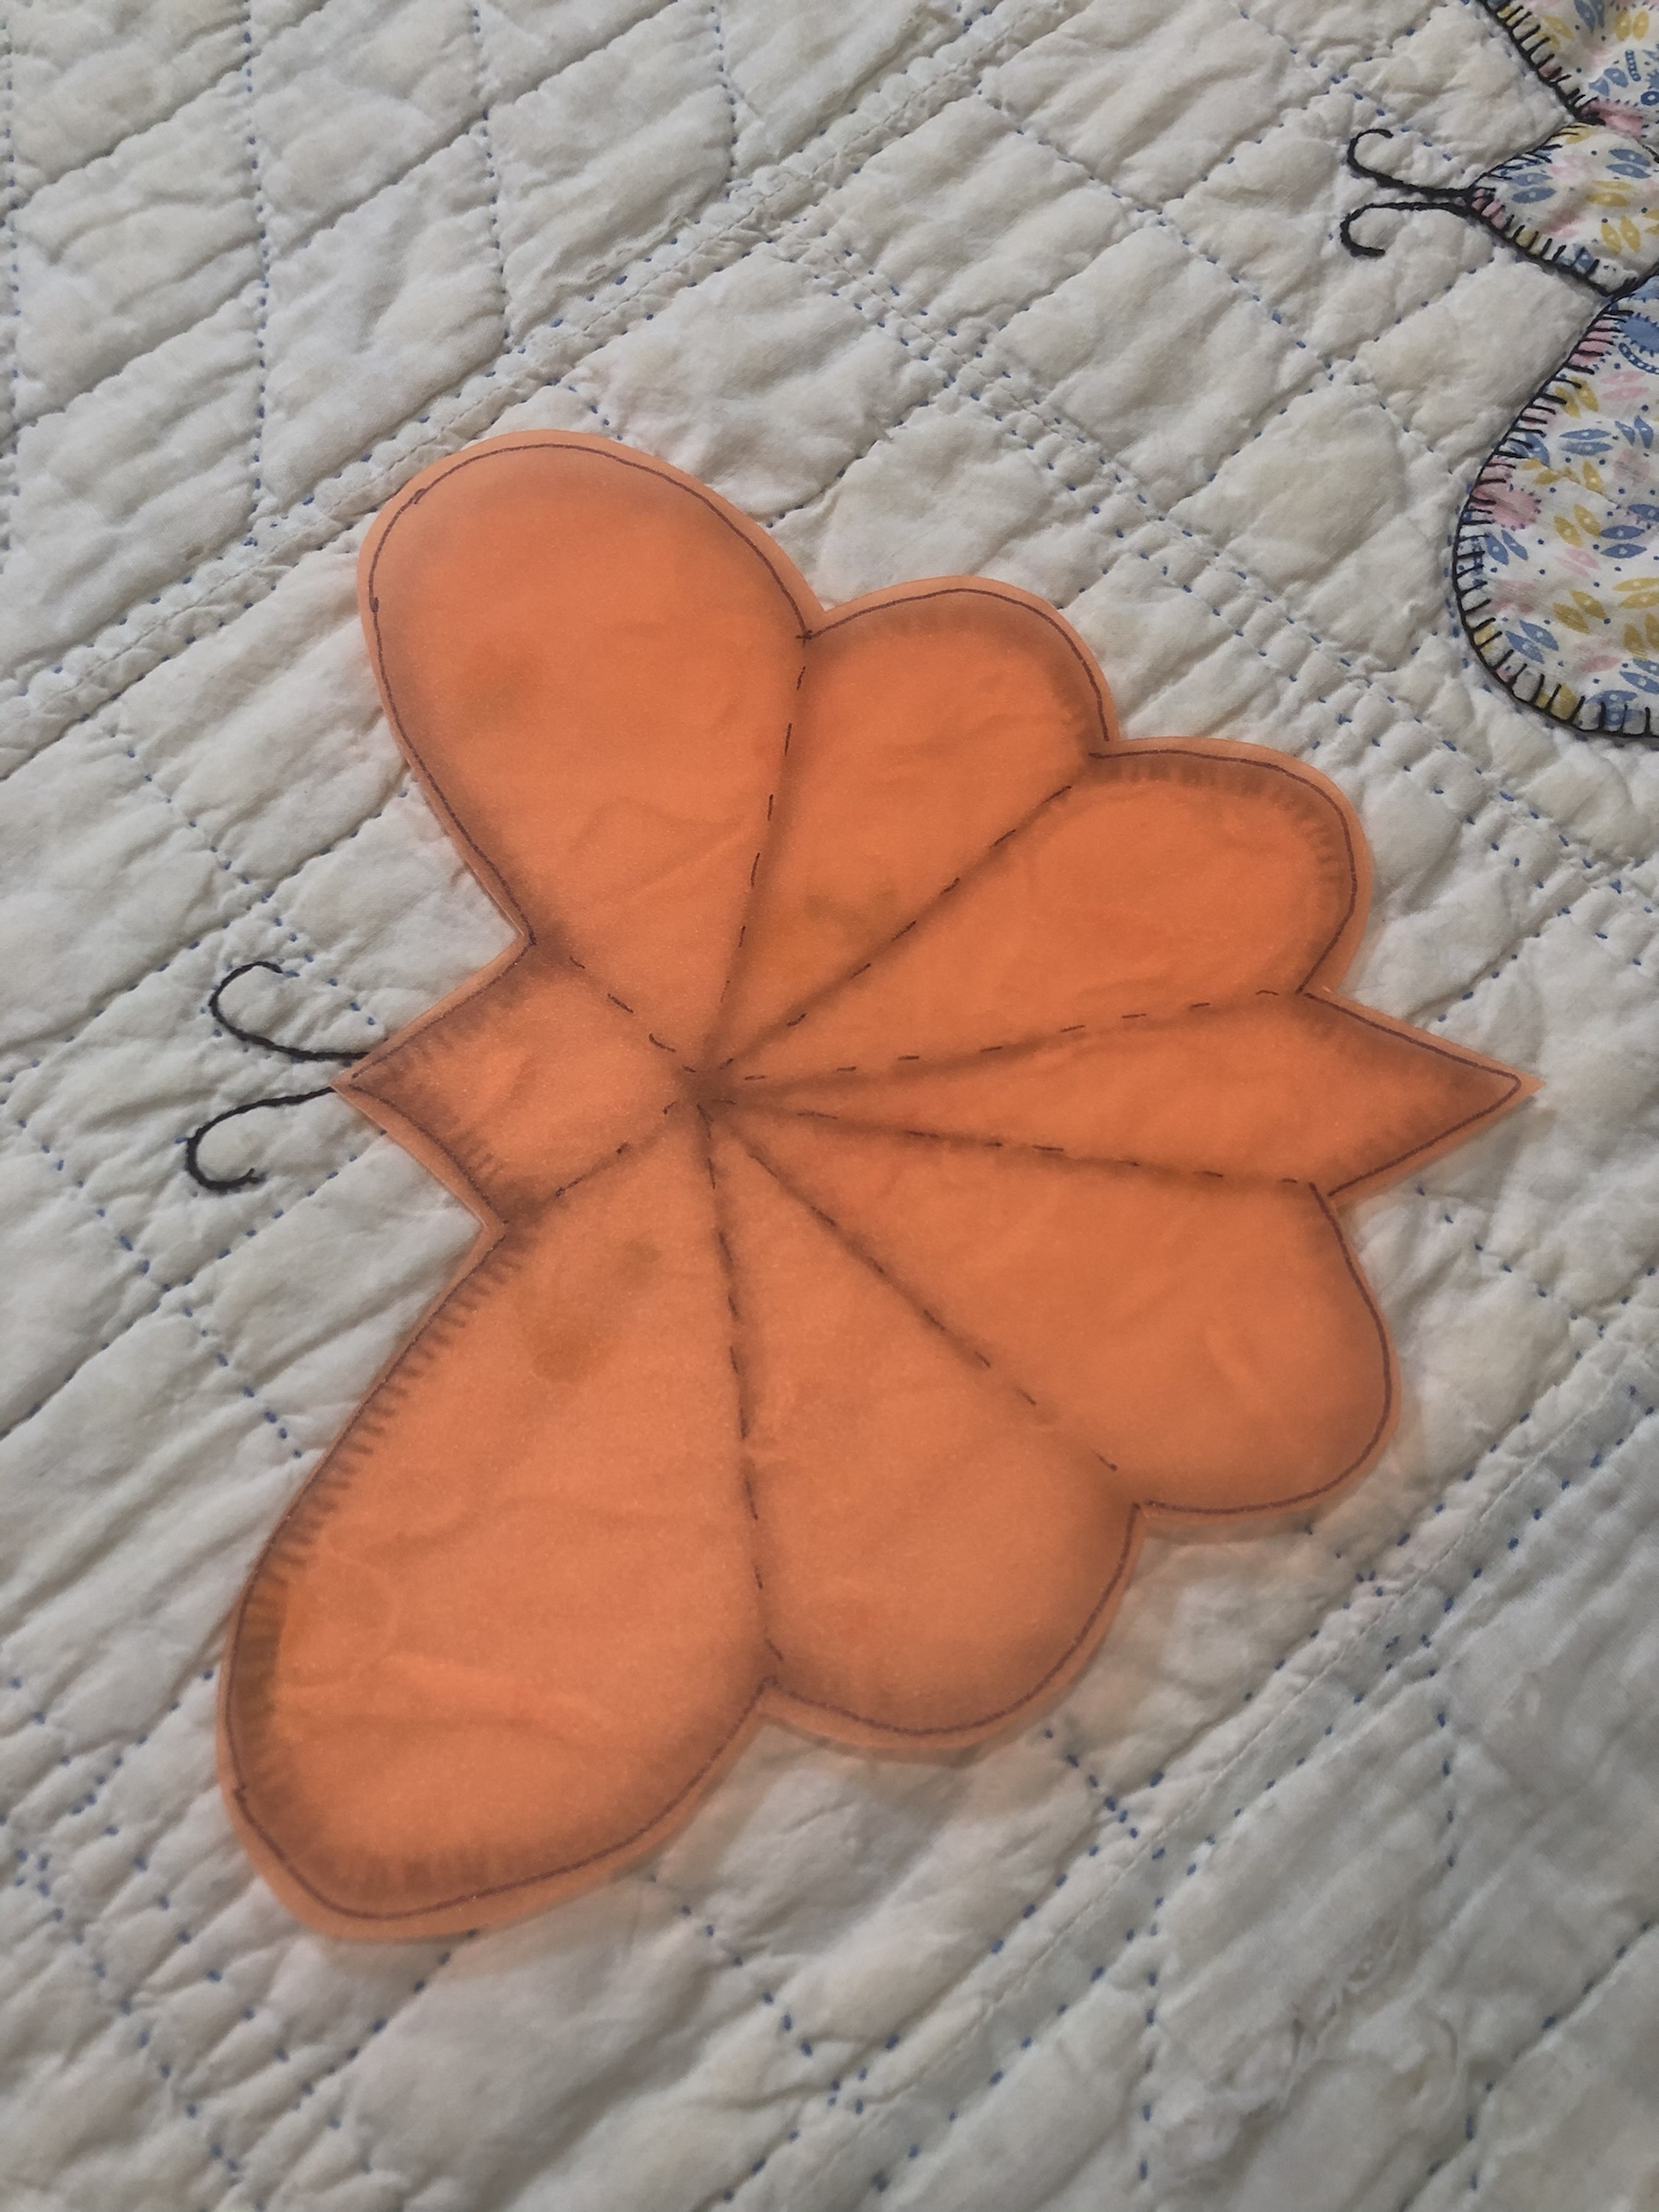
Taaaa-Daaaaa!
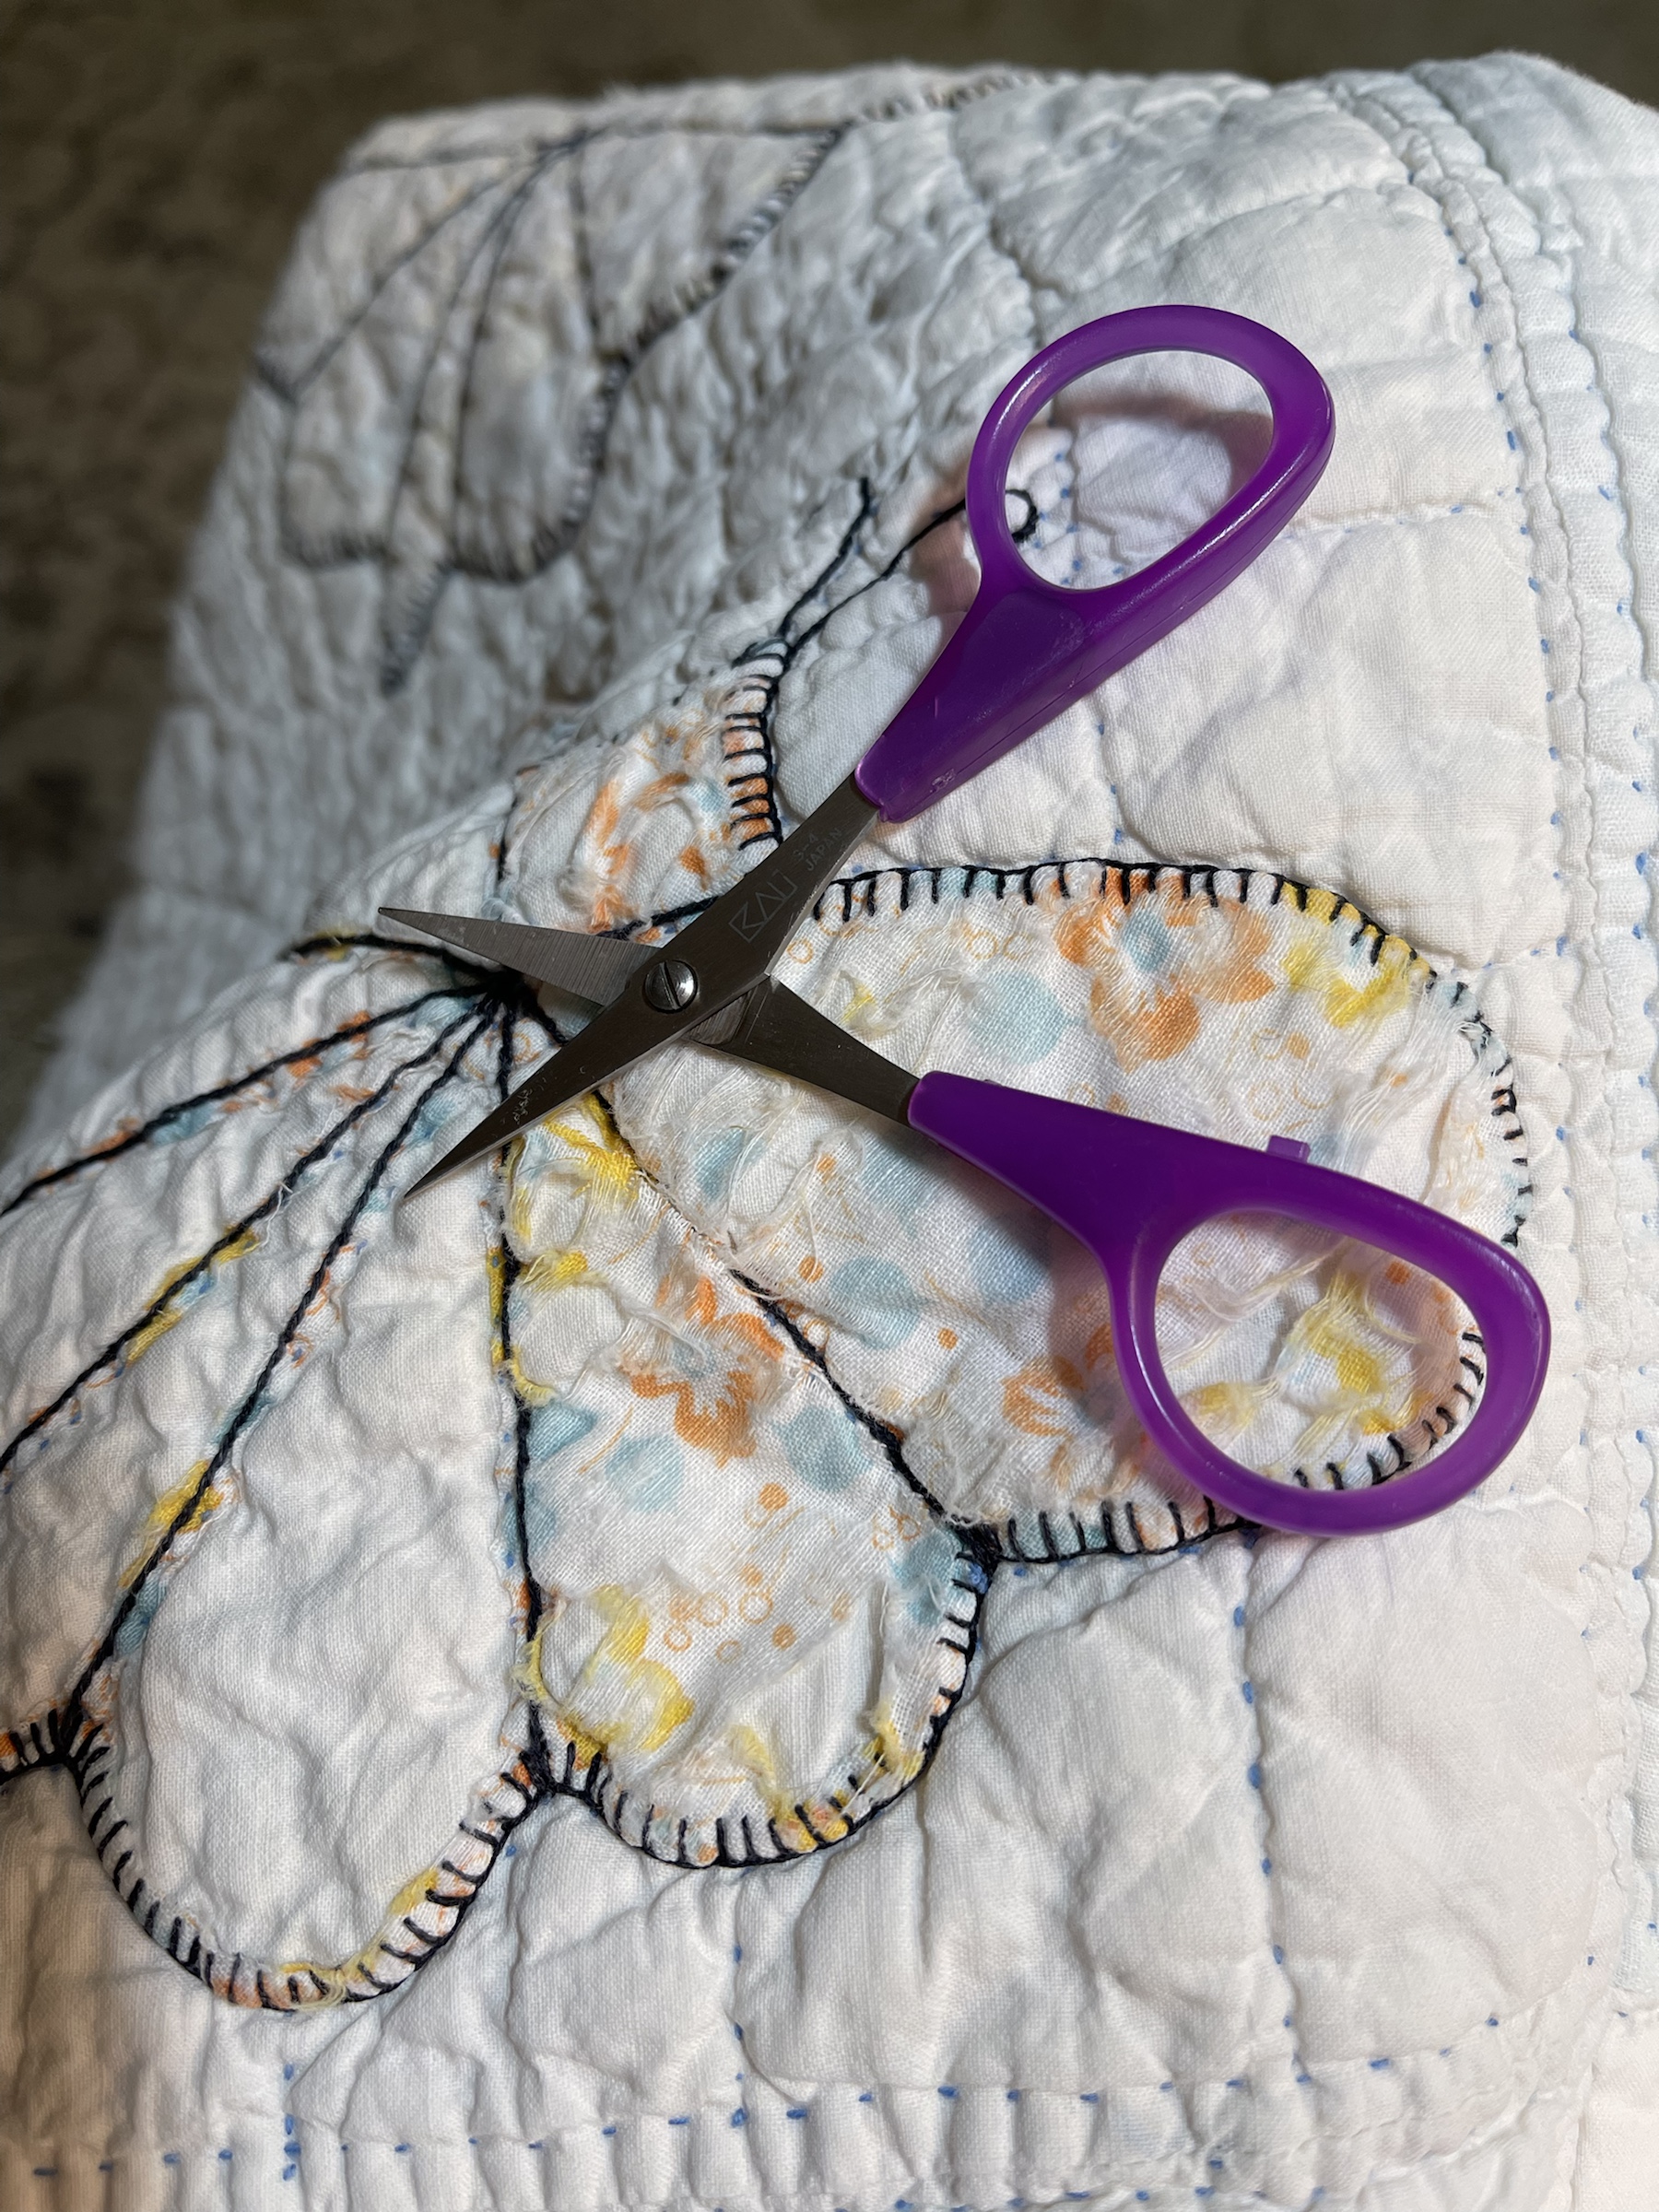
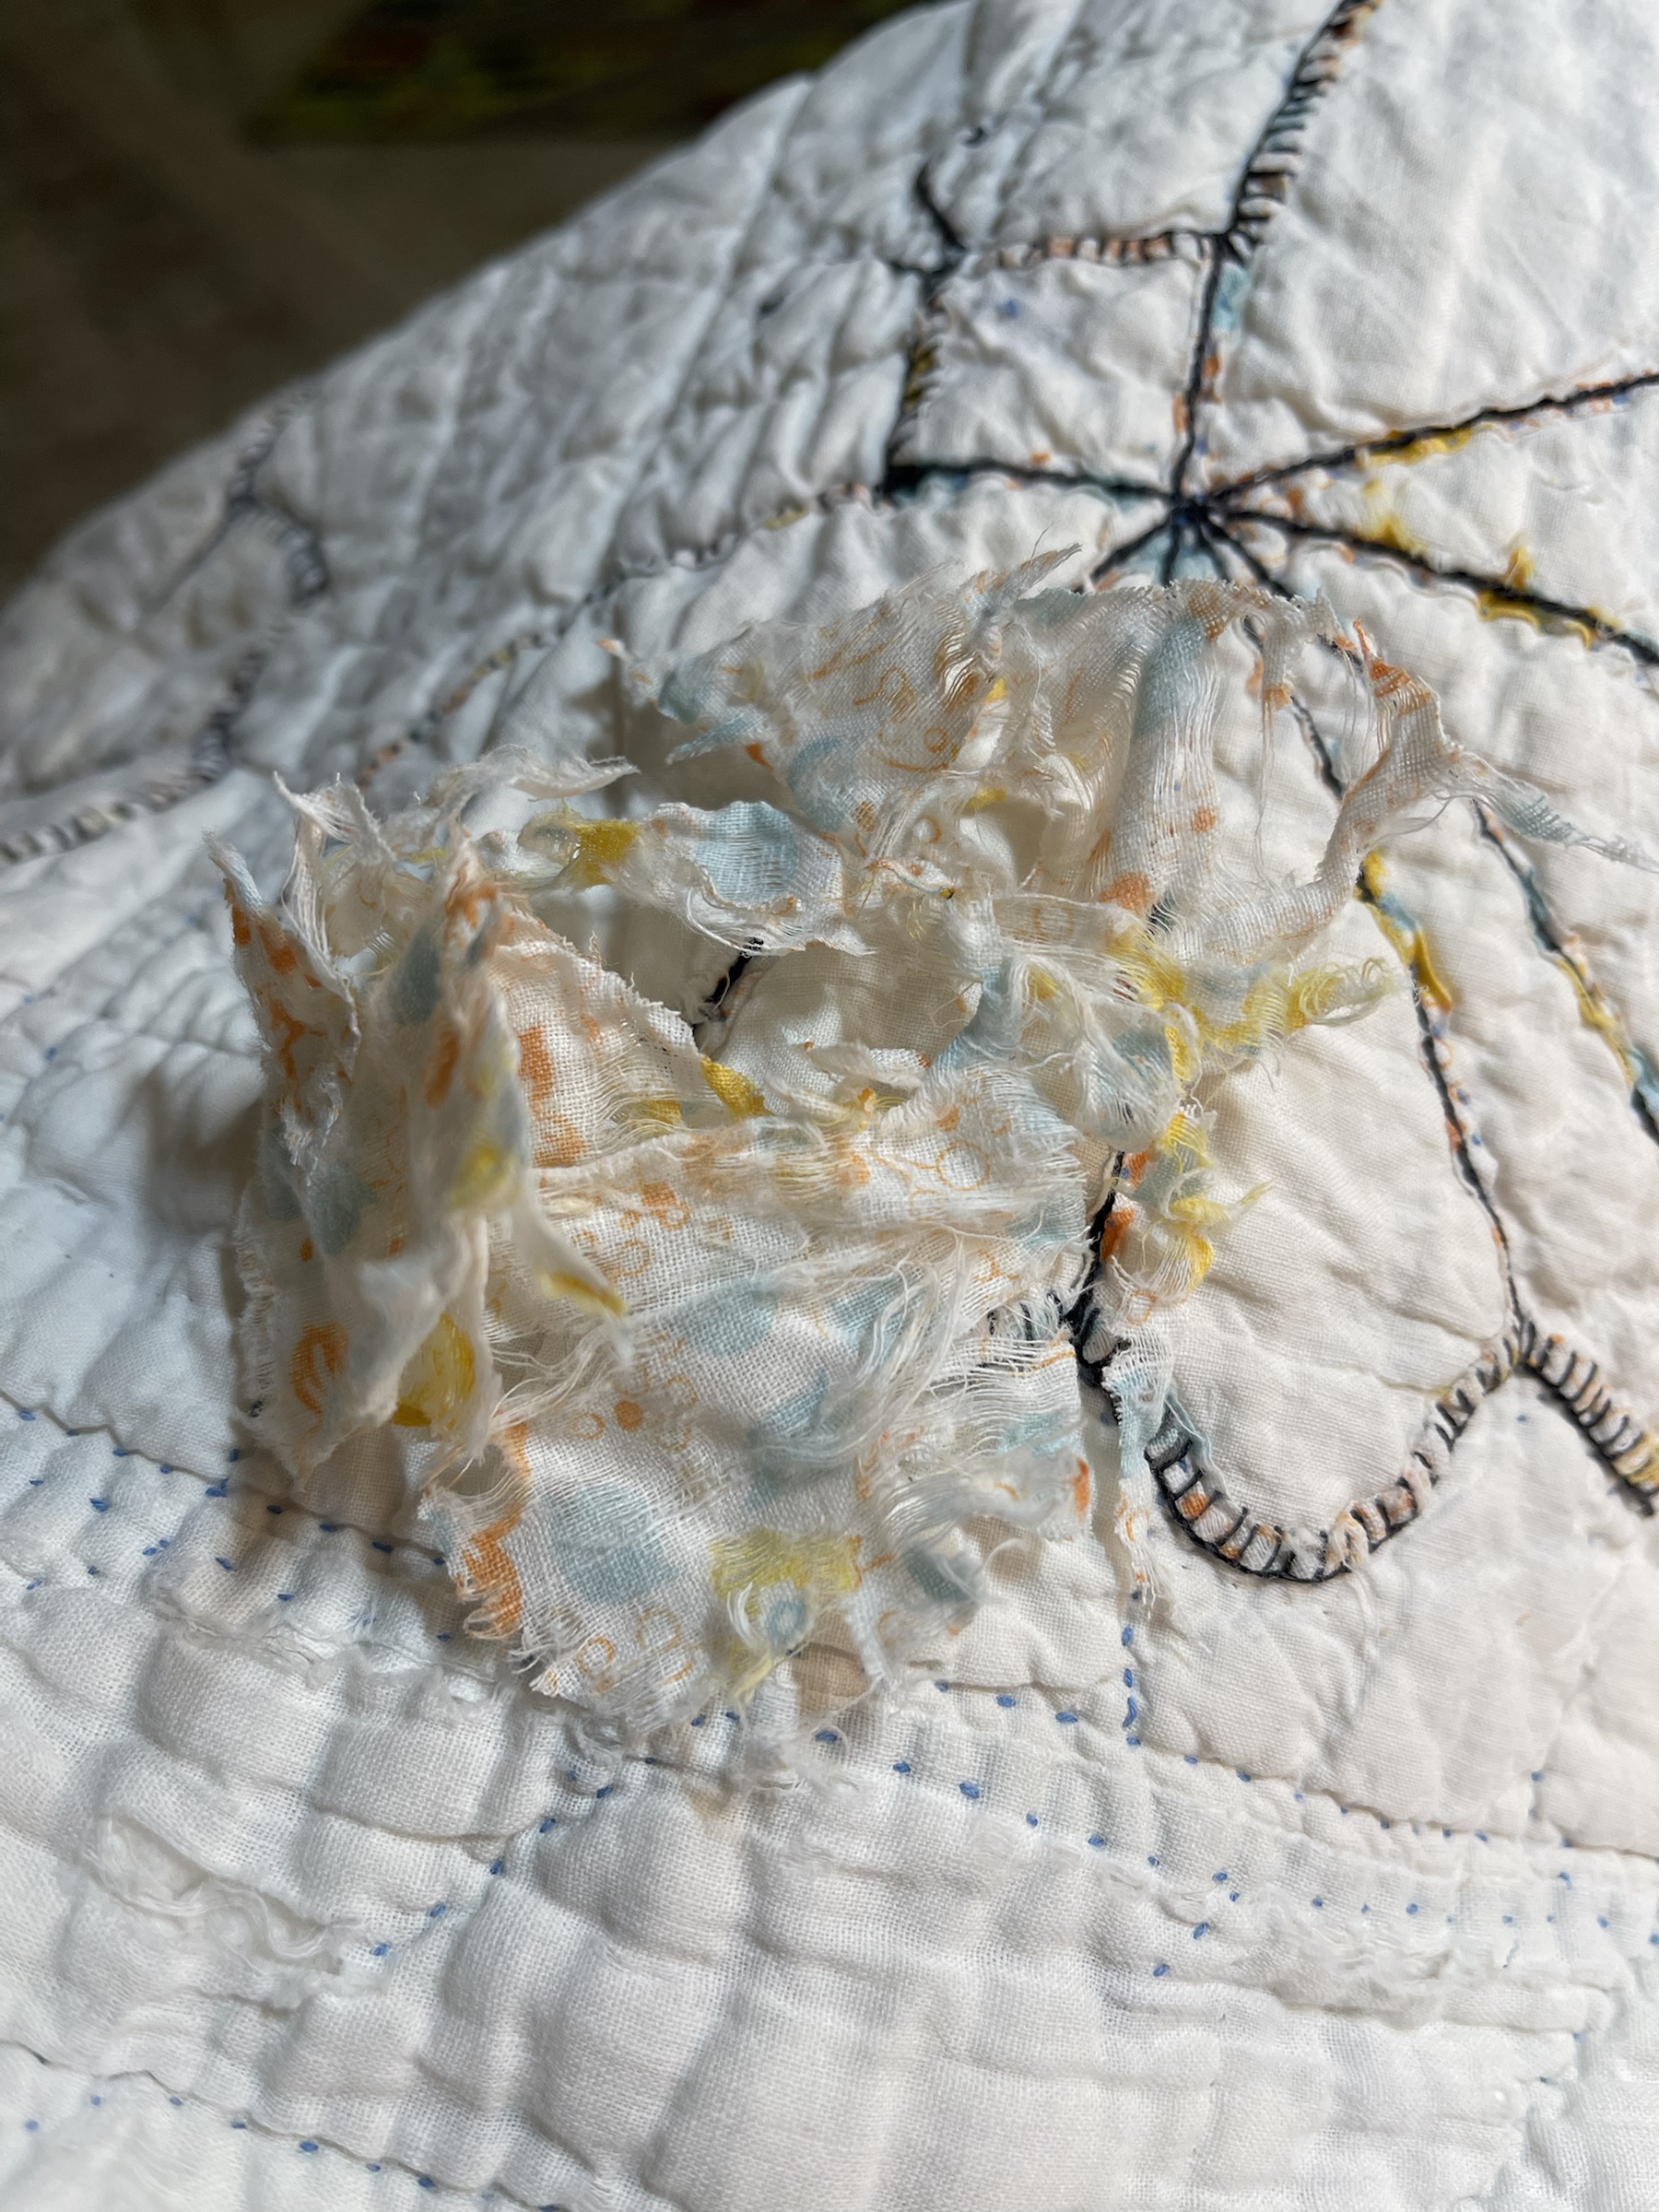
I trimmed away what was left of the original butterfly fabric. Looking back I realize this step was not necessary as all of the replacement reproduction fabrics would have easily covered and disgusted the ragged fabrics beneath.
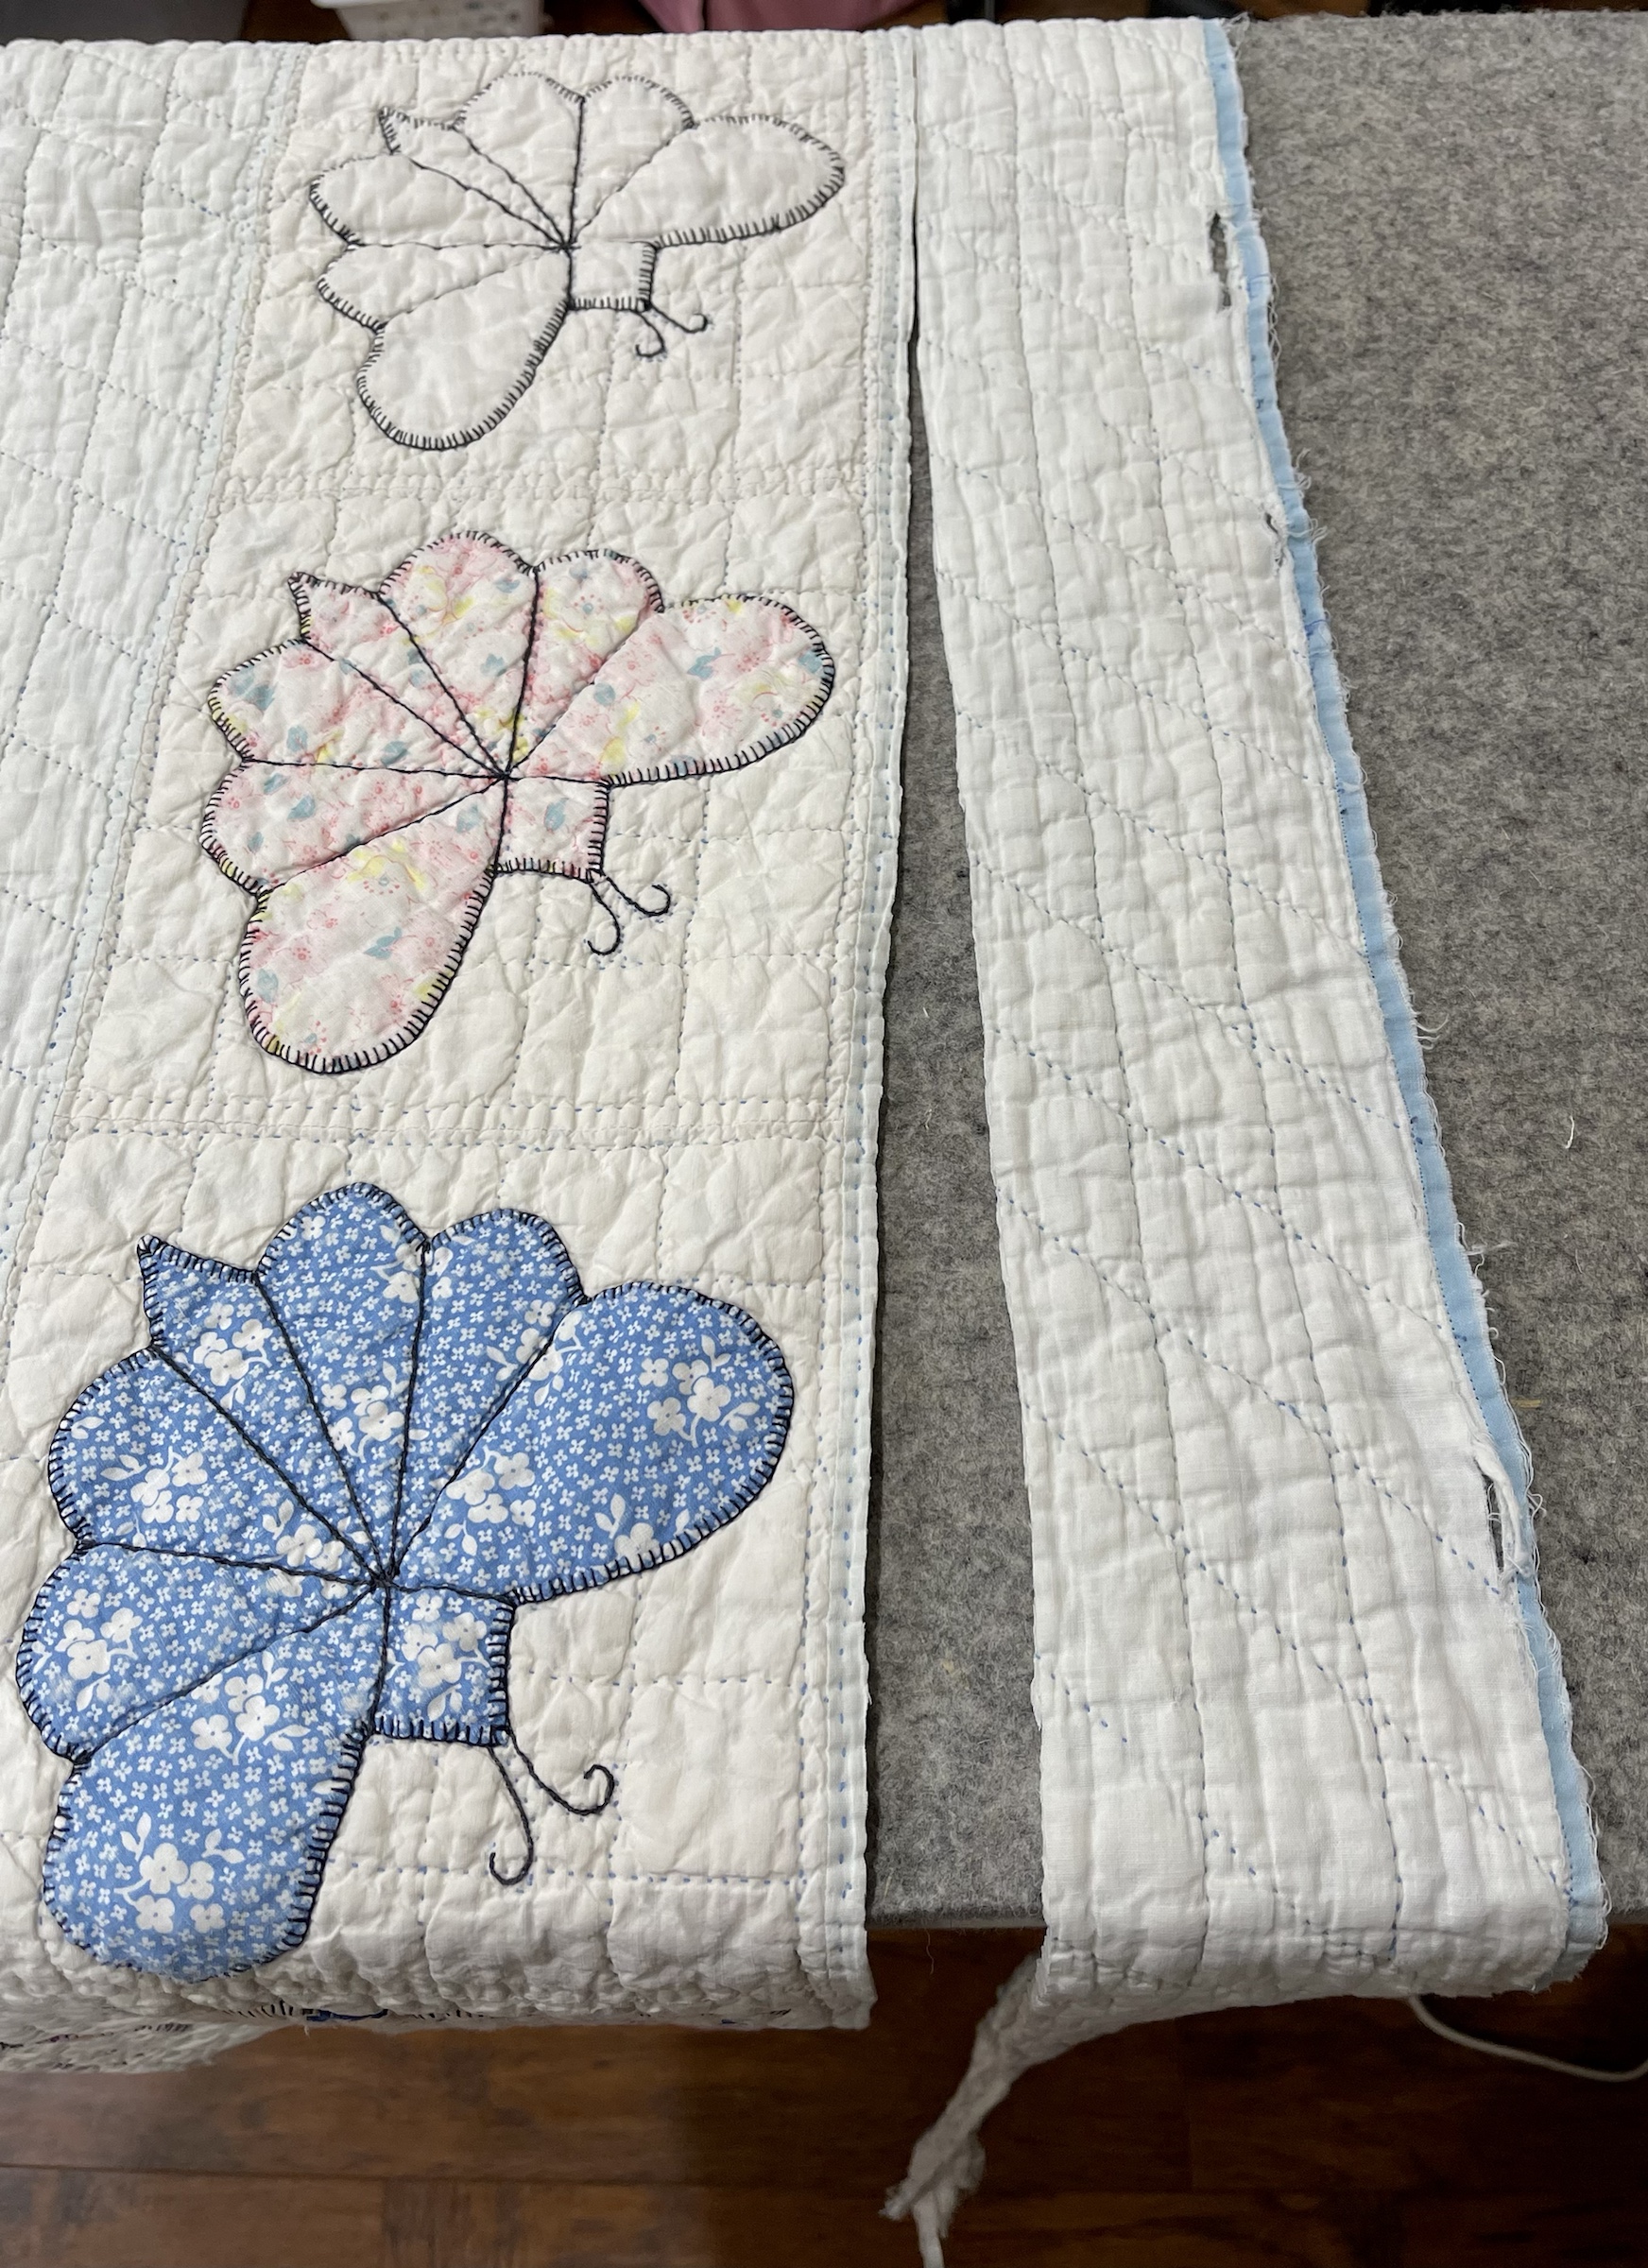
Once I realized I did not want to attempt to replace the top border I held my breath and cut away the remaining three. The trimmed quilt now measures 64×72”.
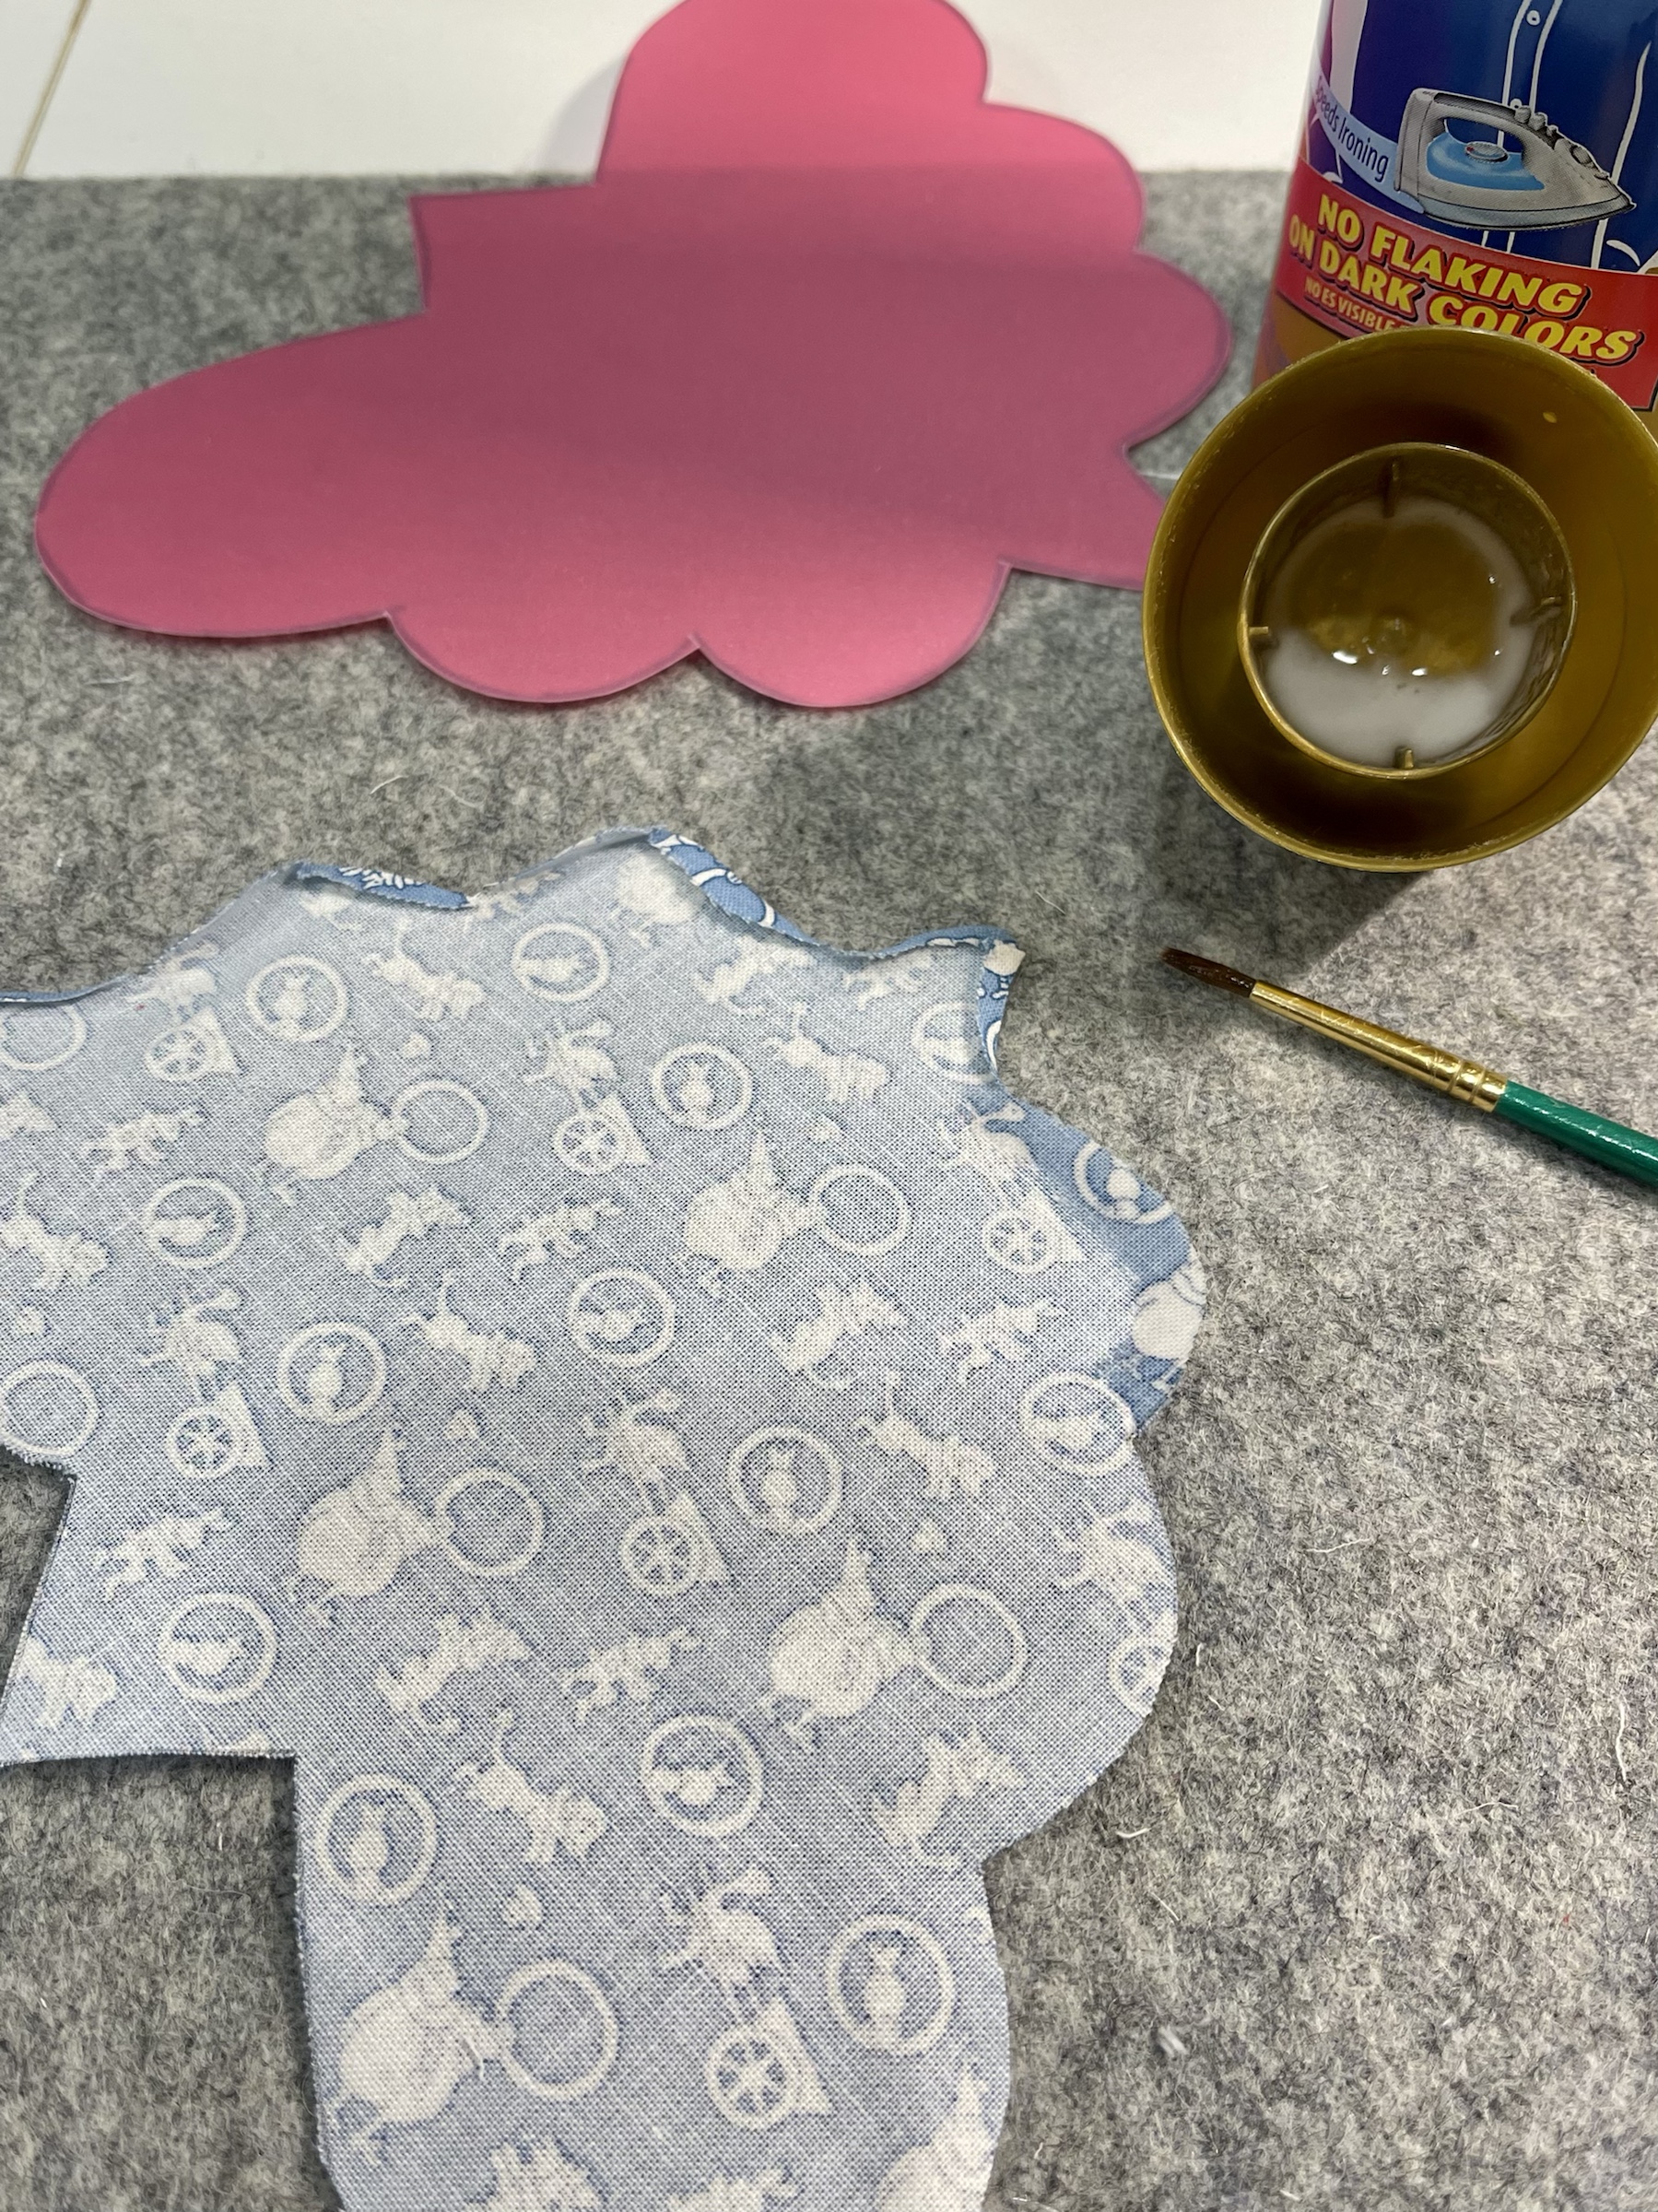
Why is the above template red? Some how from one day to the next I lost the orange one! Good grief! I quickly made another one, this time chose a red binder front plastic sheet. I realized there was no reason to mark the hand embroidery stitching lines on the second template.
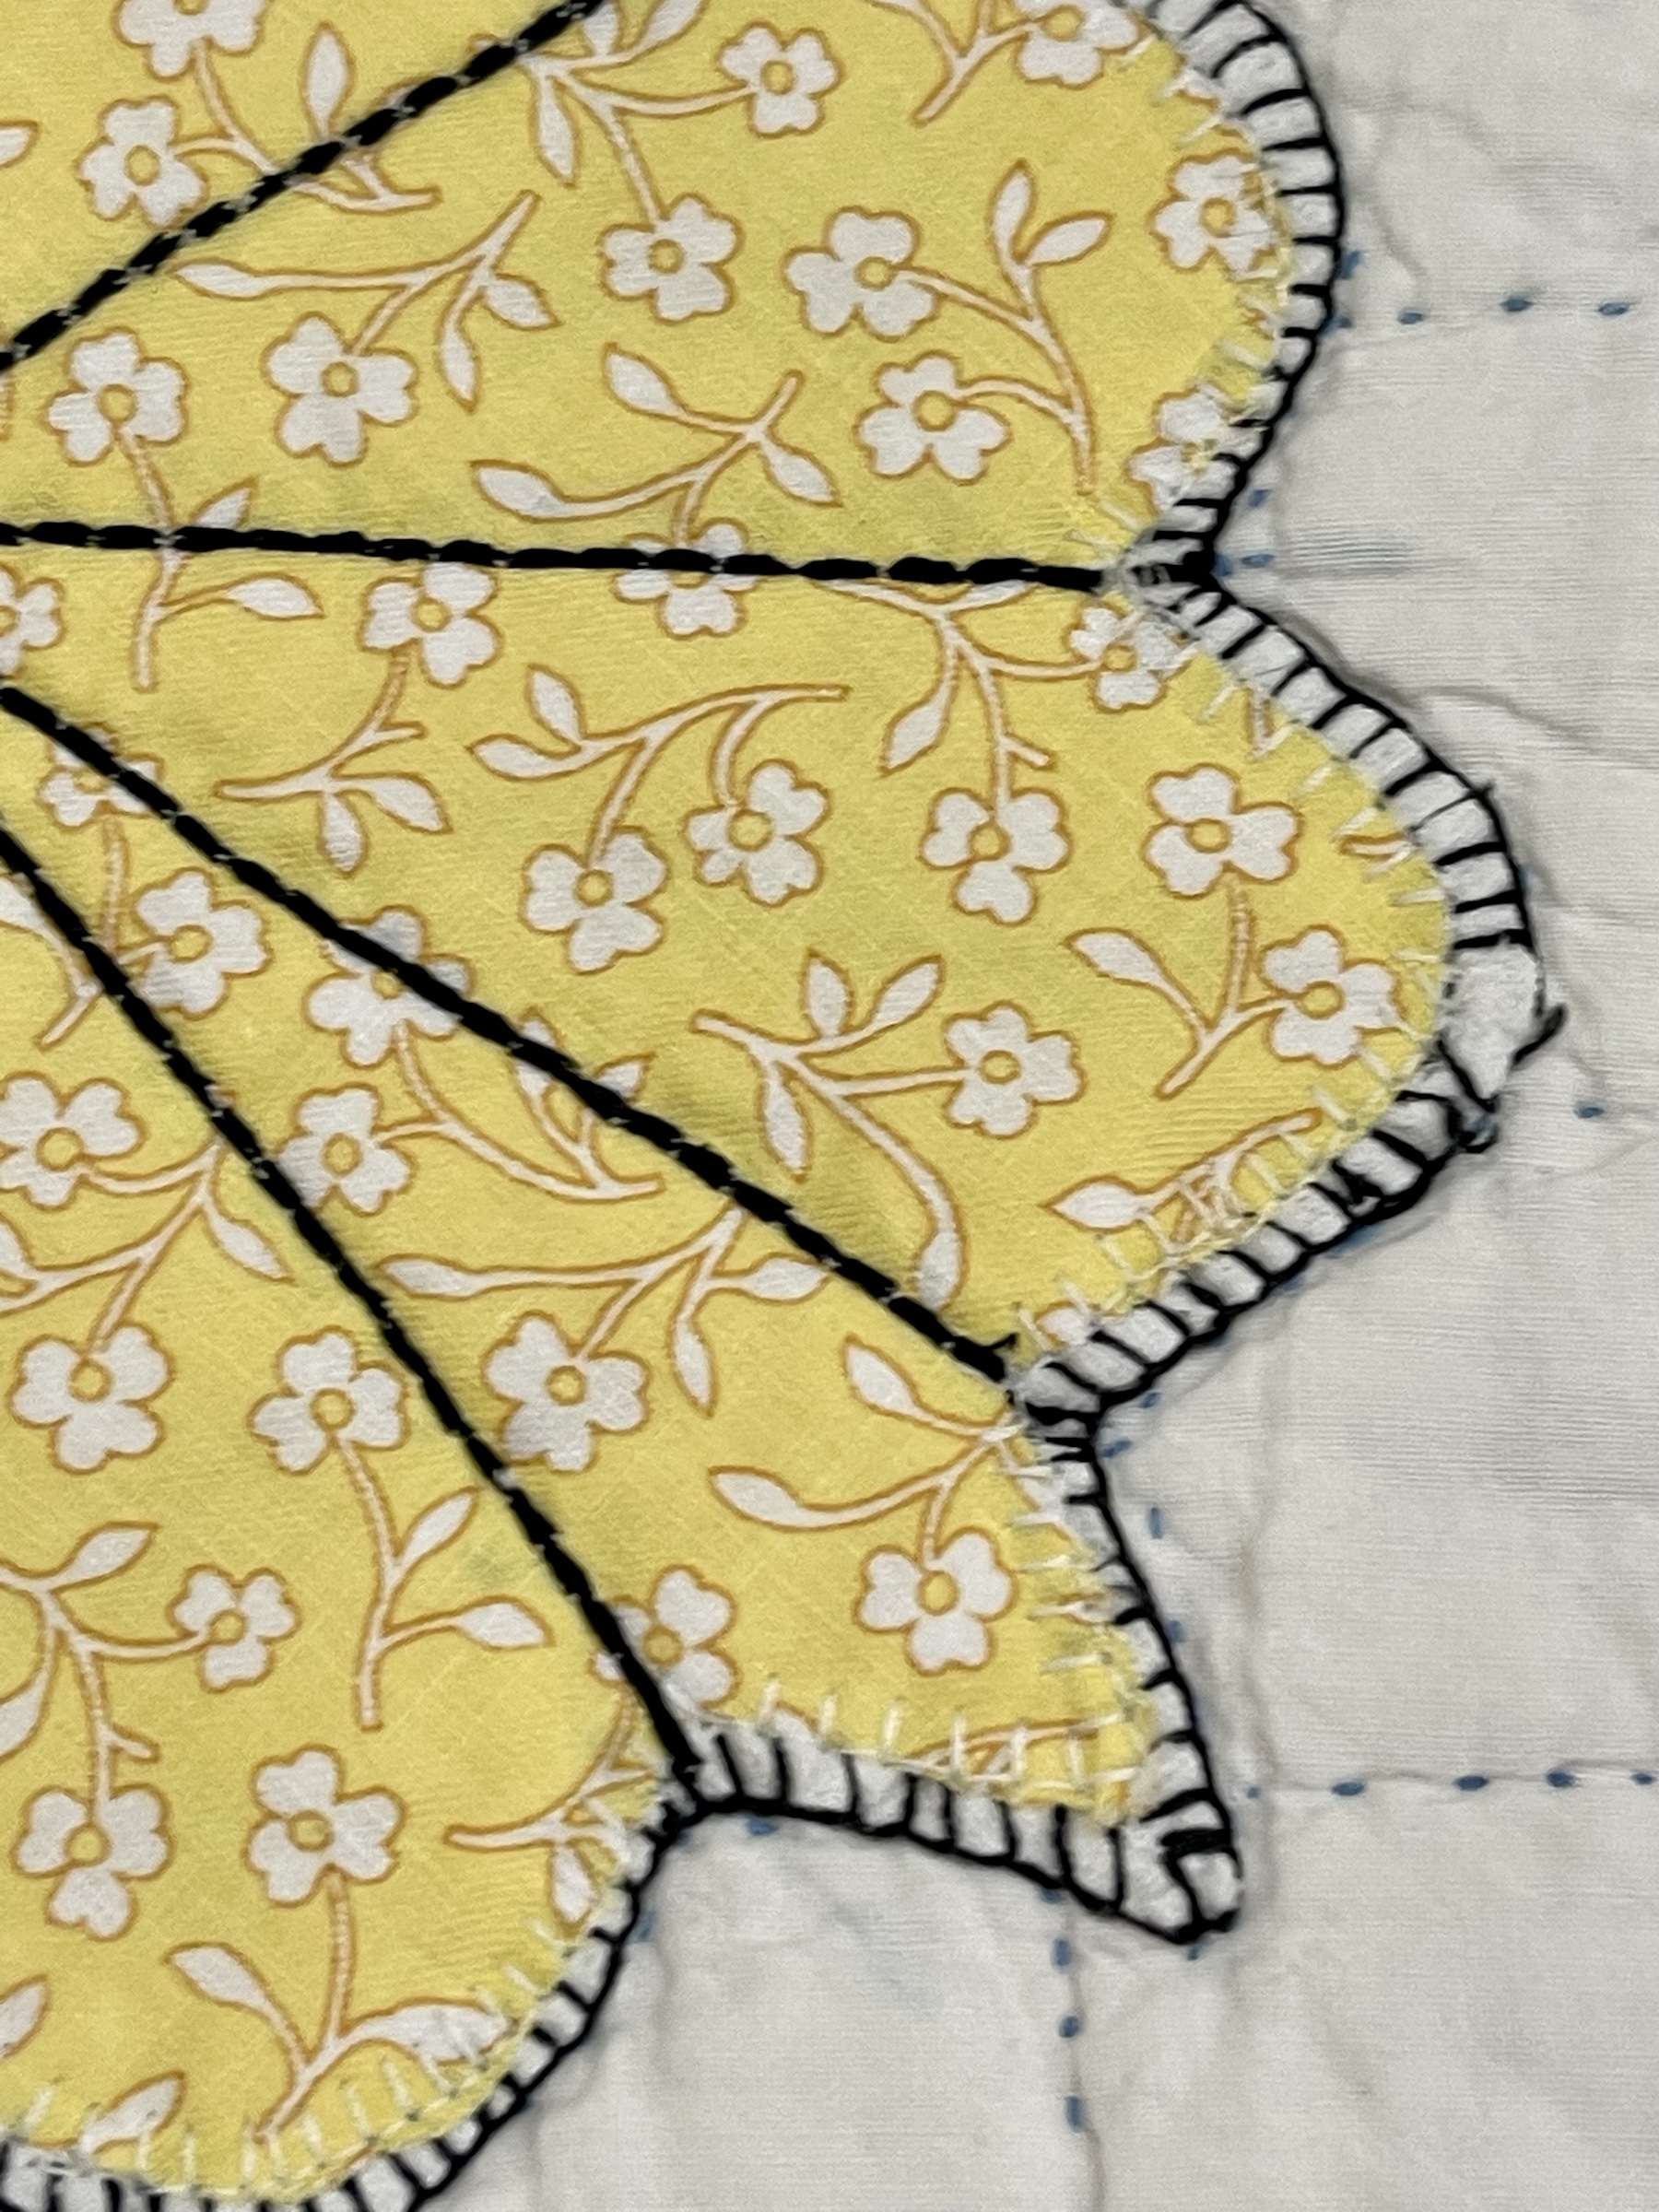
Using my spray starch and a small paintbrush I carefully dampen the outer fabric edge and press to the wrong side of my fabric.
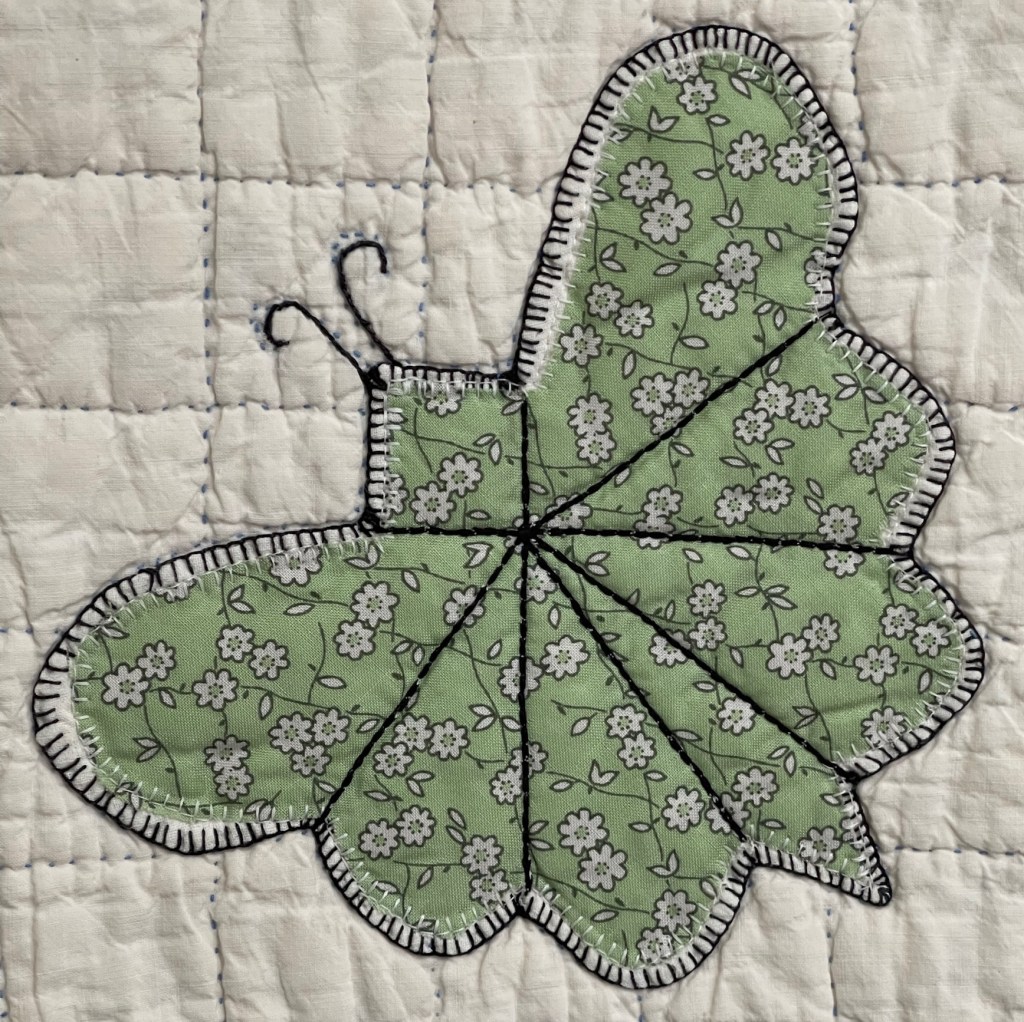
Do you see that where I have left the original hand applique stitching intact? I positioned the new butterfly in place and with a white thread machine appliqued the turned edges.
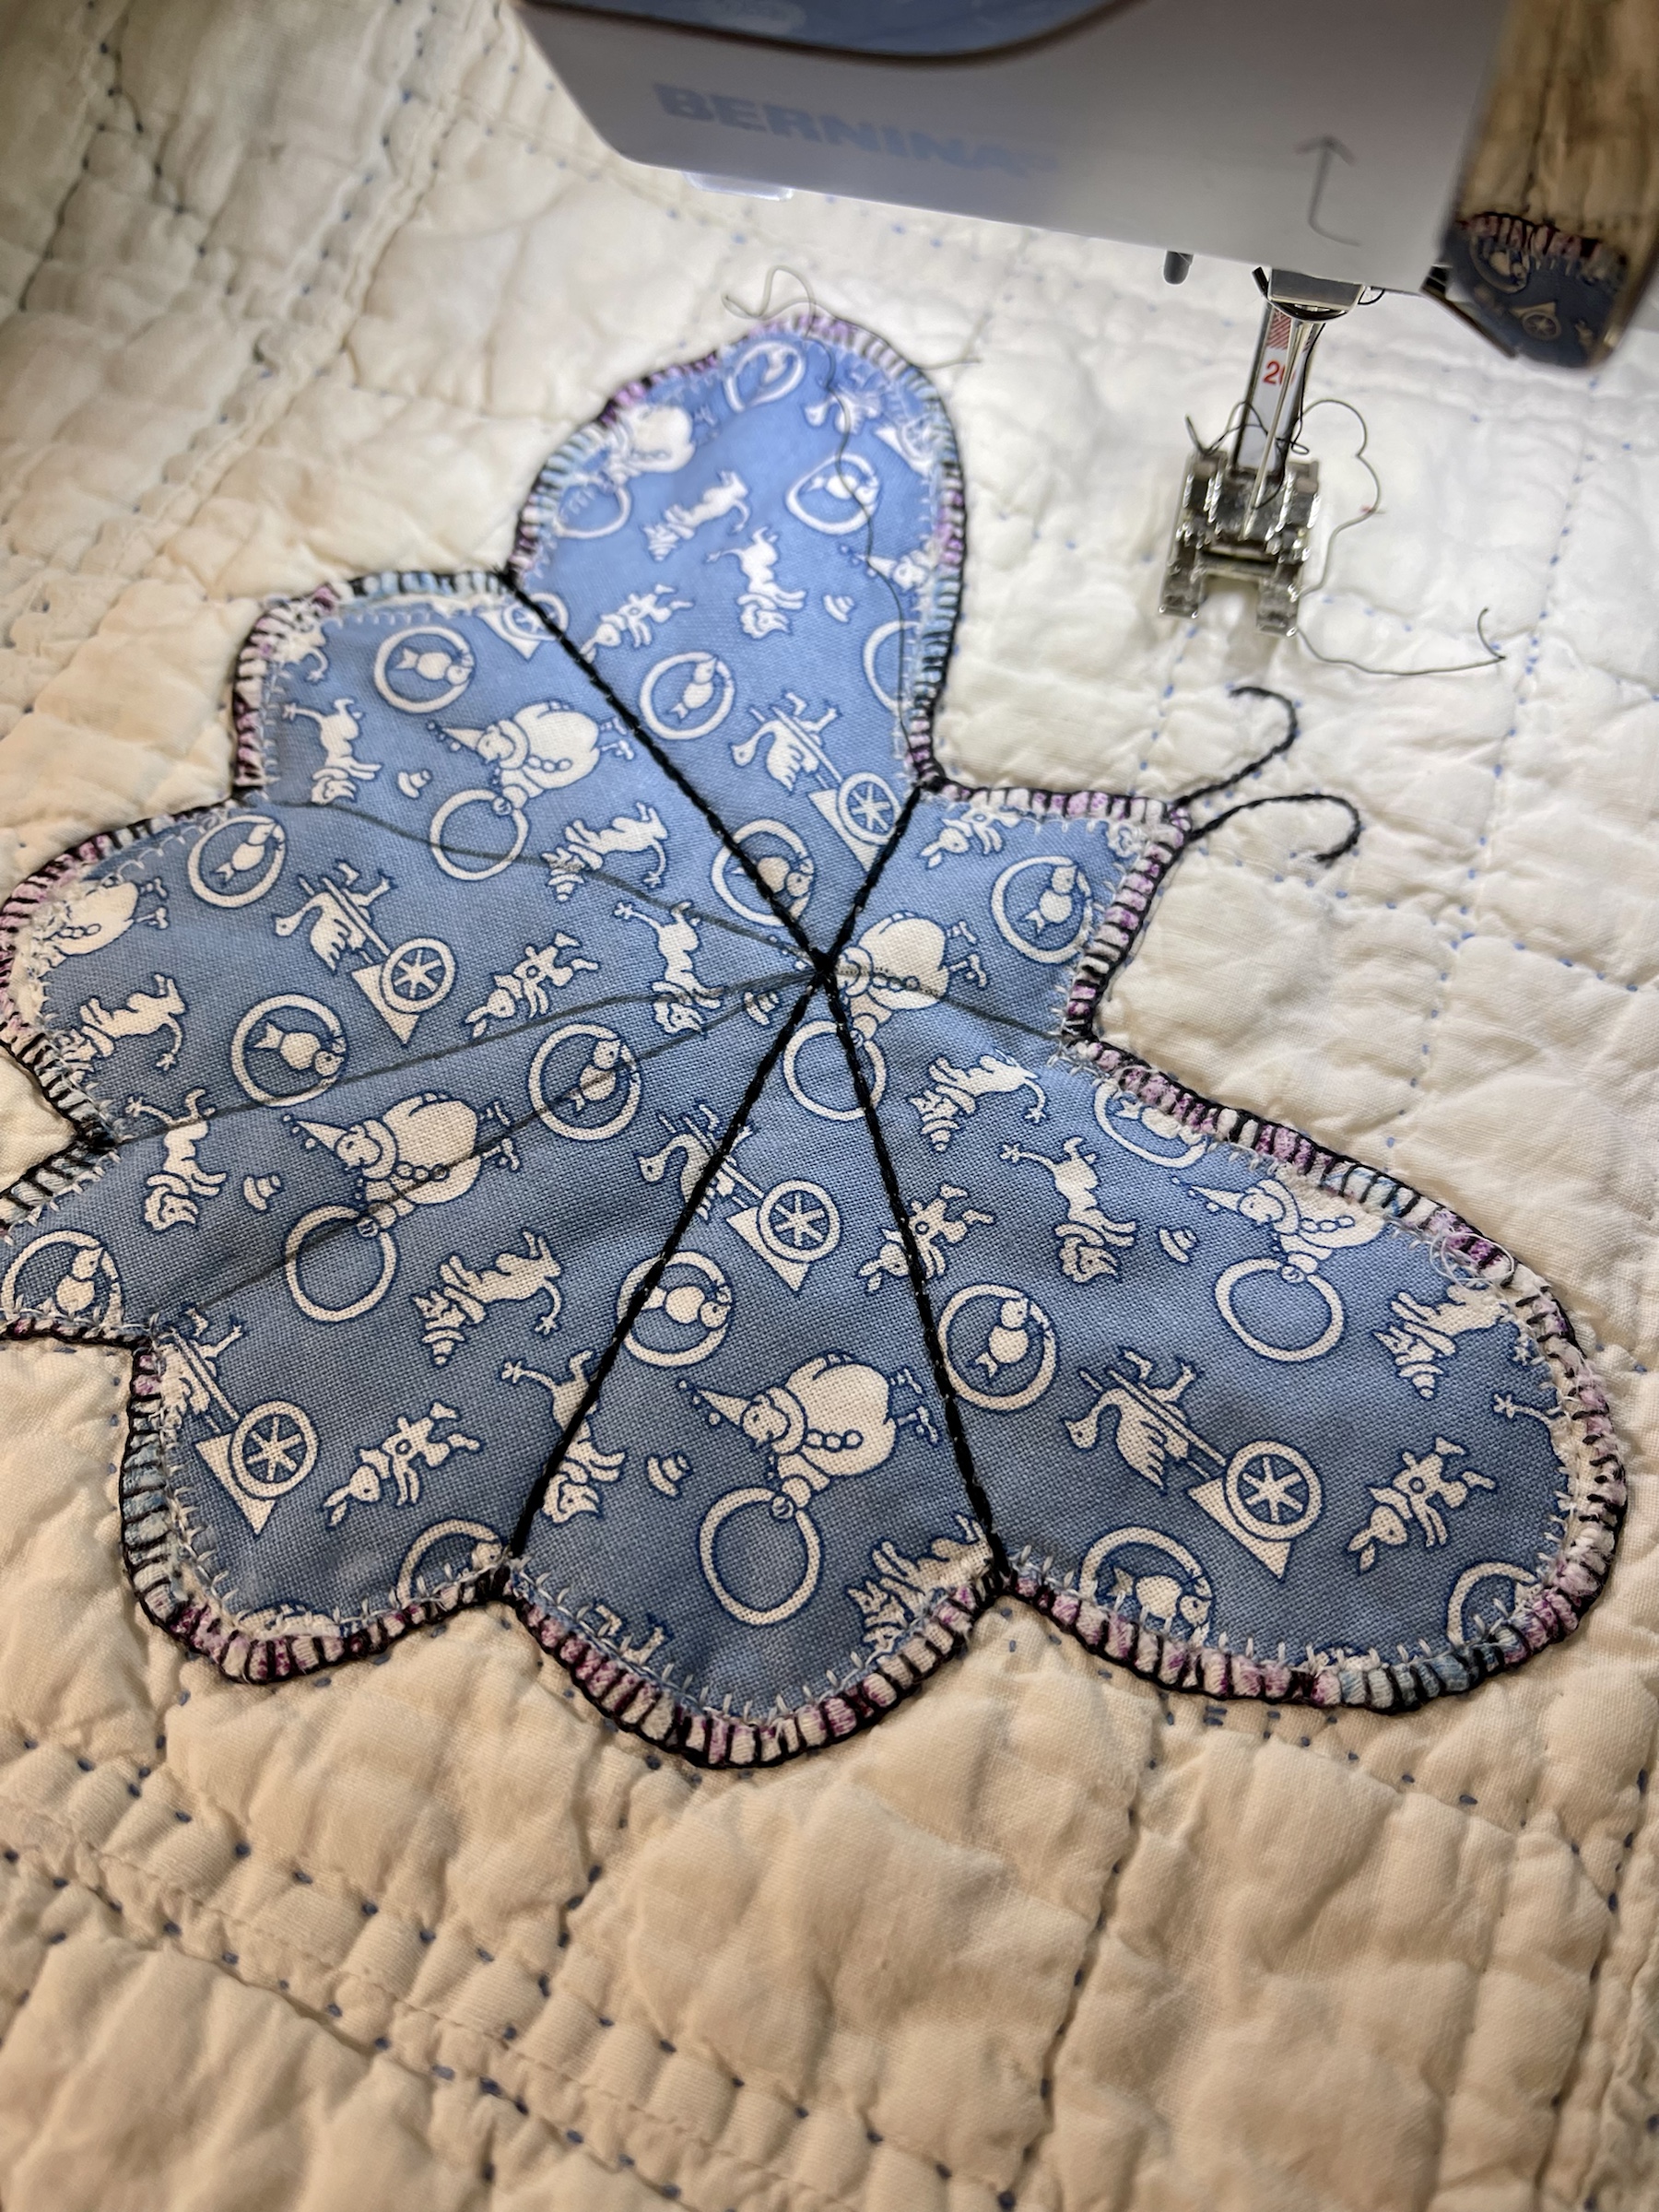
Look at the above and below pics. Would you have readily noticed this technique if I hadn’t pointed it out? If I can achieve an acceptable look by machine I’ll do it every time! I marked the stitching lines with a black Pilot brand Frixion Pen.

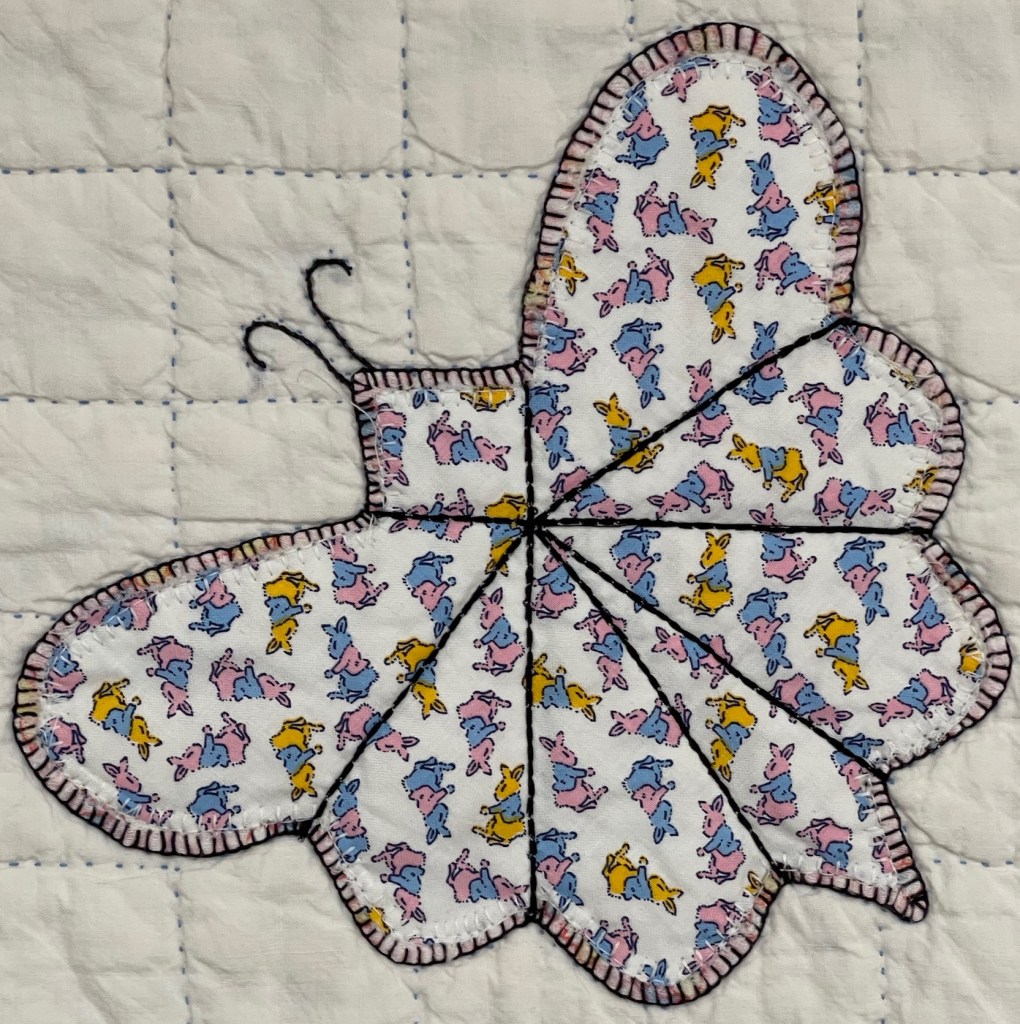
My newly dressed blue butterfly is finished but how did I do the straight interior lines? By machine!
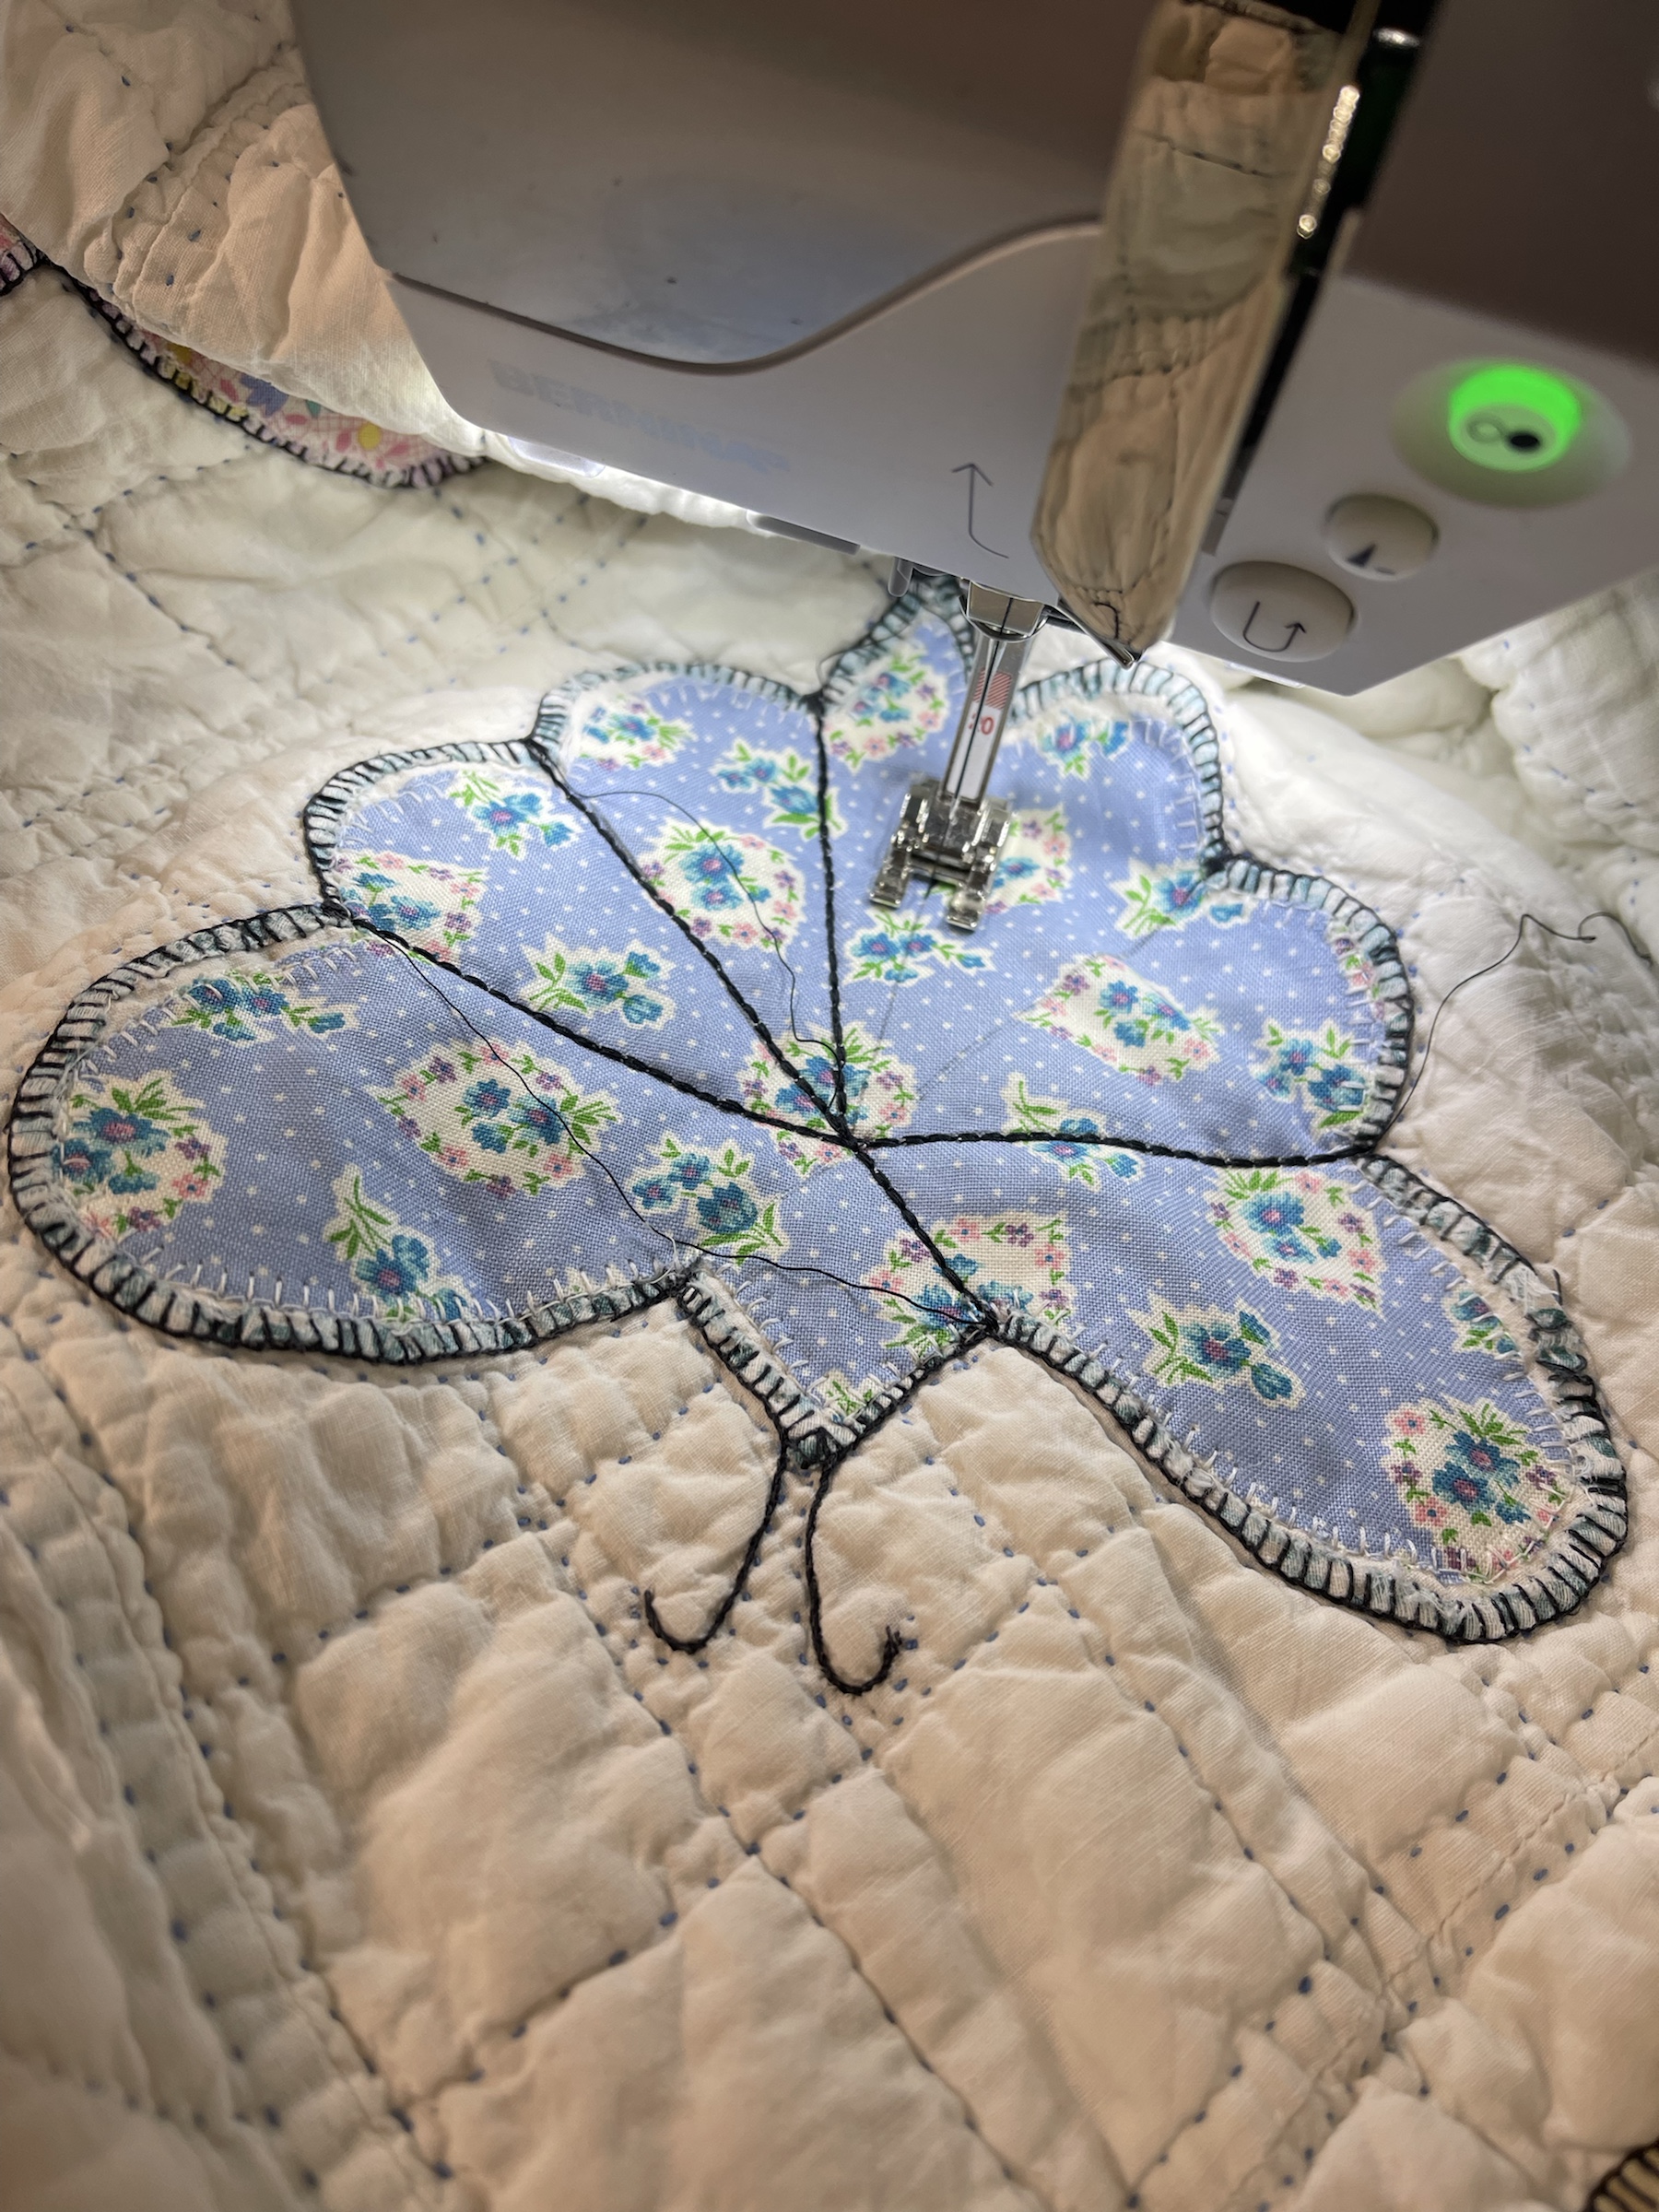
I bought a spool of 30 wt. black cotton sewing thread and used the triple stitch on my trusty Bernina 550. Remember the weight of thread increases as the numbers decrease. 40wt is generally regular sewing thread, 100wt is very thin…think silk. Check your machine manual, specifically the utility stitches, most machines come with a triple stitch. I purposely have white cotton thread in the bobbin and with a scrap piece of fabric folded into 4 layers, I stitch and slowly tightened the needle thread tension until a bit of the bobbin thread was pulled up, enough to give this machine stitch a “hand done” look.
Another new.y dressed butterfly.
And another.
Don’t be afraid is leaving a bit of the old to work with the new.
Here I am auditioning two yellow fabrics, I love that I have lots of Aunt Grace by Moda reproductions to choose from!
Stay tuned, when I post again I will go into detail about all the embellishing that happened to achieve the look of the first picture way above at the top. Such fun!!
Blessings to all and happy quilting, Rhonda
Ps: if you’re so inclined, scroll back a few days to March 10th and read my post about making quilt blocks for Ukrainian refugee children! Such a worthy cause! 💙💛


I absolutely love what you did with this old quilt. I collect old vintage embroidered linens and will not look past an old quilt from now on. I think this is something that I might need to do.
LikeLiked by 1 person
Your ingenuity never ceases to amaze me!
LikeLiked by 1 person
For some reason I was thinking of the original maker of this quilt. You have kept so much of the love that went into it and added your own. This is beautiful before and after. I love the smart idea of using the tulle and the contrasting thread.
LikeLiked by 1 person
I love how you save old quilts! I have an old dresden plate quilt that needs several blades replaced. Getting to see your process step by step makes me think I can fix my old quilt. Thank you so much for sharing your process step by step!
LikeLiked by 1 person
You are so talented. I love the quilt and your process of saving it.
LikeLiked by 1 person
It’s going to be interesting watching you rescue another quilt.
LikeLiked by 1 person
I love reading all your methods of saving old quilts, Rhonda. So interesting to read. Plan to read about previous projects of yours when I have some free time.
LikeLiked by 1 person