This blog post addresses the Double Wedding Ring quilt that has pieced arcs. I’m showing you below the template set I prefer, the set from Marti Michell. In this blog we will be specifically talking about three pieces: the Pieced Arc End, the Pieced Arc Middle Segment and the Small Melon. Just ignore the center template labeled Four Patch Corner, this template will be addressed another day.
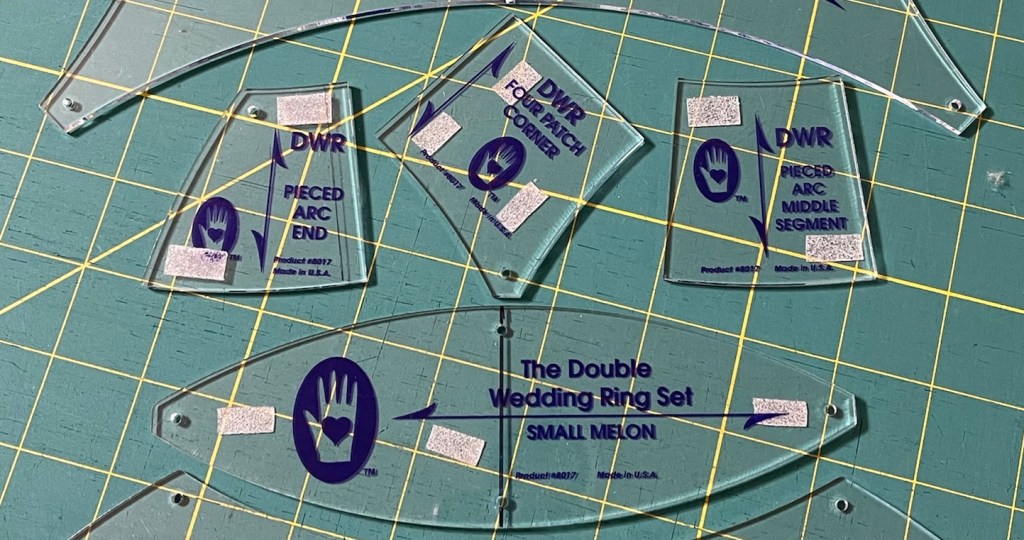
Oh, and what are those little white rectangles? Skateboard Grip Tape! They work wonders for keeping my template securely in place while I am rotary cutting. Because I need to flip the Pieced Arc End template I placed the grip tape on both the front and the back. I bought a large roll of this grip tape online. Just google Skateboard Grip Tape. Oh…and whatever you do, DO NOT CUT THE GRIP TAPE WITH GOOD SCISSORS!
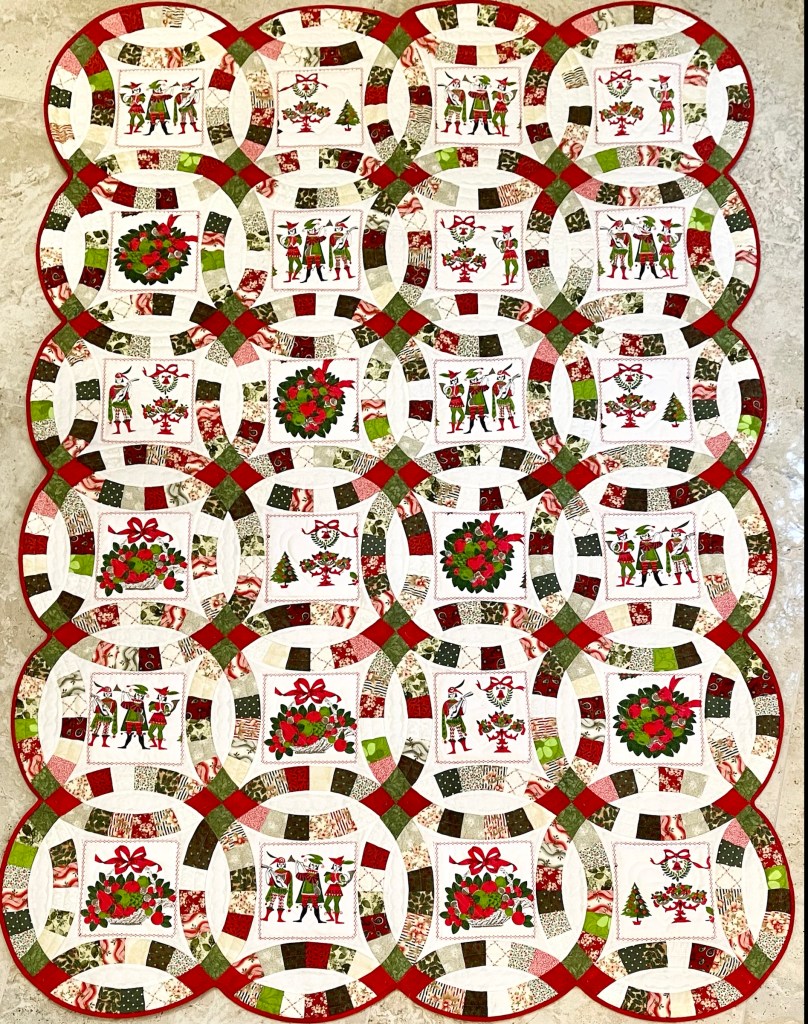
For this quilt I used a vintage Christmas tablecloth and found that I had just 27 of the darling motifs I could cut out so I ended up with a 24 block quilt. Your quilt may be smaller or larger.
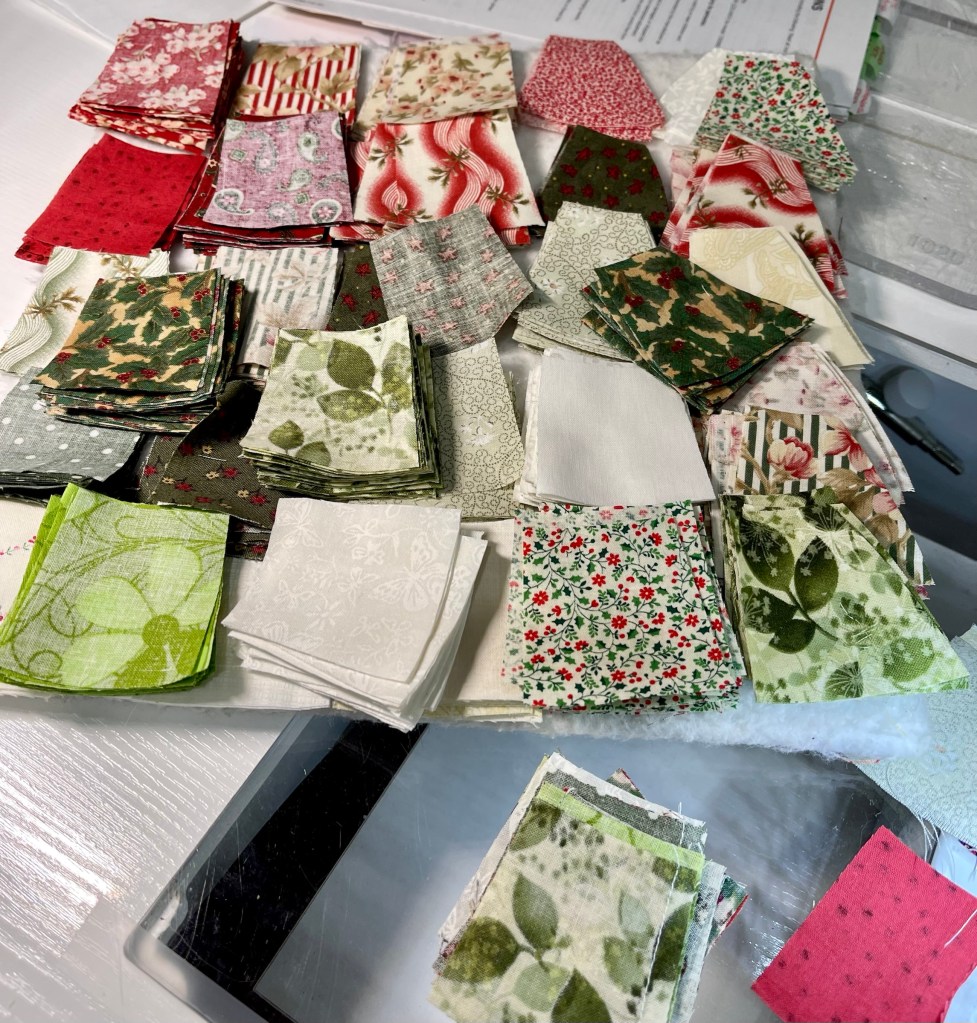
I spend several hours choosing my fabrics that would work well with the old tablecloth, paying close attention to using both white and ivories, lots of reds and an equal amount of greens. Many of the fabrics are Christmas themed but definitely not all. It was also important to me that I not use the four patch fabrics in the pieced arcs.
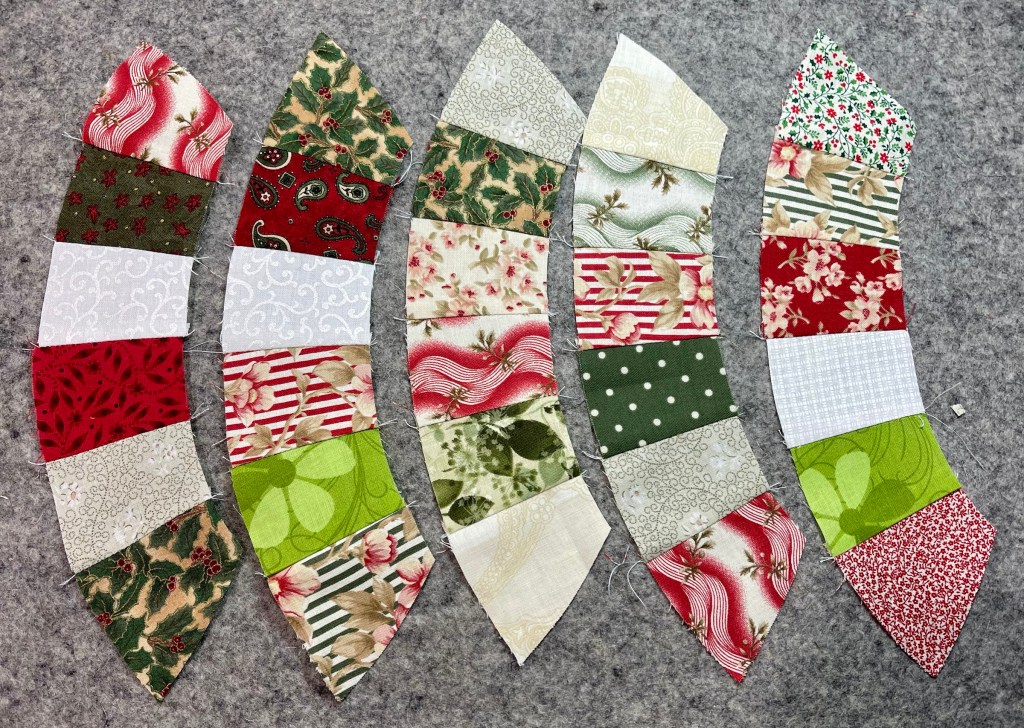
To piece a single multi fabric arc I needed 4 Pieced Arc Middle Segments and 2 Pieced Arc End segments for a total of 6 pieces.
But how many of each piece from any or all the fabrics would I need? I had no idea so I cut a minimum of 15 from a whole bunch of fabrics. As I began sewing I found I was cutting lots more pieces!
But…you need to pay close attention to the Pieced Arc End Segments…look closely at the picture below…do you see that while the center four pieces are identical, the two end pieces are mirror images of each other.
In the picture above you can see that I stacked my pieces on a small 14×14” batting covered piece of cardboard. If you need to make yourself a small board such as this I’d suggest making it at least 16×16”. This little board was invaluable for keeping everything organized and while not super obvious, I had all my Pieced Arc End Segments lined up vertically along the right side.
Oh my goodness, at this point I wanted to stay up all night sewing pieced arcs!
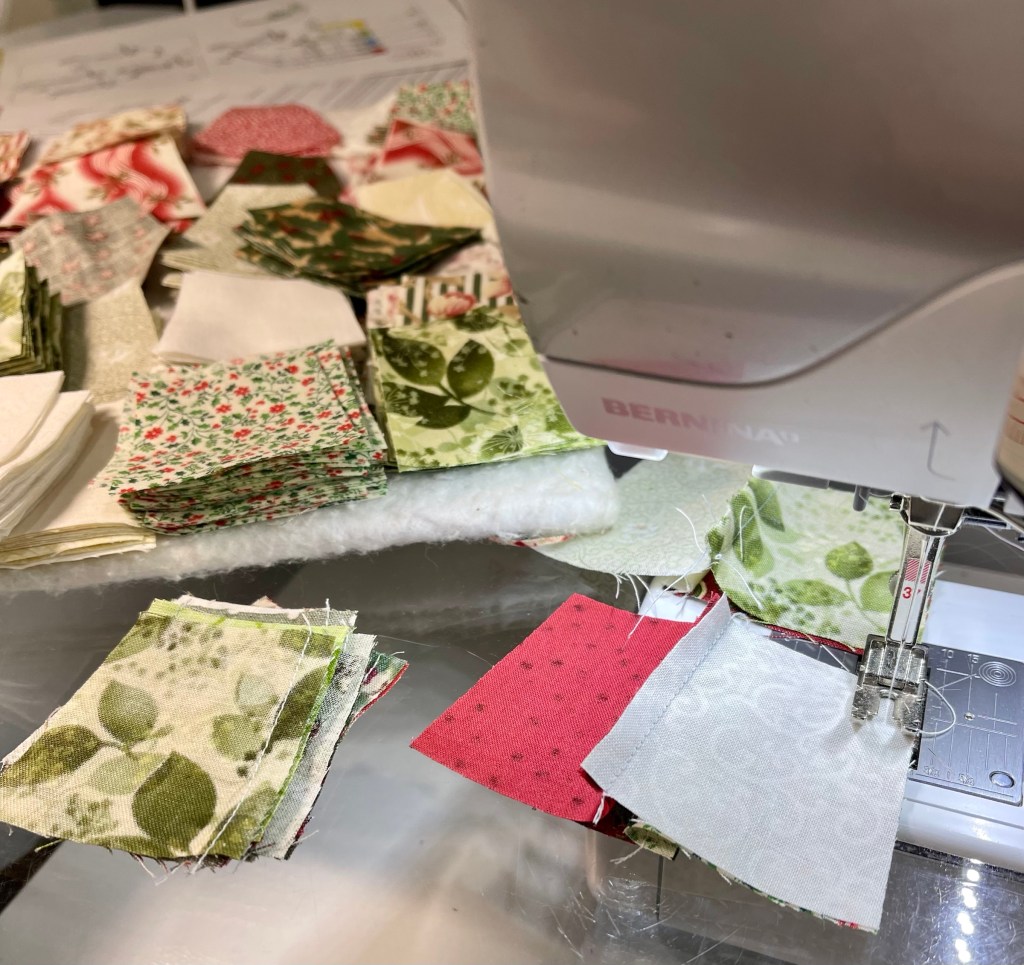
Plan to have a nice mix-up of fabrics/colors. I chain pieced most of the center four pieces, joining together two at a time taking care to not have two similar color fabrics next to each other. Once I’d chained maybe 20 or so groups of two I then chained those 20 together making the center portions of 10 pieced arcs. I’m not a huge fan of chain piecing but it worked great for this project.
📌📌📌📌📌 A HUGELY IMPORTANT THING: pay very close attention to sew AN EXACT 1/4” seam allowance!! 📌📌📌📌📌
You need to audition your arcs just like the class participants making the Solid Arc DWR.
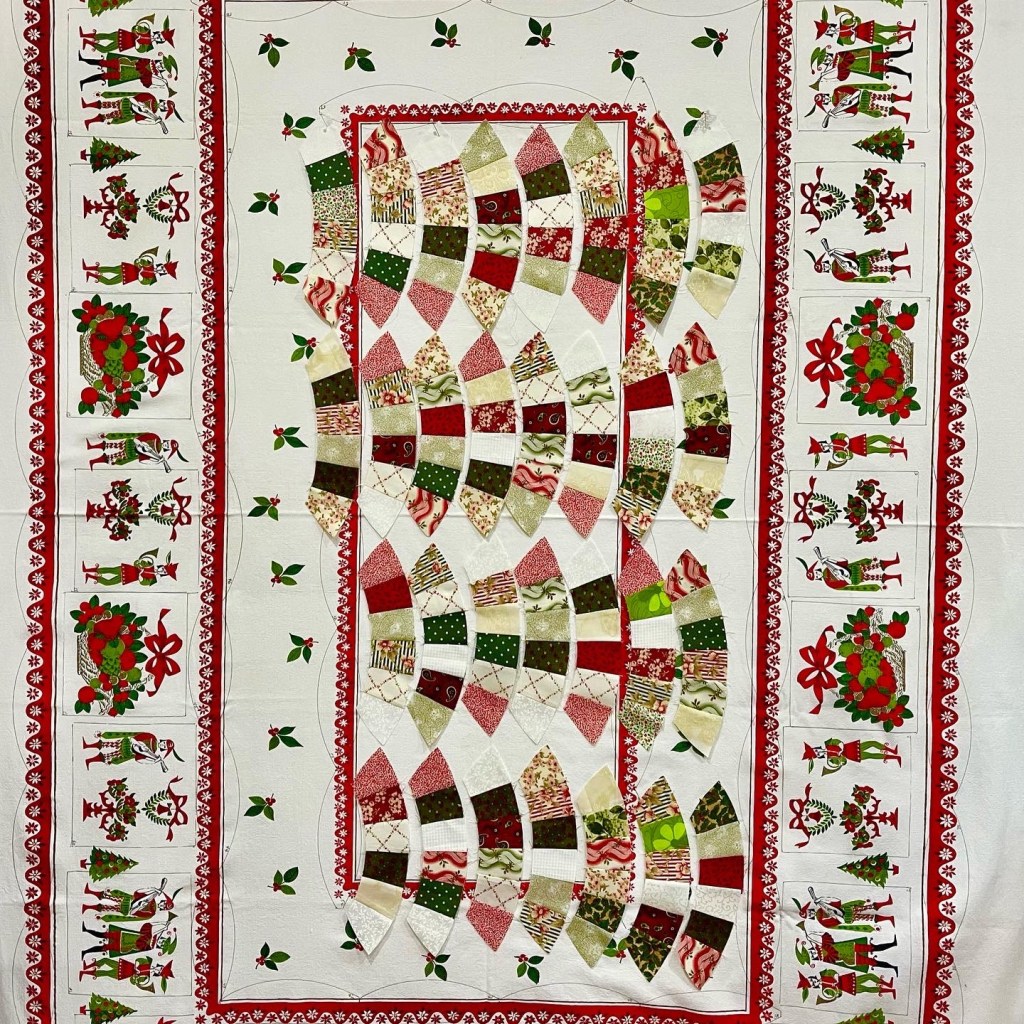
Can you hear my heart go pitter-patter as I look at this picture! Having never made a pieced arc DWR before I knew I was hooked!
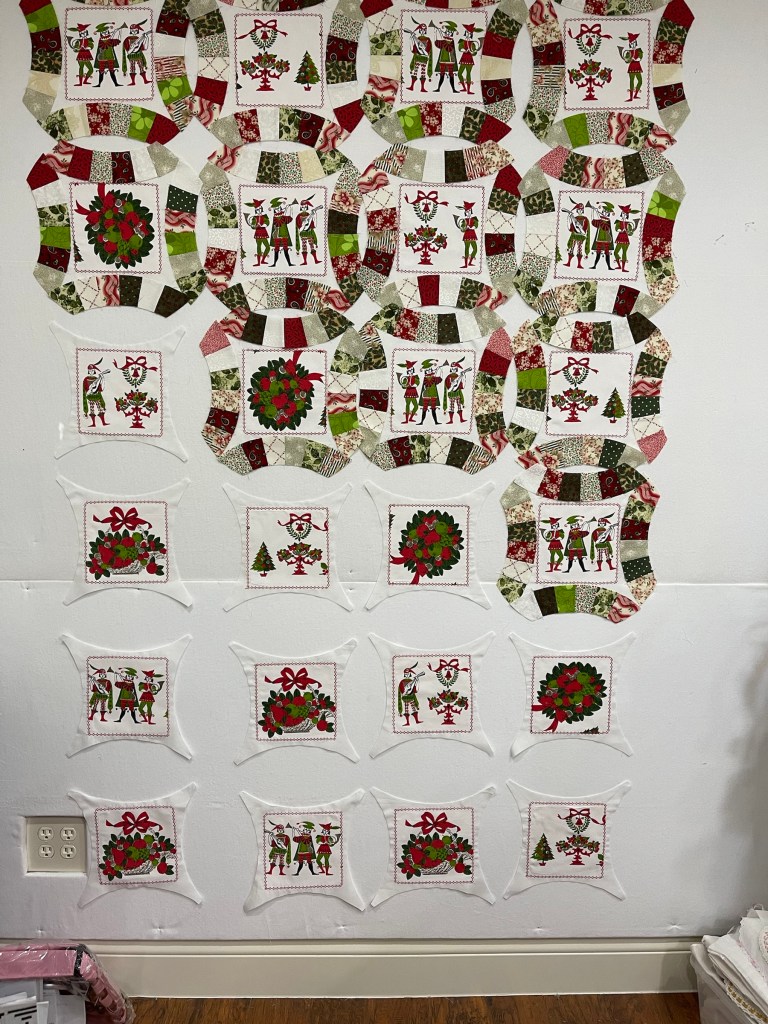
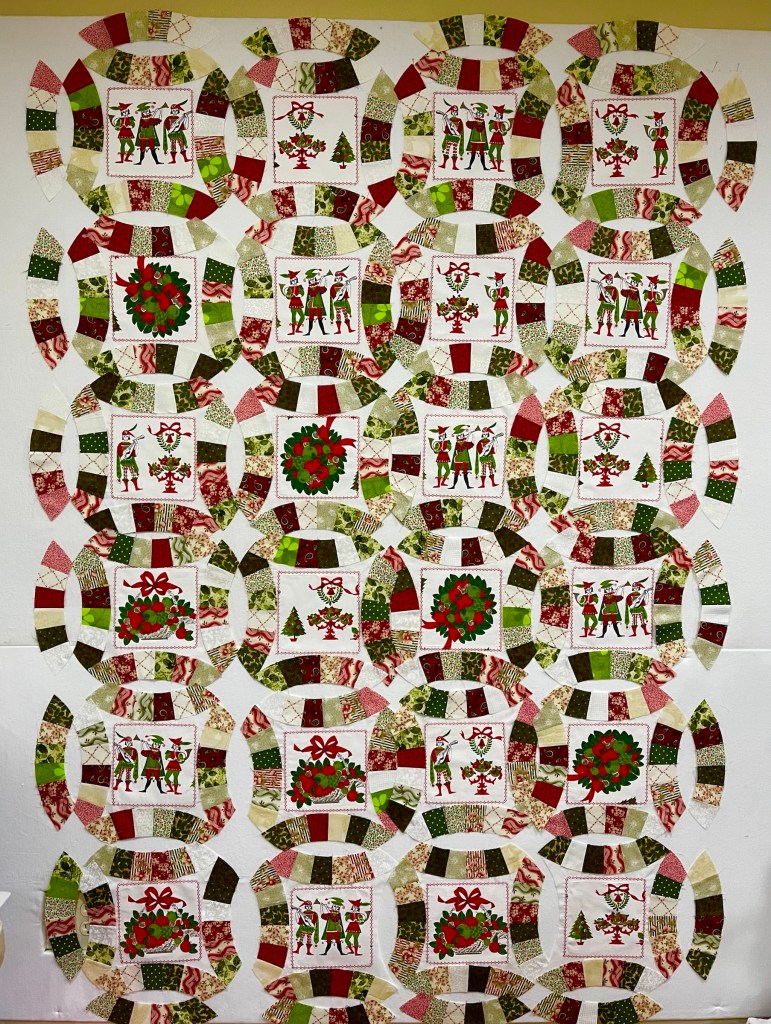
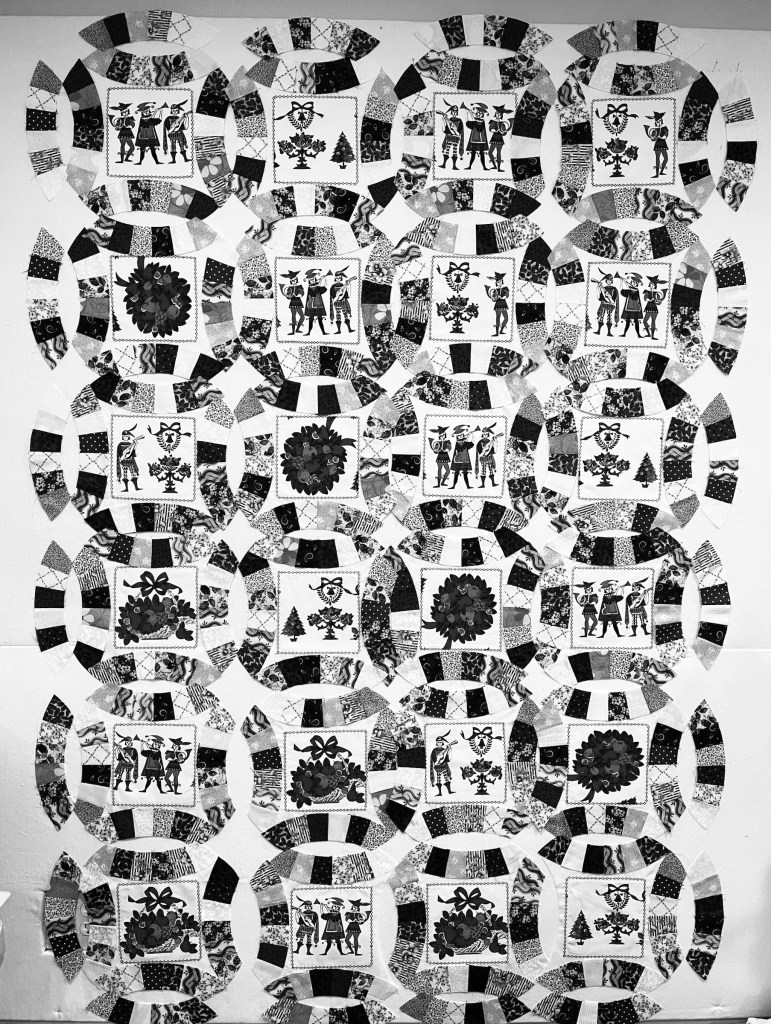
Once you have all your Pieced Arcs made and you’re happy with the layout, take a picture. Next change the picture to black and white and see if you are still happy with the layout or if some changes or arc swapping needs to happen.
Speaking of pictures, I say take lots and lots of pictures are you work on your quilt. They provide such a nice record of your progress start to finish of your projects!
Again…do not sew footballs! It’s not time yet!
How are you feeling about your Double Wedding Ring quilt project? It’s exciting isn’t it!
Happy quilting and blessings,
Rhonda