

Faced with the dilemma of needing my Vintage Linens Quilt #1 (VLQ#1) for a presentation to the Alamo Heritage Quilt Guild earlier this month and knowing it wouldn’t be back in my possession until the end of March, I decided to create a replacement of sorts! VLQ#1 was handed off to the Houston Livestock and Rodeo the first week of January so on New Years Eve day I started this new one creatively titled: VLQ#2. I learned a hard lesson when I made #1: make the blocks with some sort of guide as to size. Being the Pinterest addict I am, I searched for several hours thru various pre-created quilt diagrams, found one I liked and immediately sent off a quick email to the creator seeking permission to use her pattern.


Now when you see the end product you’ll be surprised to learn I’m not all that fond of pink, but I have so many pink and green vintage doilies in my stash I decided they would get a chance to shine.
With this project in mind, I scoured the International Quilt Festival last fall for fabrics and came home with several yards total of about 15 different choices. I’m going to feature several different blocks today and try my best to answer any and all construction questions that you might have.
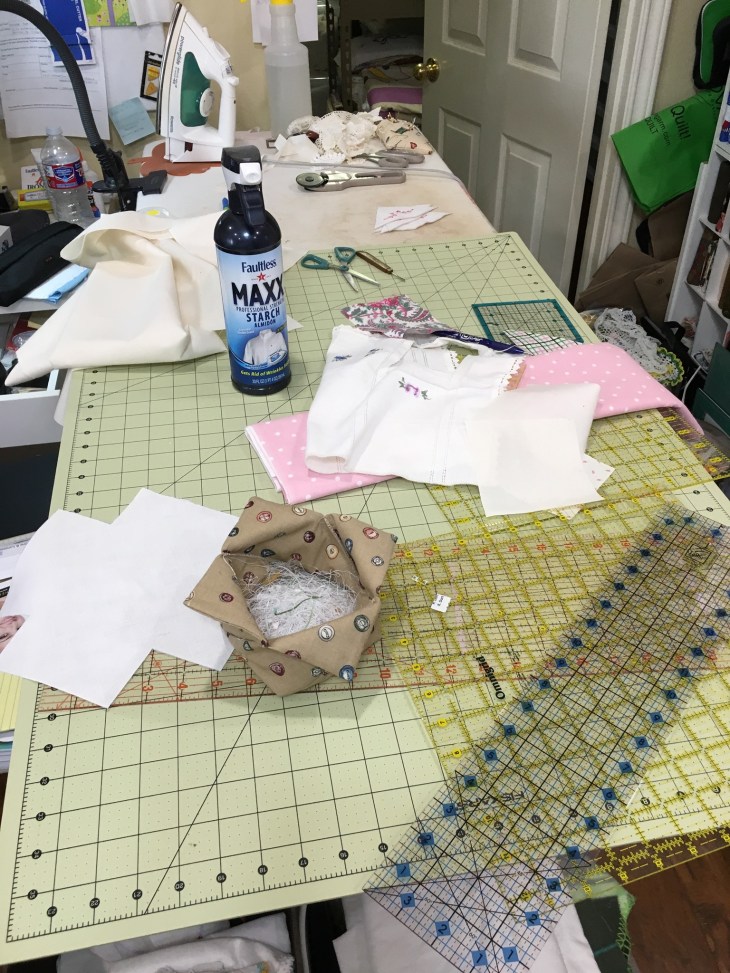
Remember my hubs is sharing my sewing room??? I created both a cutting and a pressing station on my Big Board. Why am I using my ratty light green cutting board for this project? Because several times I forgot and steam pressed my work right on the cutting board 😦
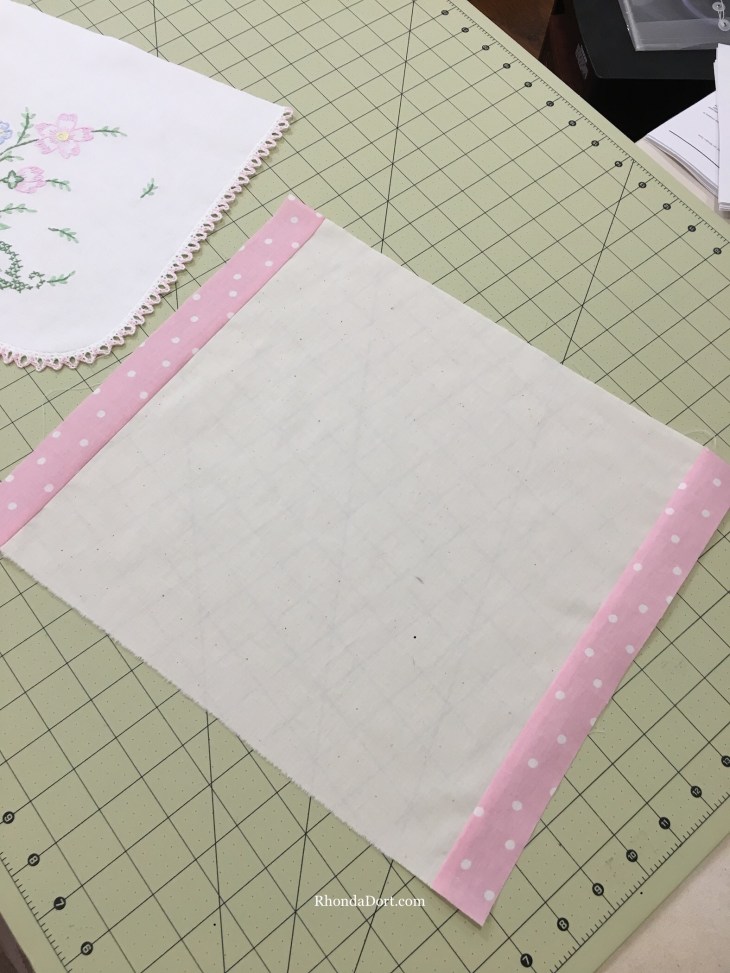
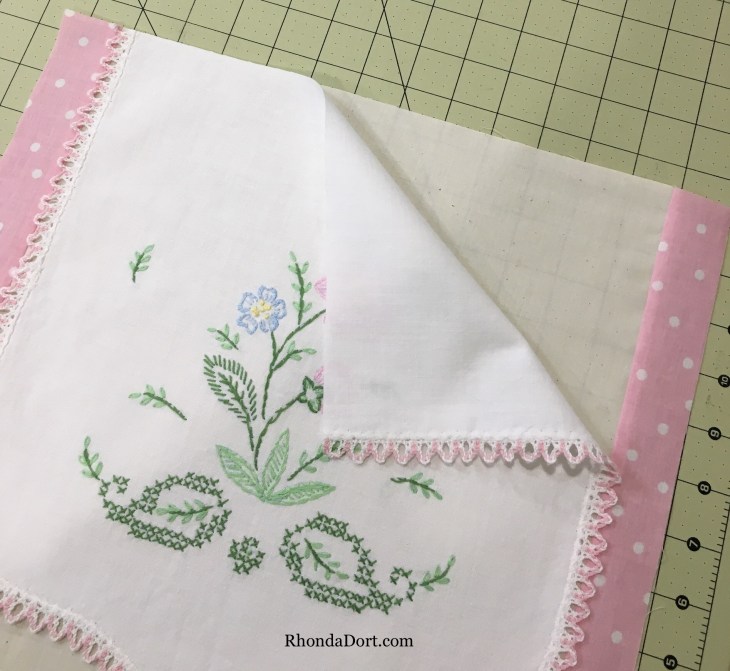
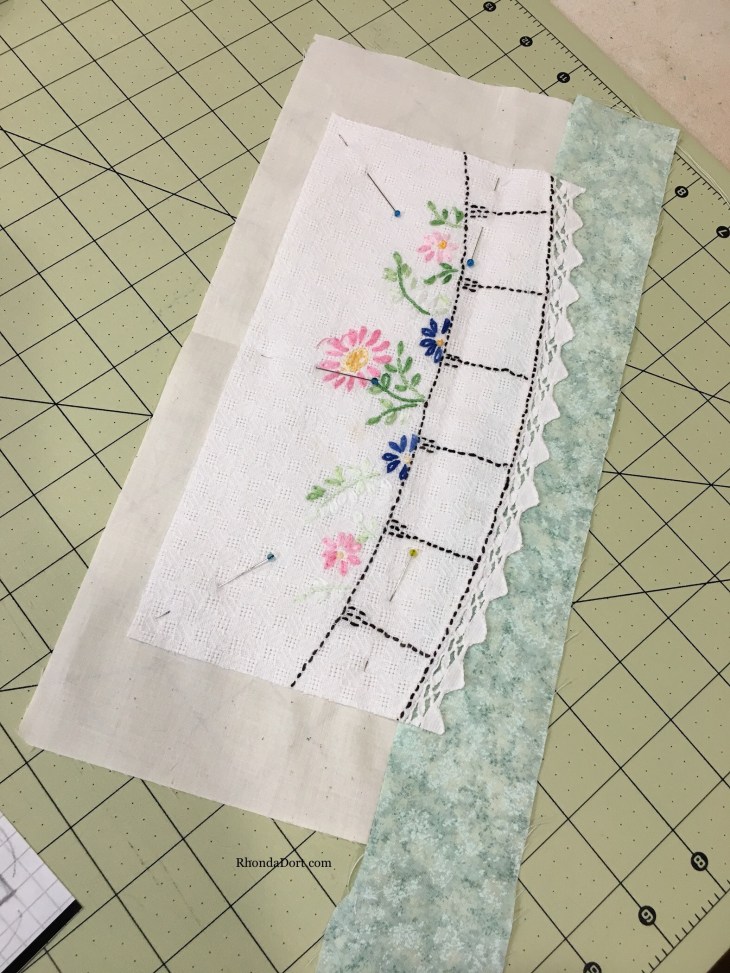
Of note: I have created this quilt using the foundation method. I chose a light weight natural 100% cotton muslin which I preshrunk using a spray water bottle and a very hot steam iron. Many of my vintage pieces are quite fragile and cut on the bias. The foundation will fortify/stabilize these pieces. The foundation also serves the purpose of keeping me on track regarding block size.
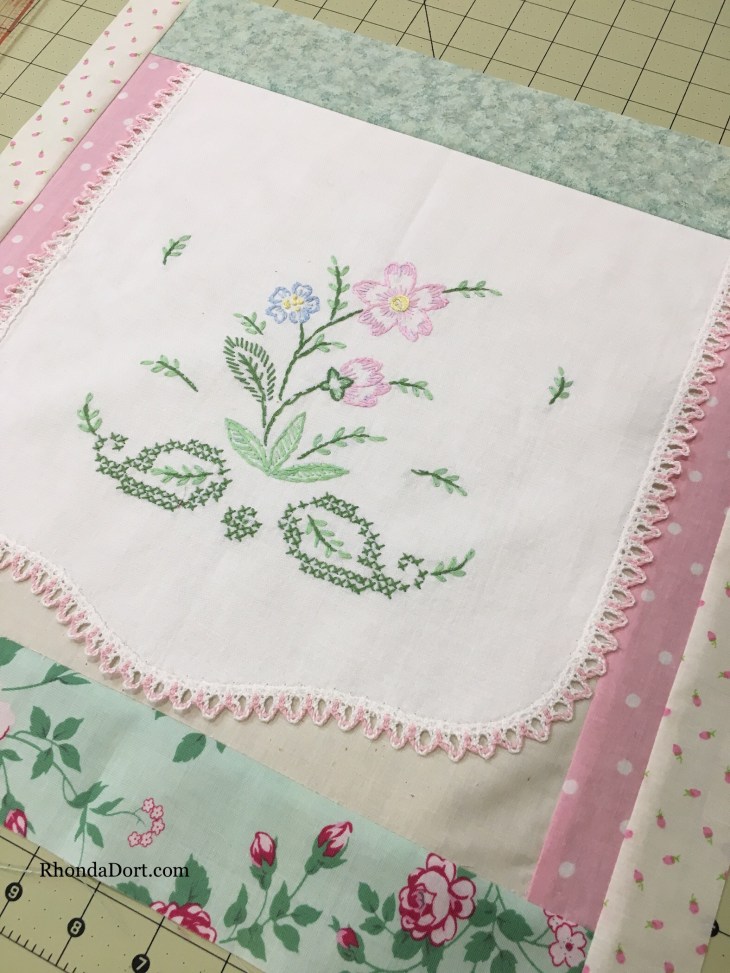
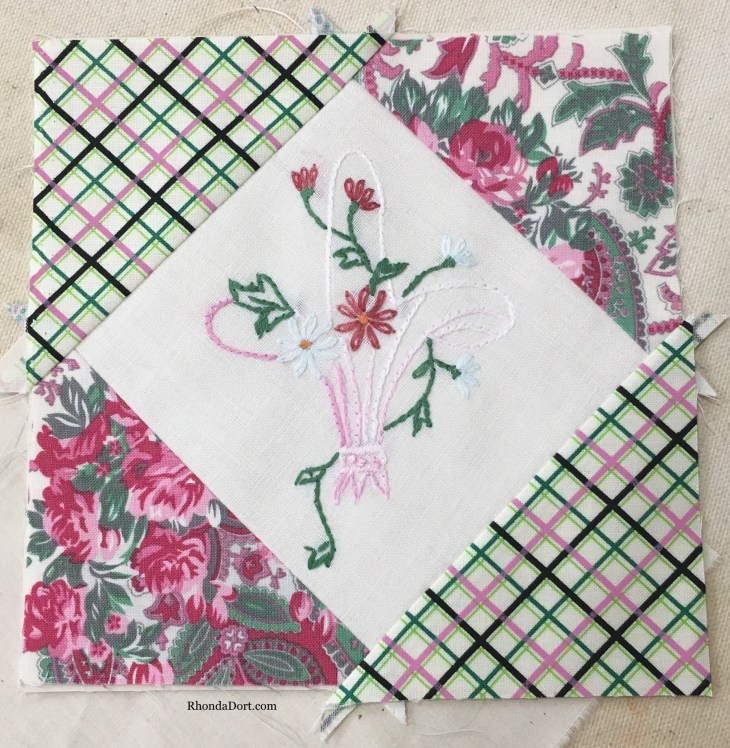
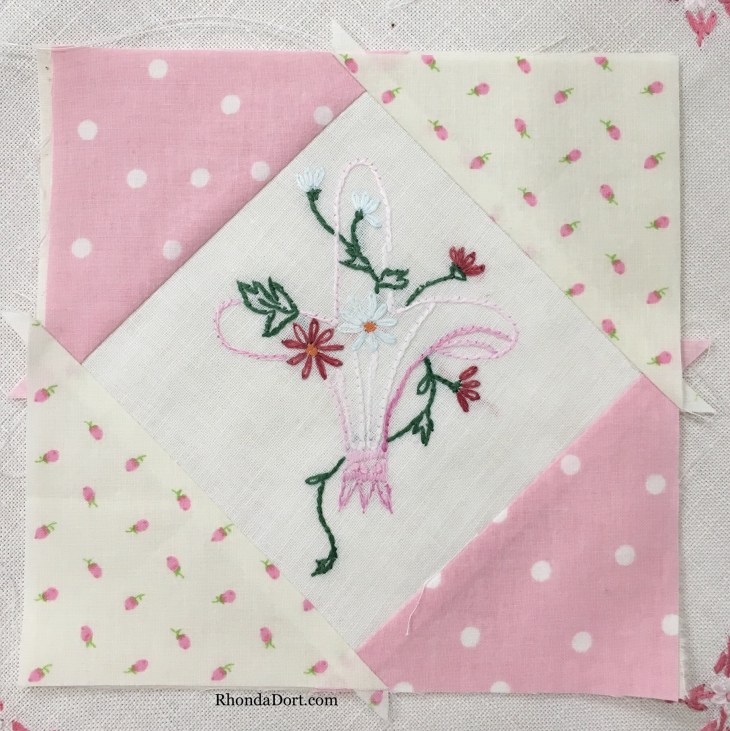
This is going to be the 16×16” finished block in the upper left part of the diagram. I know I want the manufactured edging to be showing rather than incorporated into the side and bottom seams. Now keep in mind you need to add all 1/4” seam allowances so the finished 16×16 will really be 16 1/2×16 1/2” until you see all the blocks together.
Below you’ll find a visual tutorial on how to construct this block:
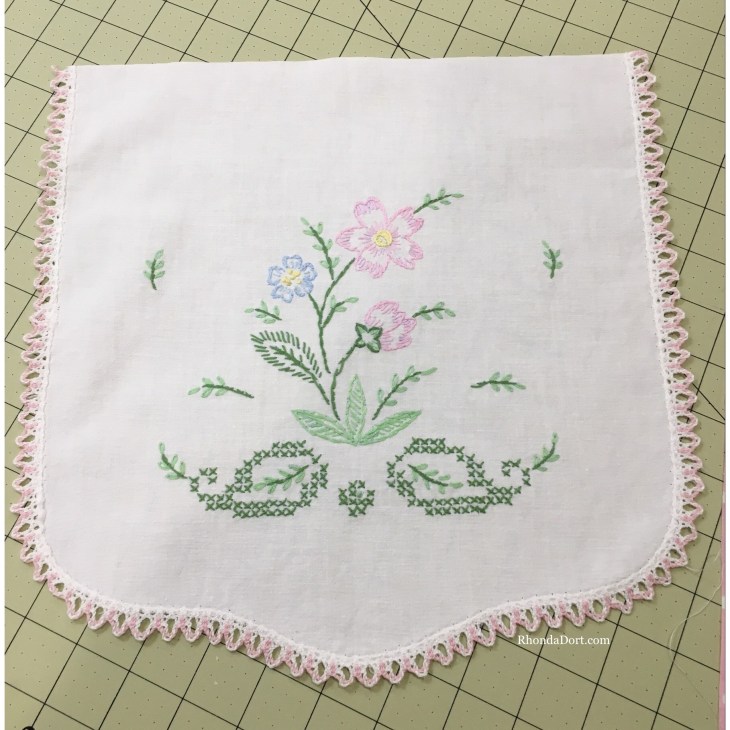
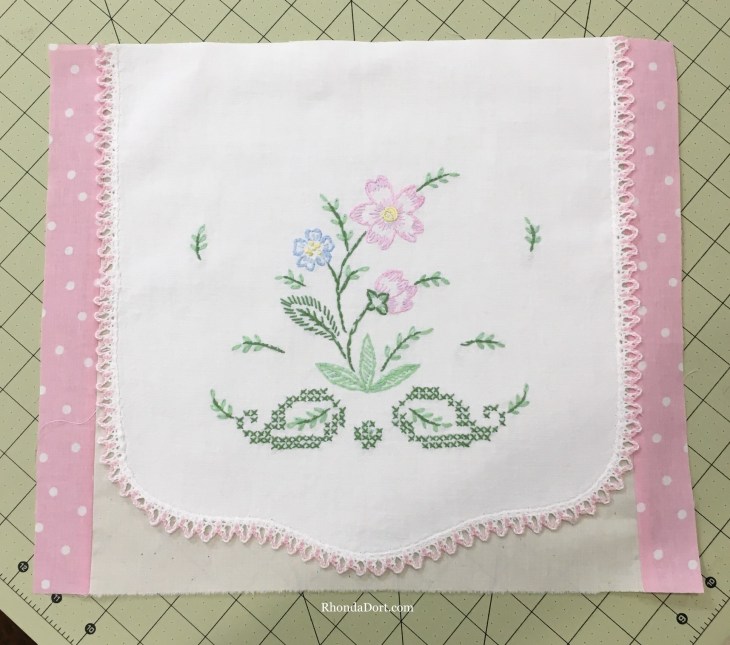

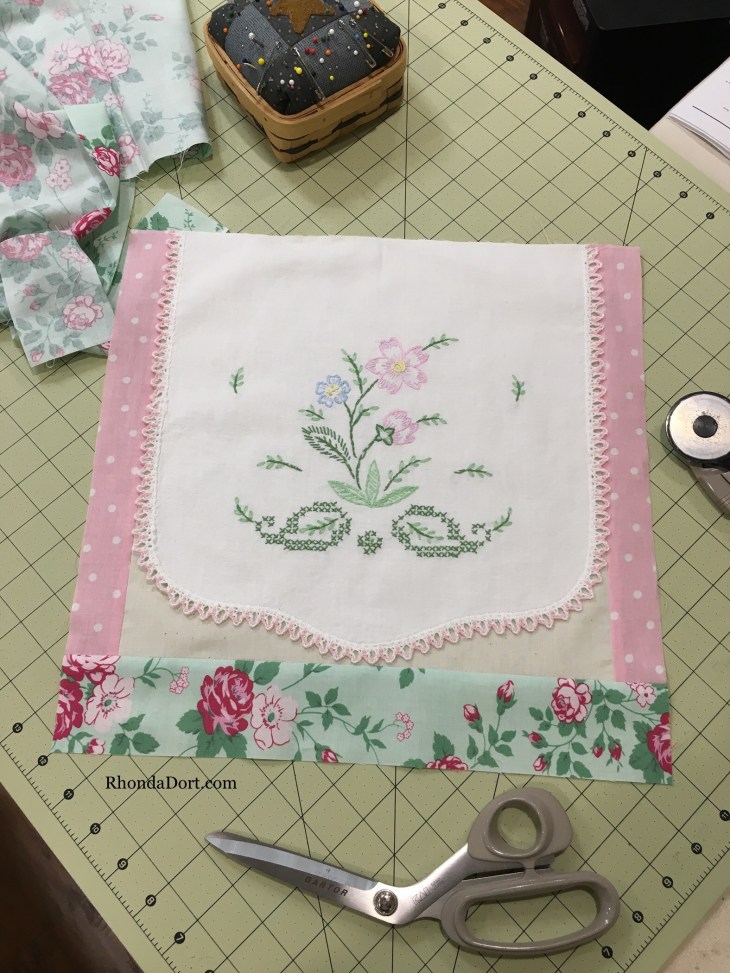
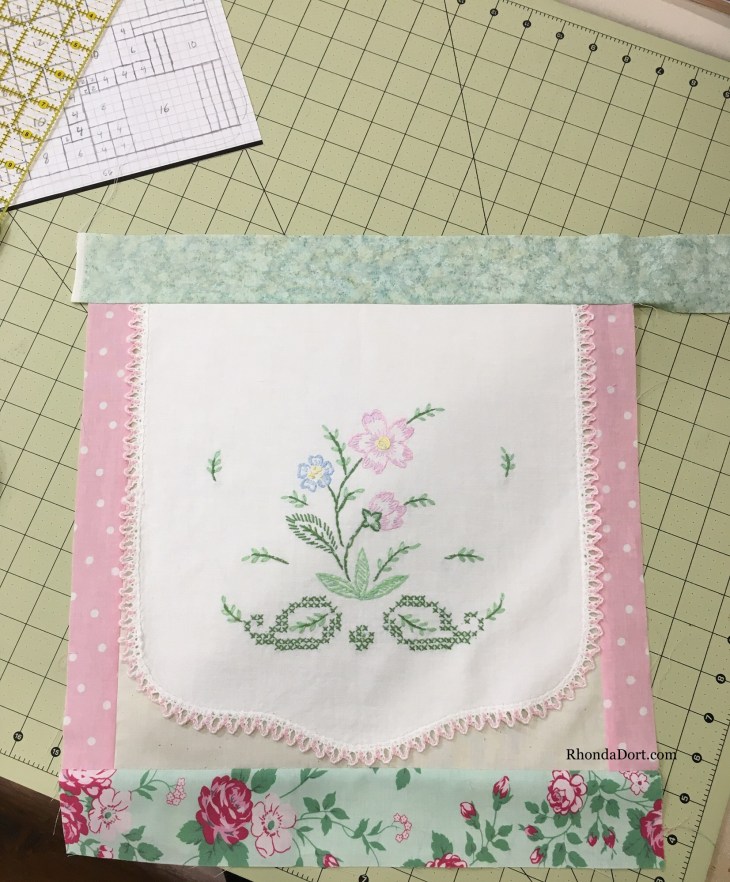
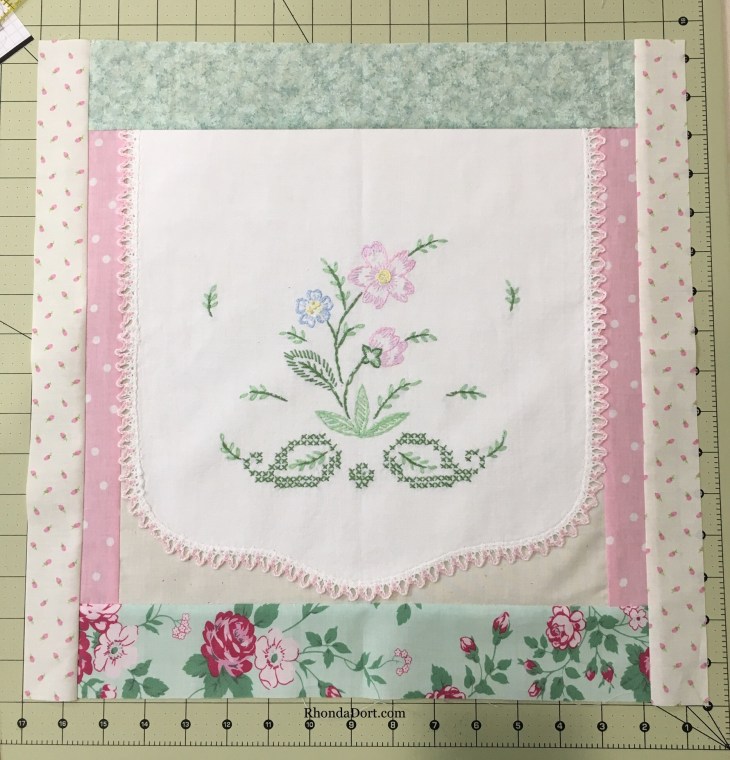
I chose symmetry for this block construction, keep in mind your goal is a 16 1/2×16 1/2” square no matter your fabric and doily placement.
***
Moving on:
This block quite frankly looks boring as can be! I have big plans for this block so stay tuned…
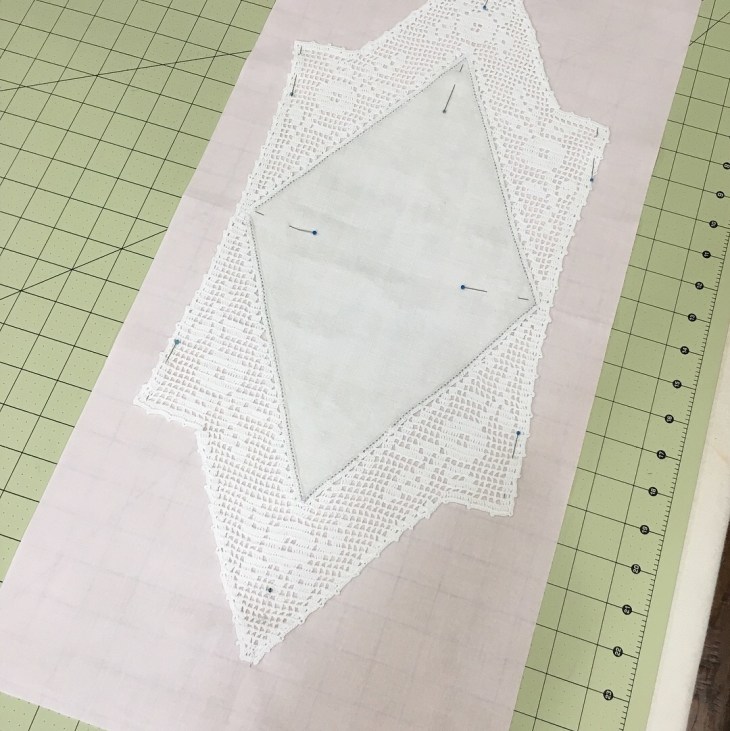
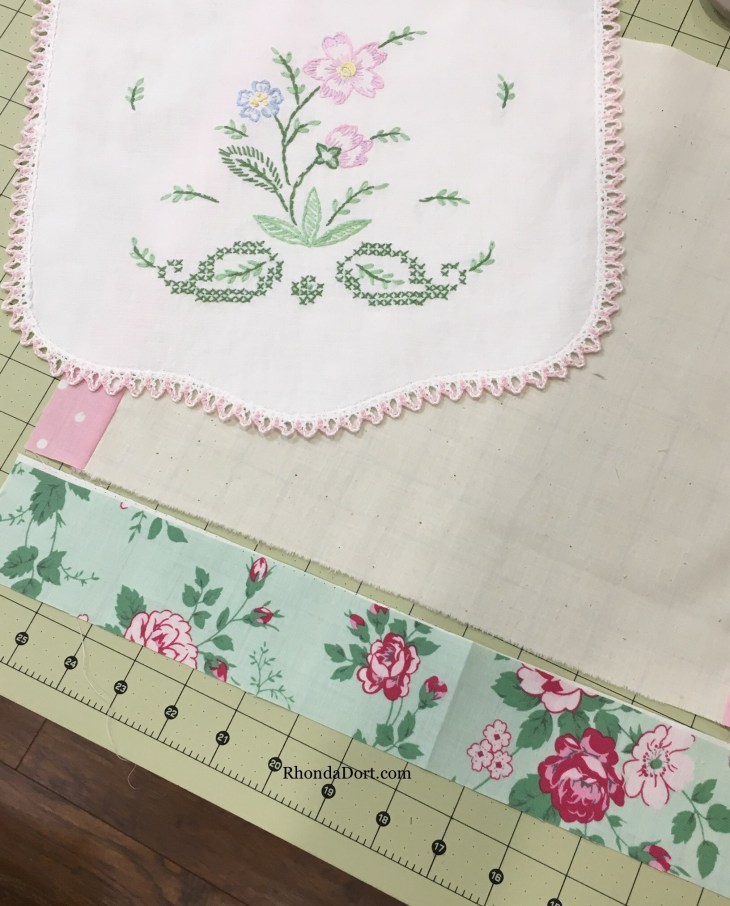
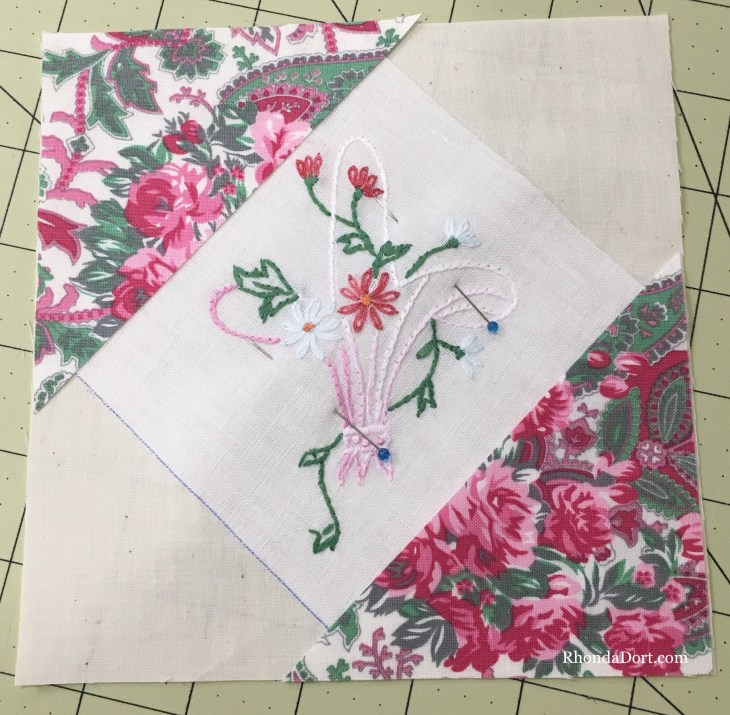
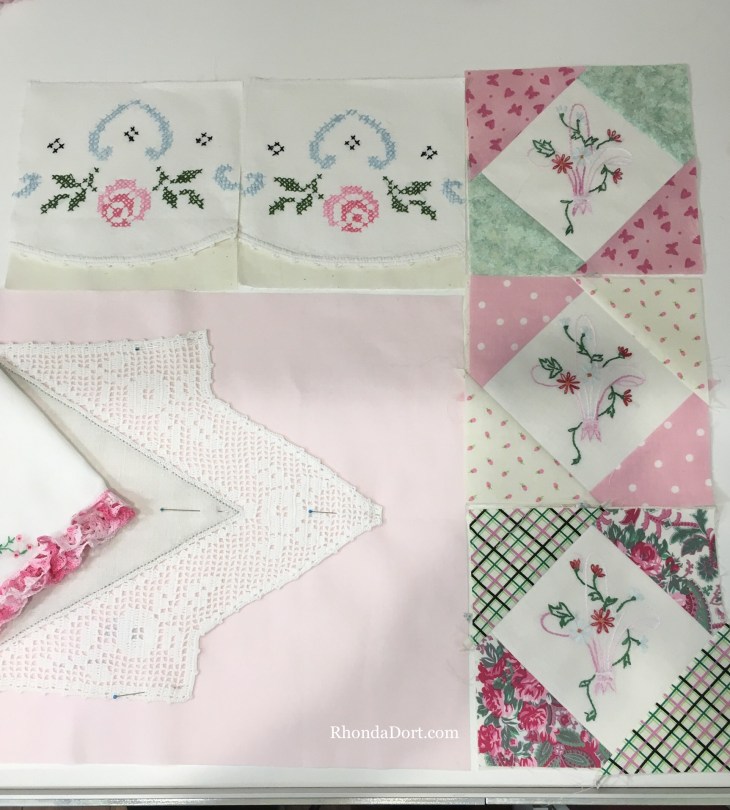
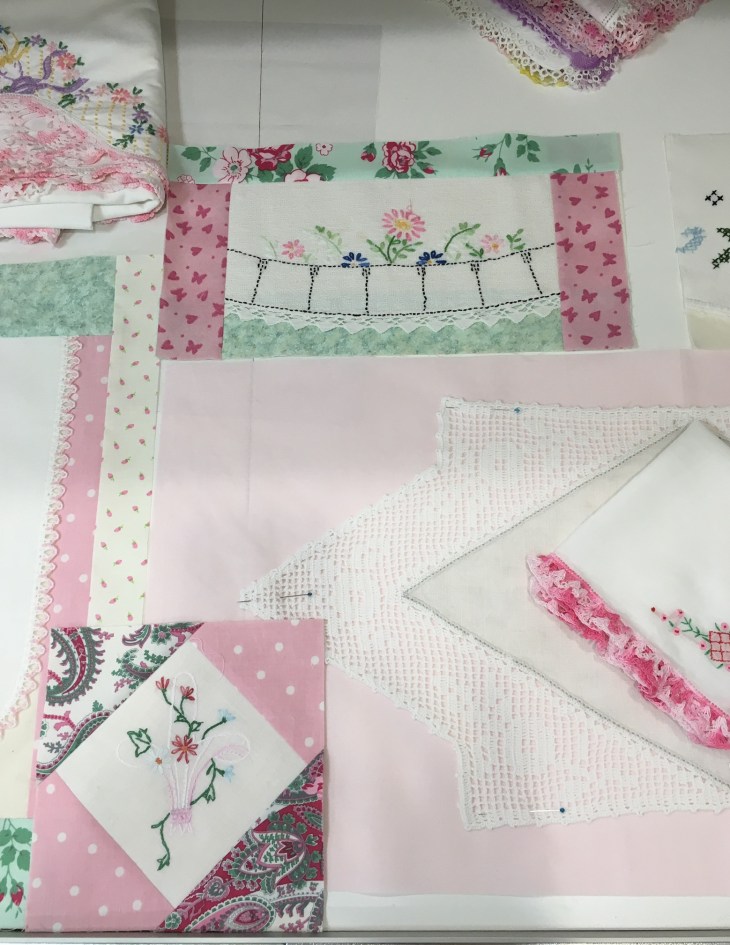
I’m introducing an adaptation already to remind you that the diagram is a suggestion, not a hard and fast rule. I knew I wanted to use this vintage doily but none of the block designs were this large. All I did was to combine several of the blocks together. In fact, I printed out a copy of the diagram and made notes all over it. Once you have your larger blocks determined, it will be easier for you to begin creating/deciding what and where to use your vintage linens for your medium and smaller blocks. See what I mean: 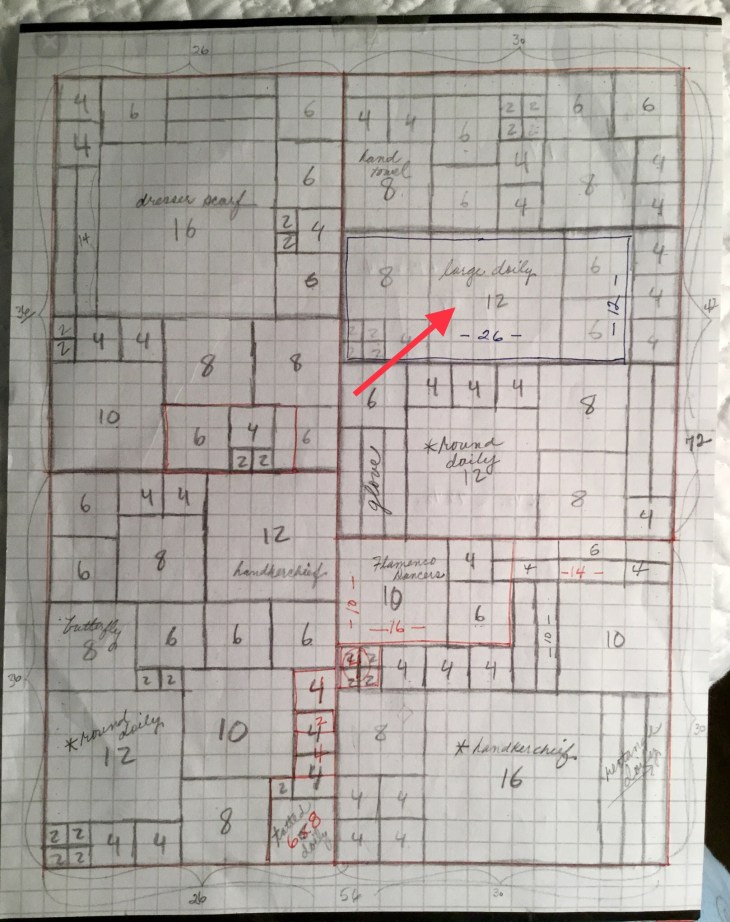
In this long linen and crochet doily, the pink fabric measures 12 1/2 x 26 1/2”. I know eventually I will add a doily to the middle of this long rectangle piece, but that’s for another day.
***


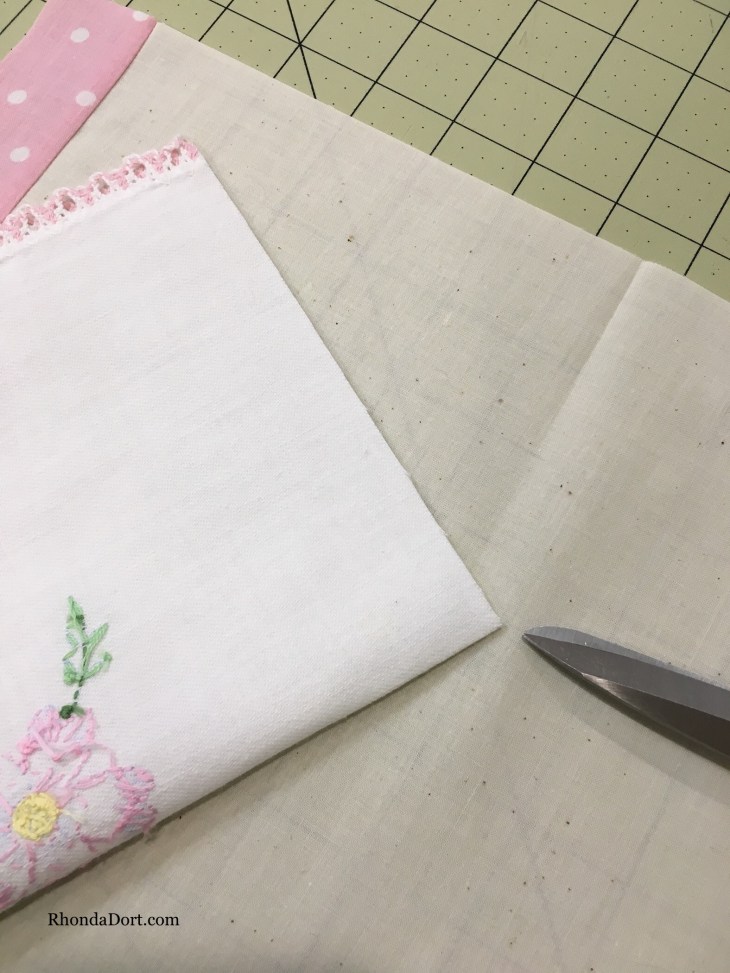
As you make changes here and there to fit your vintage pieces, just remember to make your block measurements fit a space in your diagram. And above all remember to add the seam allowances!!!
***
And finally for today, 4 darling little baskets of flowers. The foundation was very important here because they are cut on the bias and are embroidered on remarkably thin fabric. 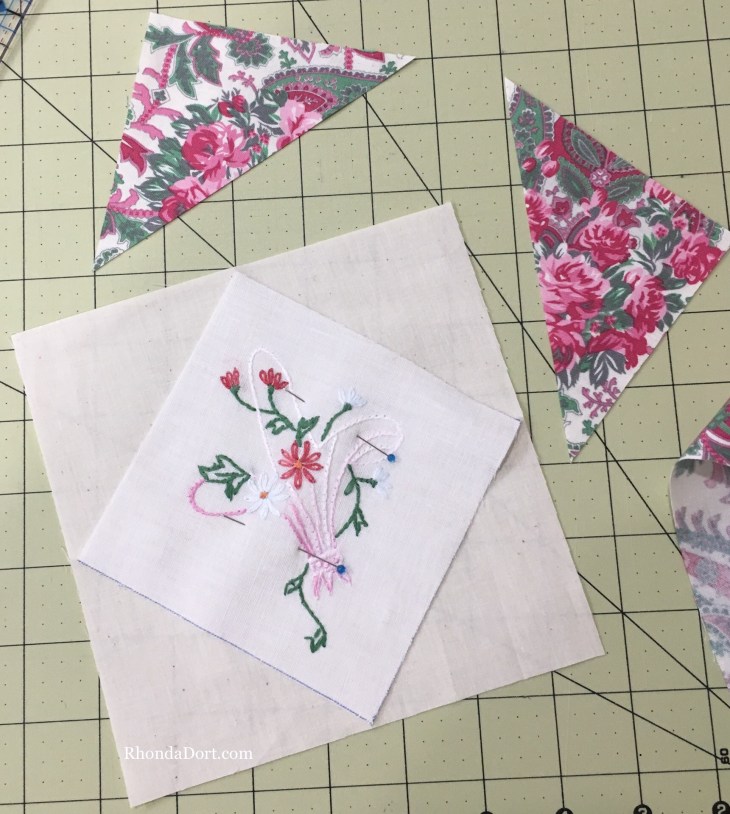
Are you ready to start your own Vintage Linens Quilt? Let me know if you have questions so far!
*** House update: we’ve been on a blessed 3 week construction hiatus. We’re waiting on windows, doors, siding, some baseboard, plumbing, tile work, etc. I’m so very thankful for many things, among them: God, family, insurance, patience, a 2 story home and my sewing room!
Blessings to all and Happy Quilting,
Rhonda

my dear friend, i do miss seeing you.
I’m still organizing my new sewing room and consolidating all the vintage linens. I’m off to retreat this week. With ideas swirling in my head. You are my hero!
LikeLiked by 1 person
I am just getting up the courage to try to finish a vintage block quilt I have been working on for 30 years! I love your work and am inspired by you! I have sooo many ideas1 Here goes!
LikeLiked by 1 person
Ugh, I just lost two whole paragraphs.
I saw a clip of this quilt on Pinterest and had to follow the trail. This along with many of your hexagon pieces have already been saved in my Pinterest.
In doing so, I got distracted with your pansy doily quilt, which was beautiful! ❤️❤️❤️. I also saw your latest (I believe) restoration of a quilt from December ‘23. I can wait to explore more of your site.
I just wanted to say how lovely your stuff is.
Collette Landwer
LikeLiked by 1 person
Thank you for your kind words!
LikeLike
I ran across your vintage hanky pieces quilt design and your expert advice. I’m thrilled!!!! I have dozens of mine and my husband’s great-grandmother’s and grandmother’s hankies and doilies that I want to make a special piece. Quilt-top sewing is a new hobby for me and I’m loving it. Your post has me excited!! Thank you!! I will visit your website, too!
LikeLiked by 1 person
Your VLQ #2is so beautiful. It is how I will fashion my first VLQ. Thanks for providing a diagram on scaled paper. I can make any needed amendments with that precision.
LikeLiked by 1 person
Thank you!
LikeLike
Absolutely love this. Thanks for sharing
LikeLiked by 1 person
Thank you for your kind words 🙂
LikeLike
I love your vintage quilts. I have looked all over the internet for a book on making quilts with vintage “stuff” and have not found a thing. Your page is the closest thing I saw. You should consider writing a book. Let me know if you ever do. Thanks so much for all your tips and instructions.
LikeLiked by 1 person
I’m actually in the process of making a quilt with vintage linens, but using a very different approach. I love seeing that you’re doing and the ways you’re honoring the makers of the original pieces!
LikeLiked by 1 person
Hi Rhonda! I was wondering what stitch you use to attach the doily? Also where do you sewing lines go? Above the crocheted edge where there is fabric? Where there is a lot of crotchet do you need to see more than just around the perimeter? I was wondering this too when u saw you pansy doily quilt. I am new to this page so not sure if this is something that you have covered before. Thanks.
Sorry to say I sent these questions via email first …please ignore I obviously wasn’t thinking !
LikeLiked by 1 person
Glenda, did I ever reply? For some reason today is the first time I’ve seen your comment/questions and they are very good questions! The sewing line – for the very first block I talked about the sewing line goes just barely on the inside of the trim directly on the doily itself.
When there is only crochet I either stitch directly through the crocheted doily with my sewing machine or I stitch it in place by hand.
The Pansy Doily Quilt has all the crocheted pieces stitched by hand. The Vintage Linens #2 has all the crochet stitched by machine.
Like I said earlier, great questions! Thank you!
LikeLike
Rhonda thanks for sharing.
What kind of stitch do you use to attach the doily?
Do you see on the fabric rather than the crocheted edge trim when there is fabric ? On the crocheted doily do you need to sew more than just a line of stitching around the perimeter? I was wondering this too when I saw the pansy doily quilt.
Thanks in anticipation
Glenda
Sent from my iPhone
LikeLiked by 1 person
Hi Glenda, sometimes I use a small zig-zag, sometimes just a regular straight stitch. I usually stitch right where the decorative trim meets the DOILY. This way the trim remains free from stitching. For the crocheted doilies there are two methods: 1. Remove the doily and do the quilting and then carefully hand stitch the doily back in place. 2. Machine quilt directly through the crocheted piece. I’ve used both on this project so I’ll make sure to address these methods as I feature these blocks. Thanks, great question!
LikeLike
I’m so in awe of your talents! I just came from viewing each block on your Facebook post and love this new quilt of yours. Thank you for sharing this tutorial – you have inspired me to get out all my vintage linens and get busy!
LikeLiked by 1 person
Yay!!! Post pics!!
LikeLike
Thanks so much for this tutorial! Your lesson is very helpful to me. I’ve inherited a great many linens and I hope to get creative with them sometime soon. Again, thank you!!
LikeLiked by 1 person
Thanks Rhonda! This was very helpful. I do have a question re. the muslin backing. You backed the smaller pieces completely – including the fabric borders. The large (first piece) you only backed the vintage linen. Was there a reason for doing it that way? Curious.
Carol
LikeLike
Rhonda! This is so helpful! Thank you. I do have a question. With the first square you did not have the muslin foundation under the full square size. On the smaller pieces you do. Is there a reason?
Carol
LikeLiked by 1 person
Oh Carol, you have such a good eye! Because that was my first block I was unaware that additional old Lennon pieces were remarkably frail. After I completed that block I did put foundation under Lea under the strips around the embroidered peace. 🙂
LikeLike
That makes sense. I’m watching closely because I hope to embark on a similar quilt project soon …. once I finish sorting and documenting a massive genealogy archive.
LikeLiked by 1 person
Thank you for giving us the opportunity to see your process! It’s so exciting!
LikeLiked by 1 person