

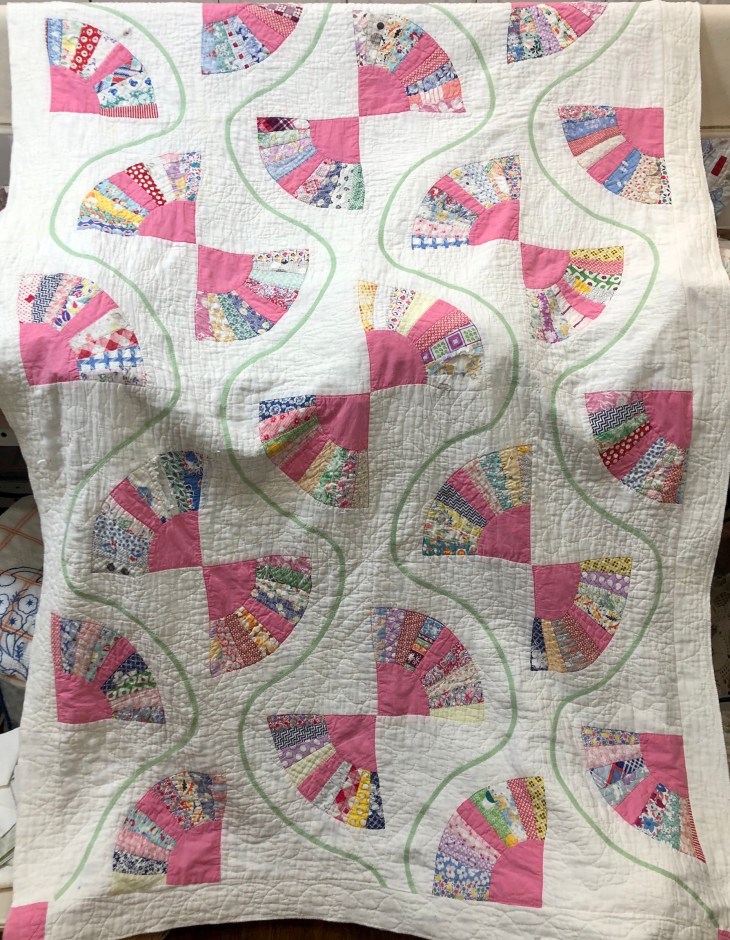
We’re at it again, Allison Aller and I challenged each other again to rescue another once beautiful quilt that was in need of serious repairs. We met up at the Quilt Festival in Houston early last month to take a serious look at our potential next project, purchased on EBay a few months ago for $65.00 plus shipping.
To better understand our challenge let me clarify a few things. We are not attempting in any fashion a “restoration” of this quilt but rather, we are taking a well loved but damaged piece and saving it by both additions and/or deletions, transforming it into a new creation to be actually used again or hung as quilt art. You may have read my prior 2 blog posts about saving the double wedding ring quilt? My finished piece has been through the washer, air dried and I use it as a lap throw.
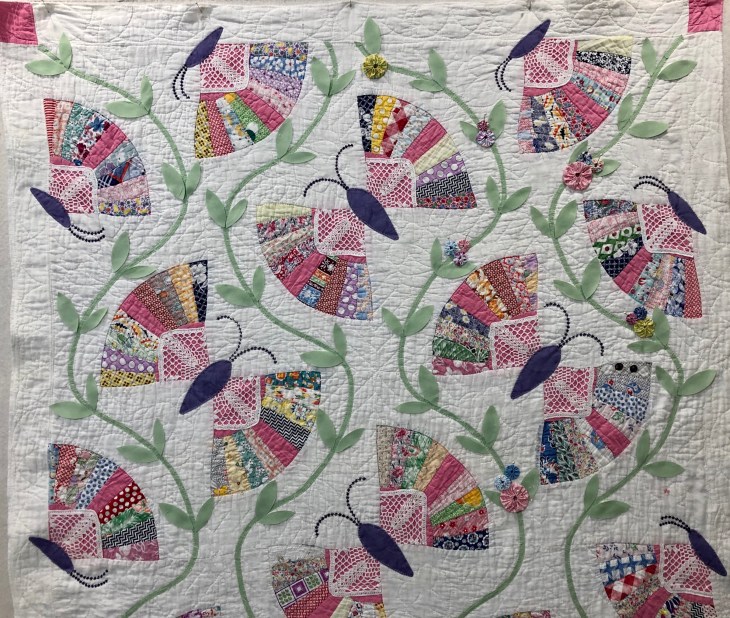
Here’s where I am so far but how did I get to this point?
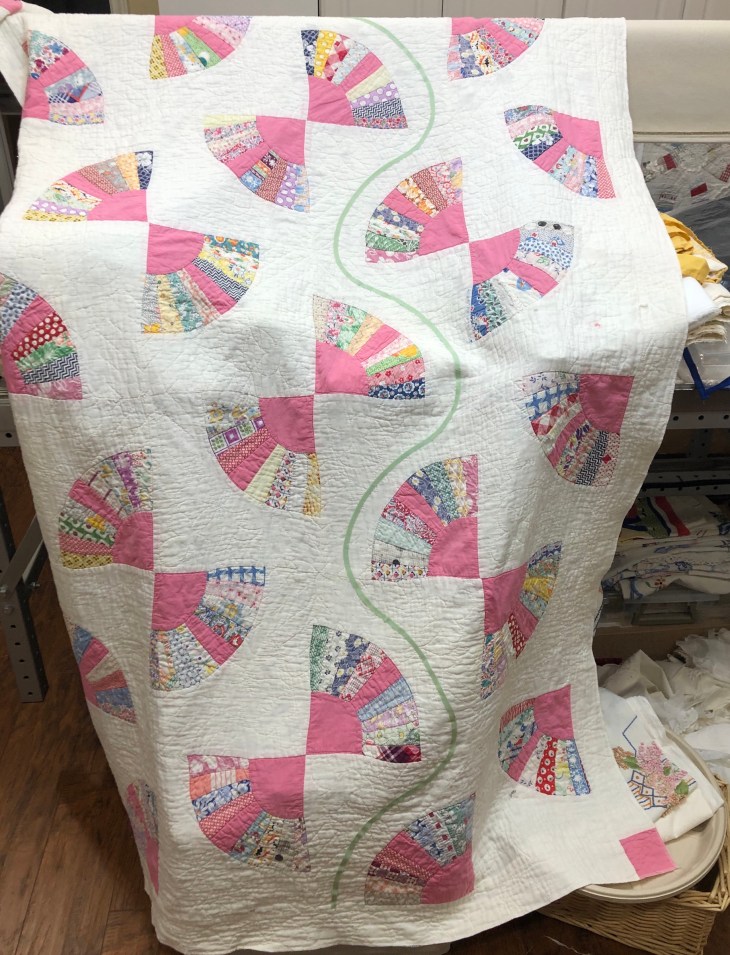
This is where we started:

Here’s my half:
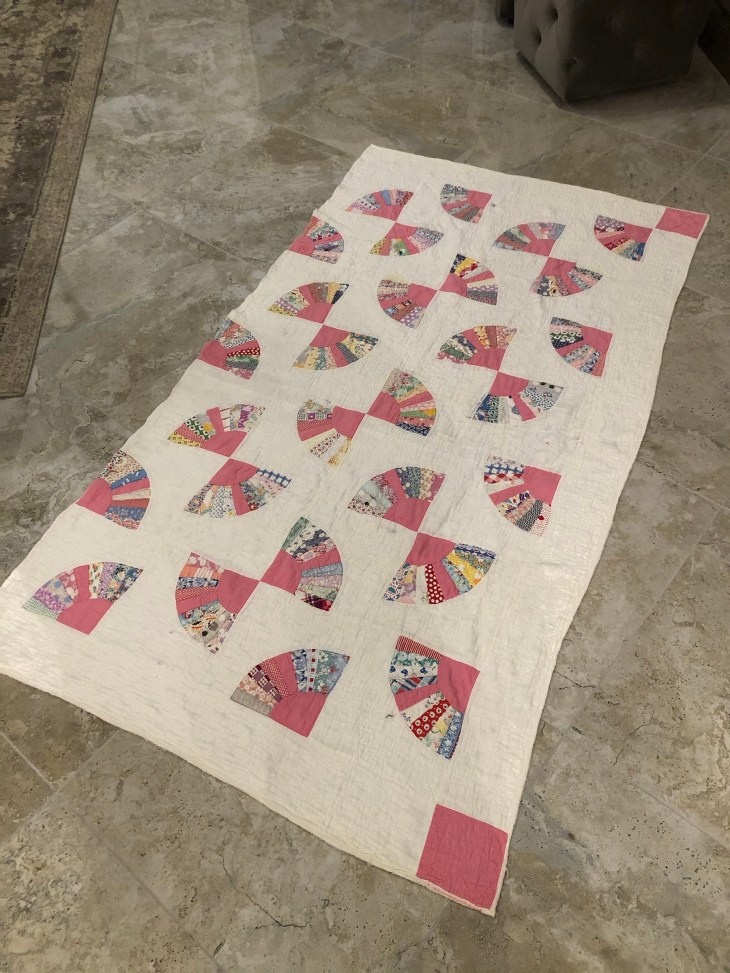
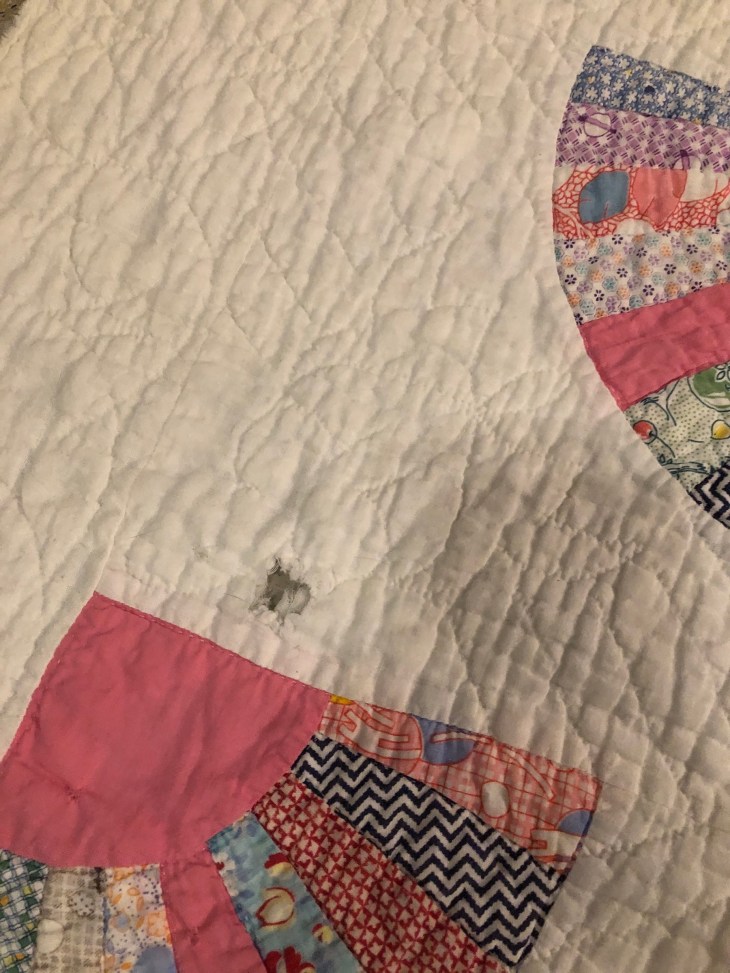
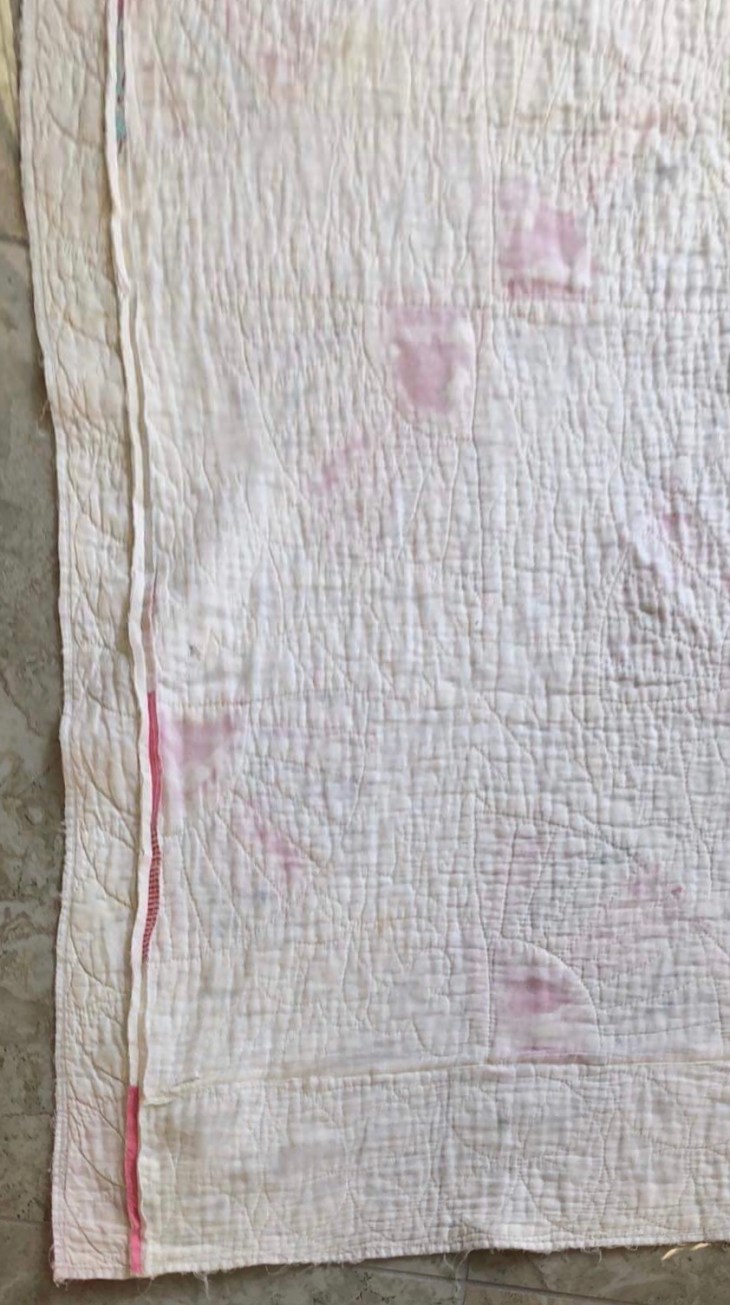
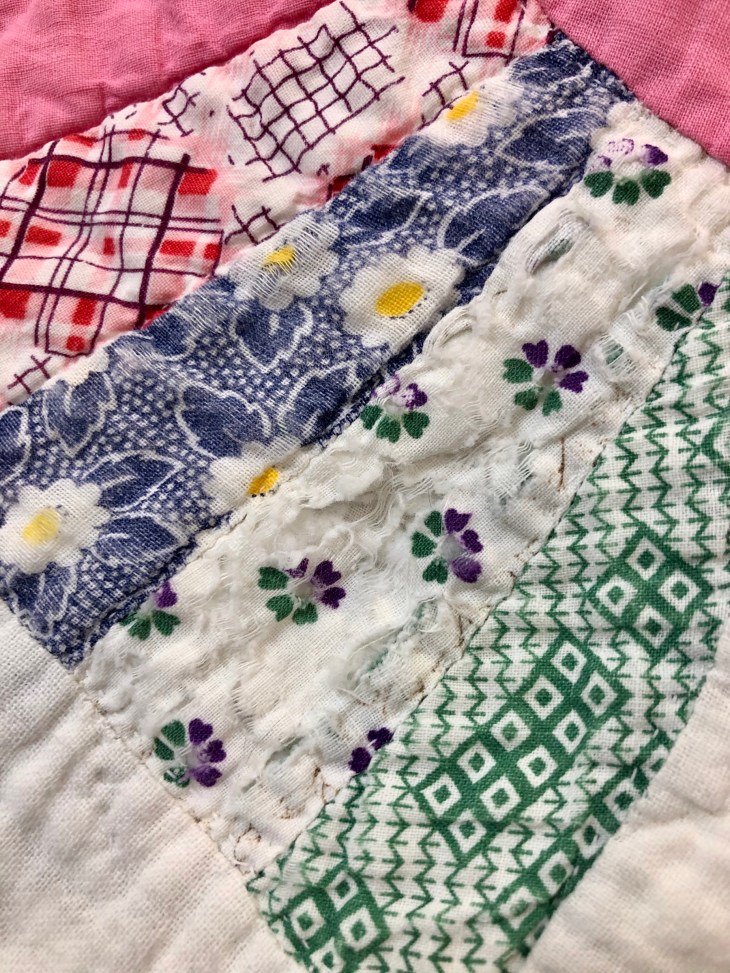
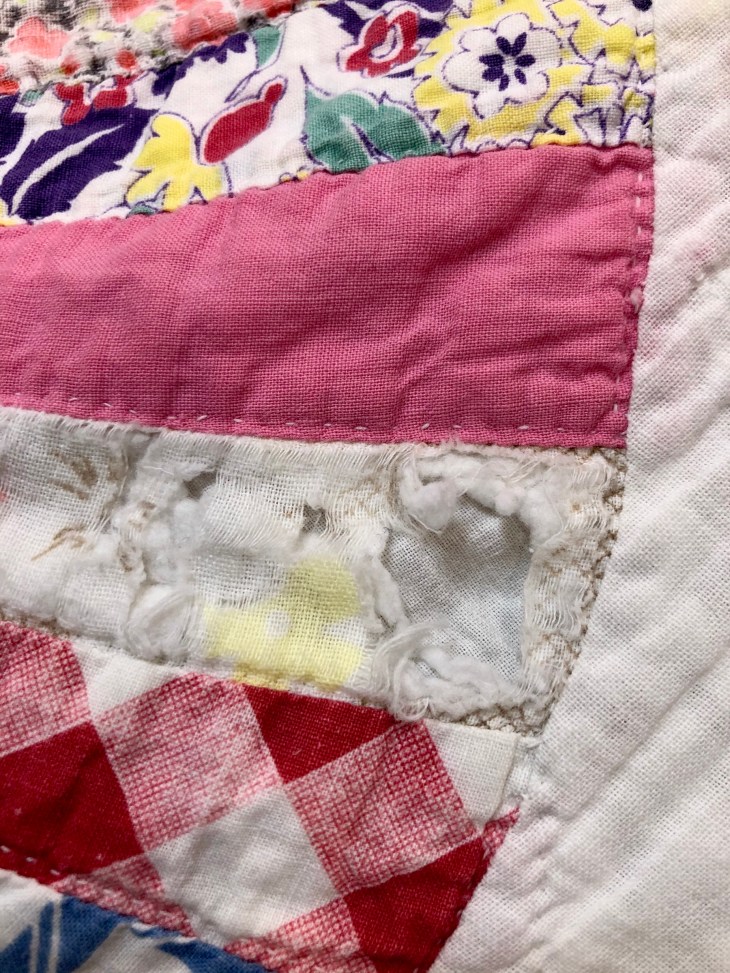
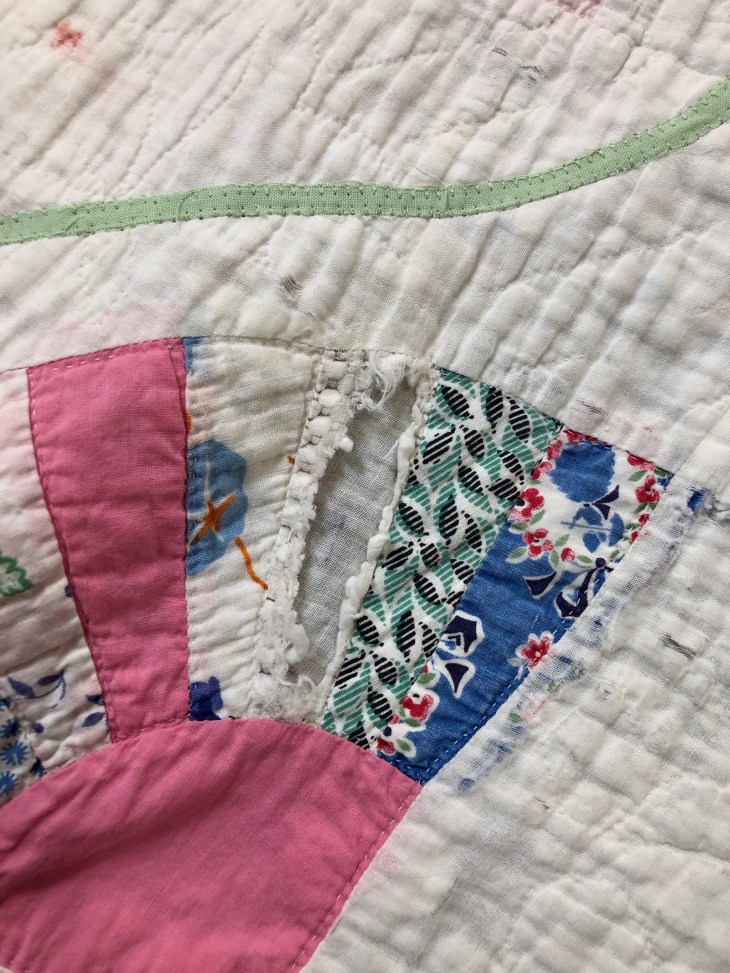
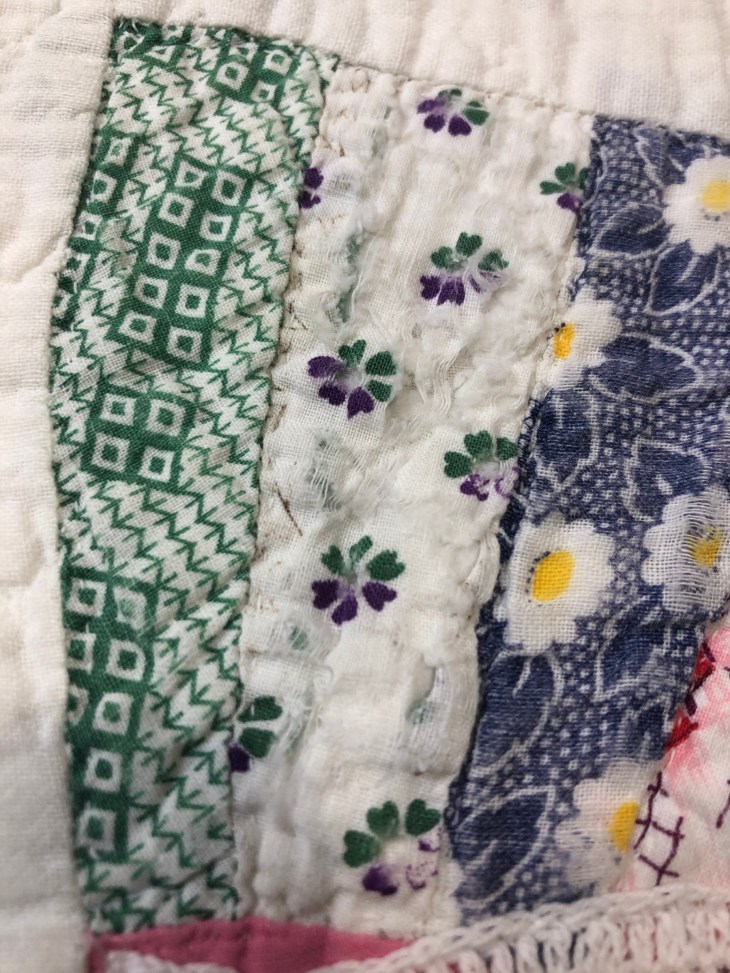
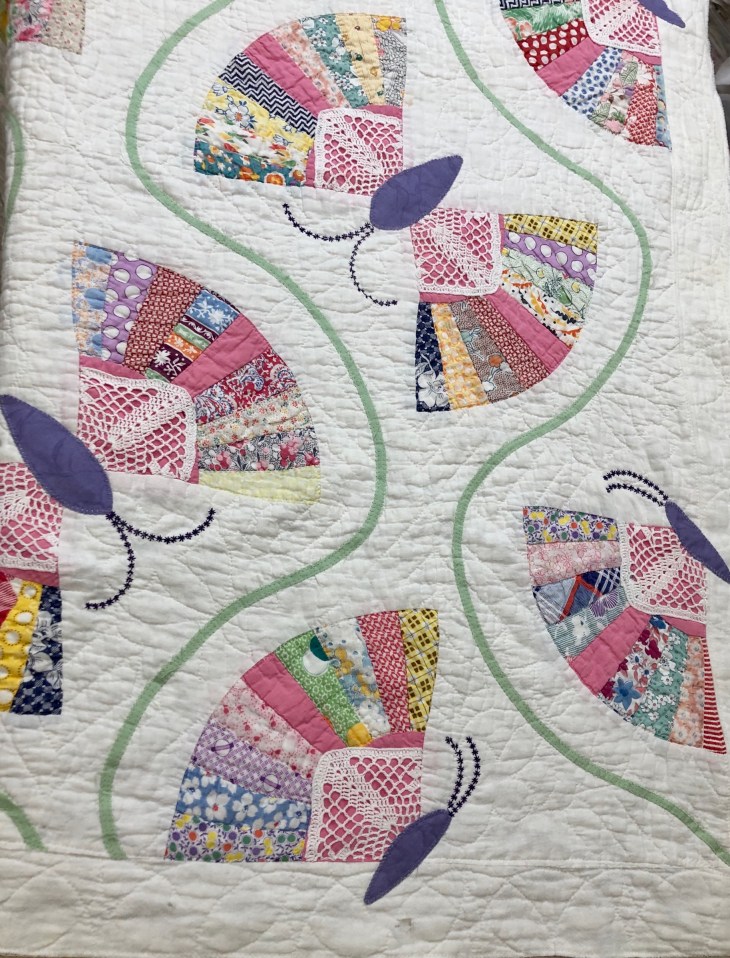
I’m going to try and show you some close up pictures so you can understand we had no qualms about cutting this quilt in half lengthwise. From a distance it looks find but there are holes everywhere, damaged and/or missing fan blades, nail polish and badly worn white fabric.
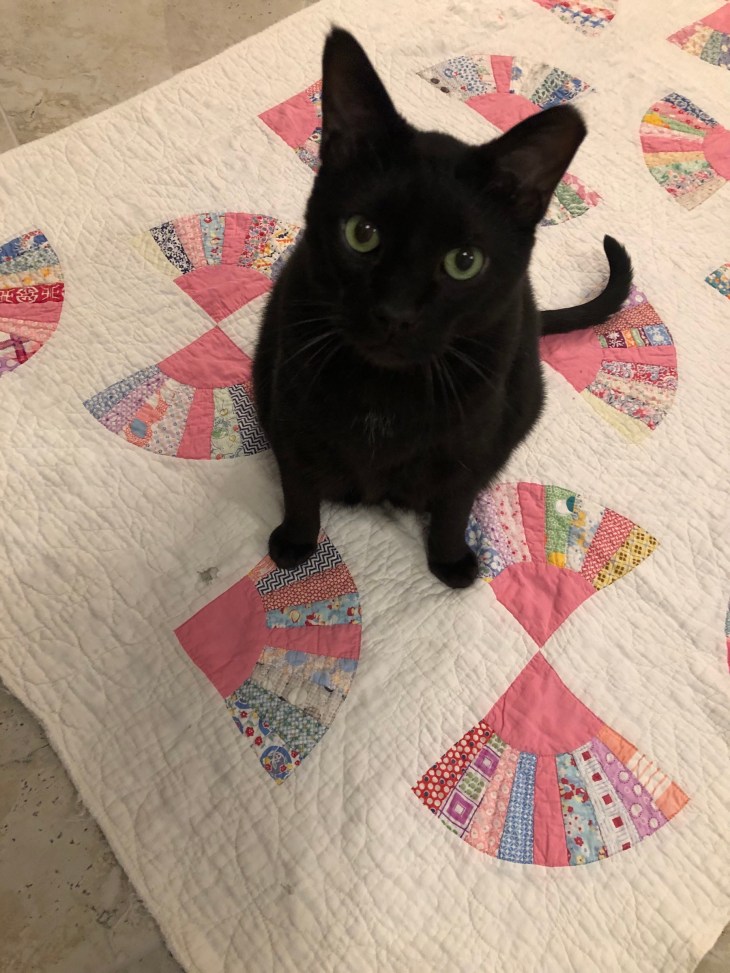
You know me, it’s almost impossible to put a quilt down on the floor for a photo opportunity and not have my black fur baby pose for a pic. Say hello to Winston the Cat.
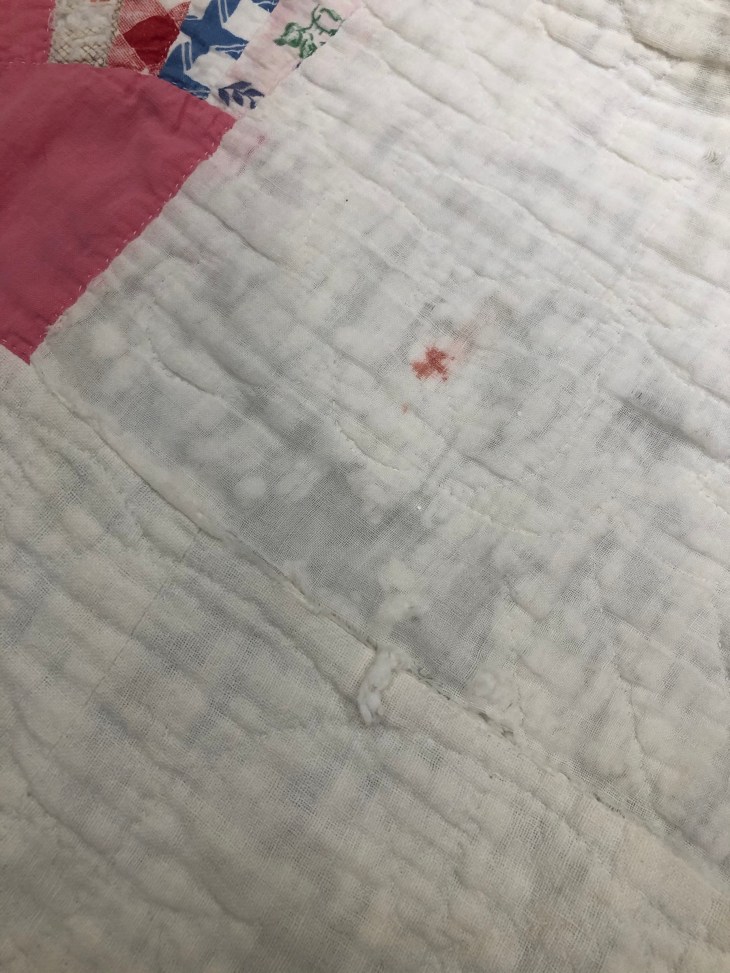
Remember I mentioned nail polish? See the above pic. And the binding is all but gone from the quilt as shown below.
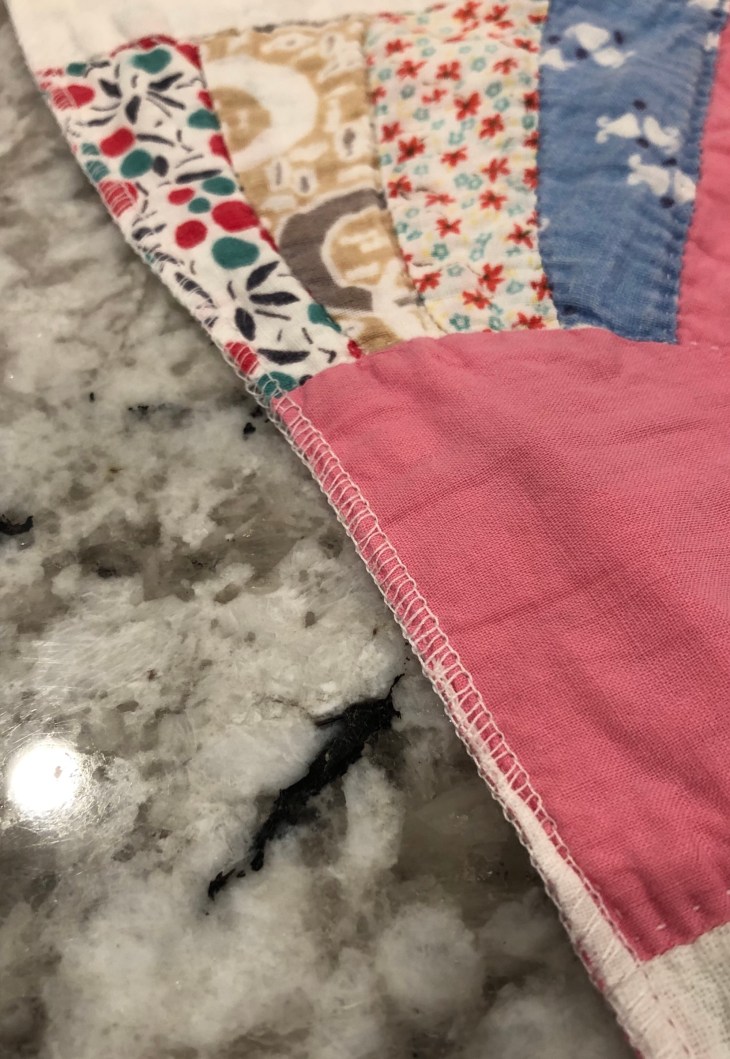
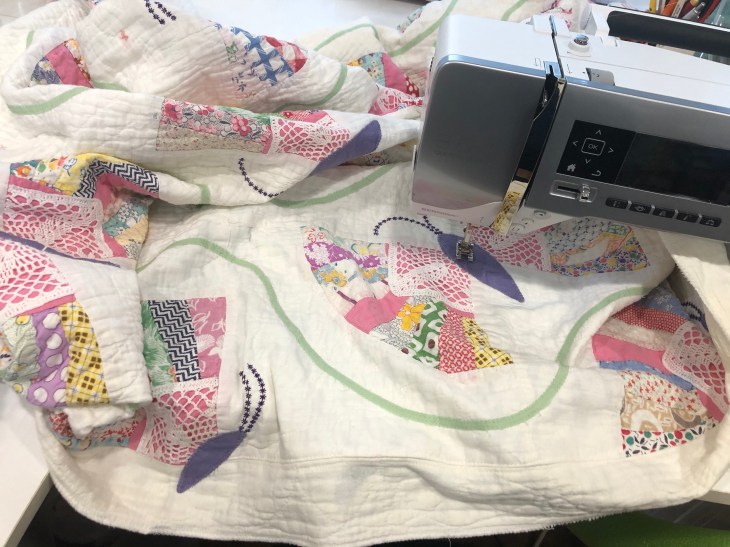
So what to you do with the raw edge of a freshly cut vintage damaged quilt? Serger to the rescue in this case.
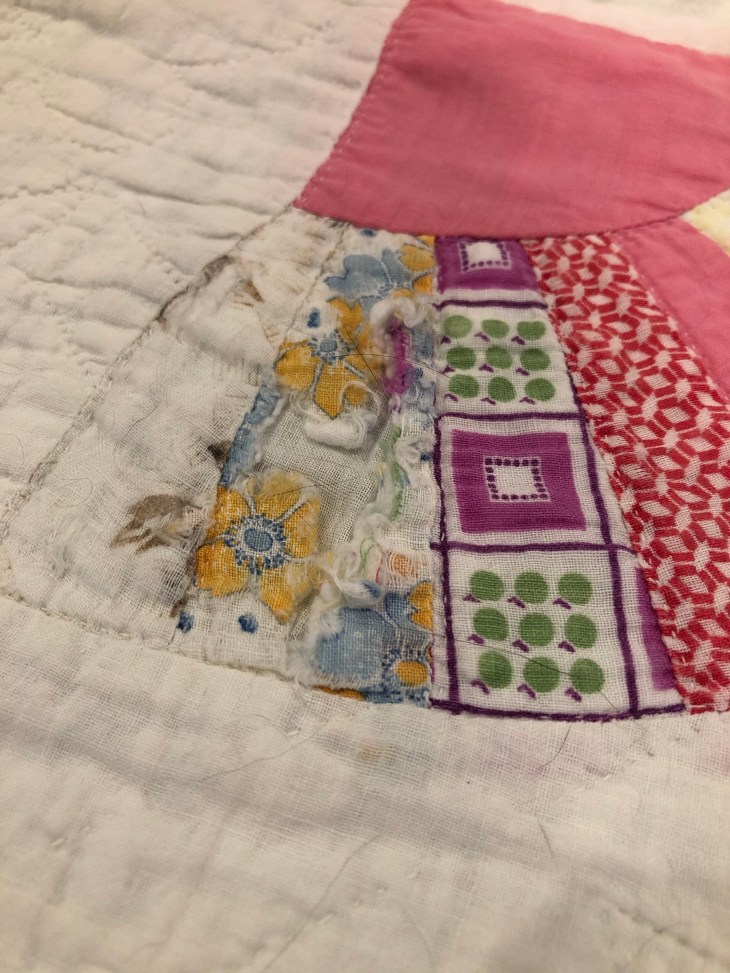
The first of many pictures to detail the damage to this quilt.
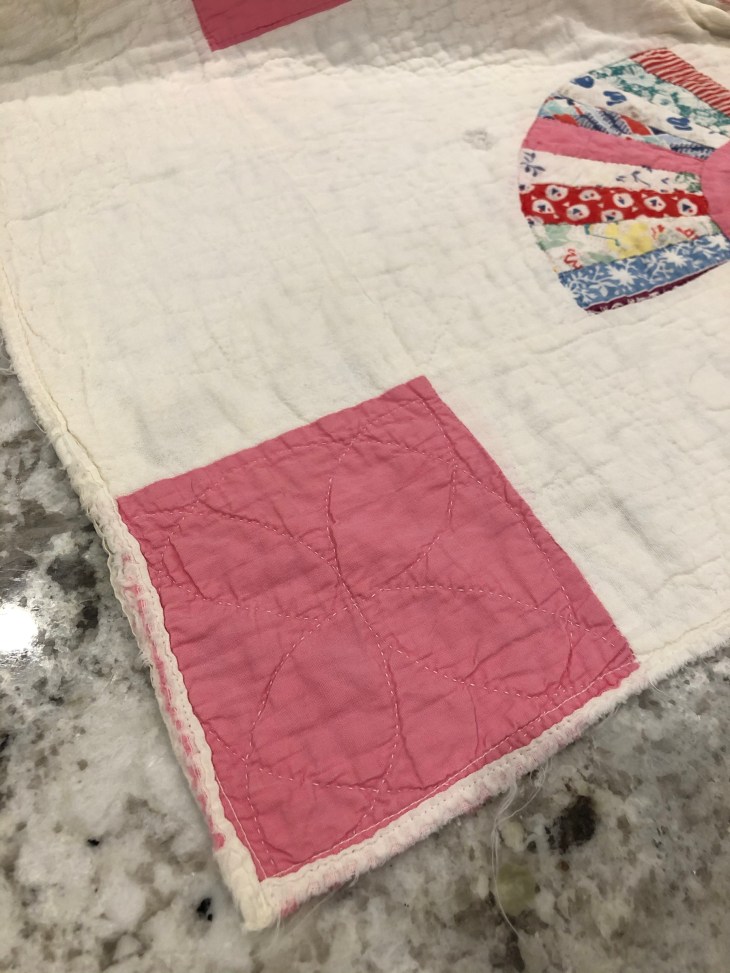
Do you remember from the third picture above, my half of the quilt has only 3 borders. I decided to cut the remaining side border in order to sew half onto the other side but… if you attempt this, remember that the original side has about 1/4th” already in the seam allowance. You MUST take this into consideration when determining what is the half way point for cutting. The next pic shows half of one side border sewn onto the side without a border. When I am completely finished with the front I will hand stitch trim, ribbon, etc. on the quilt back to hide this long seam.
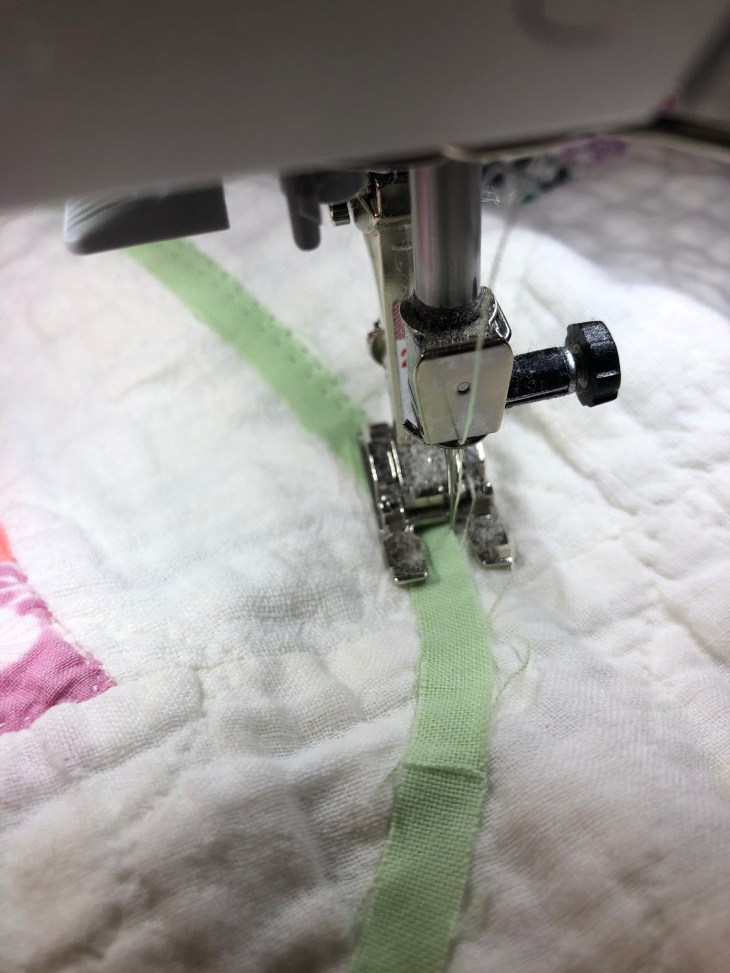
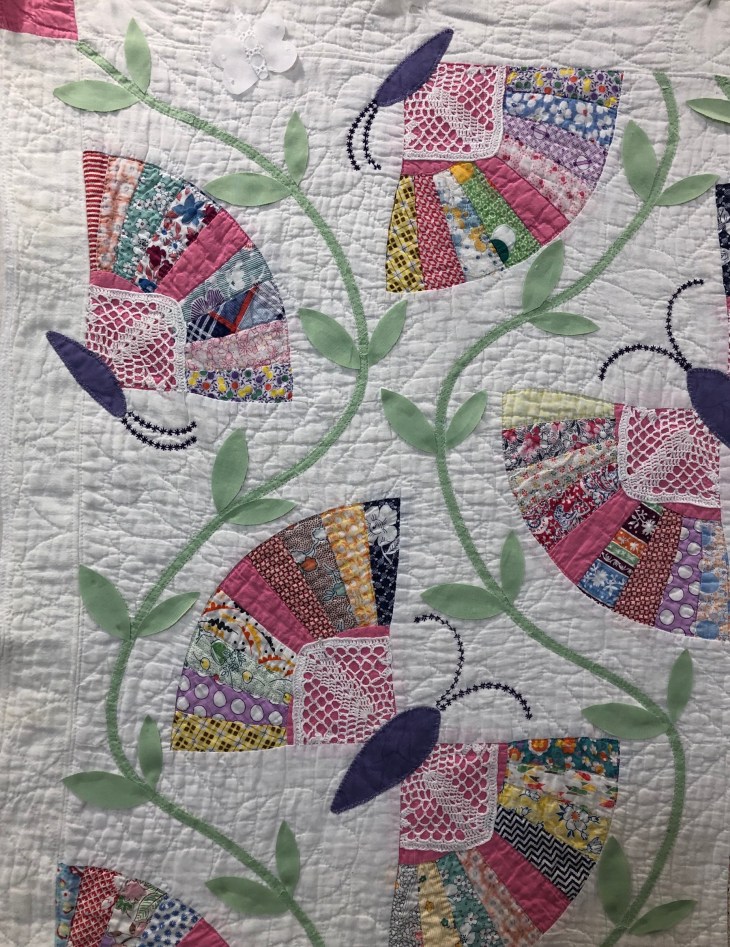
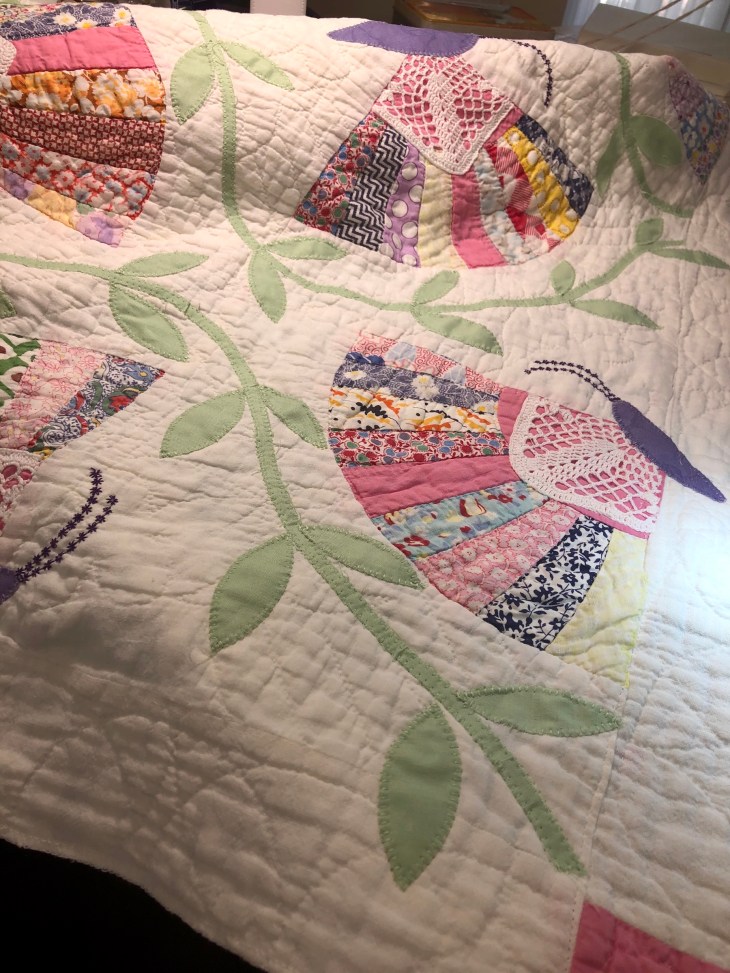
I set some early goals/ideas on where I wanted this piece to go and I surprised myself by sticking to them almost 100%. I knew I wanted my fans to become butterflies, I knew I wanted to have green vines and leaves and flowers of some kind, white butterflies and/or dragonflies. Initially I planned to hand dye narrow trims or laces to be my vines. I didn’t want to go to the expense of pricey dyes, but I knew if I used Rit Dye® the chances of fading in the laundry was a possibility so solid quilting cotton fabric was my final choice. The pic below shows my trial run at an undulating vine.
This is another instance where Elmer’s School Glue® is my quilting friend. I purposely chose not to use a fusible for my vines and leaves. Here’s my thinking: this is an old quilt, there are no straight edges any longer, the fabrics are worn and frayed. If I introduce vines and leaves with nice clean edges, I felt visually it would not be the look I was trying to achieve. A very thin stream of Elmer’s and a dry iron held all the greenery in place nicely as I transitioned from ironing board to sewing machine.
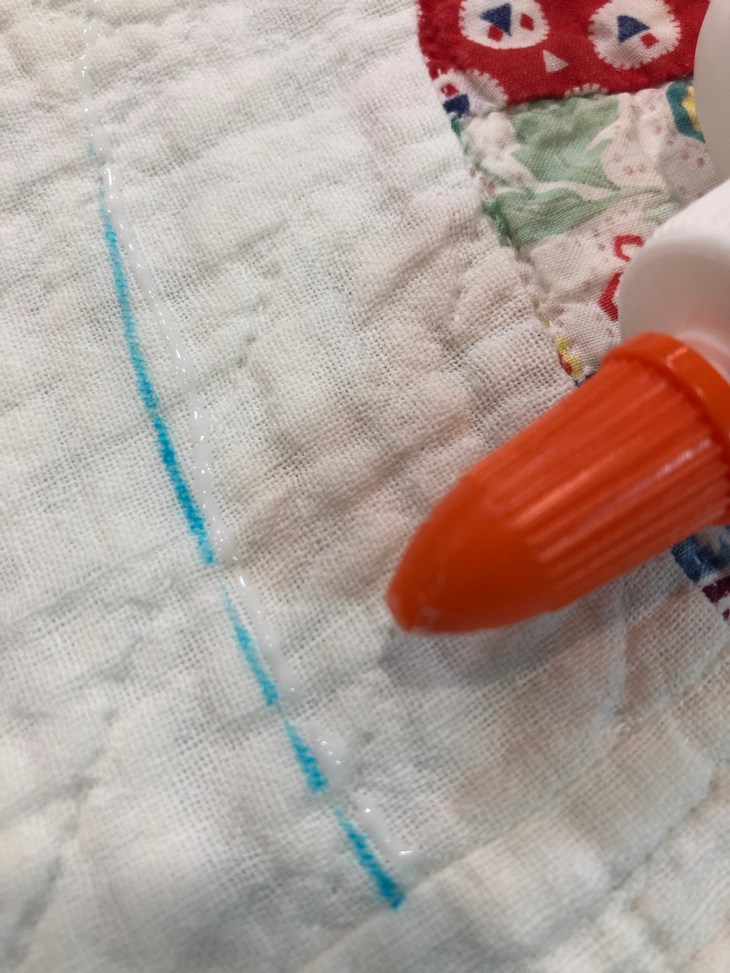
I use EZ International blue water soluble marking pens for any number of reasons but in this case I know I can iron over the marks and they will not darken and/or stain the white fabric.
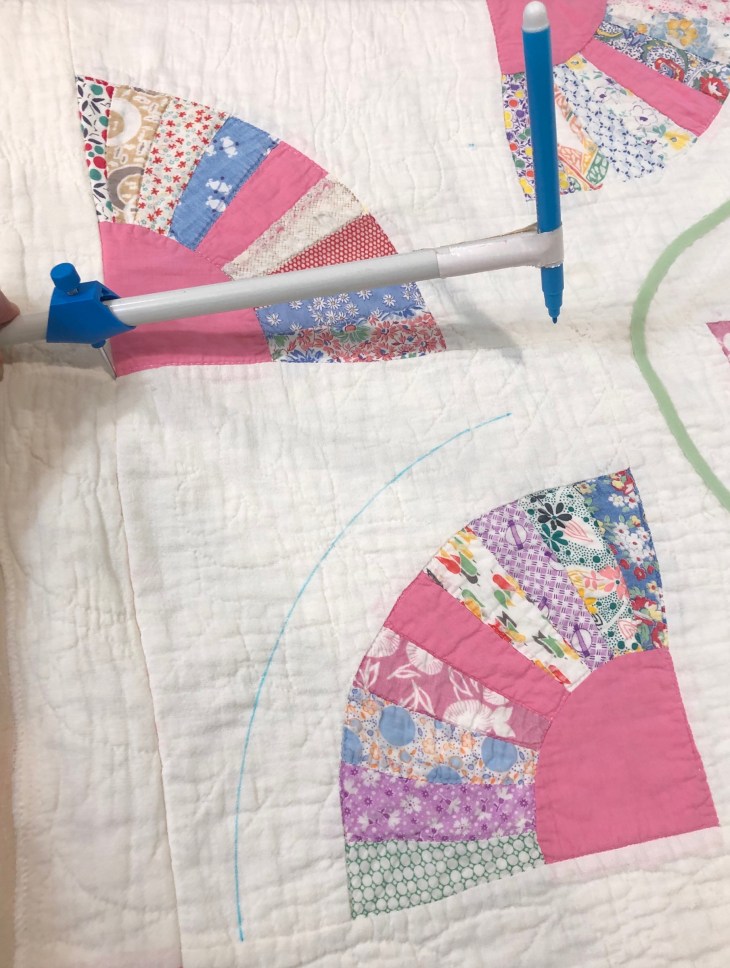
And the large compass is from either Lowe’s or Home Depot kind of stores, it’s a Dasco Pro Compass. I have adapted one end using white duct tape to hold my blue marking pen. This is such a handy tool!

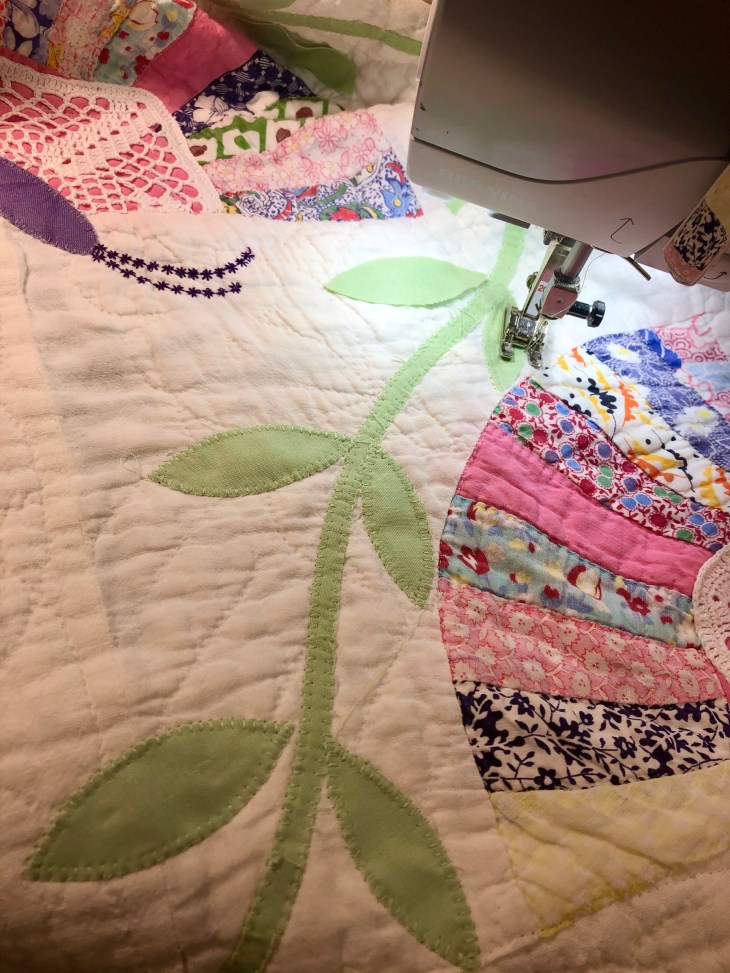
Once my stems are Elmer’s glued and dried with a dry iron, using a machine appliqué stitch on my Bernina and DMC sewing machine thread in a nice matching green (I have no idea on the color name or number, the top label on the spool has been long lost) I machine appliqué both sides of the green vine.
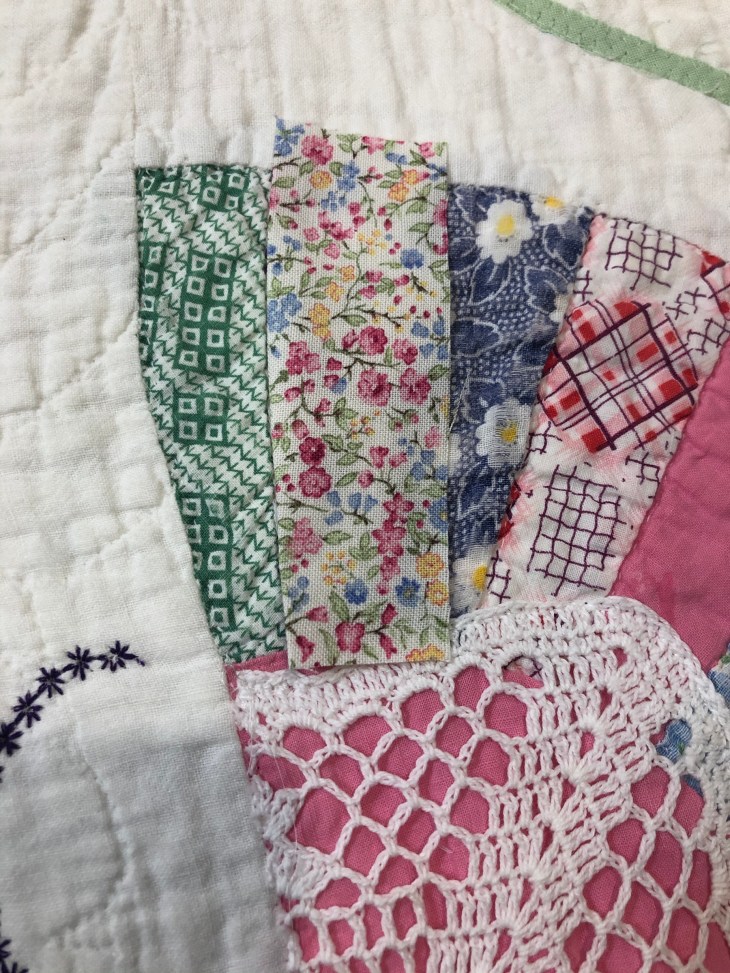
Now that the vines are on place I think I’d better address the damaged or missing Fan block blades.
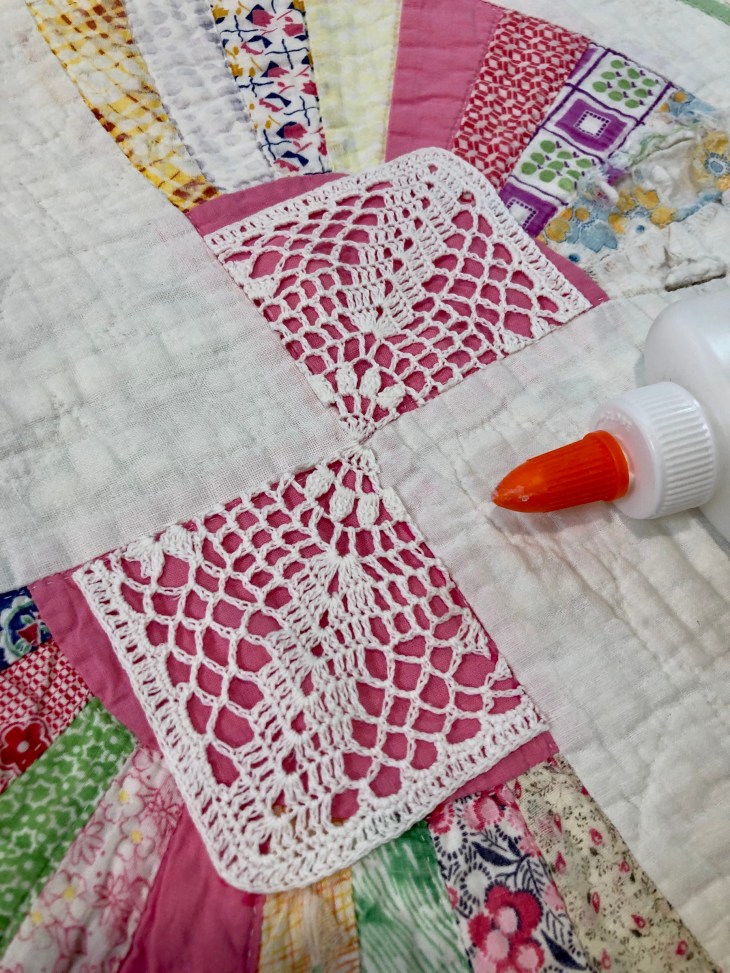
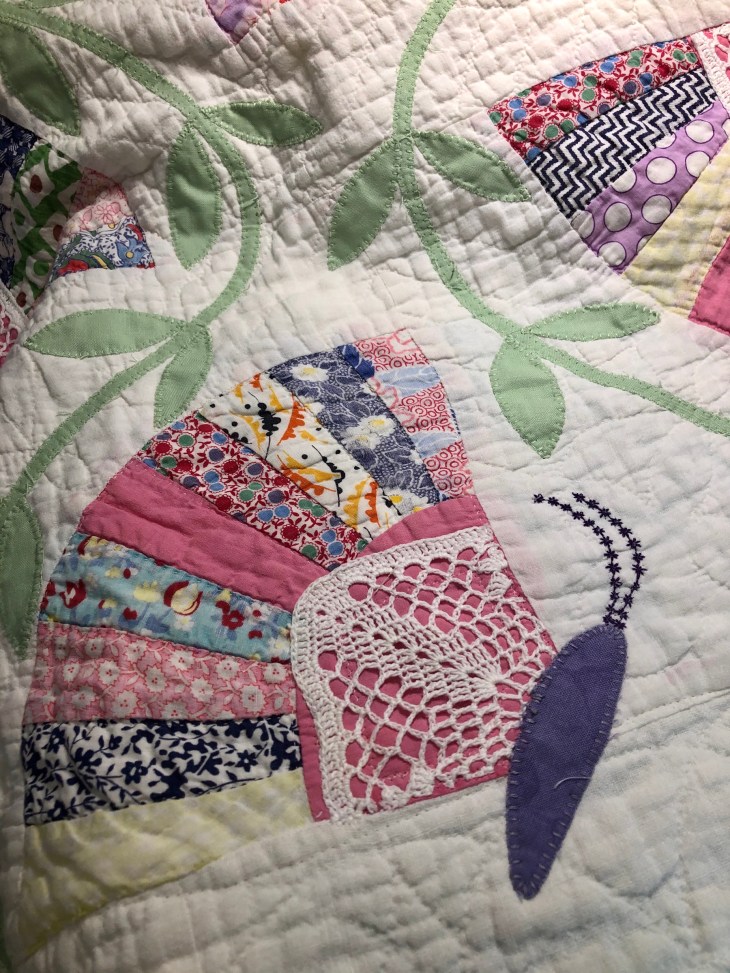
But before the replacement to the fan blades, I found about 10 square white crocheted doilies in my stash. They will work perfectly to visually “tone down” the solid pink of each fan block. I cut these doilies in half both horizontally and vertically and use 1/4th of the original doily on each of the pink quarter circles. I sewed these pieces down using a tiny zig-zag stitch at the edge and then to further secure them I sew again about a half inch in from each edge.
Using the front and/or back of an inexpensive plastic 3 ring binder from a Dollar Store, I made a rudimentary template large enough to press under about a quarter inch on each of the four sides.
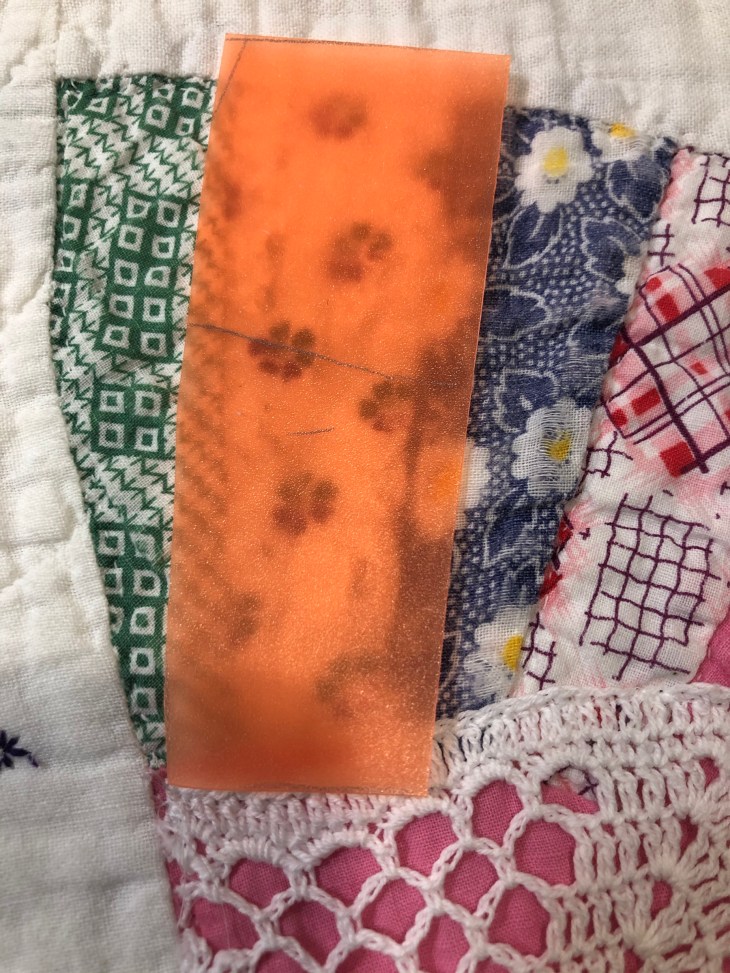
With my replacement fabric cut, I begin to press under the raw edges.
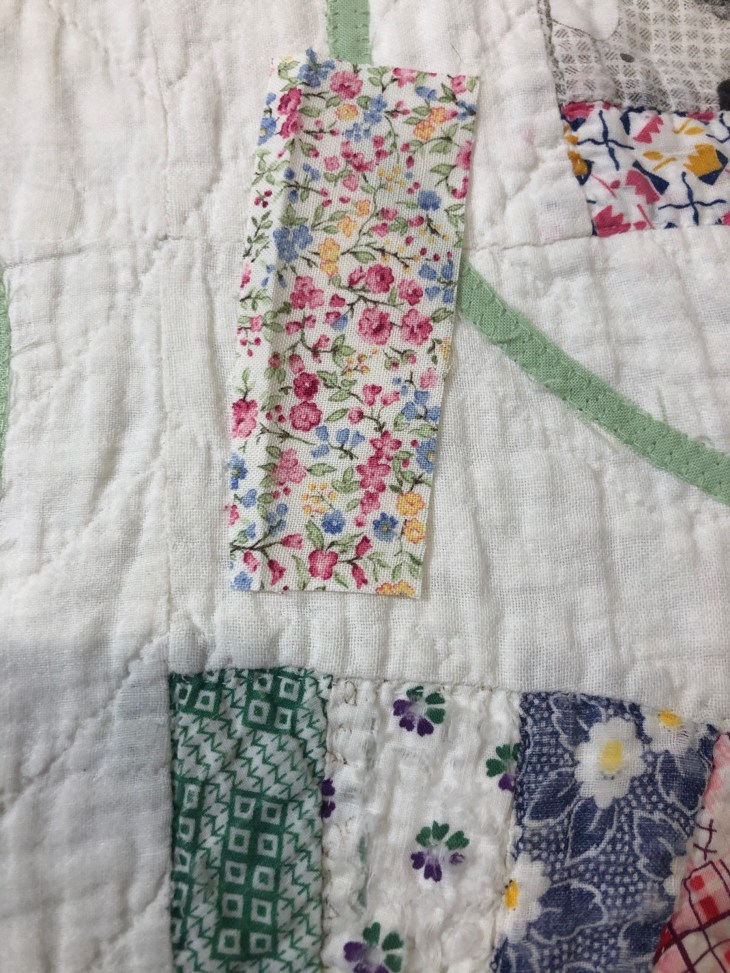
One side of the “fan blade” is a bit curved so I work with the fabric to get the desired shape.
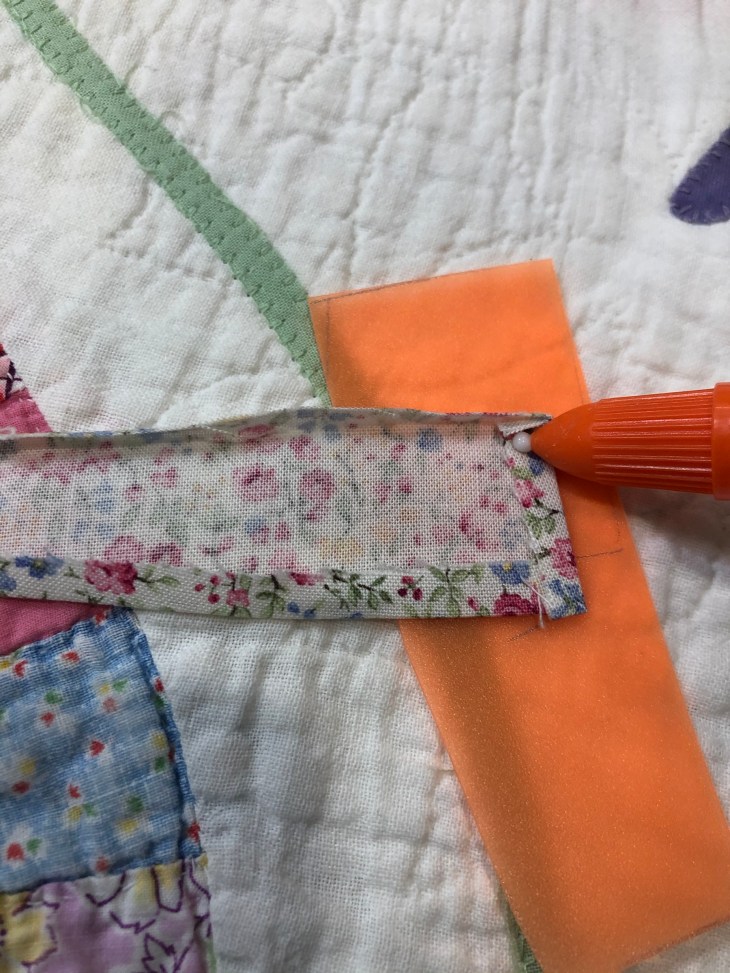
Again, to help with the corners, I put a dot of glue to hold everything in place before I dry press.
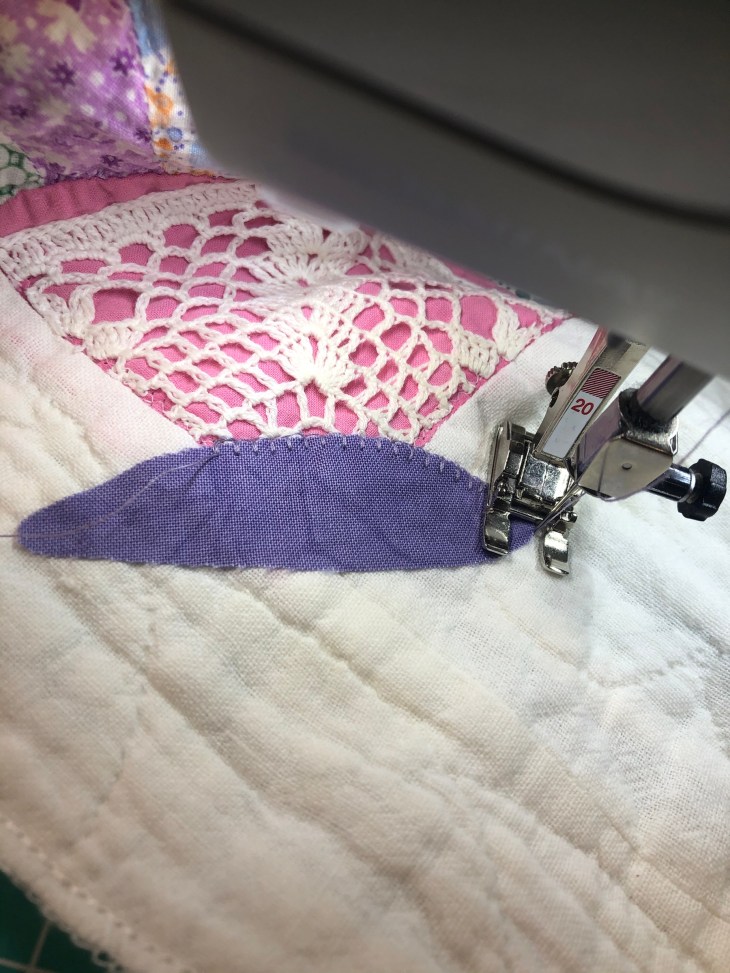
Once I’m happy with the shape and the placement of the new fan blade I pin it into place and with a tiny zip-zag I stitch it into place directly over the missing or damaged original fabric. What’s in my needle and bobbin? Wonderfil Specialty Threads makes a wonderful 80 weight thread called Deco Bob. I’m using a light almost off white and it blends in so nicely! I forgot to take a picture of the zig-zag stitched blade for you 😦

It’s getting more exciting as it’s time to officially make these fans become butterflies! I debated a long time and auditioned so many different fabrics trying to decide on the butterfly body color. There’s no denying the pink solid fabric is visually “heavy”. I considered a medium grey, a green or a mottled brown but once I cut a small piece of the purple I knew I’d found my fabric! I feel it balances the solid pink quite nicely. Speaking of the solid pink fabric, have you noticed it is consistently the center blade of all the fans?
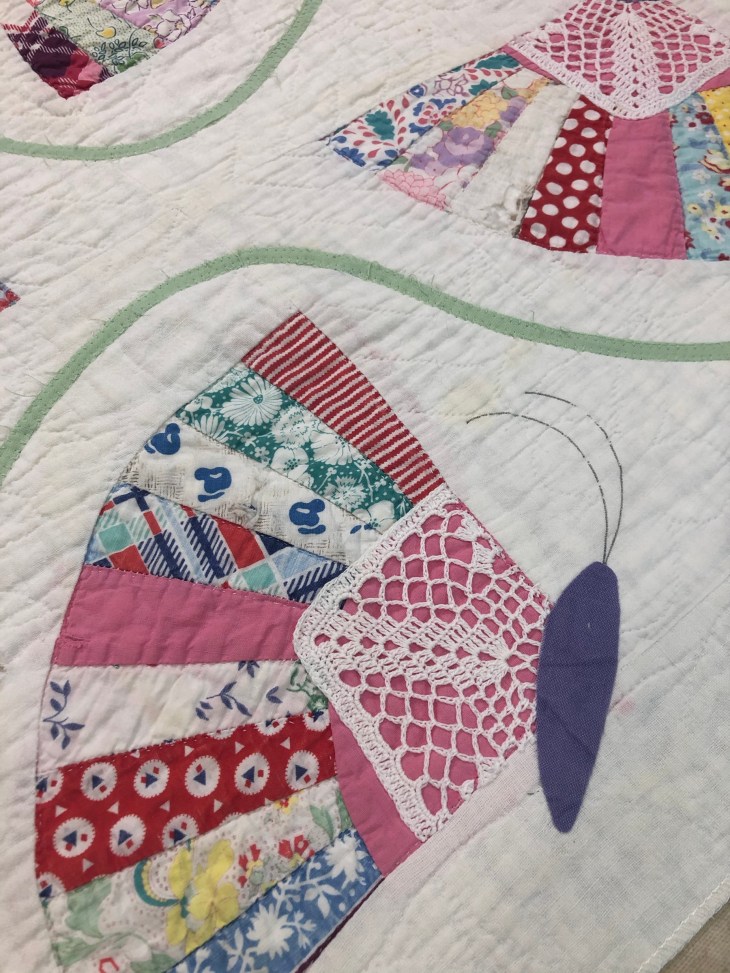 I used the orange plastic binder once again to cut a shape for the butterfly body. Note the half or profile butterfly bodies have a slightly smaller girth to them. The antenna were drawn on using a Pilot brand Frixion® pen. I used a dress making French Curve template to keep the curves consistent. At this point it was back to the sewing machine to choose and execute a decorative stitch for the antenna. I chose a purple thread from my stash that most closely matched the purple fabric.
The applique stitch on my Bernina is put to use again as I secure the butterfly bodies in place.
I used a Sue Pelland Designs template to cut my leaves, such a quick way to cut hundreds of small leaves! It may be hard to tell, but the leaves are 2 different sizes. In the final layout the larger leaf is on the outer side of each vine.
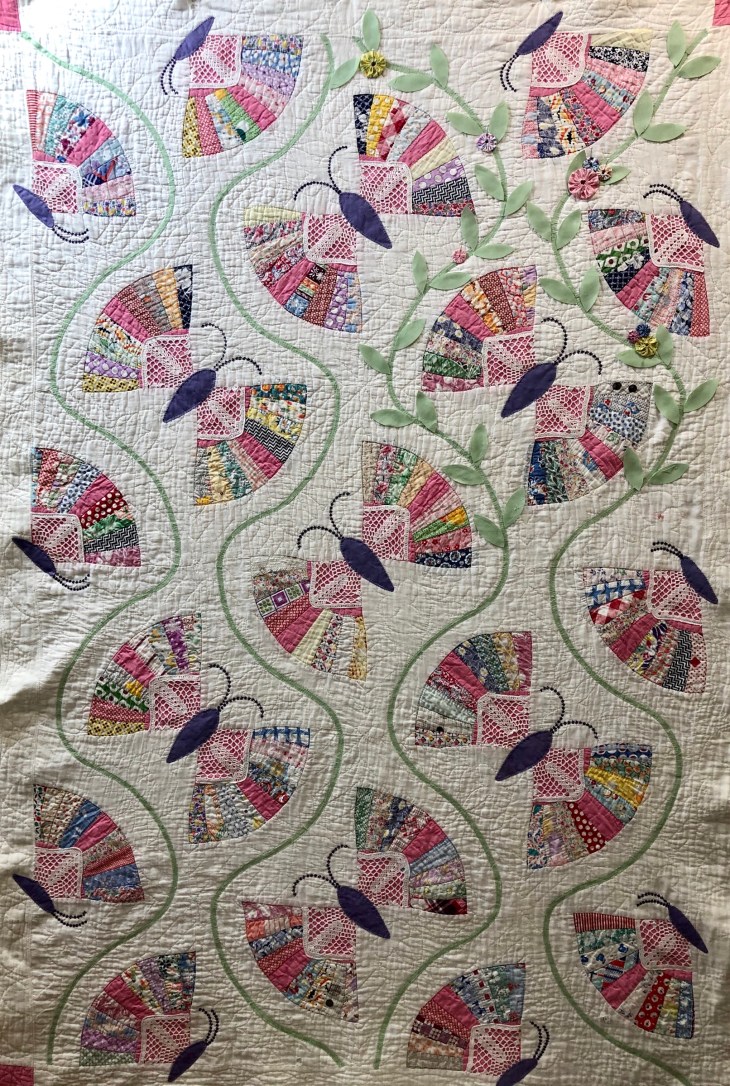
Once I had an idea of leaf placement I began to place various sized yo-yo circles as flowers on the vine.

If you can pick them out, I’m also auditioning small white butterflies.
Yes, it took forever to applique all the leaves, but well worth the time. The glue held each leaf in place until it’s turn to be stitched. Just a dot at both narrow ends did the trick.

I’m thinking lots of white butterflies and dragonflies, white ribbon and lots more yo-yo flower clusters will be in place in the next few day.
So now you’re caught up! I’m hoping for a lot more progress over the holidays, time will tell!
Merry Christmas and Happy Quilting to everyone!
Blessings, Rhonda
ps: I typed up this blog post very quickly, if you come across any blatent typos, please let me know!


Do you fill in missing batting?
LikeLiked by 1 person
Oh, I sometimes do fill in the batting if it will make an overall difference, but I’m finding lately that when I am saving and or rescuing these old quilts that often times it really doesn’t make a difference because I am adding layers to the top. I realize this is quite an ambiguous answer, but it is circumstantial dependent as to replacing small areas of batting, or just leaving it as is.
LikeLike
I think it is absolute amazing the way you took a well worn fan quilt and turned it into a beautiful butterfly quilt. You are amazing!
LikeLiked by 1 person
Thank you! If was such a fun and rewarding project!
LikeLike
I just love how you make something old into something so pretty looking. You made this look so cute.
LikeLiked by 1 person
Thank you Robbie, just wish I could create 24/7!! 😁
LikeLike
I love your detail description of how you repaired this old quilt and made it new again!
LikeLiked by 1 person
Thank you!
LikeLike
love what you are doing with this old quilt.
LikeLiked by 1 person
Thank you!
LikeLike
Test Comment
LikeLiked by 1 person
Test reply
LikeLike