

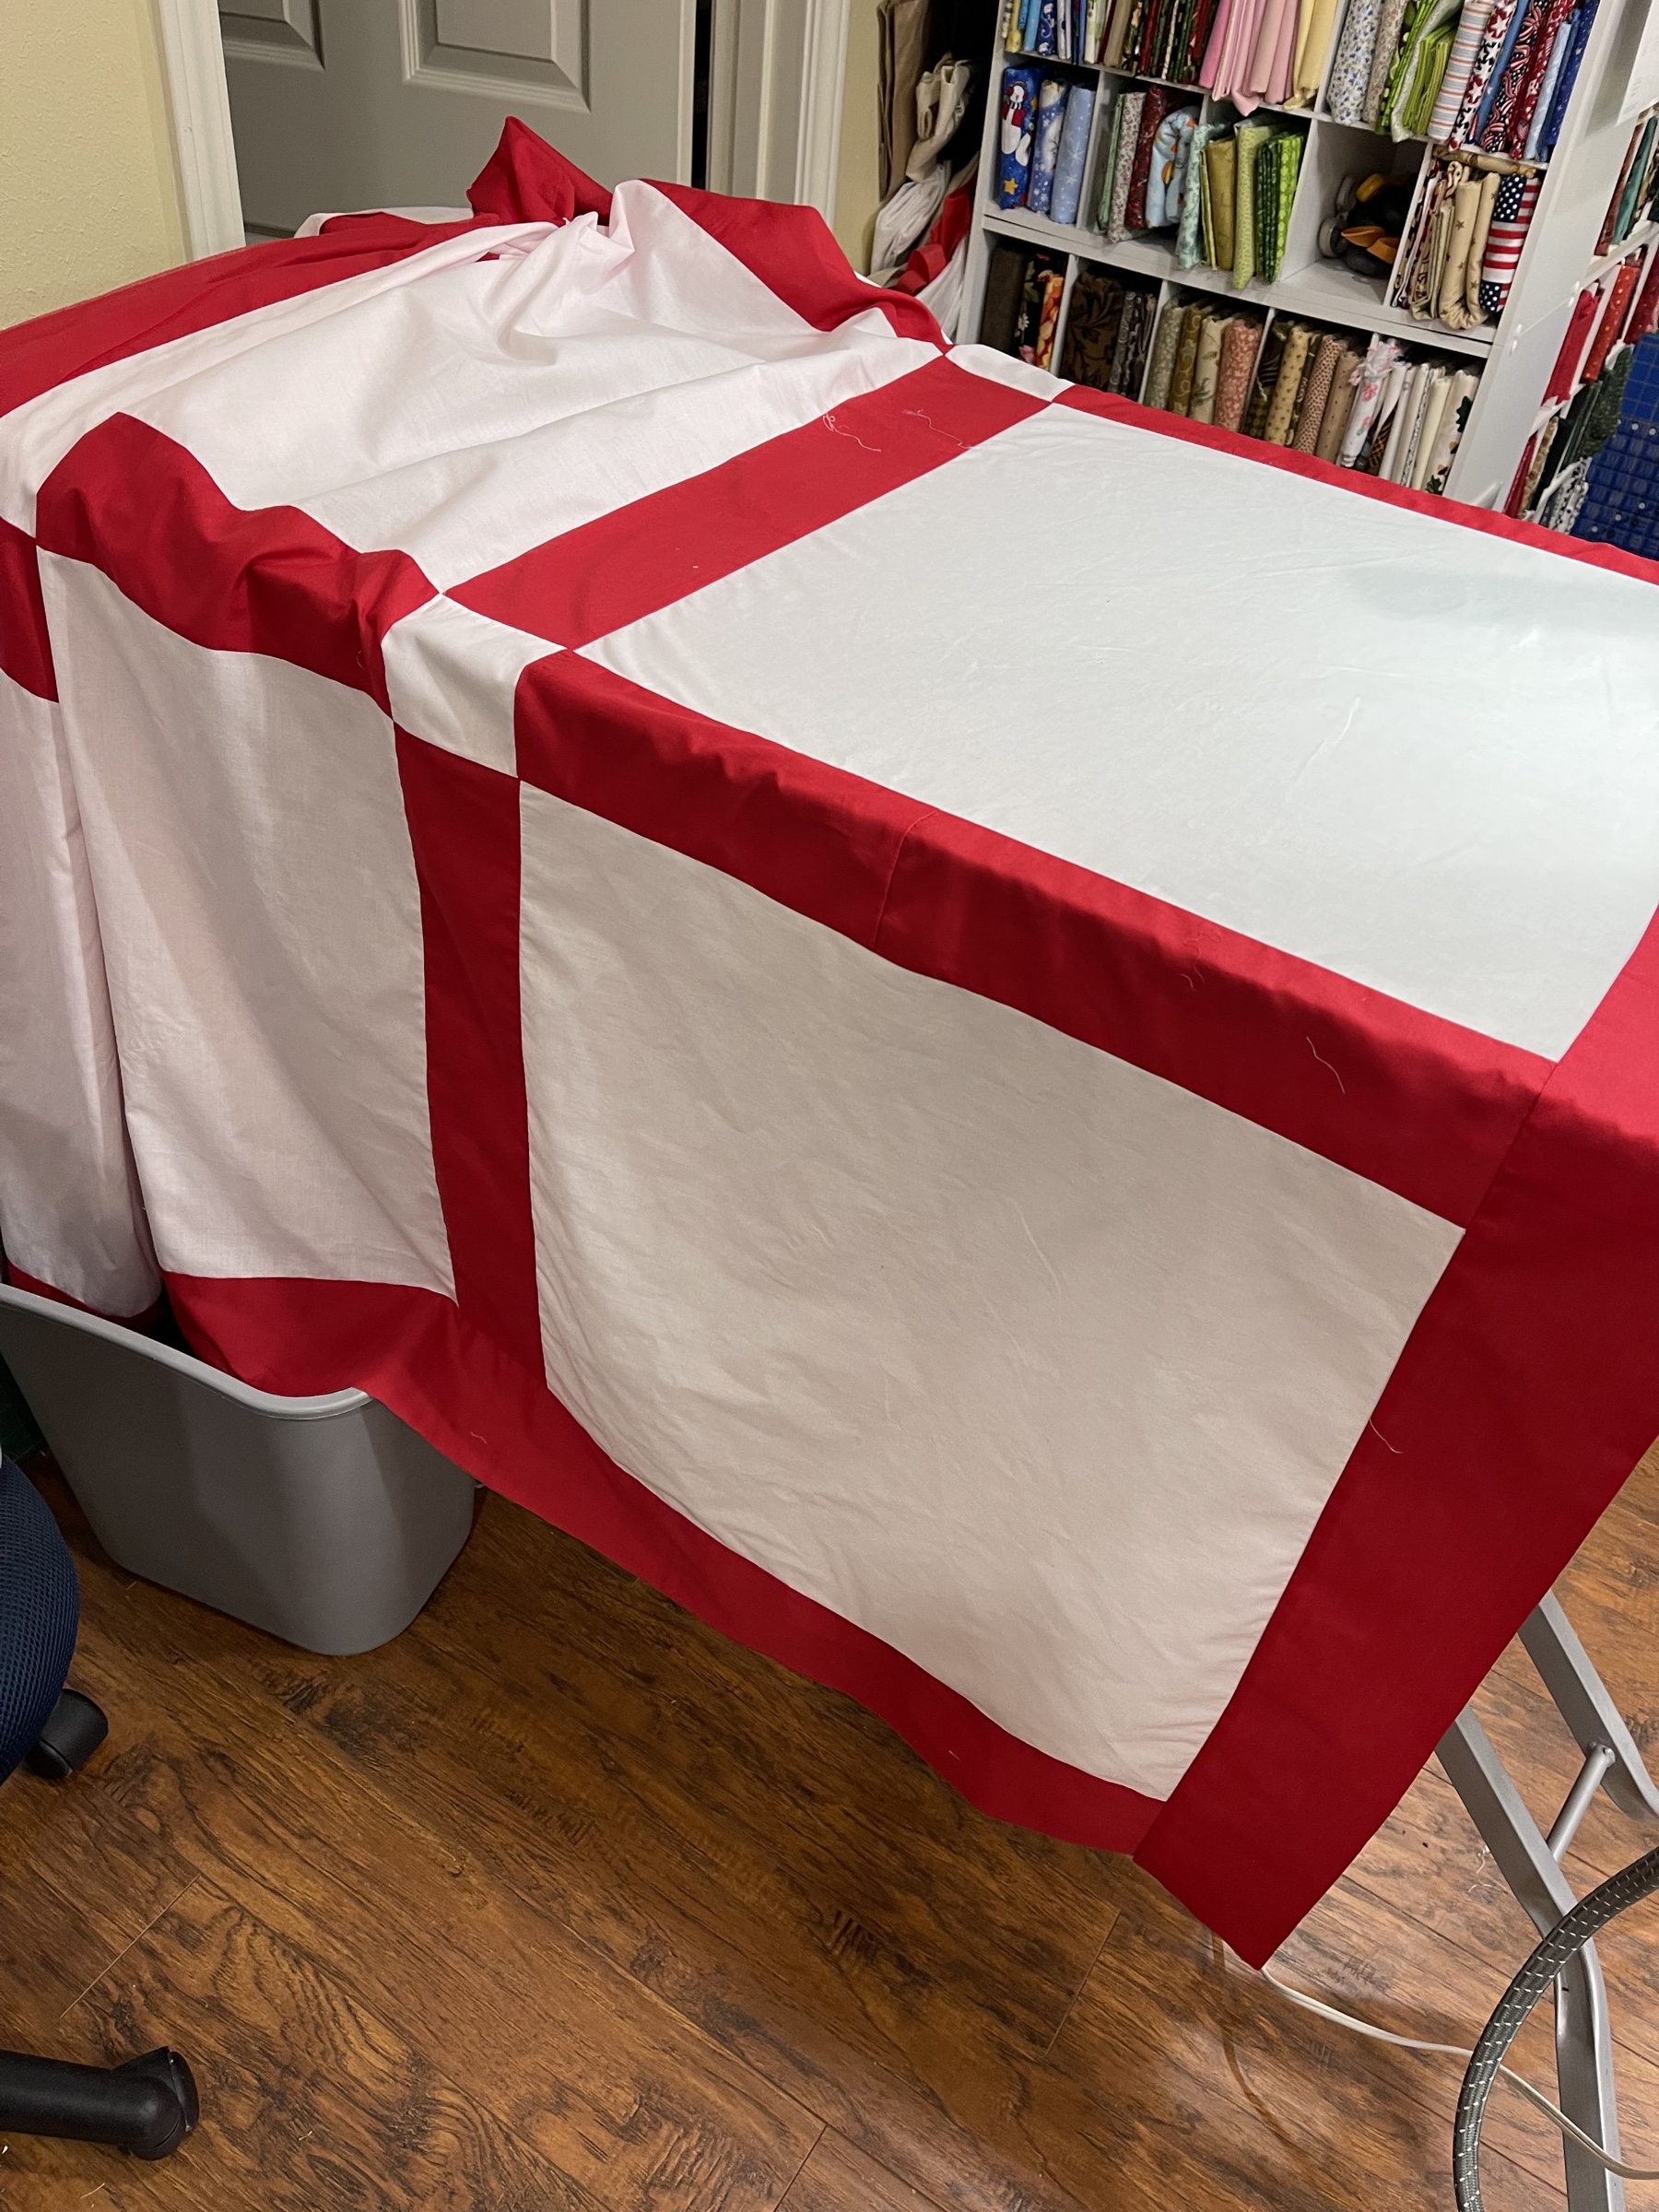
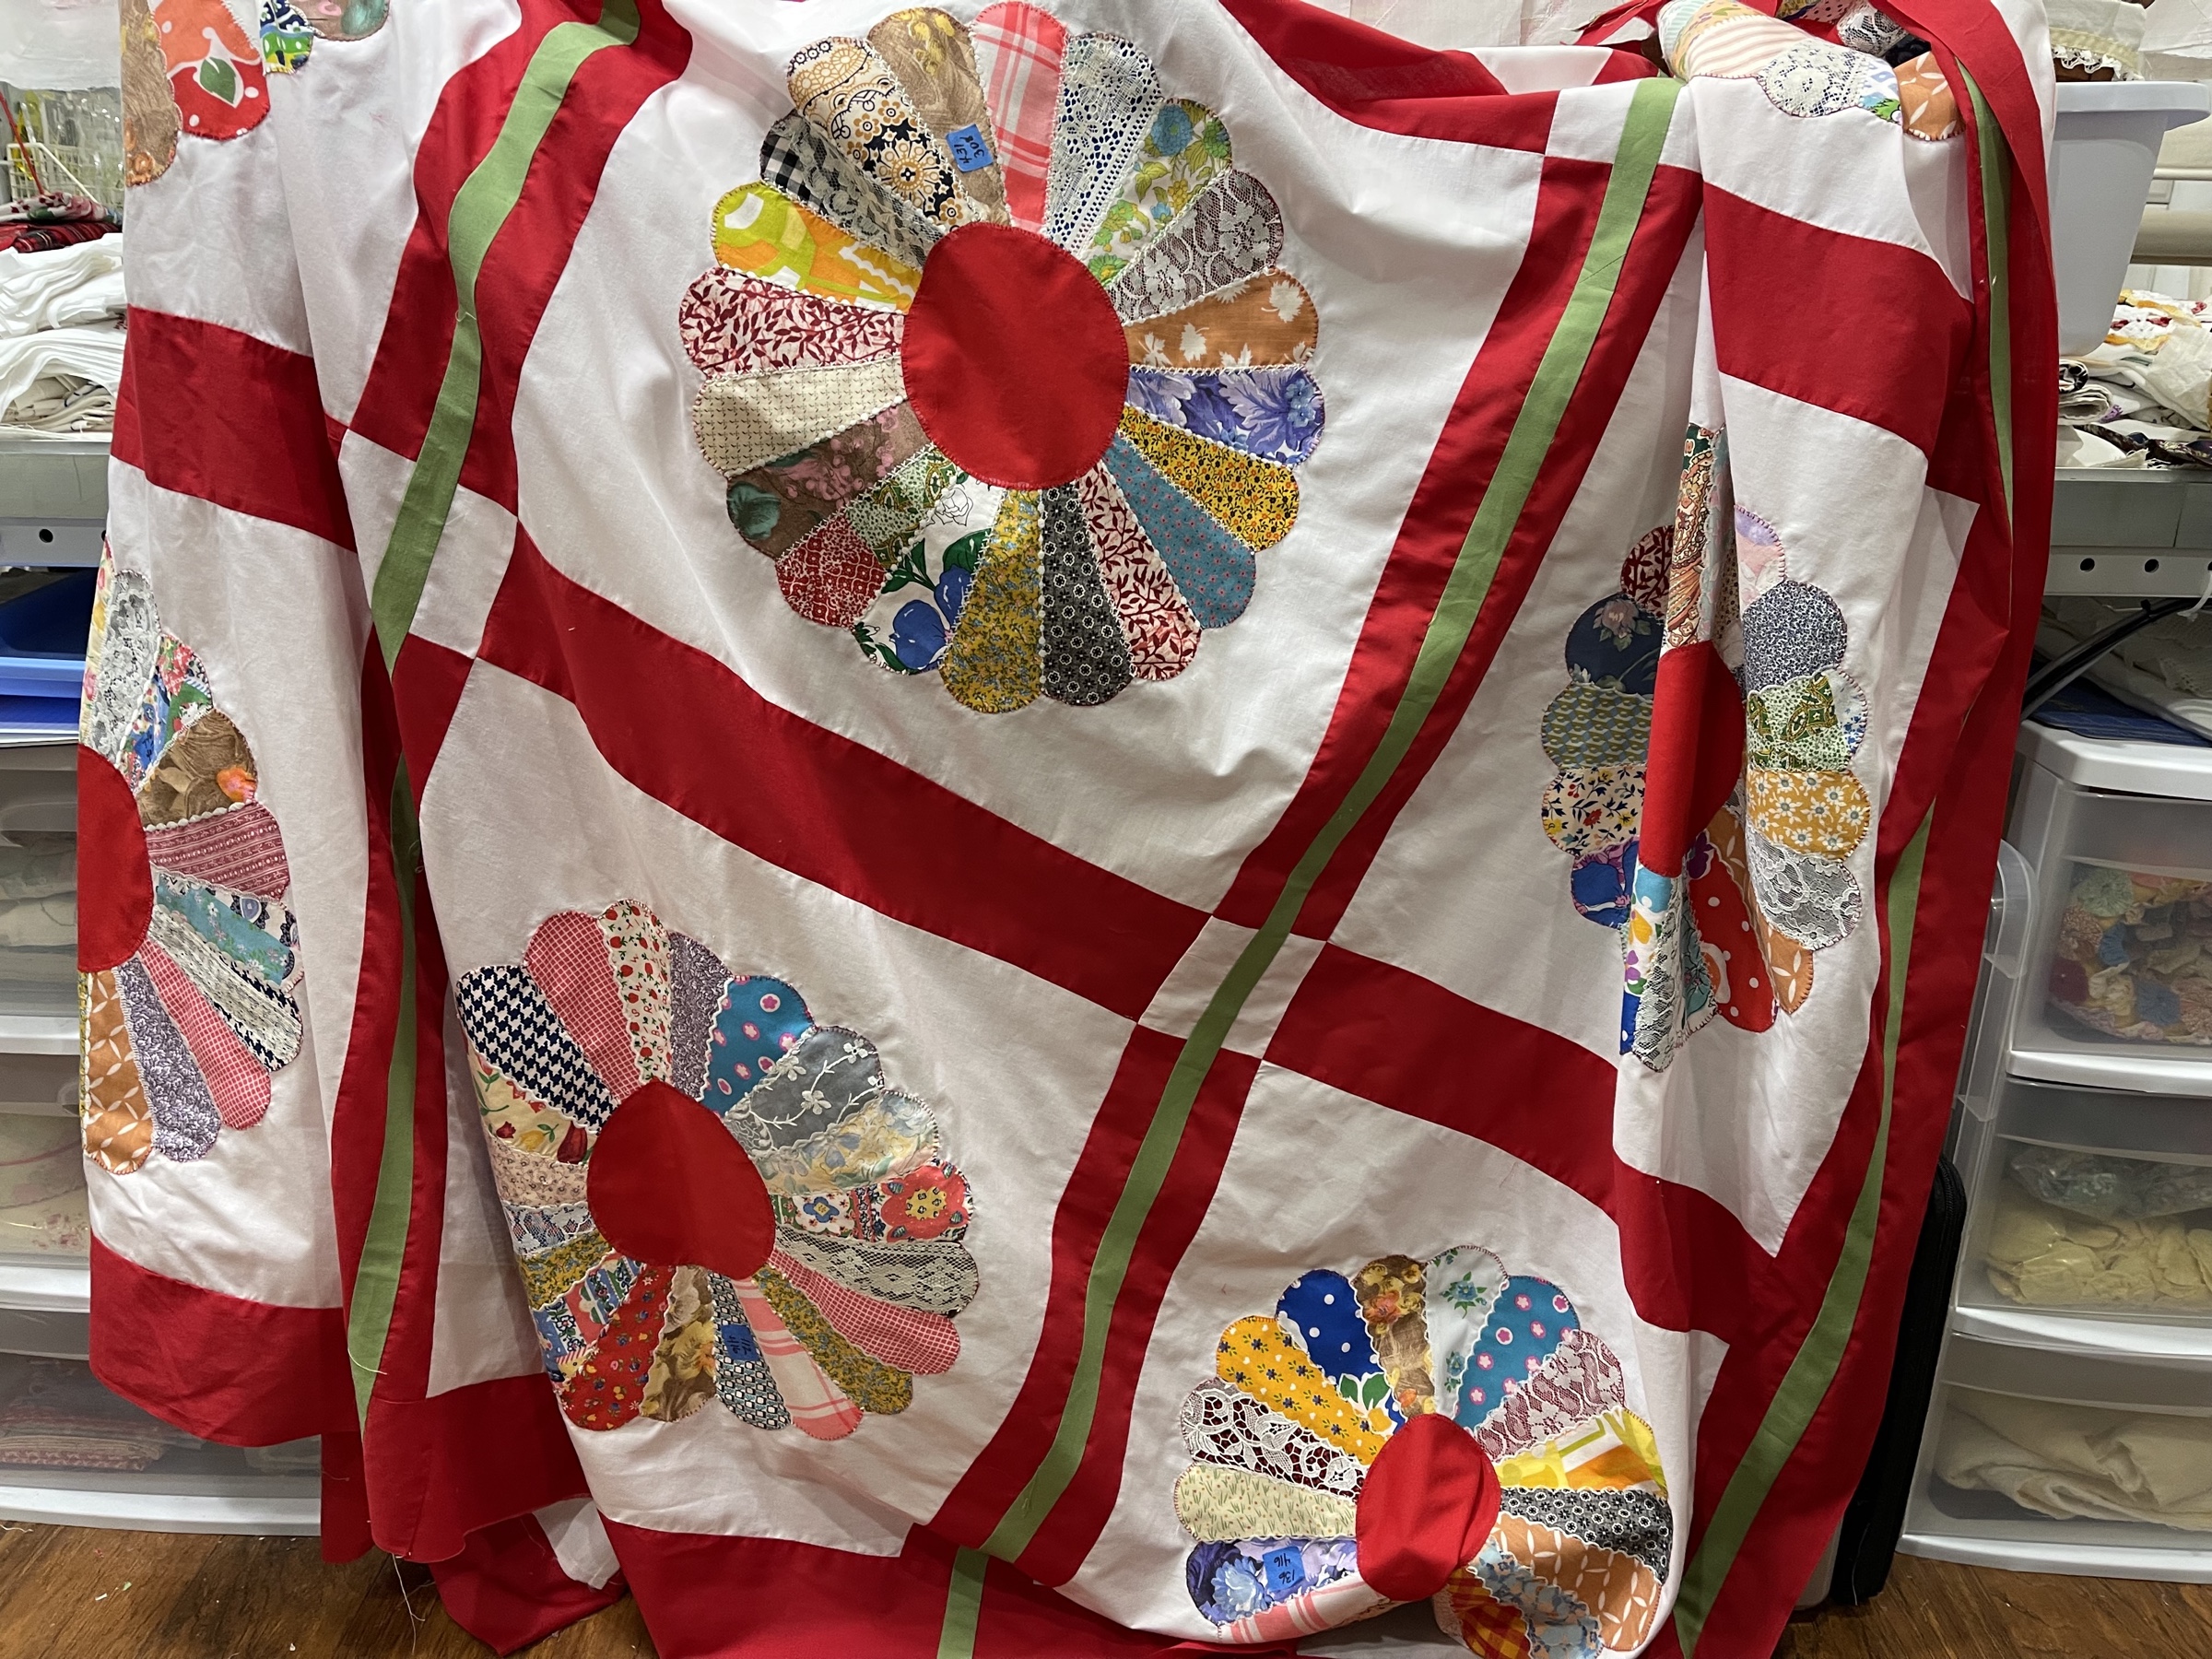
Reminding you what the quilt top looked like before I began to make changes:

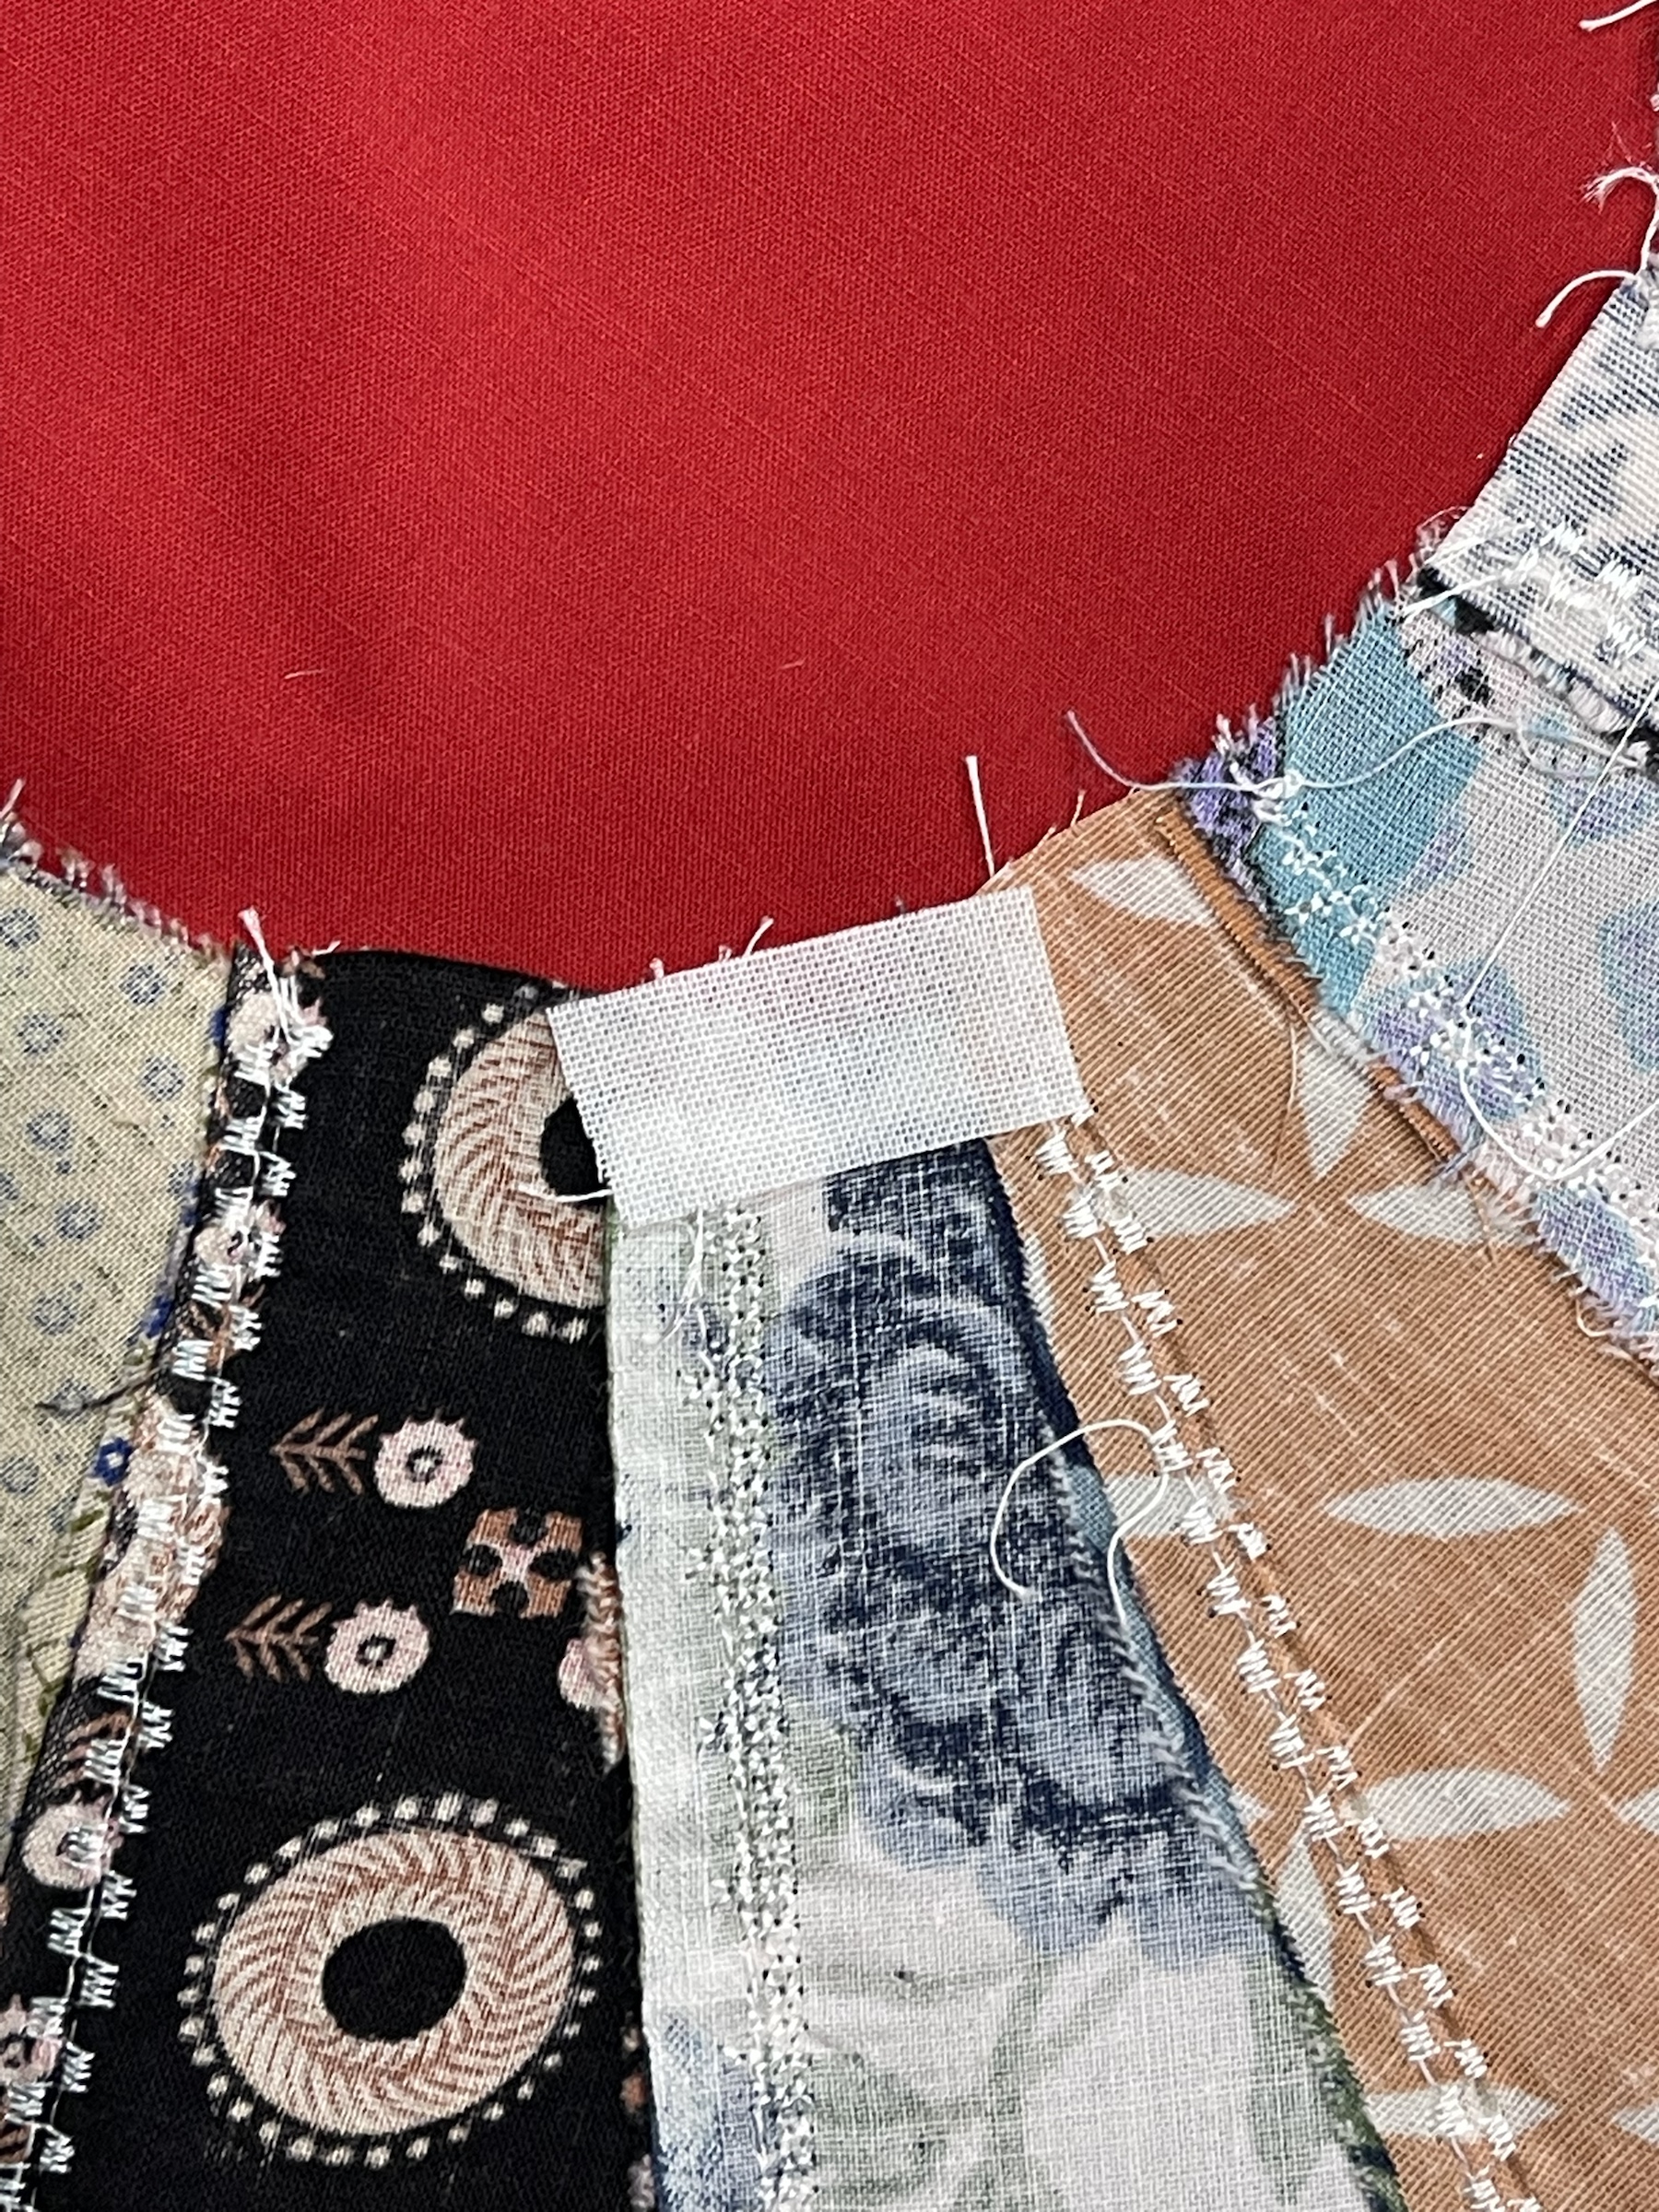
I removed each of the Dresden Plates including their big red center circles.

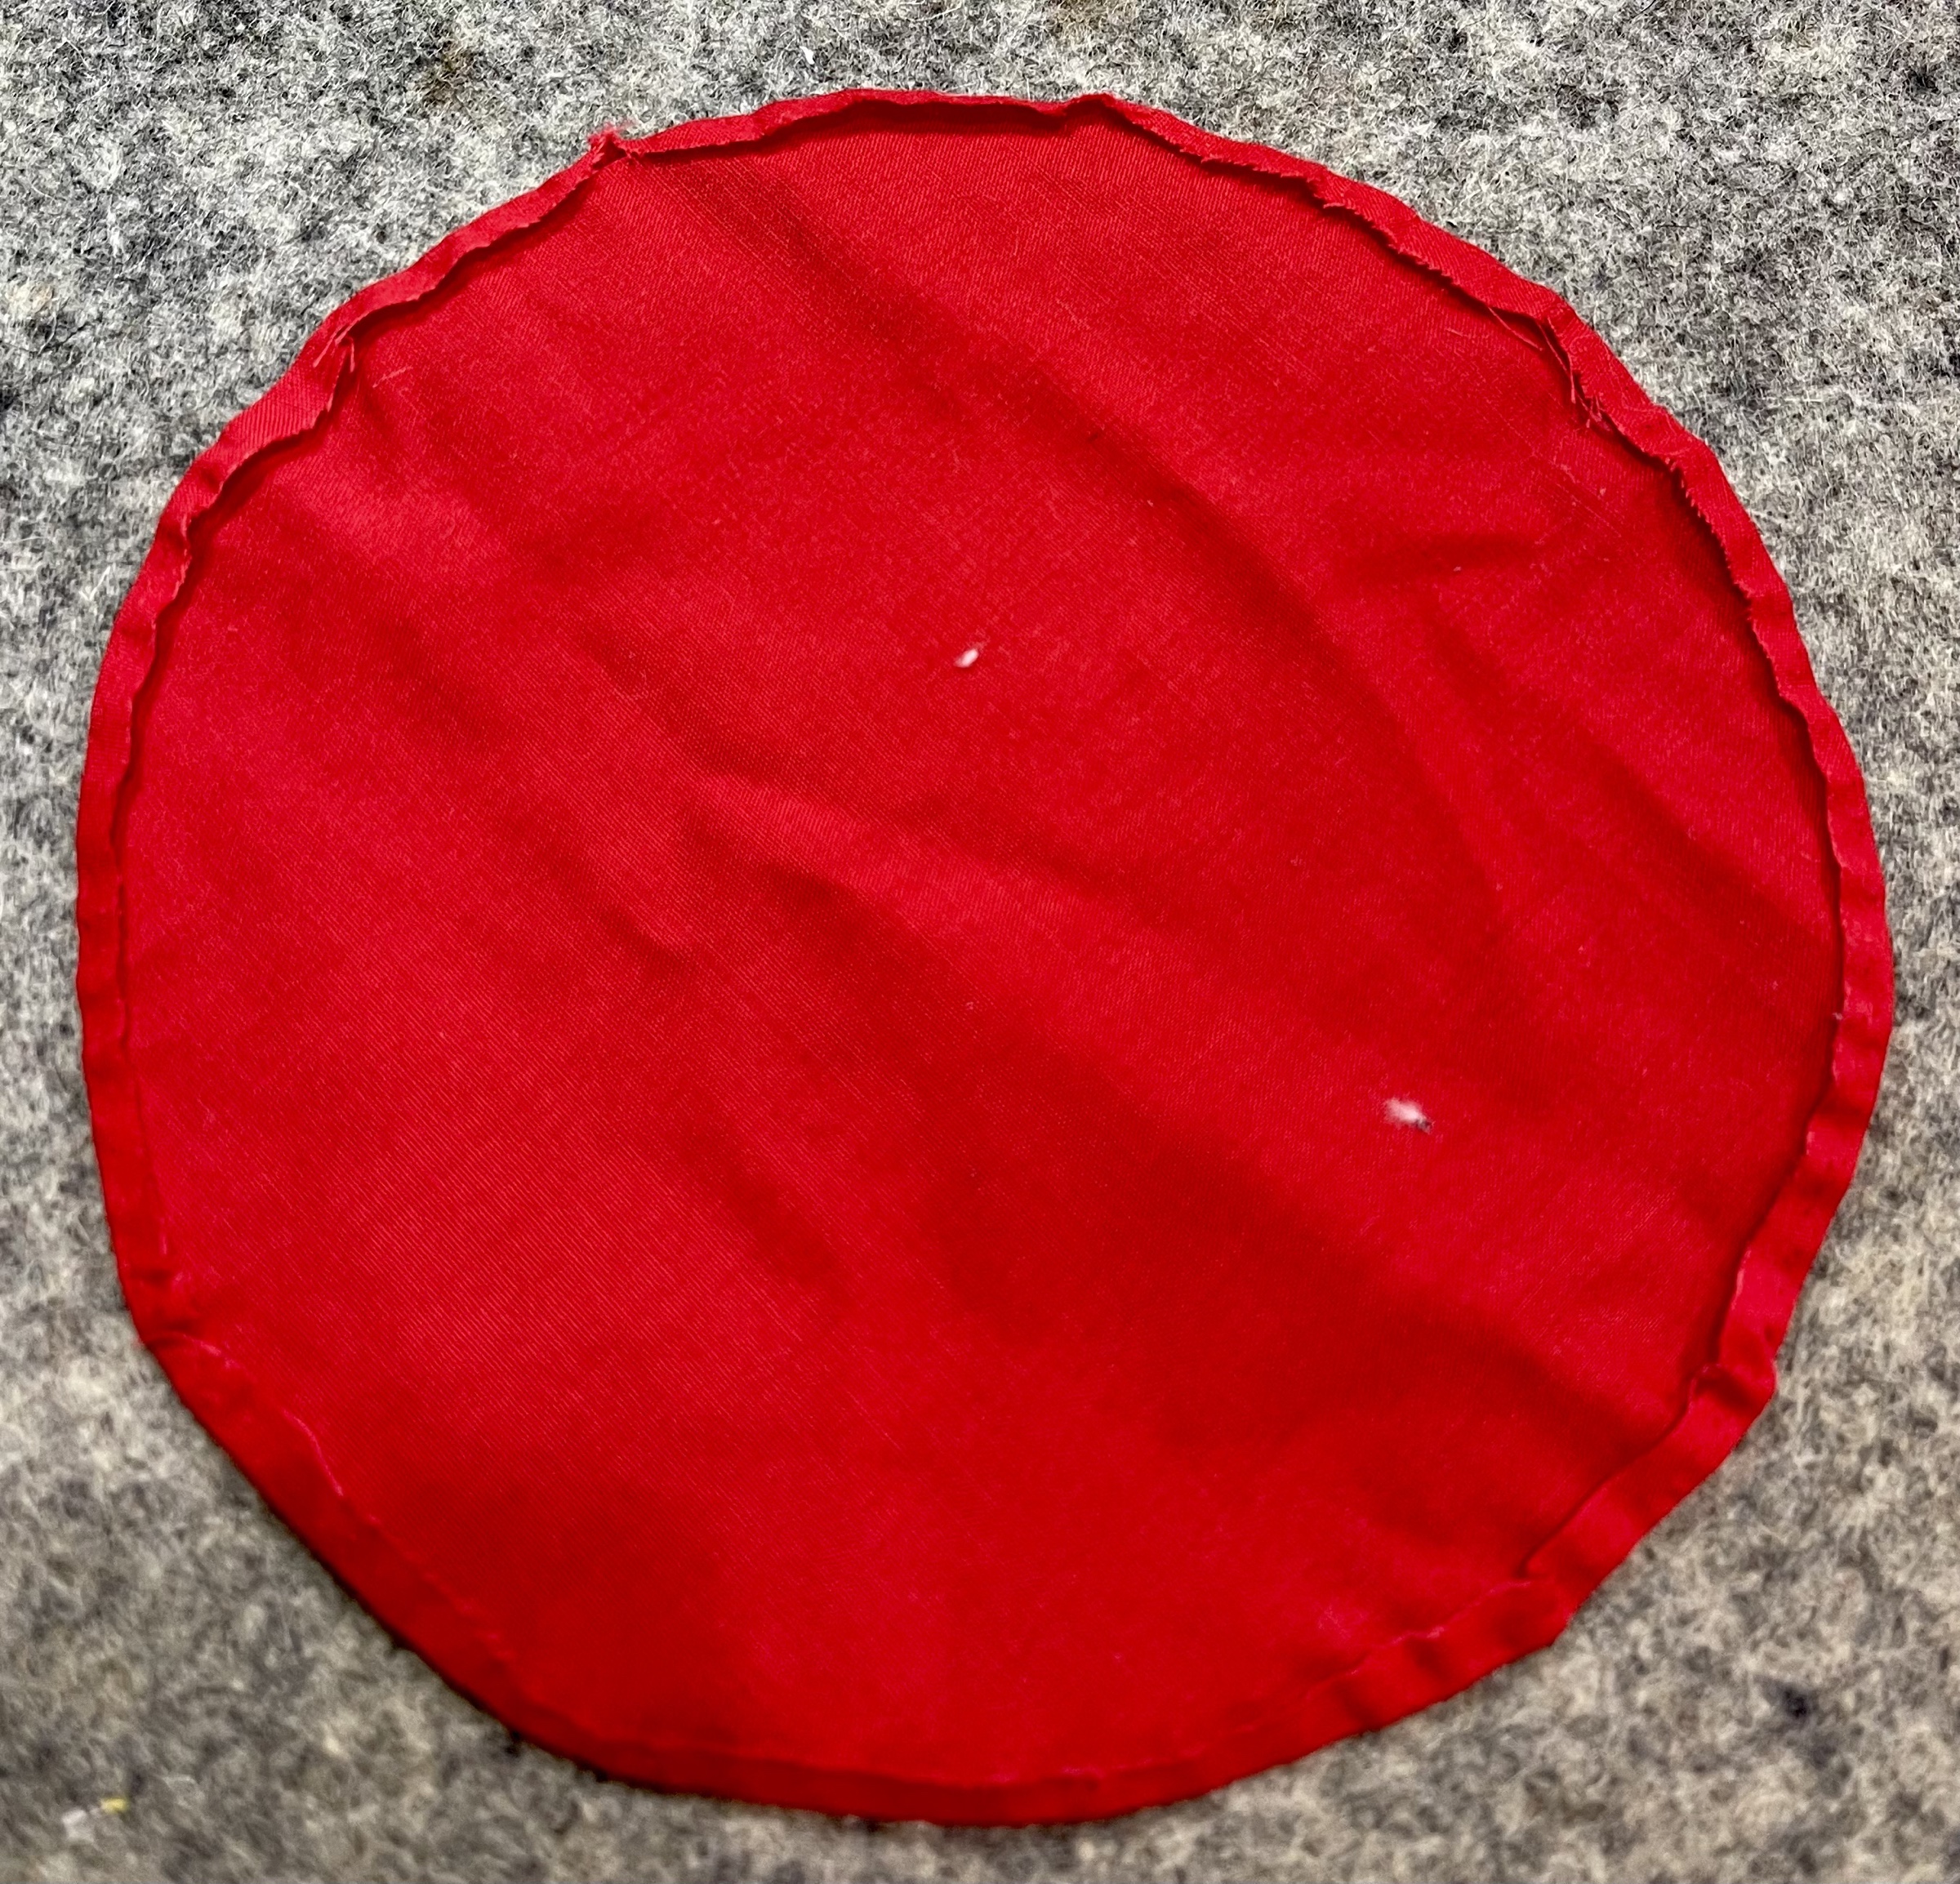
While the outer edges of the Dresden were raw edge embroidery stitched in place, the center circle raw edges were turned under, maybe about 1/8th”.
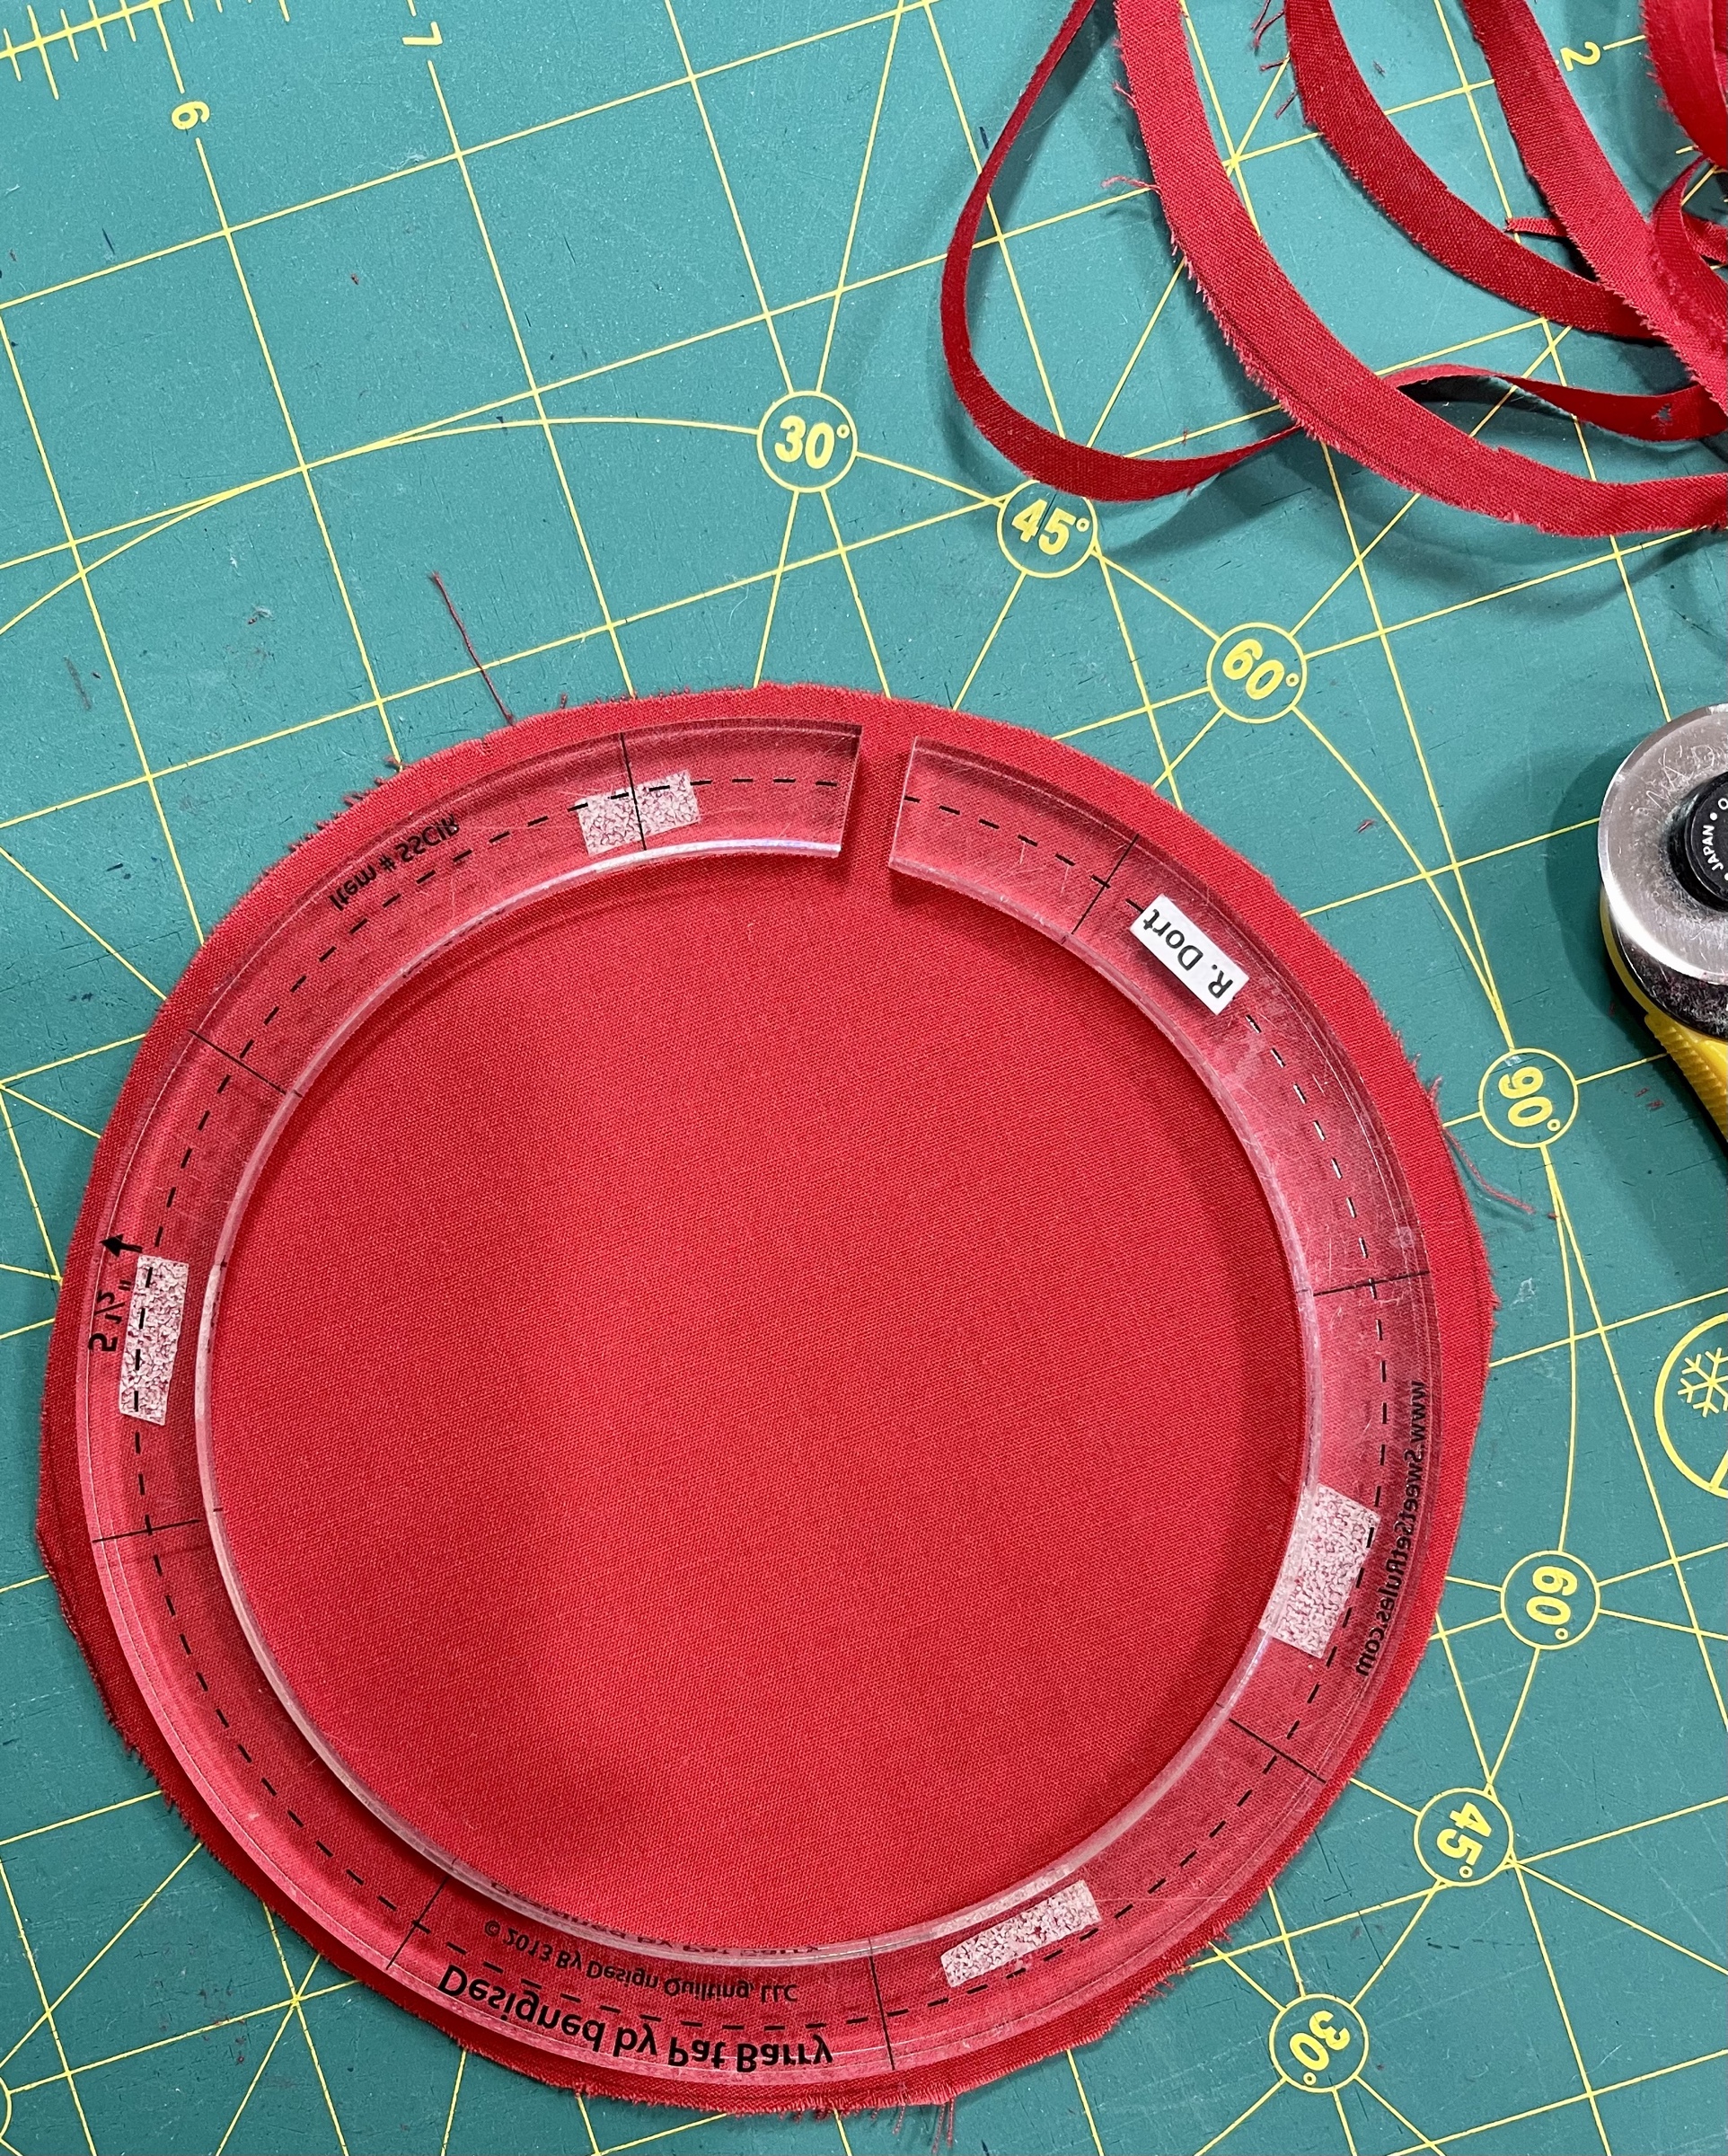
After pressing the circle flat, using an acrylic circle template, I marked and then scissor cut the circle. I’m not keen on needle turn applique and have decided to machine applique stitch both the center red circle and the Dresden outer scalloped edges.
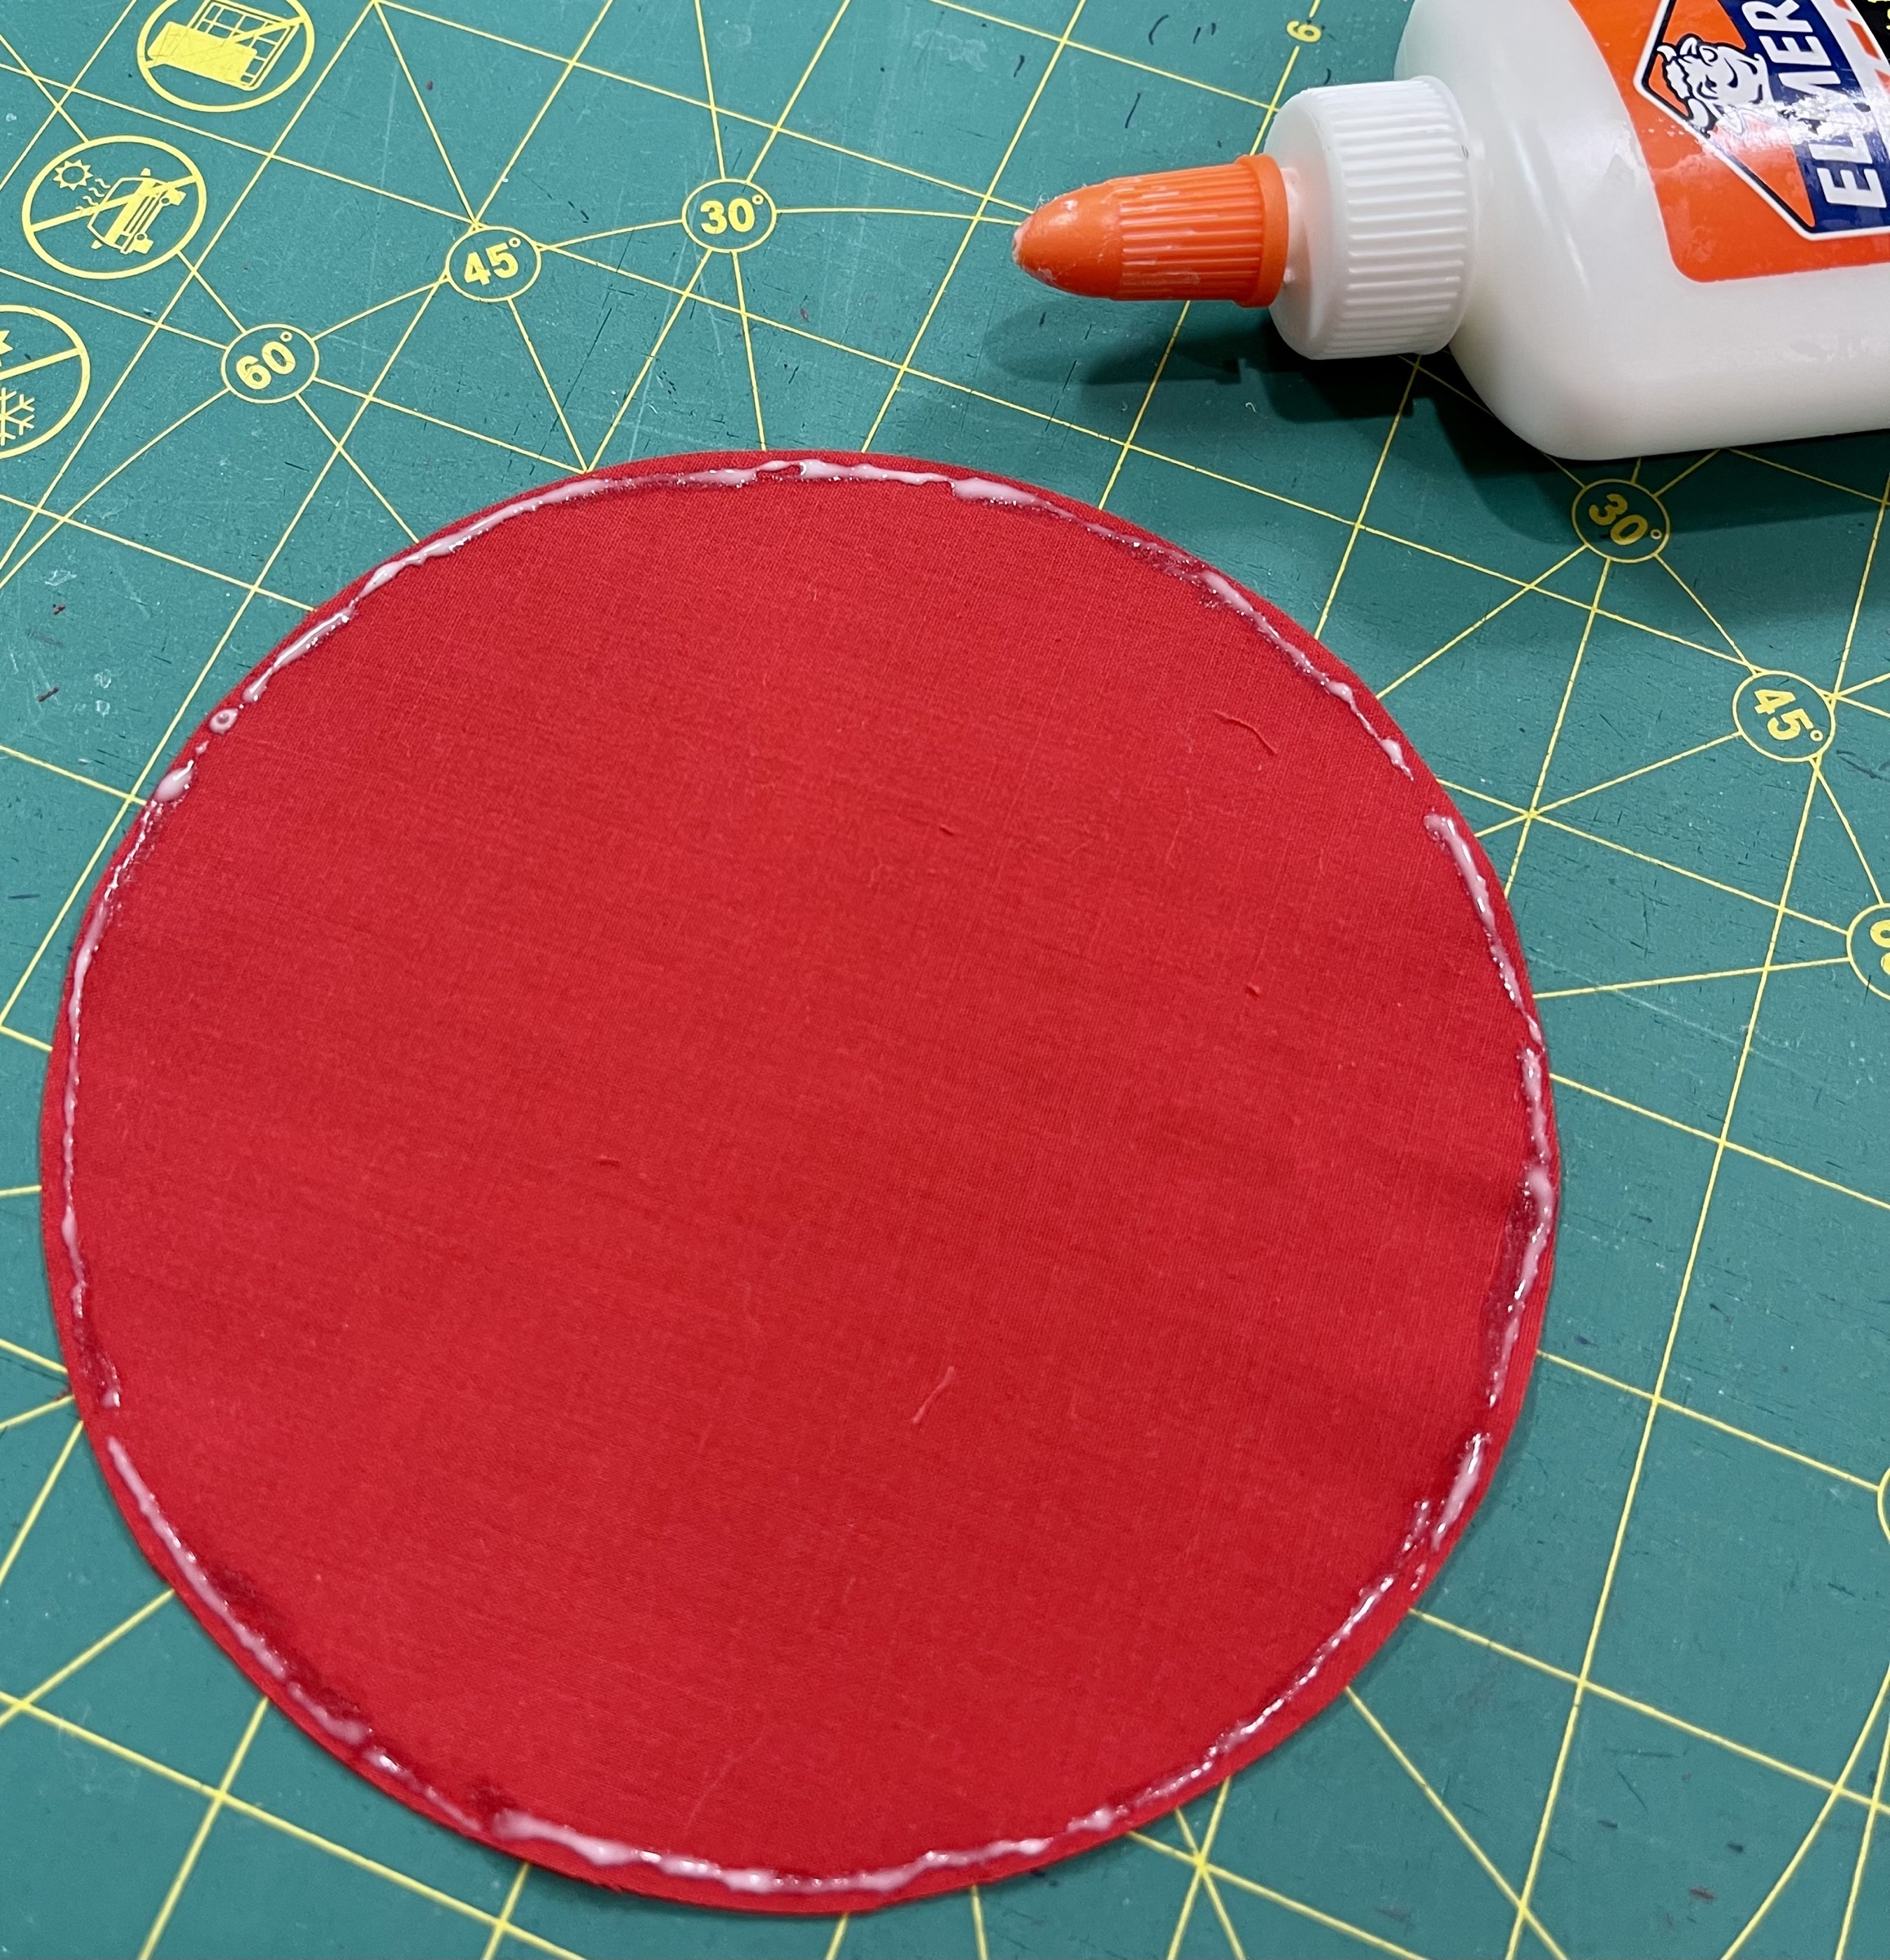
After I have cut/trimmed the center circles I rely on Elmer’s Washable School Glue to hold them in place making my machine applique stitching easier.
I use Elmer’s on so many of my projects, but…they must be projects that I KNOW will take a trip through my washer/dryer once finished. As a reminder, Elmer’s, once dry is quite difficult to hand stitch through. Keep this in mind if you plan handwork on a project you might think about gluing.
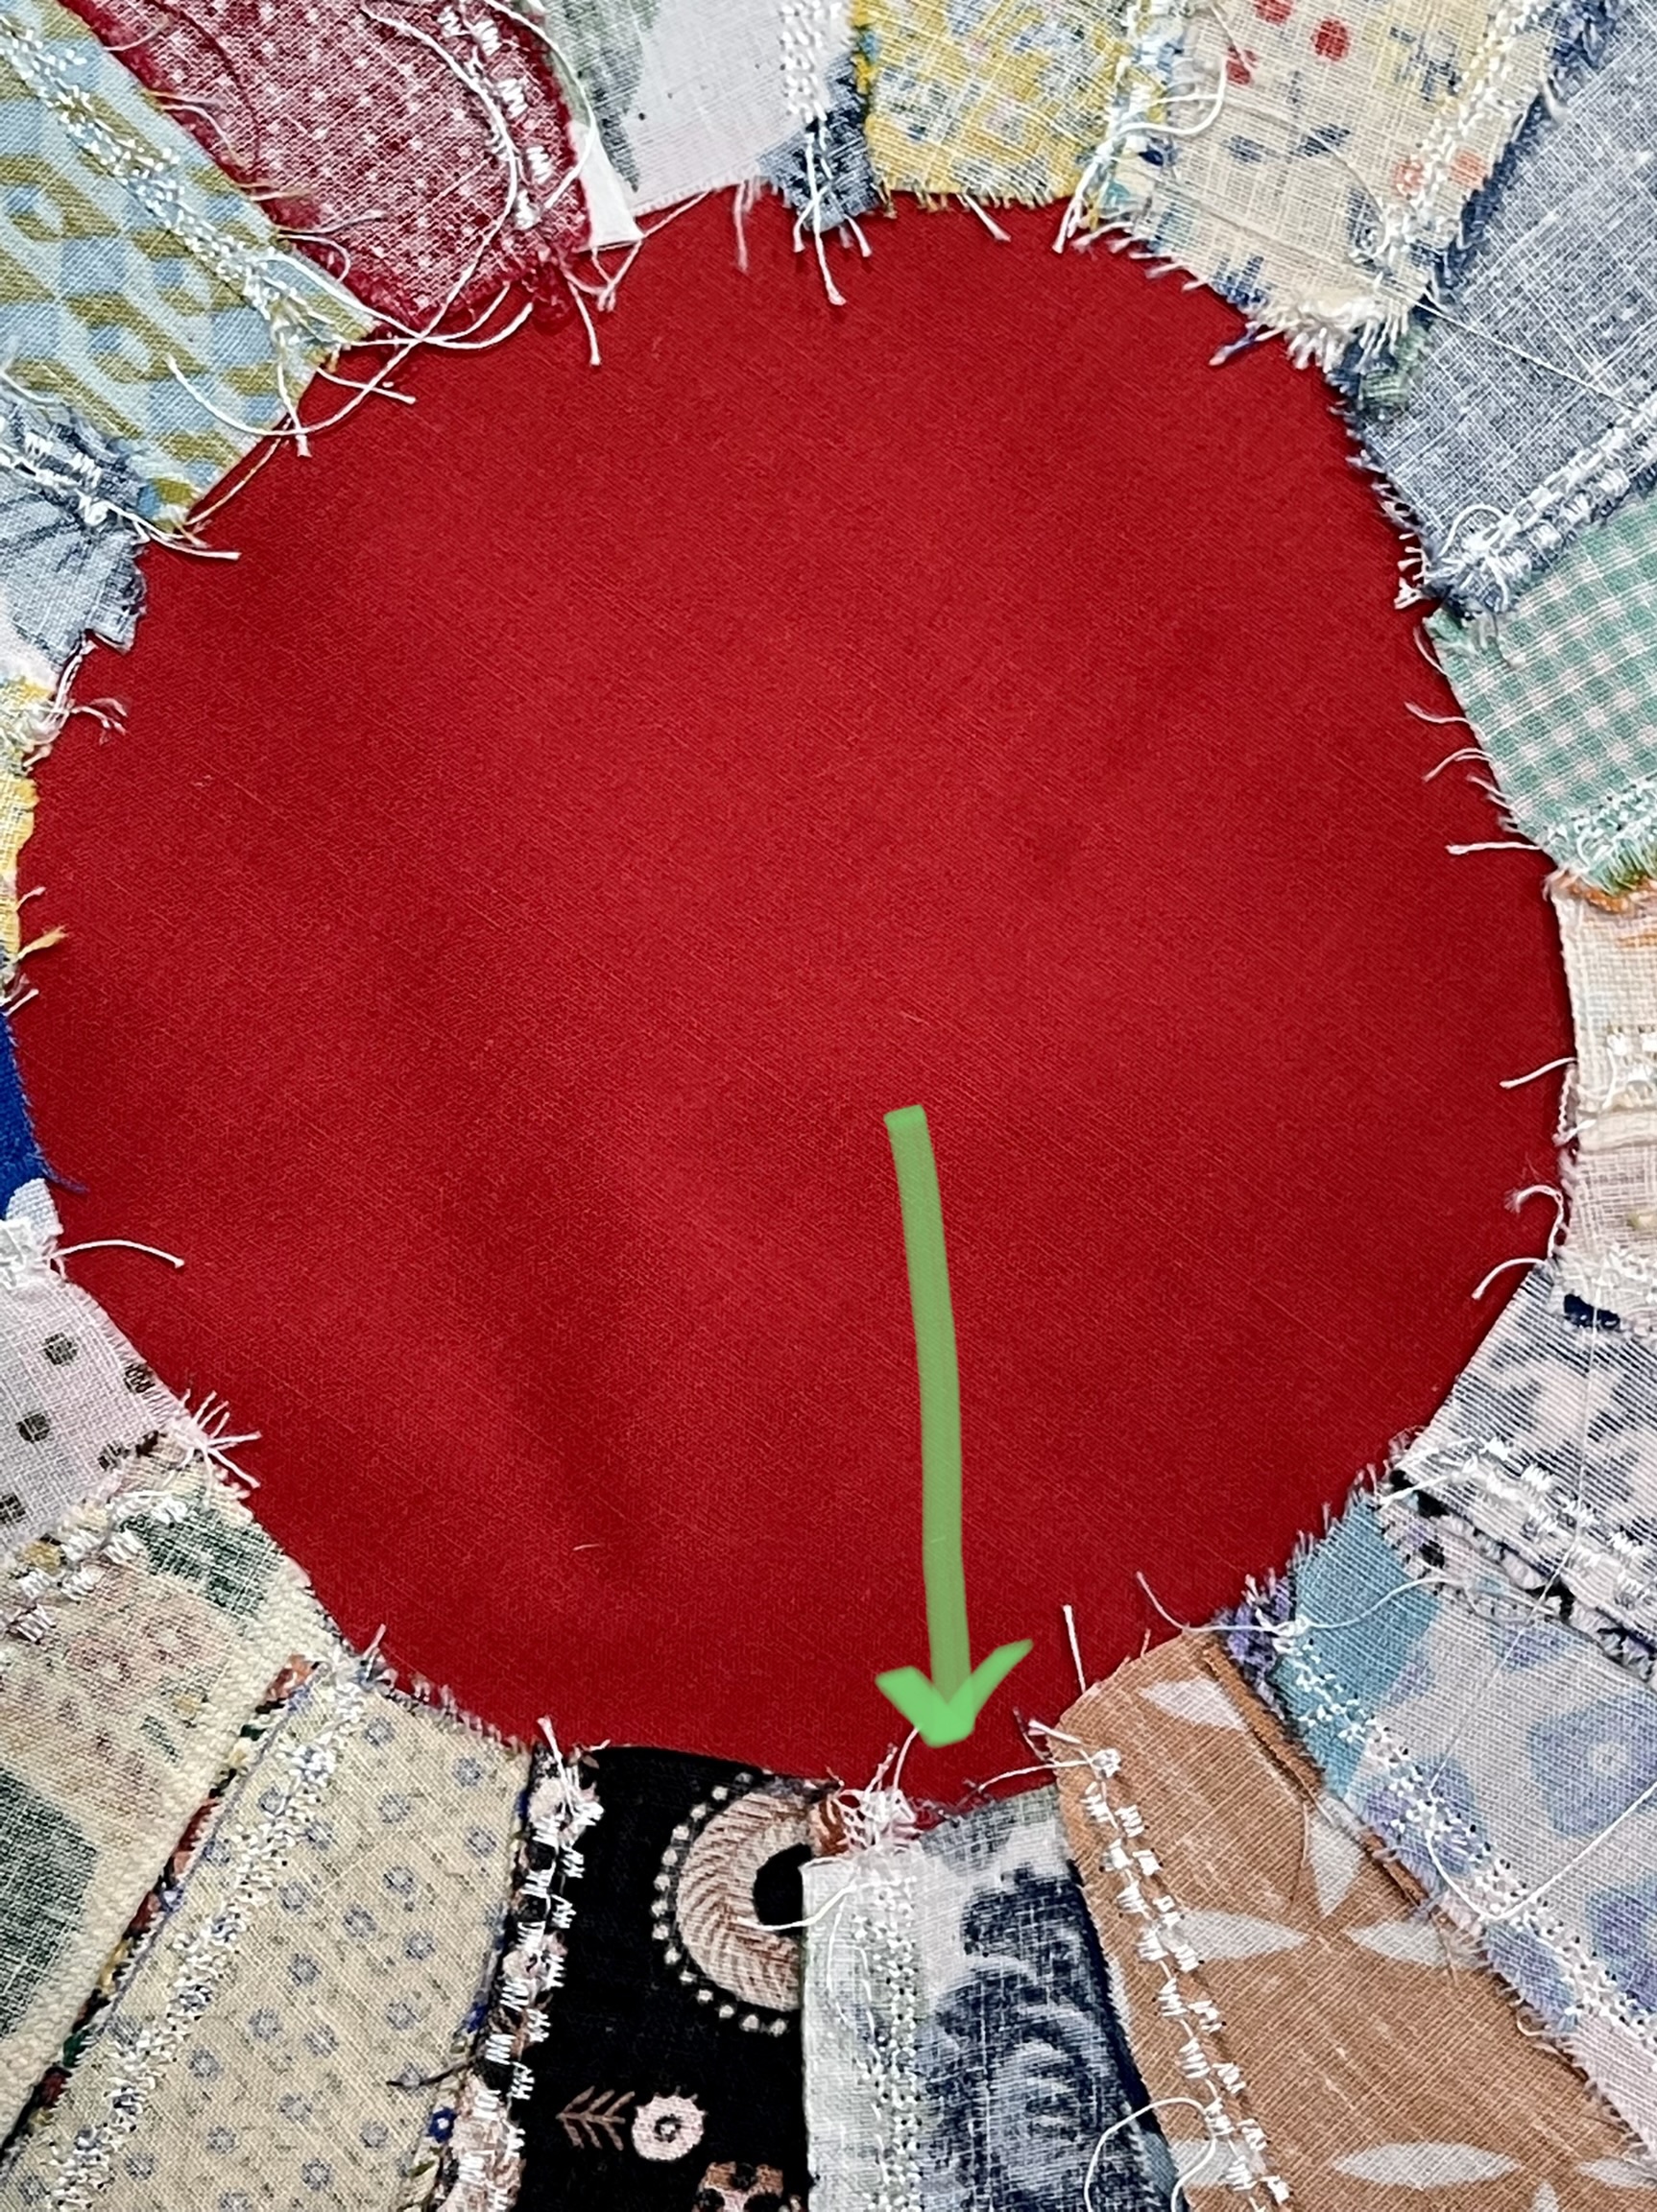
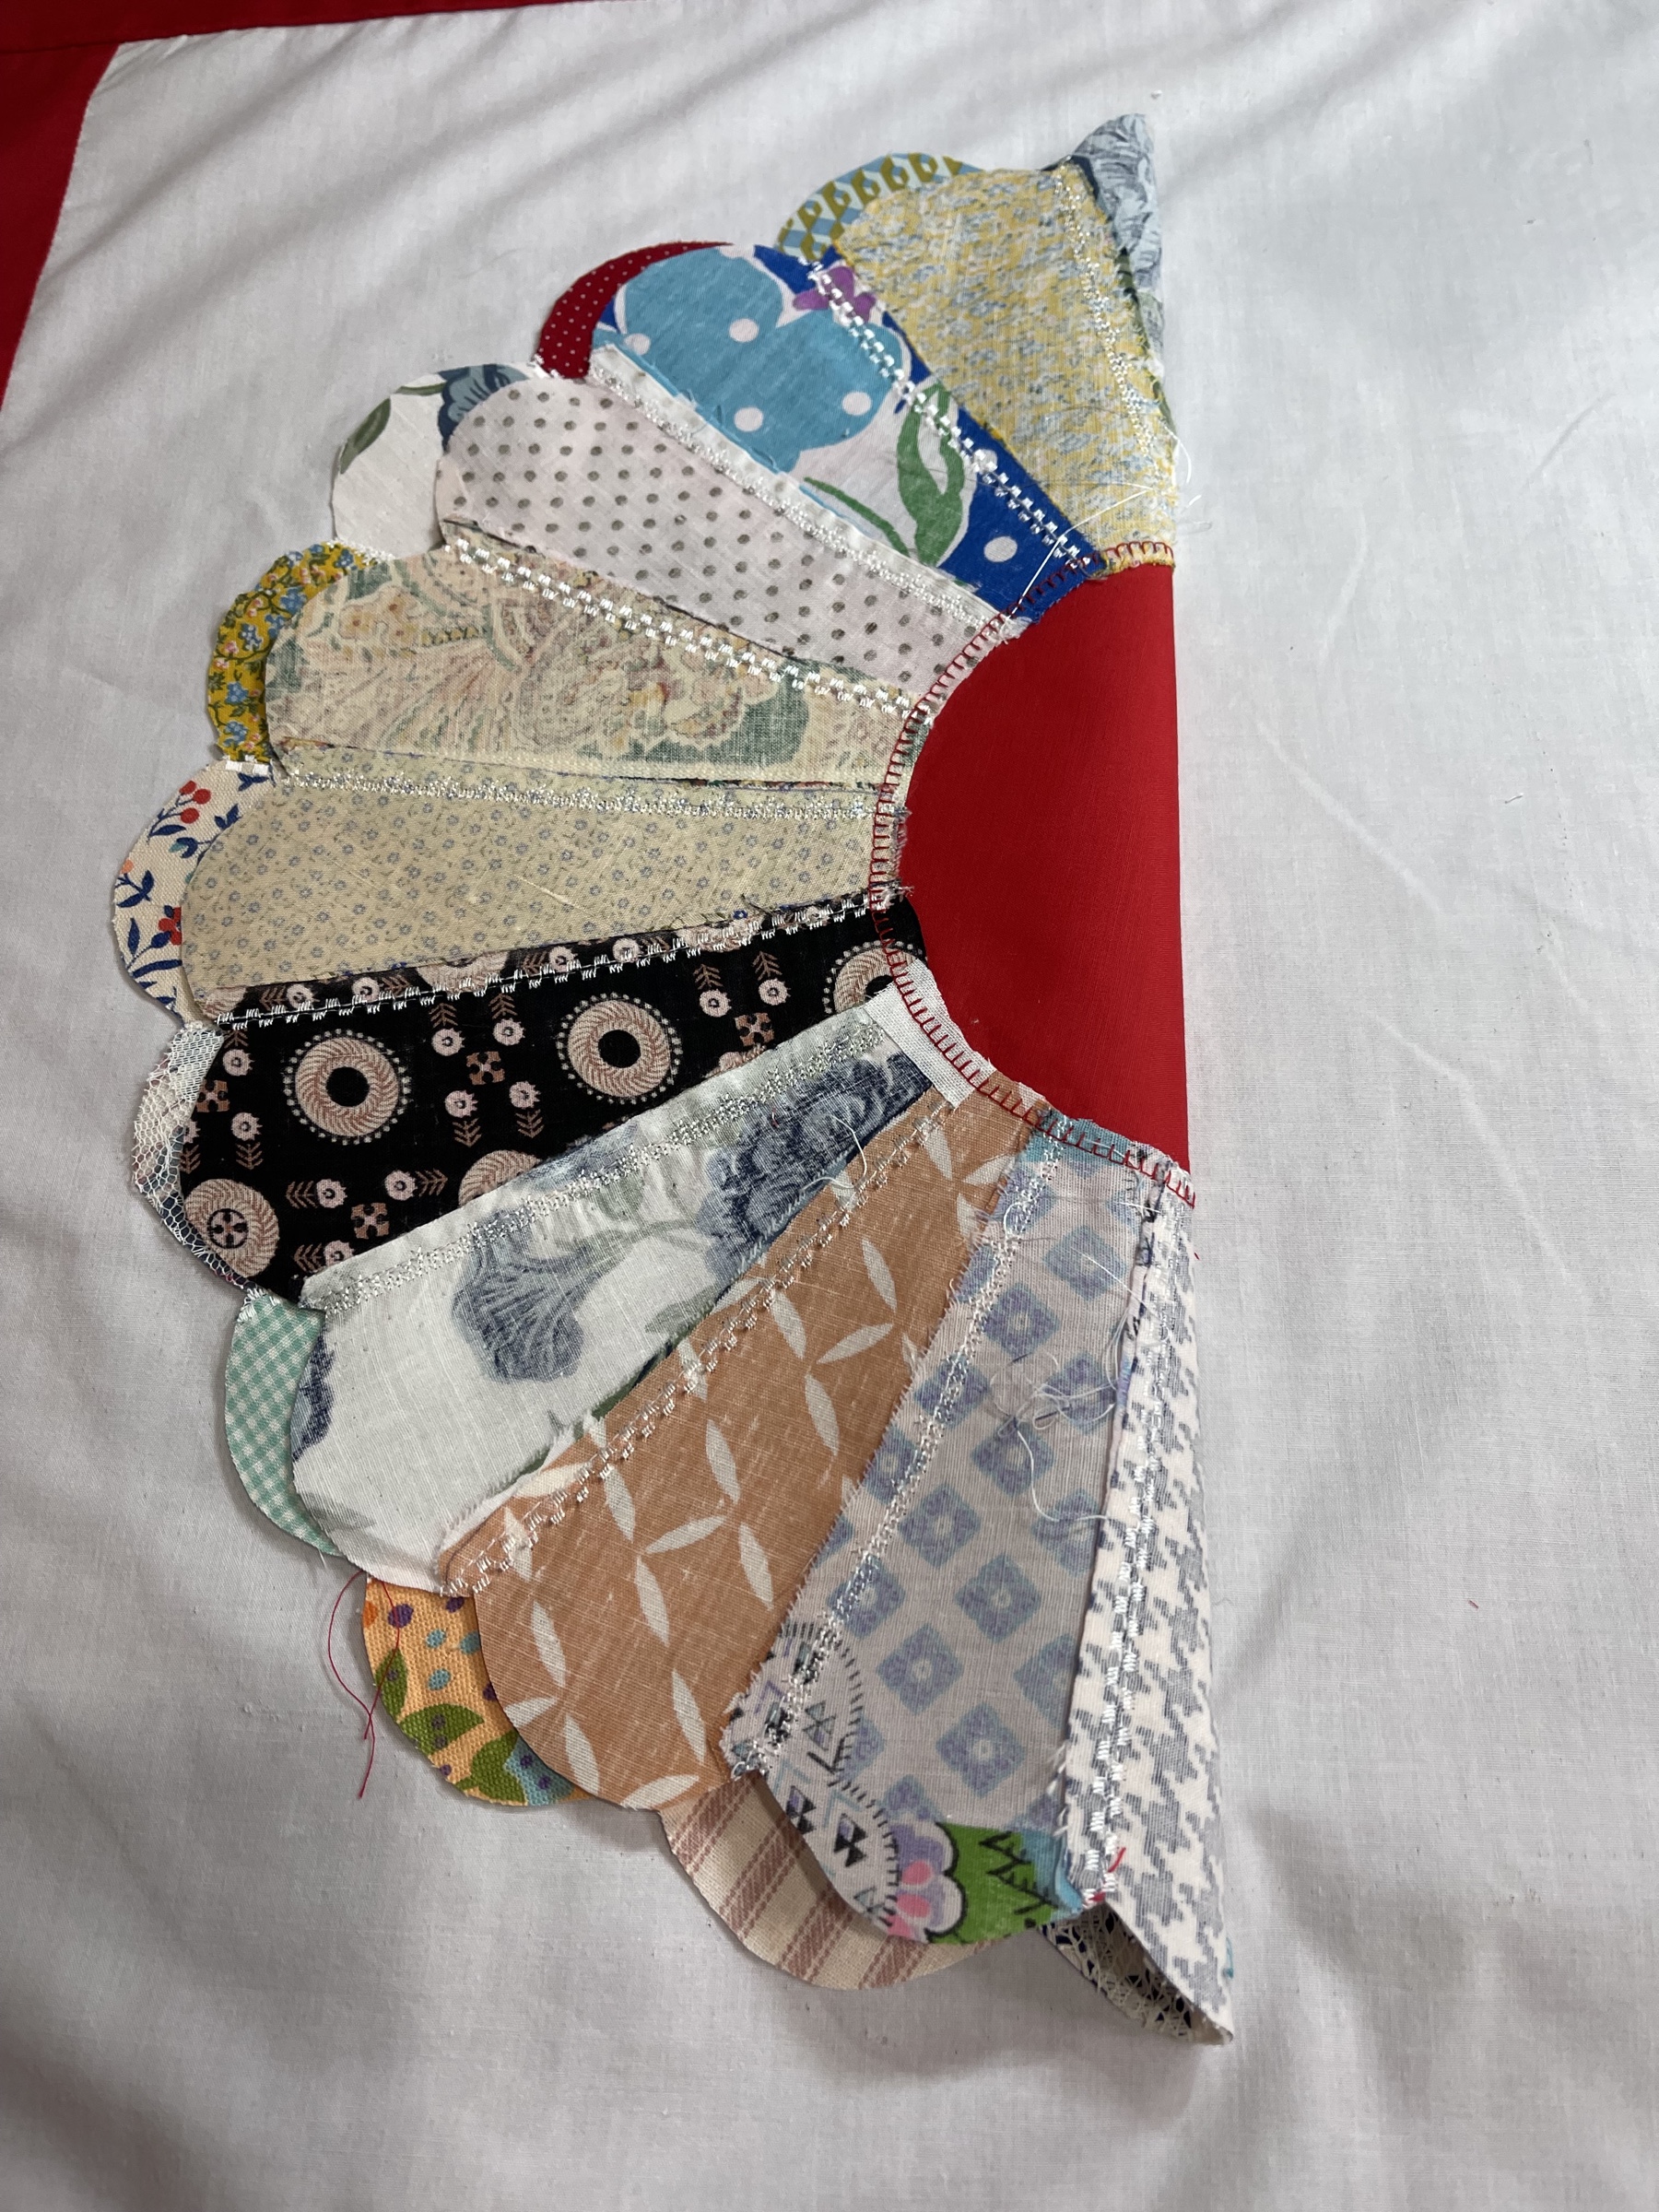
BUT…what happens when the inner circle is so misshapen that the newly trimmed old red circle just barely covers the inner Dresden petal edge(s)?
I love a product by Bosal, it is a very lightweight, think almost handkerchief, light one sided fusible. By pressing a small rectangle over the edge of the short petal I can solve the problem.
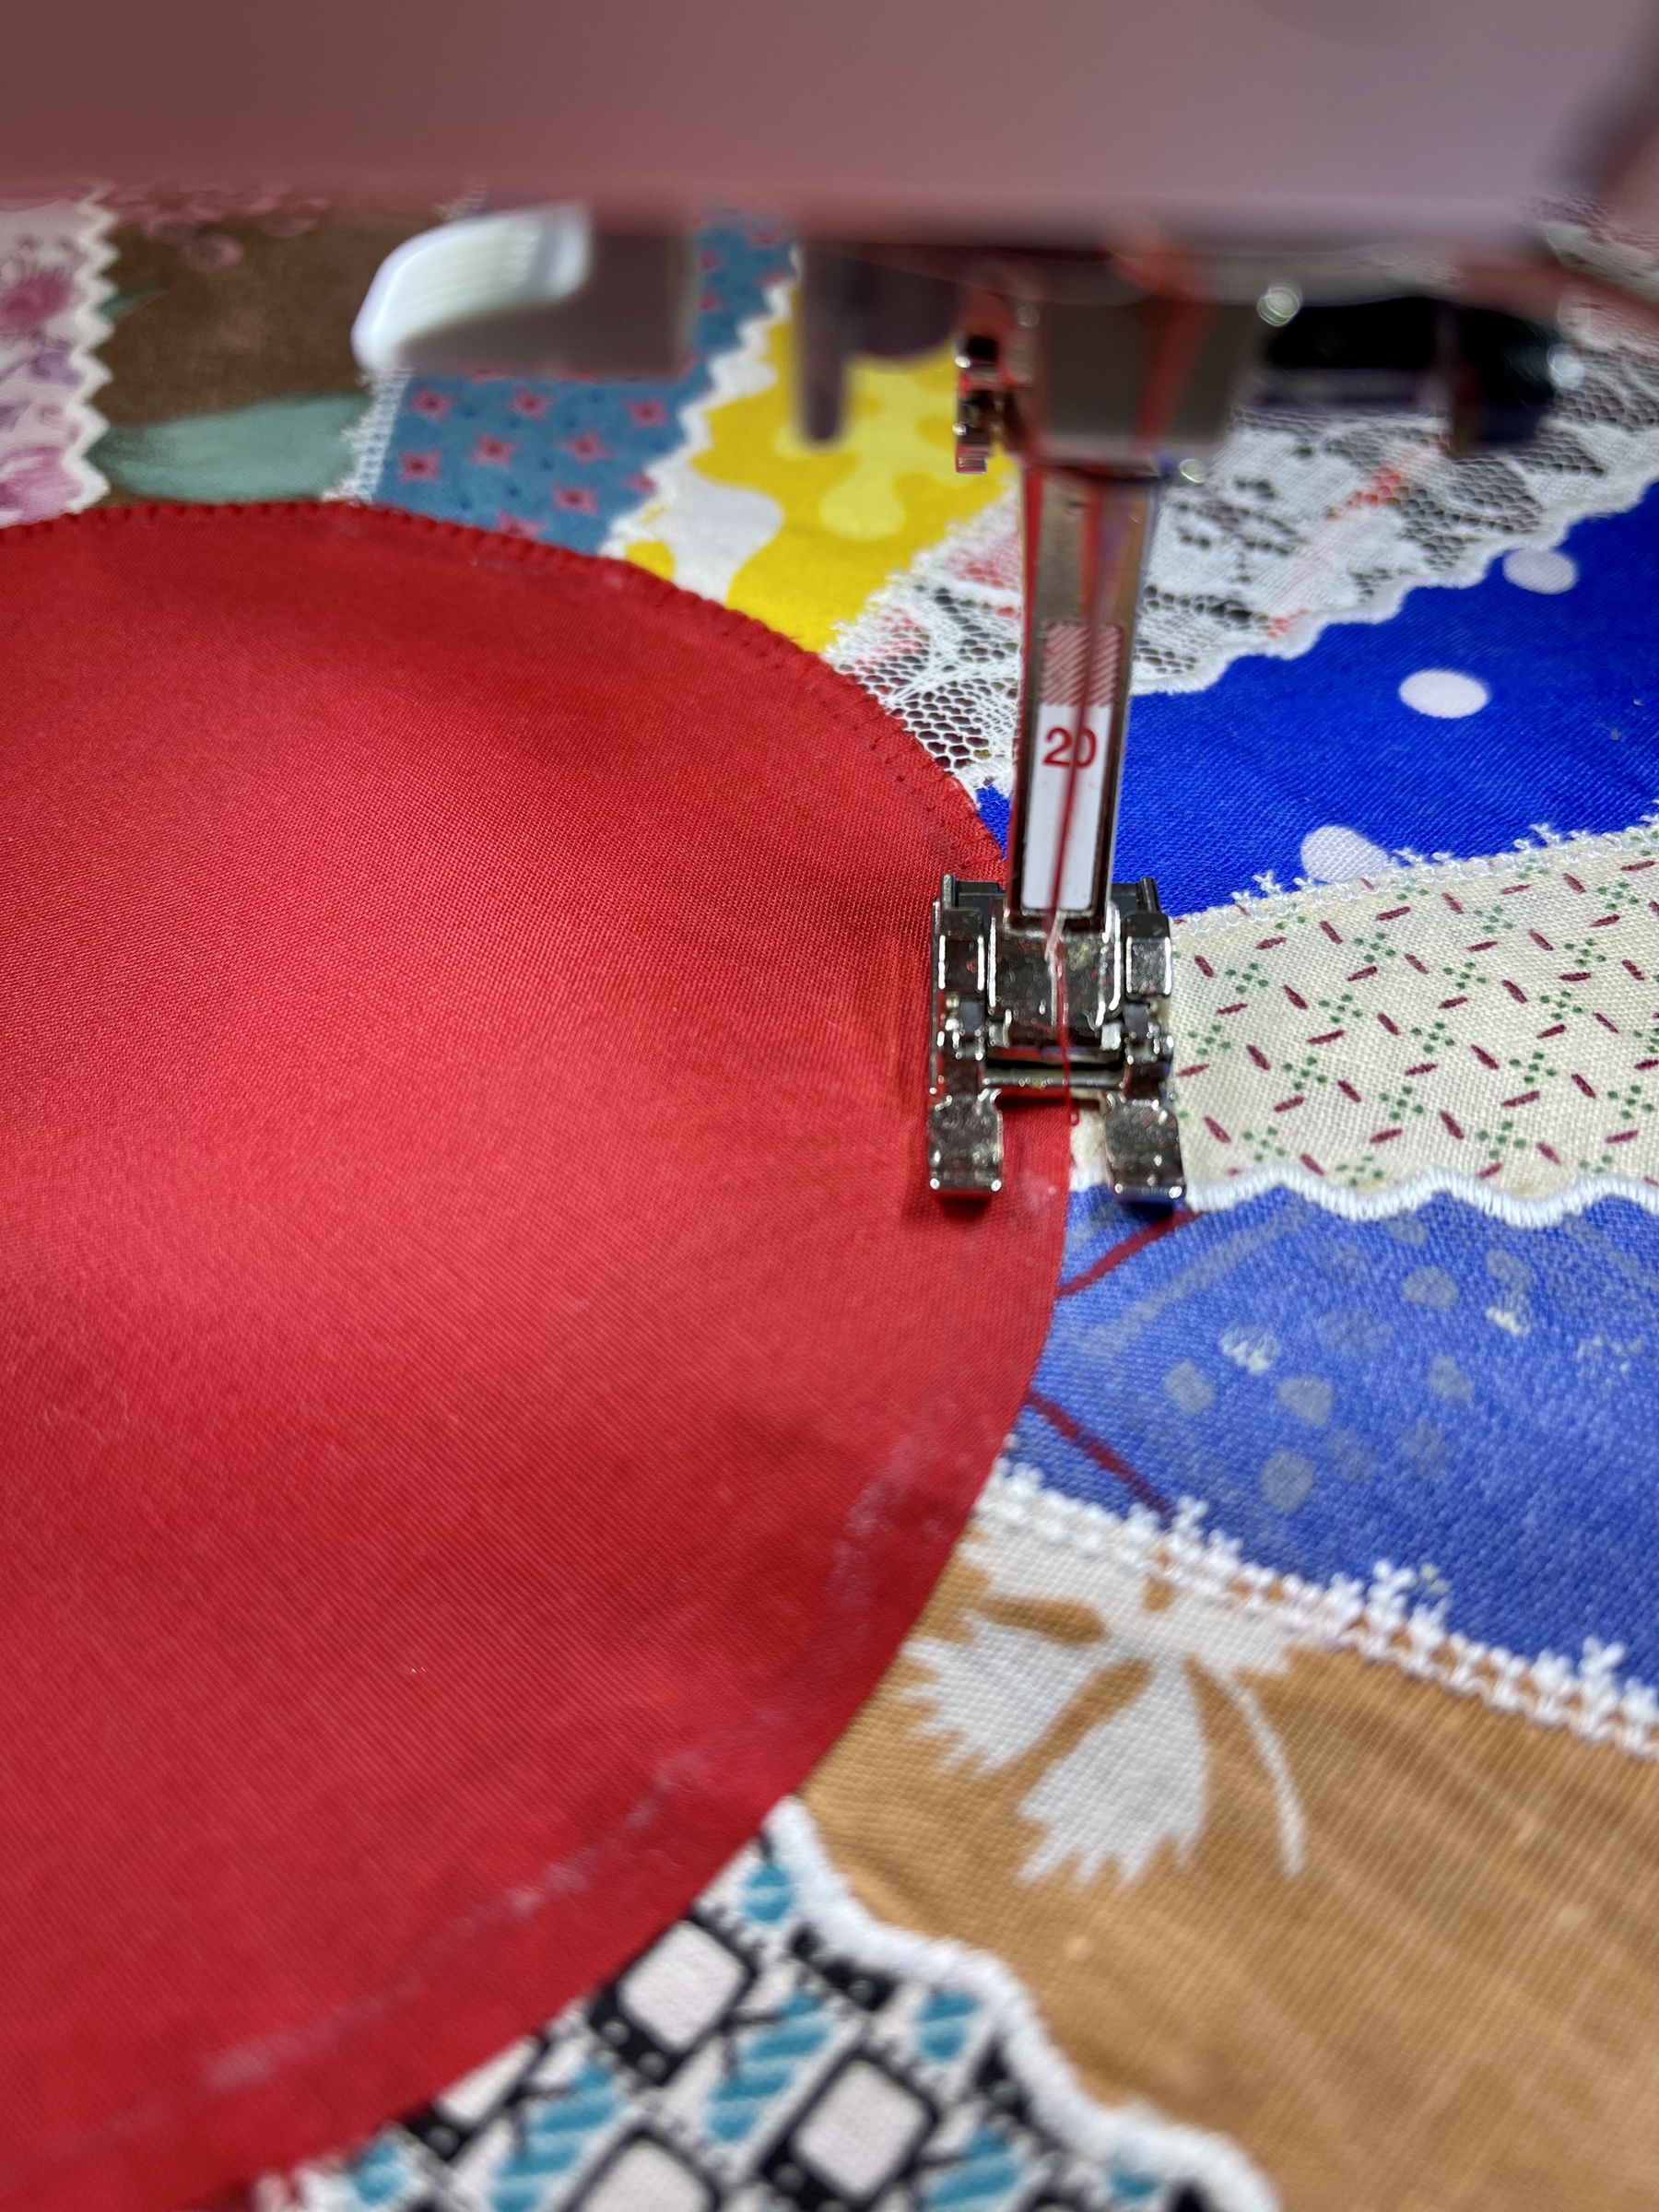
I am sewing this project on a Bernina 550QE and am utilizing stitch number 1329. I chose a nice matte finish red sewing thread in both the needle and bobbin.
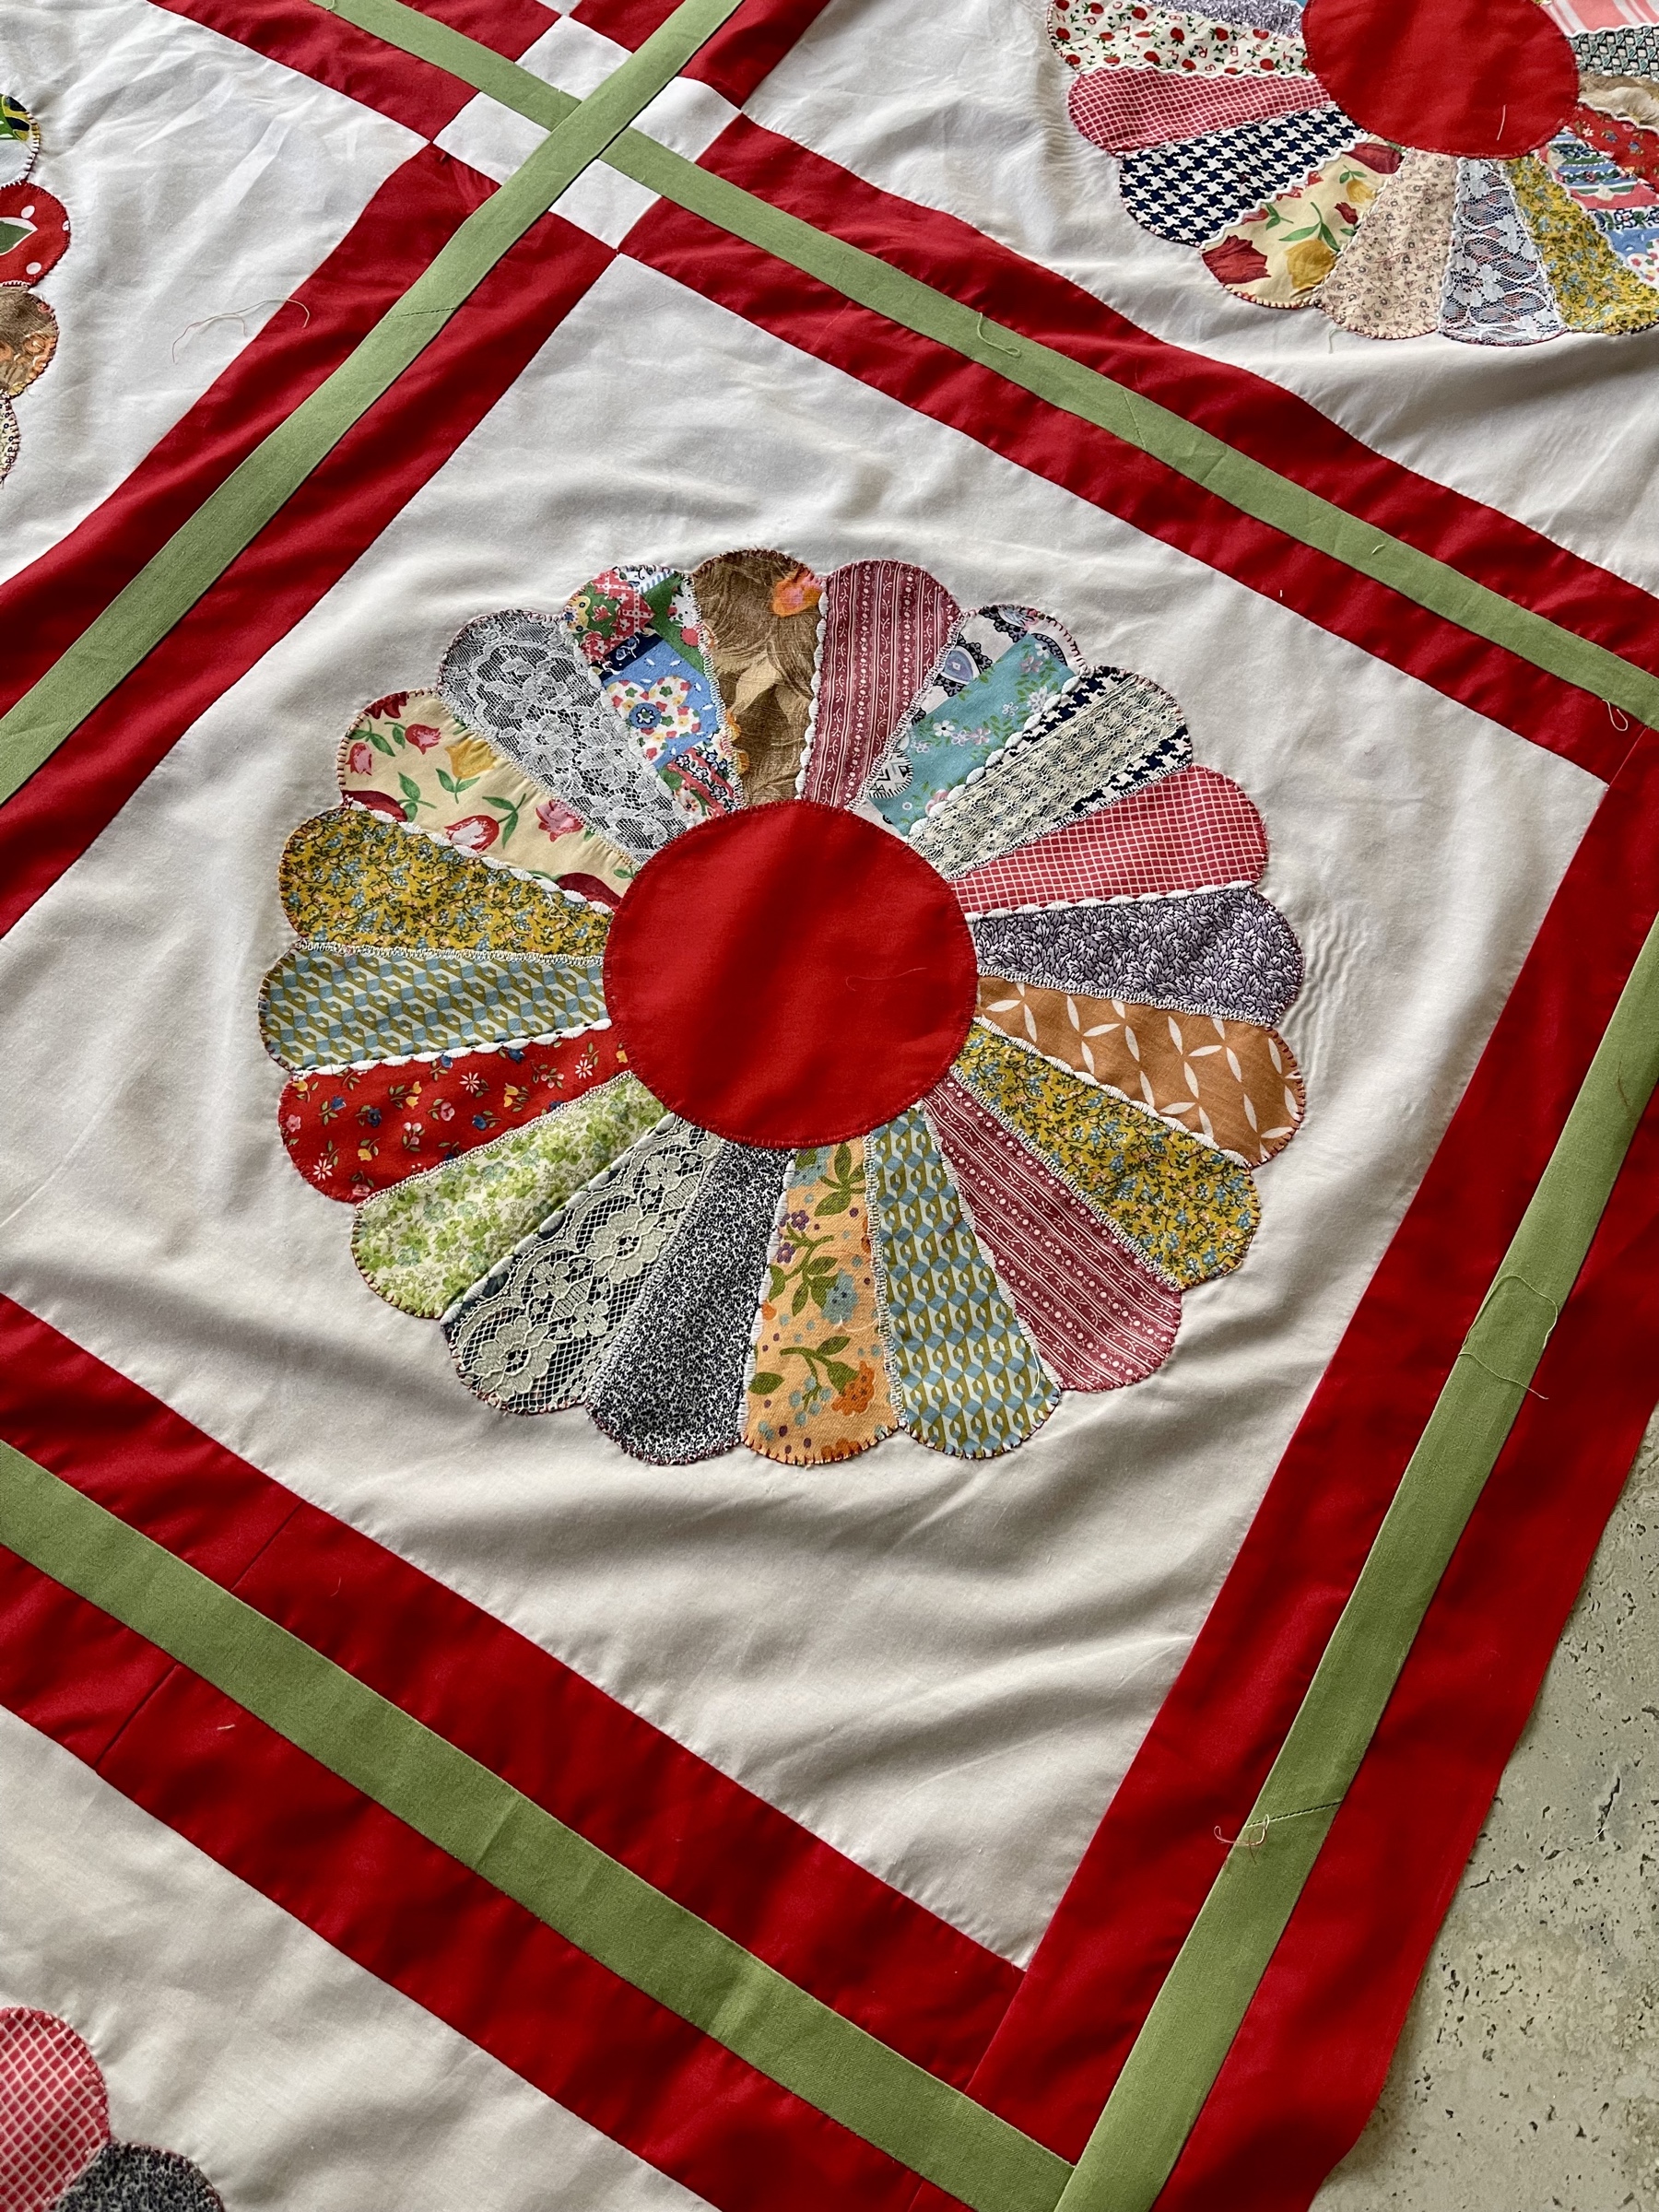
Remember from blog post 2 about this project I mentioned the irregular center circles of the Dresdens? This picture shows you just how misshapen things are.
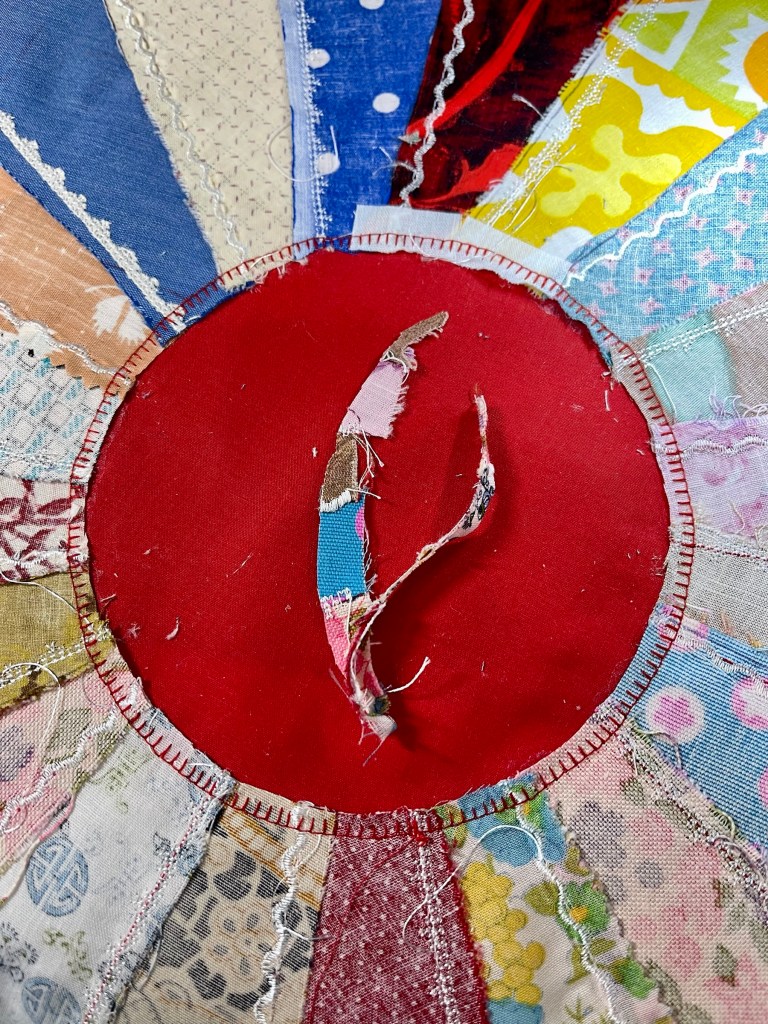
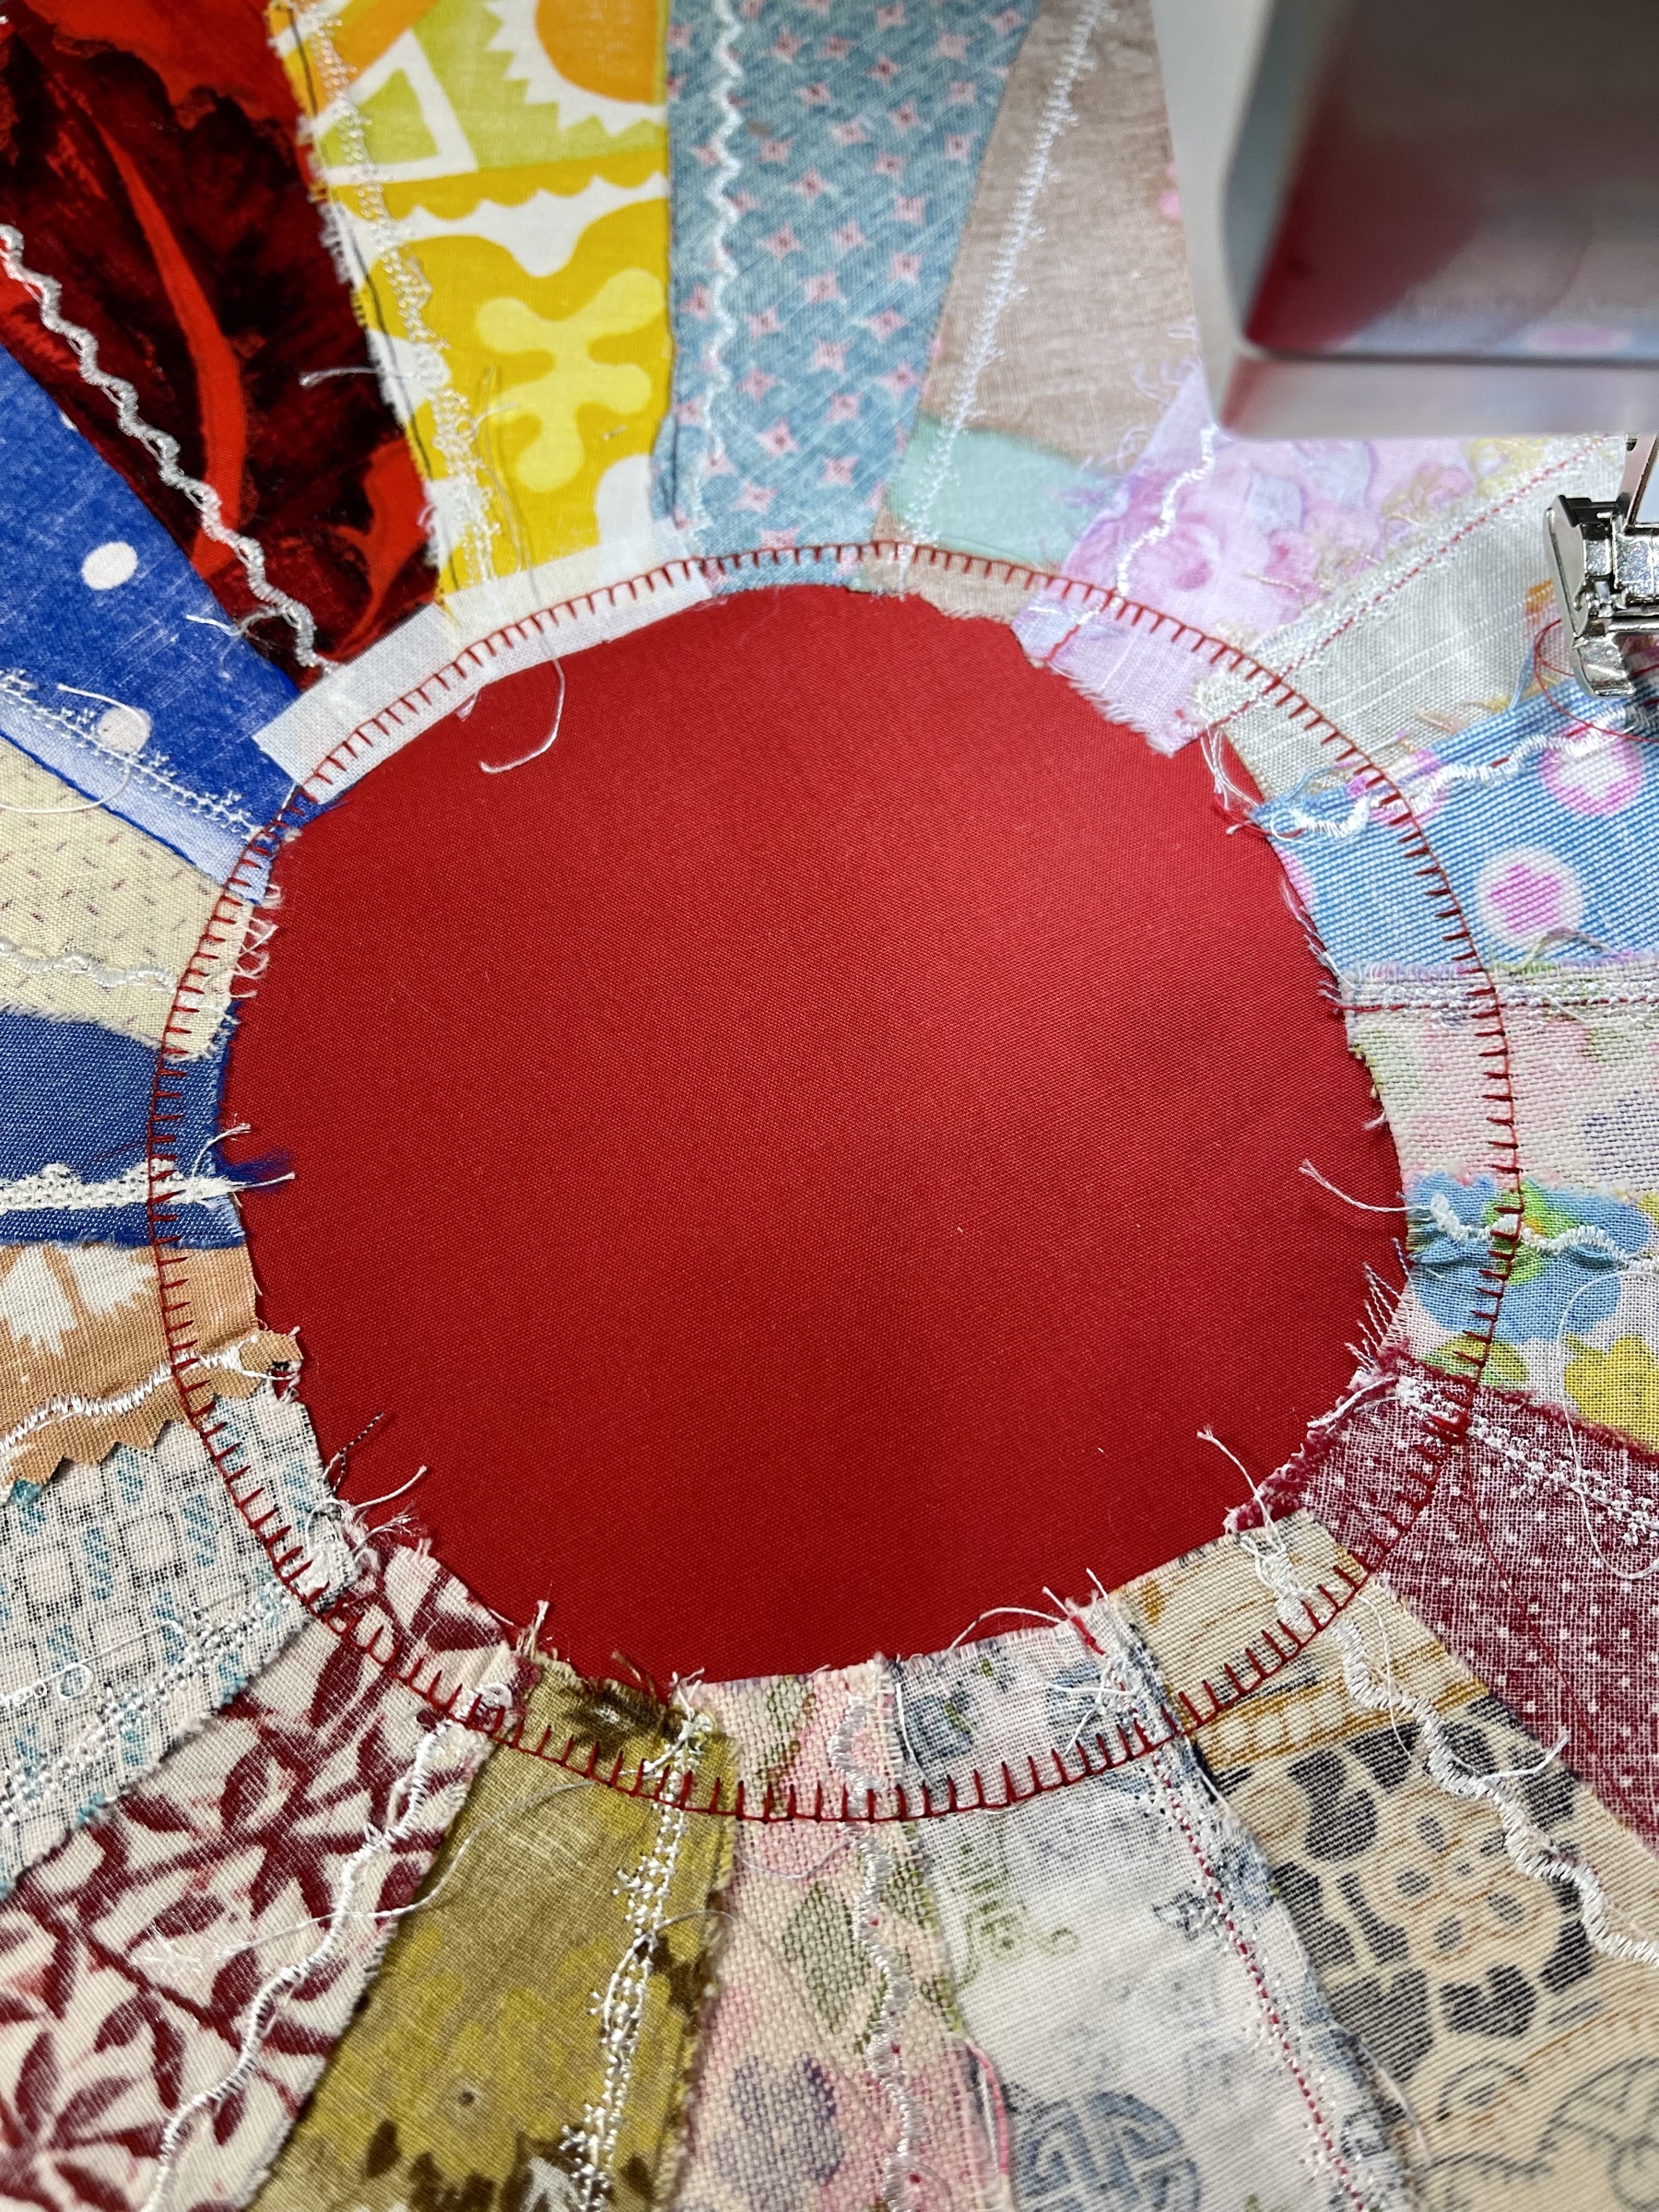
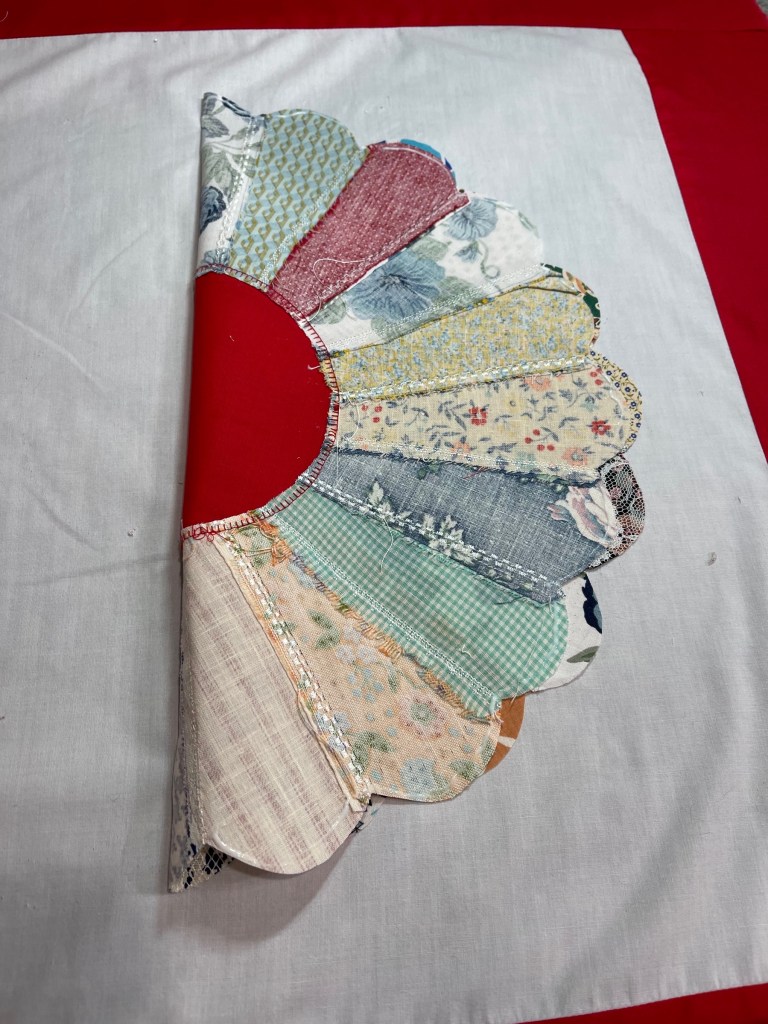
It is easy to trim away the excess petal fabrics making for a better visual from the quilt top front. By trimming away this excess I did not have to worry about the solid yet thin red fabric will show the bumps and humps and raggedy edges of the underneath. By doing this unnecessary but appropriate step I’m confident that from the front side things will look ship-shape.
I stitched the centers on each of the 12 Dresdens and now I’m ready to reattach them to the quilt top.
The next step will be to place the Dresdens back on the quilt top and stitch them securely in place.
After I am confident the Dresden is centered, I use two vertically positioned pins at the top and bottom. This pinning technique allows me to fold the right side nearly in half. I next run a thin bead of Elmer’s along the outer scalloped edges and carefully flip the Dresden back in place. Finally I dry press to set the glue. Dry press because there’s no reason to add moisture (steam) to a liquid (glue) that I am trying to dry.
Repeat on the left side of the Dresden.
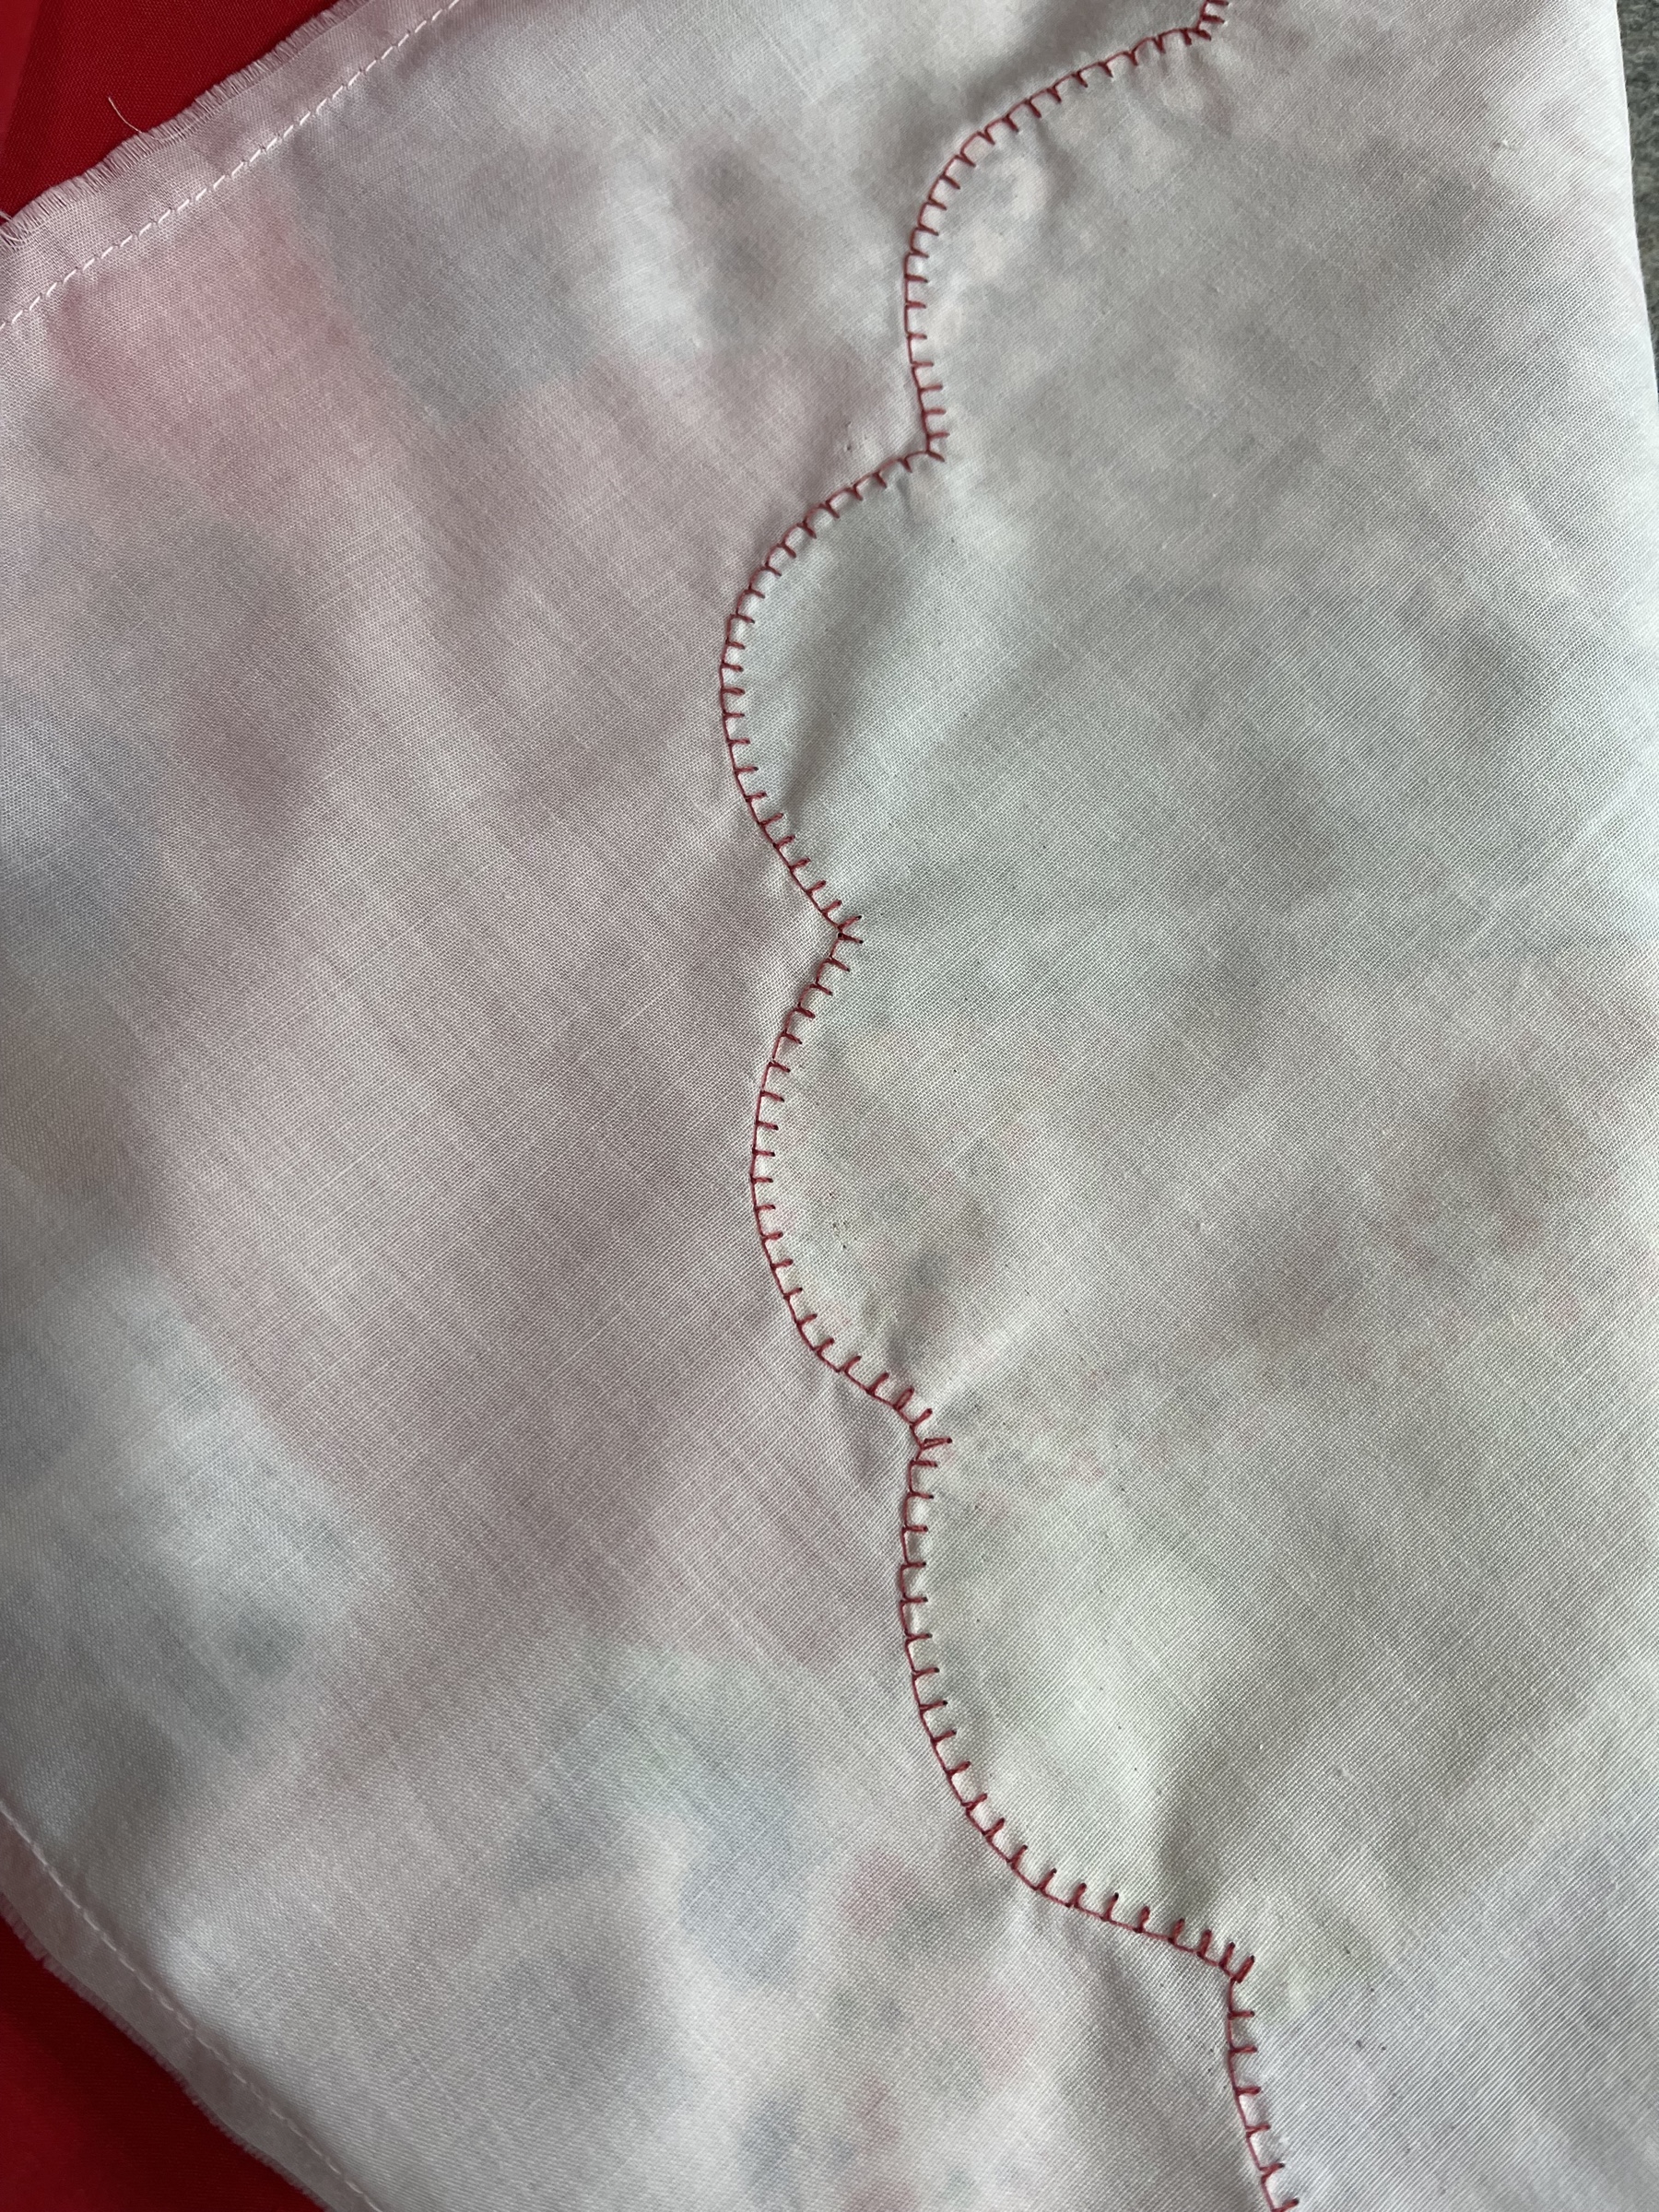
Using the machine applique stitch once again, I reattach the Dresden Plates along the outer scalloped edge.
When I had all the Dresdens once again attached to the quilt top I was so excited that I forgot to take a picture! ☹️ For several days I had been mulling over how to add some interest to the plain red 3 1/2” finished sashing strips.
After auditioning several solid color fabrics I finally decided on this warm green cotton. Remember, the red and light ivory fabrics are a poly cotton blend?
All I had to do was very carefully, with my ruler and rotary cutter, slice the sashings in half and insert a 1 1/2” green strip that finished to 1”. I began with the top sashing and worked my way down the quilt one row at a time so that I never had more than one slashed sashing at a time.
Once I had all the horizontal sashings finished I started on the vertical ones.
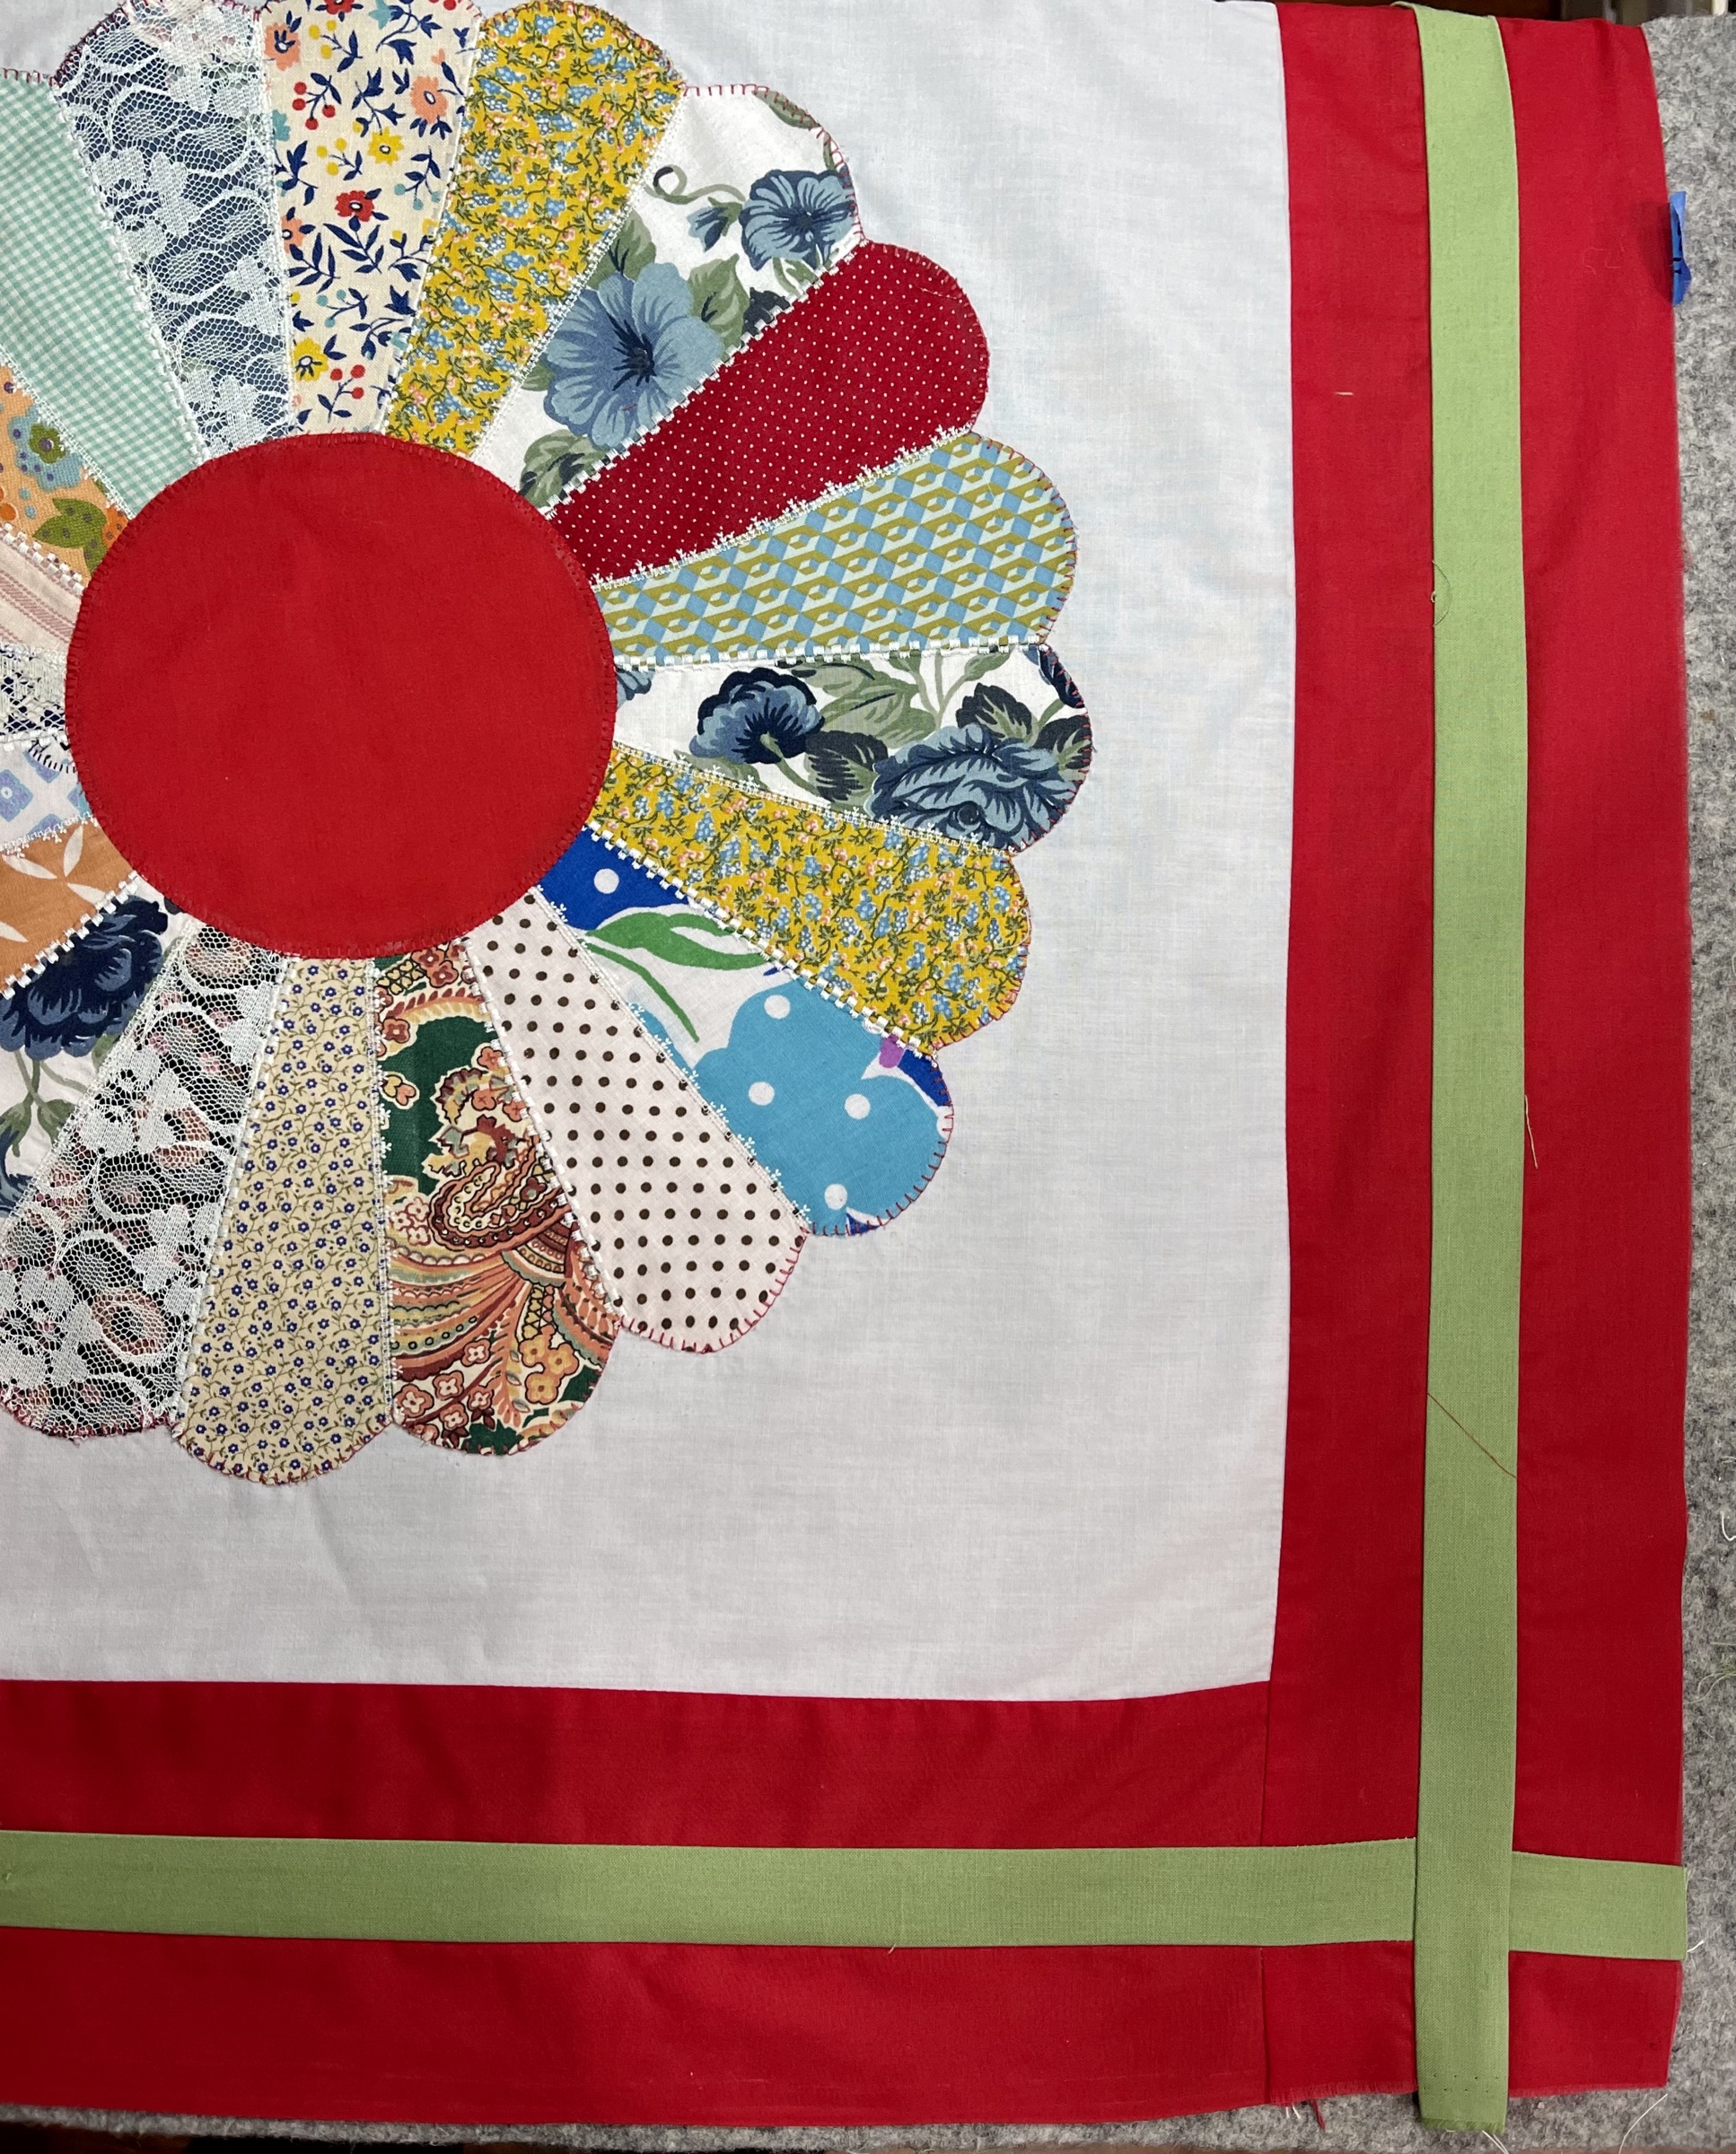
A close-up of the quilt top lower right corner.
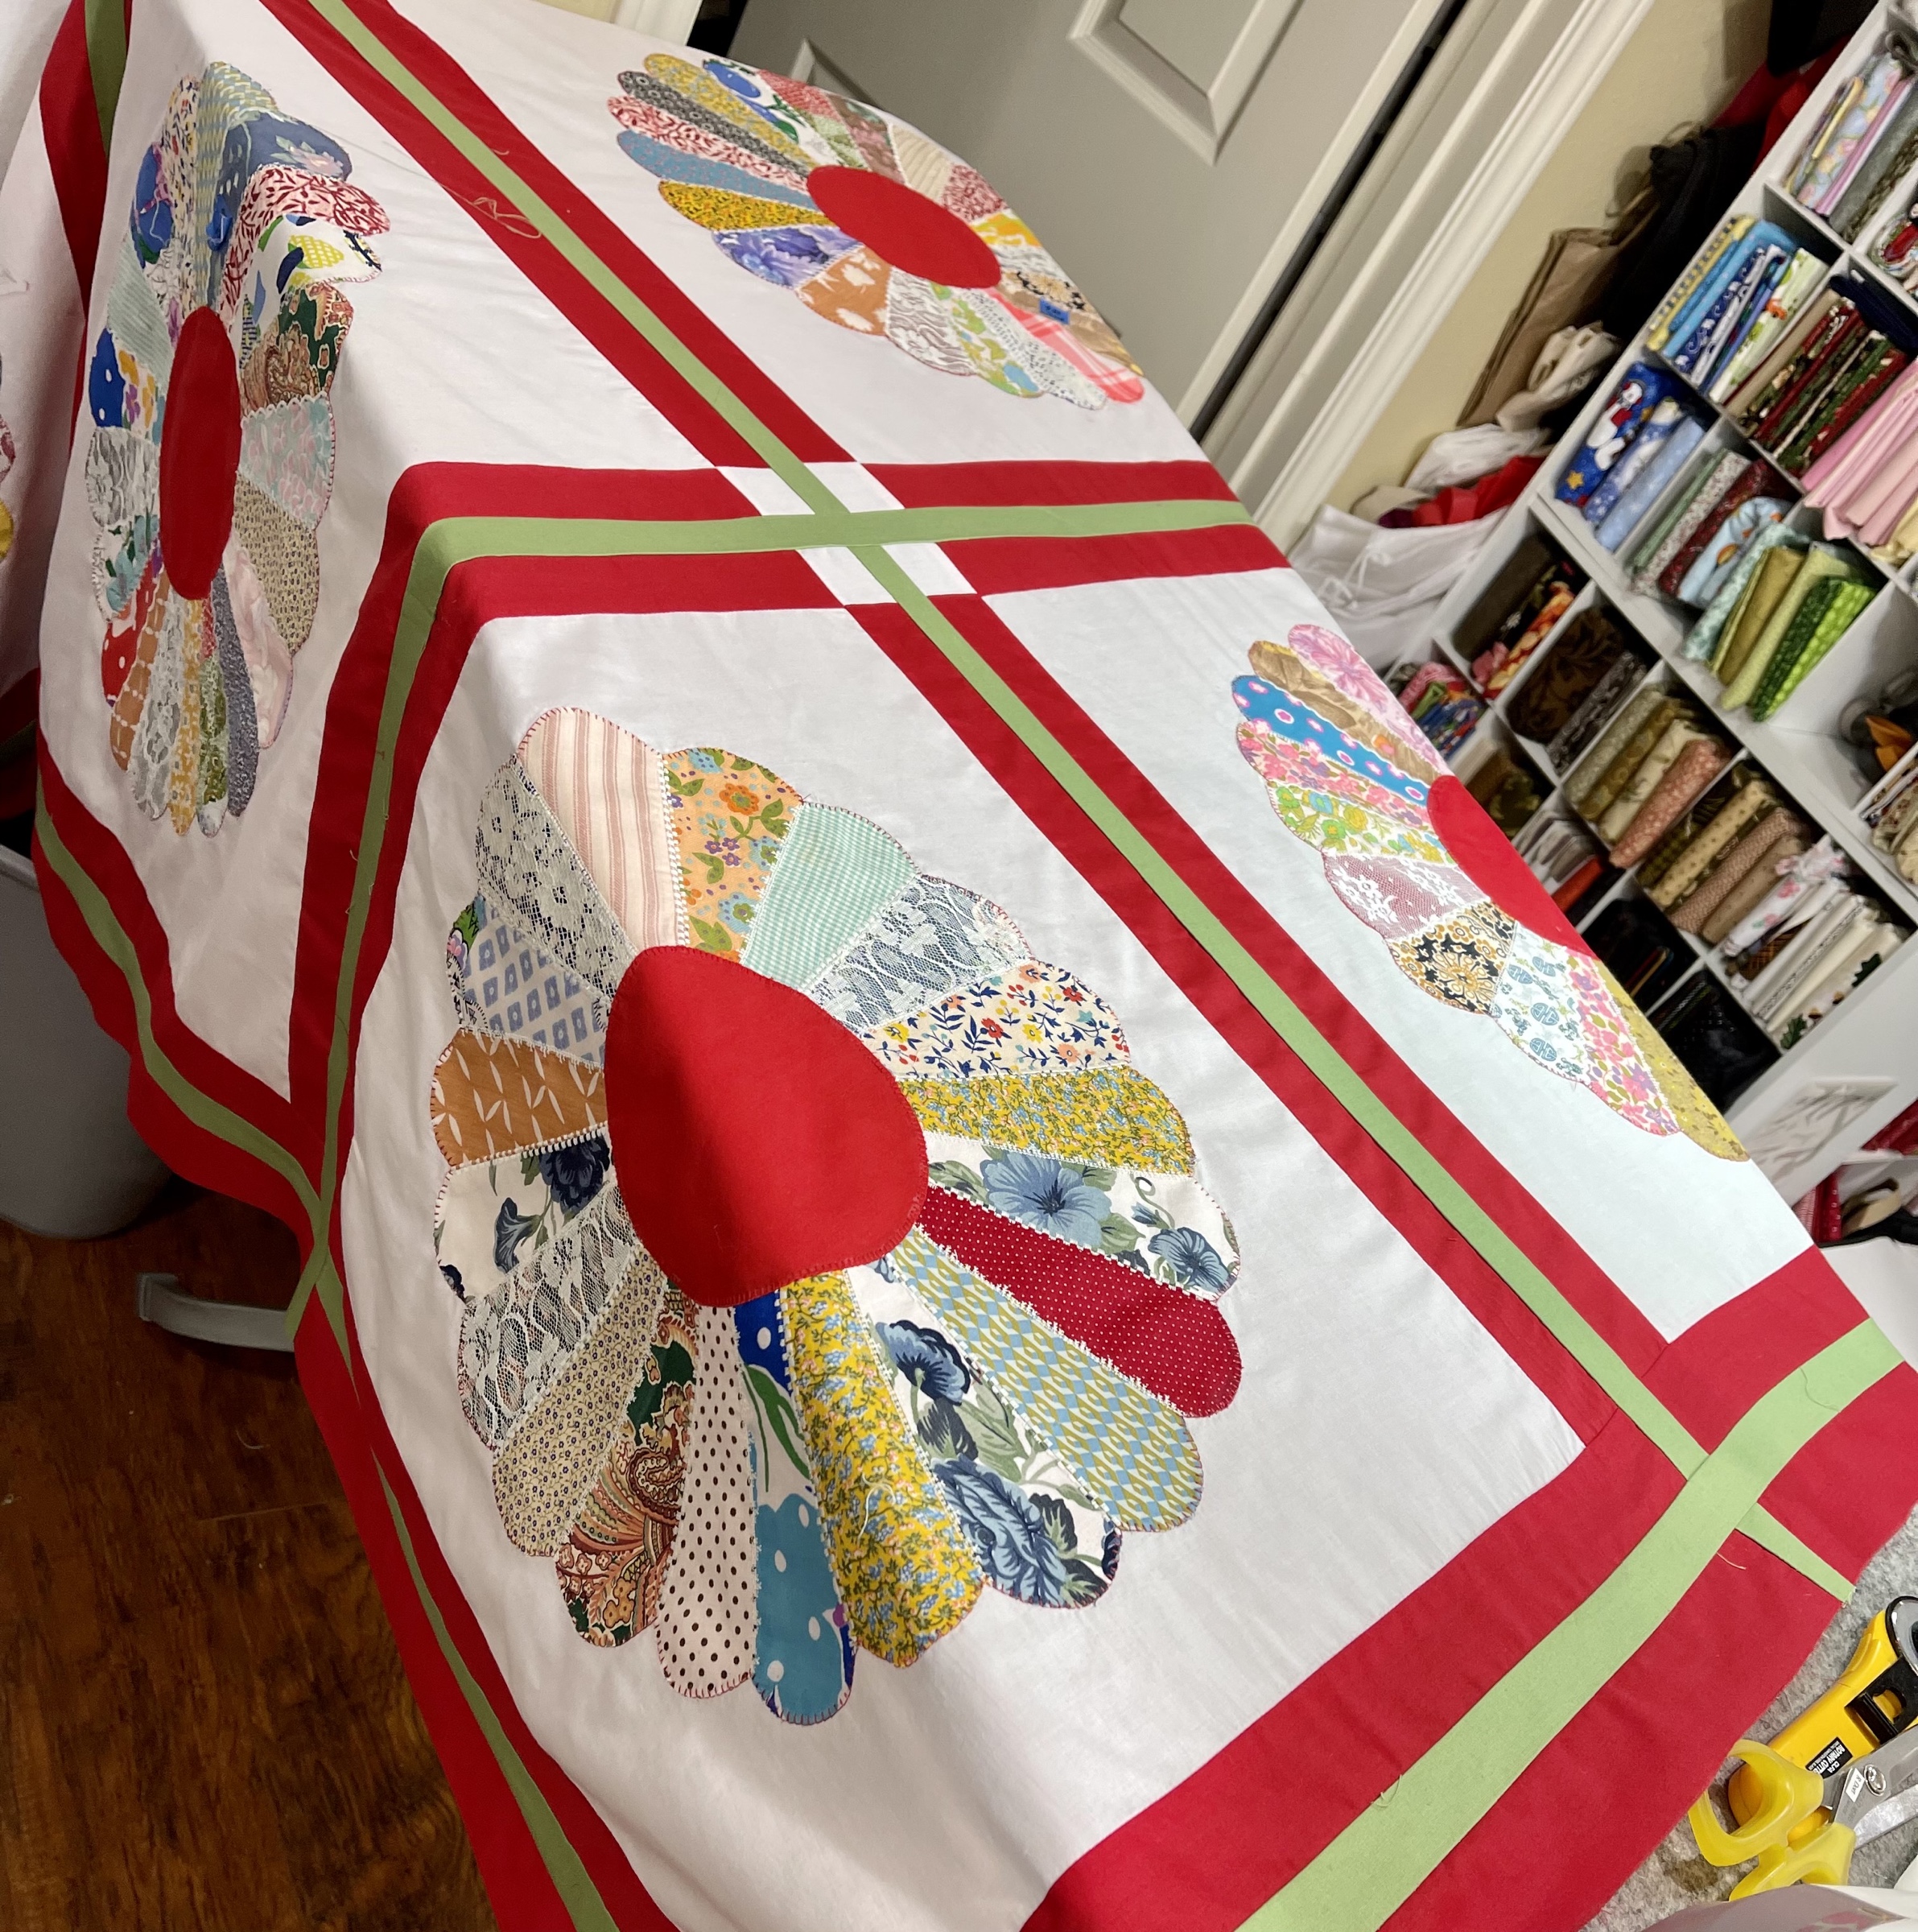
I really love how the green strips change up the solid light ivory cornerstones into 4 separate small squares.
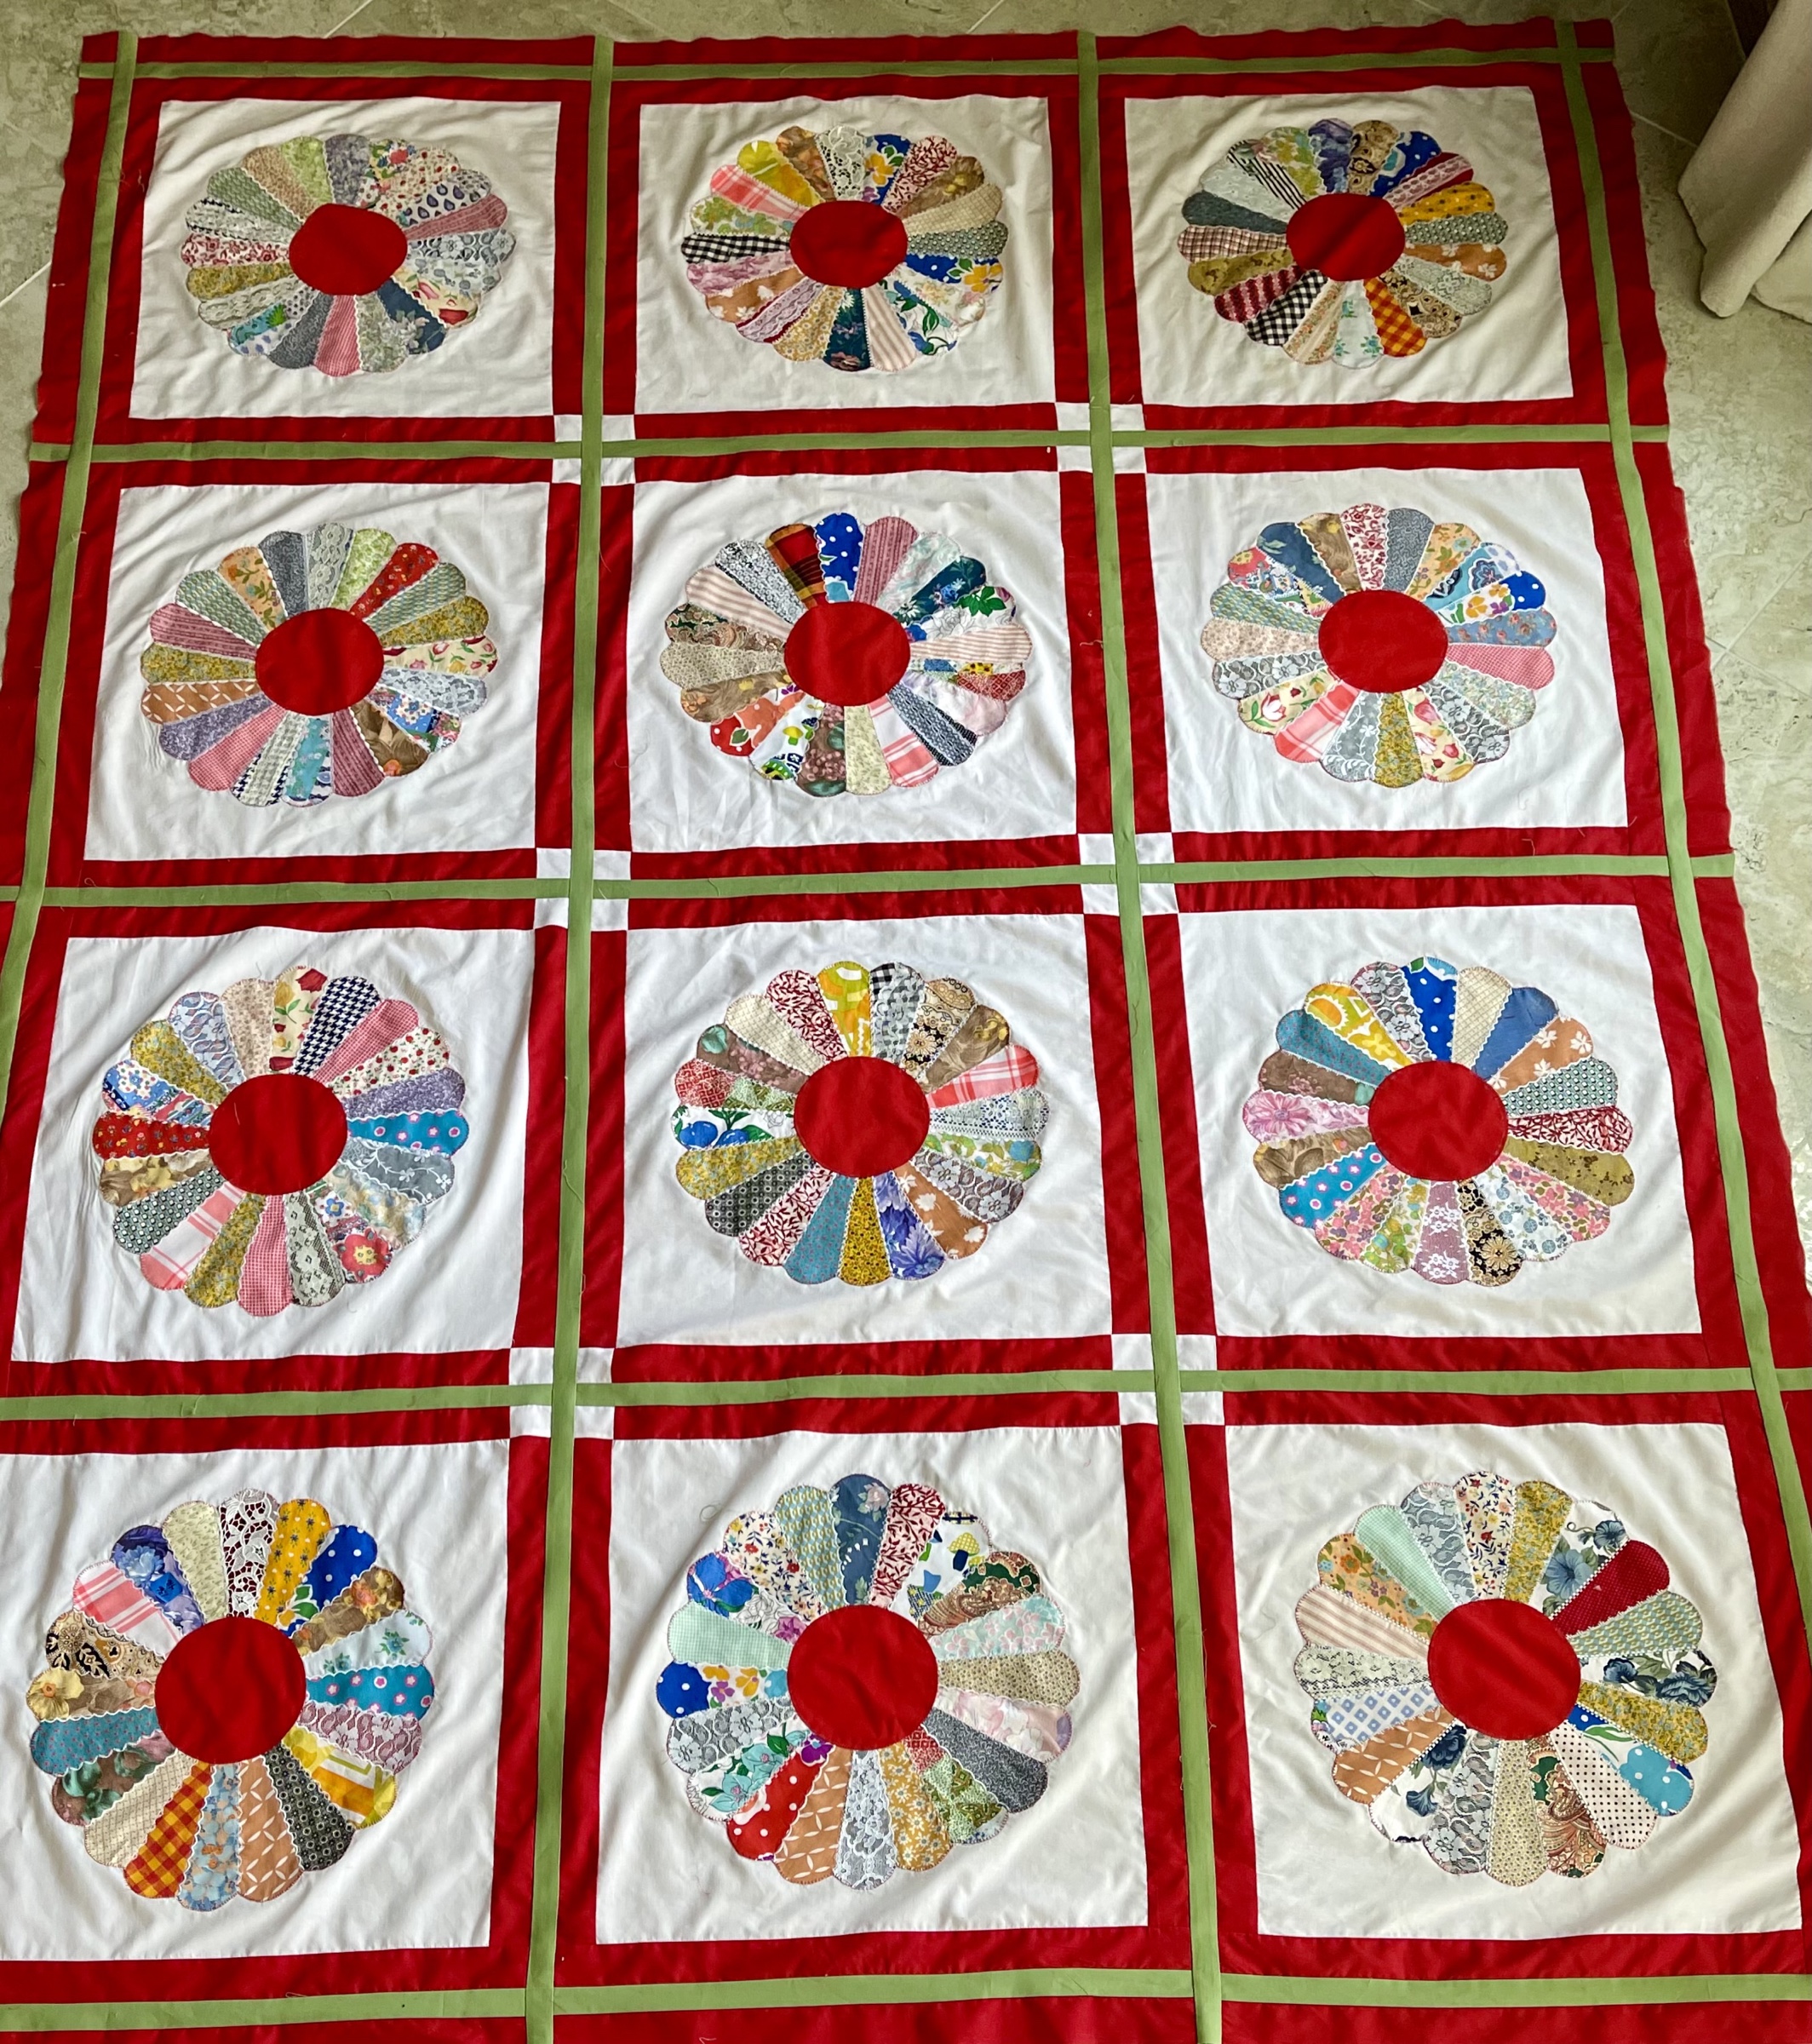
Oh I seriously love this result!
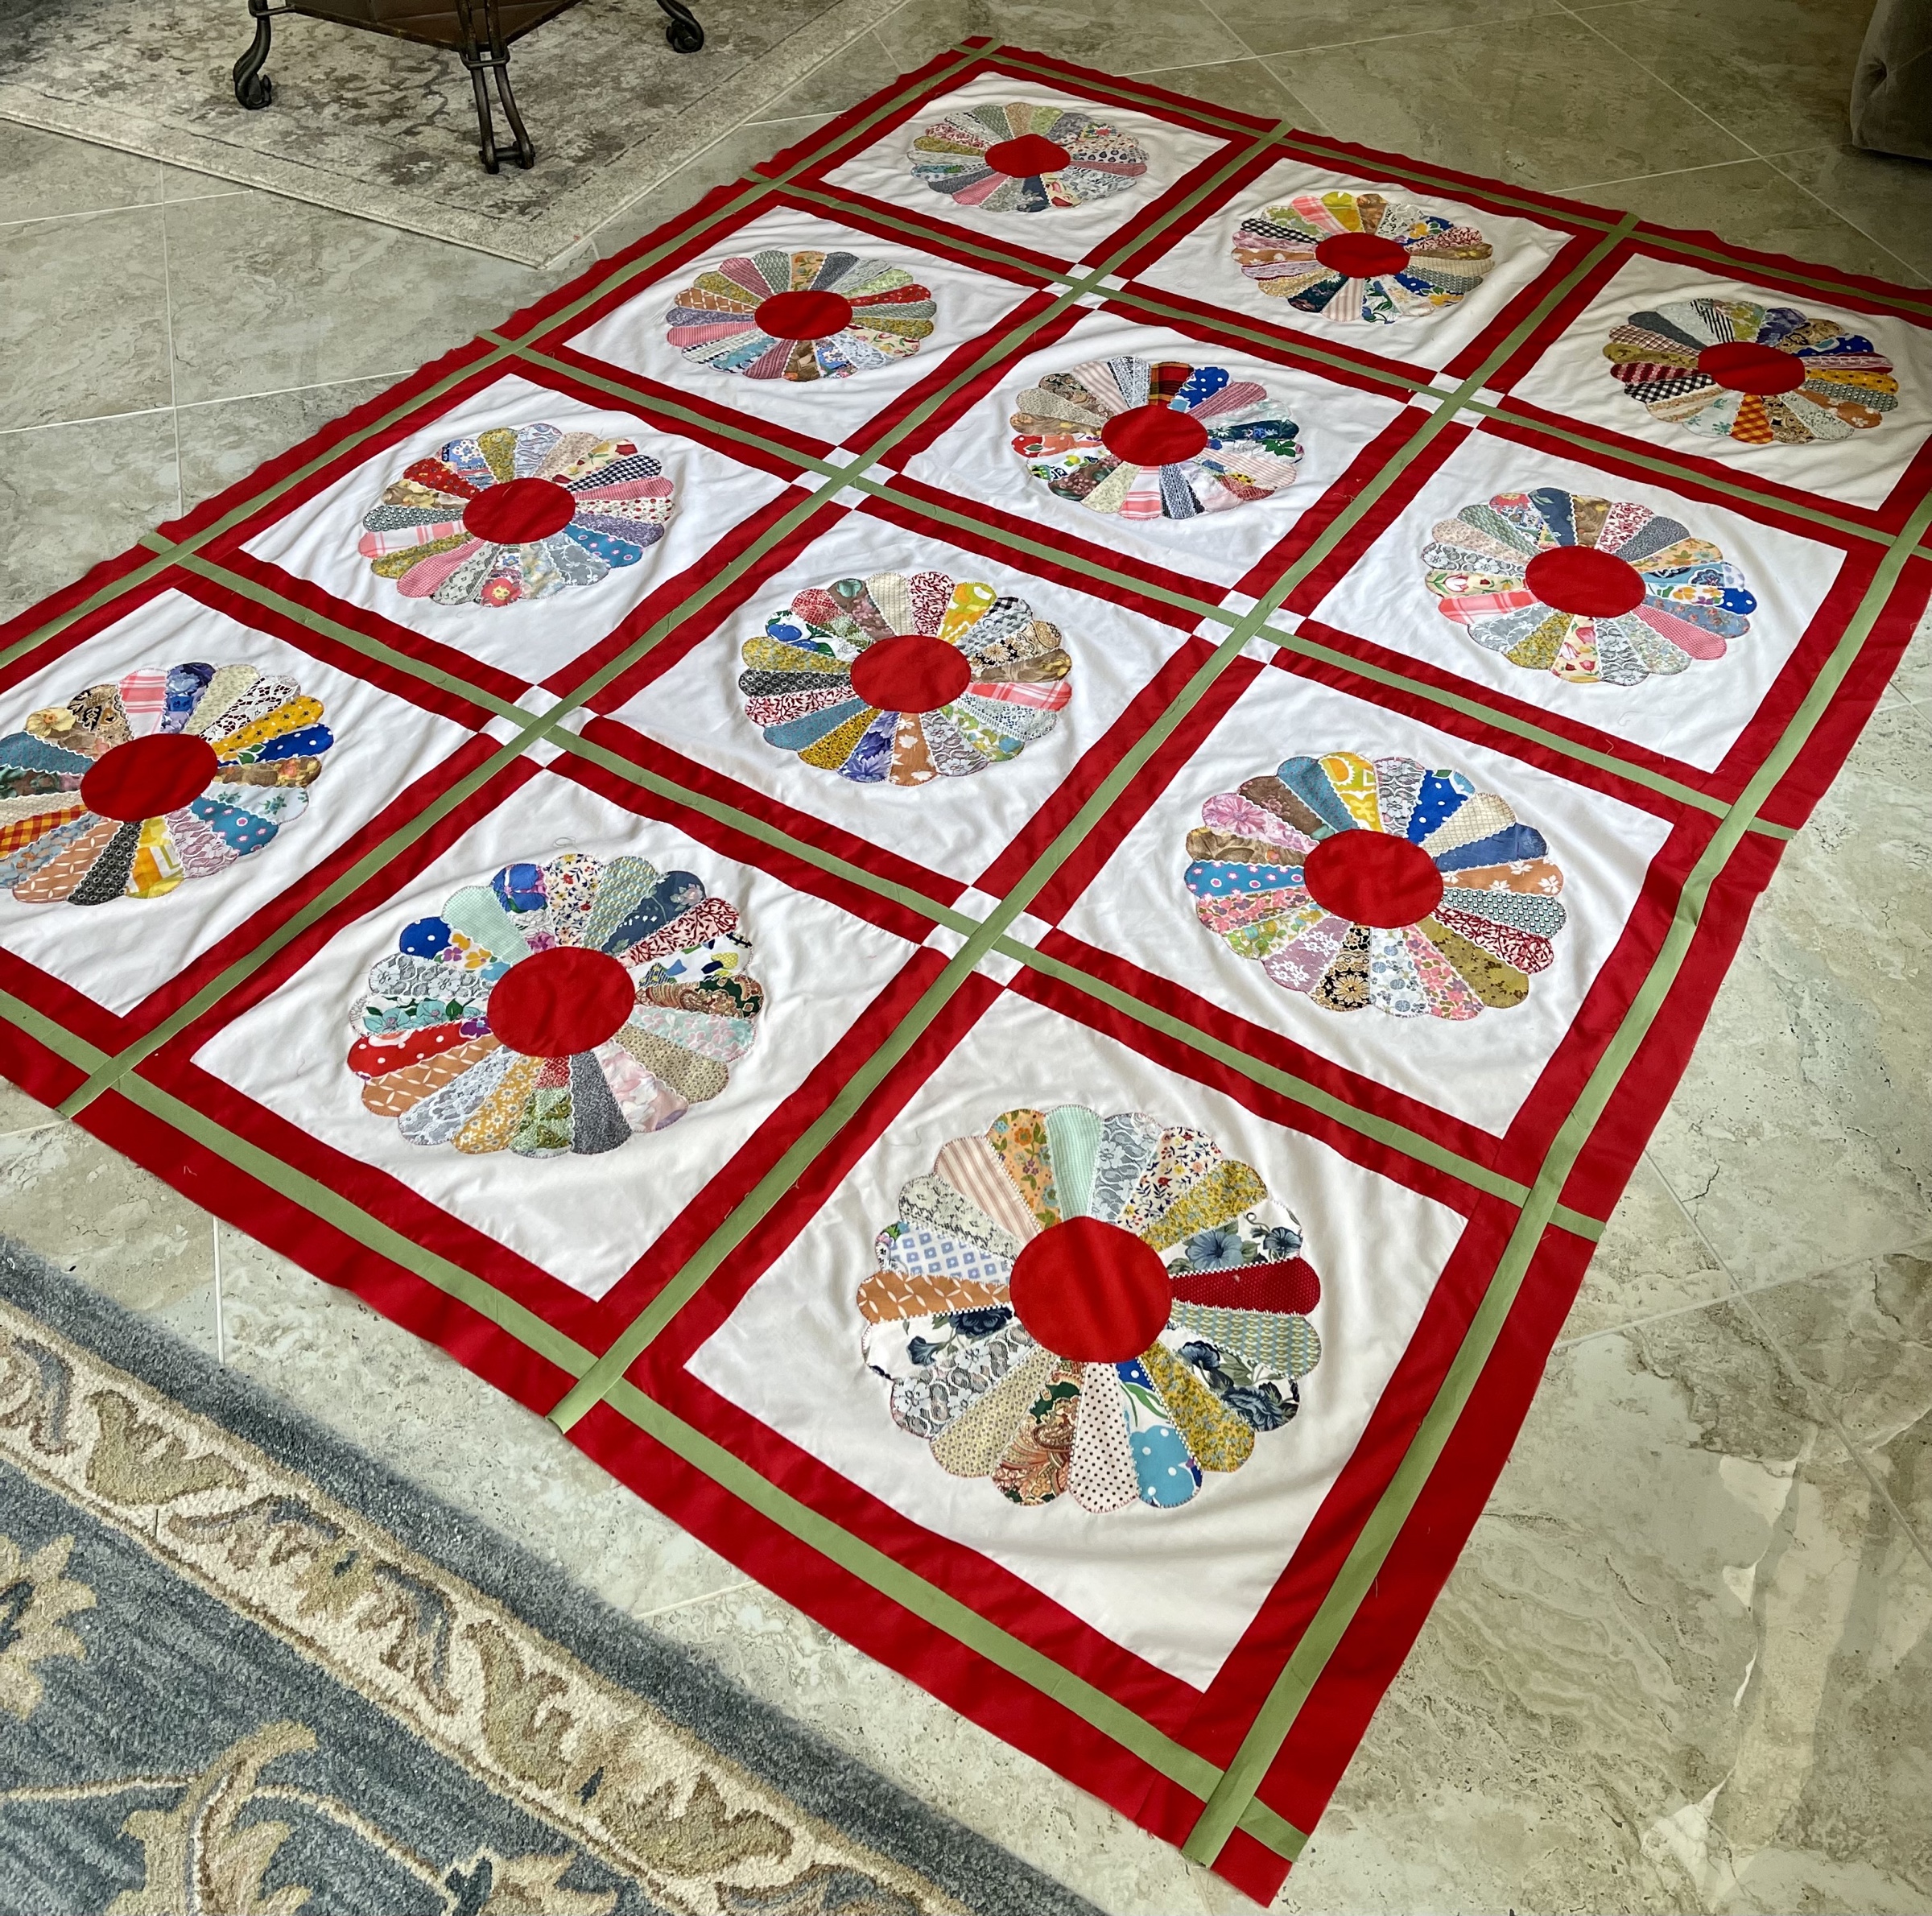
Can you see that the addition of the green strips added 4” to the width and 5” to the length? My quilt top now measures 73×98 and is ready for the longarm for some custom hand-guided quilting when I can get to it…🙂 Hopefully soon! I am very happy with the outcome, sure hope the original quilter would be too as I had a wonderful quilt top to start this project!
Blessings to all and happy quilting, Rhonda


I am so glad to have encountered your blog posts on your experience with working with these dresden petals! I have a mountain stack of them, inherited from my great grandmother and my mother, which never made it to application on blocks. They’re identical in style, scrappy with fabric choice, and have many of the same conditions when it comes to their shape and seam work. Reading your blog posts have helped tremendously with considering how to make them more secure and prep them for their application into blocks. 🙂 You’ve been bookmarked!
LikeLiked by 1 person
Thank you so much for sharing this project — it is so satisfying to see the details, along with the final beautiful results of this restoration. What a talent you have!
LikeLiked by 1 person
Thank you! 🙂❤️
LikeLike
What a transformation. I love that you rescued this piece.
LikeLiked by 1 person
Thank you! 🙂❤️
LikeLike
I JUST LOVE YOU!!!! This turned out so beautiful!!! You really have an eye! And such SKILL!!!! I’ve looked at this several times, and Diane is right “Dessert for the Senses”! I would love to have a set of clear acrylic templates like that…
LikeLiked by 1 person
Thank you! The template is one of a nesting set by: Sweet Set Circles, http://www.sweetsetrules.com
LikeLike
I can’t find them Rhonda… I googled and found a picture but no site☹️
LikeLiked by 1 person
☹️ I bought them about 7 years ago, maybe they have been discontinued or the company has closed? Go to this website, this company has great products including nesting circle templates
https://quiltersrule.com/
LikeLike
That’s amazing. Love the green and how it really dressed it up
LikeLiked by 1 person
Thank you! ❤️🙂
LikeLike
Fabulous. Who would have thought the green in the sashing would make this quilt so sensational!
LikeLiked by 1 person
Thank you! ❤️🙂
LikeLike
Such a fantastic transformation! I’ve so enjoyed your progress on this one and especially appreciate all the tips you graciously share with us. 🥰
LikeLiked by 1 person
Thanks!!
LikeLike
Wow, what a difference! I need to find some of that Bosal interfacing, I need some of that. I am wondering, though, doesn’t the glue affect your needle when sewing through it?
LikeLiked by 1 person
No problem whatsoever with the needle, the fusable is light.
LikeLike
The addition of the green to the sashing is absolutely a brilliant idea. I love, love, love it. I have to save the idea.
LikeLiked by 1 person
Thanks!!
LikeLike
Reading through that is absolutely satisfying. Like dessert for the senses.
LikeLiked by 1 person
❤️🙂❤️
LikeLike