

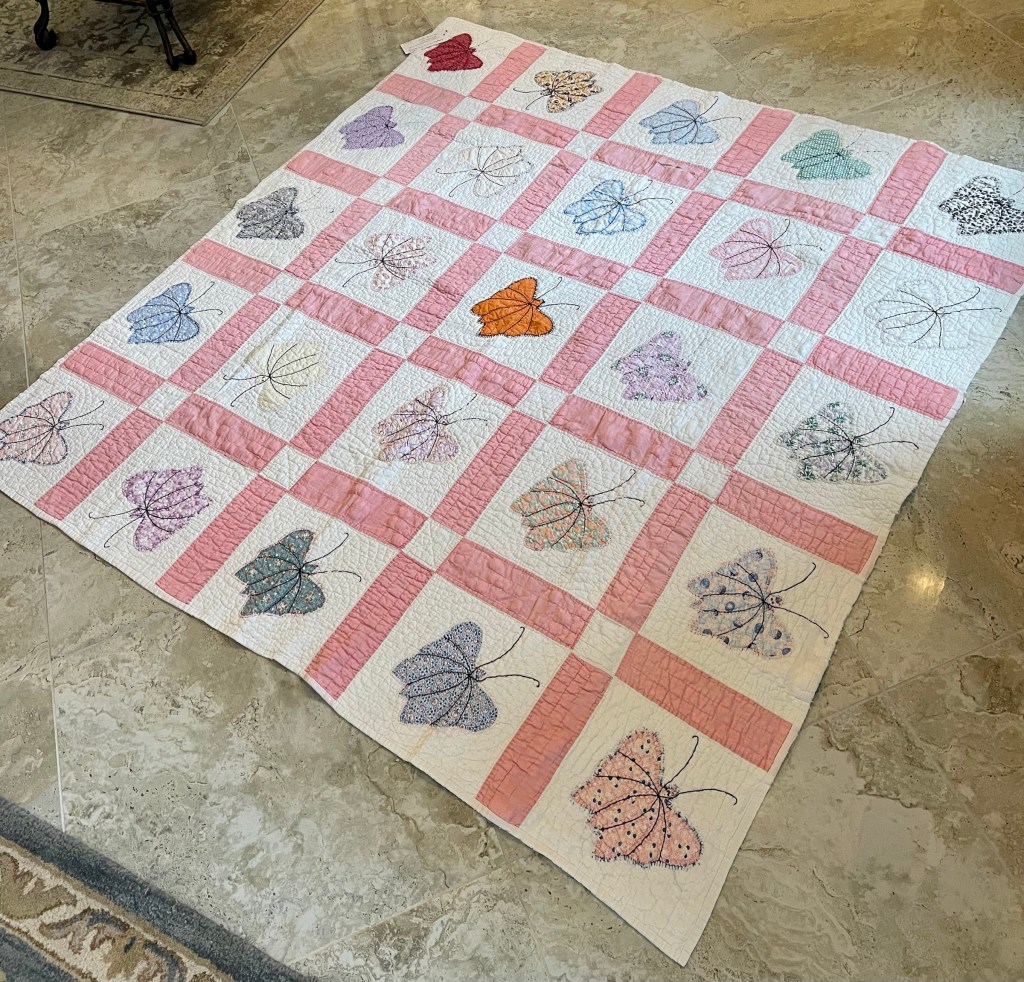
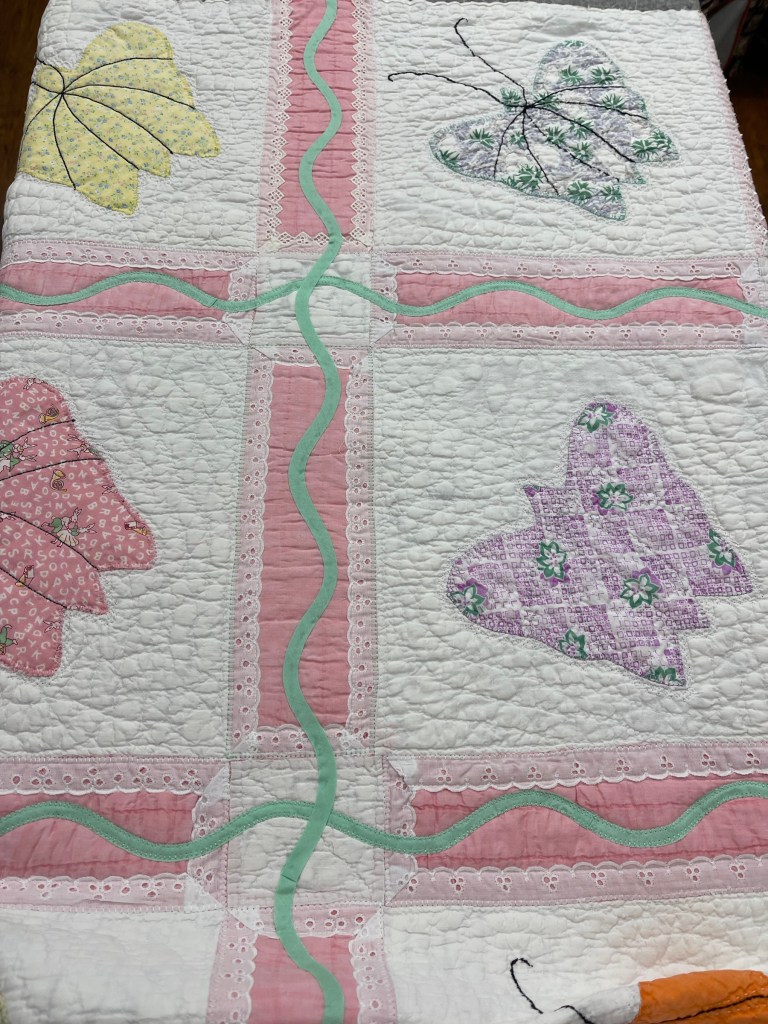
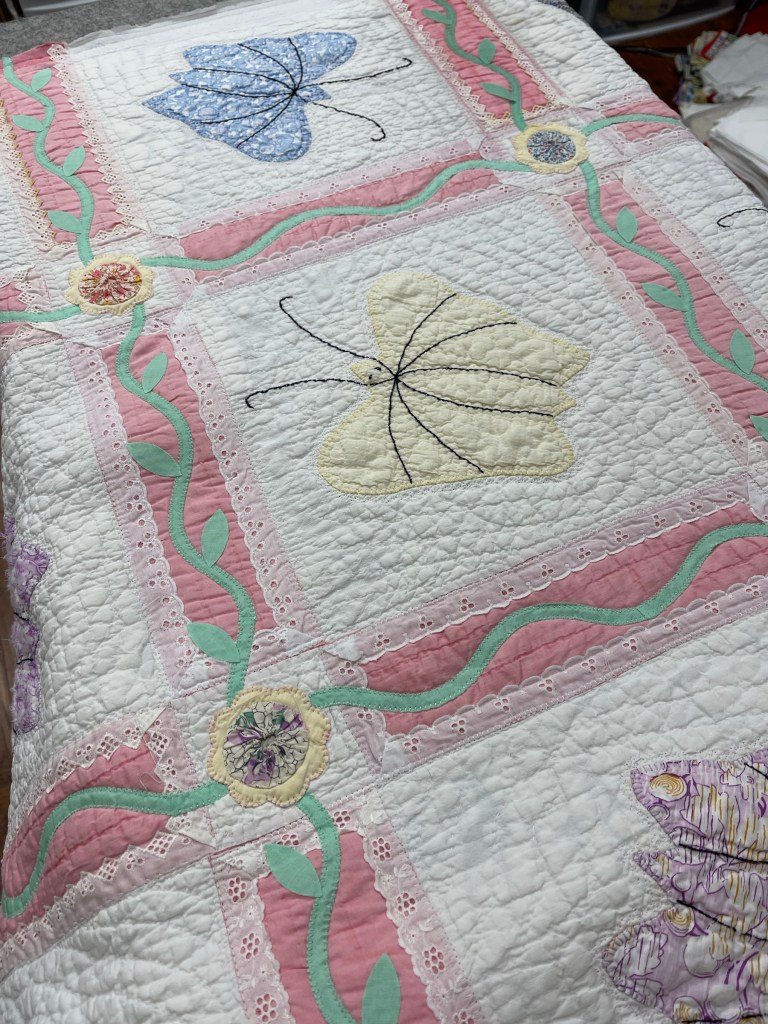
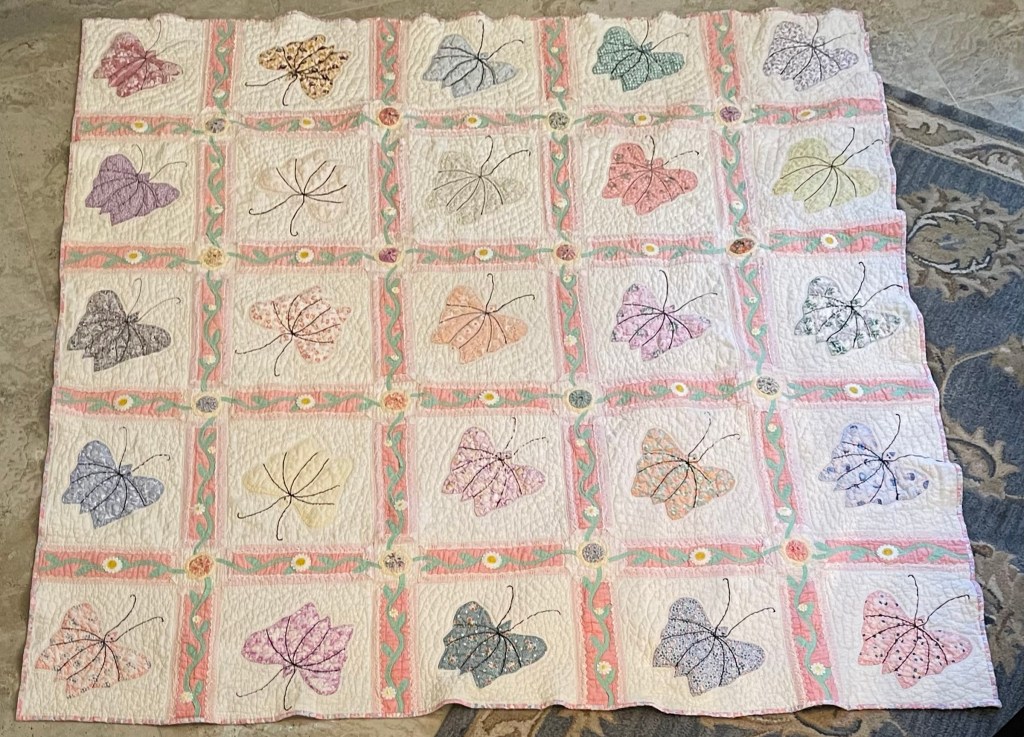
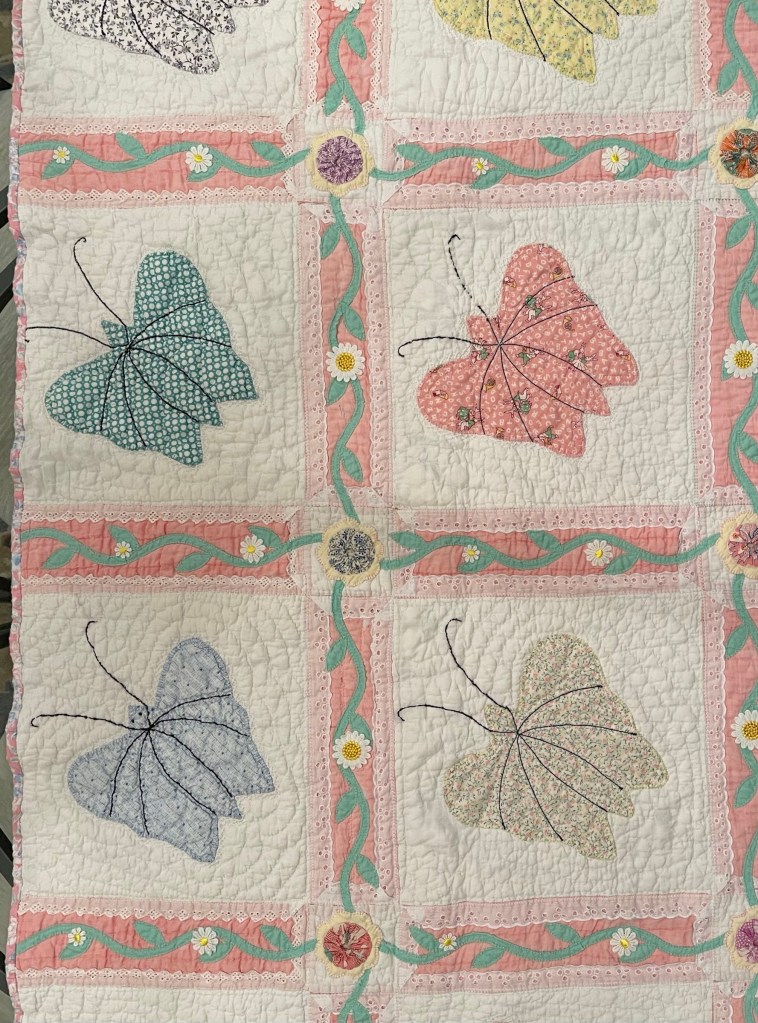
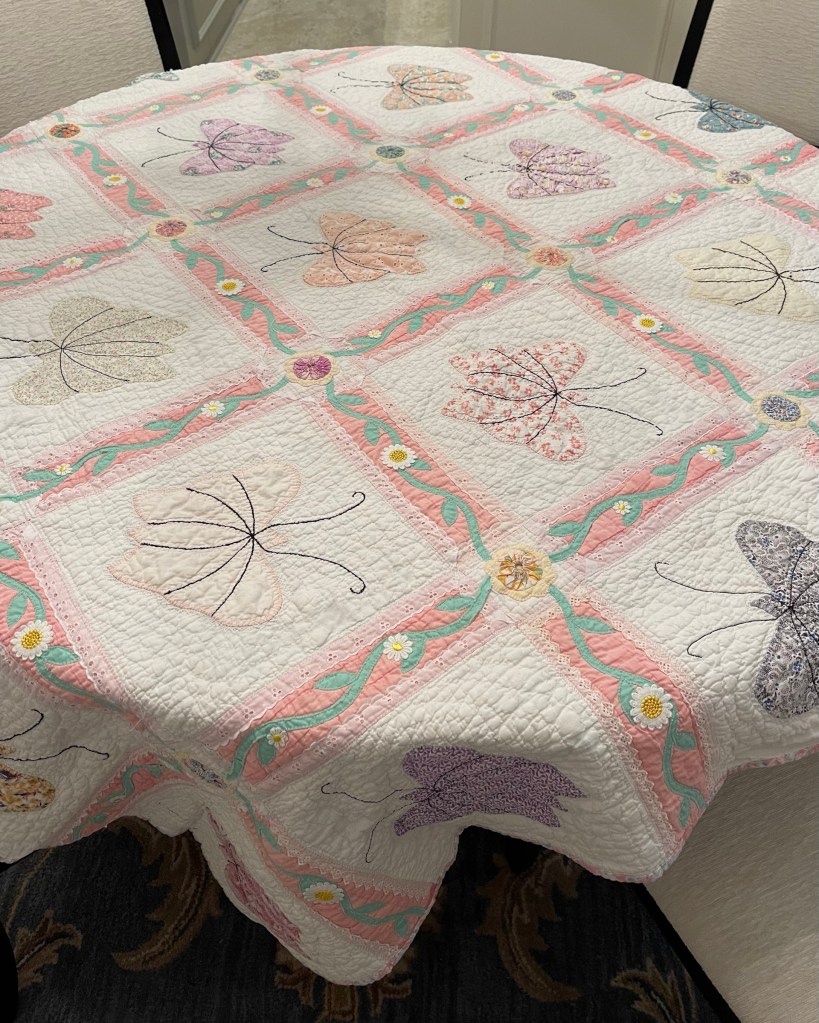
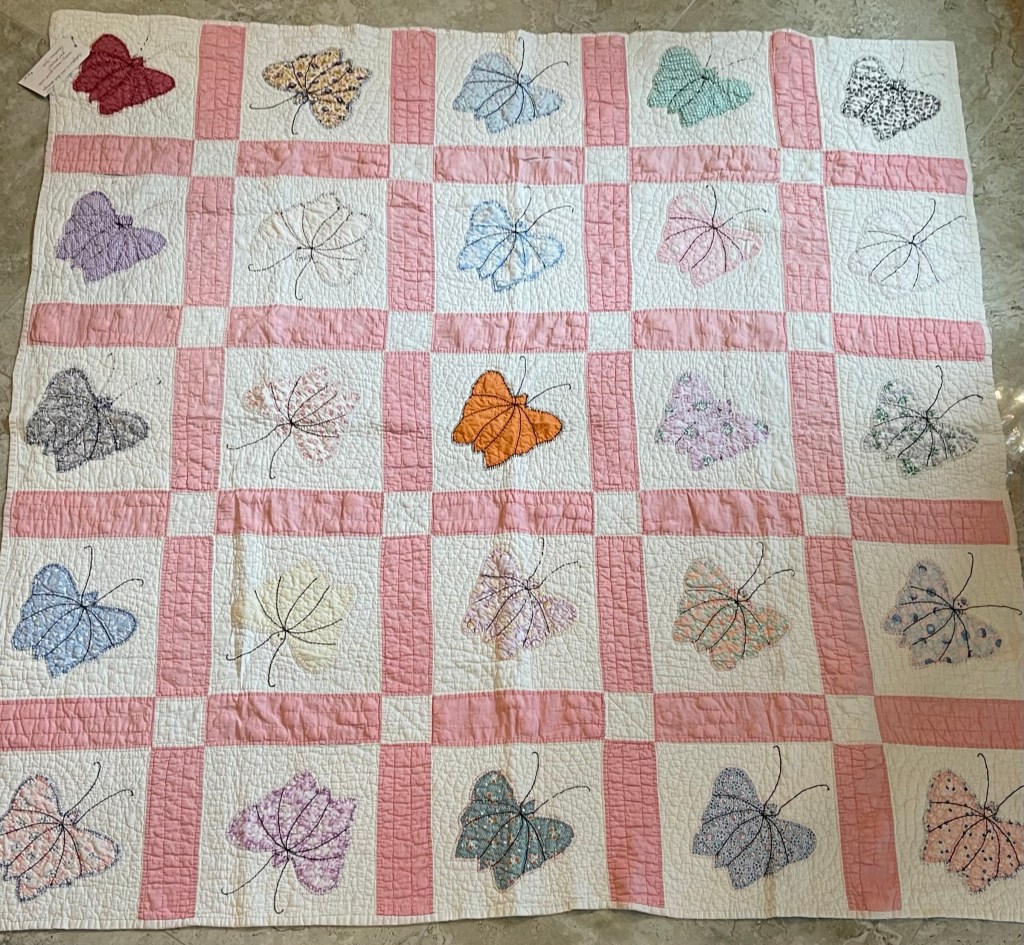
A once lovely 73×73” Butterfly quilt, well used, well laundered and most likely well loved, this quilt needs help. The fabrics are worn and torn over much of the quilt top and the batting…oh my goodness!
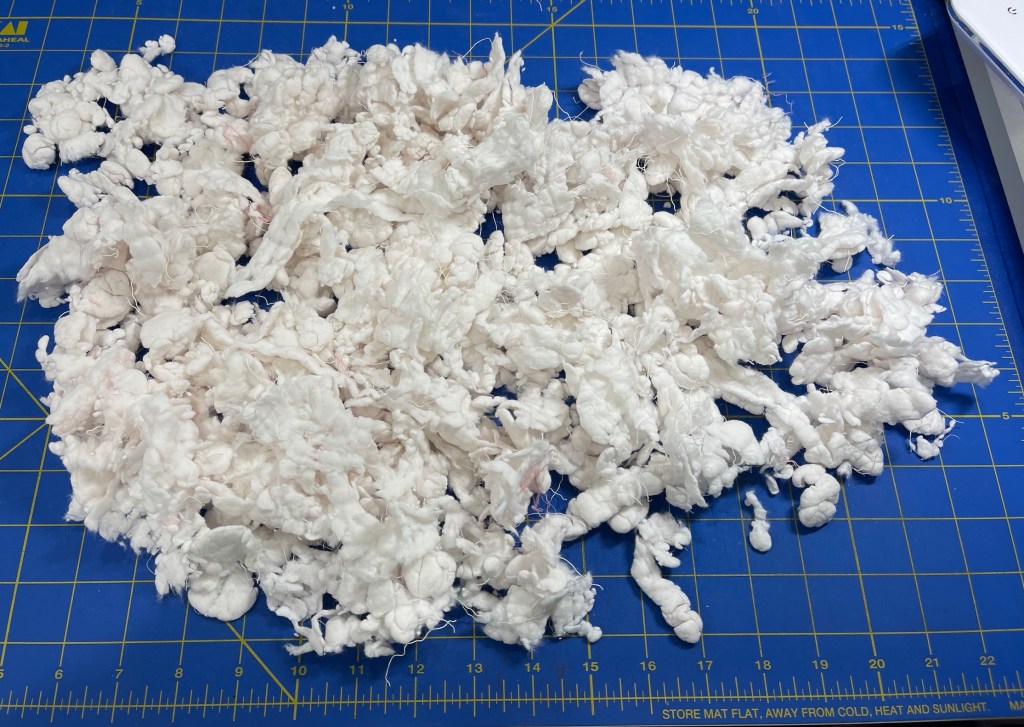
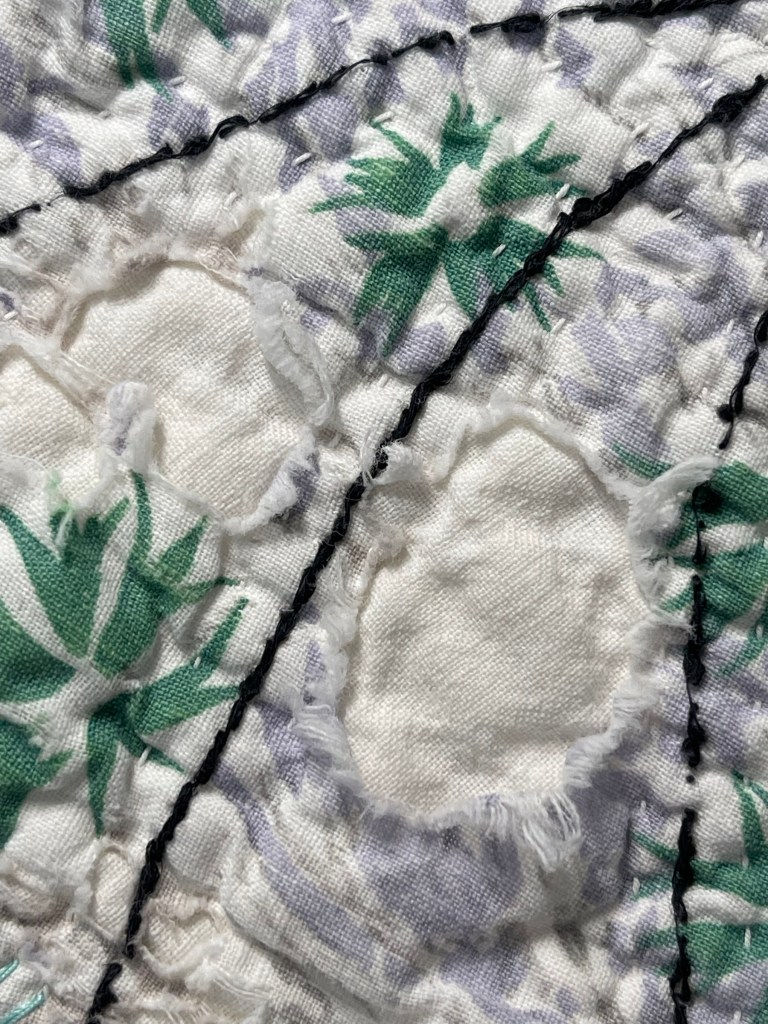
And the batting in the sashing strips has migrated to form hard lumps. The picture below shows a lump that is at least a half inch thick. The butterfly blocks are heavily hand quilted and most if not all the batting stayed in place. Sadly the sashing strips have only 2 straight lines of quilting and time and use has caused many of these straight stitching lines to pop (break).
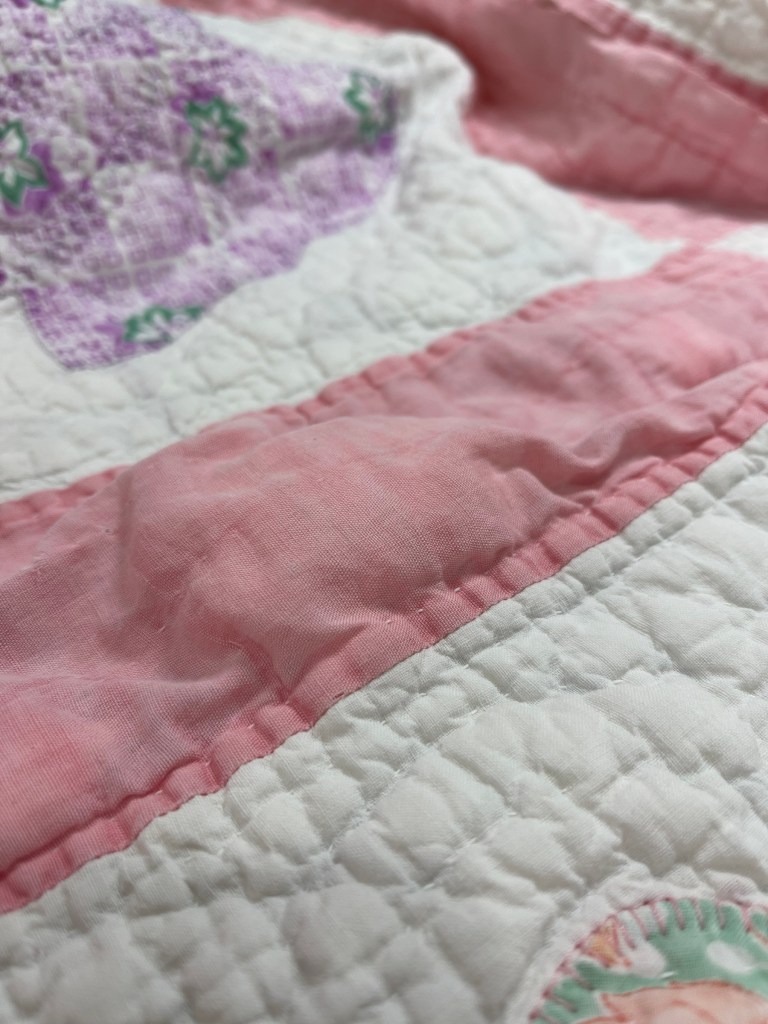
Rather than have a quilt with hard large lumps I decided to experiment and remove the sashing batting. “Oh sure” I thought, this will be fast and easy…well…I was wrong. ☹️ I ended up needing to slice open the long side of the sashing, removing the remaining quilting stitches and pulling out the lumpy white cotton batting.
This process reiterated to me my thankfulness for modern day batting. This quilter used what she had, making the best of the materials available to her. Quilters of today: count your blessings!
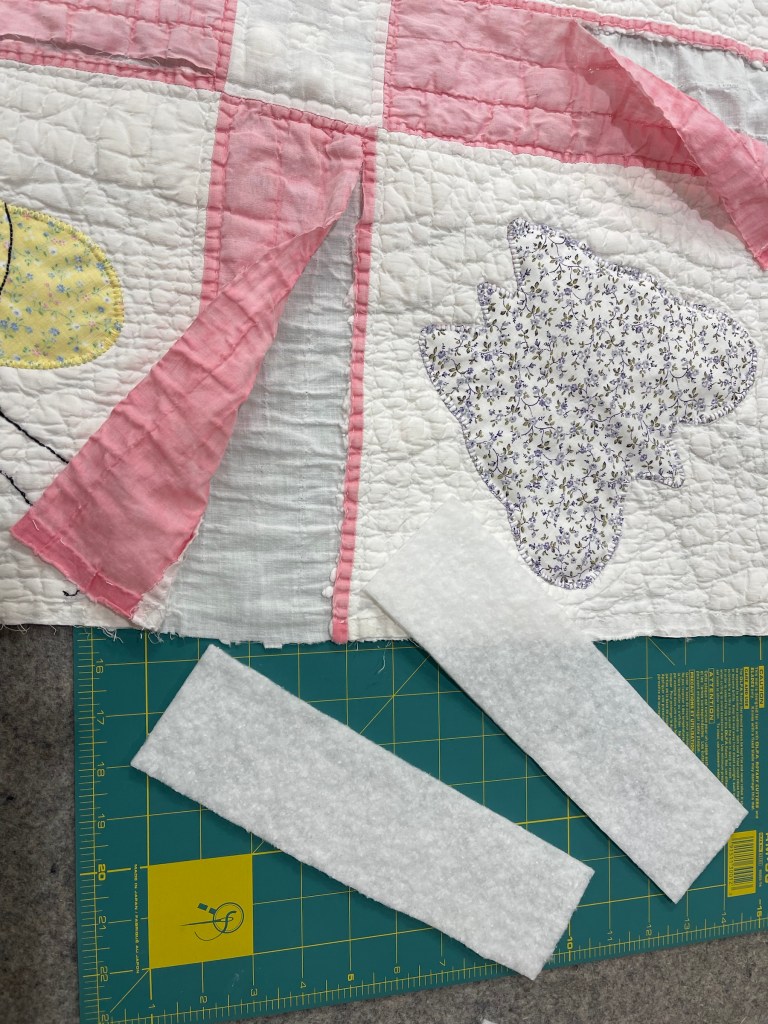
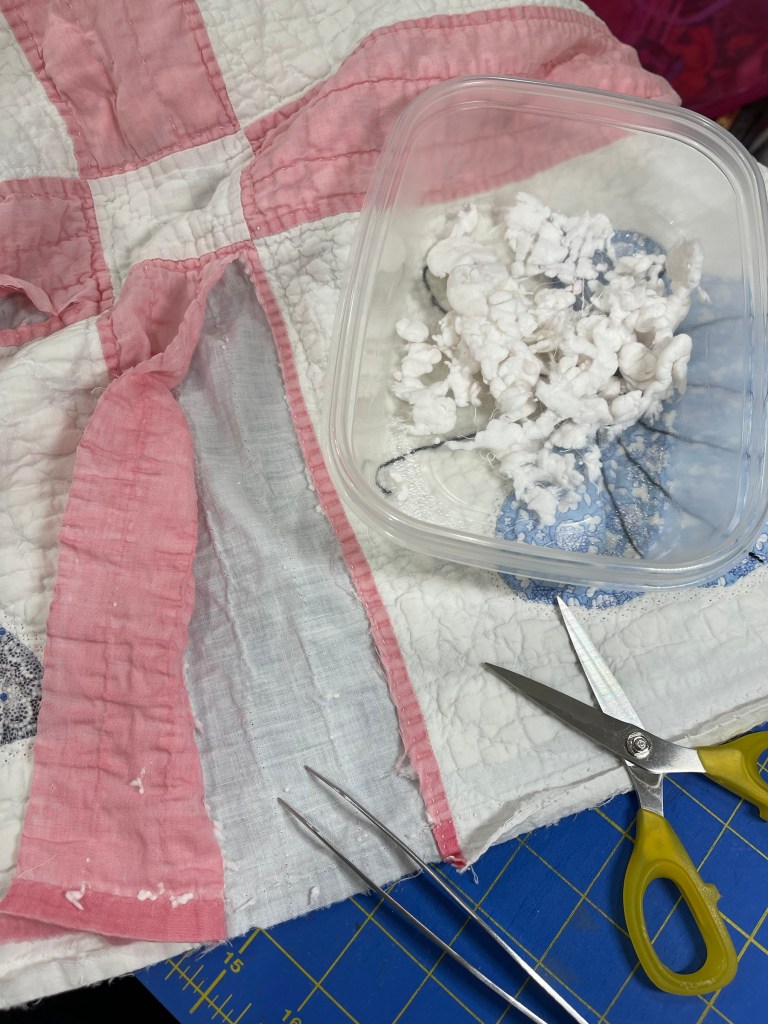
I cut 40 rectangles of Hobbs white 80/20, positioned them in the quilt sashings and zig-zag stitched the openings closed.
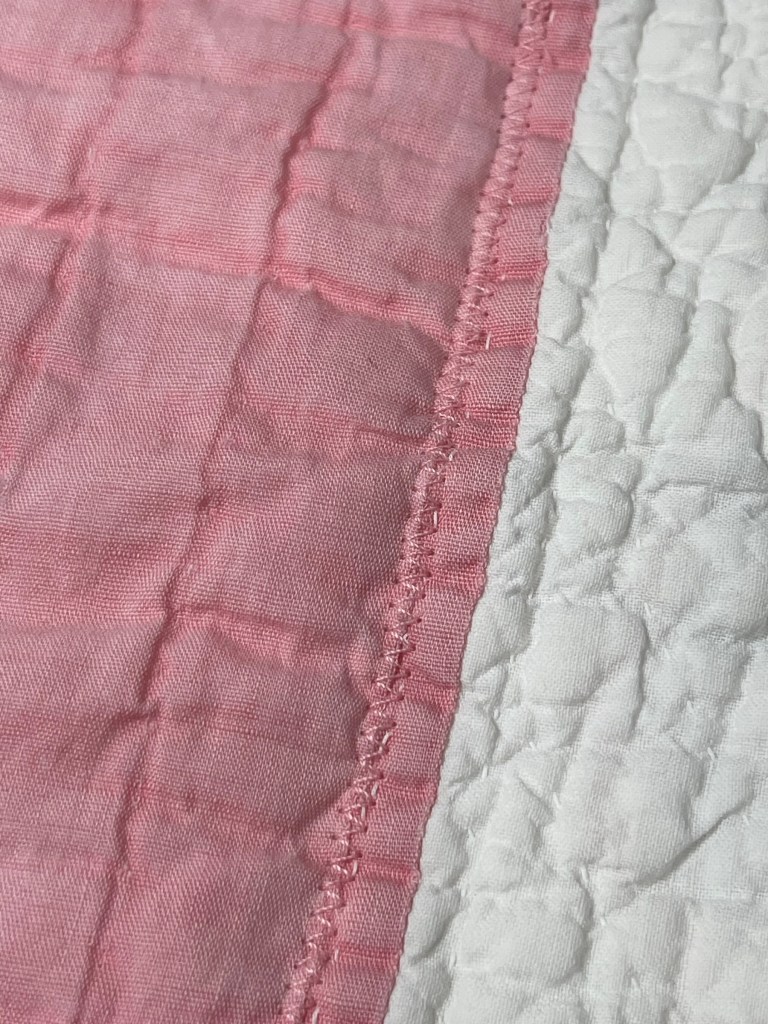
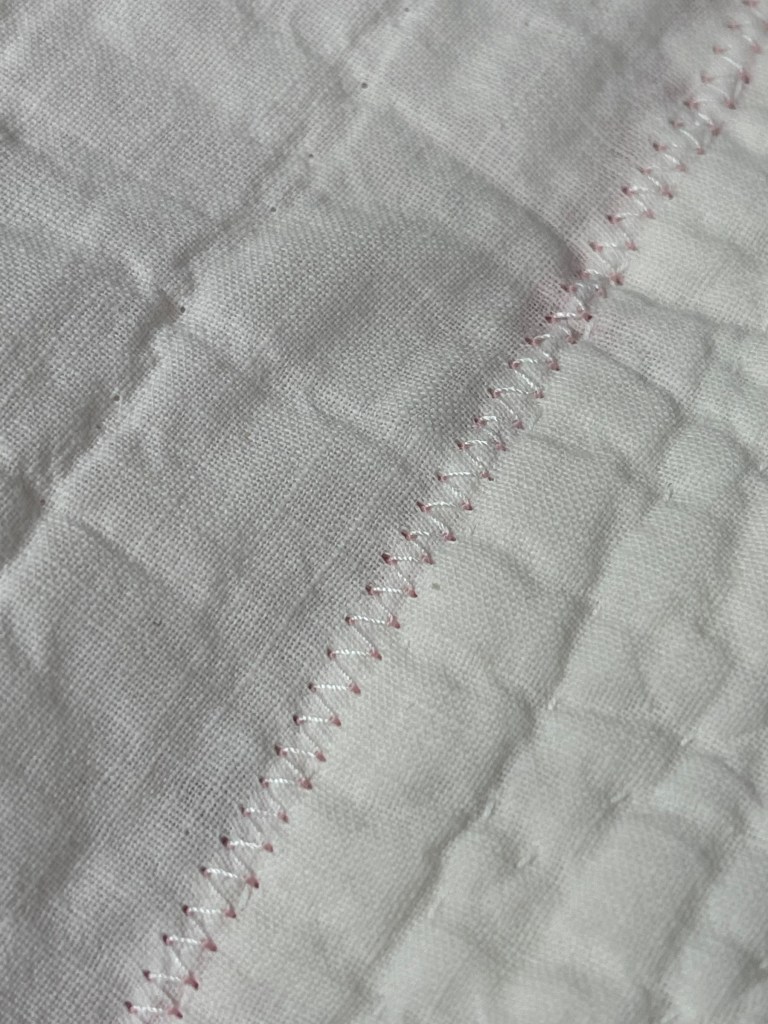
Well…I should have done more. What I didn’t expect to happen is that as I worked through the repairs on all 40 sashings, the new batting rectangles shifted inside the quilt. I did not secure them properly and had to cut openings once again and by using long tweezers, reposition the rectangles.
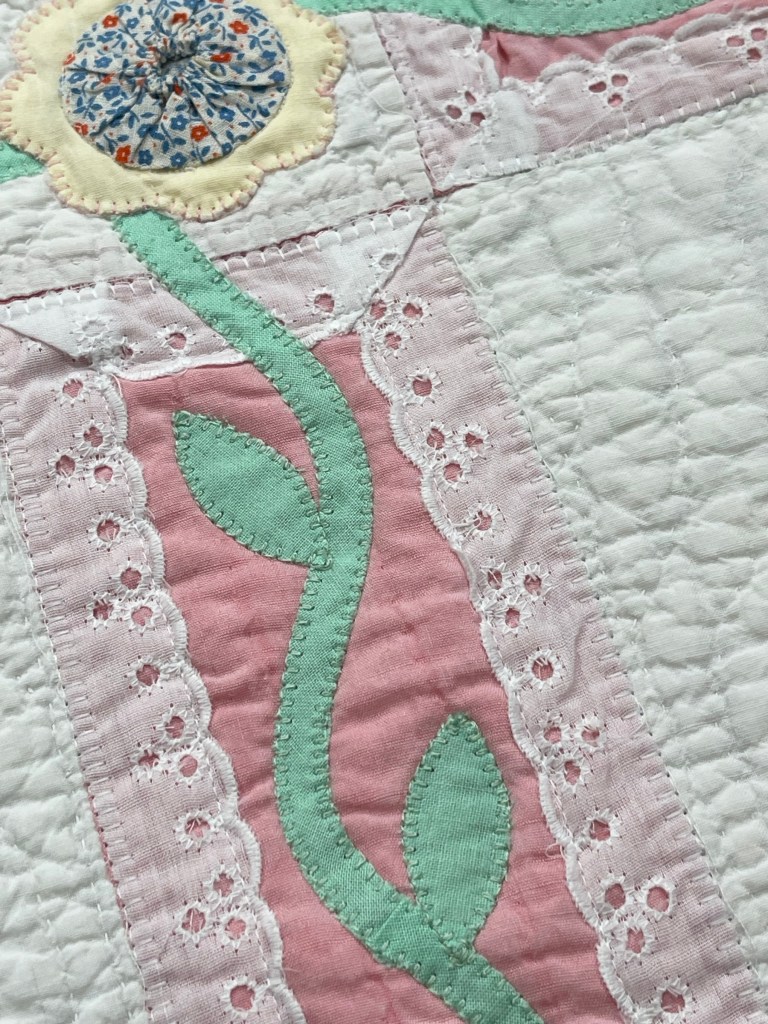
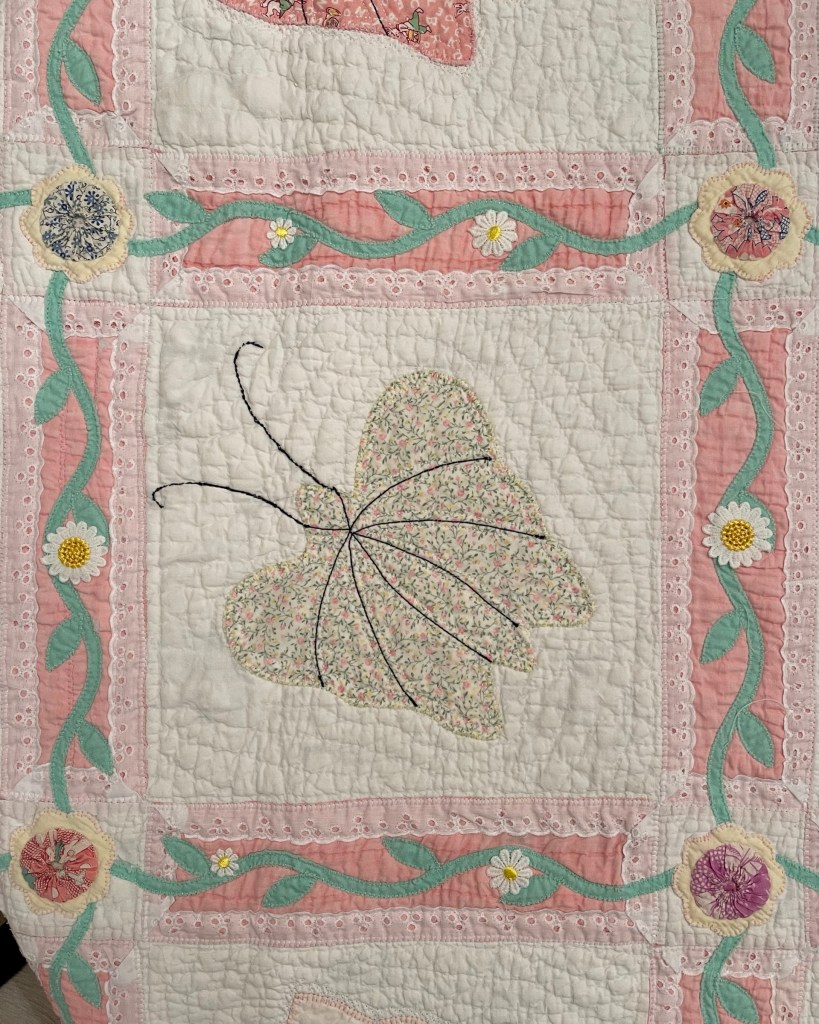
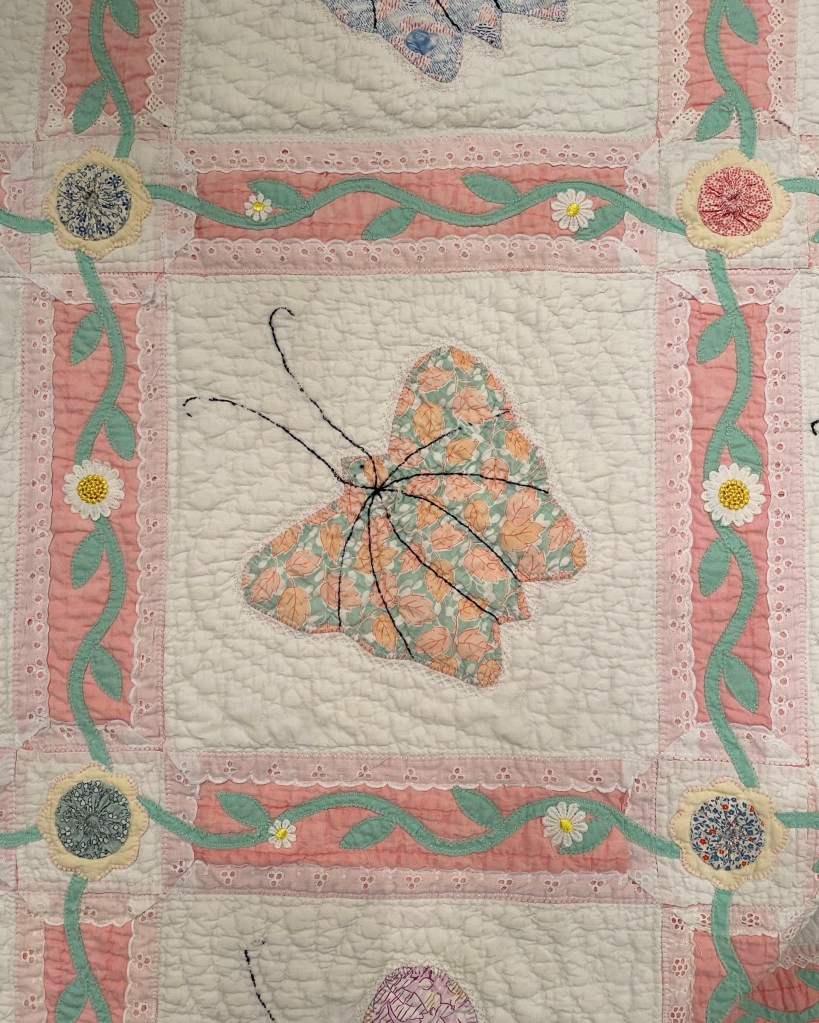
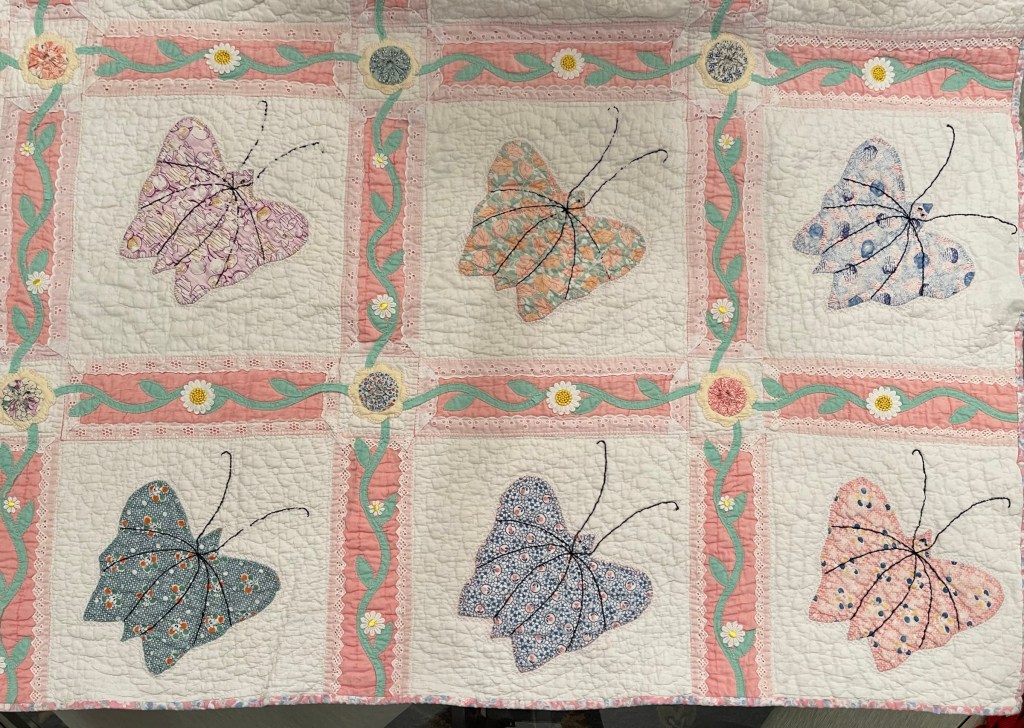
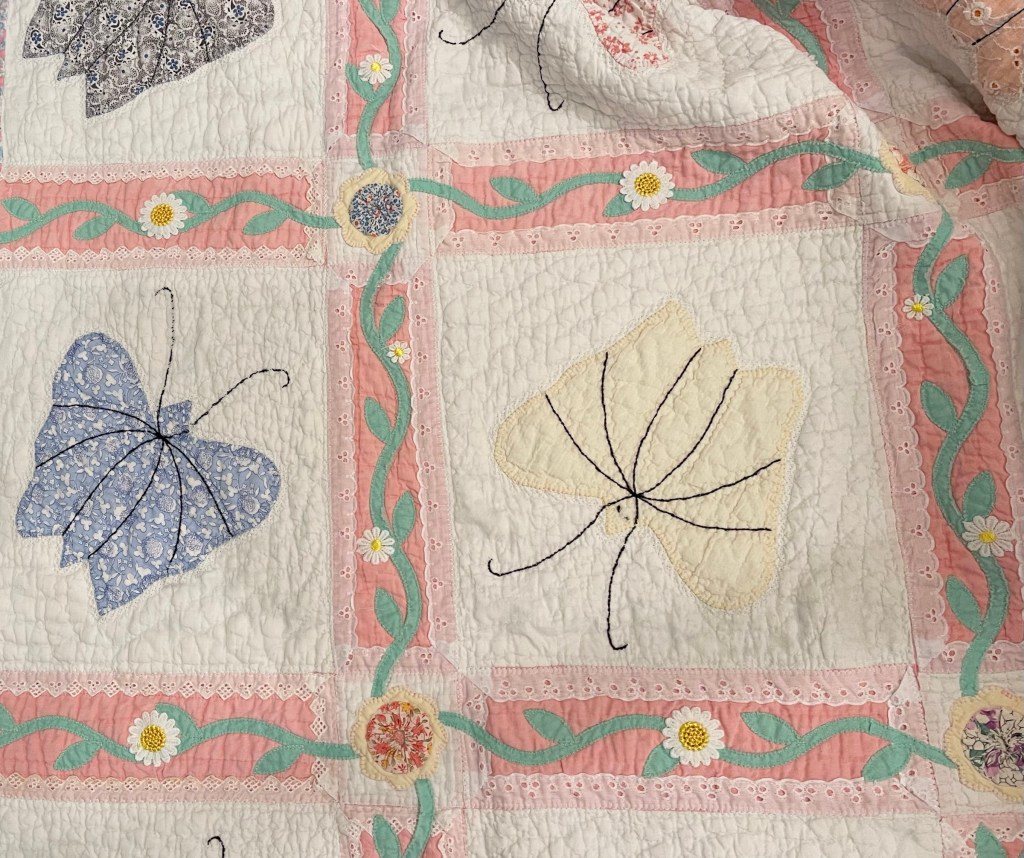
Here’s where I forgot to take pictures. Using various vintage white or very light ivory eyelet trims, I edged each of the sashing strips. Besides liking the look of eyelet, this also brought down the heavy look of the solid pink fabric. Imagine the pic below does not have green vines. 🤪
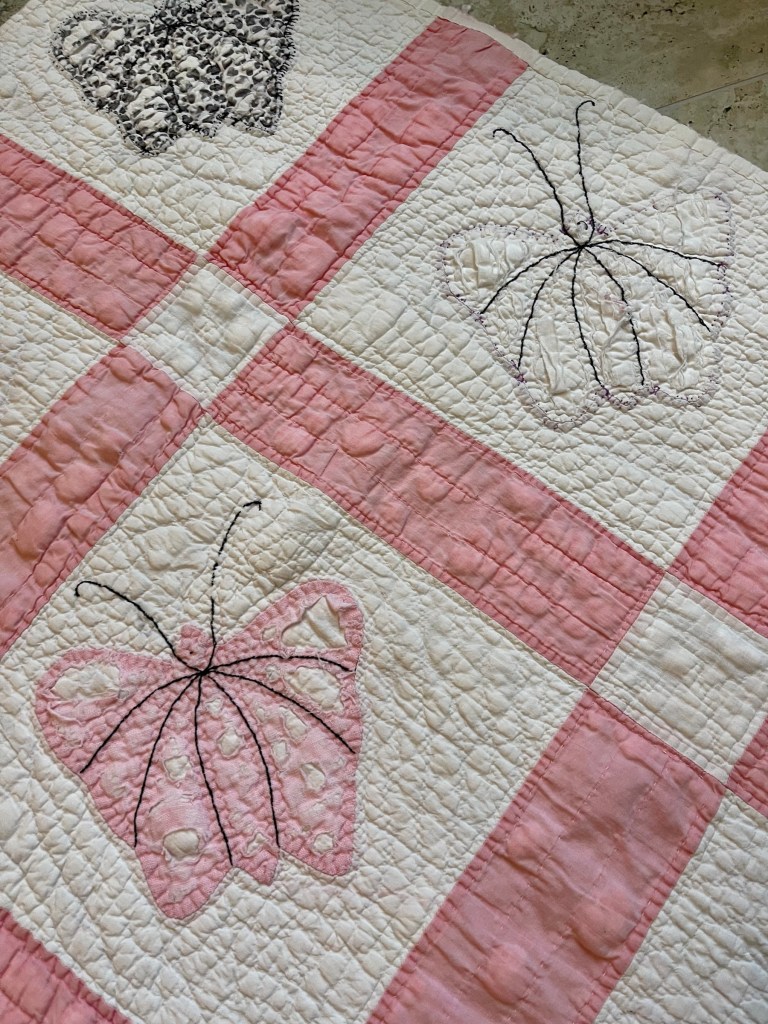
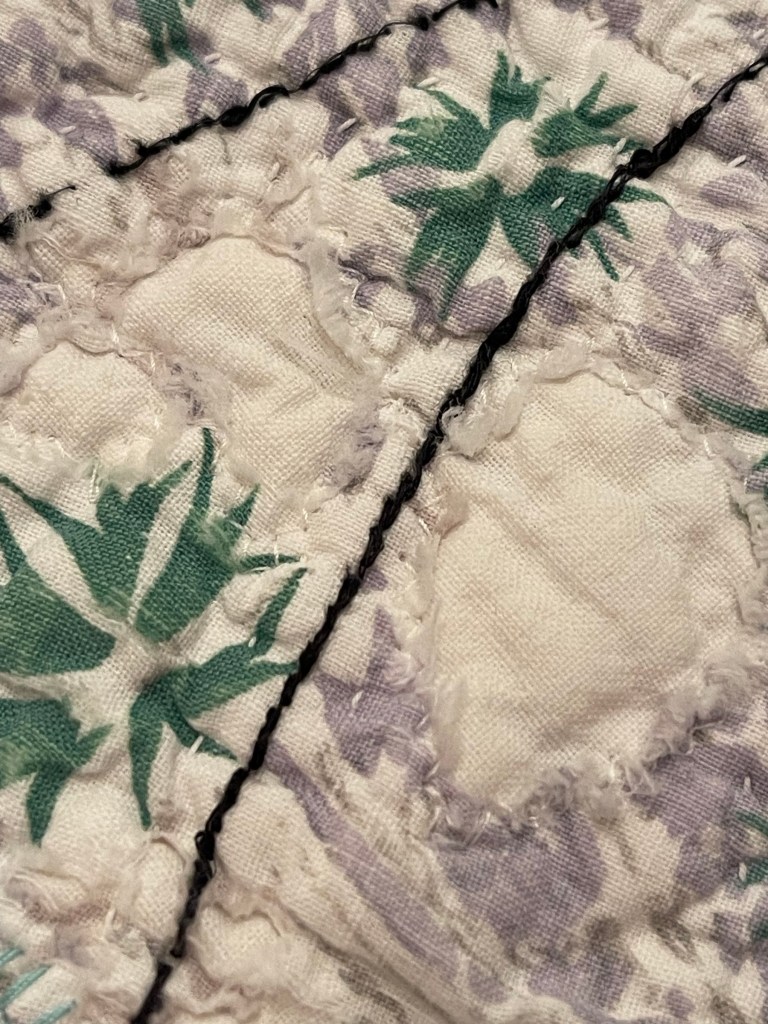
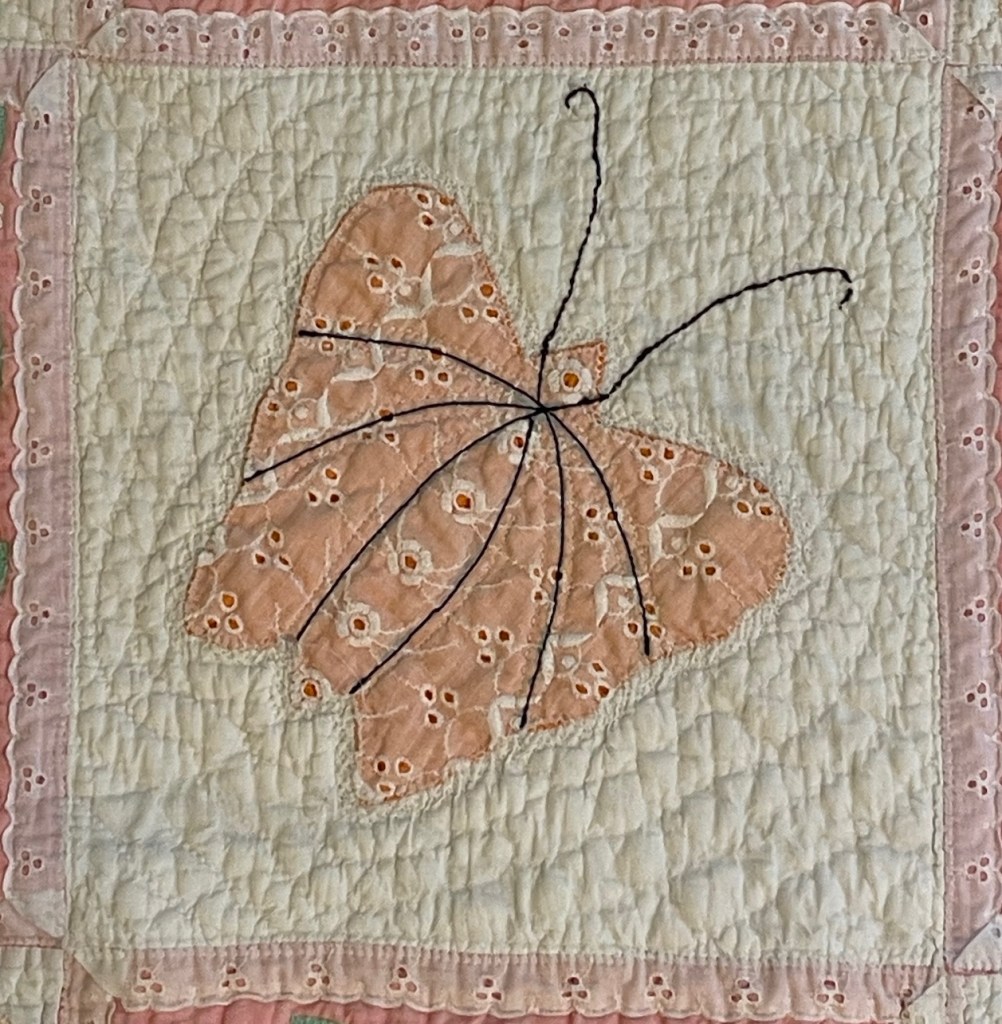
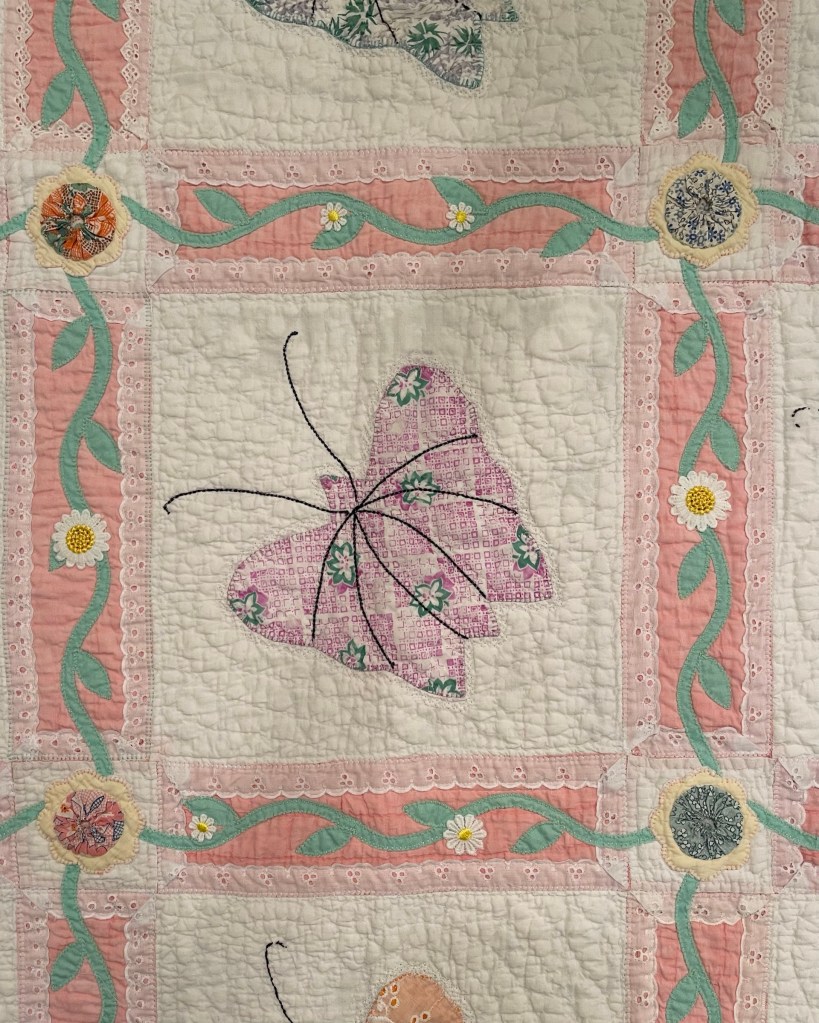
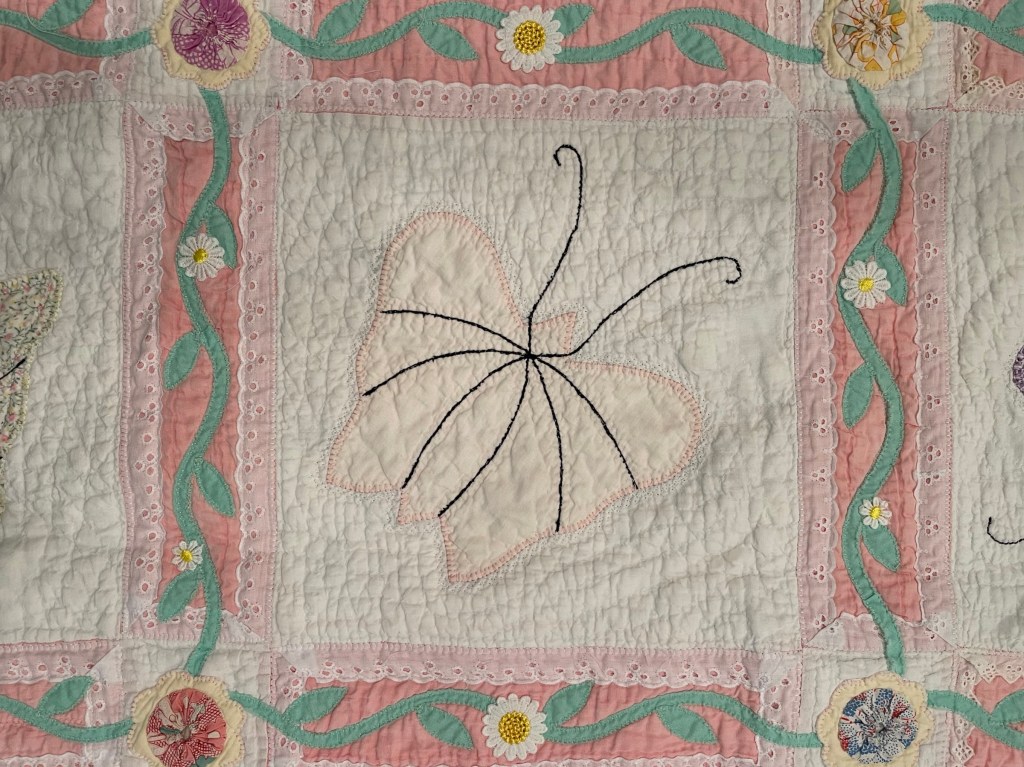
Let me jump to a Butterfly needing a fabric fix. Here are before and after pics of a “repair” that did not involve replacing the fabric. I stitched a small zig-zag stitch at the outer edge of the missing fabric.
I might have mentioned at the top of the blog that my intentions when rescuing or saving any vintage quilt are never to completely restore the piece but rather, I try and let the quilt retain its well loved appearance and at the same time add just enough to give it new life. Every one of my rescue quilts, when I am finished, take a trip through my front load washing machine and dryer and are ready to be used.
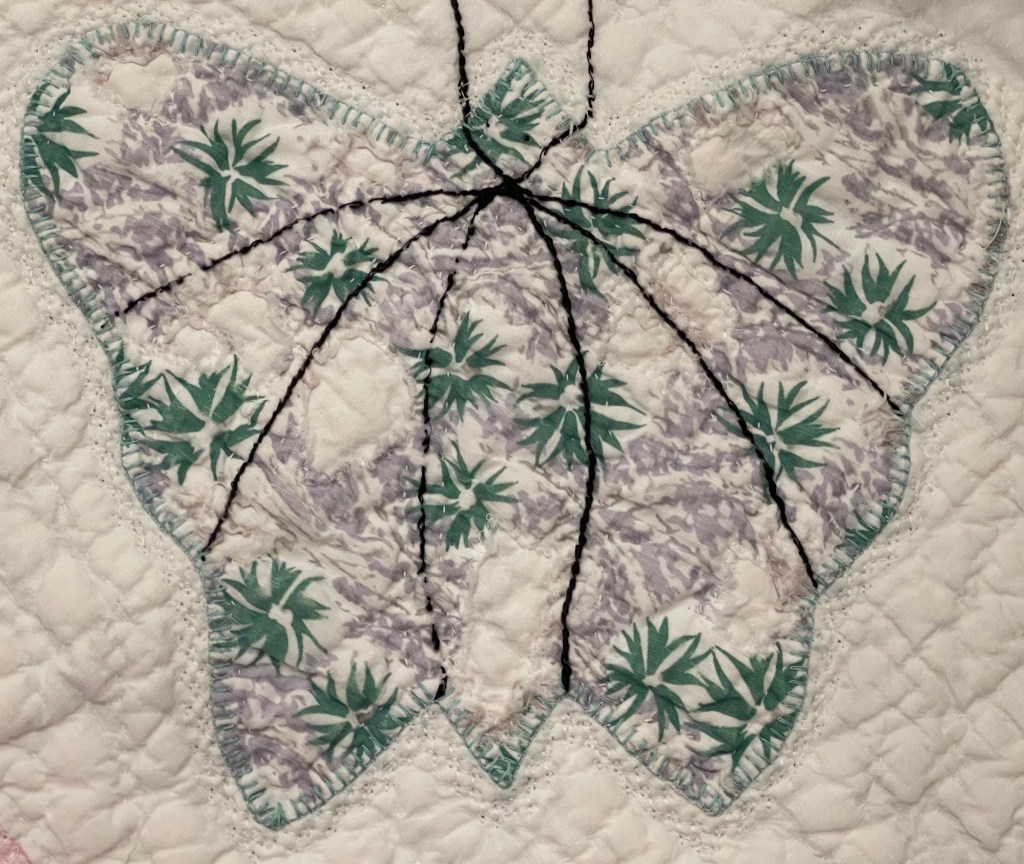
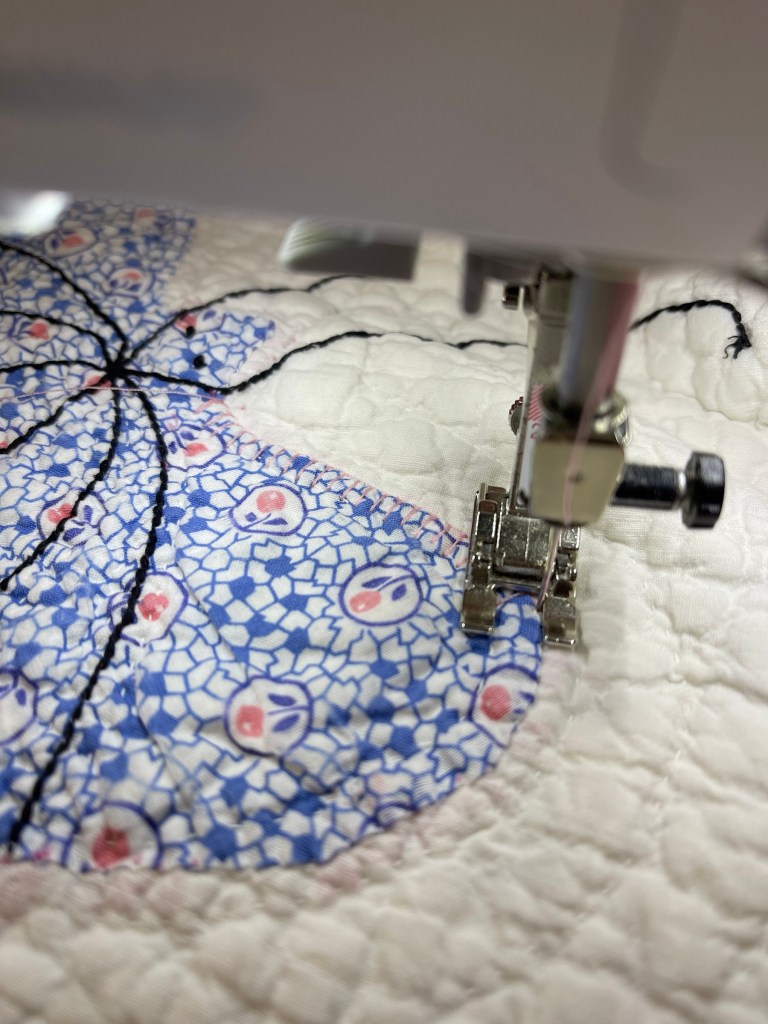
The three pictures below show: 1. The damaged Butterfly fabric, 2. A closeup of the machine zig-zag stitch around the damage and 3. The Butterfly after stitching and the trip through the laundry.
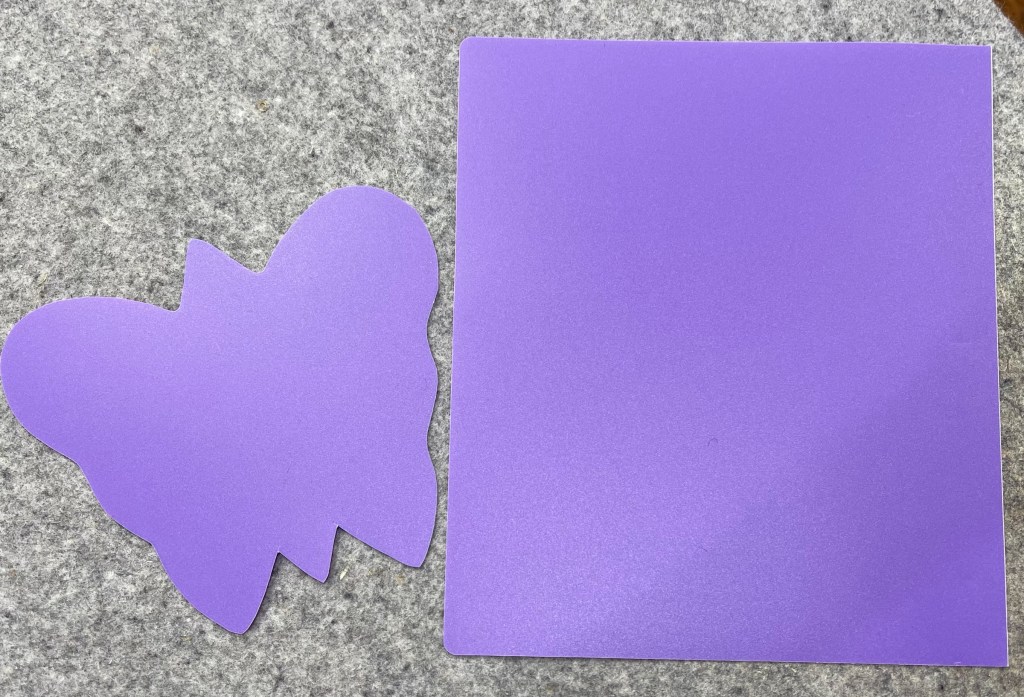
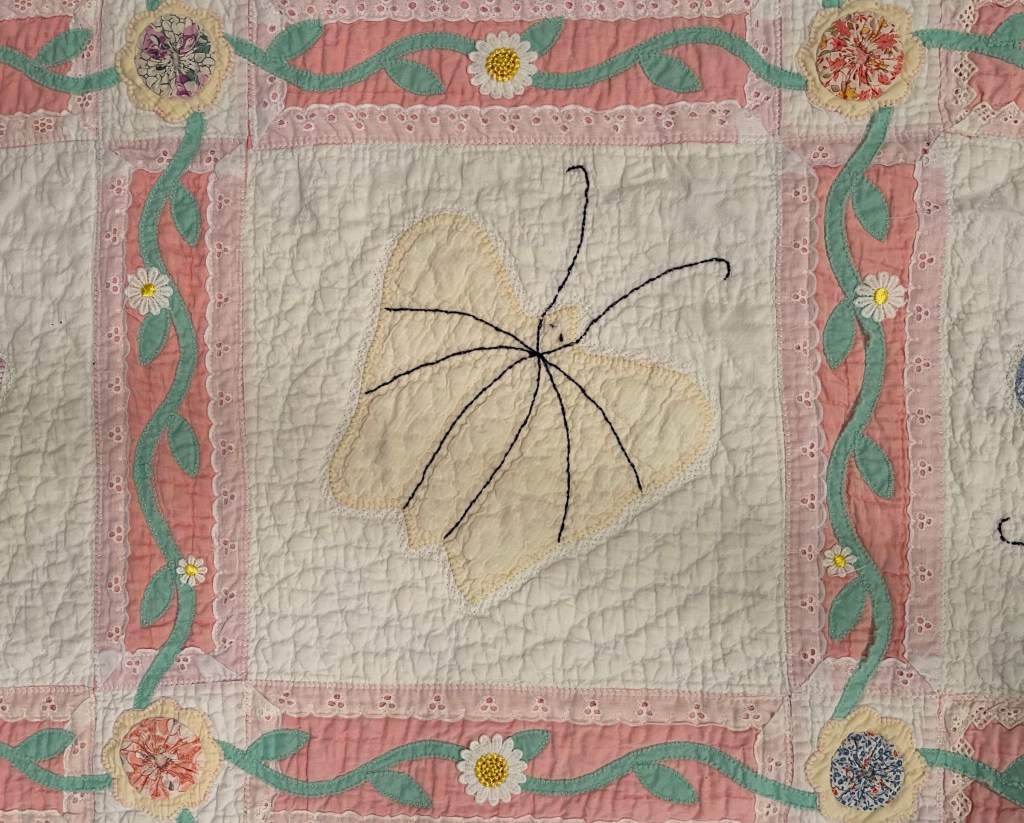
Several of the Butterflies were so badly damaged that they needed to be replaced. Keeping it in one piece I carefully removed one badly damaged Butterfly, I placed it on a piece of flexible plastic, drew around it with a sharpie and cut it out with my utility scissors.
About the purple plastic: the Dollar Store to the rescue. Any one of these types of stores sell three ring binders with flexible plastic covers. They are perfect covers for making templates. Using a box cutter I cut off the front and back. I’ve used these plastic sheets for years, they come in so handy for template making.
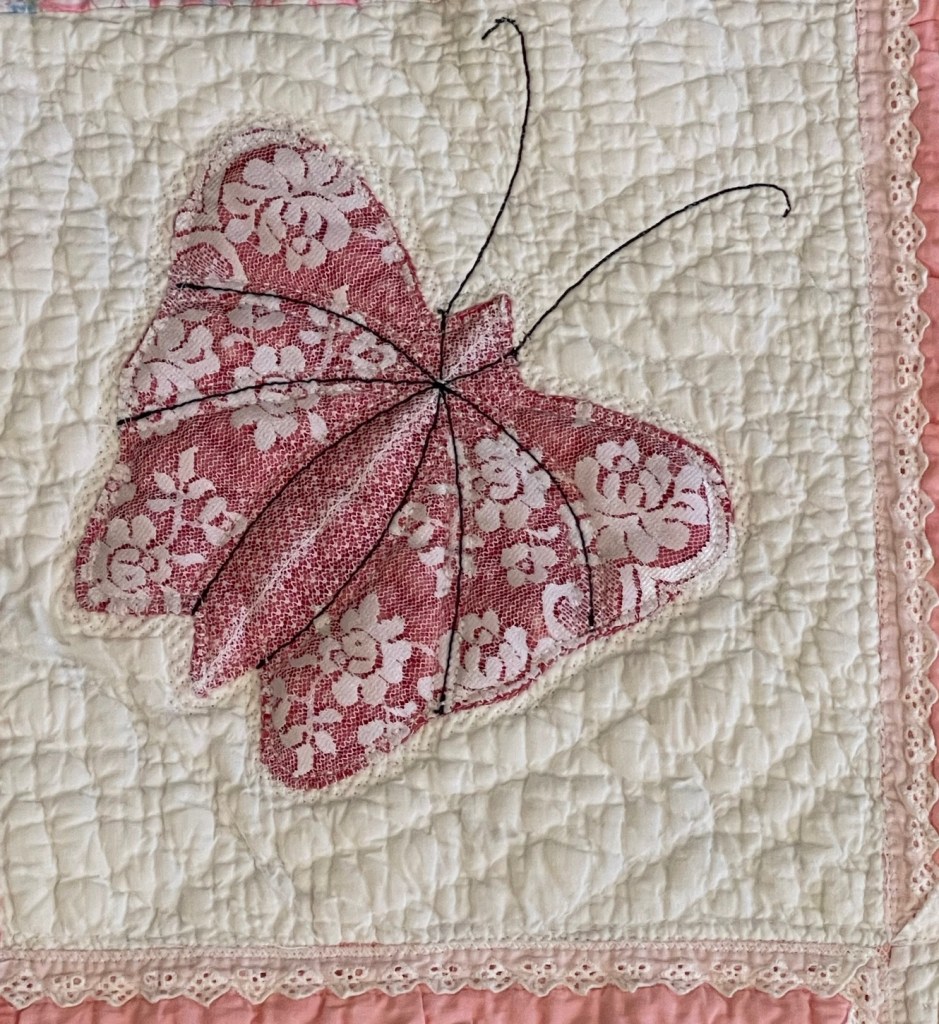
This is a new fabric Butterfly. This is also the “wrong” side of the yellow print fabric. The motifs were perfect but the “right” side of the fabric was not. Would you have known if I hadn’t said…probably not.
There’s so much more to tell you about in this picture above. After pinning the motif in place I raw edge machine applique stitched around the outer edge.
I then decided to add a machine decorative stitch around the outside of the butterfly. I felt it gave the butterfly an almost lacy edge look.
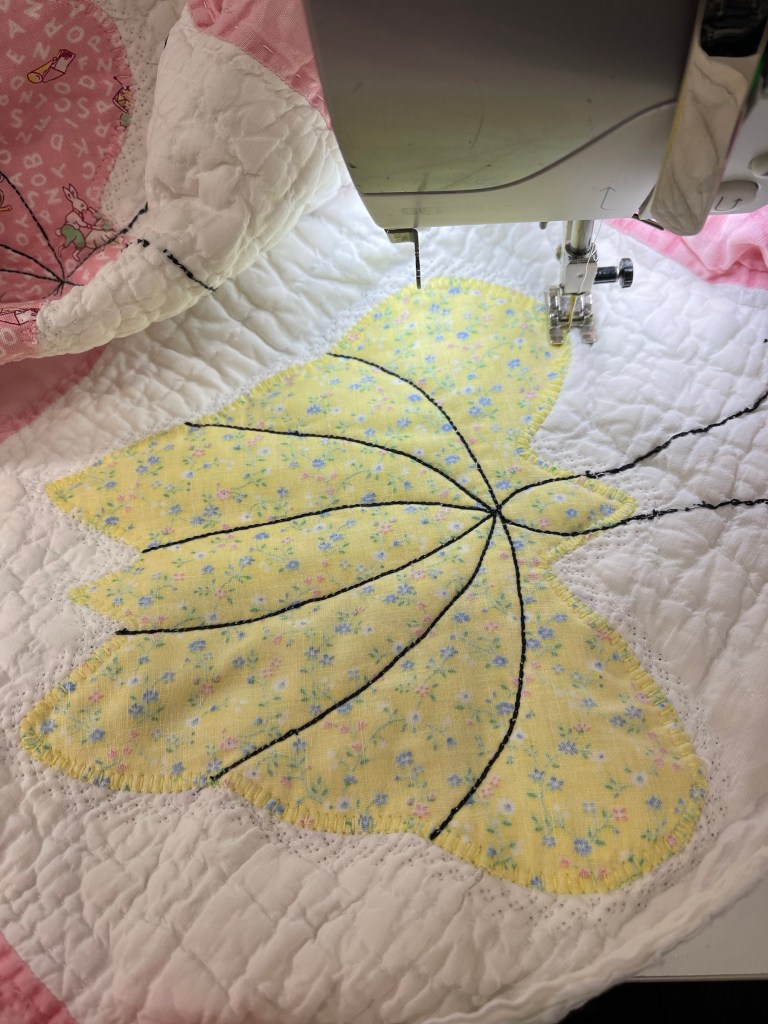
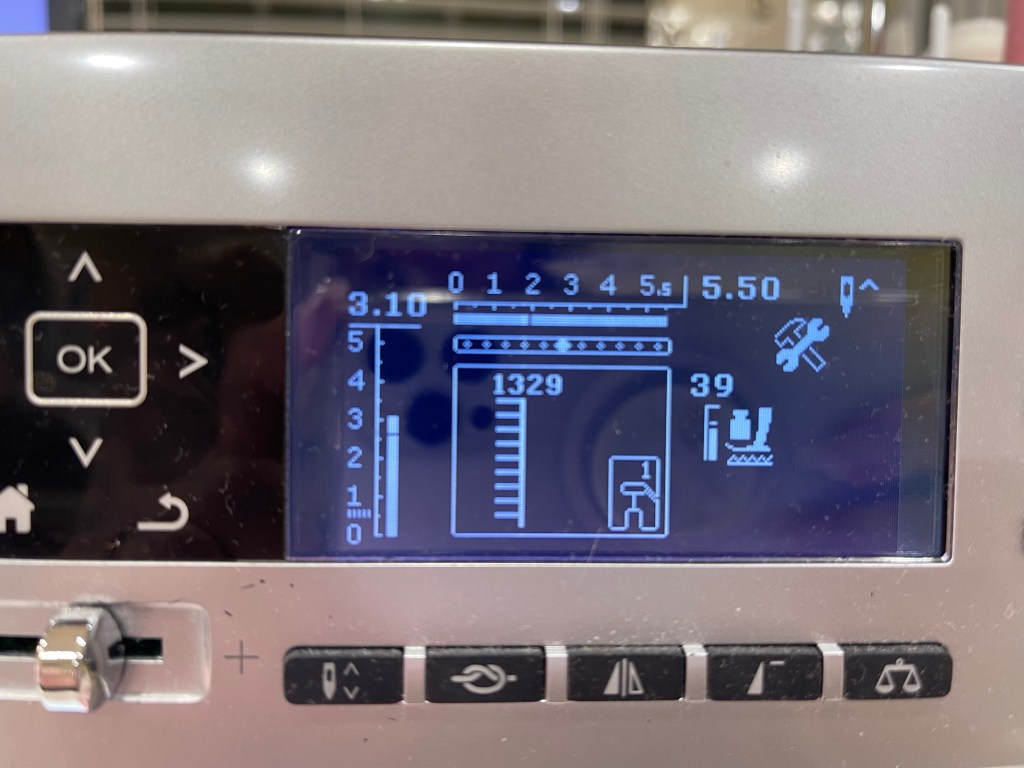
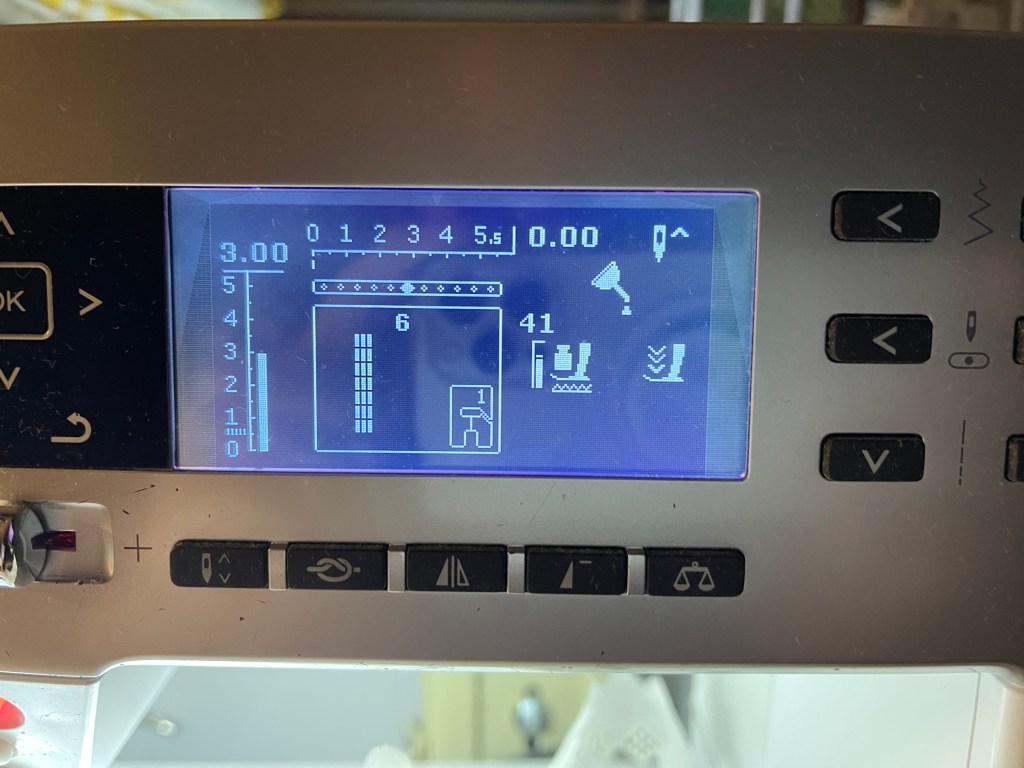
Next, using a 12 weight black thread from Aurifil and the Triple Stitch on my machine I stitched the black lines. Below you’ll find what the stitches look like on my sewing machine screen:

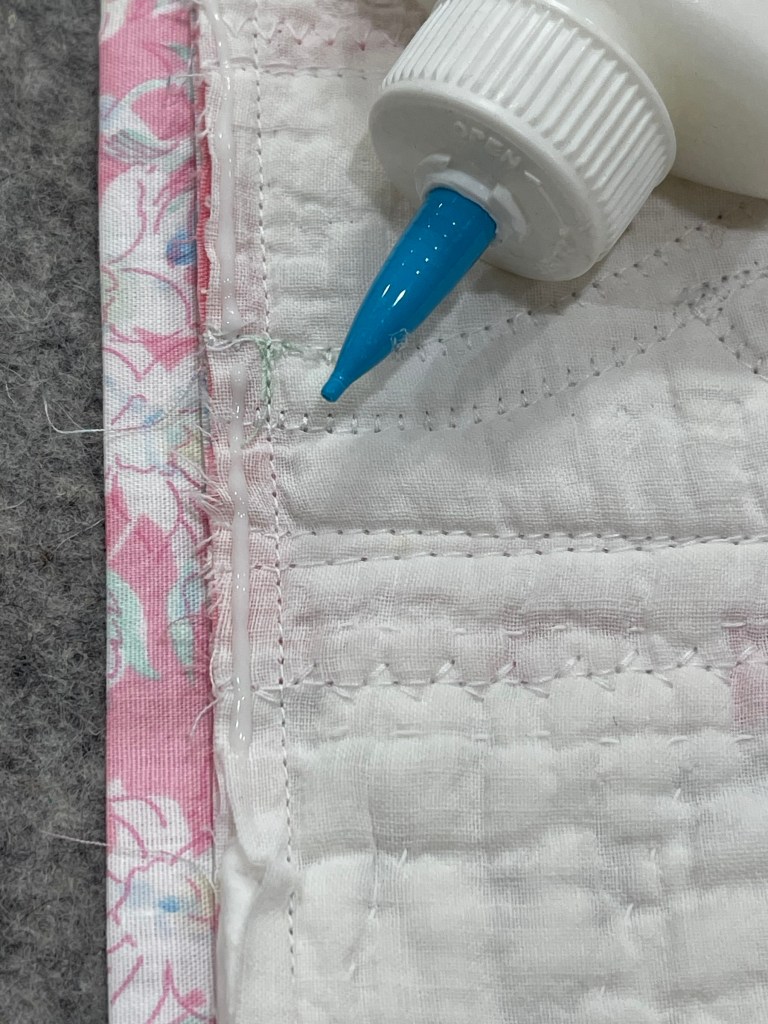
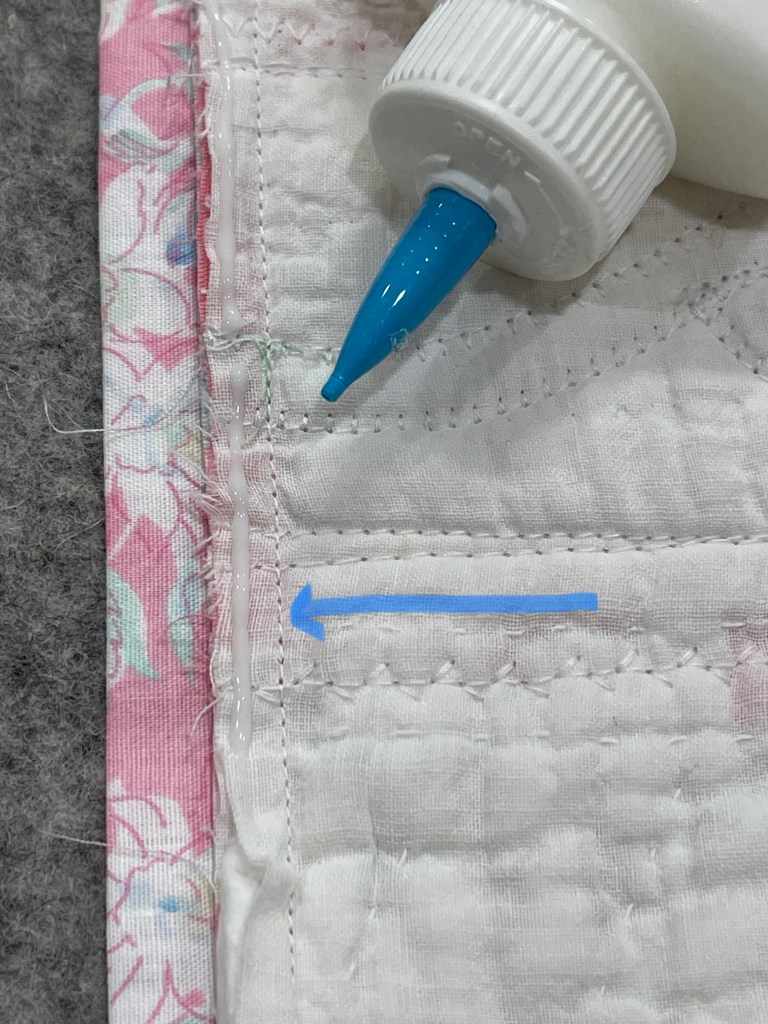
There’s a lot going on in the above pic, I’m using my Sue Pellon ruler to draw (with a black Pilot Frixion pen) the undulating lines for the green vine to follow. I wanted some consistency so I red tape marked where the ruler should be placed on the sashing strips.
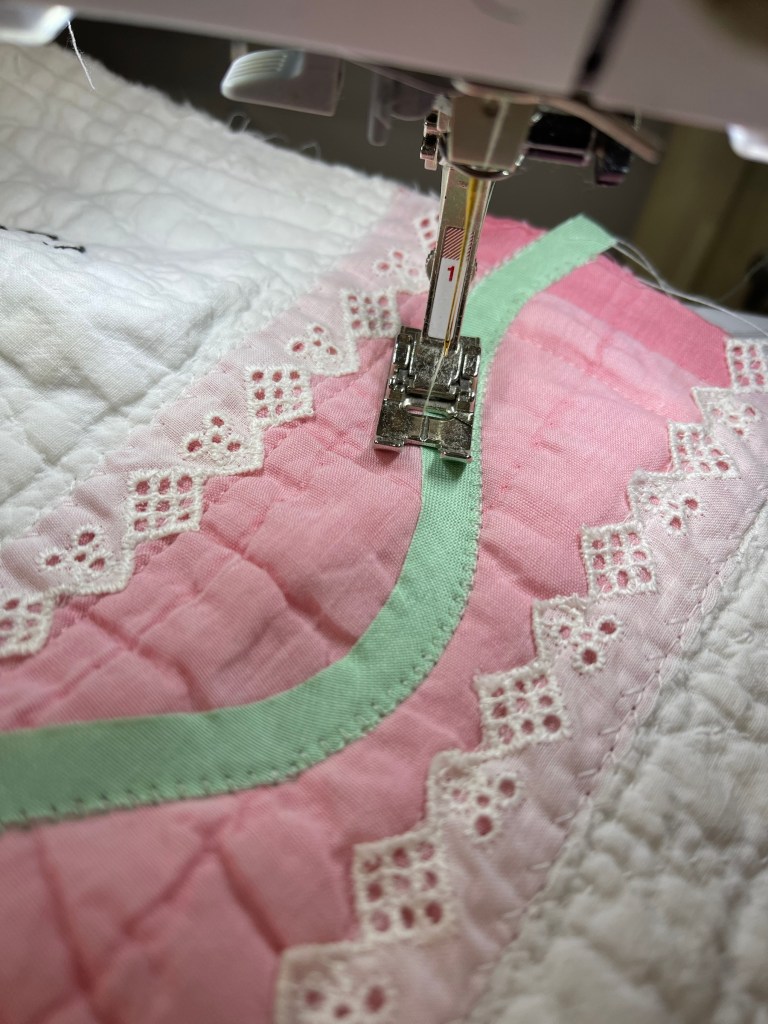
The green vines, cut on bias, are held in place with Elmer’s Washable School Glue and you may notice the glue bottle has a blue tip? it’s the end of a mechanical pencil and produces such a nice narrow line of glue!

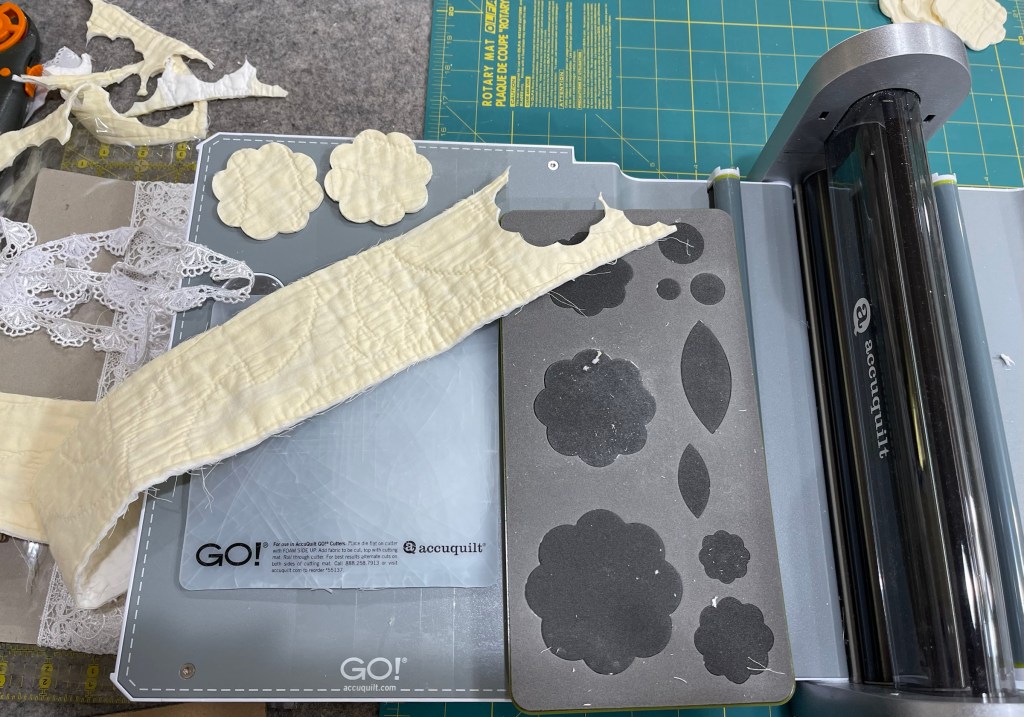
The cornerstones in the quilt sashings need flowers! I’m using my Accuquilt Cutter and Die to cut flower shapes from old very worn and torn quilt pieces.
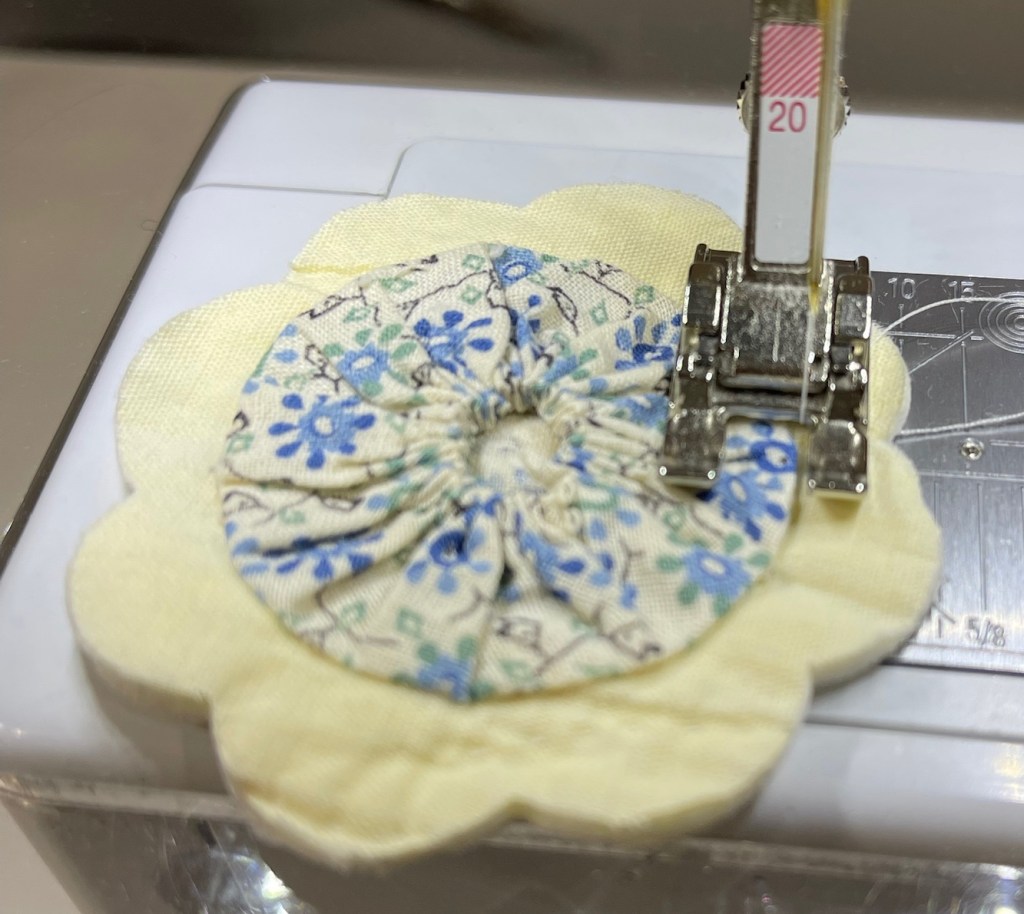
Each of the yellow old quilt flowers gets a vintage yo-yo machine stitched to the center.
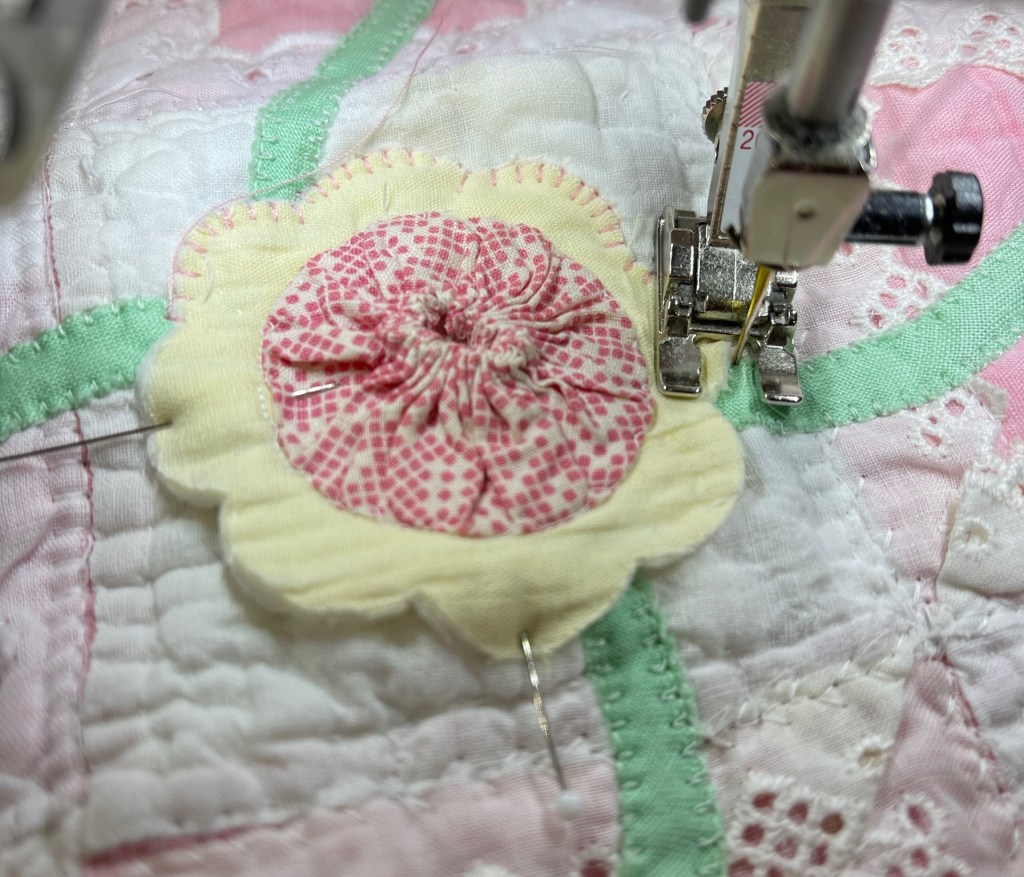
Once the yo-yo’s are secured, the unit is machine appliqued to the quilt.
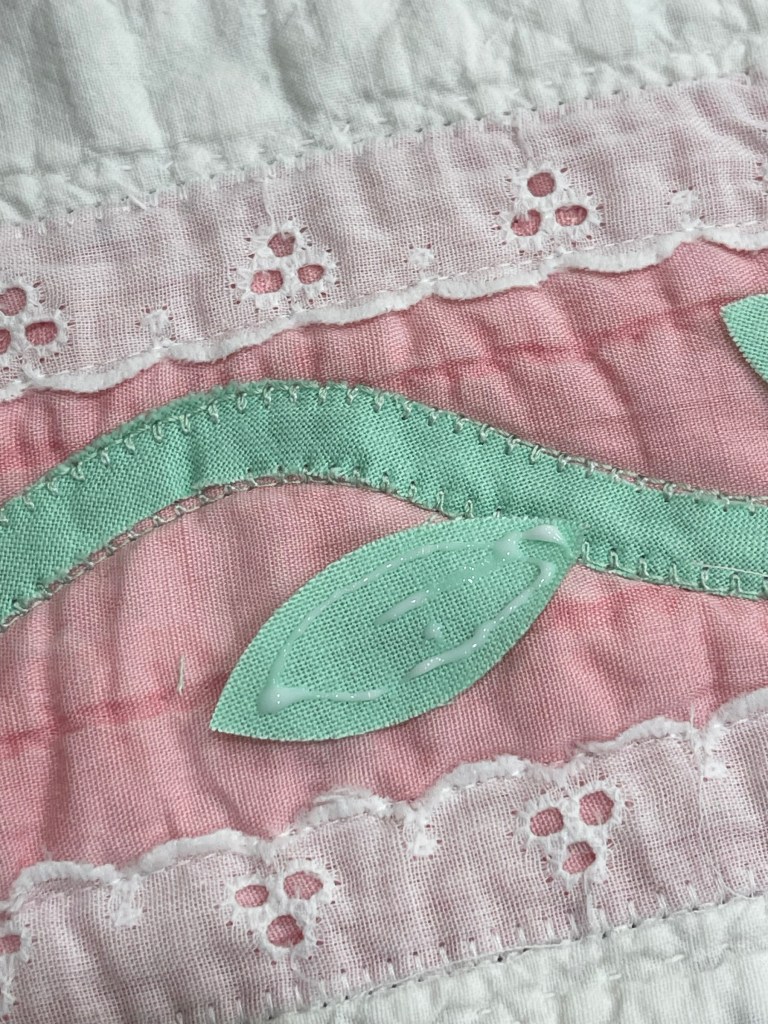
And the green leaves…all 160 of them…glued, pressed to dry and machine applique stitched. (And yes, I did fix the bad stitching on the vine)
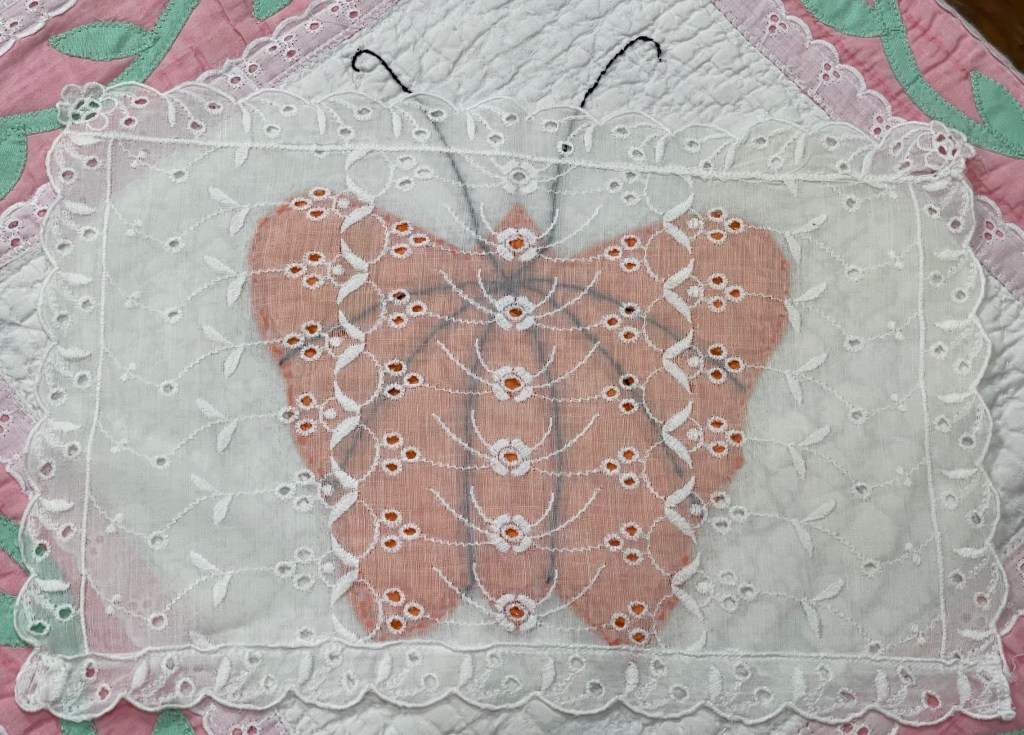
Remember the original quilt and the orange Butterfly? It got a lovely make-over by laying a small light ivory eyelet doily on top. I ran a very thin bead of glue around the outer edge of the orange Butterfly, carefully placed the doily atop, iron pressed to dry the glue and then carefully trimmed away the excess doily.
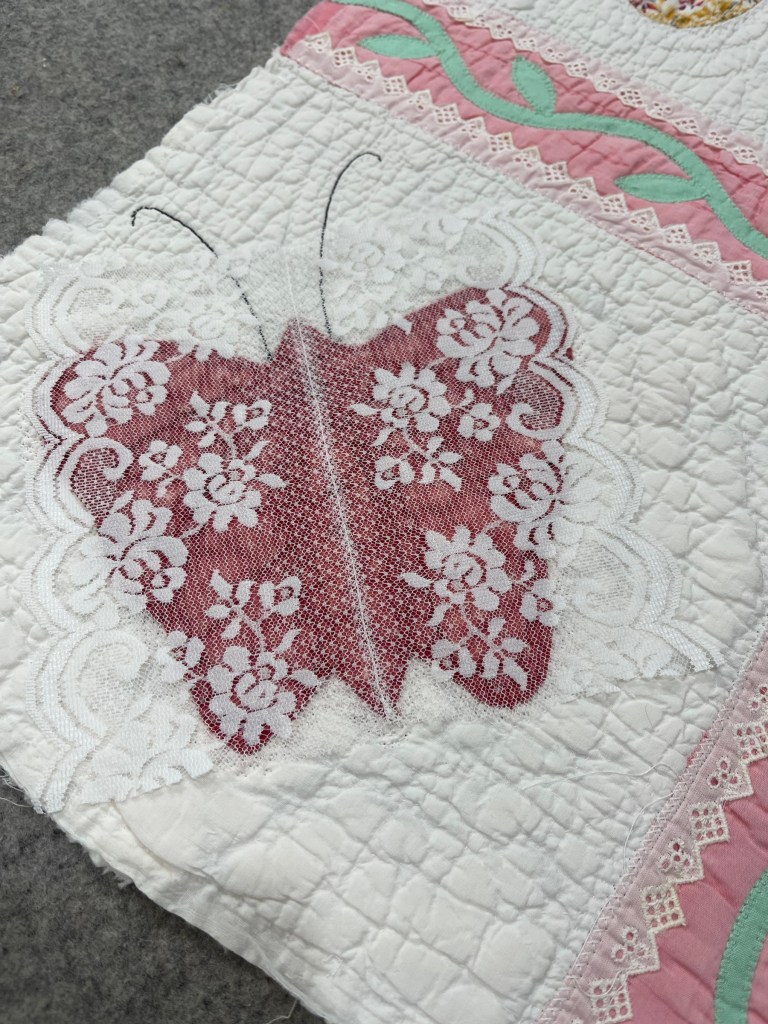
The deep red Butterfly got basically the same treatment as the orange but this time I used white lace.
This method of “no-pin” fold over binding was an experiment for me. I used the regular method of pinning the binding to the front side of the quilt and stitching. I then opened up the seam and steam pressed. My next step was to flip the quilt over to the back side, run a thin bead of glue at the edge of the quilt seam, fold the binding to the back covering the stitch line and iron press dry.
Success! I was “pin free” as I hand stitched the binding down. Note: if trying this, do not!!!…do not glue close to or on the machine stitch line. It is very difficult to hand stitch your binding closed thru dried glue!
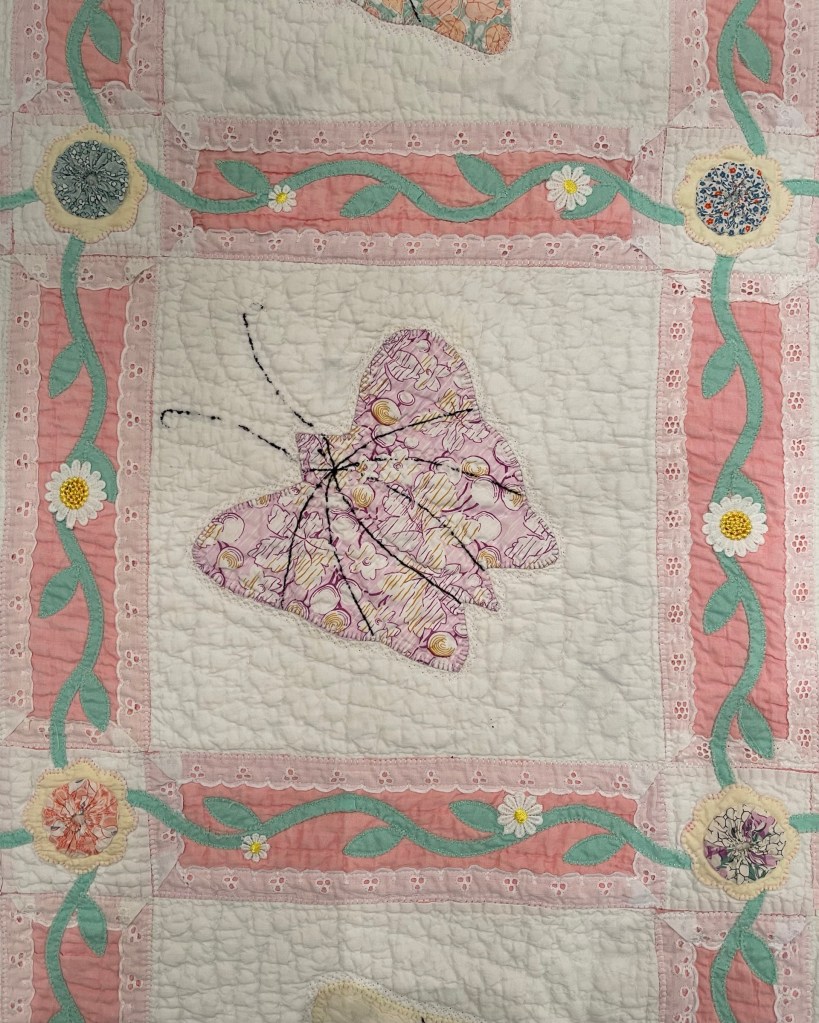
The vines needed flowers! I found these new daisy flowers in my stash, I think they are perfect for the sashings.

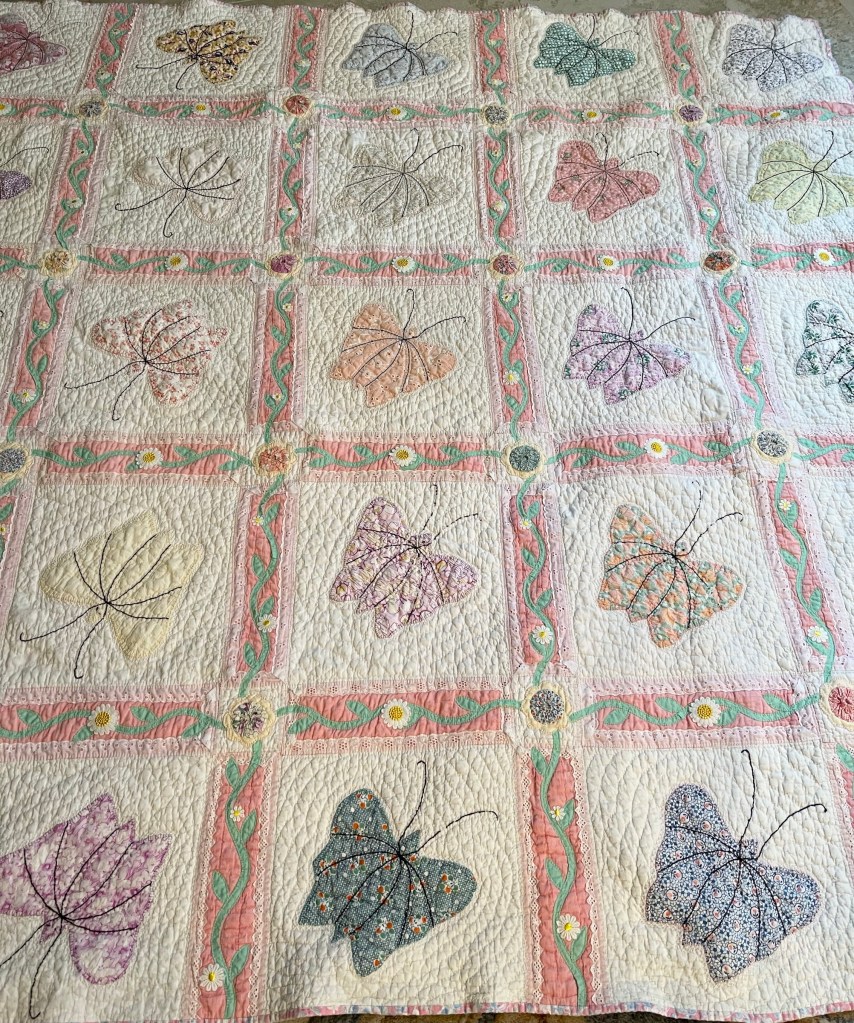

I just love this quilt rescue, I hope you do too! Blessings and Happy Quilting! Rhonda

I’m so thankful to have found your blog! My grandmother made a butterfly quilt from scraps of old shirts and dresses that had belonged to my mother and her 6 siblings. She gave it to me for my 10th birthday, that was over 42 years ago! The quilt was well loved and heavily used, it went to camp one year, my college dorm, and finally hung on the wall of my first baby’s room. At some point my four daughters each took a turn having it until it began to look desperately worn so I wrapped it in tissue and stored it away. Seeing your beautiful rival of the worn butterfly quilt has inspired me to pull my quilt from the cedar chest and start plans to make her beautiful and useable again. Thank you!!
LikeLiked by 1 person
❤️ Thank you for your kind words and best wishes for A wonderful “save the quilt” project!
LikeLike
Such inspiring work. I have a 100 year old quilt from the farmhouse my dad was born in. It is very damaged but I can’t bear to cut it up! How do I handle frayed, holes, on bothe the front AND the back?
LikeLiked by 1 person
Often times these frays, holes, etc. can easily be repaired by appliquéing fabric pieces/shapes directly over the damaged areas. If you don’t belong to the private Facebook page titled Quilting Vintage, you might want to join. The members can offer a wealth of information and help.
LikeLike
I admire your skill and creativity!
LikeLiked by 1 person
Thank you!
LikeLike
I love to see you “work your magic”. Your creativity always astounds me.
LikeLiked by 1 person
Thank you!
LikeLike
Thank you for sharing your wonderful methods for saving old quilts!
LikeLiked by 1 person
Thanks!
LikeLike
Fantastic, and Congratulations! I love Butterflies & Quilts but neighbor doesn’t
like either one. Sew, I’ll continue to Quilt & Plant for my Butterflies. Thanks
for sharing. Rosemary Clark
LikeLiked by 1 person
Thank you!
LikeLike
What a beautiful finished quilt. Thank you for the step by step methods. I learned a lot that I will use on a very old Victorian Crazy Quilt with lots of embroidery . My first comment but I have learned so much from your skills….THANK YOU !!
LikeLiked by 1 person
Thank you!
LikeLike
You did a fantastic job! What a tropper you are!
LikeLiked by 1 person
Thanks!!
LikeLike
Oh, my goodness. Your quilt is absolutely beautiful. You are amazing! I alway enjoy seeing your before and after quilts.
LikeLiked by 1 person
Thank you!
LikeLike
Totally wonderful, Rhonda. Sometimes, I think, I’m not really enthused by one of your processes, but the results are perfect and I always change my mind. 🙂 Your ‘eye’ is spot-on!
LikeLiked by 1 person
Thank you!
LikeLike
So many ideas, I need to make some notes – I didn’t know about pressing glue dry, and the pencil tip is brilliant, not to mention the binder template. And of course, your makeover of the quilt is the best.
LikeLiked by 1 person
Thanks!!
LikeLike
Your sewing is beautiful. Thank you for sharing. I enyoed it very much.
Margie
LikeLiked by 1 person
Thanks!!
LikeLike
I ABSOLUTELY LOVE what you do with old battered vintage quilts to bring them back to life. The creator of the quilt would be in awe! You must be the most patient person in the world!
LikeLiked by 1 person
Thank you!!
LikeLike
I absolutely love what you’ve done to preserve this wonderful old quilt! All of the extra touches enhance it so beautifully! Thank you for sharing its journey!! Another quilt saved!
LikeLiked by 1 person
Thanks!!
LikeLike
Wow. I’m blown away by the wonderful make over that you gave this beautiful aged piece. You do amazing work. I’m inspired to tackle something like this 🌹🌹
LikeLiked by 1 person
Thank you!!
LikeLike
What an amazing save. You really have me looking at vintage quilts, that most might consider a cutter, in whole new ways. You did another fantastic job!
LikeLiked by 1 person
Thank you!
LikeLike
Your rescues are inspiring! Thanks for sharing, Rhonda!
LikeLiked by 1 person
thank you!!
LikeLike
Amazing. Incredibly amazing.
LikeLiked by 1 person
Thanks!!
LikeLike
Another beautiful save. Your creativity never ends.
Beautiful 💕 g
LikeLiked by 1 person
Thanks sweet amazing and awesome friend!
LikeLike
Absolutely gorgeous work 🦋 I enjoy seeing all your amazing projects!
LikeLiked by 1 person
thank you!
LikeLike