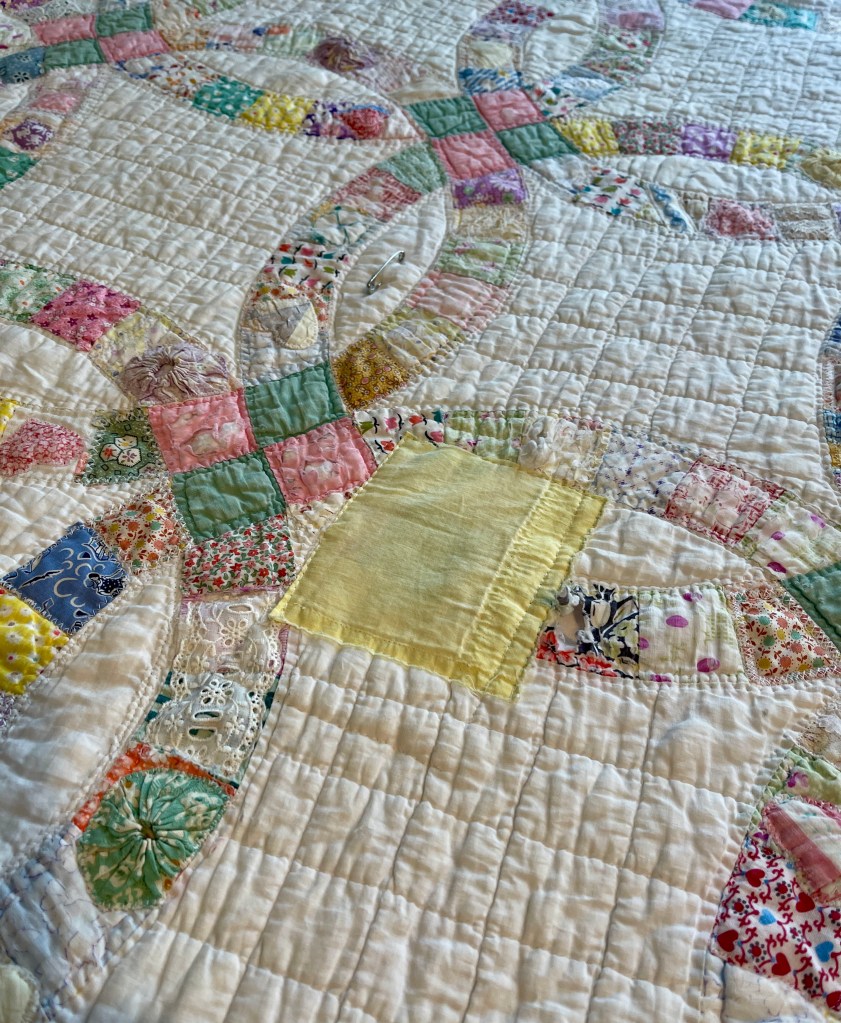
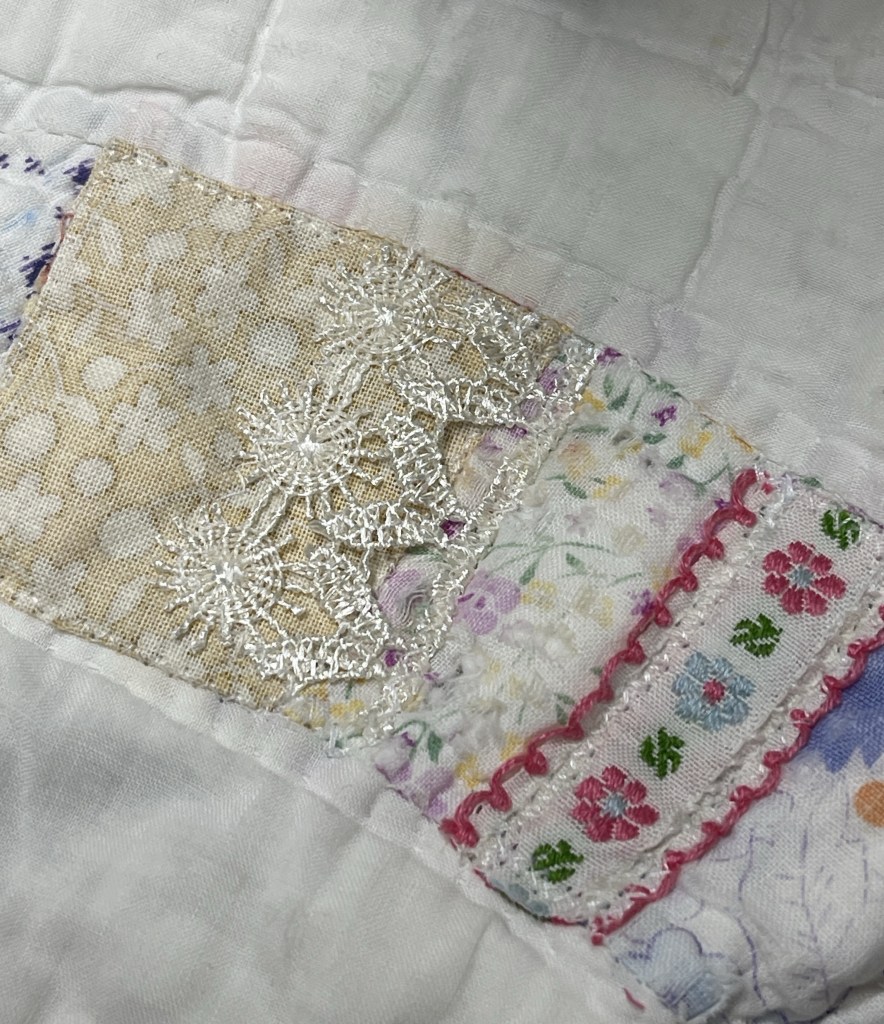
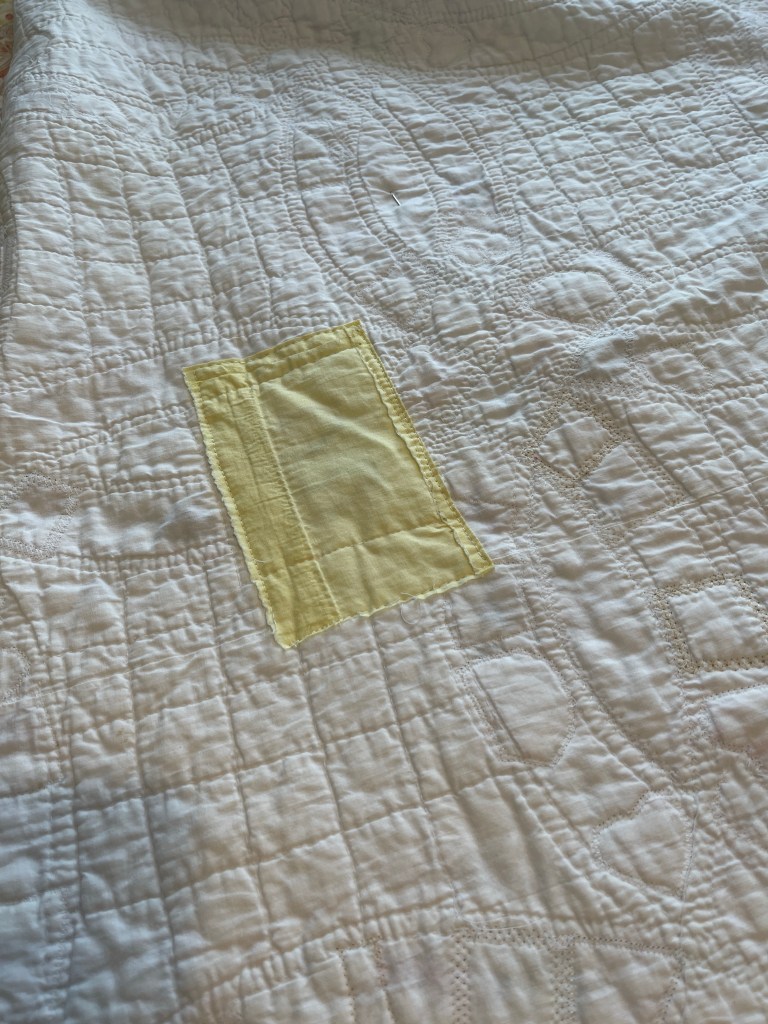
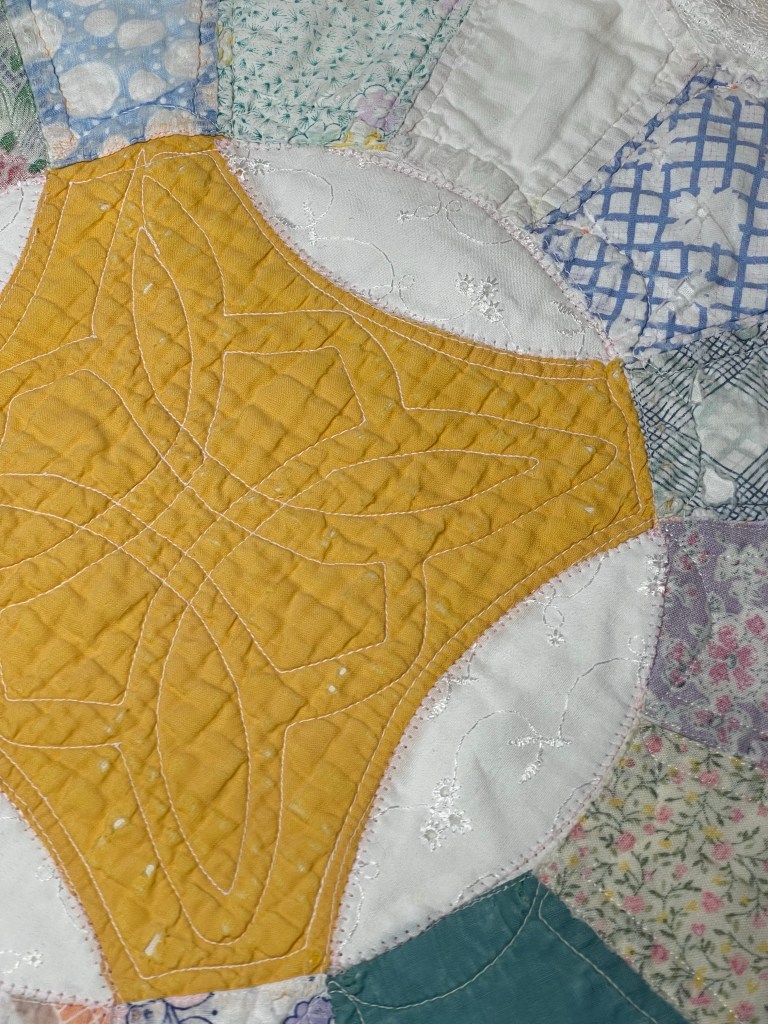
Working my way through all of the fabric patching and machine decorative stitching, it was time to address the hole in the quilt temporarily covered by the large yellow square.
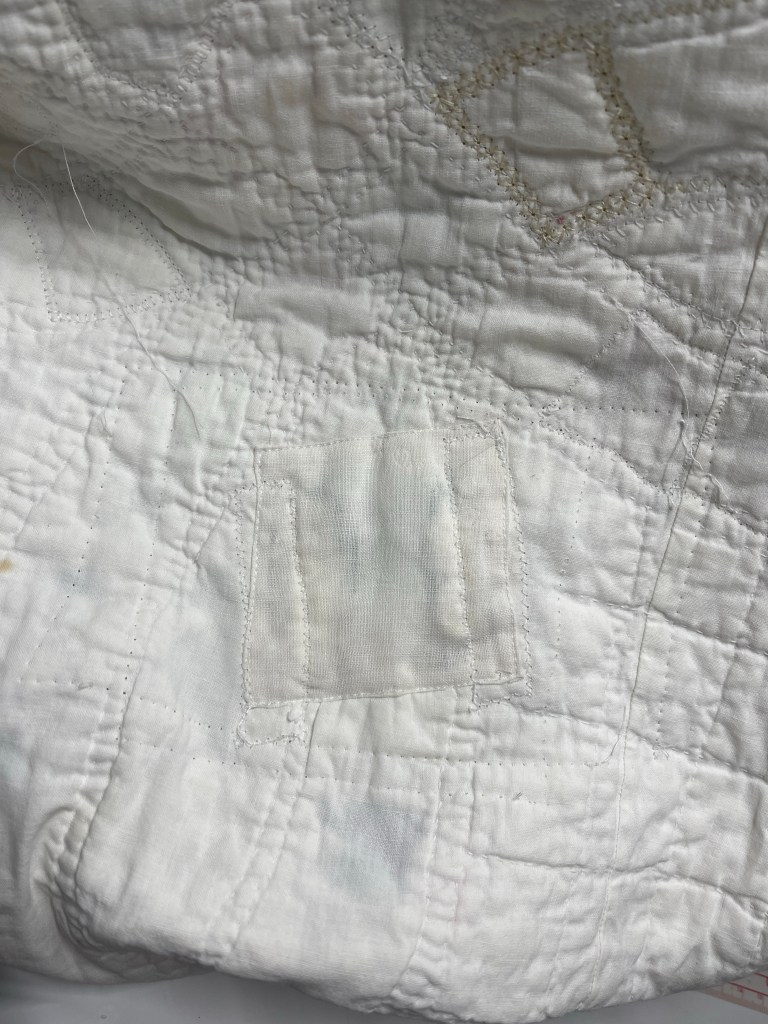
I saved the vintage muslin back of a small baby quilt and found it matches the muslin in this quilt almost perfectly. A 3” square covered the quilt back hole.
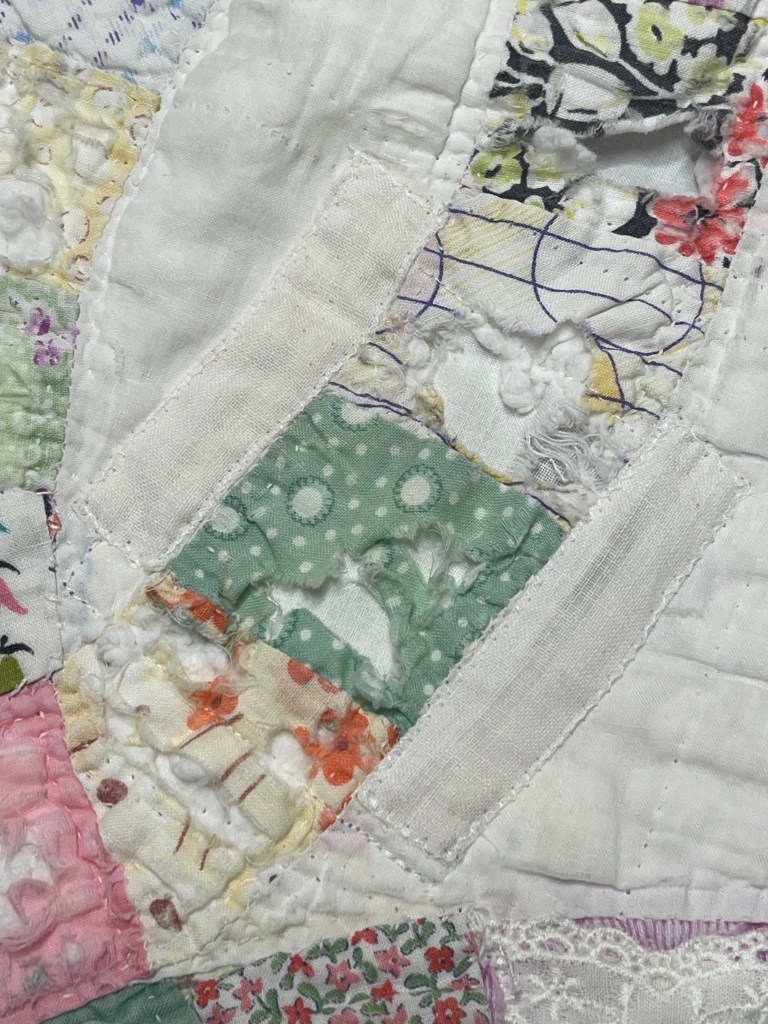
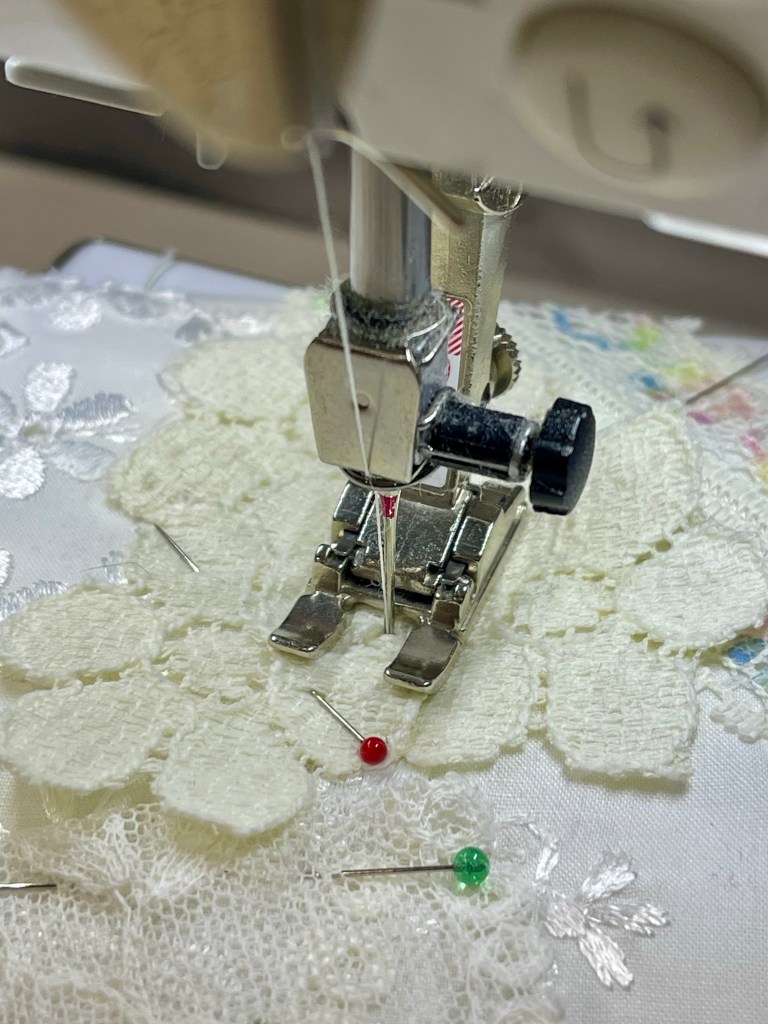
After the machine decorative stitching, the patch on the back will blend in. The quilt top hole repair needed two 3” x 1/2” rectangles.
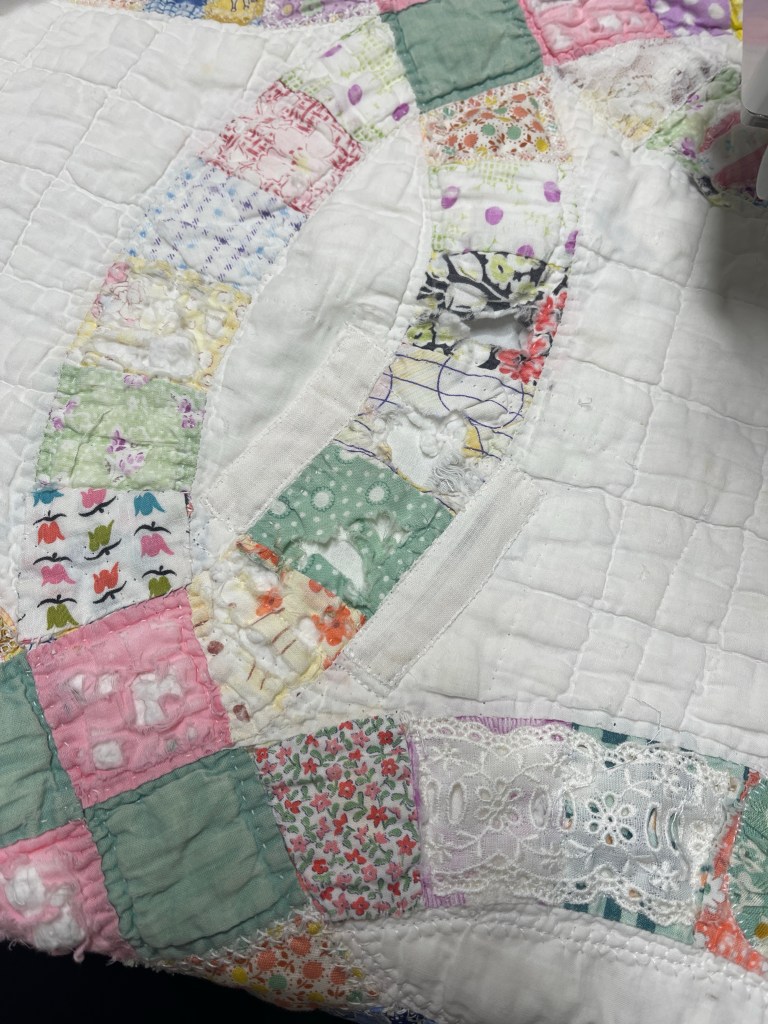
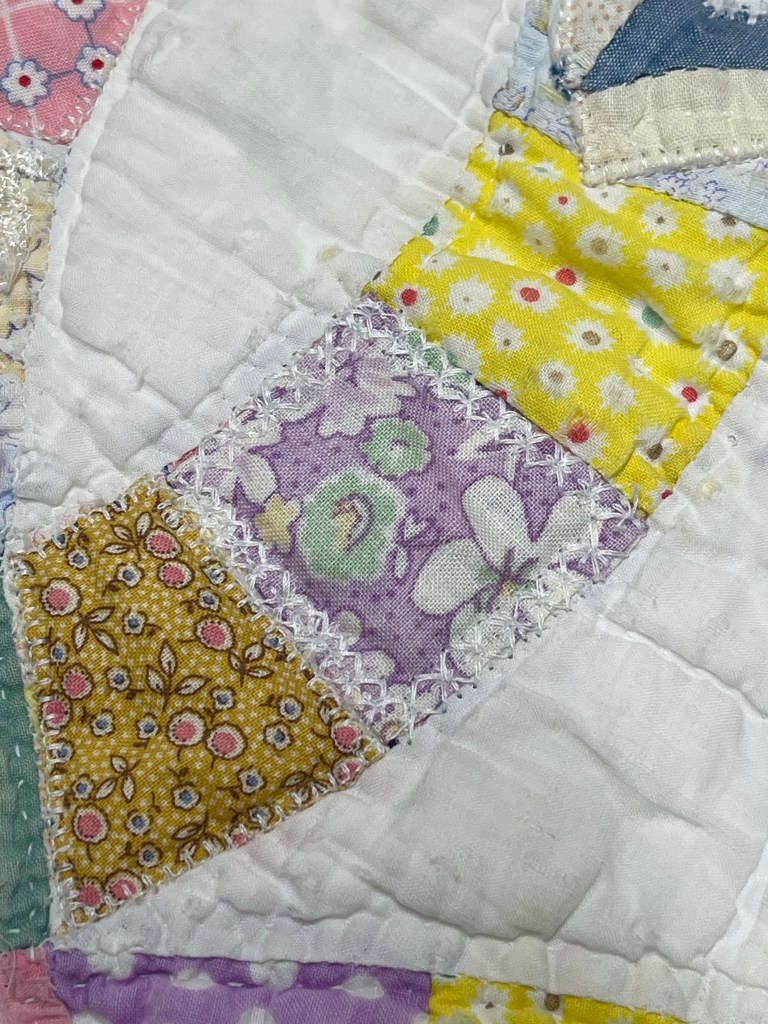
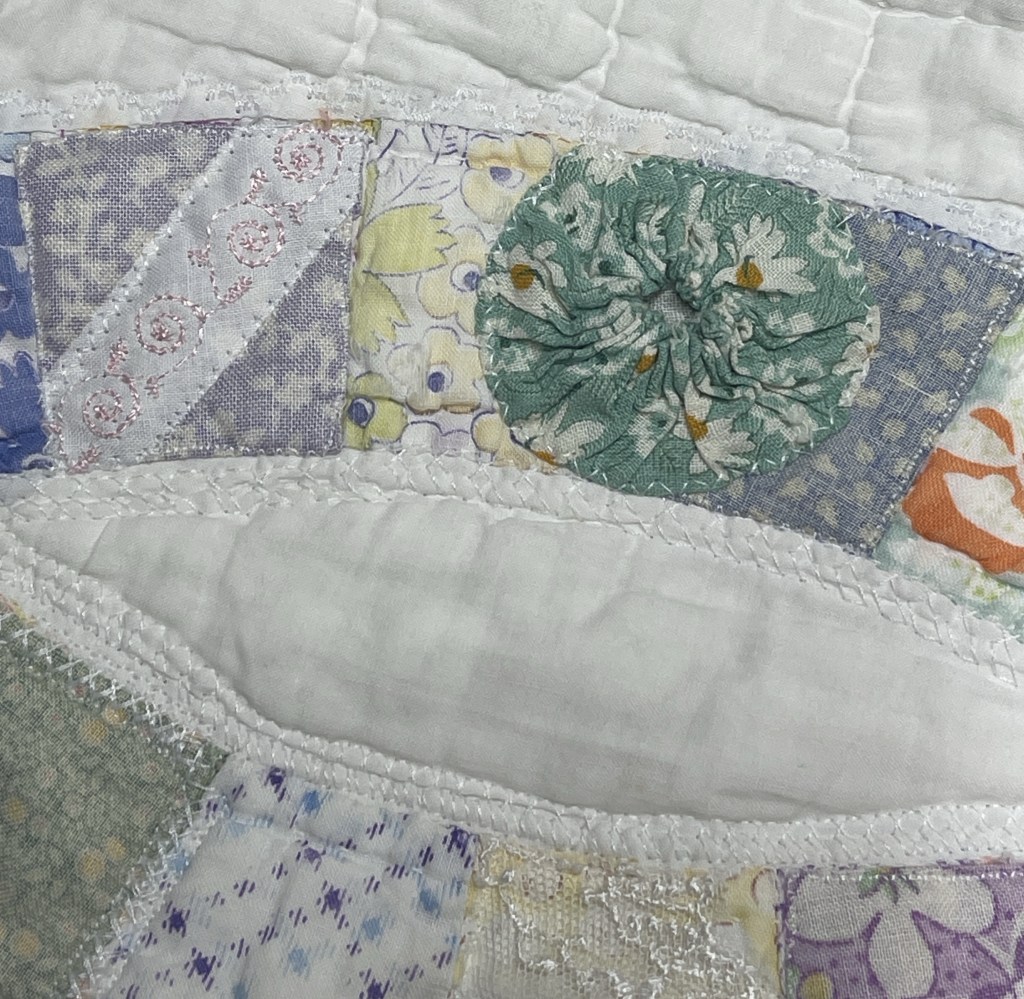
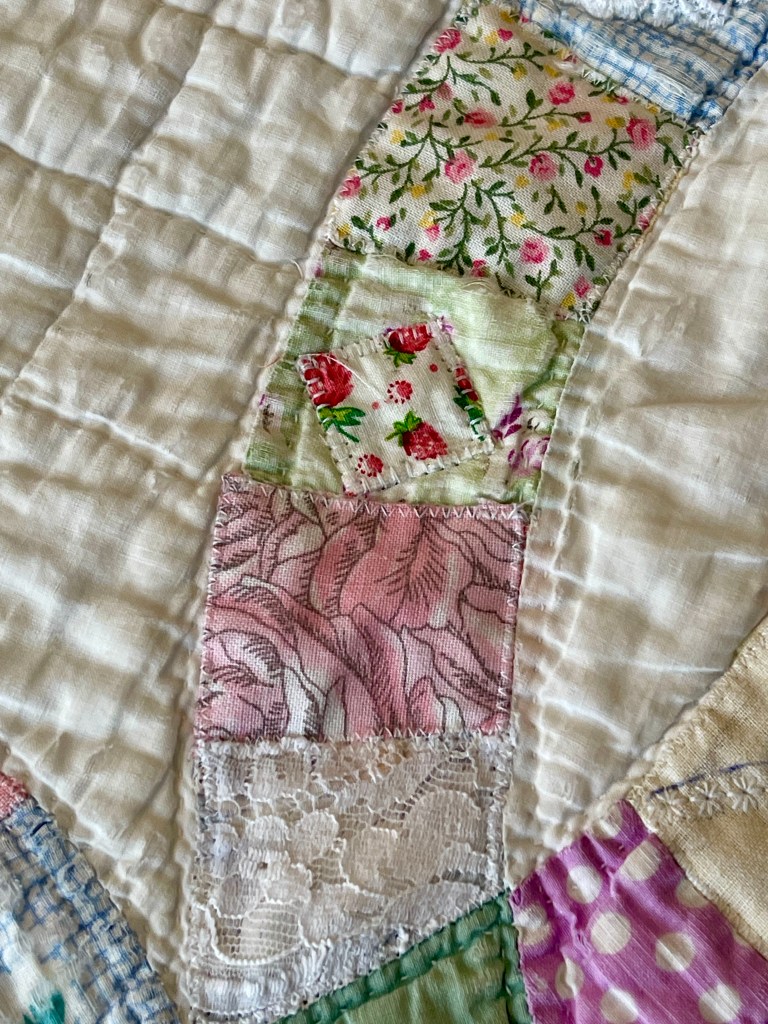
The same with these two long rectangles, after the decorative stitching, they will blend in nicely on the quilt top. You can see close-up that the fabrics in this quilt have almost deteriorated overtime and use.
The repair to the muslin (front and back) completed, it is time to take care of the printed fabric blocks.
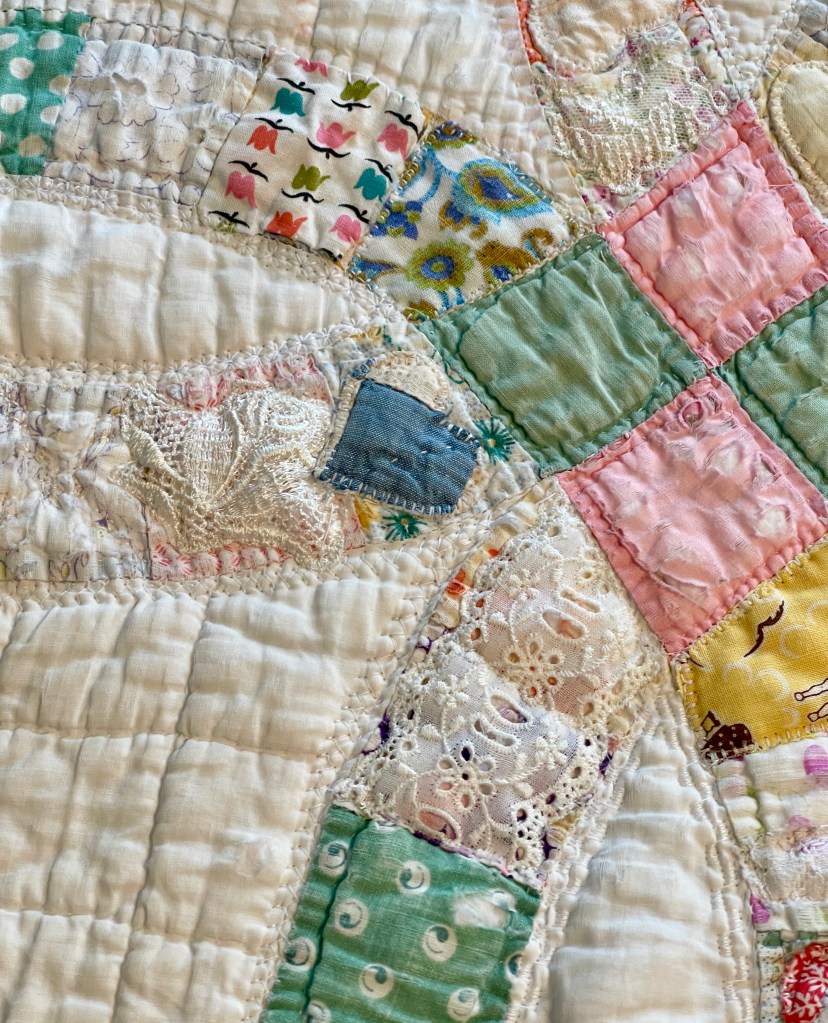
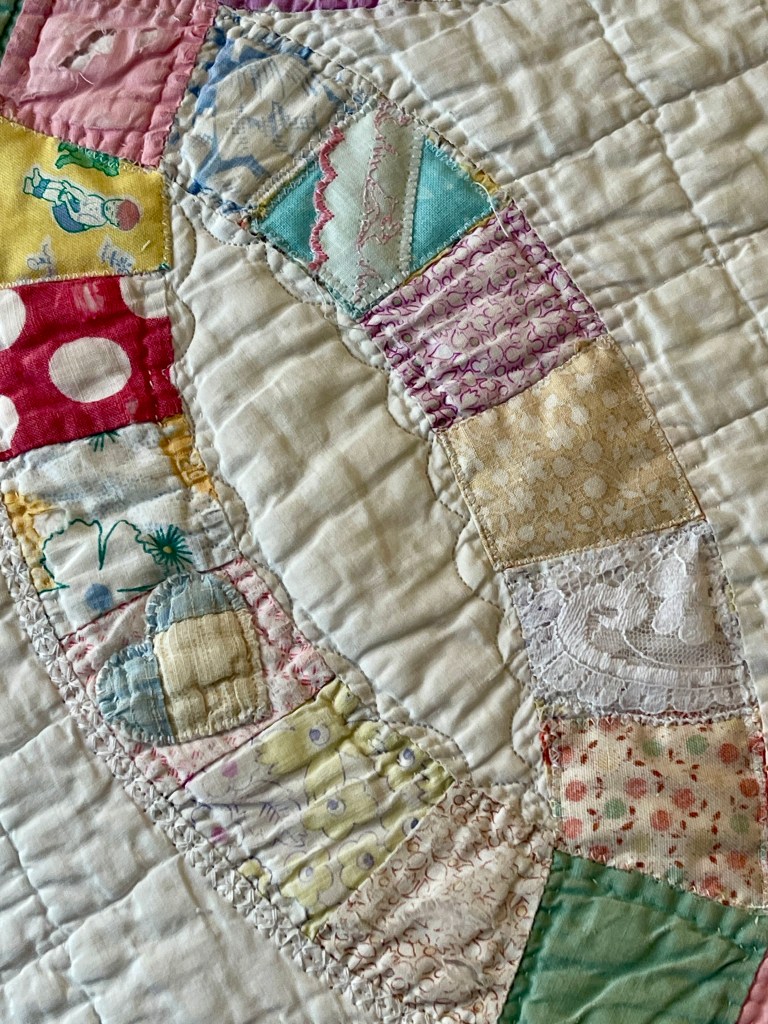
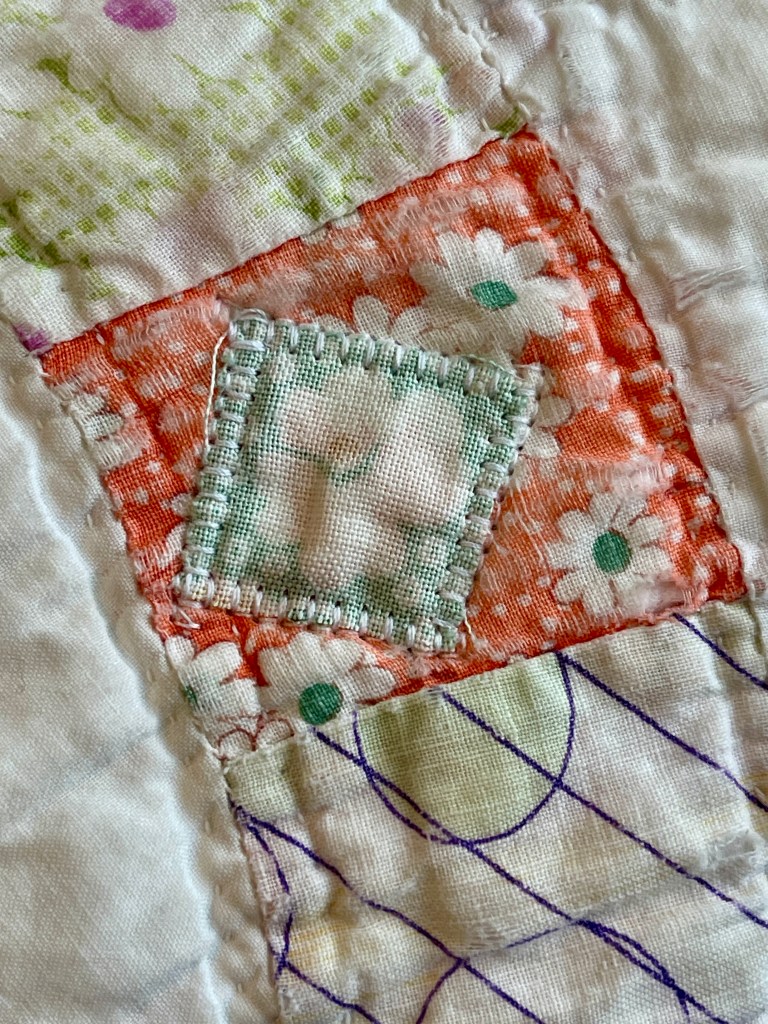
This is an example of what I did with blocks that needed repair. Sometimes I turned the fabric edges under, sometimes I machine stitched over the raw edges.
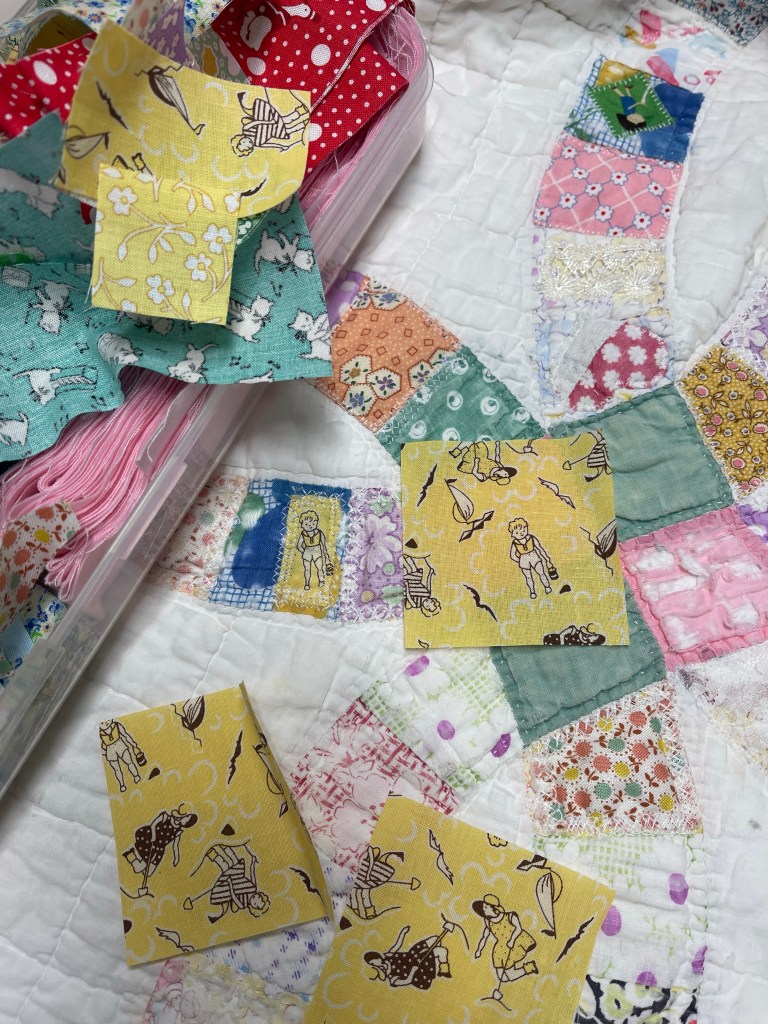
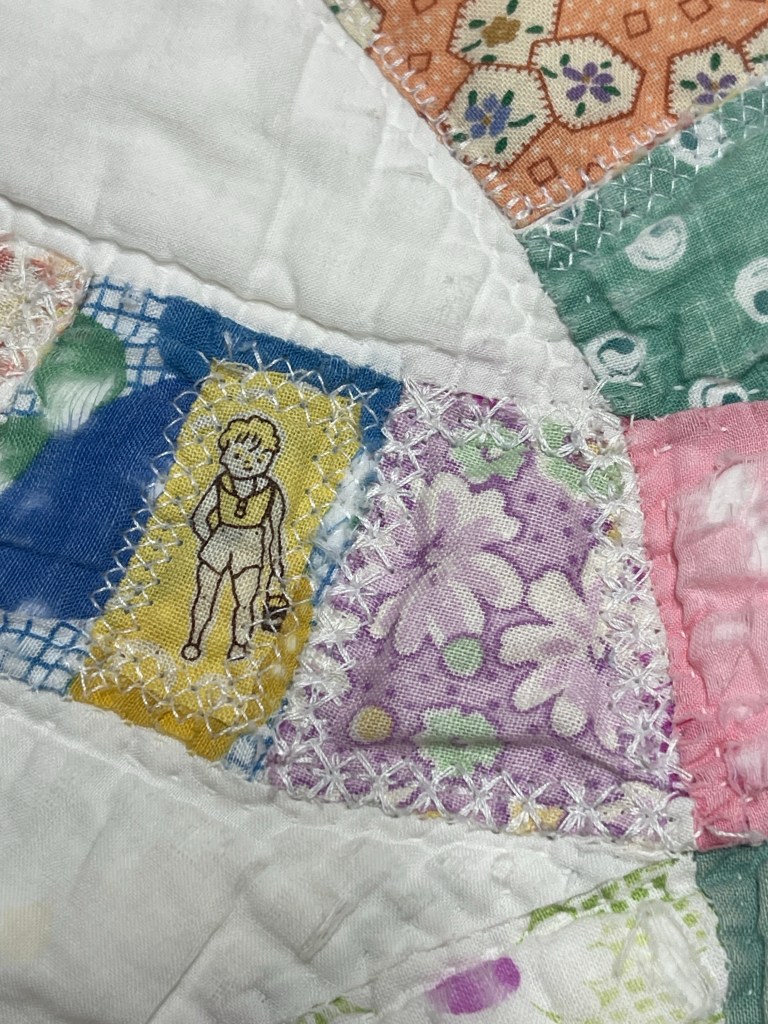
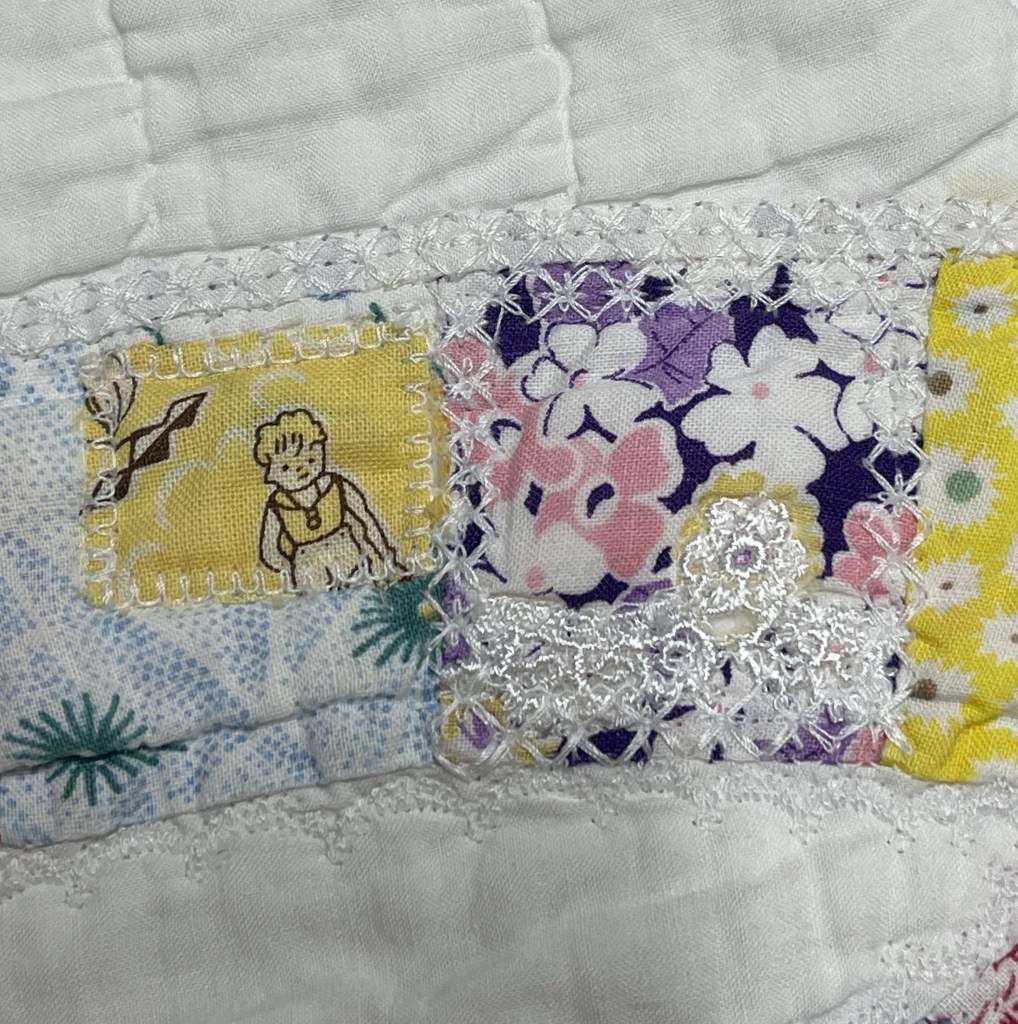
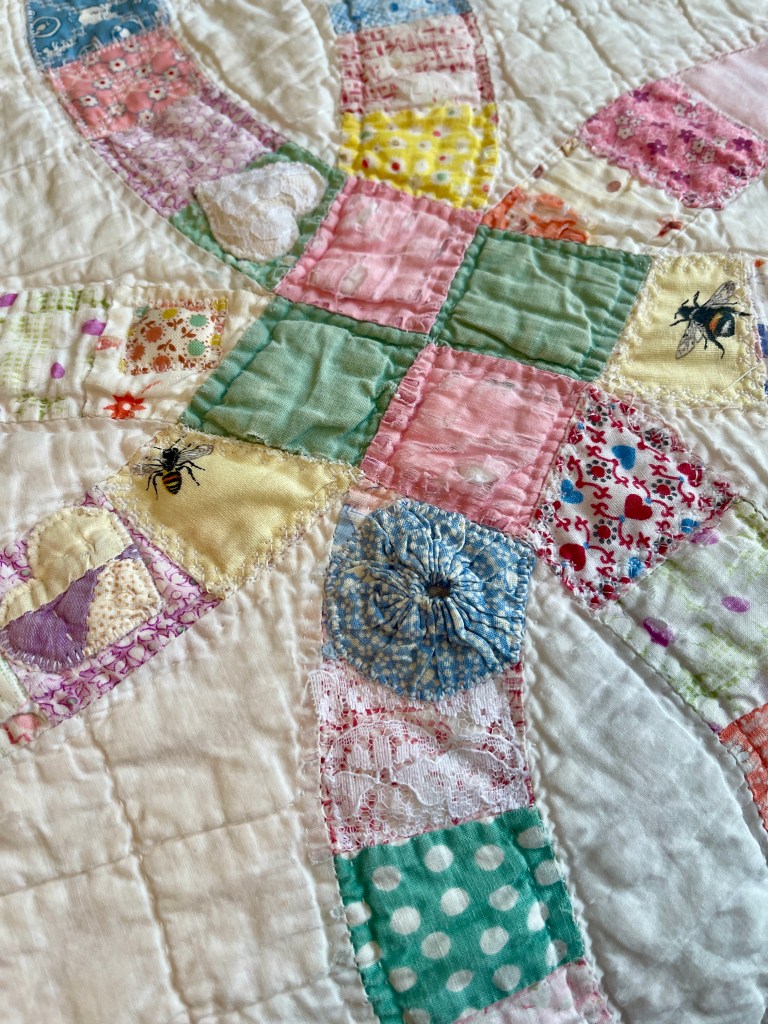
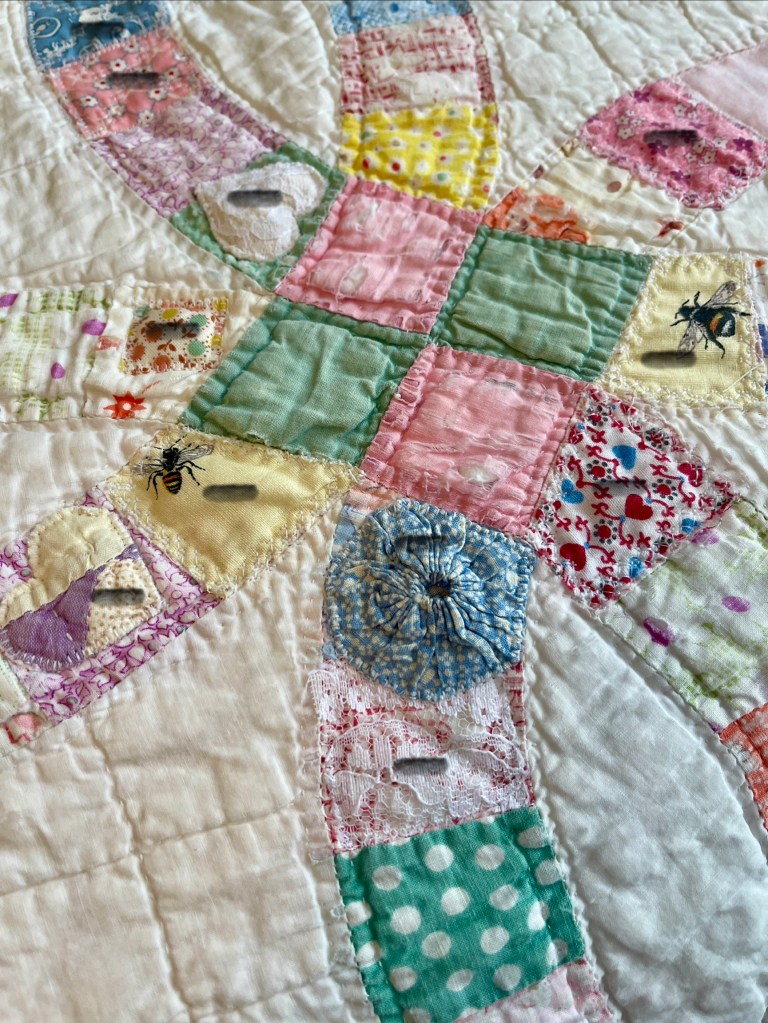
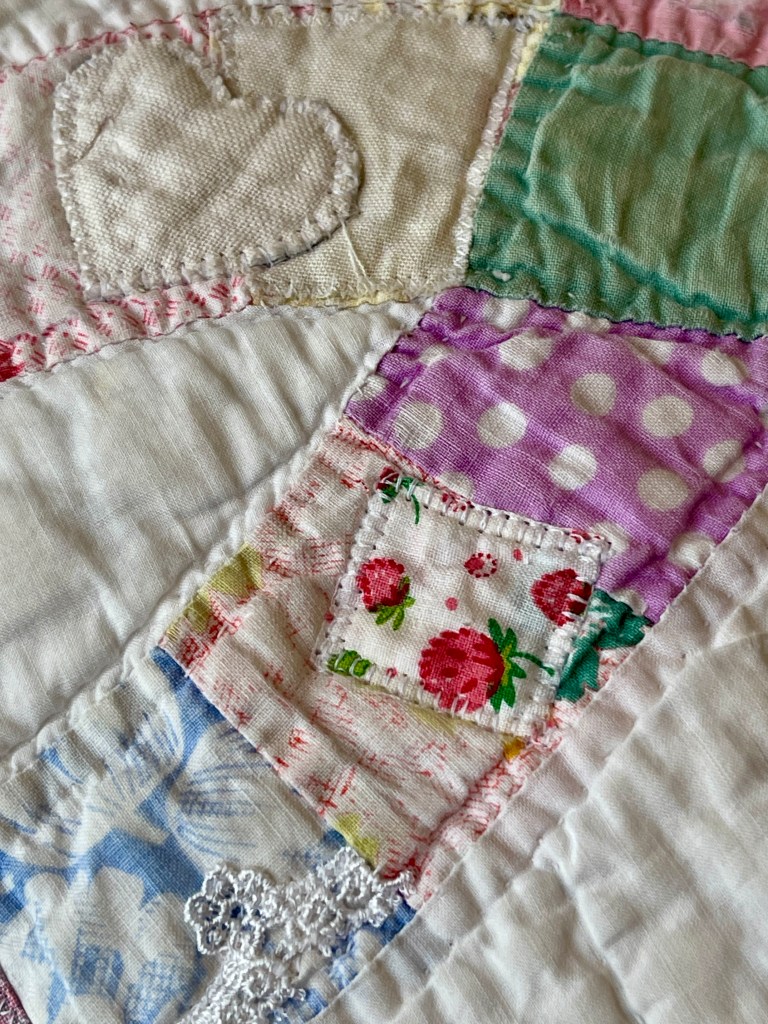
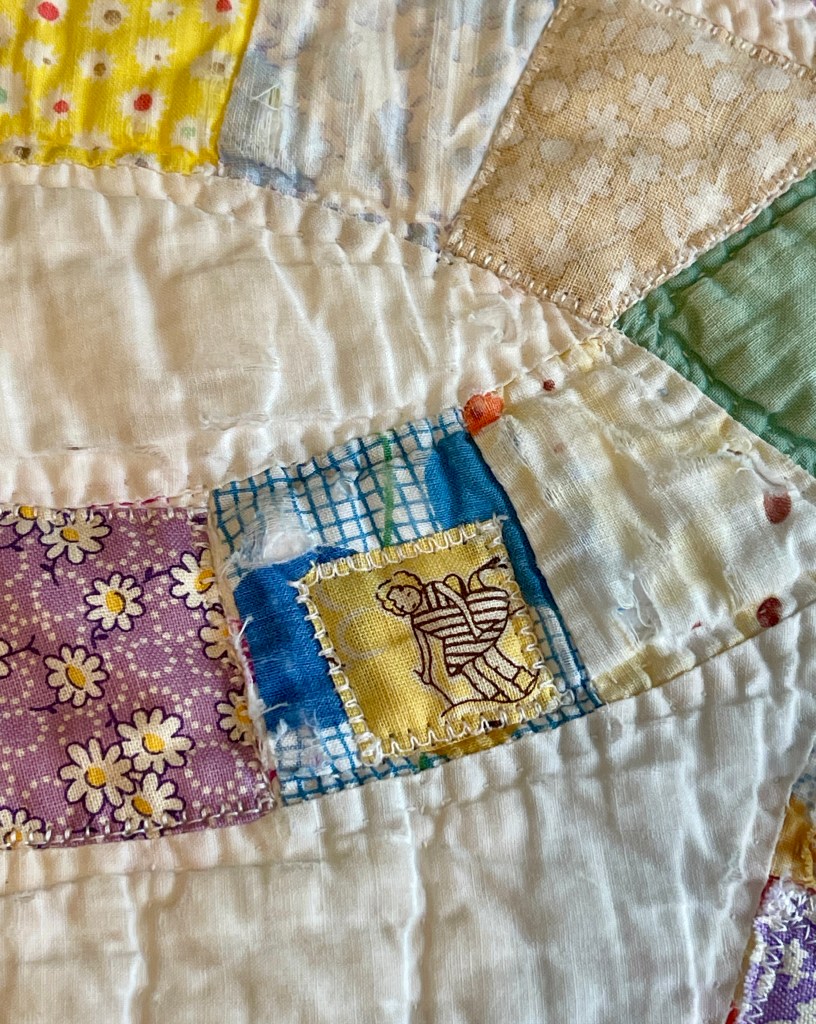
I’ve had a great time fussy cutting images from reproduction fabrics and using the tiny squares and/or rectangles to cover holes.
While upside down on the pic, the block of the child is darling!
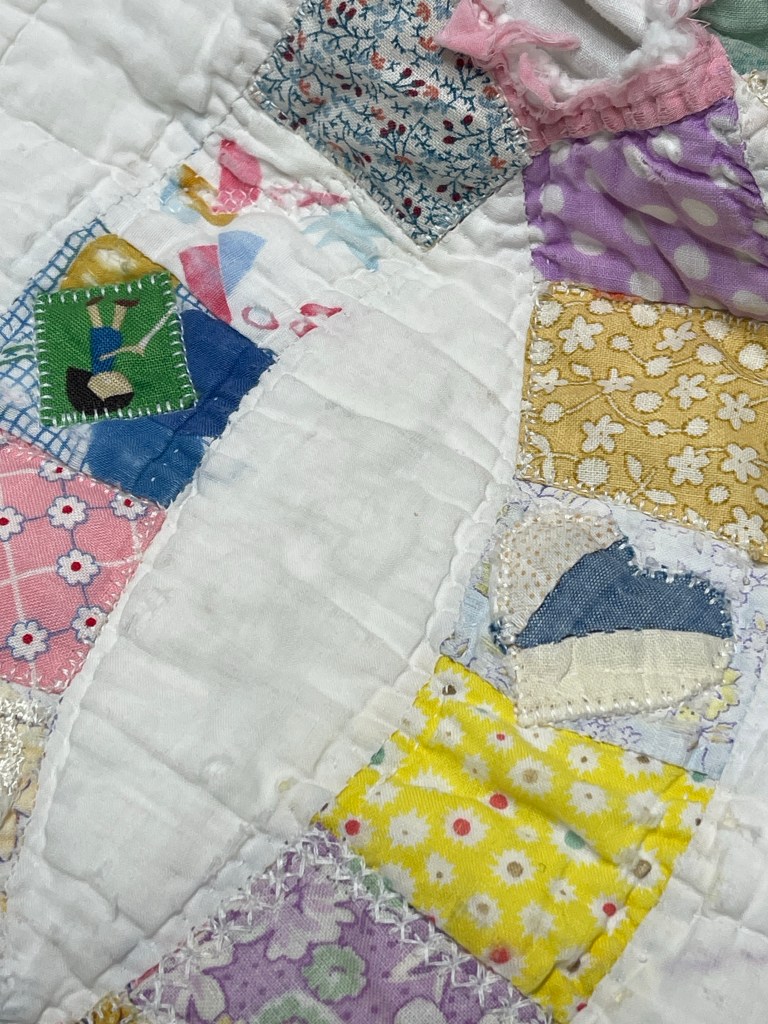
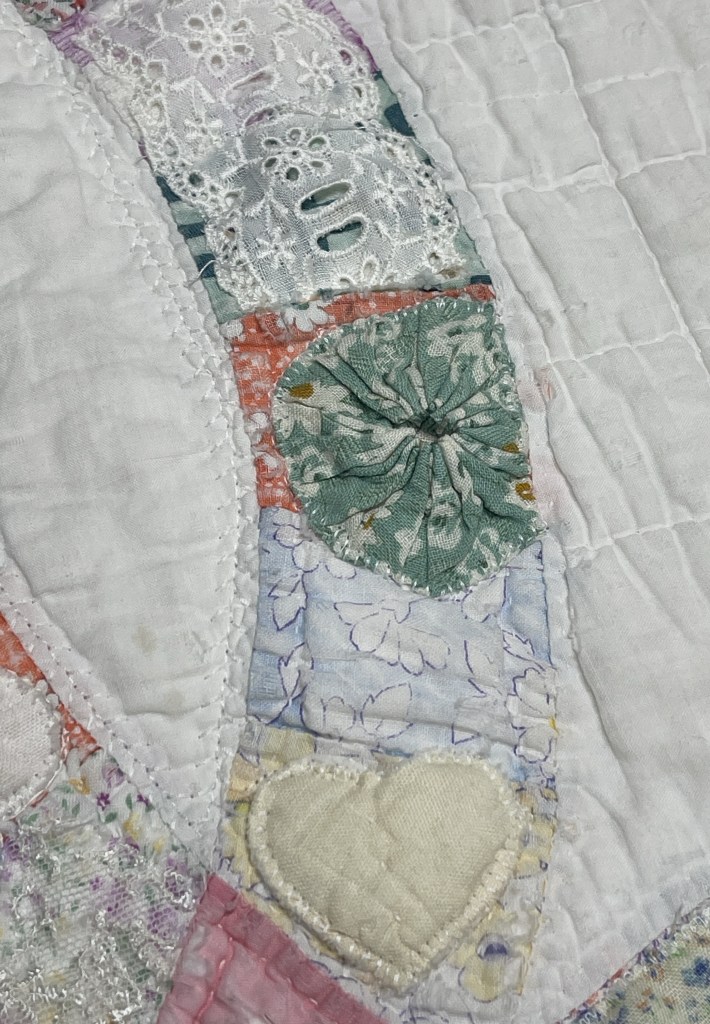
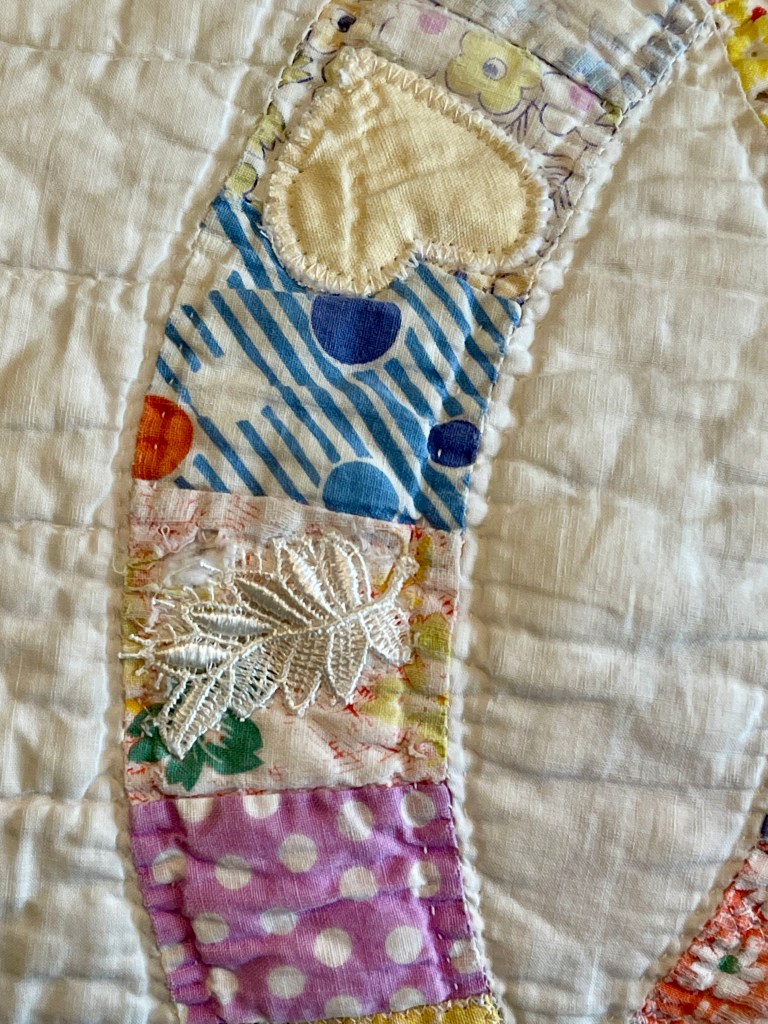
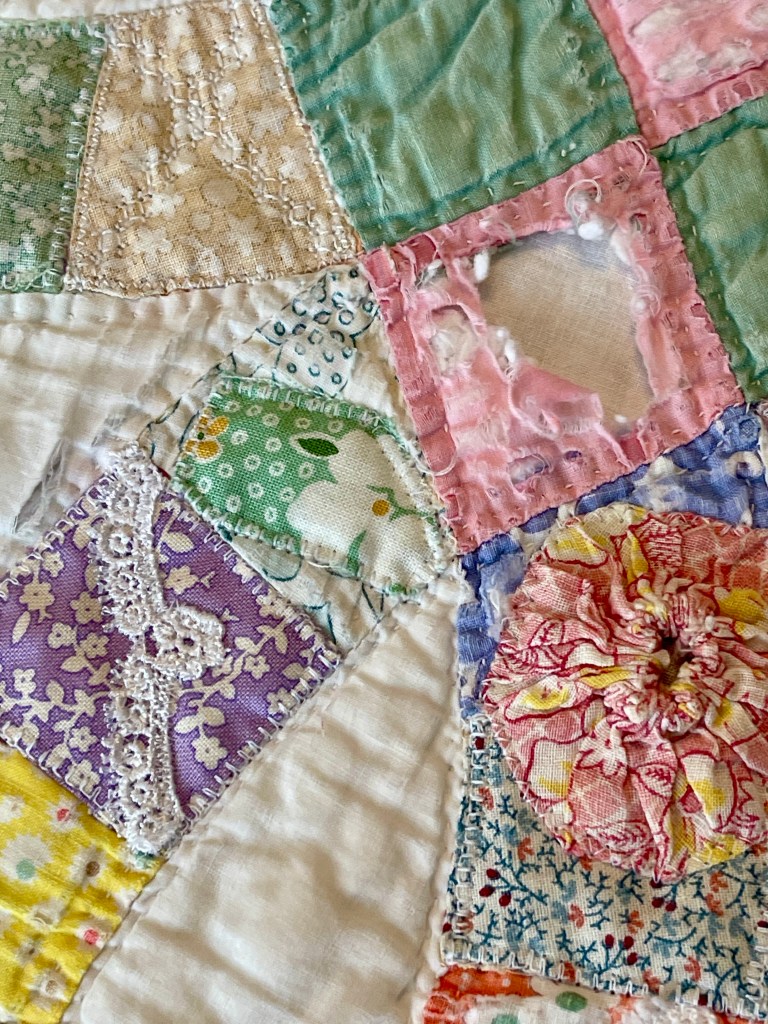
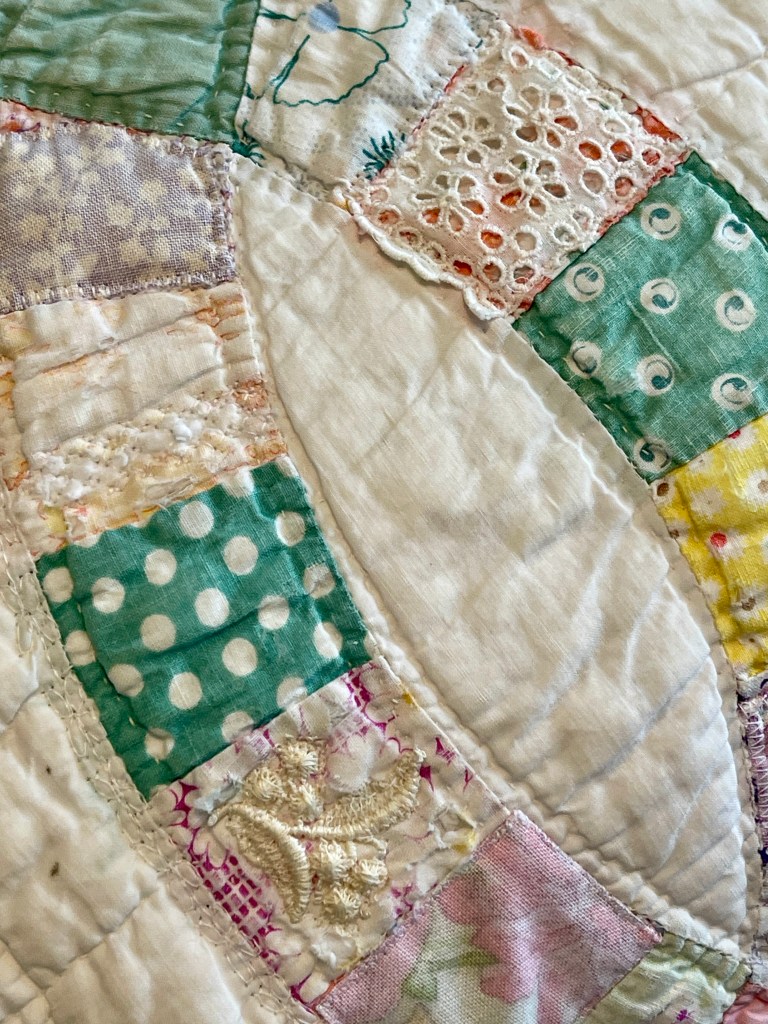
Laces and trims are perfect to either decorate or cover blemishes.
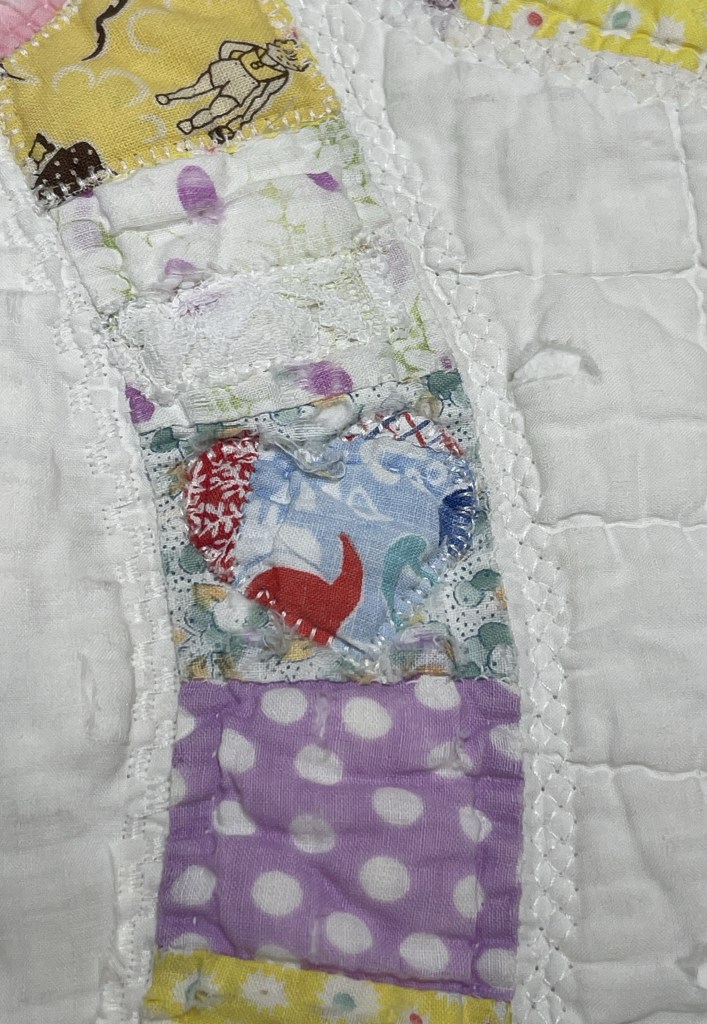
The tiny hearts cut from an old tattered quilt are perfect to cover holes in the quilt top fabrics.
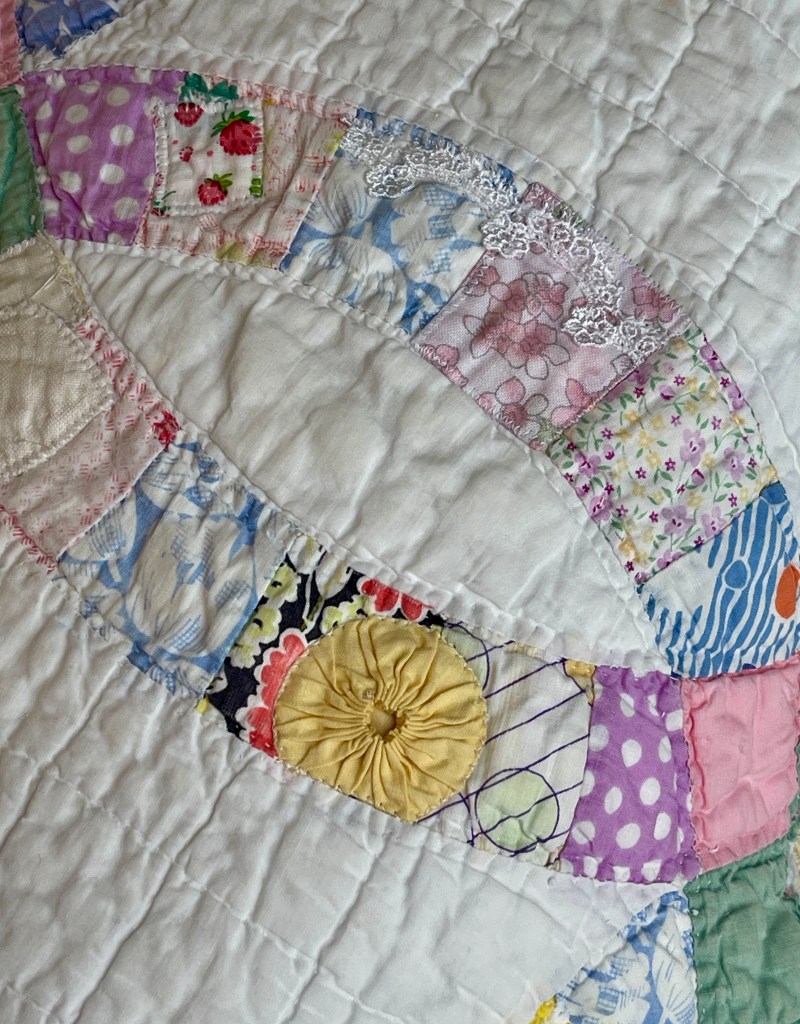
Vintage yo-yo’s have also worked well to cover larger damage.
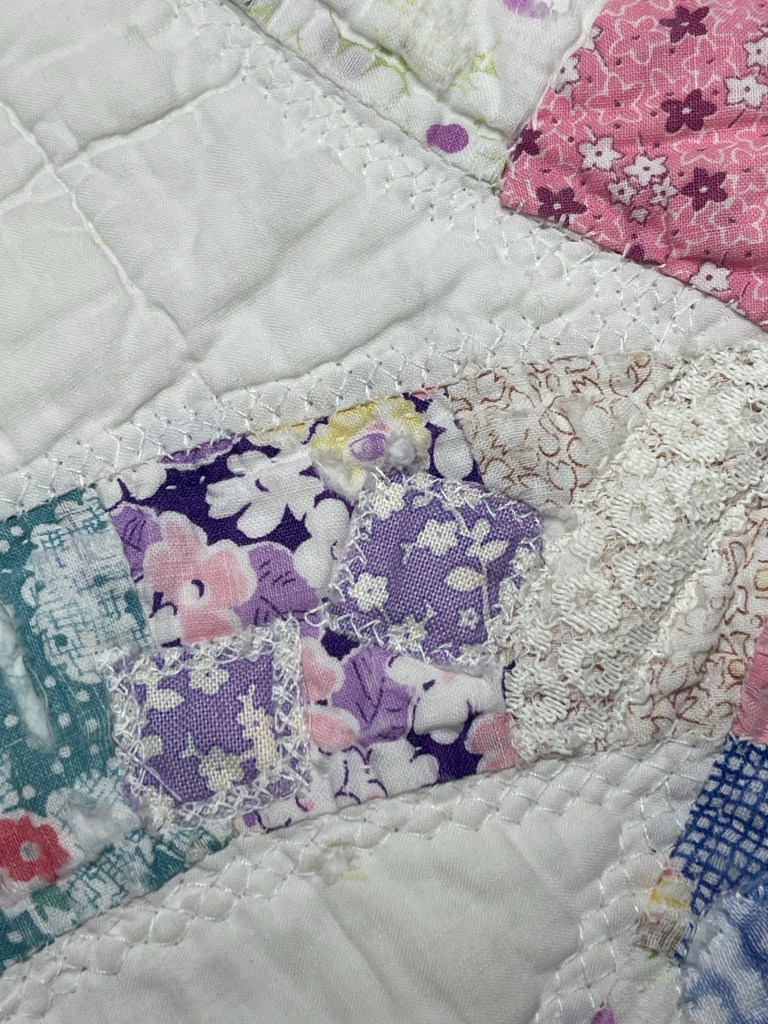
These 2 tiny patches are half inch squares.
Below are lots of pictures showing lots of bits and pieces used to make repairs:
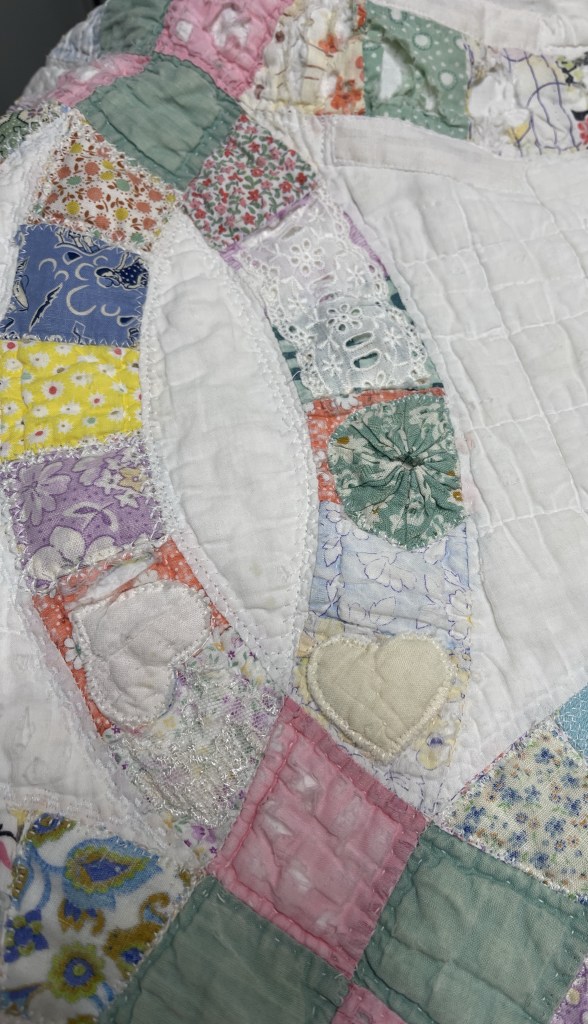
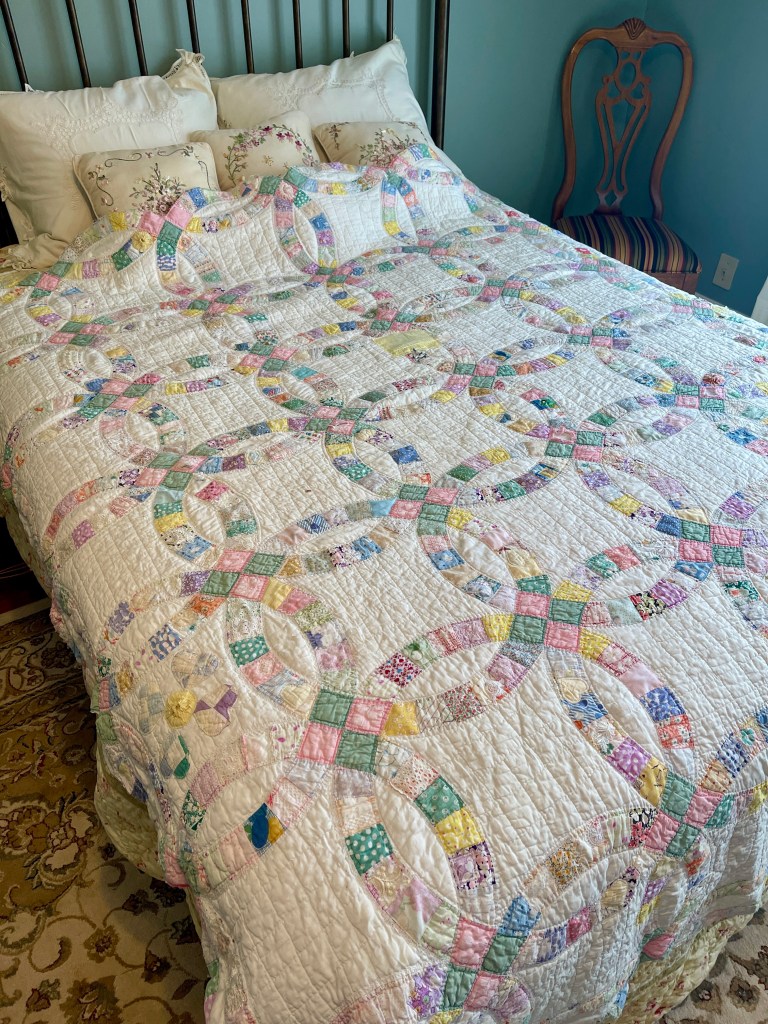
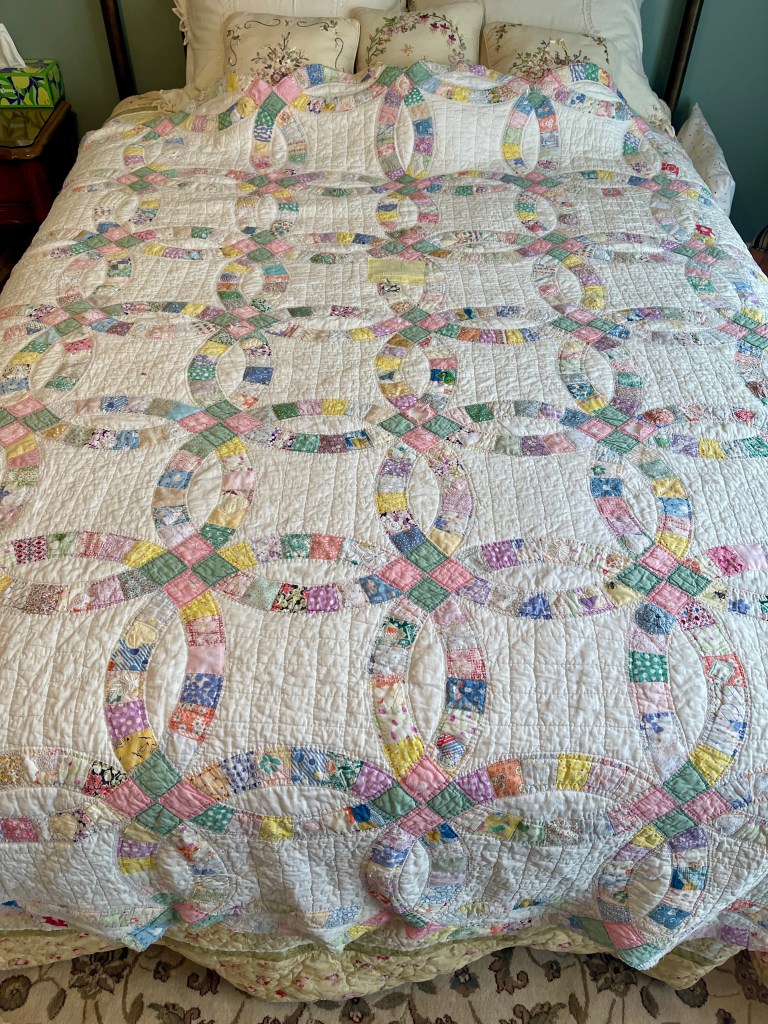
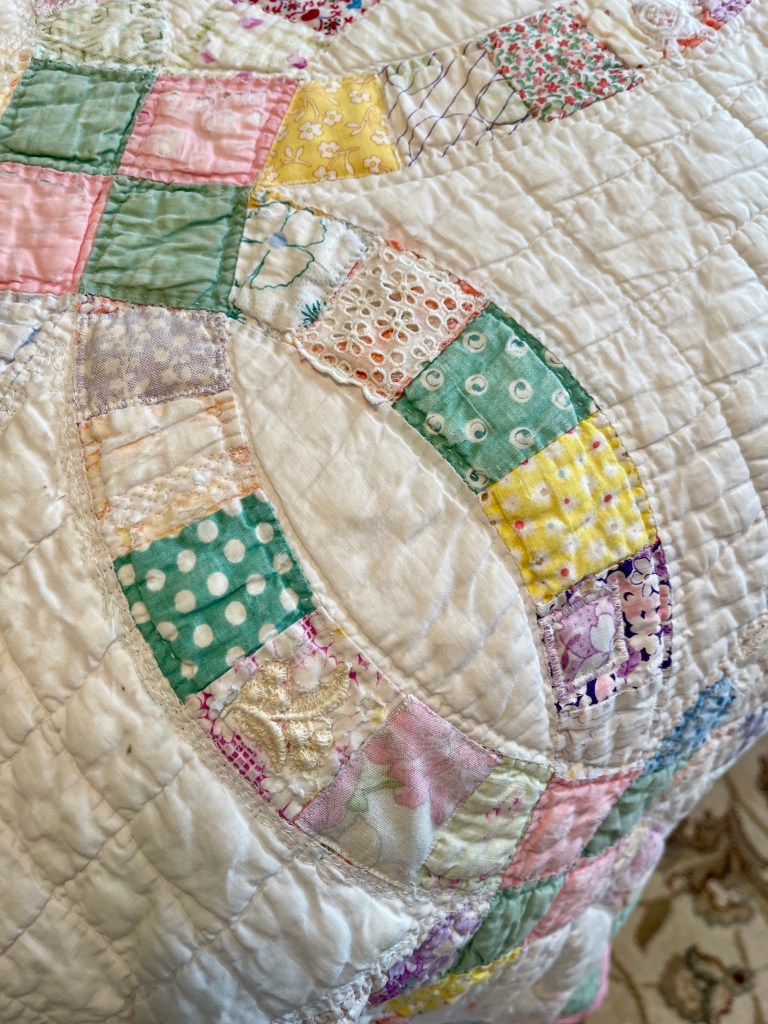
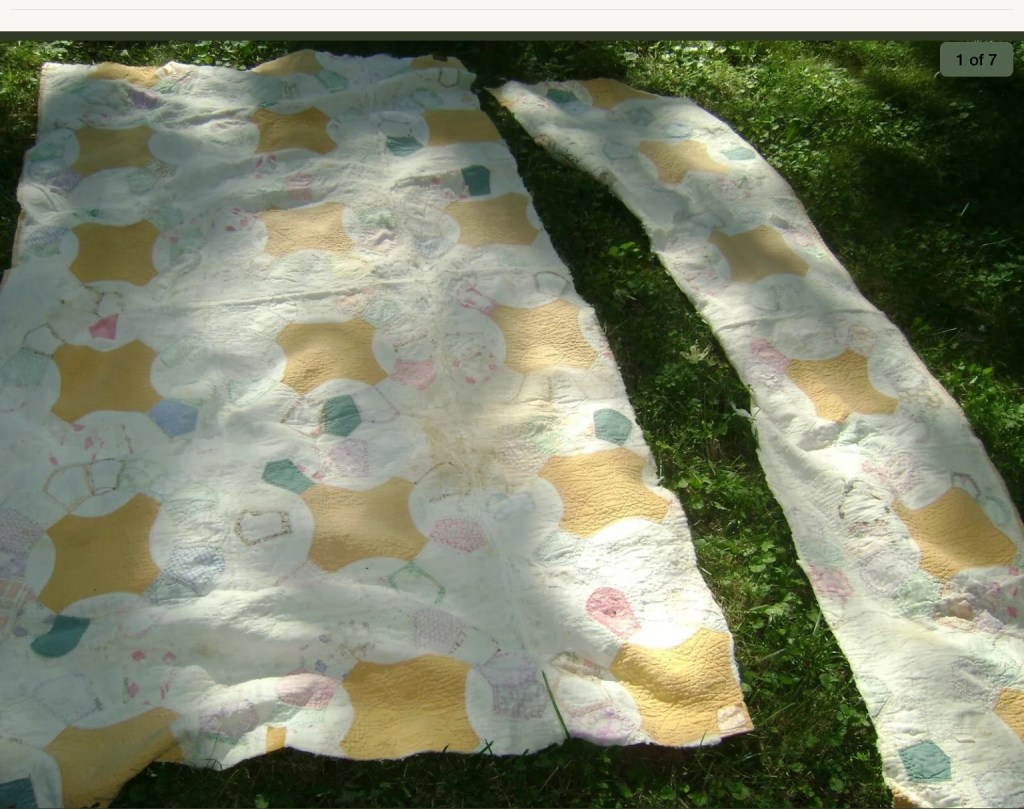
Another project that’s easy to work on, a vintage well loved Double Wedding Ring quilt. What do I mean by “well loved”? I mean worn out, torn, tattered, stained and full of damaged and/or missing fabric…everywhere.
So many of you wonder why I choose projects like this…in a nutshell I love the opportunity to save a quilt that was well made and well used. Maybe someday one of my quilt creations will be saved by someone with a bent towards vintage, what an honor that would be.
Sadly I forgot to take detailed pictures of the quilt before I began working with it. The pictures above show the quilt on a Queen size bed.
So let me tell you a bit about what I’m doing before I show lots of closeup pictures. If I had to guess I would estimate at least 75% of the original fabrics were either missing, torn, faded and/or frayed. I set out to use mostly Reproduction fabrics. In many instances I turned the fabric to the wrong side allowing the new fabrics a chance to blend in by appearing to be faded.
I also knew I would be using mostly vintage laces and trims to give the vintage quilt little pops of interest and surprise.
And finally, I planned use 10 to 15 of the wonderful built-it decorative stitches on my Bernina 550. Lots and lots of machine decorative stitching on this quilt!
Here’s the same picture from above marked with black dashes showing the 11 “fixes”:
More fixes as well as decorative machine stitching:
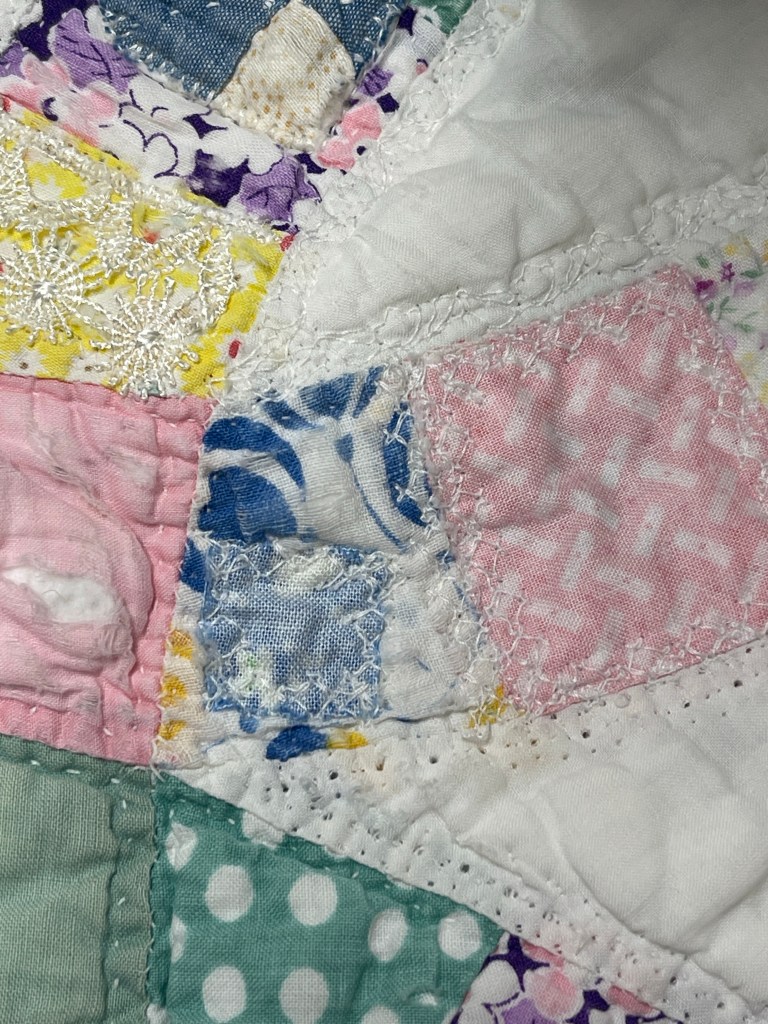
I have yet to decide how I will address the damage to the pink and green blocks.
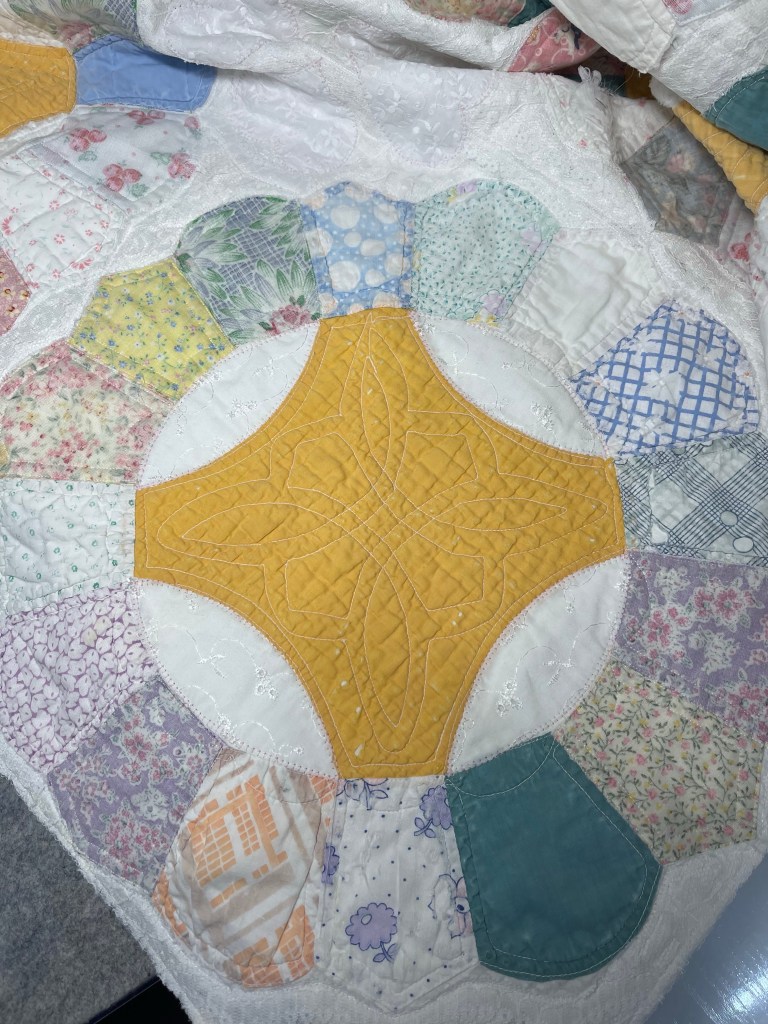
What’s up with the big yellow patch? There is a large hole that will be repaired in a few days.
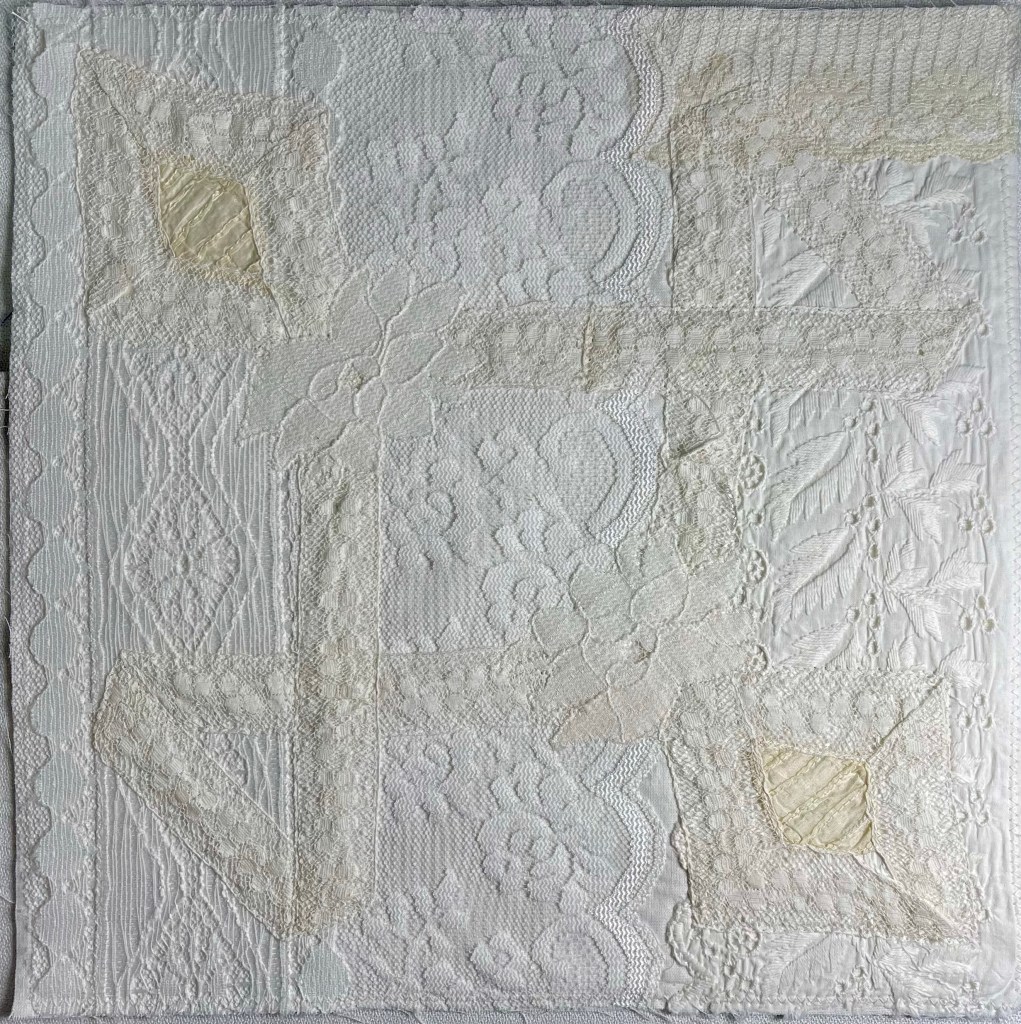
Wondering what the back of the quilt looks like with the machine decorative stitching? I love the look the stitching creates.
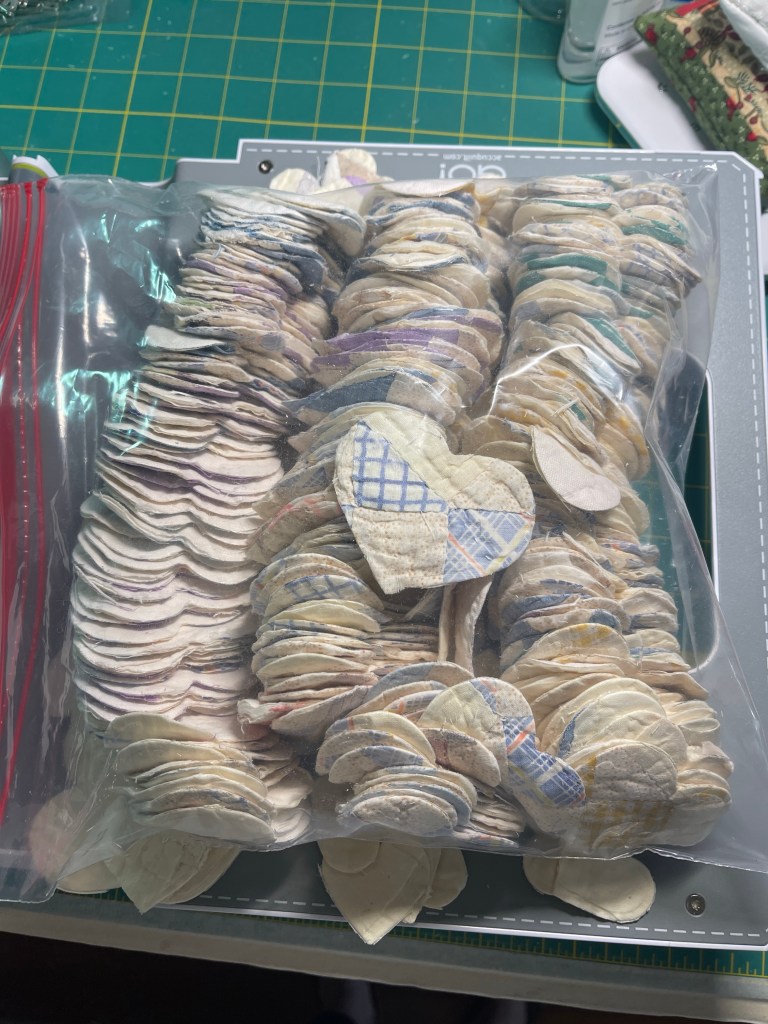
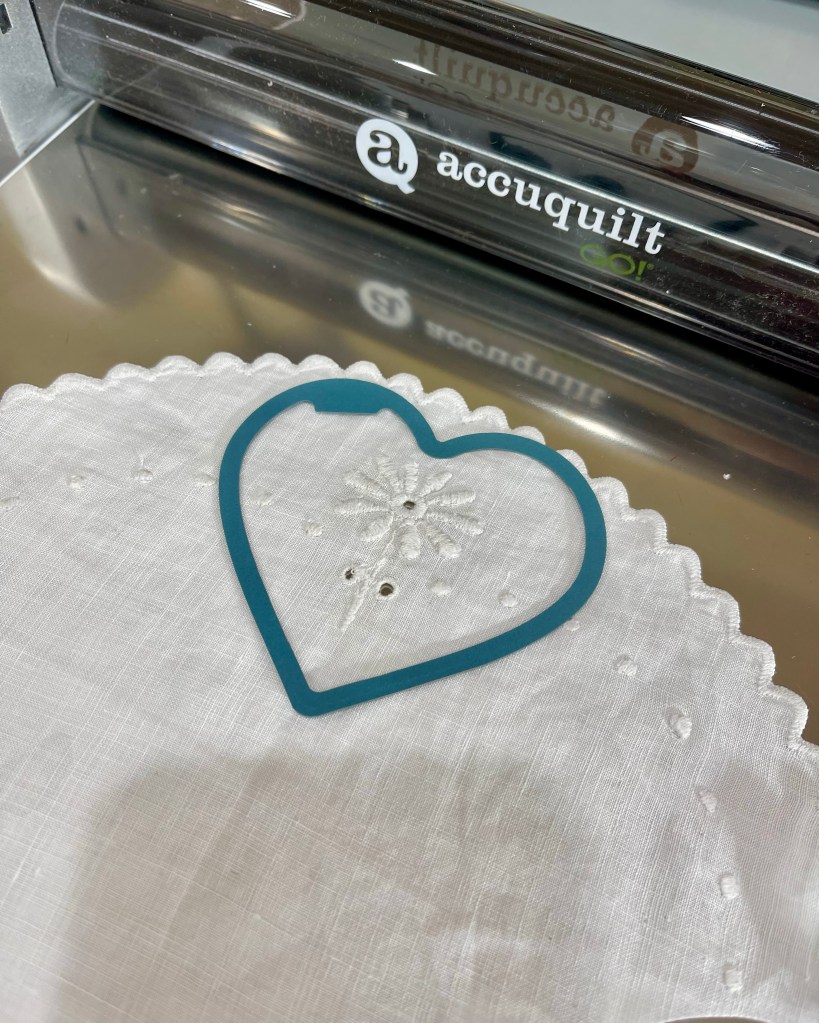
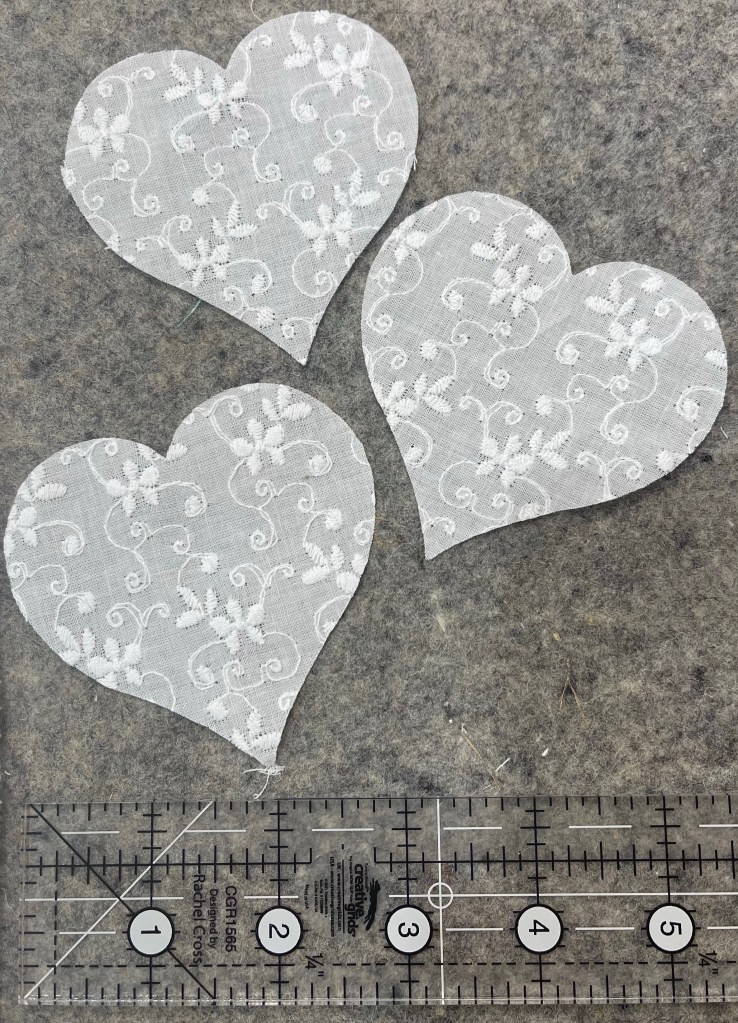
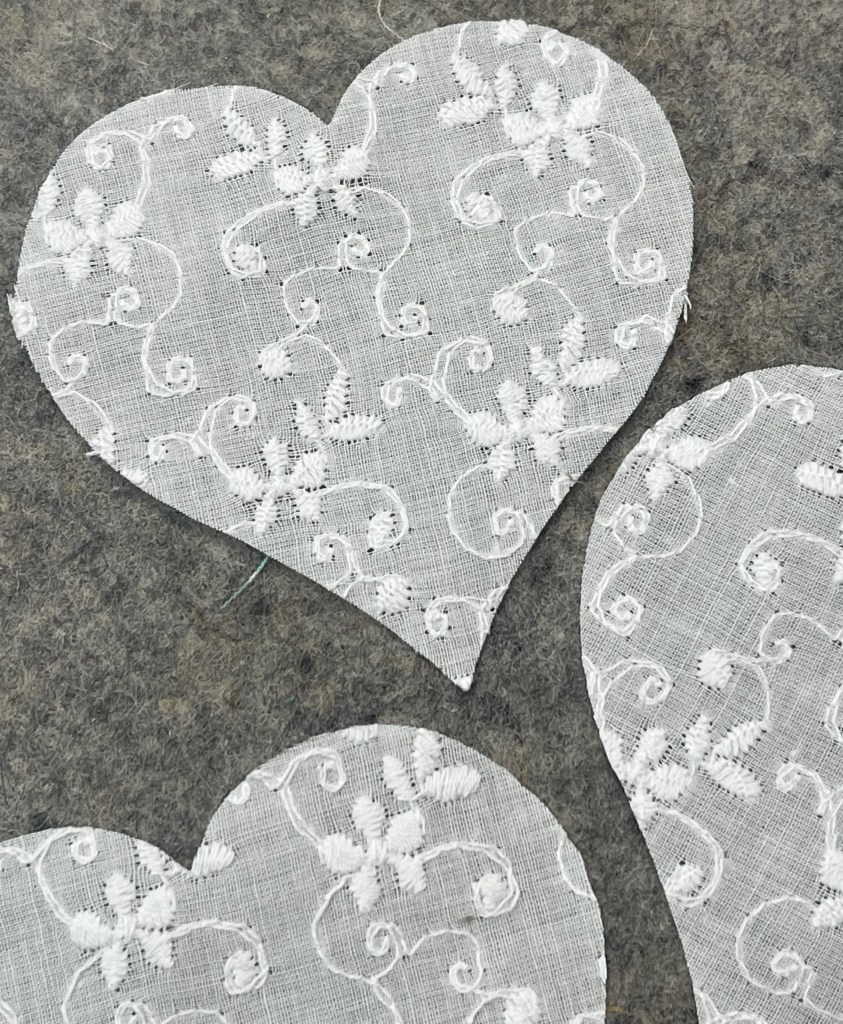
Using my Accuquilt and dies from Crafters Edge I cut the small hearts from a piece of a damaged vintage quilt, let me show you a few pictures:
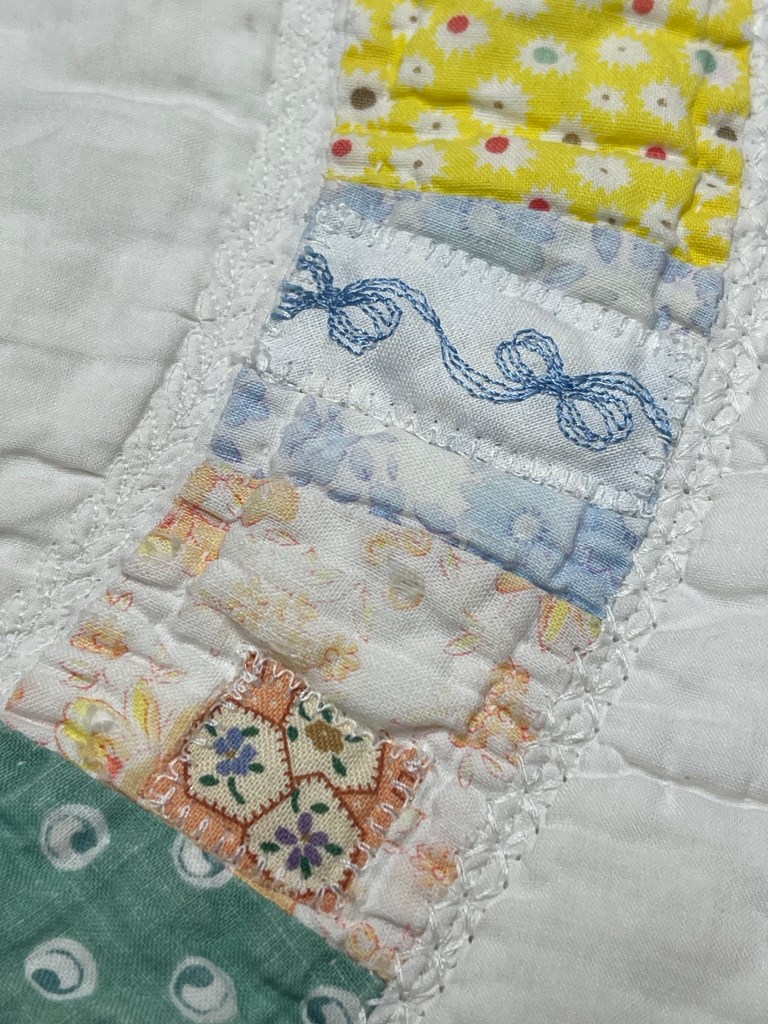
Another block almost completed. Have you noticed that besides color, I have a theme running through most of the blocks? Hearts, ribbons, small flowers and butterflies. I’ll soon add the butterfly to this block:
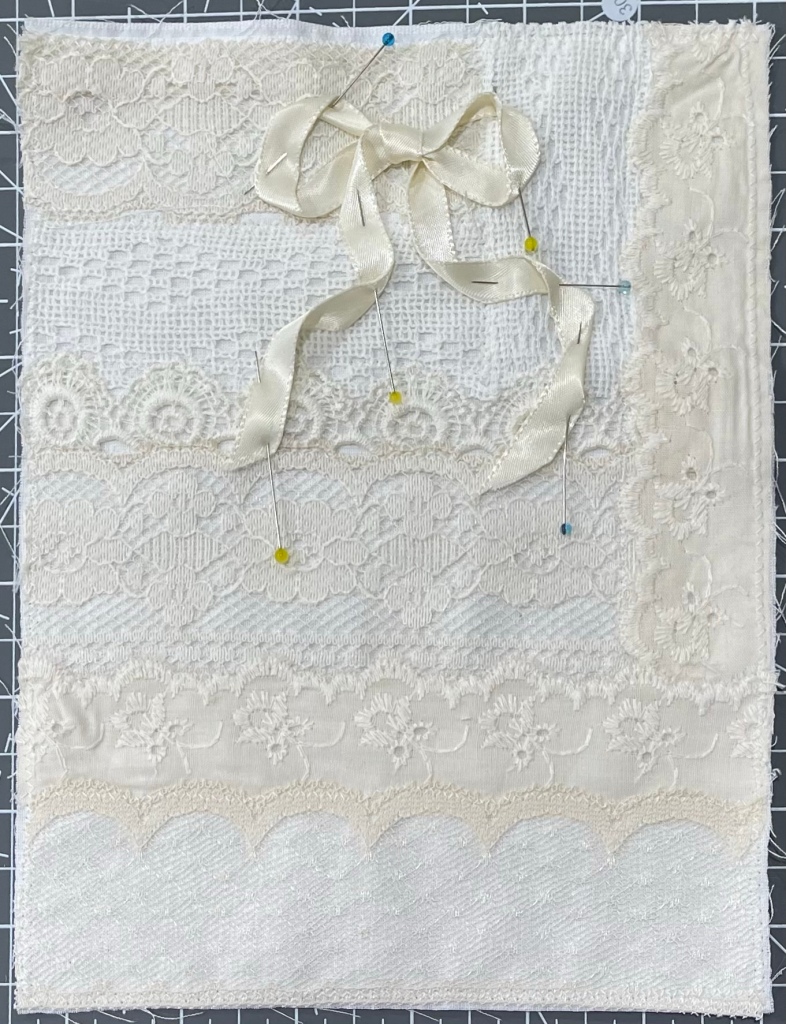
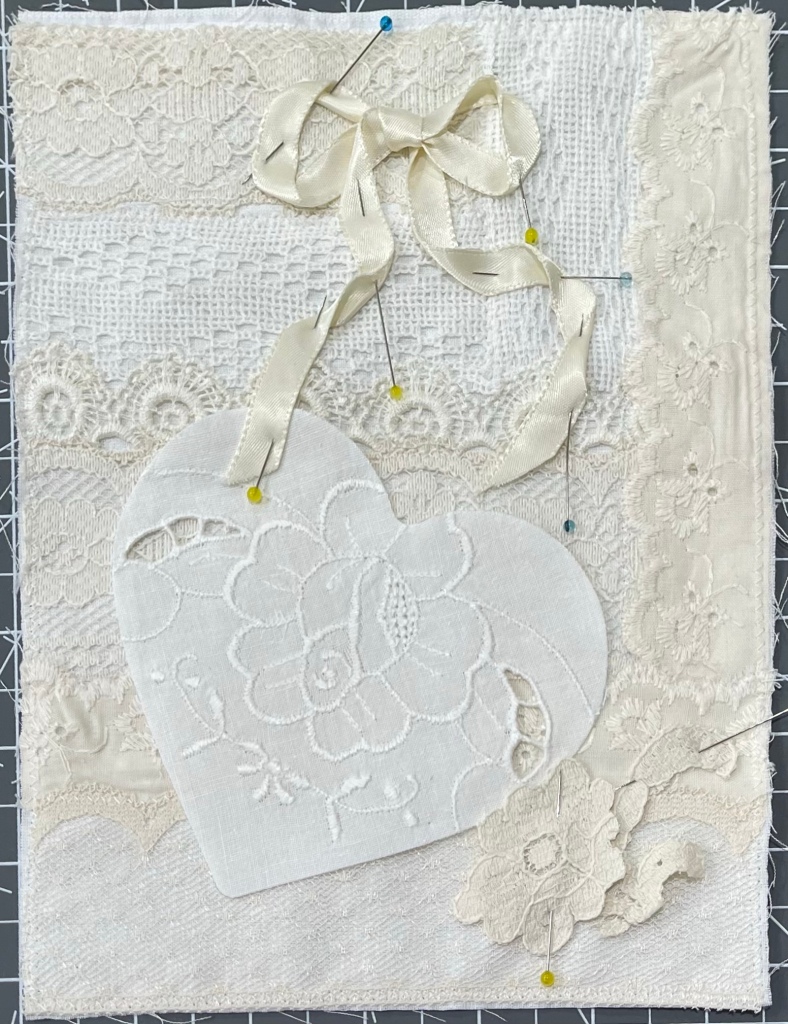
After creating the lace and trim base, I begin adding points of interest, first positioning the satin finish ribbon bow.
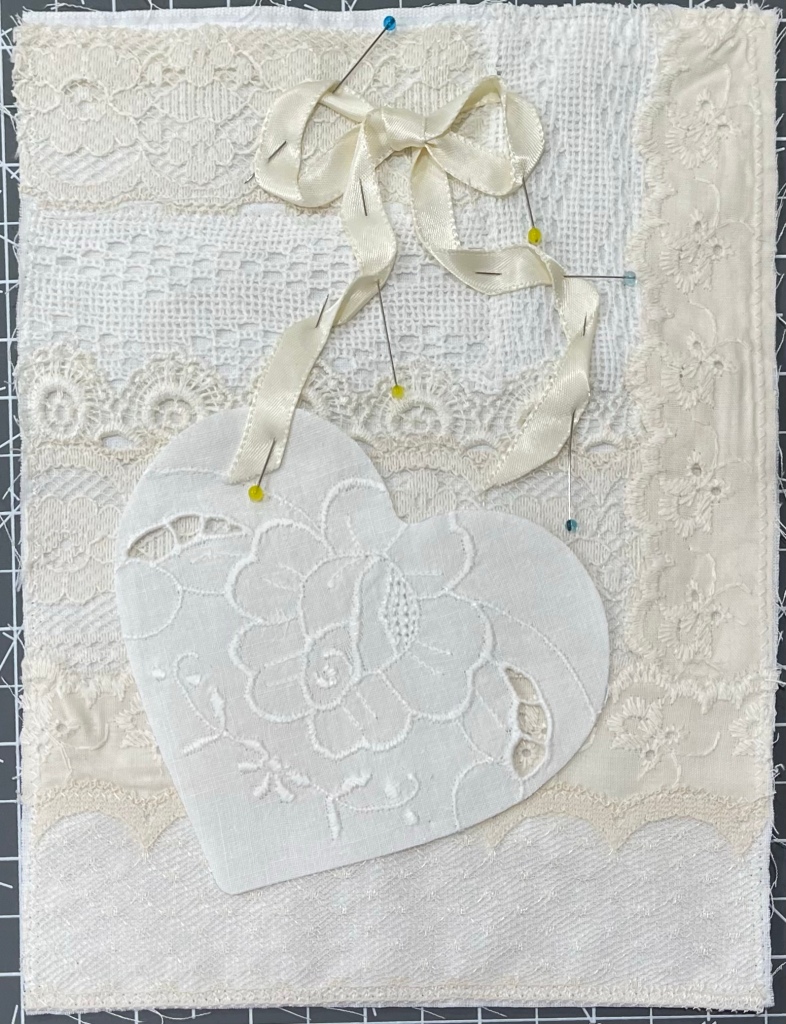
Next, the white heart positioned at an angle. Did you know that when you overlap points of interest you give the piece both physical and visual depth?
The ivory flower in the bottom right corner was fussy cut from lace trim.
And the additional of the small ivory flowers gives the block additional visual interest as well as balance.
I’m a big advocate of (when possible) grouping things using an odd number, for example using 3 instead of just 2. This concept works great in most all instances.
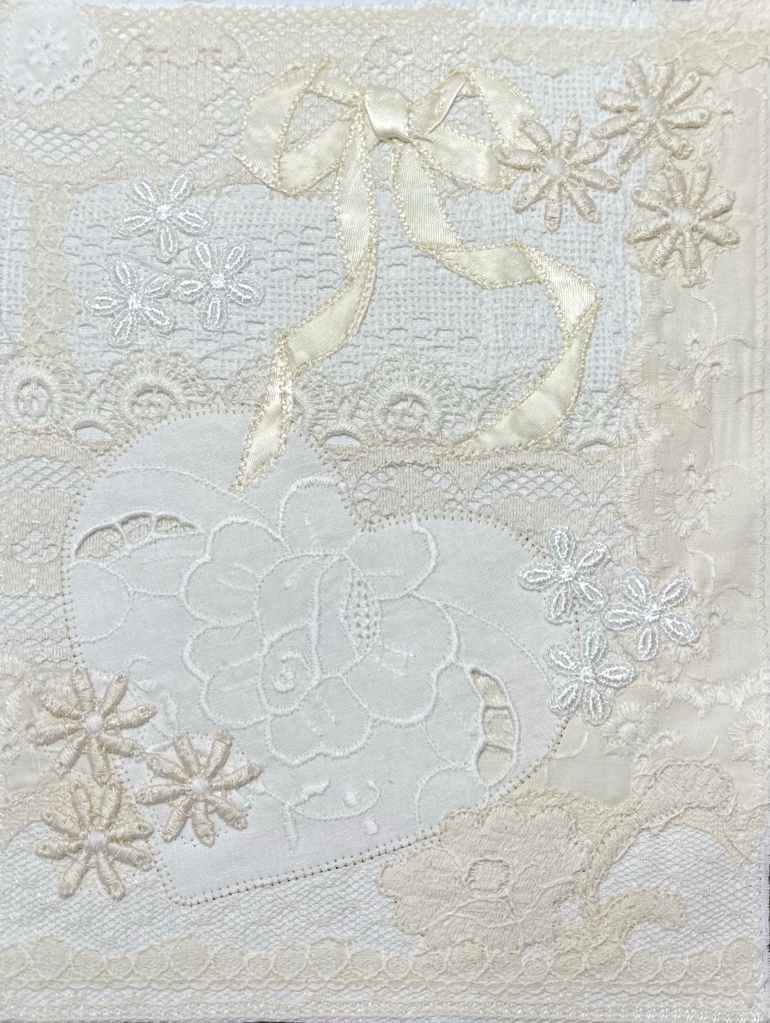
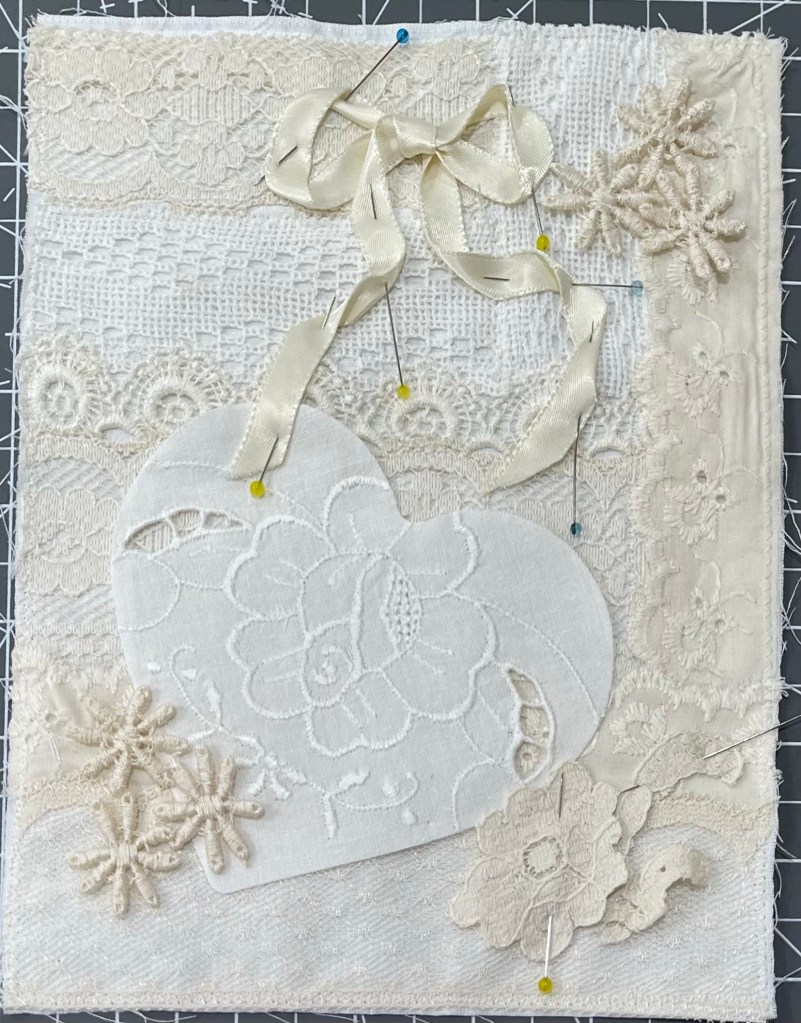
And again, the finished block:
In this piece I used threads that closely match the pieces I am stitching. If I think, for example, that a bow too closely matches the background I often stitch using a darker thread making to give it more contrast.
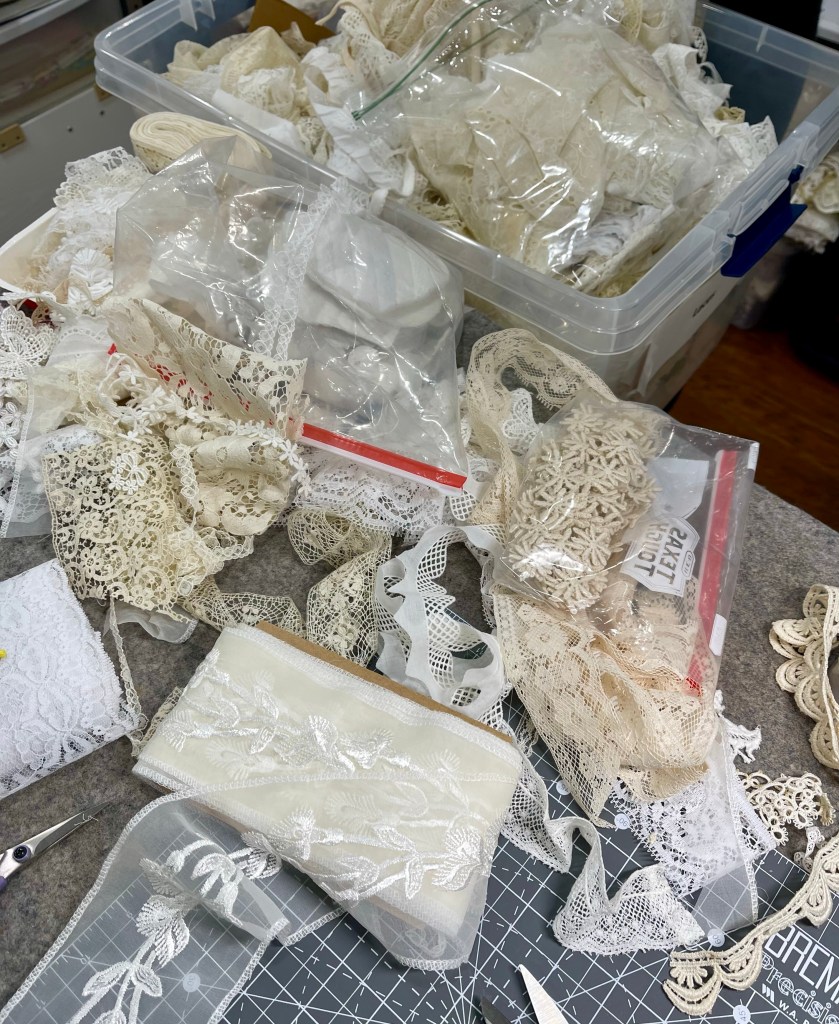
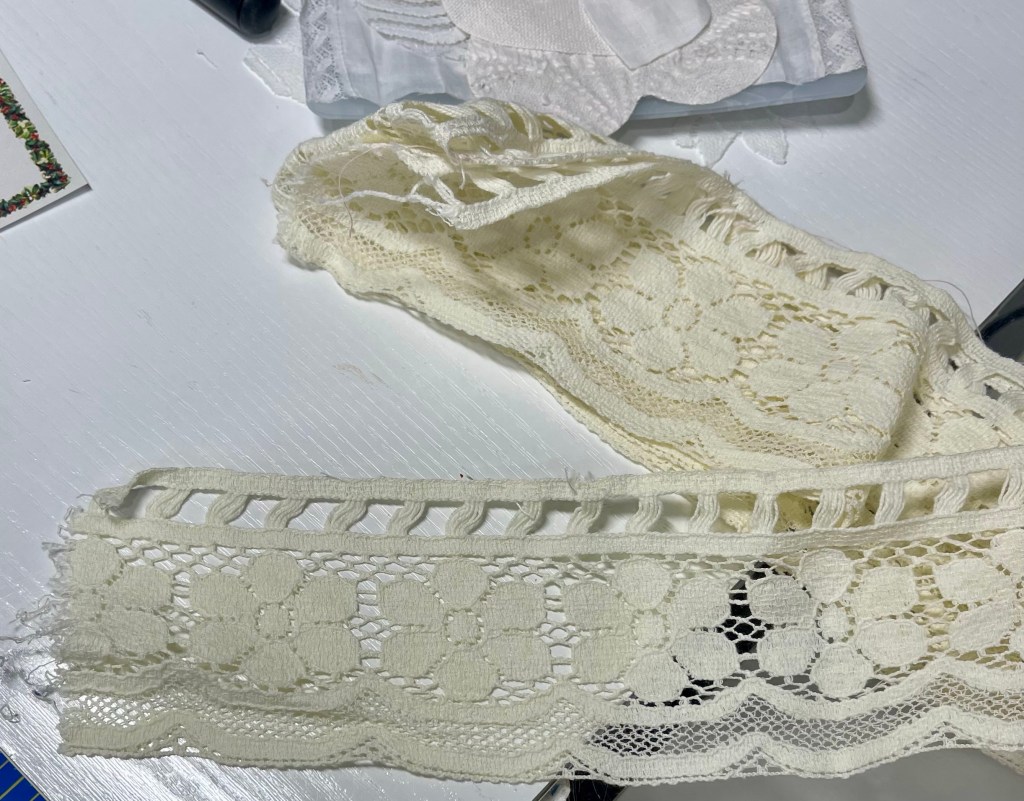
My bin of vintage laces and trims:
Even after creating all the blocks, the supply seems never ending!
Still creating, my Bits and Pieces quilt top blocks are growing in number and so is the disaster of a mess in the sewing room, I’ve got laces and trims spread out everywhere!
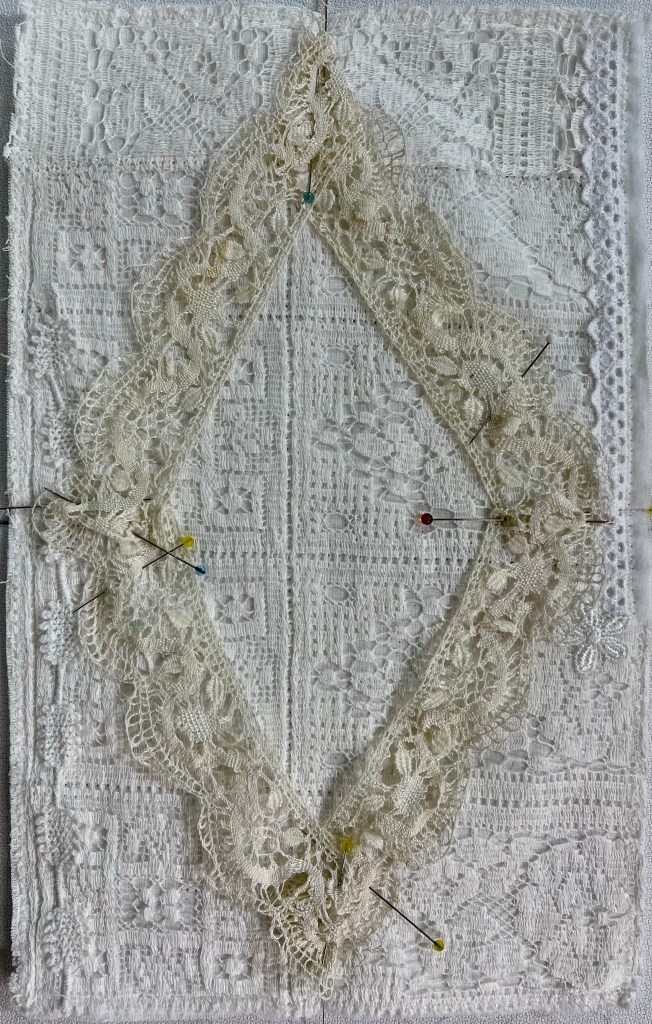
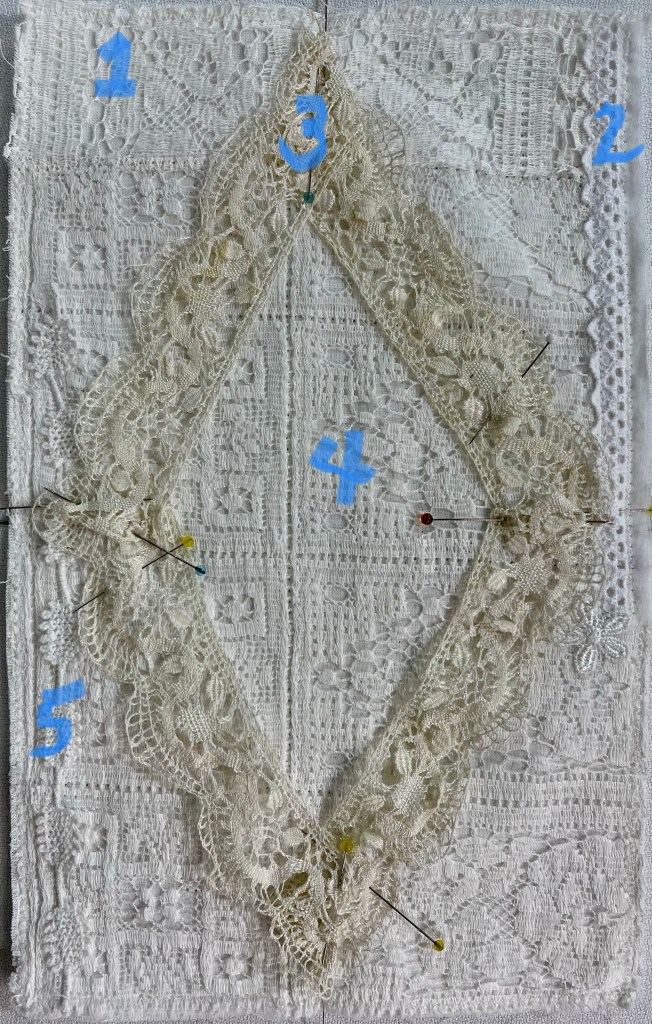
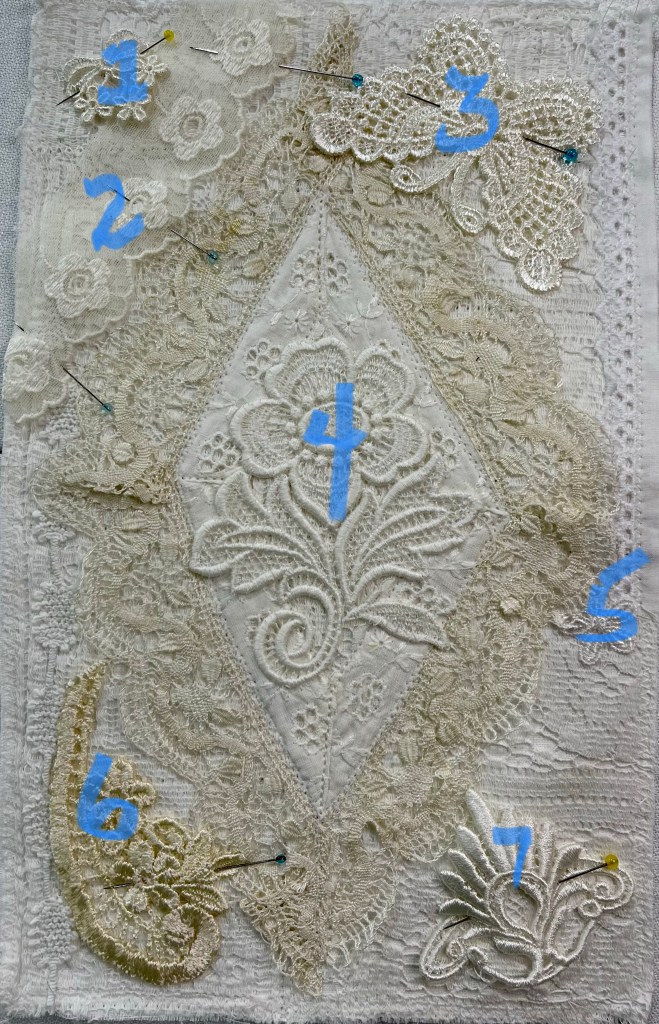
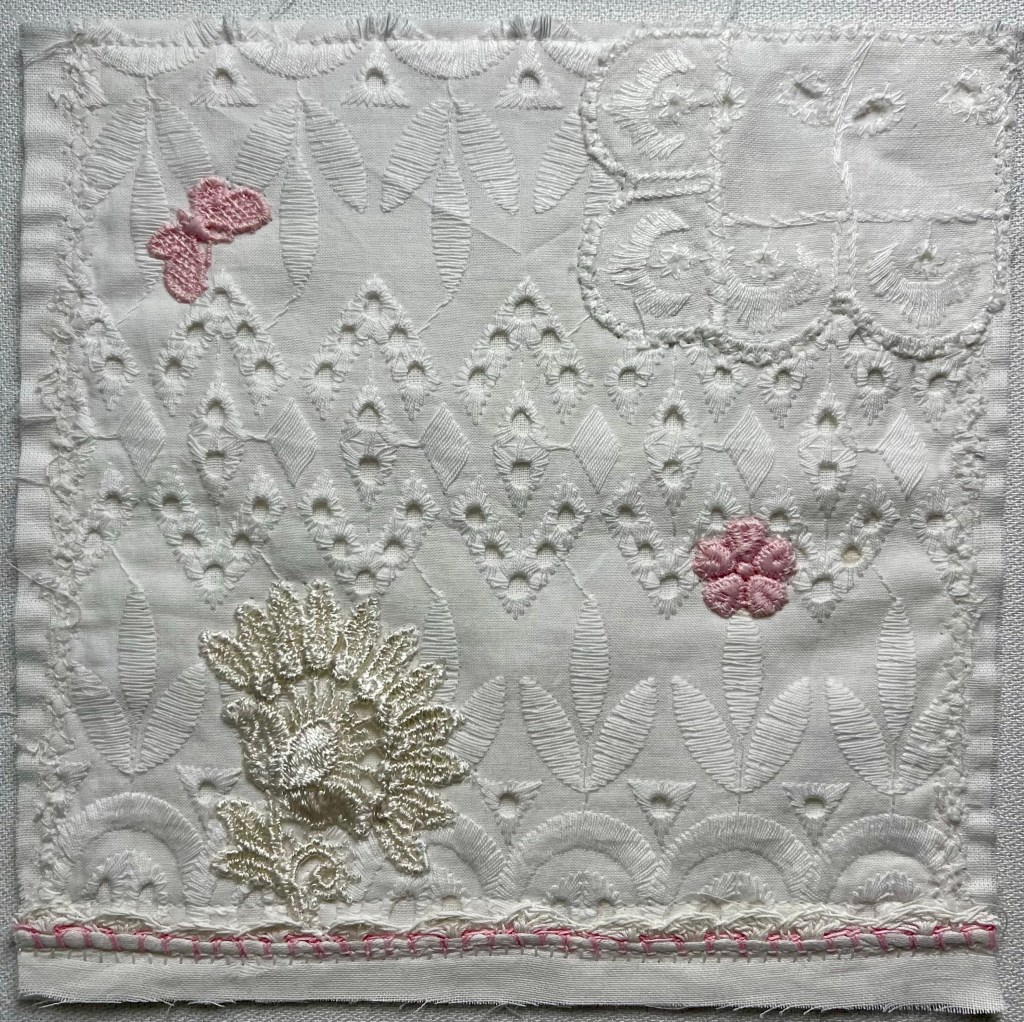
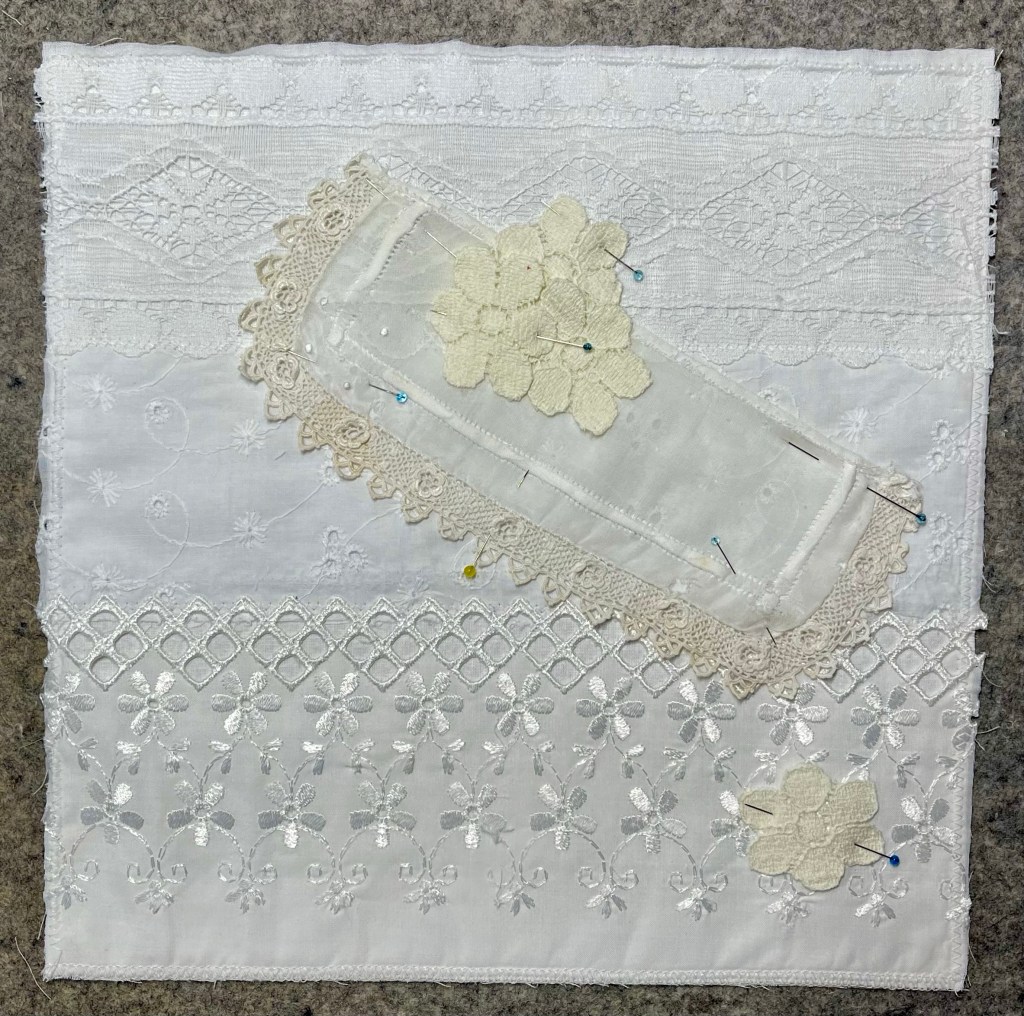
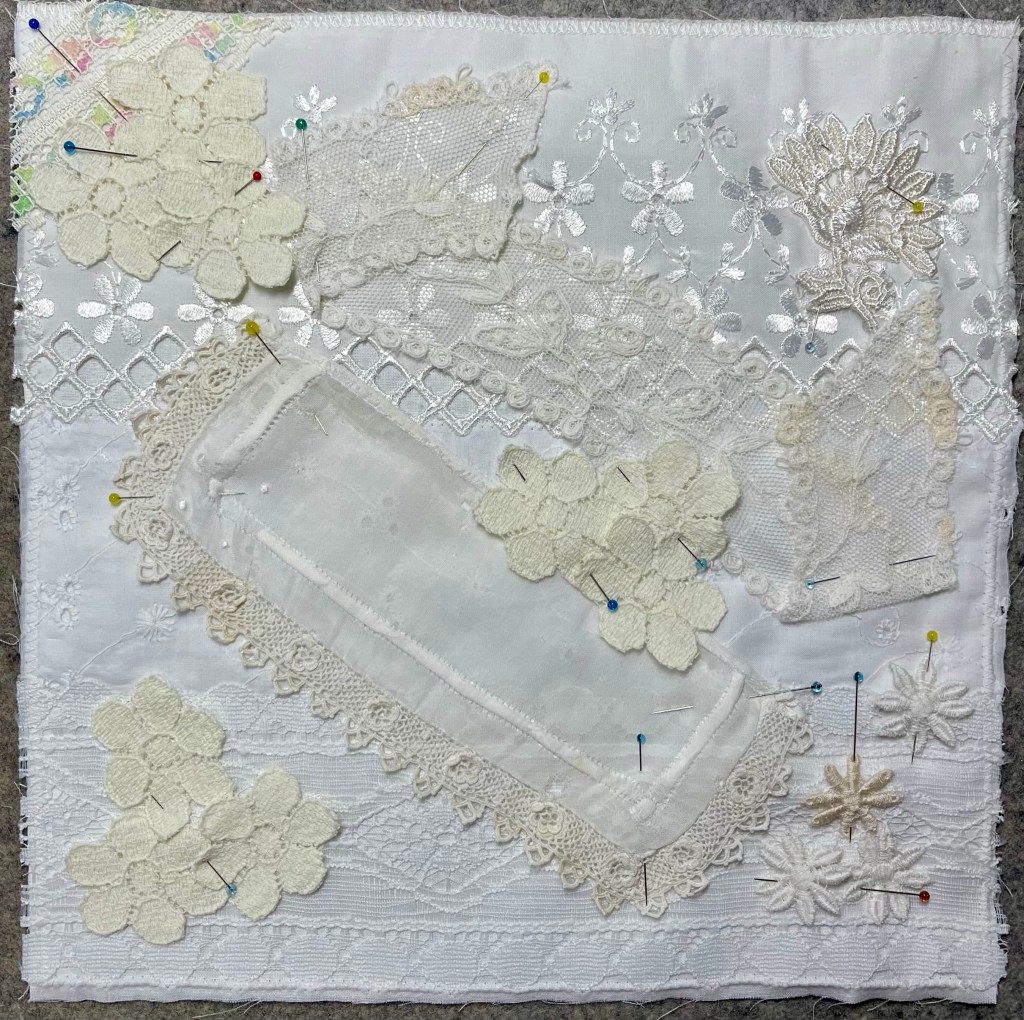
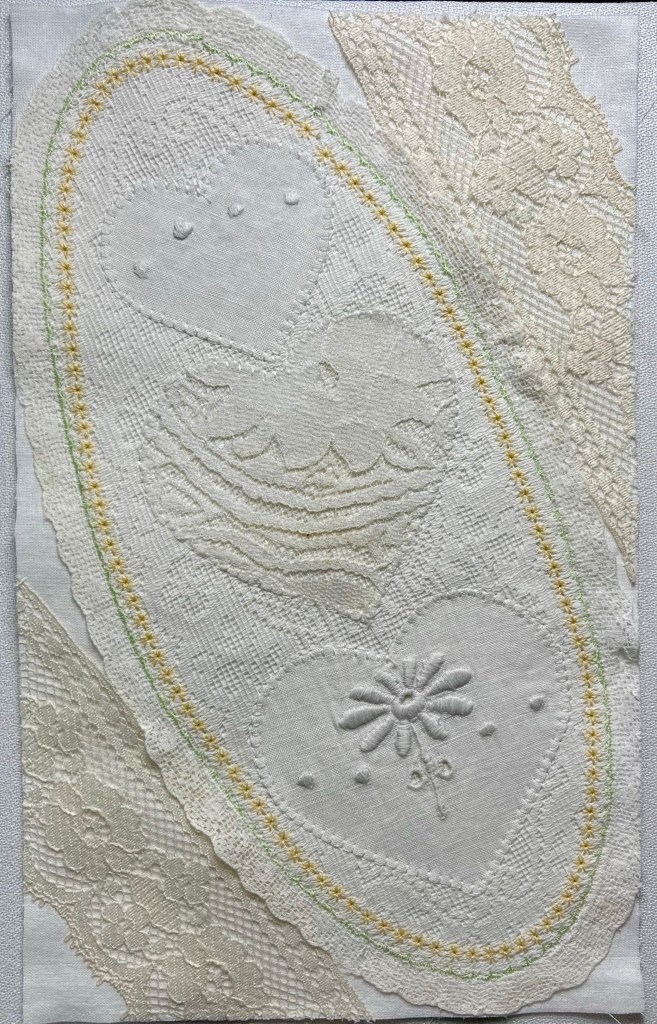
When finished this block measure will measure 6×10”. Let me take you through step by step to see how things were auditioned and then added to make this block collage.
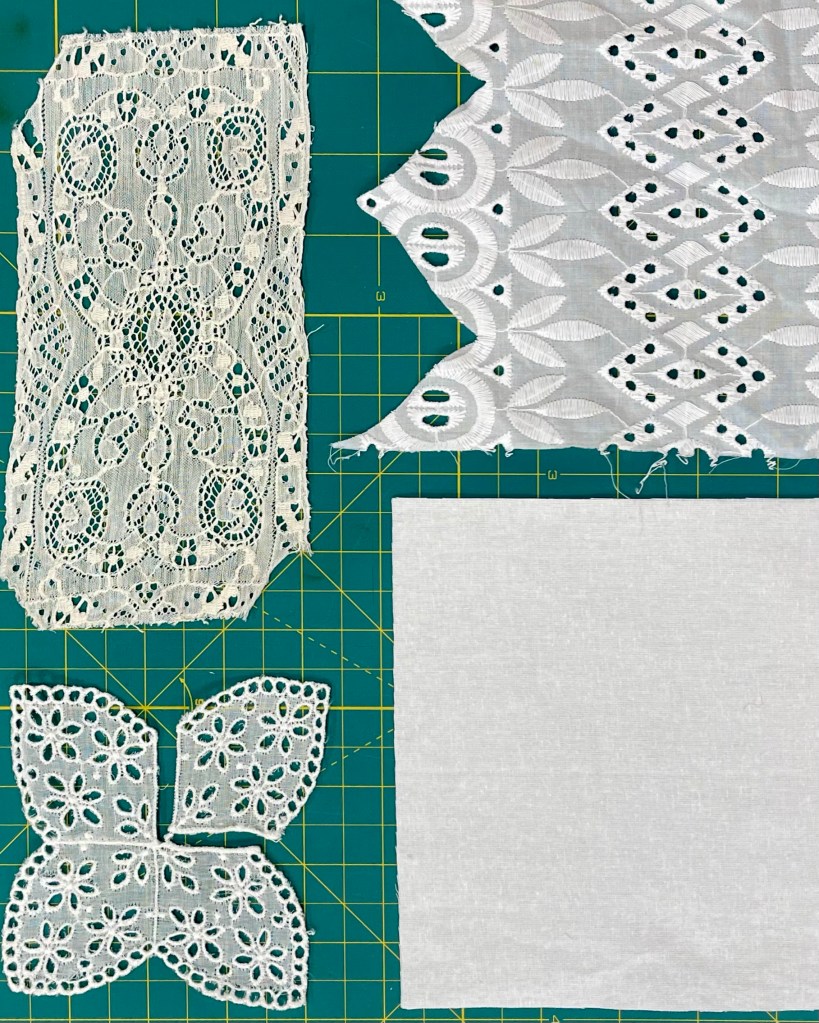
A lace base (#4) atop 2 layers of light weight 100% cotton ivory/off white muslin. #1 is a small rectangle of lace, #2 is a small length of trim. #3 is a nice length of wonderfully beautiful ivory lace approx. 1.25” wide. #5 is a strip of rather modern looking trim about .5” at its widest point.
A narrow (half inch) white eyelet trim has been added to the center.
Auditioning pieces.
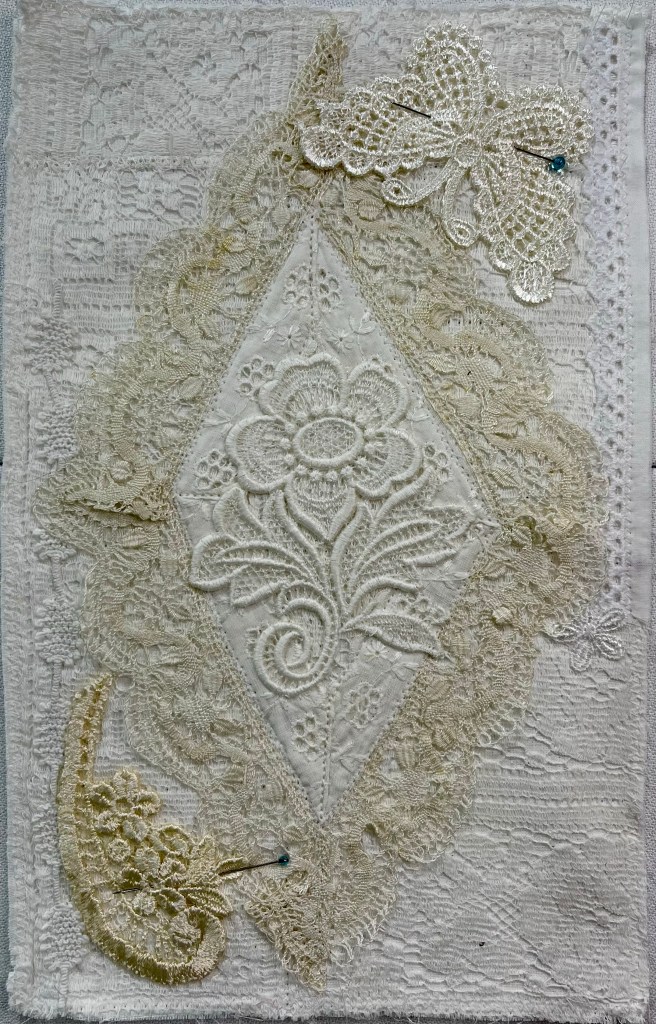
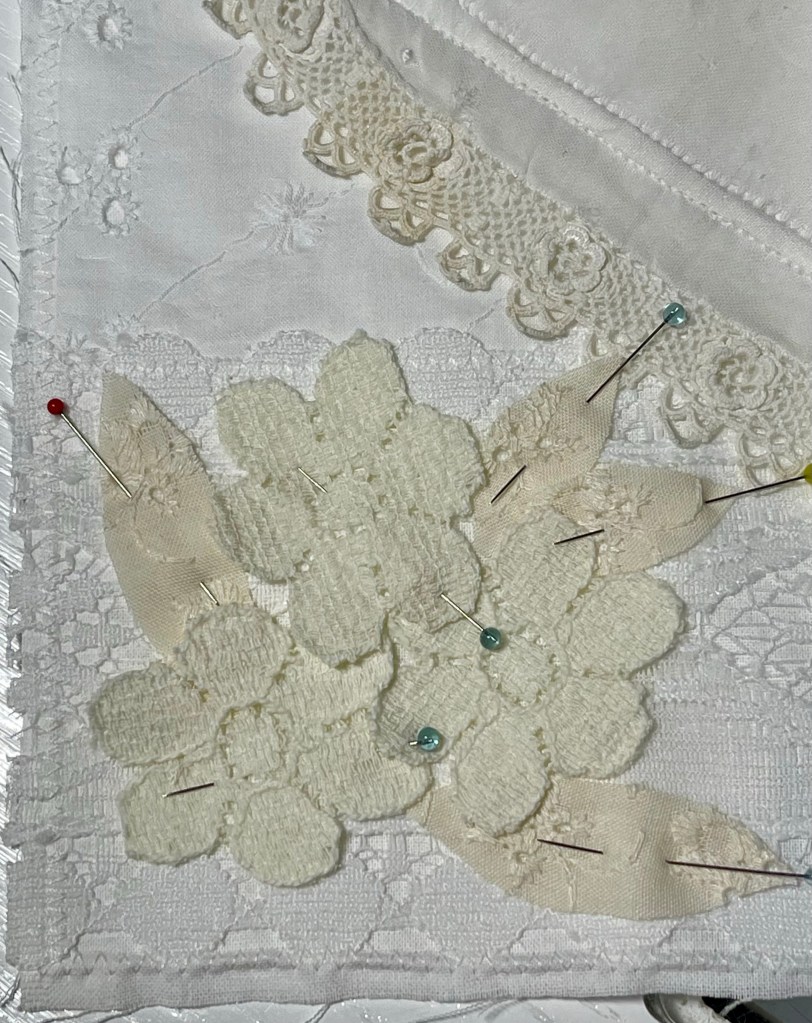
7 pieces placed strategically around the ivory lace diamond. I’m very picky about directional items like butterflies. In my mind they need to be “coming to the party” rather than flying away.
Even more was added before I considered the block to be finished:
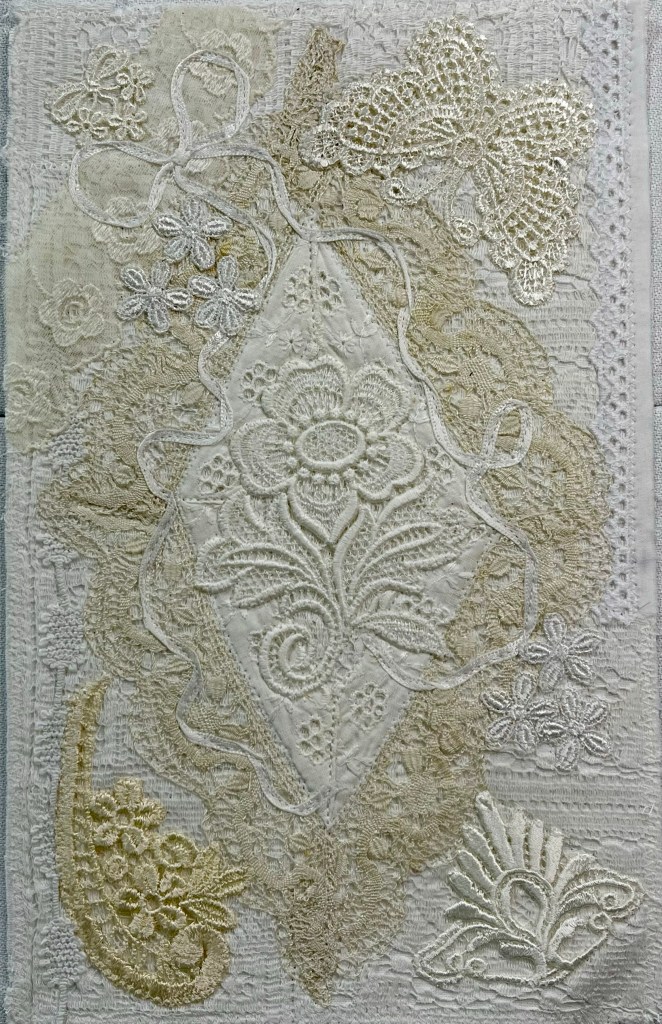
And finally, I am satisfied that my lace and trim collage block is finished.
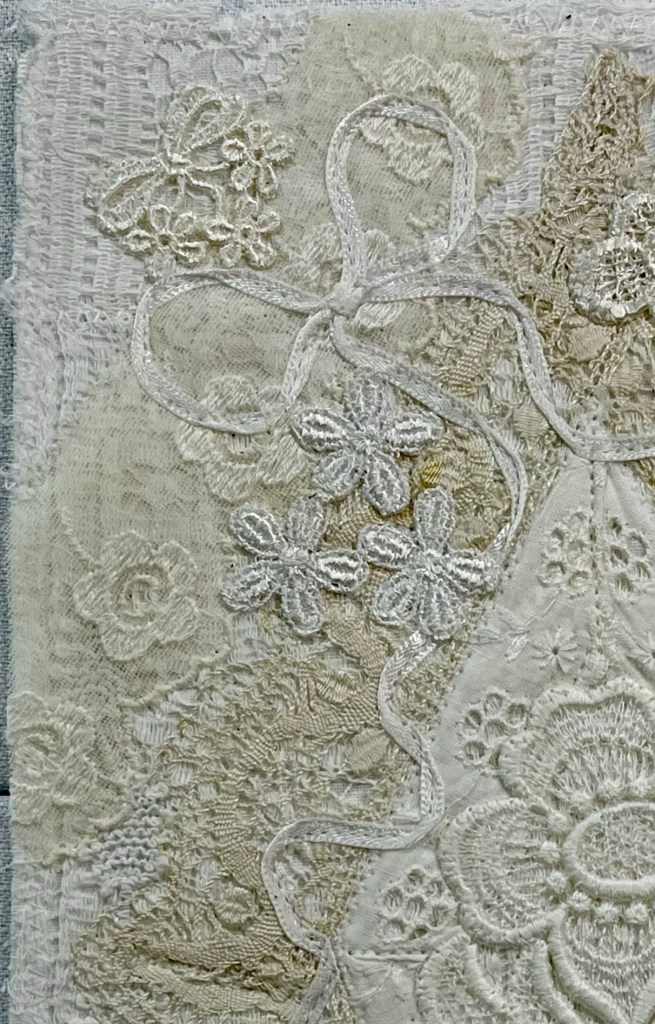
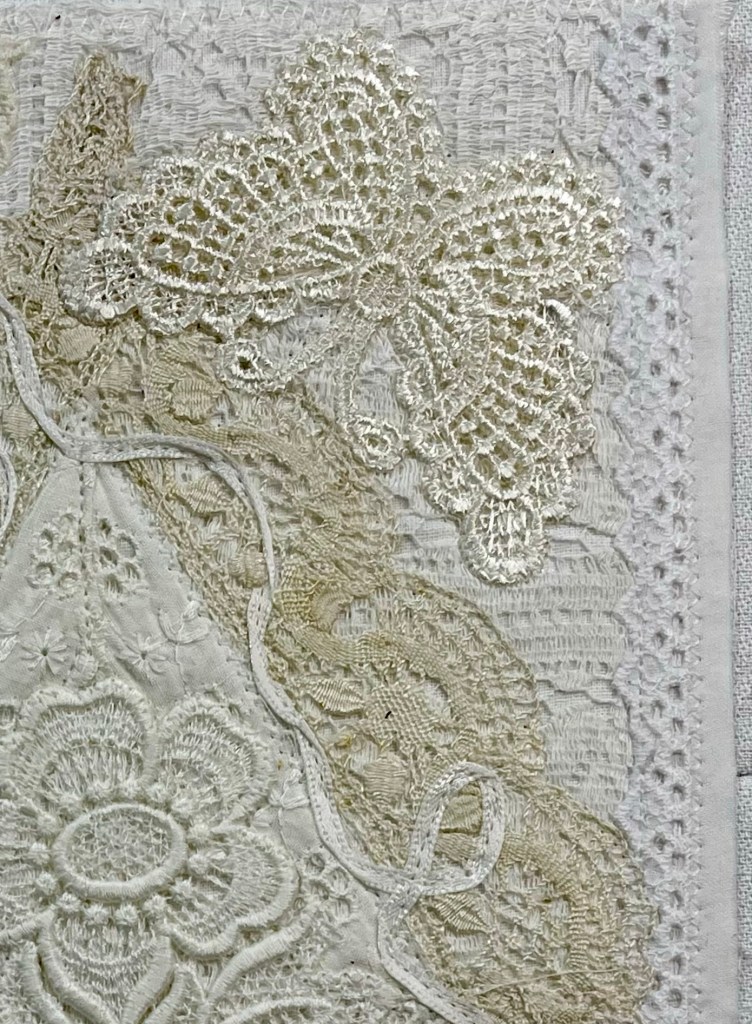
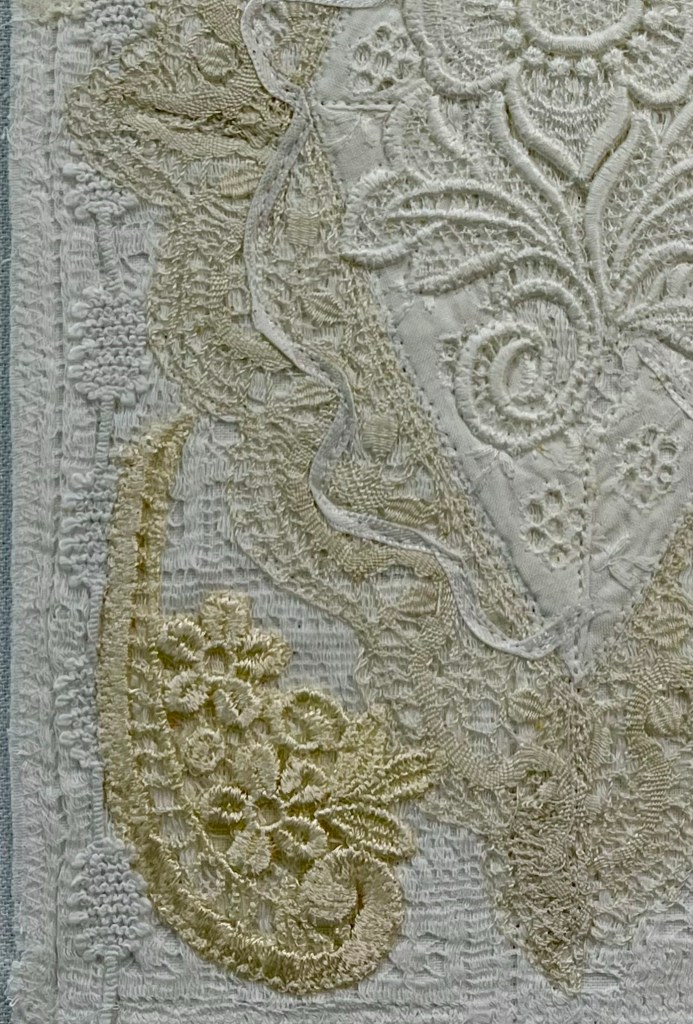
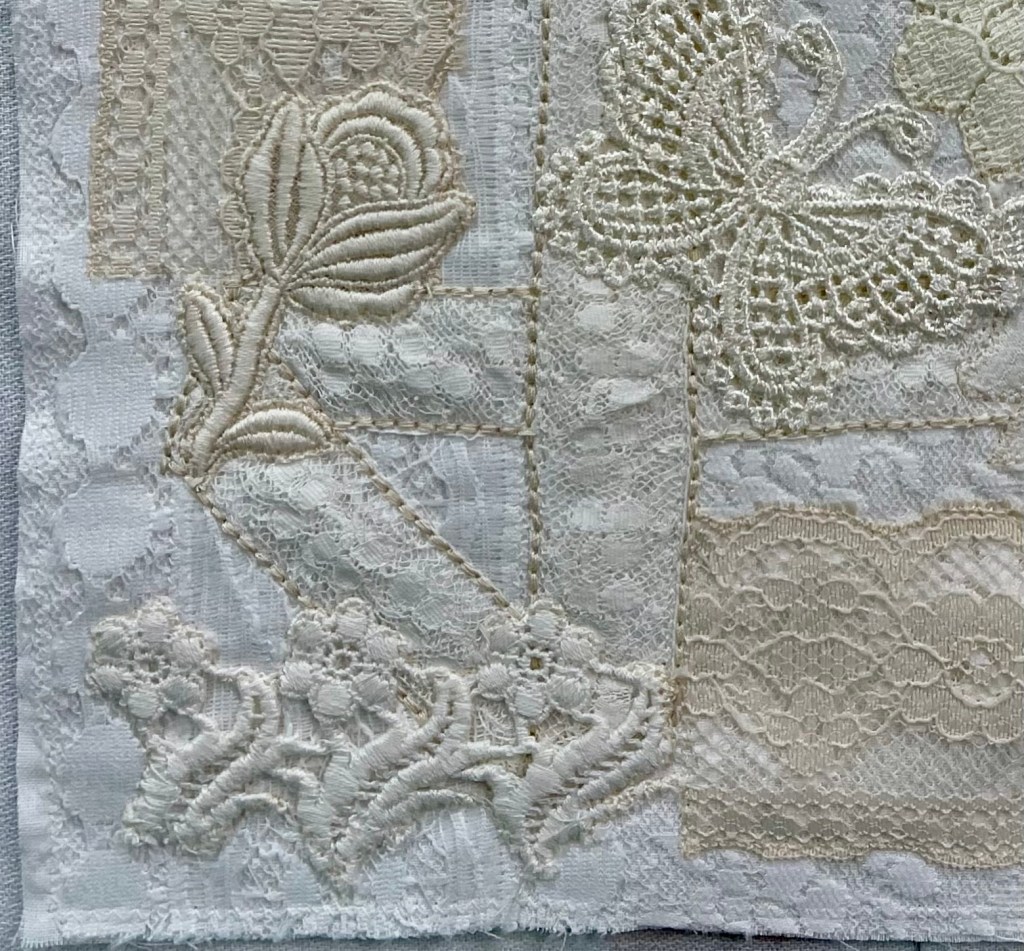
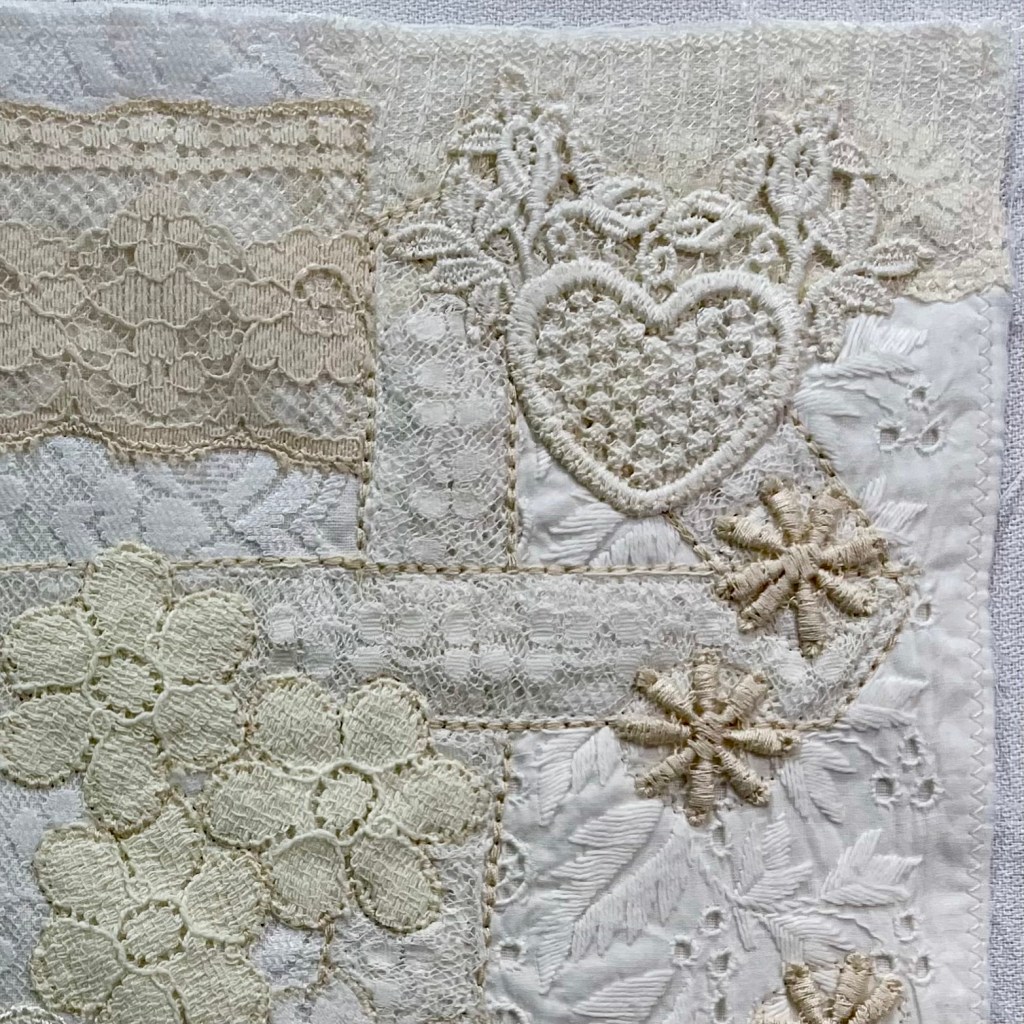
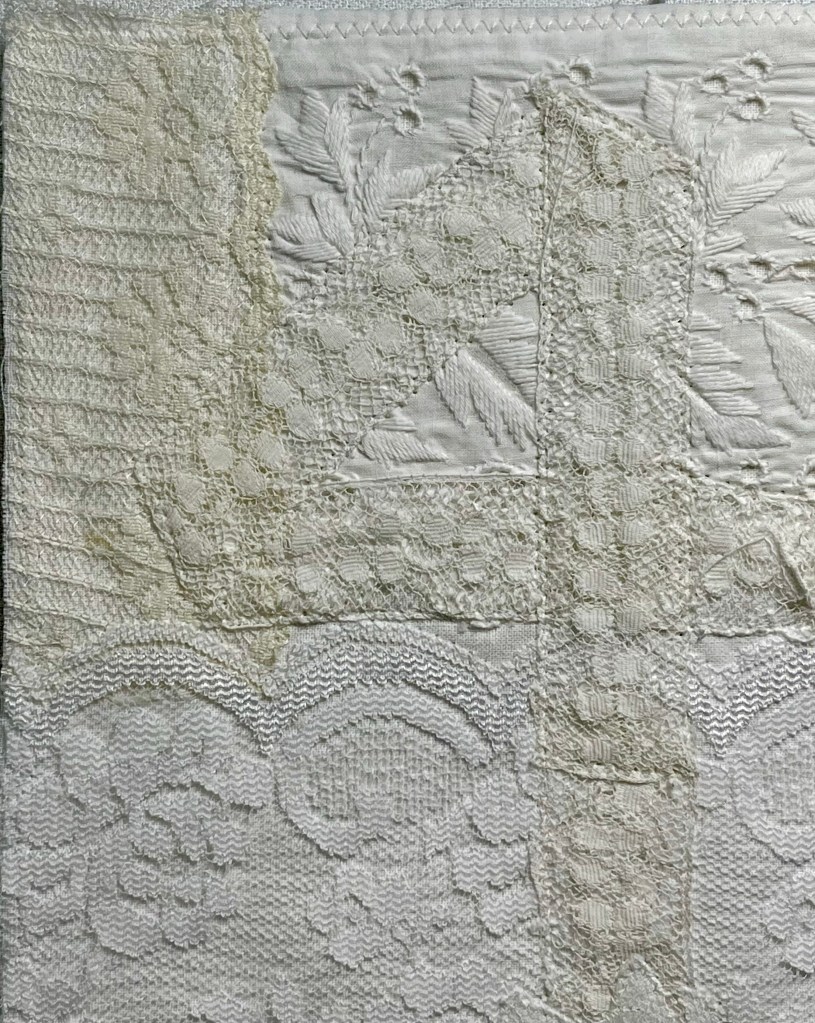
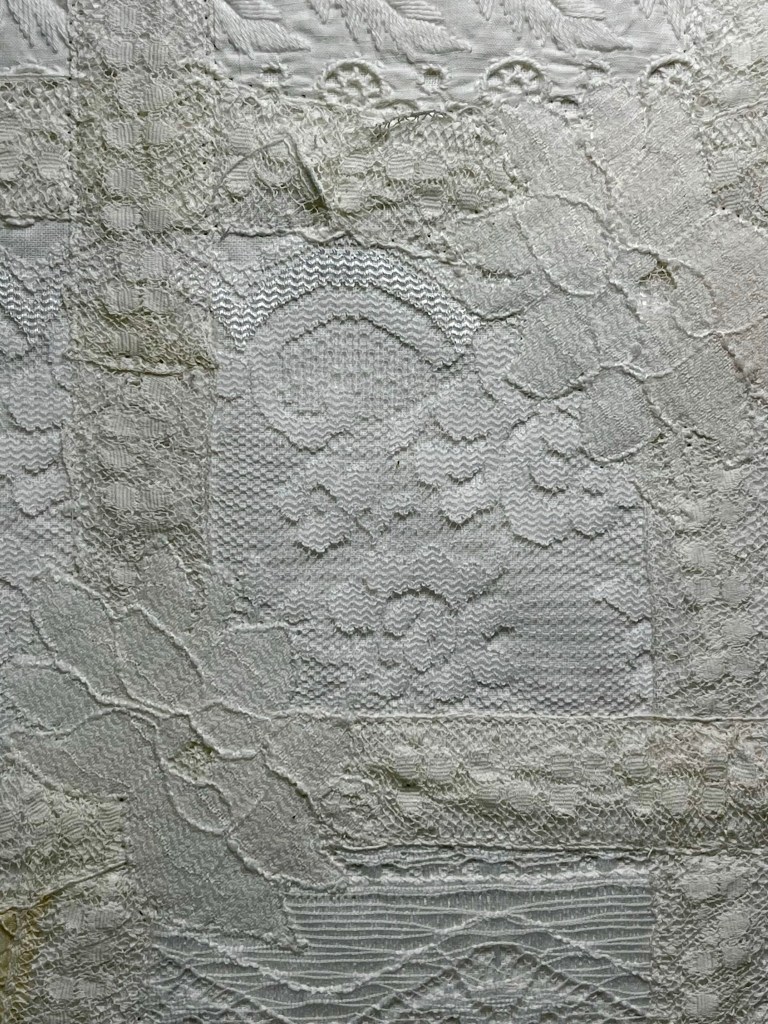
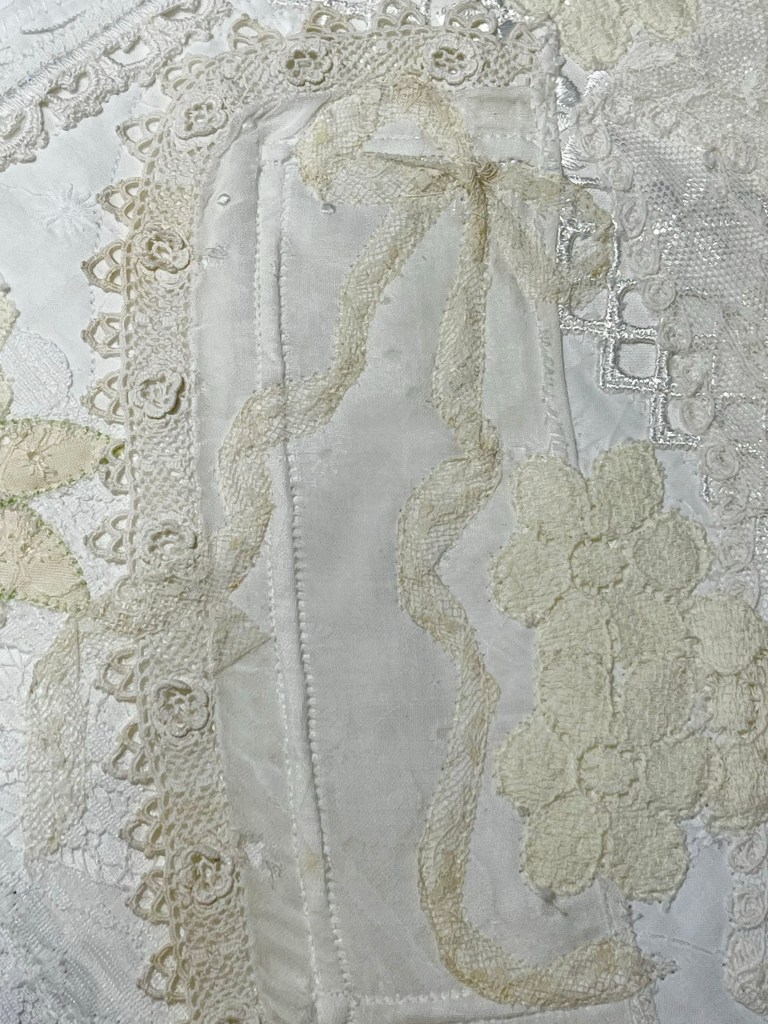
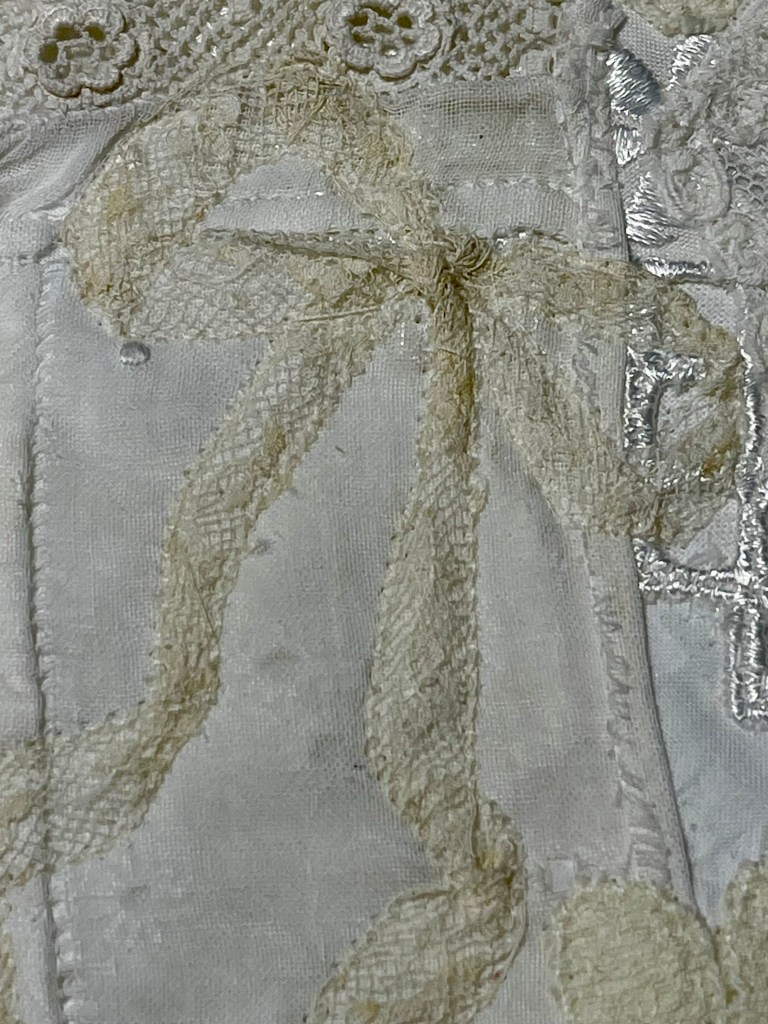
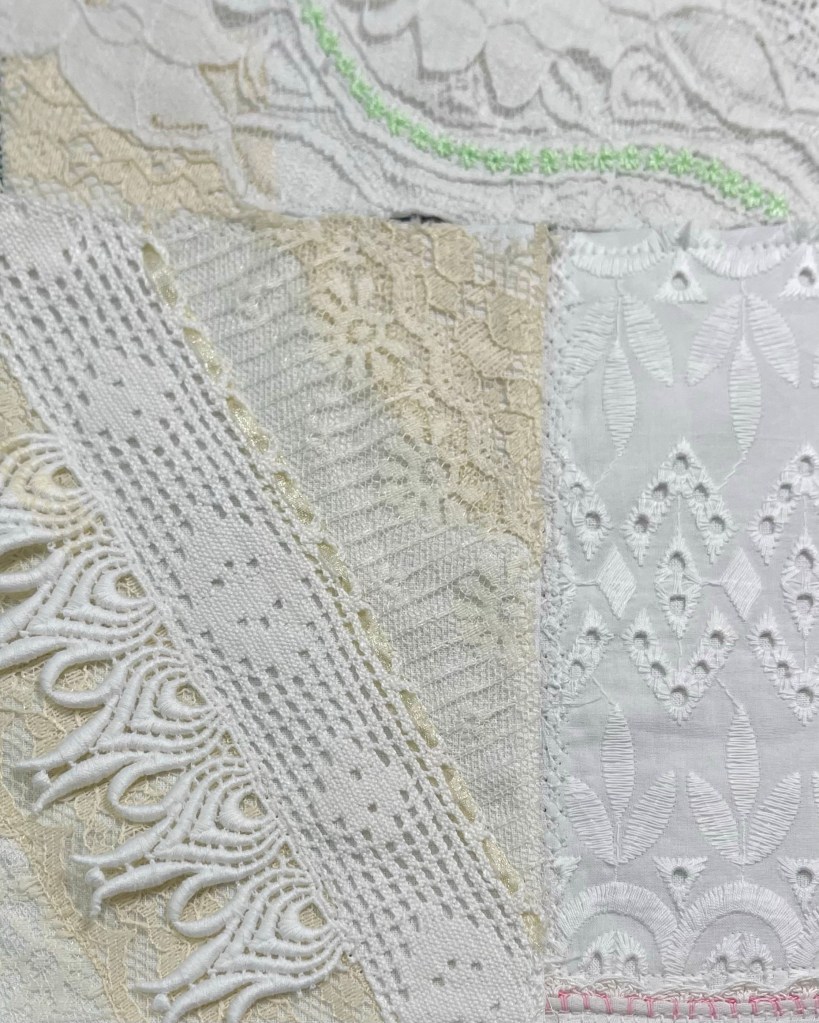
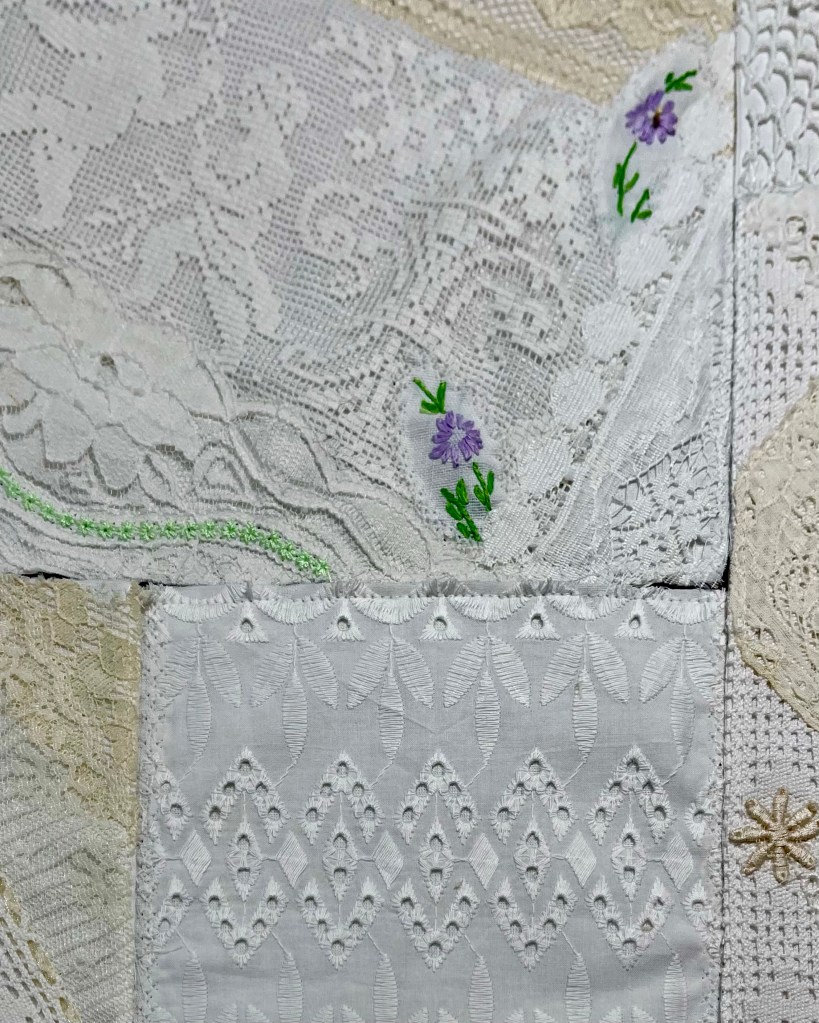
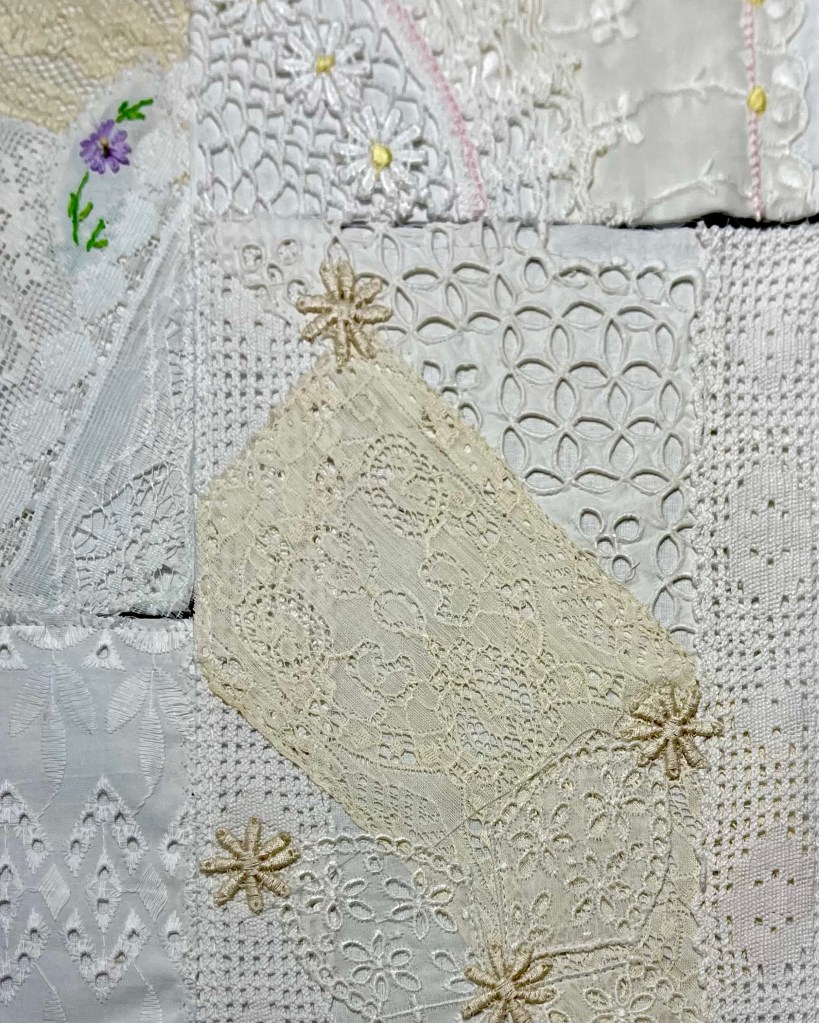
I’m adding pictures of the 4 quadrants to give you a close-up view.
Are you creating your own Bits and Pieces quilt? Hope these pictures help with your project!
Blog post #3 threw a lot of information and pictures your way, todays blog is all about just one 10×10” (when finished) piece.
In the 3rd blog a viewer also posted 3 very good questions about what I’m doing, how I’m doing it and how am I planning to quilt when ready. Remember, this project is my own, no tried and true directions, no finished project for reference, just me in my sewing room with a bin of wonderful and varied trims and laces.
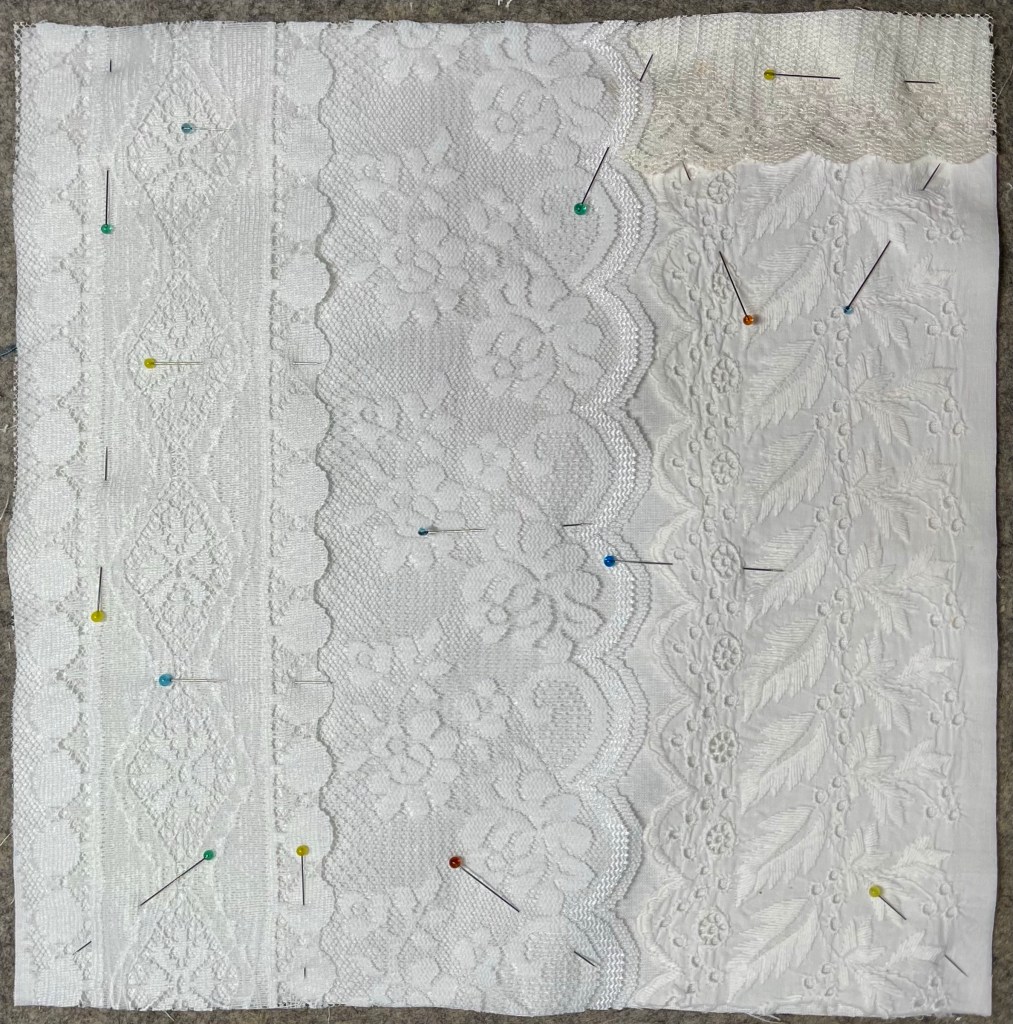
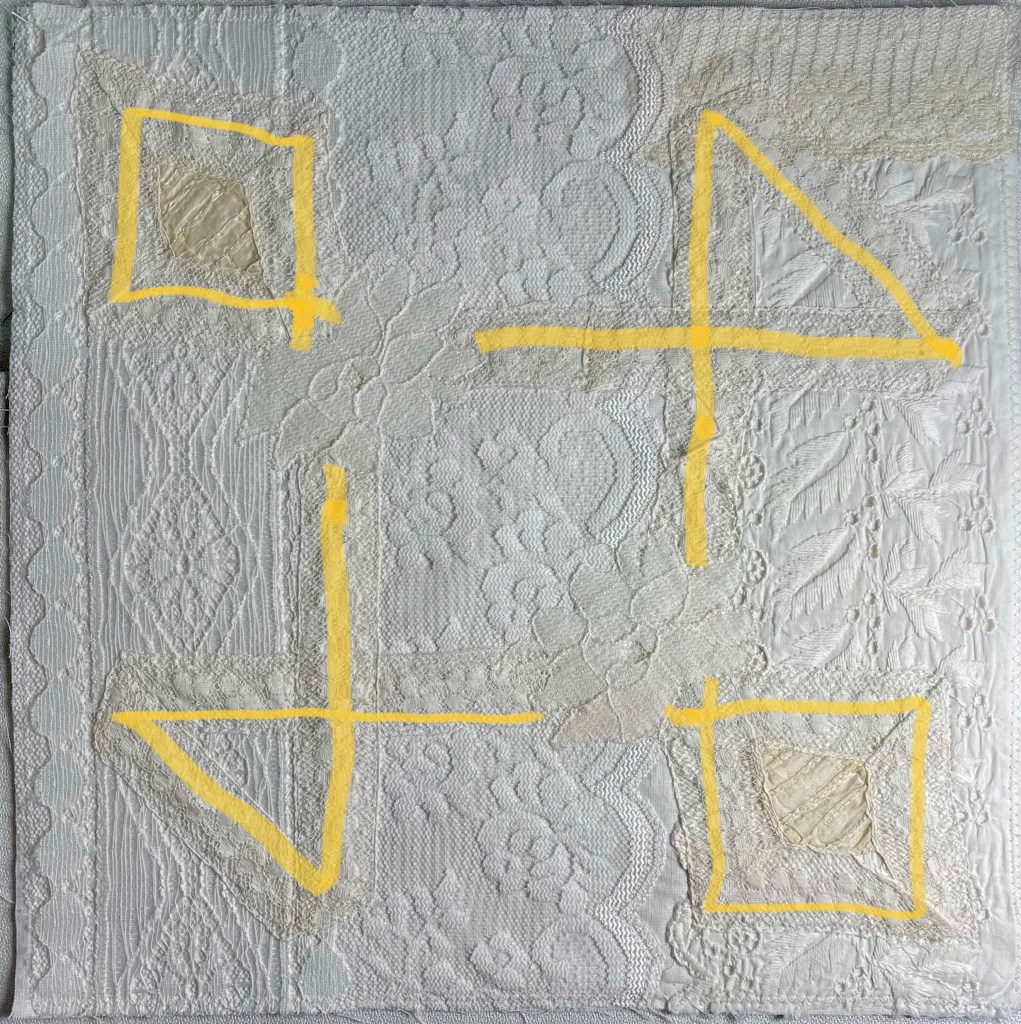
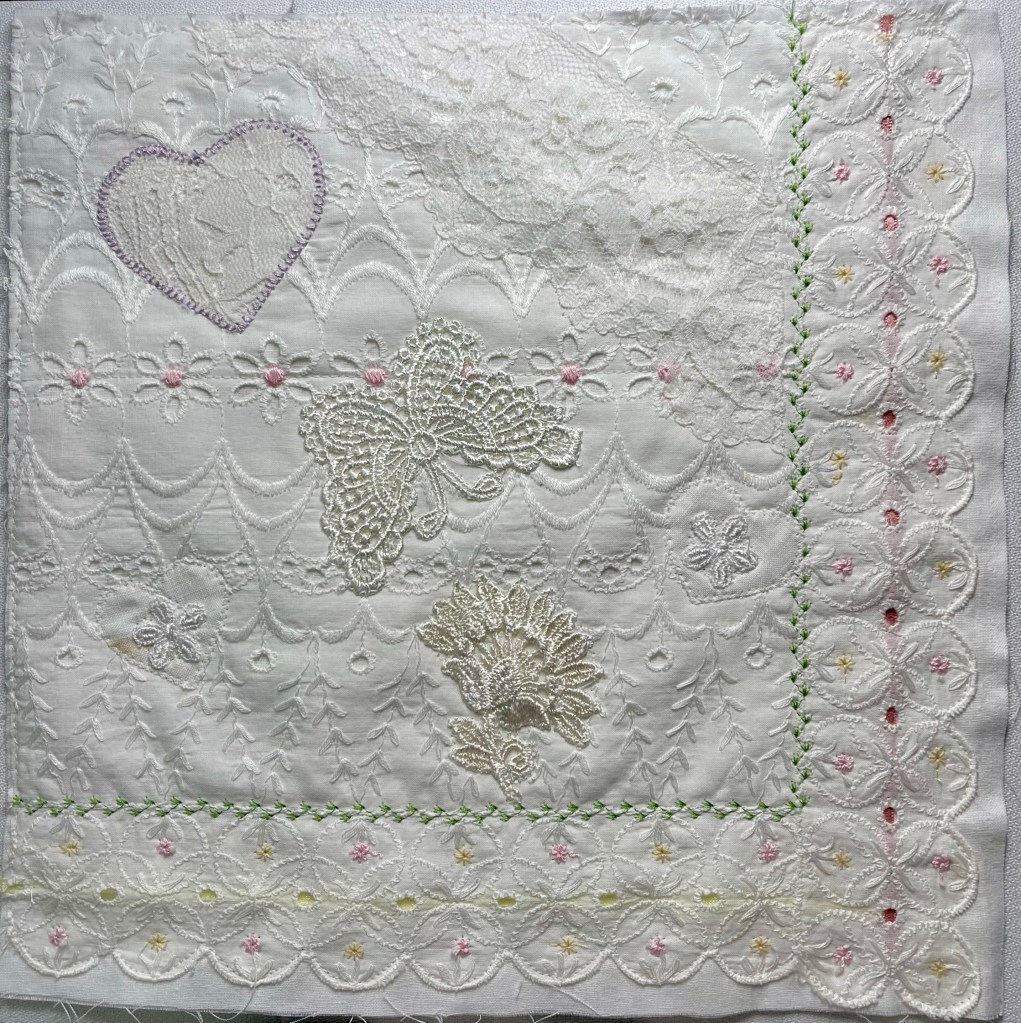
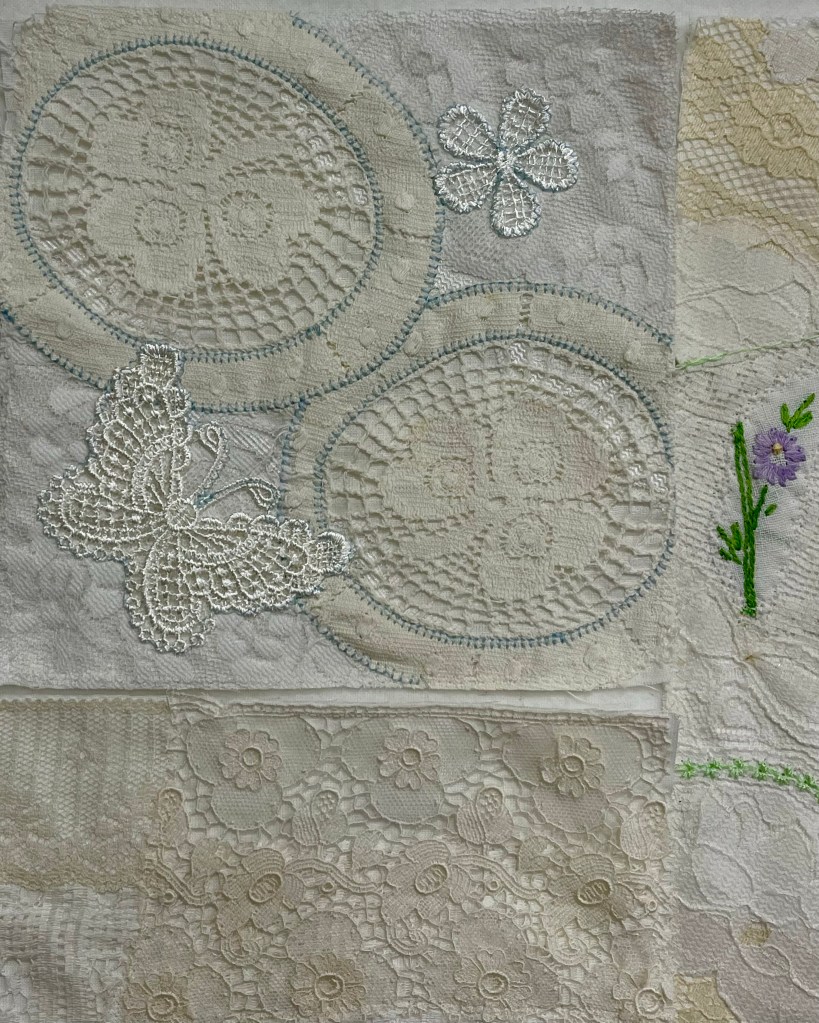
I started with 4 different pieces placed on a block base of 2 layers of relatively thin off-white 100% cotton muslin.
The yellow line above overlays a lovely and very long piece of trim. I wish I would have taken a picture of the trim before I stitched it to the block. The diamond ivory pintucks were part of a garment I’m sure, many many years ago. I folded the entire piece over the existing block placing the ivory pintucks at opposite corners.
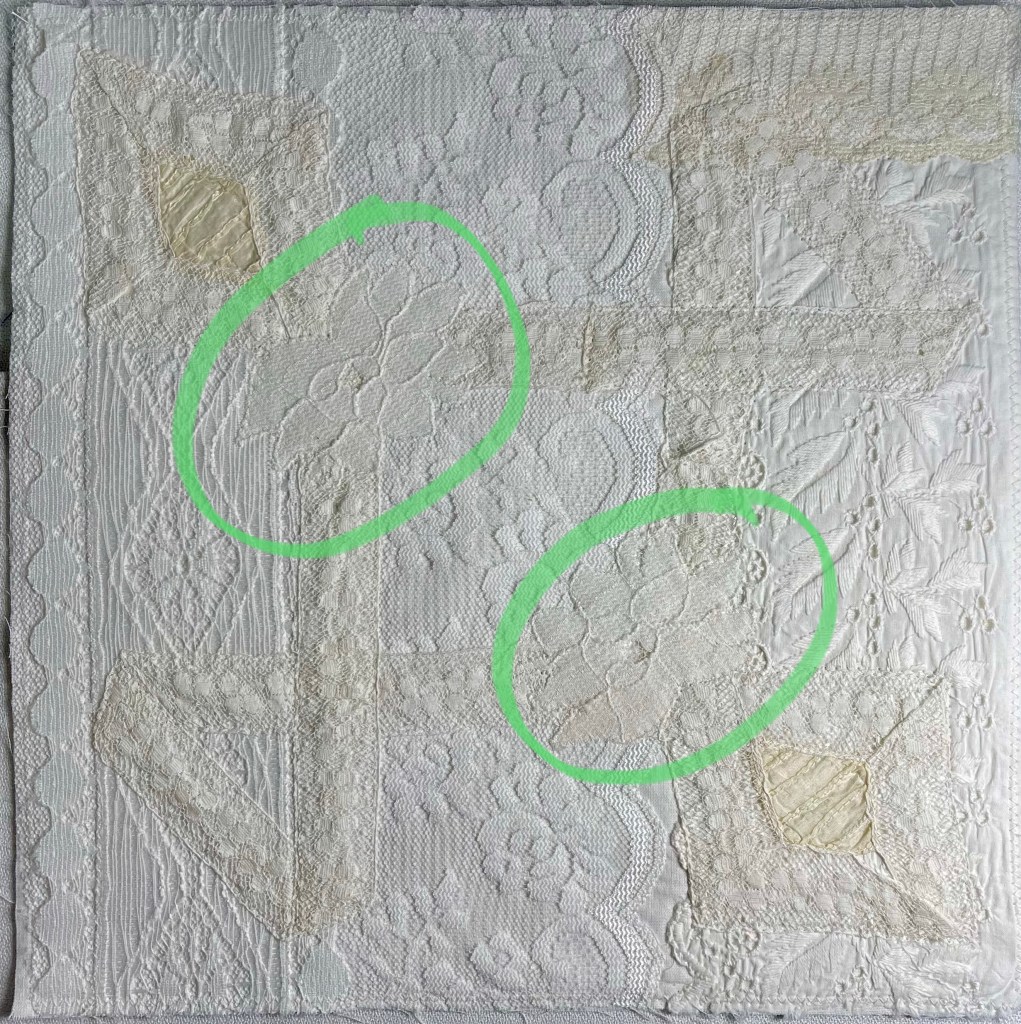
The green circled ivory lace flowers were fussy cut vintage lace.
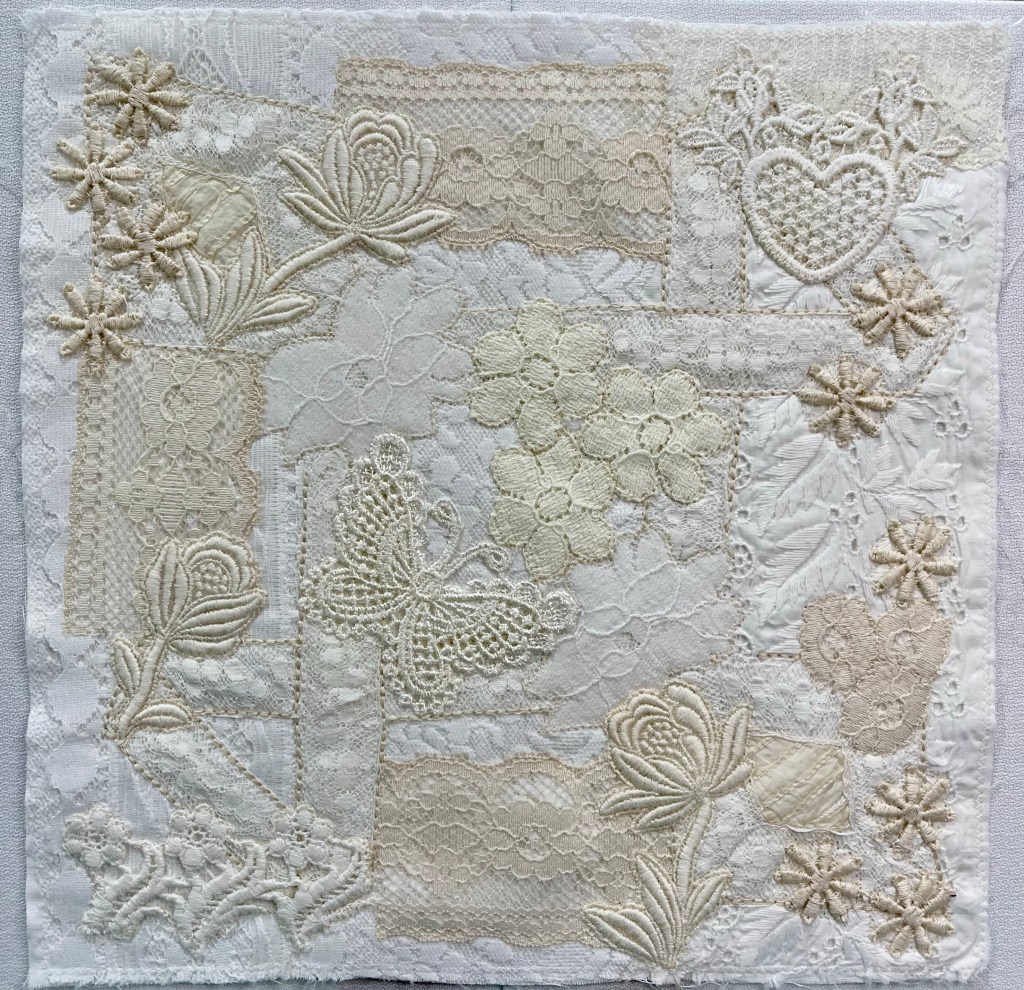
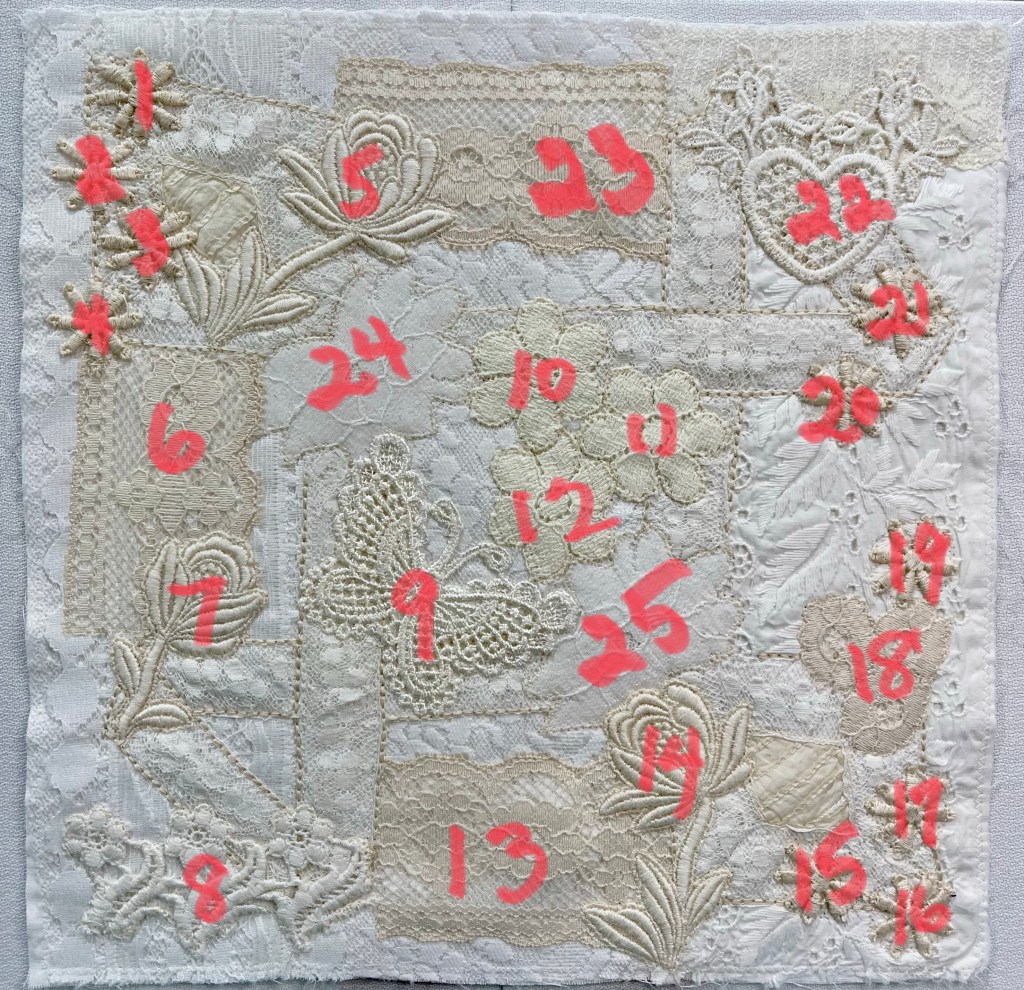
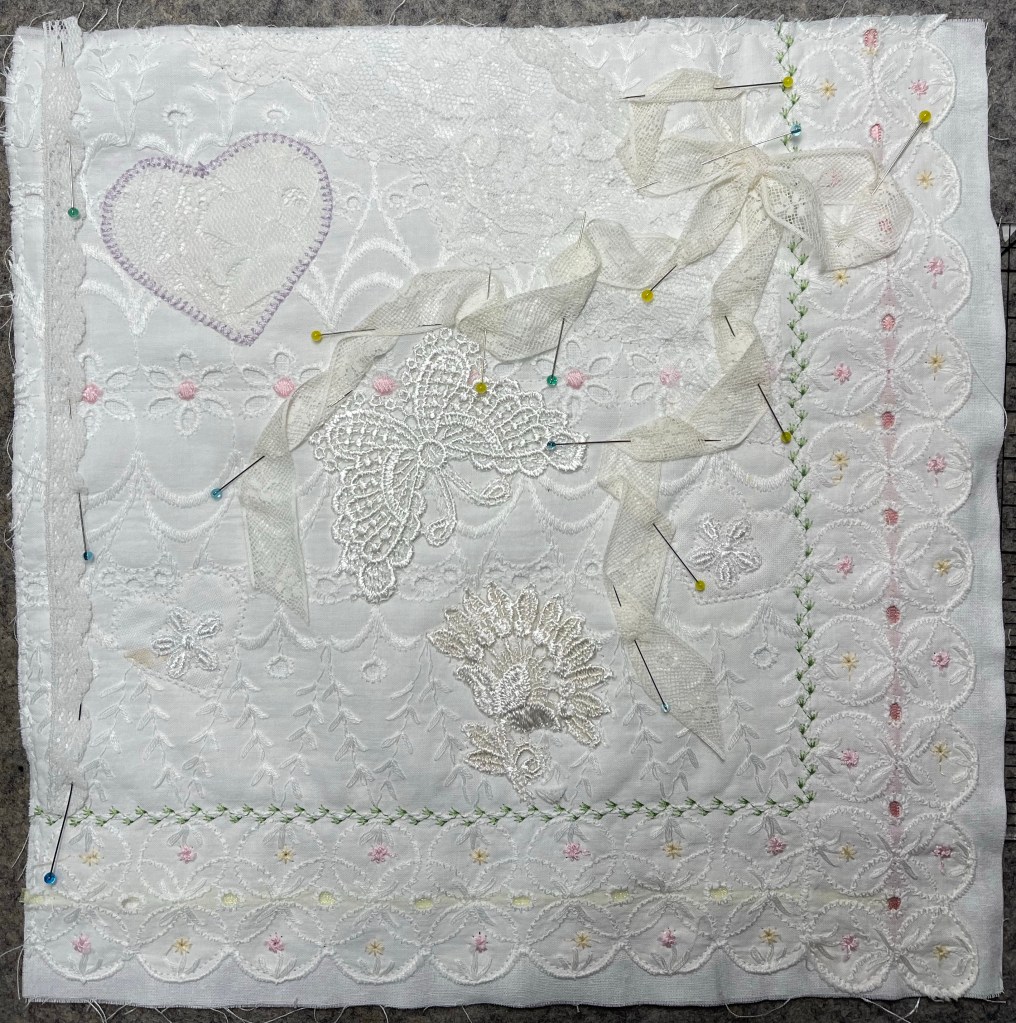
I initially thought this block was finished. About a week later I changed my mind. I decided each of the quilt blocks should be collages containing many many little points of interest.
The block above became the block below:
If I’ve numbered correctly, in addition to the initial lace trim with the ivory pintucks, this block has 25 points of interest. I like this!
So let’s recap:
1) 2 layers of muslin, 2) 4 pieces of flat lace, one very long piece of trim with pintucking and 3) 25 white/off white/ivory bits and pieces.
Important to notice, especially if you’re making your own bits and pieces quilt: can you see how after #2 above, I have intentionally placed all the 25 pieces inside the quarter inch seam allowance? Very important when the time comes to sew all the blocks together.
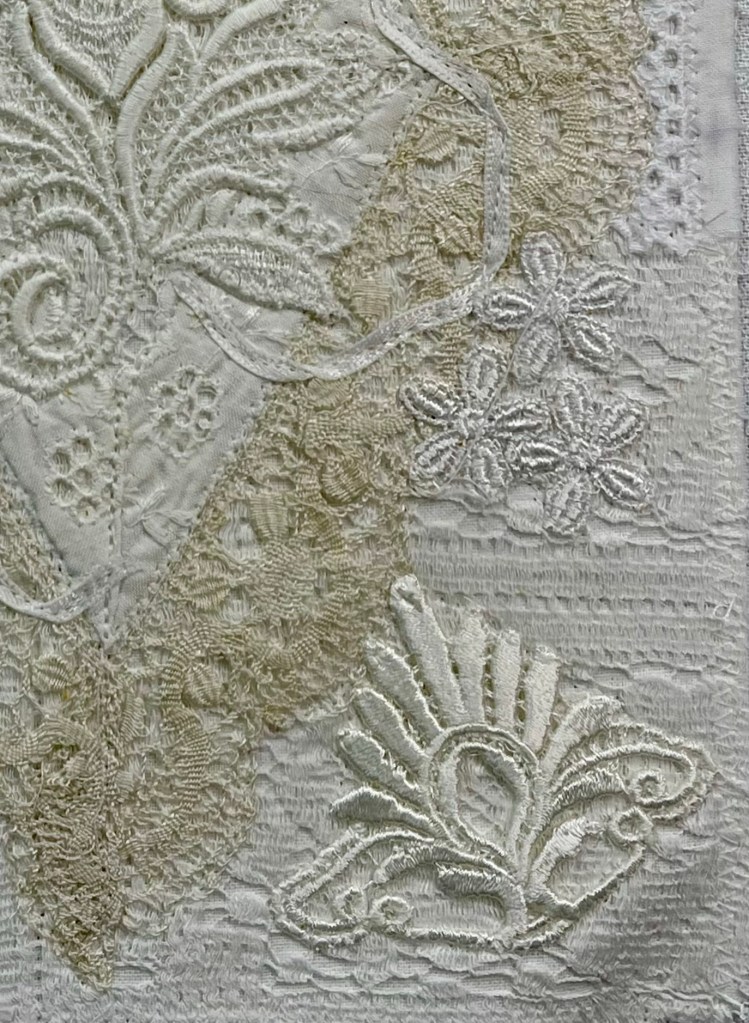
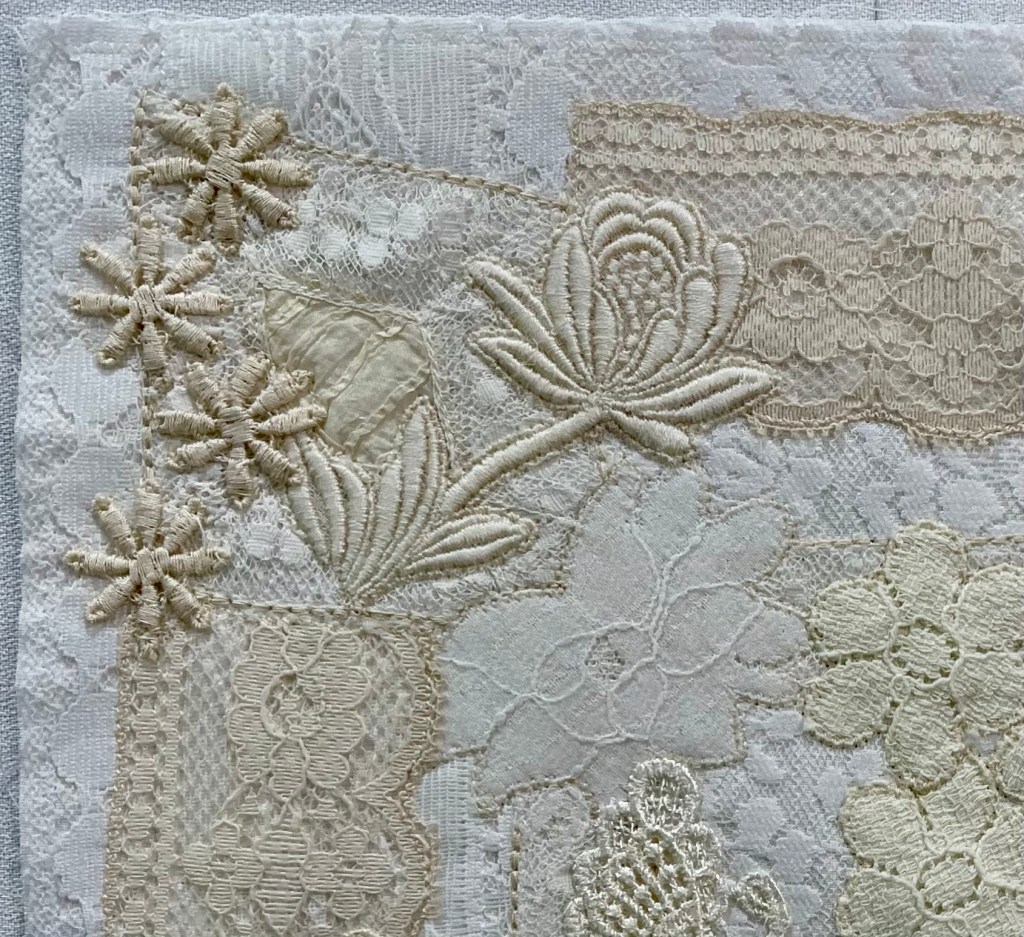
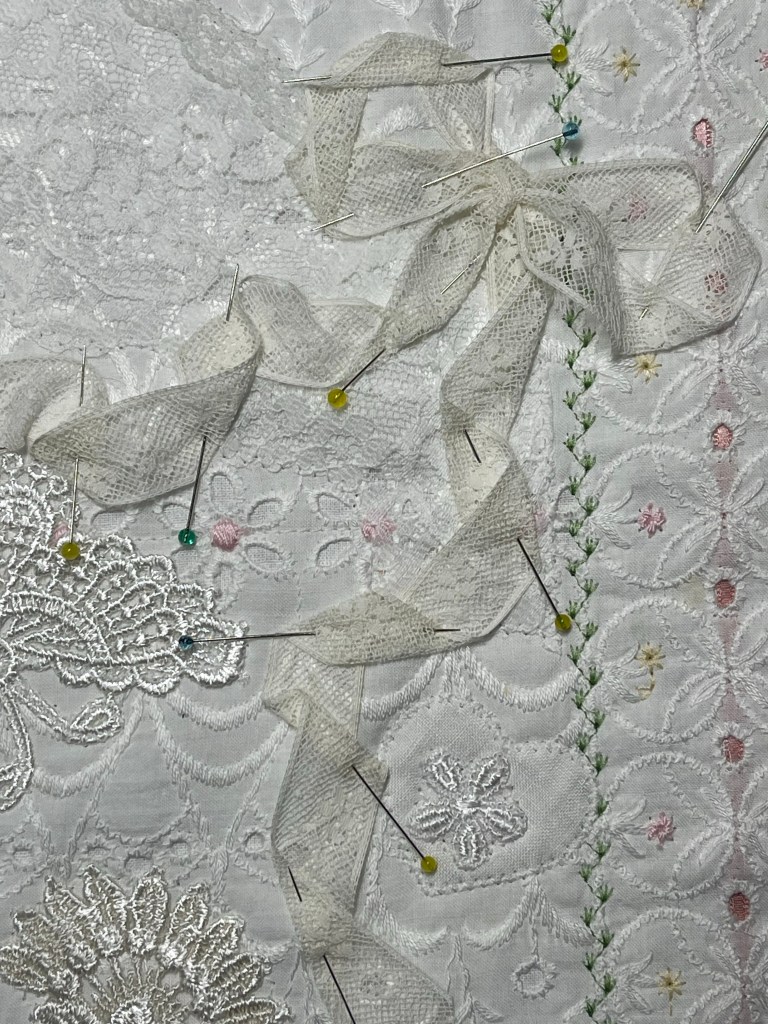
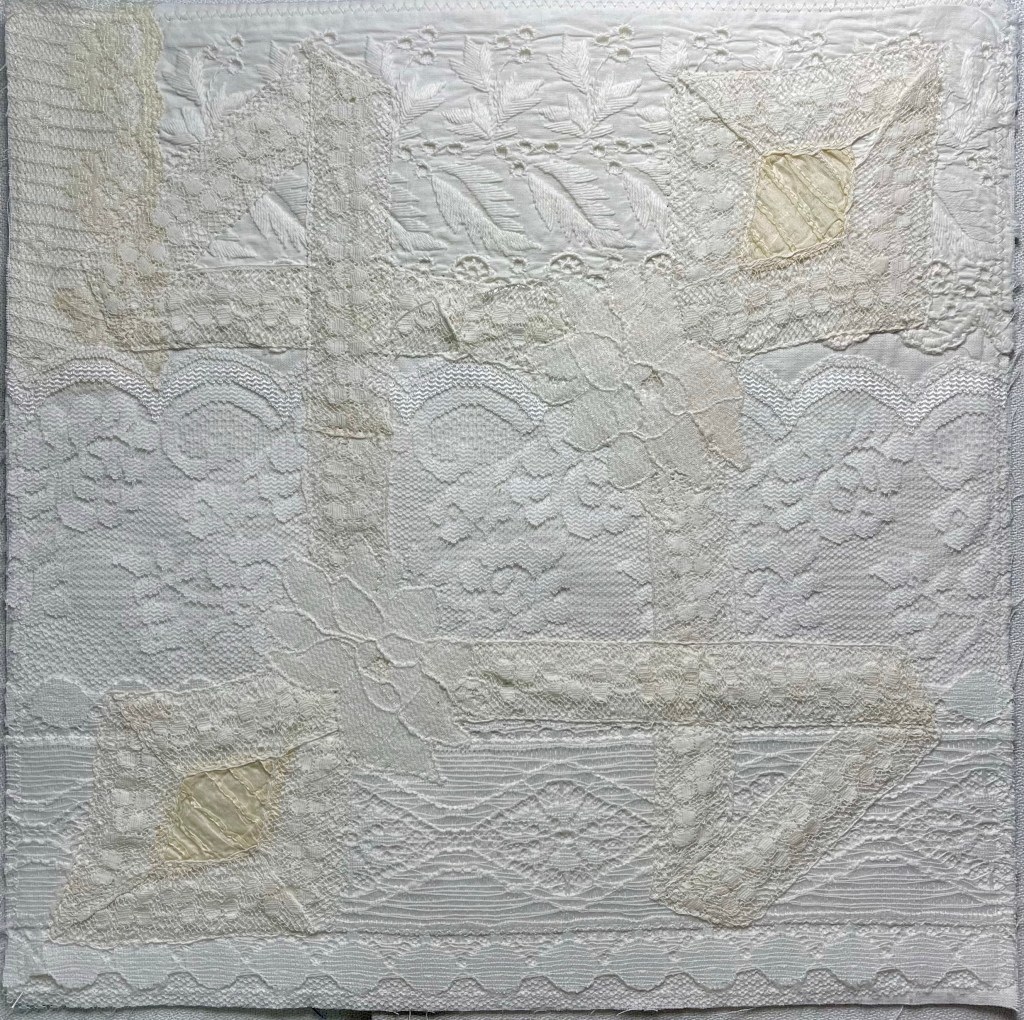
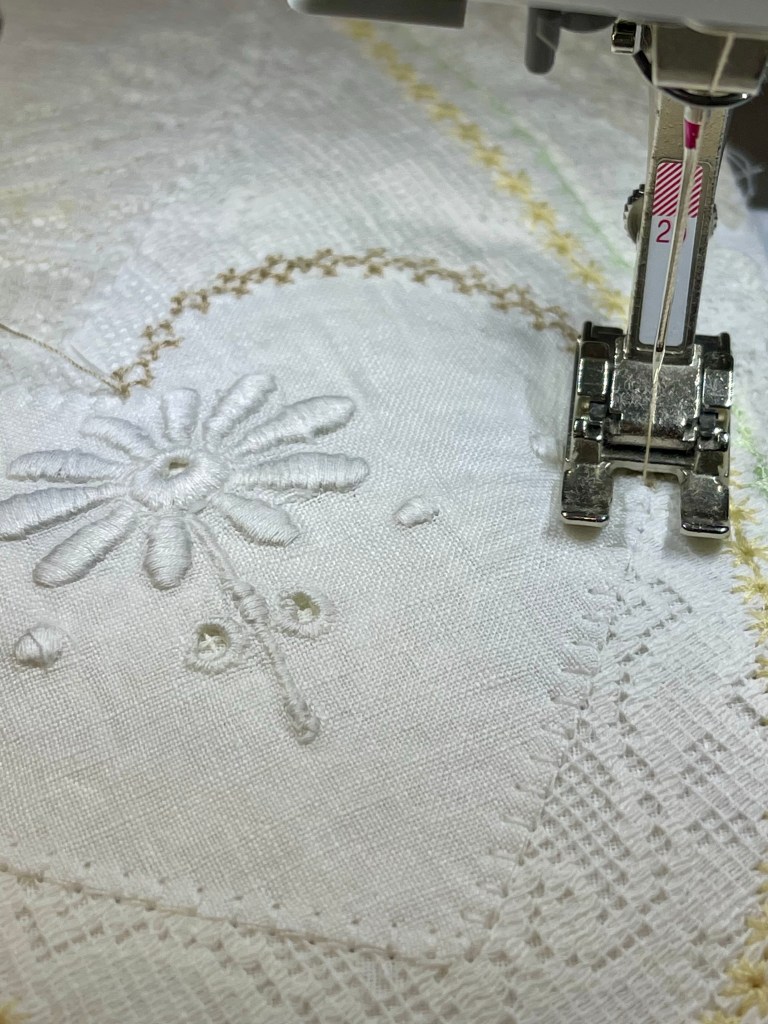
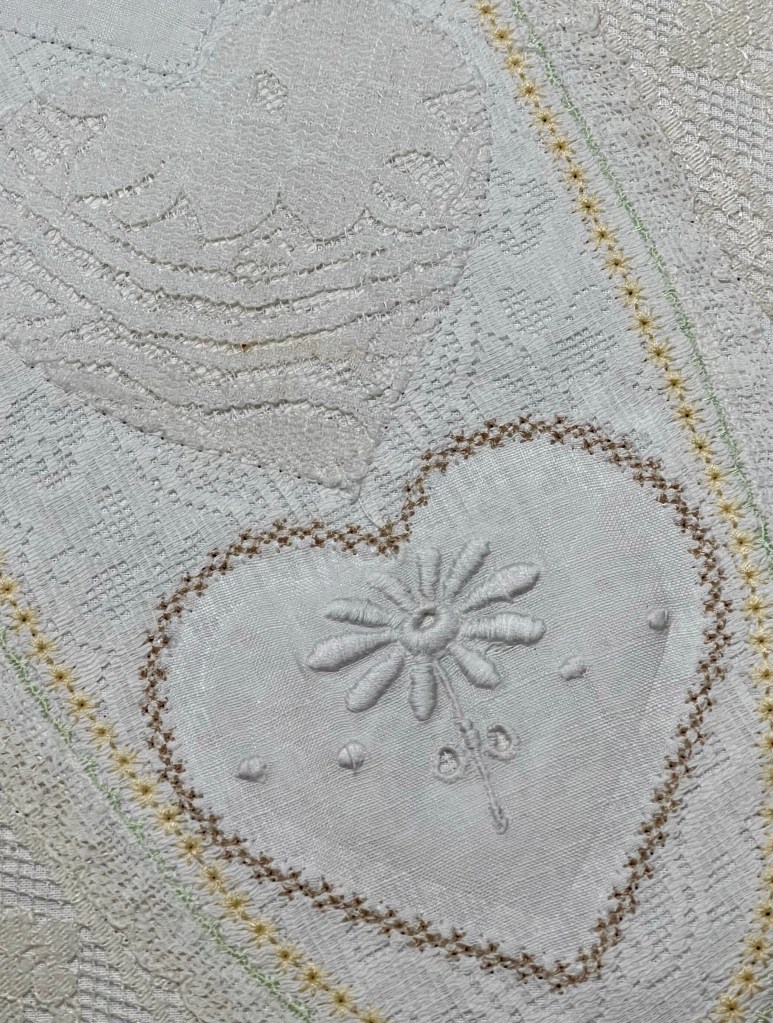
How about 4 close-up pics of the 4 quarters of this block:
Does this help as you create your own blocks? Can you tell that I’m using a variety of thread colors in the needle? The darker threads serve to both show the outline the motif as well as provide some visual depth to the piece.
The question remains…how am I going to quilt this! If you zoom in as close as possible on these last 4 pictures, you might be able to see that everything is machine stitched down. There is nothing that will catch the hopping foot of my longarm but still…right now I have no idea!
Hope these blog posts will inspire you to create your own Bits and Pieces quilt! ❤️
One of the nice things about this pattern is the freedom to experiment, change your mind, take things apart and head off in a slightly revised direction. For this quilt top I’ve already done all four.
I began by making simple blocks randomly embellished with trims and laces and eyelets with a very small pop of color here and there.
After creating maybe 20 blocks, I changed my mind and removed the color (yes it took me forever to remove some of the colorful machine decorative stitching), and decided that each block should be transformed to a detailed collage…collages where each time you look at the block you find new things. Am I happy I removed the color? Absolutely! Why? 🤷♀️ I found it distracting.
This block is a good example of filling it up with bits of so many things! The bit of color in the upper left corner will either be removed or hidden with something placed atop.
This is another example of a block where all the color will be removed.
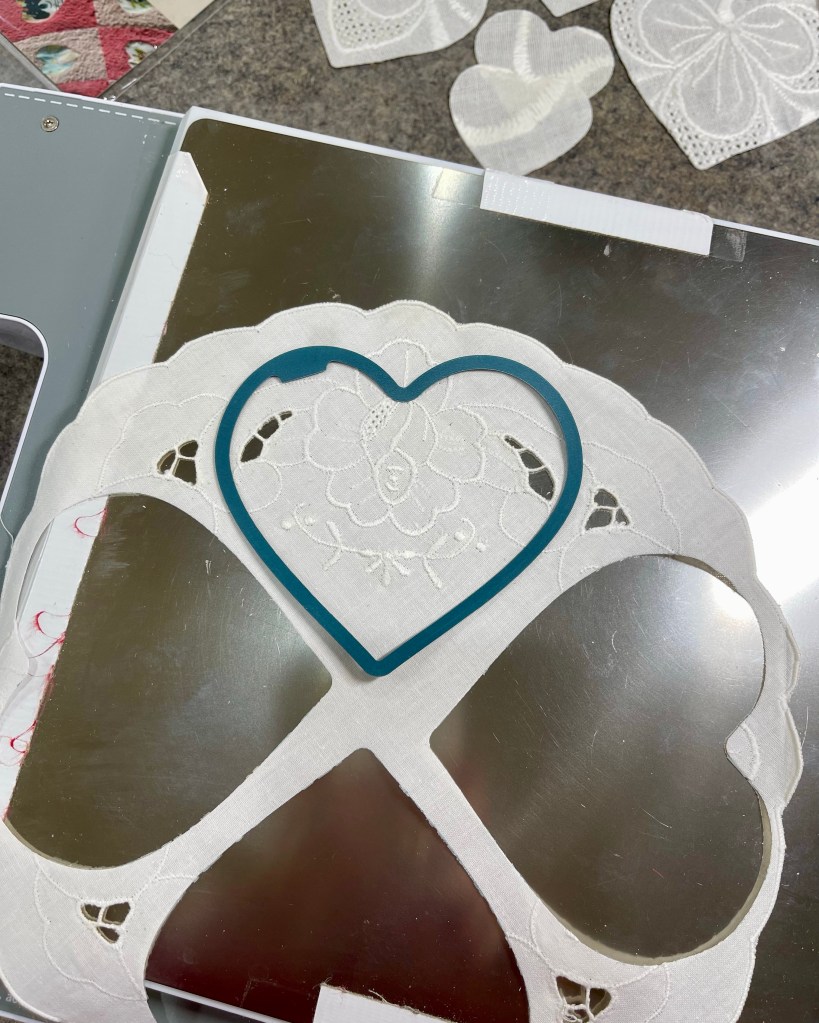
I’m very fond of hearts and you’ll find them in most of the blocks. I’m using my Accuquilt with the Crafter’s Edge (the company is no longer in business ☹️ ) adapter as well as Crafter’s Edge metal cutting templates.
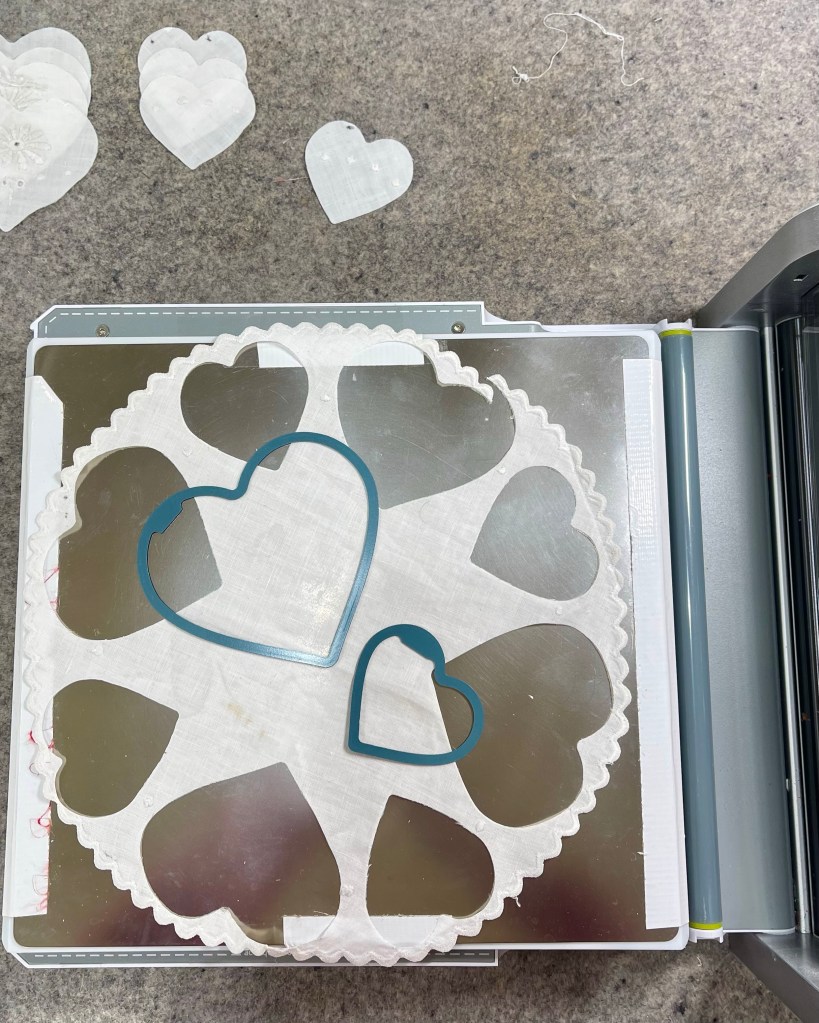
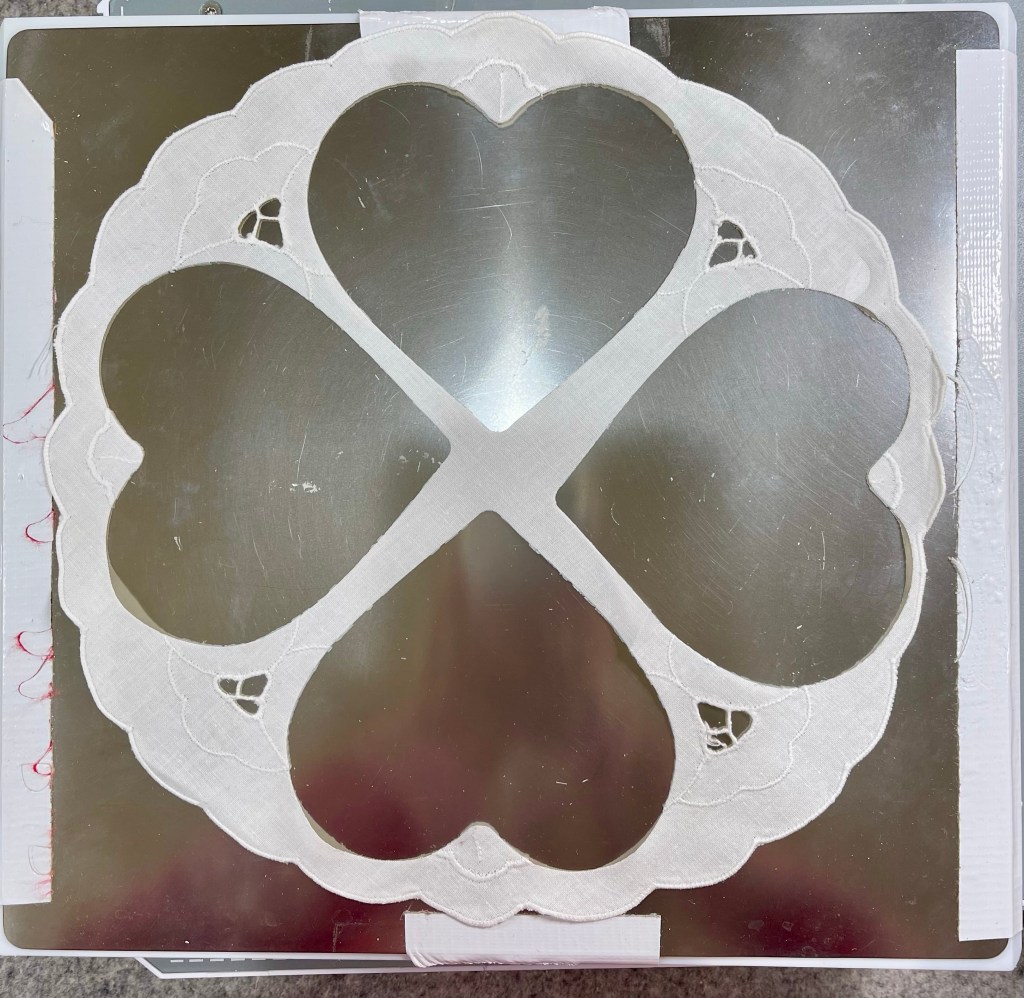
This vintage white circle doily gave me so many hearts, each one so far fussy cut to take advantage of the white embroidery in the doily.
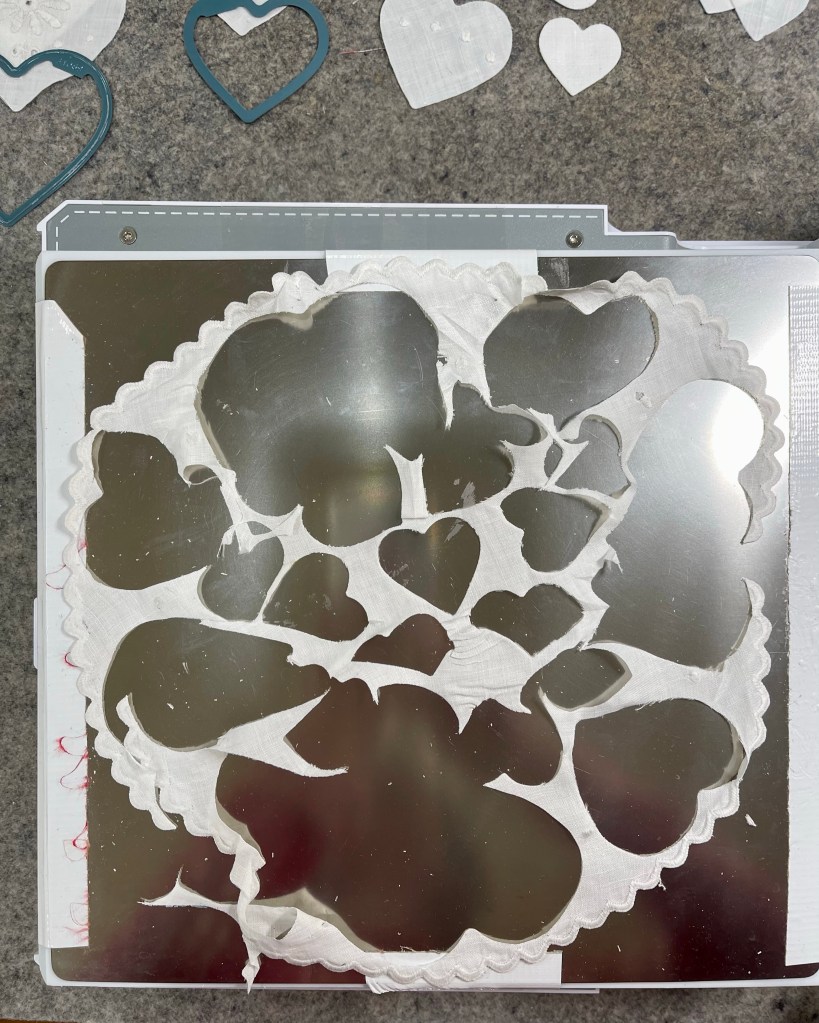
Almost zero waste as I am hopeful to use the leftover scalloped outer edge.
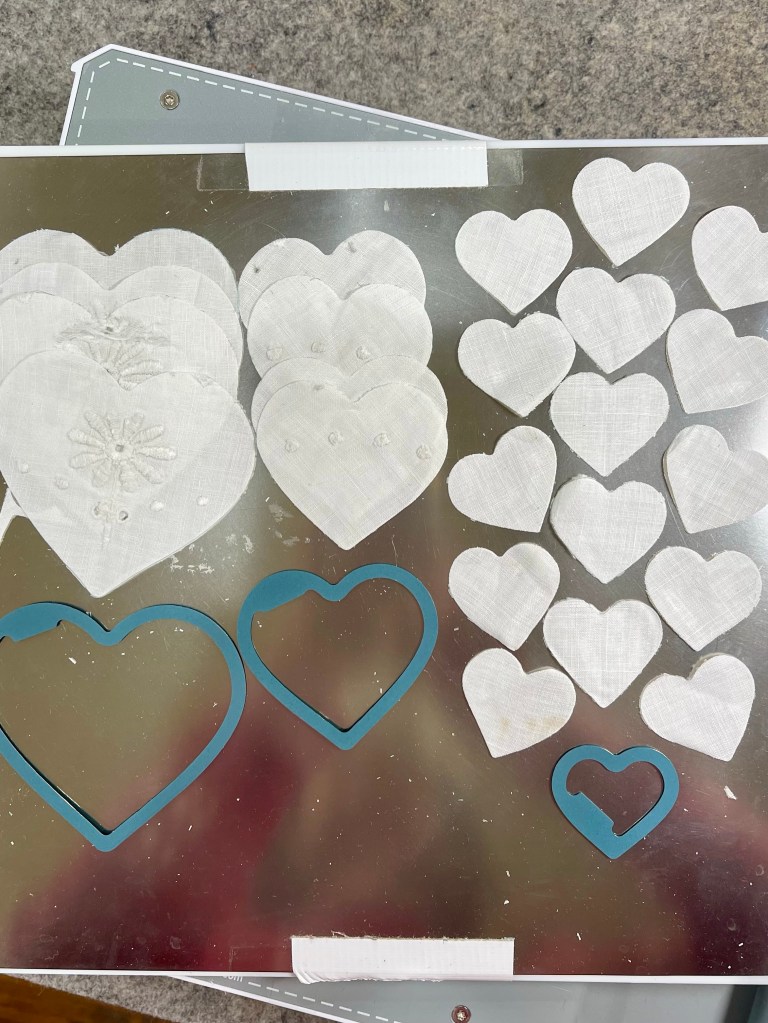
Another vintage doily with some lovely white embroidery.
23 hearts from two small white doilies.
Don’t have the Accuquilt or the adapter? Check out this older blog post talking about creating your own templates from dollar store plastic binders:
Here’s just one example of the hearts used to embellish a small block.
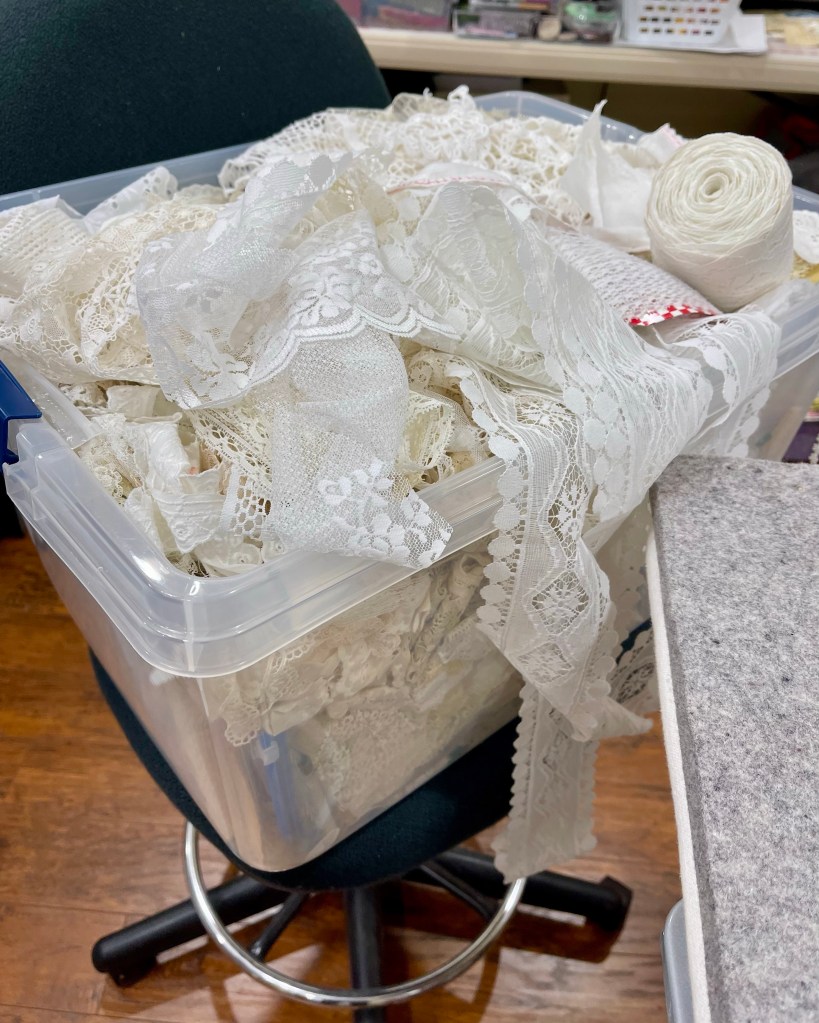
You remember this picture from an earlier blog post? I’ve not even made a dent in the laces and trims! Wonder how many quilts I could make from this container of treasures! ❤️
This post is all about telling you it’s absolutely ok to change your mind mid-project, it’s absolutely ok to become distracted as you create and it’s ok to be flexible as to what works and what doesn’t! It’s your project, do what makes you happy! ❤️🙂
Are you thinking of making a Bits and Pieces quilt of your own? Today I’m going to load up the blog with pictures of some of the blocks and talk about several of them.
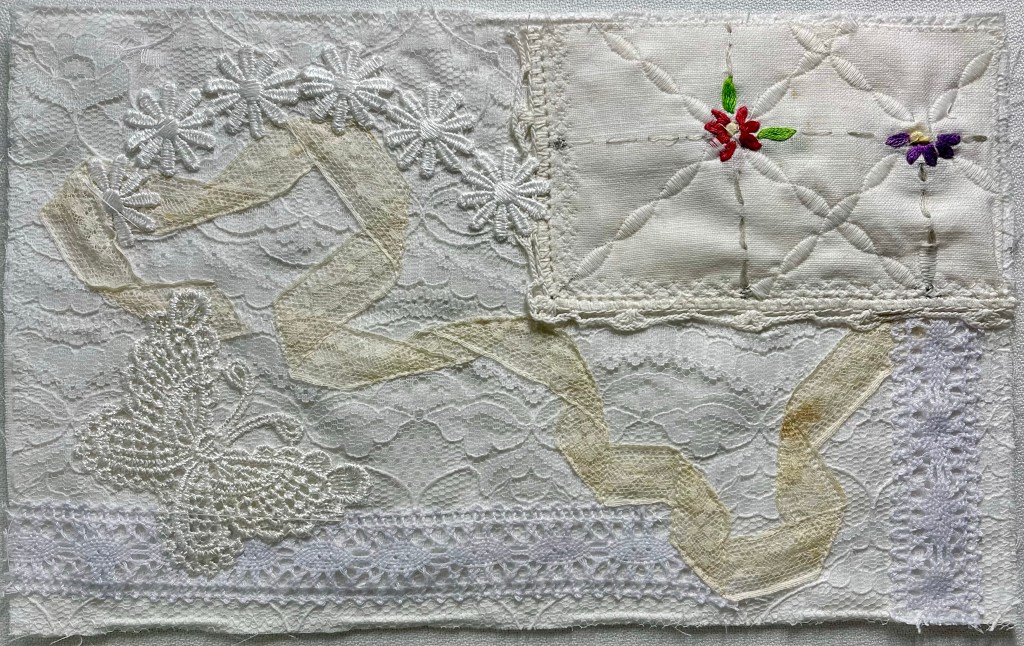
Incorporating both old and new this block began by covering the muslin base (the stabilizer for the laces and trims) with both white and off while laces. The top right piece is from a dresser scarf, I added the diagonal machines decorative oval stitches AFTER the piece was stitched to the block. The butterfly, the string of 6 white flowers and the white bottom and right side trim is new.
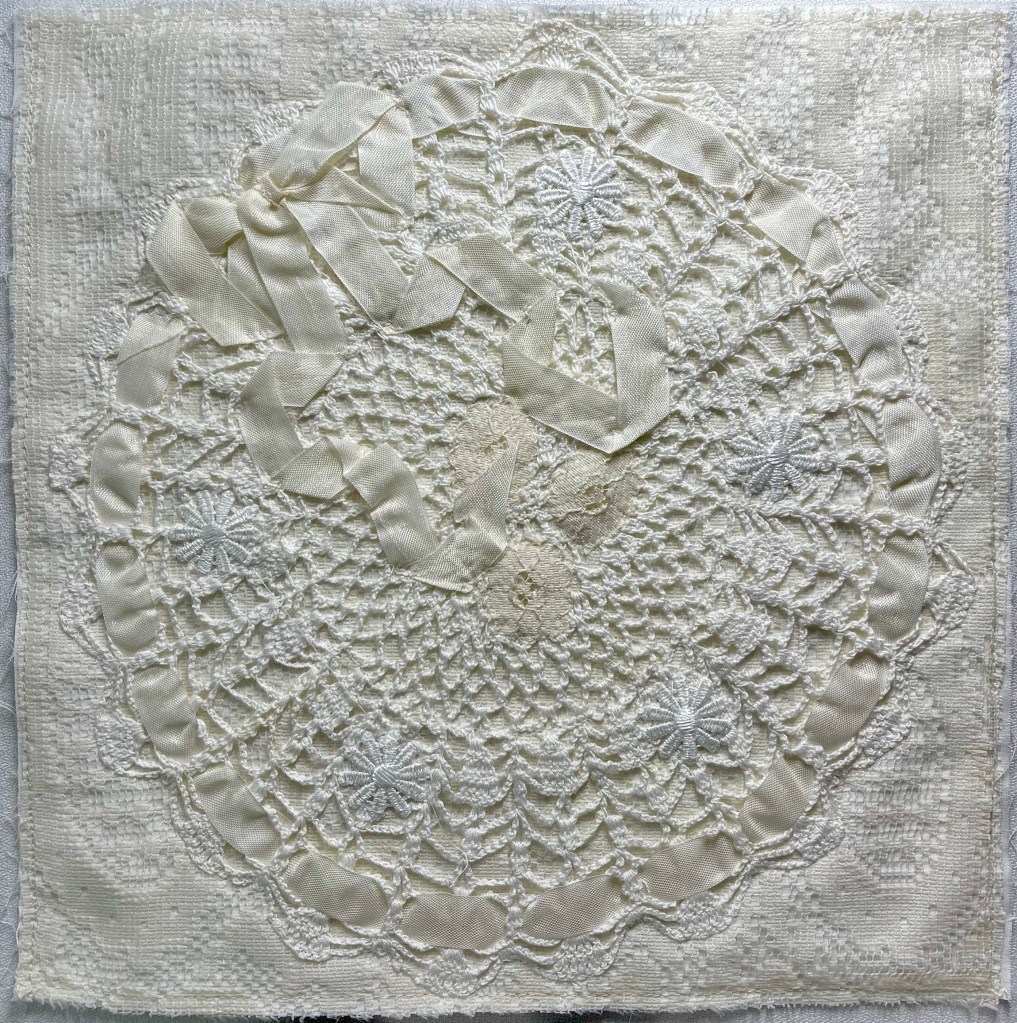
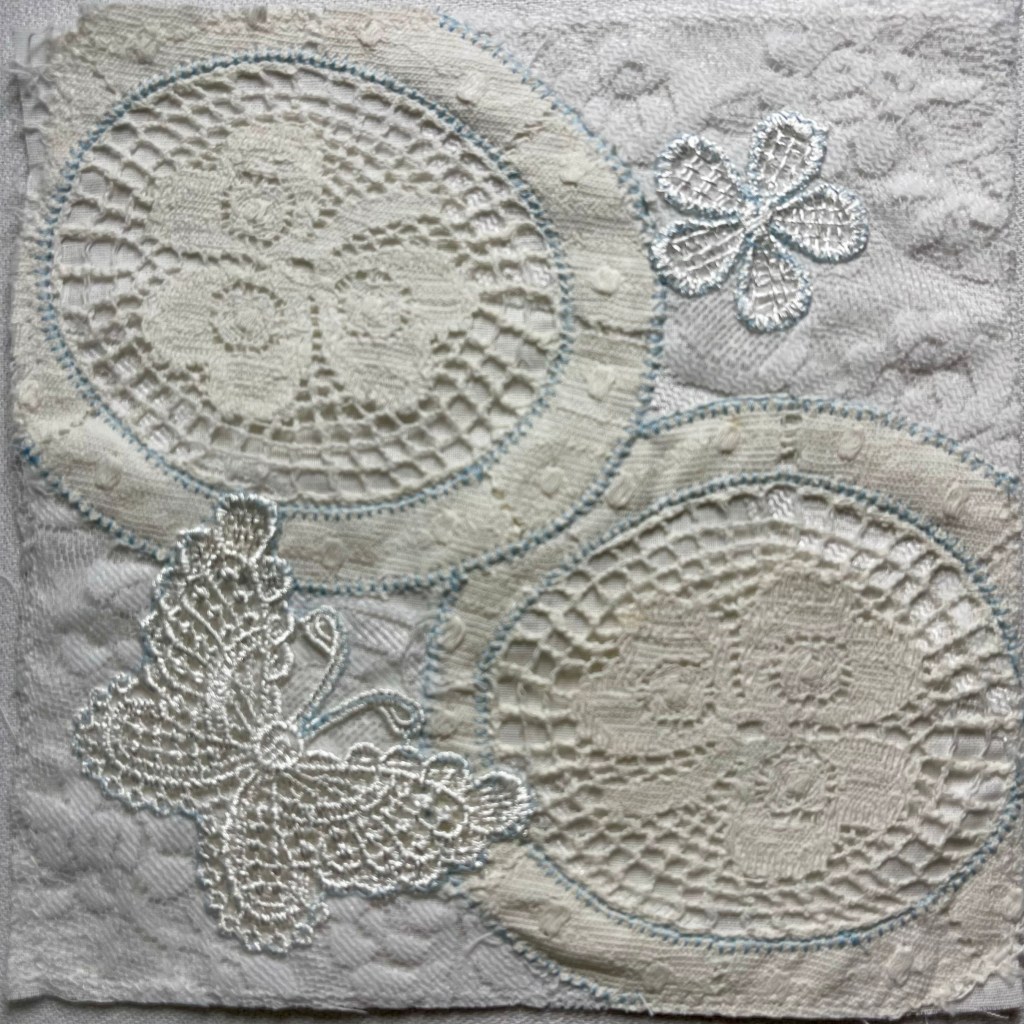
This block base is a piece of an off white vintage commercially produced tablecloth. The old hand crocheted doily (white) needed some “pizzazz” so I added the outer edge ribbon woven, the off white hem tape ribbon with streamers. I fussy cut the 3 center flowers from vintage lace and added the 5 white commercially produced daisy flowers.
This block, while I kind of like it, it may not make the cut as it will be a challenge to longarm.
Oh Lily of the Valley! This brings back childhood memories!
This block did not grow on me. I dismantled it yesterday with the thought: I can do better. I’ll keep you posted.
Talk about a mish-mash of vintage, this block fits the bill!
Hum…at his point in my project this one, in my mind, is boring. Expect changes next time I blog…
Have you noticed I am partial to hearts, butterflies and the white daisy-like flowers?
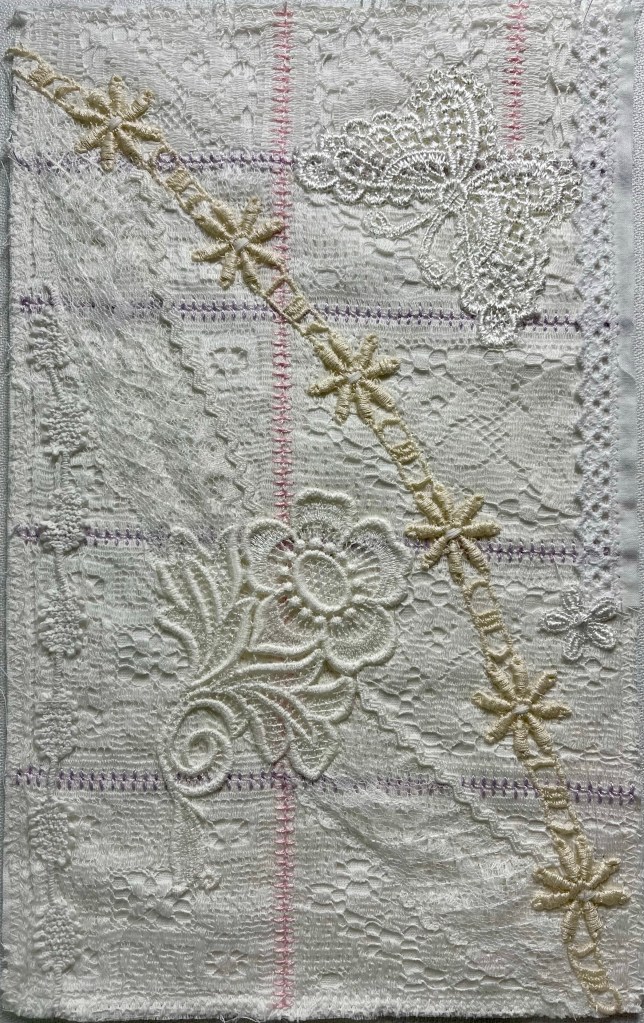
The visually heavy top motif, using a matching color thread I decoratively machine stitched around the outer edge of the large flower. It is hardly noticeable. Using a darker color thread I did a different machine decorative stitch on the inside of the outer flower. It serves to give the motif just a tiny bit of visual depth.
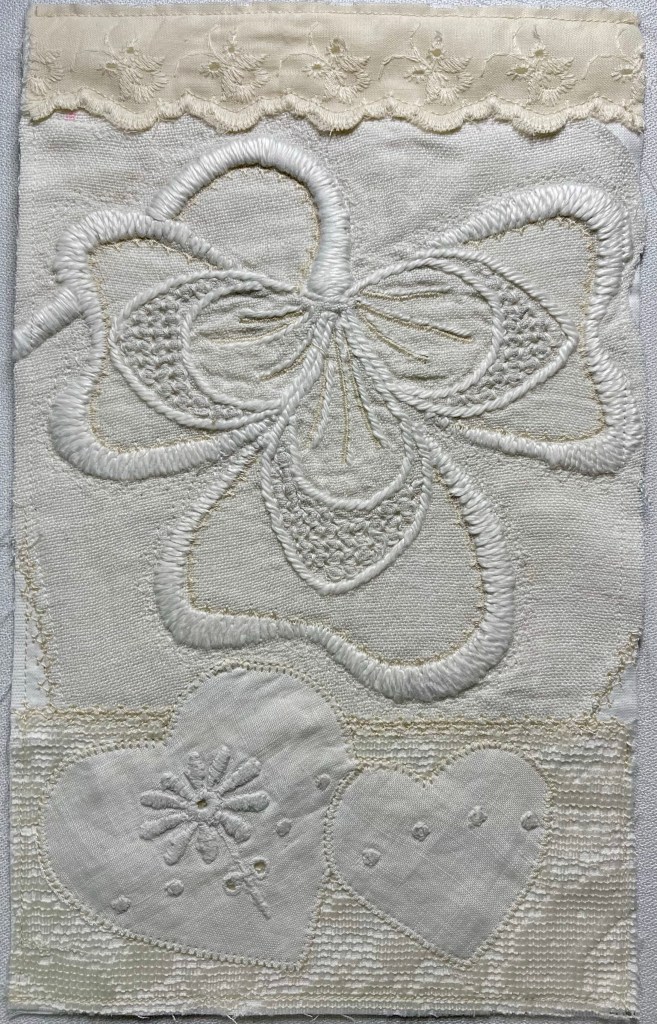
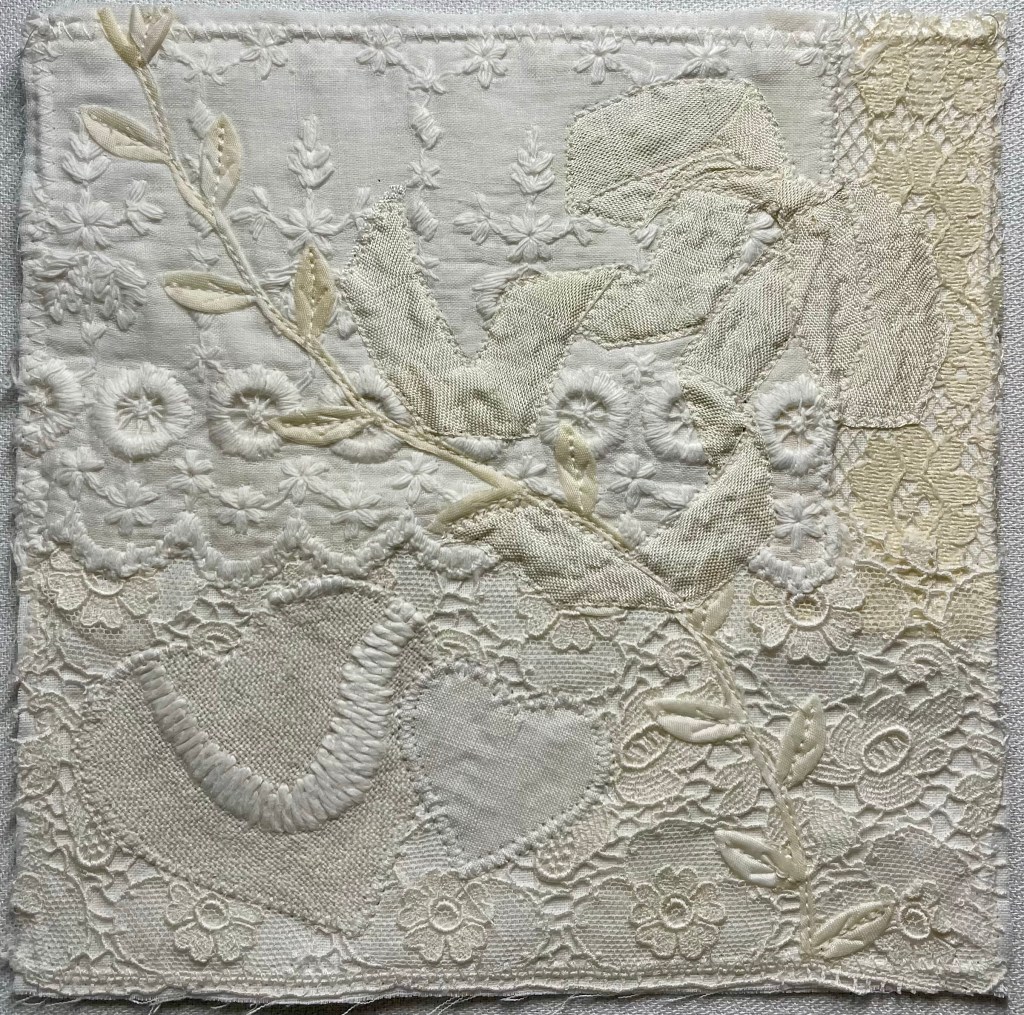
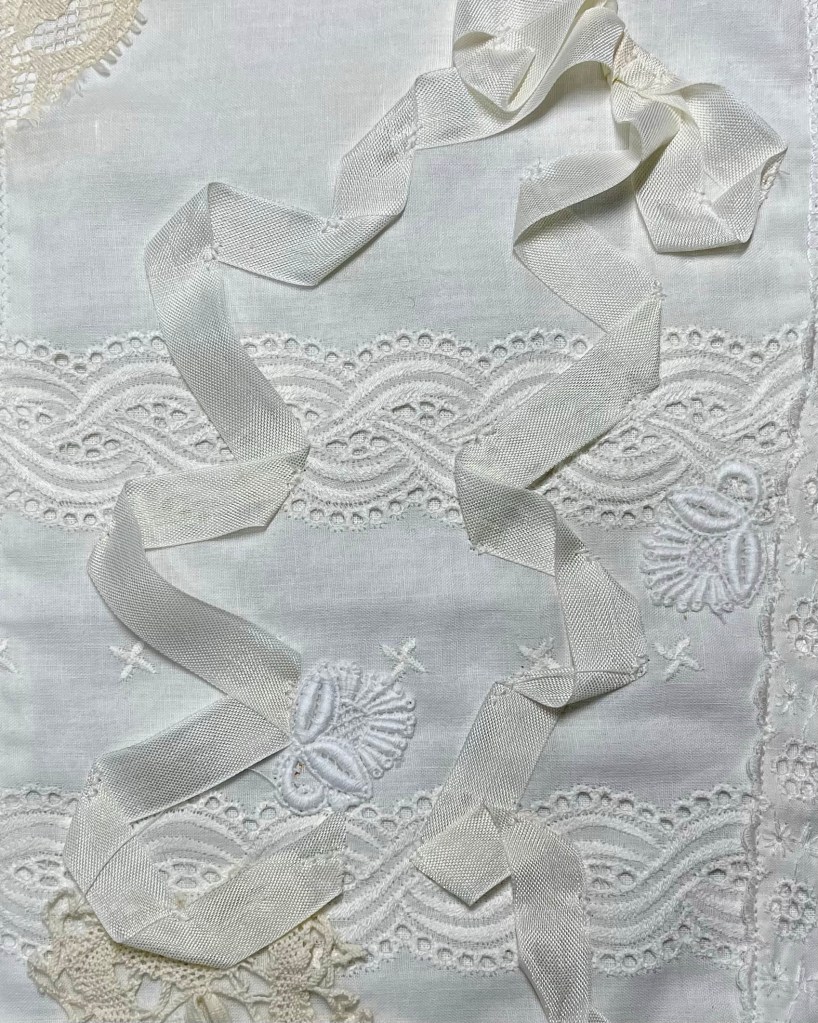
Goodness, where do I start describing this one, it’s jam packed with so much! Can you easily see the off white hem tape ribbon?
I should have mentioned earlier, I’m also smitten with ribbon bows with long streamers.
Vintage shamrocks appliqué stitched with pale blue 40 weight thread. This stitching gives them definition.
A portion of a white vintage doily with loads of white decorations stitched to the front.
How the block began…
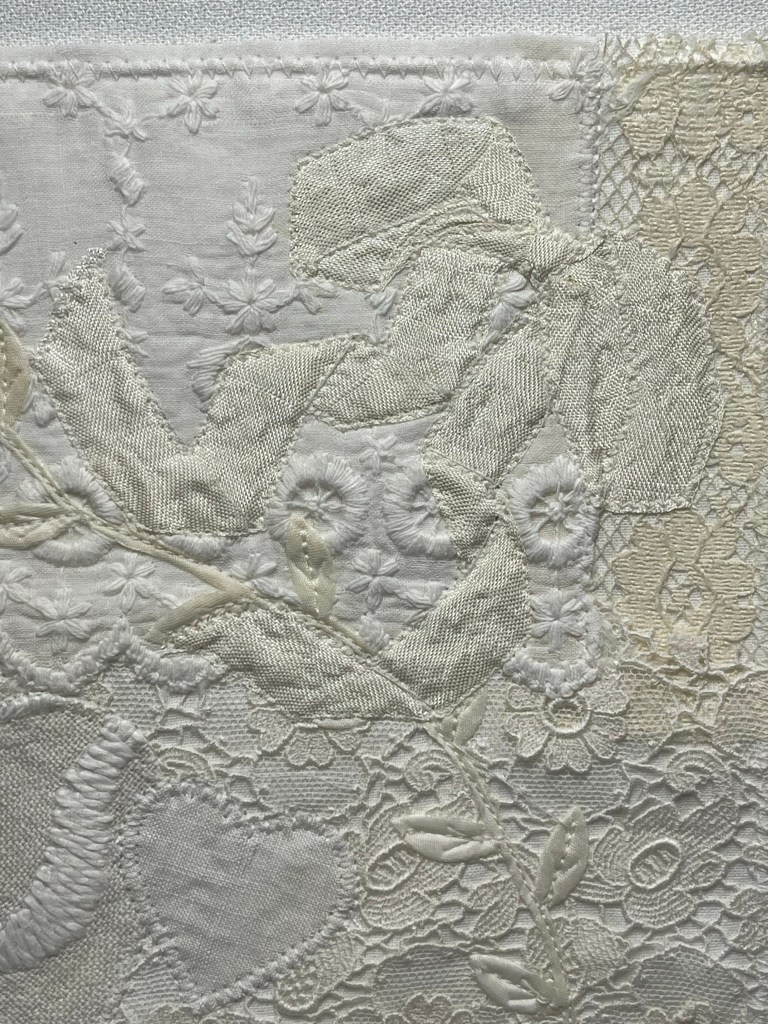
And how it finished. Below you’ll find a few close-up pictures:
The block above is the first of 10 pictures showing step by step start to finish.
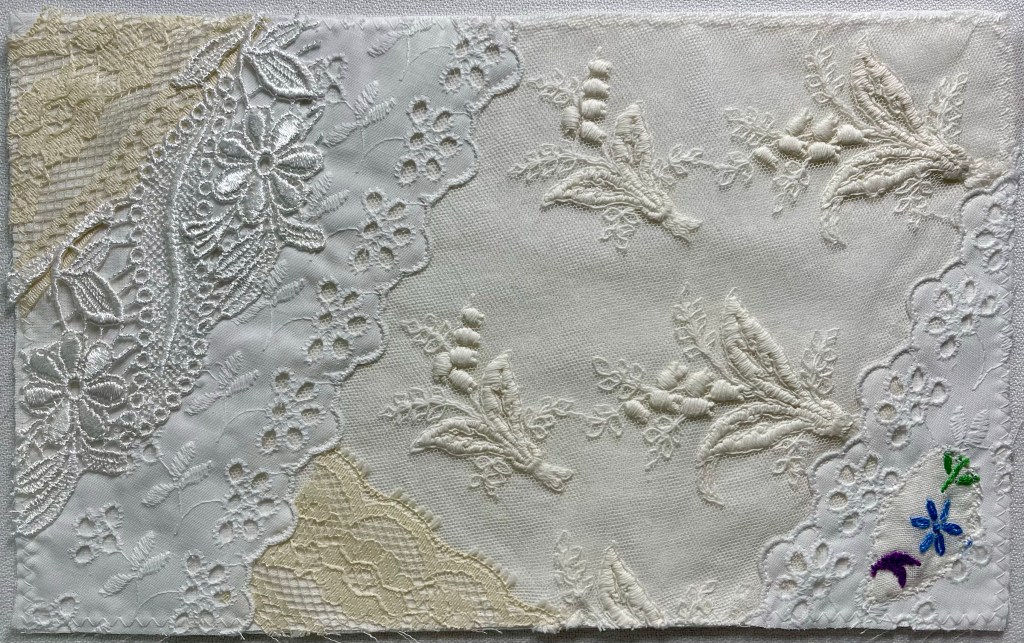
Using this wonderful vintage lace I fussy cut lots of flowers.
The diagonal piece? Maybe a child’s garment cuff?
The ivory leaves were cut from vintage eyelet trim.
A tiny zig-zag with matching thread firmly attaches the fussy cut flowers.
In order to give the petals interest I appliqué stitched them in place using a pale green 40 weight thread.
The piece above the cuff, a child’s lace collar?
Another lace bow with streamers! Are you surprised! This bow is made from quarter inch wide very fragile ivory lace.
Did I intend for the stained part to fall at the center? No! But in my mind I couldn’t have planned it better!
Finished!
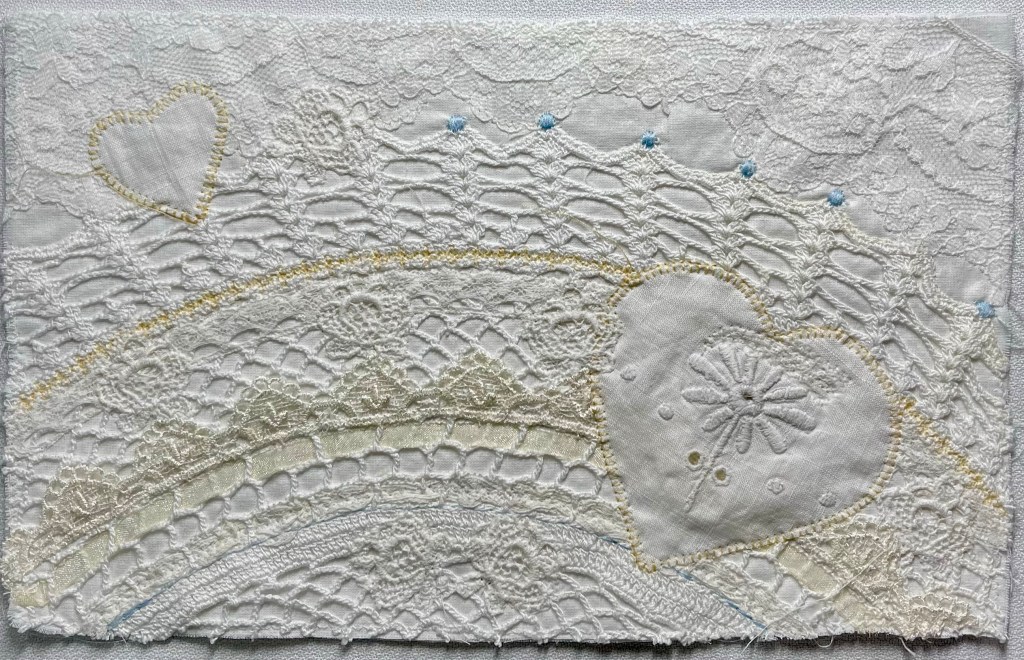
While I like everything in this block it remains rather boring. I initially appliqué stitched the off white hearts with matching 40 weight thread.
Rather than removing the appliqué stitching, I just put a darker thread in the sewing machine and stitched right over my original work.
I’m happy with the results and will apply the same procedure to the remaining 2 hearts.
Initially began as a project to use up whites/off whites/ivory vintage pieces to create a utility “throw” sized piece, I’m still thinking that will be my plan. What has changed since I began is the idea of doing a bit of hand embroidery stitching on the blocks as well as some beading.
I have no time frame in mind, that’s how I work best. 🙂
I’ve been collecting vintage linens, doilies, trims and laces for years and often it’s the white, off white and/or ivory pieces that are passed over for the more colorful embroidered pieces.
This picture is a testimonial to how often these pieces are delegated to a storage bin.
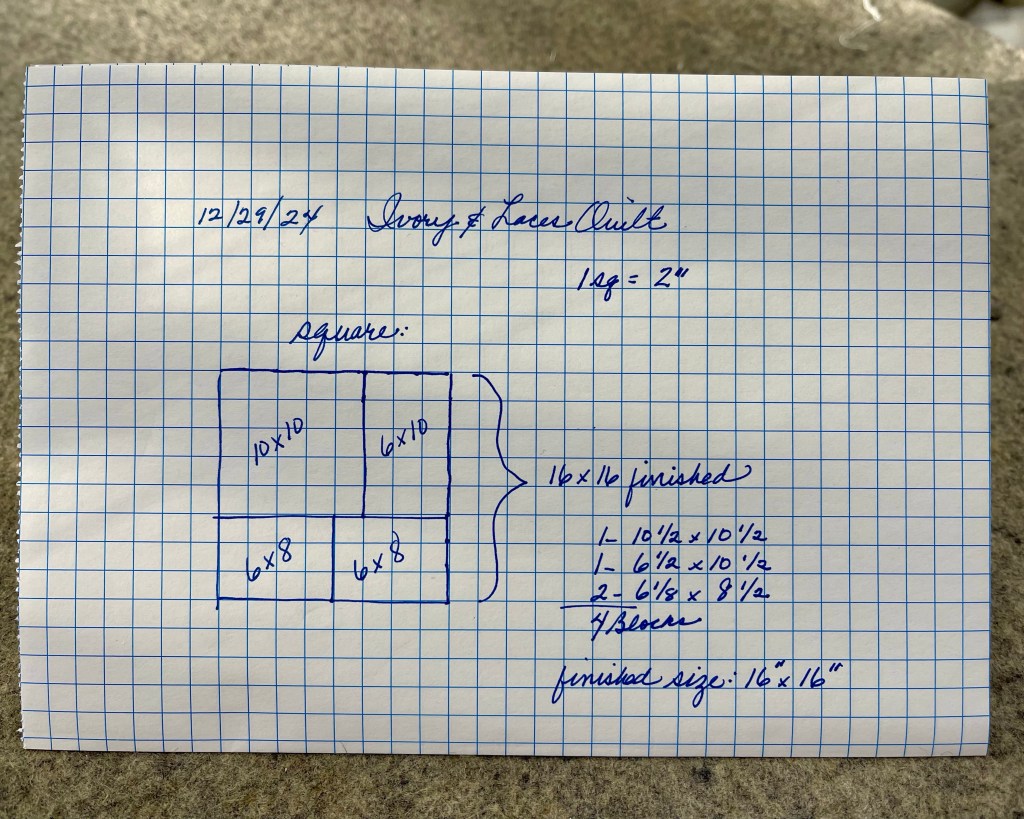
Over the 2024 Christmas Holidays I began a project to use these pieces by creating collage blocks. Using graph paper I created a pattern to follow:
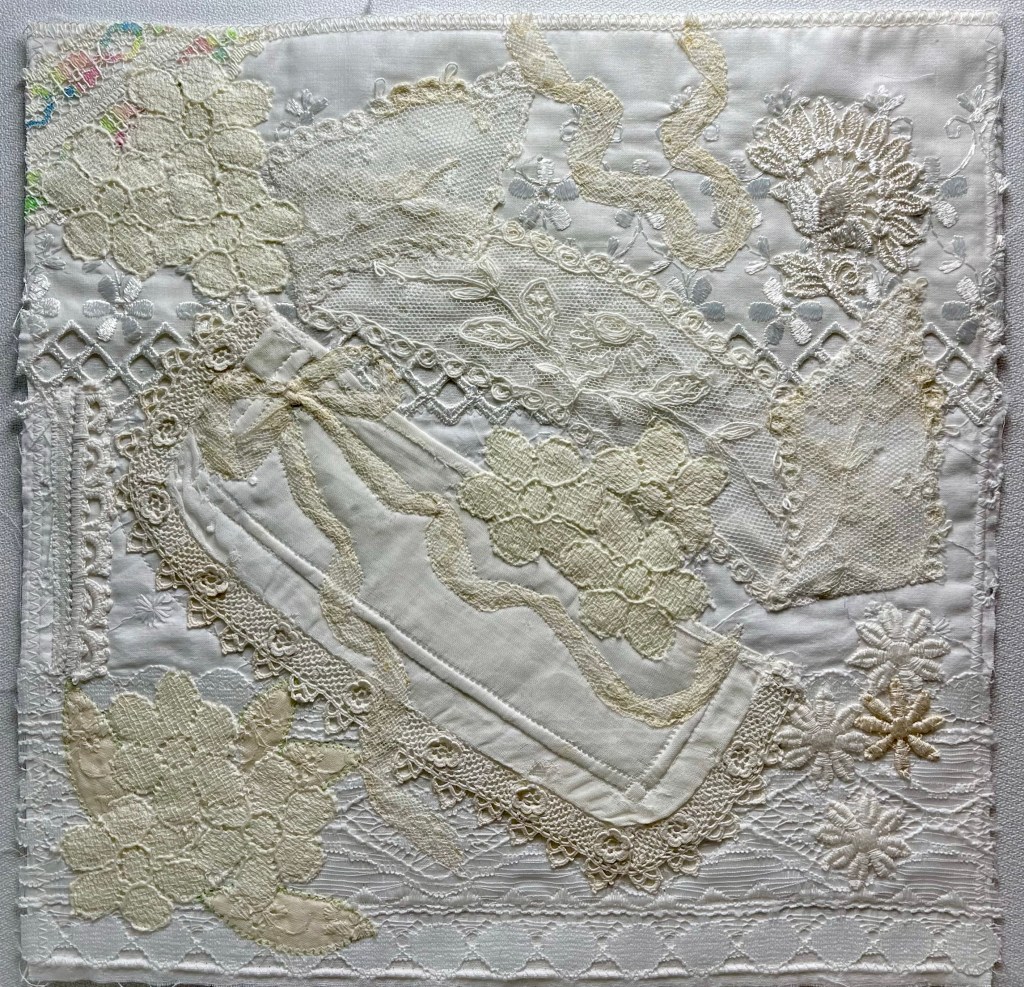
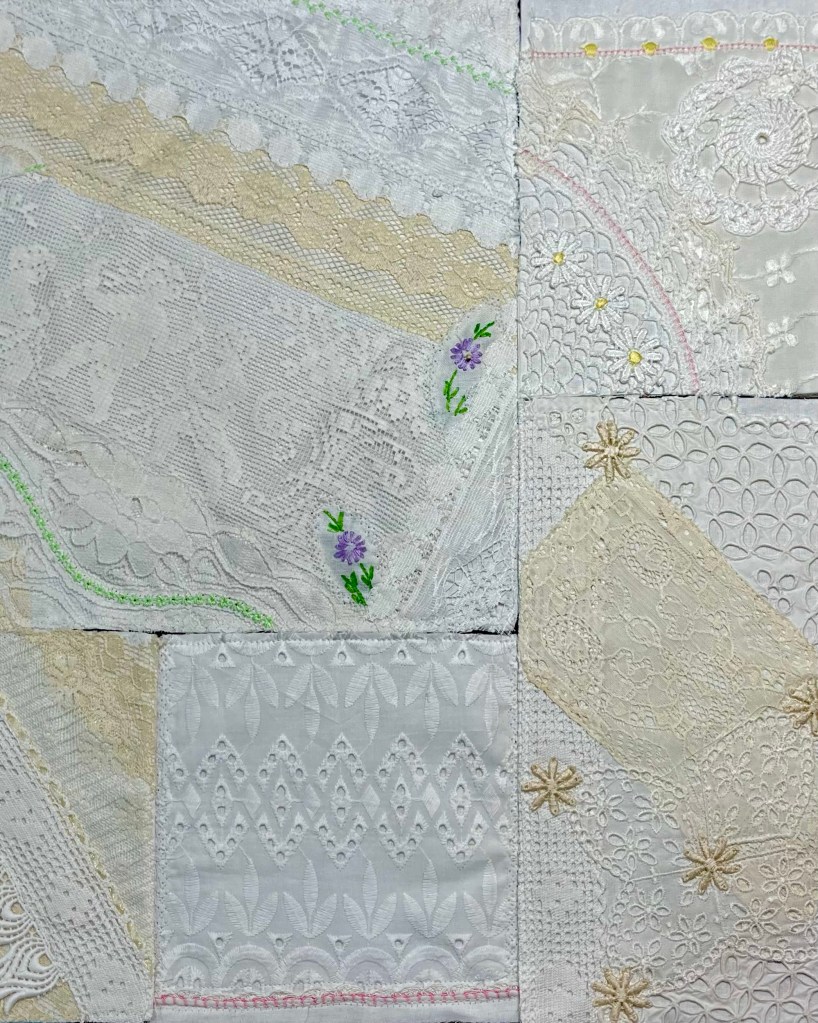
A finished 16” block created by one 10×10” square, one 6×10” rectangle and two 6×8” rectangle blocks.
Because laces and trims are light weight and often fragile I knew I would need a Base Fabric for stability and chose 44” wide light weight pale ivory 100% cotton muslin. From the bolt I cut a 5 yard length, zig-zag stitched each of the two raw edges and laundered in hot water before tossing into the dryer.
After the laundry process I needed to press the muslin and begin to cut blocks as per the measurements above. Having cut out one of the 10 1/2” muslin blocks I immediately knew I would need a double muslin base. Good thing I laundered 5 yards!
Was I tired? Paying more attention to the TV? Sleepy? Who knows but I promptly mis-cut both of the 6×8” blocks to measure 6×6” and began creating collage blocks. Imagine my surprise when on the design wall they didn’t all fit together! To make these “mistake” blocks work, I had to create a finished size 4×6” filler block.
➡️ 01/09/25 edit: Please know the muslin serves as the stabilizer. It is on this “stabilizer” that I will be building my block using just about anything I can find in my bin of laces/trims/dresser scarves/tray cloths/eyelets/doilies/vintage and/or new yardage/etc. etc.
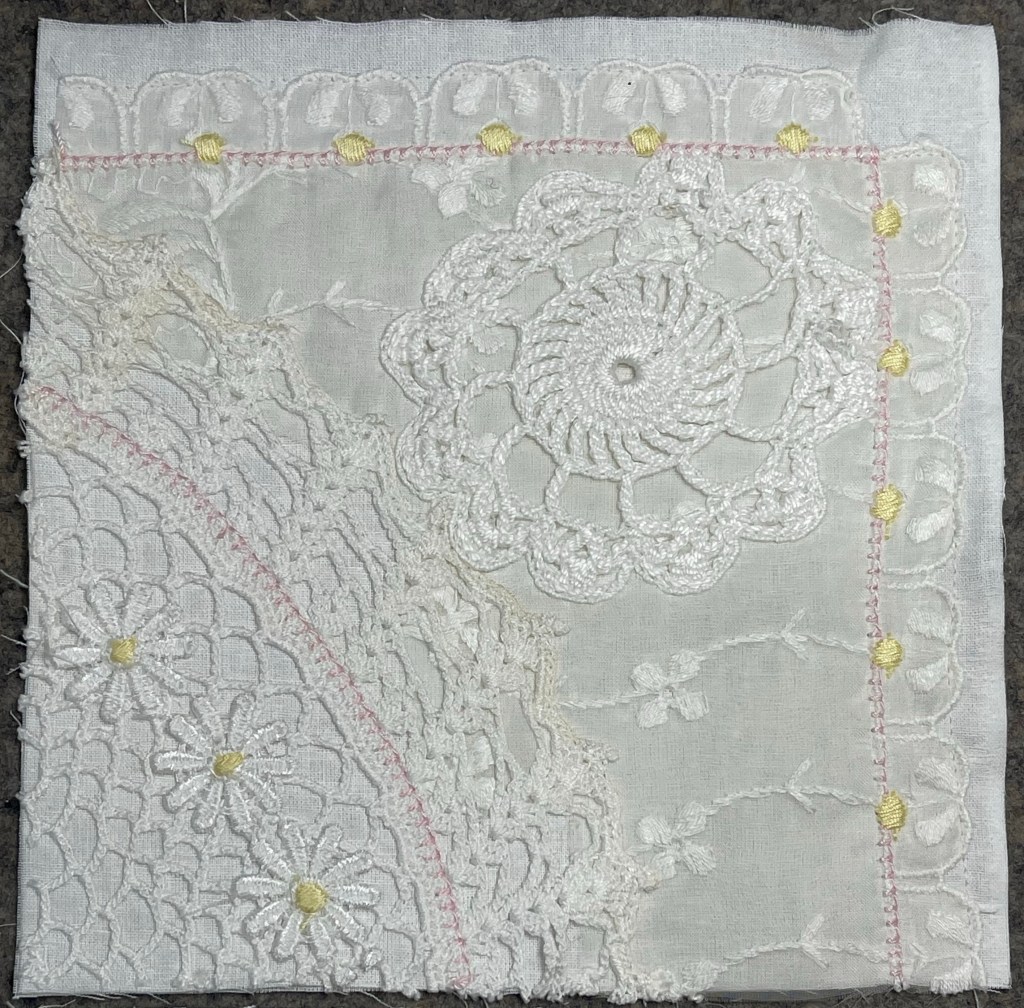
This is my first block, one of the mistake 6×6 size. It is made up of: tray cloth, part of a crocheted doily, 3 commercially produced white flowers and a very small crocheted circle. The pink and the yellow machine decorative stitches use Spaghetti Threads (size 12 weight) from Wonderfil Specialty Threads. https://www.wonderfil.ca/?goal=0_2be335a0bb-a87de171ce-438423661&mc_cid=a87de171ce&mc_eid=04e4f0a978
This wonderful white fabric above was off the bolt several years ago at JoAnn Fabrics. The pink is from a vintage crocheted edging.
While the overall theme concentrates on white/off white/ivory I’ve added very small pops of color. These purple flowers are from leftover scraps of a long ago project.
Aren’t these cherubs just the best!
I most likely jumped the gun on this ivory hem tape ribbon, it will definitely be a problem when long arm quilting. I might stitch down every edge or I might remove it now and stitch it down again after the quilt is finished.
It’s easy to add commercially produced embellishments to many of the blocks, both the butterfly and the 5 petal flower are new.
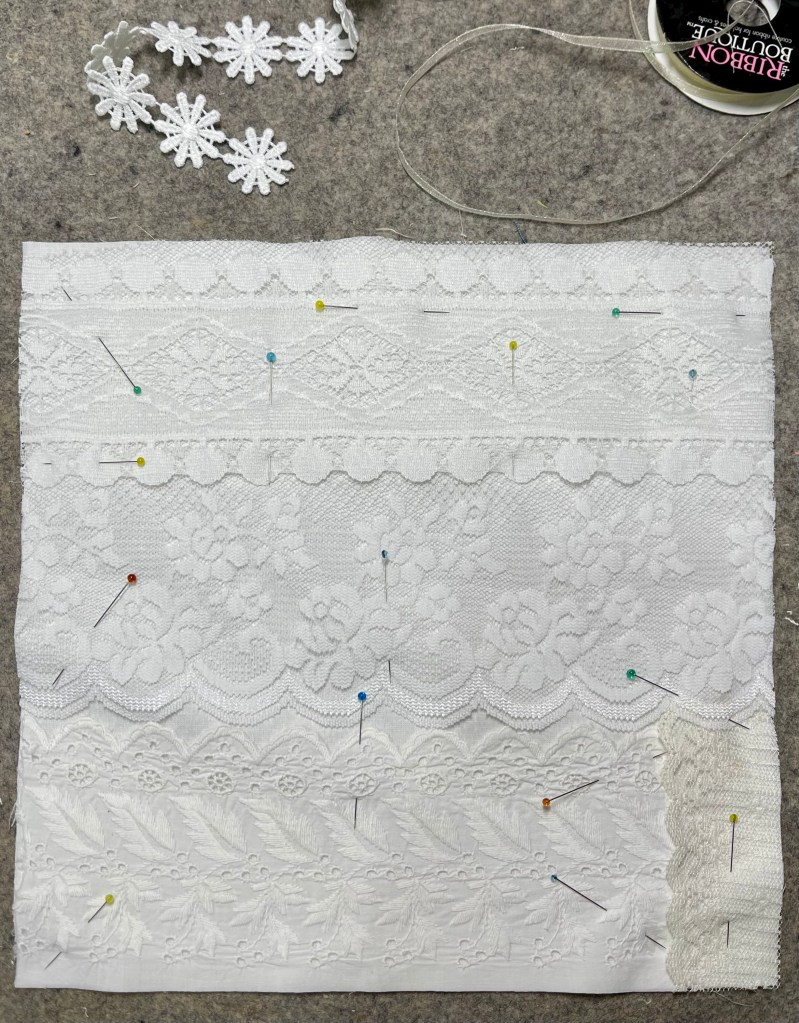
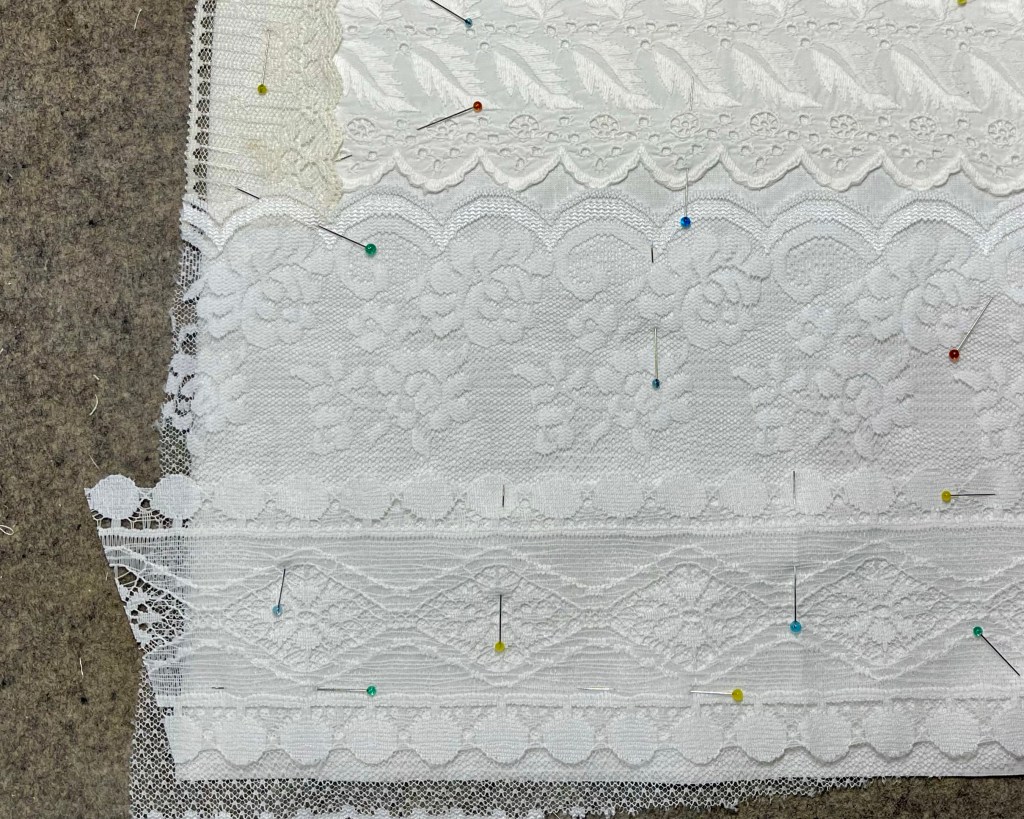
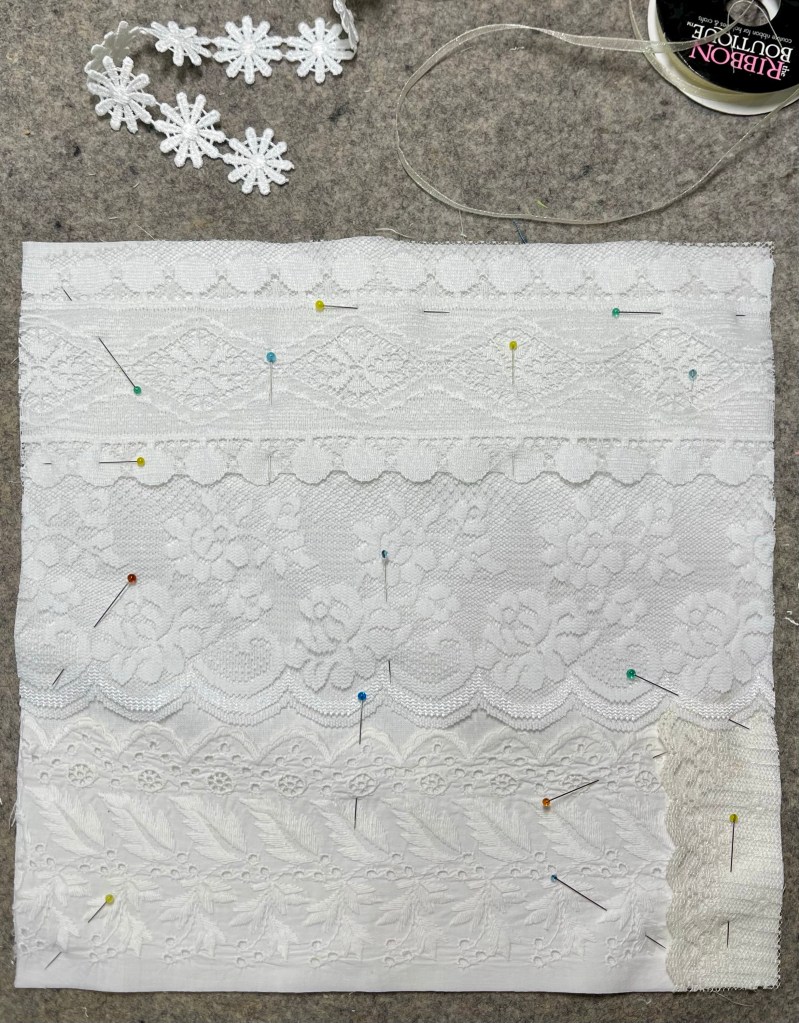
With the 10 1/2” square on the work table, I randomly began to pin trims and laces to the double muslin base.
With the block base covered, I next trim to size.
I’m now ready to machine stitch the laces to the block base.
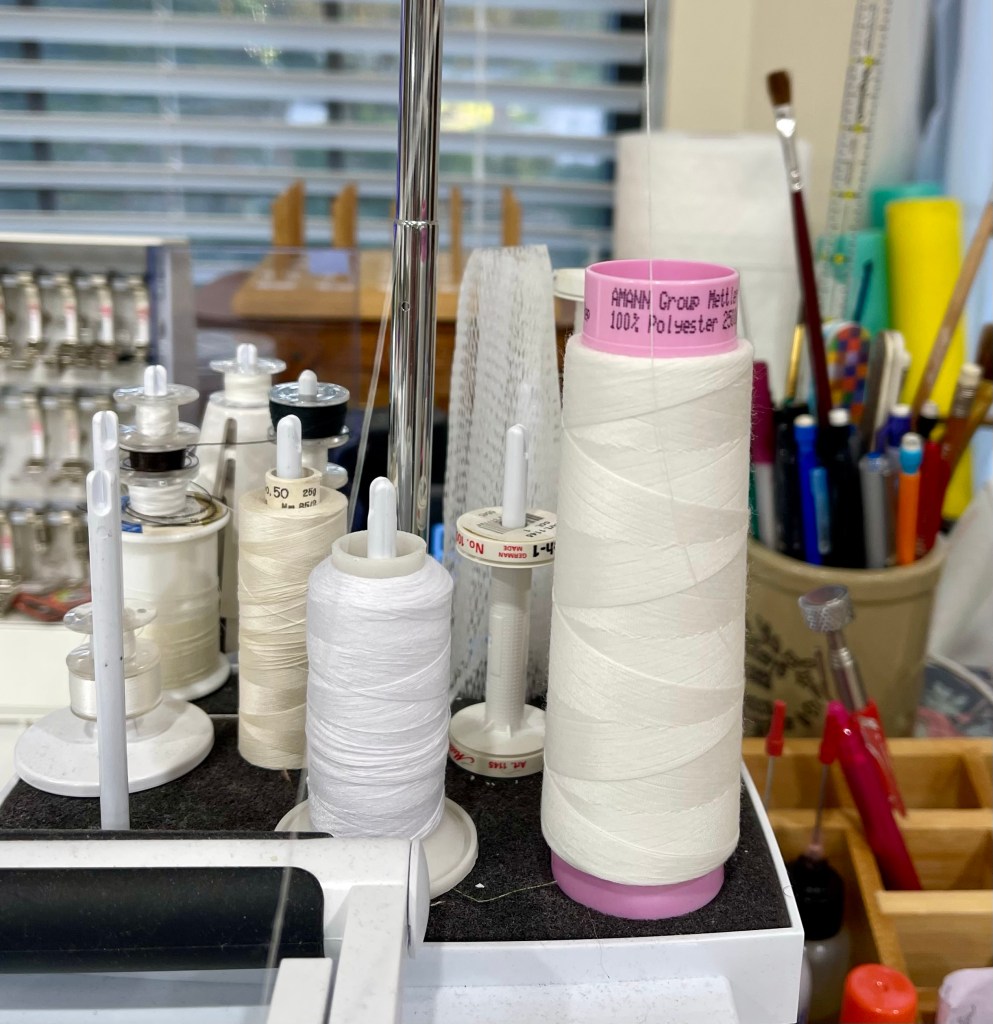
I’ve got various threads ready to use.
In order to see where I’m stitching, I have found that an Open Toe foot works best for me.
Either before or after the laces are machine stitched to the muslin base, I zig-zag stitched all around the outside edges. I used a thread that closely matched the laces, this way if during block construction the zig-zag stitch might fall outside the quarter inch seam it will not be readily visible on the front of the quilt.
Today I’ll leave you with this picture, a block ready for a decorative collage.
Blessings, Happy New Year and of course Happy stitching,
I’m still here! I haven’t posted a blog since December of last year, family/parent responsibilities have kept me busy so quilting has taken a back seat. With things getting under control I’m hoping the creativity will fire up again!
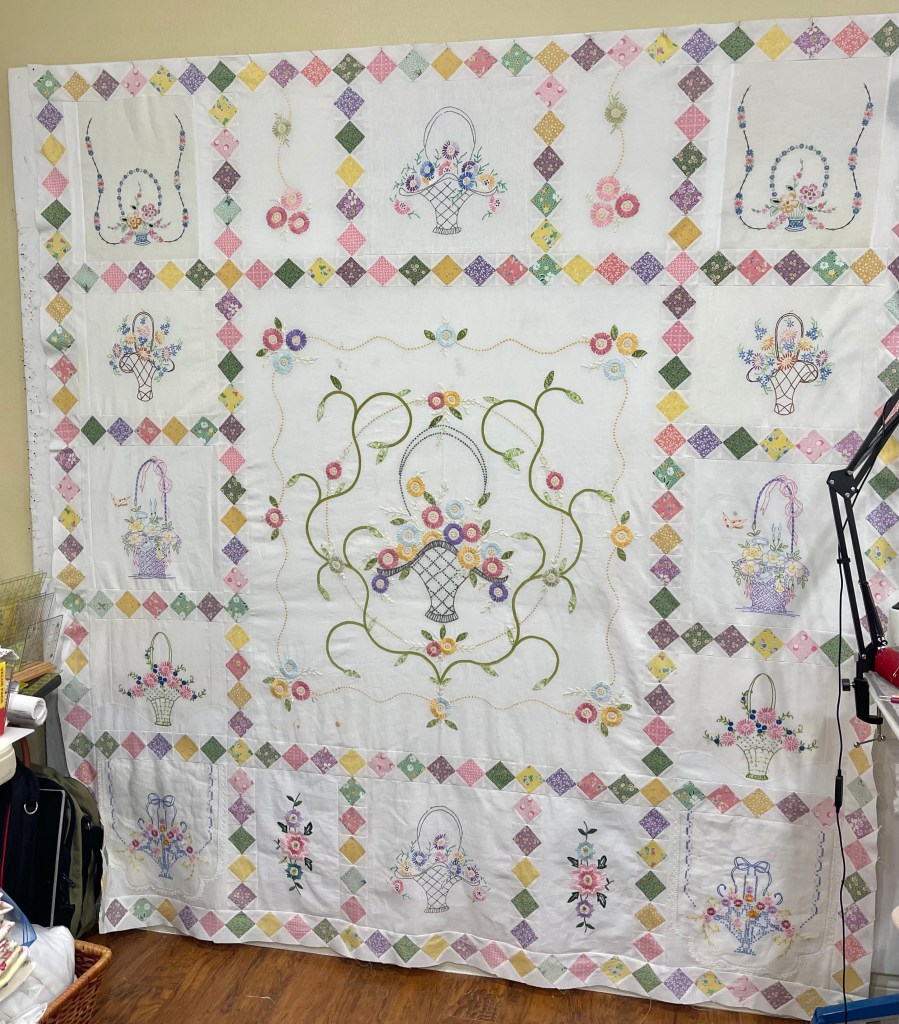
If you’re a follower of the Facebook group 1914 Boehm House Vintage Linens Classes you’ll recognize the Class 6 project below.
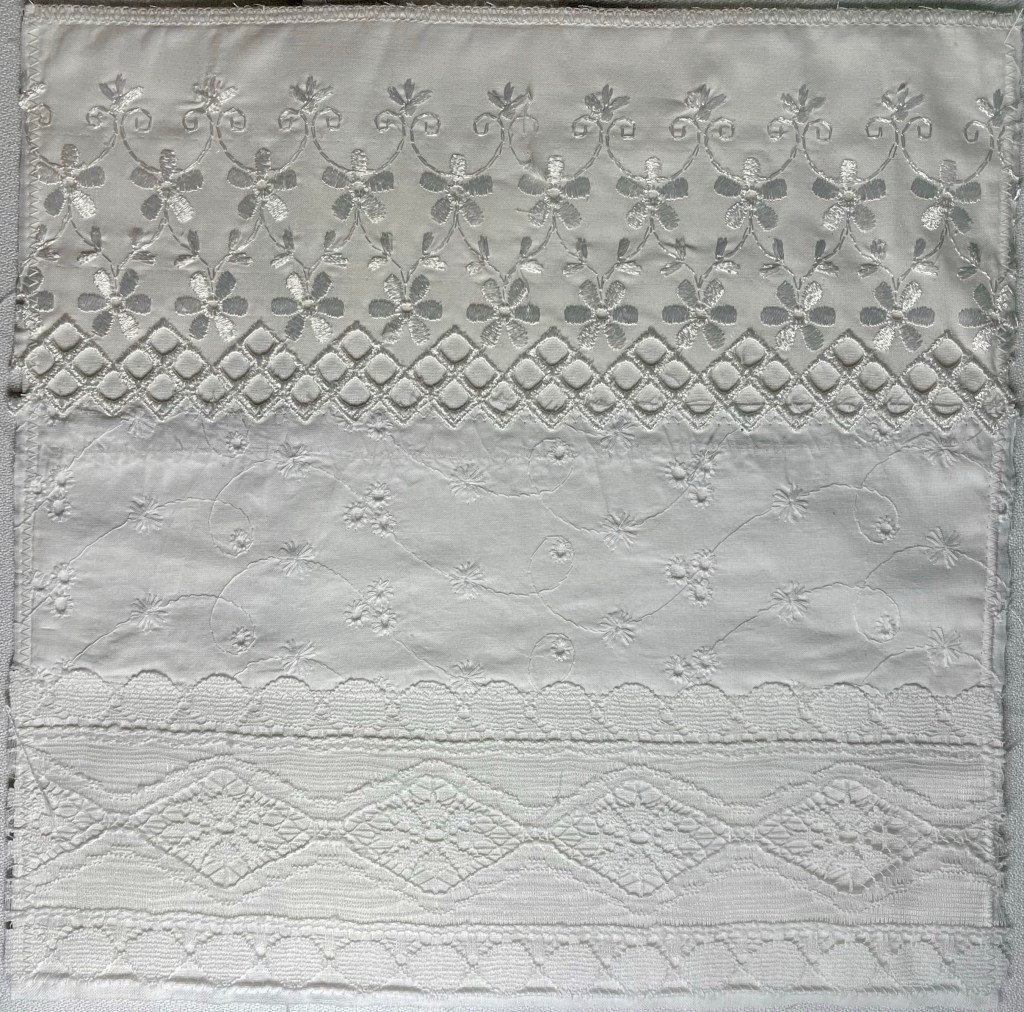
This class project revolved around working with a Summer Weight Bed Coverlet. If you’re from or in the South you’ll know just what these coverlets are, anywhere else and you might be scratching your head. These coverlets are hand embroidered on medium weight fabrics, usually 100% cottons, often times on commercially produced bed sheets.
Summer Weight Bed Coverlets are single layer, no batting and no backing. They are perfect for a beautiful bed cover in hot/humid weather.
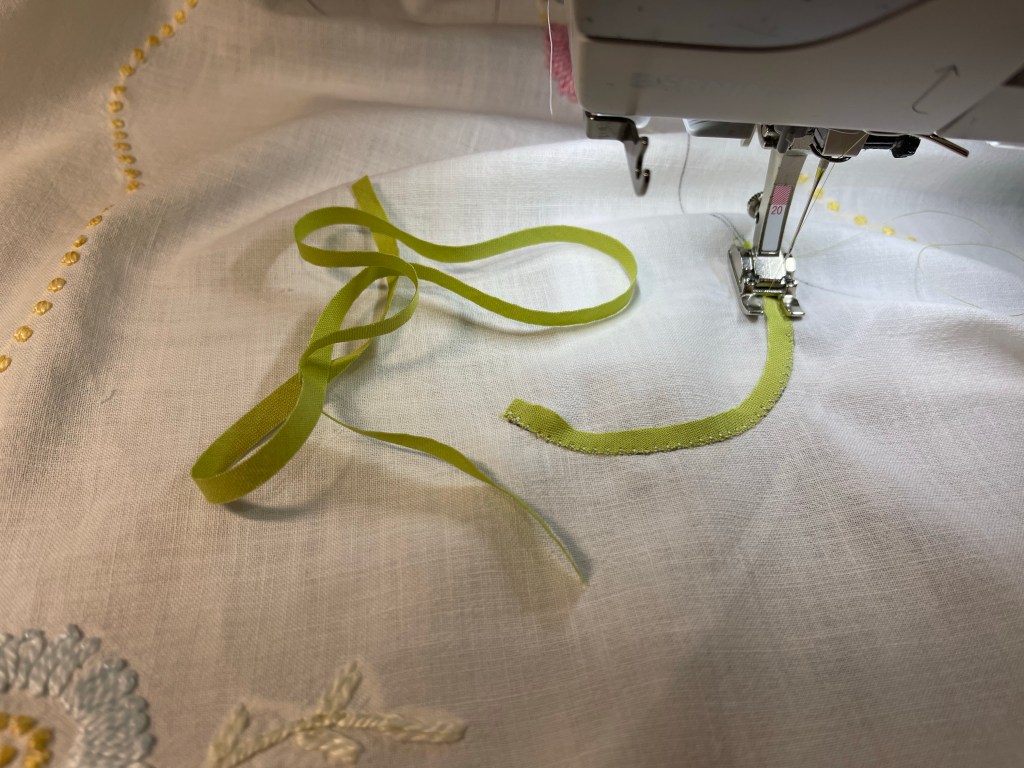
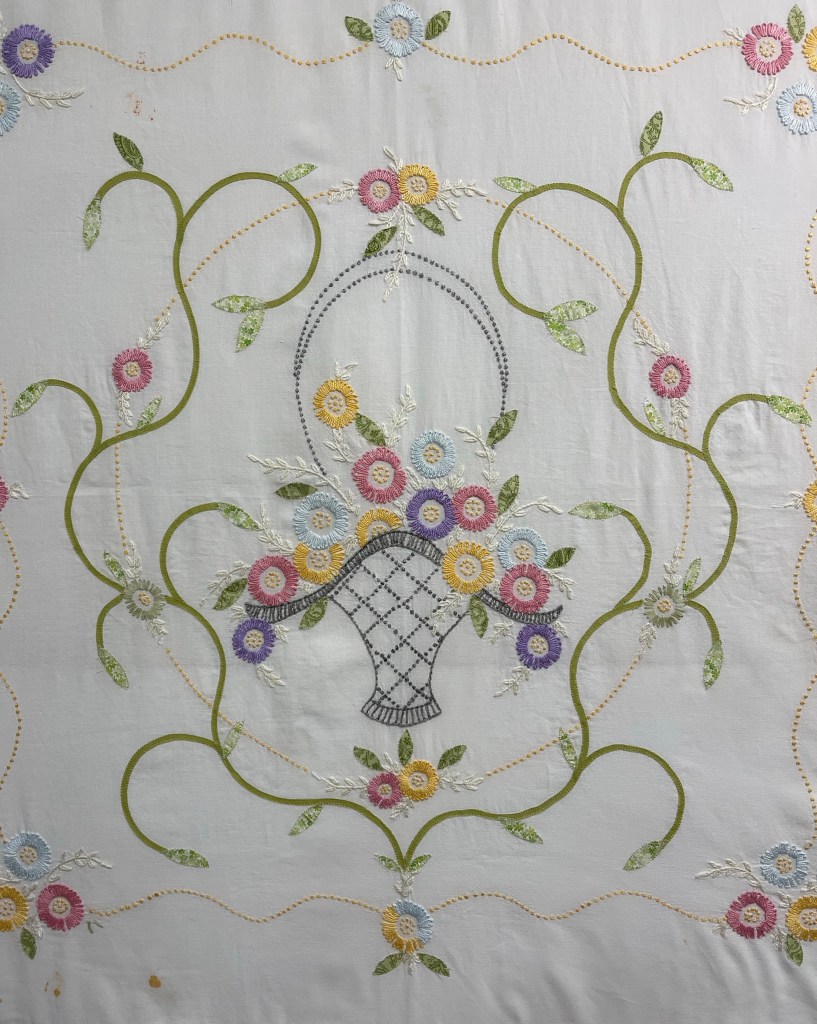
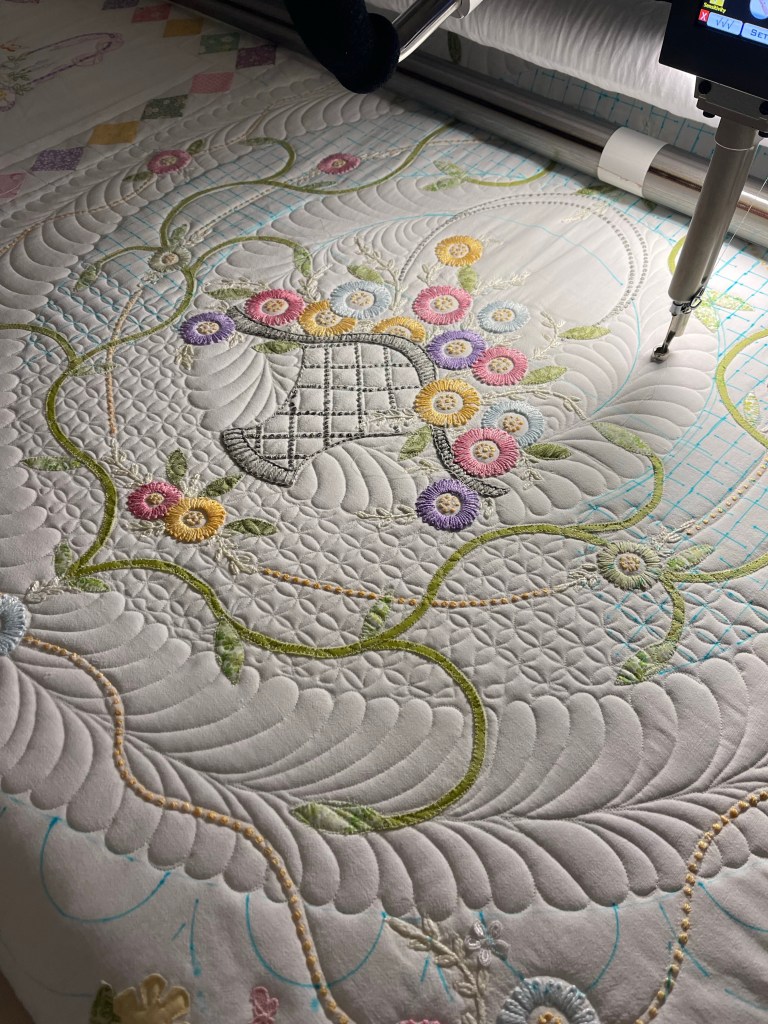
I took the creative approach with the large center block and added swirling green vines and leaves.
Using a solid spring green fabric, I cut 1/4” bias strips, marked the block with swirls and stitched the vines and leaves (raw edge) with my machine button hole/applique stitch.
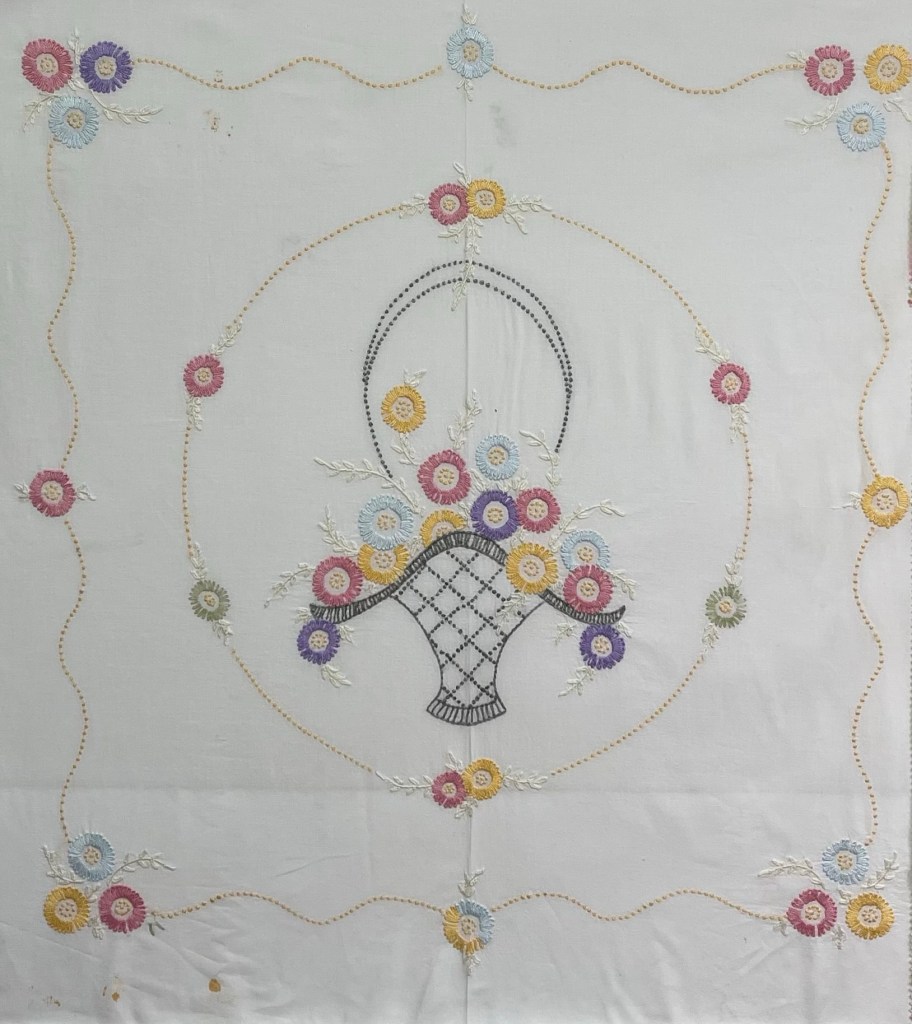
Here are before and after pics of the center block.
See the stains at the bottom left? Later you’ll see how I disguised these stains with flowers.
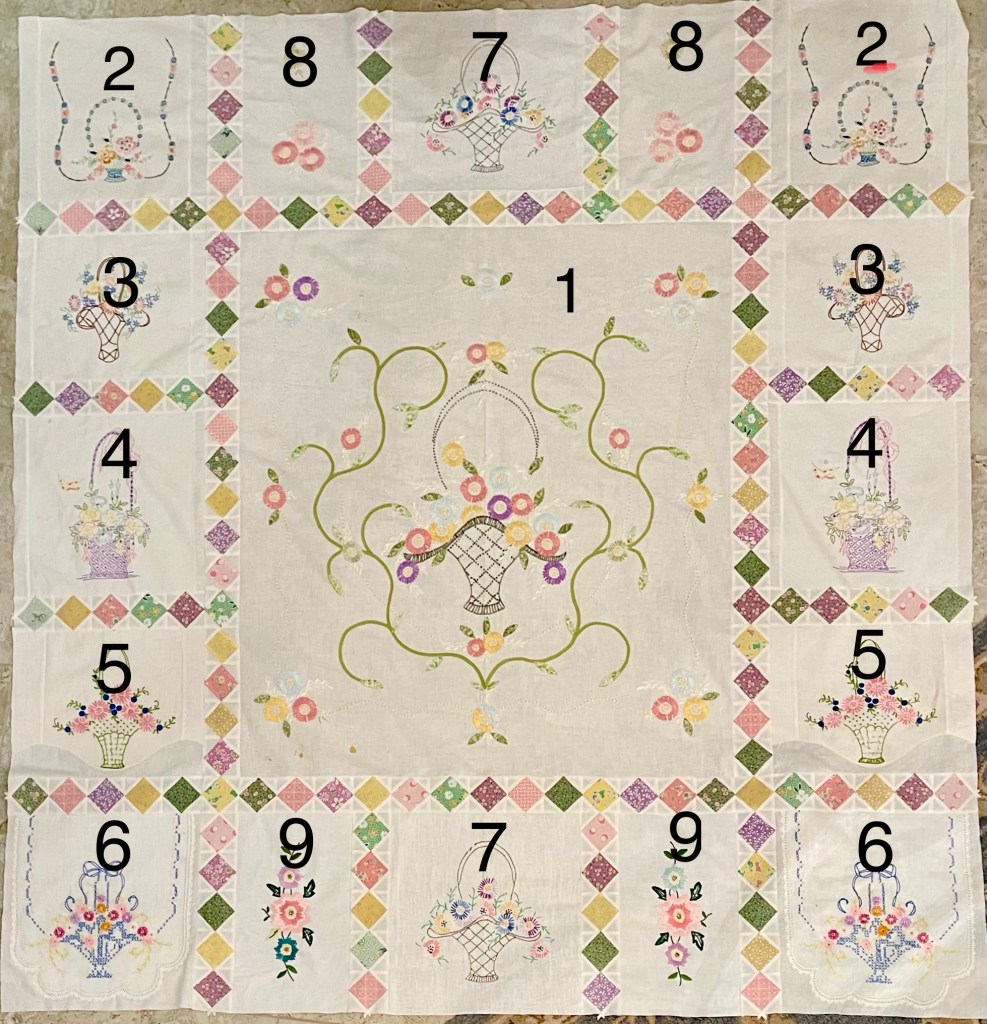
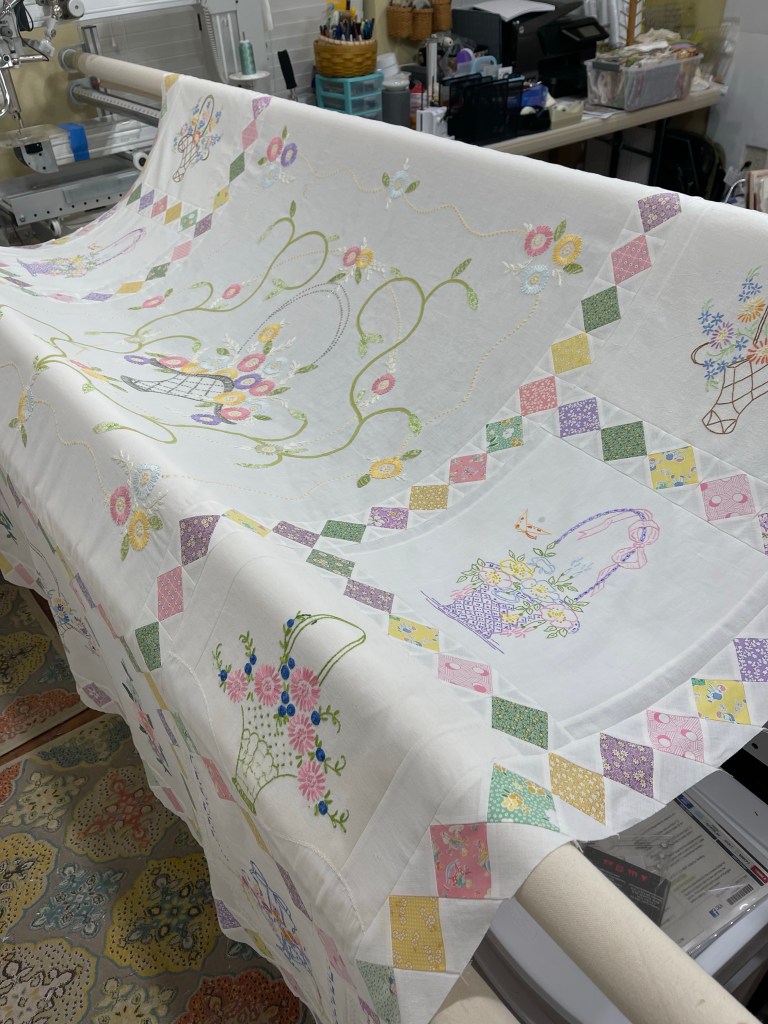
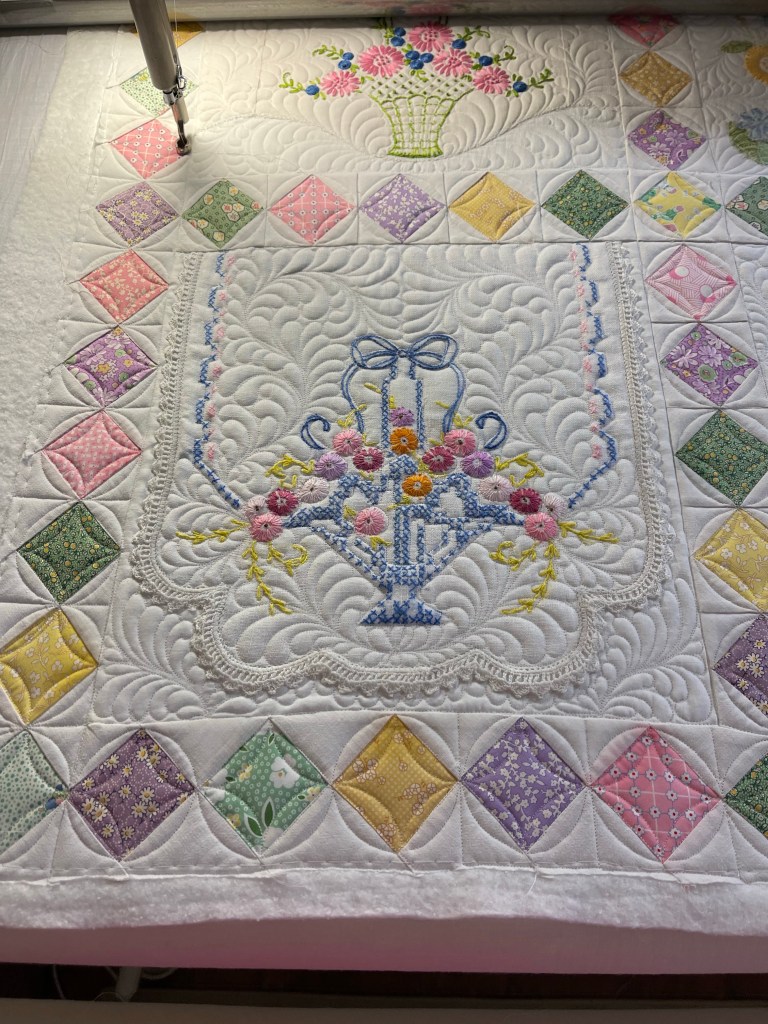
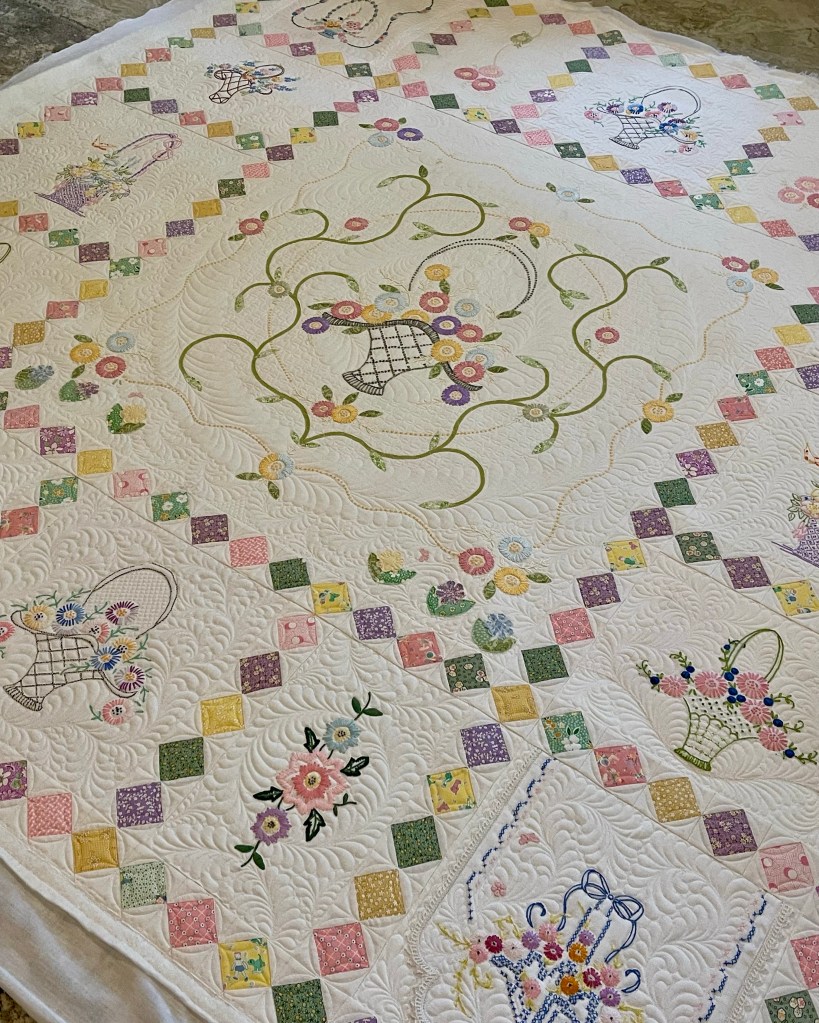
This quilt is made using 8 dresser scarves (identical embroidery each end) and the Bed Coverlet center block.
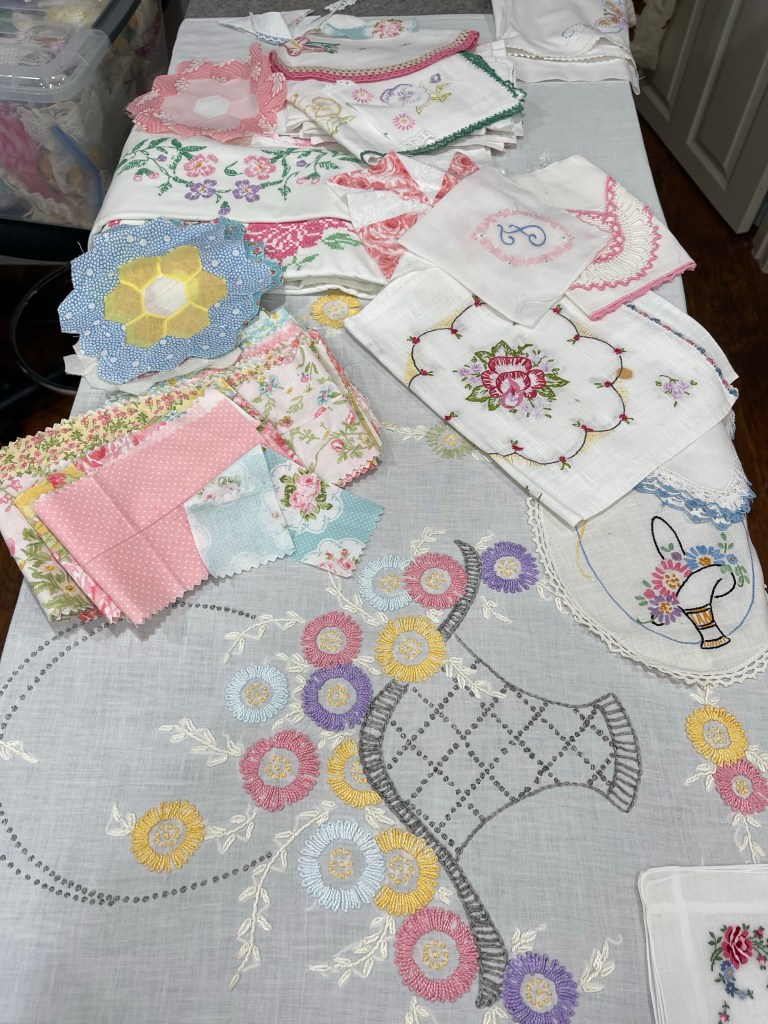
Choosing the dresser scarves as well as the fabrics for the sashing on-point squares was challenging yet fun!
This was what the auditioning process looked like. Some of the vintage linens and fabrics made the final cut, others were sent back to the stash for a future project.
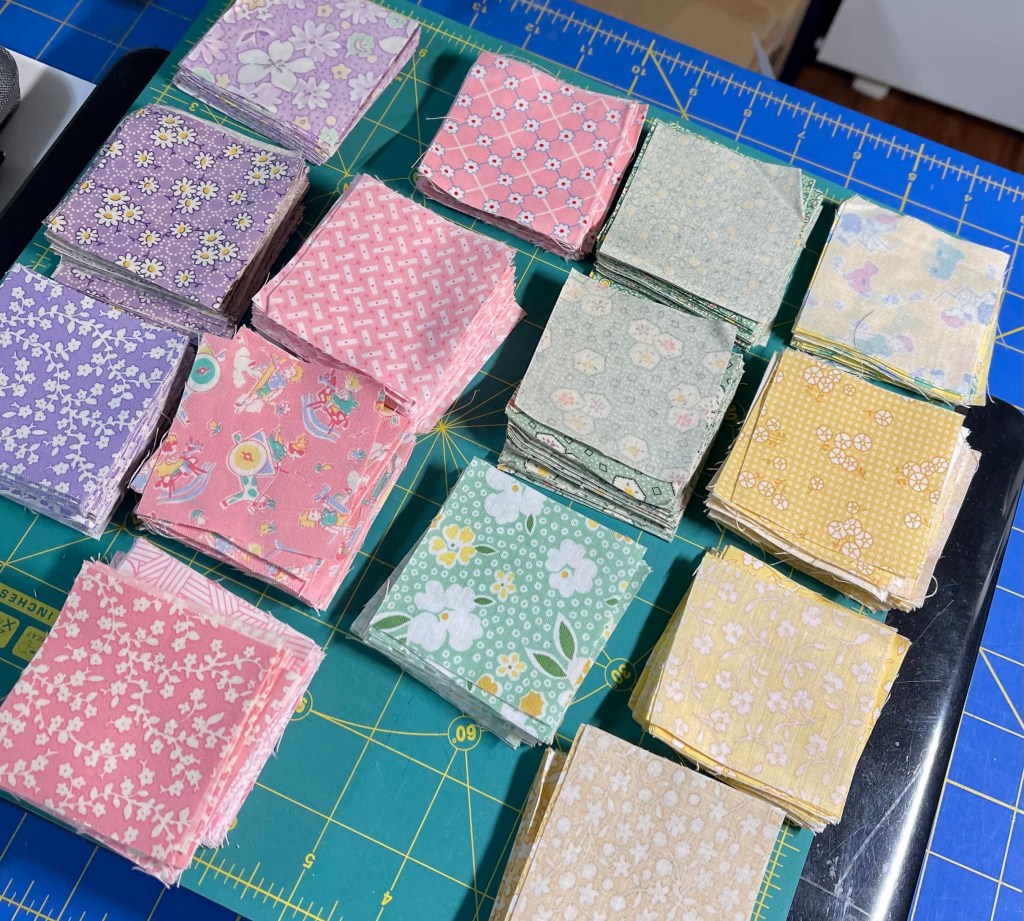
Lots of reproduction fabrics cut into squares.
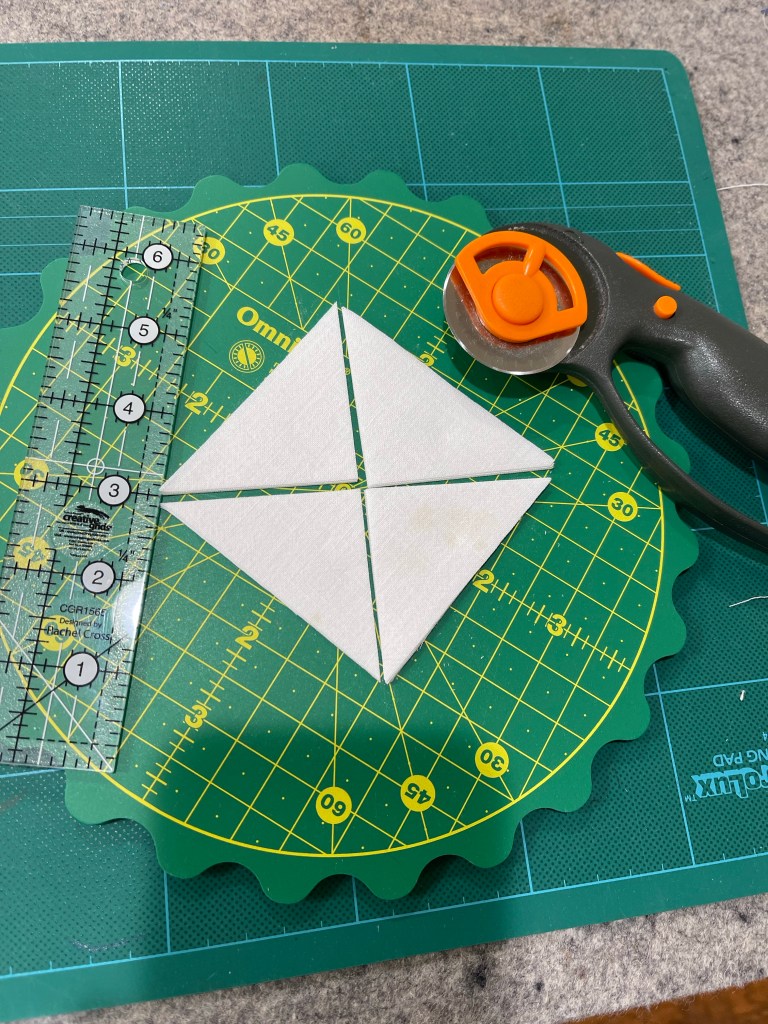
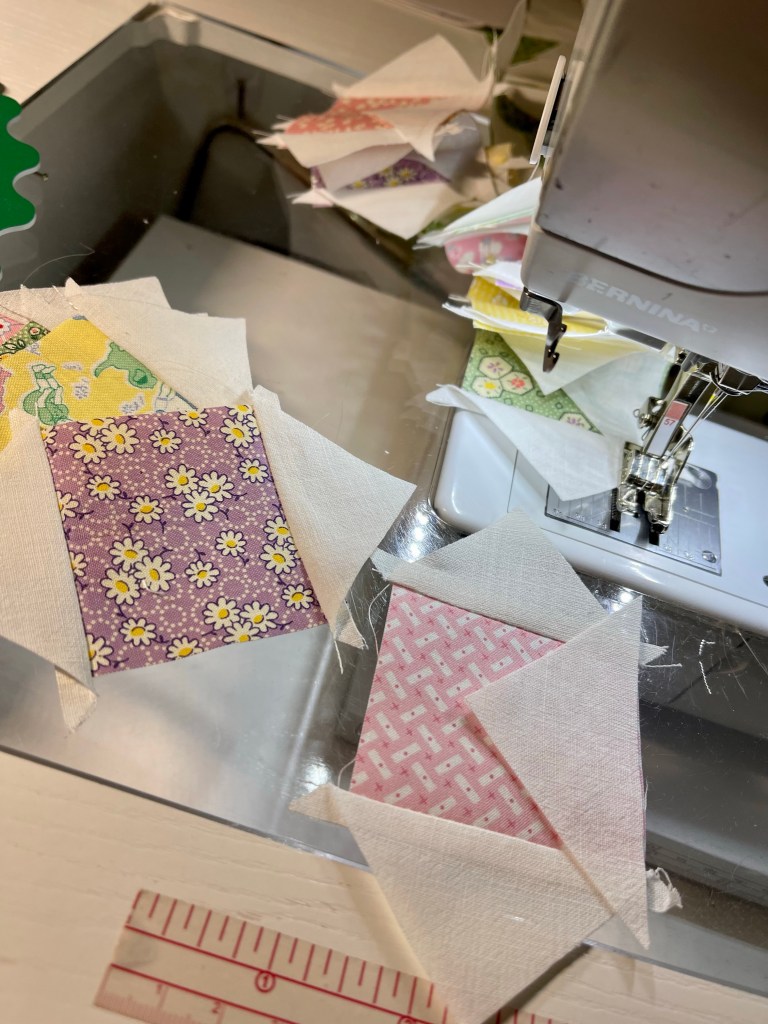
These “square in a square” blocks will be the sashing strips.
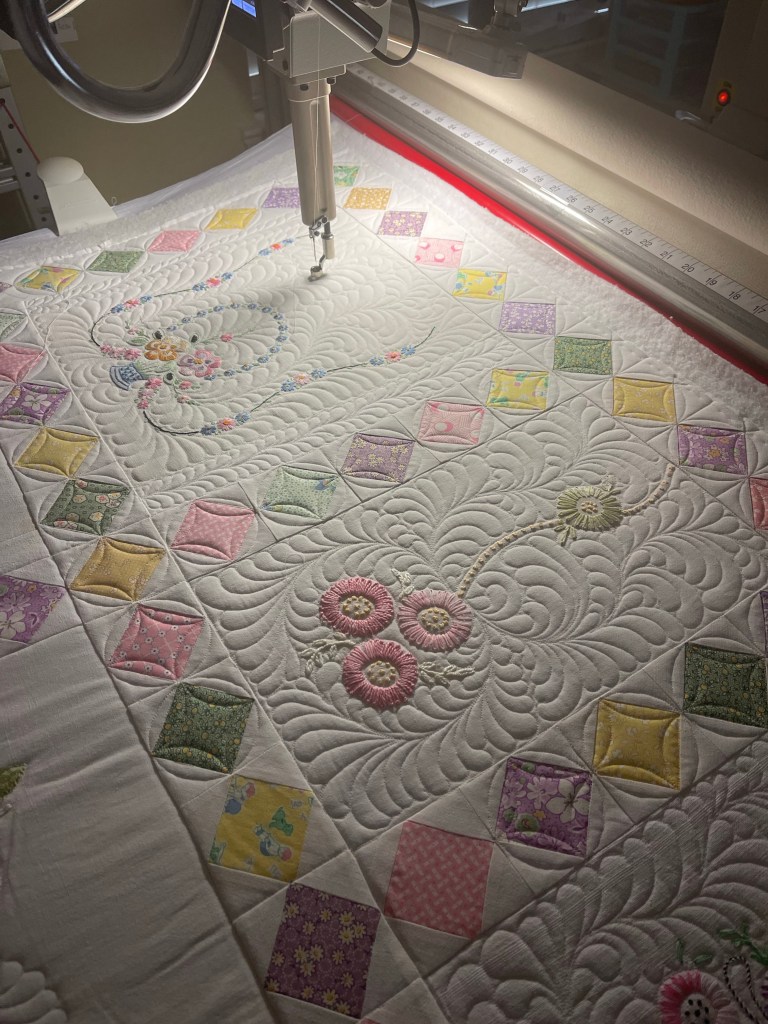
Finally finished the quilt top and I love it!
I piece so I have something to quilt and this is going to be a fantastic longarm project!
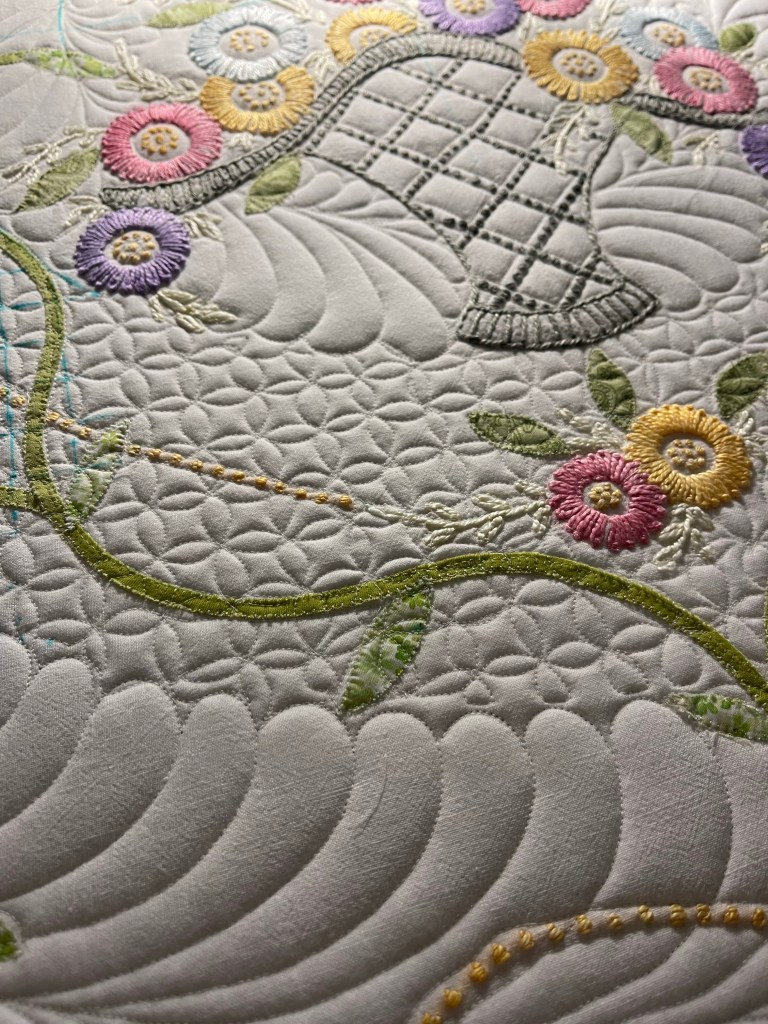
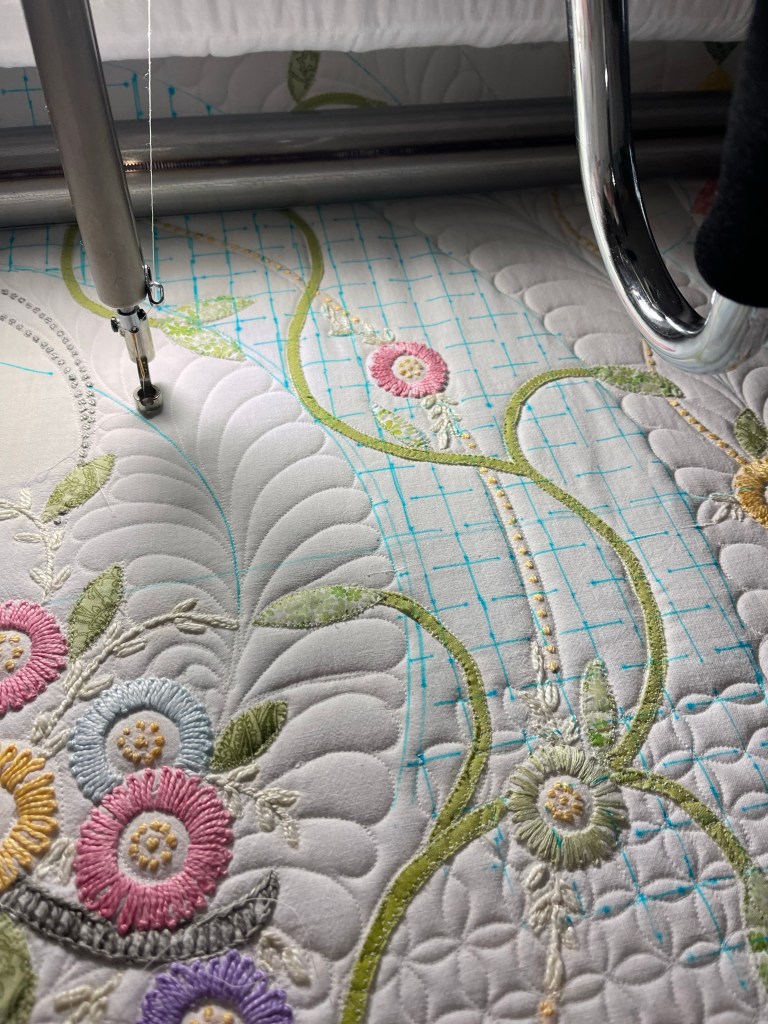
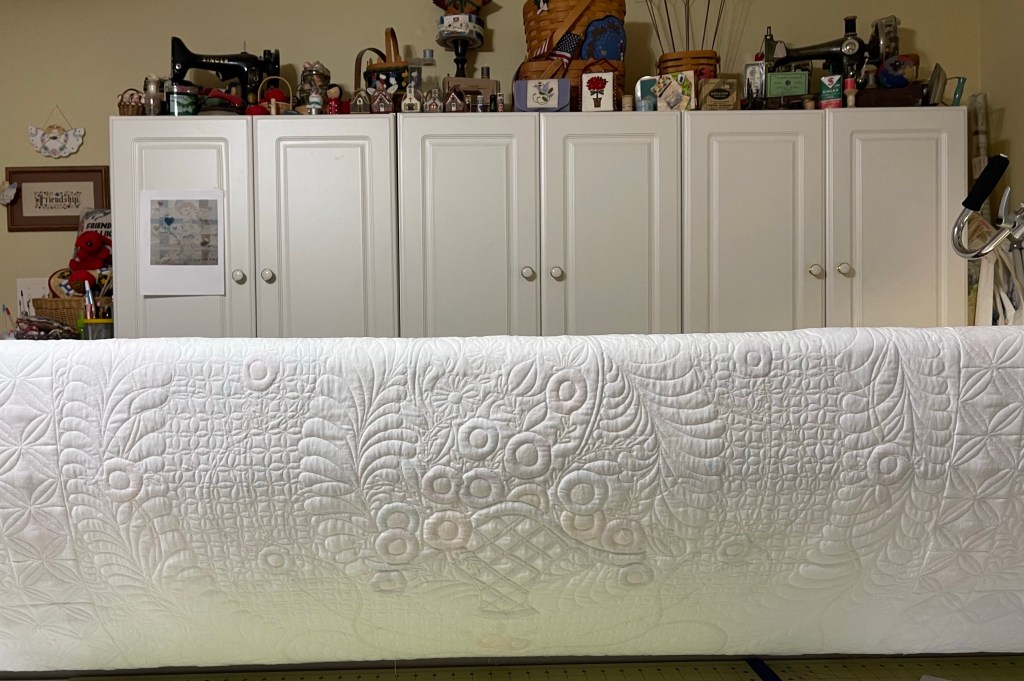
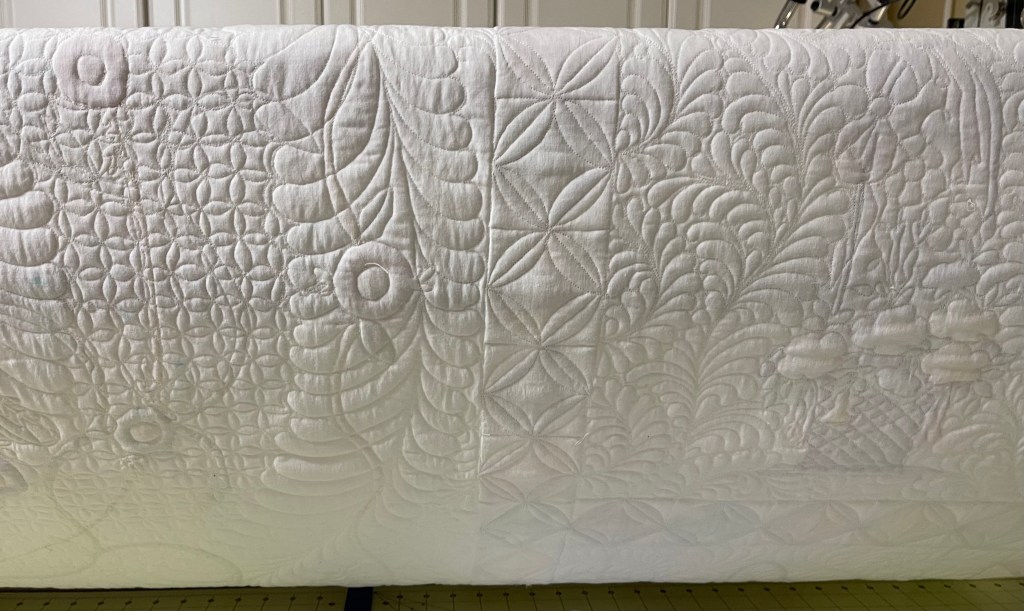
I remembered to take lots of pictures as the quilting progressed:
I most always mark the stems of feathers, especially if the feathers will be long reaching.
The quilt is finished, the binding is finished but I forgot to take a picture, I’ll post one later on a future blog.
If you’re wanting very detailed instructions/information about the making of this quilt, jump over and join the Facebook group!
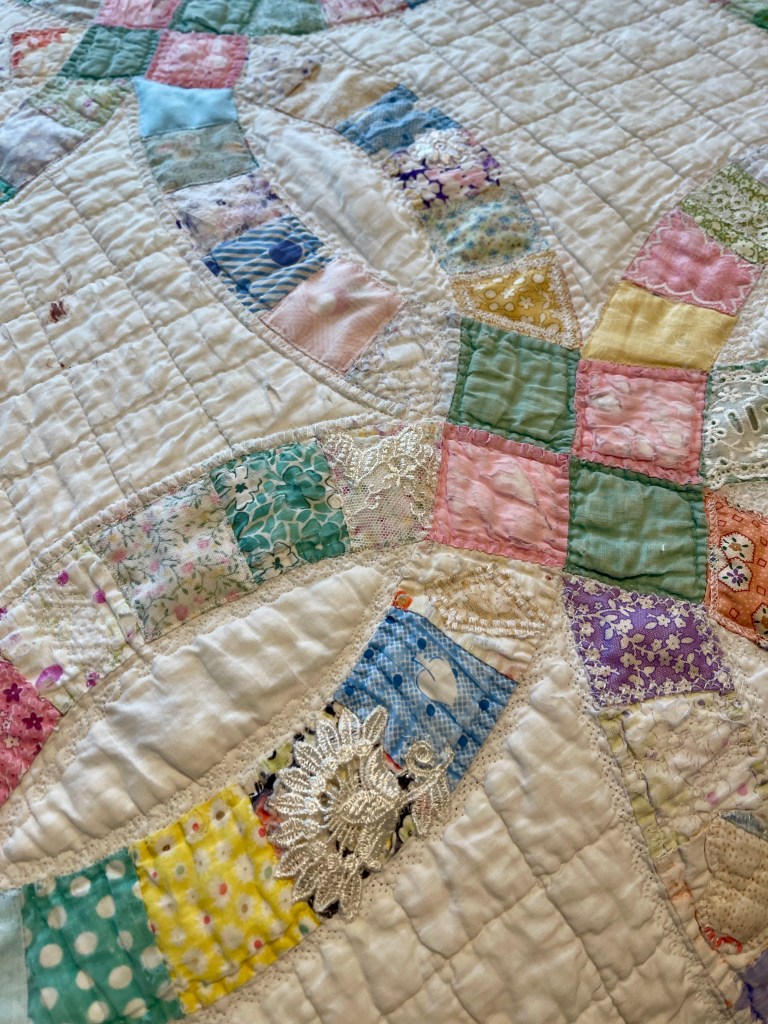
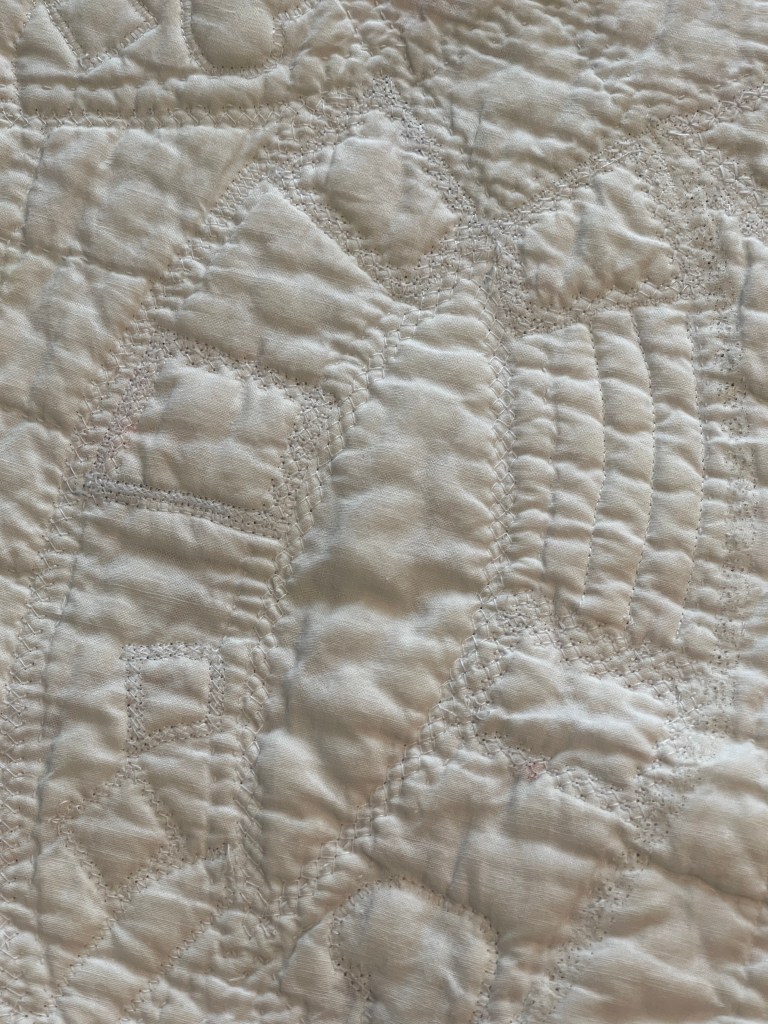
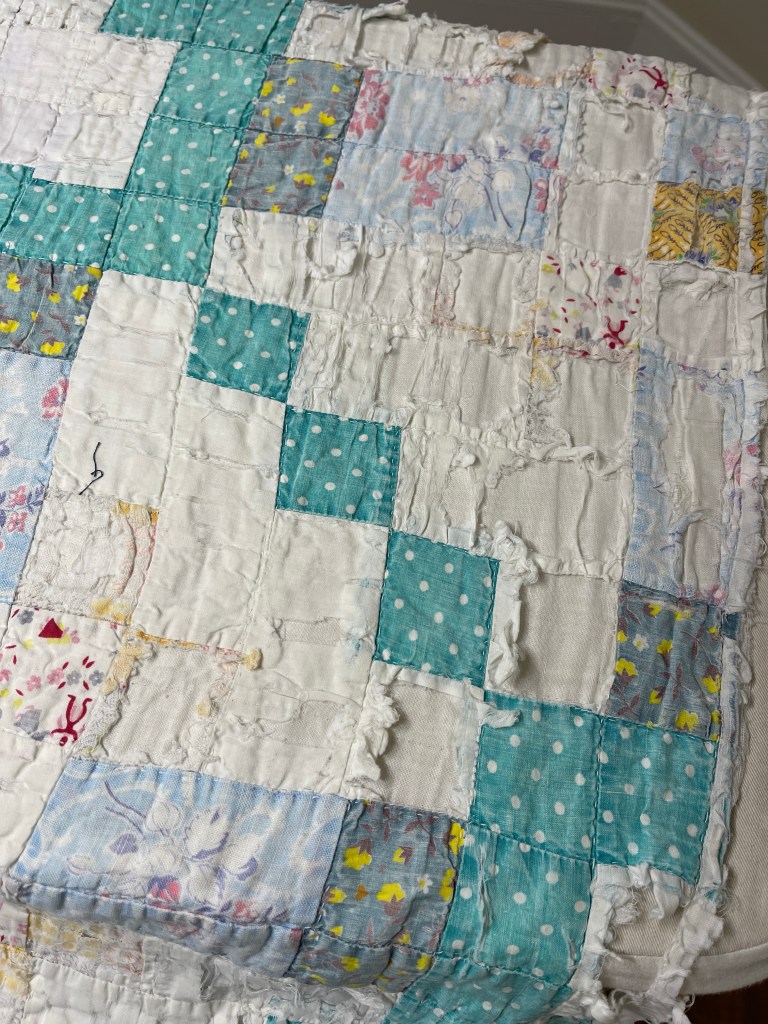
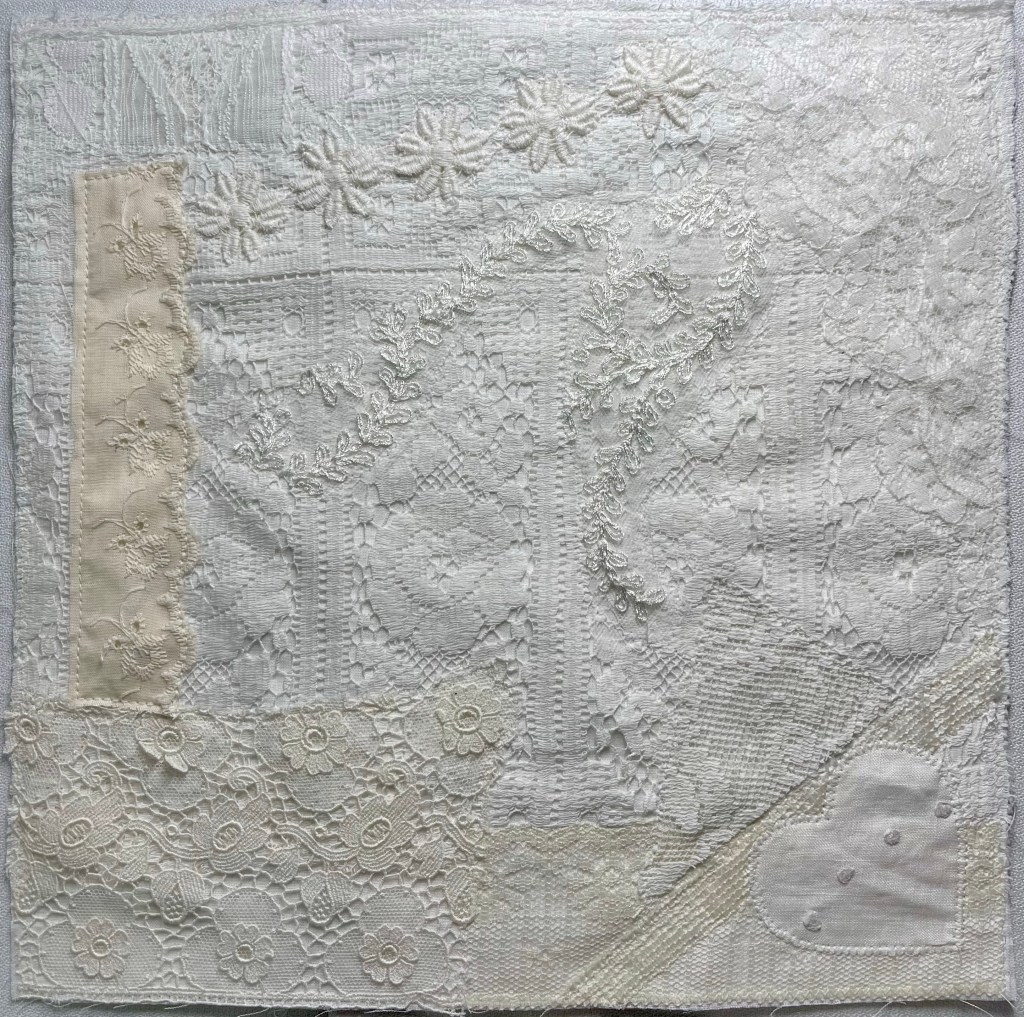
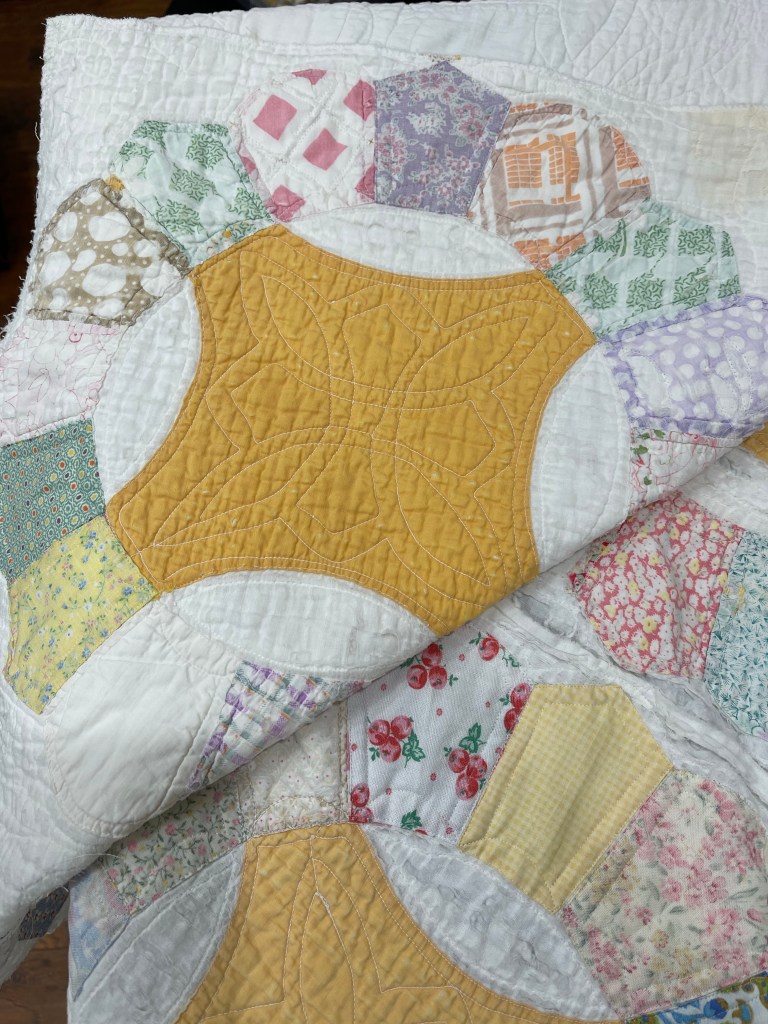
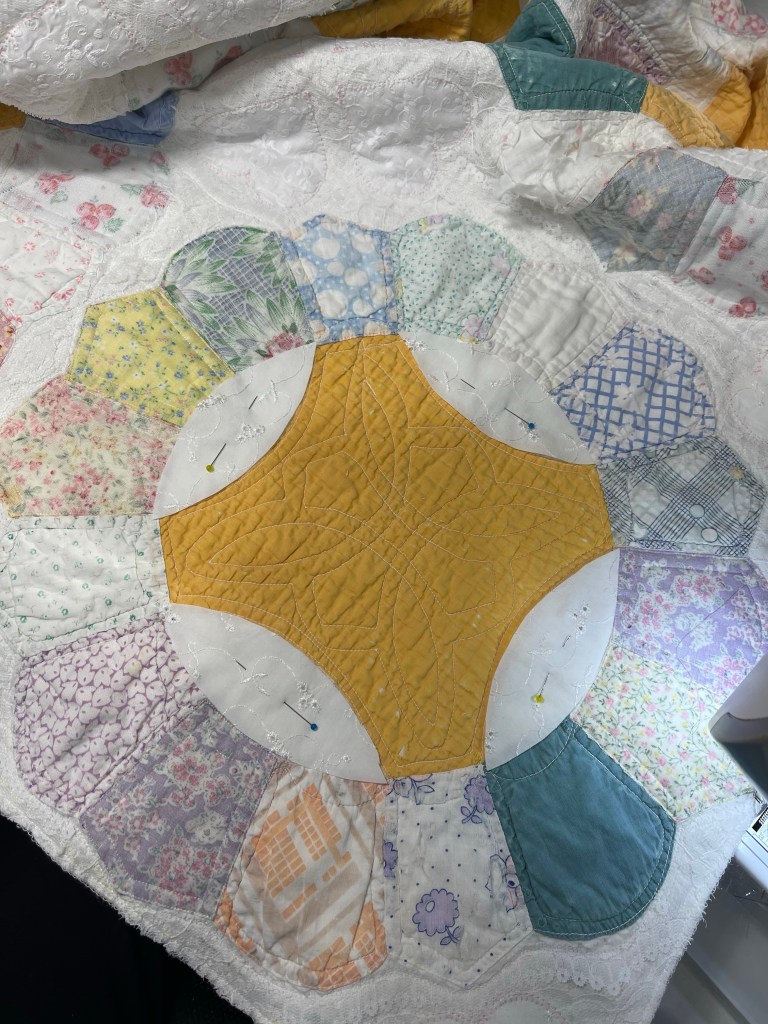
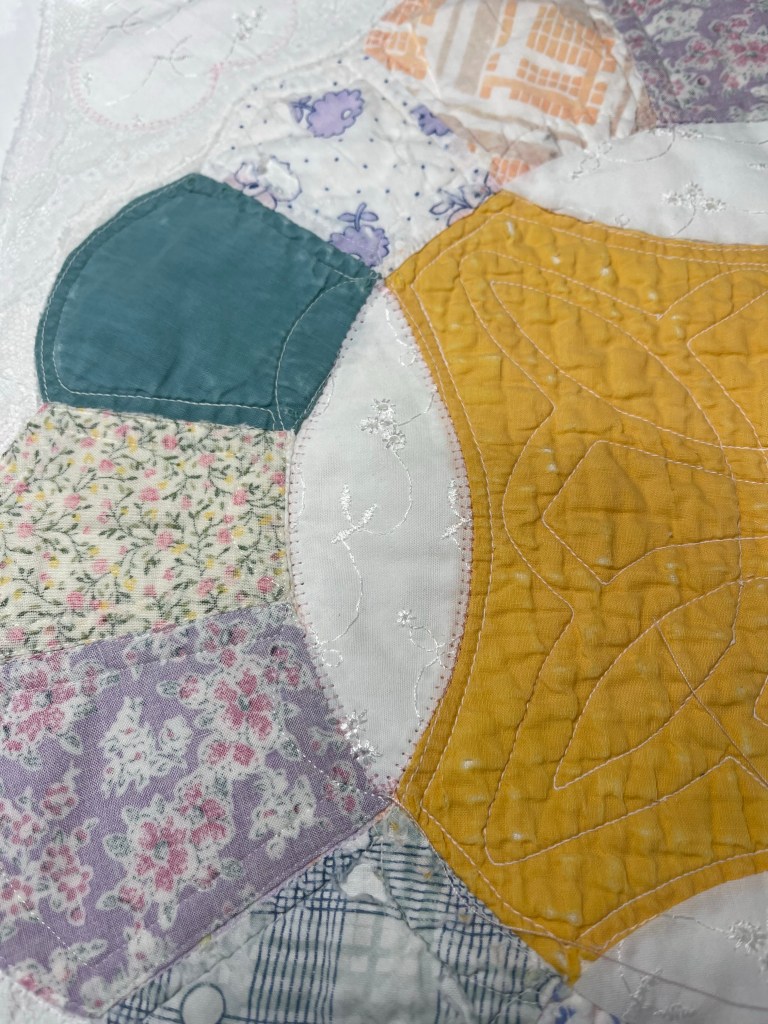
If you’ve been following, you’ll know all about this disaster of a vintage quilt and how I’m rescuing it piece by piece. I’ve replaced all of the seriously damaged pieces in each of the 16 rings so it’s on to the damaged and/or missing white fabric throughout the quilt top.
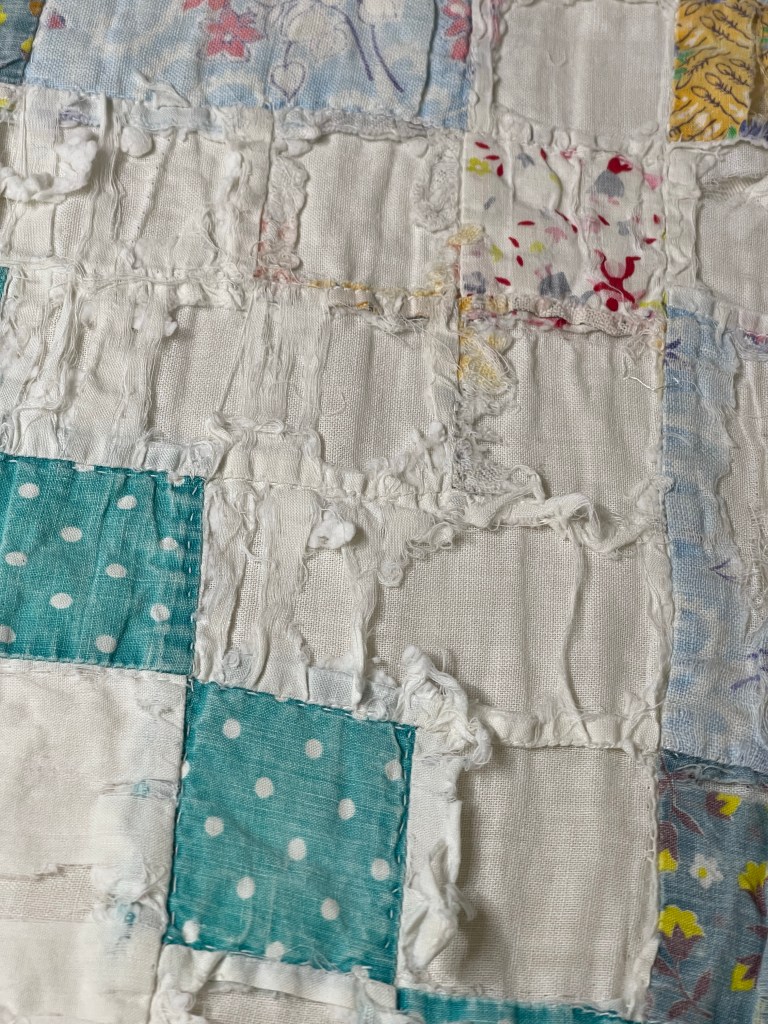
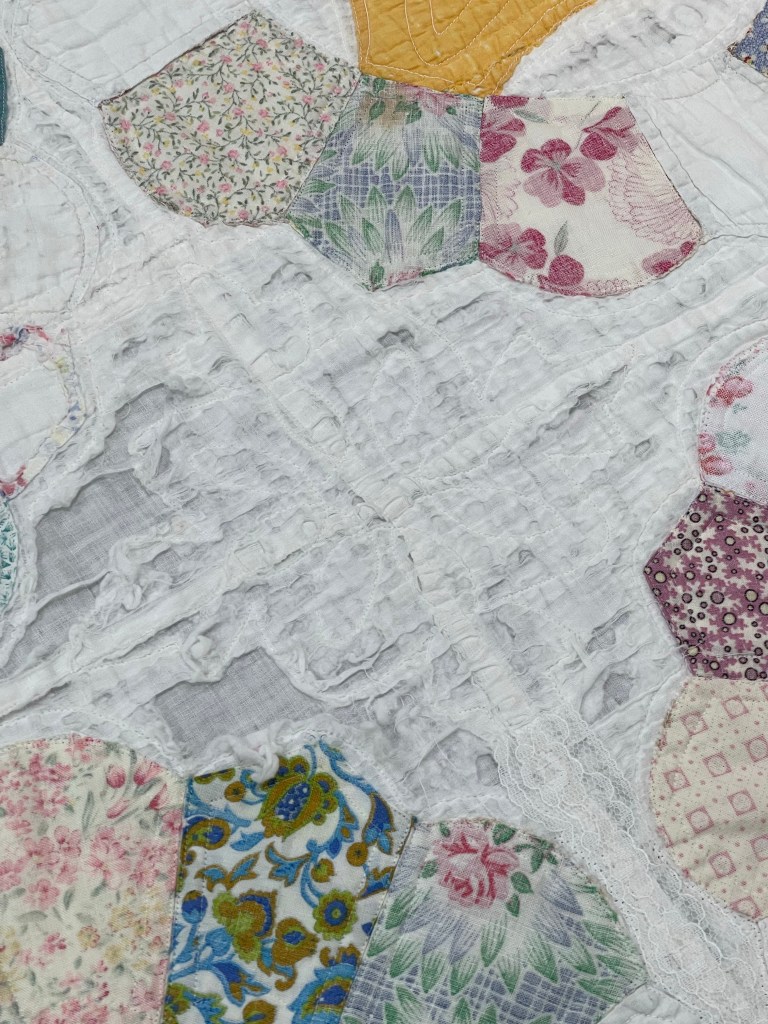
This is what I’m faced with…over much of the quilt the white fabric is either very damaged or missing entirely, the same for much of the quilt batting.
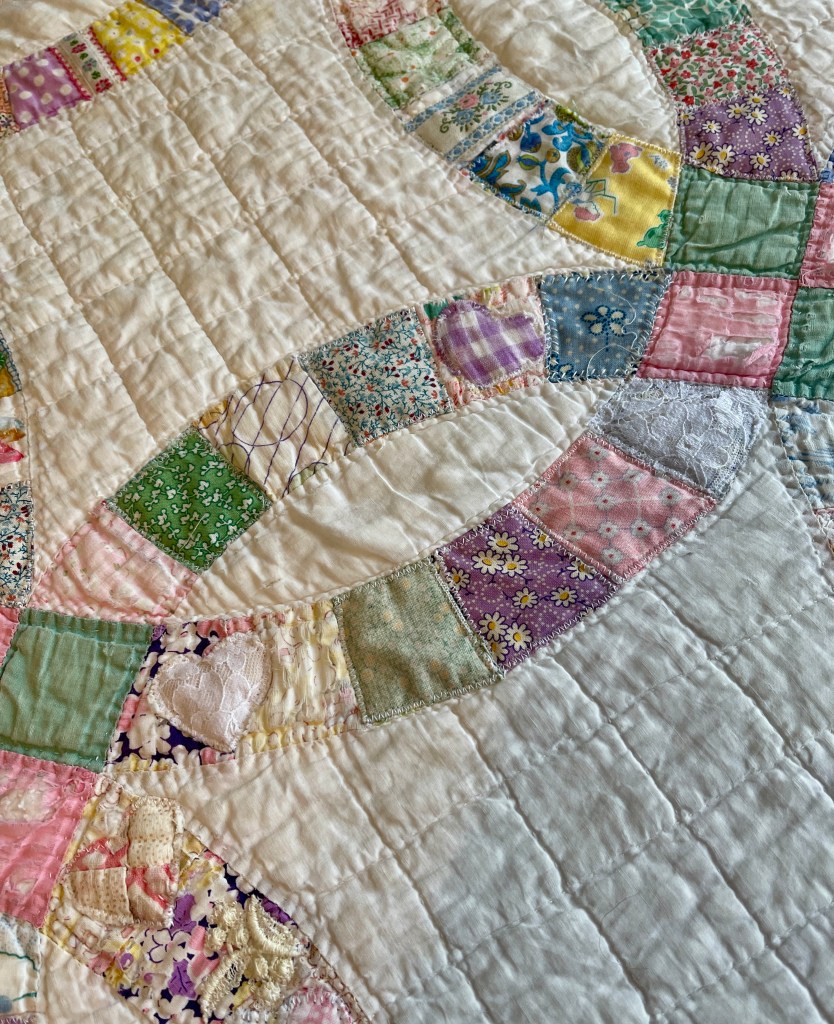
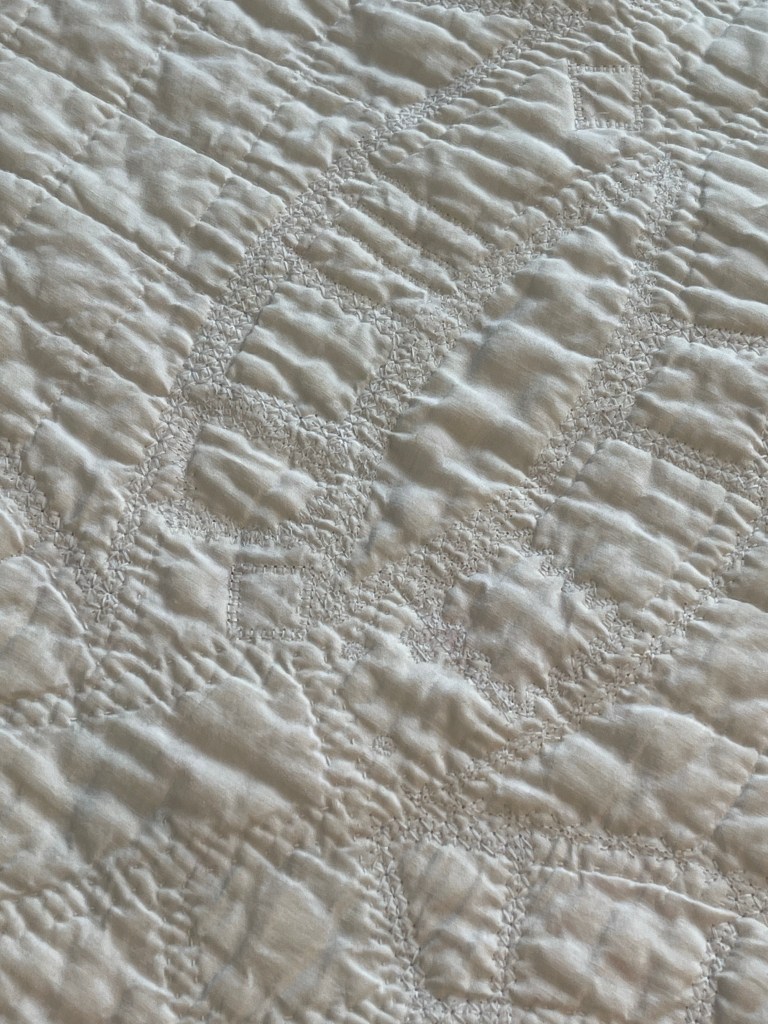
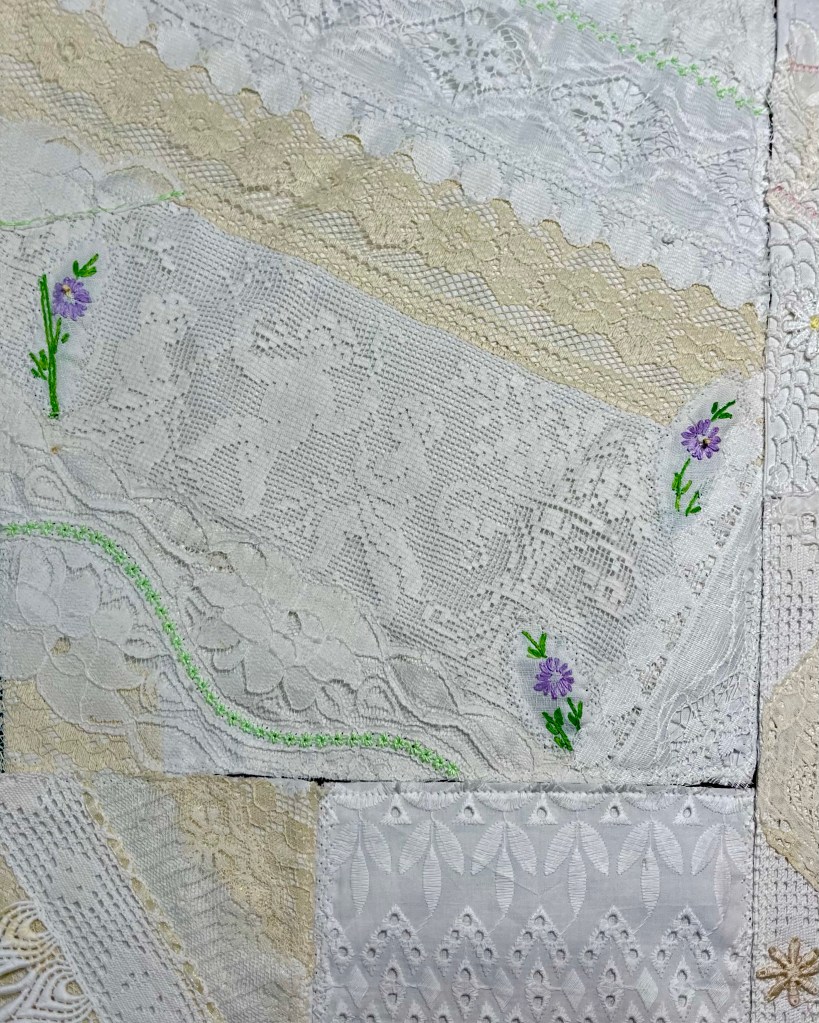
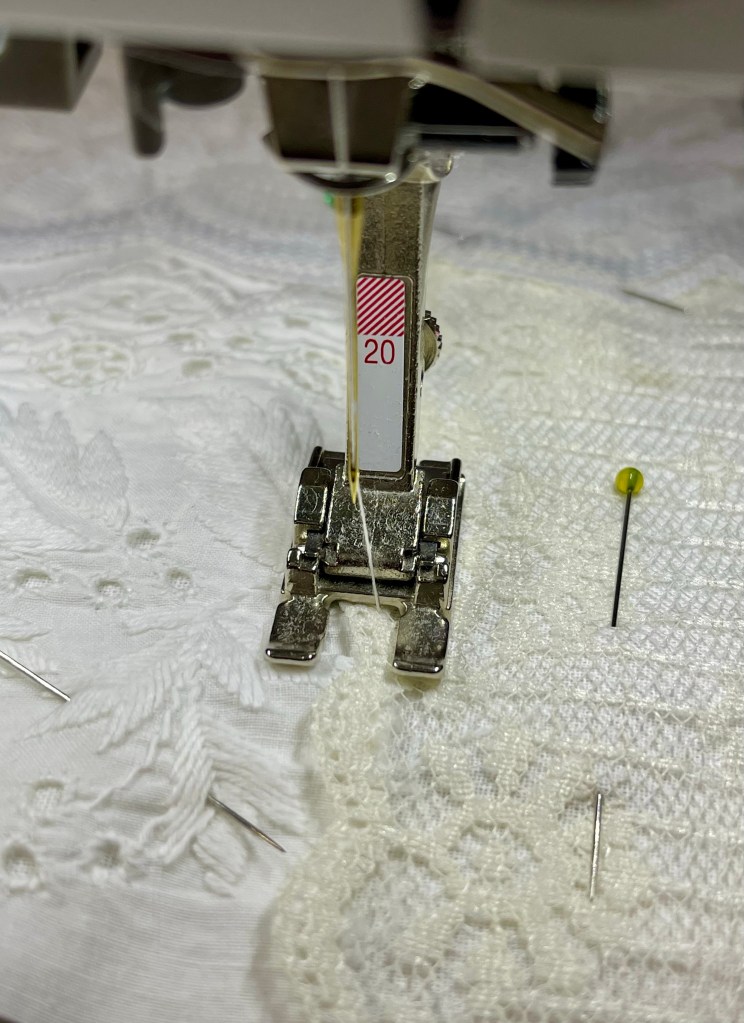
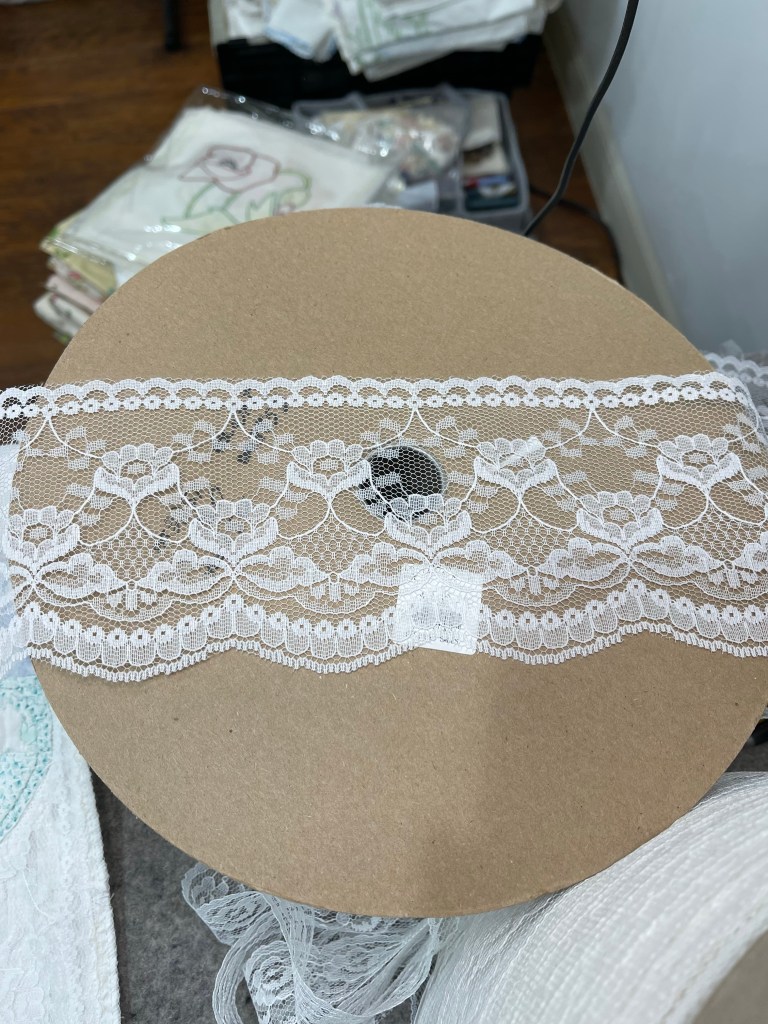
After deciding not to try and replace the batting, I pull out a huge roll of soft white wide lace.
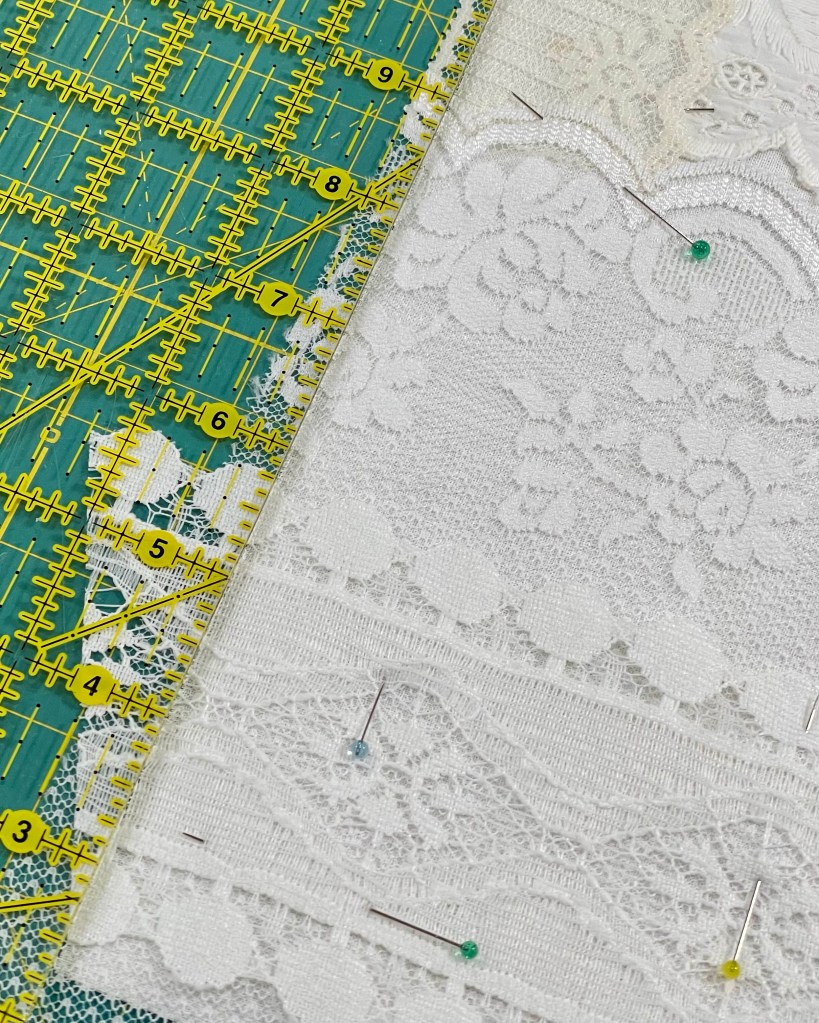
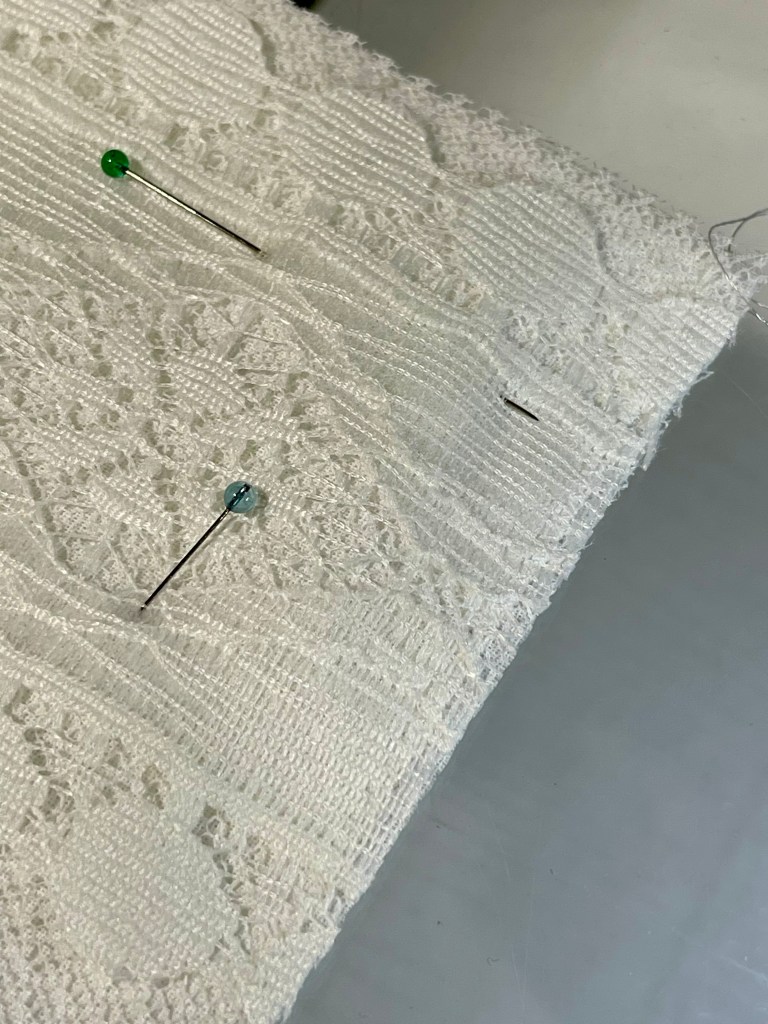
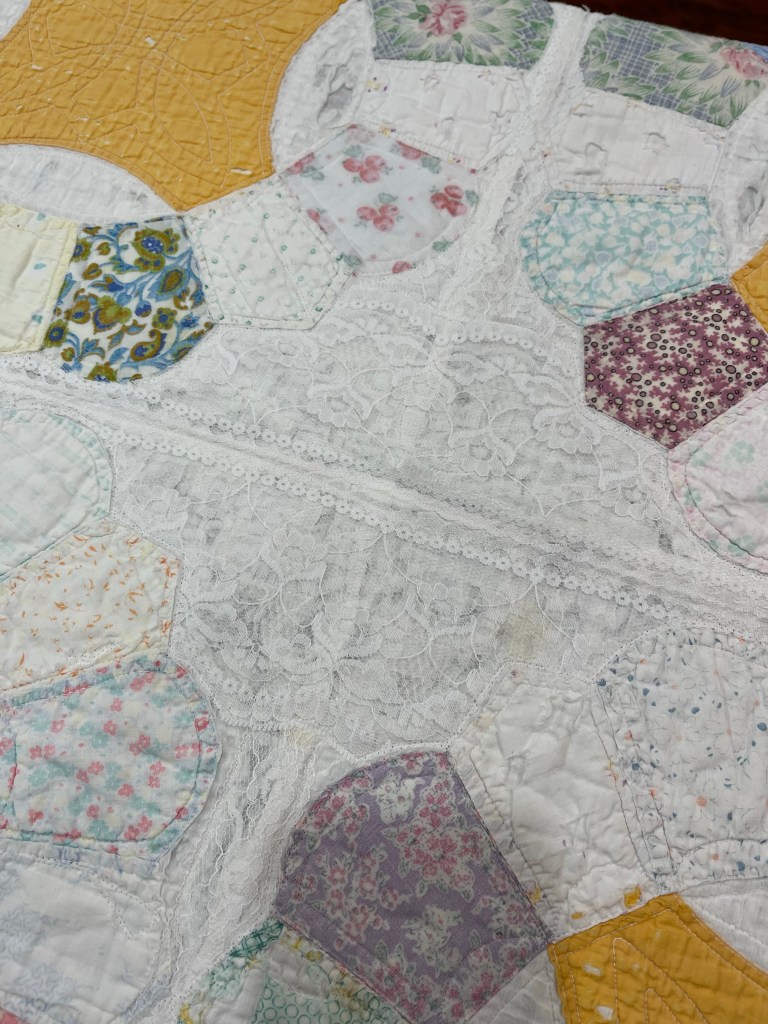
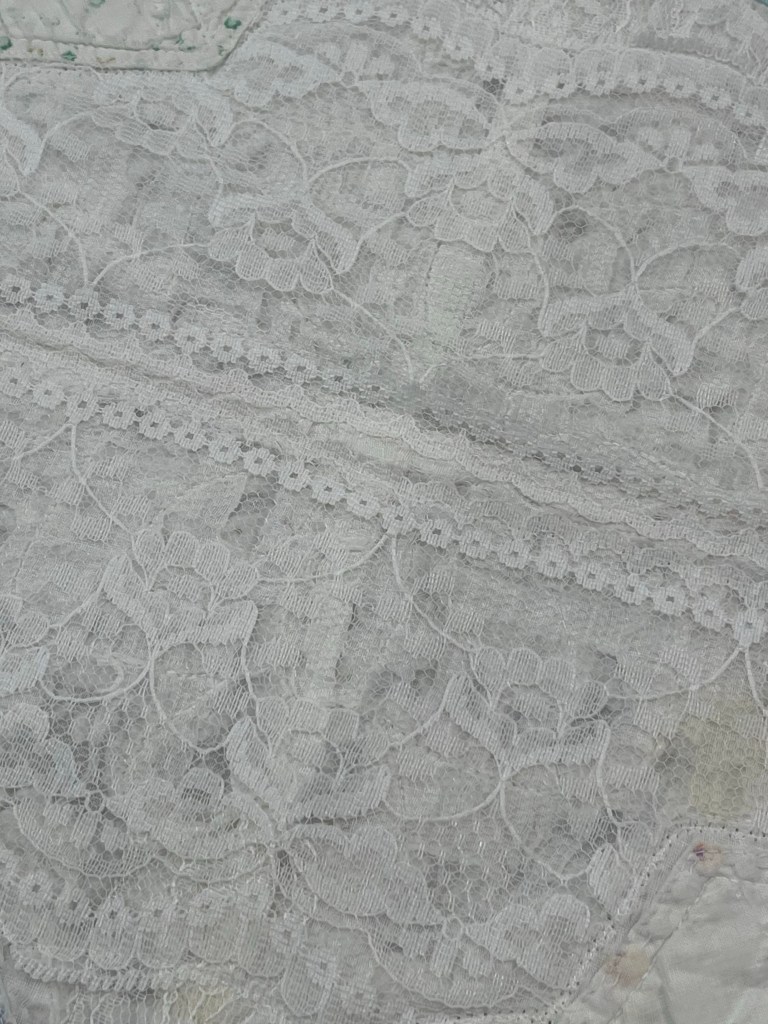
After positioning the lace over the damaged white fabric, using a very small tight zig-zag, I stitch at the outer edges of the pieced circle pieces.
The red line shows you where I stitched down the white lace, the blue line shows where the straight edges of two pieces of lace were slightly overlapped and were also zig-zag stitched.
After zig zag stitching, it was easy to trim away the lace that overlapped the block circle pieces.
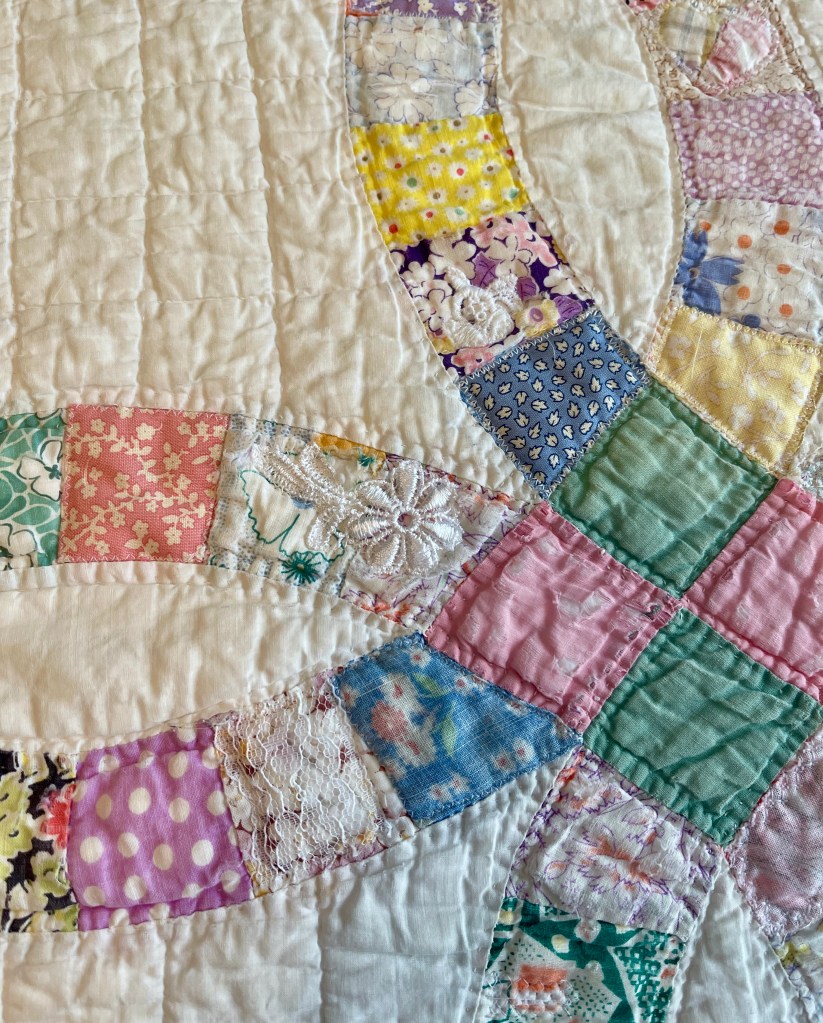
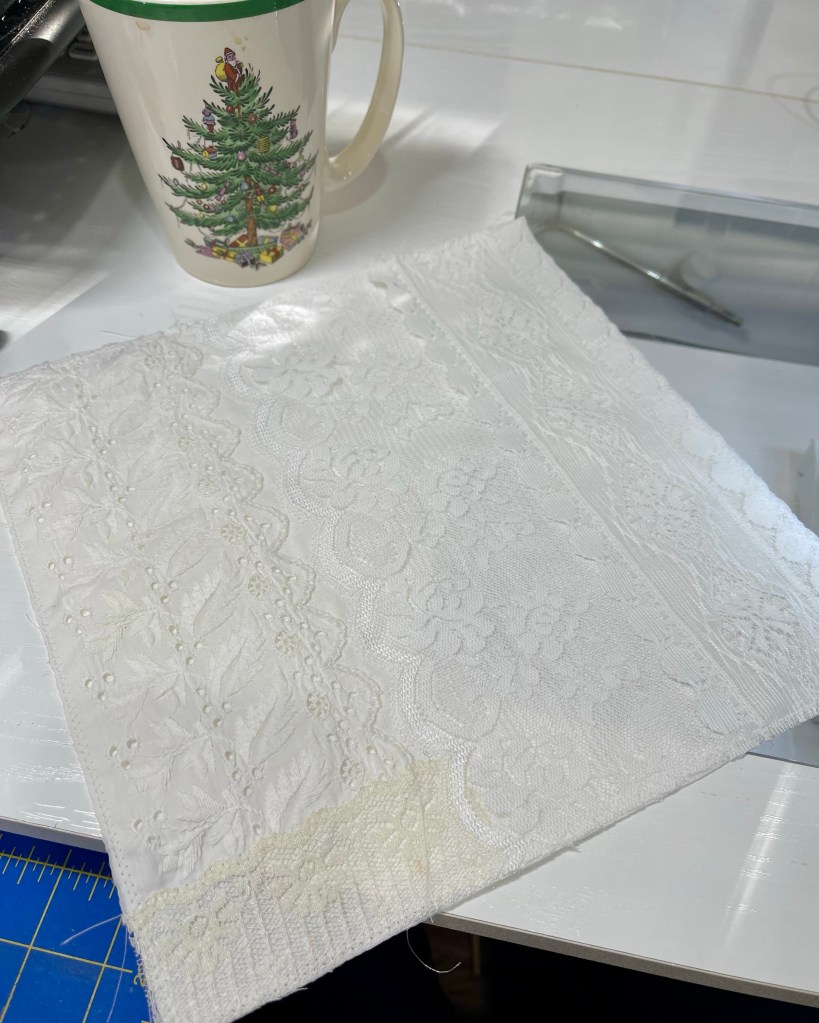
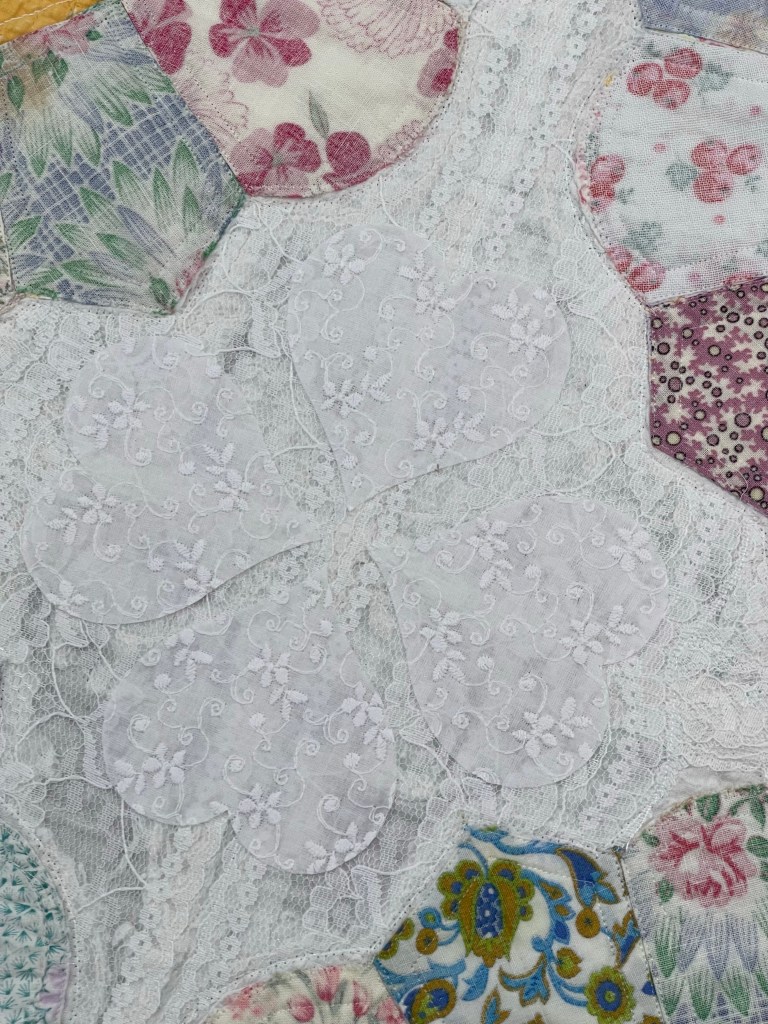
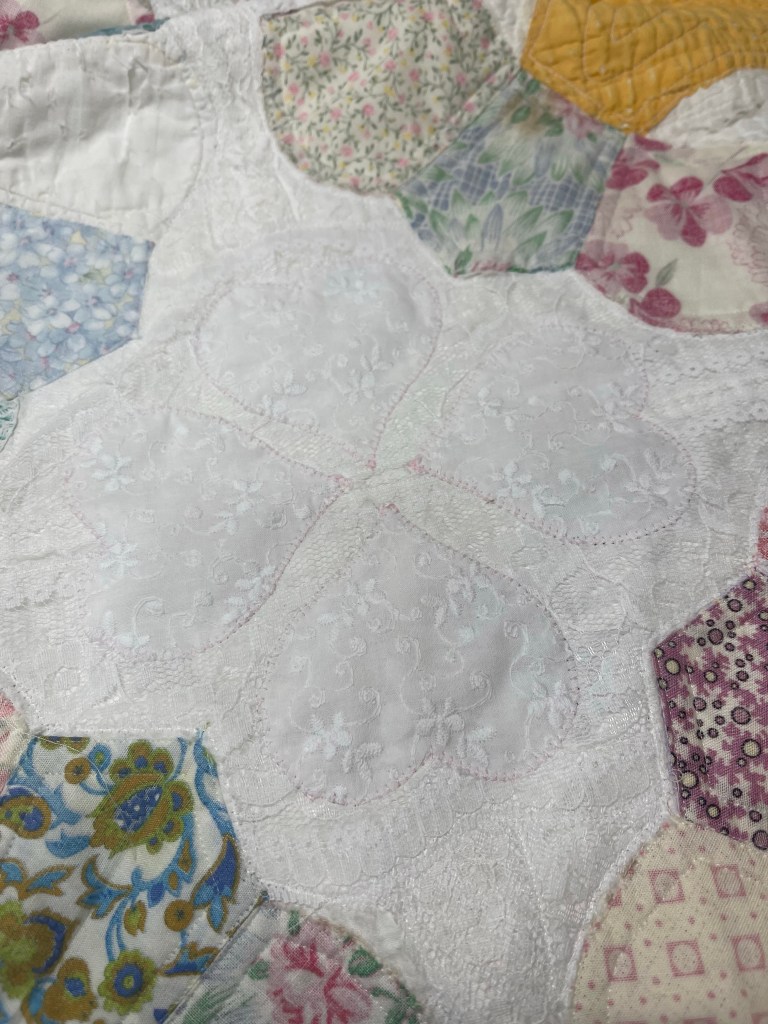
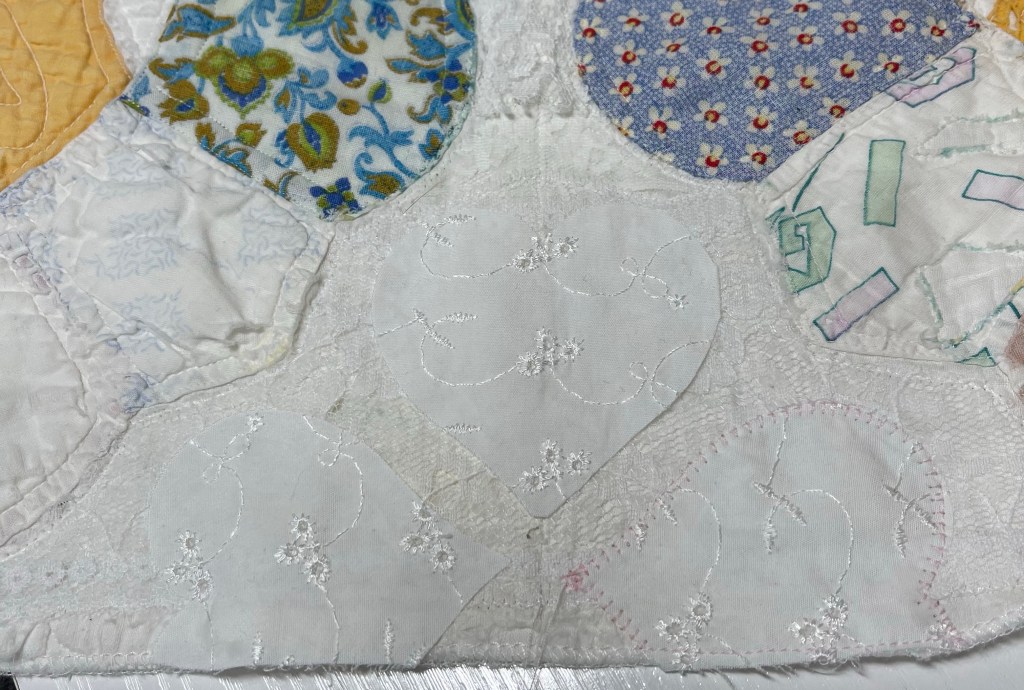
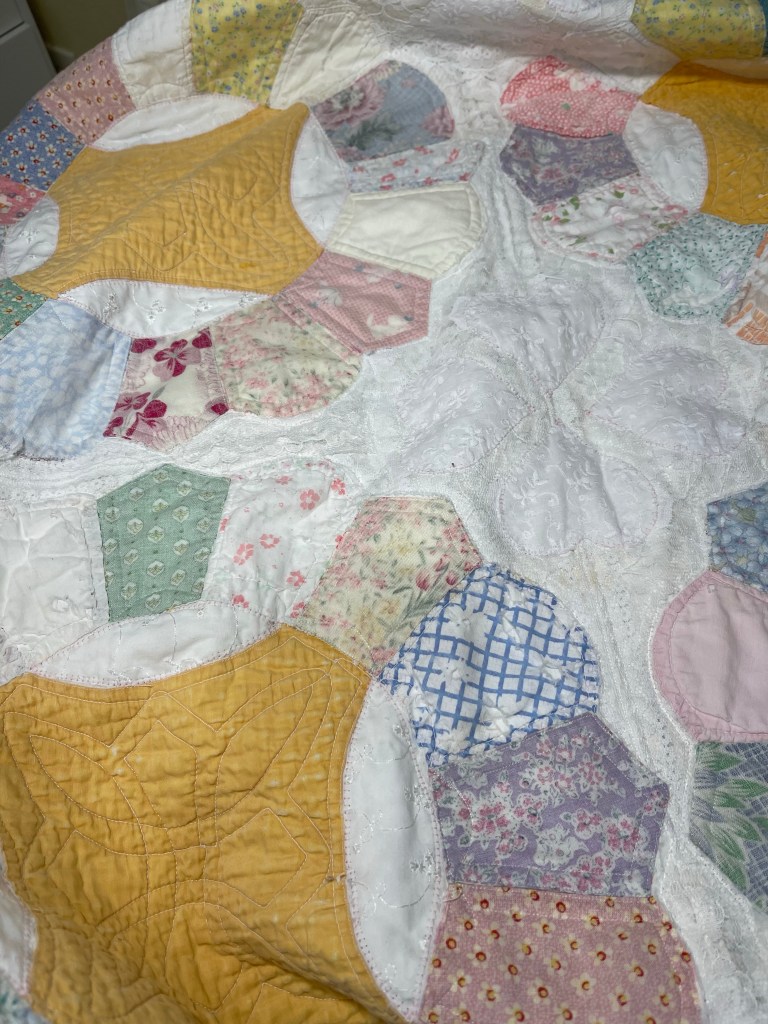
I like the look of the lace but it leaves these white areas looking a little boring so…
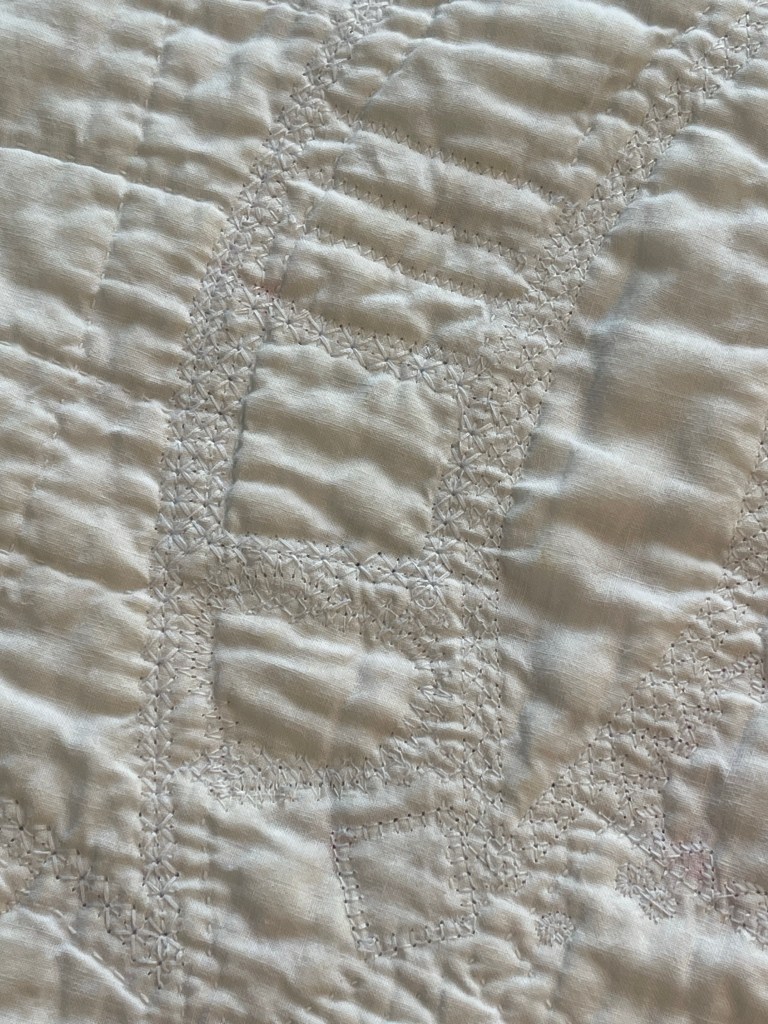
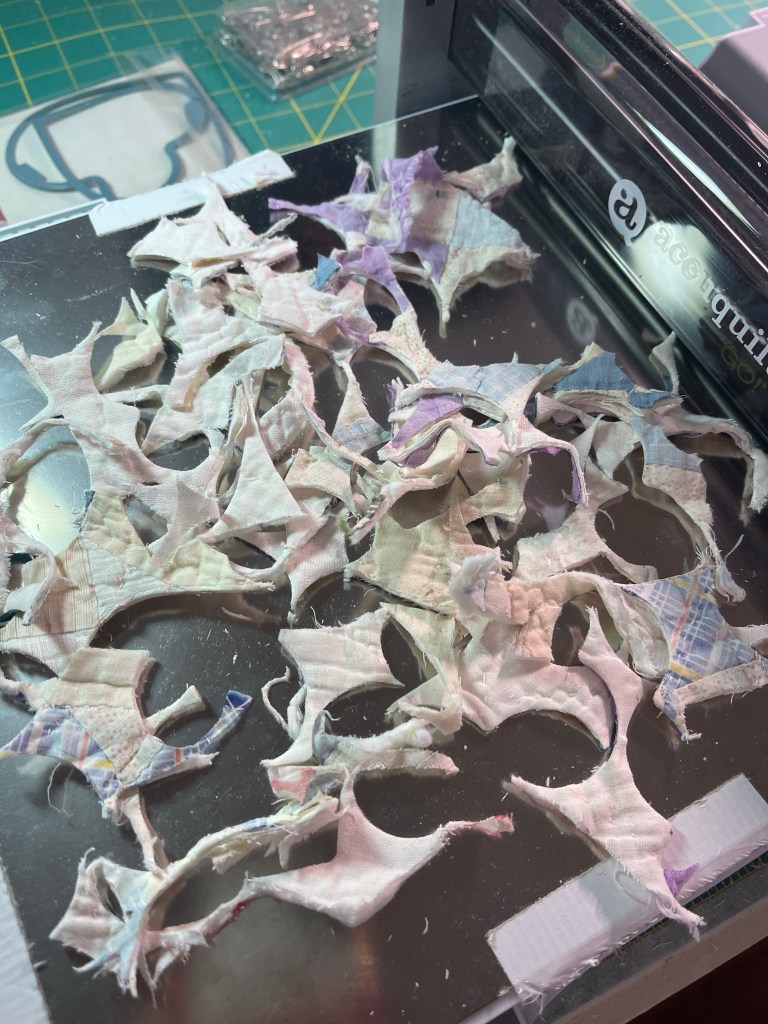
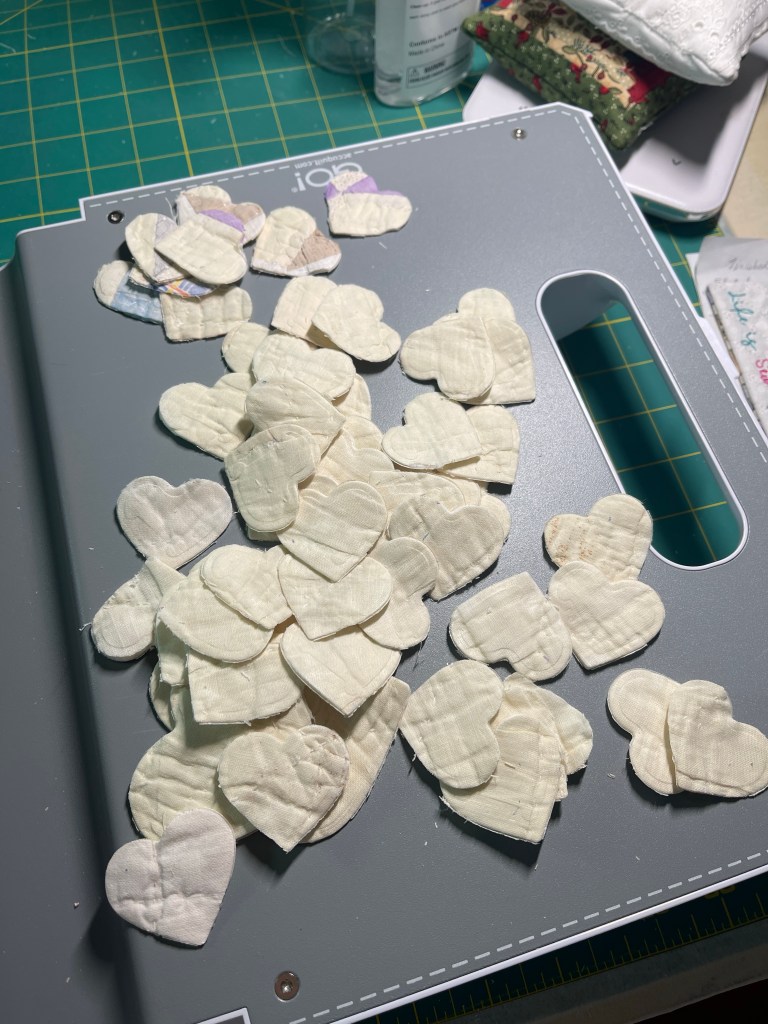
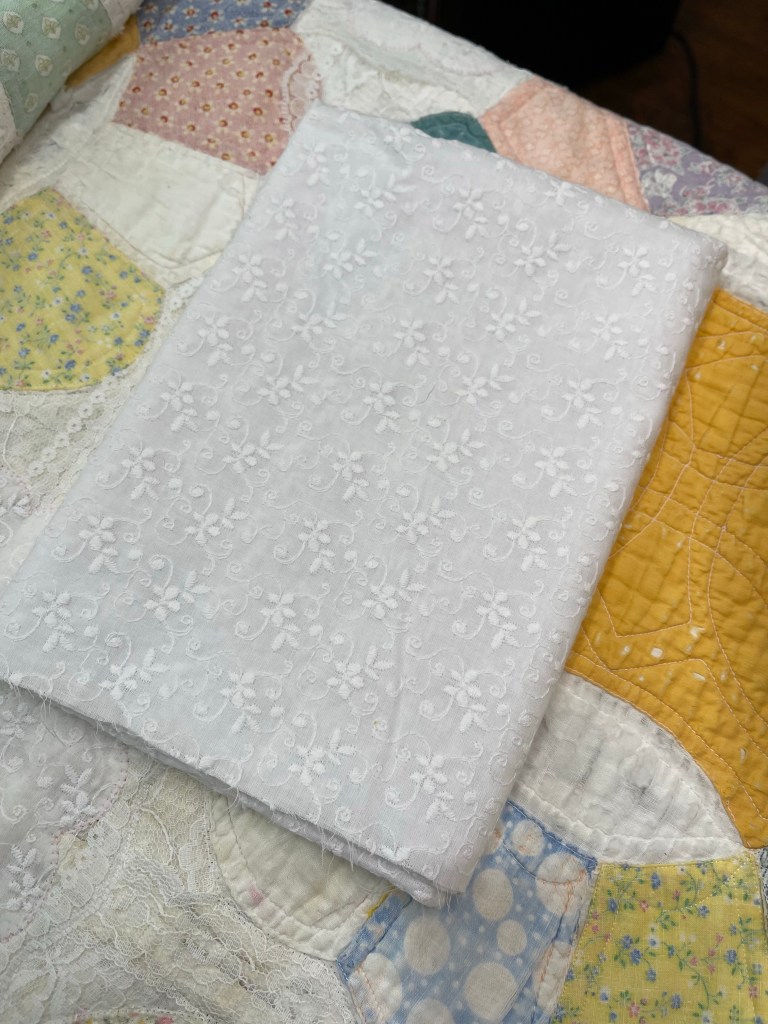
I hunt up this yardage and pull out my Accuquilt cutter and heart shaped die.
I like that these hearts add interest but don’t steal the show.
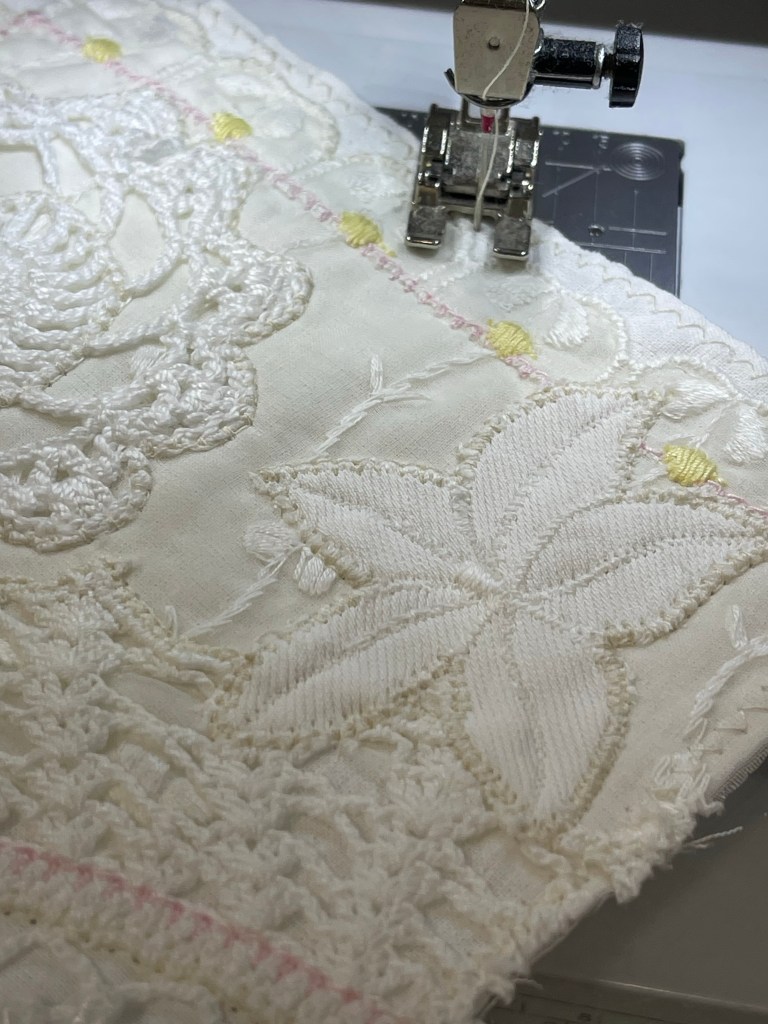
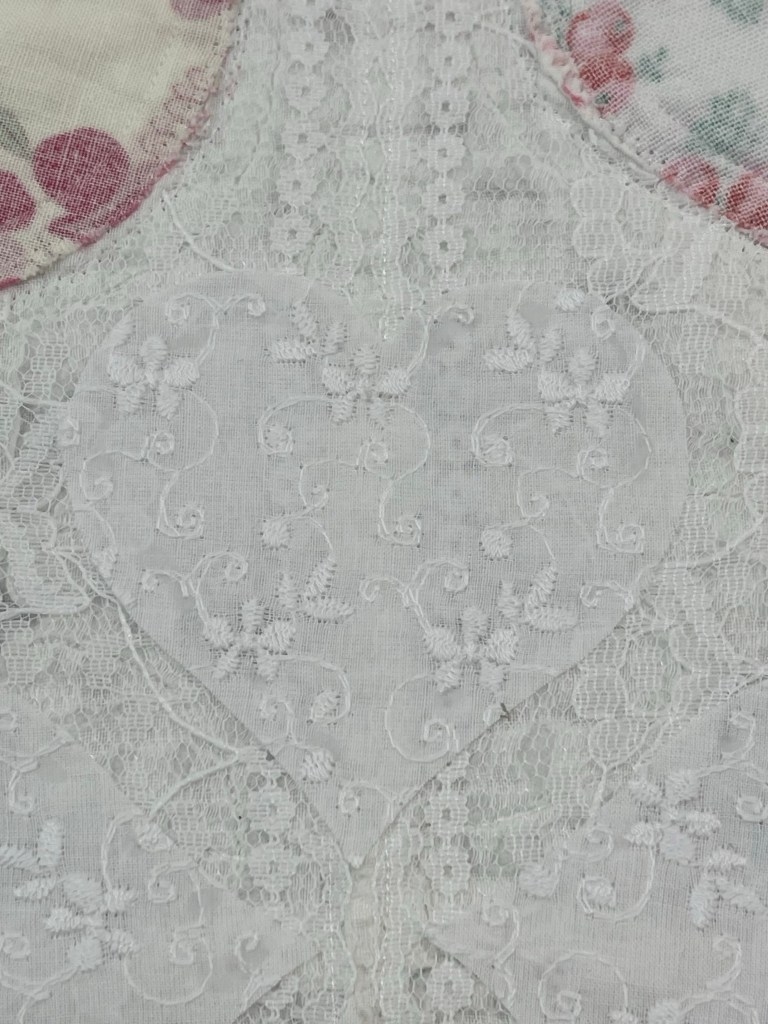
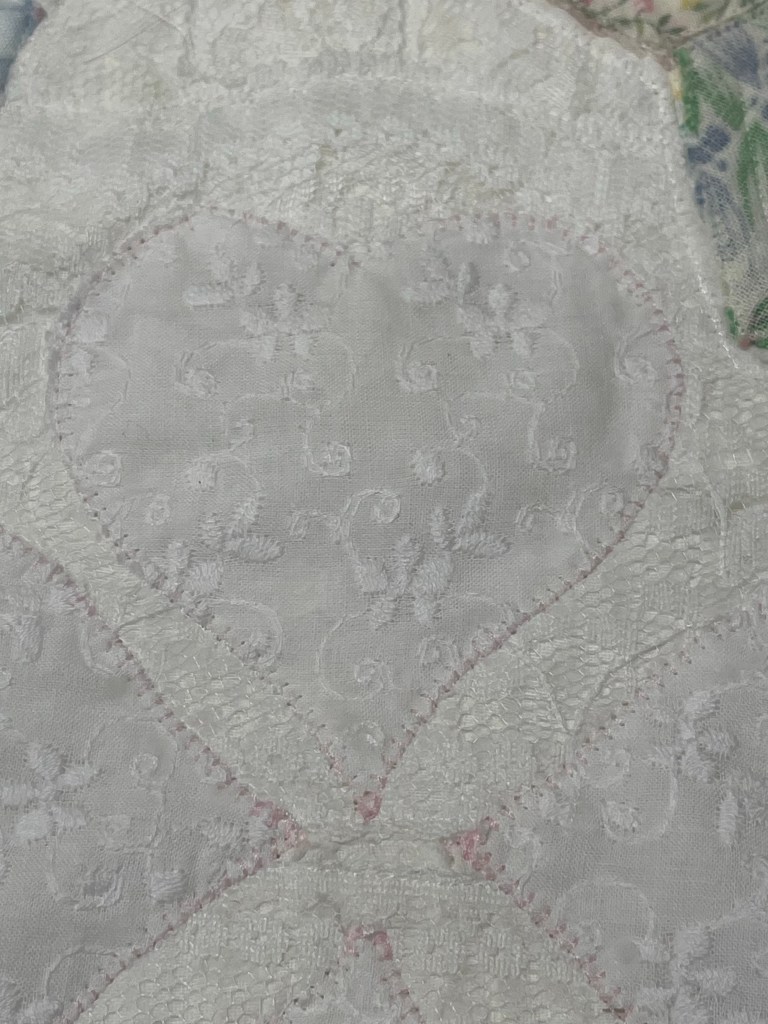
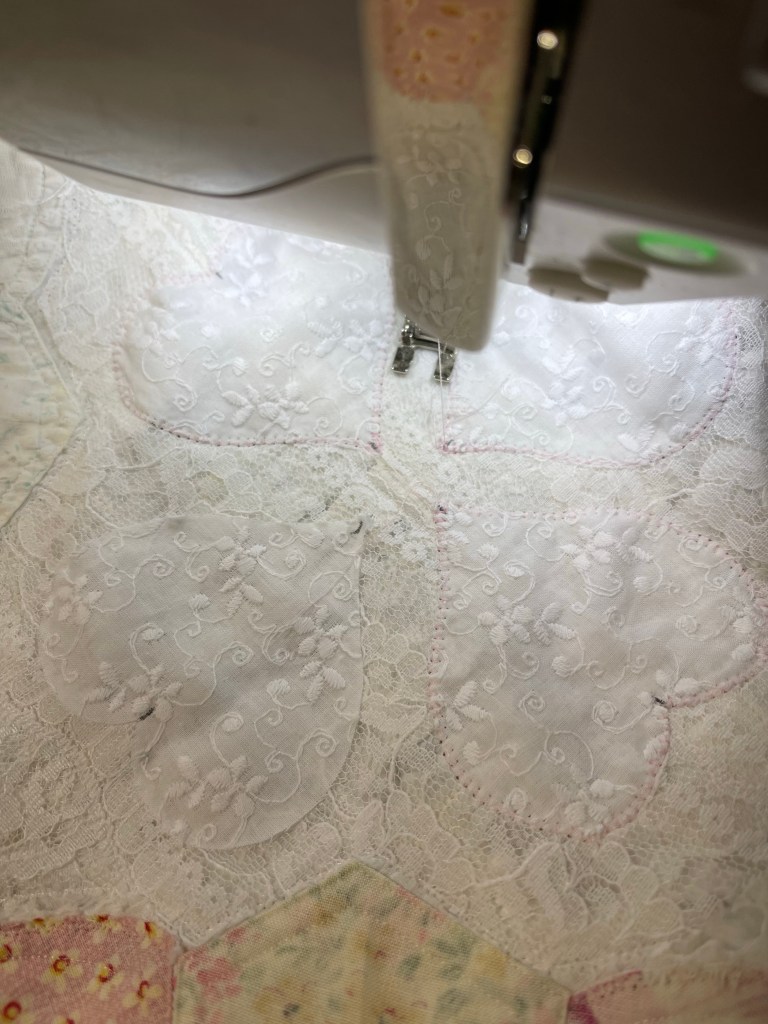
Using a matte finish light pink thread, the hearts are machine applique stitched.
The white on white was at some times hard to follow and it helped to mark both the bottom point and top dip of each heart before stitching.
My marks were made with a Frixion pen, easily made invisible with a quilt touch of my iron.
Just to add a bit of interest, I chose a different heart fabric for the outer white areas of the quilt.
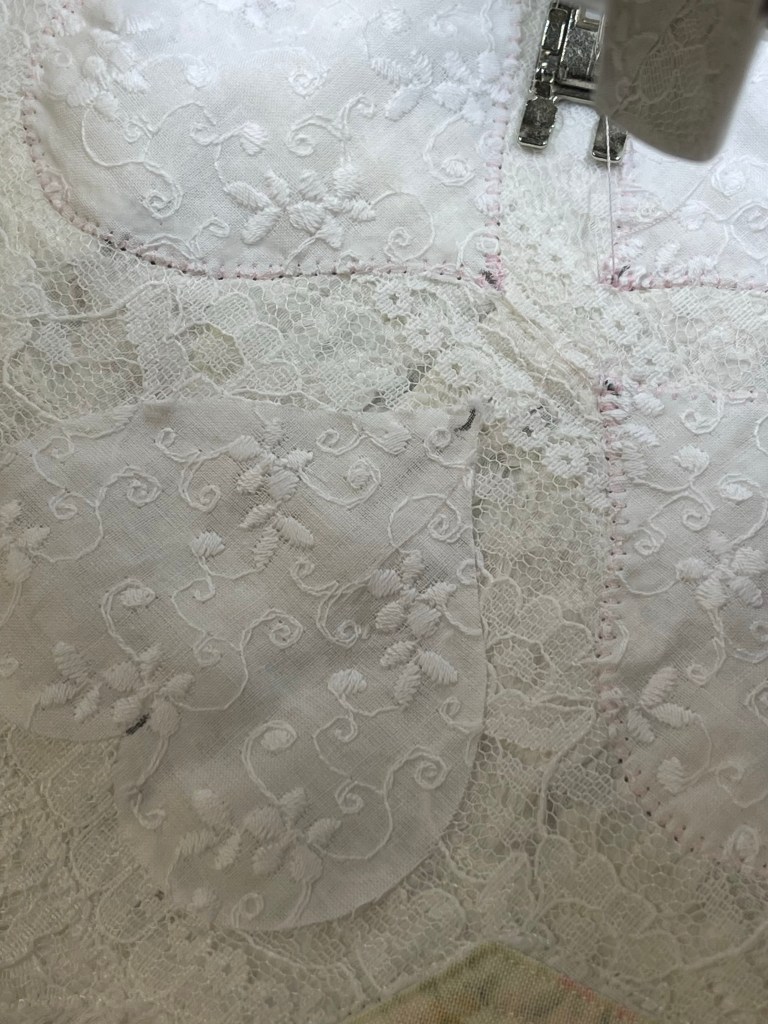
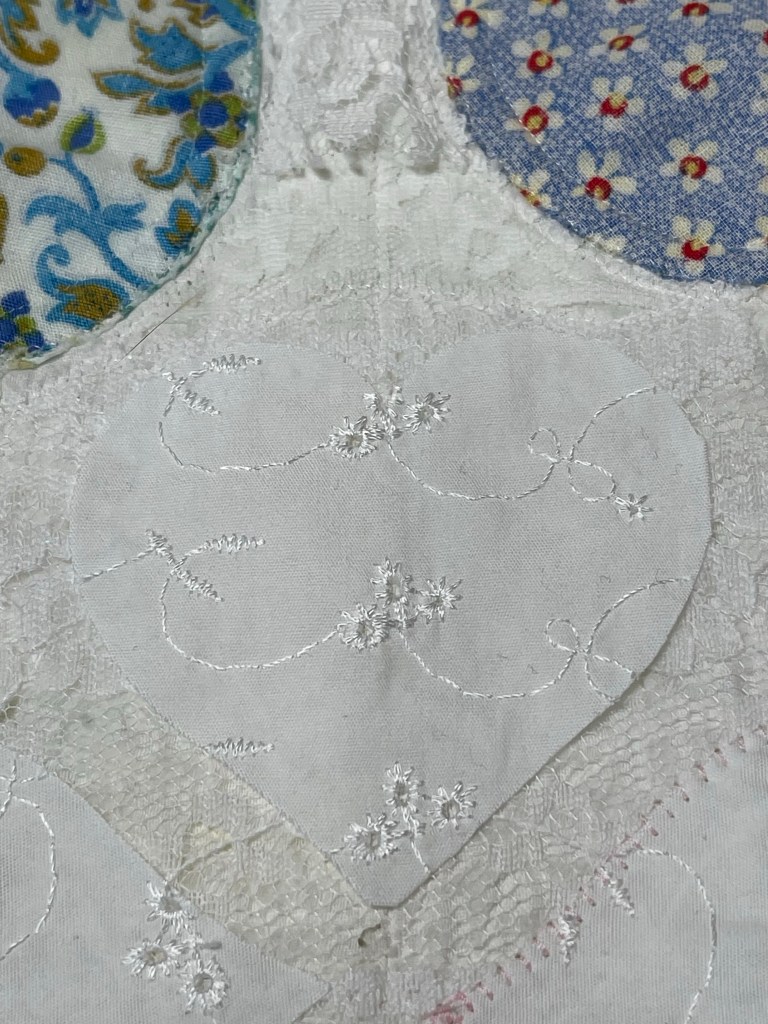
And then it was time to address the inner melon shaped pieces of the blocks. Just like I showed you in the previous blog post, I made a template for this melon piece. The eyelet fabric worked nicely.
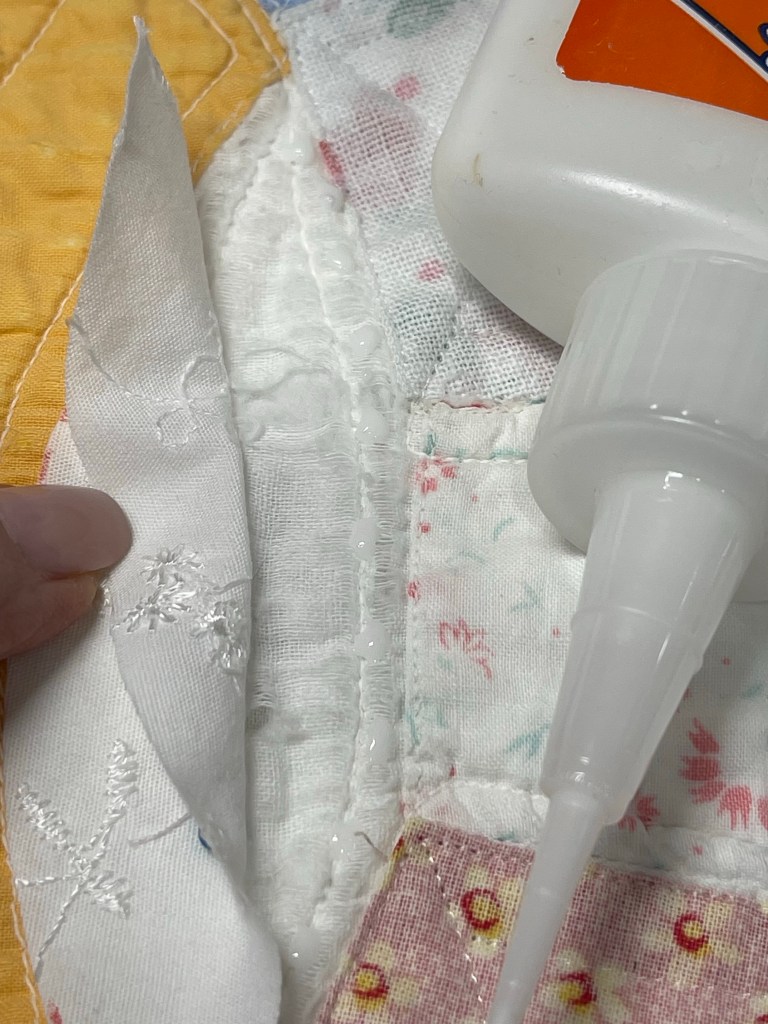
Elmer’s Washable School Glue once again makes this quilt rescue easier. Once I’ve completely finished this rescue I will send the quilt through the washer and dryer and the glue will be history.
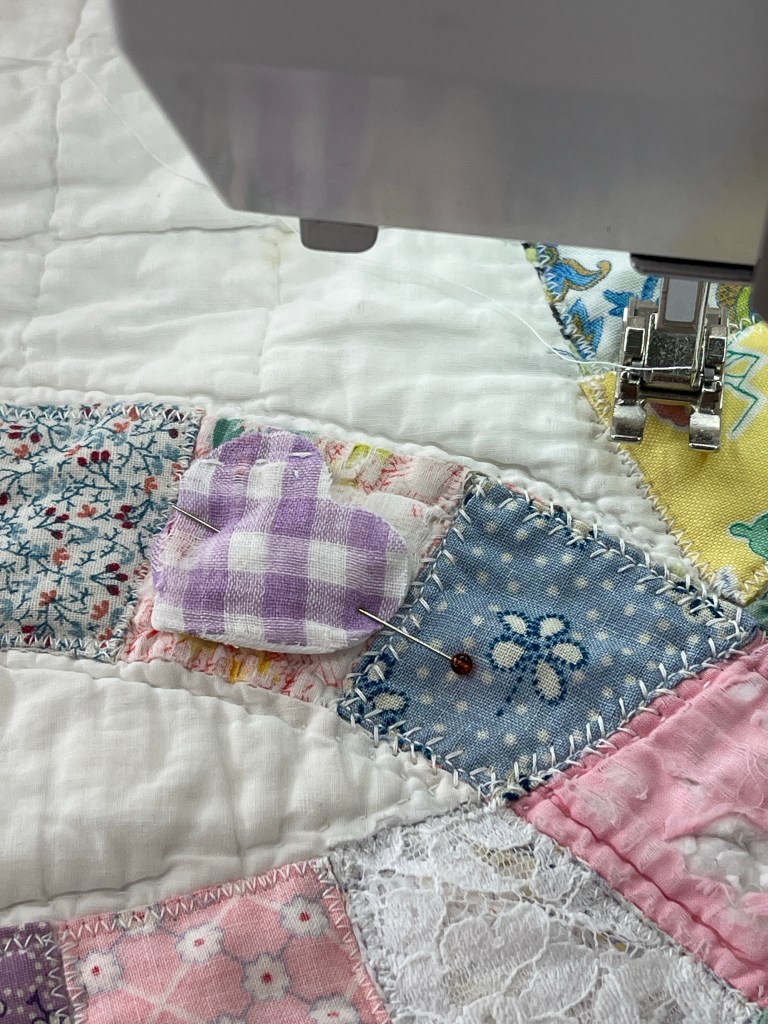
With the repairs completed, it’s time to add all the embellishments, bits and pieces of laces, trims, maybe some machine decorative stitching, ribbons, buttons and such.
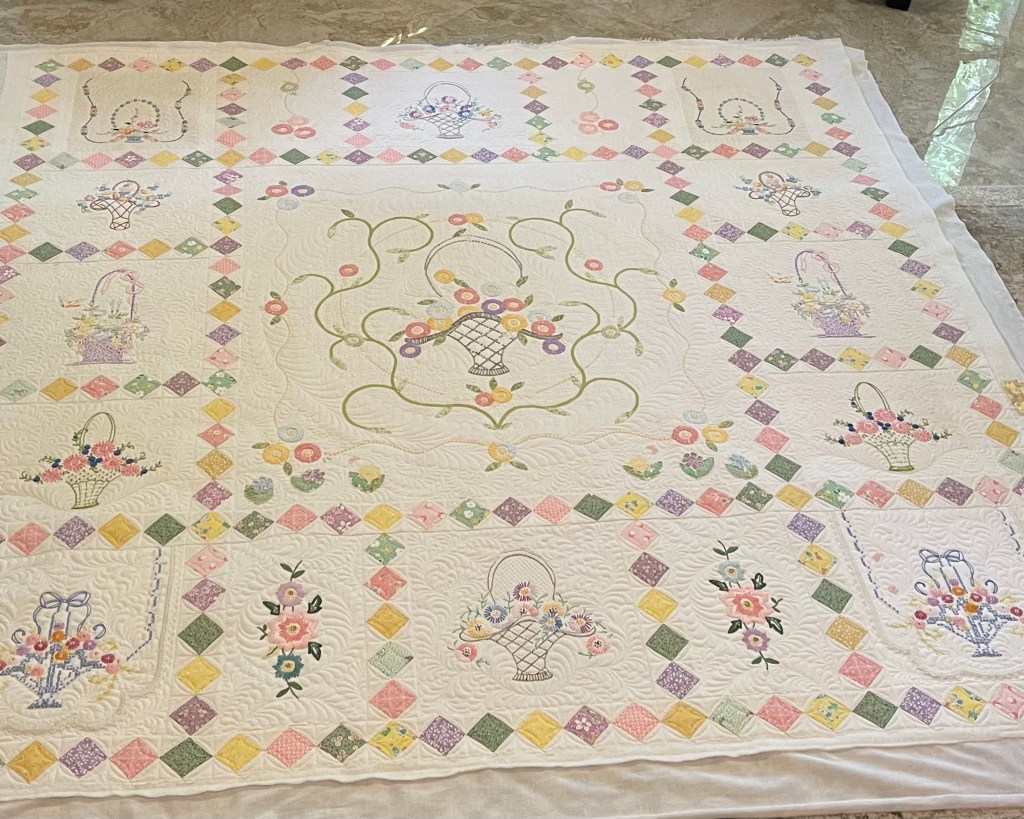
I am loving the transformation of this old well loved, worn, torn and cut in two quilt! Remember how my project began? Here’s a pic:
Stay tuned for update #4!
Merry Christmas, Happy New Year and blessings, Rhonda