

I’m so happy to let you know I had time today to get the top and the backing fabric loaded on the longarm! The batting will be a challenge as the large rolls of Hobbs are stowed away in a guest room closet. A closet that is quite inaccessible because boxes and boxes and boxes of “1st Floor stuff” are piled in front of the door. “Where there’s a will there’s a way” said someone famous. Sometime tomorrow afternoon I plan to put on a hard hat and steel toed boots and retrieve that batting!
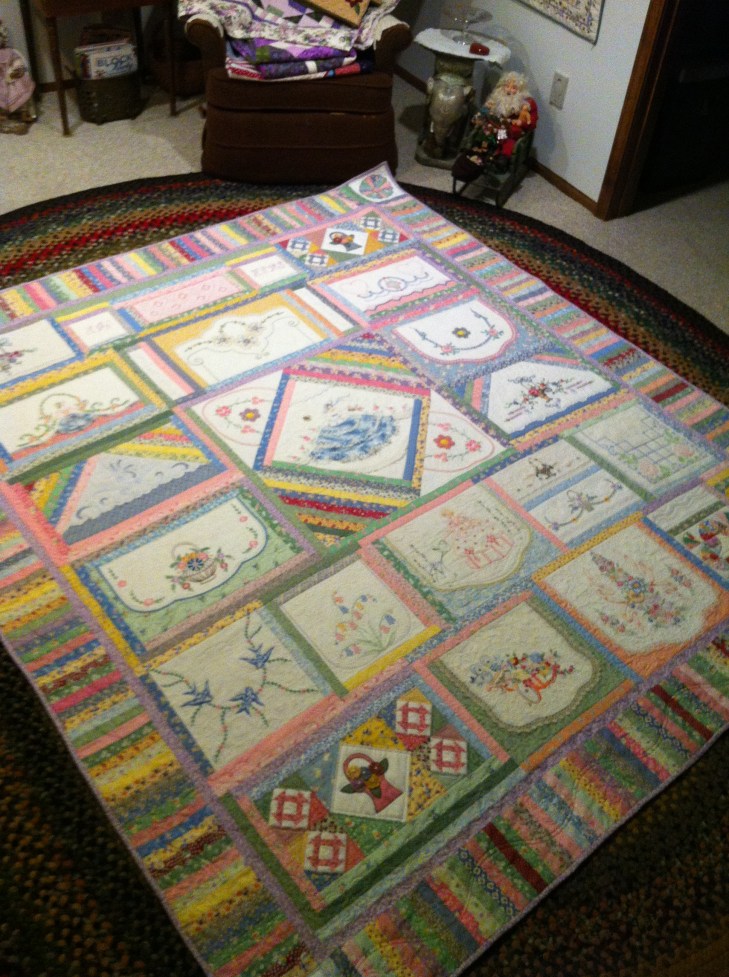
This quilt top has been long in the making. Years ago mom and I saw an inspiration piece hanging in a long closed quilt shop in Liberty, Mo. We both began furiously making our own quilt blocks. She finished hers a long time ago and oh how I love her quilt! I love the vintage linens, I love the piano key border and I love the quilting she did on this piece:
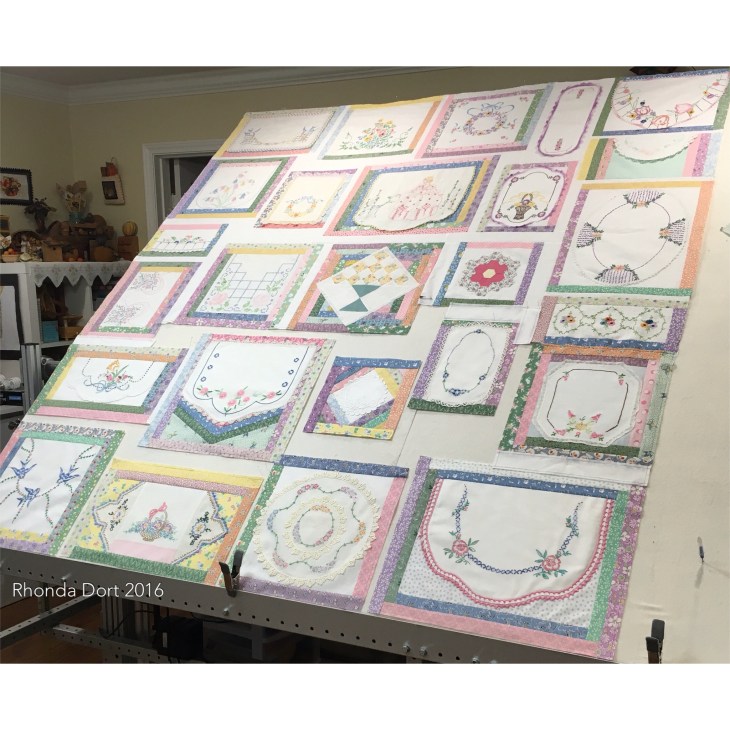
But I didn’t want to duplicate her work so I branched out. While our projects are remarkably similar, they are also unique stand alone pieces. Here’s my quilt top draped over the longarm:
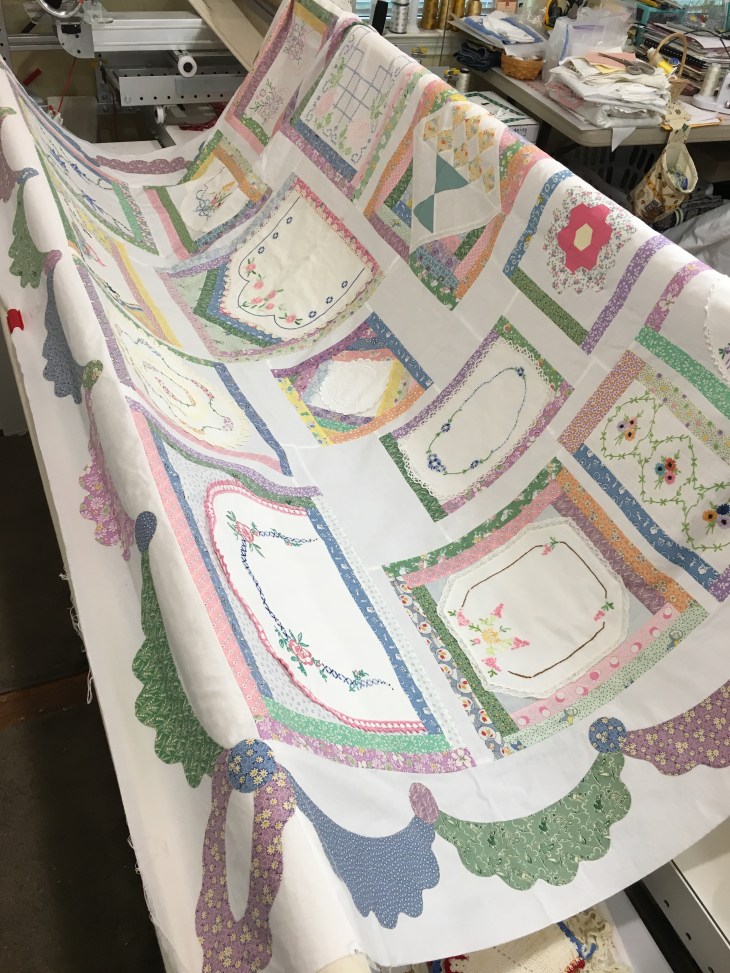
For me this is a sizable piece, 85×92″, I usually work on much smaller projects.
The border is a custom swag. Sounds impressive doesn’t it… If you’ll scroll back a few blogs posts you’ll find a detailed tutorial on how to make a Custom Swag and you’ll know it is easy-peasy! Try it! Your quilting friends will be impressed. It’s up to you whether or not you tell them how straight forward it is…

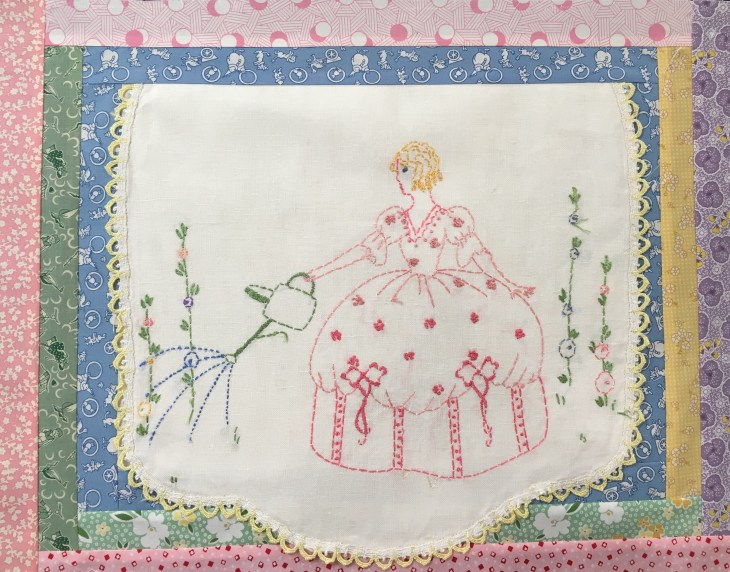
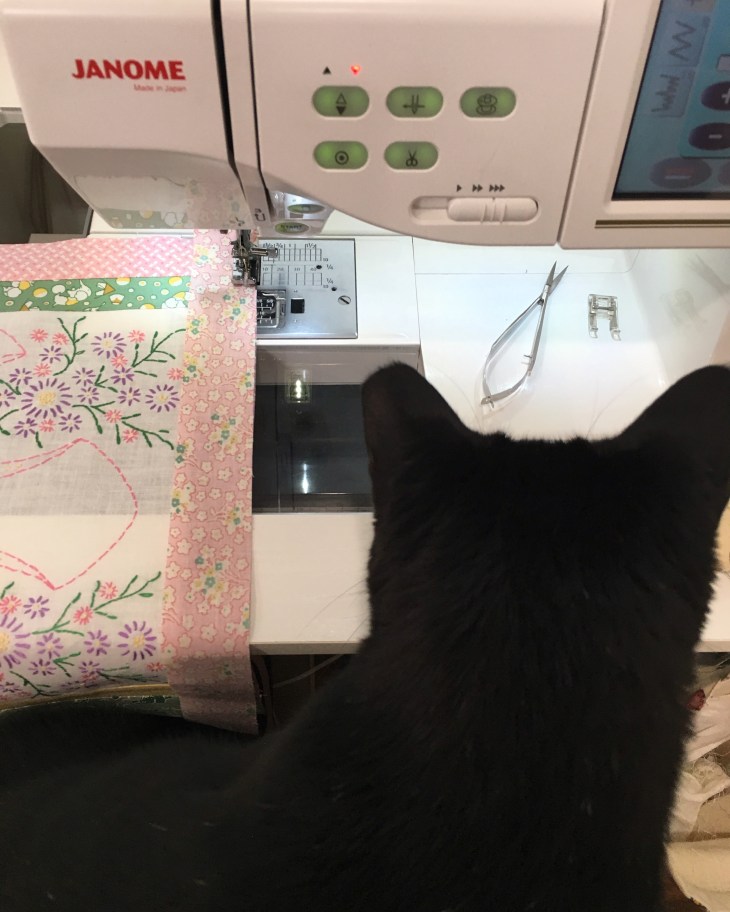
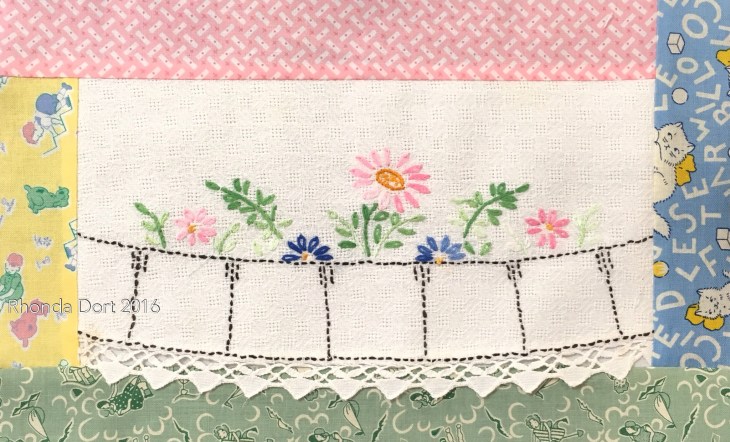
Each of the vintage linens used in this project was cleaned, pressed and if necessary, trimmed to size. The beautiful piece below was once one end of a dresser scarf. If you look again at mom’s quilt you’ll see the other end of the scarf near the center of her finished project. This block shows how the decorative trim can be part of the quilt block. Only the top of this linen piece is incorporated into the quilt block seam.
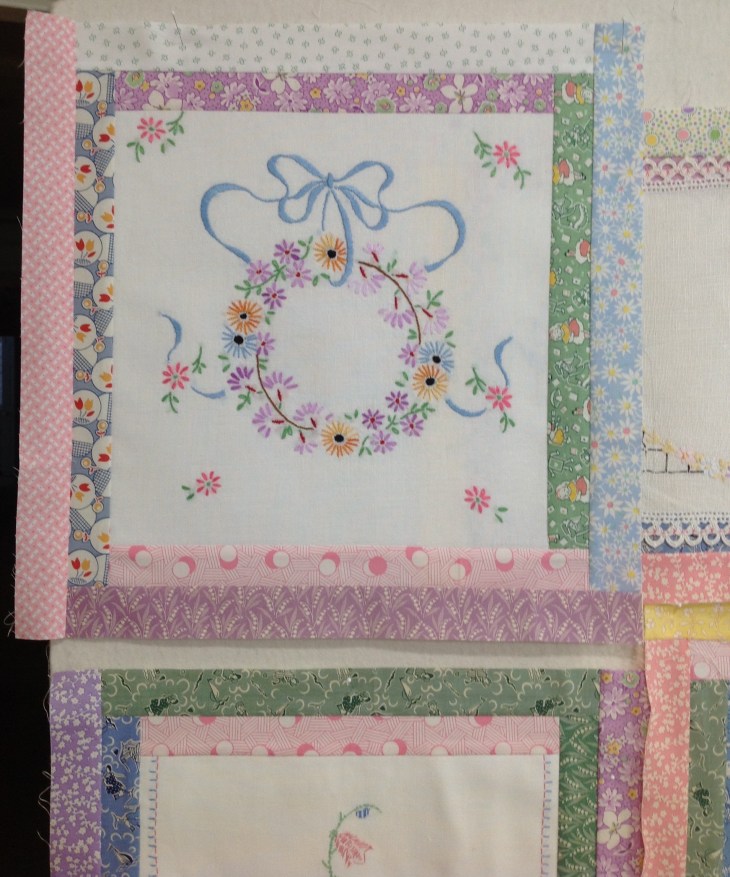
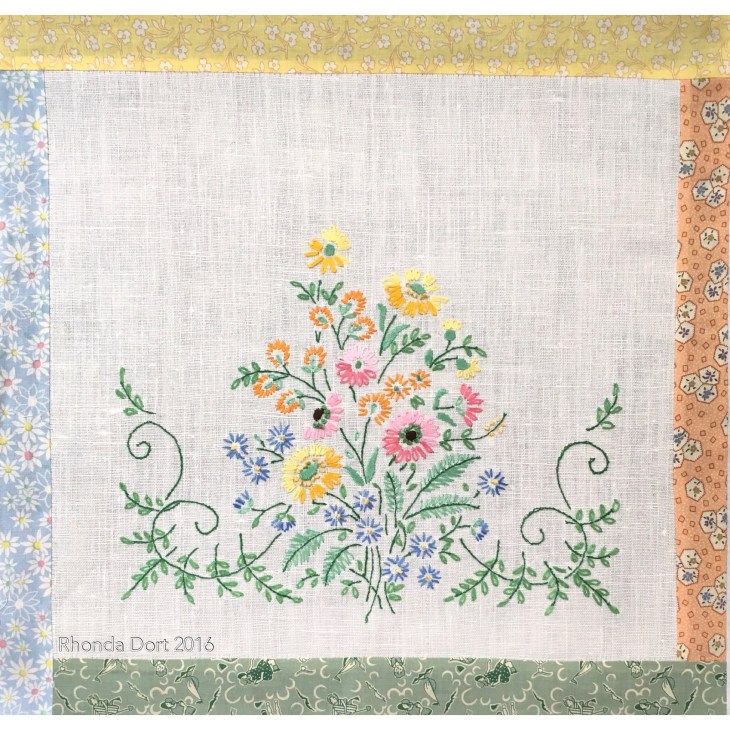
The block below shows how the entire linen is stitched to the surrounding fabric strips.
And what’s not to love about having a “sewing helper” during block construction! If you don’t remember from previous posts, this is Winston, our beautiful and wonderful and very vocal House Panther. He is carefully eyeing those silver scissor snips, making sure they don’t wander off…
I created all the blocks in a “helter-skelter” method. “Oh, how hard could it be to get everything to fit together?” I said to myself as I started this project. I will NEVER ever use this crazy “fly by the seat of my pants” construction method again.
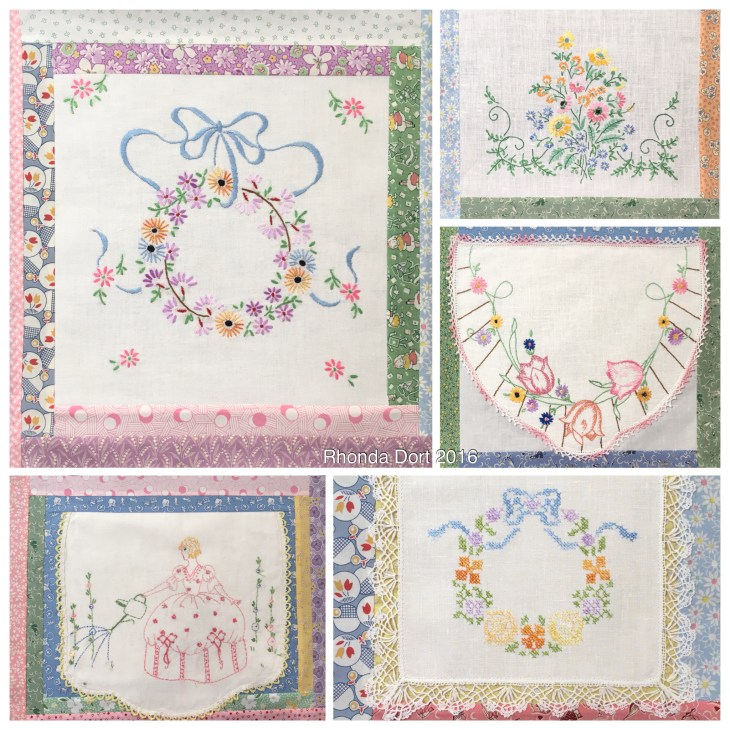
Do I have some favorite blocks? Oh yes and here are a few:
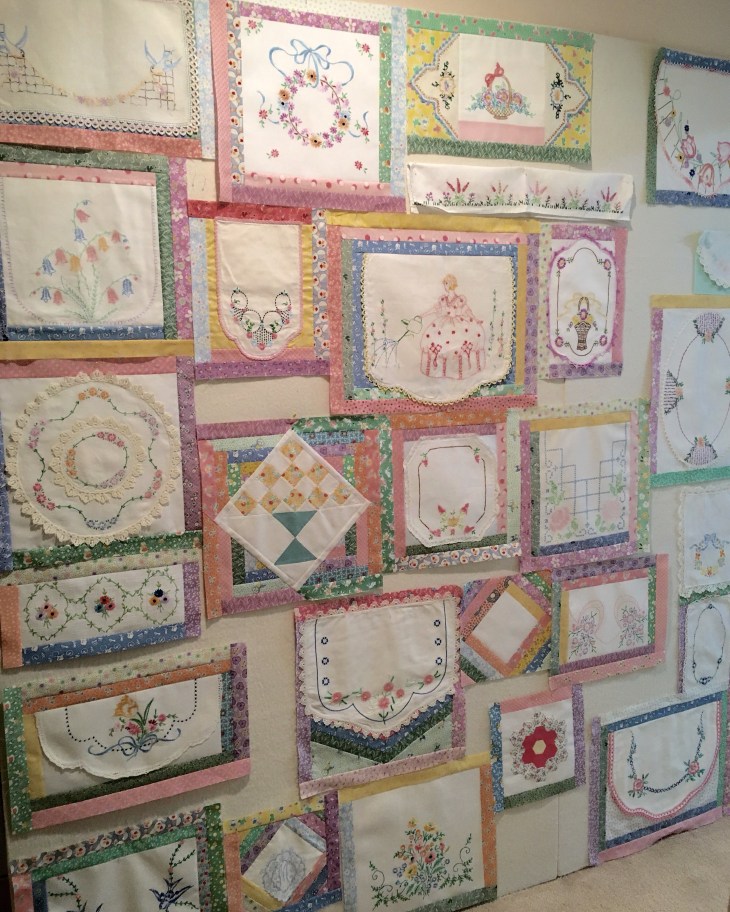
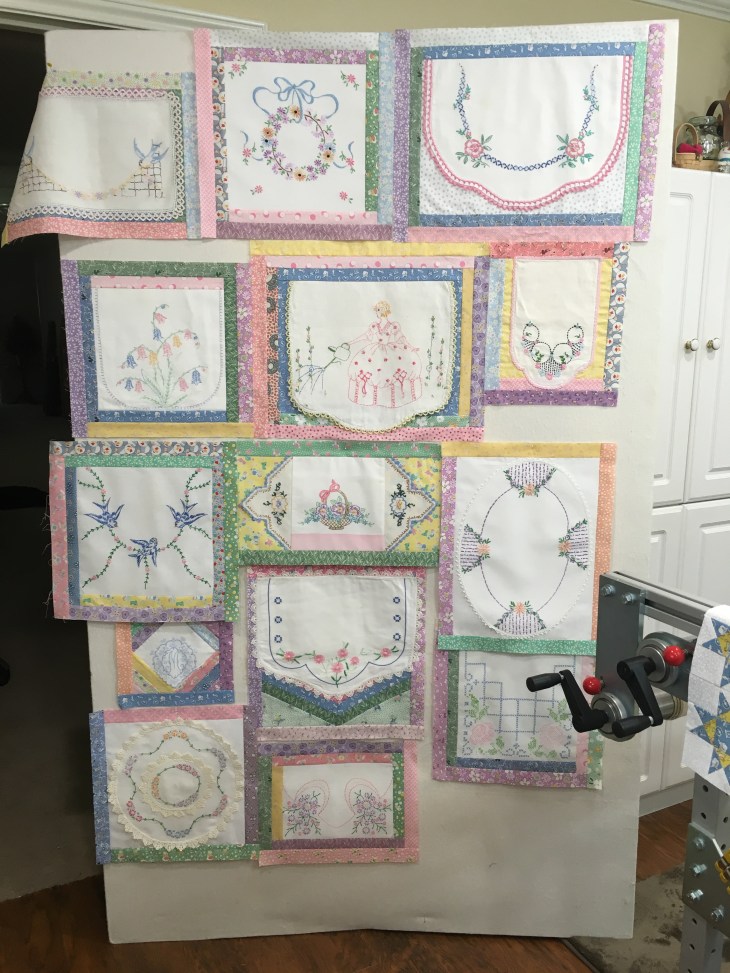
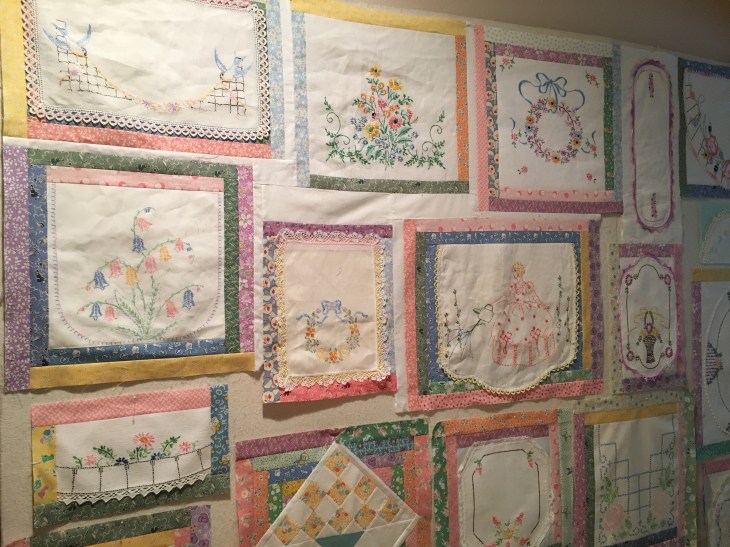
Here is how I began to work with the blocks. Needless to say, things got moved around a lot!

Since I put the longarm in my sewing room I don’t have a good space for my portable design wall. In the picture below I have it propped up on the longarm table. It actually worked quilt well! You may also see that I’ve used 2 vintage quilt blocks with the embroidered pieces, the hexagon flower (think Grandmother’s Flower Garden) and the on-point green and yellow basket block. Looking over this quilt top I see dresser scarves, pillow cases, doilies, quilt blocks, antimacassars and dish towels. Some of my “negative” white spaces, once quilted, will feature vintage crocheted butterflies. At least that’s the plan right now.
Again, a few pictures of some of my favs:
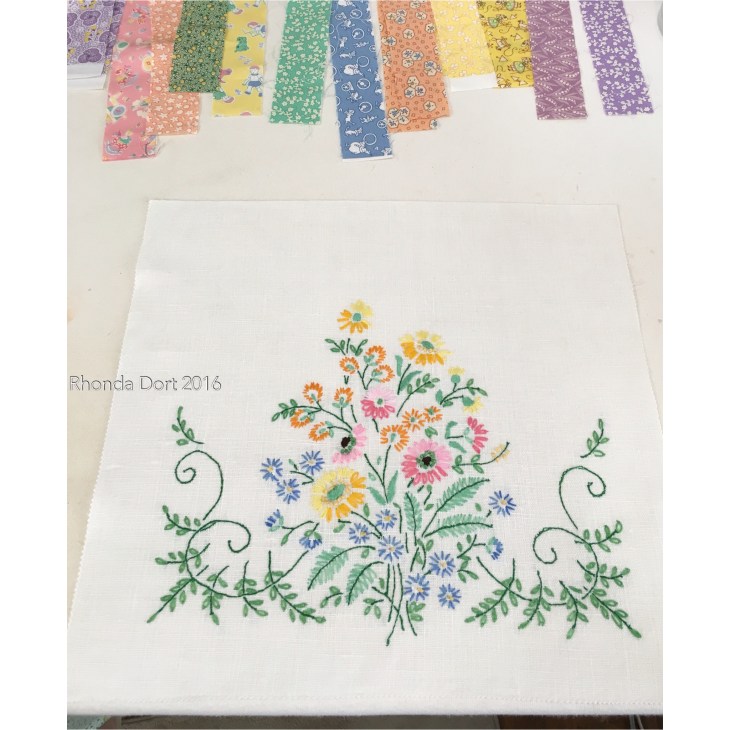
How did I decide what fabric strips go where? All the fabric strips are cut 1 1/2″ by width of the fabric. It was just an audition process based on the colors of the vintage embroidery designs. I did use all reproductions by the way.
The top right block, a dresser scarf made by my maternal grandmother.
Once I was comfortable about the block placement I began measuring to determine the sizes of bleached muslin needed to “fill in the gaps”. Like I said earlier: NEVER AGAIN!
So it’s on to the quilting! I will double batt this project using both Hobbs Heirloom white 80/20 with their Poly Down on top. I will get the entire quilt stabilized by stitching in the ditch in every seam before I begin the exciting process of decorative hand guided free motion quilting longarm.
I plan to use white WonderFil Deco Bob (80 weight) in the needle and a white poly 60 weight in the bobbin. If you haven’t tried this fantastic thread, give it a try! I love it! If you’re planning to attend the IQFin a few weeks, look for their booth, #1634. I don’t know what they will have as a “special” but earlier this year in Chicago they had a “buy 6 for the price of 5” booth deal. Stock up!
I’ll keep you posted in my longarm progress! Until then, Happy Quilting and Blessings to You!
Rhonda

wow, the timing couldn’t have been better that I seen this post. I was just cleaning my cedar chest out and put a couple of old dresser sca rfs and dollies in the get rid of bag. Guess I will go dig them out lol thanks for the inspiration
LikeLiked by 1 person
I’m in the process of doing asz quilt with my collection of vintage lines. I am wondering how you dealt with the different weights of the various fabrics? Some of mine are on finer fabric, linen and such, while many are a bit “courser”. Yours is just wonderful. Thanks, maggie
LikeLiked by 1 person
Thank you Maggie, the different weight fabrics seem like they would present problems but actually they are not difficult. Each vintage piece I use is atop a layer of white 100% cotton muslin. This is especially important for the fine weaves such as handkerchiefs. Keep in mind I do not consider my vintage linen quilts to be utility pieces used for warmth on a bed. Knowing this ahead of time it does allow me the freedom to play with the different weights of linens used together in the same project.
Have you had the opportunity to read my blog posts about the making of the pink and green vintage linens quilt? Reading them may provide you with additional tips as to my construction method(s).
Let me know how I can help you as questions arise!
LikeLike
this is the coolest idea I have ever seen, gives me ideas on what to do with some of the things I have done and my mom and grandmothers
LikeLiked by 1 person
Thank you Carolyn!
LikeLike
I love this. I sell vintage linens and have been working on my own (very different) quilt, using sections of damaged linens that I can’t sell. I love seeing the way yours all came together, although the process of fitting them all together sounds like nightmare!
LikeLiked by 1 person
Hi Rhonda!
I am not a quilter, but love quilts, and all sorts of handmade items. Years ago, I had a handcraft consignment shop, and also had a few quilts to sell. This was about the same time Karey Bresenhan started her first antique shop, where her mom and aunt gave quilting classes. Karey and I were close friends from high school. So I got to know her through all these years of the growth of the quilt shows. I love to go to the shows and see the extraordinary creations you folks make. I stand absolutely amazed at the beauty of the few things I have seen that you have made.
I am looking forward to getting your emails, and oooooing and ahhhhhhing over each piece.
Also, I read your story about the flood, and am so incredibly thankful for you and your husband, and your upstairs being okay. We did not flood, though I live nearby homes in Cinco Ranch that did flood.
And I was praying that night from the safety of my bed. God was with all of us that incredible week, and now especially with those of you who actually flooded and have much to do to move forward in home repairs. Bless you, dear Rhonda.
Love,
Jane Alexander
LikeLiked by 1 person
Thank you so much for your sweet and kind words, they brought a smile to me. I am so happy that you enjoy the creative world of quilting, it has brought me such joy! Blessings to you!
LikeLike
Lovely! I have saved my own embroidered dreeer scarfs and I have quite a few of my MIL. Who passed away before I seriously dated my now DH. I have 3 aprons she or her mom made for an adult and 2 child sized…. I really want to get them into a wallhanging/quilt….. so many ideas so few hours.
LikeLike
I just discovered u on Facebook, love the postings. Also, my mothers maiden name was Dort! She grew up in Witchita, Kansas but married and moved to Oregon in the ’40’s. Her parent’s Max and Mae Dort also moved west in the 40’s. God bless! Kathy
LikeLike
Totally impressive!! I love your quilt as well as your mom’s. I hate to say it but, “I’m envious.” The vintage linens quilts make me drool! lol
LikeLike
Years ago I saw the quilt you are talking about hanging in that quilt shop. When I saw it the shop was still open. I asked for a pattern and they didn’t have one but they let me take a picture of that quilt. I’ve thought about it off and on through the years and have collected linens to use to make my own. I love both your quilts! Your post have inspired me! Thanks so much!!
LikeLike
Oh goodness, what are the chances! Mom and I often wish we could have taken a picture of that quilt in Liberty! Keep me posted on the progress you’re going to make on yours!
LikeLike
Oh, you sound so happy with this latest project! The house and yard and YOU must be returning to a more “normal” state post-hurricane! Very happy for you, Rhonda. Your project gives me some inspiration! I moved into a new-to-me home mid-August and am finally feeling recovered from that process. Yesterday, I reorganized the large bedroom that I’d planned to use for sewing and projects – now I can access my fabric and keep my sewing projects out until done. I don’t longarm, but the beautiful projects shown are inspiring me to add some of those details with hand quilting. And, just maybe, I’ll try a little machine quilting with my Singer! Love your blogs and can’t wait to see how your latest quilt turns out!
LikeLiked by 1 person
Thank you!!! Yes, slowly but surely things will get back to normal! I am particularly happy because today marked the end of the relentless jackhammering of the damaged floor tile throughout the dining room, the foyer, the powder room and hubs office! Next week the new tile should arrive!!! Like I said, progress!! Thank you for your very kind words!
LikeLike