
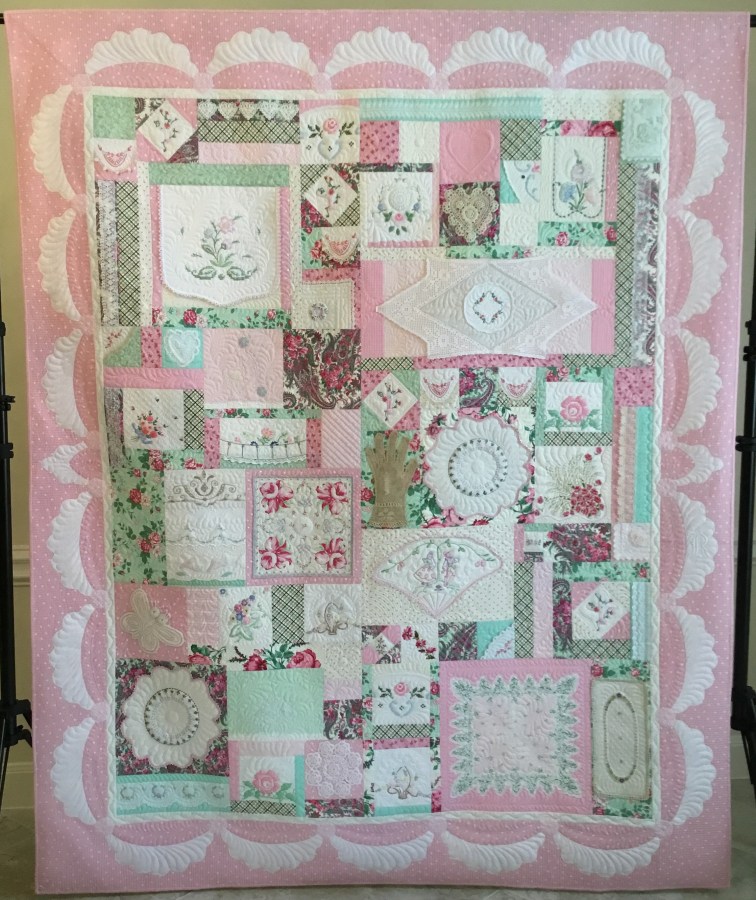
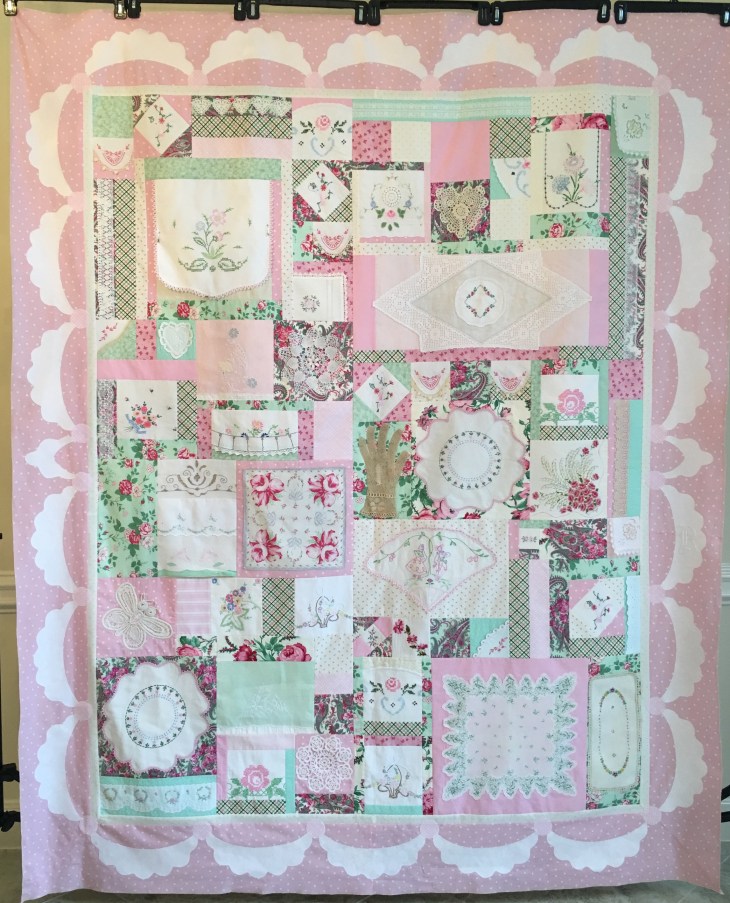
Ta-Da! It’s finished!
I’m going to take you through the entire quilt and give you some quilting pointers, some do’s and don’ts based on me getting to know my seam ripper much better. Get ready, there are more than 35 pictures below with lots of words to go with them!
I set out to quilt a theme in this quilt: Hearts and Feathers. I had such fun with this piece for a couple of reasons. For starts, I love quilting feathers and…I honestly didn’t like this quilt top all that much so I wasn’t on pins and needles about getting everything perfect! Now that’s it’s finished, it’s one of my favorites!
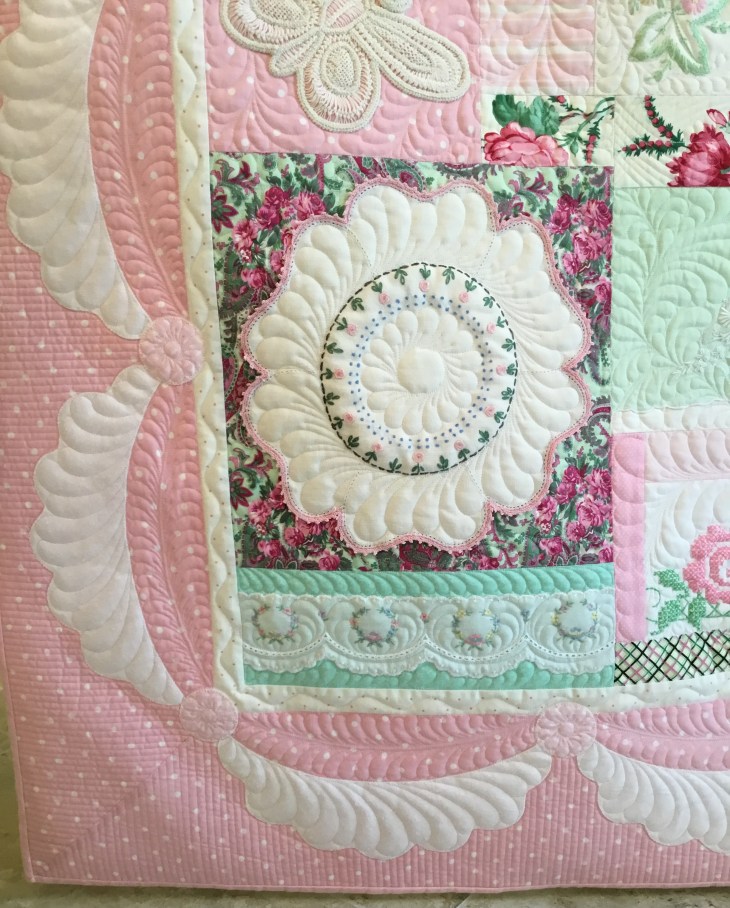
First let me show you how little things can make such a nice difference. Look at the arrows on the pic below. The black arrow points to feathers stitched in the traditional manner and the red arrow points to the feathers stitched with a simple vein in the middle of each individual plume.
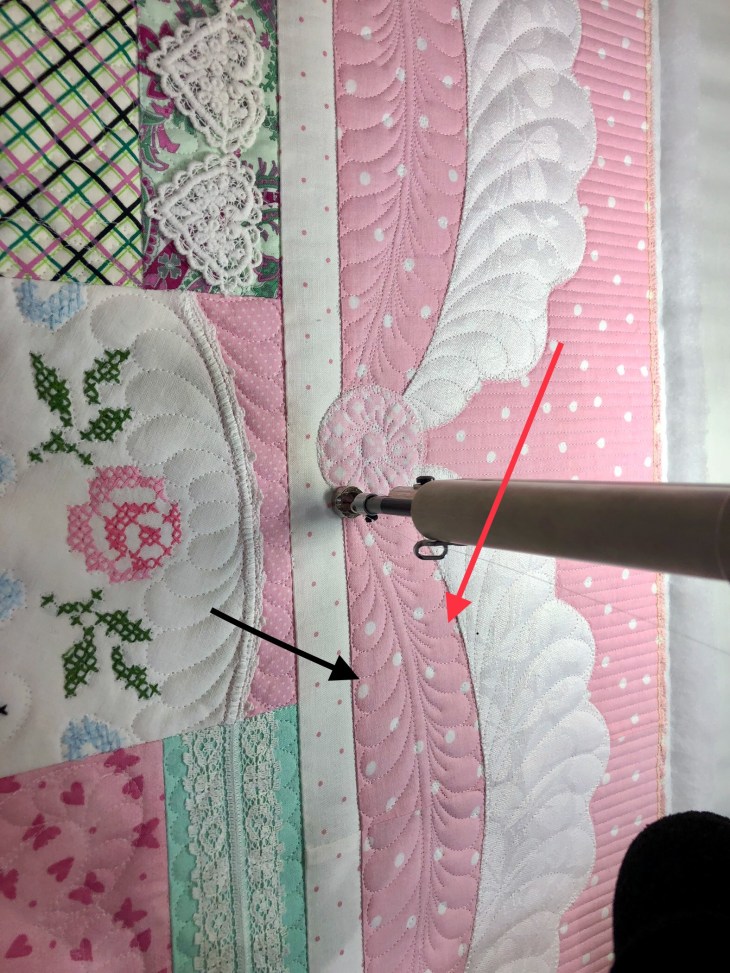
Just this simple addition to the feathers give them depth, definition and character:
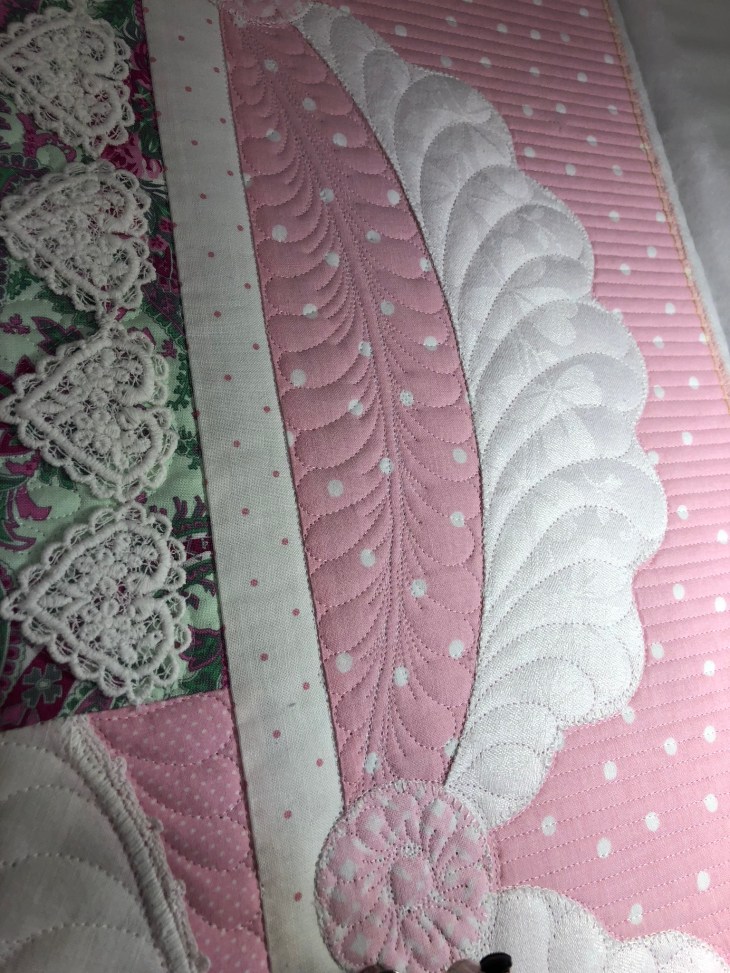
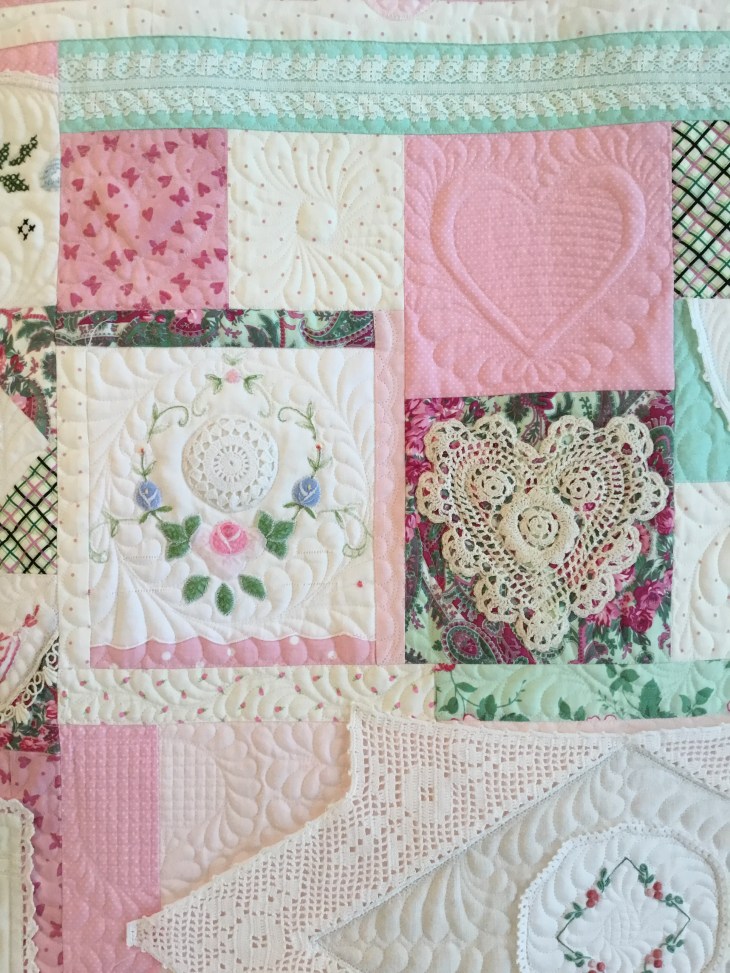
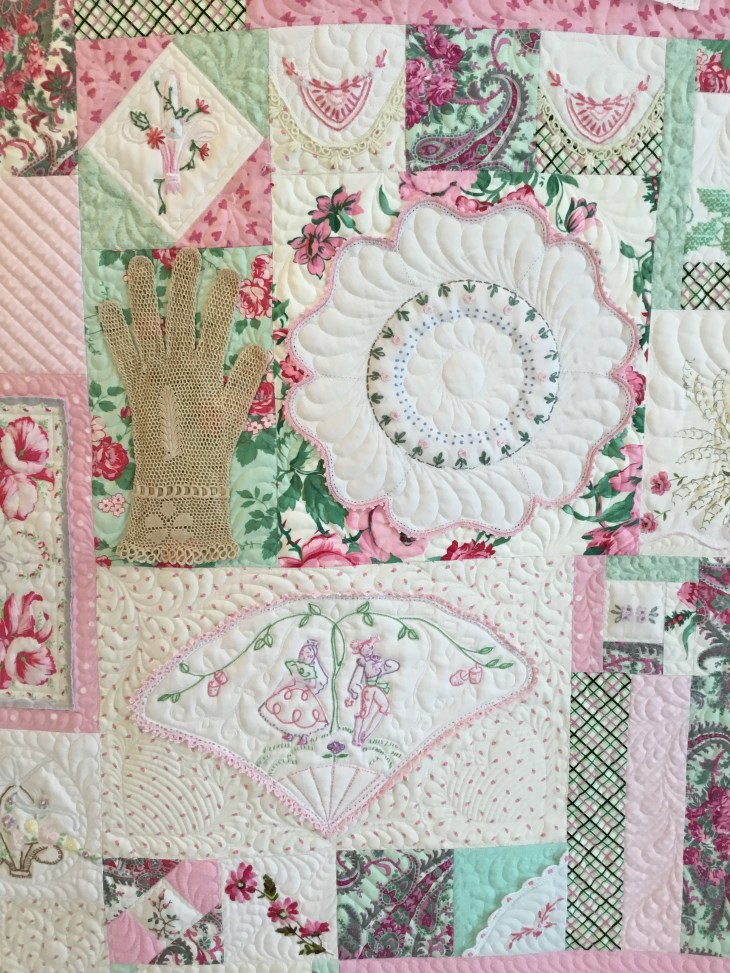
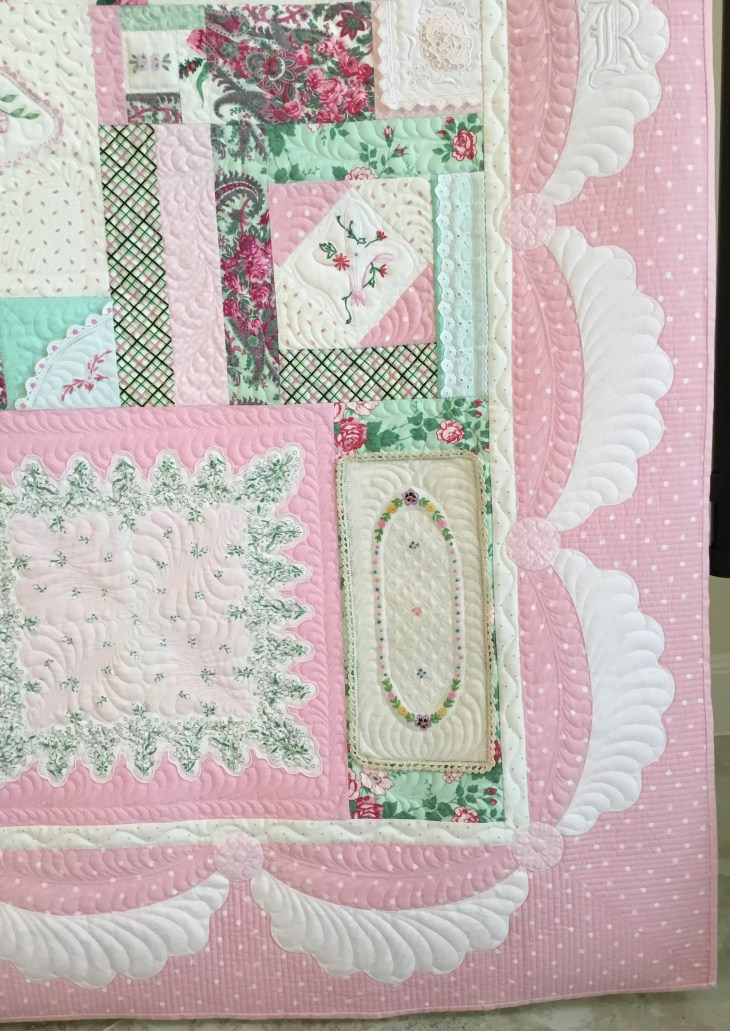
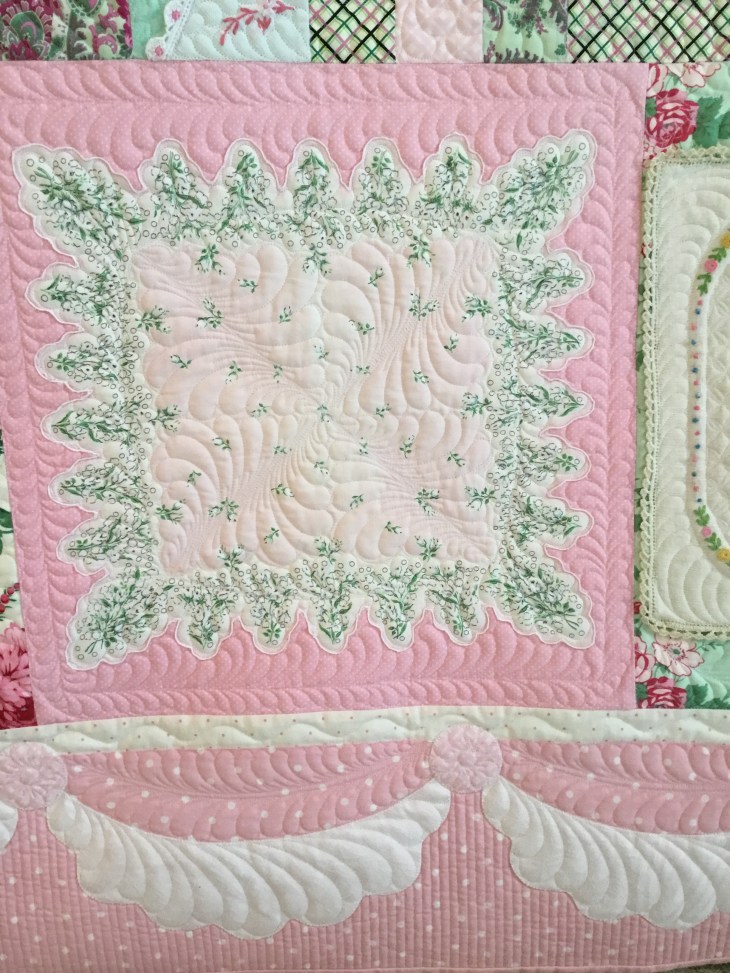
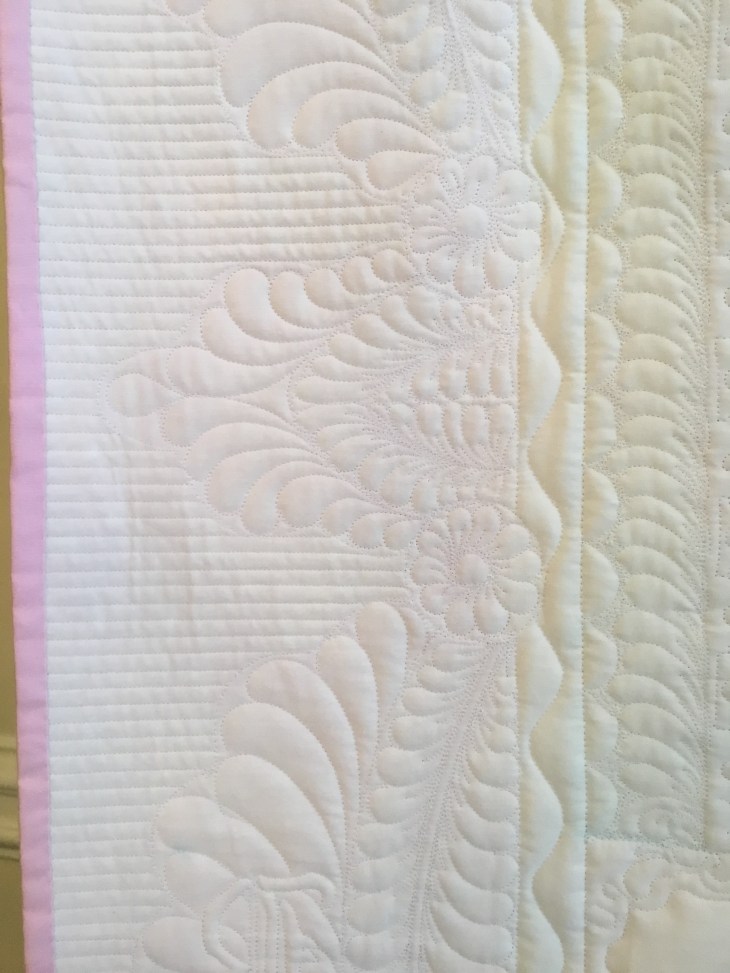
Is the pic big enough that you can see the parallel lines at the outside of the ivory swags? Super simple, very dramatic method of quilting the edge of a piece. Now, don’t get any idea that the parallel lines 1/4” apart go quickly, they don’t but I think they’re worth the time.

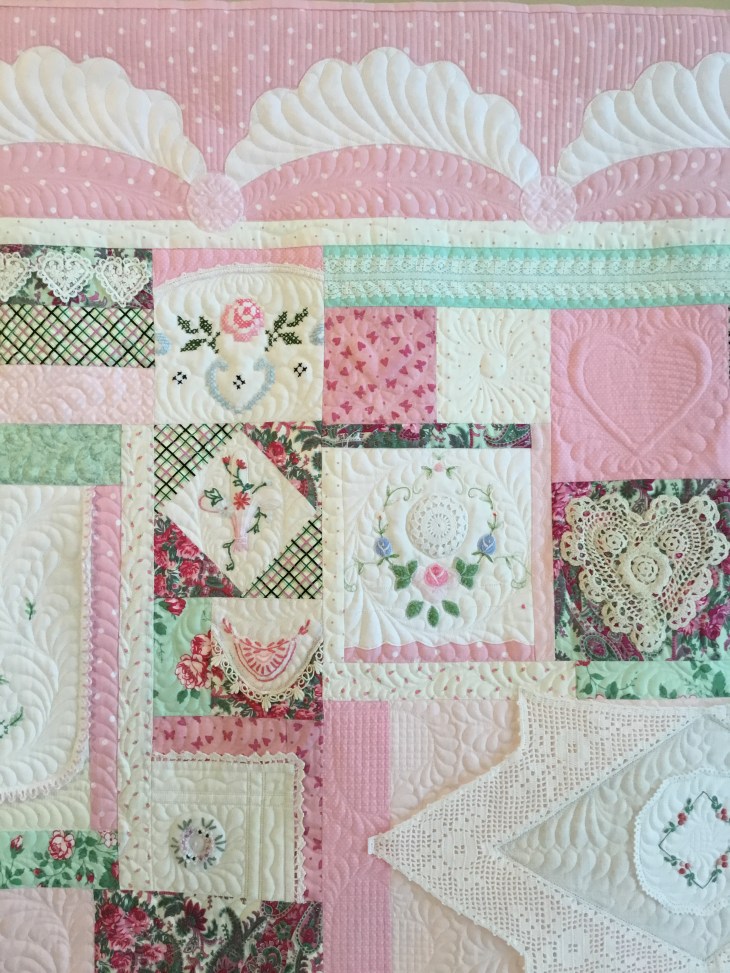
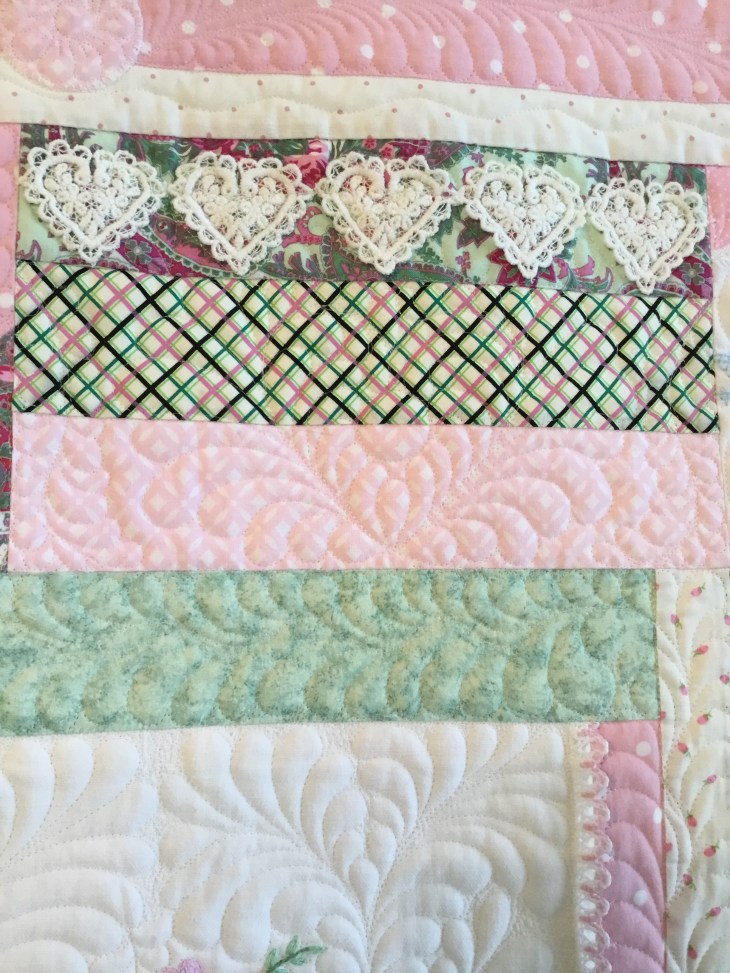
When you’re quilting or telling your quilter what you’d like, keep in mind that seams/fabric changes can be completely ignored when it comes to quilting designs/motifs. See how the hearts below span both the pink polka dot as well as the solid light pink and right above the top heart, notice how the undulating feathers cross over both the ivory with the tiny rosebud and the mint green floral. Don’t ever feel you’re confined by your seams/fabric changes.
But how did that quilting get beneath the big horizontal ivory linen and crochet piece above? I un-tacked the corners of the crochet, folded them into the center and quilted underneath. Once the quilting was finished, I folded back the crochet, tacked it back into place. Here’s an example of a don’t: see the horizontal and vertical lines on the hearts in the above pic…had I thought through my process completely I might have realized that diagonal lines would have been a better choice. The quilting lines, as they are, accentuate the fact that they are askew with the fabric seam lines. The top heart lines are ok, the bottom heart lines look wonky.
Speaking of quilting, you’ll see when you mix things up you create a quilting visual interest/tension by sometimes staying within a fabric such as the pink heart and the feather wreath to its left.
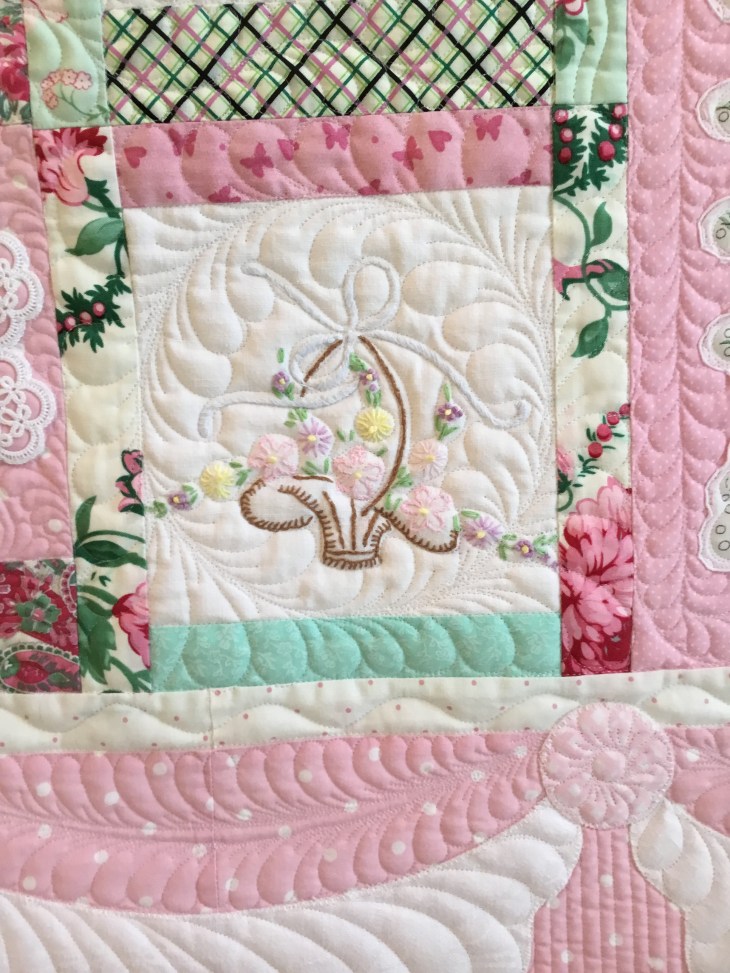
The sweet blue ribboned floral bouquet below gets lots of attention with the tiny orange peel background fill.
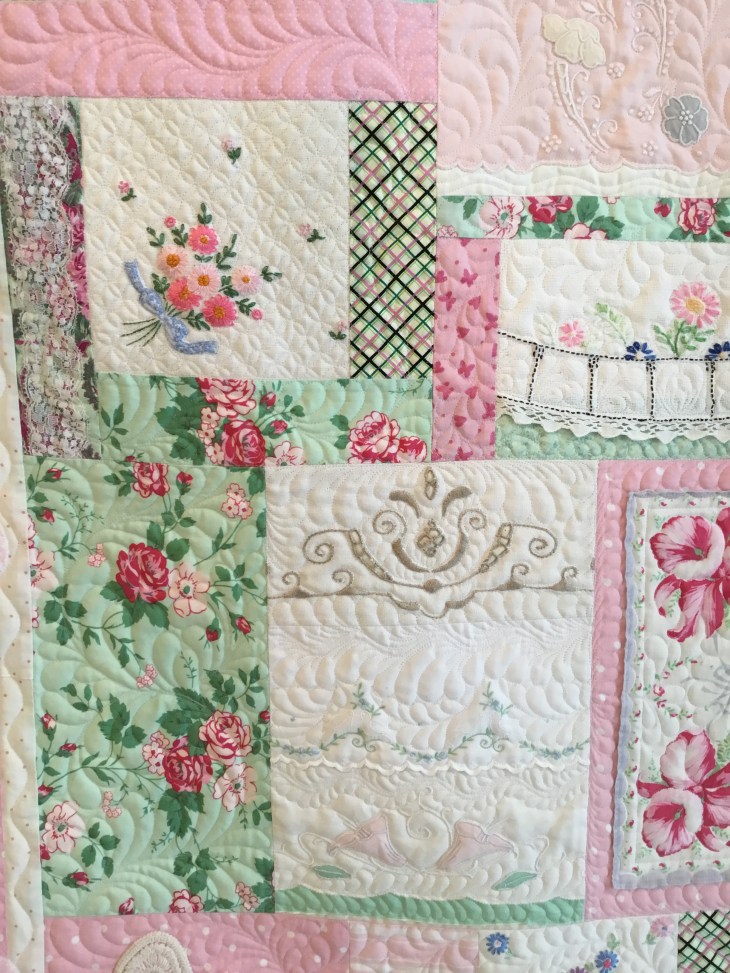
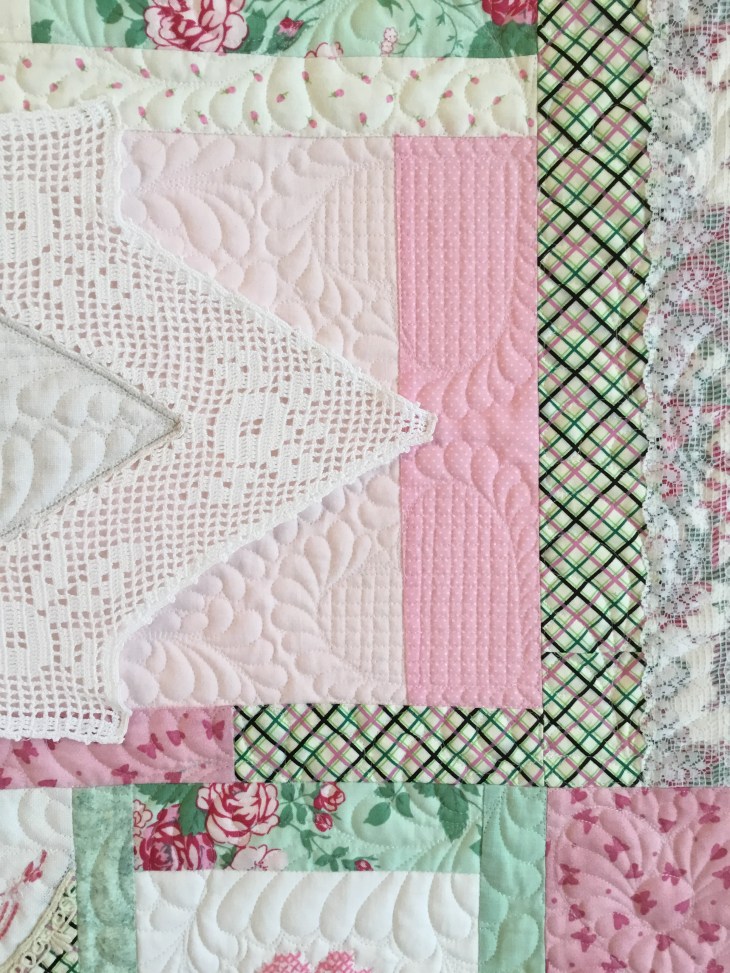
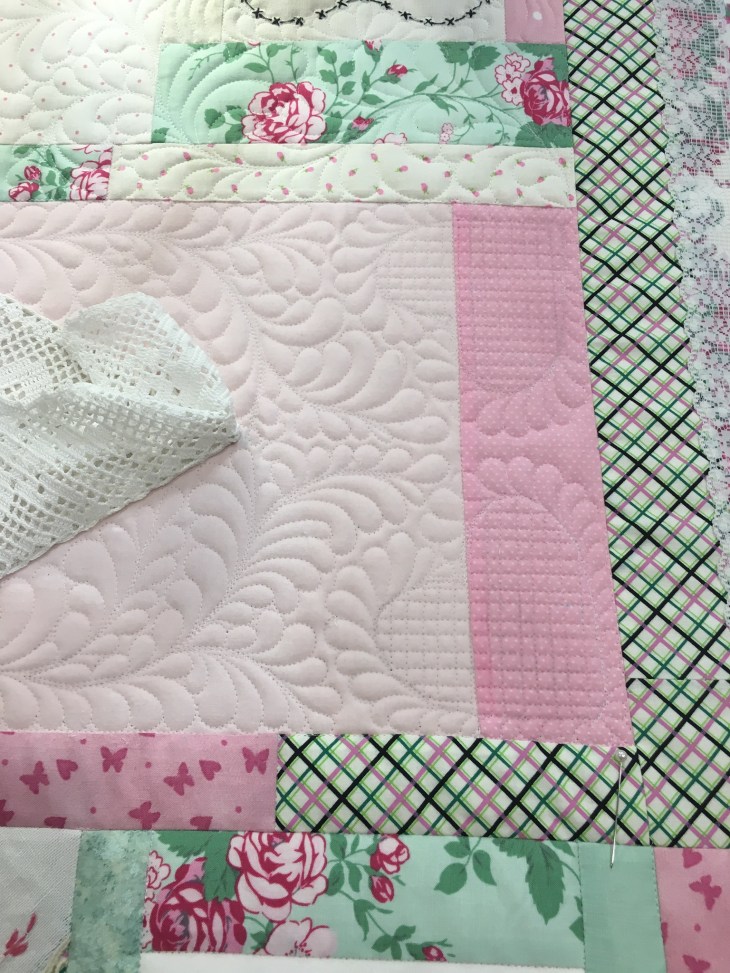
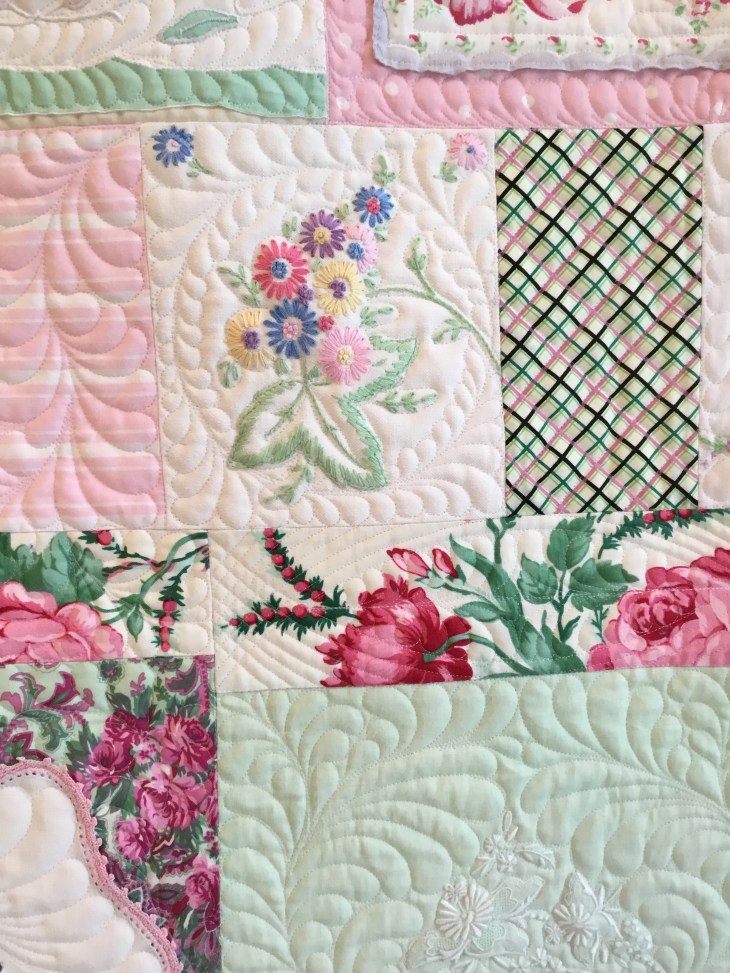
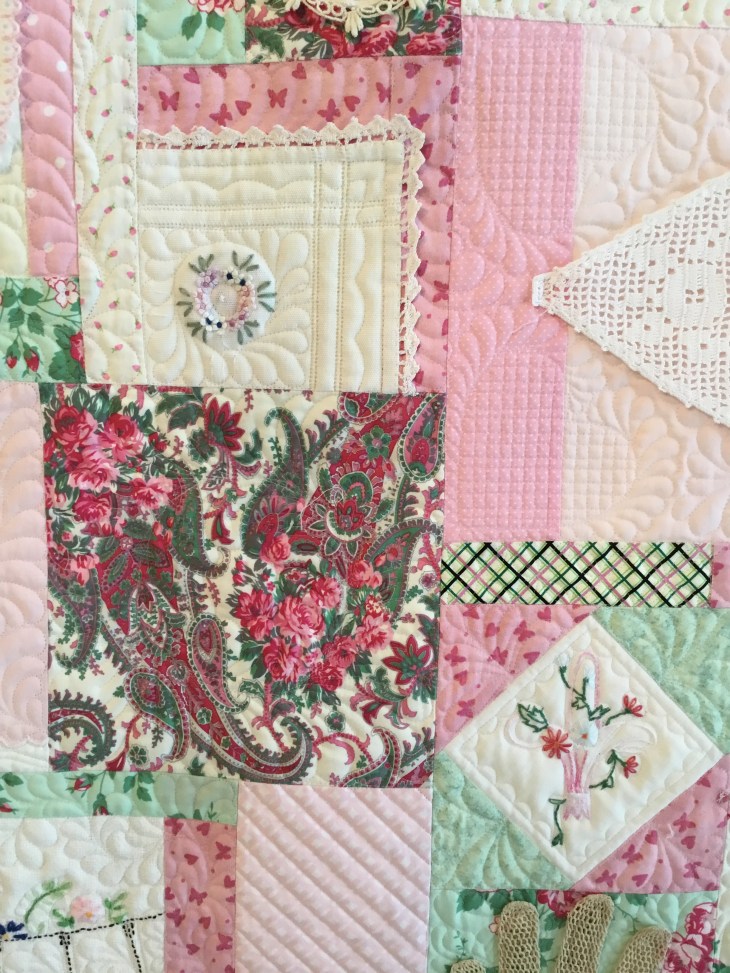
Just to add some visual interest I quilted diagonal parallel lines in the pink print fabric below. What the pictures don’t show is that I diagonal line quilted all the plaid fabric also. And how about that beautiful ladies vintage handkerchief? It was the perfect background for a half feather wreath within a half feather wreath.
See the sweethearts Juan and Juanita below? How could I not quilt hearts on the lower left and right open areas of their block! And can you see I took liberties with the doily and quilted additional vining branches and leaves into the design?
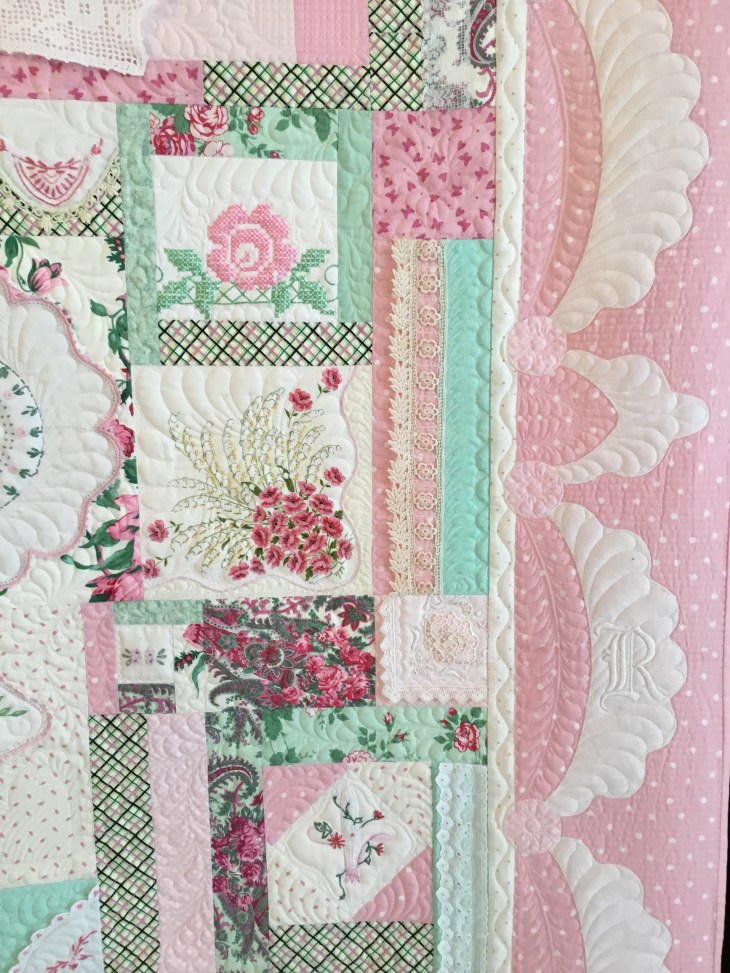
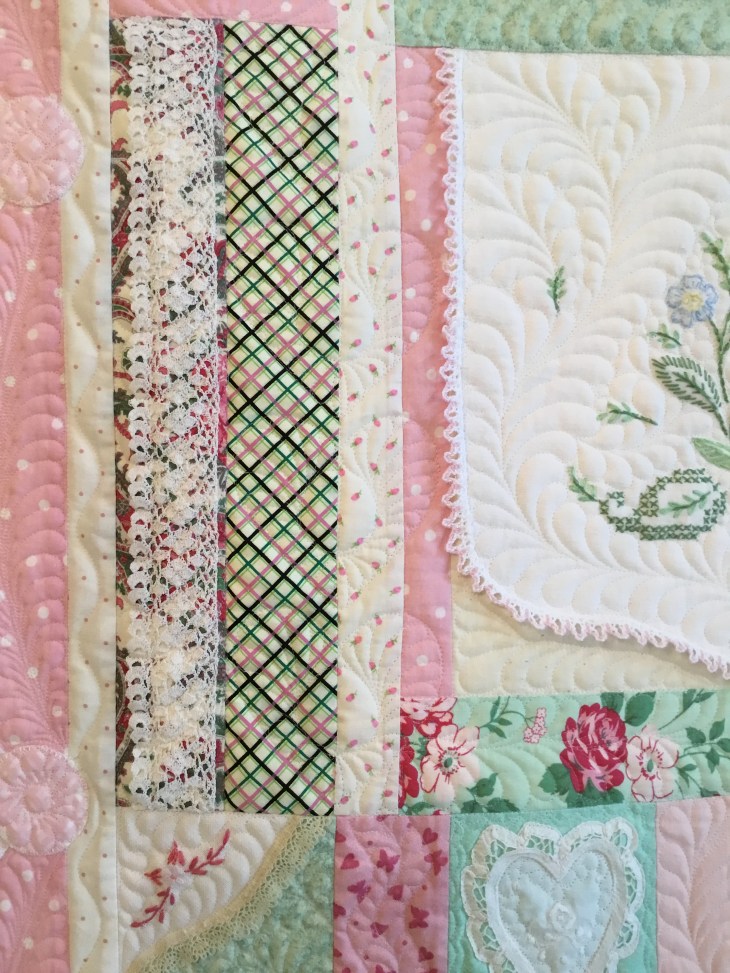
The medium ivory vertically placed trim next to the turquoise fabric was quilted down on all edges except the left side leaves. I left them free of any quilting.
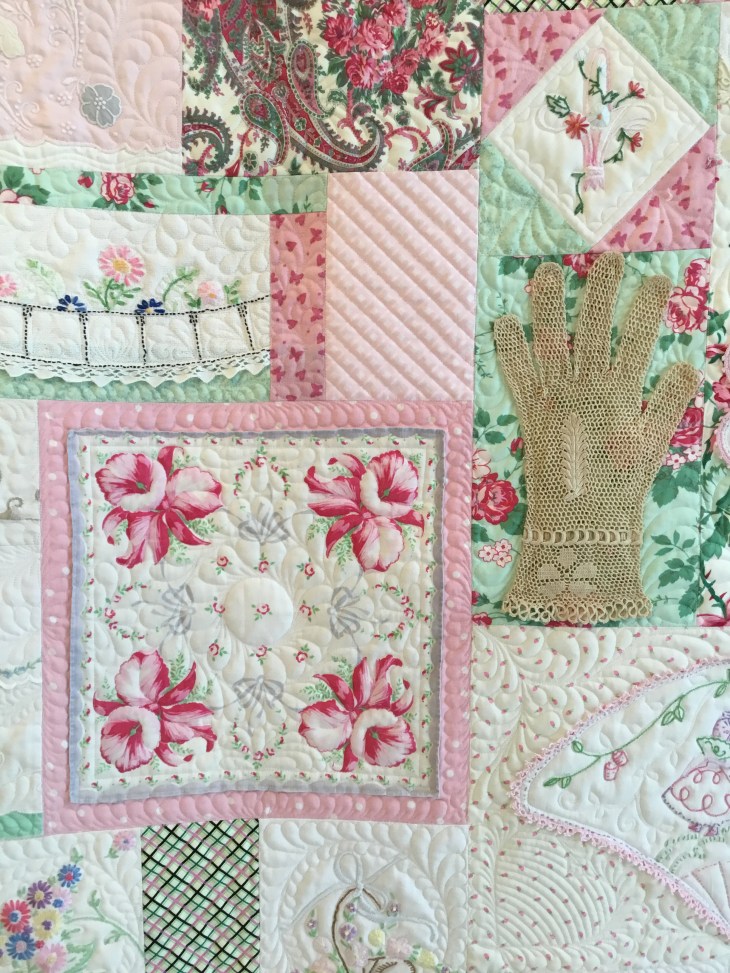
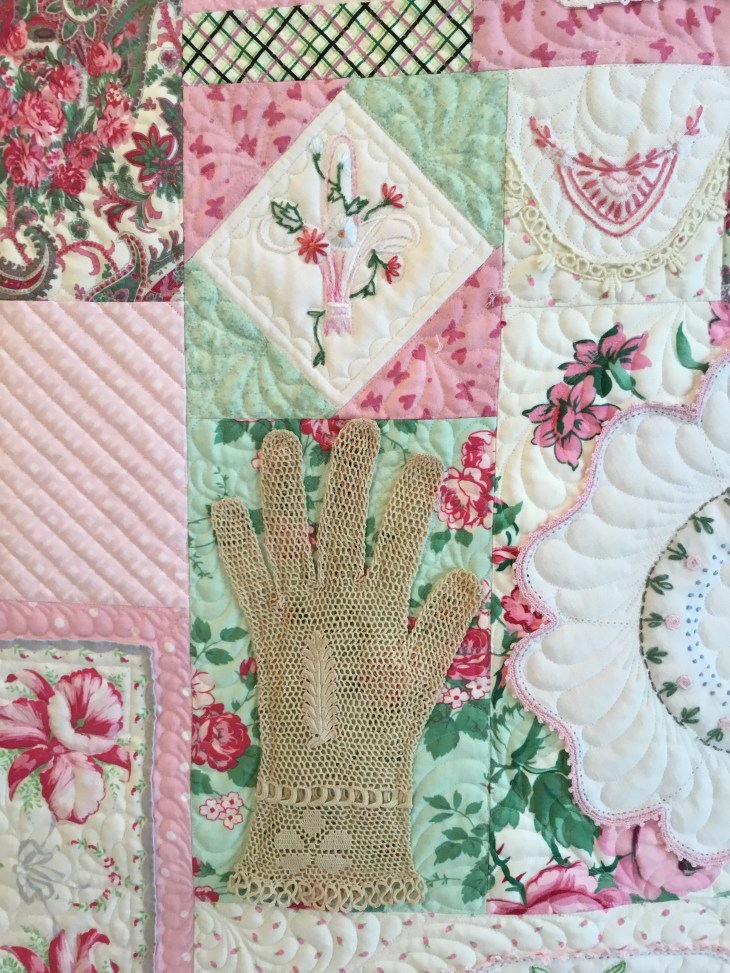
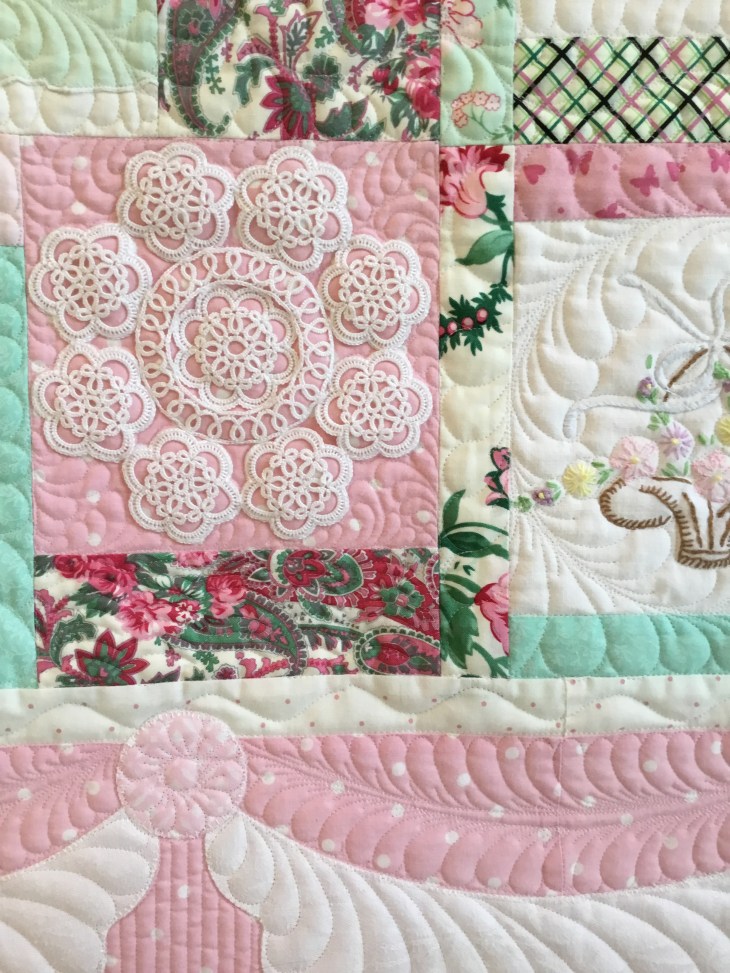
I was undecided about whether or not to quilt directly on the laces, trims, crochet pieces and the tatting so I did a variety of things. Some crochet long strips were heavily quilted, all the light weight laces were heavily quilted, the tatting was quilted, the ivory crocheted heart was also quilted but the dark ivory hand crocheted glove was not. I machine (think crazy tiny) zig-zagged the outer edge of the glove and quilted feathers all around the outside. From the front it looked great. From the back it looked awkward…there was this large un-quilted hand on the back of the quilt. 😦 kind of like I forgot to quilt a large area.
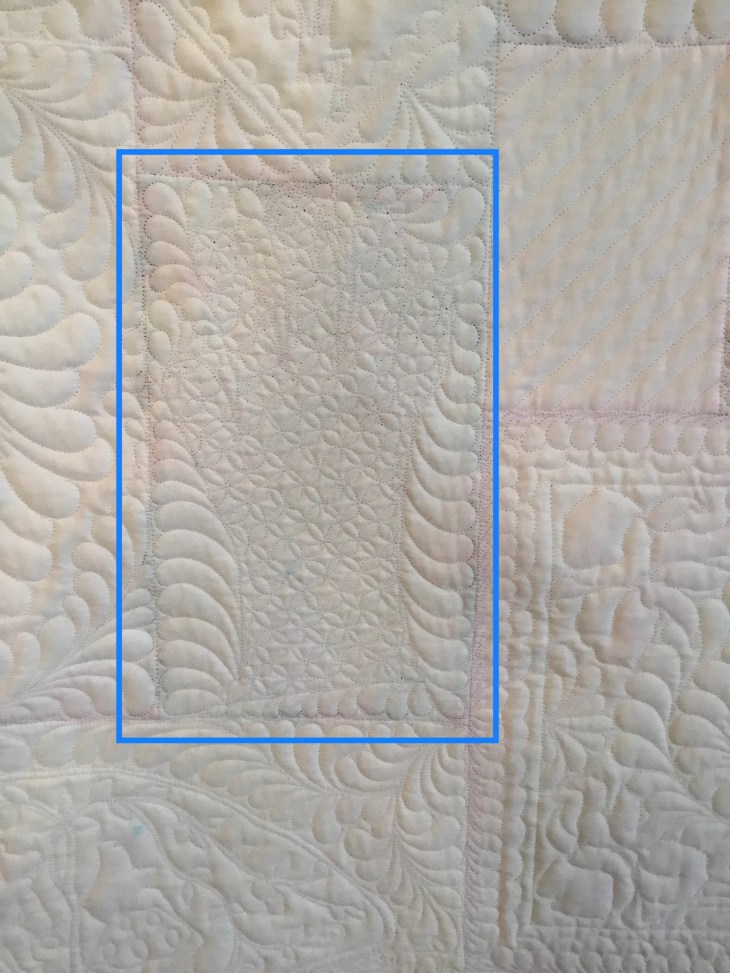
I un-stitched the glove, drew a diagonal grid in the void and quilted a tiny orange peel design. The blue box below shows the “after”. Needless to say, I was much happier!
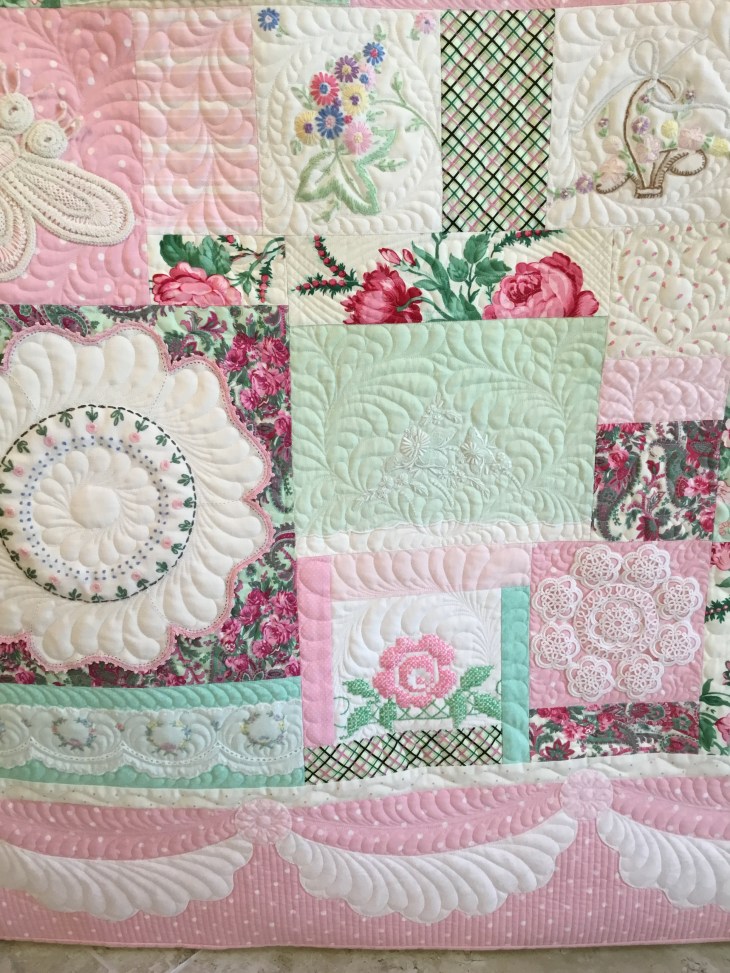
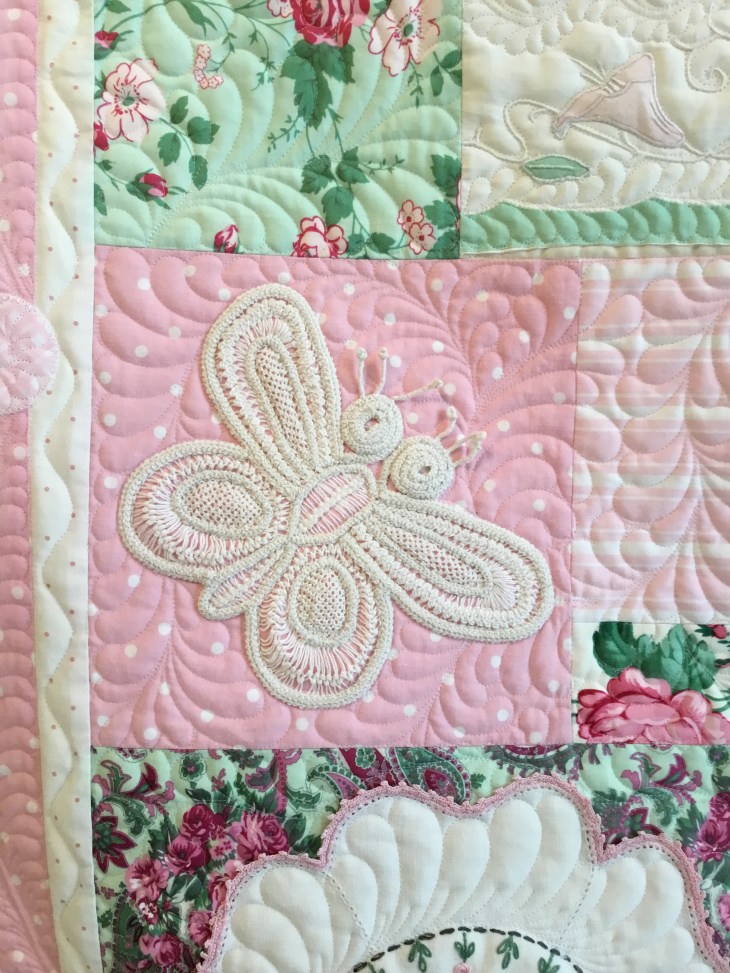
How about that “googly-eyed” butterfly! Eyes the size of nickels and 6 antennae! Crazy but I like it! I quilted directly on the butterfly. This block is another good example of quilting straying successfully over fabric seams.
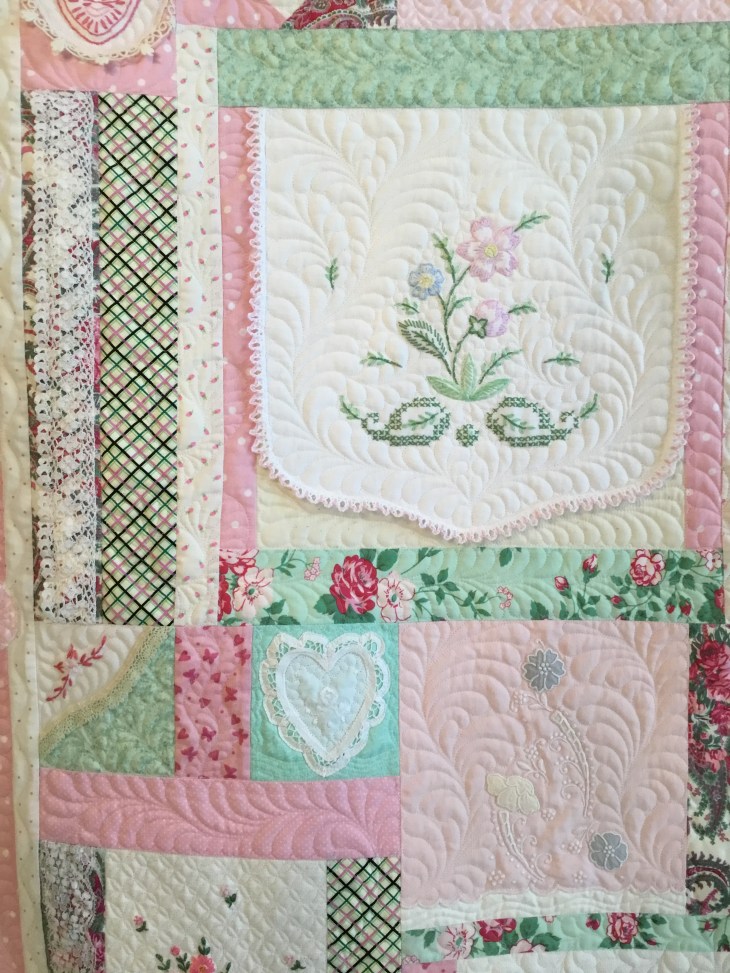
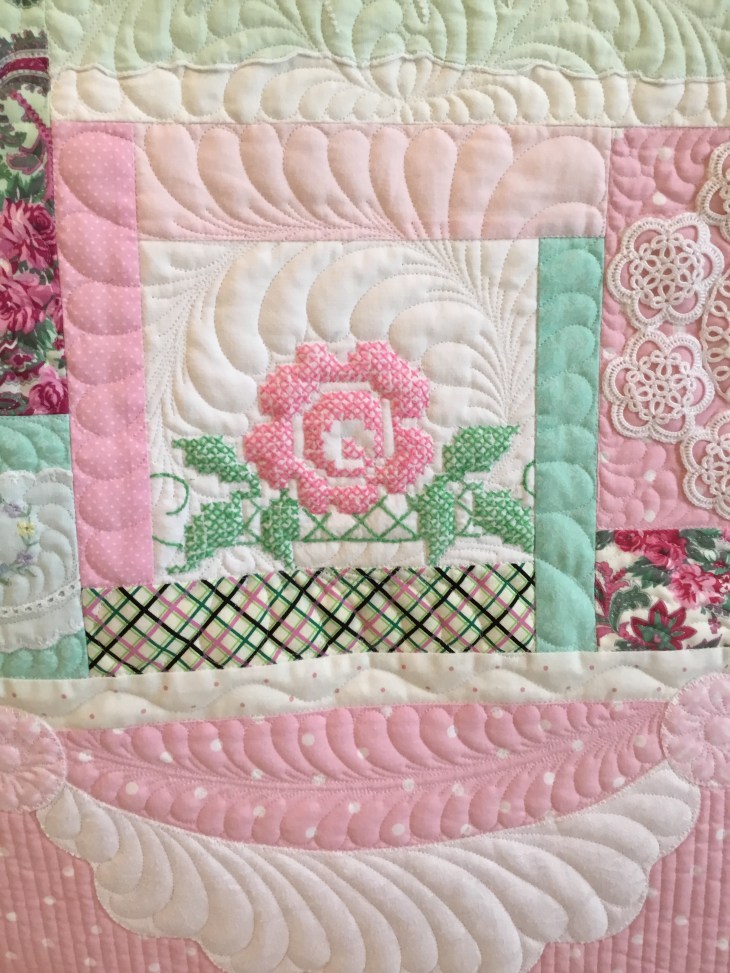
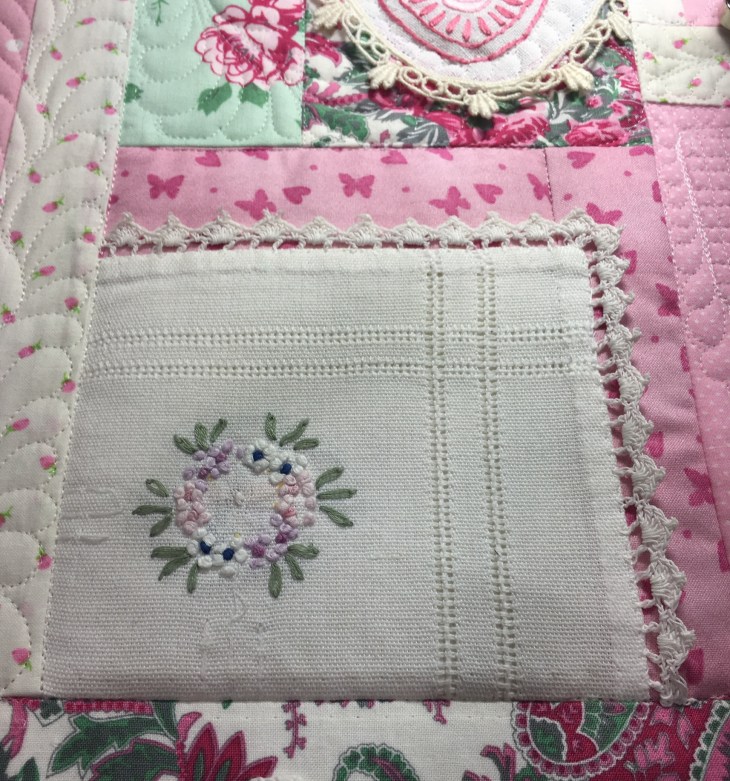
I’ve got a few cross-stitch pieces in this project. I quilted straight lines along each edge of the cross-stitch so that the flower and leaves puffed out. See how the center veins in the feathers gives them character and depth.
Such a dilemma with the tatting. I finally decided to quilt directly on and over the tatting and if it looked bad, well, my seam ripper was close by.
This large handkerchief below was in just OK shape but you’d never know it with all the quilting. Keep in mind when working on a vintage linens project that the quilting can be a wonderful distraction from less than perfect pieces.

What do you do if you have a nice crocheted edge that you want to stay loose and free of quilting stitches? Home Depot to the rescue with blue painter’s tape!

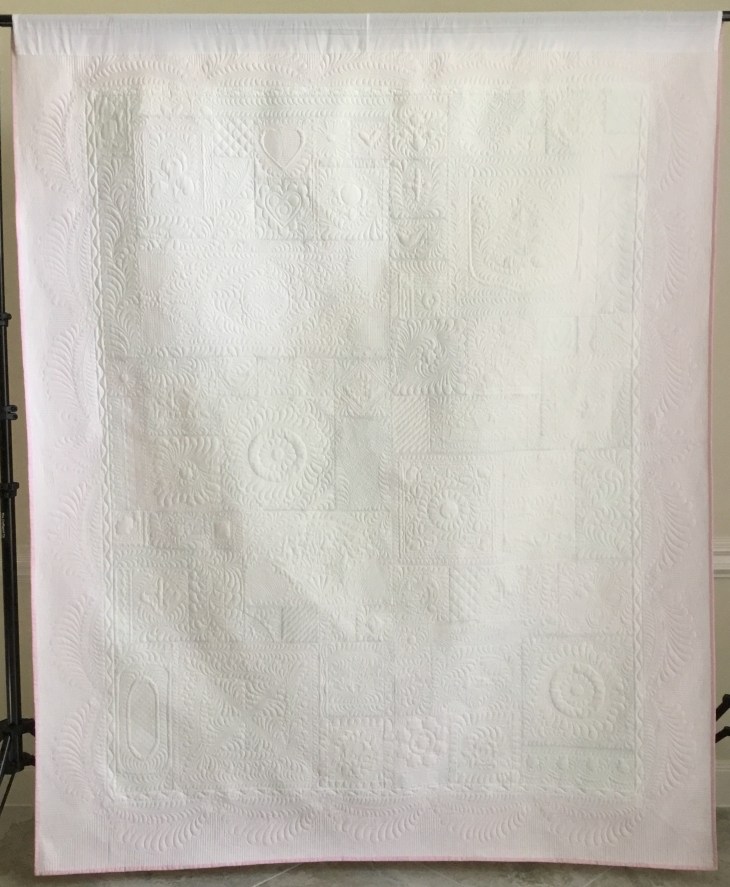
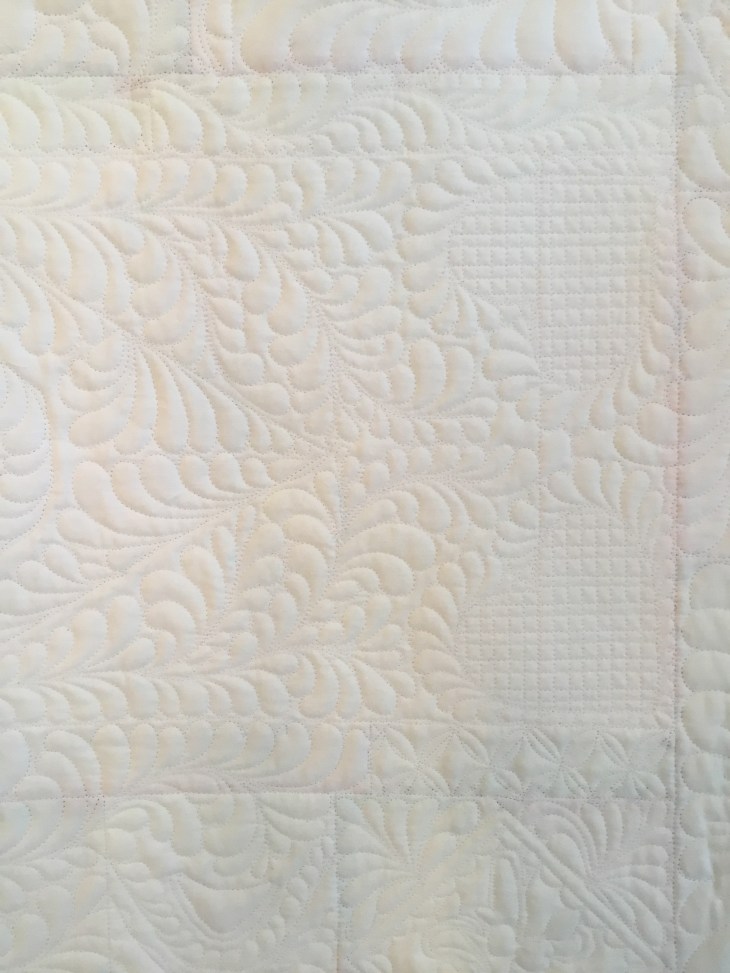
Here’s a quick look at a small portion of the back. (The yellow cast in areas of the pictures is just due to my novice picture taking abilities.)
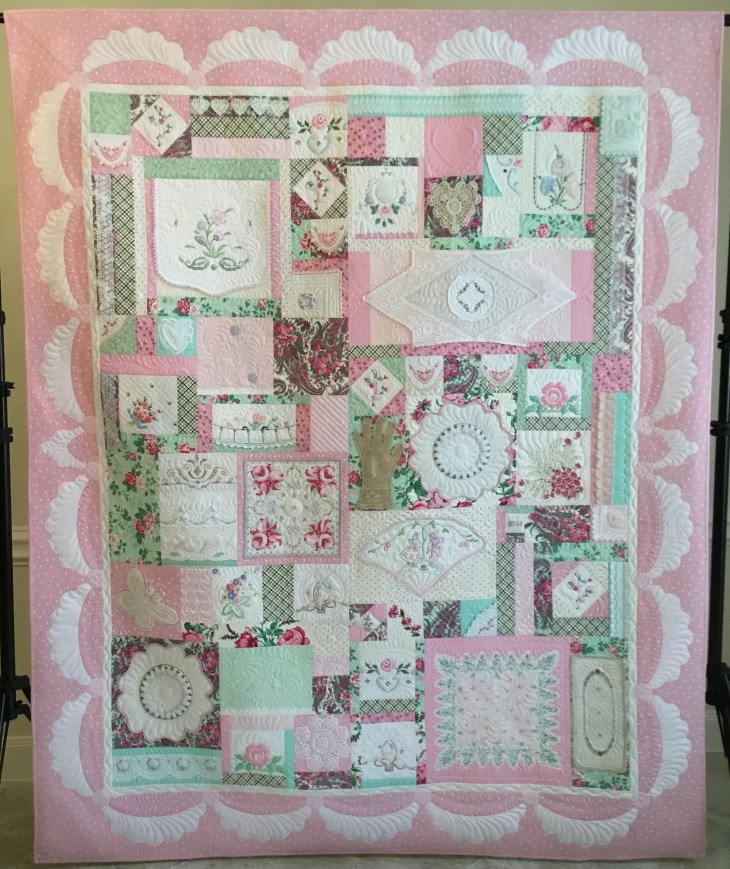
So what did I do with this “already pretty visually active” quilt top? I intentionally quilted the living daylights out of it. Does it distract or add visual interest? You be the judge with the before and after pics below.
If you’re still with me and are making your own Vintage Linens Quilt top, take a chance and quilt your project yourself! It will be a great way to practice and a great memories will be made!
The particulars: Backing fabric is Moda 995211 white, 100% cotton, 120″ wide. This time I used only 1 layer of batting: Hobbs Tuscany Poly, white. The needle thread: Wonderfil Deco Bob color #104, bobbin thread: Guttermann Skala 240 color #800. Total quilting time: 38.5 hours.
Why only 1 layer of batting this time? Remember that I created each block on a foundation of muslin. This is essentially like having a double layer quilt top. It was heavy and I felt like a double layer of batting would be too much.
From tutorial #4 someone asked how I handle all the little tears, shreds, holes, etc. in the vintage pieces. As a general rule I acknowledge I am not creating a utility quilt to be used as warmth on a bed. I make my pieces to be teaching tools as I guest lecture, as examples to accompany my blog posts or as show pieces. Unless the damage is severe I ignore the problem areas and leave them as evidence of their use for which they were created. When it’s time to quilt I specifically use a dense technique where necessary with the idea of further securing the damaged area(s) with the stitching.
So many of you have asked such great questions! Keep them coming! Thank you!! And of course thank you so much for all the kind words about the loss of my youngest sister.
House update: windows are scheduled to be delivered (and maybe installed?) on Thursday! Woo hoo! Progress!
Additionally a bit of exciting news: I have 3 pieces juried into the MQX New England! (I can’t find a full pic right now of the first one.) The show begins the evening of April 11th and runs through the 14th.
")
")

Blessings to all and Happy Quilting!
Rhonda

Wow I have only just found your blog Ihave learned a lot reading how you did your vintage linens quilt. I am doing the same pattern so it was great to see your thoughts. I am actually doing it as quay which makes you think how to put the pieces together
Thank you for your blog
LikeLiked by 1 person
What a joy to read and see your project. I absolutely love your quilt, I admire all the intricate quilting stitches you added. The combination of vintage linens and lace are tender additions to your quilt. I appreciate your detailed instructions and pictures. Thank you so much for sharing; I learned quite a bit!
LikeLiked by 1 person
Thank you for your kind words!
LikeLike
Now I know what to do with vintage linens I have. And have made many years ago. Thank you so very much for this article
LikeLike
Thank you! Send me pics as you progress thru your new project!
LikeLike
Rhonda, What do you think about using the cut off pieces of pillow cases, etc., for the vintage linens to be attached to? I do have plenty of other fabrics, but thought it might be good to use those up too.
Thanks, Audrey Clark
LikeLiked by 2 people
An excellent idea!
LikeLiked by 1 person
Thank you for sharing your wonderful quilting. It’s perfect that you draw our eyes to different techniques and just how you solved the problems you ran into. Just reading about the quilting is giving me a new perspective. Good luck at the MQX show; I’ll be anxious to hear how you did. Splendid, I hope.
LikeLiked by 1 person
Thank you!!!
LikeLiked by 1 person
Beautiful work!!! I love how you incorporate all types of vintage linens.
LikeLiked by 1 person
Thank you!
LikeLike
Your quilt is breathtaking! Also, thank you for sharing the process and providing inspiration.
LikeLiked by 1 person
Thank you!!
LikeLike
The first look at your finished quilt took my breath away. It is pretty before and stunning after all the beautiful quilting. You are amazing and beyond talented. I can see why this is your favorite quilt. Can I admit that I had tears I was blinking back with each picture I saw? I am so anxious to get started. How do people do the quilting when they do not have a long arm quilting machine? I may be able to rent time on a machine. Wow I am inspired again. Thank you so much for teaching us. I am excited for your new windows. Yipee!
LikeLiked by 1 person
Thank you Roberta, I’m glad you like this quilt!
LikeLike