The Dresden Plate center 12” block. Pictures 1-14 show the Dresden made with 2 ladies vintage handkerchiefs. Pictures 15-40 show the same block made with a single handkerchief plus a tiny bit of white fabric.
Take some time to read the picture captions for both the 1 and the 2 handkerchief Dresdens. Hope you enjoy this lesson! 🙂❤️🙂
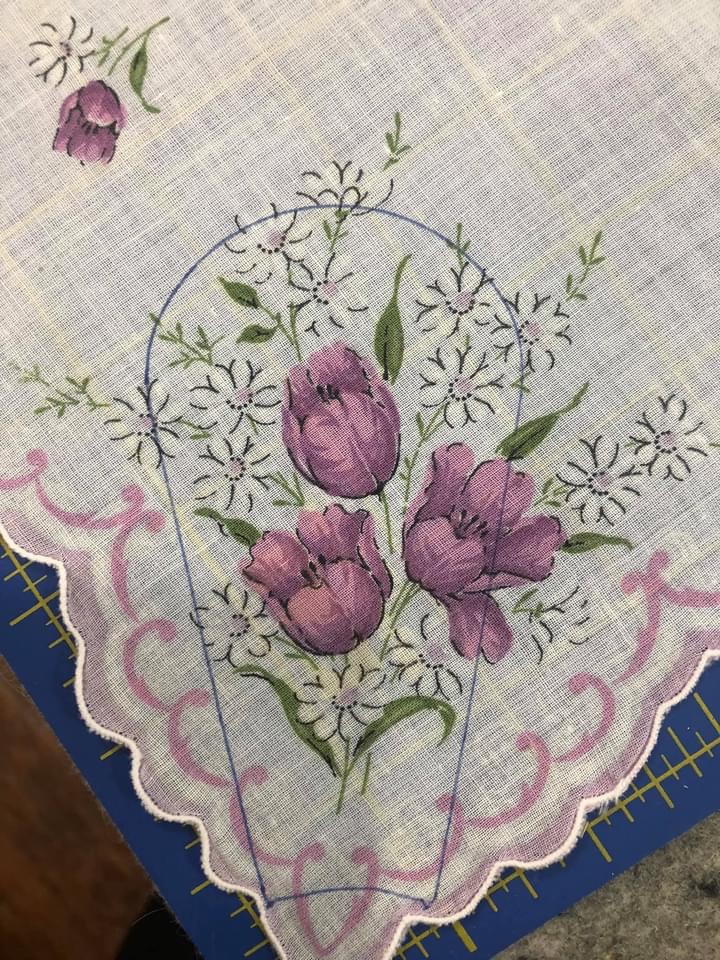
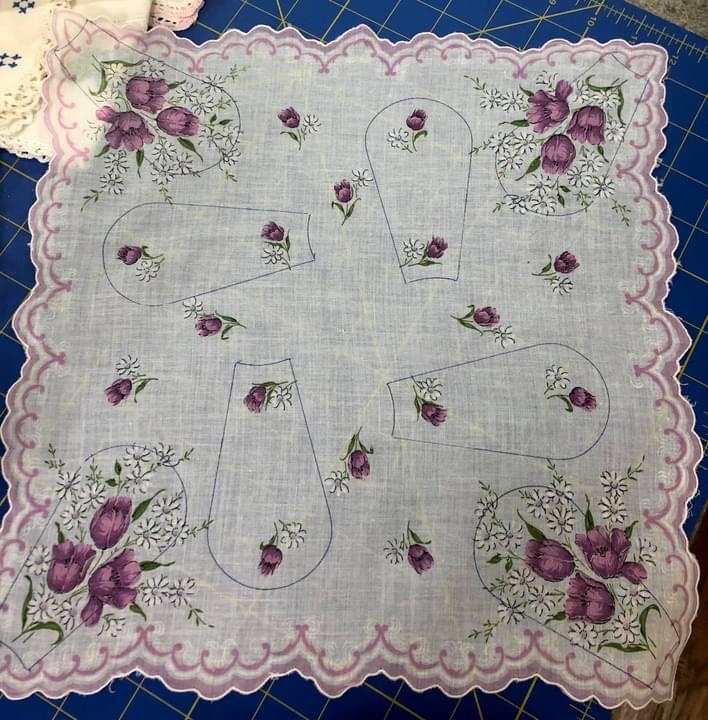
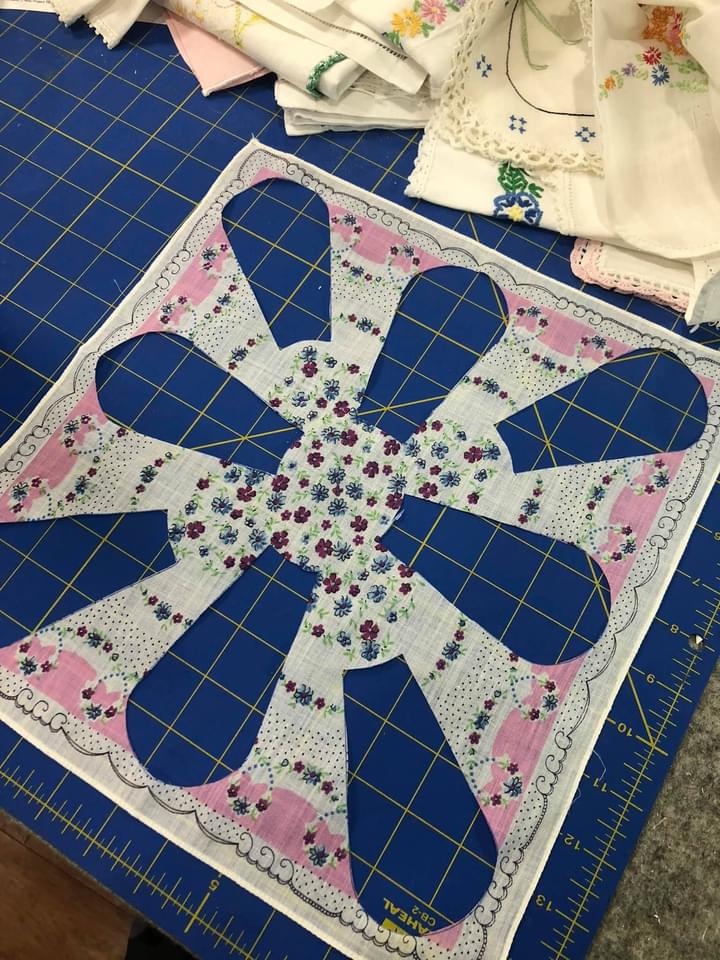
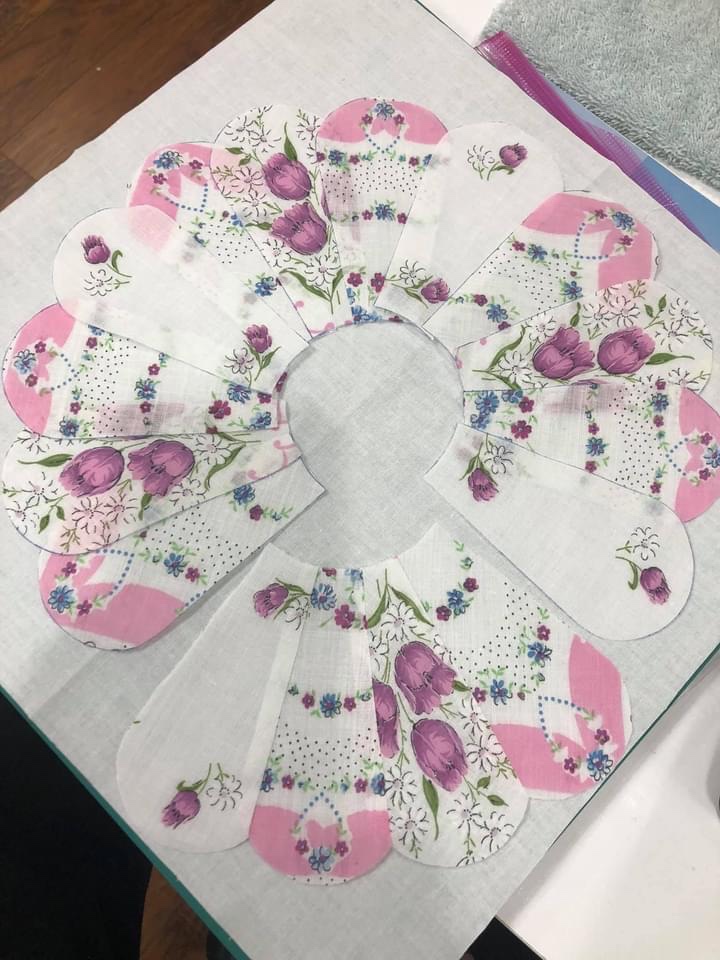
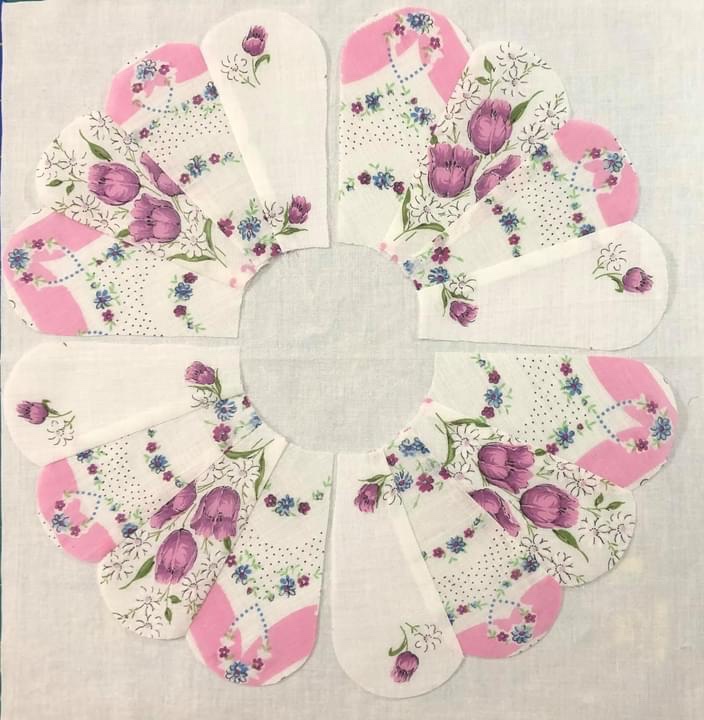
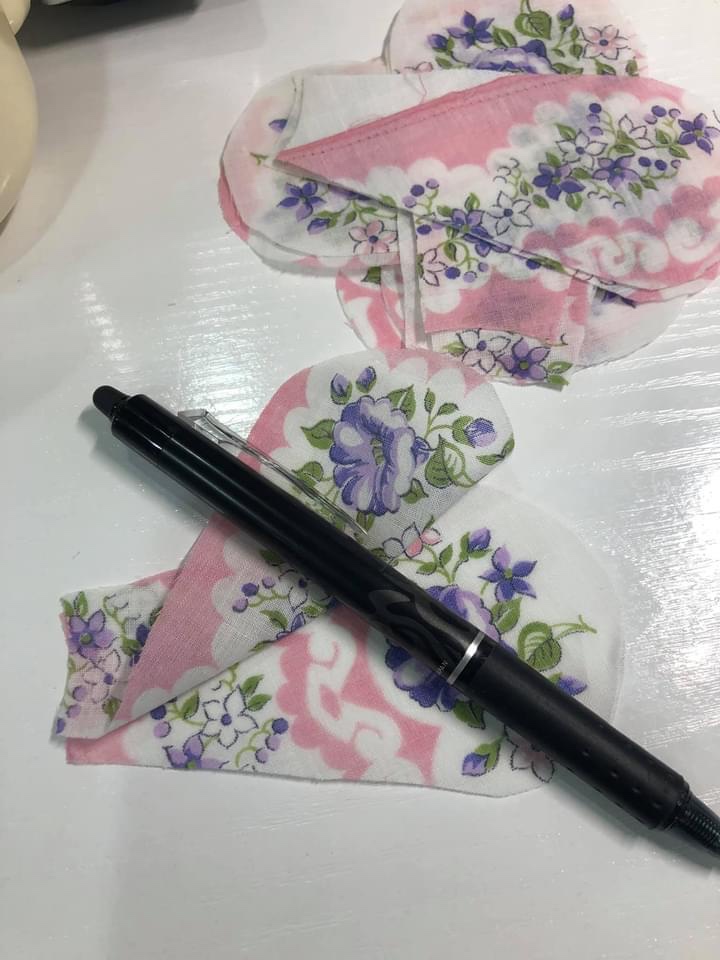
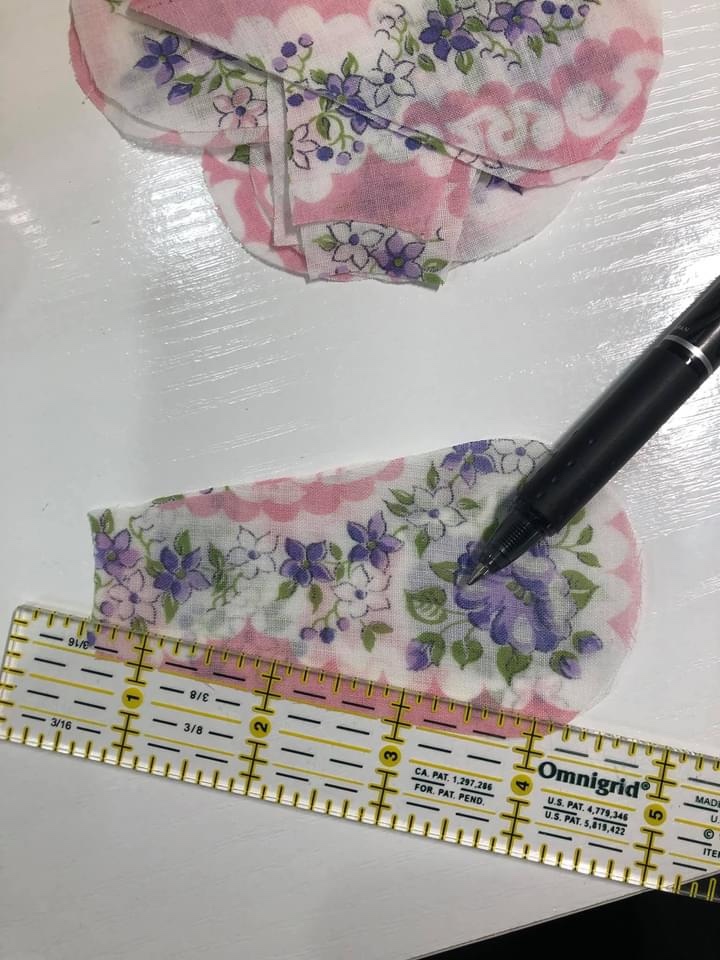
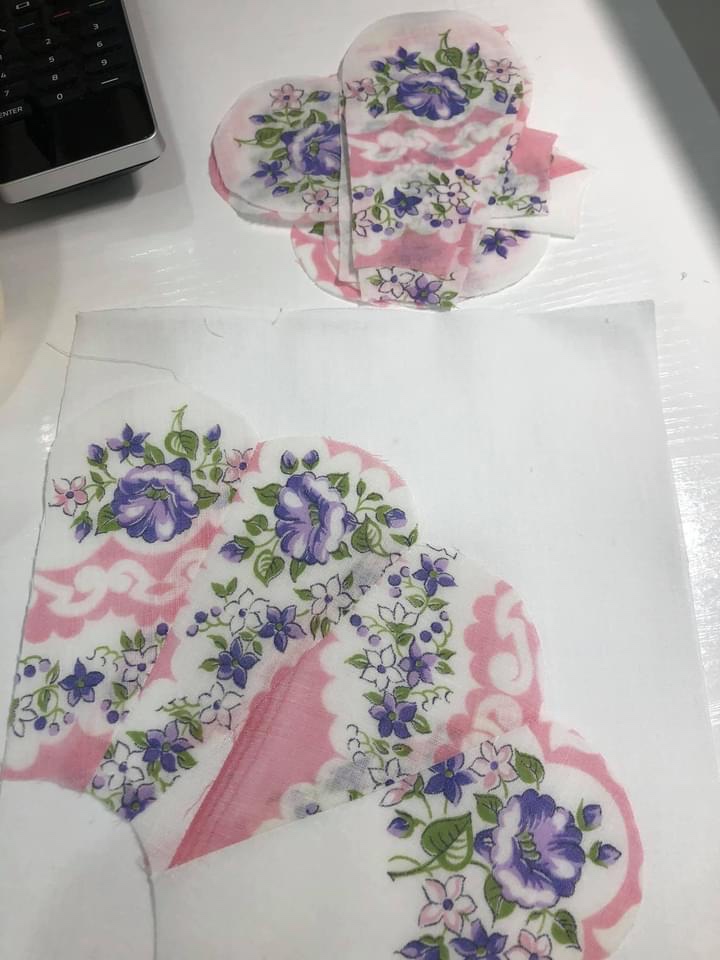
Handkerchief 1 of 2. Using my Marti Michell template I “fussy cut” 8 Dresden Plate pieces from each of the 2 vintage handkerchiefs. I place the template and trace around it. I have used a blue Frixion Pen by the Pilot company.As best as I can I place the template at each of the four corners and mark, trying to have the motif exactly the same. Once the four corners are marked, I repeat the process in the interior of the handkerchief, doing my best to have each of these additional motifs match. From the first of 2 vintage handkerchiefs I have marked 2 sets of matching Dresden Plate petals. Tiny tidbit: did you know that for a Dresden block, if the individual pieces have a curved top (such as ours) they are called Petals. If they were pointed then the pieces are called Blades.The second of 2 handkerchiefs is not marked in the same fashion as the first.Now we have 4 sets of 4 Petals.The cutting out process is slow and steady, of course you could try it with your rotary cutter but you will need a very small diameter blade to cut the bottom concave edge.Save this! There is a lot of useable bits here!Again, save this!Lay out all your pieces into a circle. You have 4 of each motif so one of each “4” will be placed in each of the 4 sections of your circle, top left, top right, bottom left and finally, bottom right. Rearrange until you are pleased with the layout. Lay a small clear ruler along one edge of a Petal. In some fashion mark a 1/4” seam line.Sew carefully on this marked seam line. You may want to change your sewing machine needle to a size 70. Your call, but definitely use a thread color that will not distract.This is one quarter of my Dresden Plate block. Sew each of the 4 quarter sections and lay them out.You can see only 1/4th of the circle petals have been sewn together.In this picture I have completed 4 sections of my Dresden Plate. Next I will sew the top right and left quarters together. Do the same for the bottom left and right sections. You will now have 2 half circles. Sew them together to make a beautiful Dresden Plate! Beautiful and easy!The Dresden petals have all been sewn together and I am happy with the results. I will talk about how I will attach the Dresden circle to background fabric and what I plan to have in the center in a later post.A template if you are needing one. Why have I included a section of my tape measure in the picture? It gives you “scale”. When you print this picture you will need to adjust the printout of the picture via you own printer. For help in this function please see your printer manual, either your paper copy or online.
Now we will talk about making a Dresden Plate using only one vintage handkerchief.
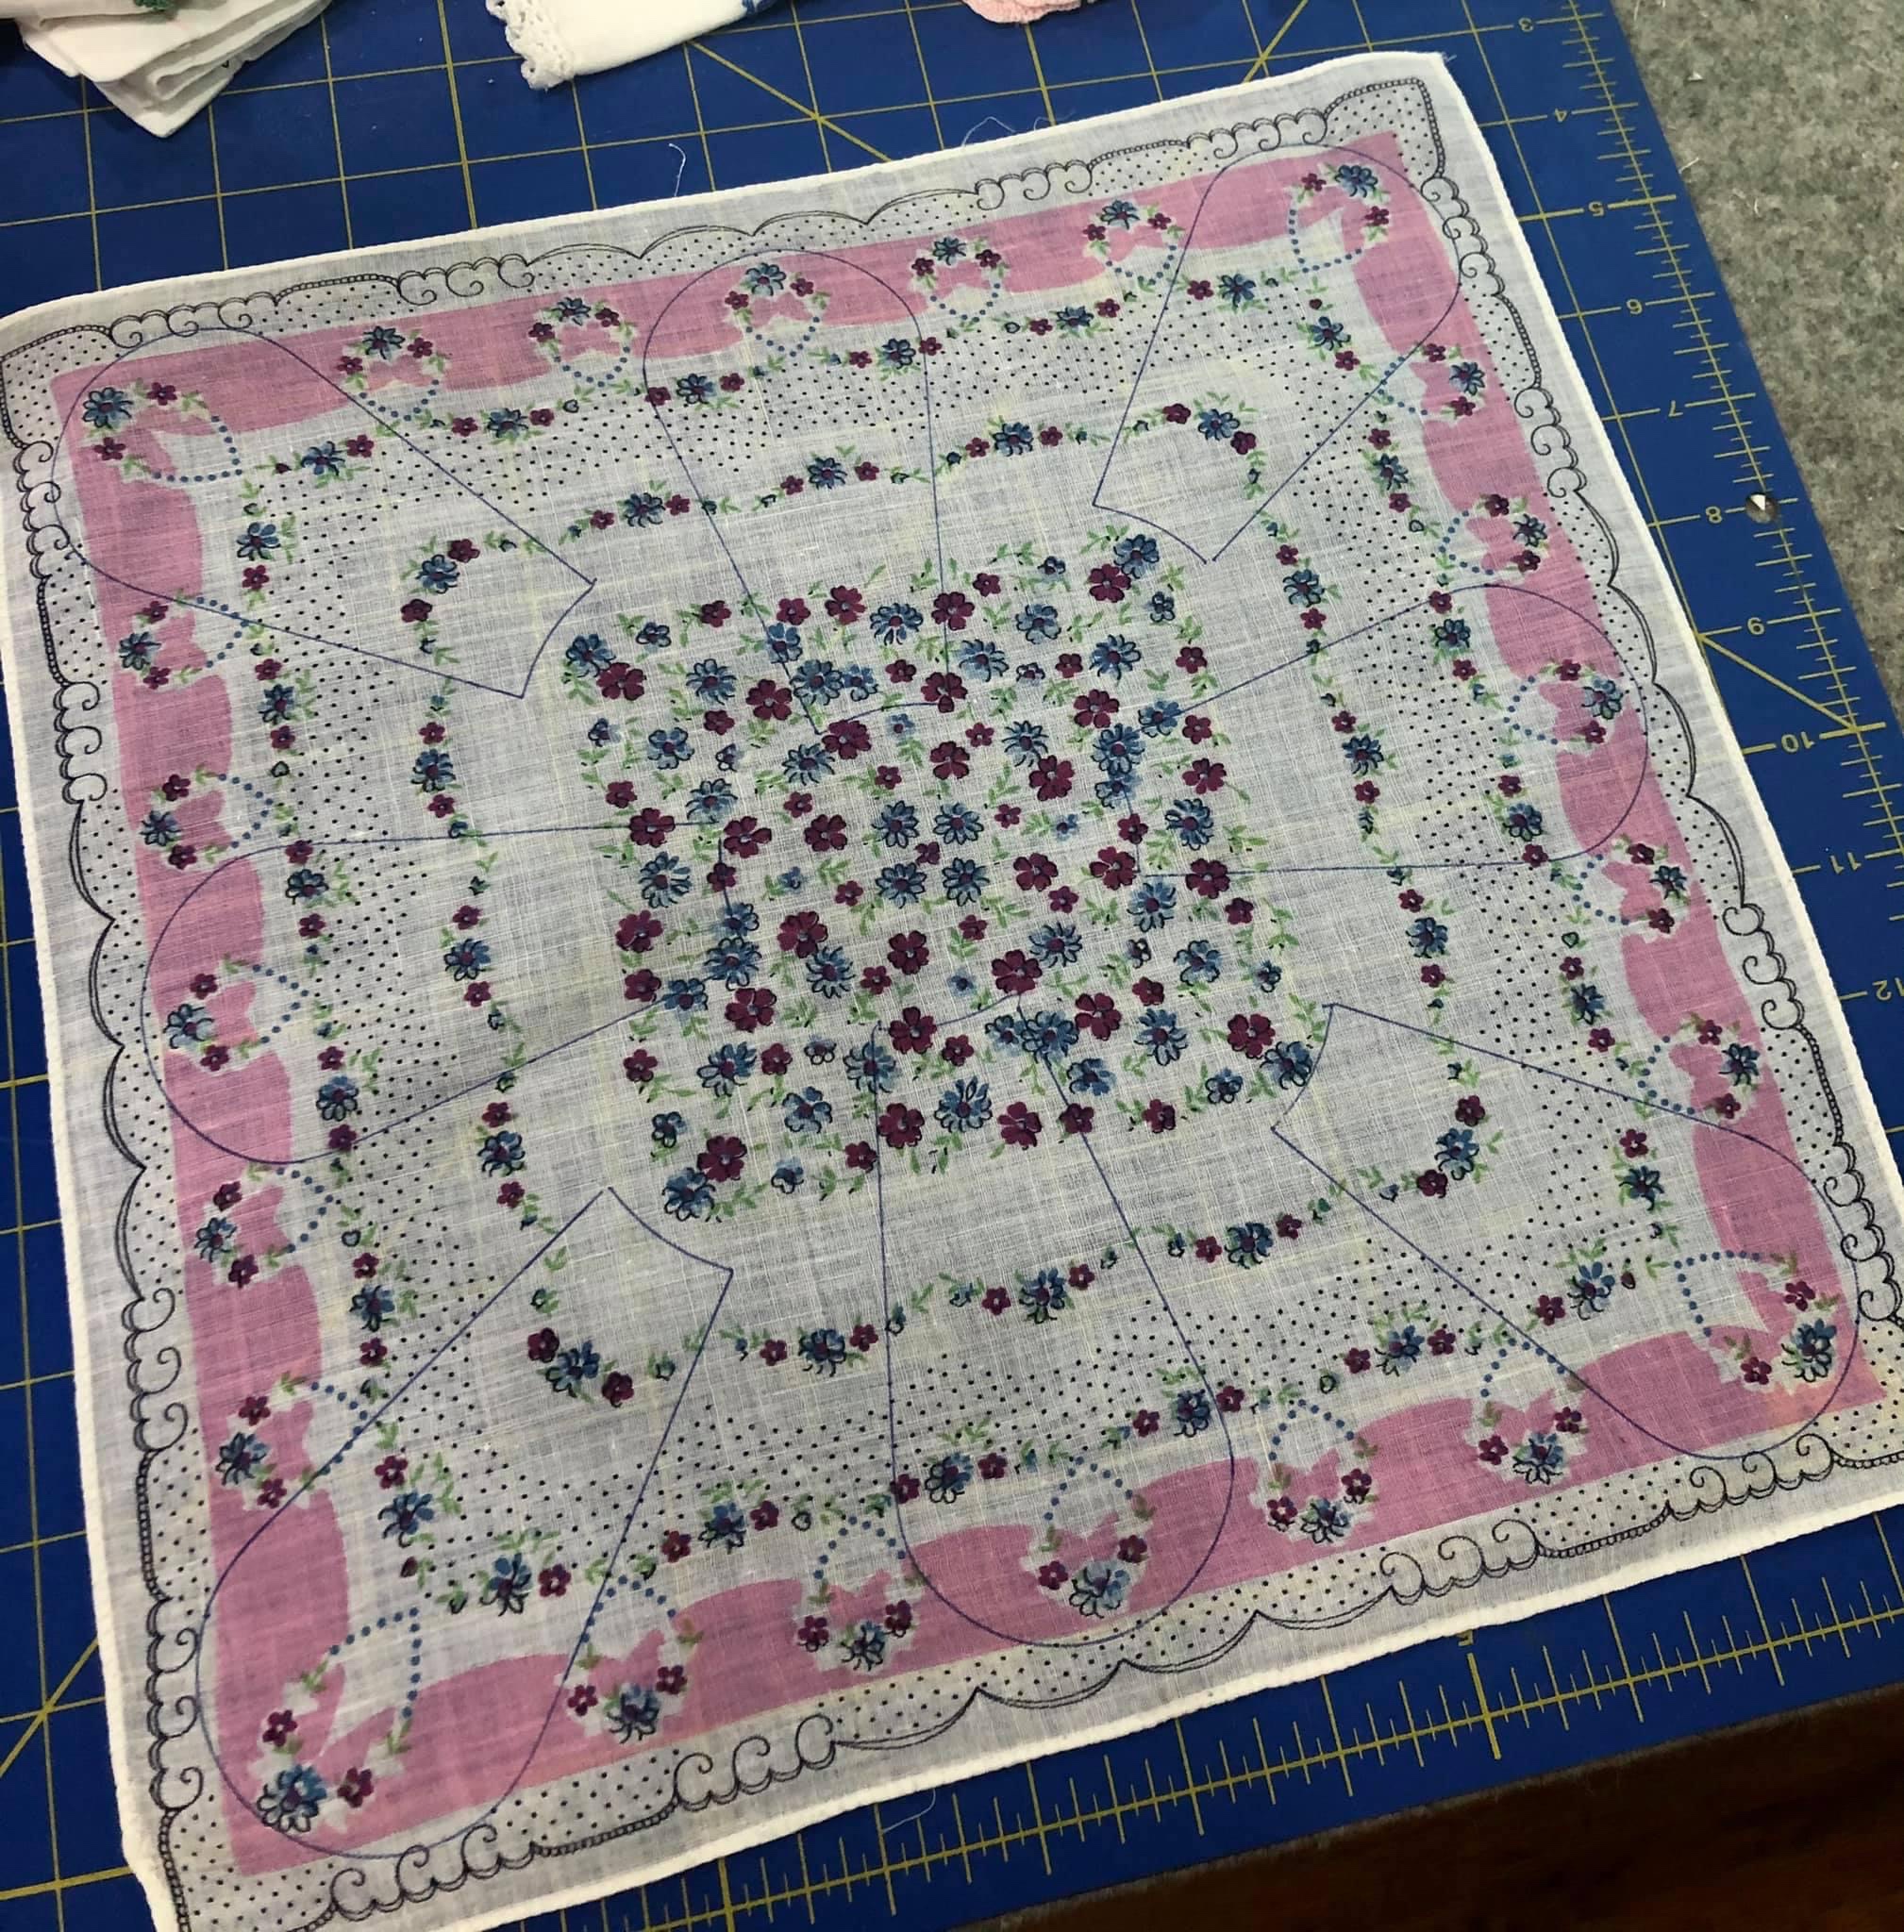
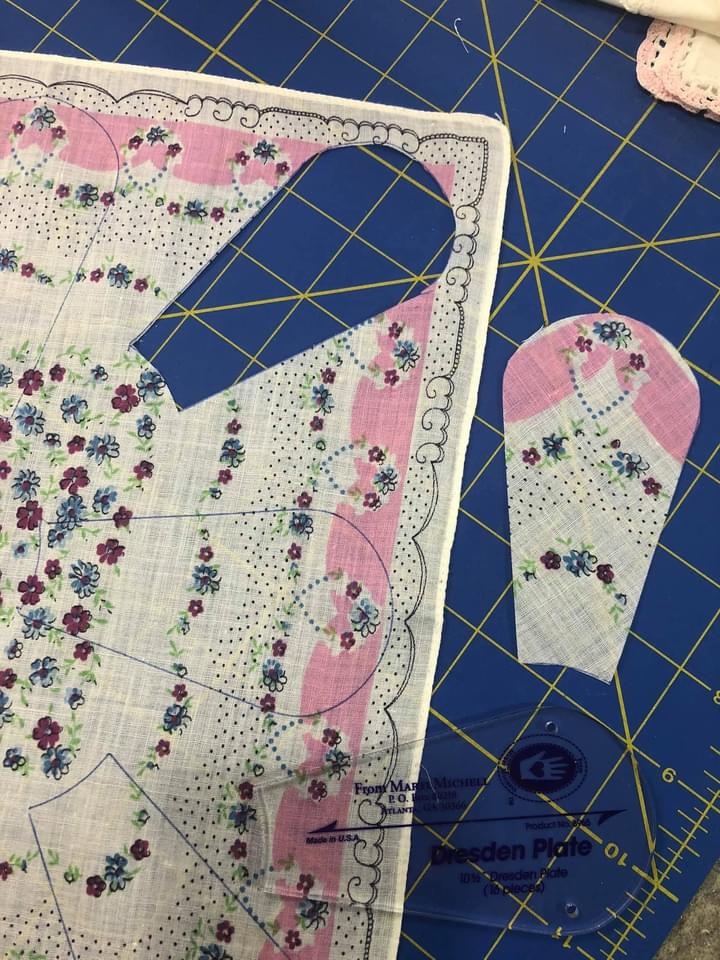
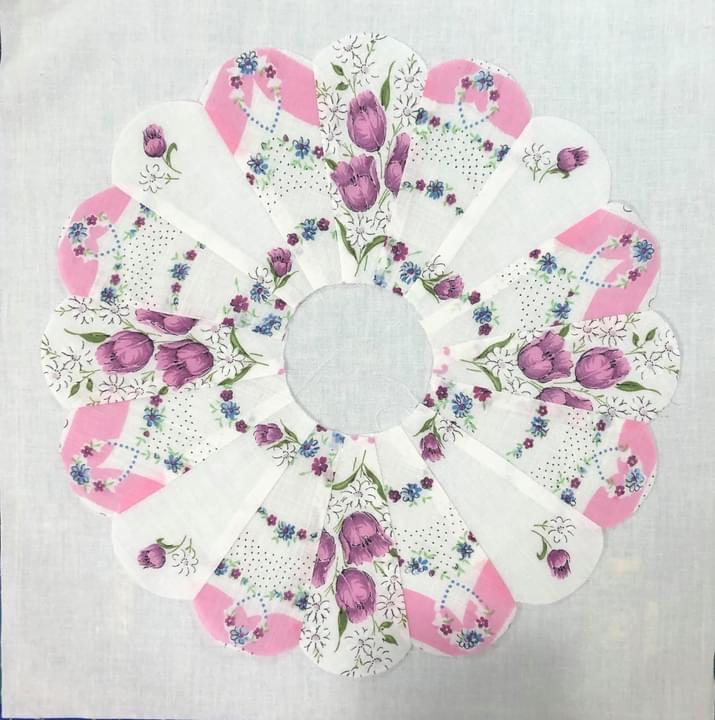
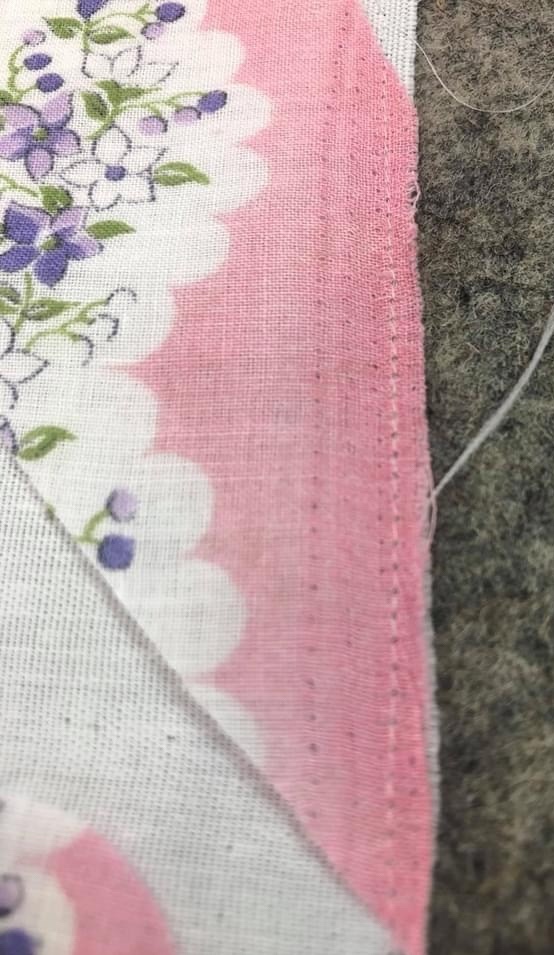
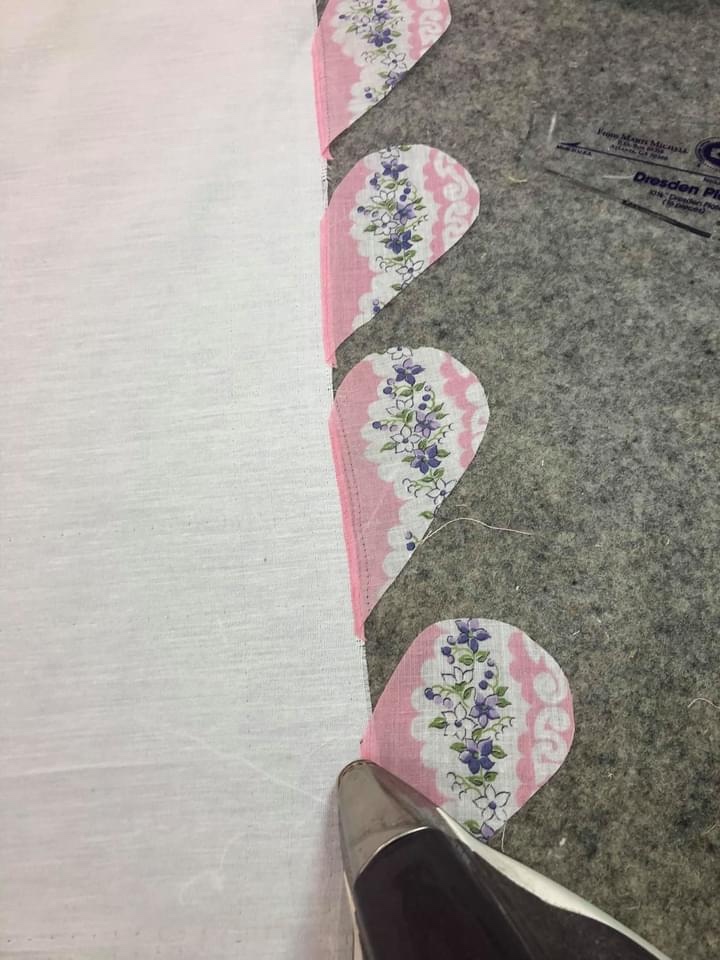
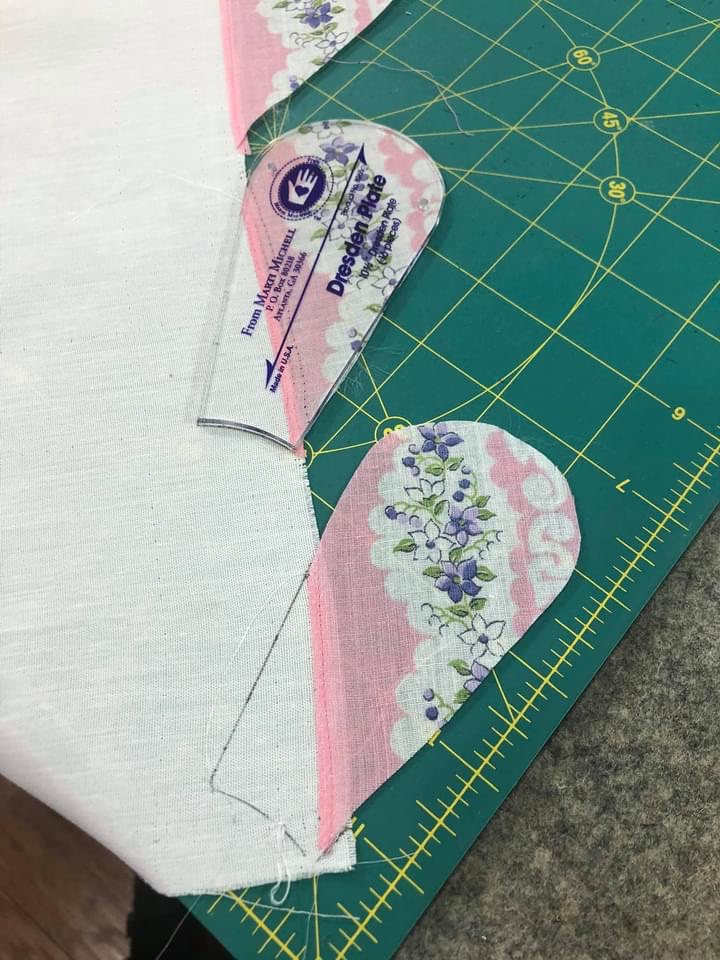
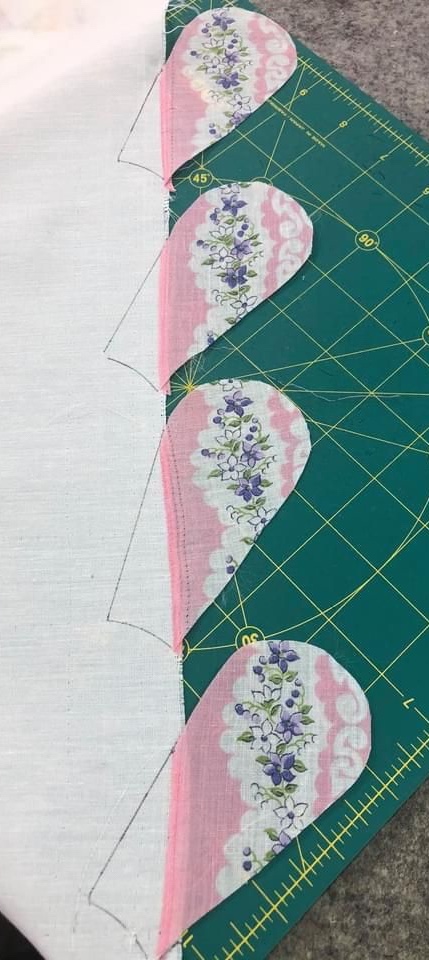
16 Petals drawn/traced on a single handkerchief. What is she doing you might be thinking, does she not see that 4 of the pieces are not complete? I have a plan…In order to give me the maximum amount of fabric, I unstitched the handkerchief hem and carefully pressed it. Of note: see the little black dots on the lower edge? The manufacturer prints these dots as cutting guides as the handkerchief was made.I carefully hand cut each of the 16 little petals.2 sets of 4 matching petals.I flip the petals over to the right and press the 1/8” seam.Using my template I mark the remainder of the petal.And carefully cut.With raw petal edges together and using a black Frixion Pen, I mark a 1/4” seam allowance.Sew 4 sets of petals together in the same fashion.Sew the 2 half circles together and your Dresden Place circle is complete!Does the look of the “4 pieced petals” bother you? Me? Not at all!A nice close up! If I absolutely had to make a choice about using 1 or 2 vintage handkerchiefs to make a Dresden Plate I believe I would choose 2. It does give more variety and pattern to the circle. It is so nice to have choices!
Rhonda, this is SO beautiful! I want to try it. Do you use any kind of backing/lining since the hankies are usually so thin & finely woven?
I would love to see more of this version of your artistry!
No backing/linkng needed, the fabric the item is sewn to, the batting and the quilt backing provide all the needed support these vi take pieces need. 🙂
Just saw this, thank you. Have collection hankies for a couple of yrs, also have been wanting to make a Dresden plat. Putting on my list to do. Thank you.
Are you following the class on the Facebook page? If so there was instruction and examples of how to machine applique the Dresden plate to the fabric. It’s really a personal choice, you can attach your Dresden by machine or you can turn the edge and do hand appliqué.
Your instructions and advice for the Dresden Plate block were wonderful, Rhonda! I was afraid of making this block but it turned out just fine. This quilt project has brightened my mood this past month: I have gained a lot of confidence and I look forward to each new post. Words cannot express my gratitude.
You amaze me with these ideas. This one is great. I have my Mom’s linens and an aunt’s. One day soon I am going to use your directions and start working on a quilt top. Thank you!


how did you finish off the rounded corners. did you leave a raw edge or did i miss that on the tutorial
LikeLiked by 1 person
Raw edge machine appliqué finished off the edges quite nicely.
LikeLike
Rhonda, this is SO beautiful! I want to try it. Do you use any kind of backing/lining since the hankies are usually so thin & finely woven?
I would love to see more of this version of your artistry!
LikeLiked by 1 person
No backing/linkng needed, the fabric the item is sewn to, the batting and the quilt backing provide all the needed support these vi take pieces need. 🙂
LikeLike
I have always been afraid to cut my hankie but your instructions have given me the courage. Thank you so much for this tutorial.
LikeLiked by 1 person
❤️🙂
LikeLike
Just saw this, thank you. Have collection hankies for a couple of yrs, also have been wanting to make a Dresden plat. Putting on my list to do. Thank you.
LikeLiked by 1 person
Hi. Thank you! Is there a tutorial for the next step for this block? i.e. sewing it to the background fabric, making the center, etc?
LikeLiked by 1 person
Are you following the class on the Facebook page? If so there was instruction and examples of how to machine applique the Dresden plate to the fabric. It’s really a personal choice, you can attach your Dresden by machine or you can turn the edge and do hand appliqué.
LikeLike
Your instructions and advice for the Dresden Plate block were wonderful, Rhonda! I was afraid of making this block but it turned out just fine. This quilt project has brightened my mood this past month: I have gained a lot of confidence and I look forward to each new post. Words cannot express my gratitude.
LikeLiked by 1 person
Love the way you showed how to use a bit and piece of what would be considered leftovers!!!
LikeLiked by 1 person
You amaze me with these ideas. This one is great. I have my Mom’s linens and an aunt’s. One day soon I am going to use your directions and start working on a quilt top. Thank you!
LikeLiked by 1 person
You give the best directions, thanks!
LikeLiked by 1 person
I’m sorry but there is no way I can approve or allow this comment on my blog.
LikeLike
What a fantastic lesson. Thanks so much.
LikeLiked by 1 person
Great advice, especially the segment that is pieced.
LikeLiked by 1 person