

This blog is all about saving bits and pieces and making the most out of a ragged edge dresser scarf.
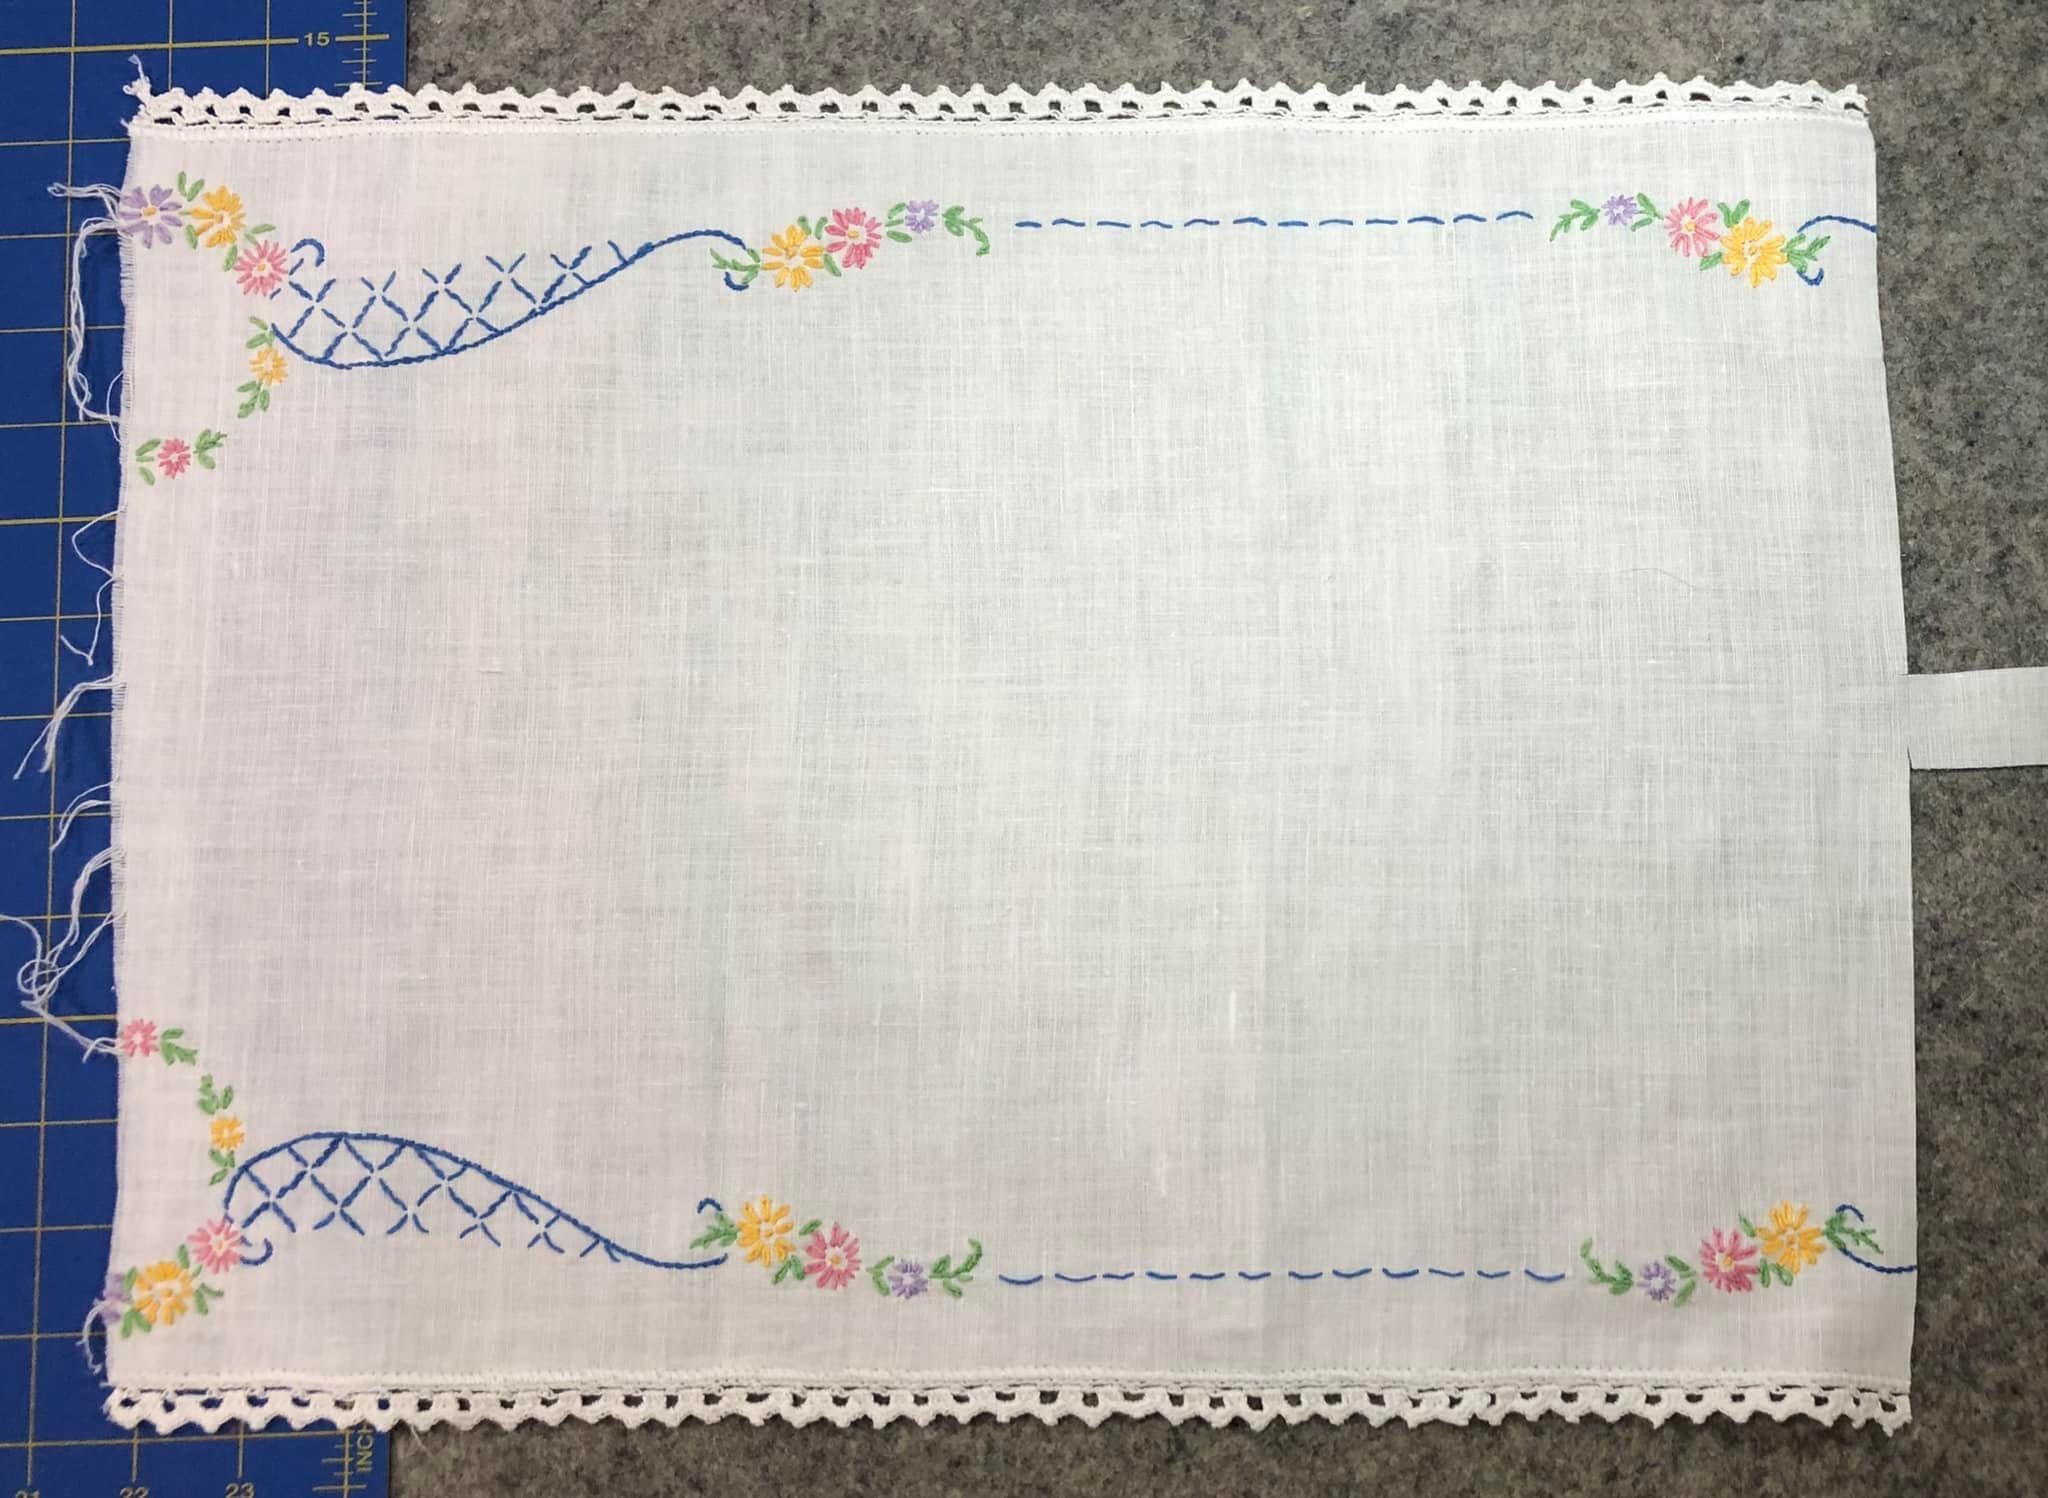
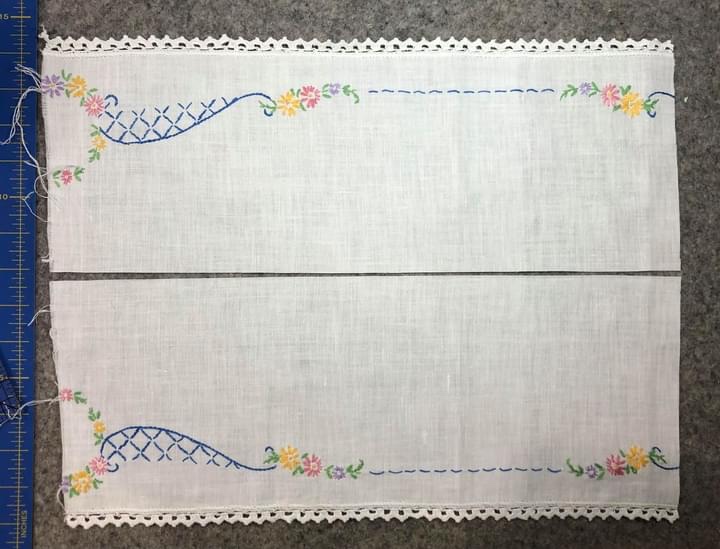
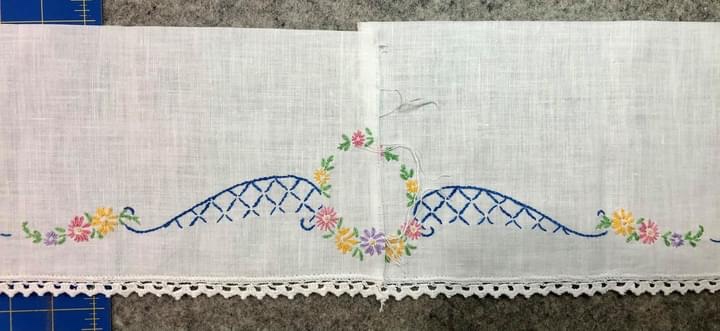
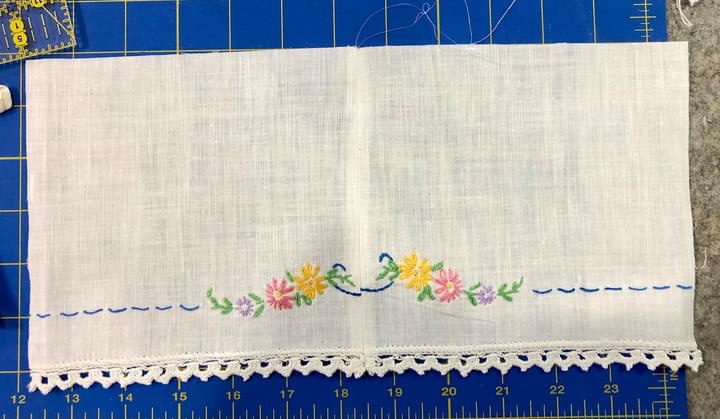
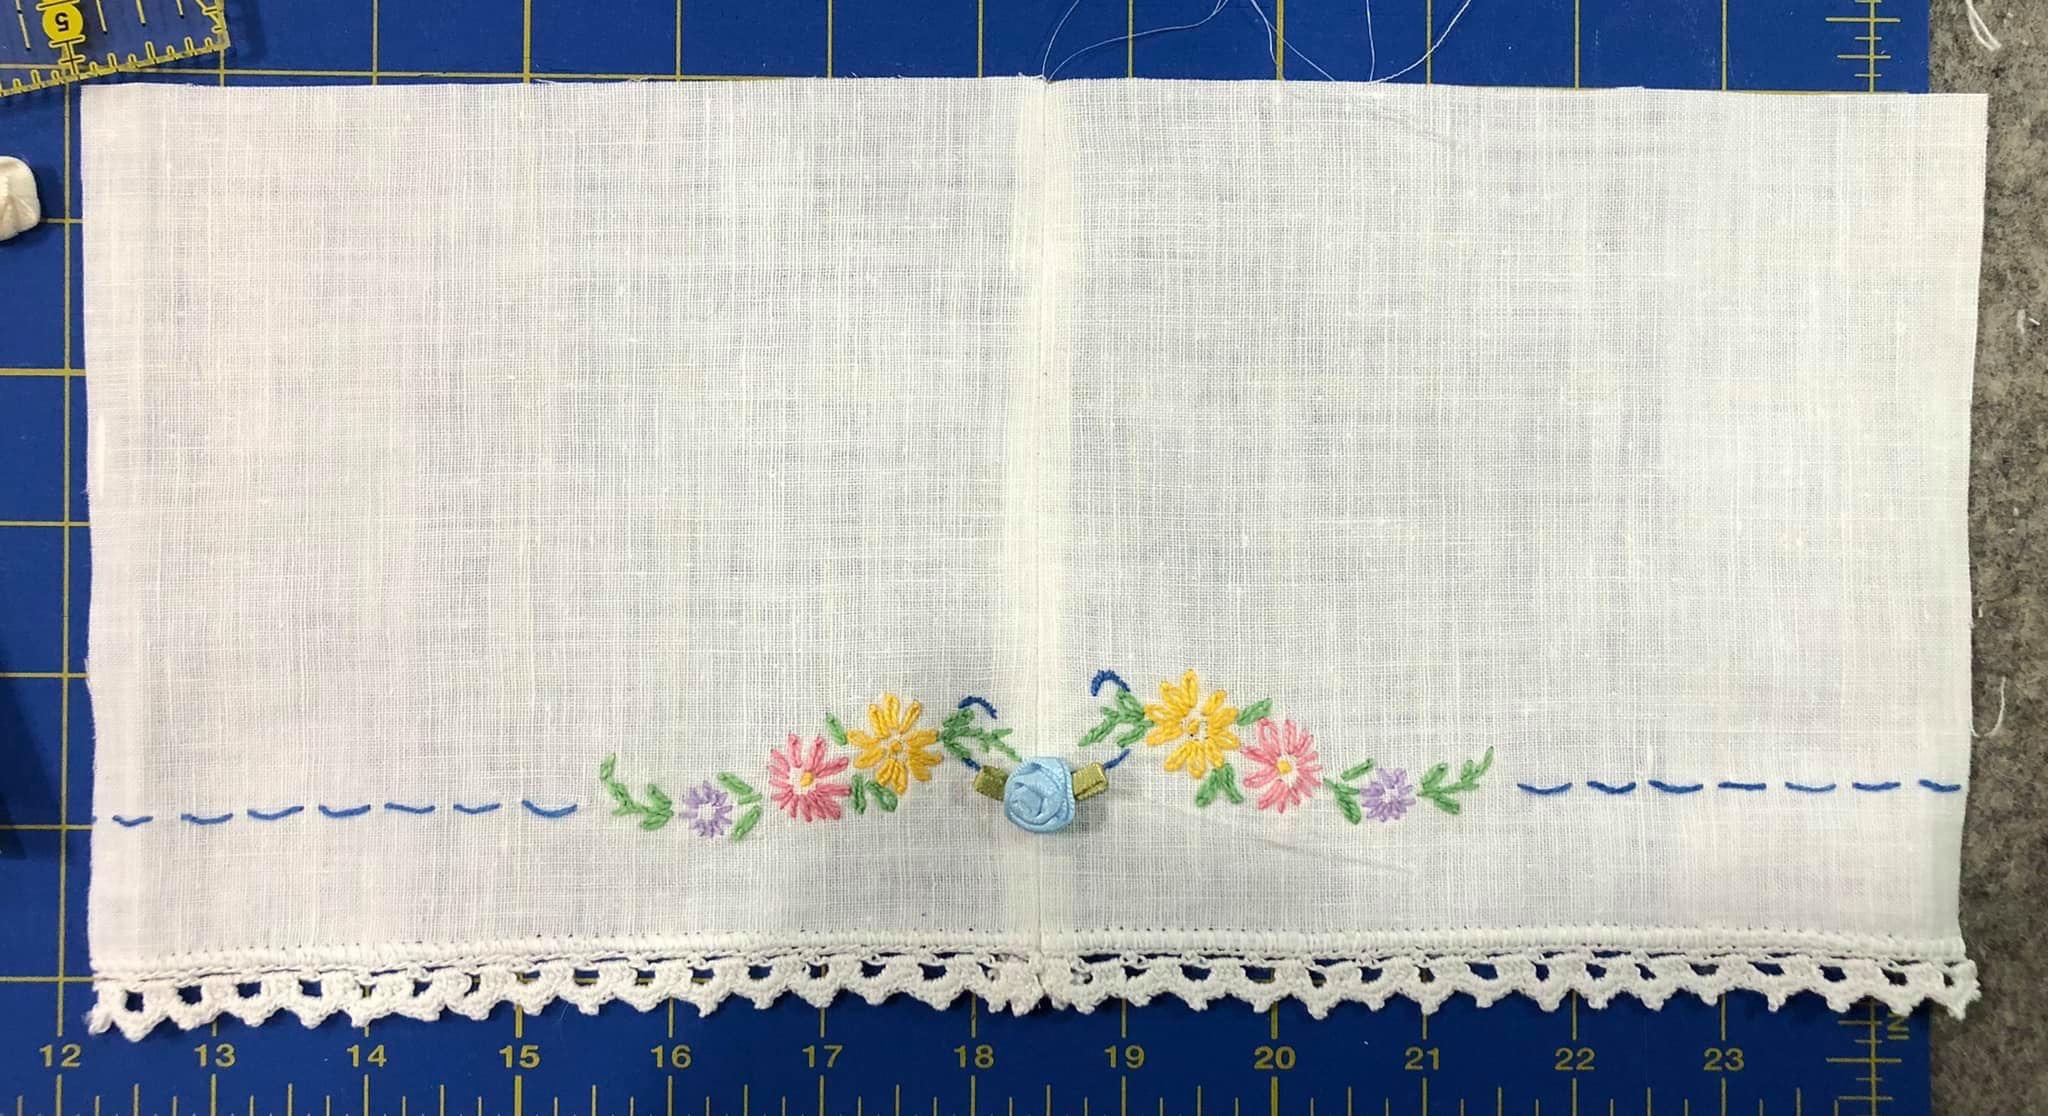
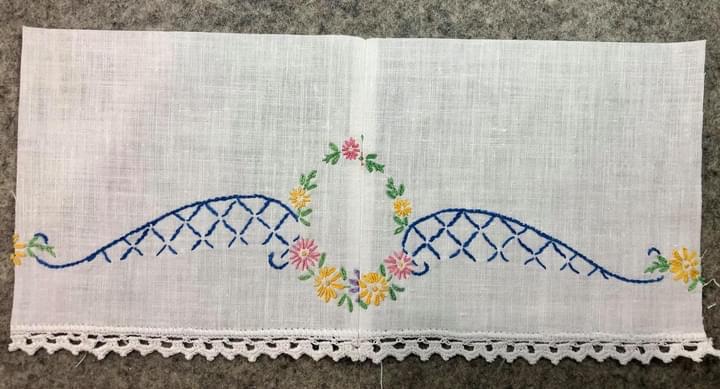
There are 28 pictures below, most all have information in the picture captions. My intention is to demonstrate to you that almost any vintage linen has potential, it just depends on how you look at it and how willing you are to think outside the box.
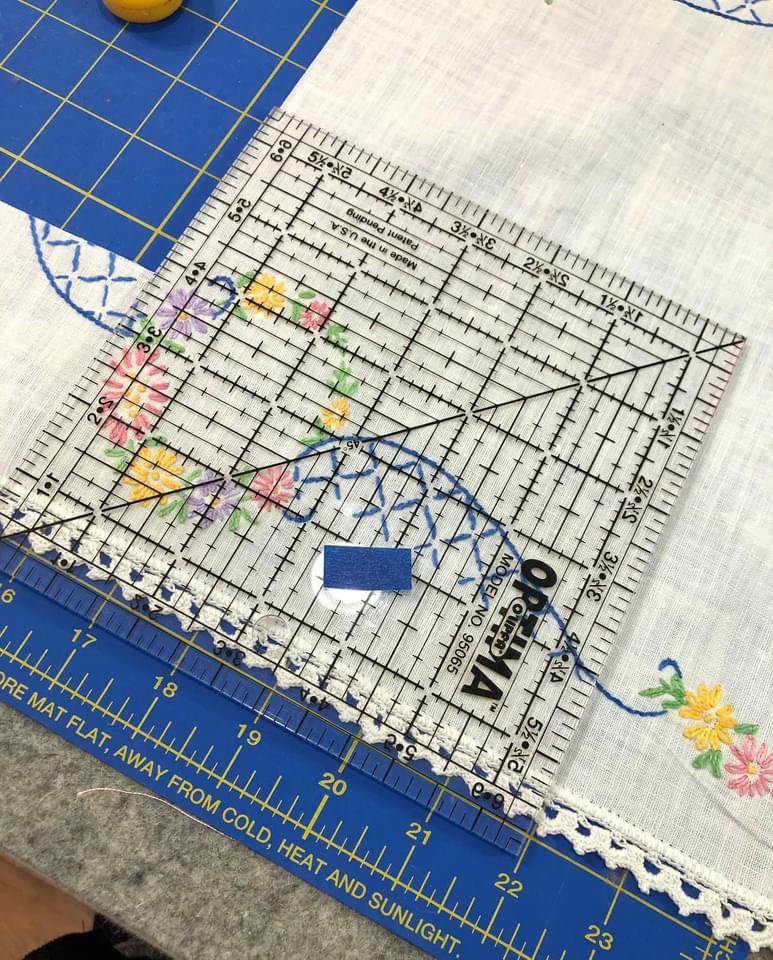
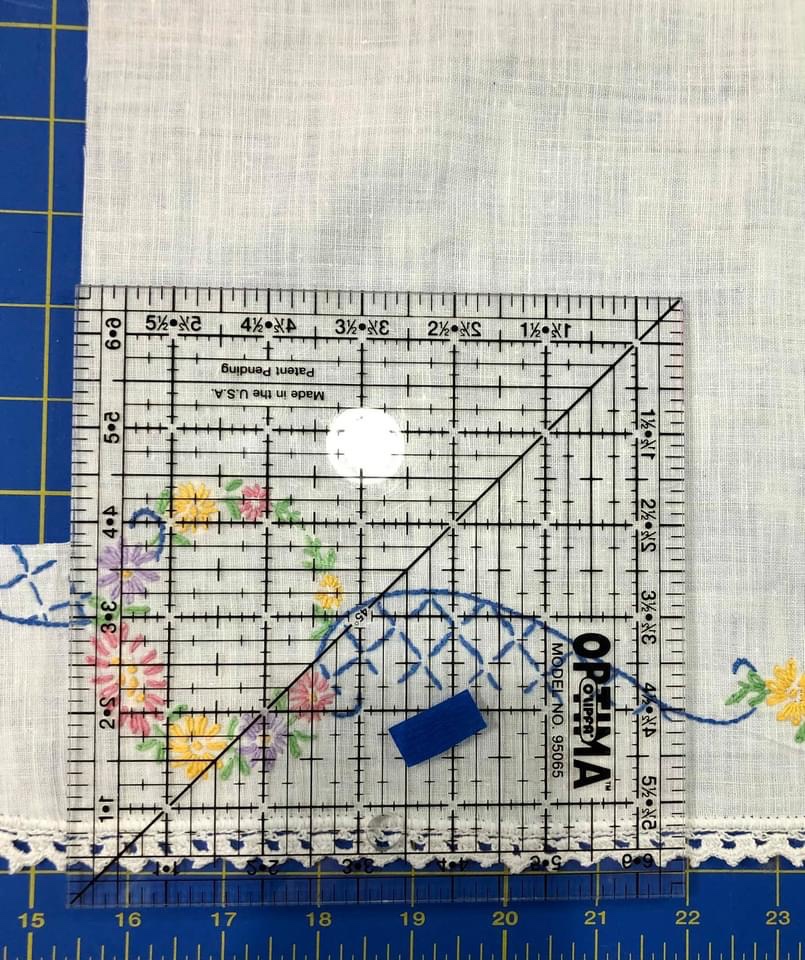
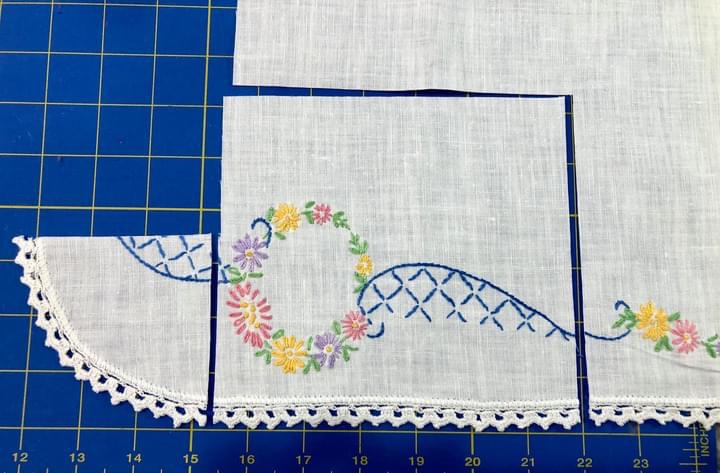
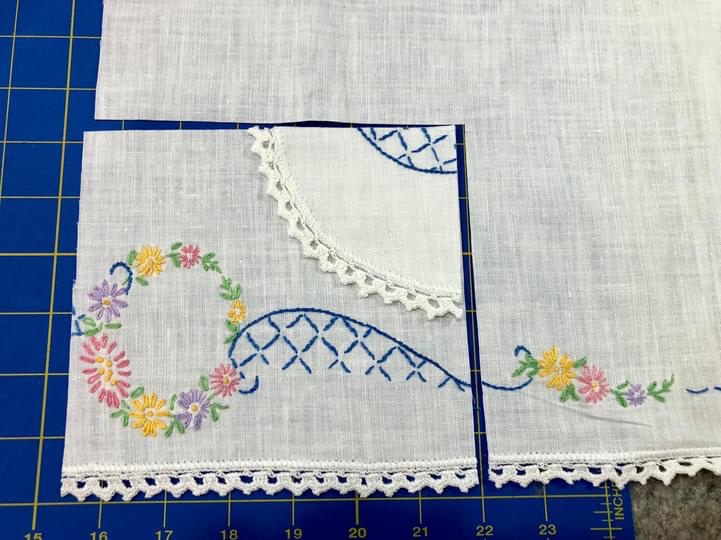
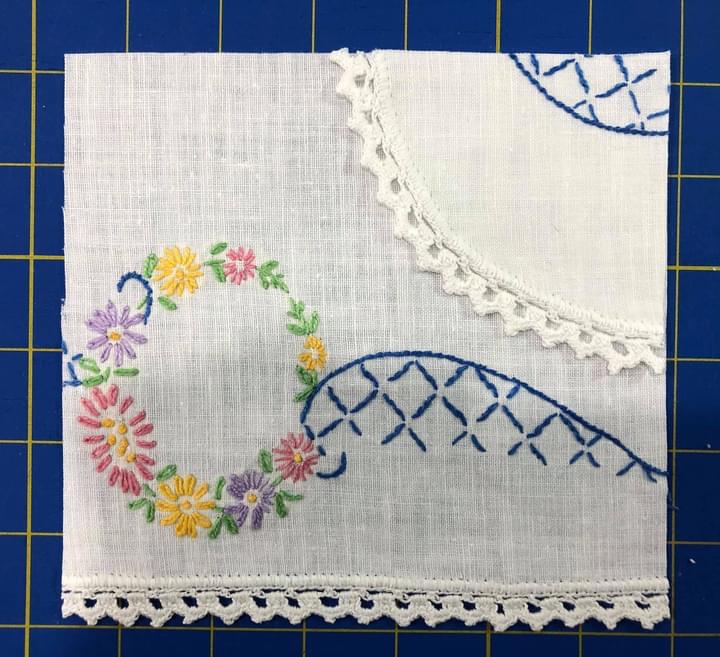
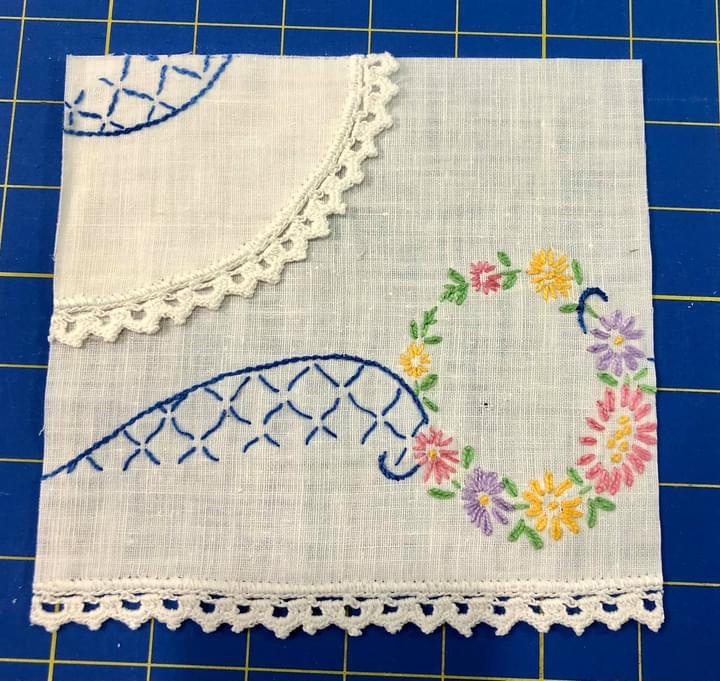
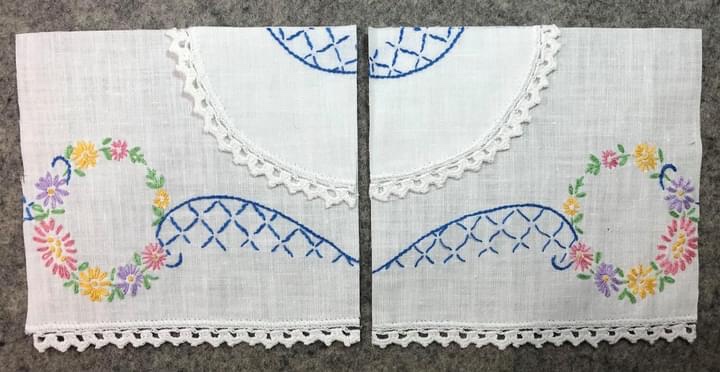
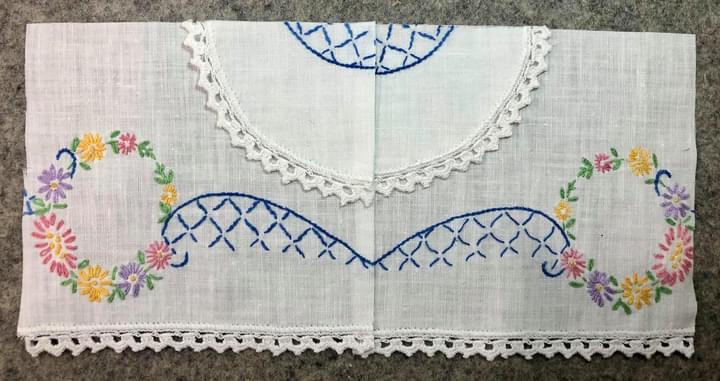
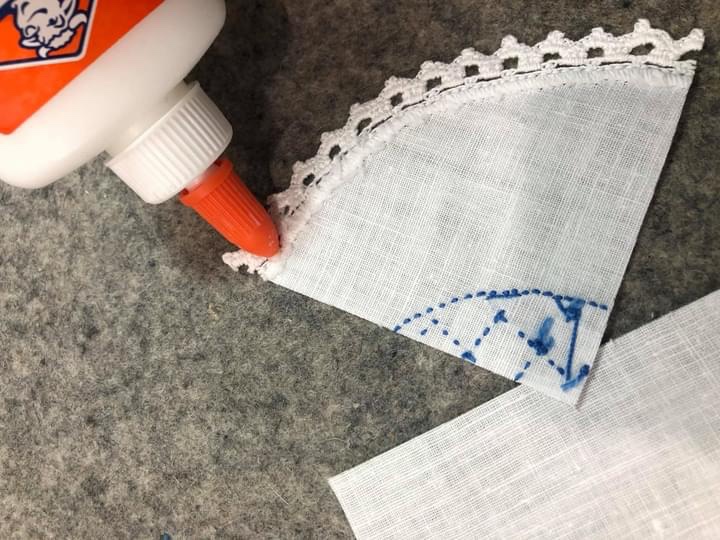
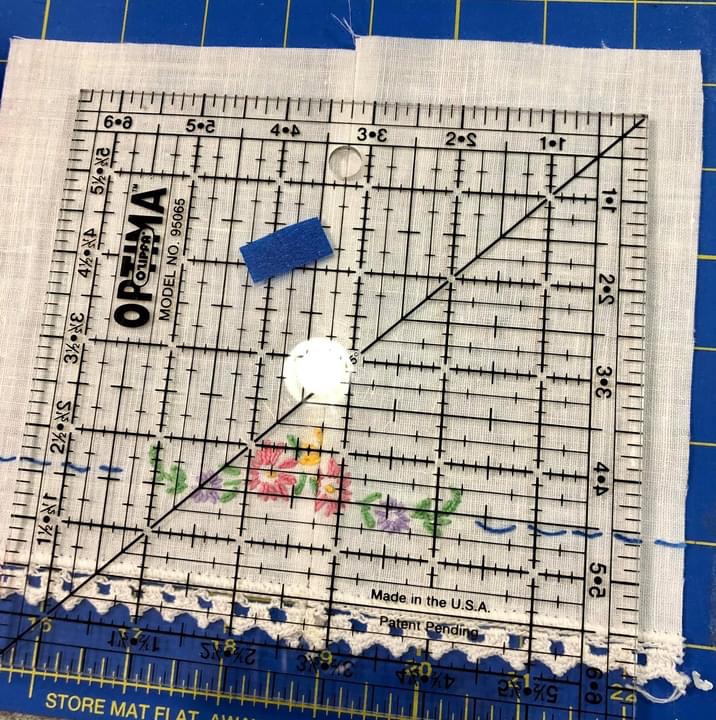
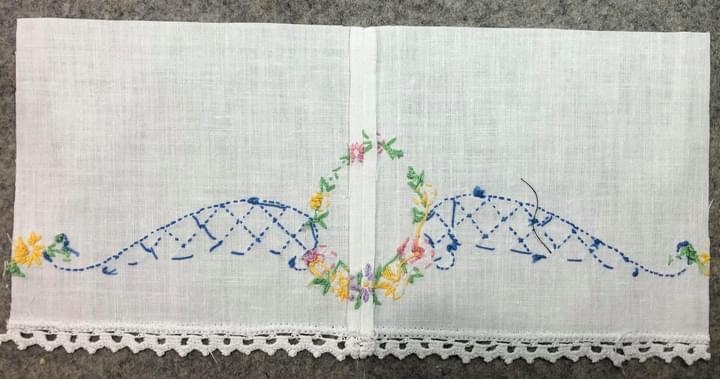
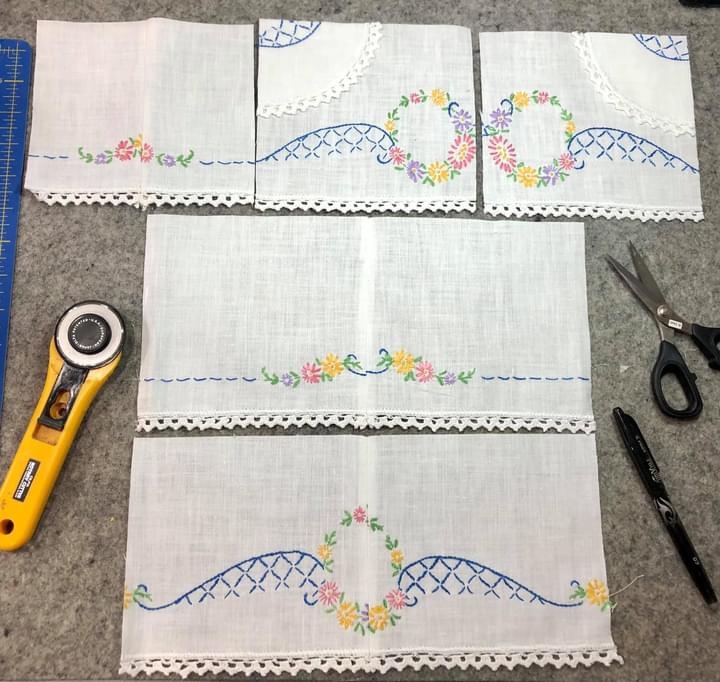
This is a picture illustration/tutorial on why I do not throw anything away that is 1” or larger.


I was thrilled!
Don’t throw away anything! 😄😄
Blessings to everyone for a great New Year!


You are an artist. Thanks for sharing your work.
LikeLiked by 1 person
Thank you for your kind words!
LikeLike
This is wonderful. I have my grandmother’s quilt and her scarfs she embroidered. The quilt has some holes from someone taking it to the beach and leaving it in the trunk of his car. 😡 I have save it not know what to do. Well I do now. Thank you so much for this.
LikeLiked by 1 person
❤️
LikeLike
Do you just cut through the embroidery? I was wondering about it coming apart?
LikeLiked by 1 person
No, the cut edges are secured as part of the eventual sewn seam. 🙂
LikeLike
Oh, WOW this is just gorgeous 🙂 With my late mothers blessing, I have made a precious quilt using this method & five generations (on mother’s side) of stunning hand embroidered table clothes, pillow cases, aprons, doilies, etc, some of which were very tread bare & totally tatty. It is just the most precious quilt ever. A beautiful heirloom to treasure for many more generations.
LikeLiked by 1 person
Love your tutorial! I have some old handkerchiefs and odds and ends that will be put to use finally. Thanks
LikeLiked by 1 person
Thank you!!
LikeLike
You have an artist’s eye! Absolutely amazing ability to foresee all that could be made from one scarf. Beautifully done! 👏👏👏
LikeLiked by 1 person
Thank you! 🙂❤️
LikeLike
Good ideas and use of old scarves! Thanks
LikeLiked by 1 person
Thanks!
LikeLike
Hi Rhonda, This is Ferri Lou. I met you through Kathy. I loved all your quilts and the slide show . Thank you for letting me join you ladies for the afternoon! I can’t wait to try some of your ideas!
LikeLiked by 1 person
Rhonda, thank you so much for the information on cutting and using parts. I am new at this and this really is helpful.
Susan Marvin
LikeLiked by 1 person
Amazing! You inspire.
LikeLiked by 1 person
Rhonda, your imagination always surprises me ~ thank you for sharing it. God bless you in the New Year.
LikeLiked by 1 person
Aha! I do have 1 dresser scarf with a few stains… maybe I can get some use out of it. I have another out of a heavier linen…. that one I’ll have to think about as it’s currently on my dresser.
LikeLiked by 1 person
Great ideas! Thank you!
LikeLiked by 1 person
Thanks for sharing! I save every little bit too. It’s is so nice to see how every little bit can be used with a little imagination.
LikeLiked by 1 person
Great tutorial. Very helpful.
LikeLiked by 1 person