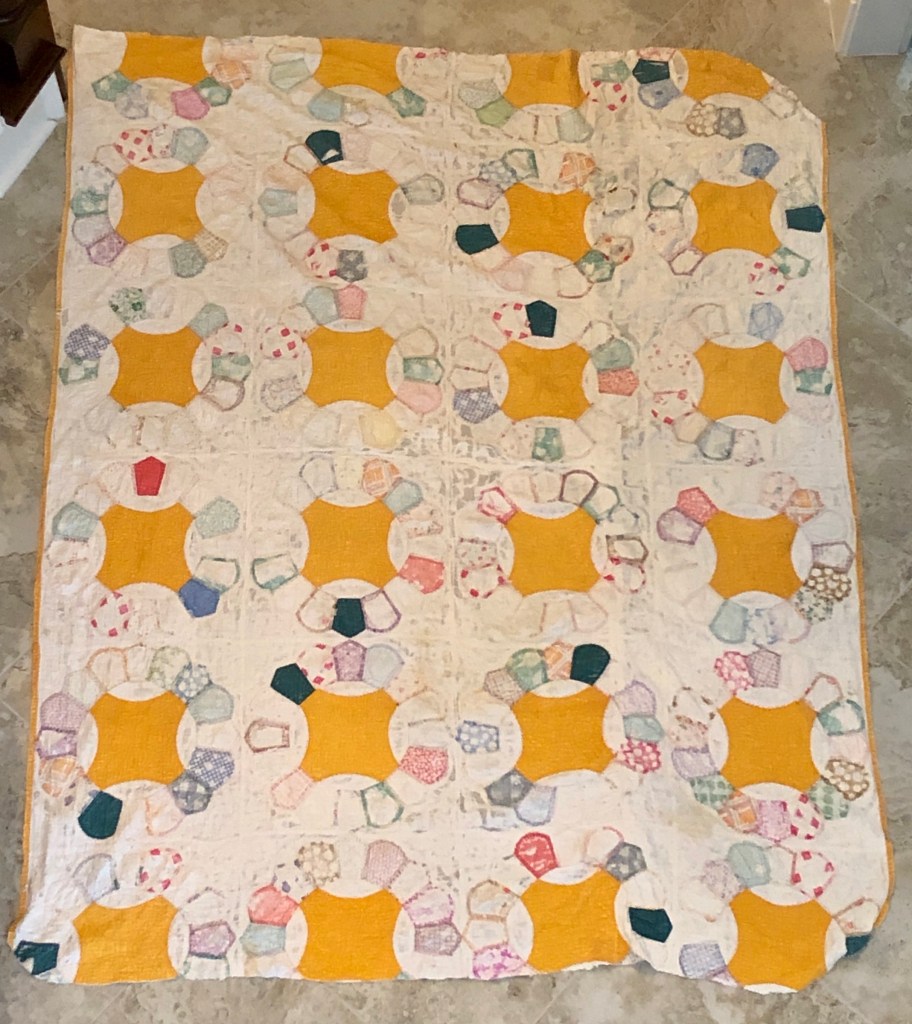
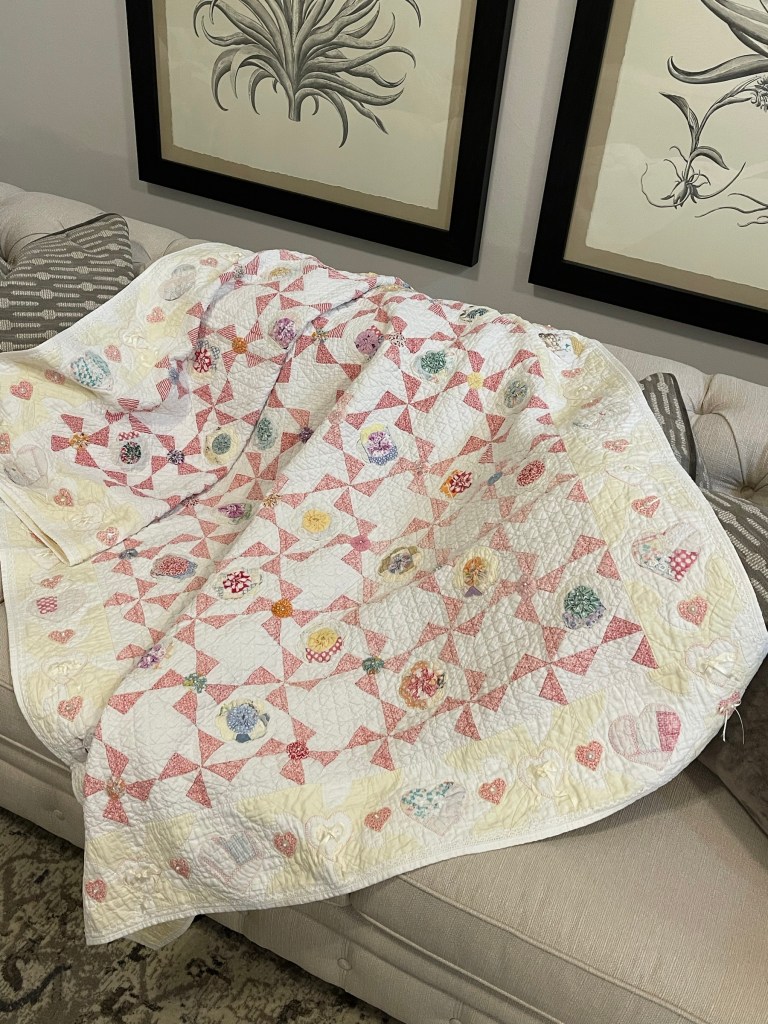
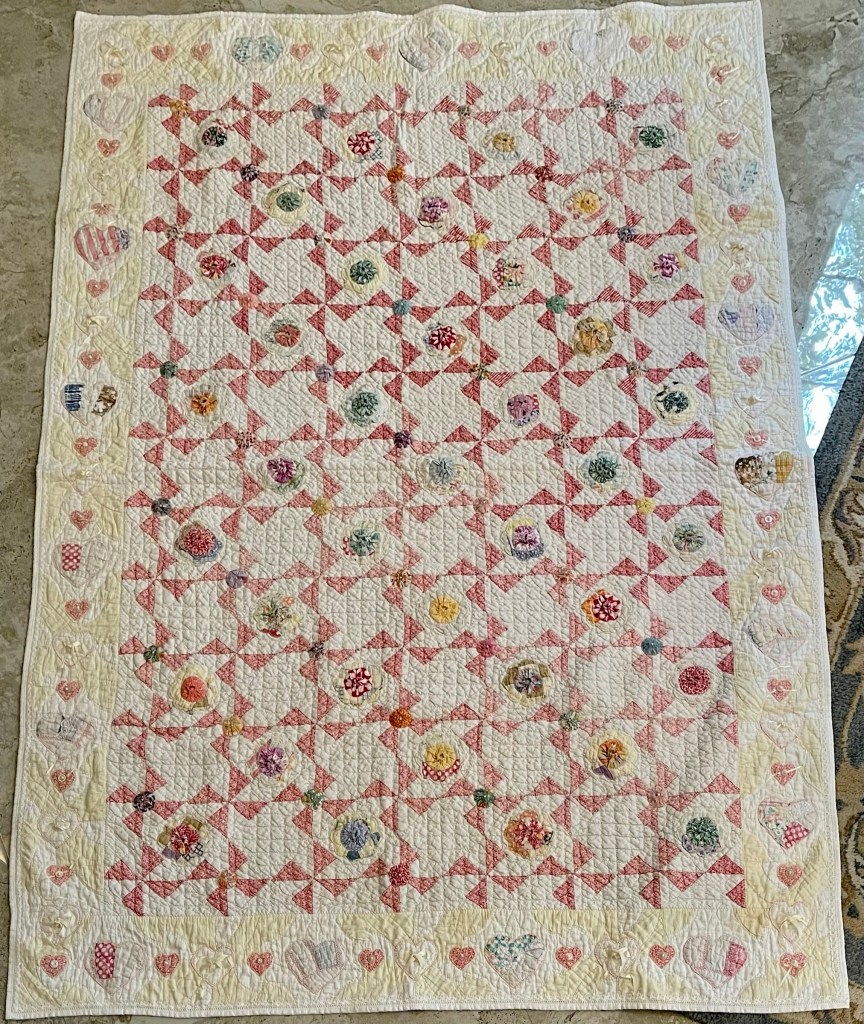
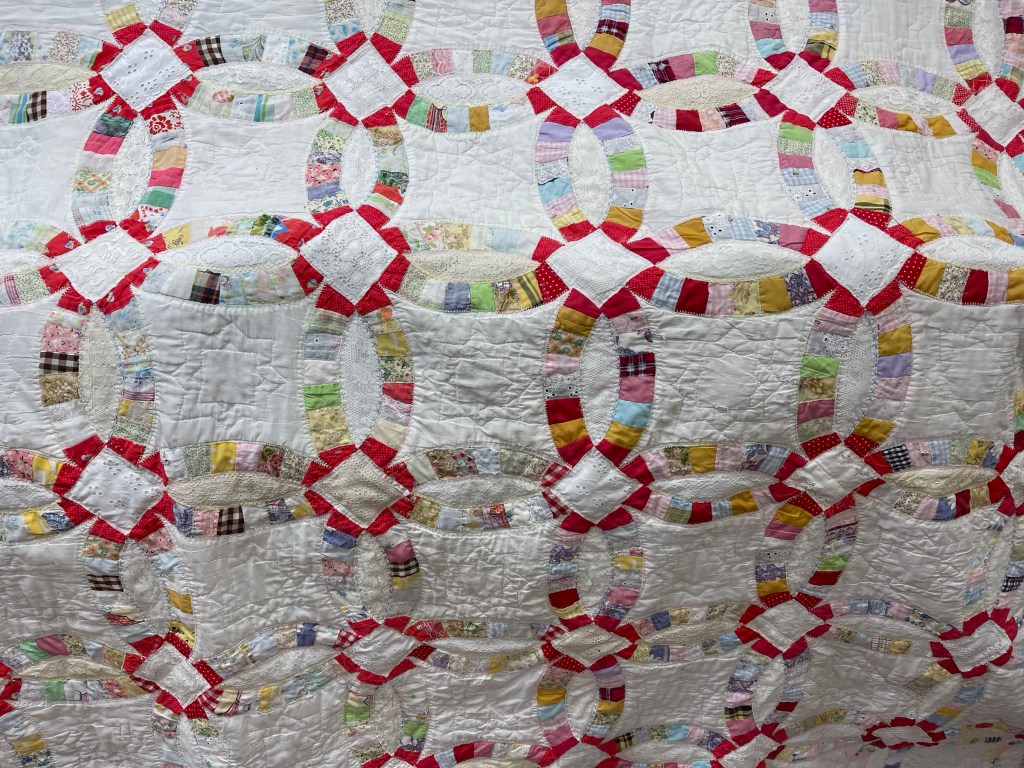
If you’ve been following, you’ll know all about this disaster of a vintage quilt and how I’m rescuing it piece by piece. I’ve replaced all of the seriously damaged pieces in each of the 16 rings so it’s on to the damaged and/or missing white fabric throughout the quilt top.
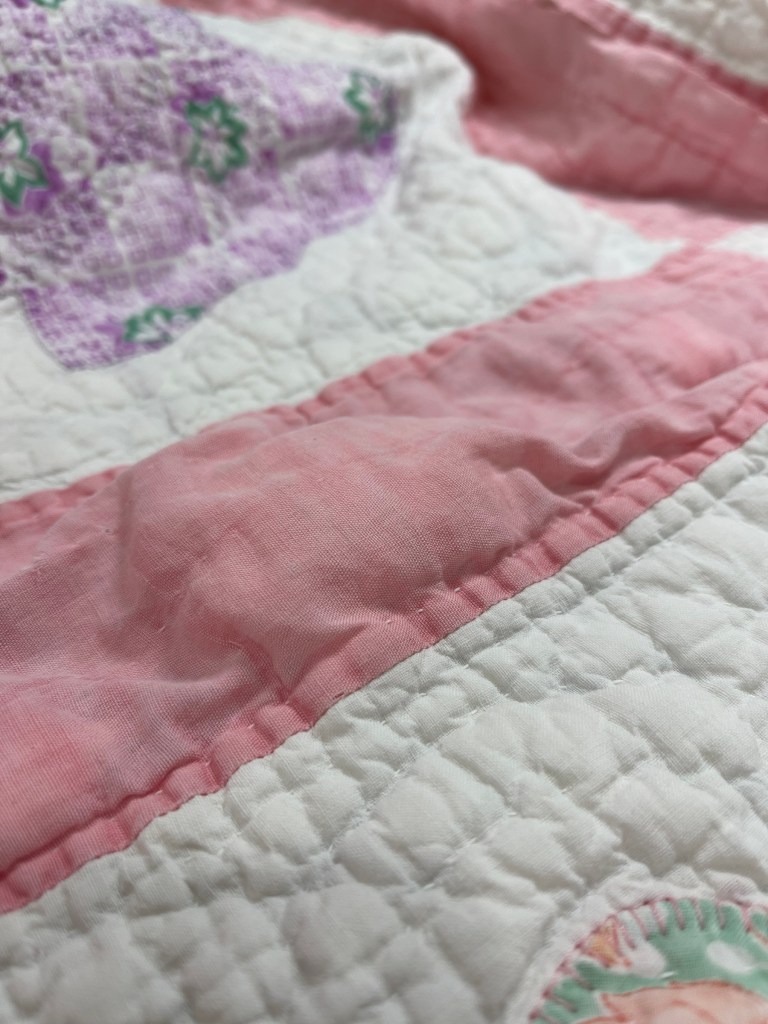
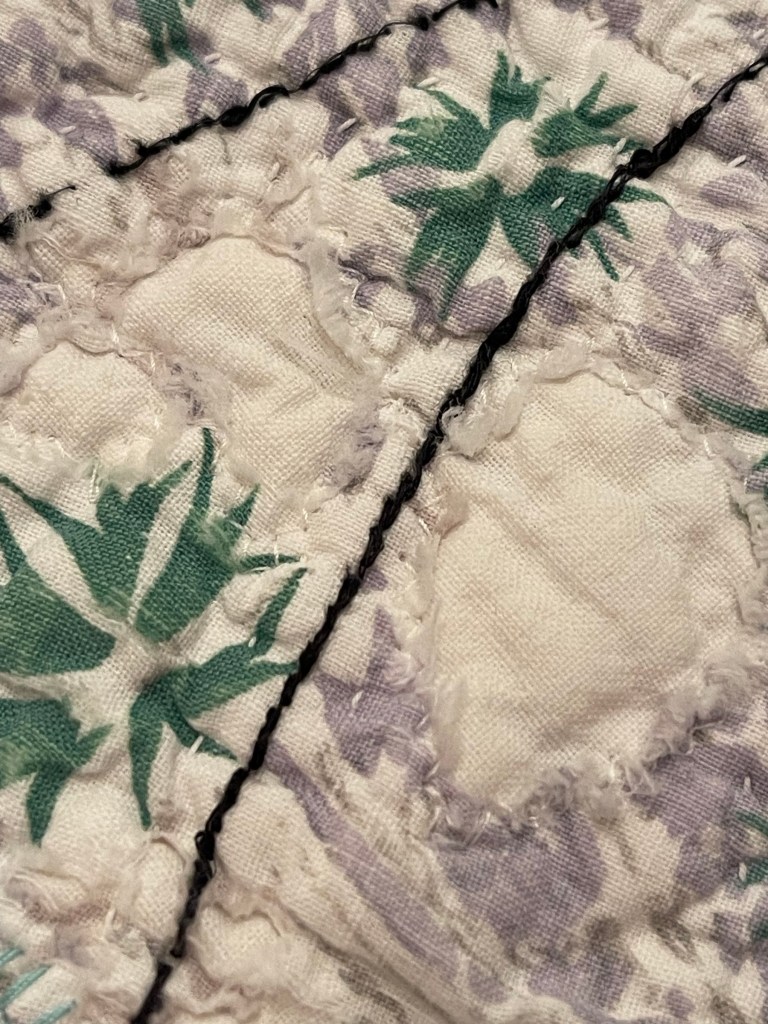
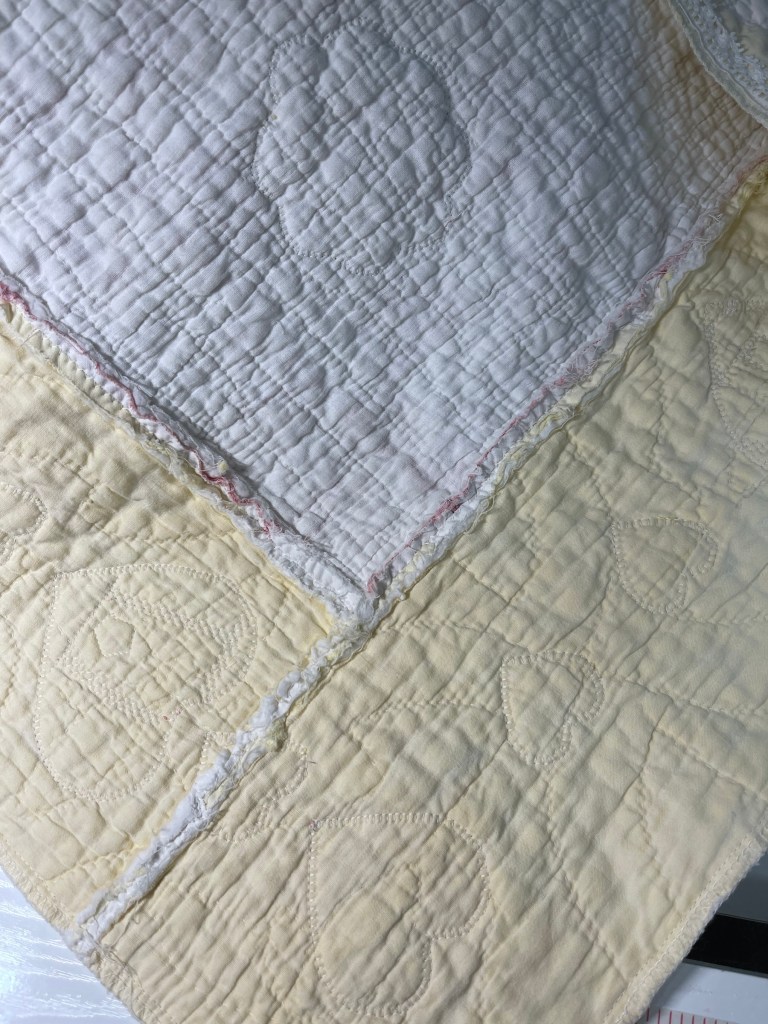
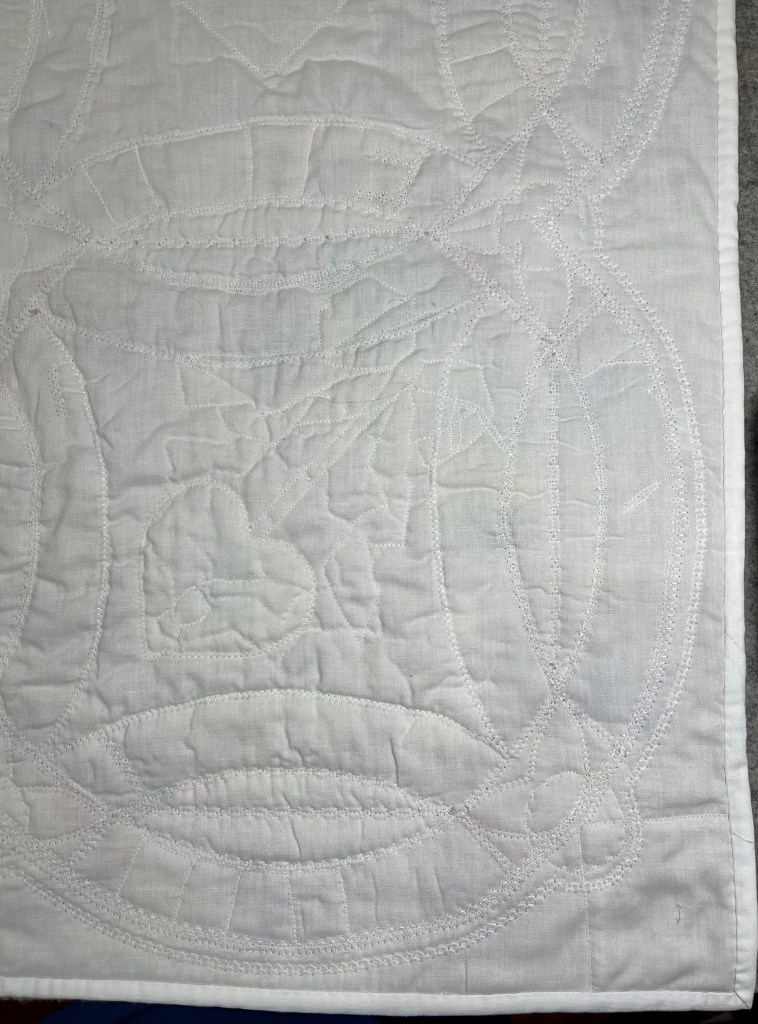
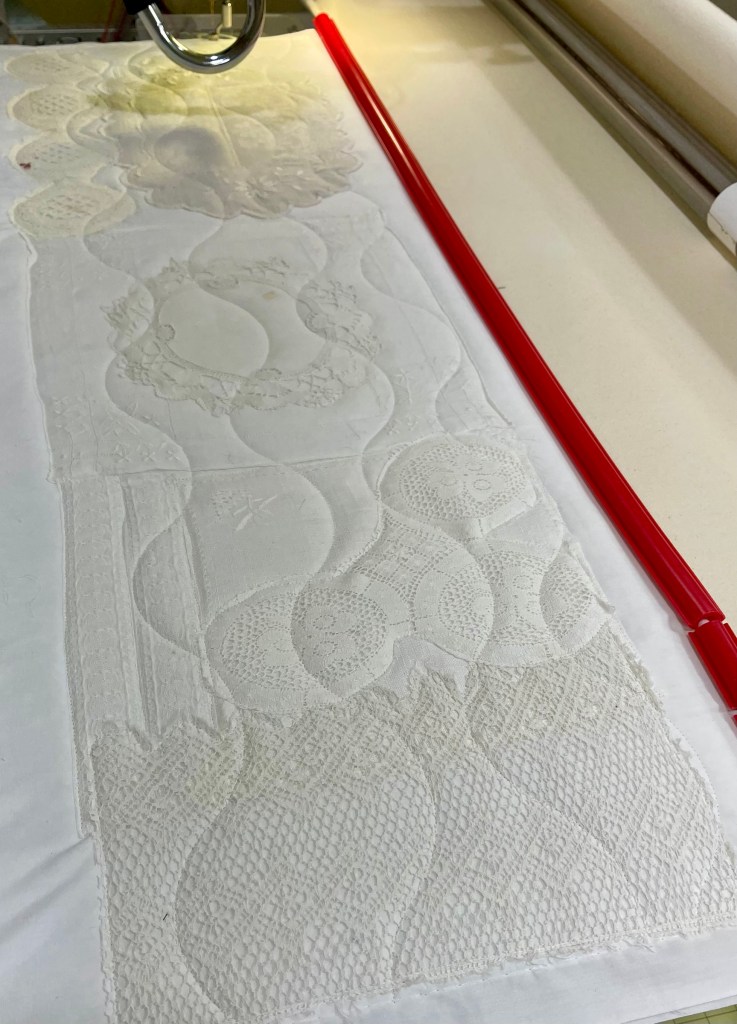
This is what I’m faced with…over much of the quilt the white fabric is either very damaged or missing entirely, the same for much of the quilt batting.
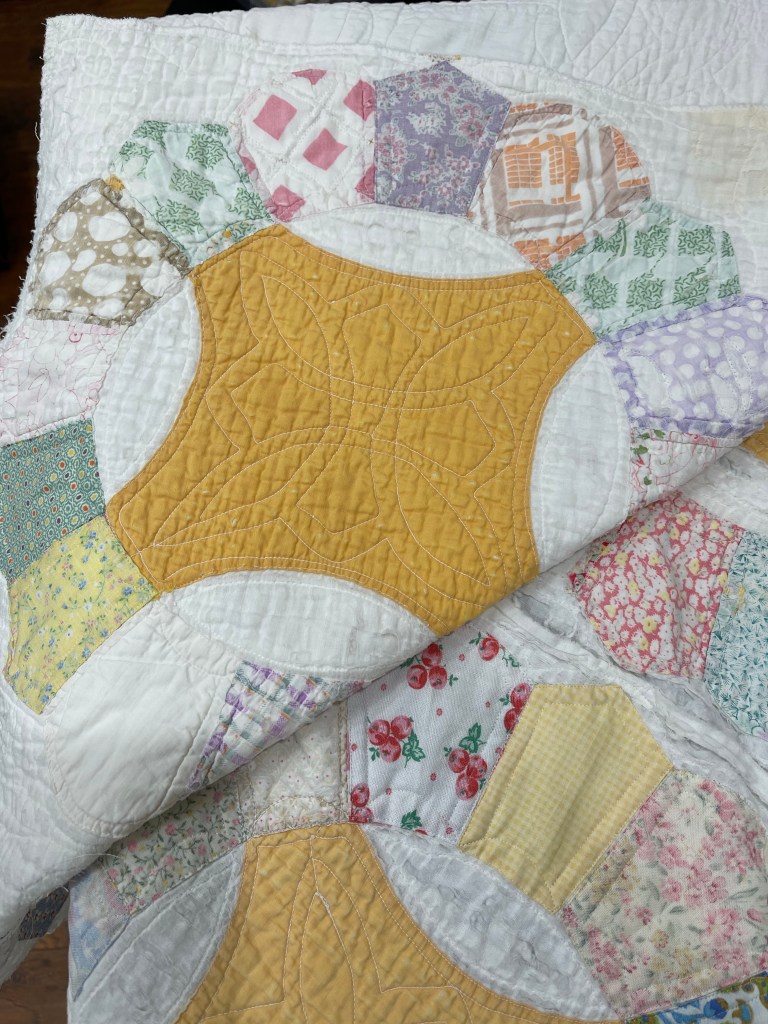
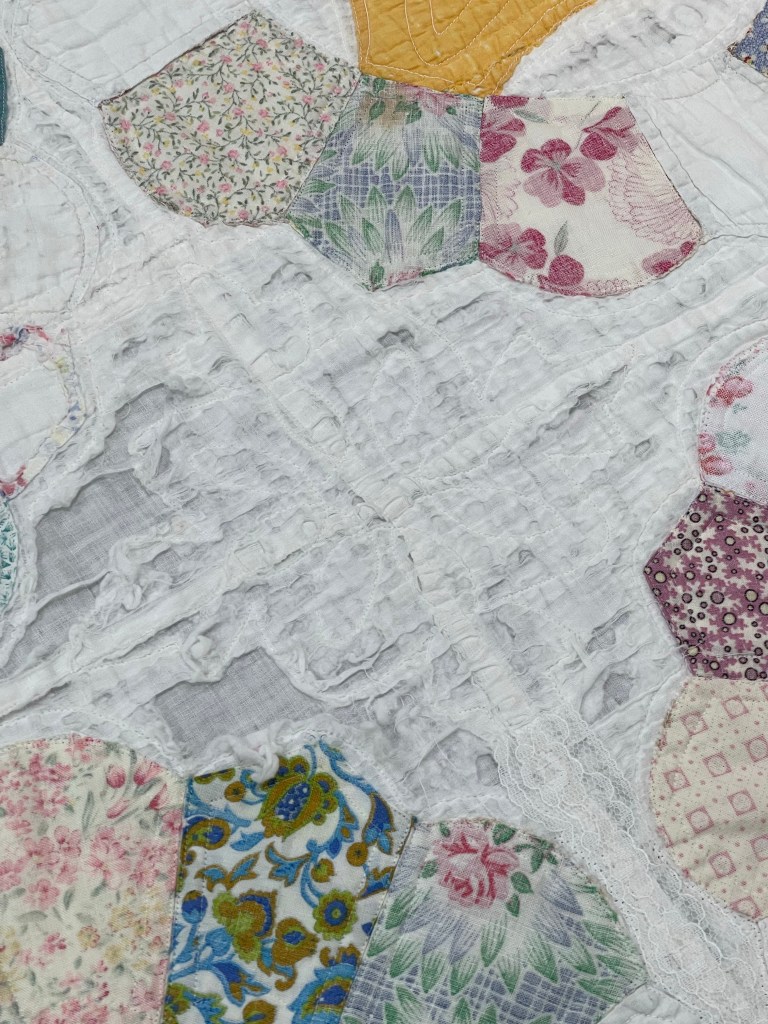
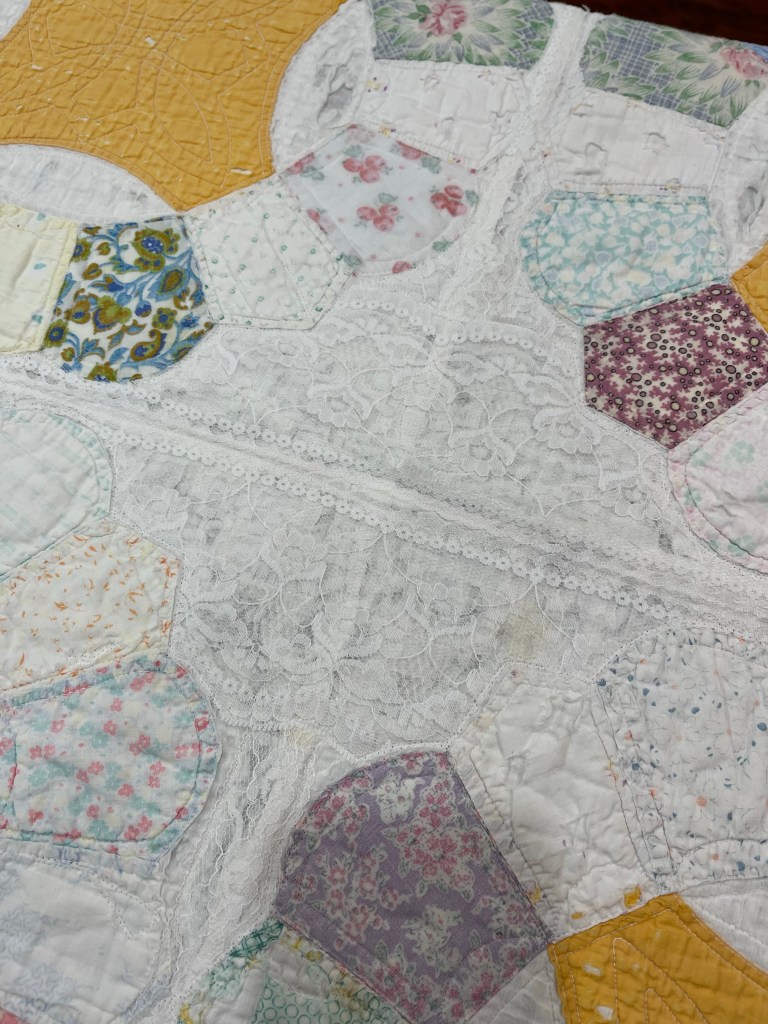
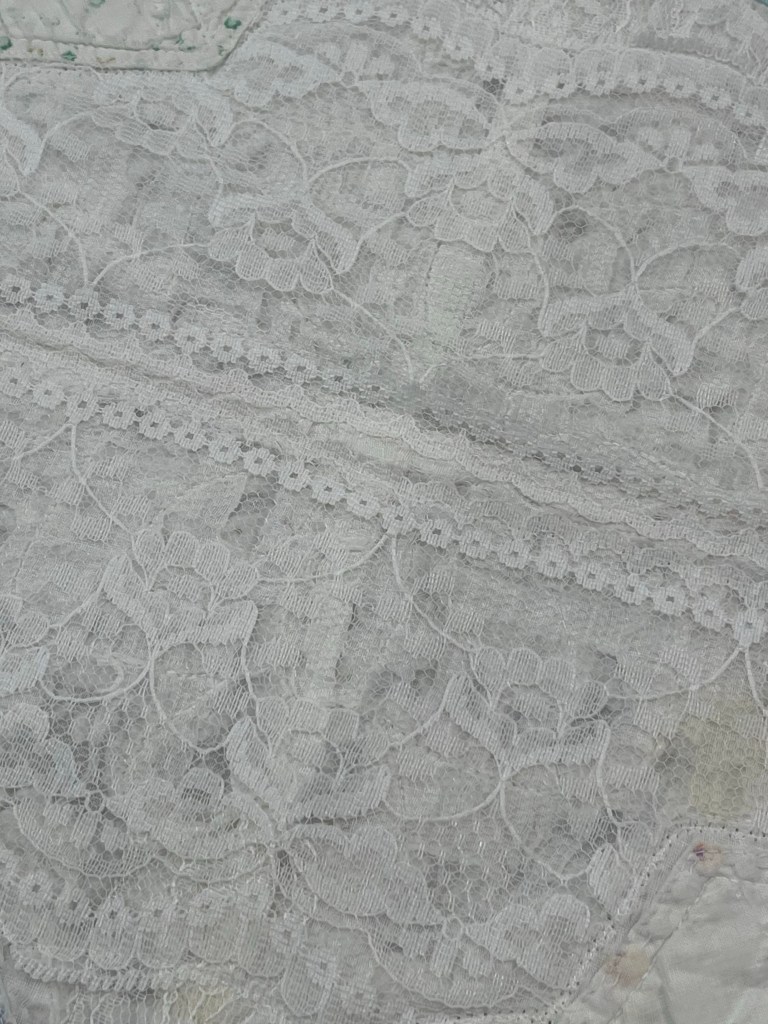
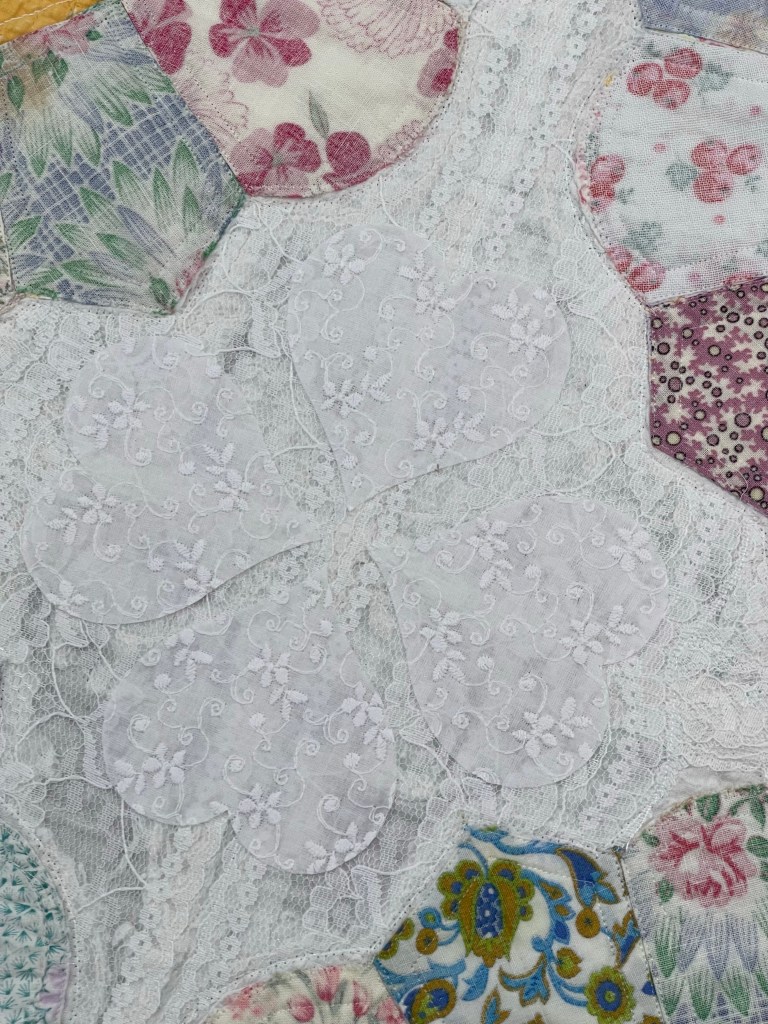
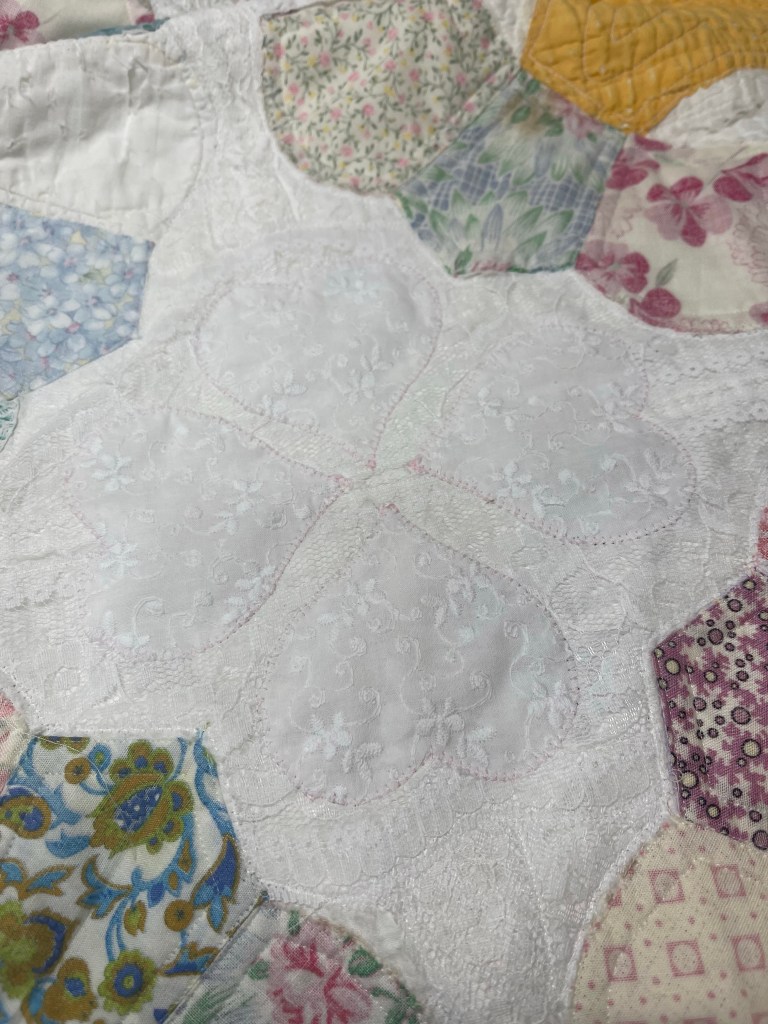
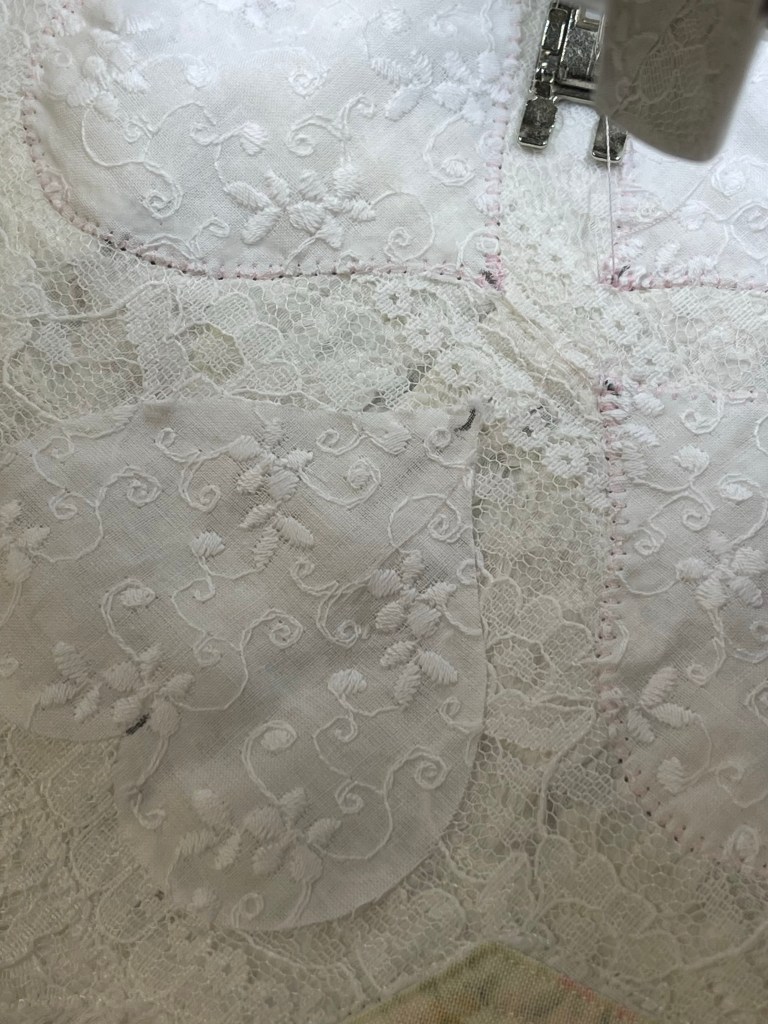
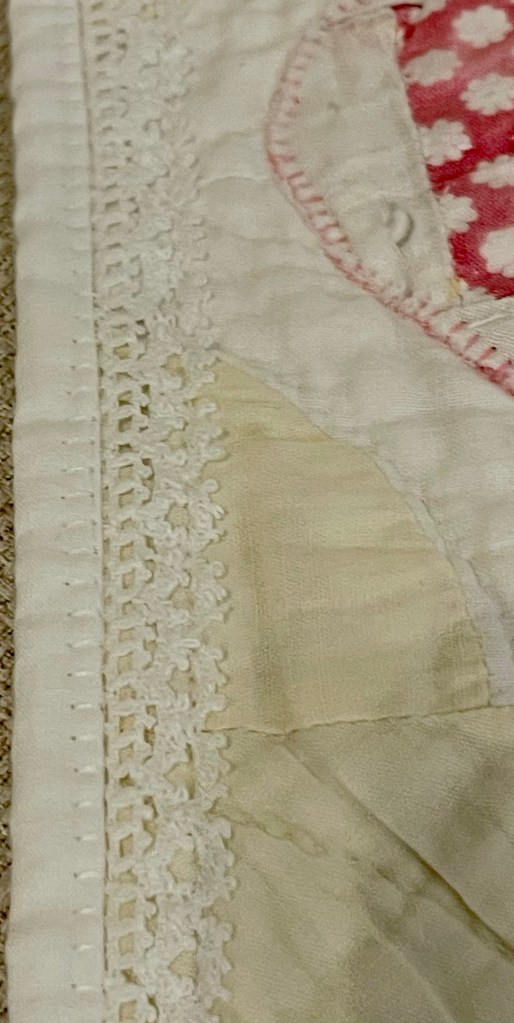
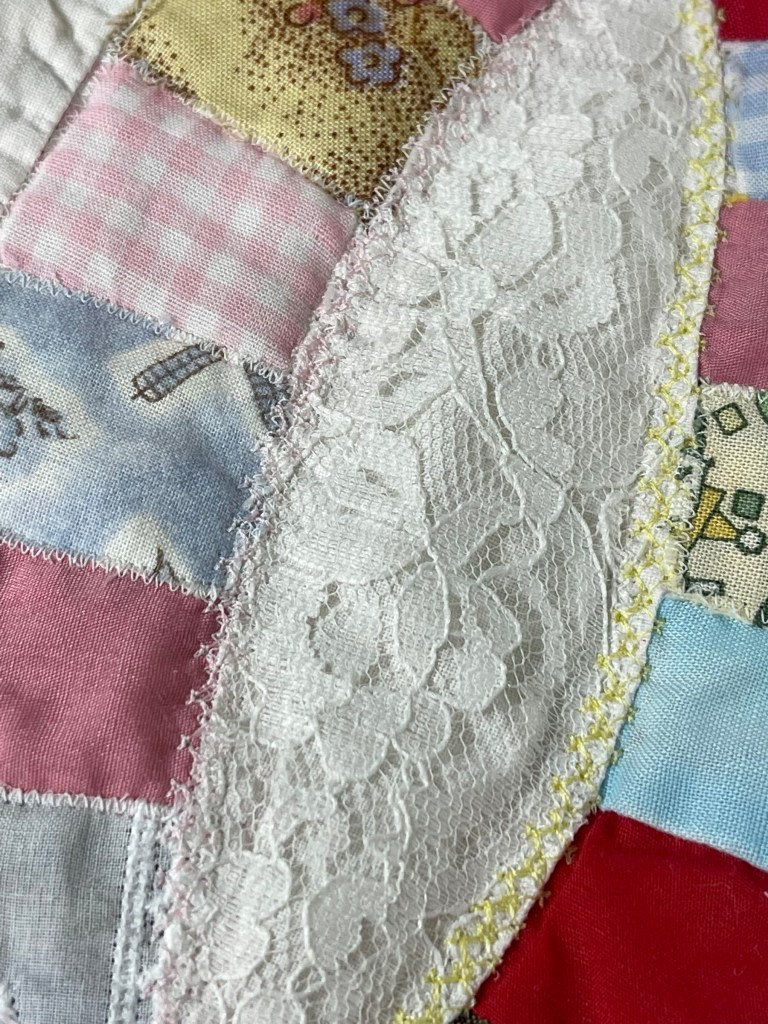
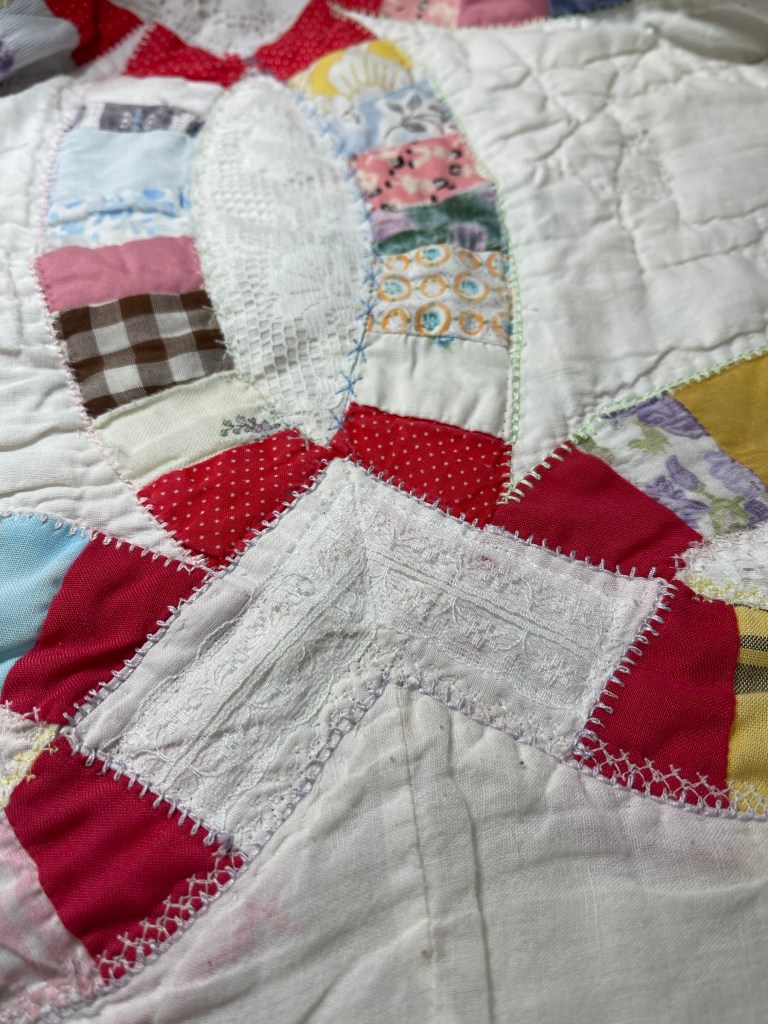
After deciding not to try and replace the batting, I pull out a huge roll of soft white wide lace.
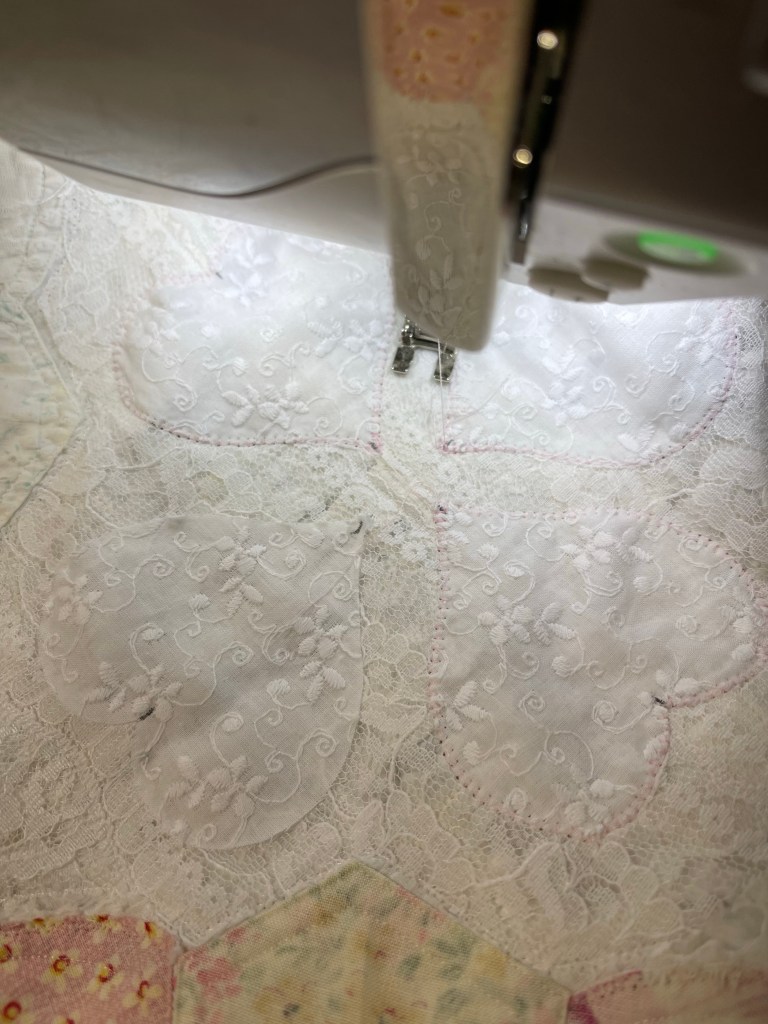
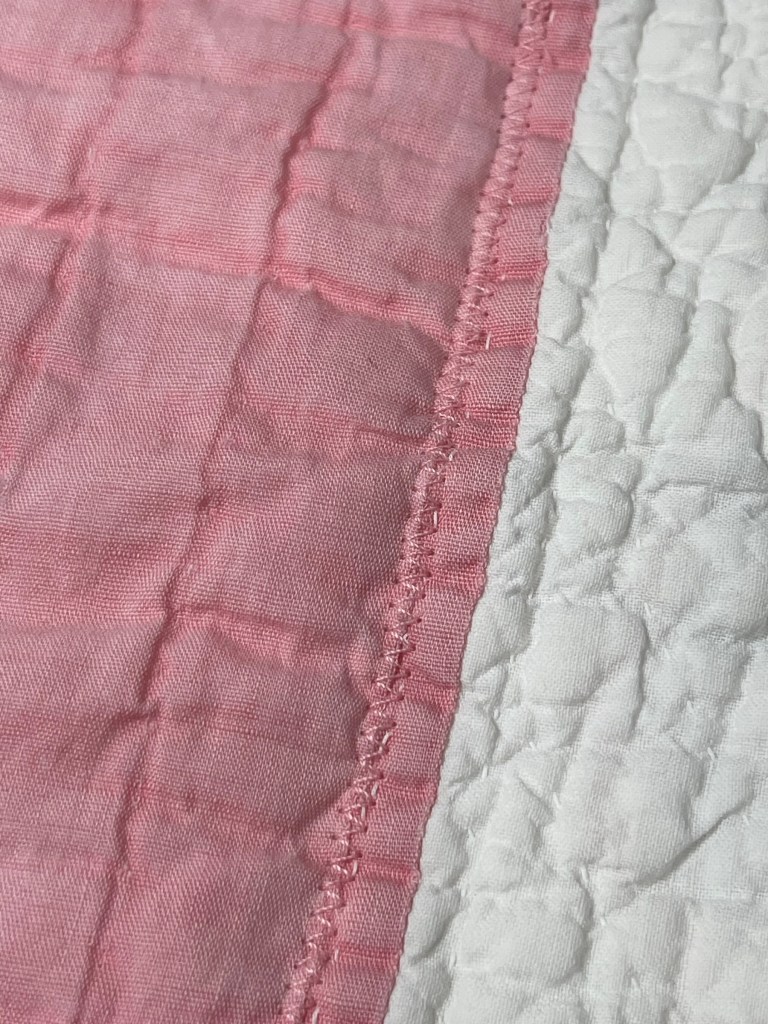
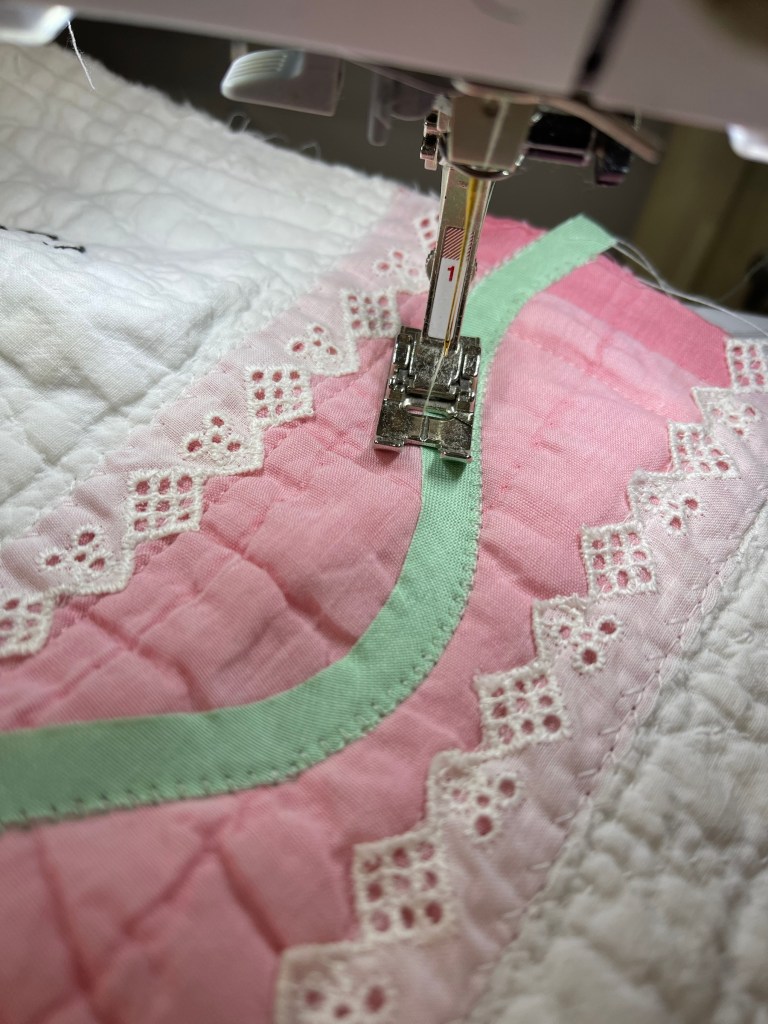
After positioning the lace over the damaged white fabric, using a very small tight zig-zag, I stitch at the outer edges of the pieced circle pieces.
The red line shows you where I stitched down the white lace, the blue line shows where the straight edges of two pieces of lace were slightly overlapped and were also zig-zag stitched.
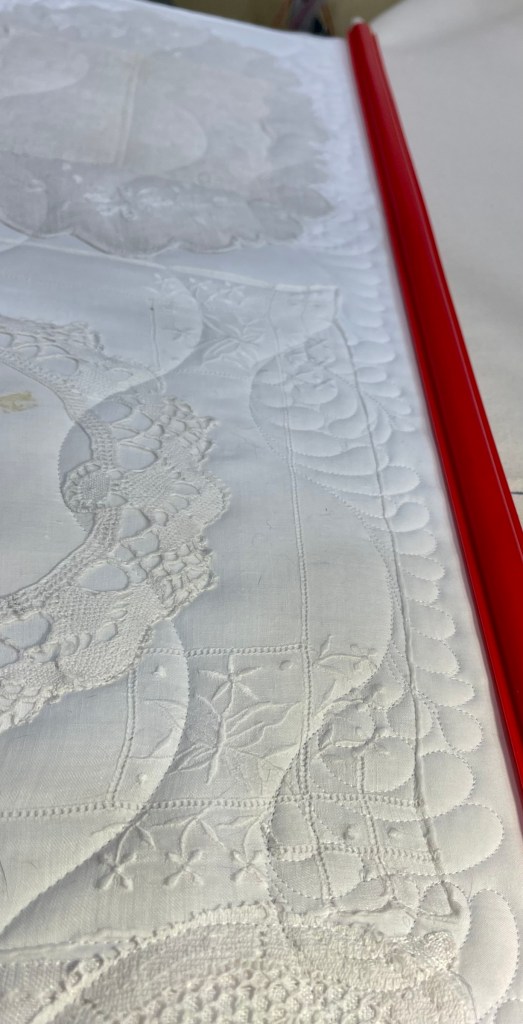
After zig zag stitching, it was easy to trim away the lace that overlapped the block circle pieces.
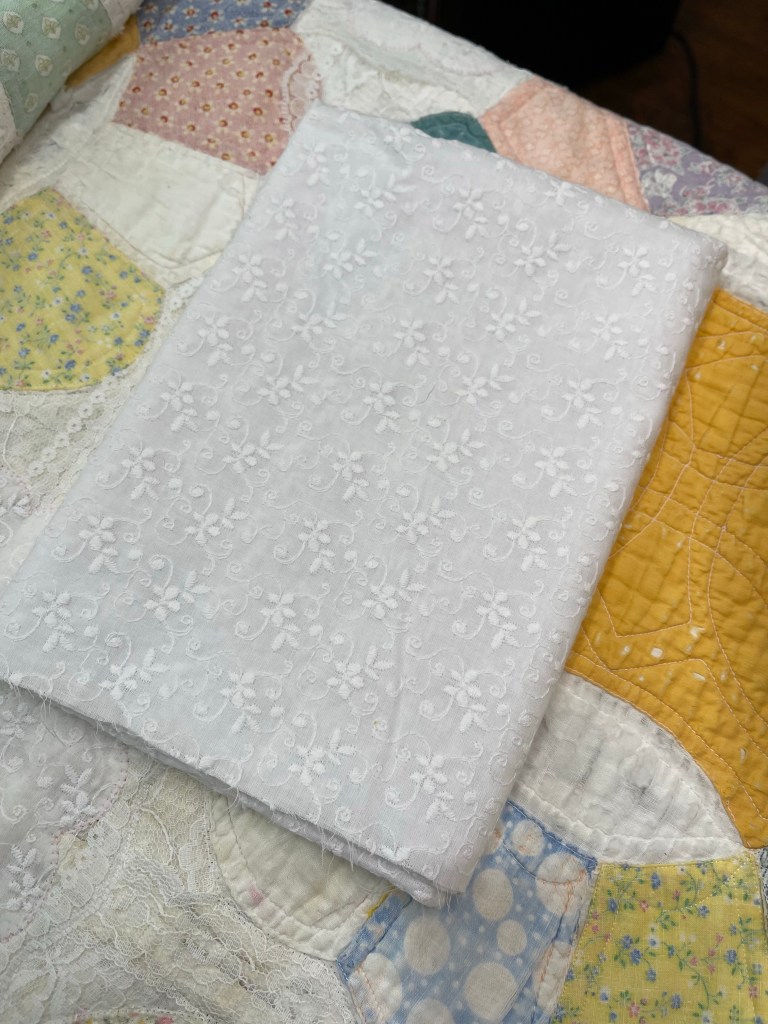
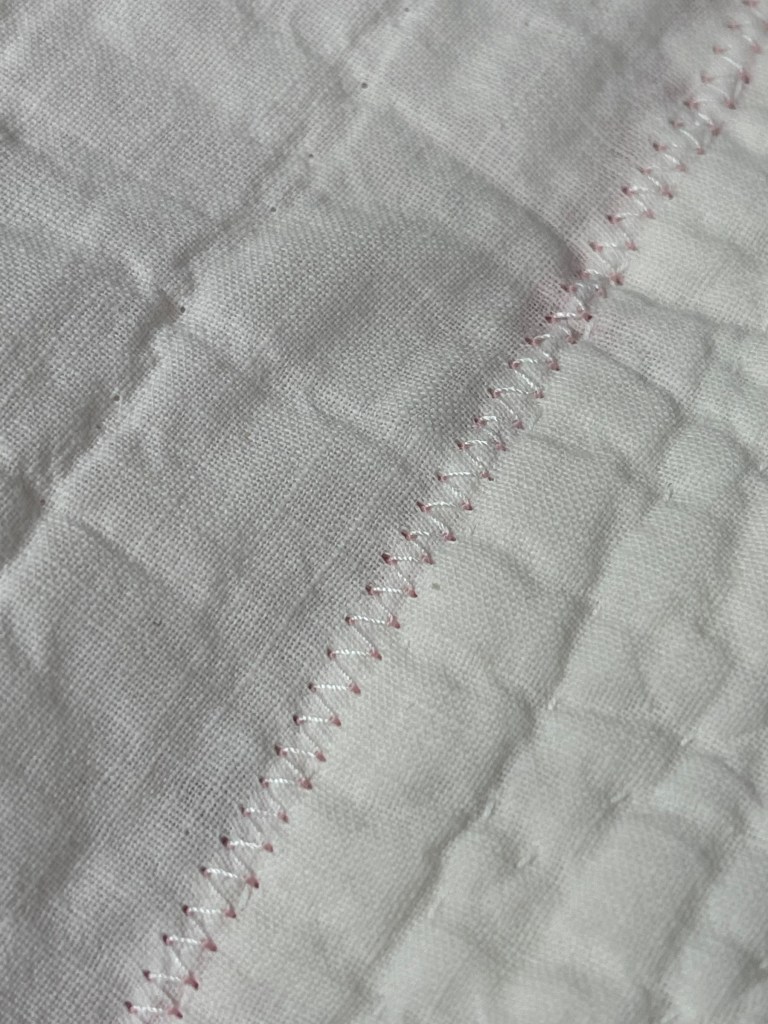
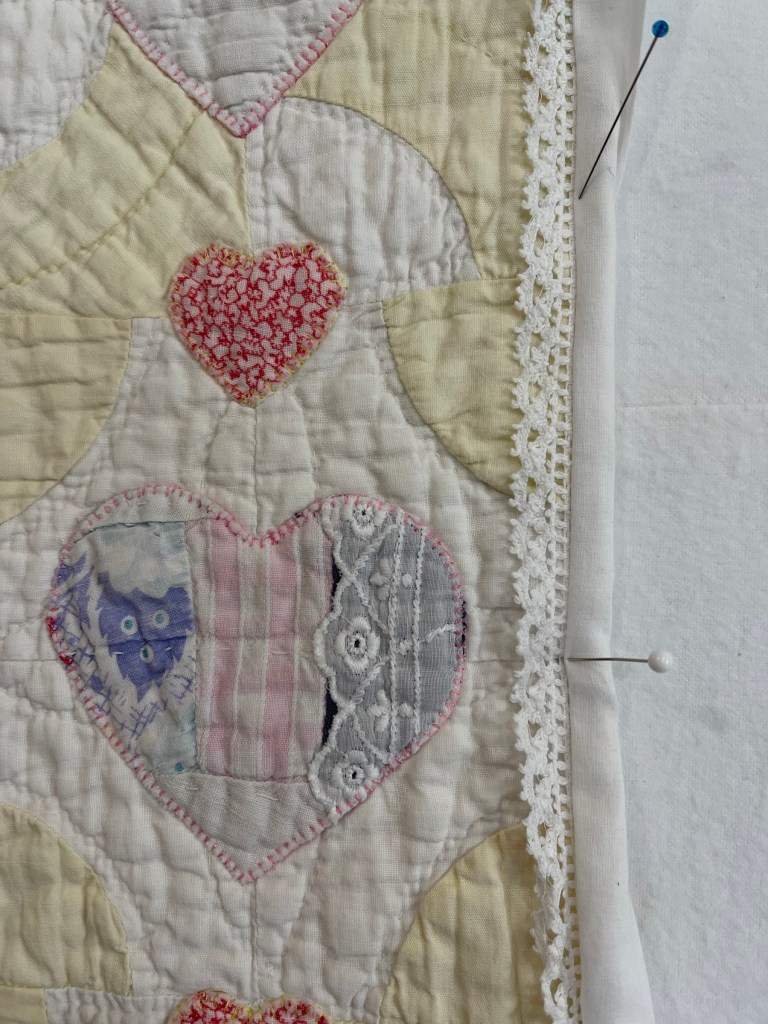
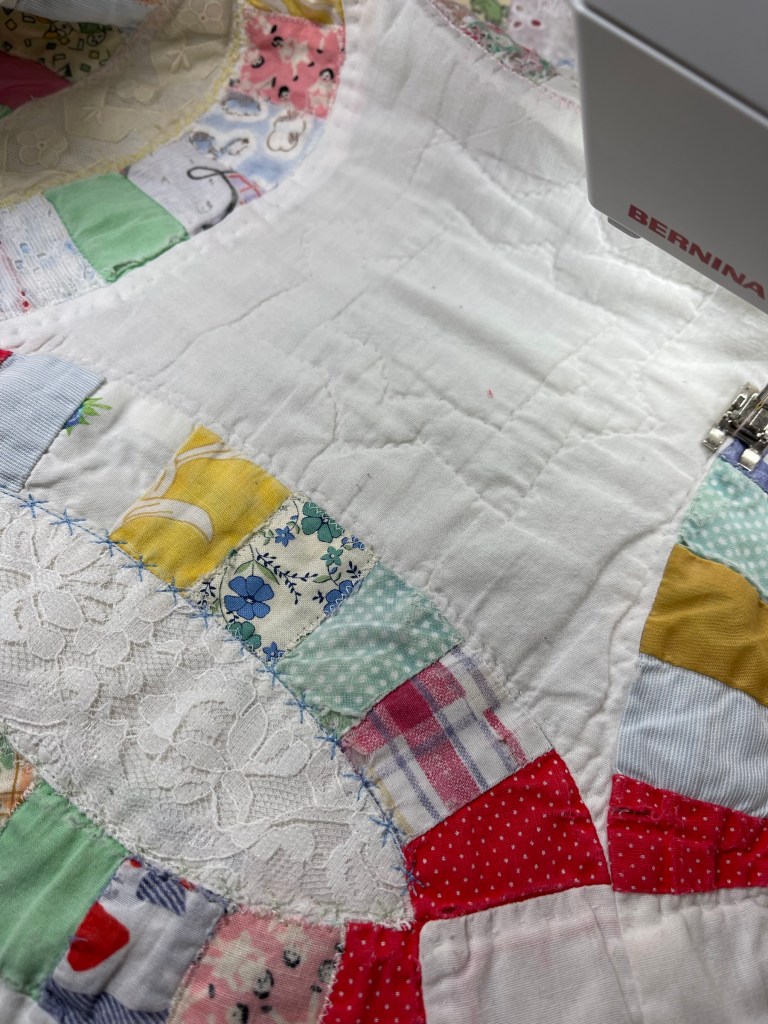
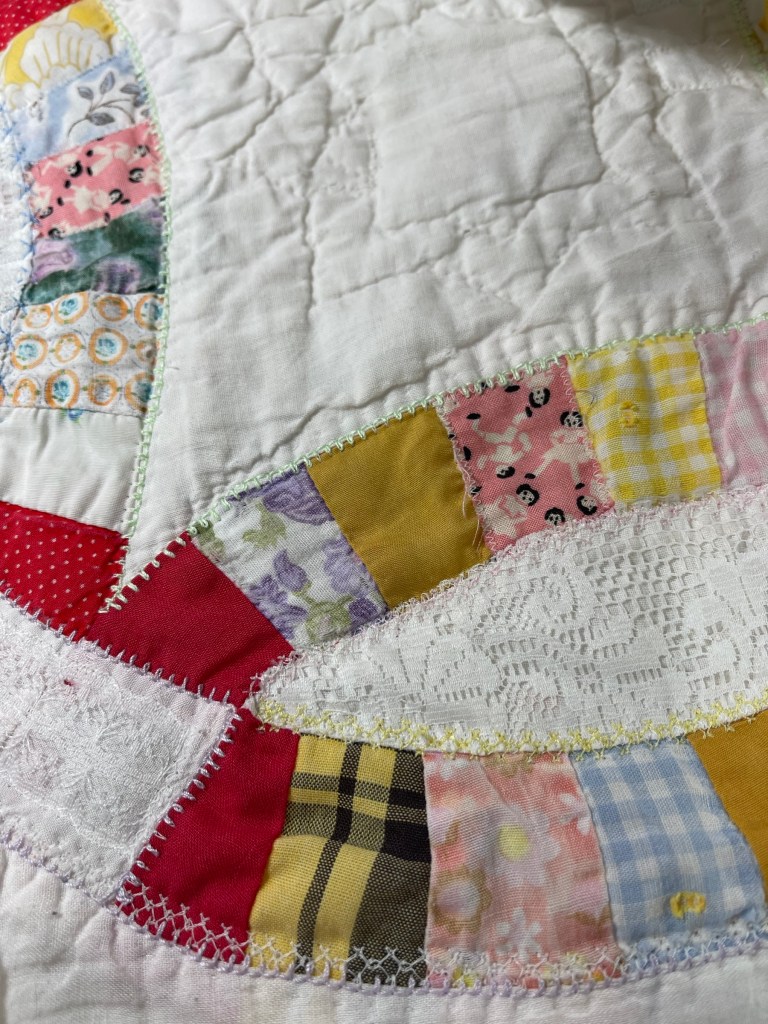
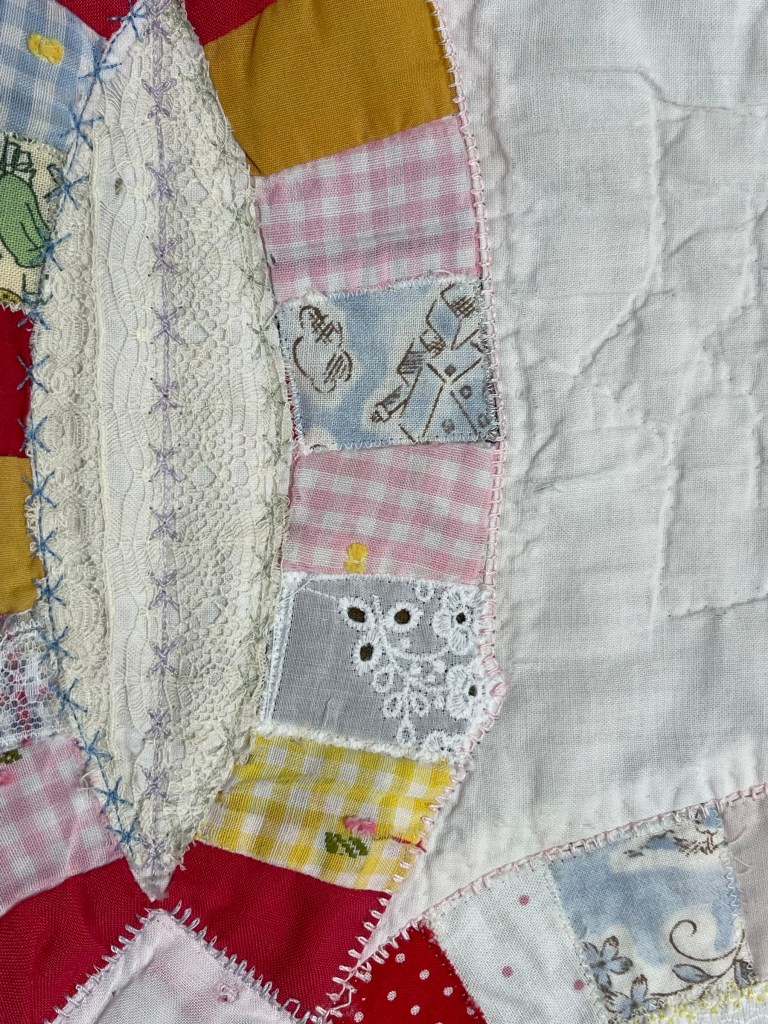
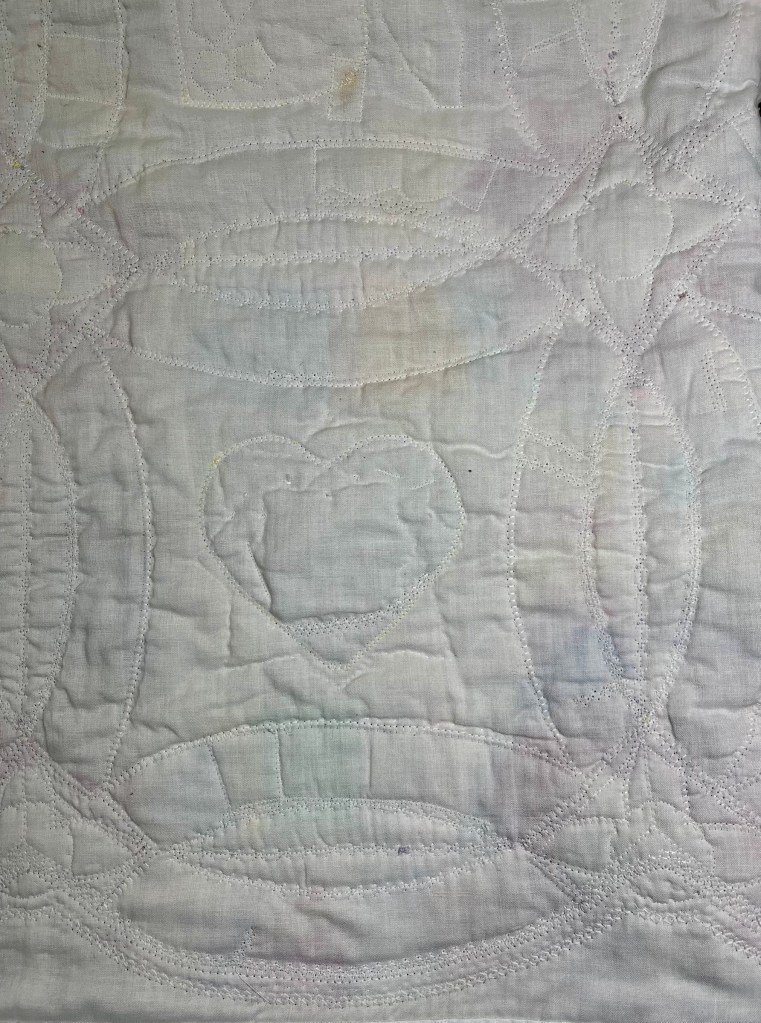
I like the look of the lace but it leaves these white areas looking a little boring so…
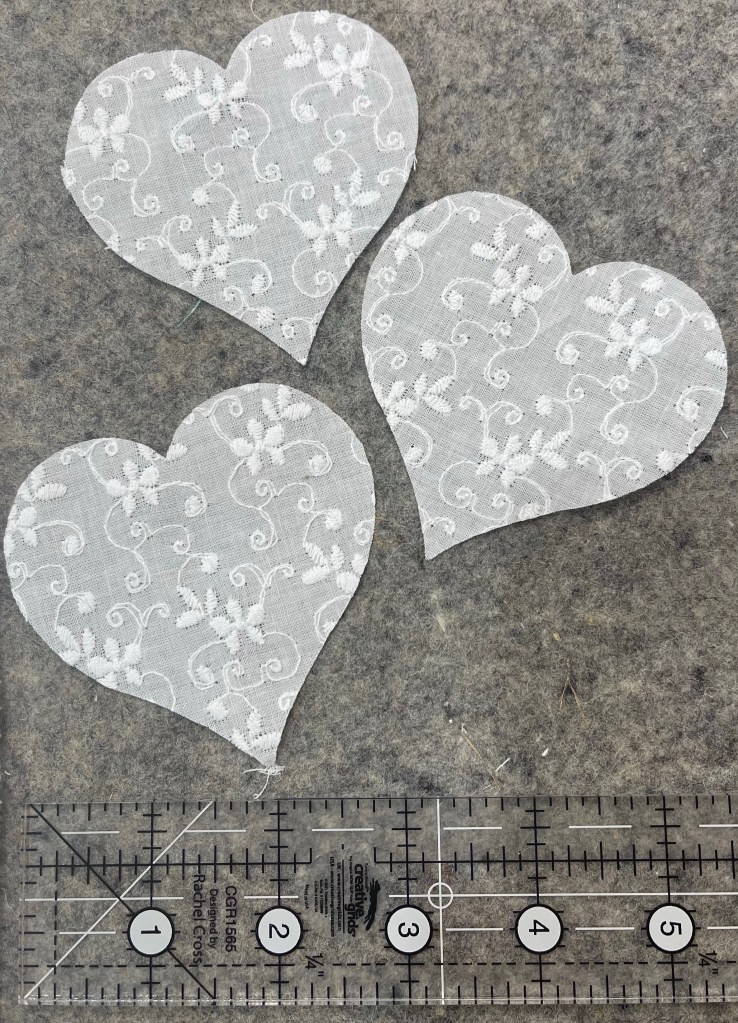
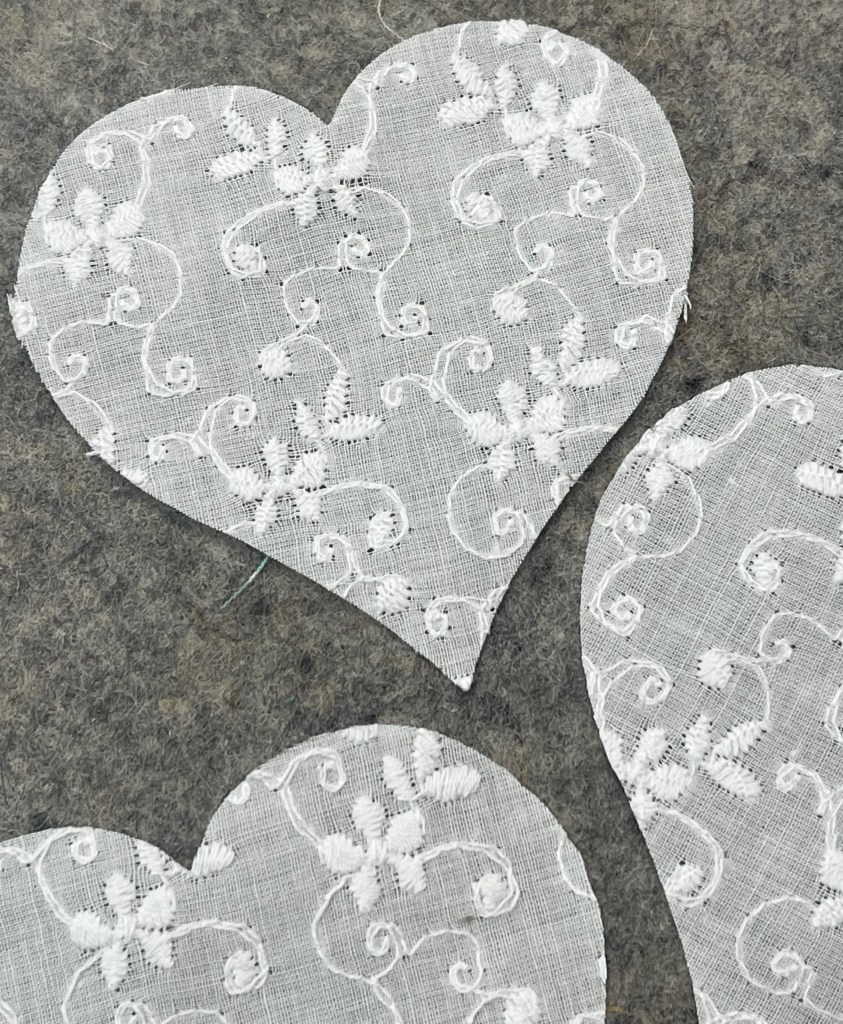
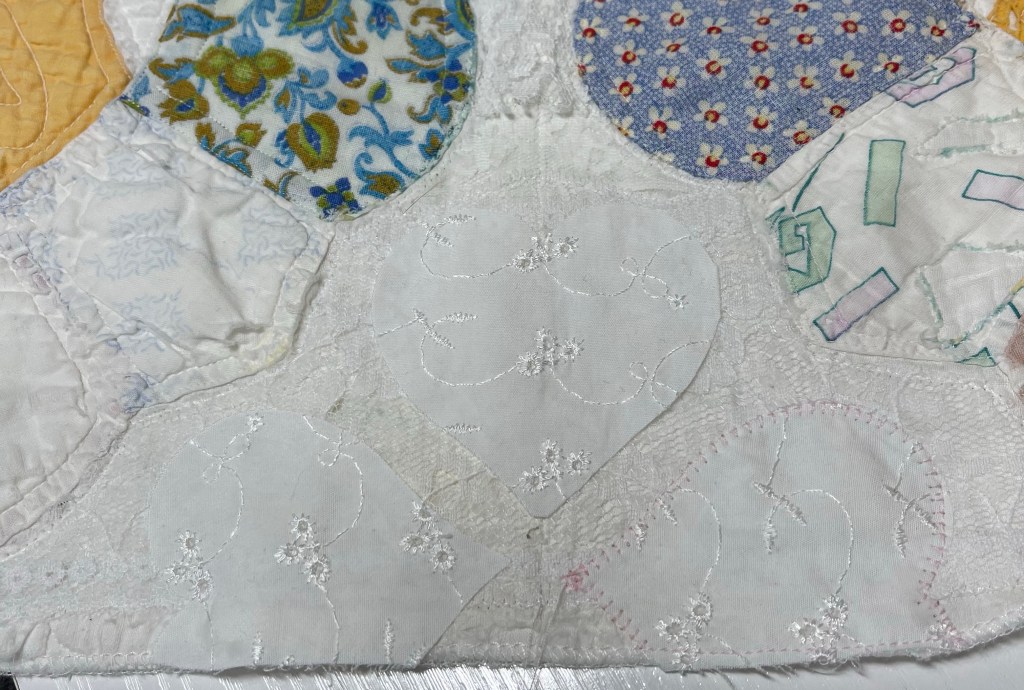
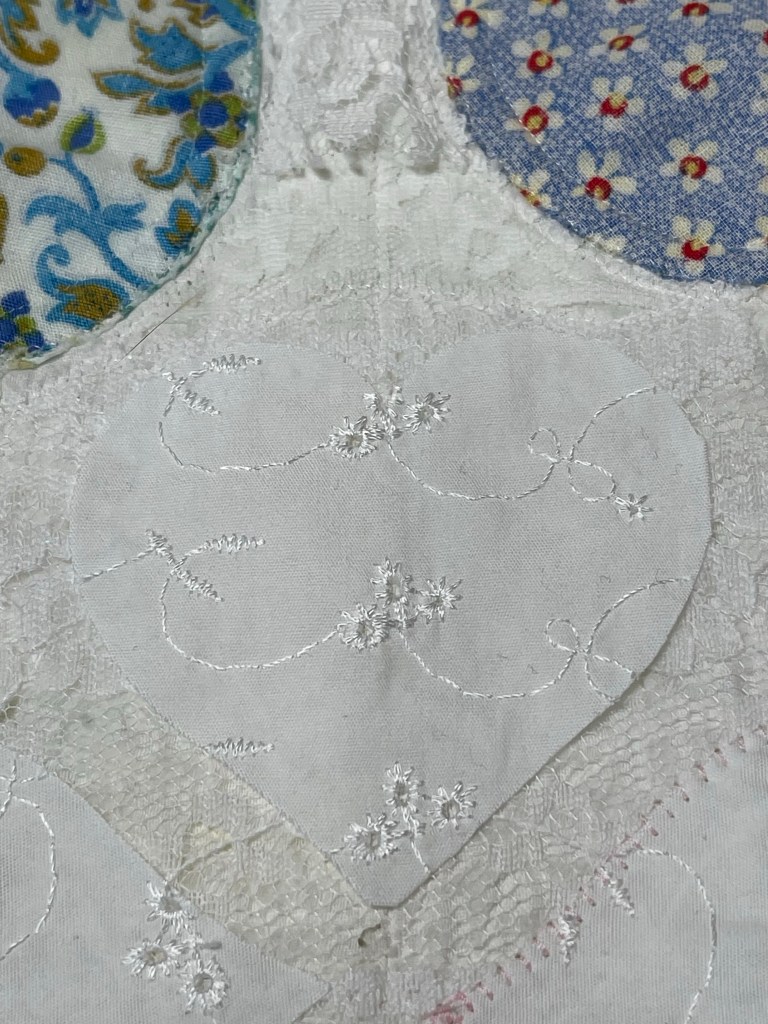
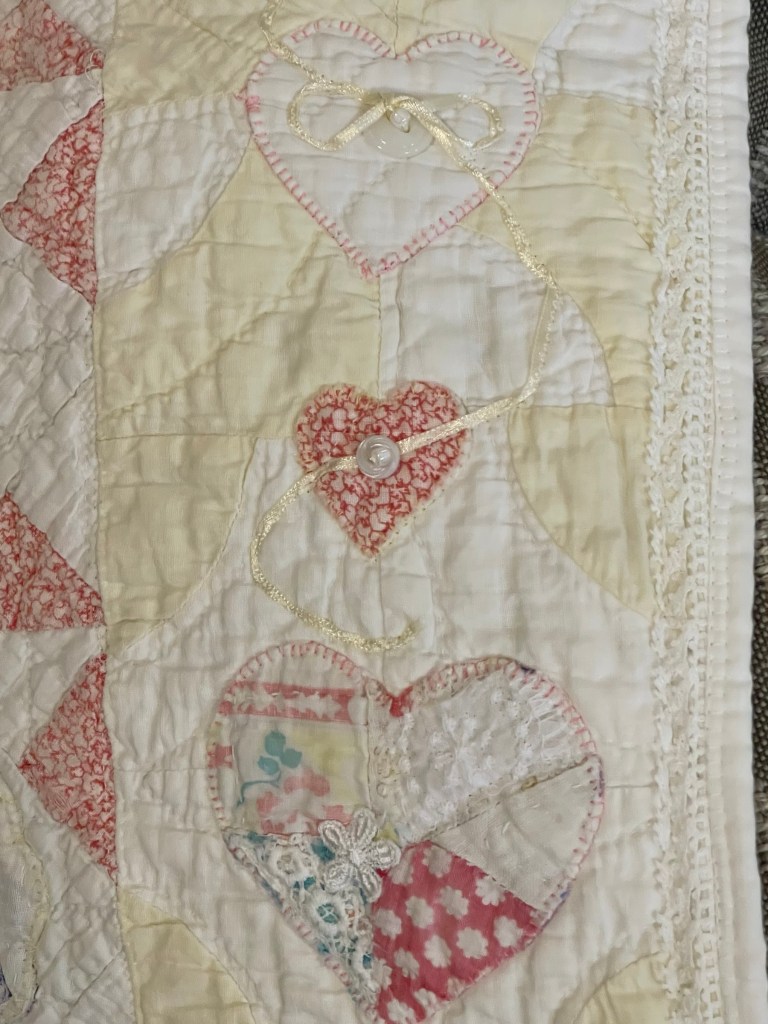
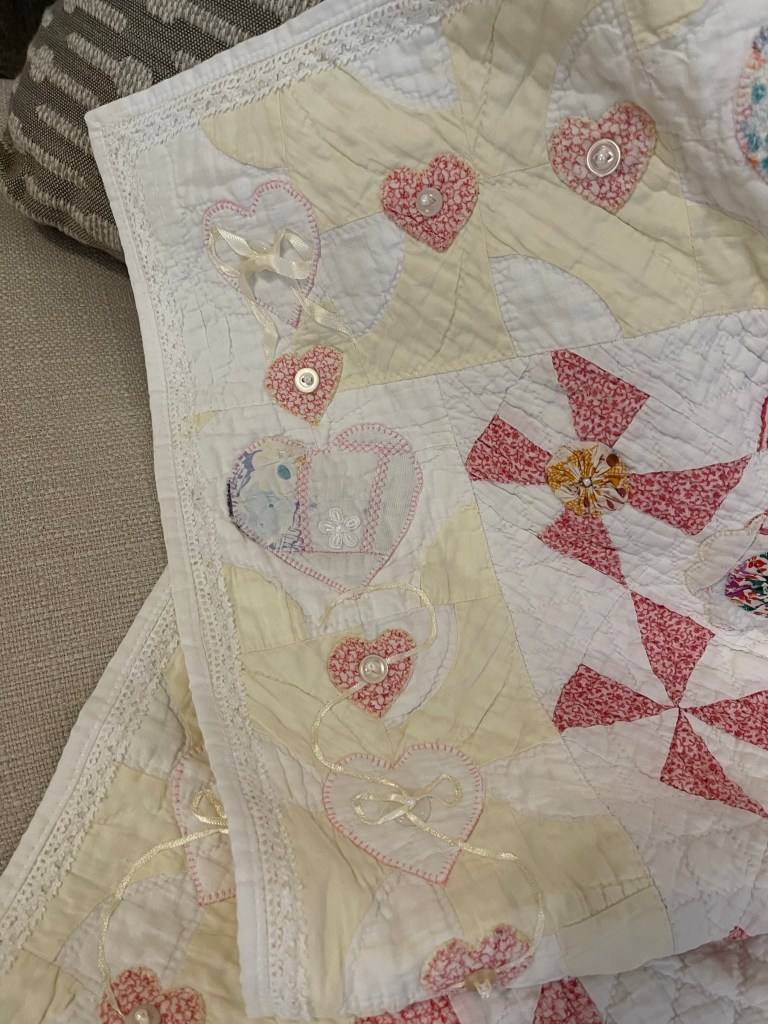
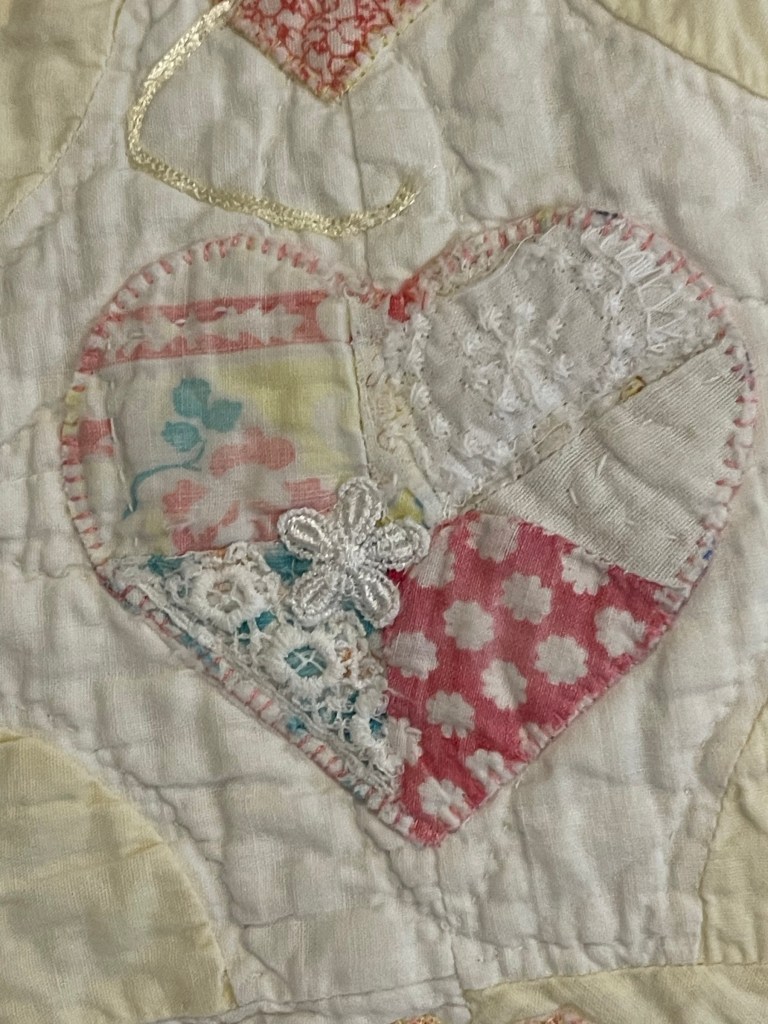
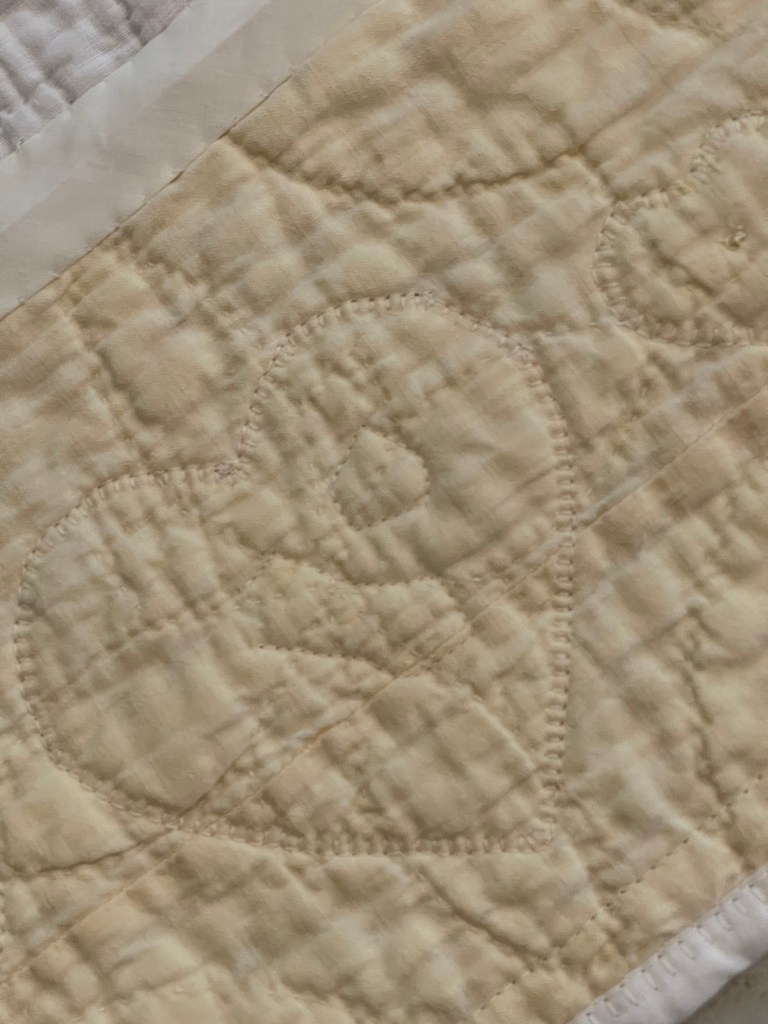
I hunt up this yardage and pull out my Accuquilt cutter and heart shaped die.
I like that these hearts add interest but don’t steal the show.
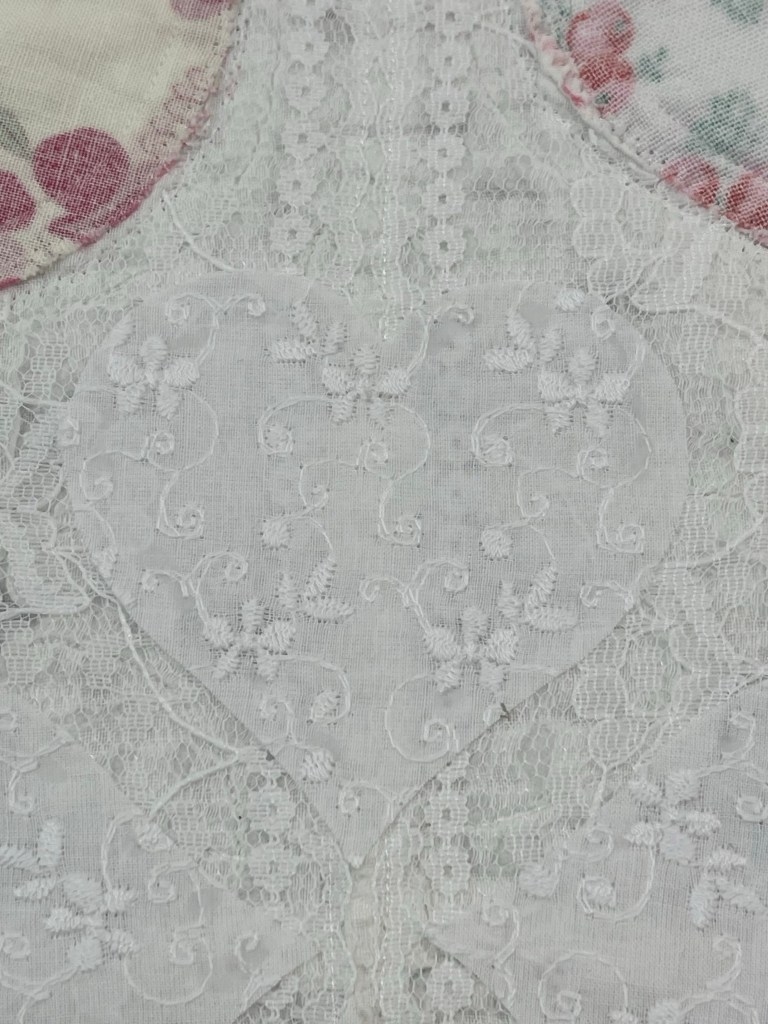
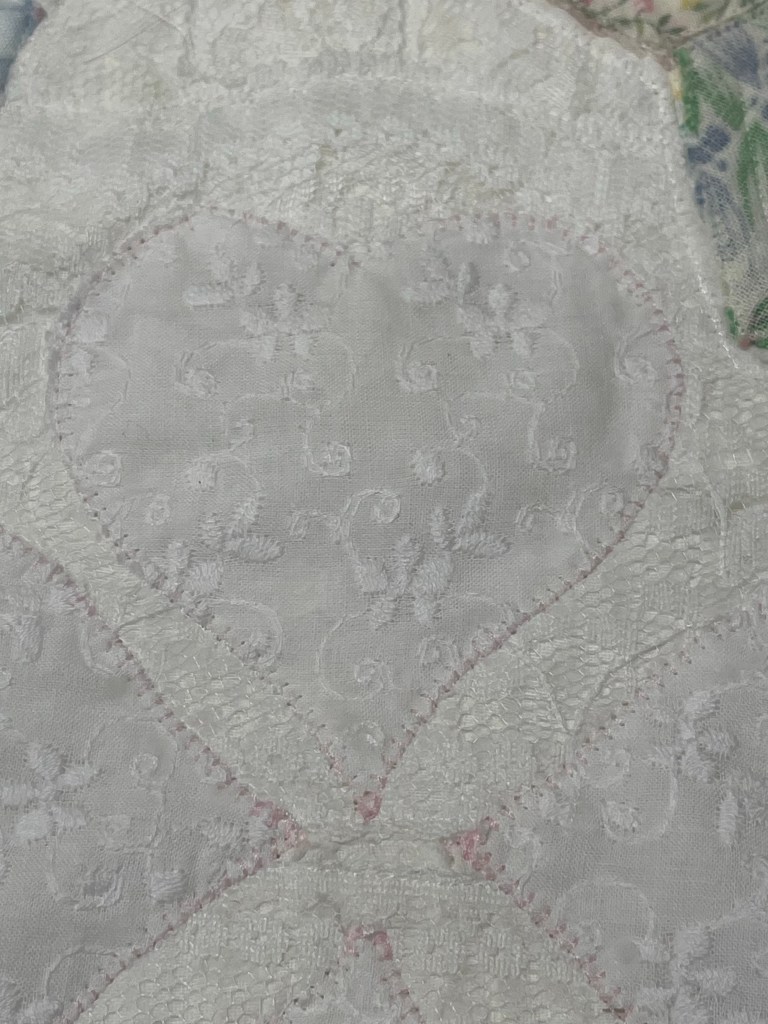
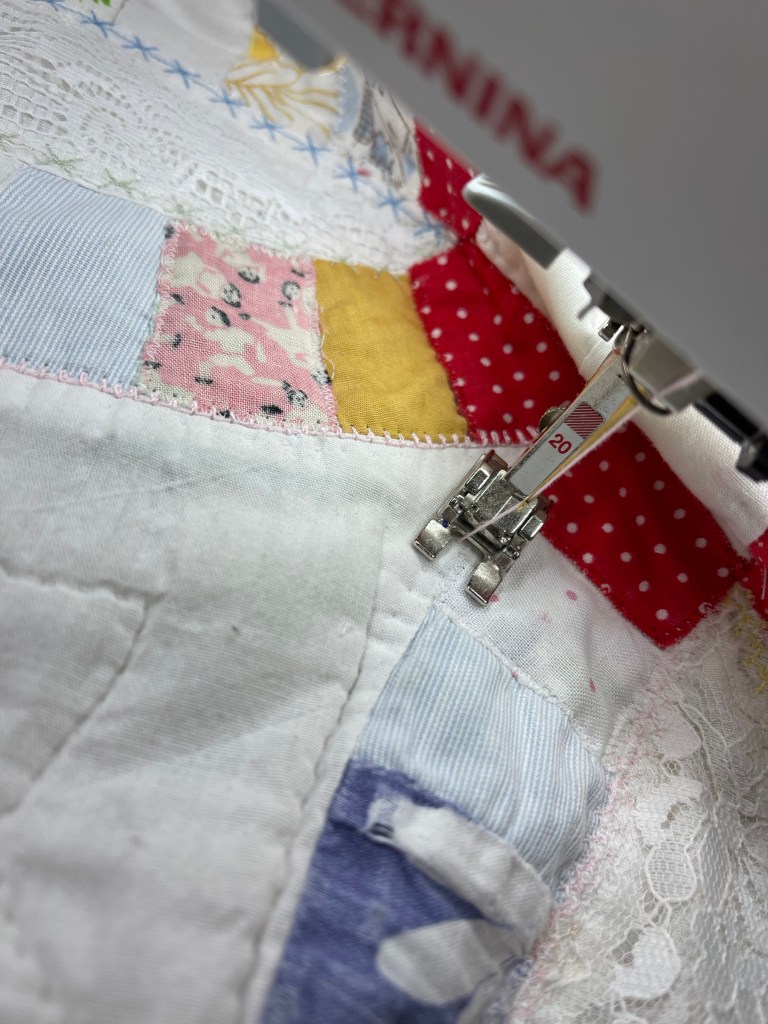
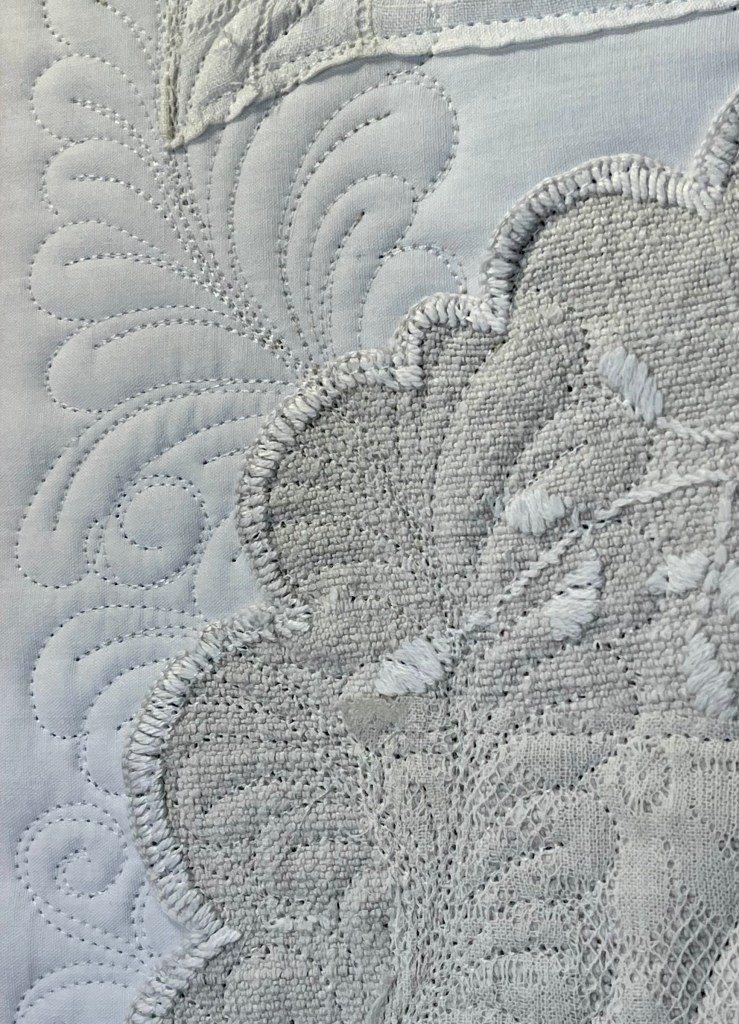
Using a matte finish light pink thread, the hearts are machine applique stitched.
The white on white was at some times hard to follow and it helped to mark both the bottom point and top dip of each heart before stitching.
My marks were made with a Frixion pen, easily made invisible with a quilt touch of my iron.
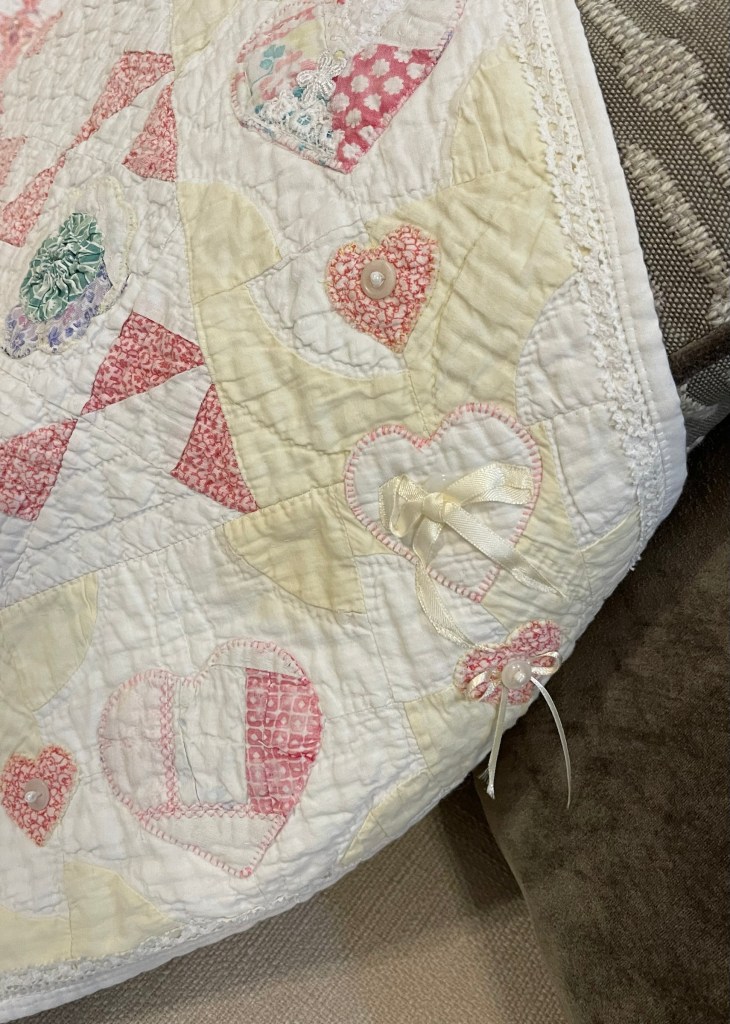
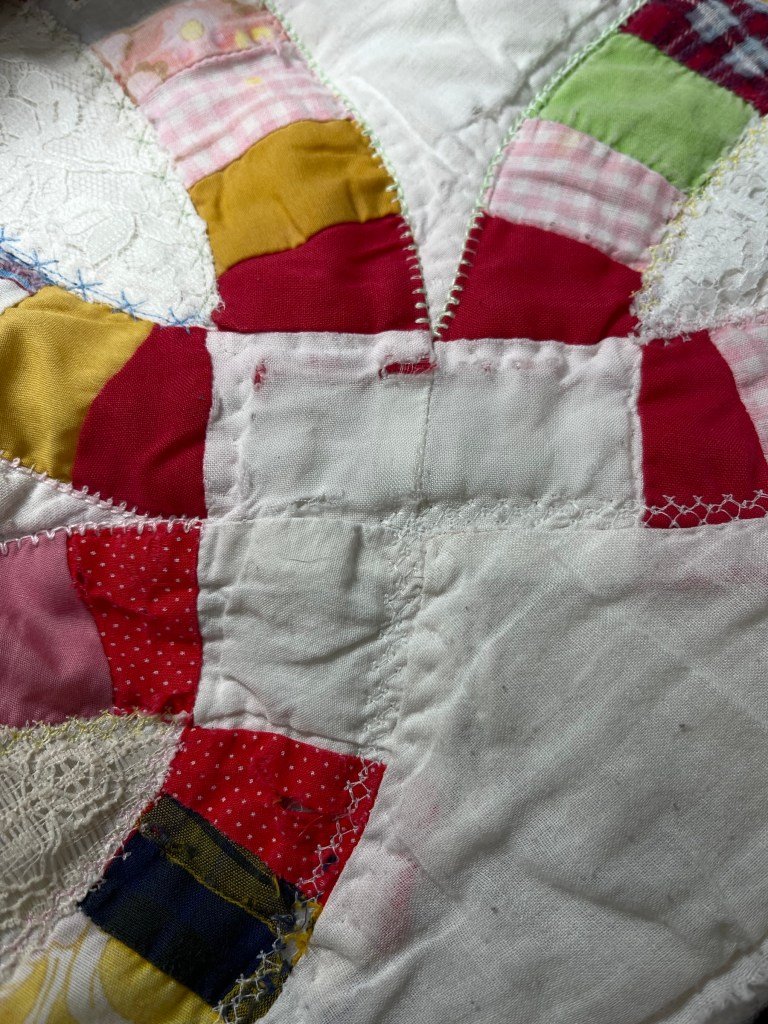
Just to add a bit of interest, I chose a different heart fabric for the outer white areas of the quilt.
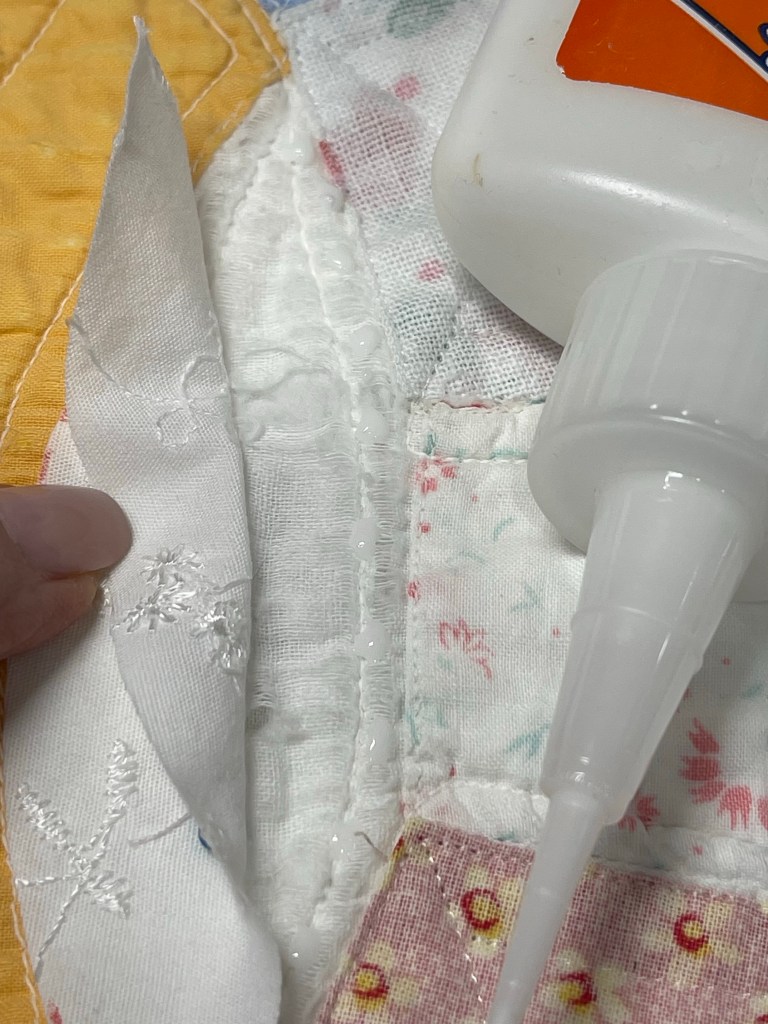
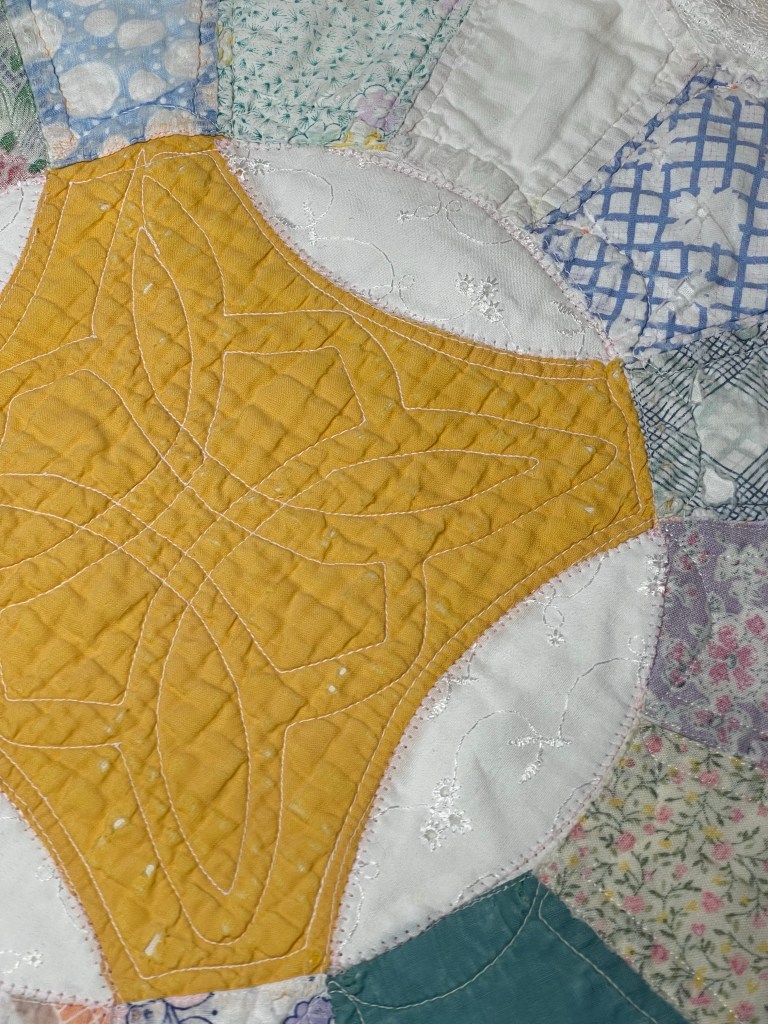
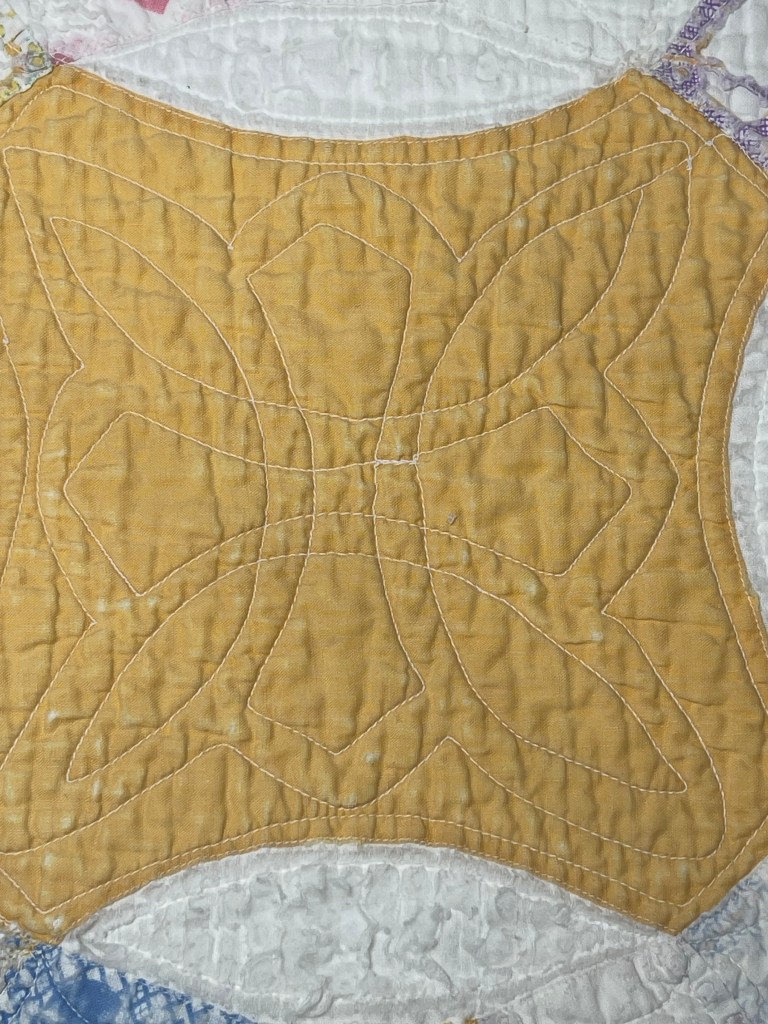
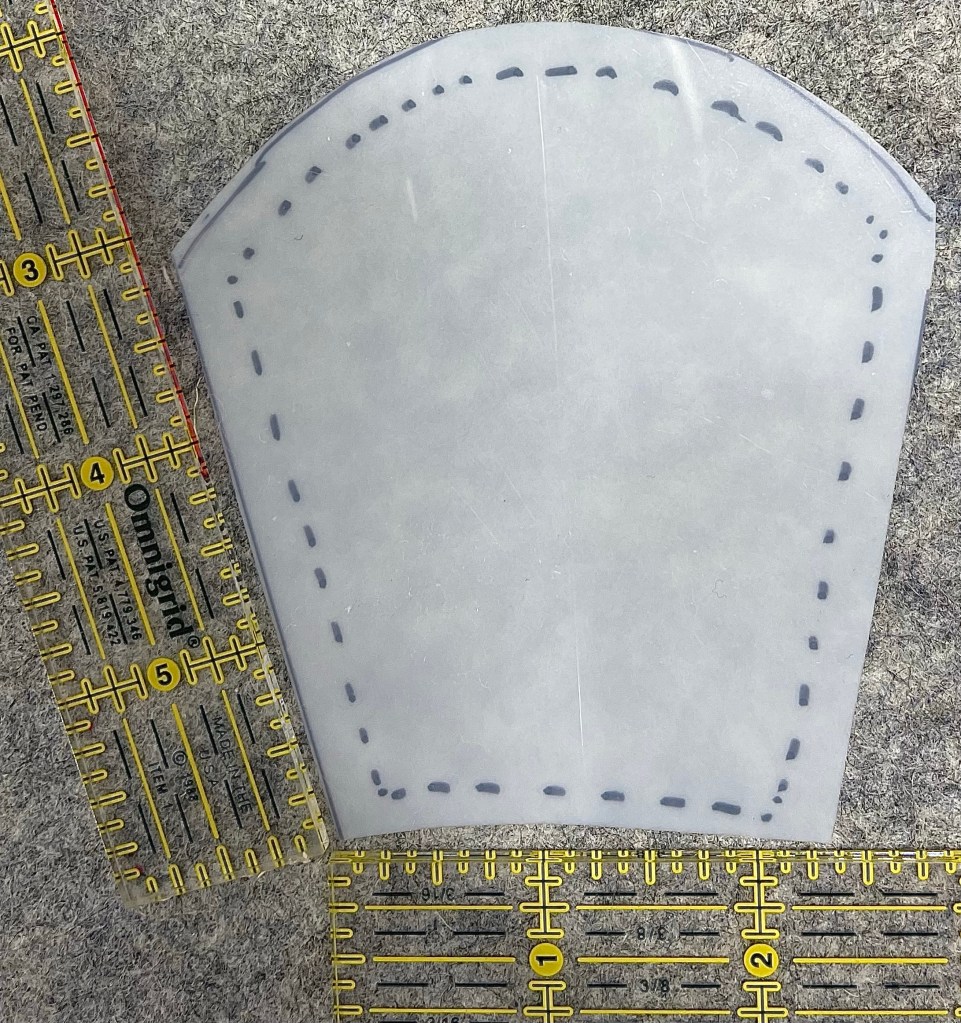
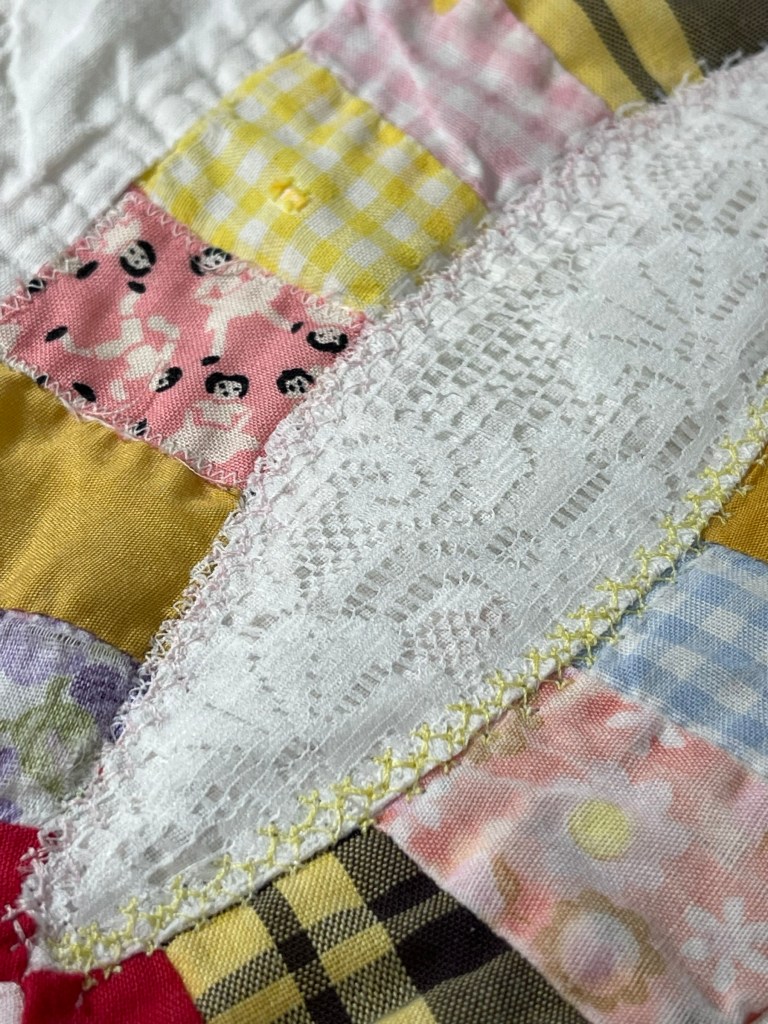
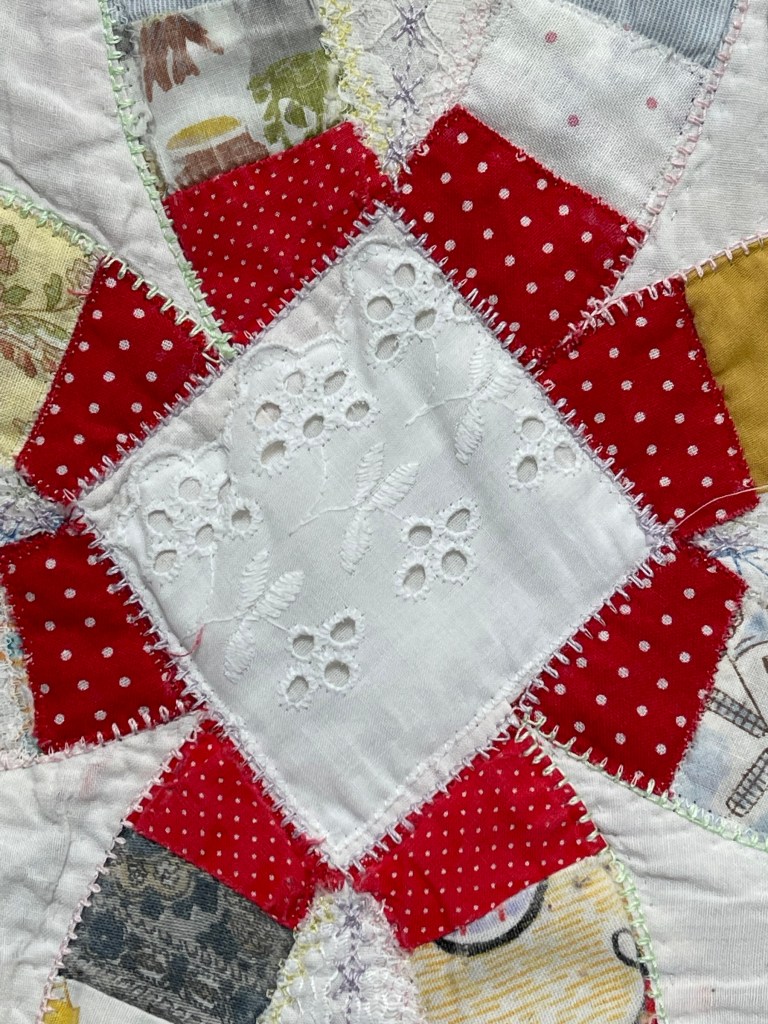
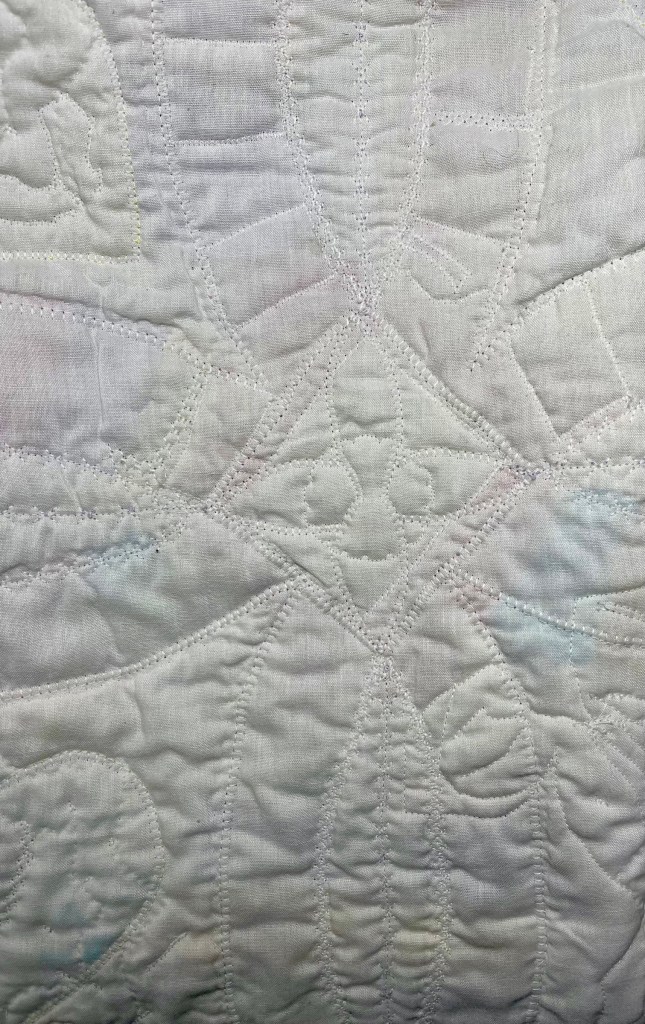
And then it was time to address the inner melon shaped pieces of the blocks. Just like I showed you in the previous blog post, I made a template for this melon piece. The eyelet fabric worked nicely.
Elmer’s Washable School Glue once again makes this quilt rescue easier. Once I’ve completely finished this rescue I will send the quilt through the washer and dryer and the glue will be history.
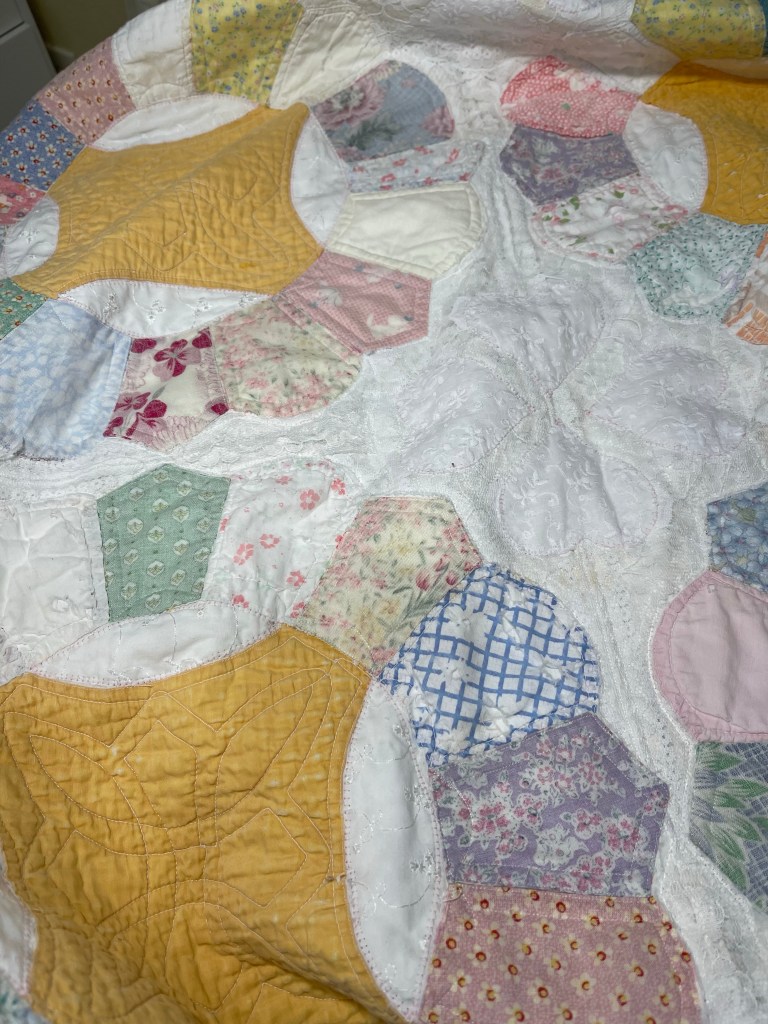
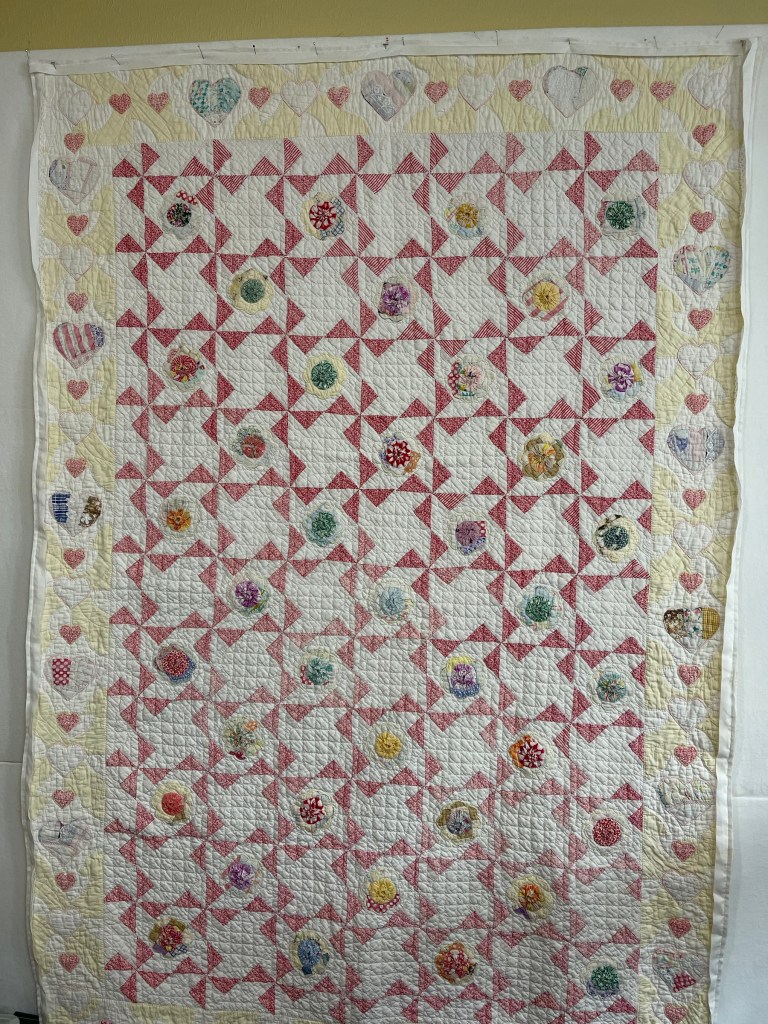
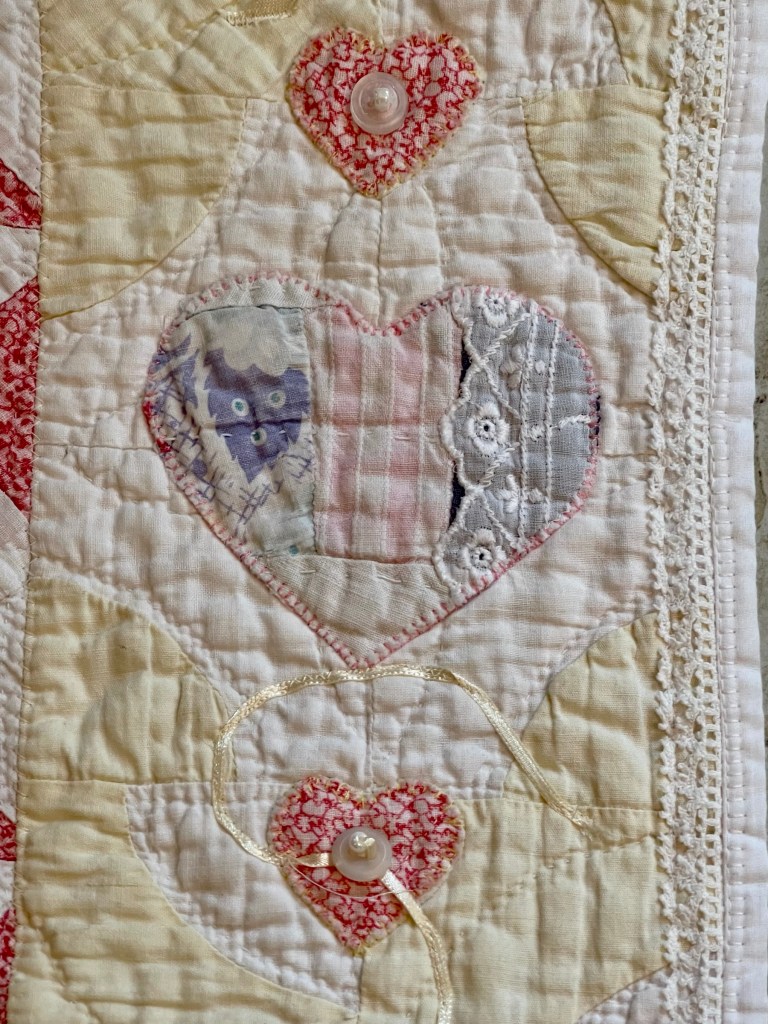
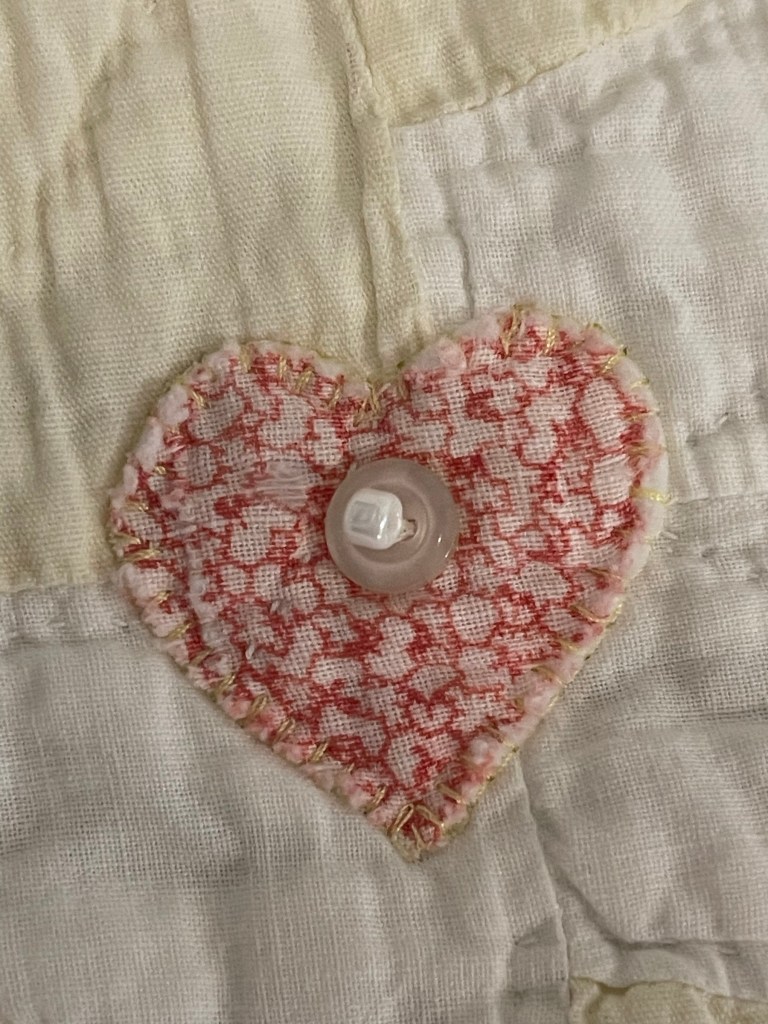
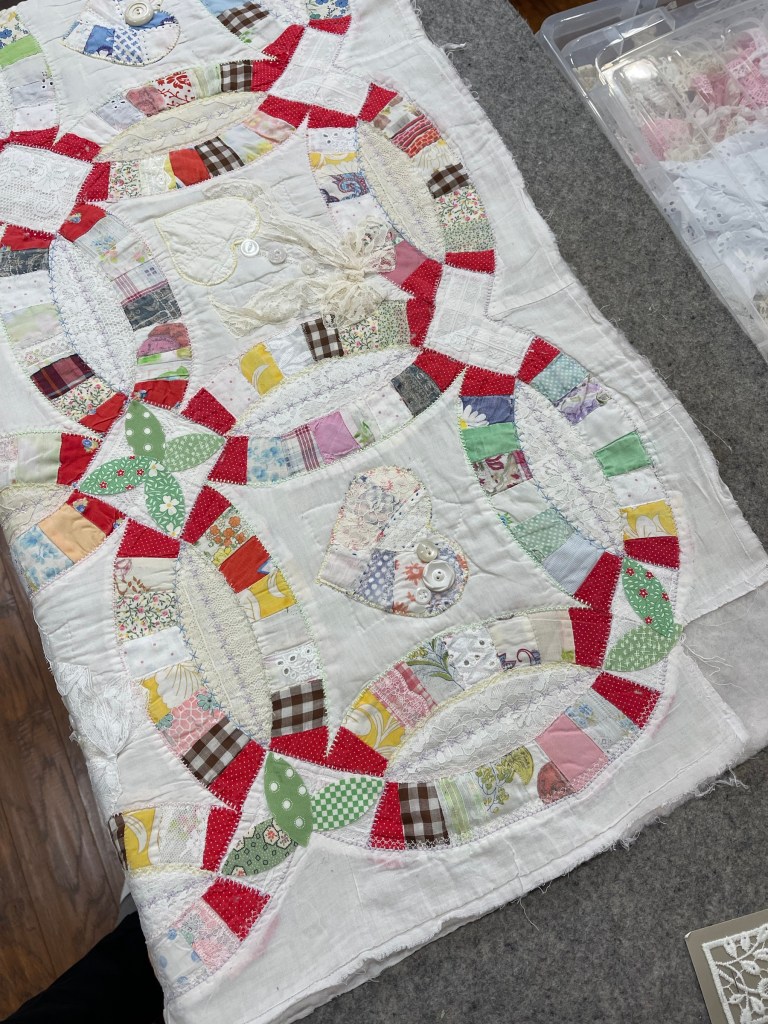
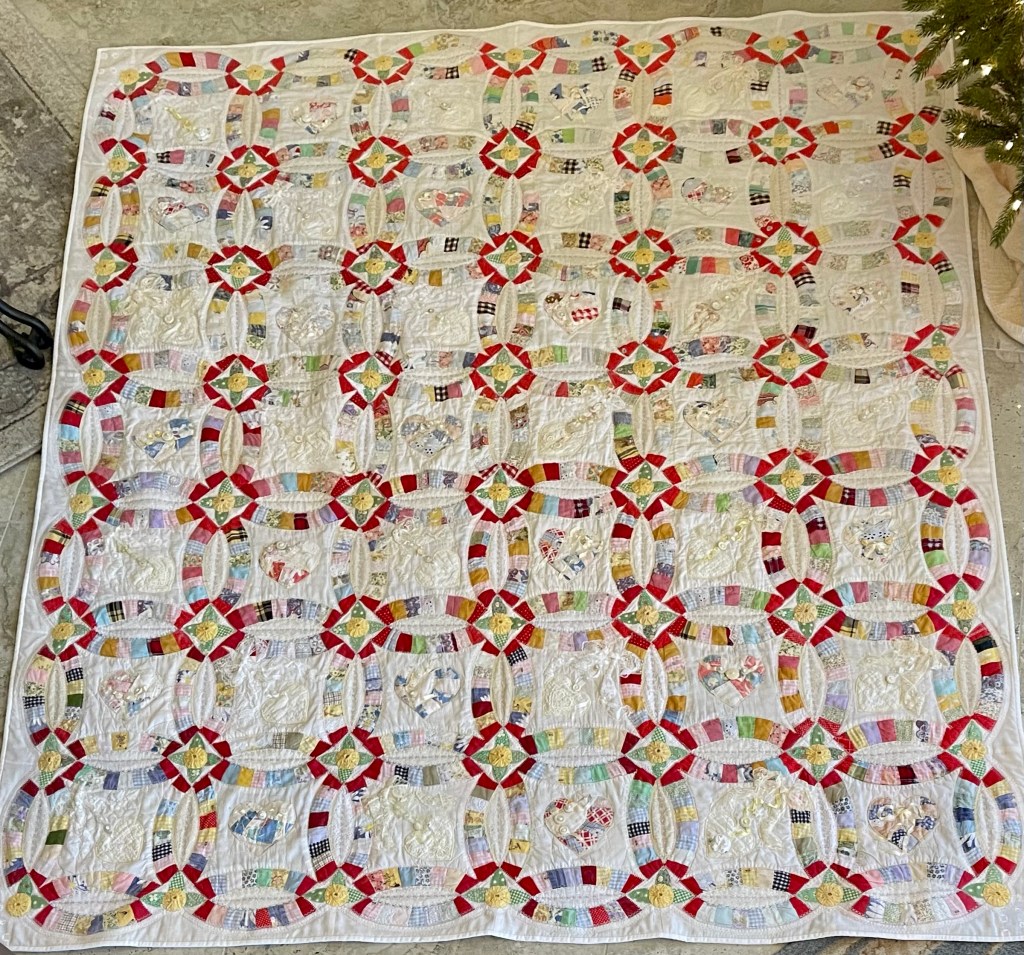
With the repairs completed, it’s time to add all the embellishments, bits and pieces of laces, trims, maybe some machine decorative stitching, ribbons, buttons and such.
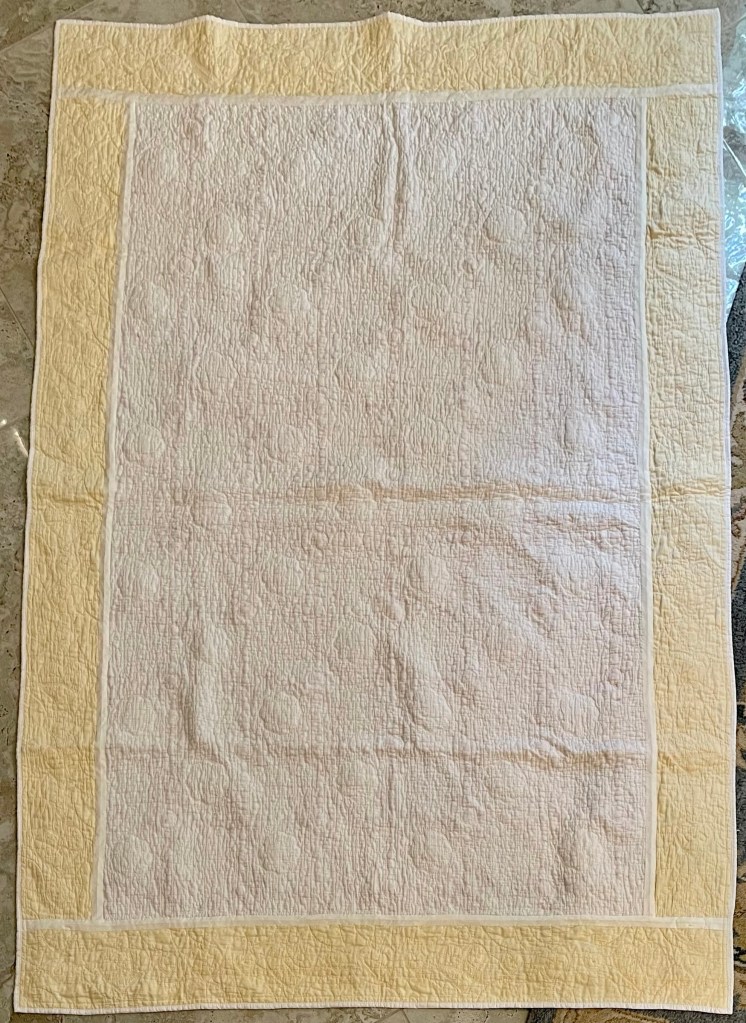
I am loving the transformation of this old well loved, worn, torn and cut in two quilt! Remember how my project began? Here’s a pic:
Stay tuned for update #4!
Merry Christmas, Happy New Year and blessings, Rhonda
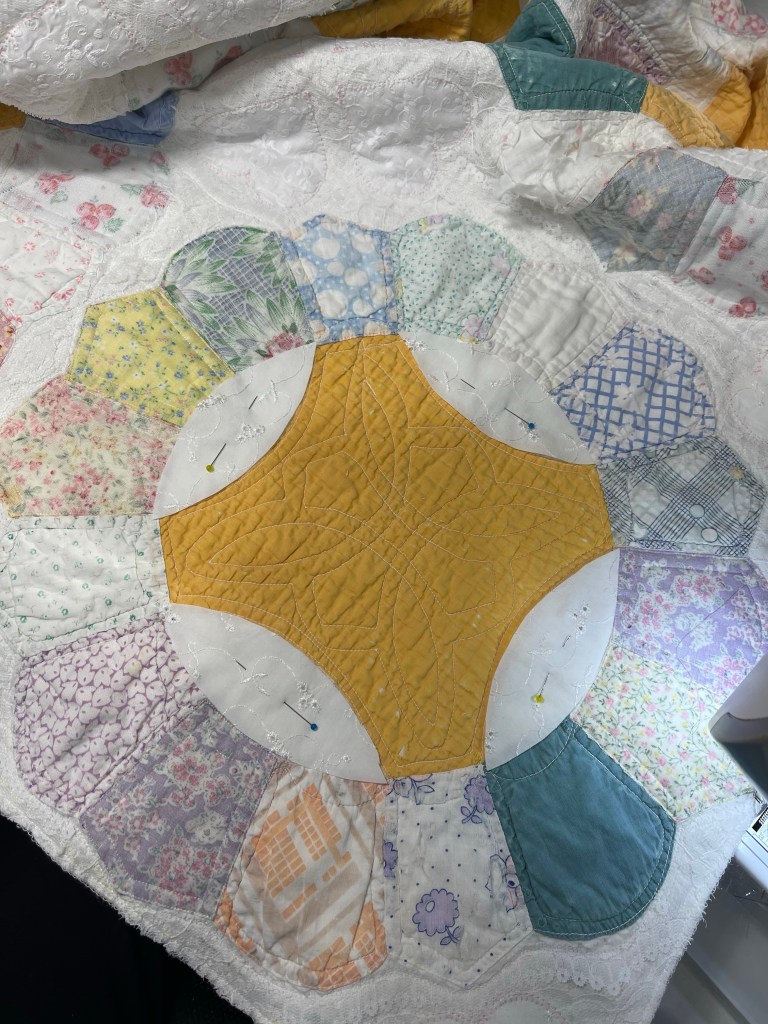
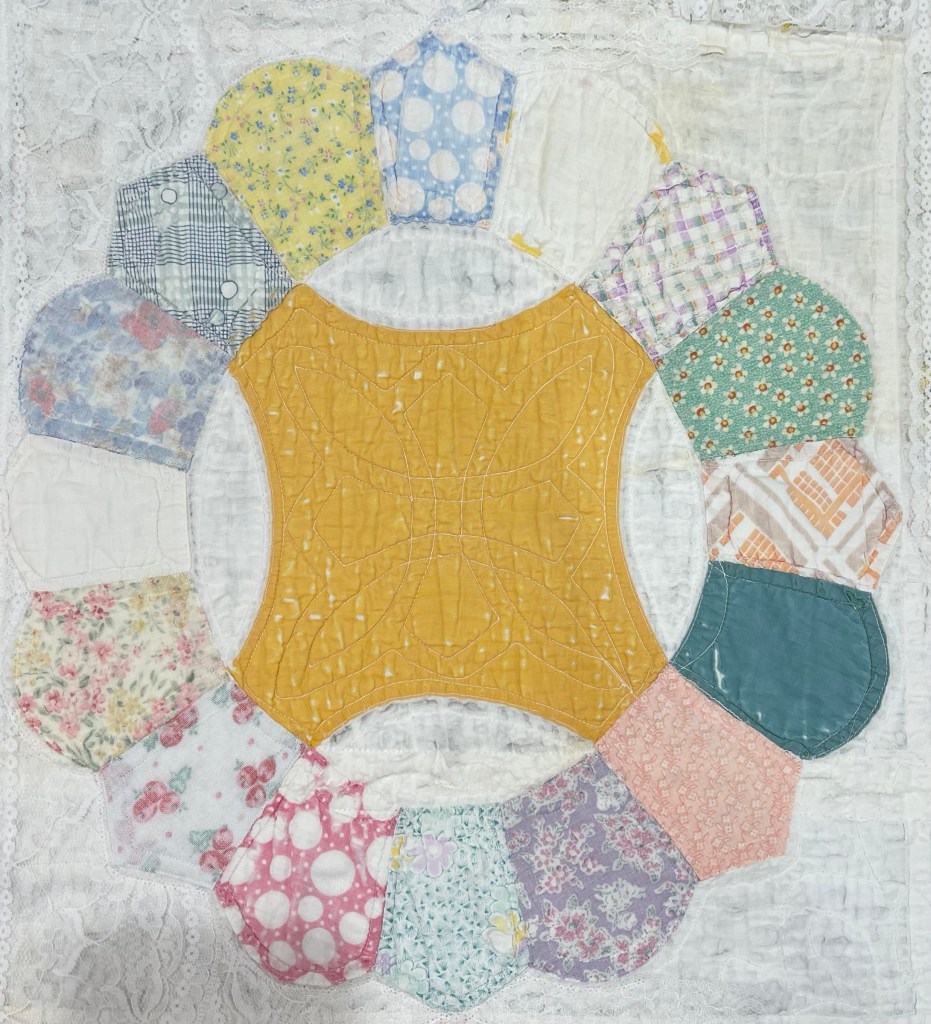
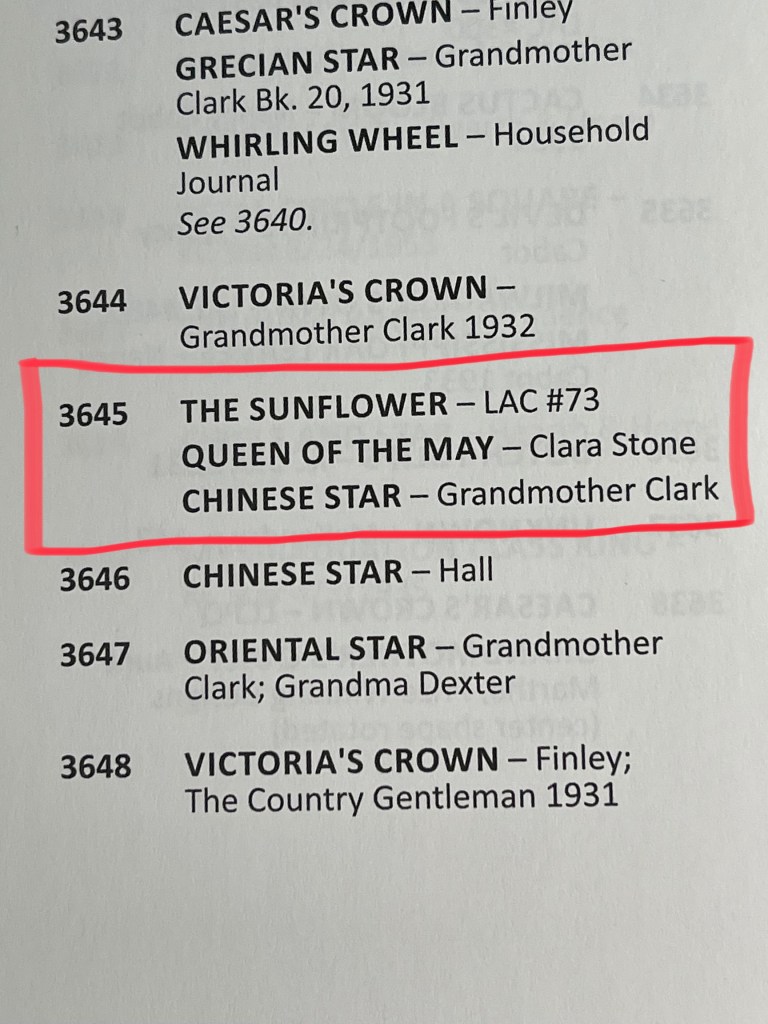
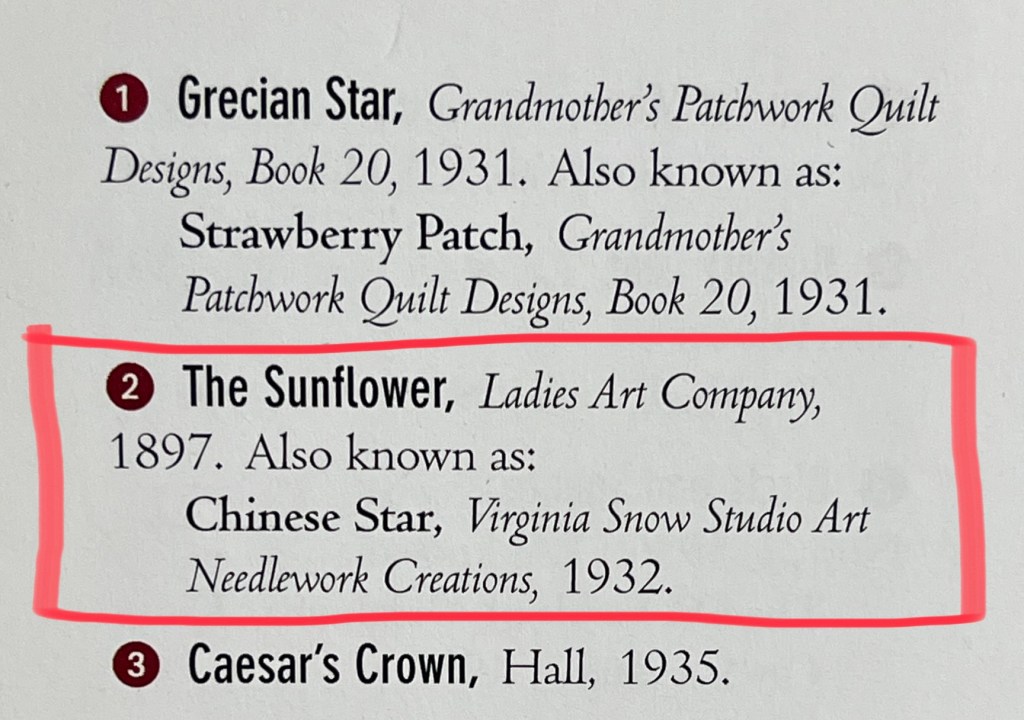
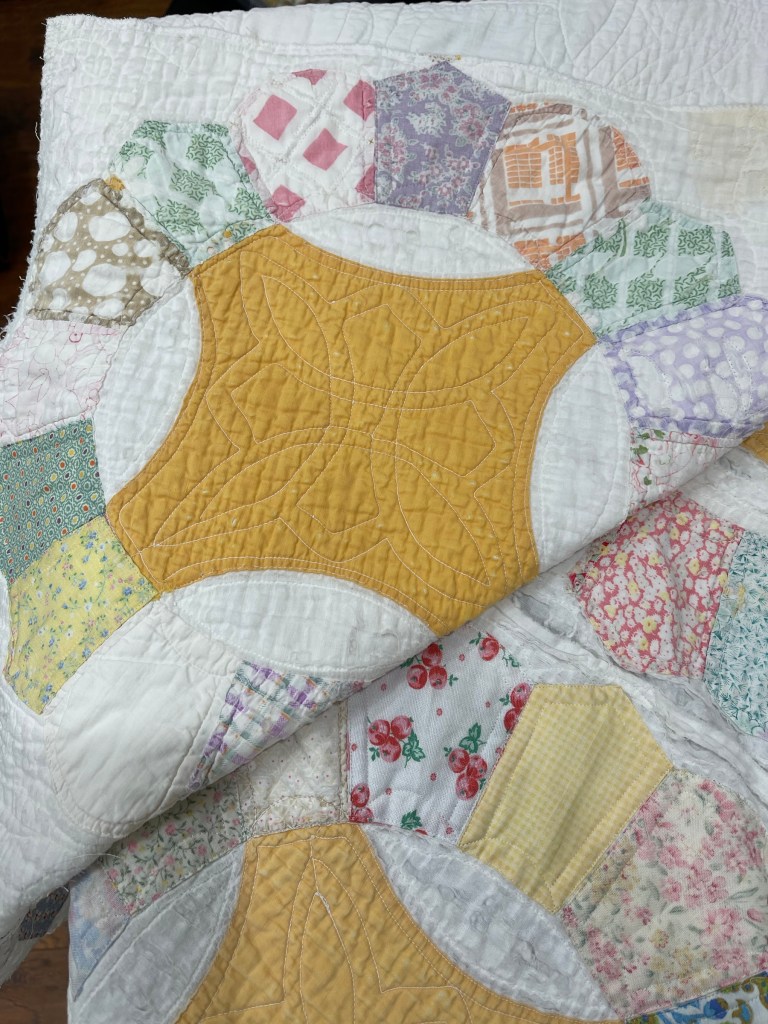
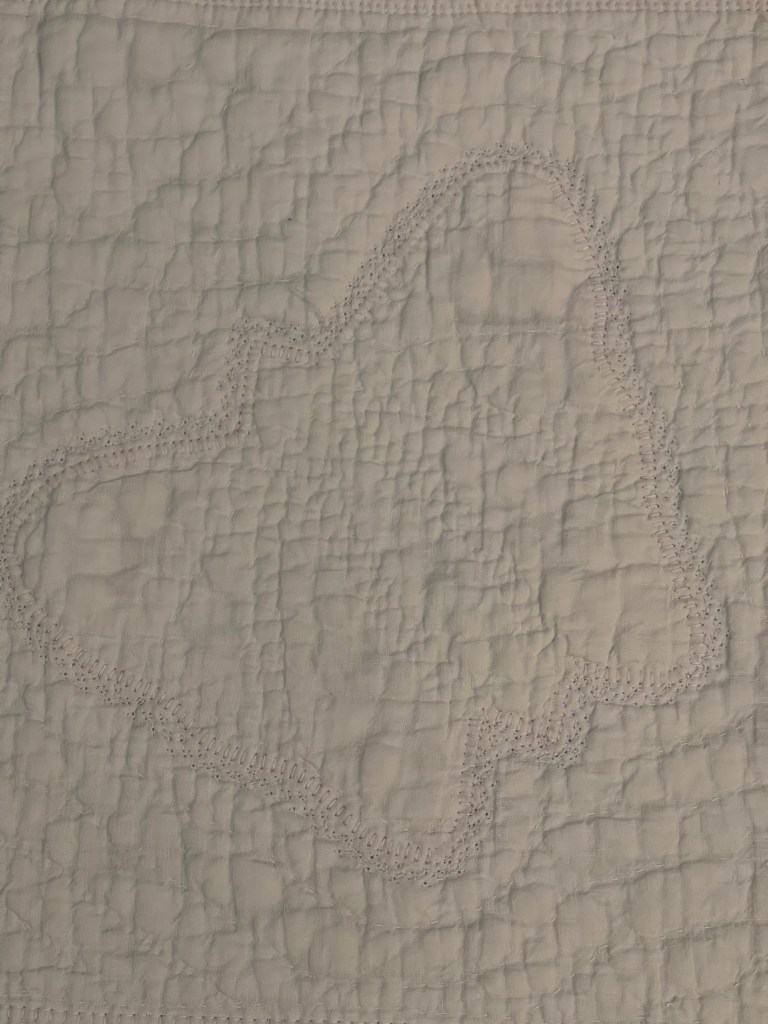
It took a long time to find the name(s) of this interesting quilt block. I remembered it was similar to the Brimfield Awakening block but I also knew this was a relatively new block for them as they redesigned the construction to be an EPP project.
I pulled out my trusty big quilt block books and began my hunt. For reference, the block below is a picture of one of the blocks in the quilt I have been working on:
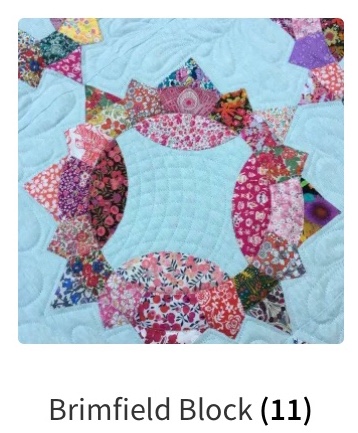
The block below is the EPP created by the Brimfield Awakening Co. Similar but not exactly the same.
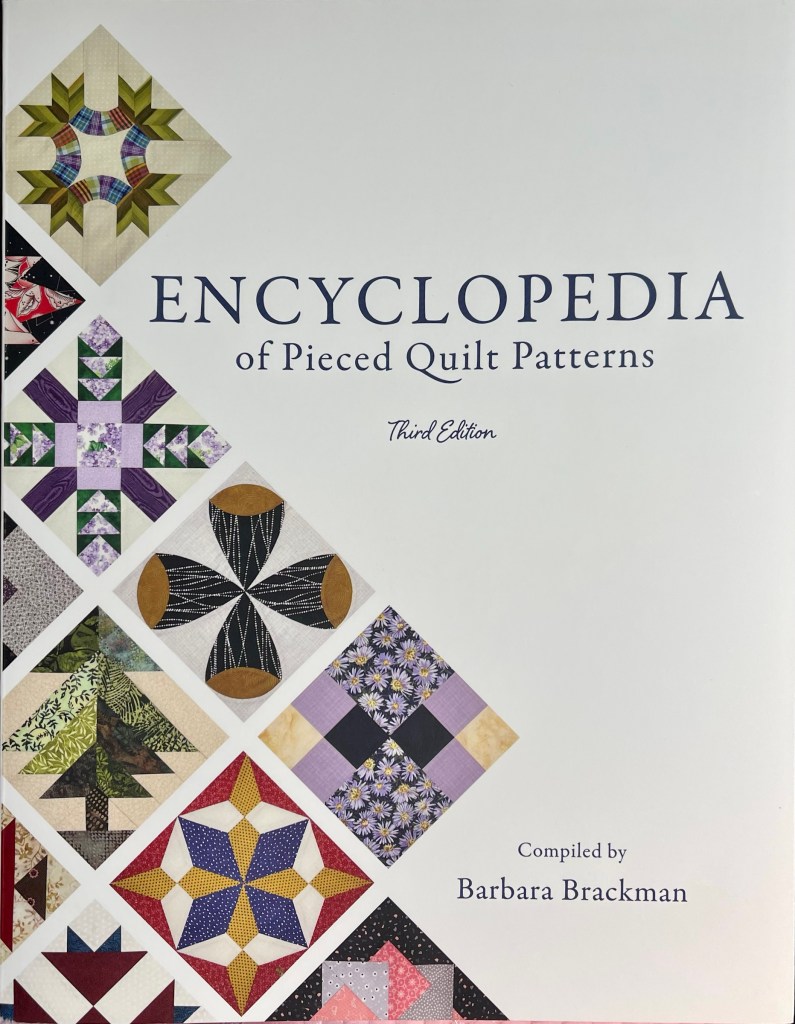
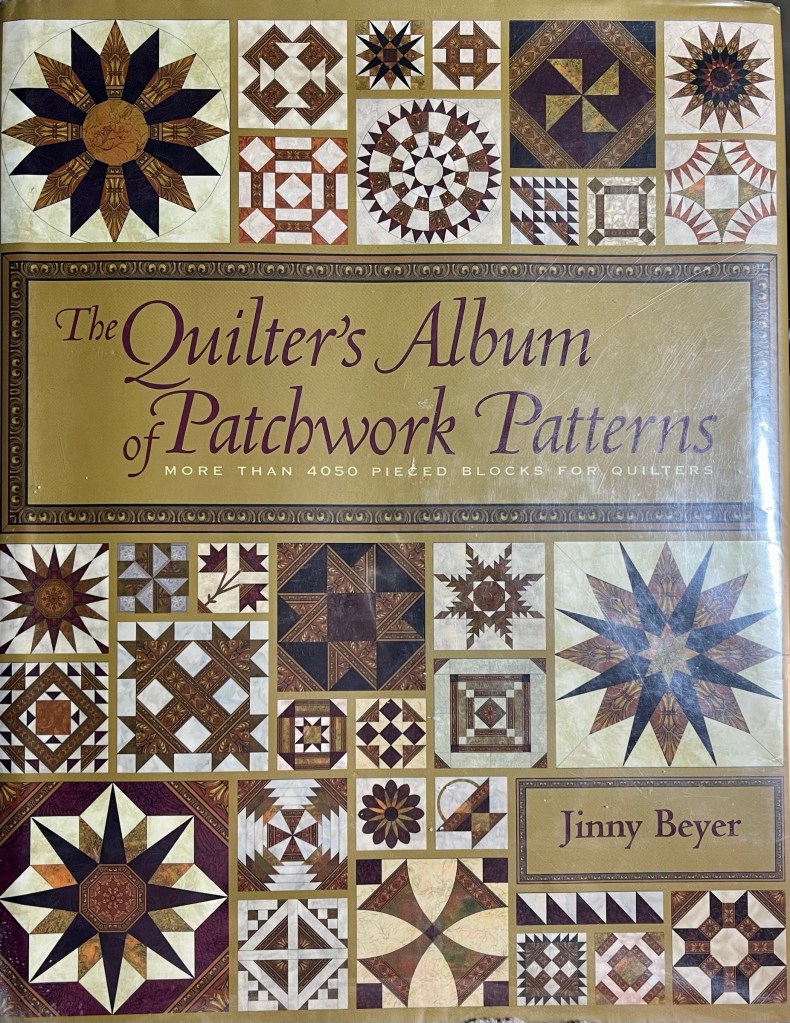
My next search was in this book by Barbara Brackman:
And finally, another wonderful resource by Jinny Beyer:
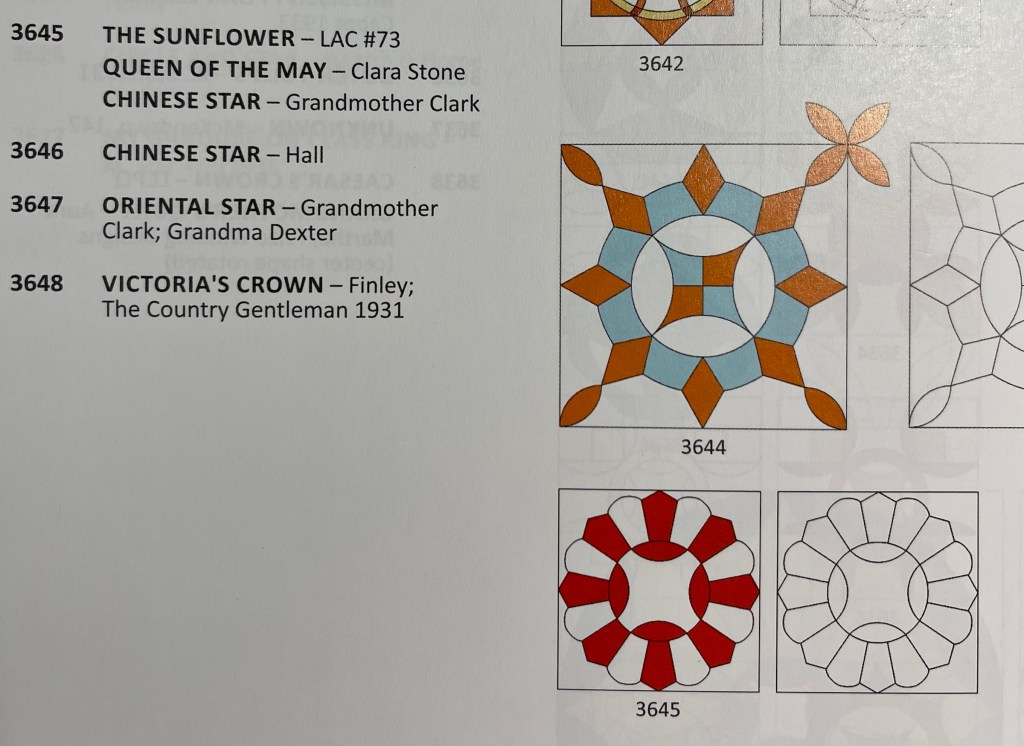
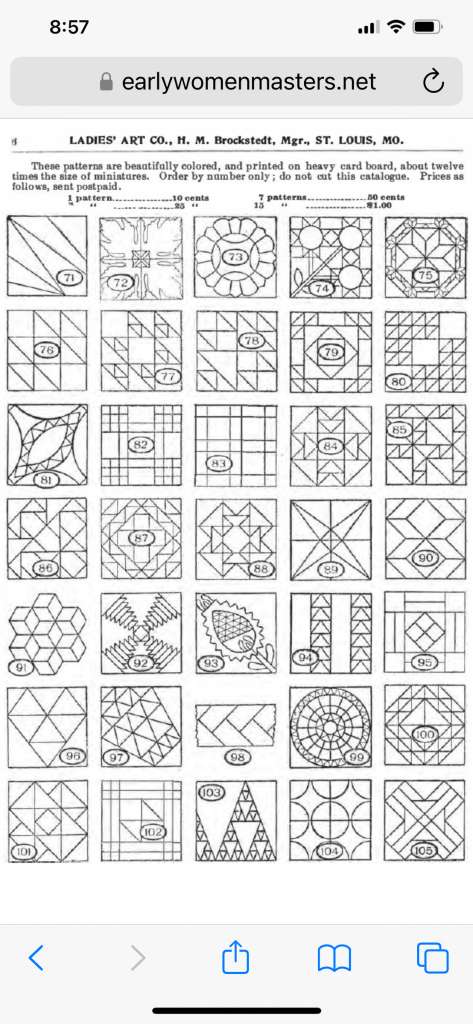
But…I also found by googling The Strawberry quilt block these 2 blurry pictures from the LAC (Ladies Art Company) pattern number 73:
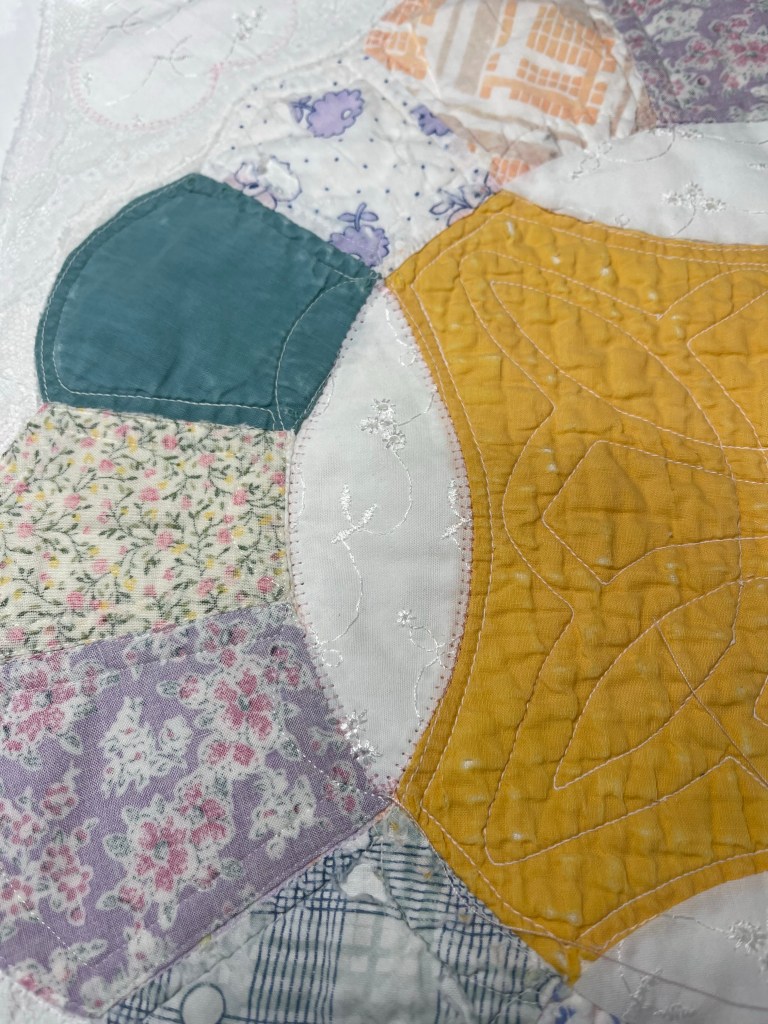
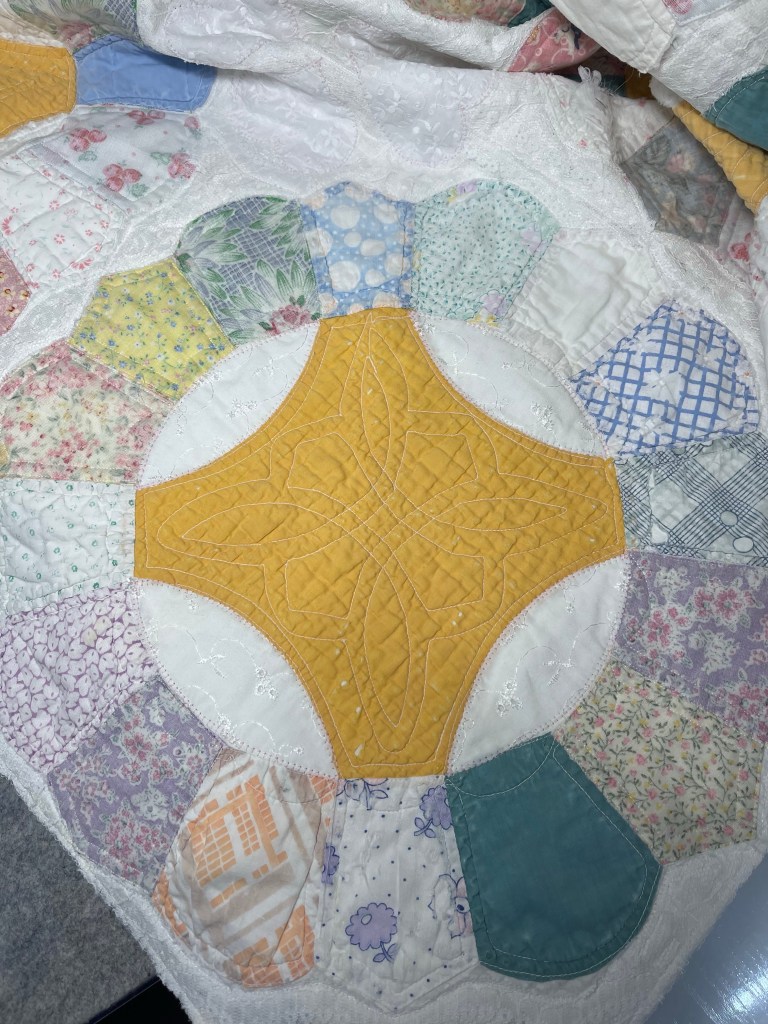
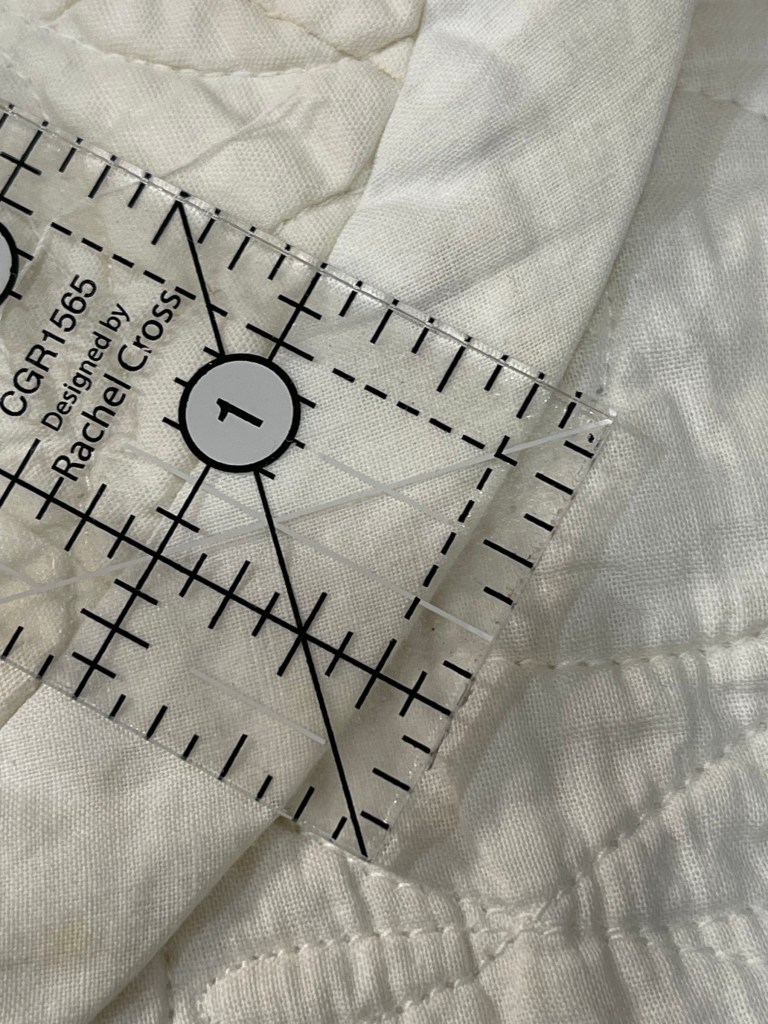
And by the way (in my quilt) this is a very large block measuring 16 1/2” square.
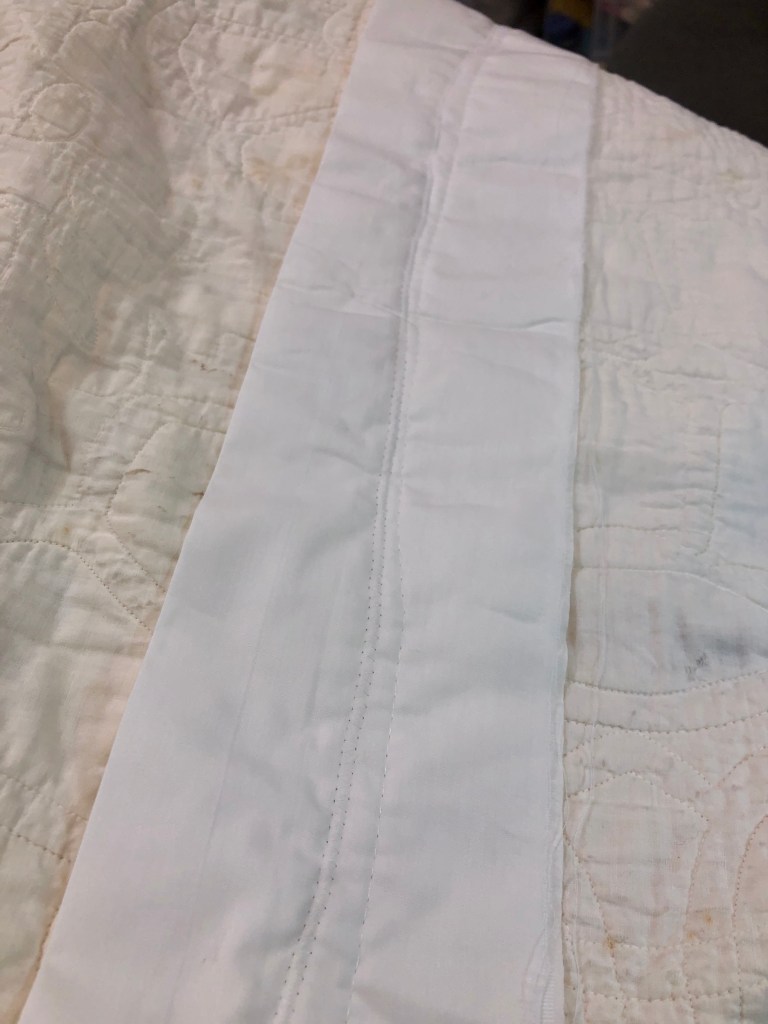
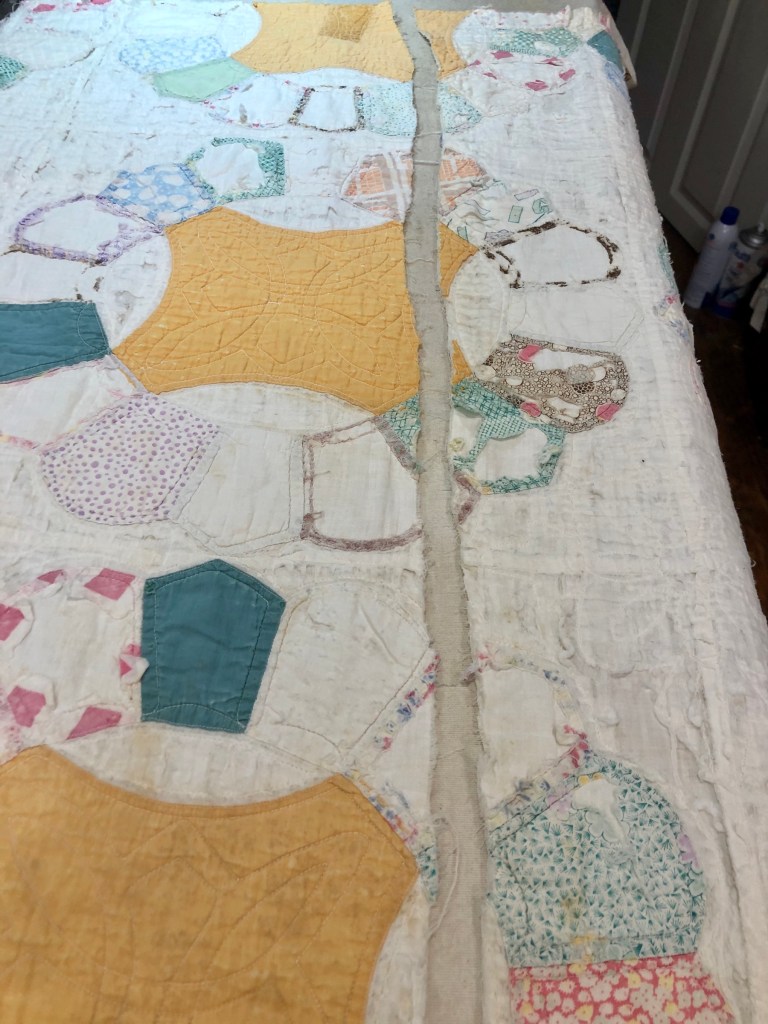
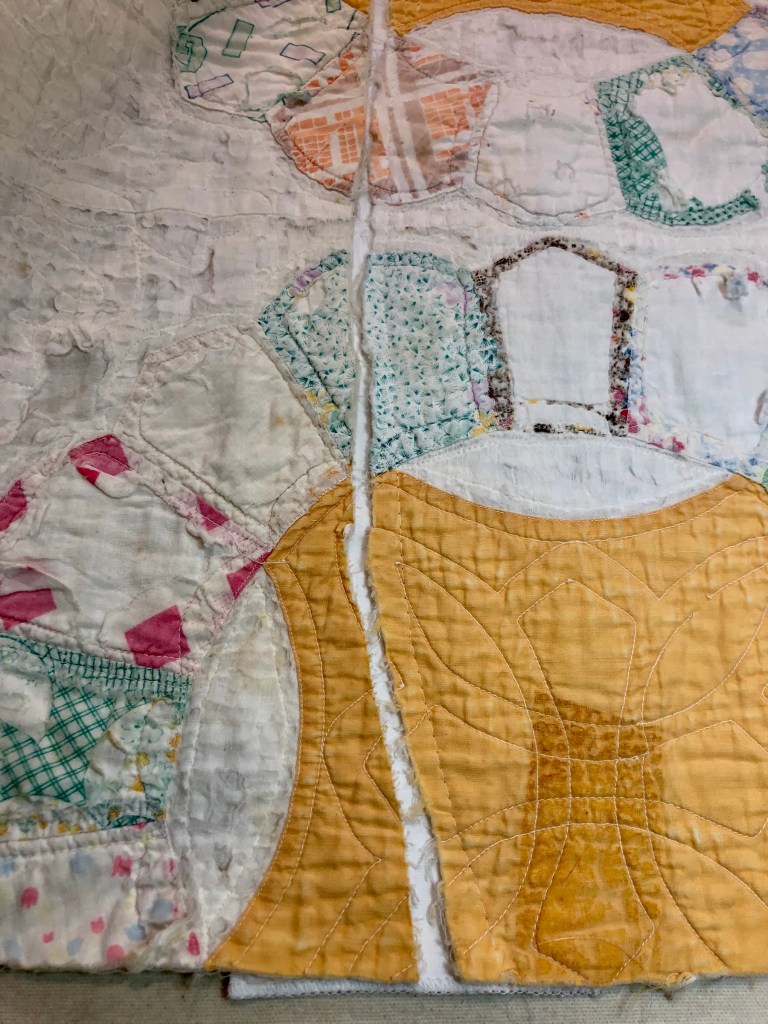
Let’s revisit yesterdays post and talk about what the front and the back of the quilt looks like after my method of rejoining the two pieces.
Above you can see what my long straight machine stitch as well as the zig-zag that joined the two quilt pieces.
I removed the long machine basting stitch, trimmed the white support strip to 1 1/2”. I tucked under 1/4” each side and straight stitched each side. Do I care that the quilt back now has a 1” “new fabric” strip running down the length of the quilt? Absolutely not! It’s there to secure the repair not to look beautiful. 👍
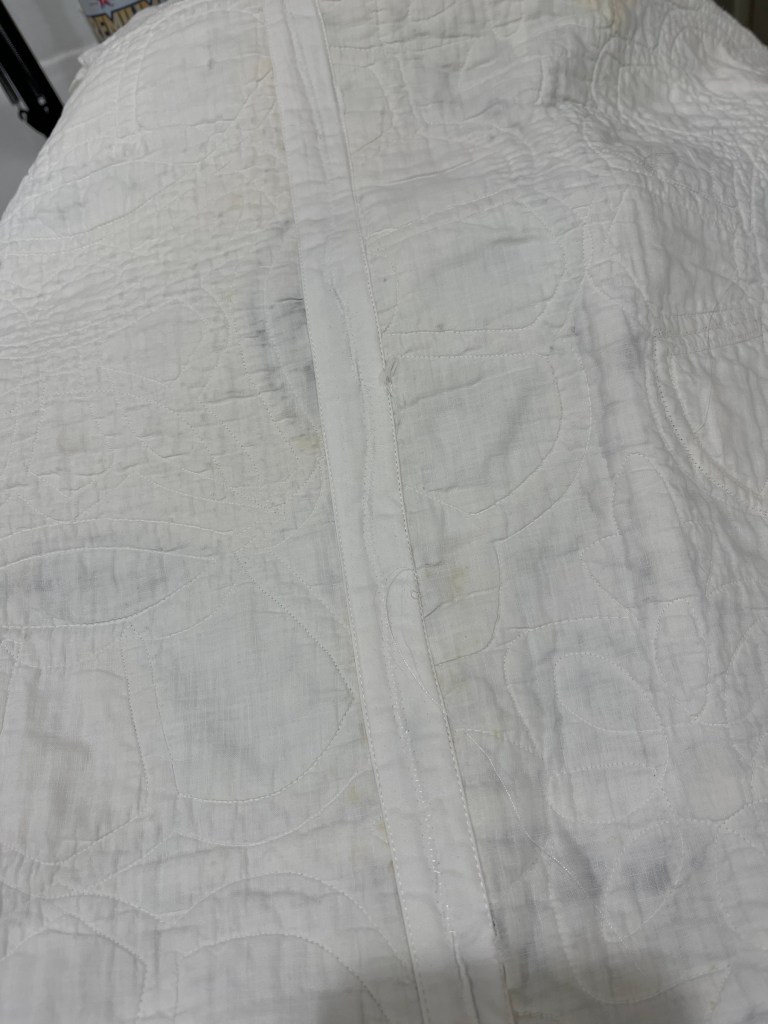
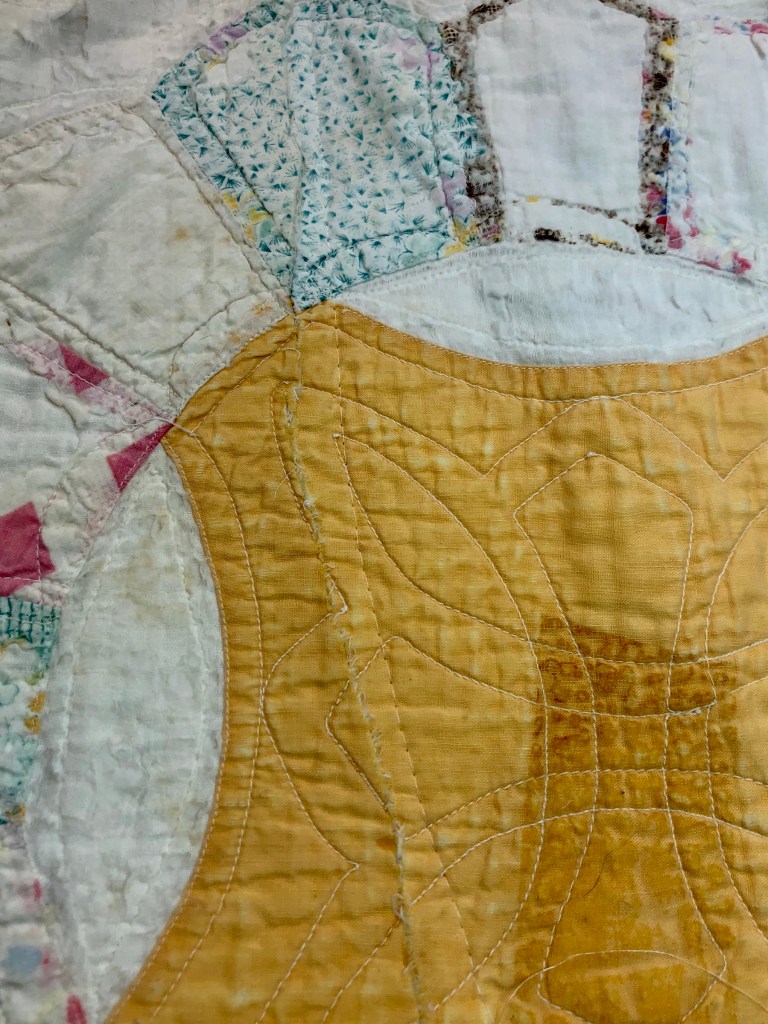
What does this technique look like from the front?
Remember, I’m “saving” not restoring a vintage quilt. As I see it, there are almost zero rules to break! 🙂
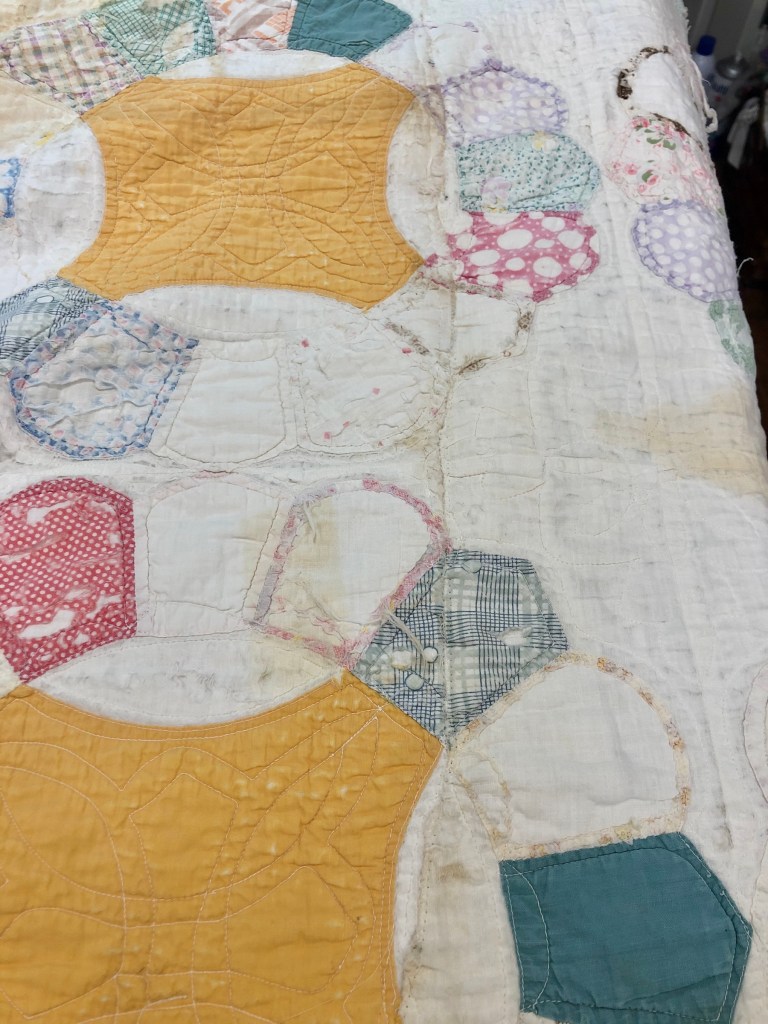
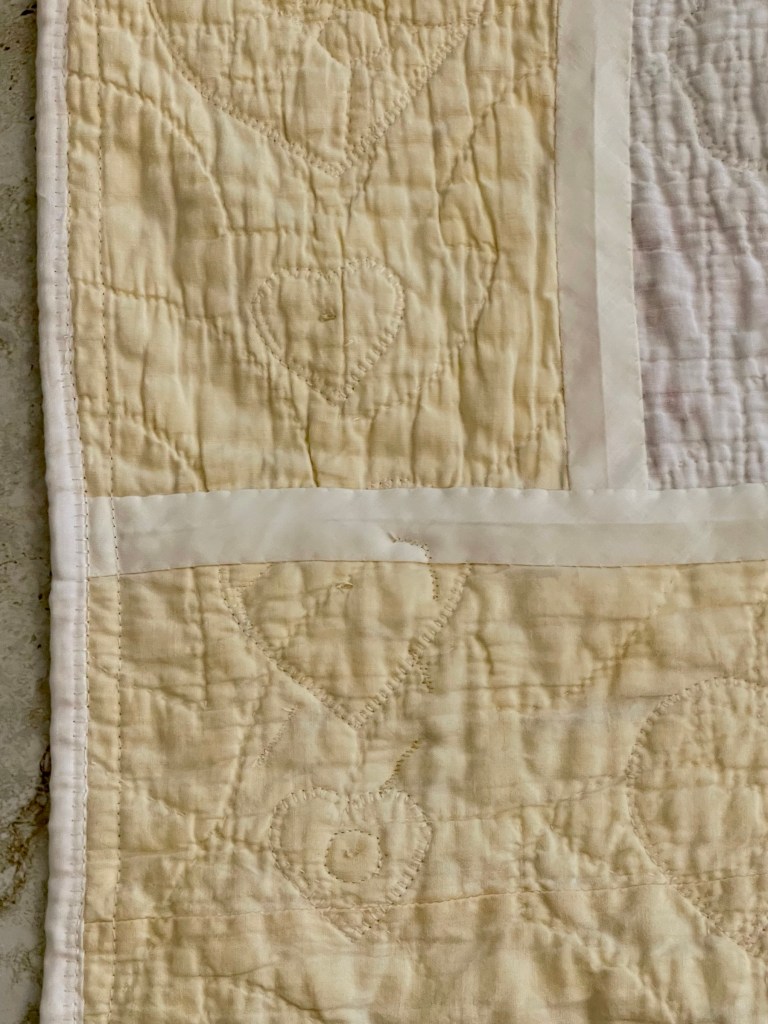
More to come soon, I’ve got one more block to repair and then it’s on to deciding what to do about all the Fractured and missing front white fabric.
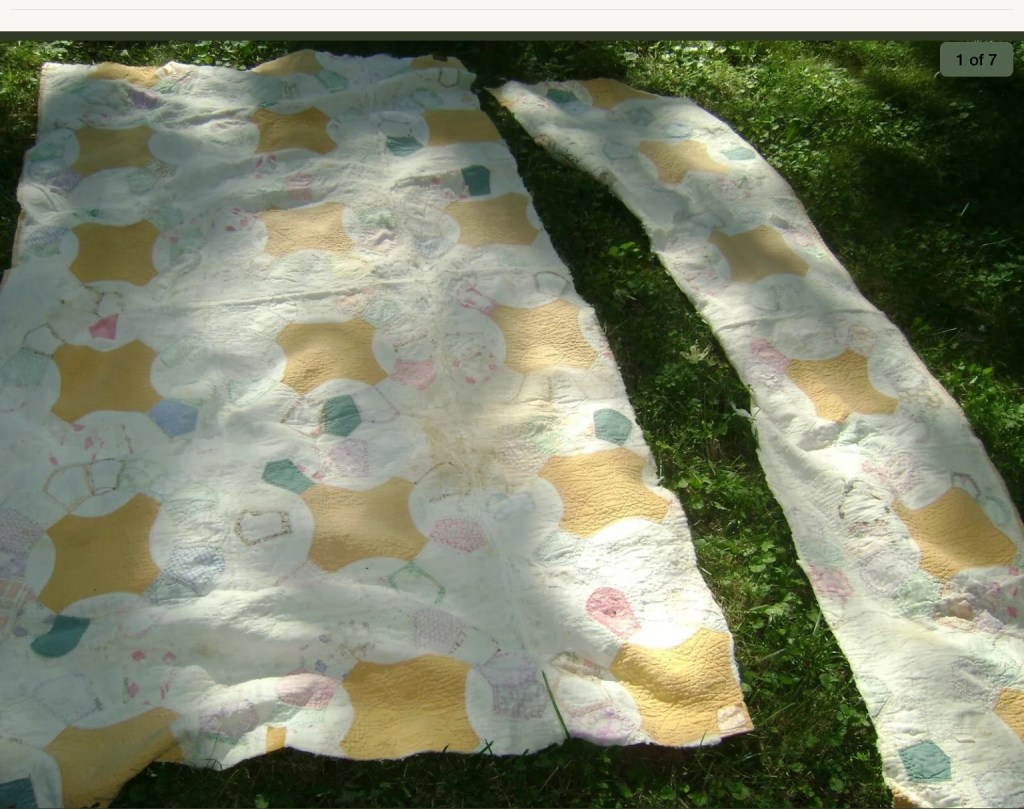
Whichever name the block goes by, I think I’ve covered them all. Almost four years go to the day I began working on this disaster of a quilt, Dec. 4, 2019. I’m guessing it was an eBay purchase and more than likely I paid just a pittance for this “cut into two pieces” vintage old stained ripped worn out quilt? I stitched it back together and set it aside and it was promptly forgotten.
Today I’m thinking…what on earth was I thinking when I bought this disaster? And yes, you read that right, the quilt was cut into two pieces with no regard for much of anything. Nov. 11th of this year, while looking for some sit down work I came across this project and decided to give it a go once again.
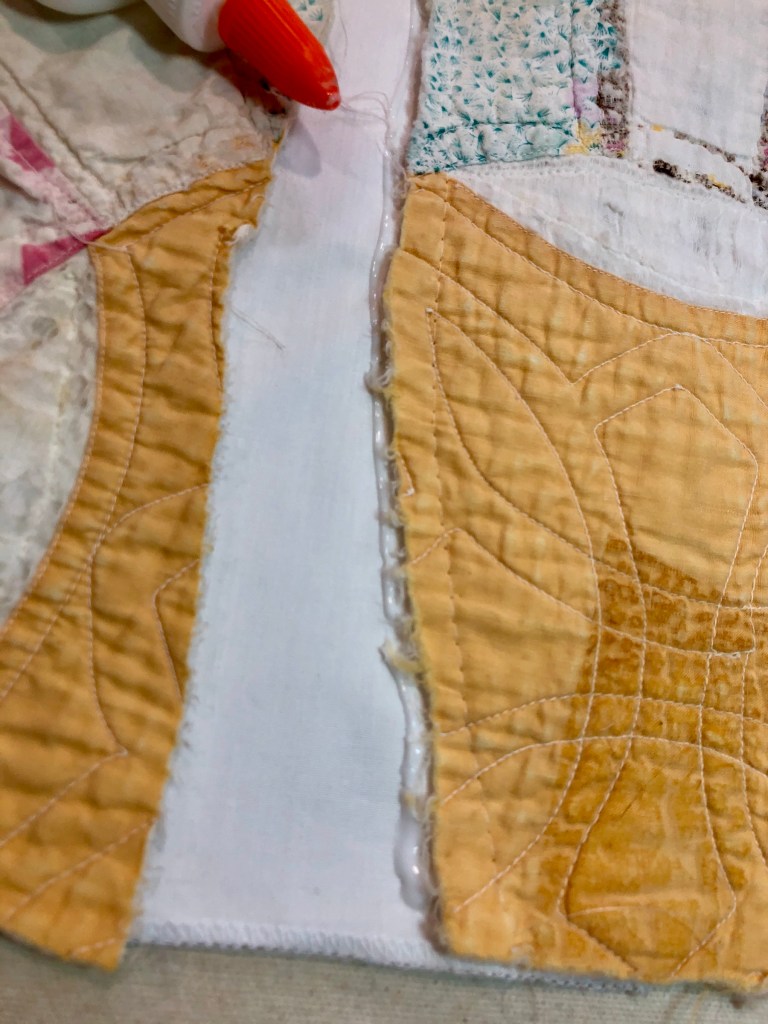
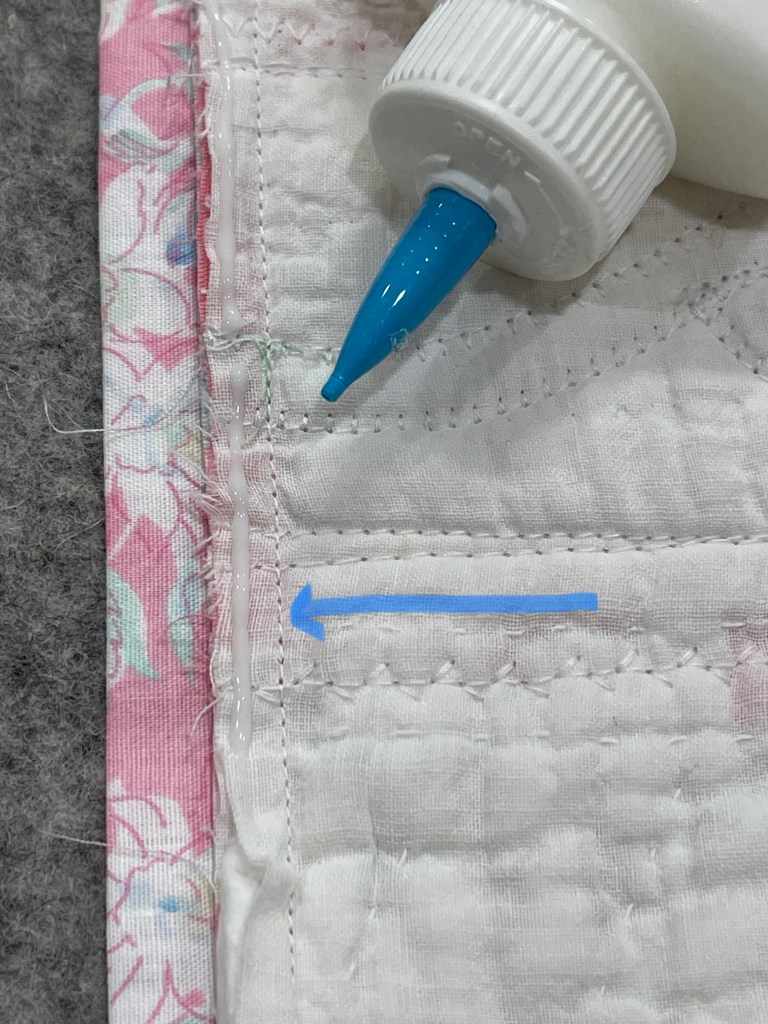
Because of the sad condition of the quilt, I decided I needed a backing strip. I laid out one piece of the quilt, pinned the cut edge in place and after pinning, I machine stitched (using a longer stitch) about a half inch away from the cut edge.
Ready to address the second piece.
Using Elmer’s Washable School Glue I run a thick bead along the cut edge of the piece I’ve already stitched to the white added back support strip.
I’ve positioned my two quilt strips to match their cut edges, I’ve glued both pieces to the white back support strip, heat set the glue with a dry iron and now I’m ready to zig-zag over the raw edges, joining the pieces back together again.
Seriously, is this just about the saddest looking quilt!
But have you noticed? This very old quilt is machine quilted! And machine quilted very well I might add. And another thing, it is machine quilted to about 14 stitches to the inch.
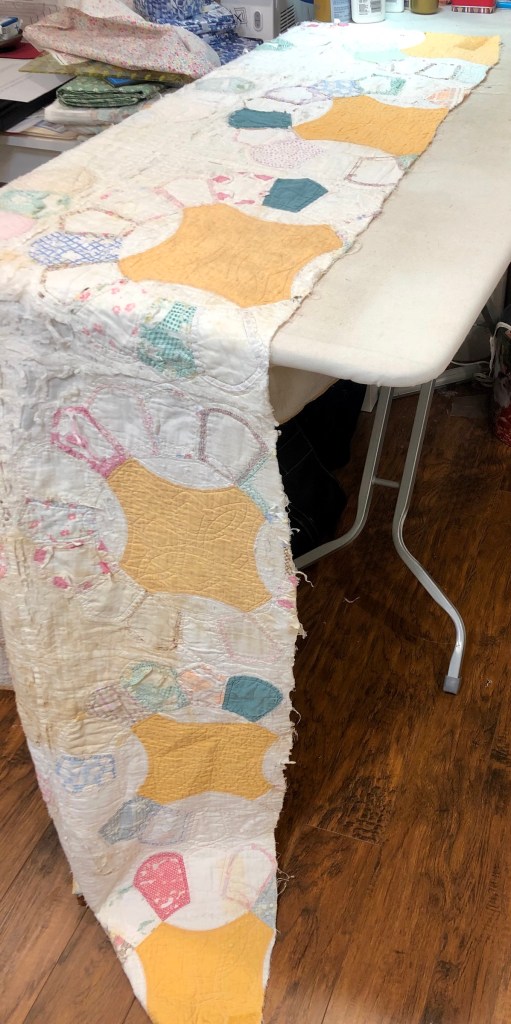
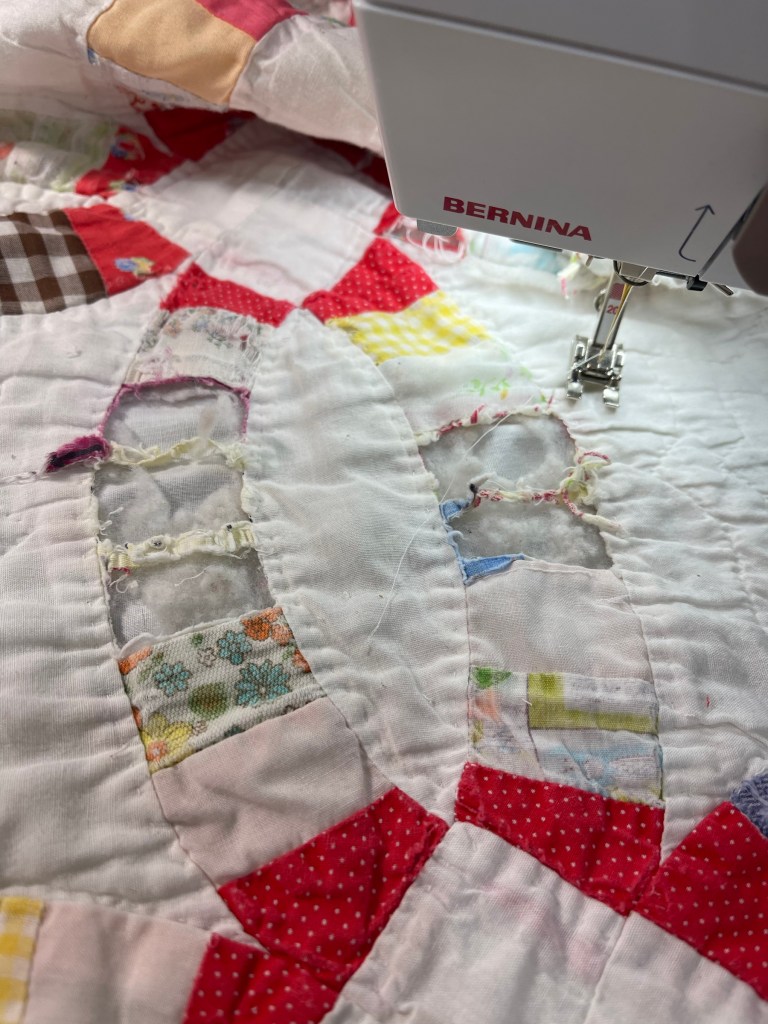
So after I get the two pieces back together this is what I’m dealing with…partial blocks both top and bottom and at least a million missing fabrics. I cut away both the top and the bottom rows and am left with a “throw sized” very dirty, worn out quilt. But I like it.
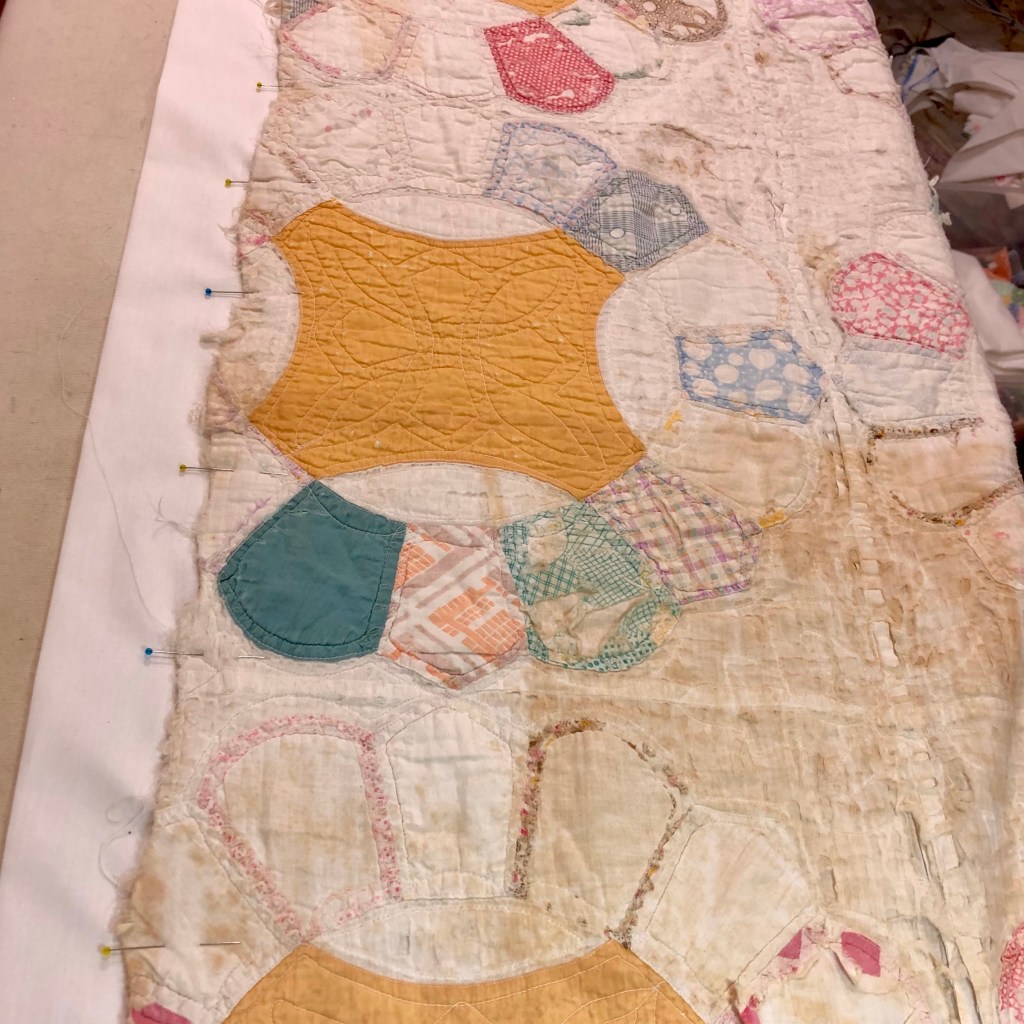
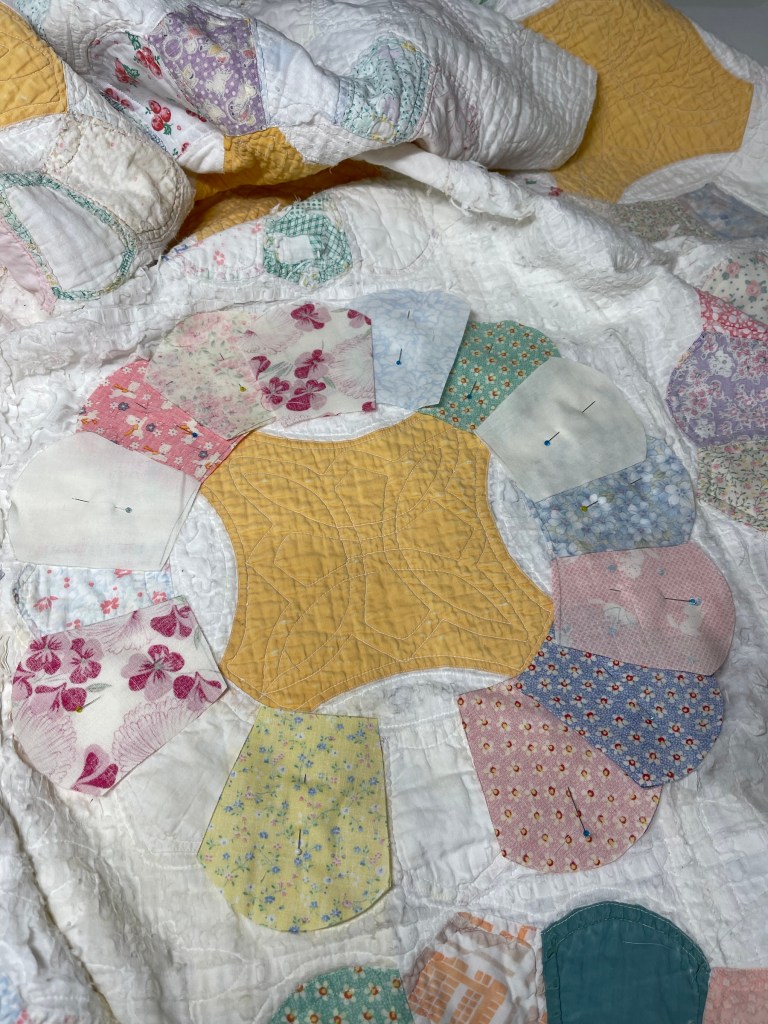
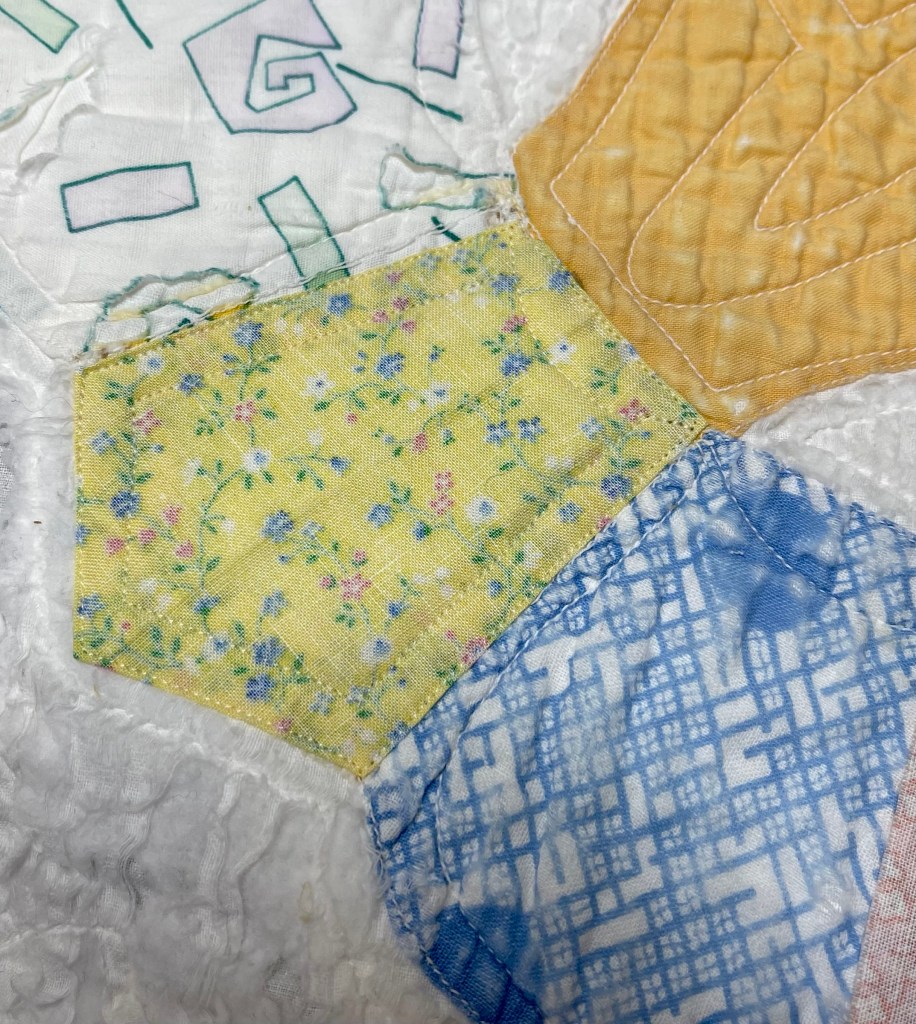
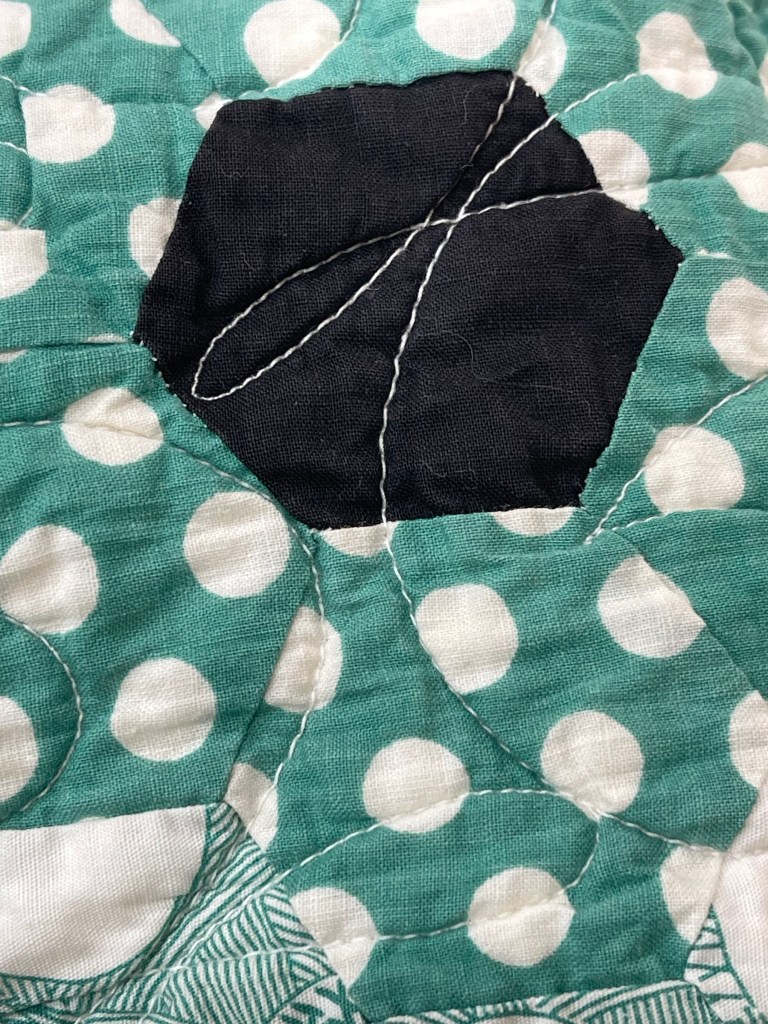
After making a clear plastic template of one of the remaining original block pieces, I begin a fabric stash search for anything that looks old, and if it only kind of looks old I flip over the fabric and use the wrong side.
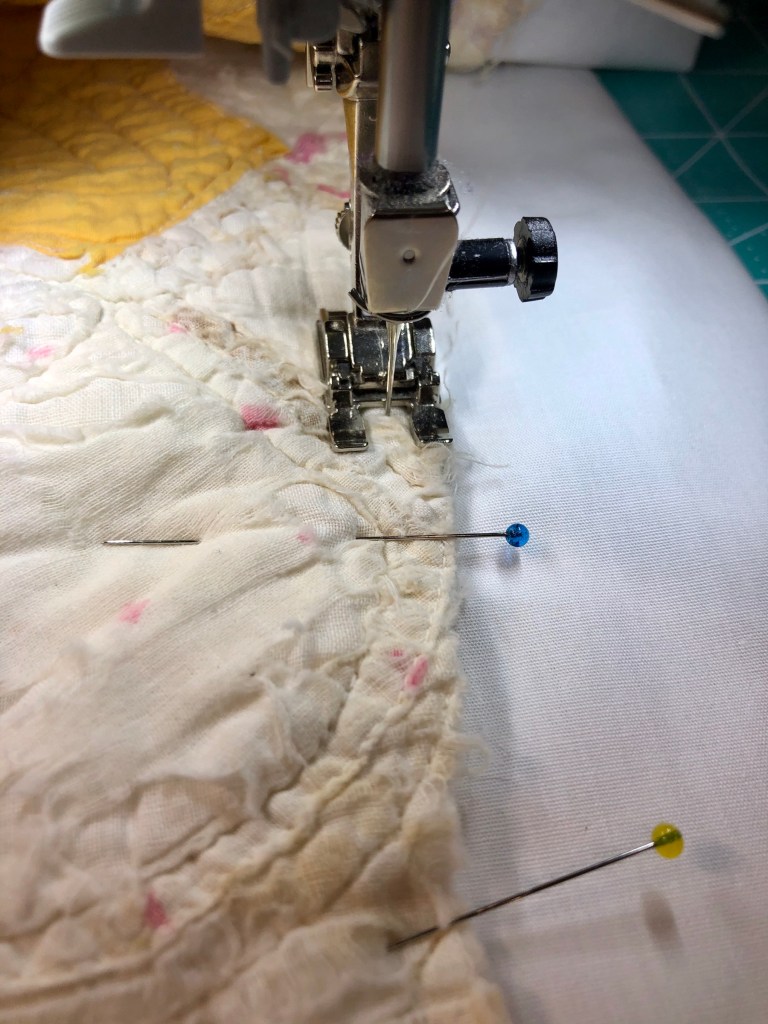
Because this quilt is machine quilted it’s easy for me to fold under the edges of each replacement piece and straight stitch into place. The picture above shows my progress as I work block by block, piece by piece to replace the worn and/or missing fabric.
Look at the yellow patch below. First know the wrong side of the fabric is facing up and can you see how I machine stitched the piece in place?
Lots more to come as I tackle the disastrous white fabric condition. I’m still thinking “oh what was I thinking” when I bought this quilt and decided to try and “save/rescue” this wreck! 🤣
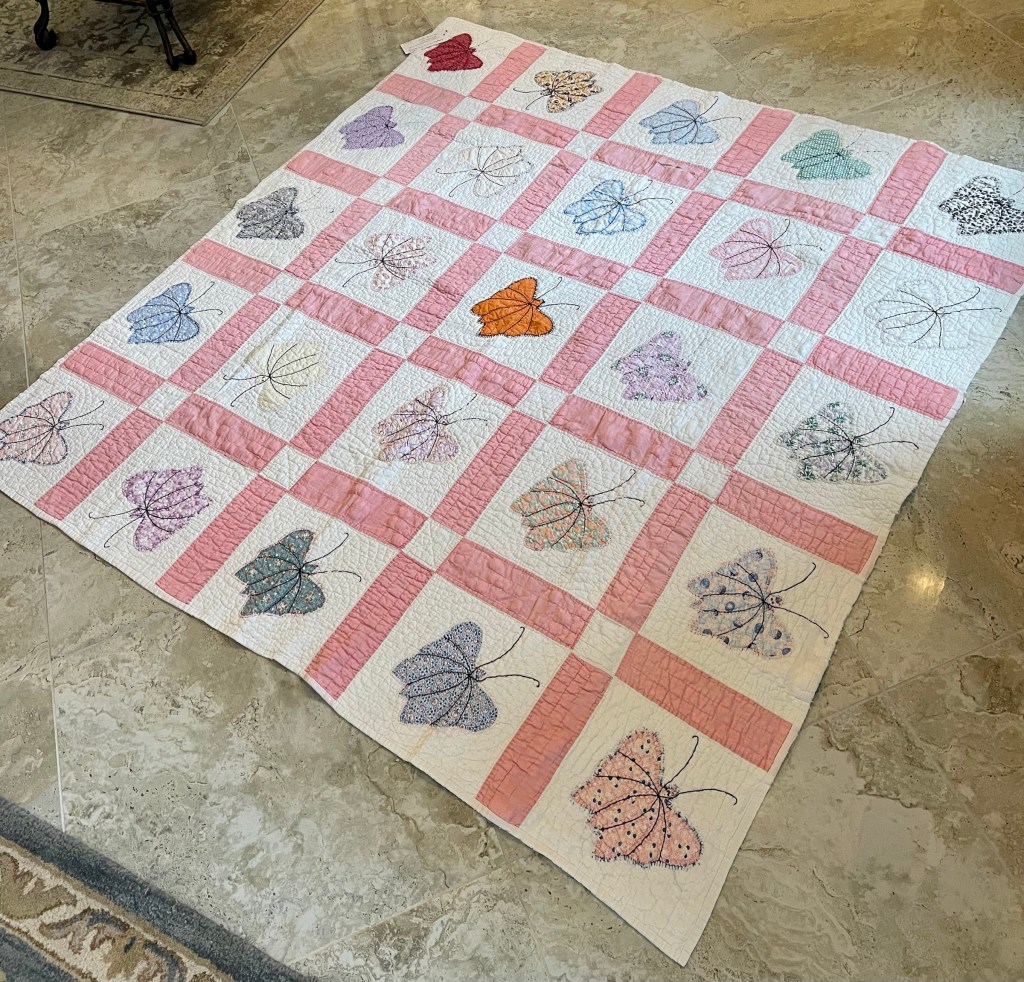
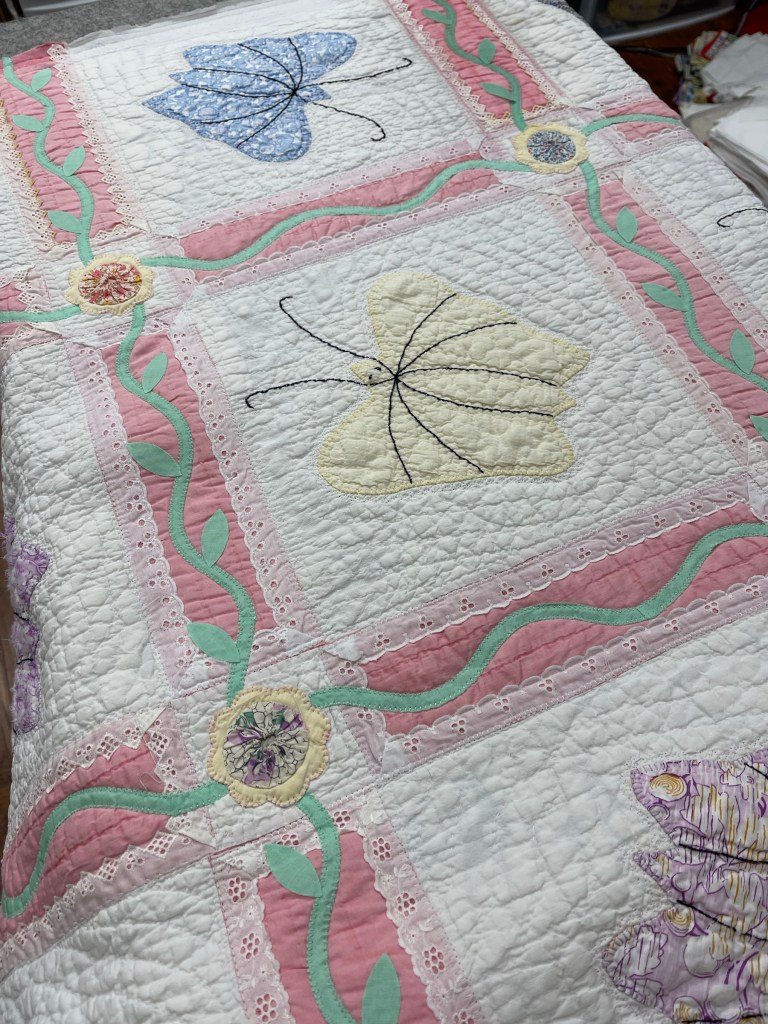
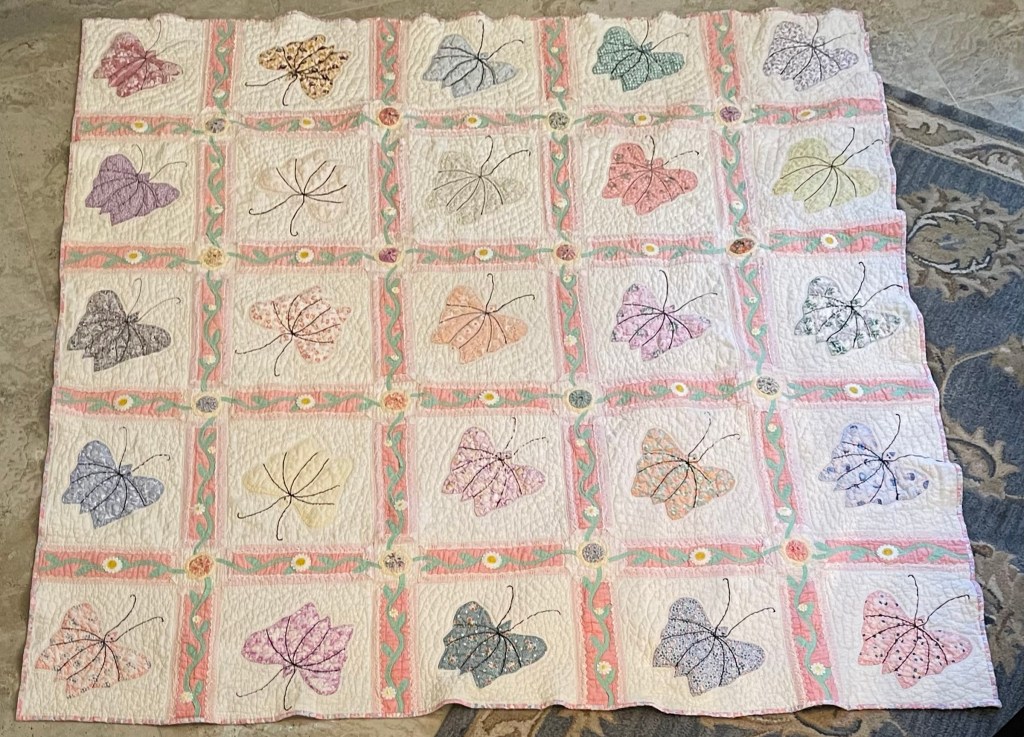
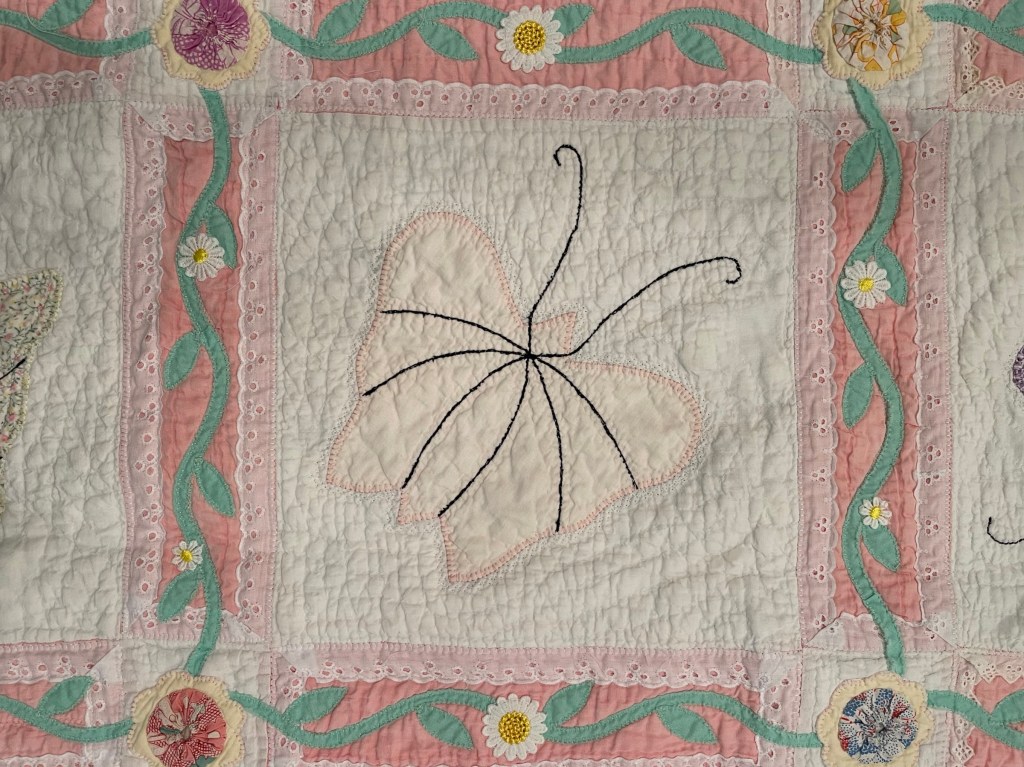
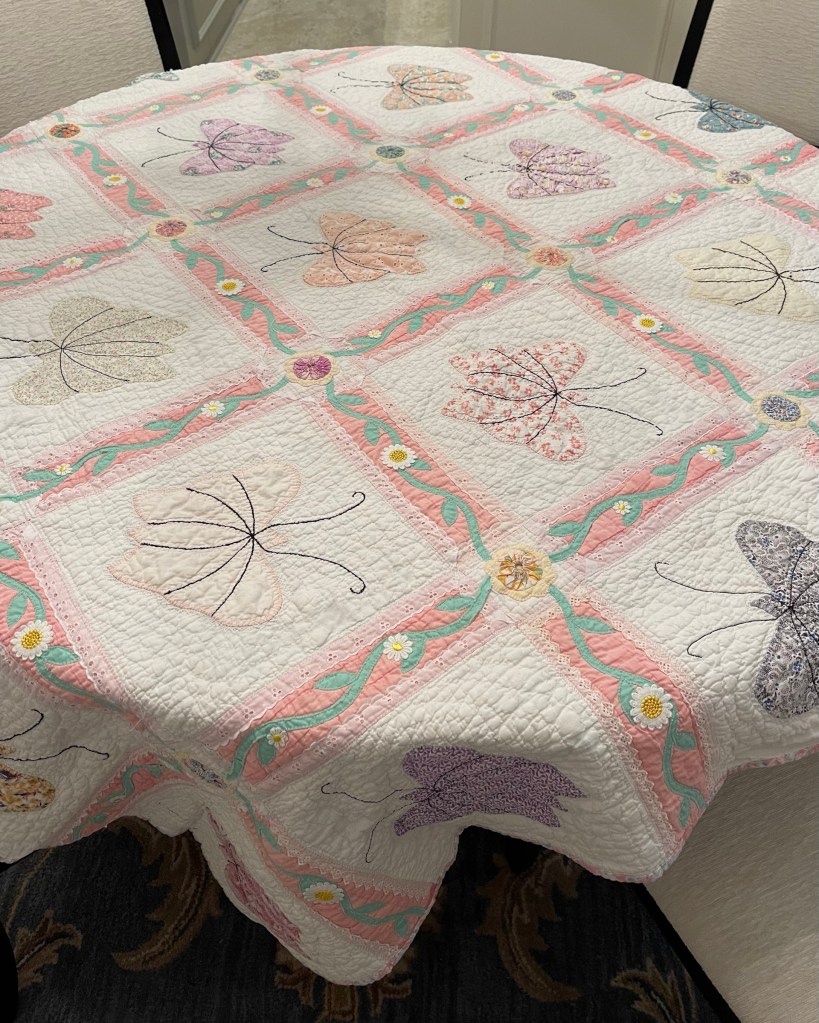
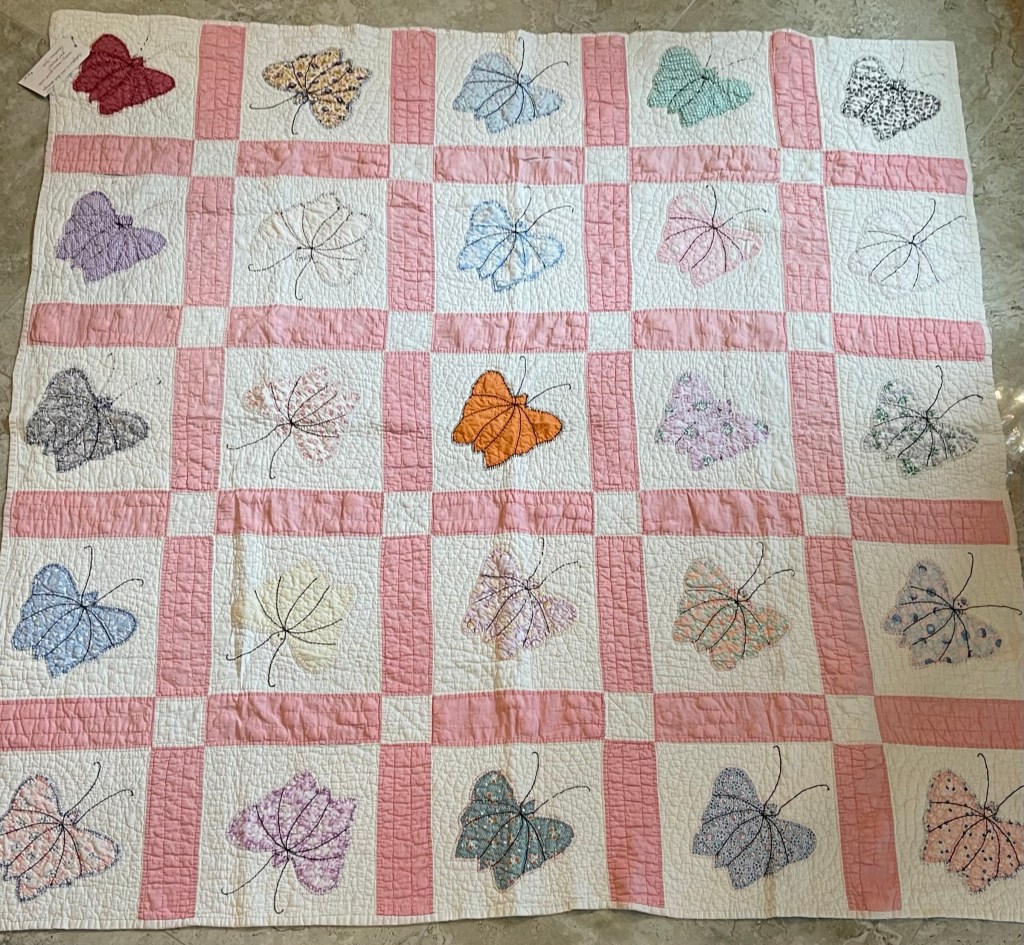
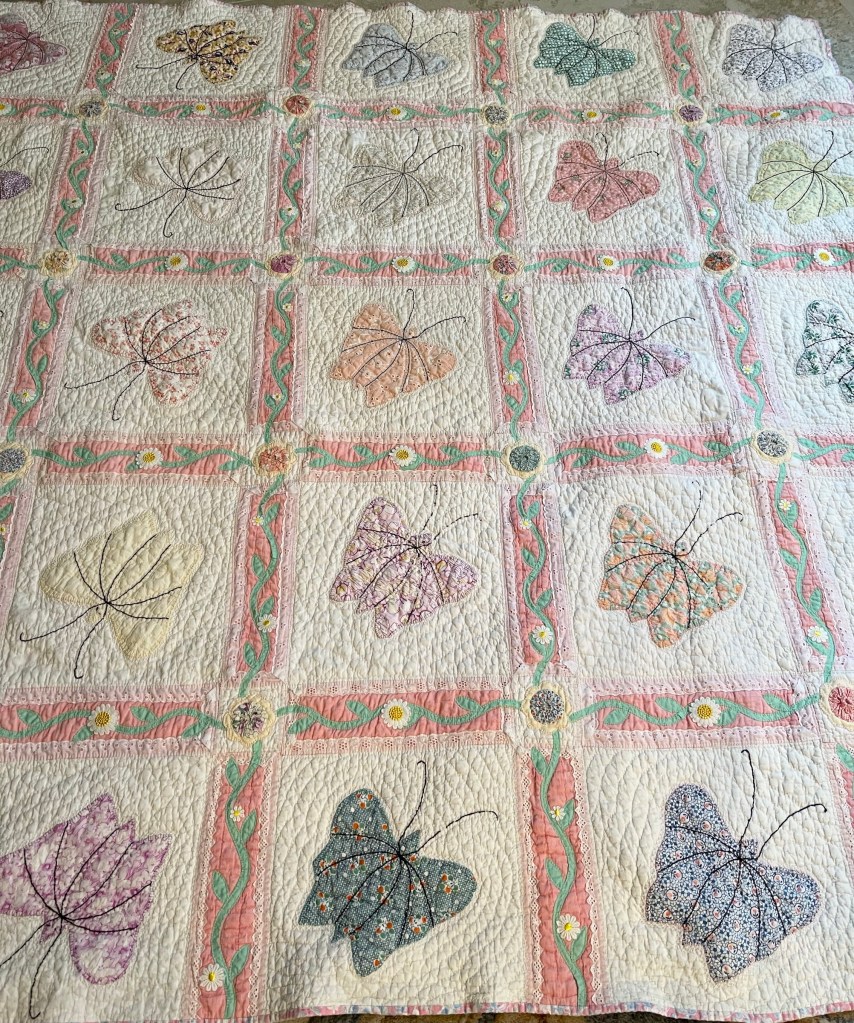
A once lovely 73×73” Butterfly quilt, well used, well laundered and most likely well loved, this quilt needs help. The fabrics are worn and torn over much of the quilt top and the batting…oh my goodness!
And the batting in the sashing strips has migrated to form hard lumps. The picture below shows a lump that is at least a half inch thick. The butterfly blocks are heavily hand quilted and most if not all the batting stayed in place. Sadly the sashing strips have only 2 straight lines of quilting and time and use has caused many of these straight stitching lines to pop (break).
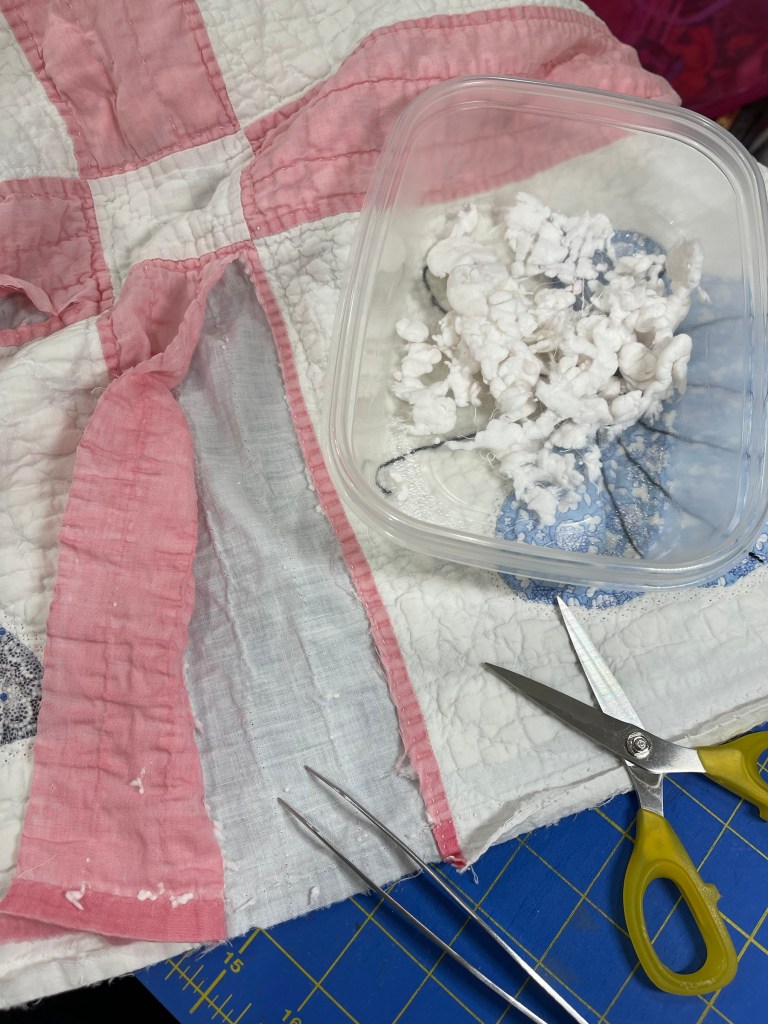
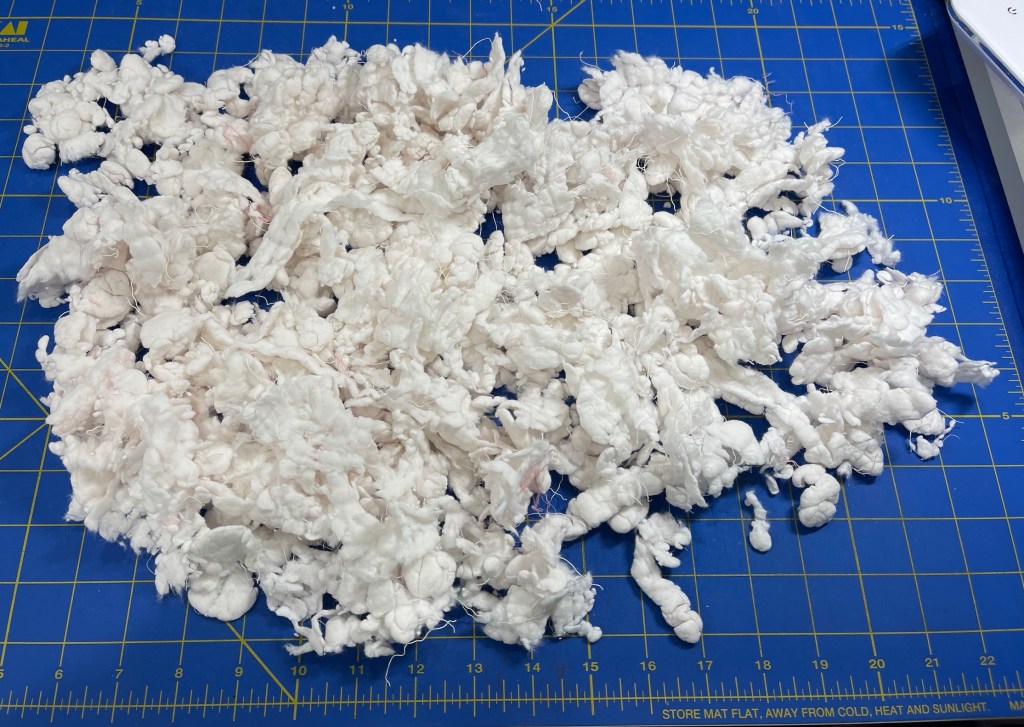
Rather than have a quilt with hard large lumps I decided to experiment and remove the sashing batting. “Oh sure” I thought, this will be fast and easy…well…I was wrong. ☹️ I ended up needing to slice open the long side of the sashing, removing the remaining quilting stitches and pulling out the lumpy white cotton batting.
This process reiterated to me my thankfulness for modern day batting. This quilter used what she had, making the best of the materials available to her. Quilters of today: count your blessings!
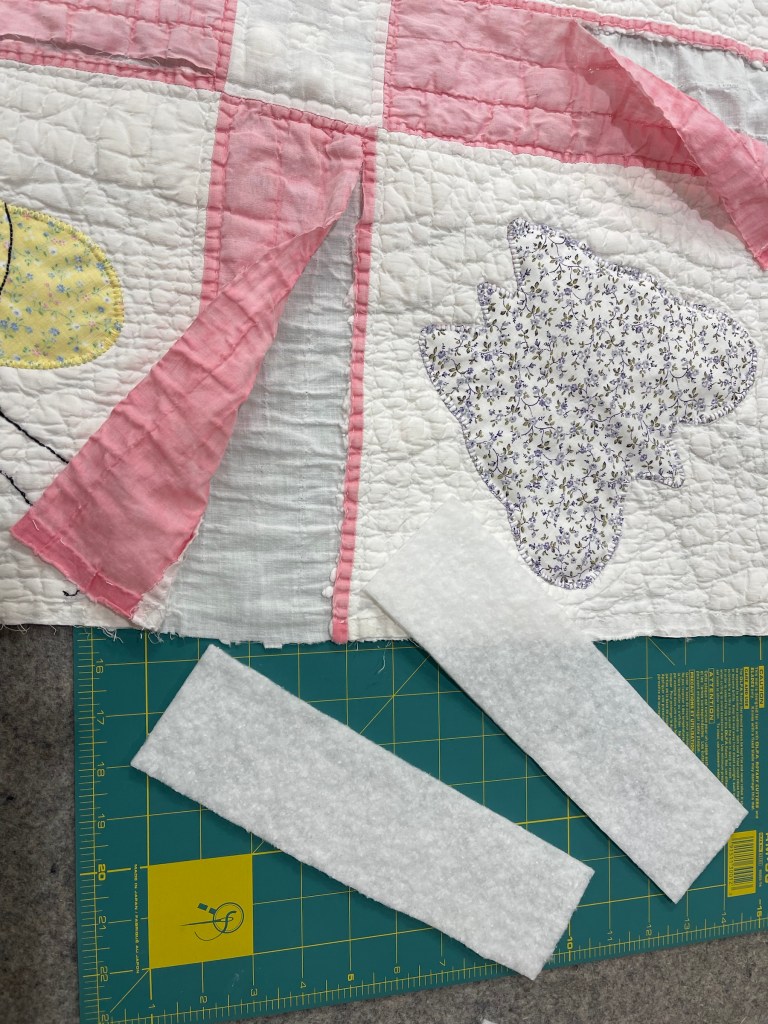
I cut 40 rectangles of Hobbs white 80/20, positioned them in the quilt sashings and zig-zag stitched the openings closed.
Well…I should have done more. What I didn’t expect to happen is that as I worked through the repairs on all 40 sashings, the new batting rectangles shifted inside the quilt. I did not secure them properly and had to cut openings once again and by using long tweezers, reposition the rectangles.
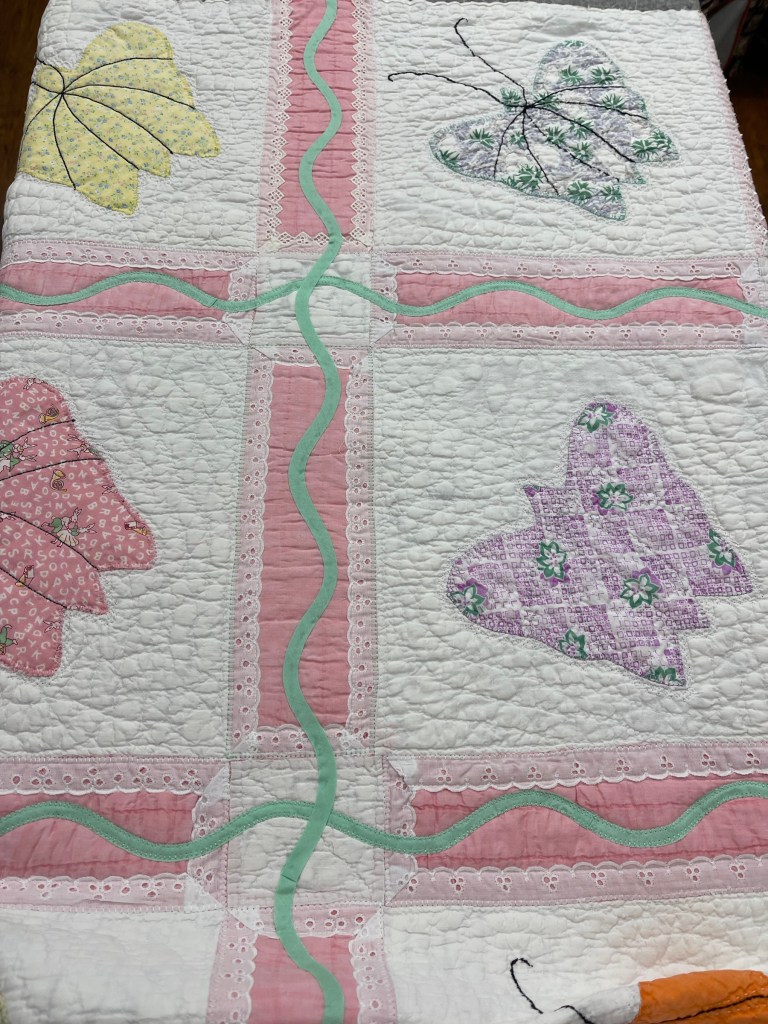
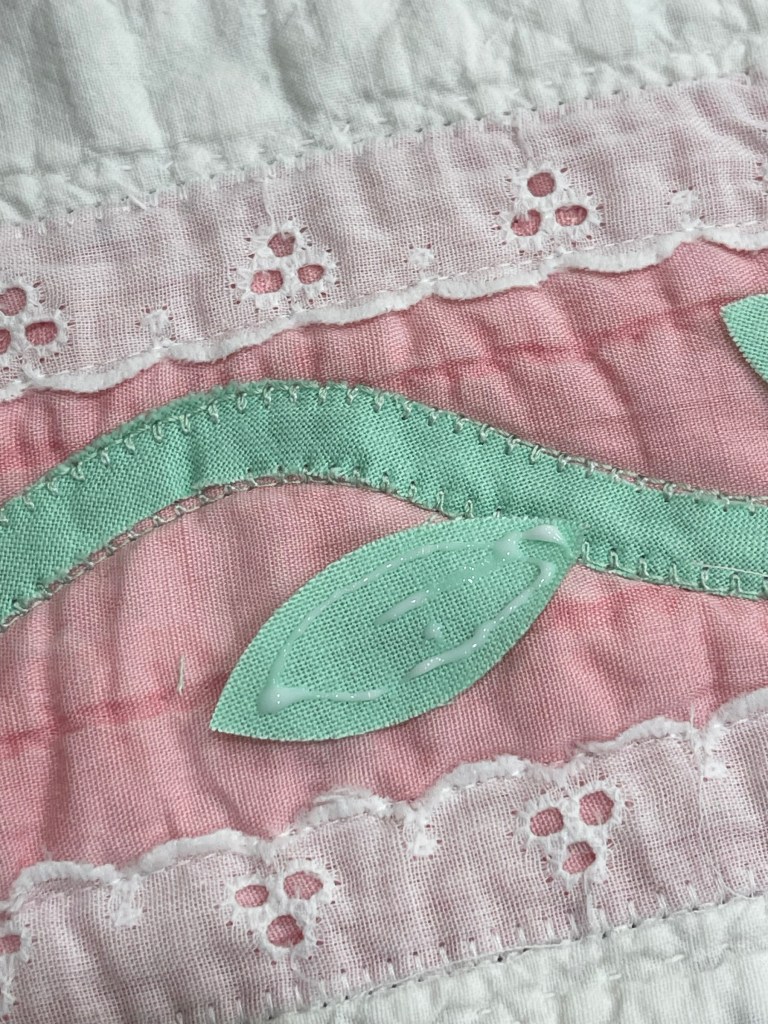
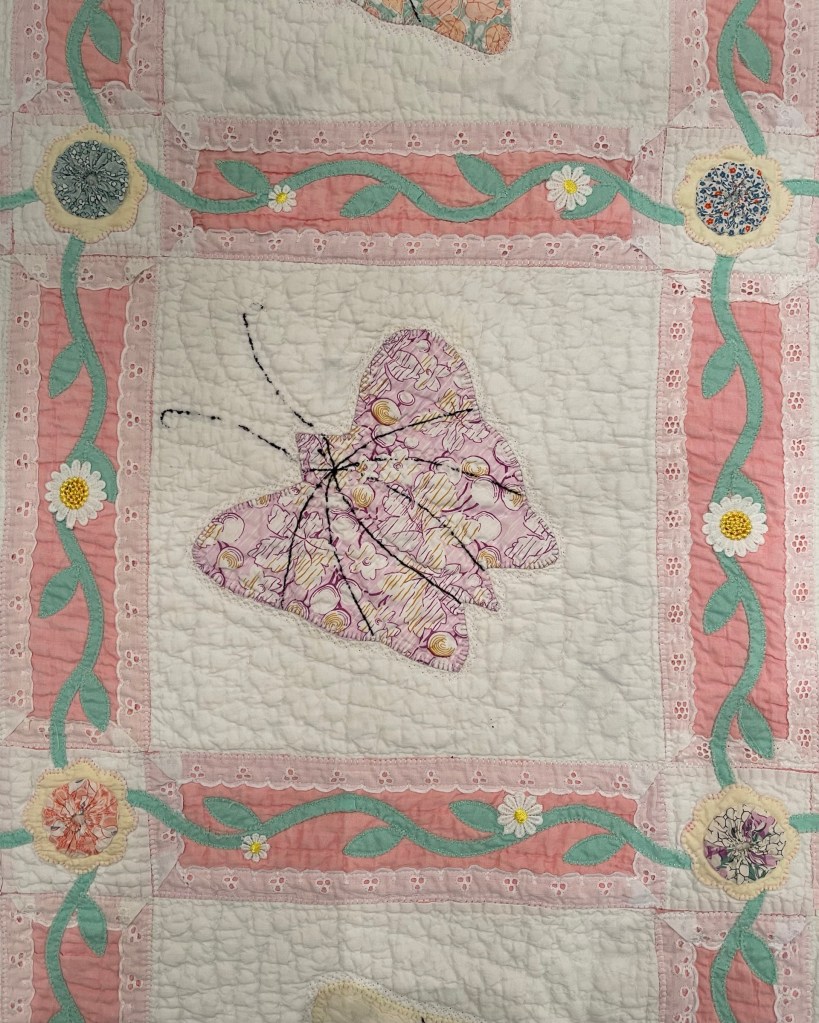
Here’s where I forgot to take pictures. Using various vintage white or very light ivory eyelet trims, I edged each of the sashing strips. Besides liking the look of eyelet, this also brought down the heavy look of the solid pink fabric. Imagine the pic below does not have green vines. 🤪
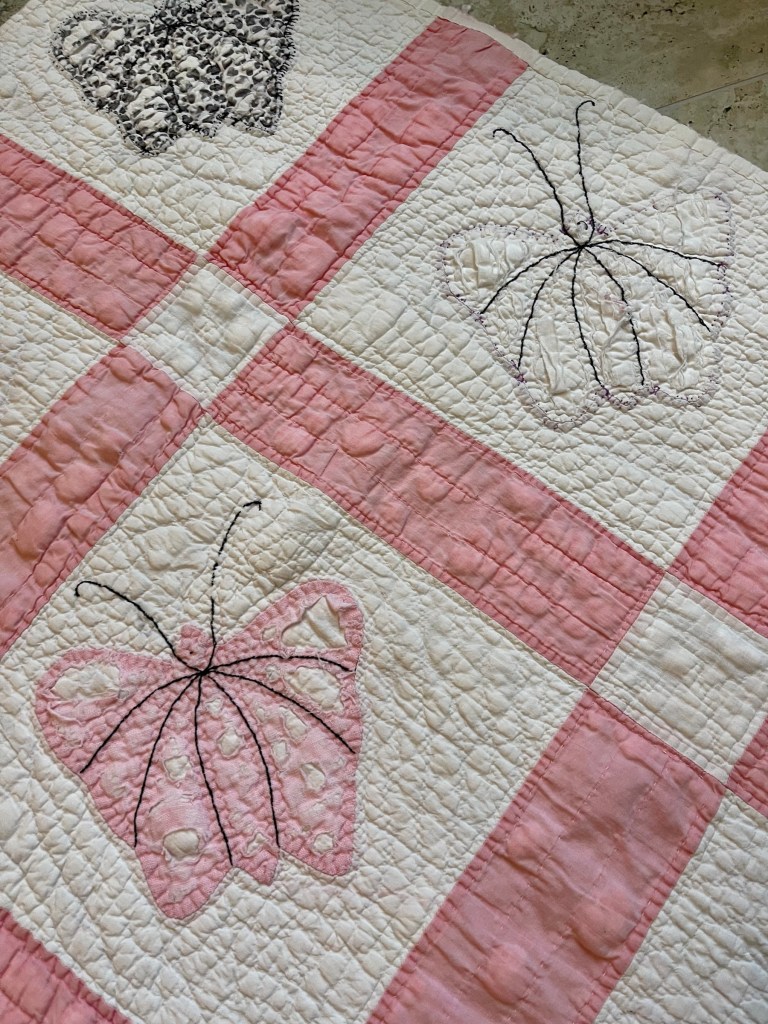
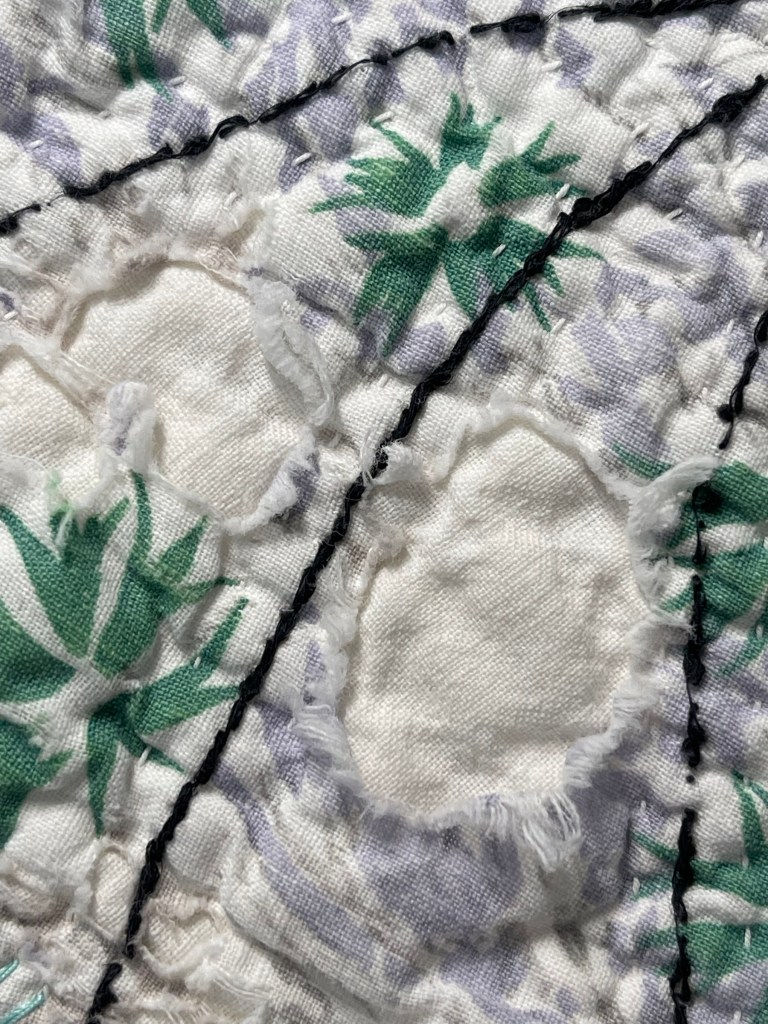
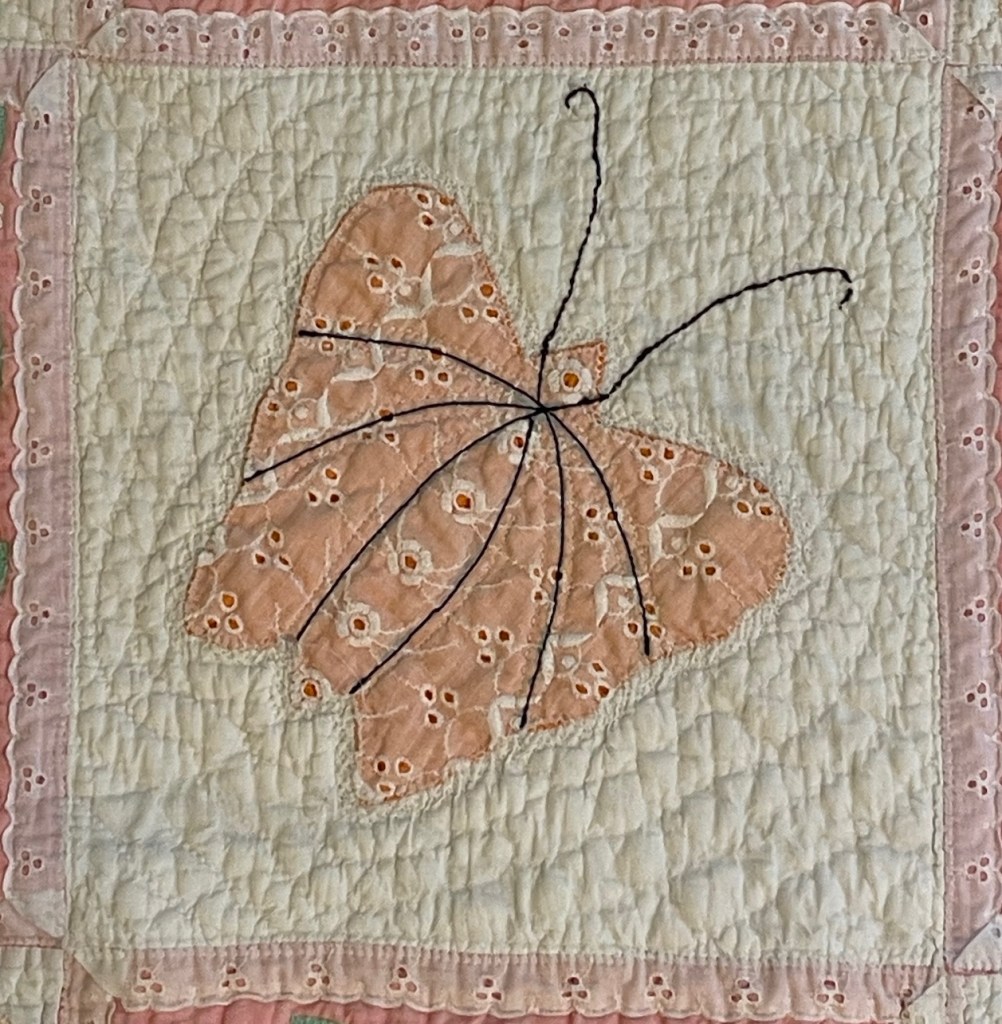
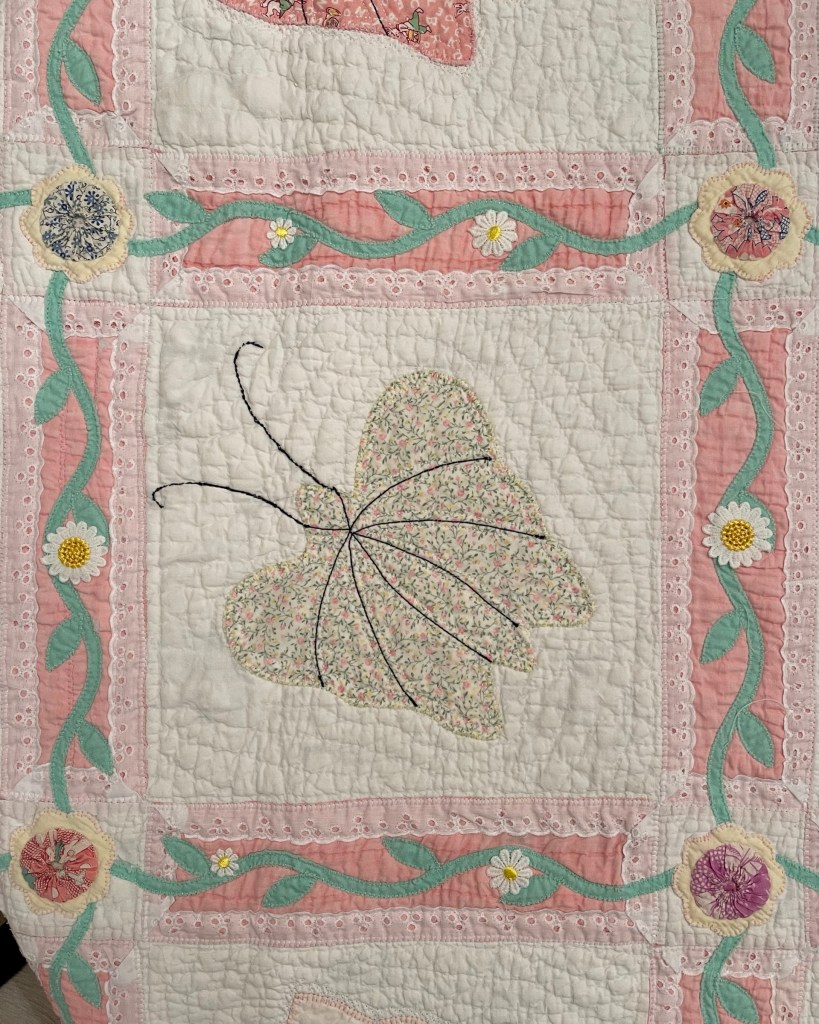
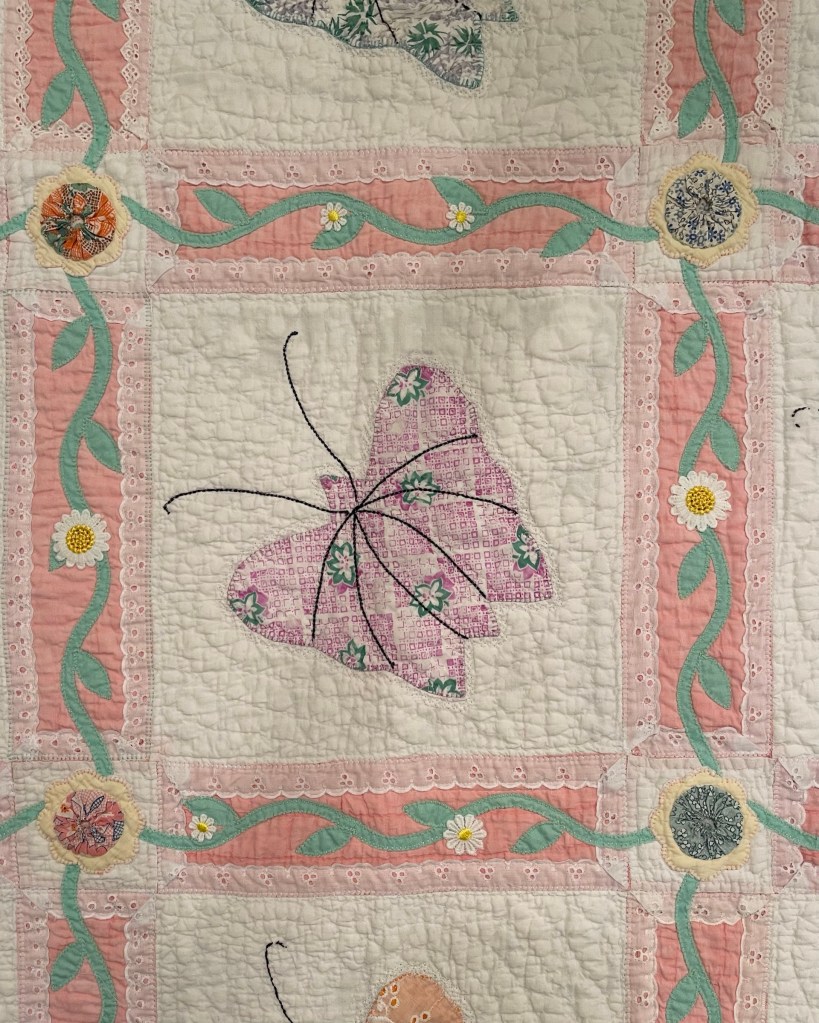
Let me jump to a Butterfly needing a fabric fix. Here are before and after pics of a “repair” that did not involve replacing the fabric. I stitched a small zig-zag stitch at the outer edge of the missing fabric.
I might have mentioned at the top of the blog that my intentions when rescuing or saving any vintage quilt are never to completely restore the piece but rather, I try and let the quilt retain its well loved appearance and at the same time add just enough to give it new life. Every one of my rescue quilts, when I am finished, take a trip through my front load washing machine and dryer and are ready to be used.
The three pictures below show: 1. The damaged Butterfly fabric, 2. A closeup of the machine zig-zag stitch around the damage and 3. The Butterfly after stitching and the trip through the laundry.
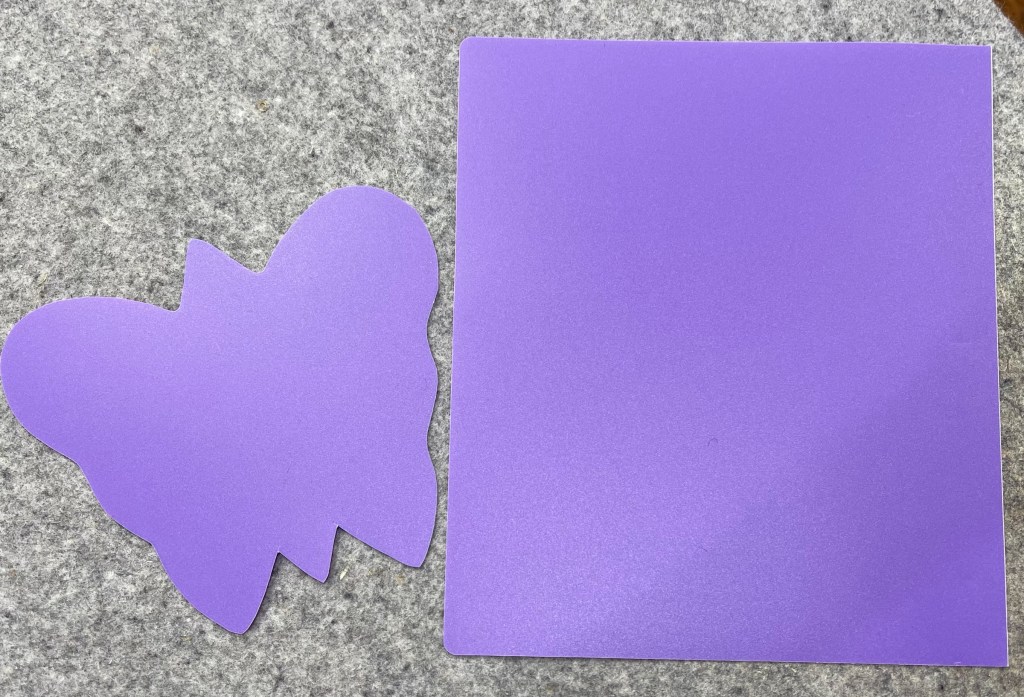
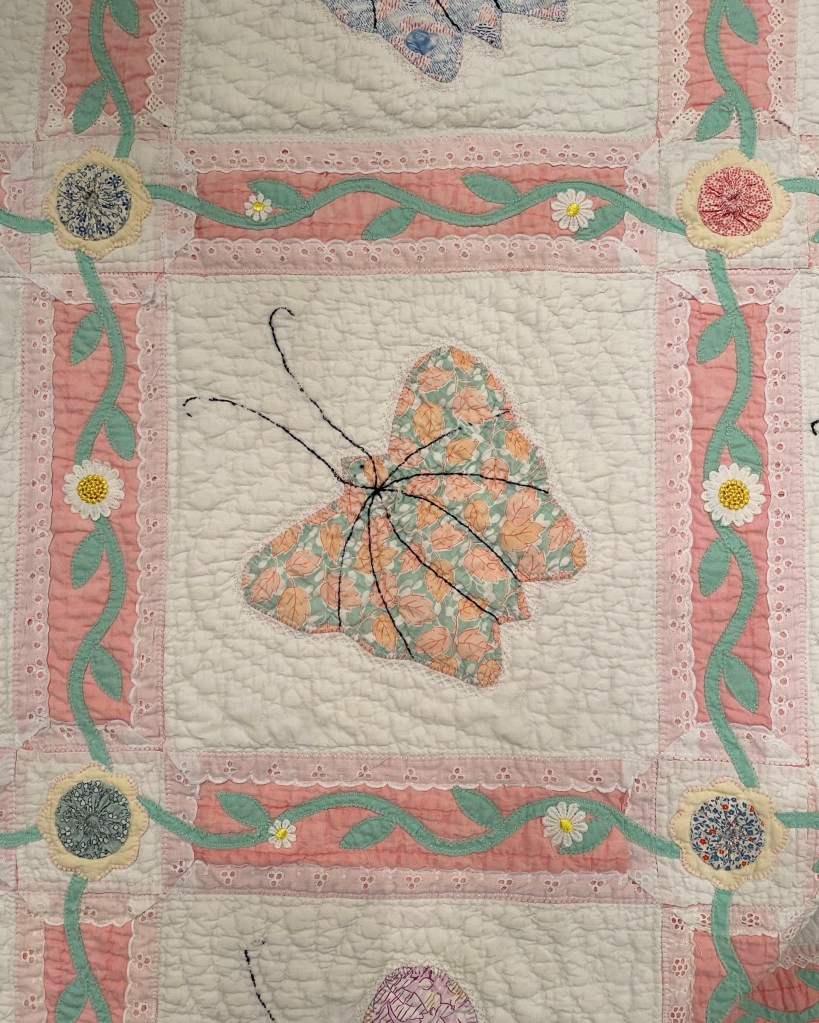
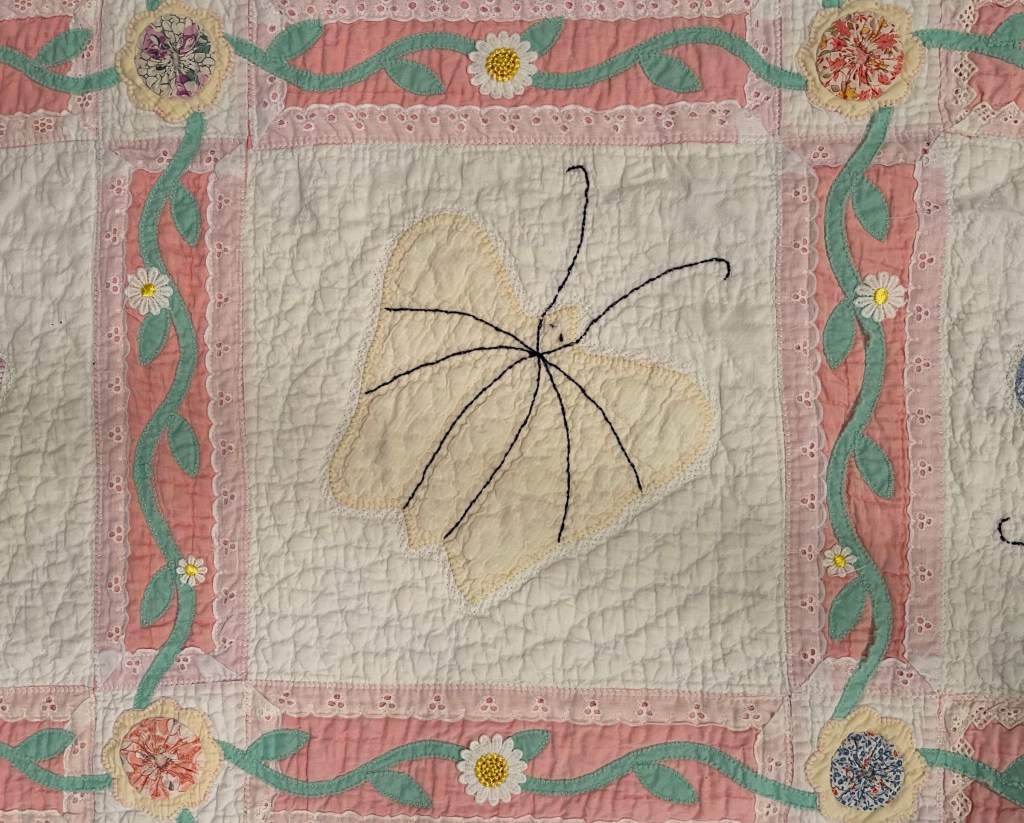
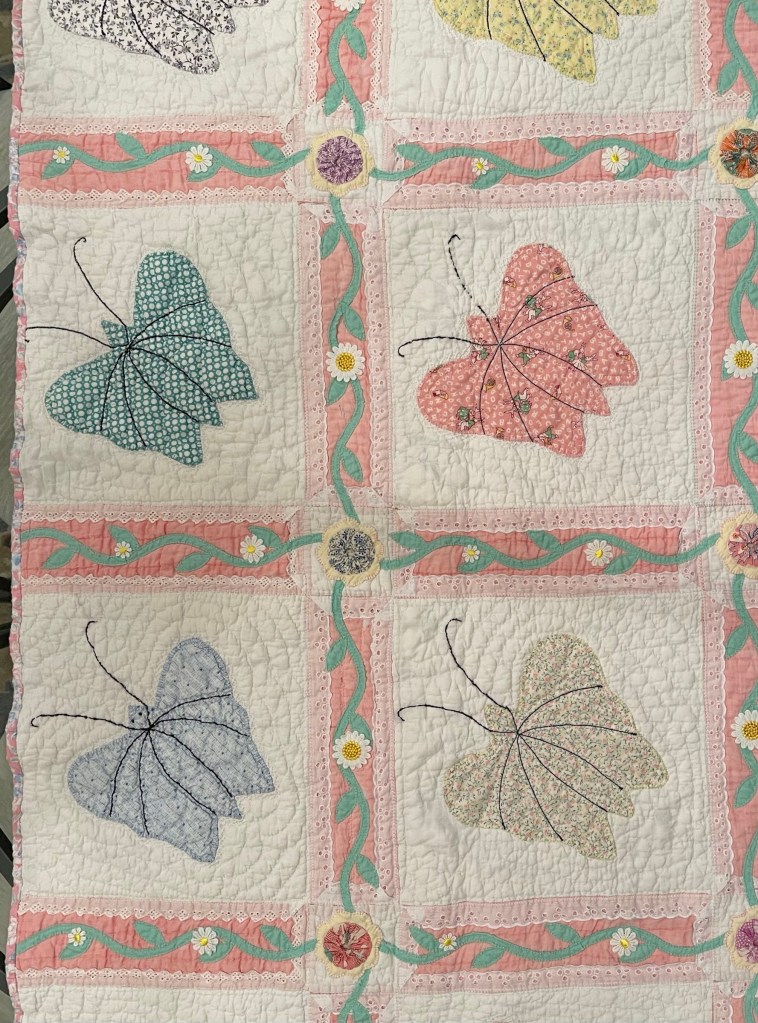
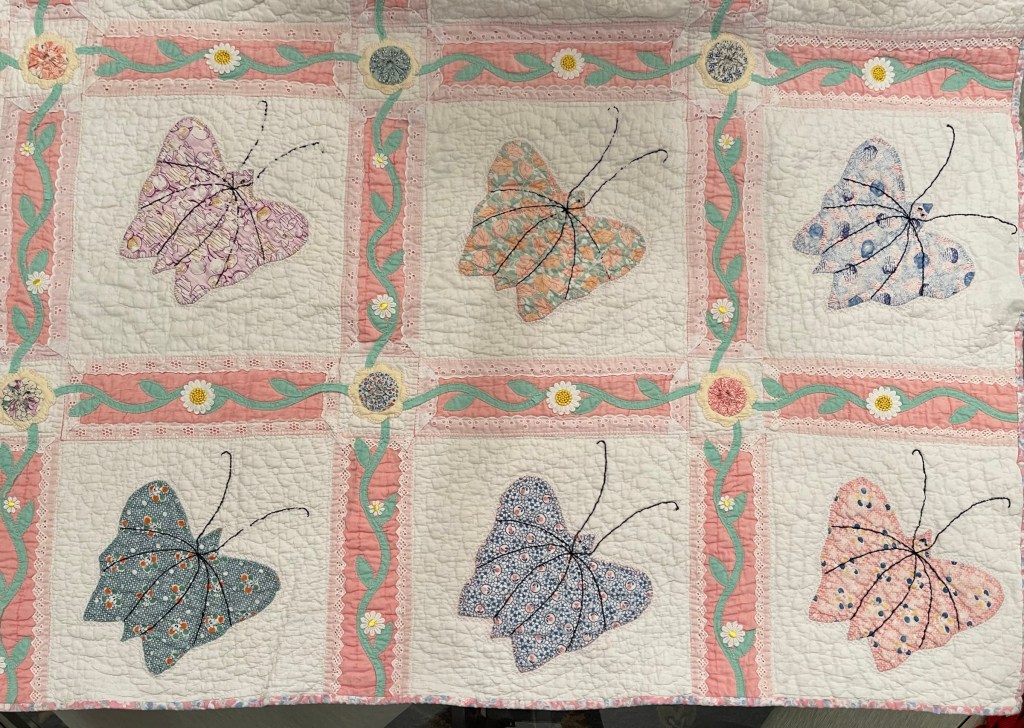
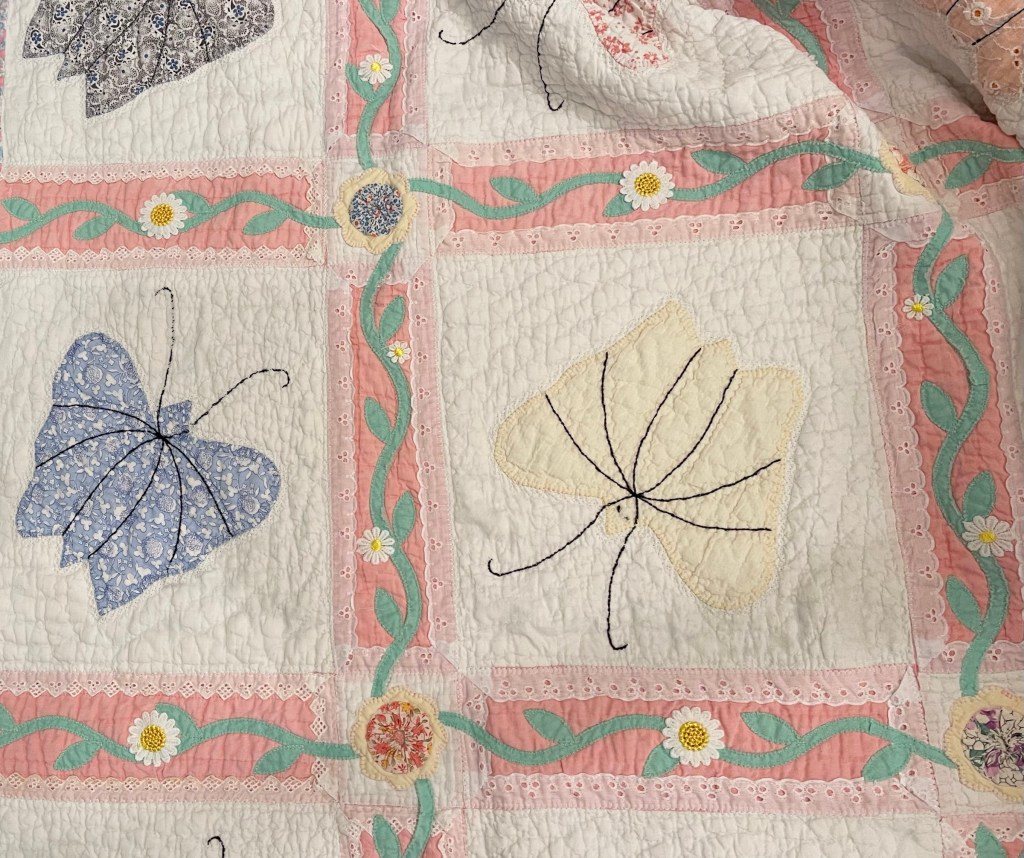
Several of the Butterflies were so badly damaged that they needed to be replaced. Keeping it in one piece I carefully removed one badly damaged Butterfly, I placed it on a piece of flexible plastic, drew around it with a sharpie and cut it out with my utility scissors.
About the purple plastic: the Dollar Store to the rescue. Any one of these types of stores sell three ring binders with flexible plastic covers. They are perfect covers for making templates. Using a box cutter I cut off the front and back. I’ve used these plastic sheets for years, they come in so handy for template making.
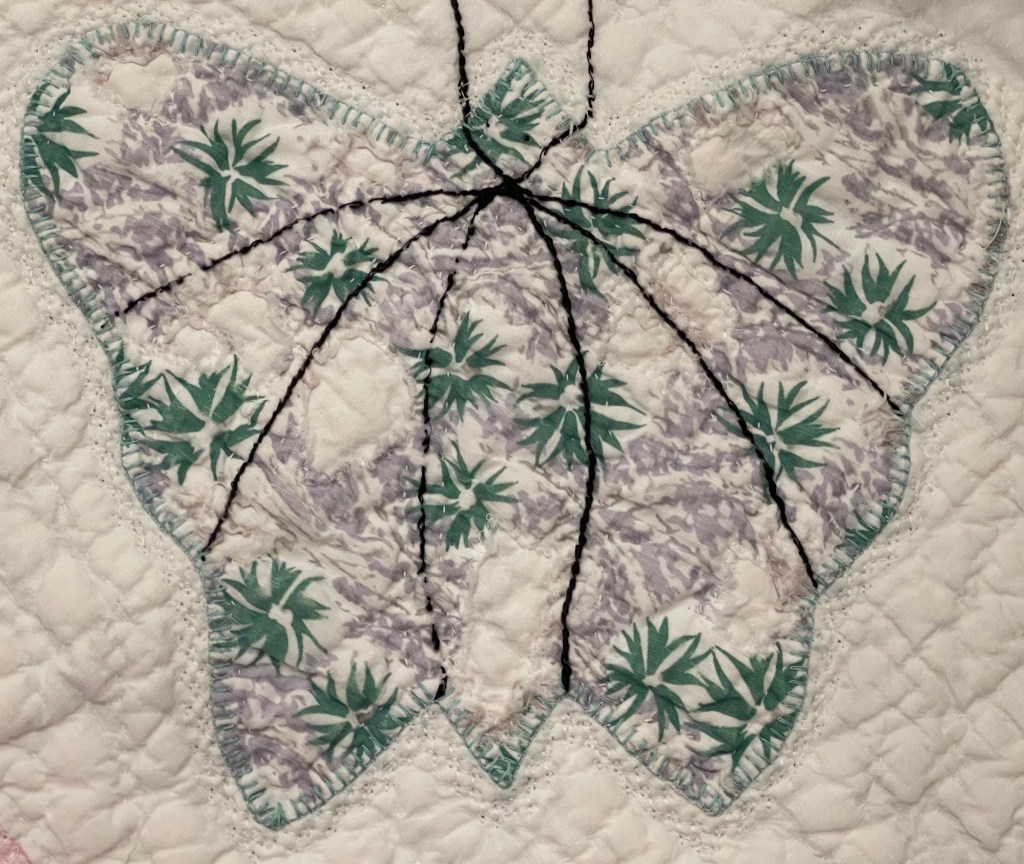
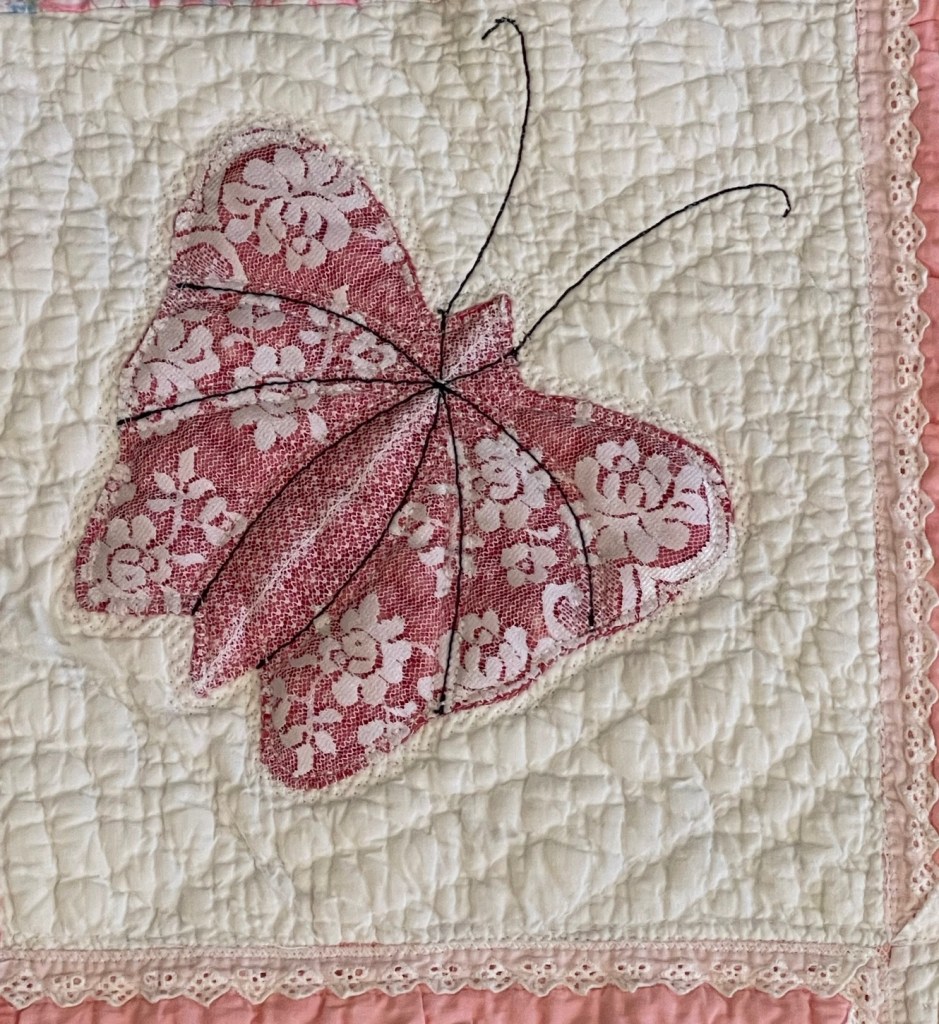
This is a new fabric Butterfly. This is also the “wrong” side of the yellow print fabric. The motifs were perfect but the “right” side of the fabric was not. Would you have known if I hadn’t said…probably not.
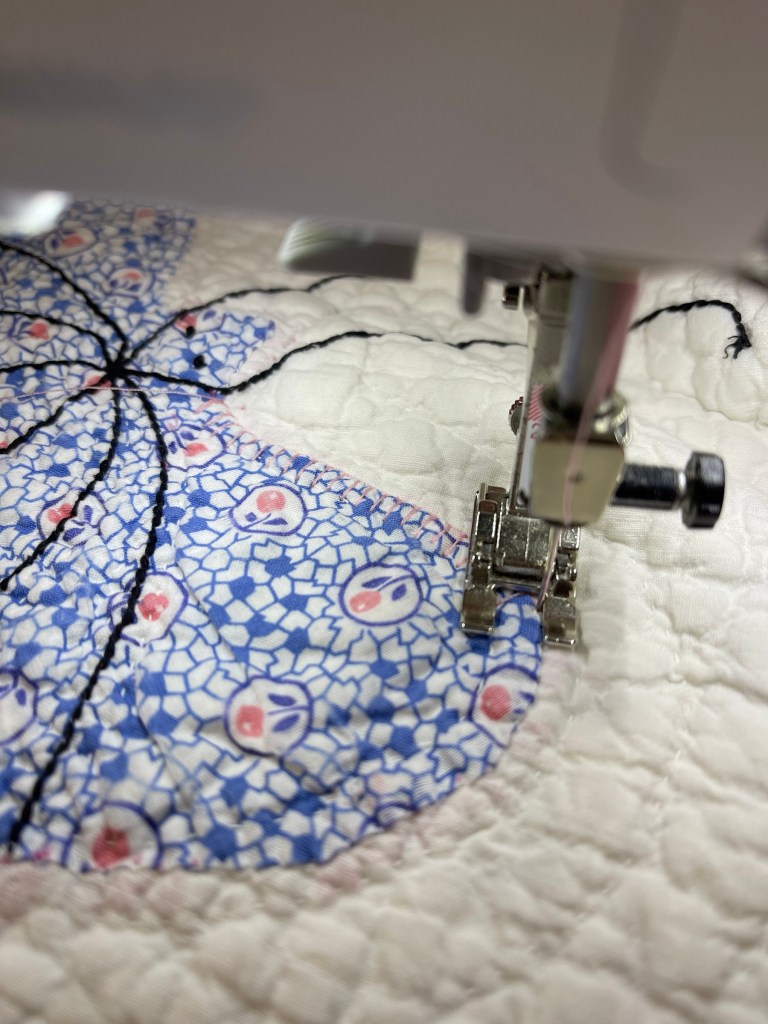
There’s so much more to tell you about in this picture above. After pinning the motif in place I raw edge machine applique stitched around the outer edge.
I then decided to add a machine decorative stitch around the outside of the butterfly. I felt it gave the butterfly an almost lacy edge look.
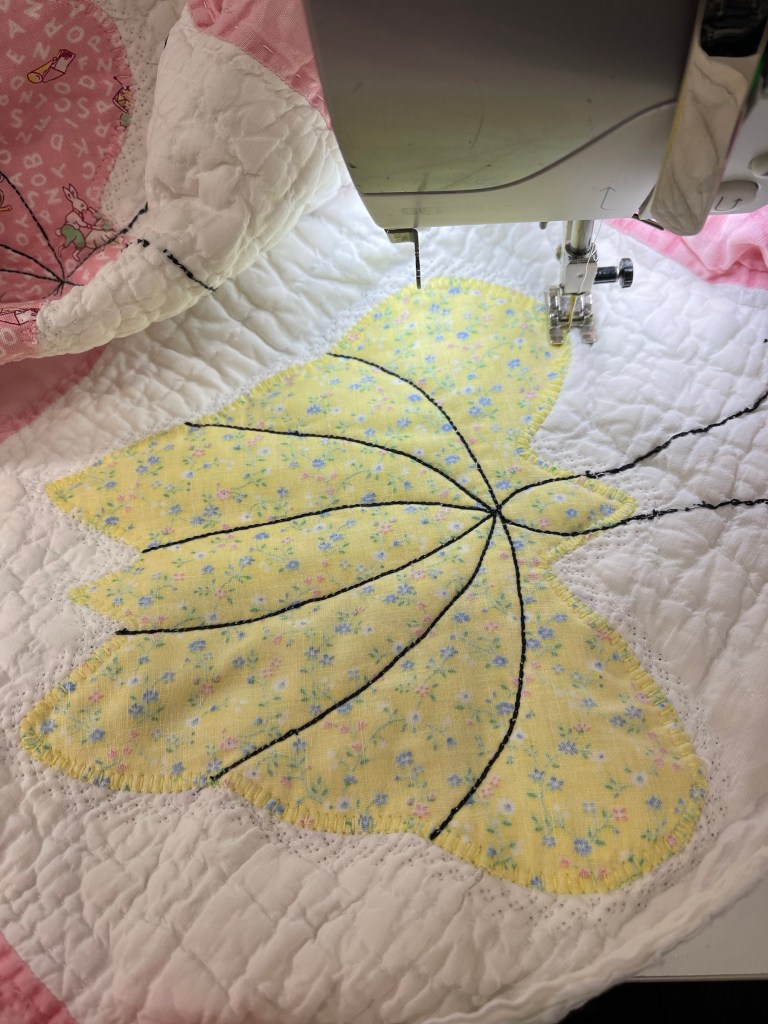
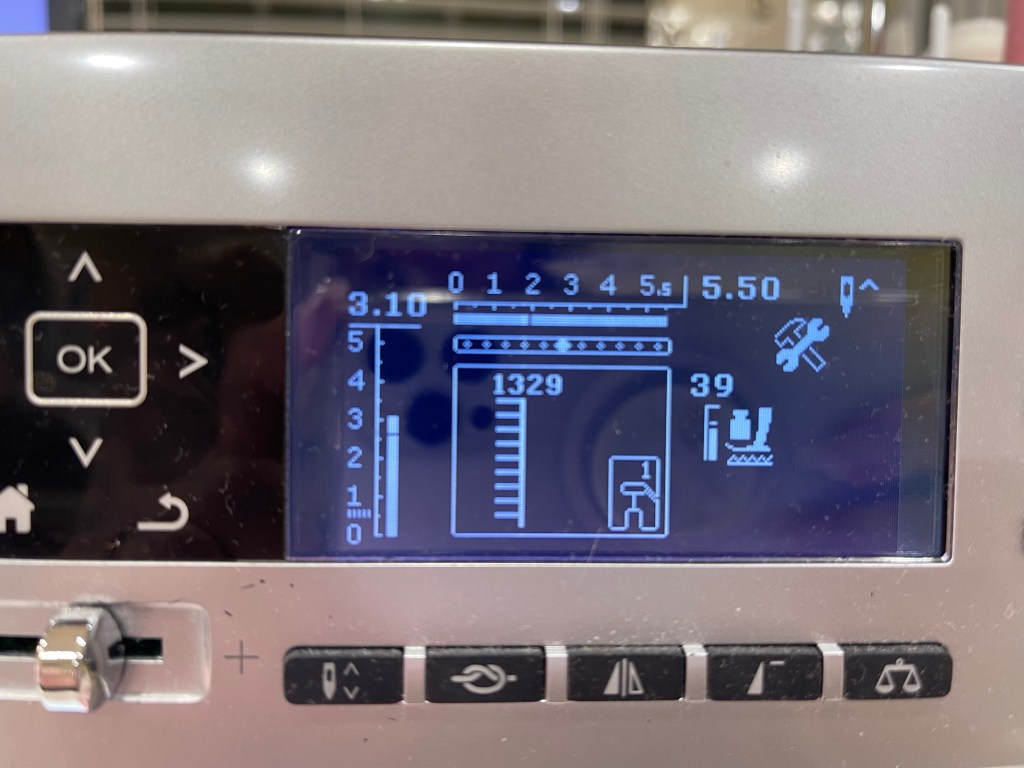
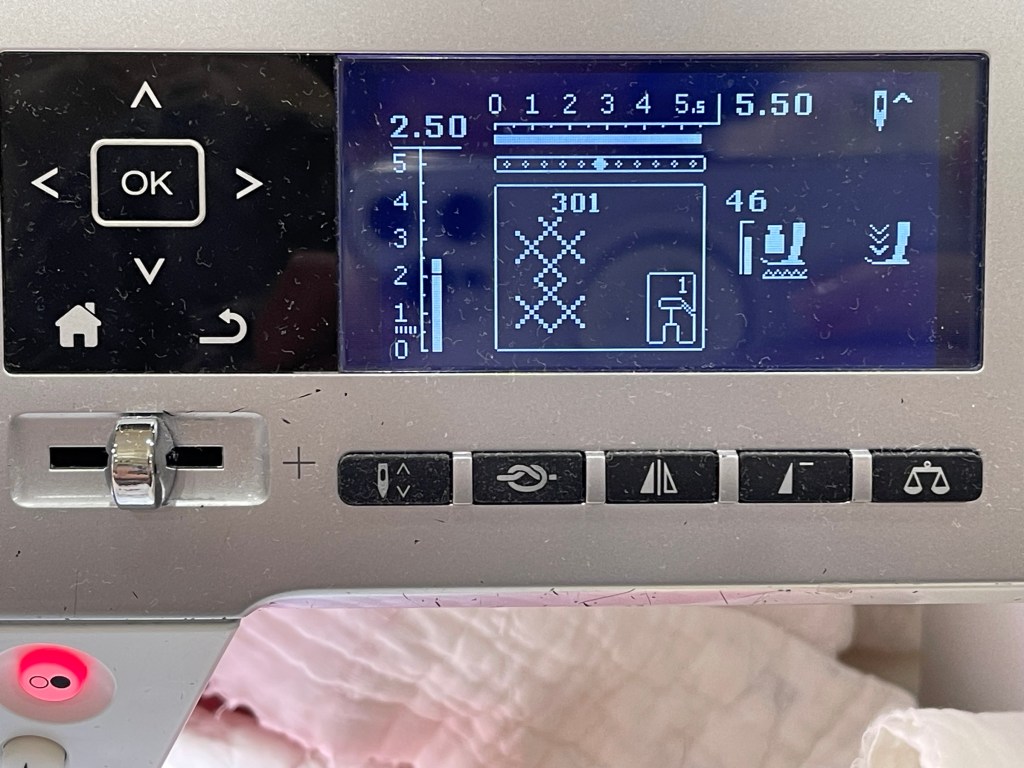
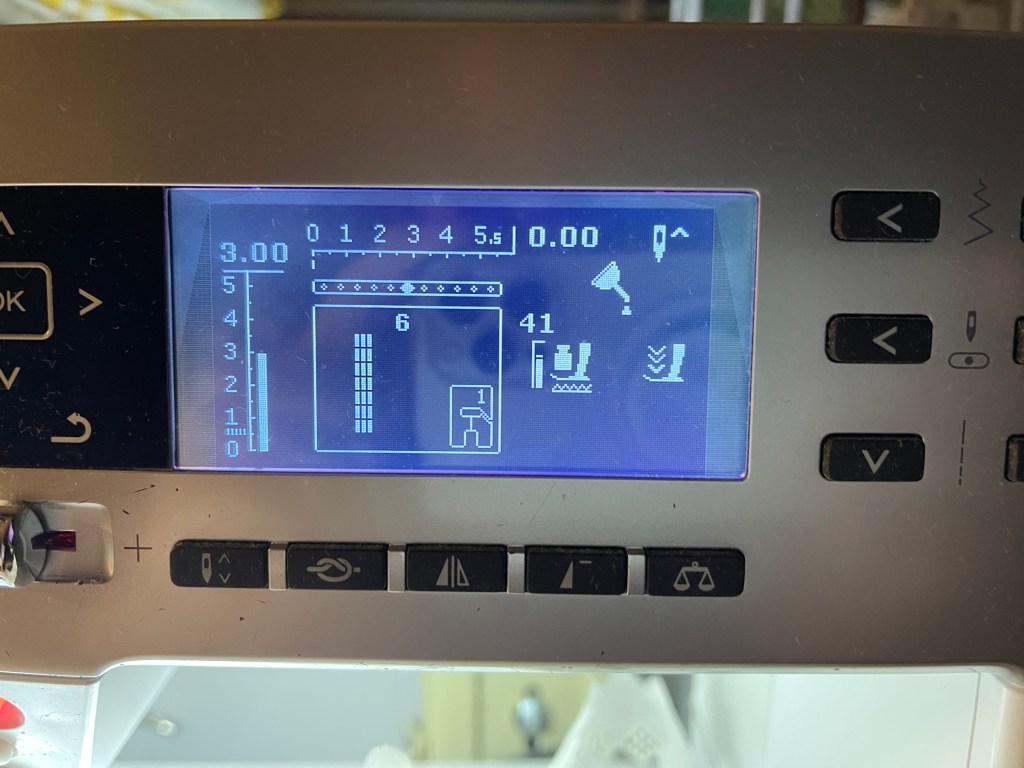
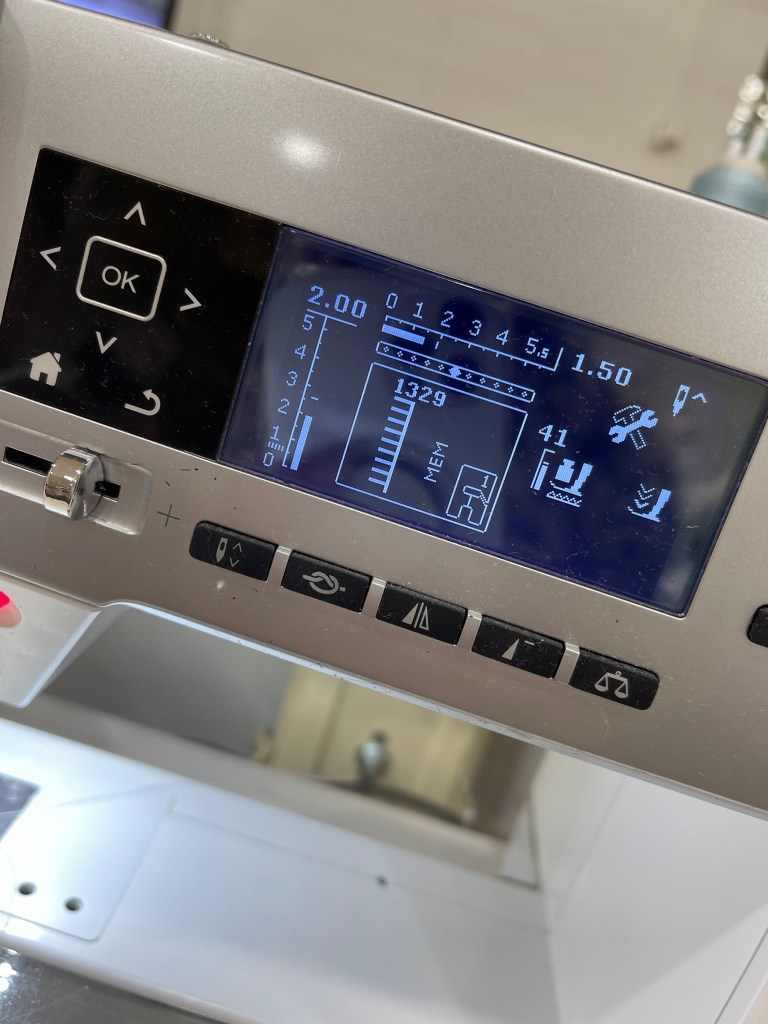
Next, using a 12 weight black thread from Aurifil and the Triple Stitch on my machine I stitched the black lines. Below you’ll find what the stitches look like on my sewing machine screen:
I sew on a Bernina 550, this is a pic of stitch #1329, the Applique or the Button Hole stitch. Stitch #301, used around each of the Butterflies.Stitch #6, the Triple Stitch (which looks nothing like the outcome). Once you play around with the Triple Stitch you will find it’s wonderful when trying to mimic a hand embroidery Stem Stitch.
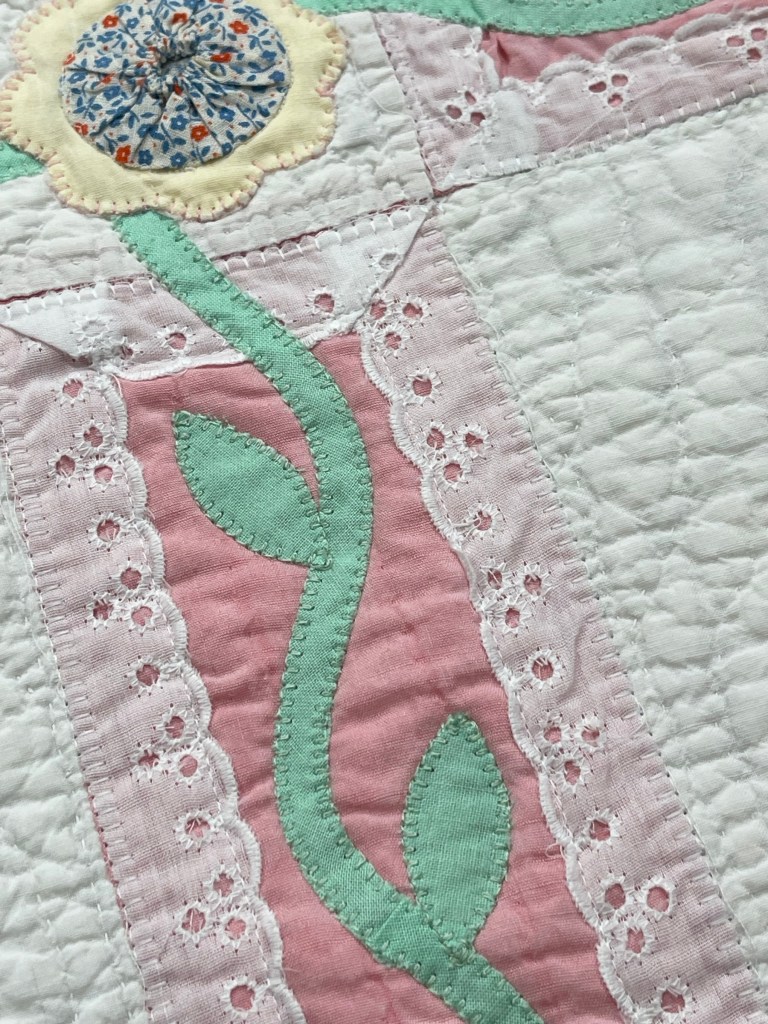
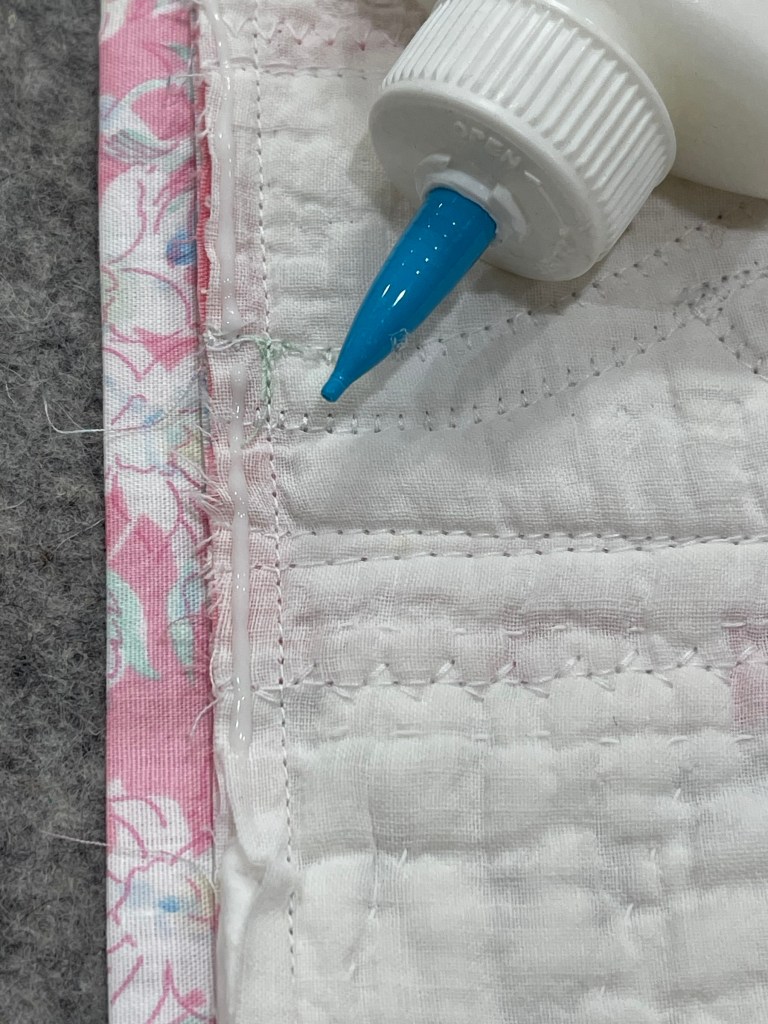
There’s a lot going on in the above pic, I’m using my Sue Pellon ruler to draw (with a black Pilot Frixion pen) the undulating lines for the green vine to follow. I wanted some consistency so I red tape marked where the ruler should be placed on the sashing strips.
The green vines, cut on bias, are held in place with Elmer’s Washable School Glue and you may notice the glue bottle has a blue tip? it’s the end of a mechanical pencil and produces such a nice narrow line of glue!
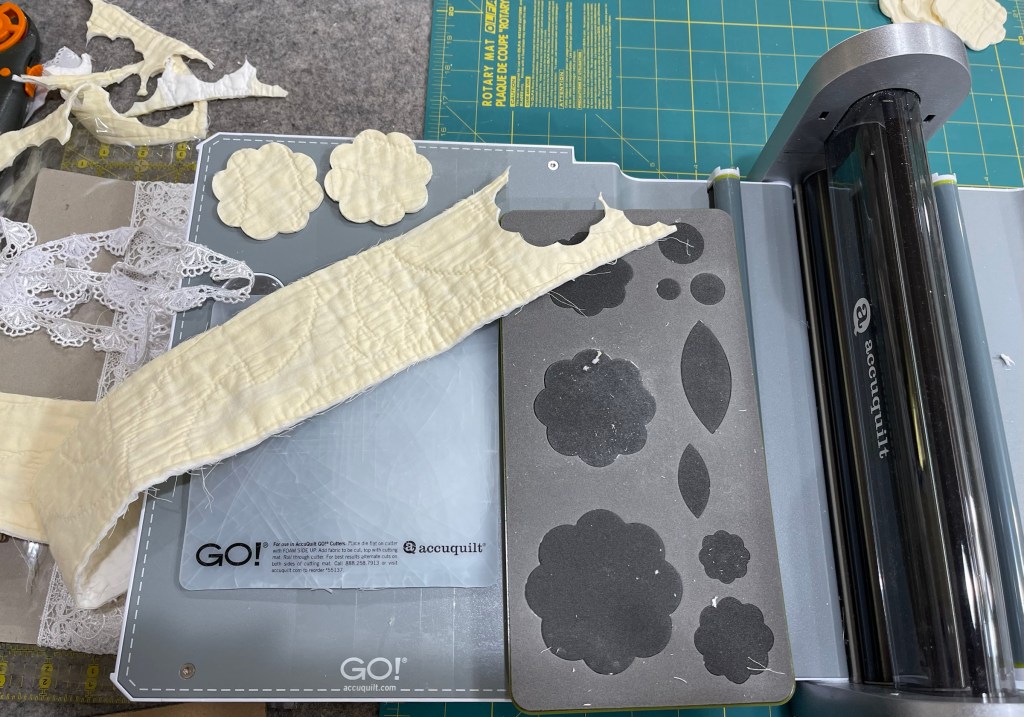
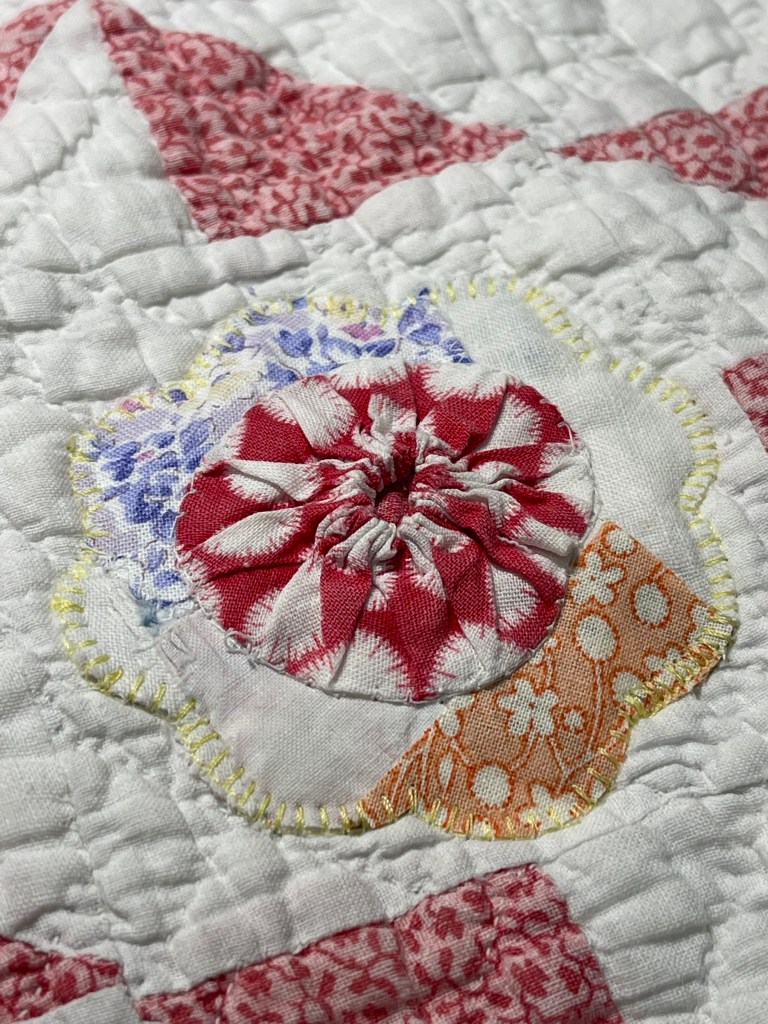
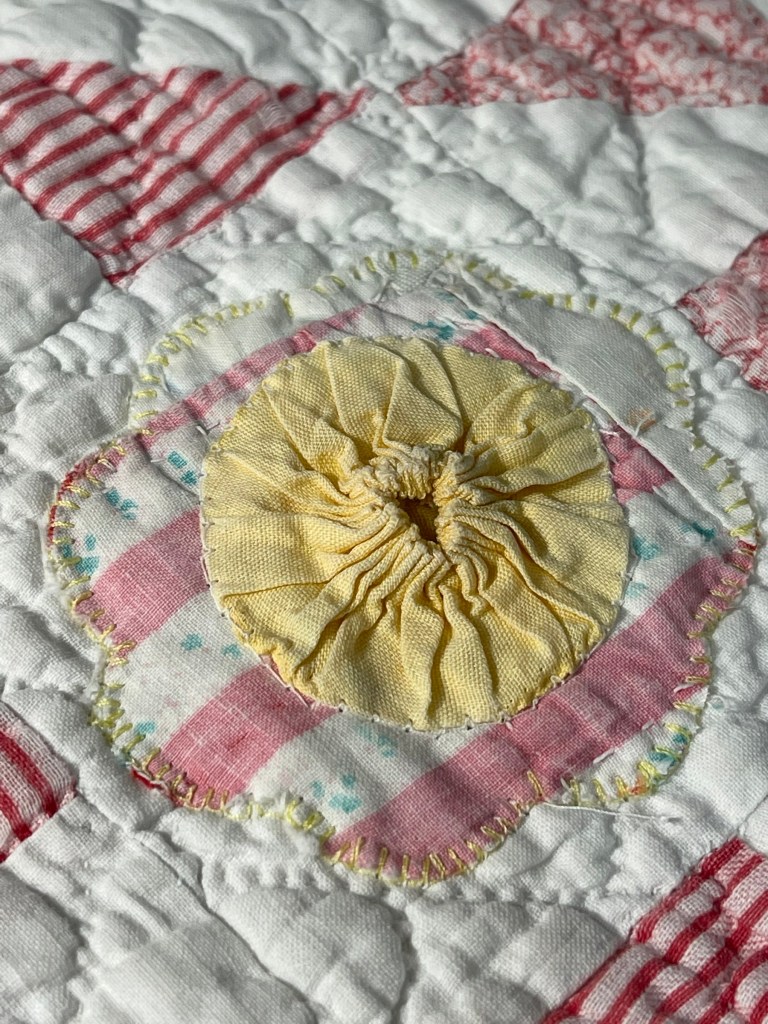
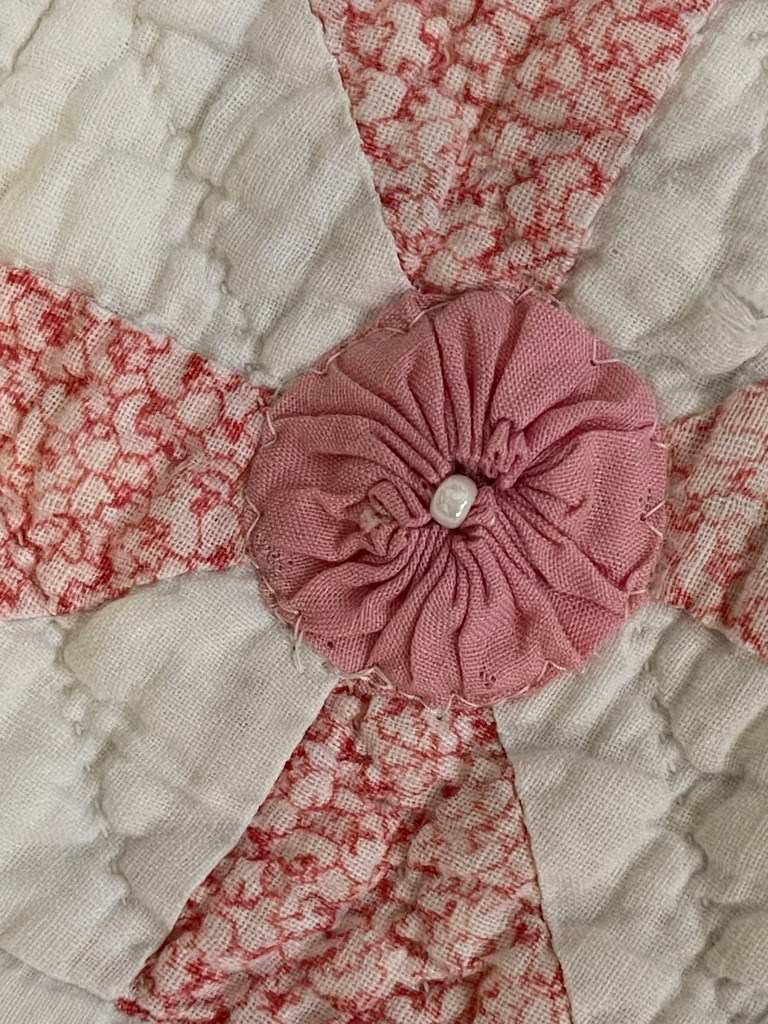
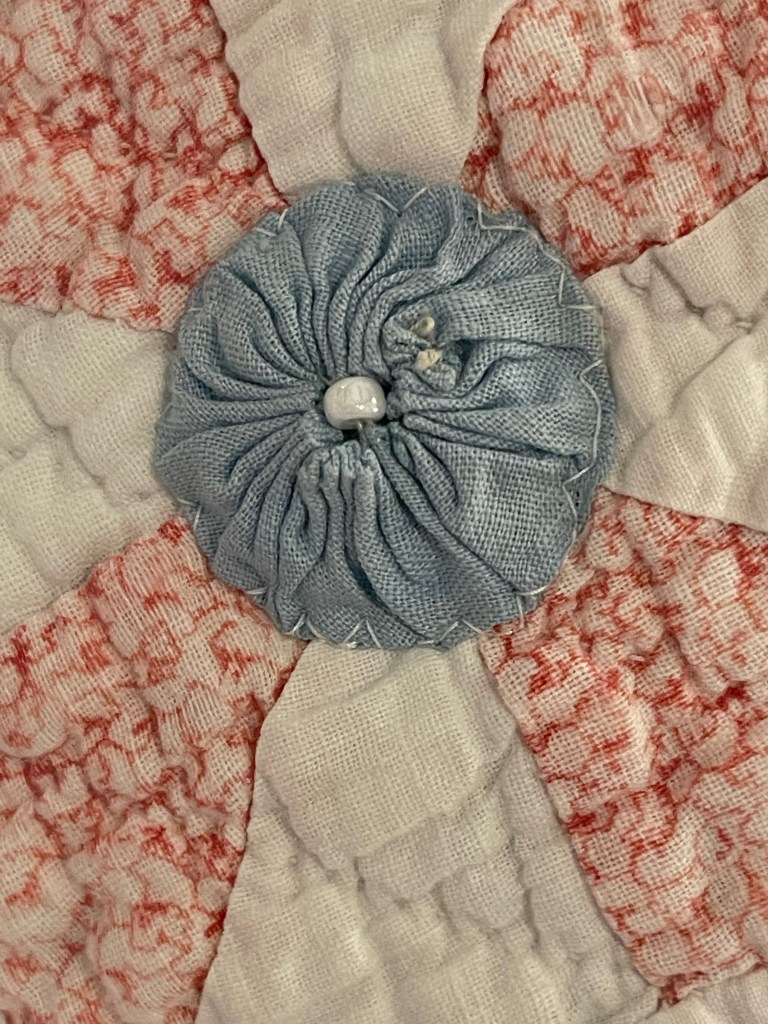
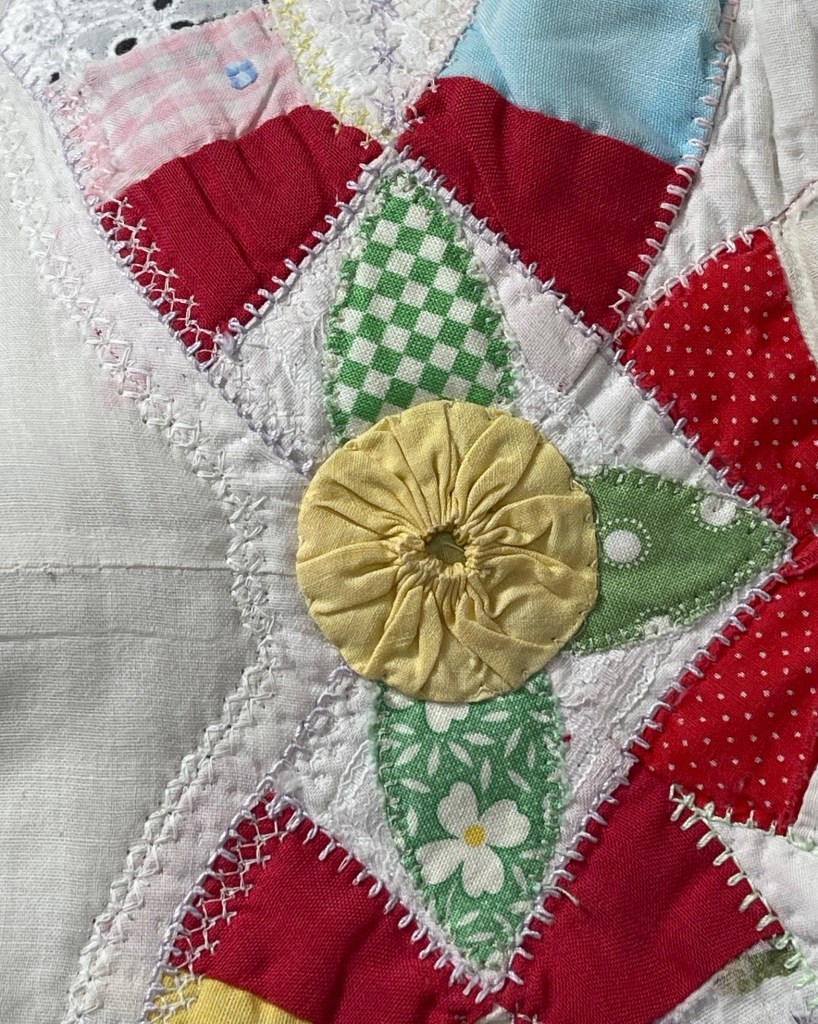
The cornerstones in the quilt sashings need flowers! I’m using my Accuquilt Cutter and Die to cut flower shapes from old very worn and torn quilt pieces.
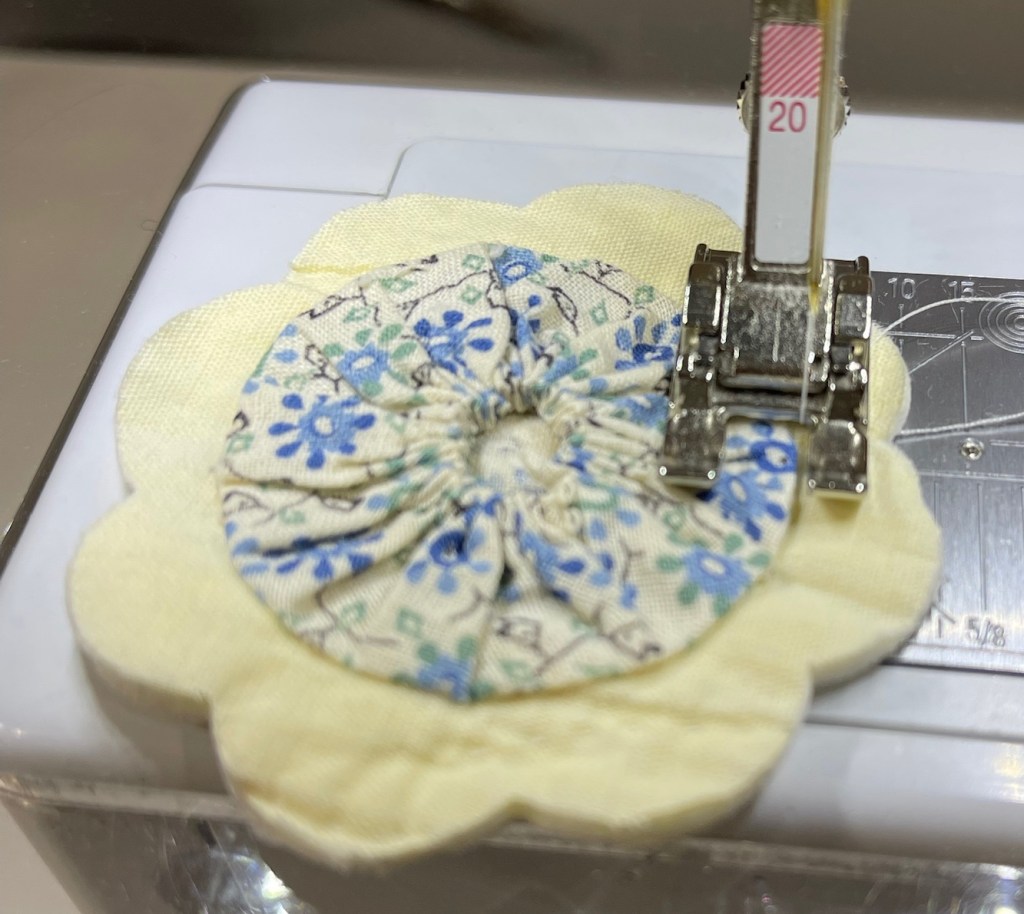
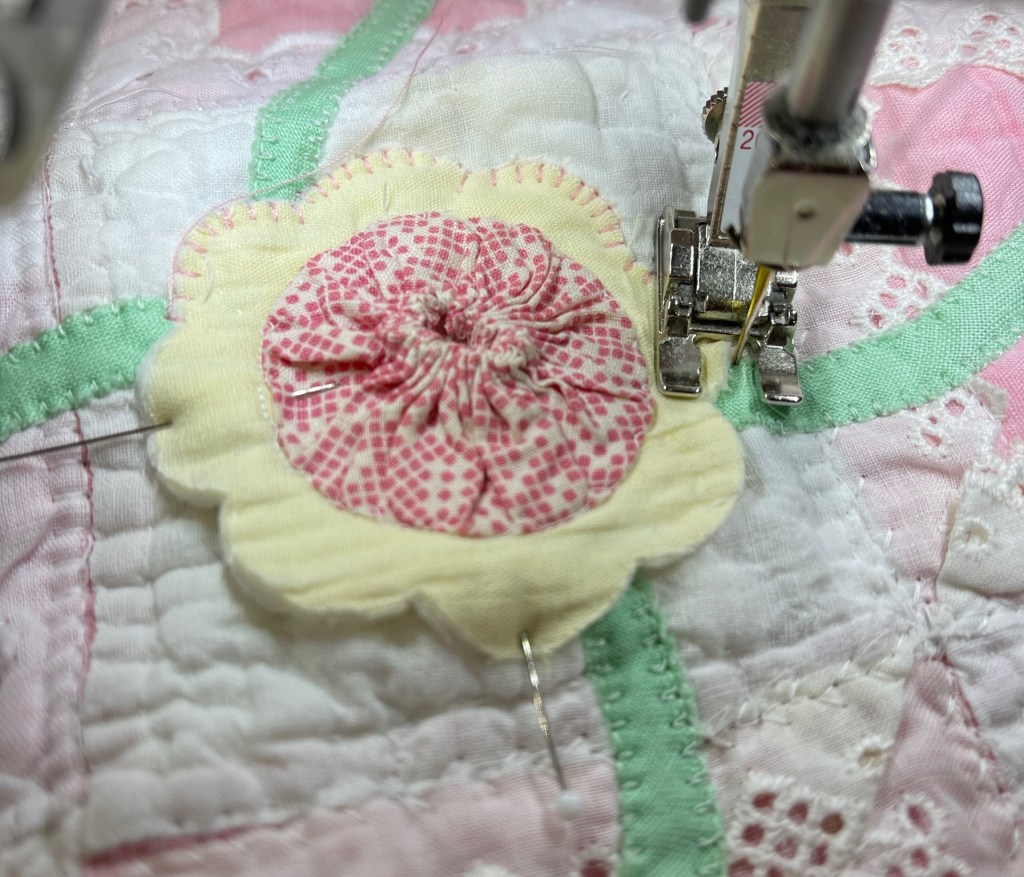
Each of the yellow old quilt flowers gets a vintage yo-yo machine stitched to the center.
Once the yo-yo’s are secured, the unit is machine appliqued to the quilt.
And the green leaves…all 160 of them…glued, pressed to dry and machine applique stitched. (And yes, I did fix the bad stitching on the vine)
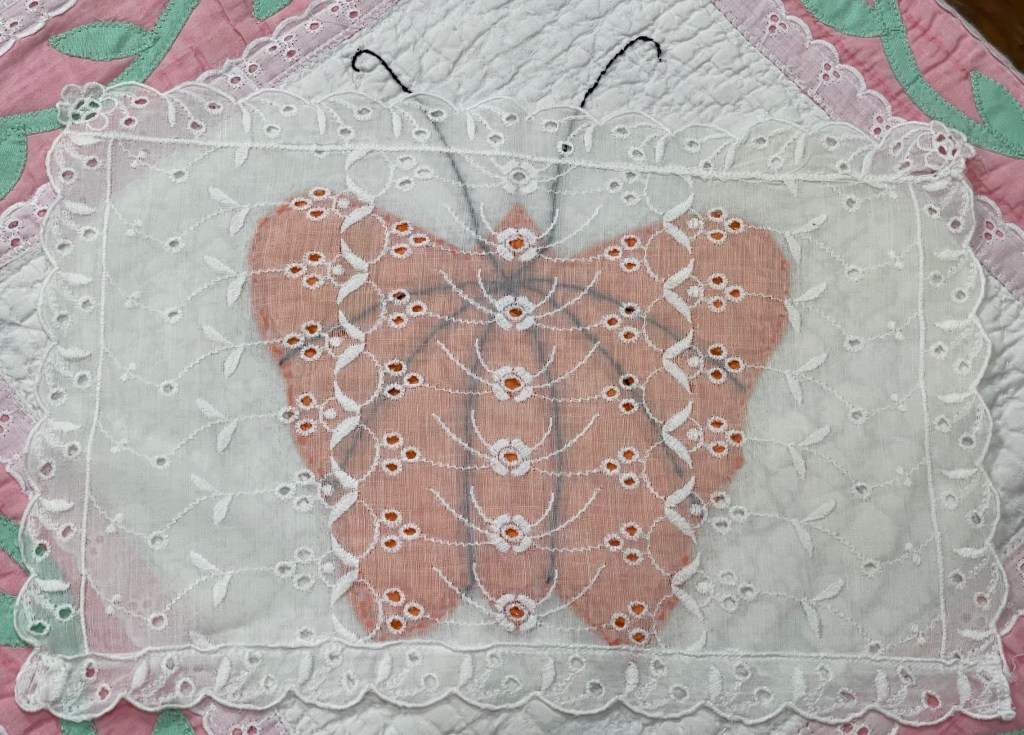
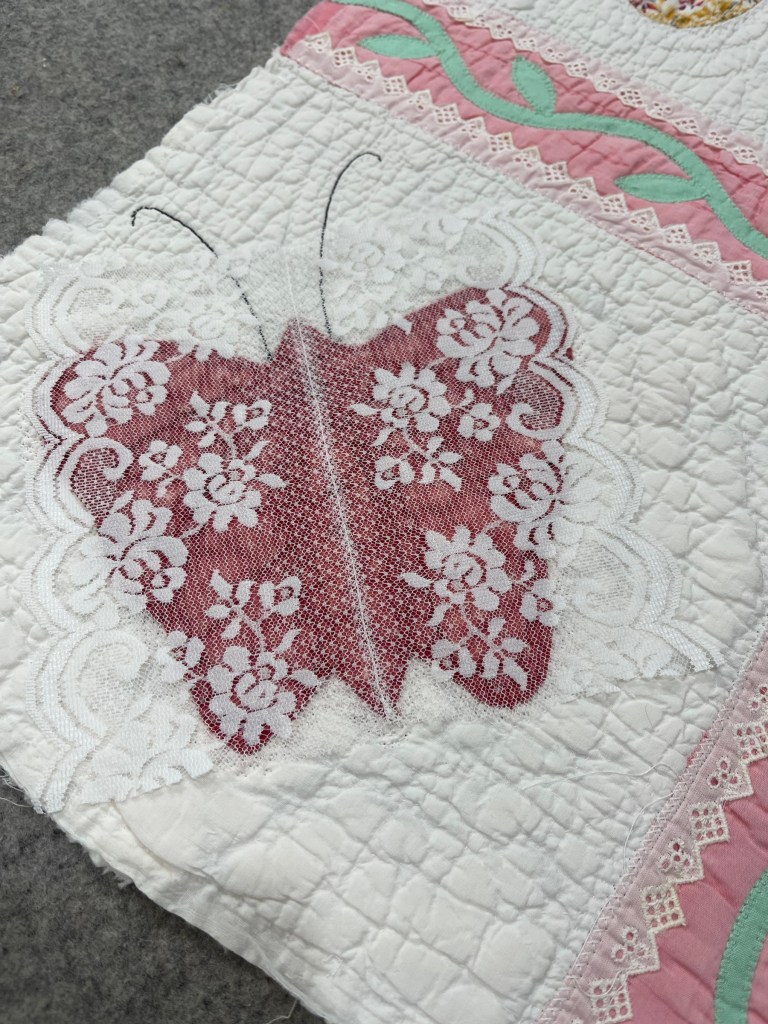
Remember the original quilt and the orange Butterfly? It got a lovely make-over by laying a small light ivory eyelet doily on top. I ran a very thin bead of glue around the outer edge of the orange Butterfly, carefully placed the doily atop, iron pressed to dry the glue and then carefully trimmed away the excess doily.
The deep red Butterfly got basically the same treatment as the orange but this time I used white lace.
This method of “no-pin” fold over binding was an experiment for me. I used the regular method of pinning the binding to the front side of the quilt and stitching. I then opened up the seam and steam pressed. My next step was to flip the quilt over to the back side, run a thin bead of glue at the edge of the quilt seam, fold the binding to the back covering the stitch line and iron press dry.
Success! I was “pin free” as I hand stitched the binding down. Note: if trying this, do not!!!…do not glue close to or on the machine stitch line. It is very difficult to hand stitch your binding closed thru dried glue!
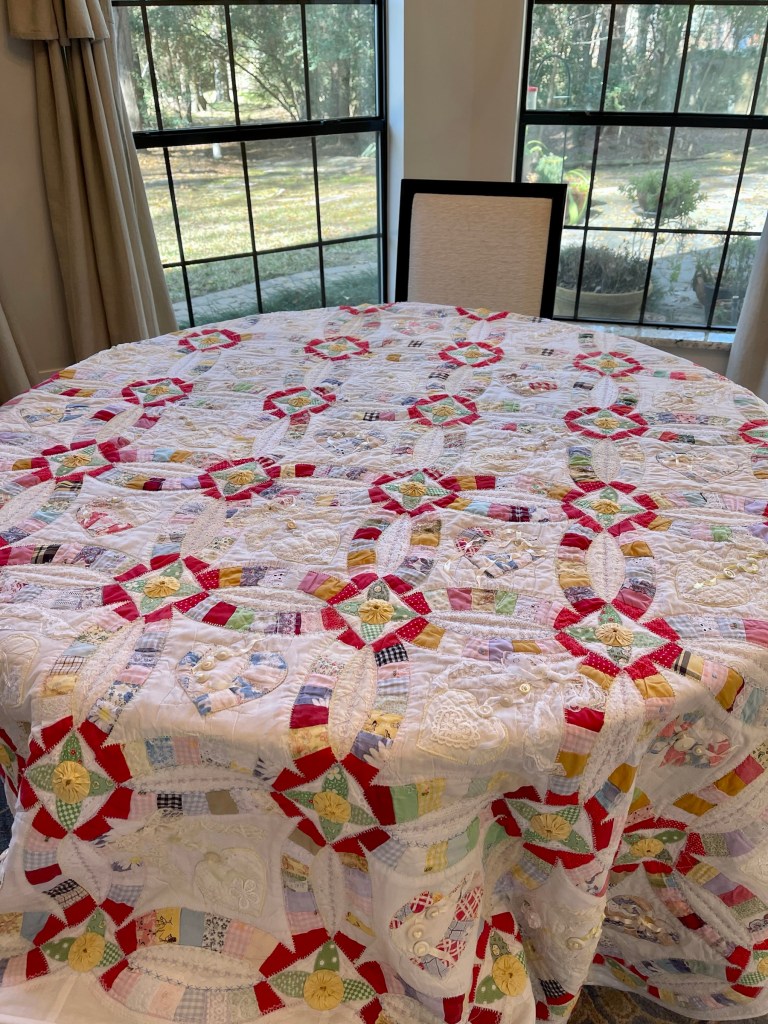
Finished!
The vines needed flowers! I found these new daisy flowers in my stash, I think they are perfect for the sashings.
The “before” picture.And “after”.
I just love this quilt rescue, I hope you do too! Blessings and Happy Quilting! Rhonda
When friends get together, all sorts of crazy things can happen! Last July while retreating at the Boehm House in Moulton, TX, Robyn says something like: how about we cut this quilt in half, you do your thing on your part and I’ll do the same and when we meet again next summer we can compare our finished pieces! I jumped at the chance to work with half a quilt!
I’m going to overload you with pictures that will hopefully give you some ideas about transforming a vintage quilt should you ever get the urge. Grab a coffee and let’s go!
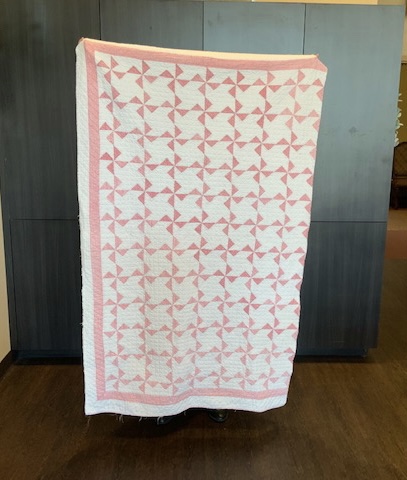
First let’s start with a picture of the finished challenge quilt above. The next picture shows you what I started with. The quilt is in relatively good condition, just showing signs of a bit of wear. Quite cuddly some might say.
In this project my goal was two fold: to give the pinwheel quilt pops of color and interest and to do most if not all the work by machine.
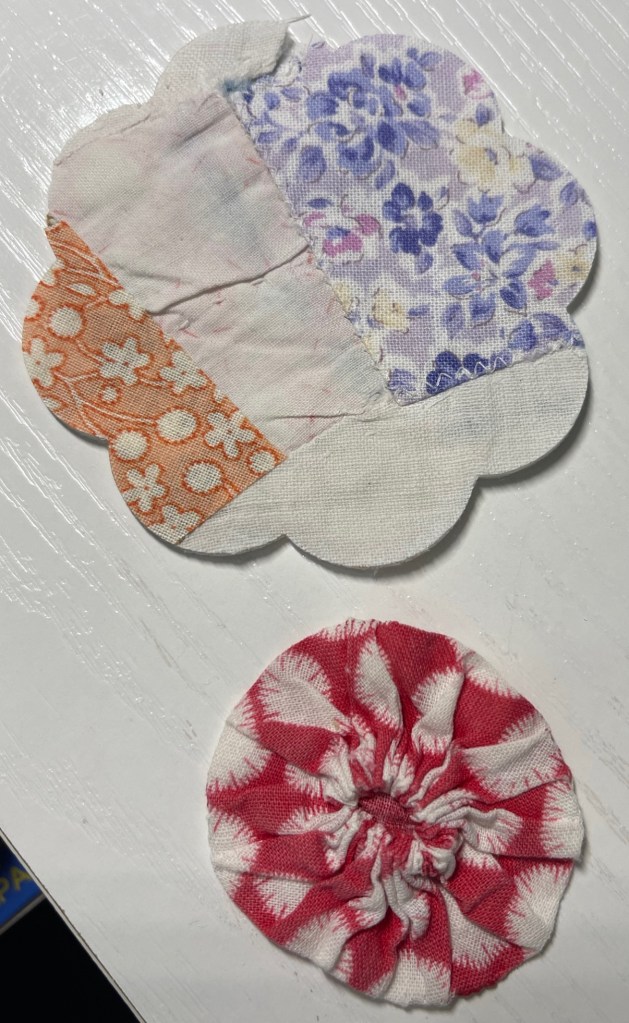
Using an Accuquilt Cutter and a flower die, I cut using a tattered Double Wedding Ring as well as a yellow/white Drunkards Path.
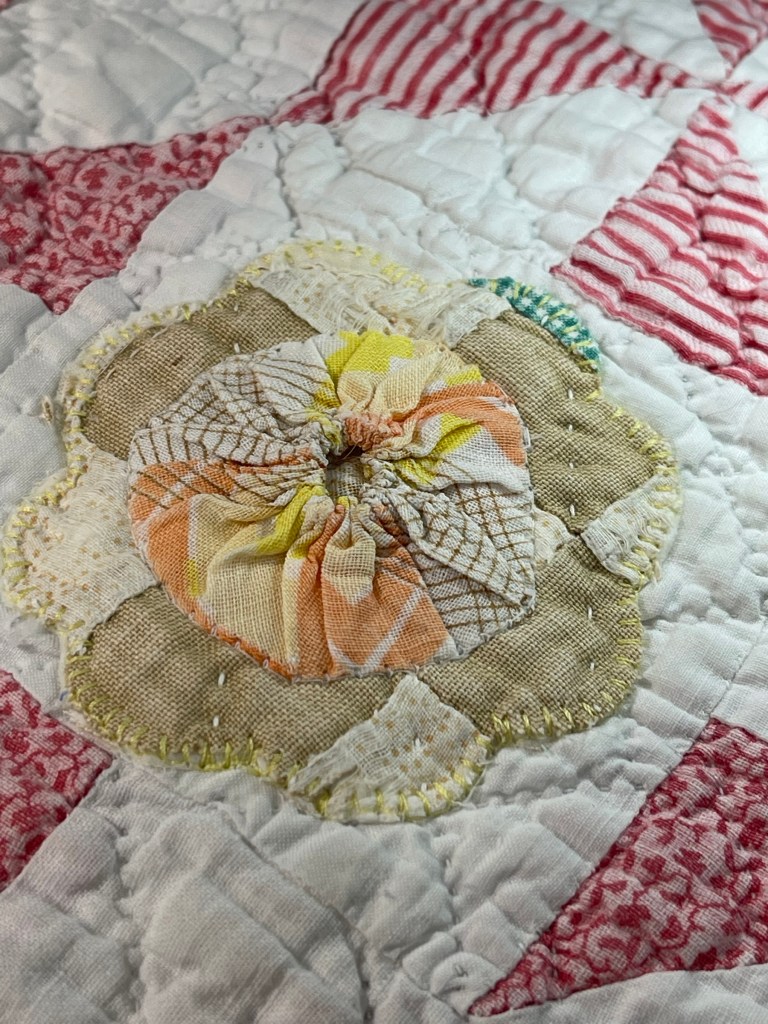
Each of the die cut flowers has a vintage yo-yo in the center. To make the process a bit easier I machine stitched the yo-yo to the flower before machine appliqué stitching the flower to the quilt. Let me explain a bit. If I had machine stitched the flower to the quilt first, each flower requires stitching/turning the quilt 360 degrees. Adding the yo-yo would require a repeat of the process. By first sewing the yo-yo to the flower, I saved time and frustration under the needle. My mantra: don’t make things harder than they need to be.
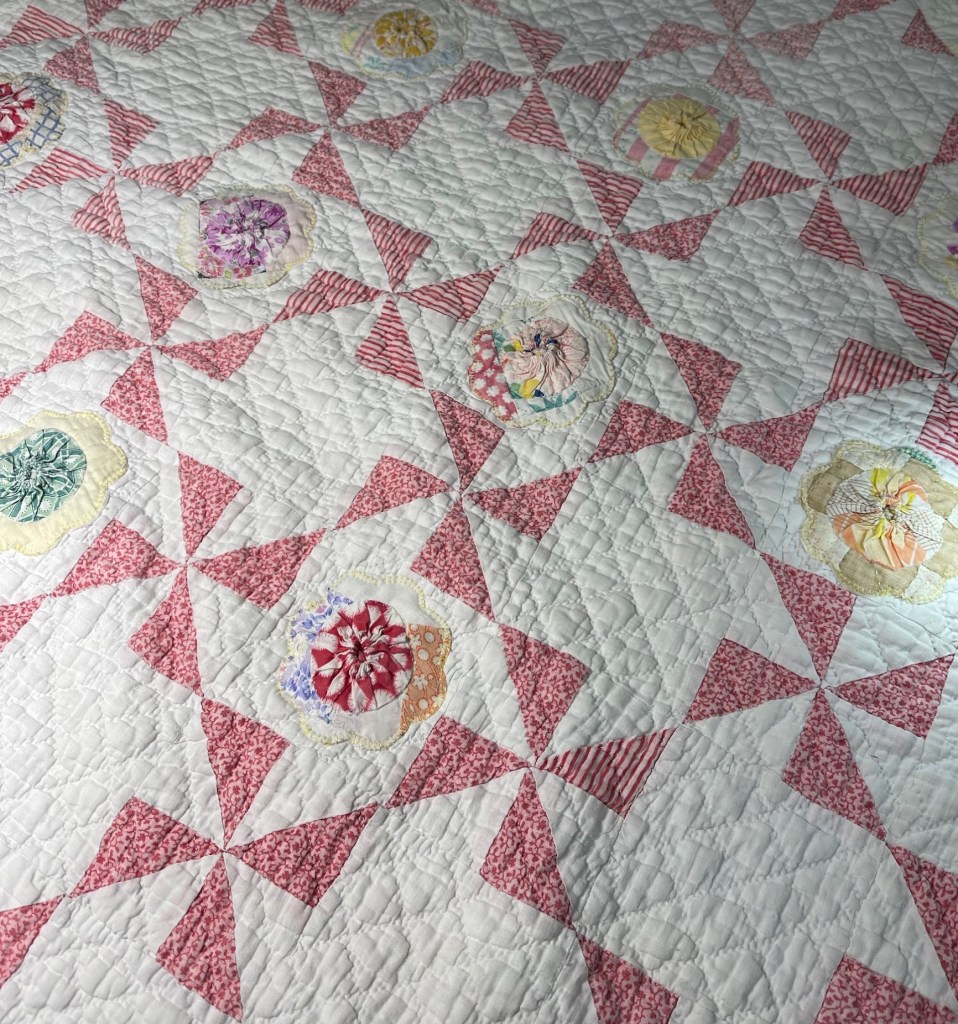
Every other open white space gets a flower/yo-yo decoration.
I sew on a Bernina 550 and used the applique stitch #1329. The default setting is perfect. I am using yellow Superior Threads, the Omni line, color 3050.
I love that by using a tattered Double Wedding Ring quilt from which to cut the flowers, it features so many pieces of the vintage feed sack fabrics.
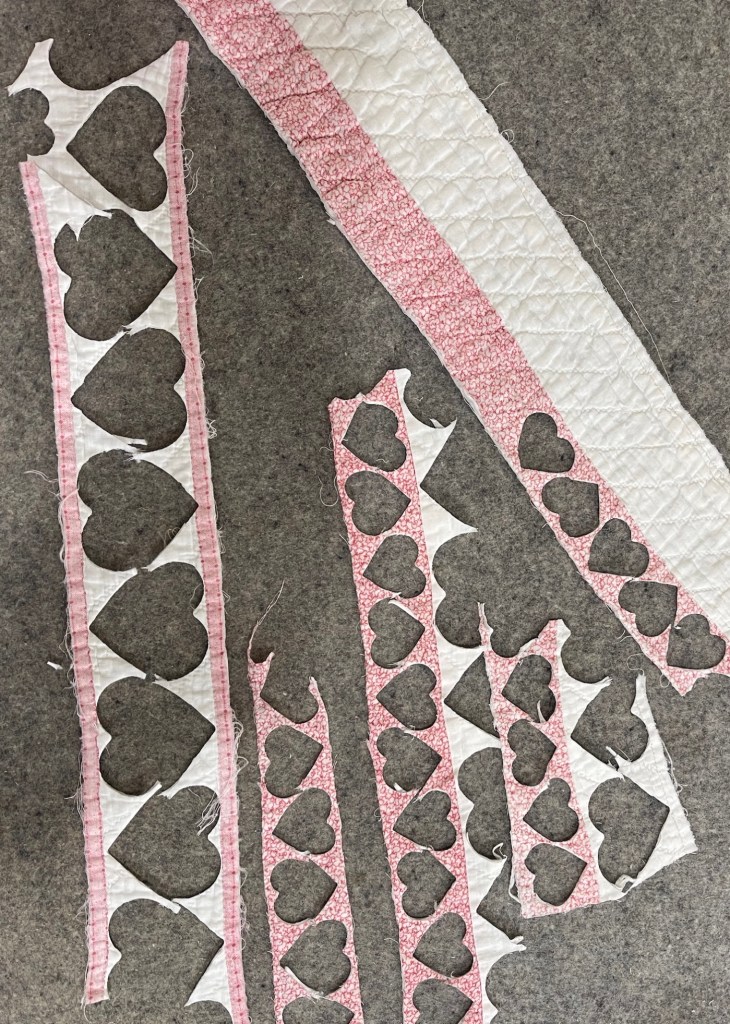
Remember how the project started? A quilt cut in half. That means I have a piece with only 3 borders. Hmmm… I cut away these borders because I can use these pieces to make smaller motifs.
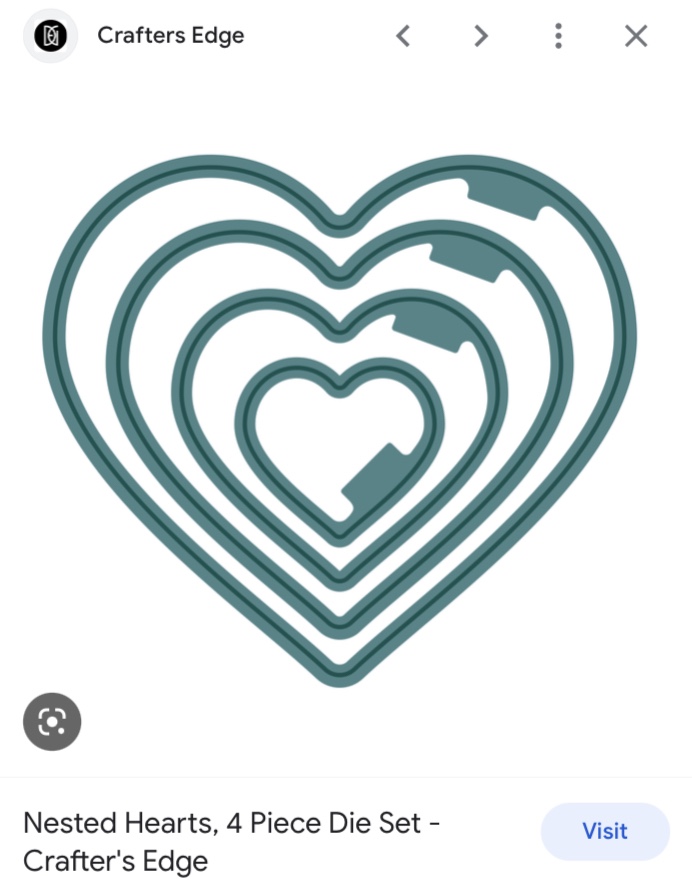
Again, Accuquilt Cutter to the rescue. By strategically placing the Die I can cut lots of hearts from the cut away 3 borders. This heart Die is from Crafter’s Edge, an adapter is all I needed to use it with the Accuquilt.
This is me using the Accuquilt with a Crafters Edge die, different project all together but the exact same process.
But…when I cut away the 3 borders I had a bit of a boring looking quilt. I dug into my stash of quilt parts and found several rows of a vintage yellow Drunkard’s Path quilt. These rows made perfect “new” borders for my pinwheel quilt.
The borders were machine stitched to the pinwheel piece. This means I was stitching through 6 layers, 3 of the pinwheel and 3 of the Drunkards Path. Yes it created a bulky seam but I pressed the finished seam open and from the front side of the quilt I zig-zag stitched, straddling the original seam. The zig-zag stitch nicely flattened the bulk but I now needed to address the raw edges on the back of the quilt.
One of the last things I did before binding was to hand stitch bias binding over the raw edges.
At this point I was moving fast and must have forgotten to take pictures so the next pic shows the quilt on my design wall. I’ve machine appliqued flowers and hearts and yo-yo’s all across the quilt. I’ve also sewn on the binding but in the next picture you’ll see that I added lace at the binding edge on the front of the quilt.
After turning and hand stitching to the quilt back I decided to give the binding a bit of interest and again using the applique stitch and matching thread, I stitched directly over the inner binding edge.
I can honesty say I was not overly thrilled with the pink and white Pinwheel quilt when I began this transformation. With the additions complete I love this finished piece!
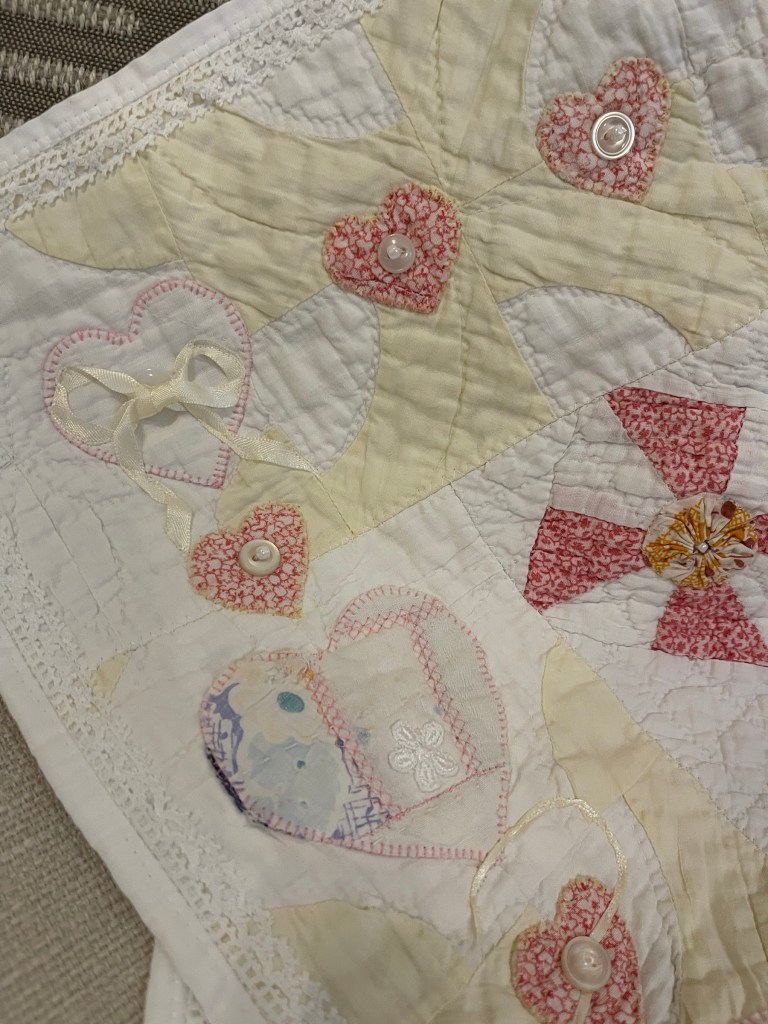
With the plan to do most all stitching by machine, you can see the border hearts are applique using pink thread, again, Omni by Superior Threads, color #3131. I sewed the buttons on with the machine using the #18 foot, added lots of ribbons, all stitched in place with a very narrow zig-zag.
Where the tattered DWR cut heart shape showed really bad damage I placed laces and/or trims over the holes and machine stitched in place. This is also a good picture below to show you that the zig-zag stitch straddling the quilt and the added border pieces of almost un-noticeable. There’s so much going on with this quilt that I’d be surprised if someone notices without me pointing it out.
A close-up showing the hem stitching used to attach the yo-yo’s to the die cut flower. The white beads were sewn down by hand.
If you look closely, the picture above shows how I used a tiny machine zig-zag to stitch the ribbon bow in place.
The border cut small heart have an added vintage button to each of their centers. The remaining picture show more close-ups of the add-ons and finally the finished project.
Thank you Robyn for suggesting this challenge, it was a joy!
Did I have in mind what my finished project would look like before I began? A resounding “NO!” Each step was an experiment. How did I know when I was finished? It was when I realized I was out of ideas for anything additional.
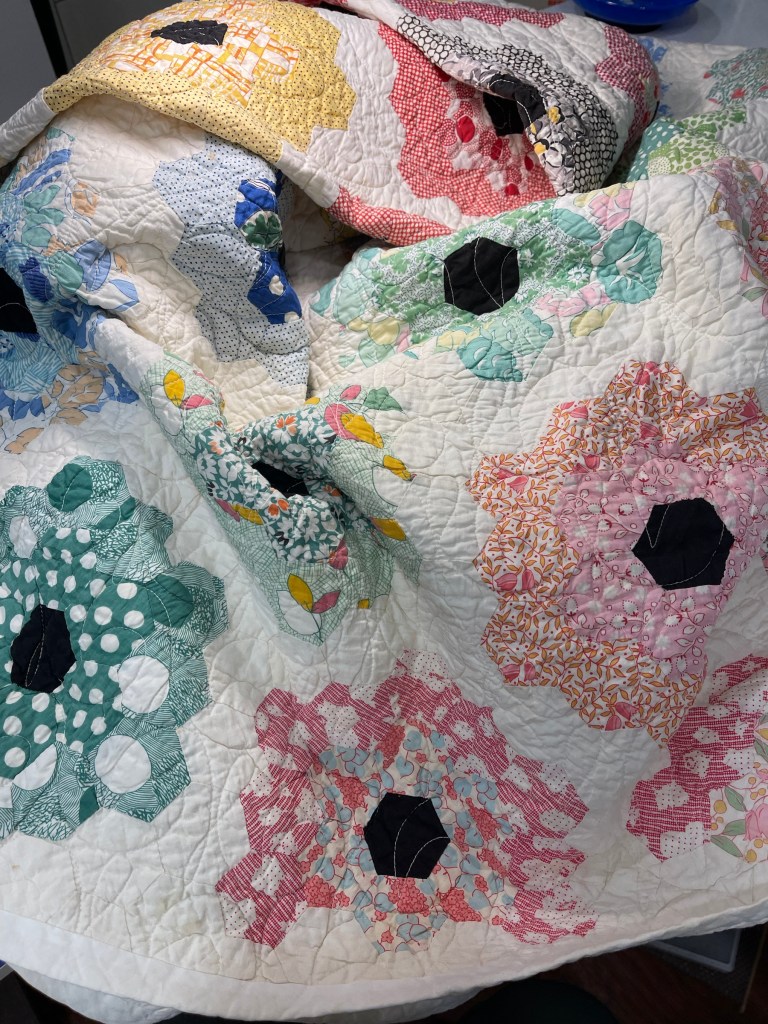
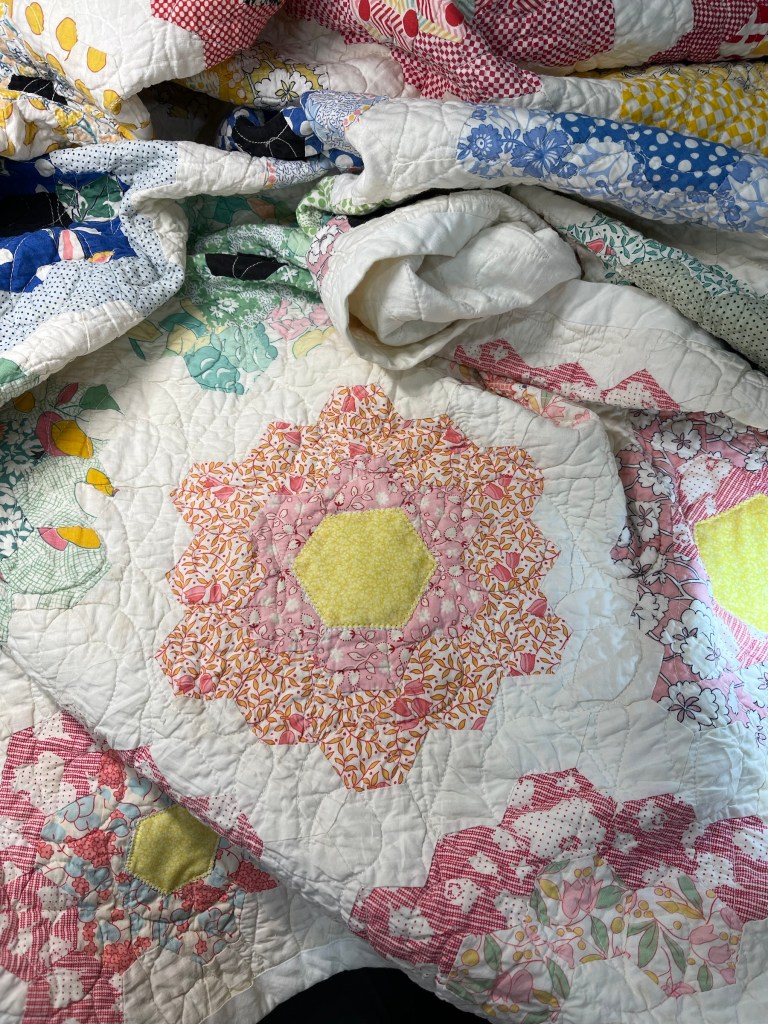
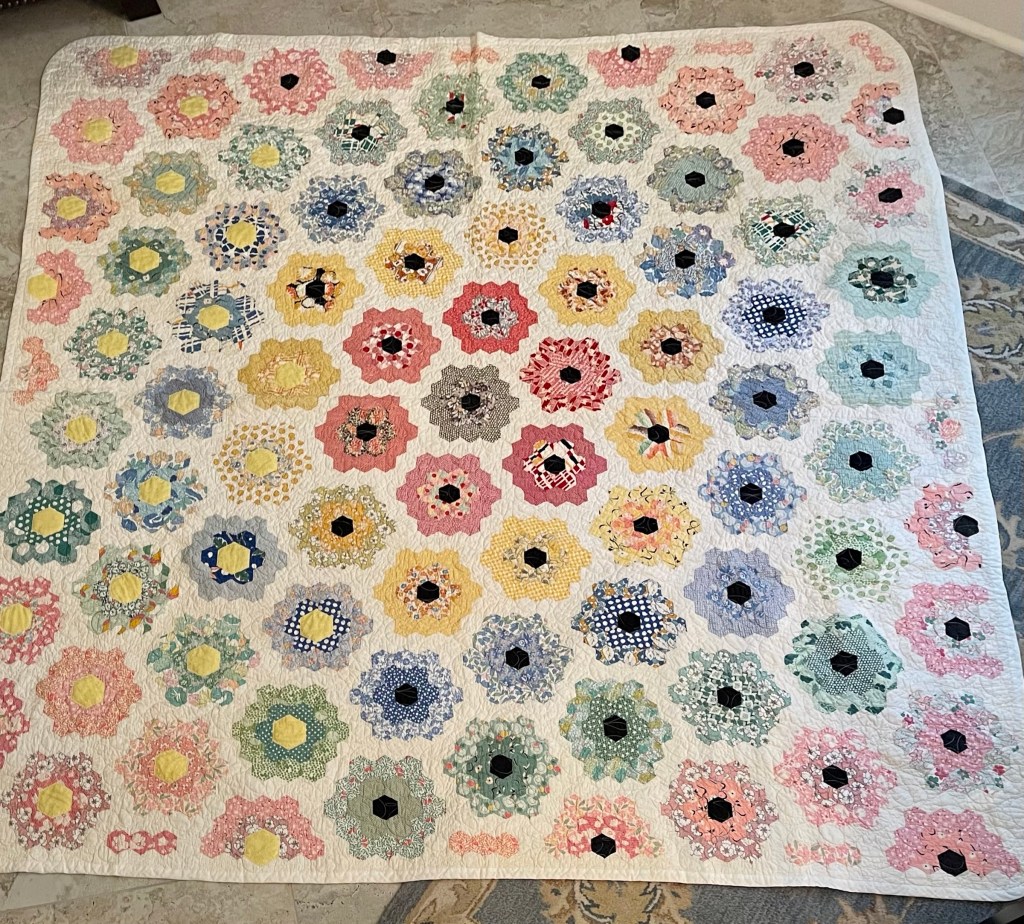
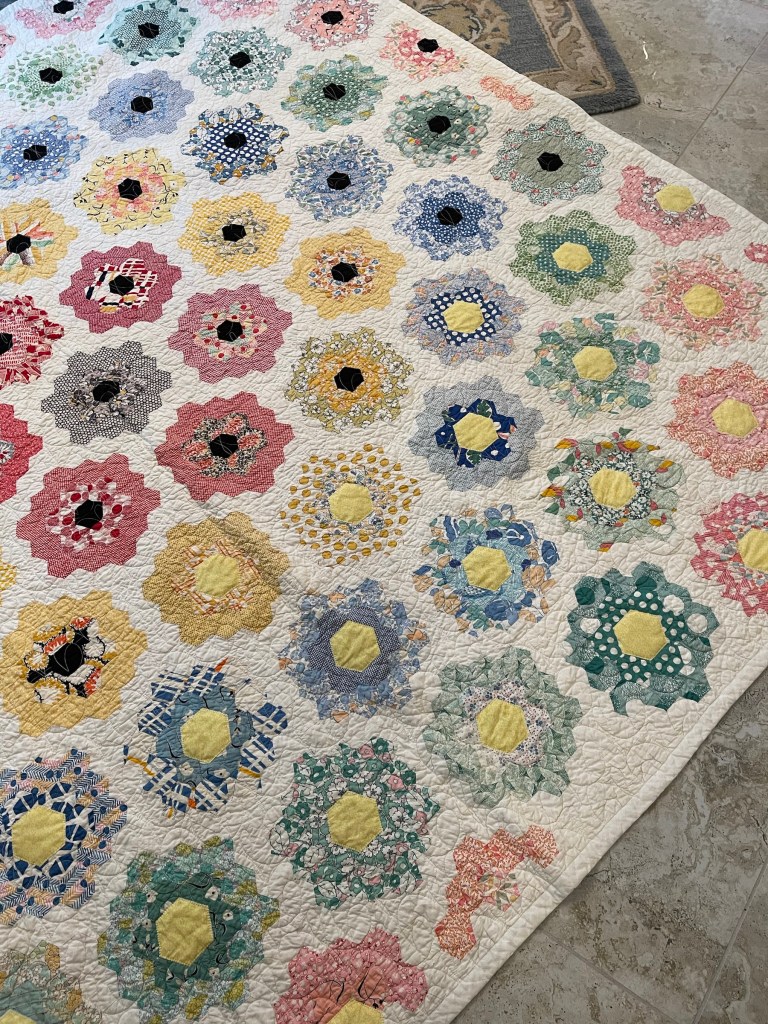
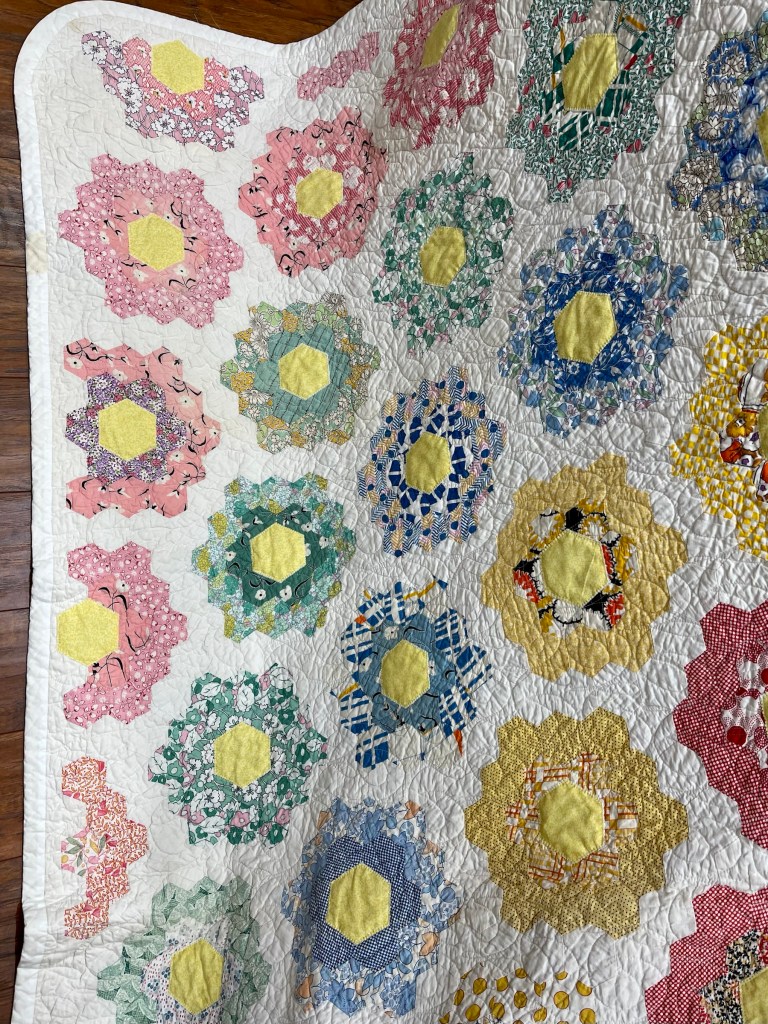
I set out to find a well used, well worn, etc. etc. Grandmother’s Flower Garden (GFG) quilt that I could, with a clear conscious, cut up without remorse. Finding nothing locally I reached out to a dear friend in the “vintage” business and she came to my rescue. She sent pictures of the GFG quilts available for purchase and I chose this one.
It arrived, I looked it over and two things jumped out, 1. The black/brown flower centers and 2. The overall “drab” look. I folded up the quilt and added it to an ever growing stack of vintage quilts in the sewing room.
Spring ahead to a few weeks ago, still wanting to cut up the quilt for a project I opened it up, spread it out on the floor and realized I had a treasure before me!
I’ve seen many GFG’s but cannot remember ever seeing one with the color/blocks arranged in a circle. The first thing that popped into my head was the Trip Around The World quilt pattern, only this one was done with GFG blocks.
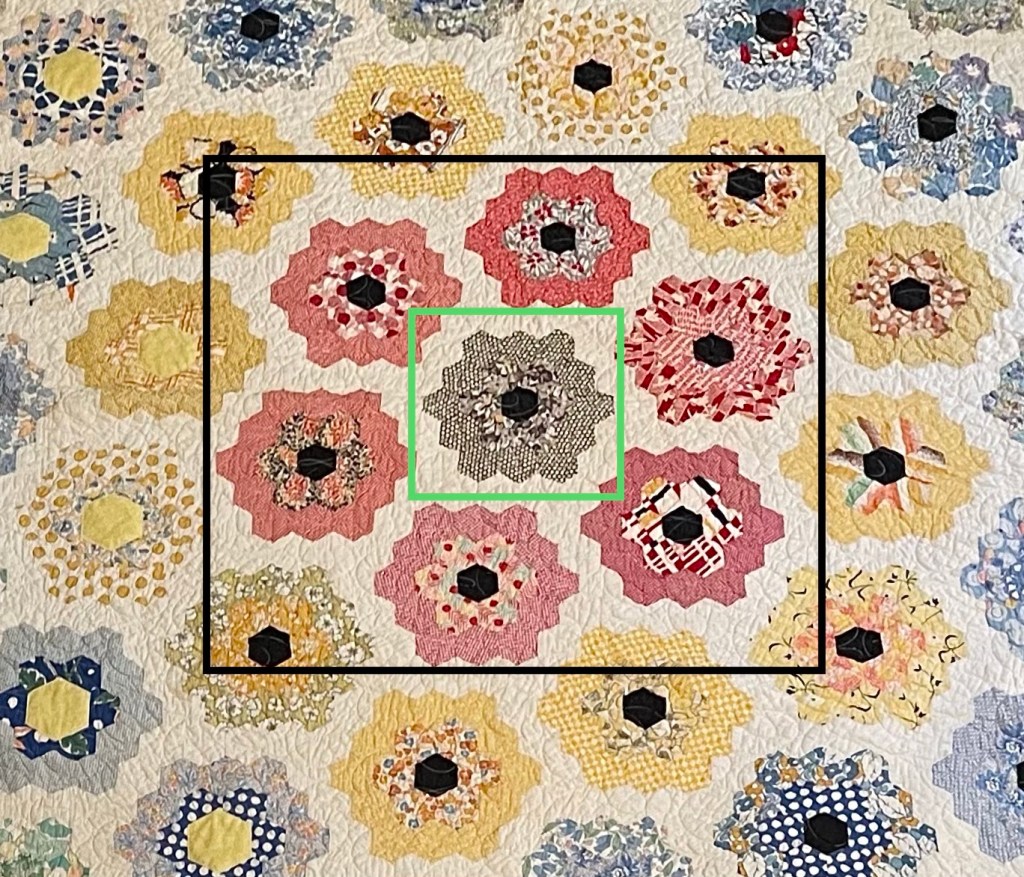
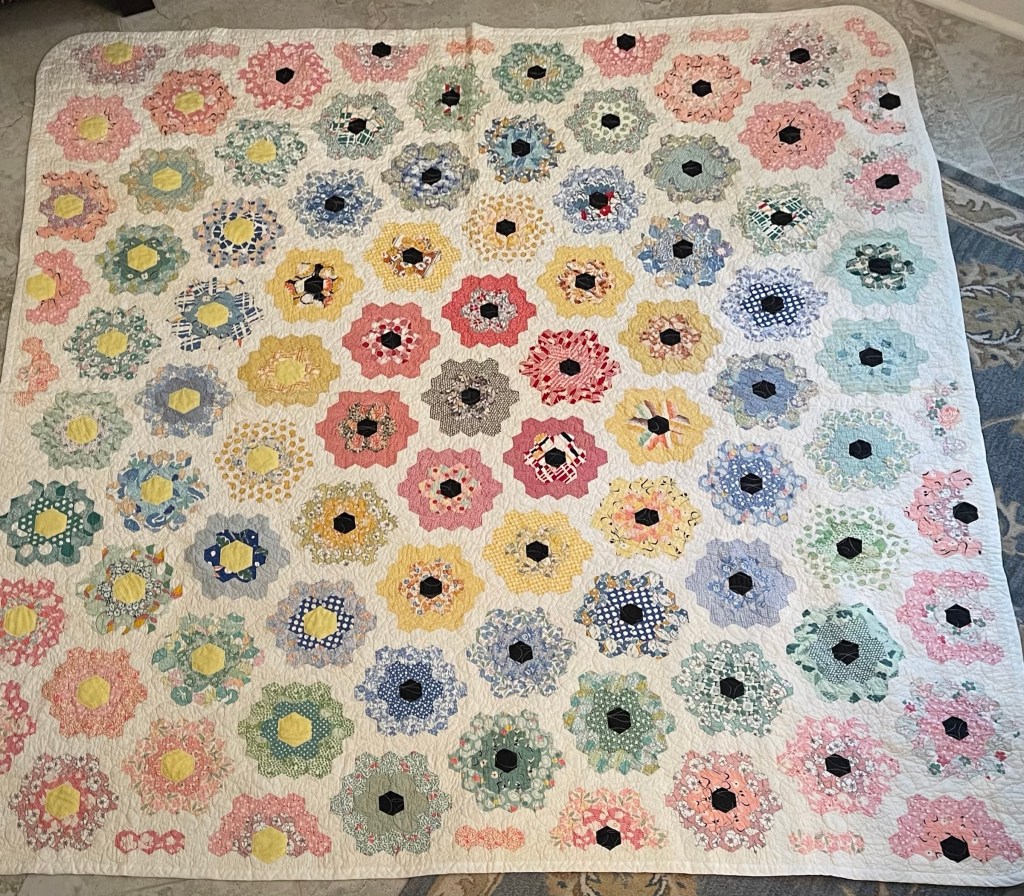
But…oh those really really dark flower centers. All 90 of them.
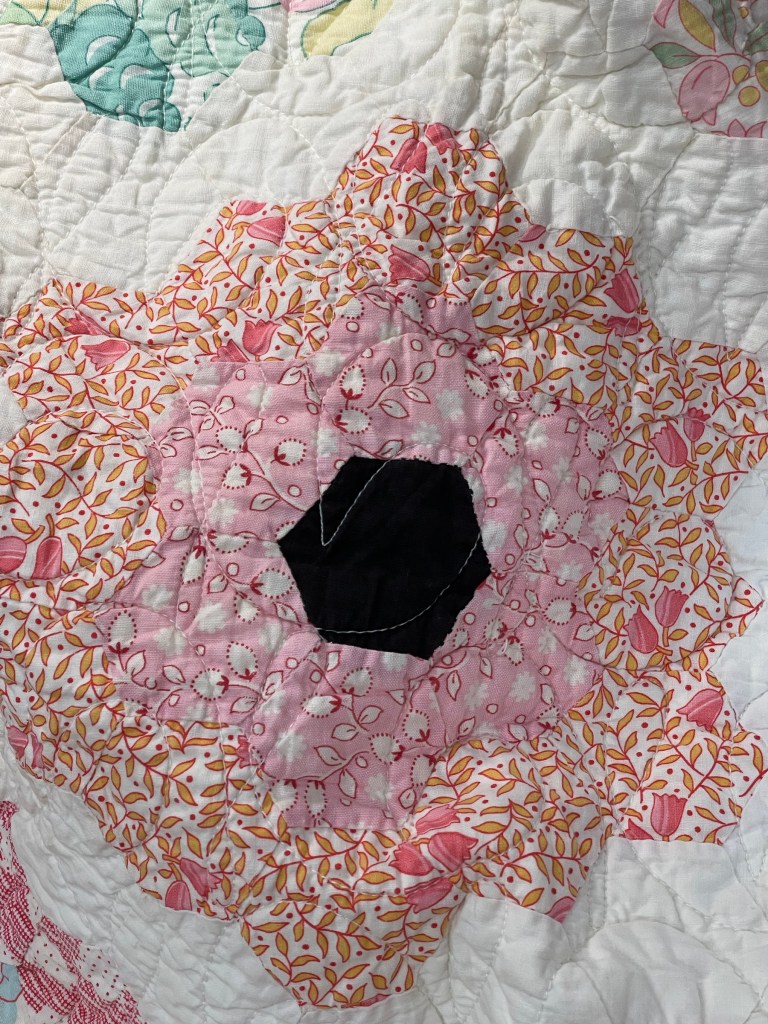
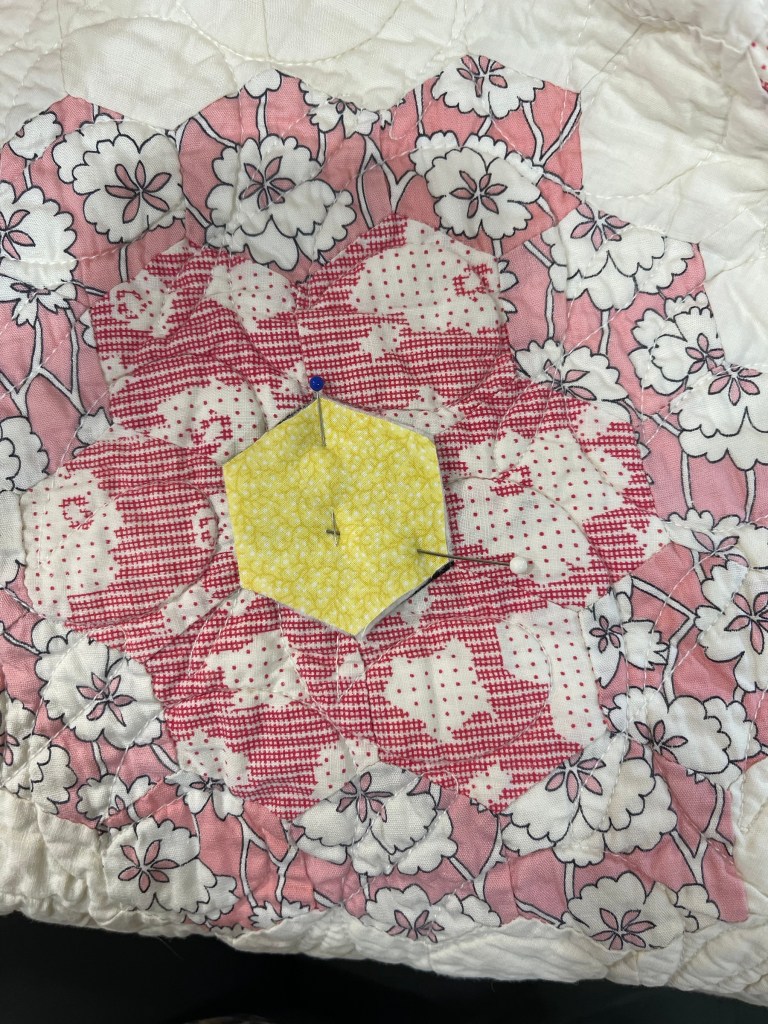
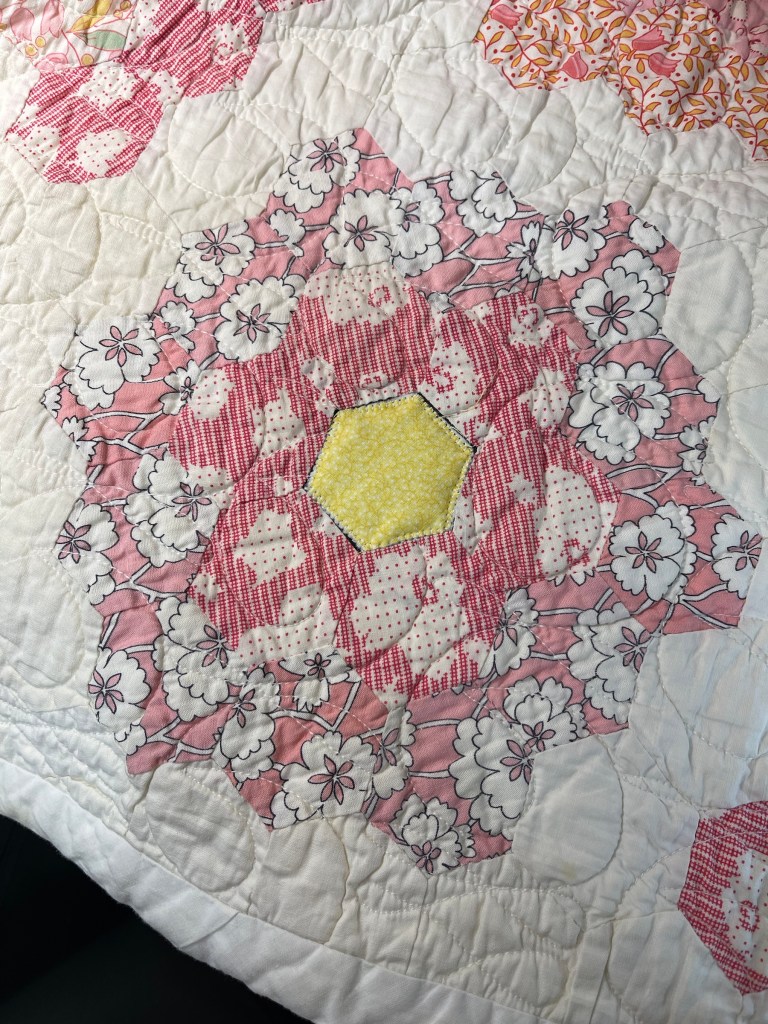
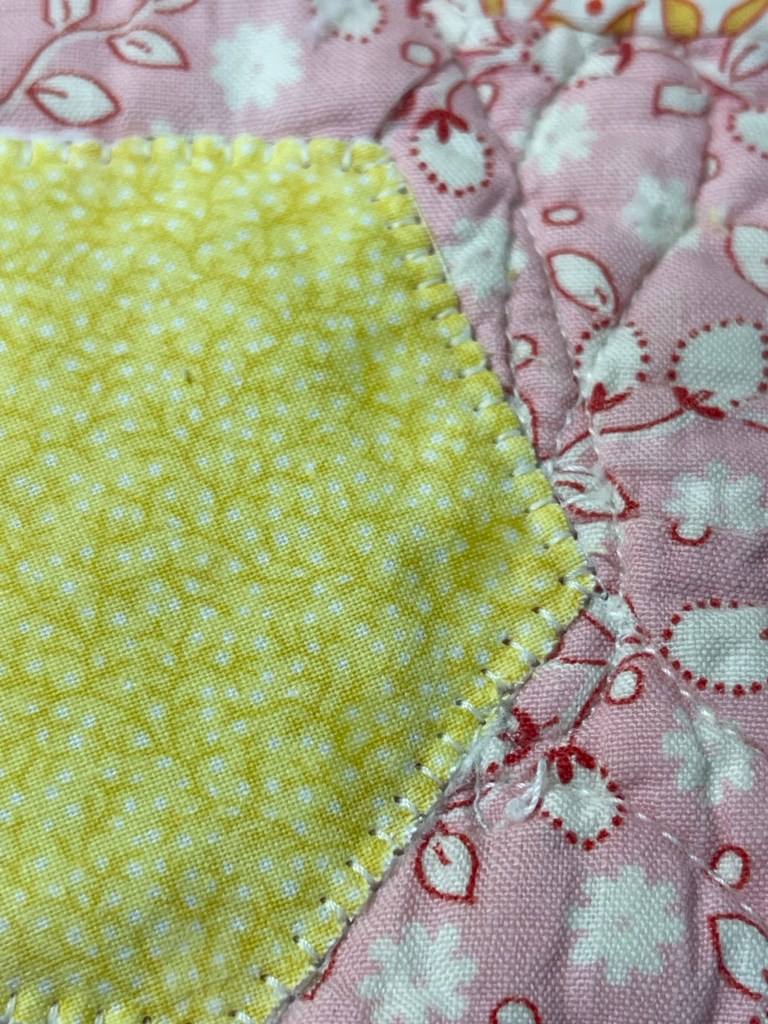
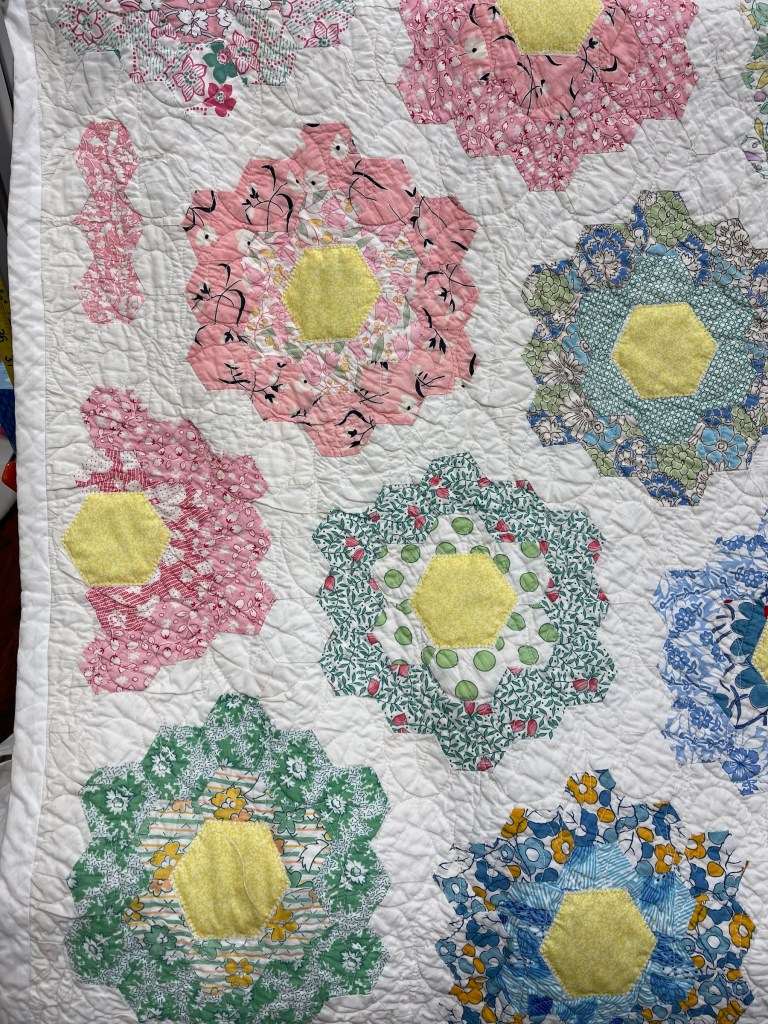
After deciding to experiment with changing the flower centers to yellow, I set up my Accuquilt cutter and hexagon die. The 1” (in Hexie speak that means each of the 6 sides measure 1”) die cut hex fit perfectly…almost, but not quite. The movement of the fabrics due to things like the dense machine quilting, fabrics shrinking (each one differently) and the day to day use of the quilt resulted in some odd shaped flower centers. The pic above shows how no matter how I placed the hexagon, there was always a sliver of black/brown peeking around at least 2 edges.
Sewing on my trusty Bernina, I selected the machine applique stitch, width 1.5, length 2.0 and thinking I could nudge the quilt as I stitched so that black brown would be covered.
Experiment fail. ☹️
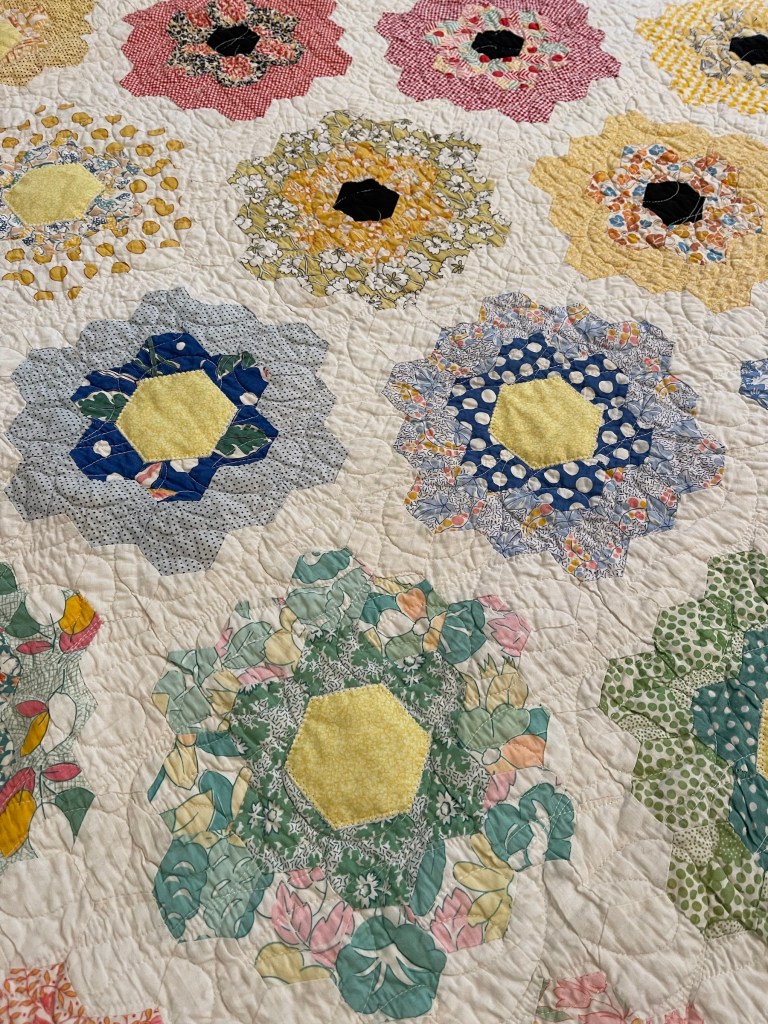
Next trial: cut hexagons that are larger.
Experiment win! To deal with the dark centers and the much lighter new yellow fabric, I also cut white Hobbs 80/20 batting to place under the yellow before stitching.
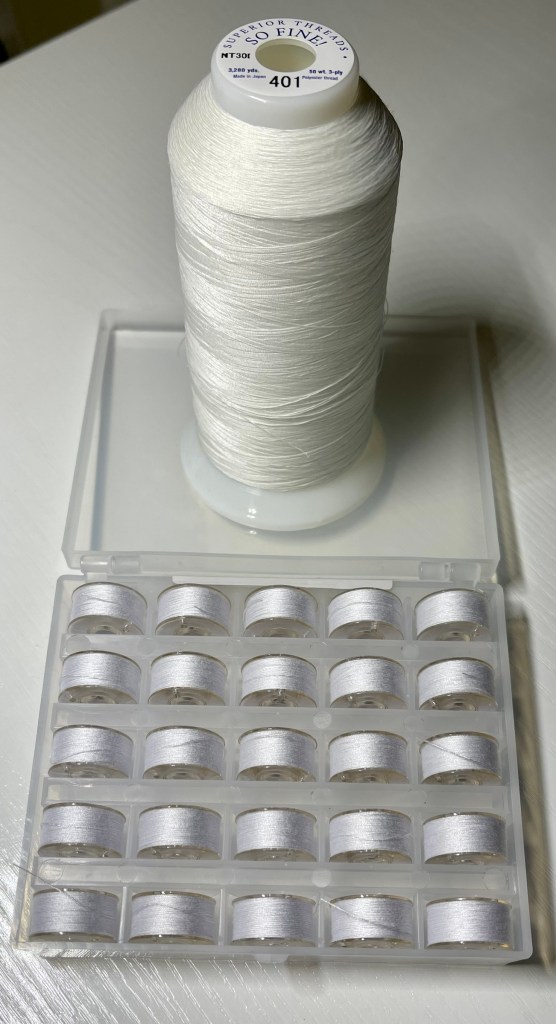
The threads I used: the needle has Superior Threads So Fine, a nice strong 50 wt. 3 ply, color 401. The bobbin is Thread Arts pre-wound 50 wt. color THPS101.
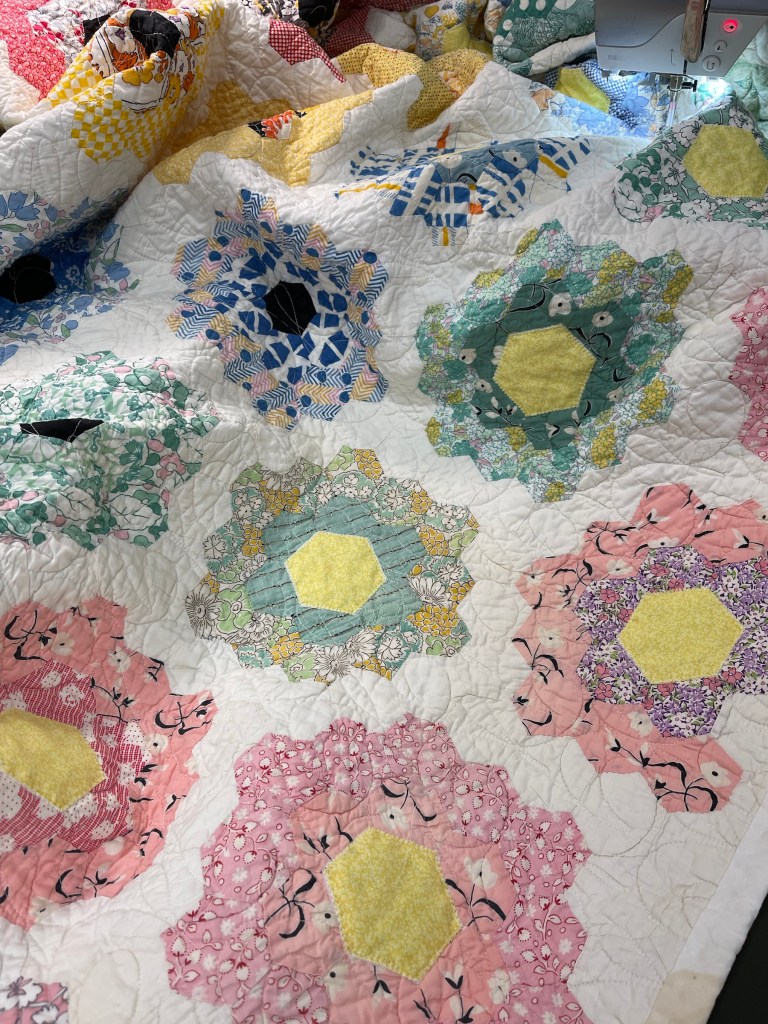
Some of the centers are covered and I’m liking the look.
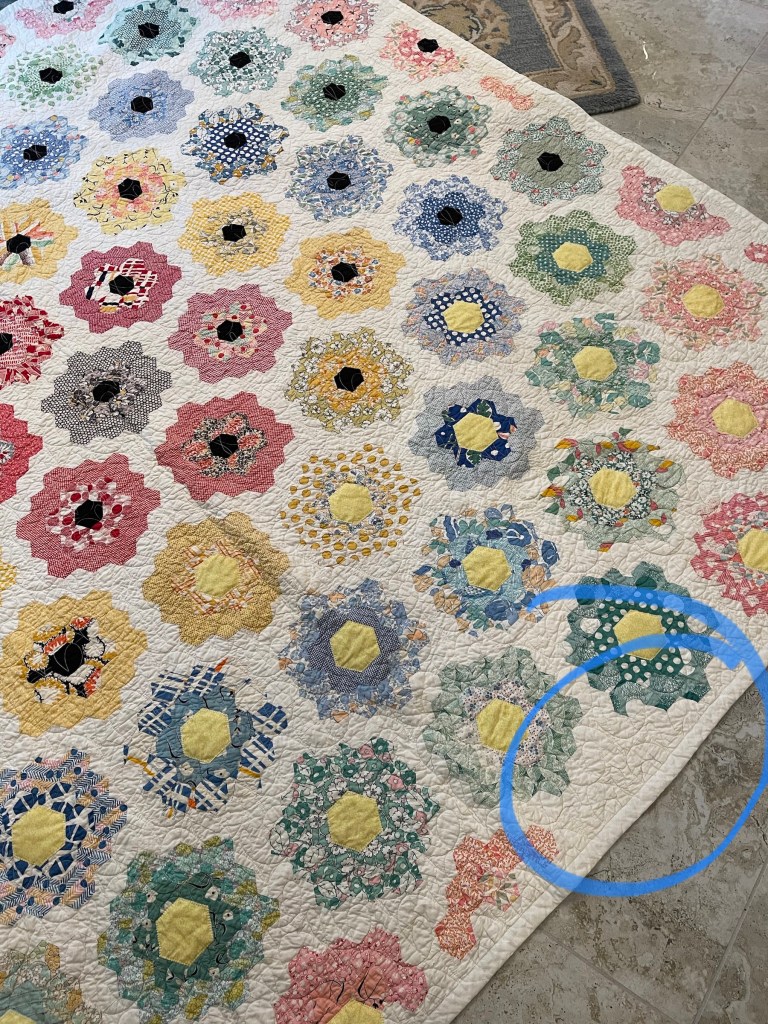
But let’s jump back to my earlier comment about the block colors set into a circle. Look at the picture below and what immediately jumps out? The blocks are not squared up with each other. The red blocks are offset by one hexagon width. They circle the center very dark block but the maker, either intentionally or by mistake stitched them together in this way. Does it kind of give me hives? Kind of yes, kind of no…
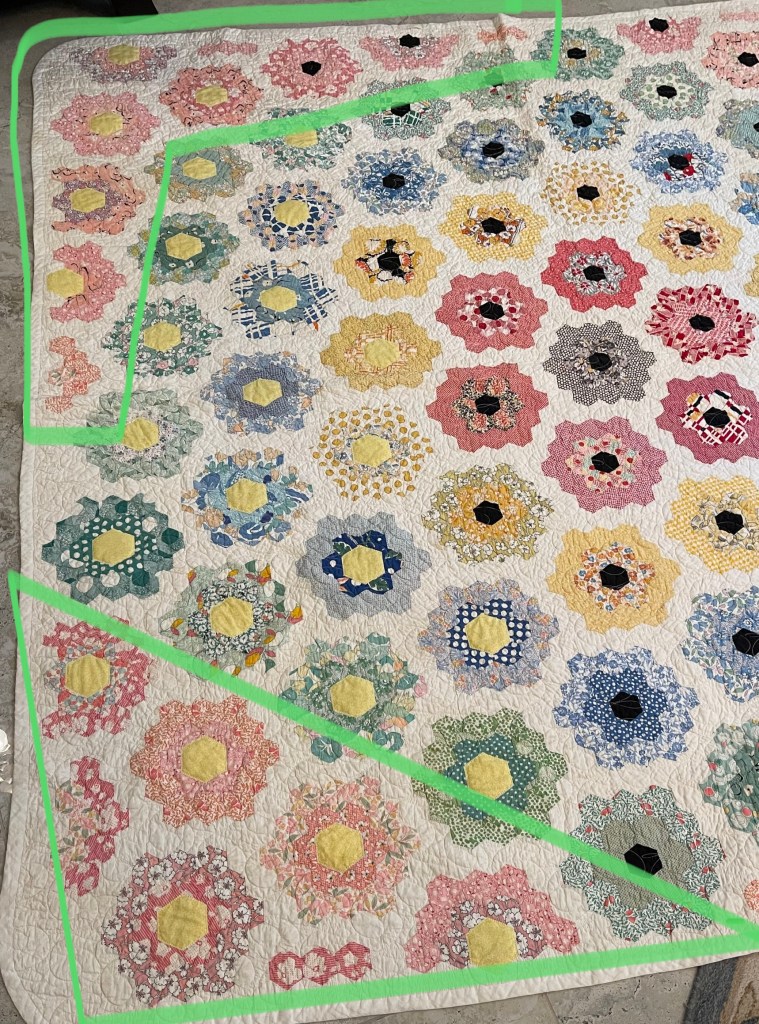
The little interesting things done stop…look closely at these pictures of the outer edges of the quilt.
The flower blocks gradually lose hexagons until they are just a simple row of 3 pieces. But what else is evident? The quilt top edges are all white hexagons. No color touches the binding.
And what about this larger area of white. There was room to add color so did the quilter run short of fabrics or was this a design choice?
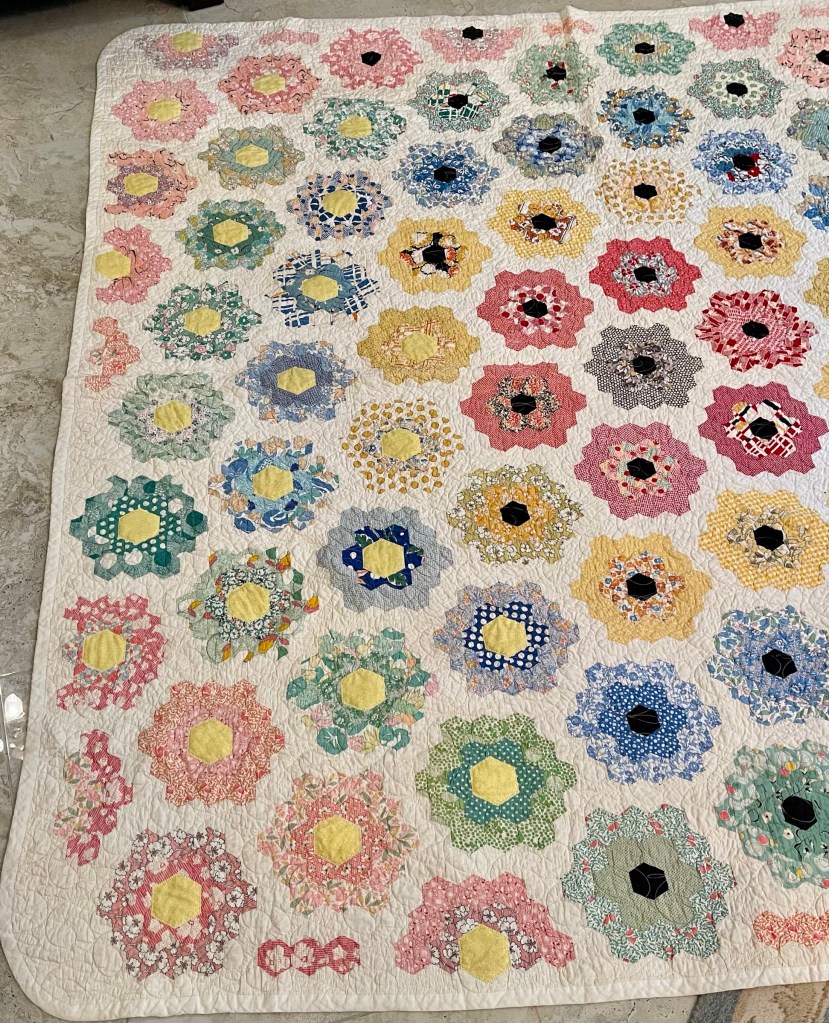
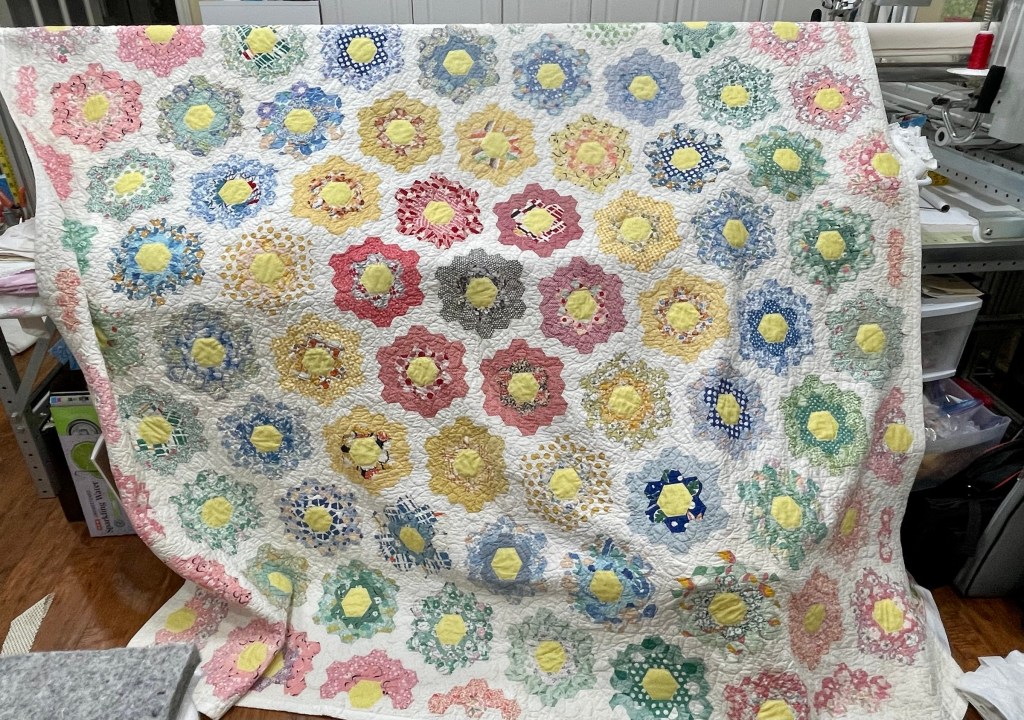
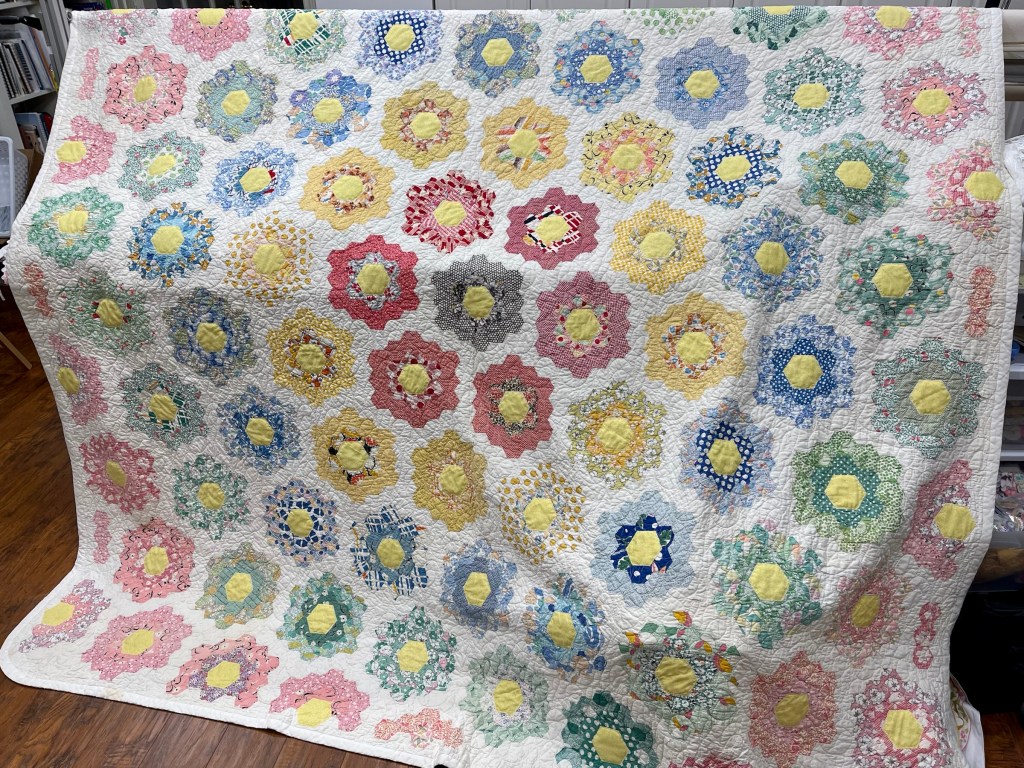
I’m really liking the look, mentally working through the oversized hexagon in the center and slowly but surely getting all 90 applique stitched. The oversized hexagon…I had to pin a few in place, walk away and the next day re-examine my idea. The “structured” part of brain was alarmed but the need to cover wonky hexies won out.
What a change!
What would the original maker think? First I’m sure she would be very happy that I did not cut up her beautiful quilt and second, it’snice knowing the new yellow centers could easily be removed, just a few hours and a seam ripper would take care of the revision.
Two more things, did you notice the 4 rounded edges of the quilt and the binding?
Love the “out of the box” thinking/planning/making do of this quilter! Where is this quilt now? It’s in a special spot in my sewing room waiting for a short journey to a BFF’s house, she fell in love with it! Enjoy your new old fabulous quilt Gloria!
Blessings and happy quilting to all, Rhonda
ps: needling some bits and pieces for a project, quilting, crazy quilting, collages, journaling? I’m reducing my stash and have lots to see on Instagram at: vintagelinensetc
This is one of those quilts where I really don’t know how I came to own it or how much I may have paid for it but I’m guessing it might have been an online purchase because the white fabric is a poly-cotton blend. It has tiny “pilling” across the white surface and was made using poly batting. Unless it was crazy inexpensive I don’t think I would have bought it as an “in-person” purchase. In other words, I didn’t much care for it.
That opinion held firm until I began to see how I could still make my mark on this old quilt and give it new life. This quilt does not have scalloped edges created by the Melons but rather, the quilter added outside pieces creating straight edges.
I’m going to fill this blog post with lots of pictures so you can see all the work/repairs/changes that went into the project. I am disappointed that I forgot to take a “before” picture. I think subconsciously I didn’t have high expectations for this experiment?
I wish I would have kept track of how many little Arc pieces I needed to address. Oh, and did I mention my intentions with this old quilt was to do all the repairs by machine?
Many of the Melons in the middle of the Arcs were in bad shape. I raw edge appliqued wide lace trims directly over the Melons and used a machine decorative stitch to secure them in place.
I consistently used yellow and pink threads on the vertical Melons.
And sewed a pink or a lavender applique stitch on the outside of each Melon.
Around the outer edge of the quilt but just inside the “outside melons” I decorative stitched to provide eye appeal and stability. You can also see the worn/frayed white fabric pieces at the end of these 3 Arcs.
I used commercially produced wide laces appliquéd over the white end pieces of each of the Arcs.
After finishing the outside Melons decorative stitching I decided to add a little visual color by using lavender thread in the machine applique stitch.
Miles and miles of machine decorative stitching, all the Arcs and Melons repaired, not it’s time to add some fun to the quilt.
When I was growing up the first car I can remember was a ‘61 Chevrolet Impala…with child-proof vinyl bench seats. Missouri summers can get plenty hot so to protect me and my sisters from painful leg burns, mom picked up an old Double Wedding Ring quilt at the Goodwill. We sat in the back seat on that old quilt for years! 15 or 20 years ago I found that old DWR quilt in a closet at moms. It made the trip home with me, terribly tattered, the pink flannel blanket used for batting very visible and what I’m saying is that what was left of the quilt was a mess!
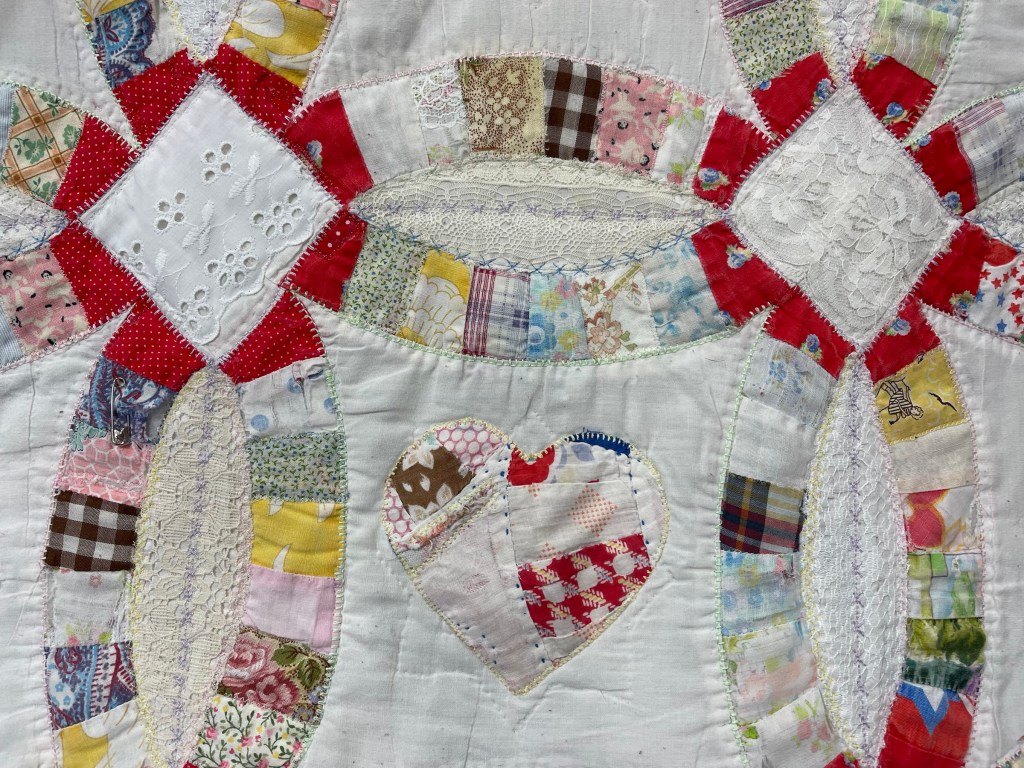
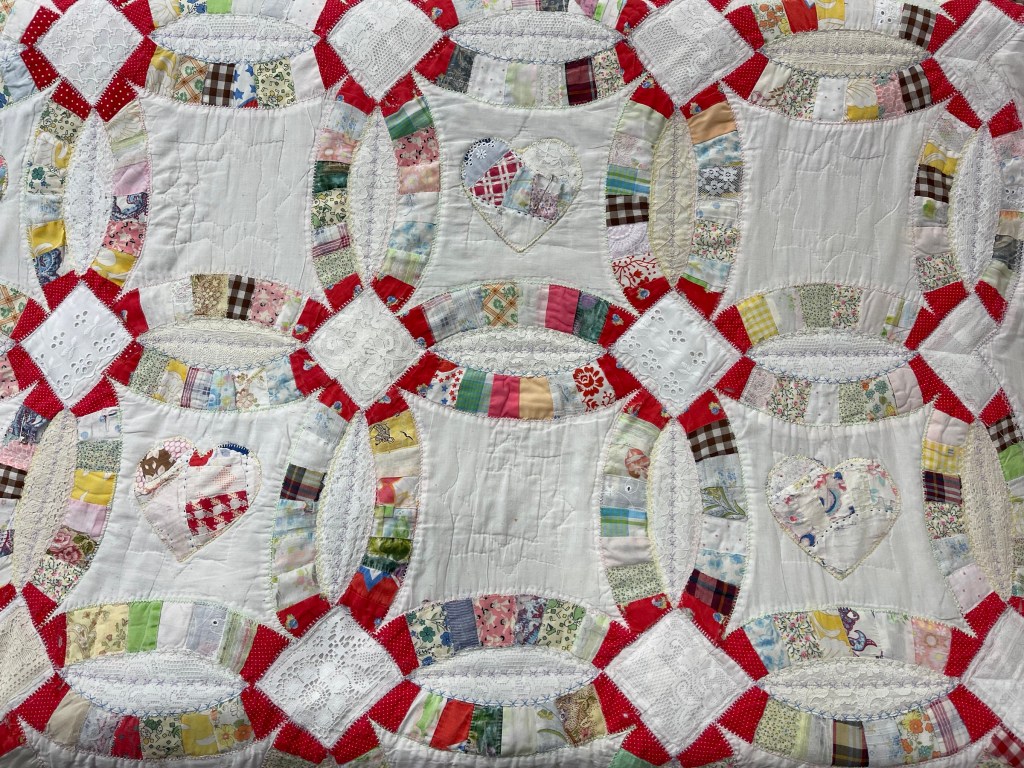
Using my Accuquilt Go Cutter and Crafter’s Edge Heart Dies, I cut hearts from this very old Double Wedding Ring (DWR) in order to appliqué them on a not quite as old DWR. This makes me smile!! 🙂
Every other block center got a single DWR heart.
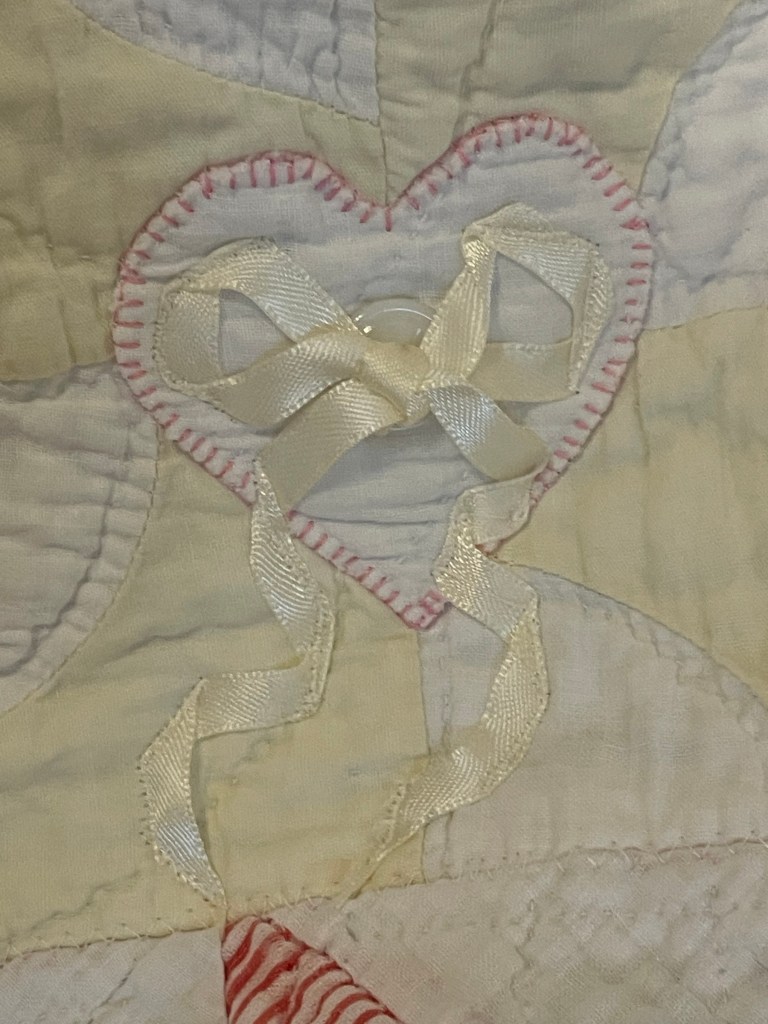
And then the remaining blocks got pale yellow smaller heart with a stem up to a lace bow. But now it’s time to address the white Mellon points. They’ve already been covered with white laces or fabrics but they looked so plain. I added three vintage buttons and ribbon to each of these hearts with stems.
Accuquilt cutter to the rescue again. I cut what seemed like thousands of green print leaves and began laying them out. I liked the look but they needed something in the center.
Vintage yellow yo-yo’s to the rescue!
But why stop decorative stitching now? I chose another decorative stitch for the outer edge of the Arcs. See the 2 pictures below.
But that does the back look like with all the machine decorative and applique stitching?
This is now one of my favorite quilt saves! Everything with the exception of threading the ribbon through the button holes was done by machine. Not a bad way to save an old quilt! 🙂 Blessings and Happy Quilting, Rhonda
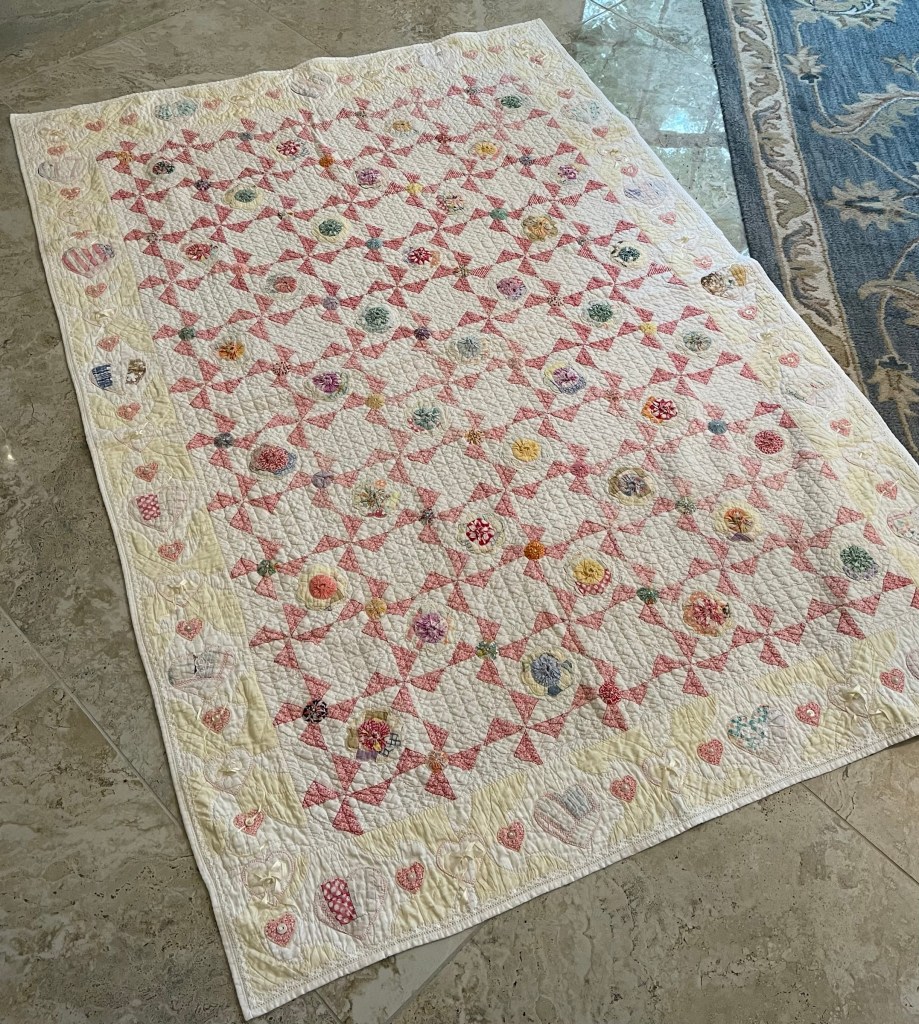
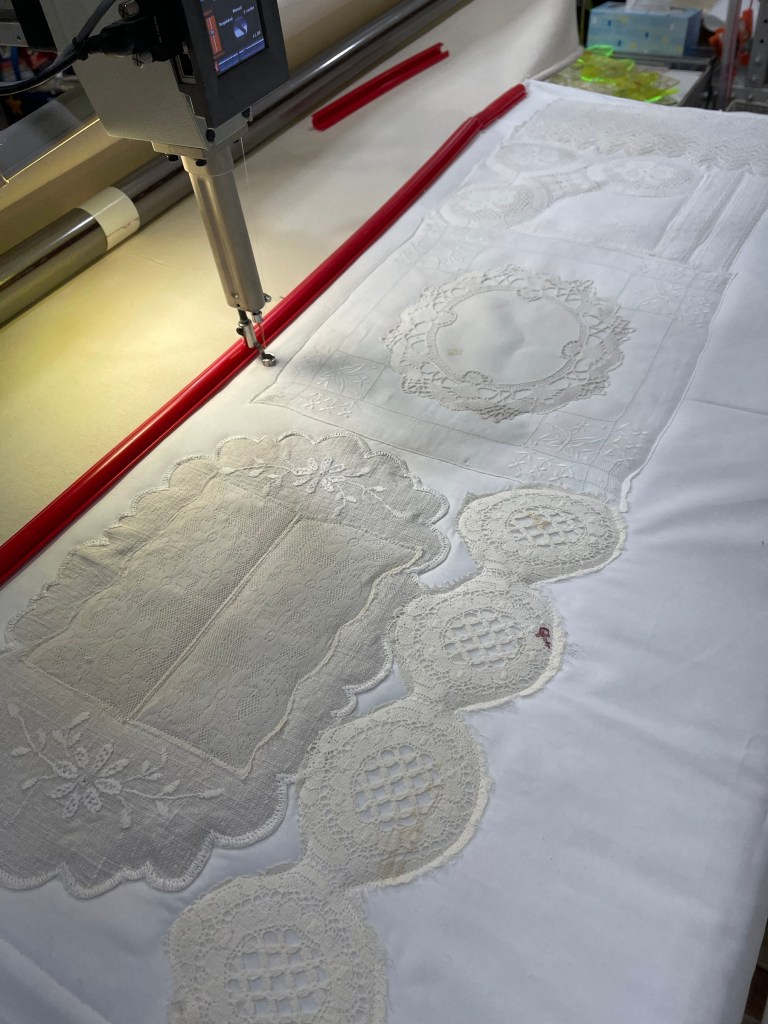
If you’ve been following me for long you’ll know I love to Rescue/Save old quilts and sometimes the vintage quilts gets motifs appliqued directly on the front. These appliqués can cover a variety of imperfections and/or add interest to the quilt.
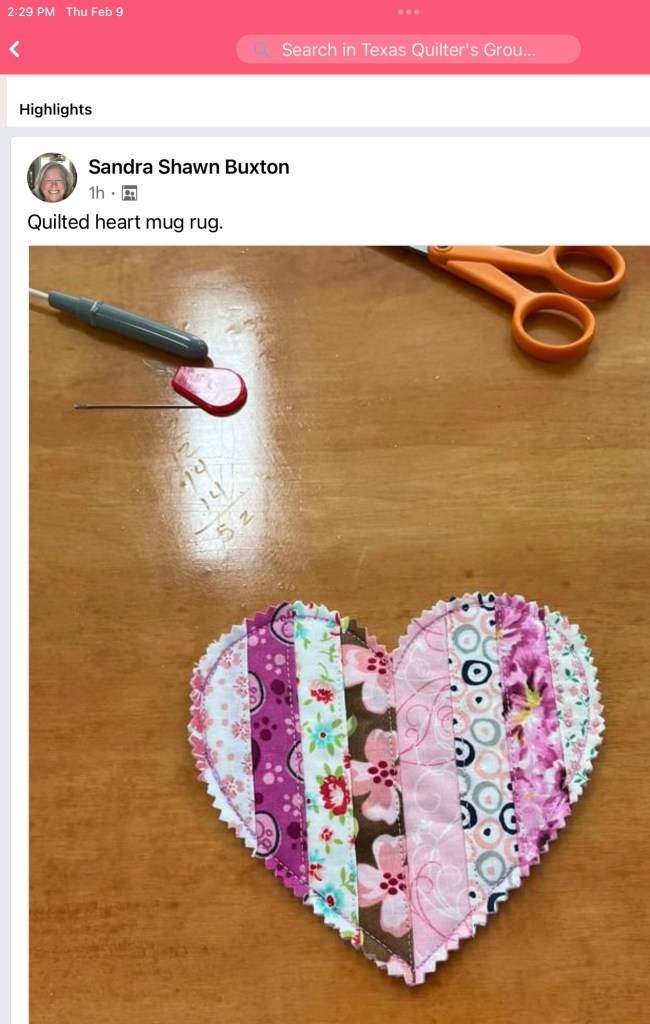
I’m always looking for new ideas for using vintage linens, especially those that are stained, worn, torn or (in my opinion) unattractive. While scrolling through the Facebook group Texas Quilter’s Group I came across the following post from Sandra Shawn Buxton, thank you Sandra for letting me use your picture/fb group post! Oh…and Sandra…I totally blame you for sending me on a crazy yet fantastic adventure! 🤣
Oh the possibilities! My brain kicked into overdrive and away I went!
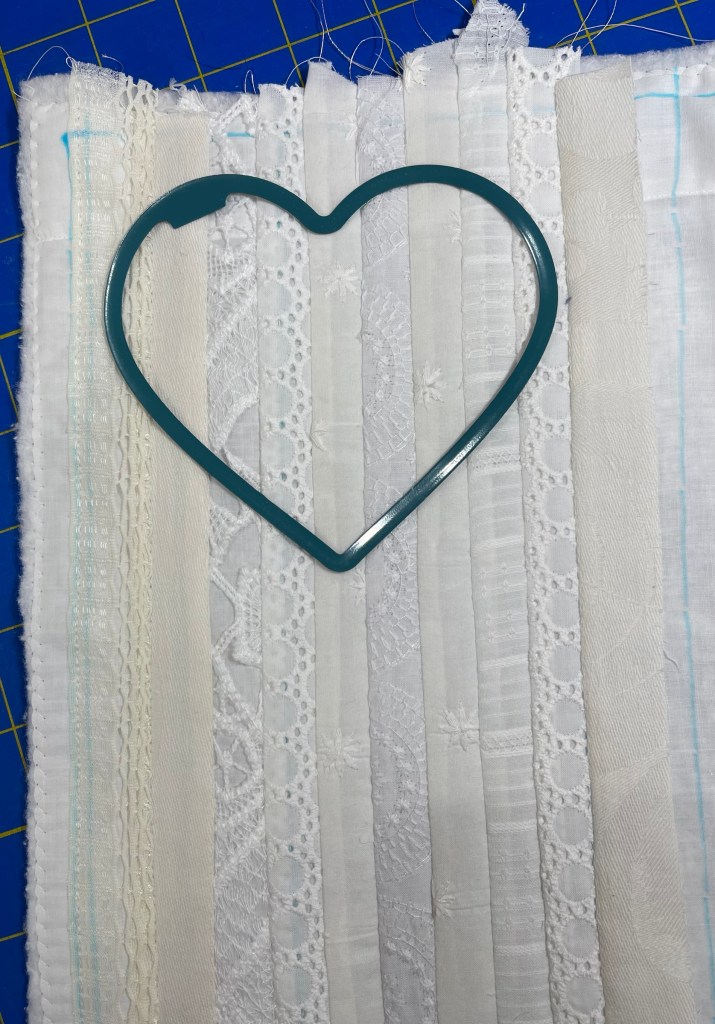
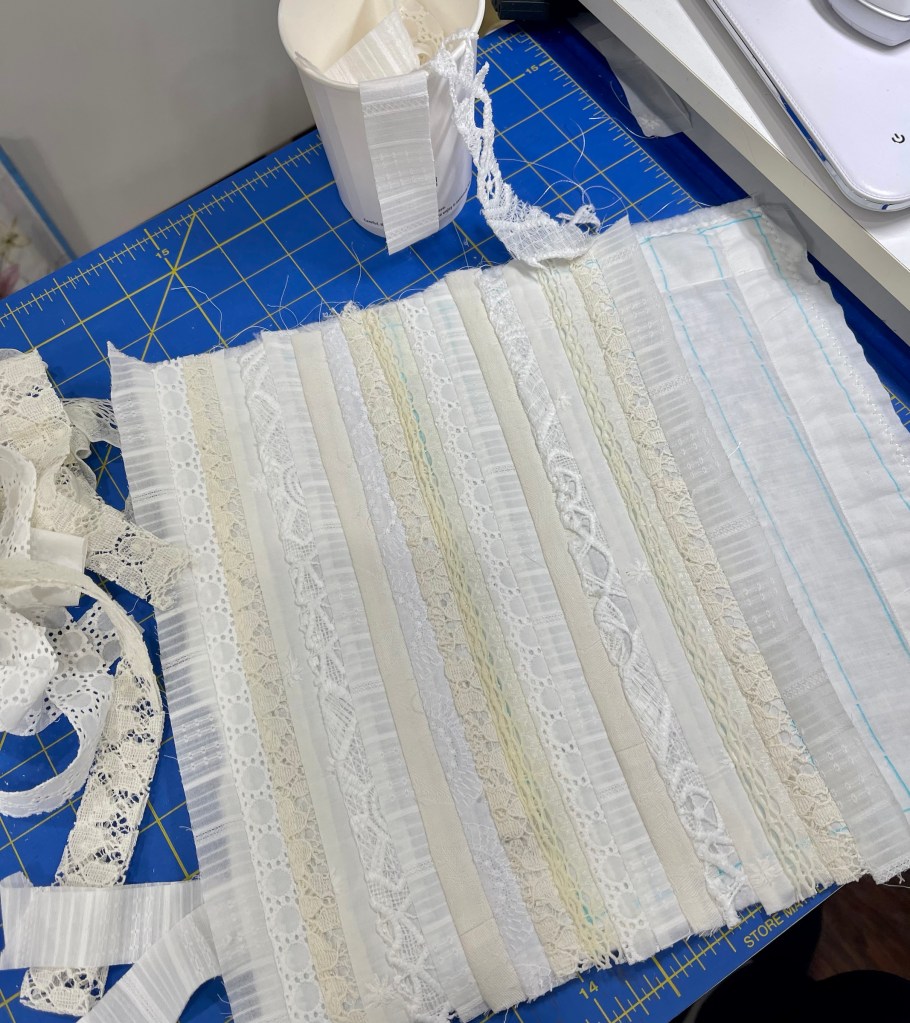
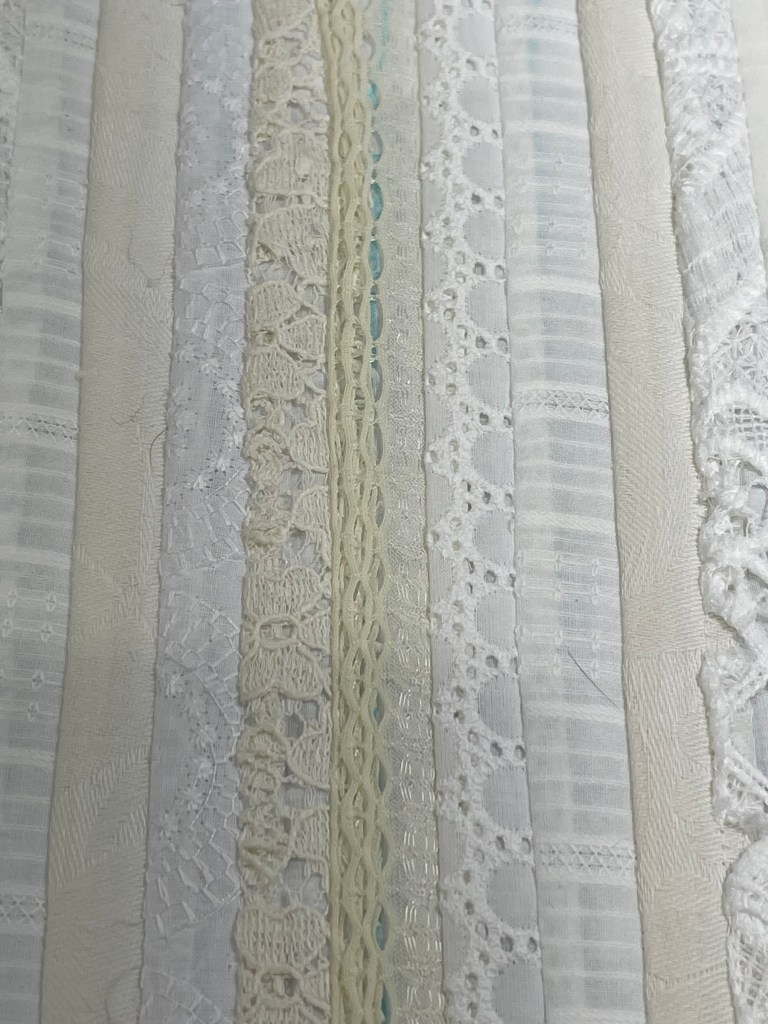
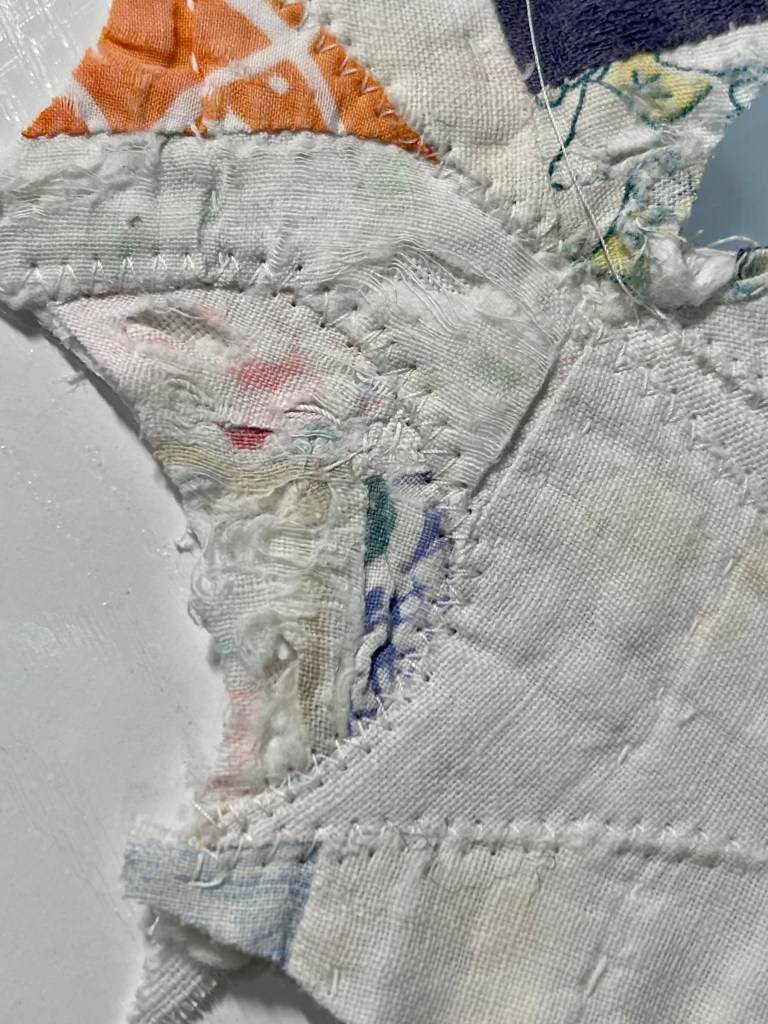
I cut 1” strips from fabric scraps, damaged vintage linens, laces and trims, stitched them together with a backing fabric marked with blue pen lines. These lines helped to keep my strip piecing generally even and parallel. I then pressed using plenty of spray starch.
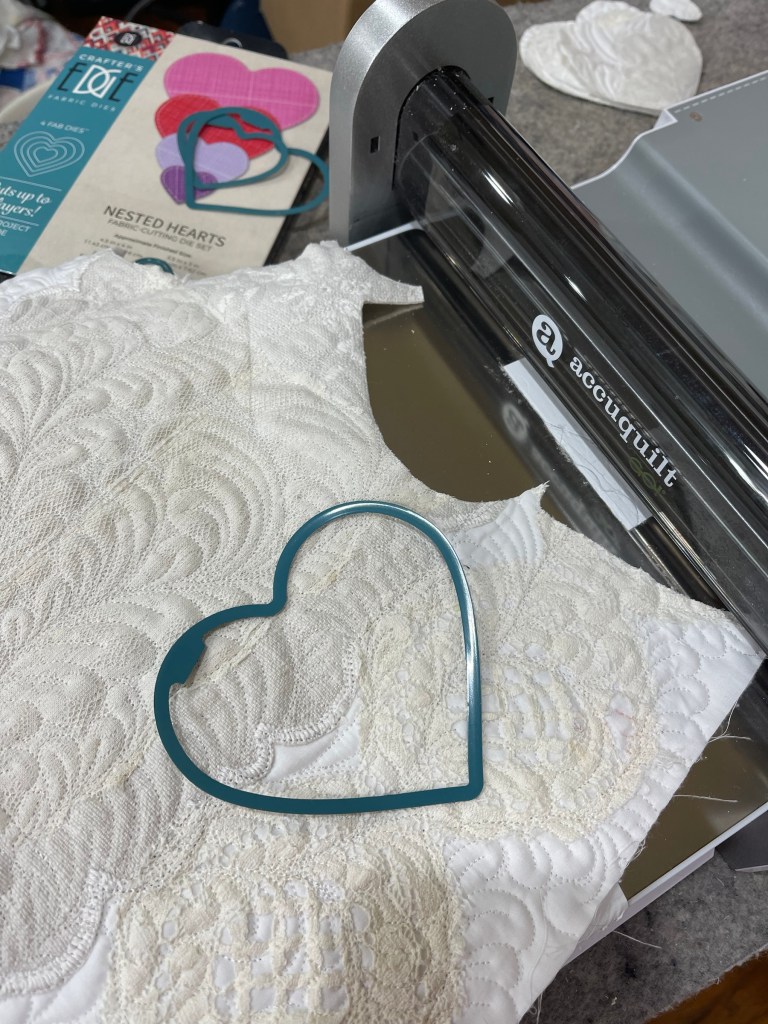
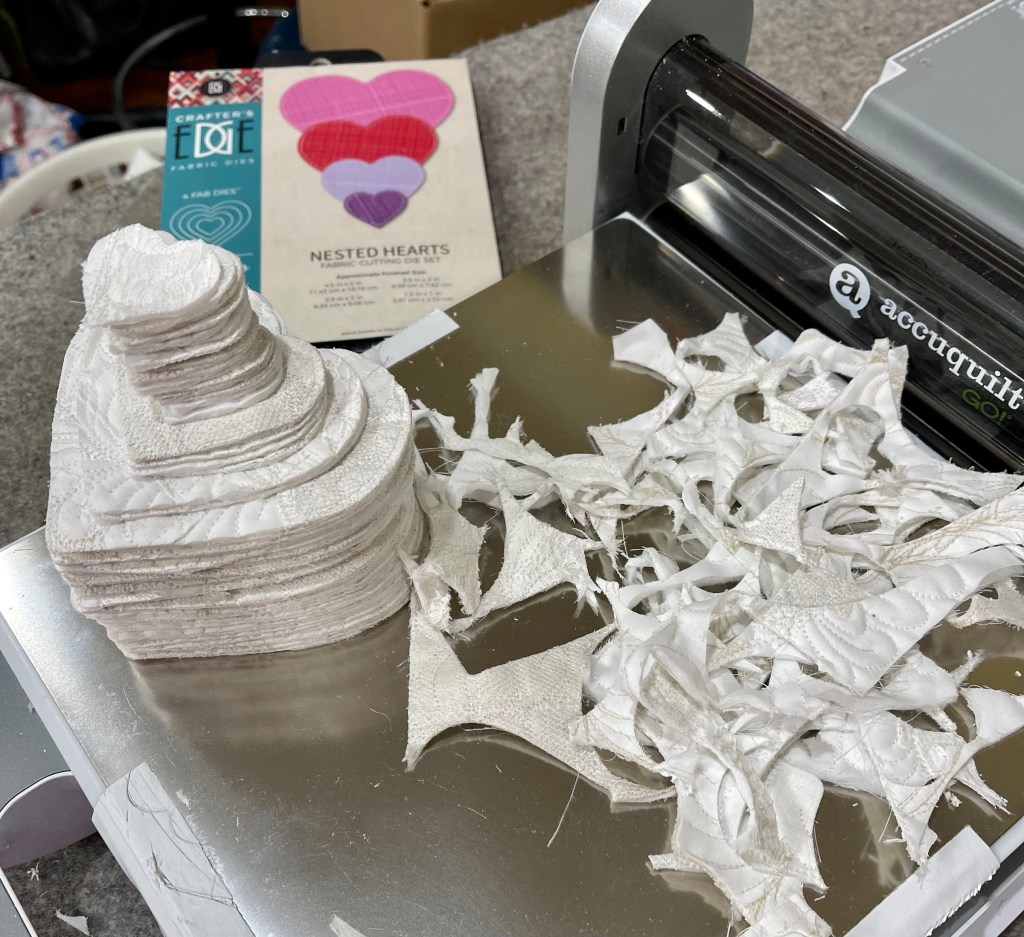
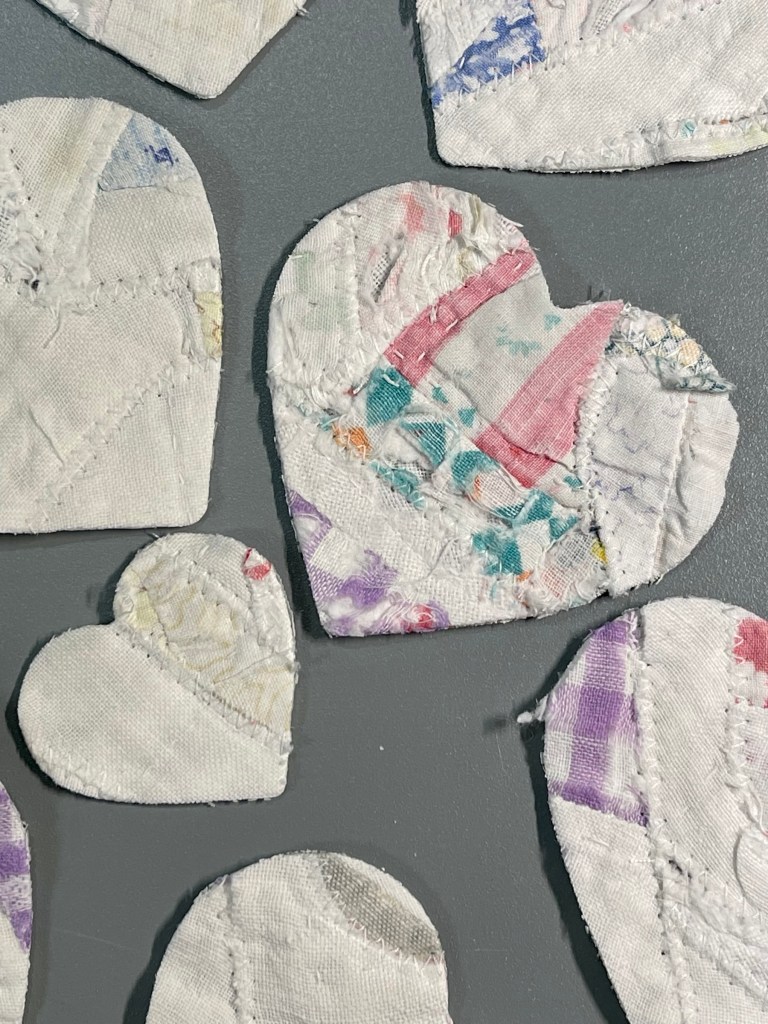
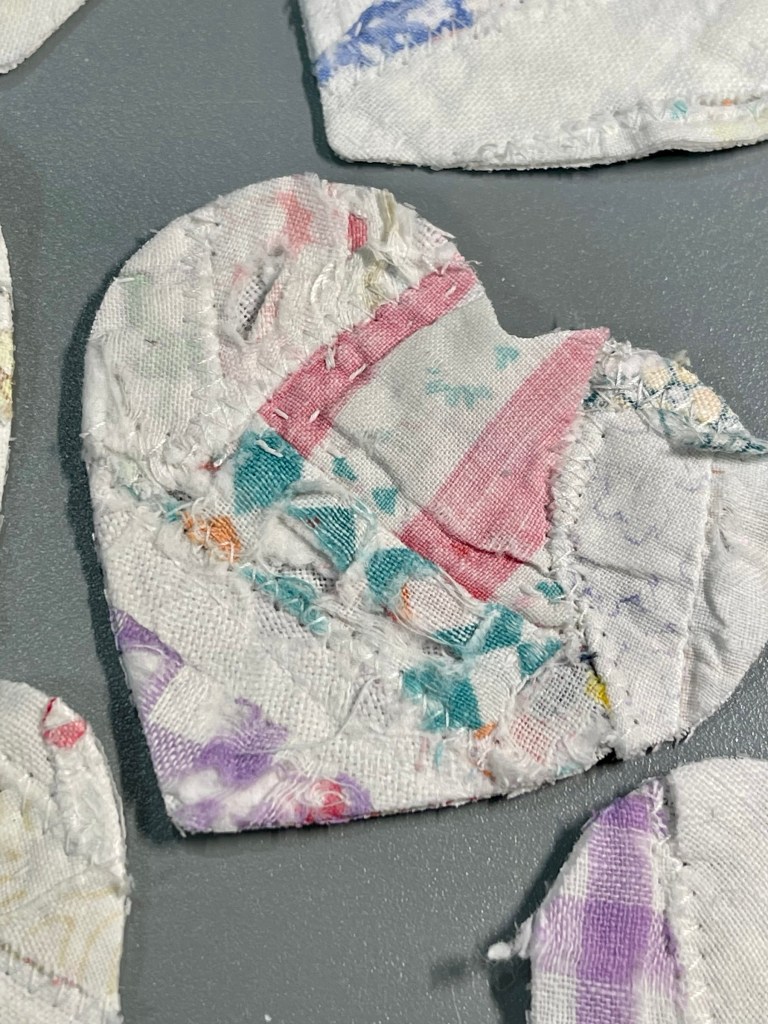
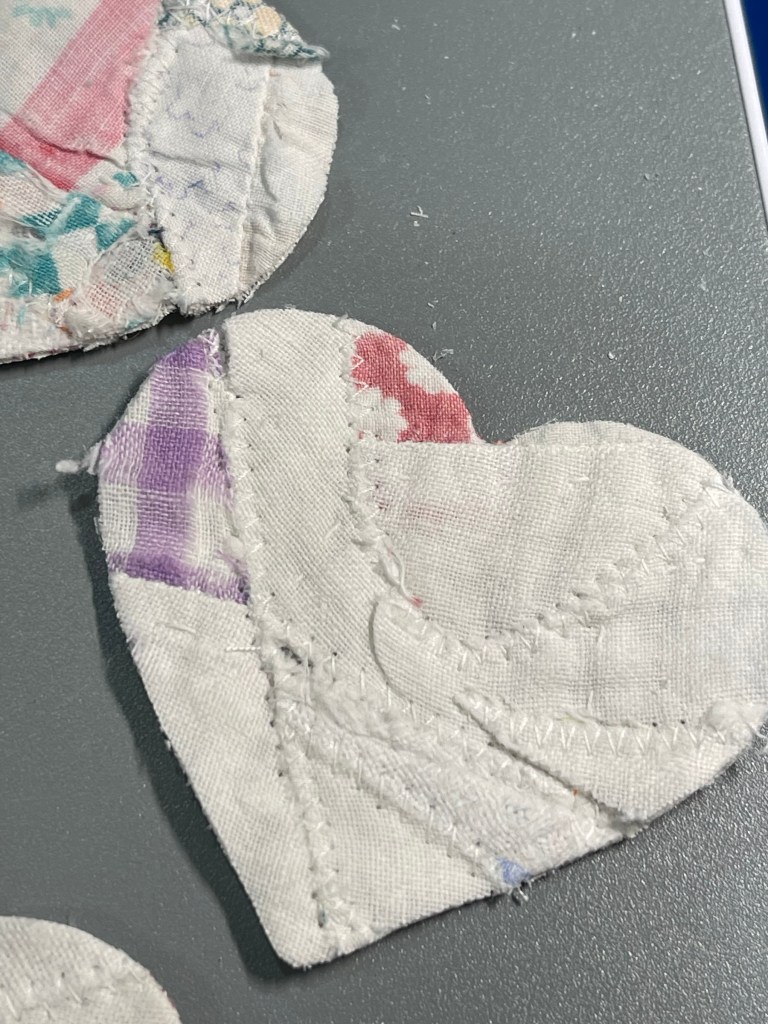
I cut my heart using an Accuquilt Go and the adapter pieces that allowed me to use the Crafter’s Edge nesting heart Dies. https://craftersedge.com
But how did I get to the point of cutting hearts?
And down the rabbit hole I went! I cut all I could and then I had a new idea…
Rabbit hole #2:
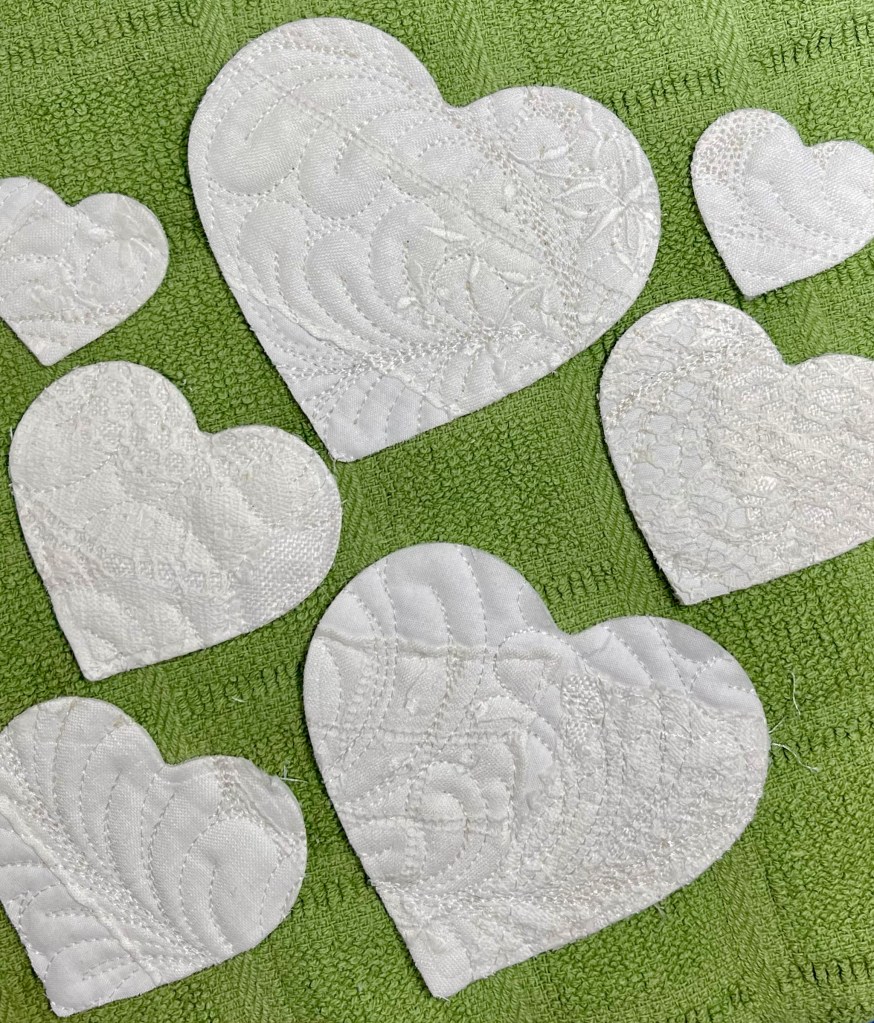
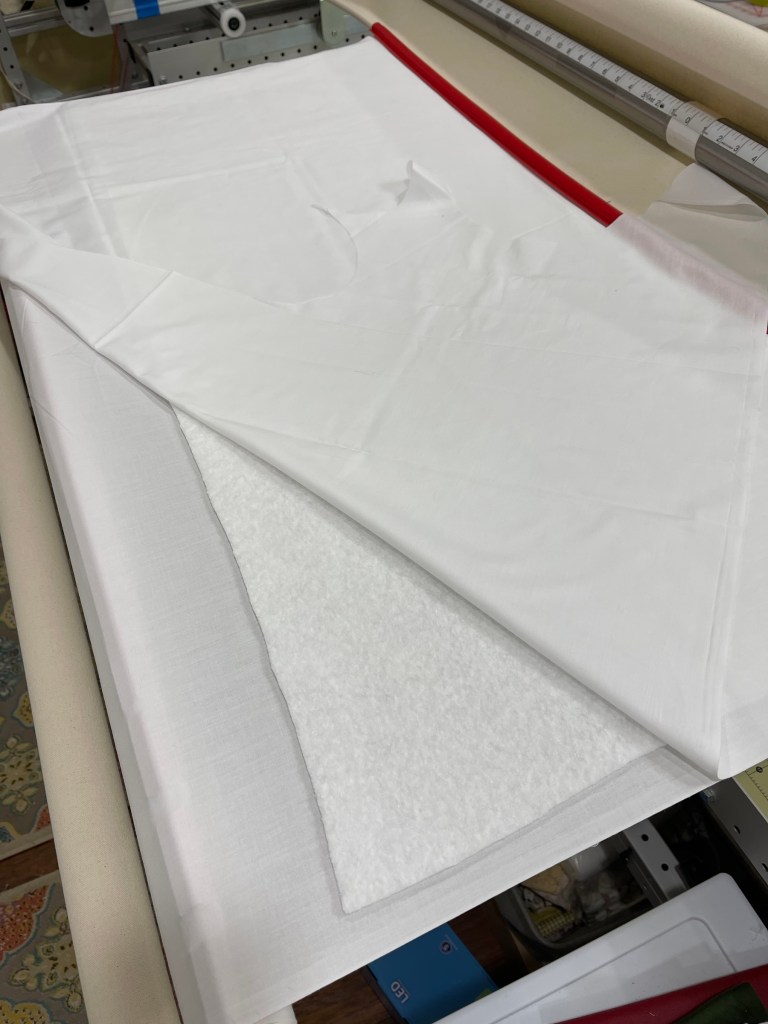
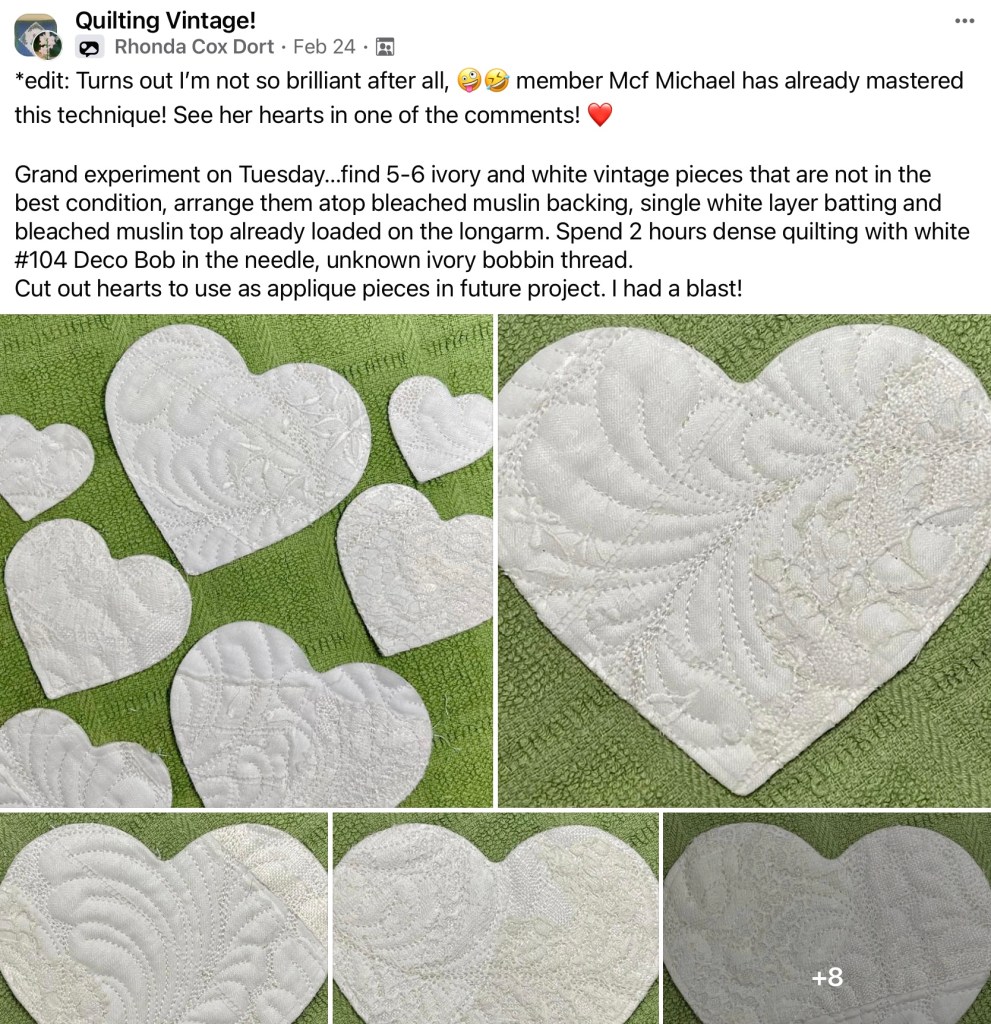
Using my longarm I decided to create a quilted piece to be cut into heart shapes.
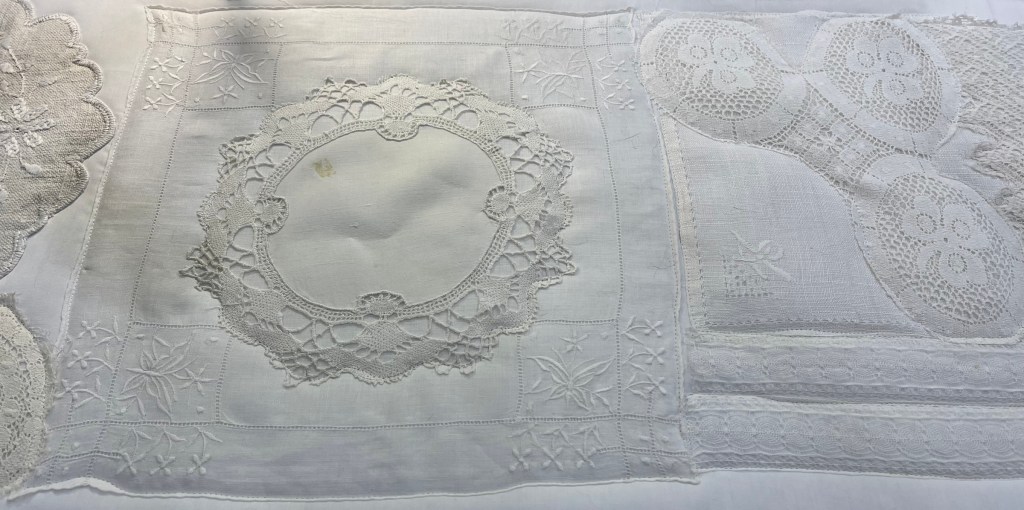
The backing fabric is bleached muslin that has been laundered (to shrink the fabric), Hobbs 80/20 white batting topped with another layer of bleached muslin. https://www.hobbsbatting.com
With the vintage ivory and white linens laid out I started by quilting around the edges of each. What’s the dark spot in the pic above? Nail polish. No worries, I’ll cut around it later.
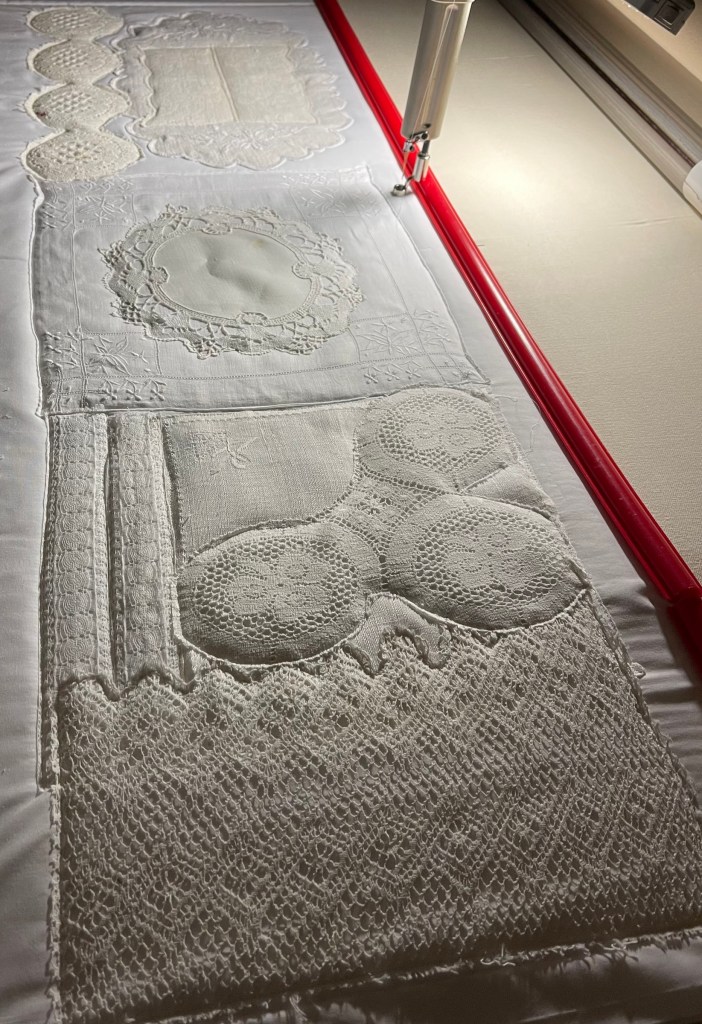
With each piece secured, let the quilting begin!
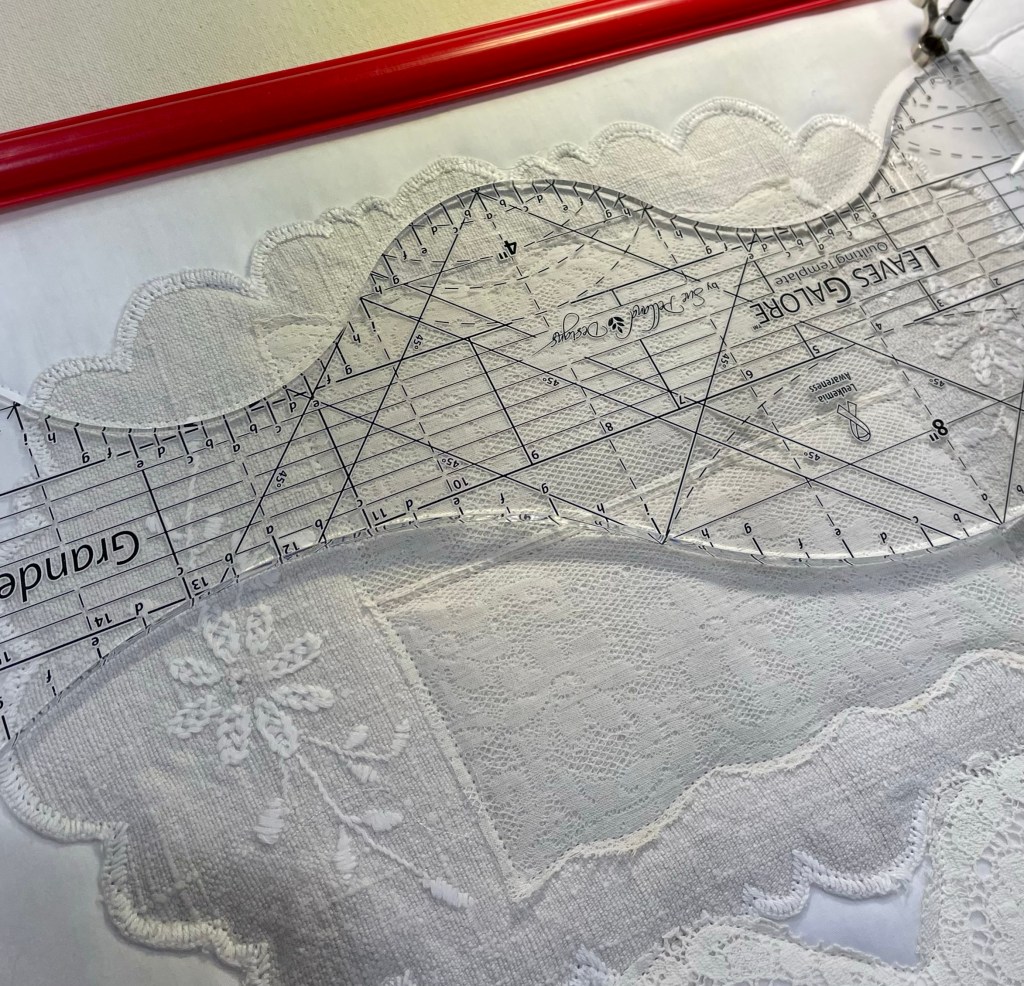
This longarm ruler is fantastic for quickly quilting long undulating lines which will become the stem for quilted feathers. https://suepellanddesigns.com/
Yes, quilting veins in each feather took a lot of time but compare the two pics above to see how much it added to the overall look.
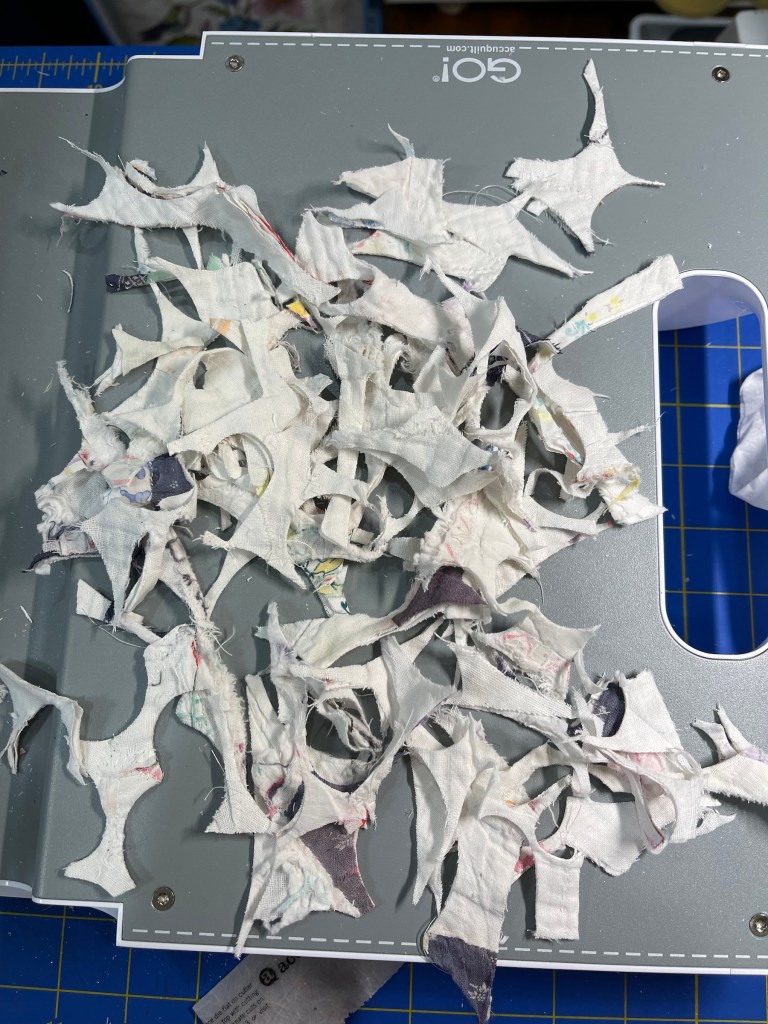
I used all four heart dies and what’s left of my quilted piece? See the little pile of scraps! Just so you’ll know, you can easily use Crafter’s Edge Dies with your Accuquilt, you’ll just need to purchase an adapter plate set.
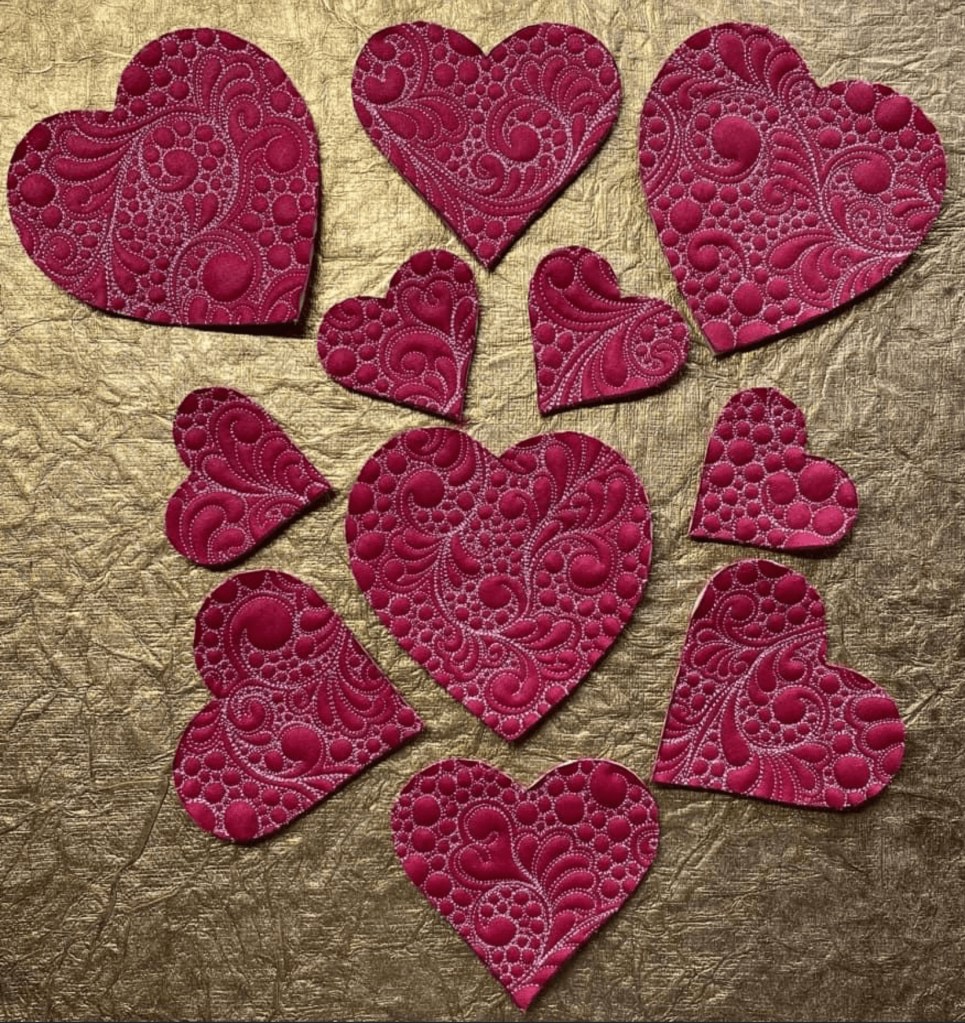
Enter rabbit hole #3…I’d previously cut hearts from a very damaged Double Wedding Ring quilt piece. I had left over scraps… hum…
I began sewing these scraps together.
I chose Superior Threads Bottom Line thread https://www.superiorthreads.com because it so closely matched the old white-ish quilt fabric and also because it has more of a matte finish. No need for the thread to visually take center stage.
The results look a bit like Crazy Quilt hearts and I love them!
These hearts will make wonderful applique pieces for a future “quilt save”.
My left over scraps. Yes, I will most likely throw them away, they’ve served me well.
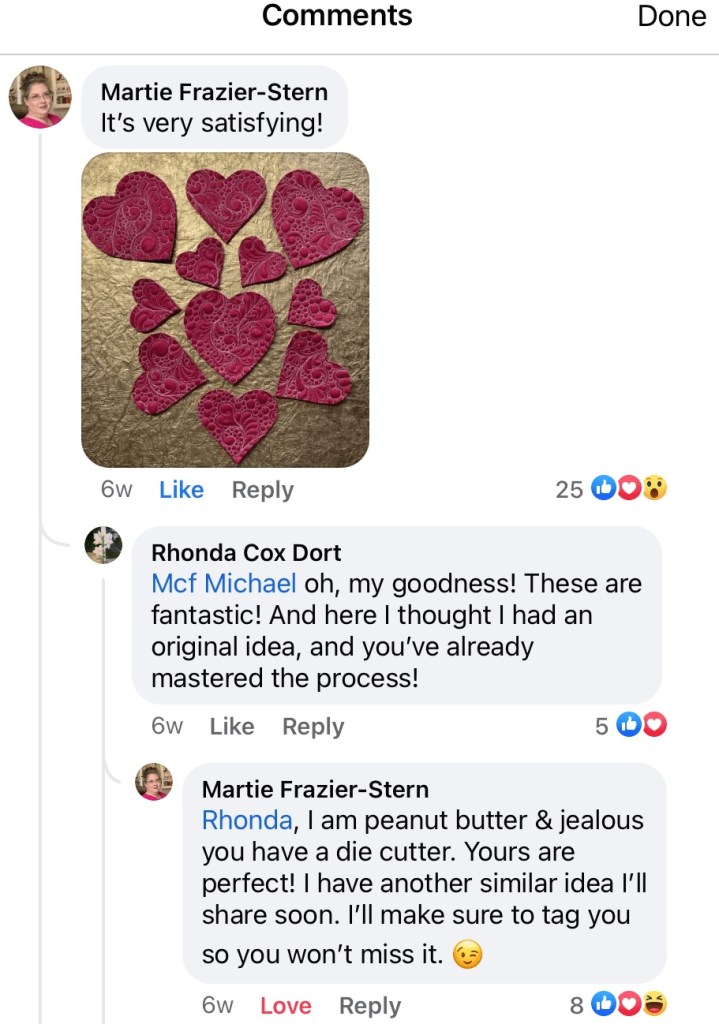
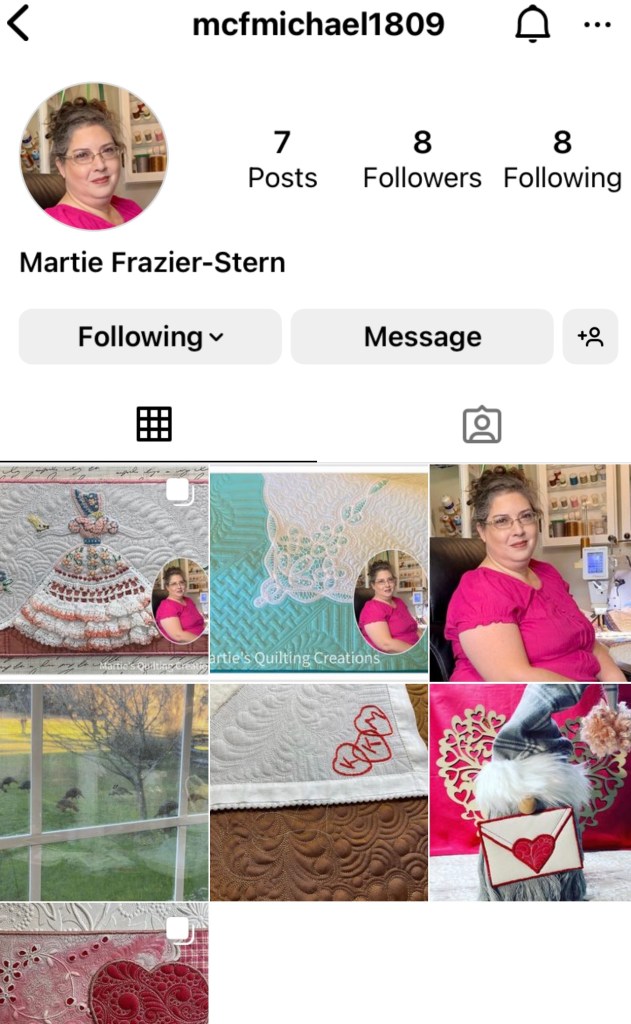
Then here’s my post to a wonderful fb group: Quilting Vintage, where I learn my grand ideas were yesterdays news! 🤣 Seems that awesome quilter/artist Martie Frazier-Stern (of Martie’s Quilting Creations) is light years ahead of me with this quilting technique! Thank you Martie for letting me post about your work!
Want to see more of her work?
It’s always fun to experiment and this time I think it was a very successful. I’m still mulling over how I will use these hearts on a future project, the sky’s the limit when it comes to saving an old quilt!
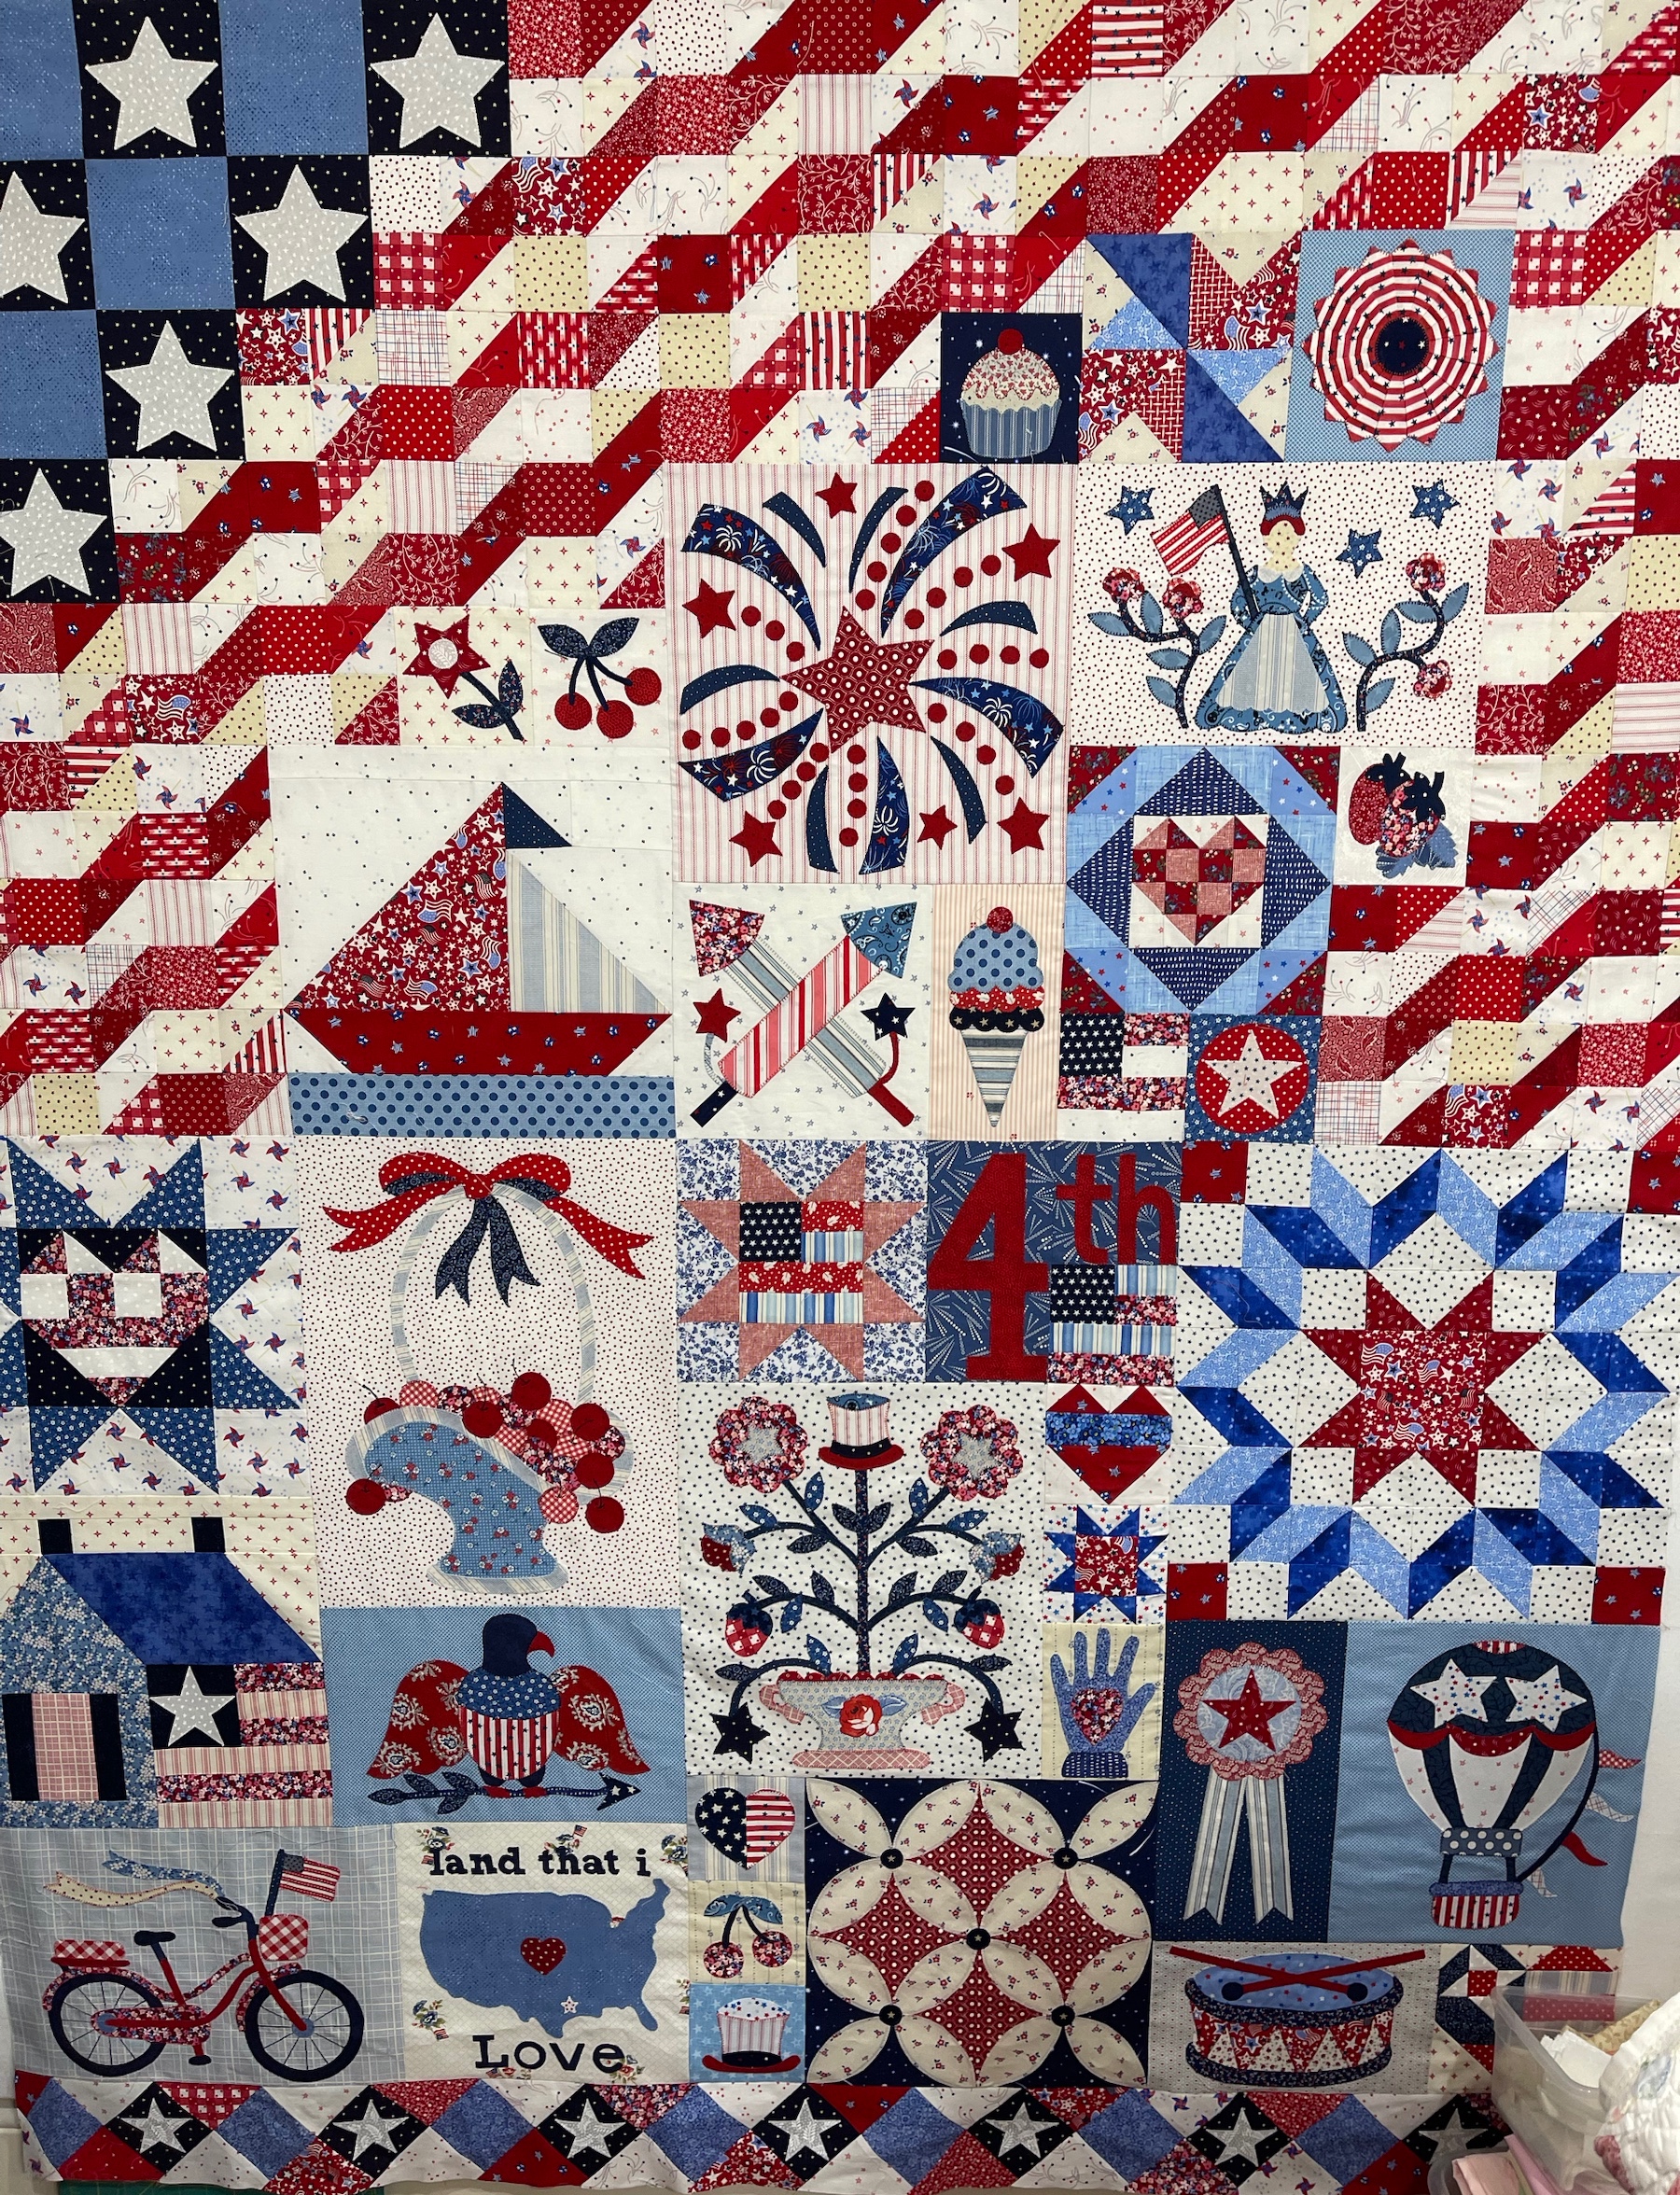
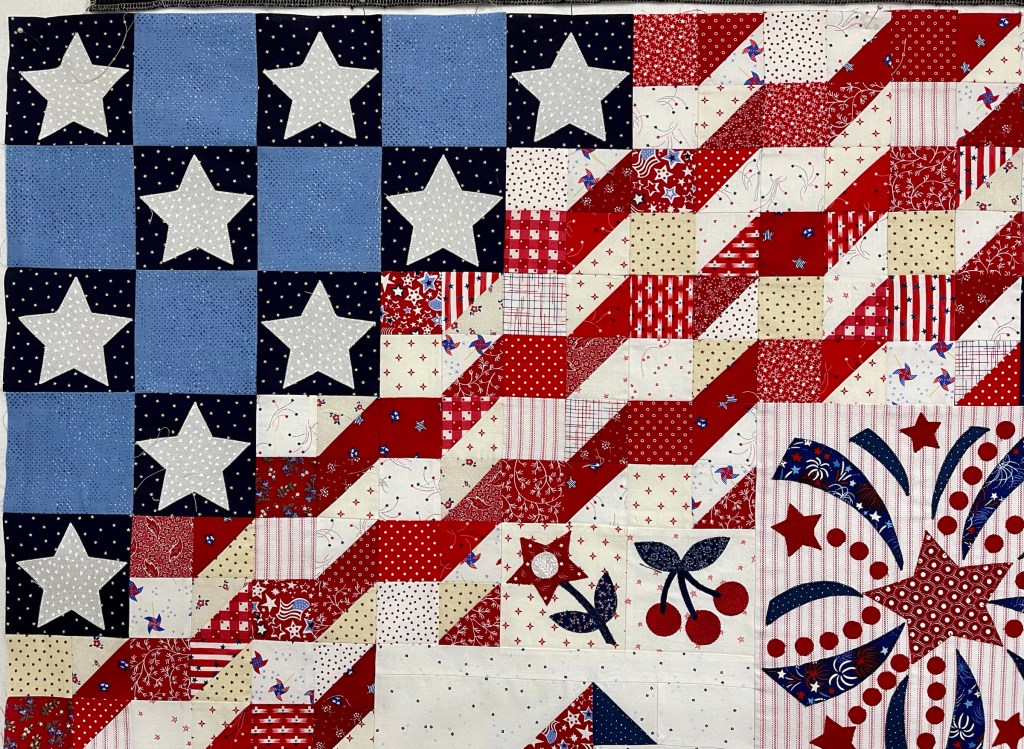
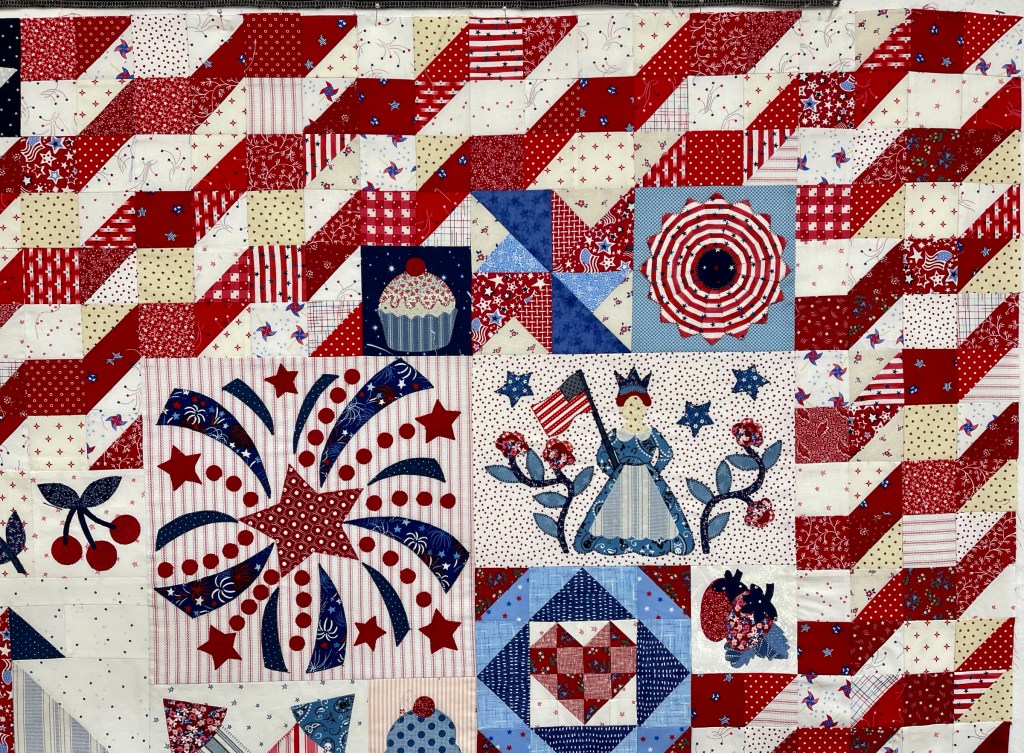
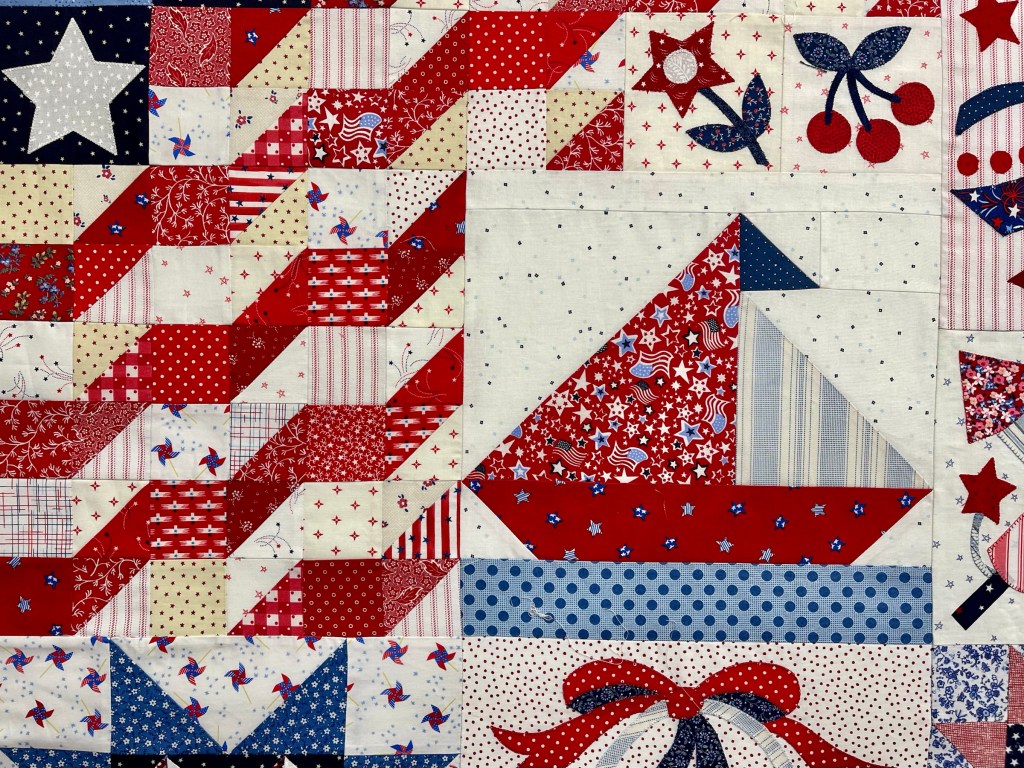
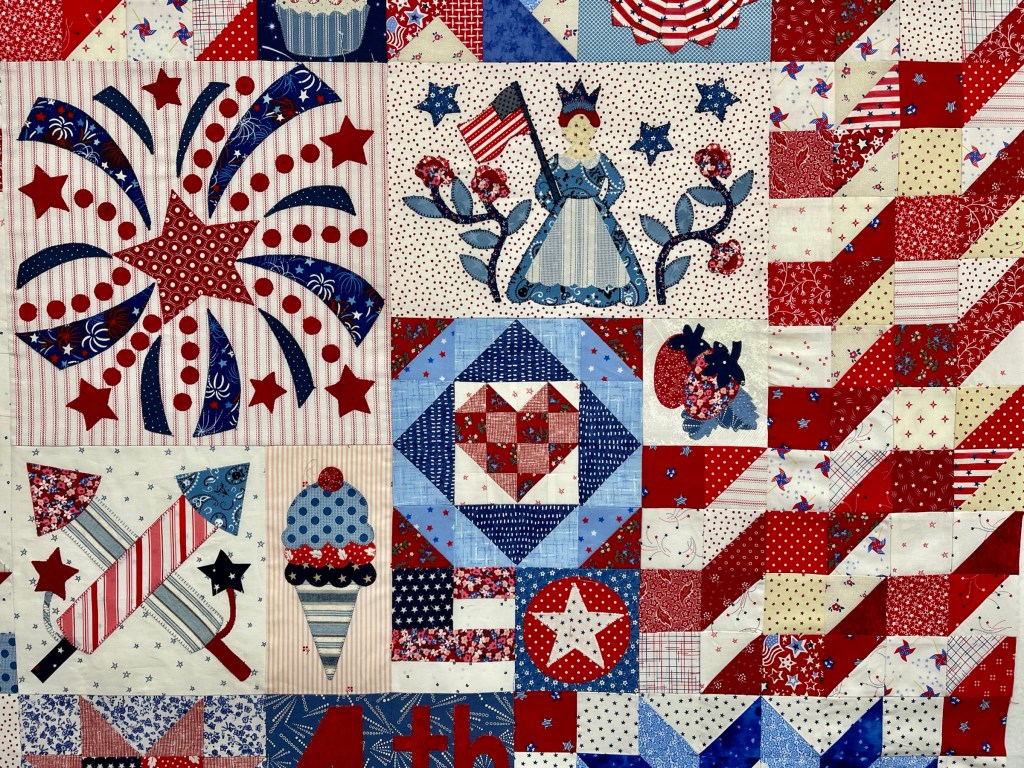
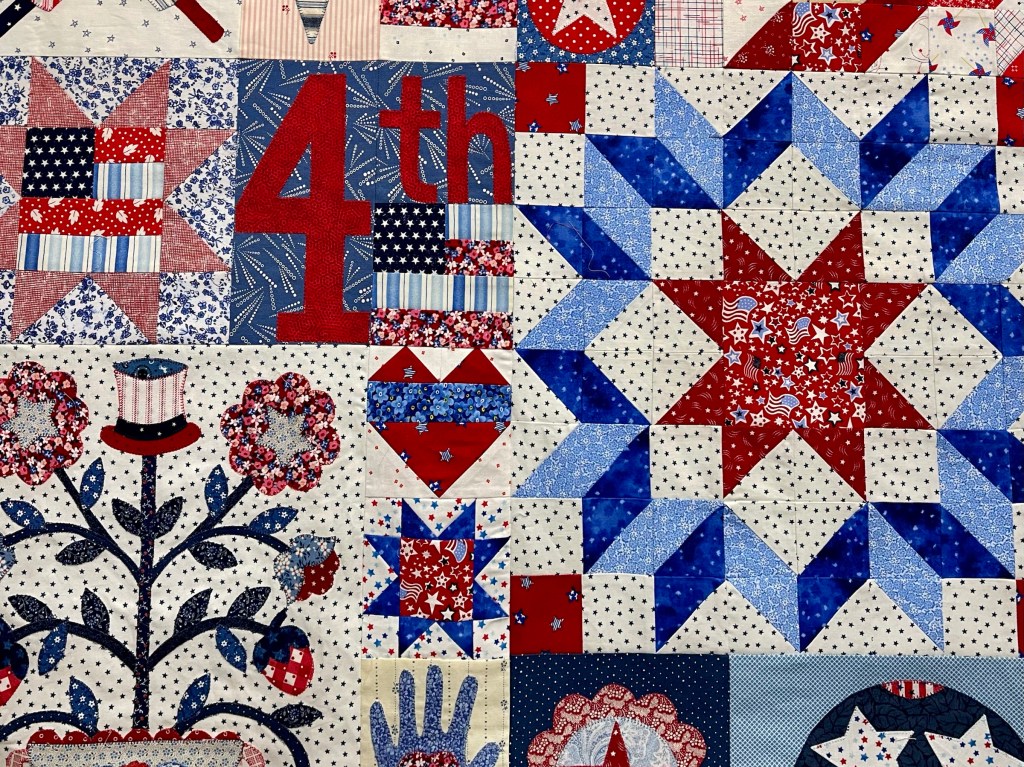
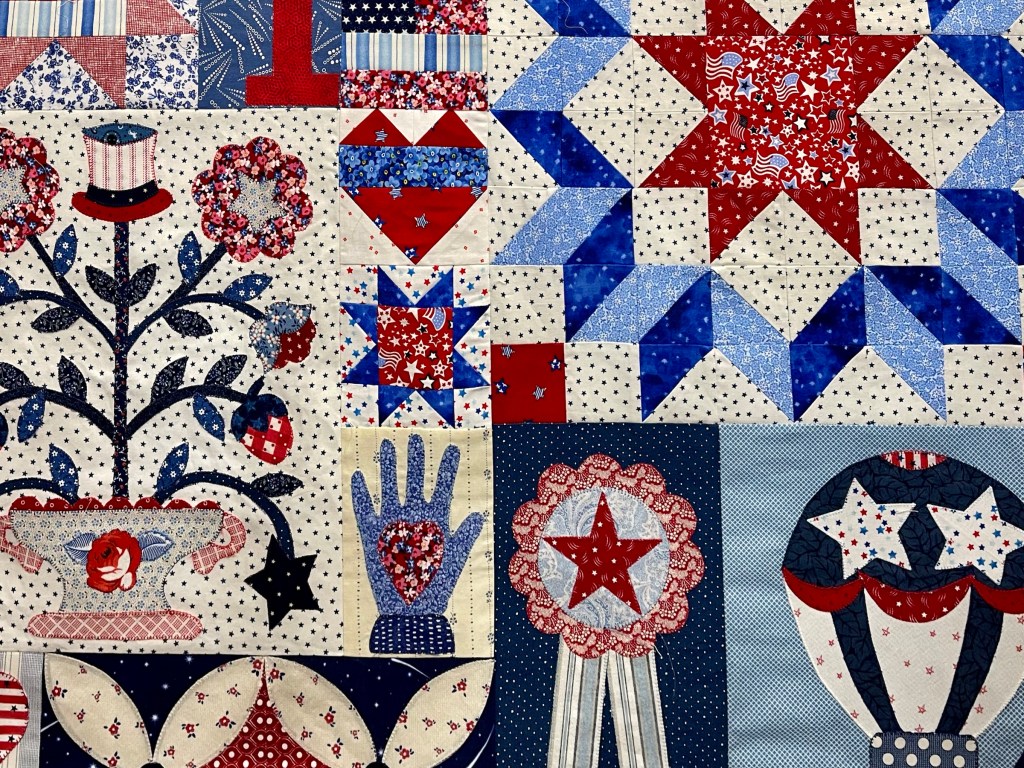
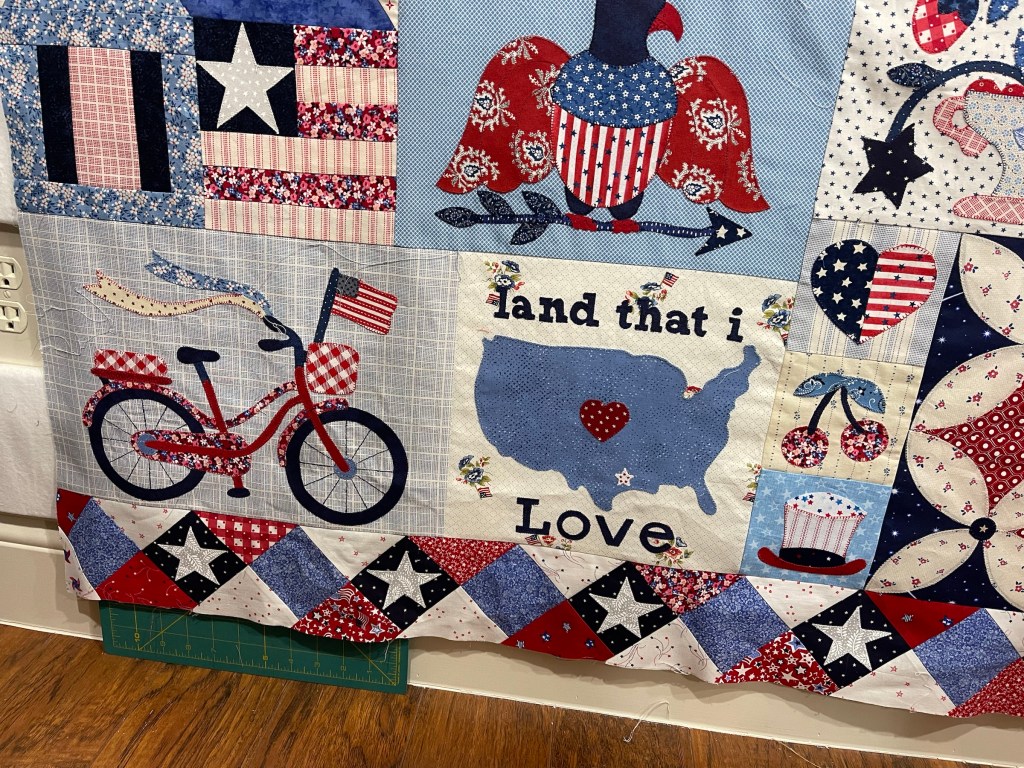
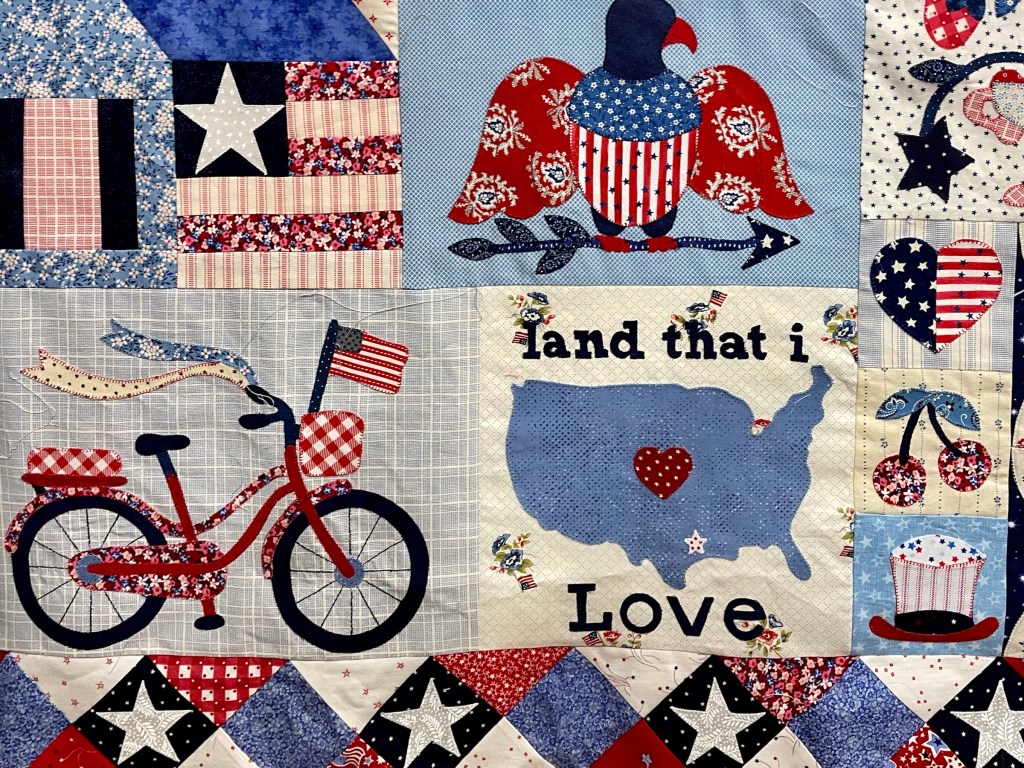
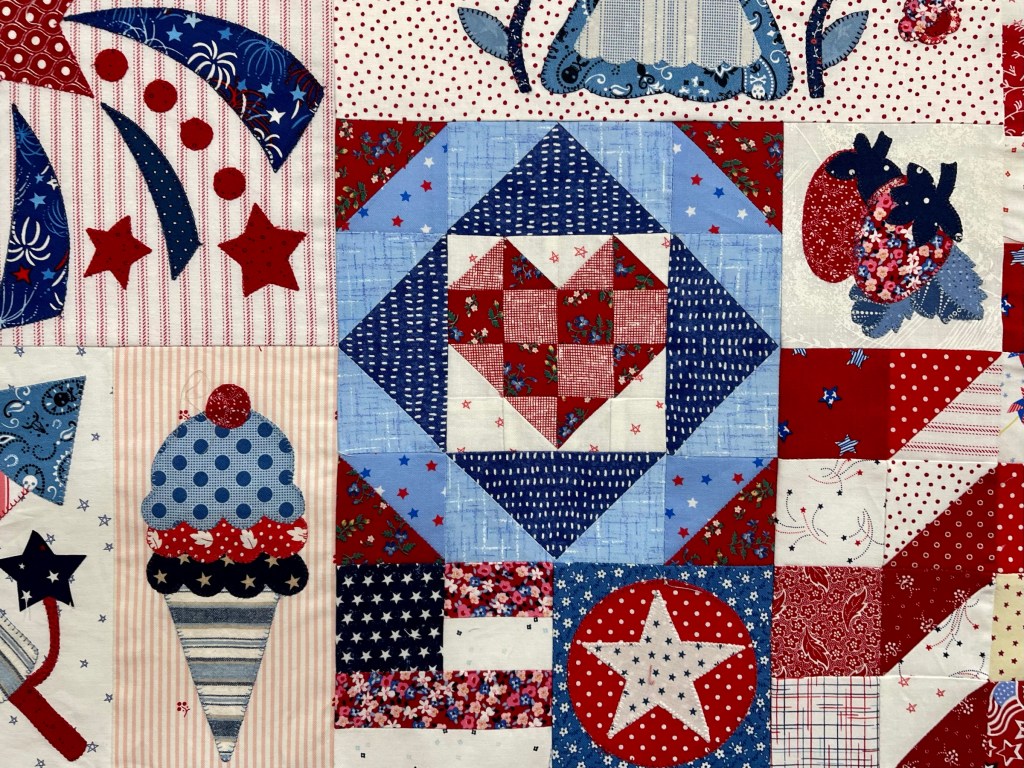
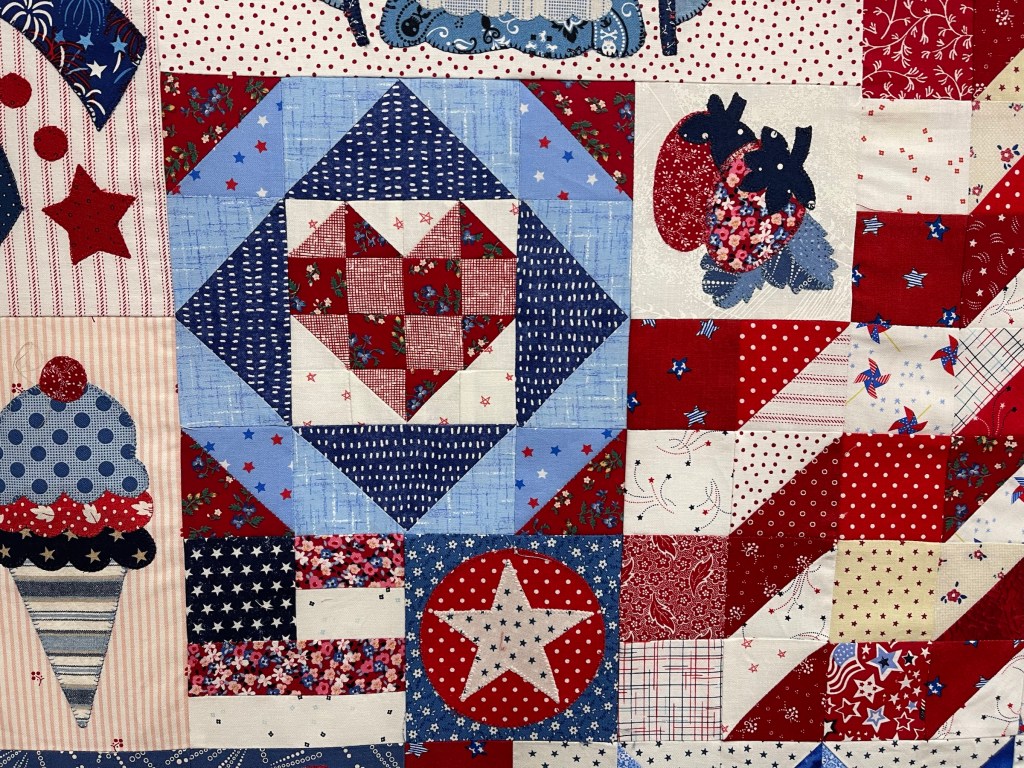
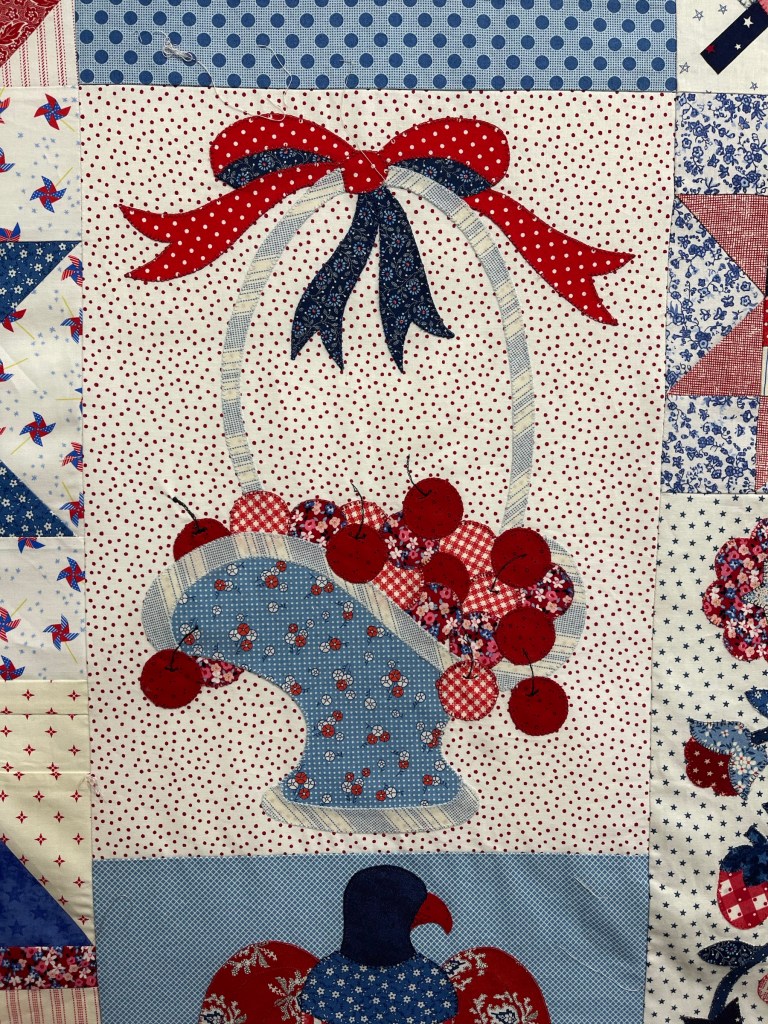
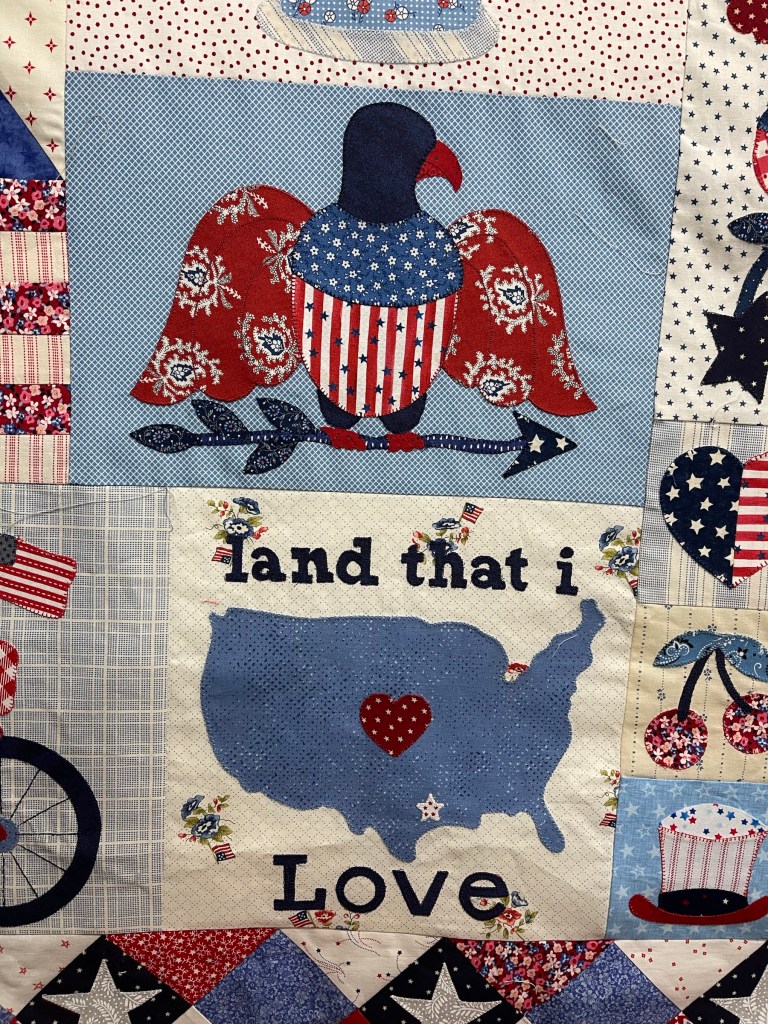
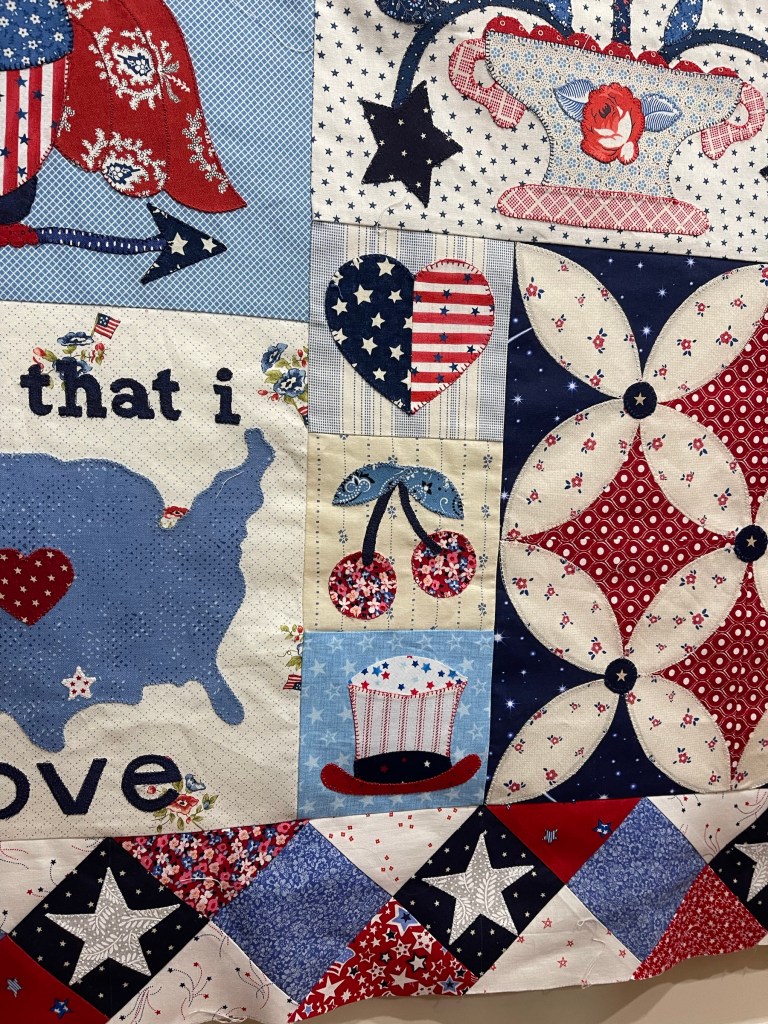
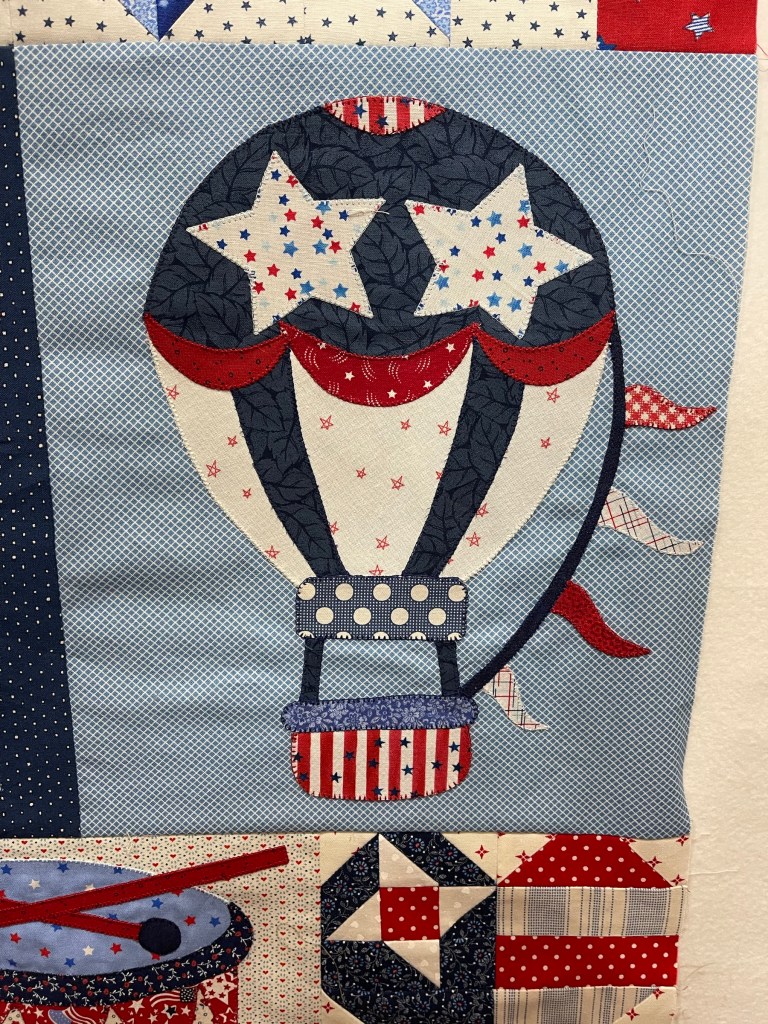
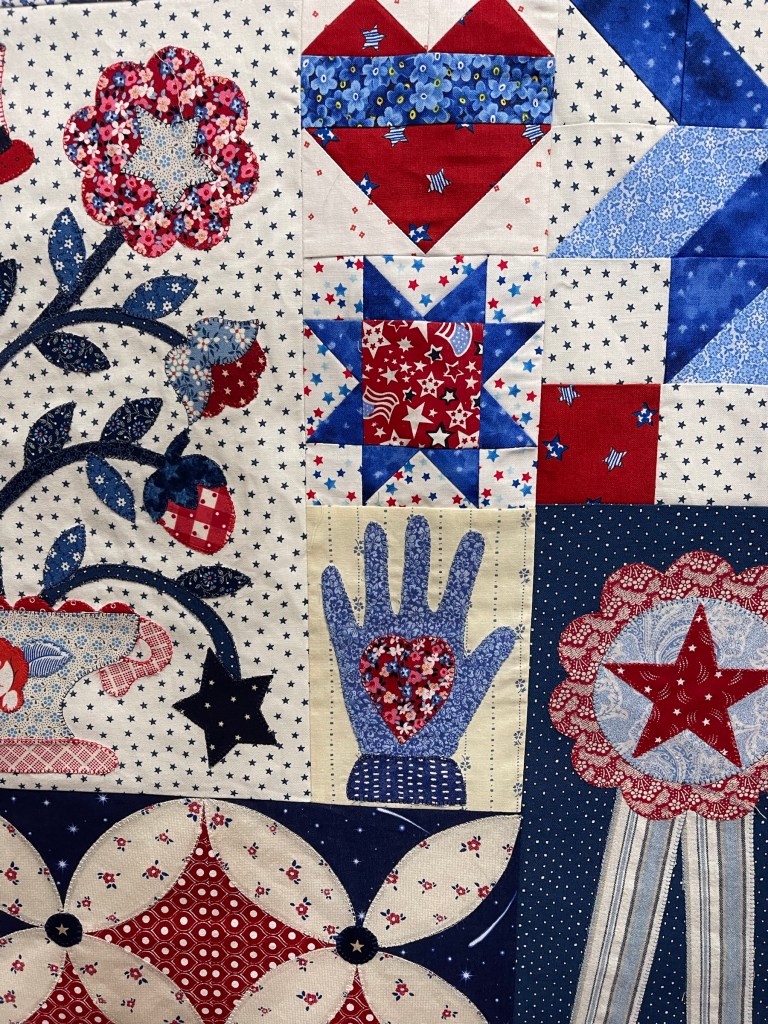
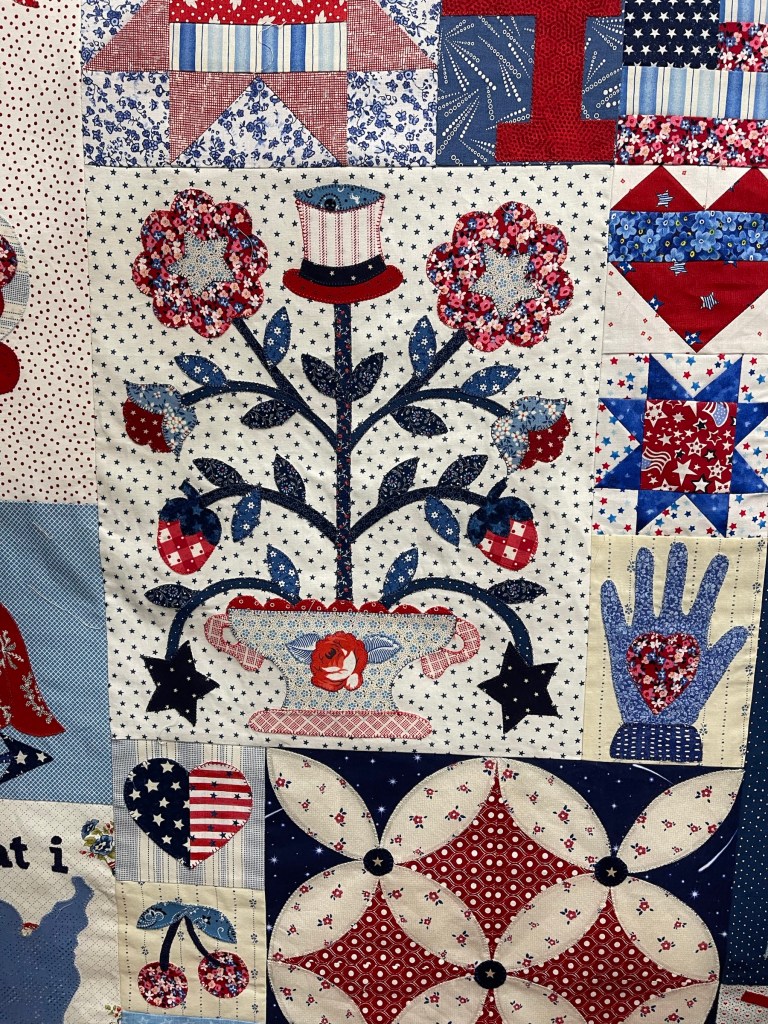
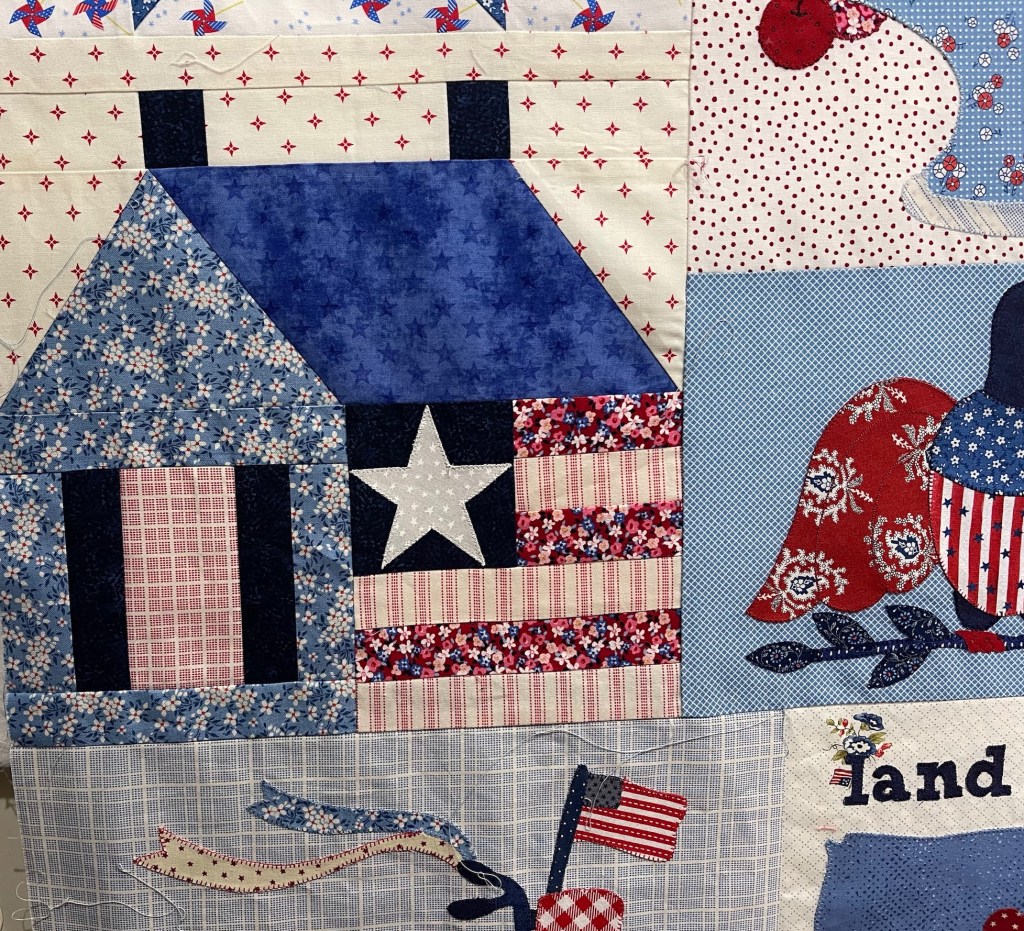
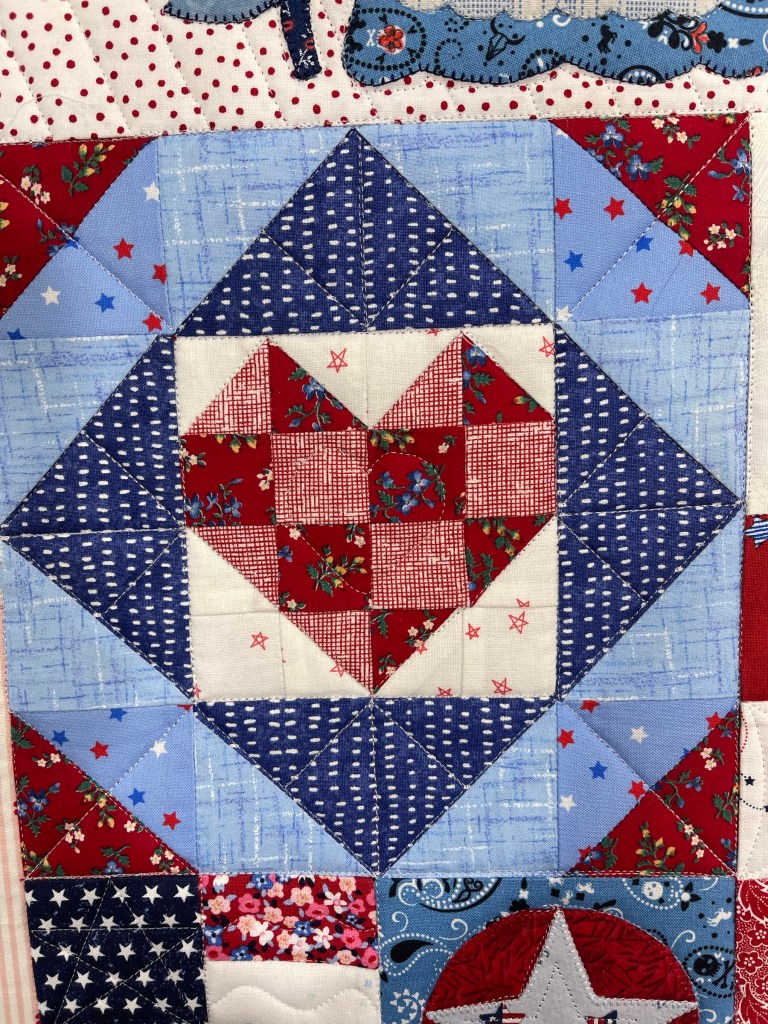
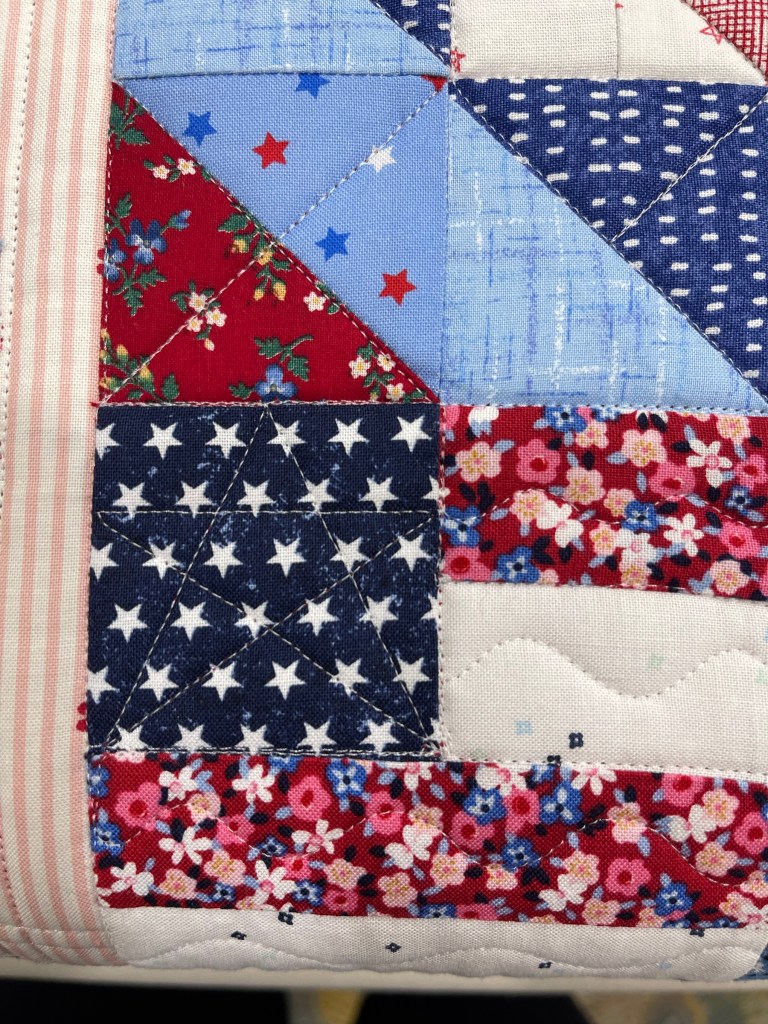
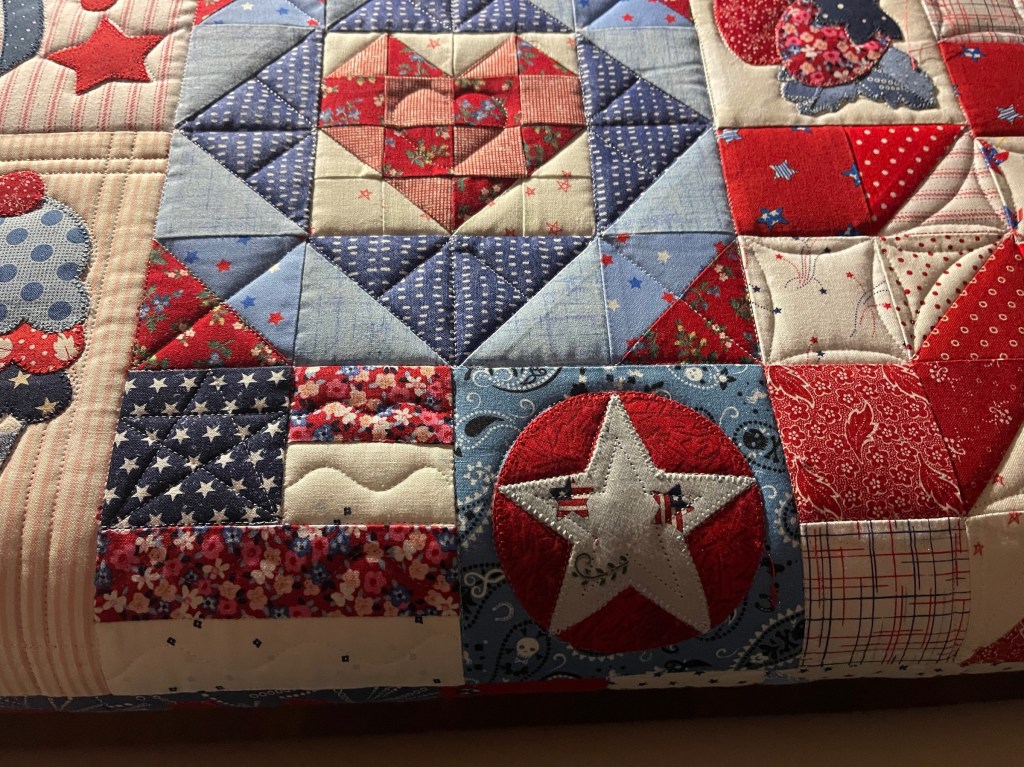
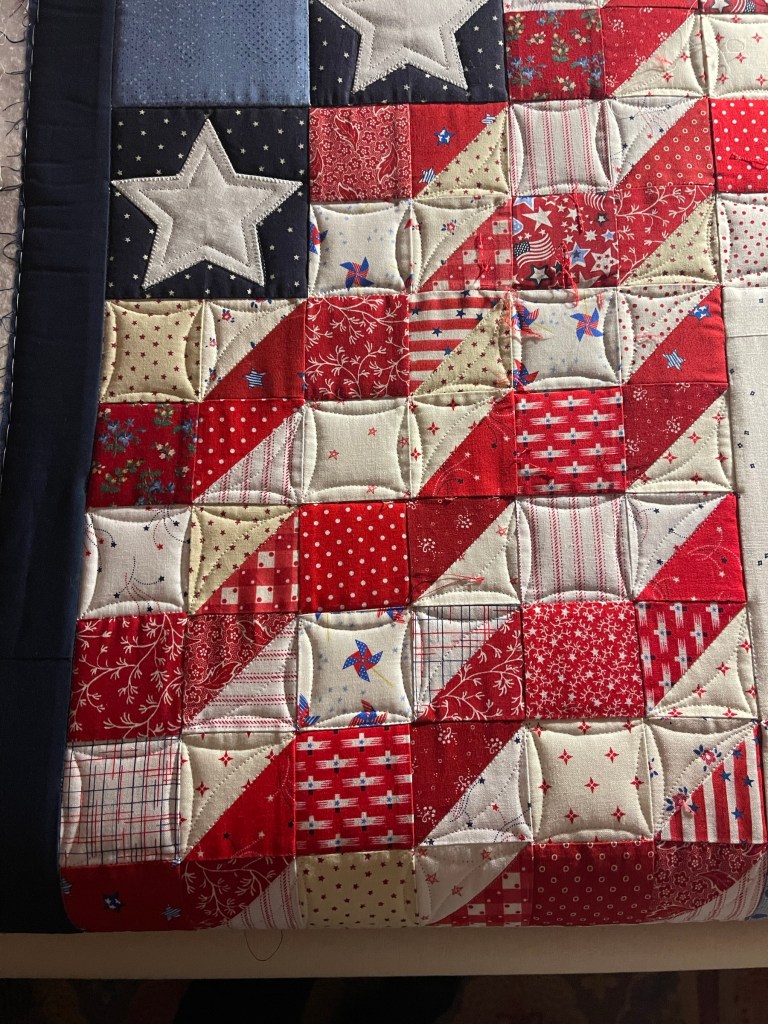
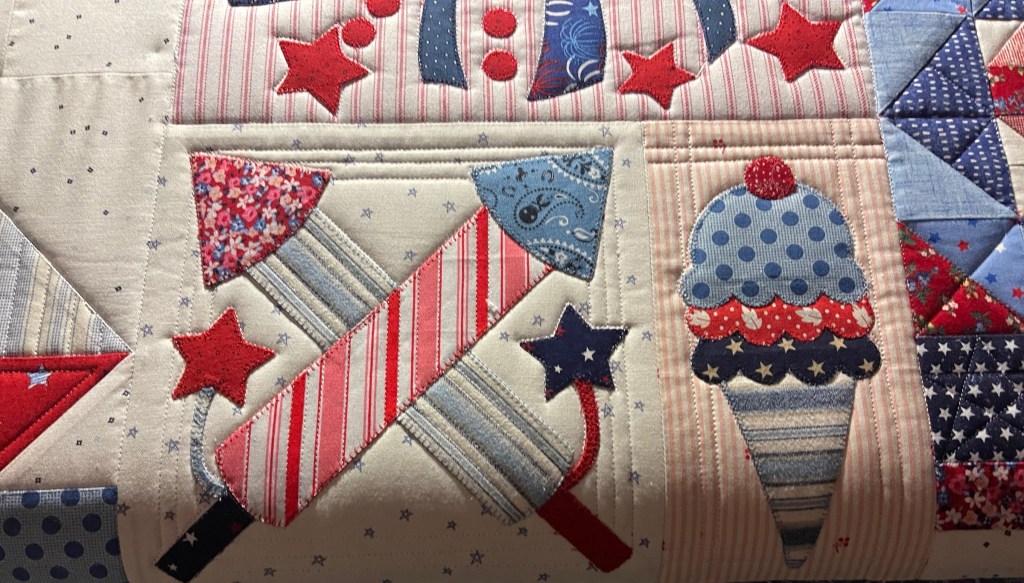
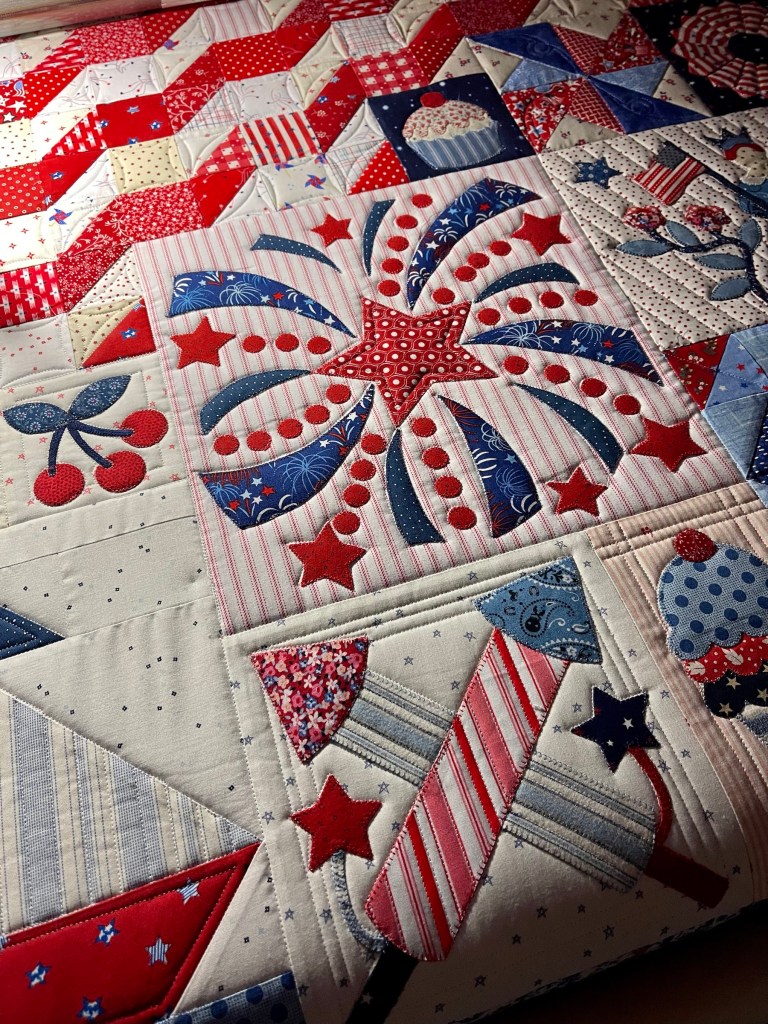
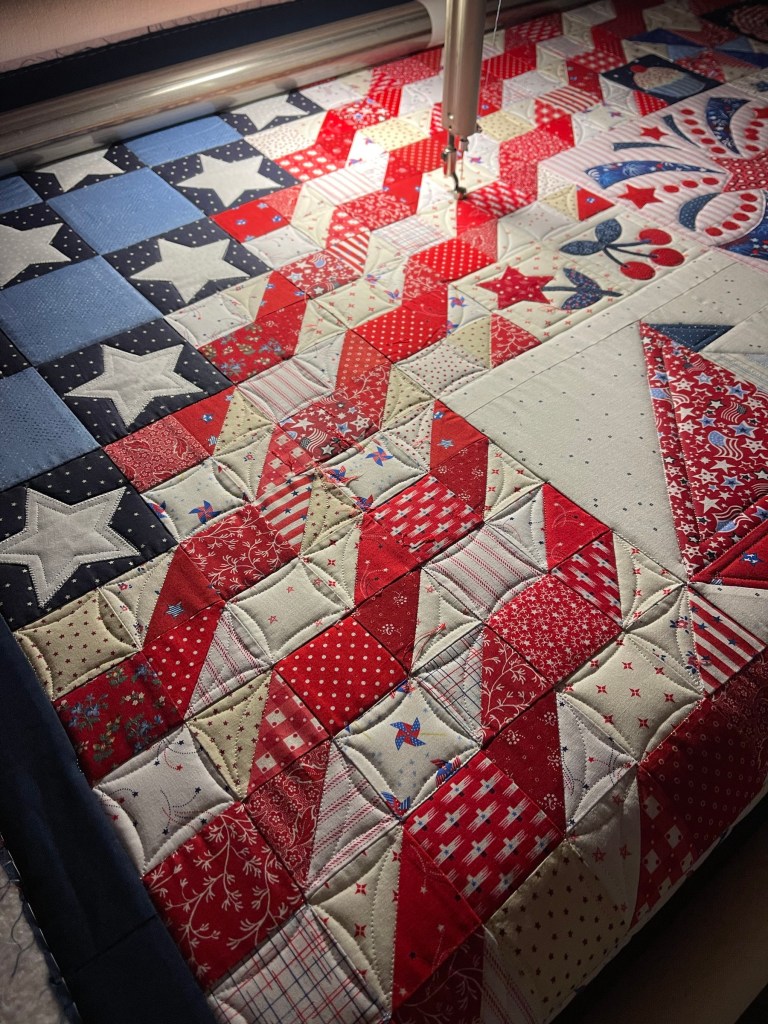
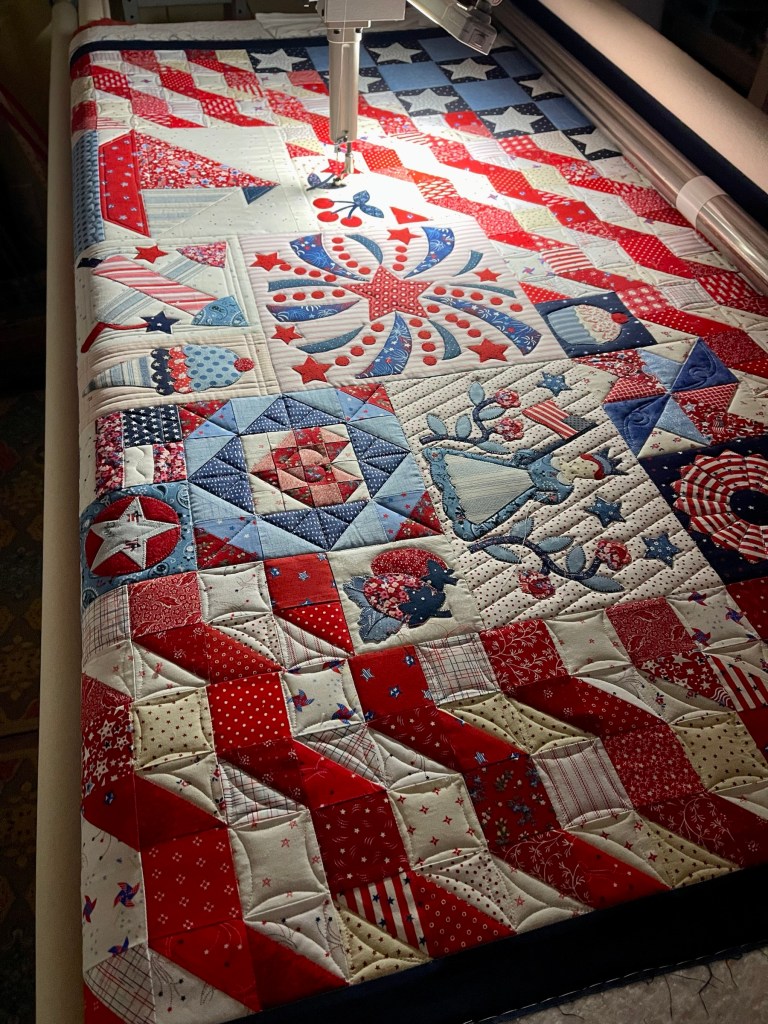
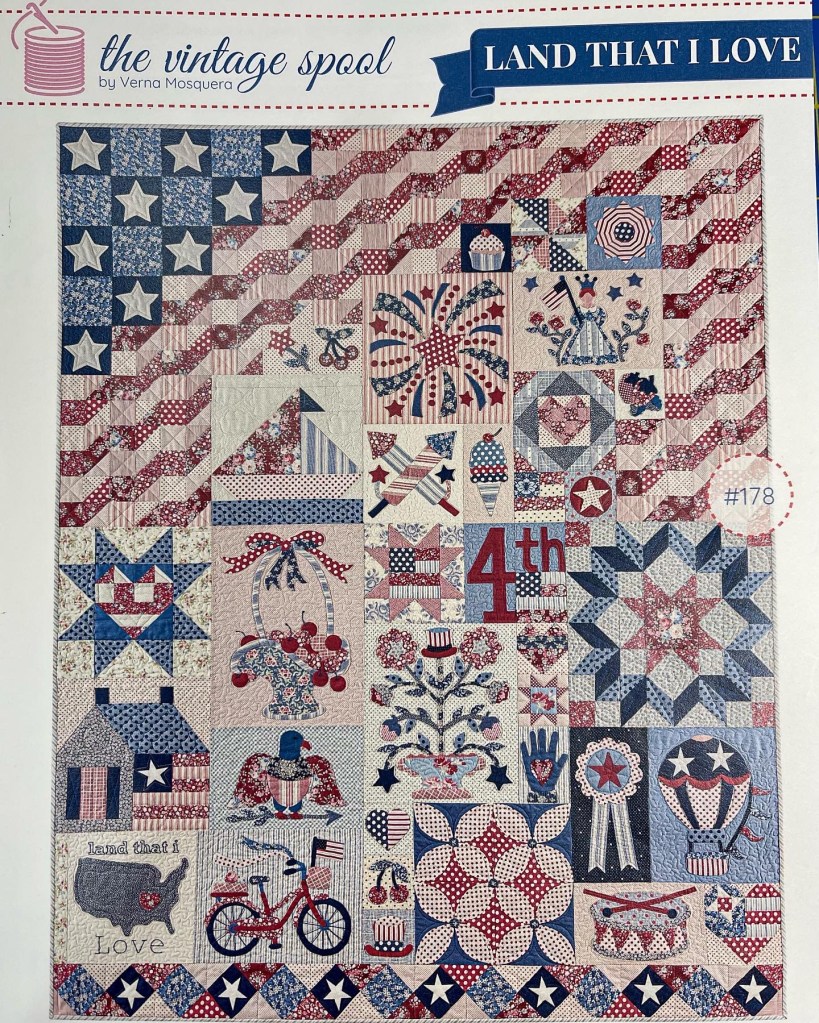
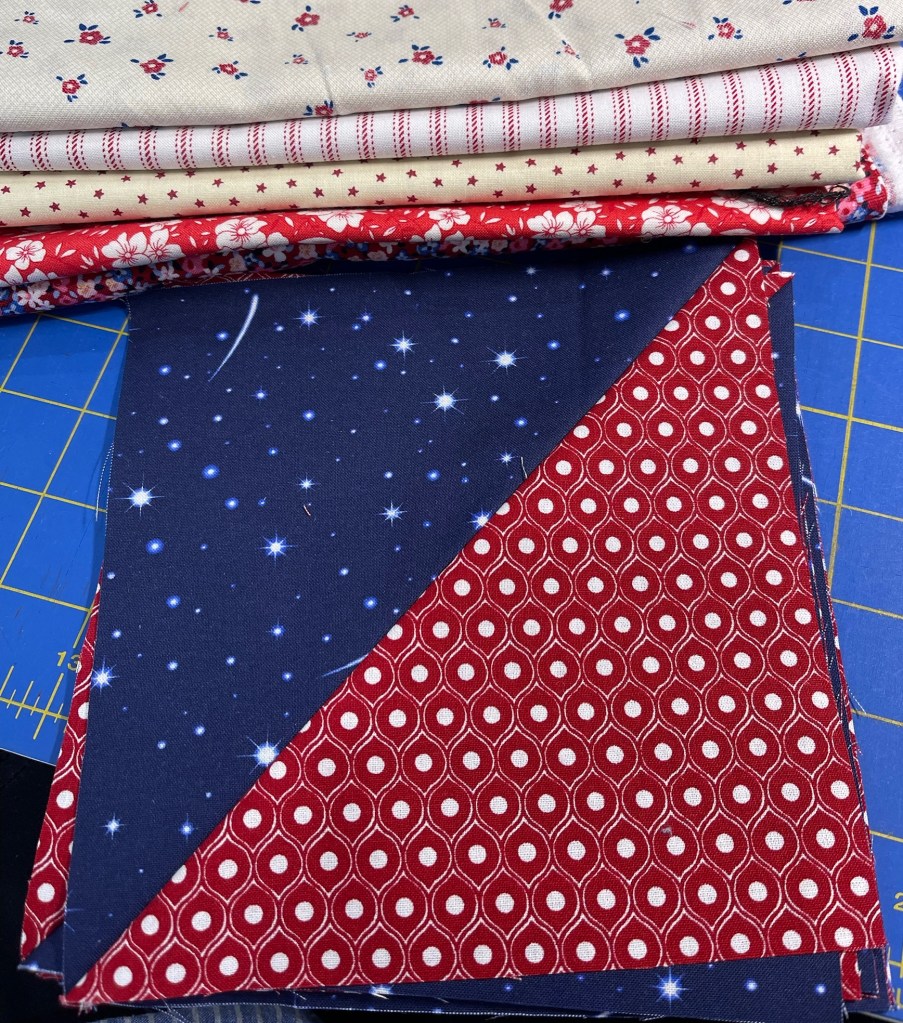
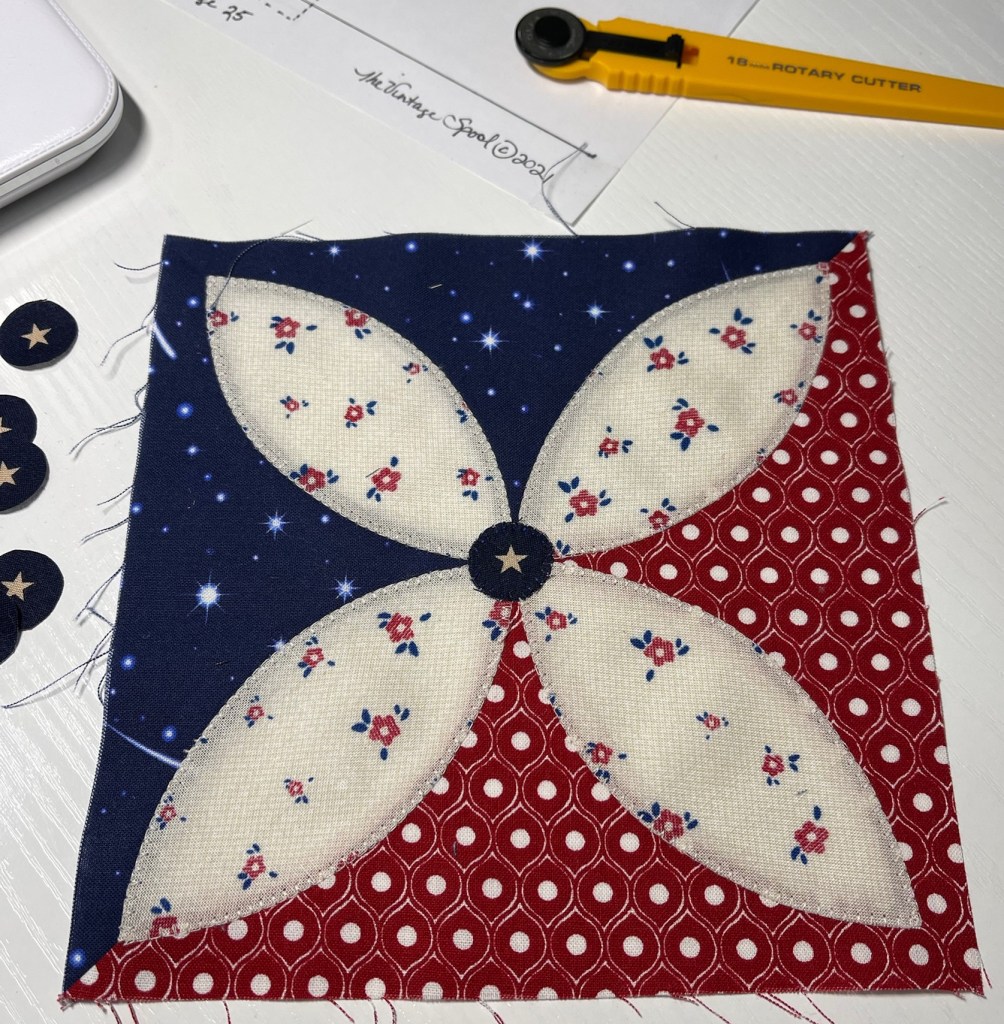
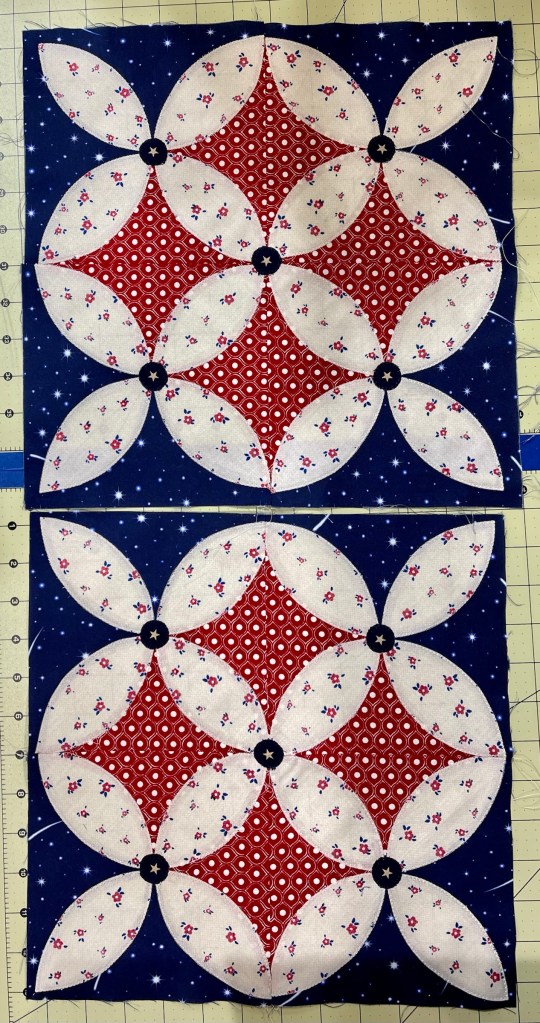
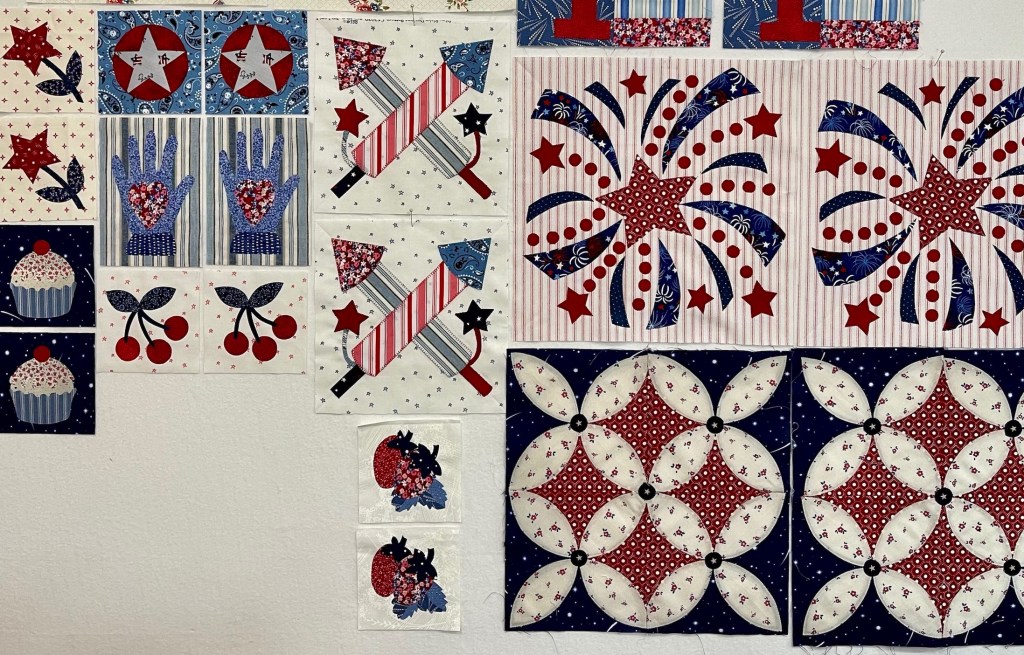
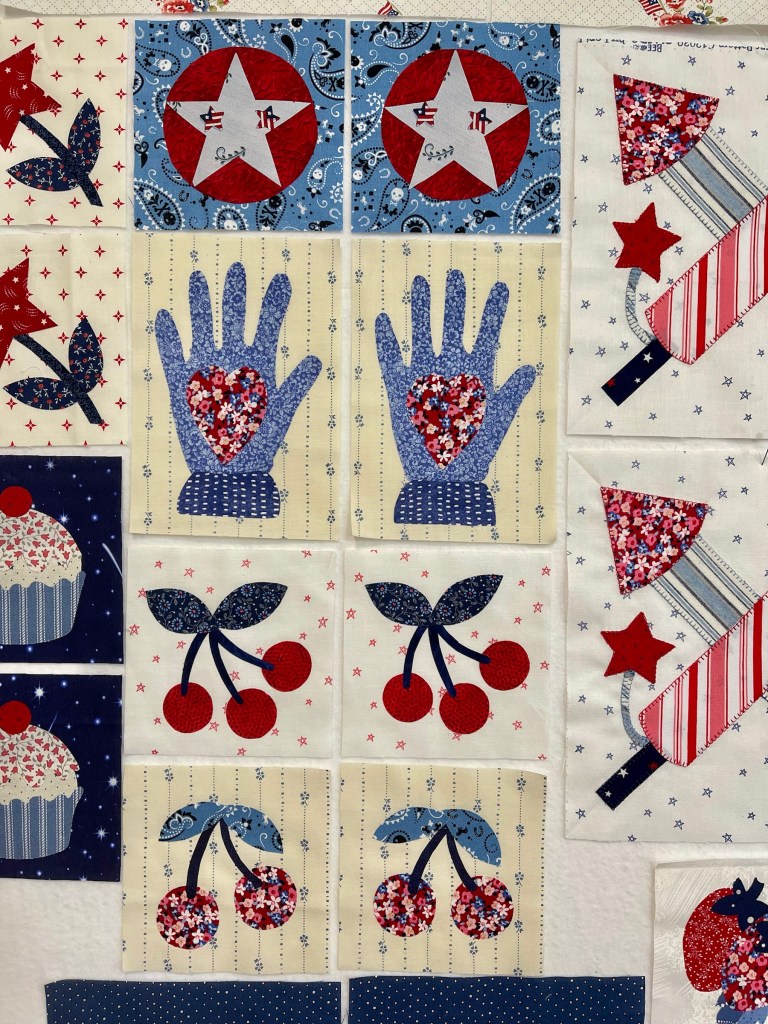
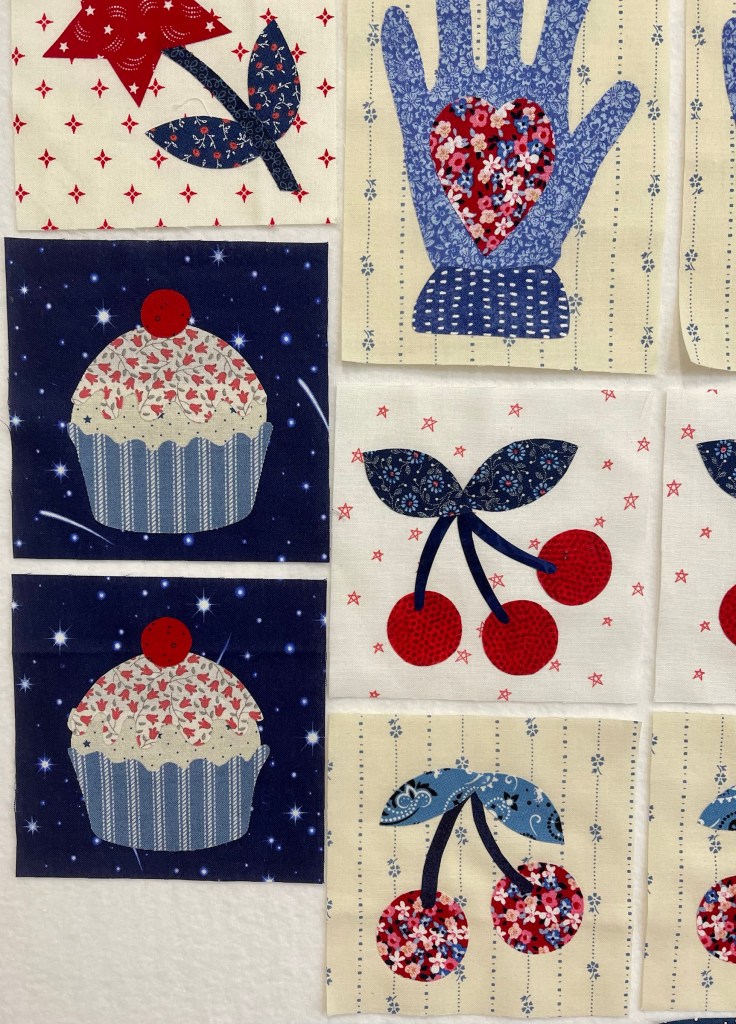
Life got busy and here it is March all of a sudden. Lots of things happening with the Land That I Love patriotic quilt top.
As a reminder, my friend Diana and I made two almost identical quilts, she did all the pieced blocks for each of us and I did all the machine applique.
The first picture is my finished quilt top minus the borders I plan to add. It’s hanging on my design wall. Diana’s quilt is on my longarm, maybe a little more than half quilted.
We began our project a few weeks before a Texas quilt shop offered this as a Block of the Month. It’s been fun to see quilters across the nation post their progress.
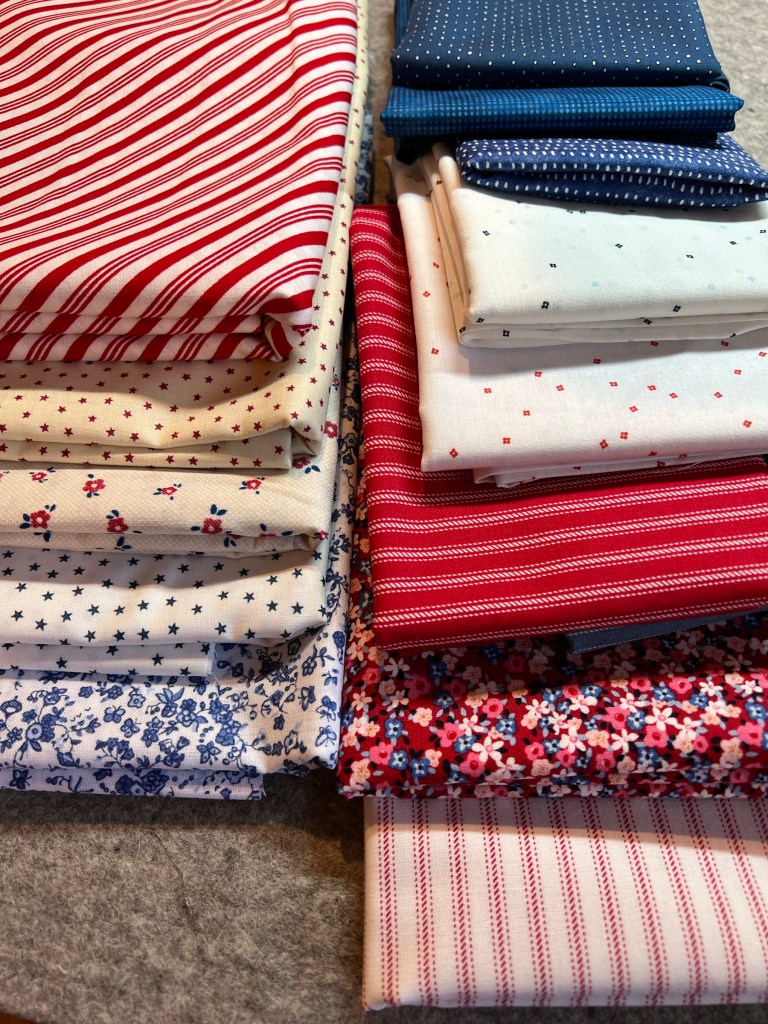
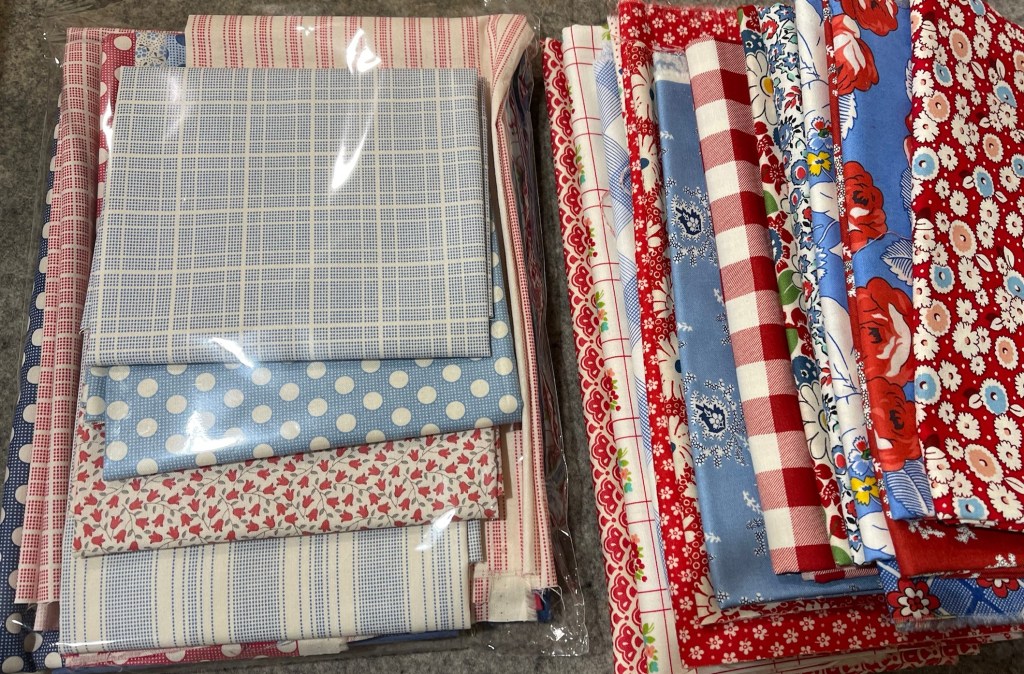
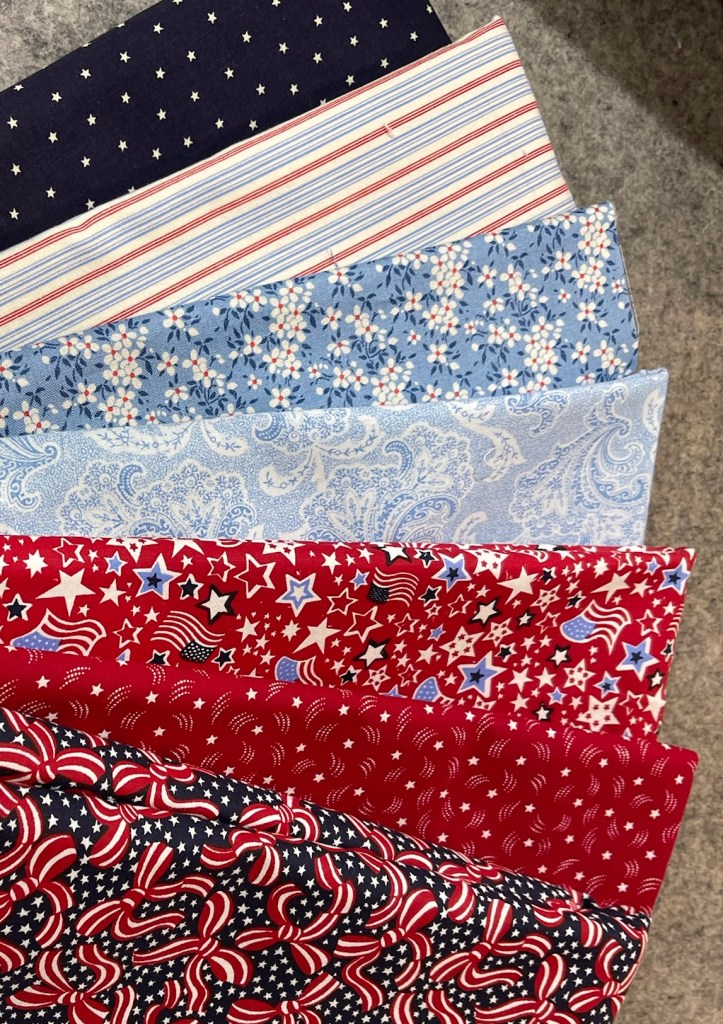
Diana and I combined our stashes of patriotic fabrics and last time I weighed the bags we had 22 pounds! Enough to make 50 quilts at least!
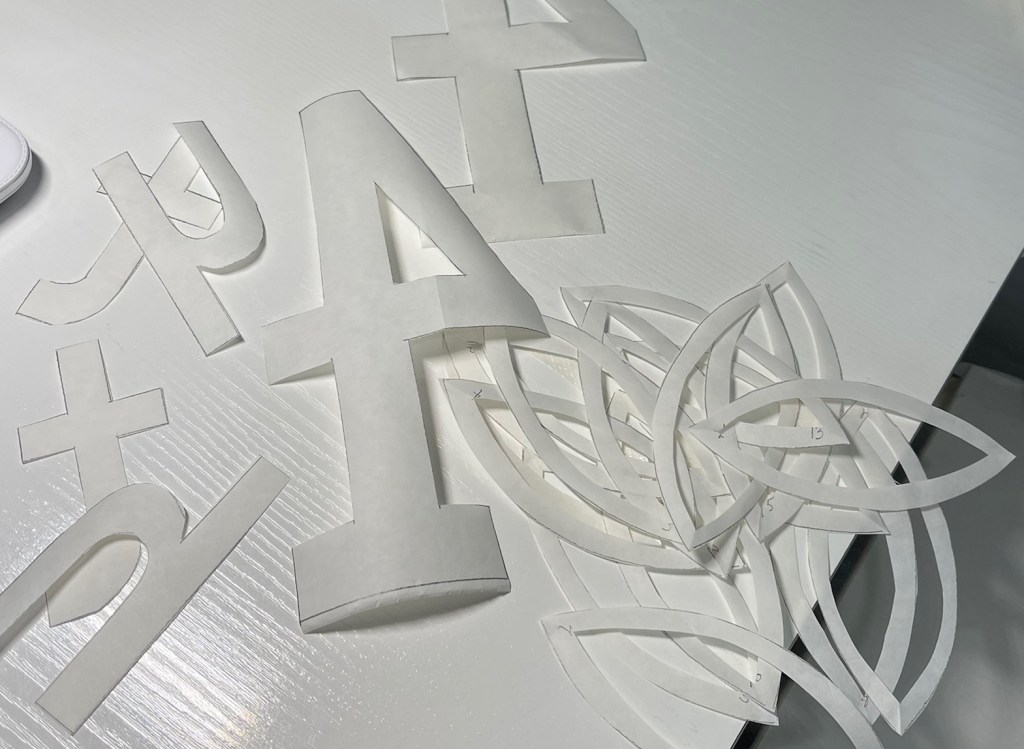
As a side note it you decide to make this quilt…the pattern forgot to include the Dresden Plate, or as they call it, the Americana Rosette.The pattern called for the words in this block to be hand embroidered. I decided raw edge appliqued letters would be the way to go. And a bit of Diana’s quilt on the longarm.
Hopefully each of these quilts will be finished by July 4th!
Taking a step away from vintage, just look at this quilt pattern! I fell in love at first sight!
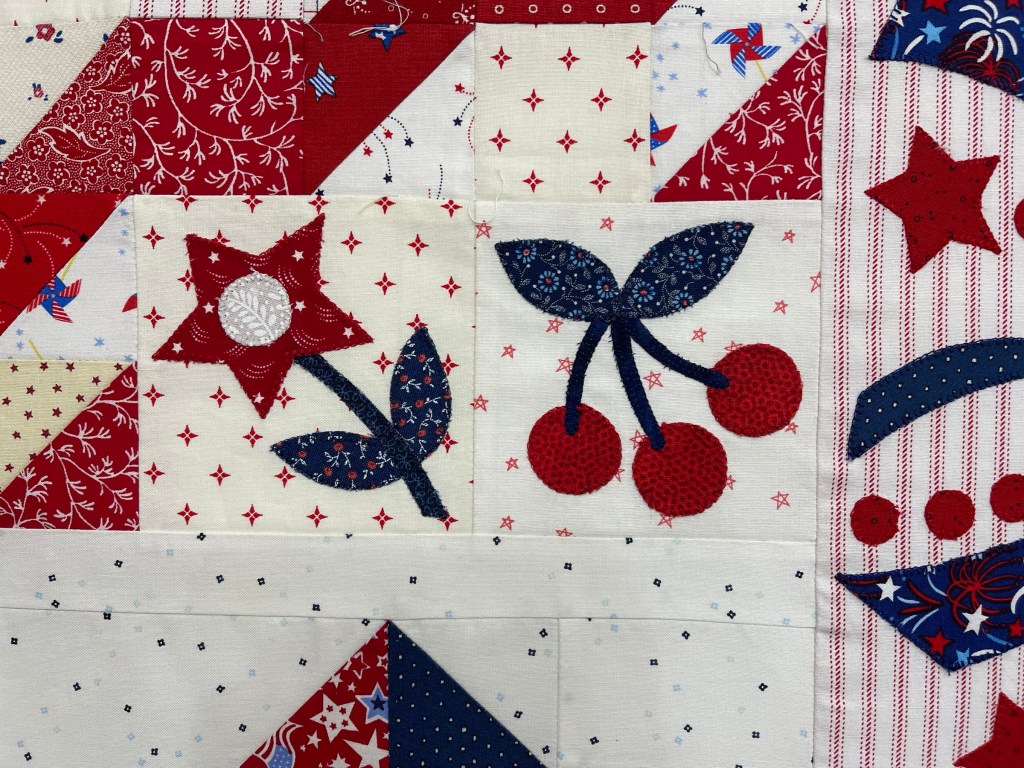
My friend Diana showed me the pattern and suddenly things escalated, we devised a plan: she’s not crazy about doing applique and I’m not crazy about piecing so by combining our efforts we are making two quilts, I’m the doing the applique and she’s the piecer.
We’ve raided our respective stashes, spent a few hours together reviewing blocks and choosing fabrics.
We realized we have enough red/white/blue/ivory fabrics to make 50 quilts! 🤣🤪
And the first block is born!
I thought about doing needle turn applique but came to my senses a day or two later. This project is going to be raw edge machine applique all the way.
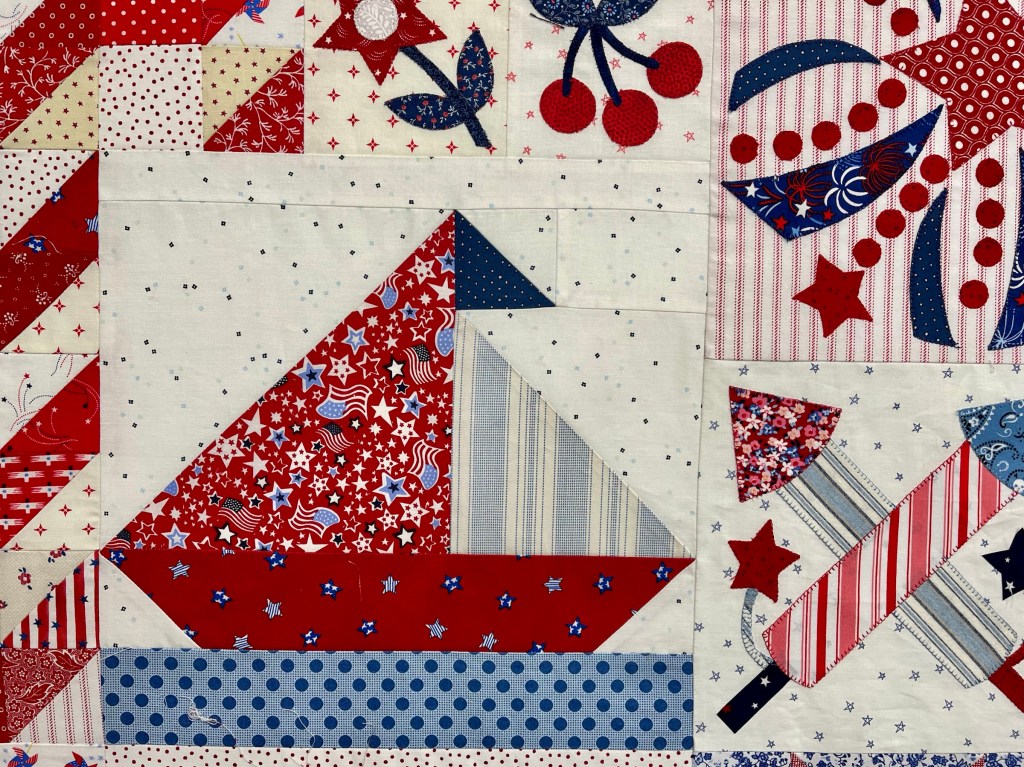
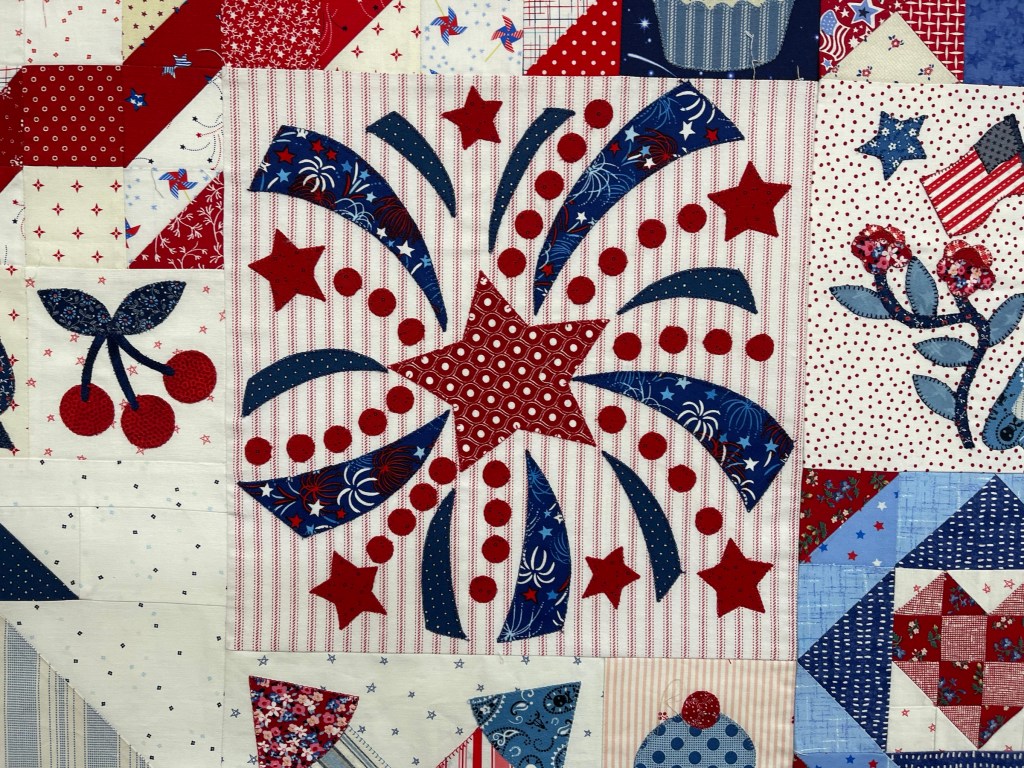
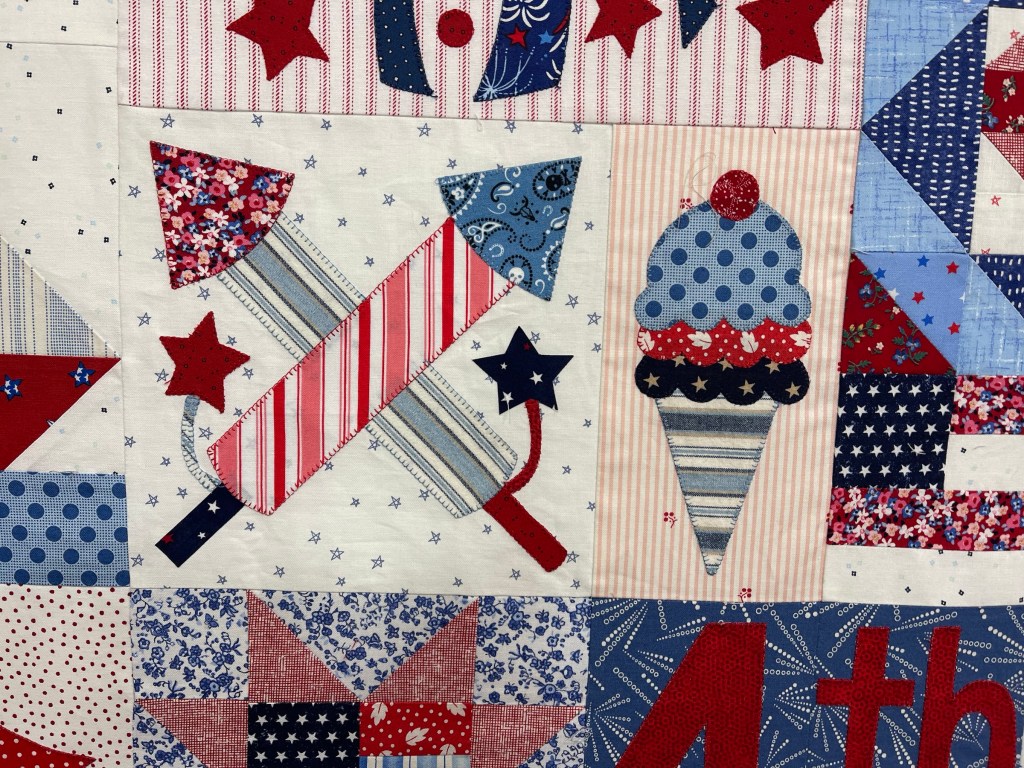
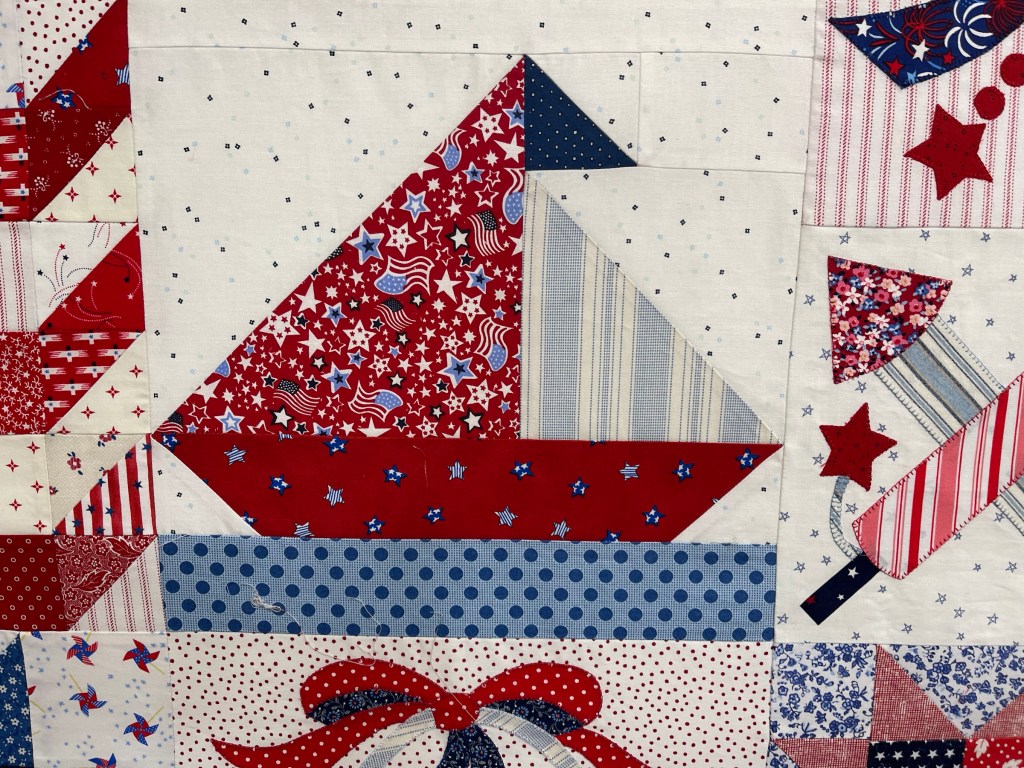
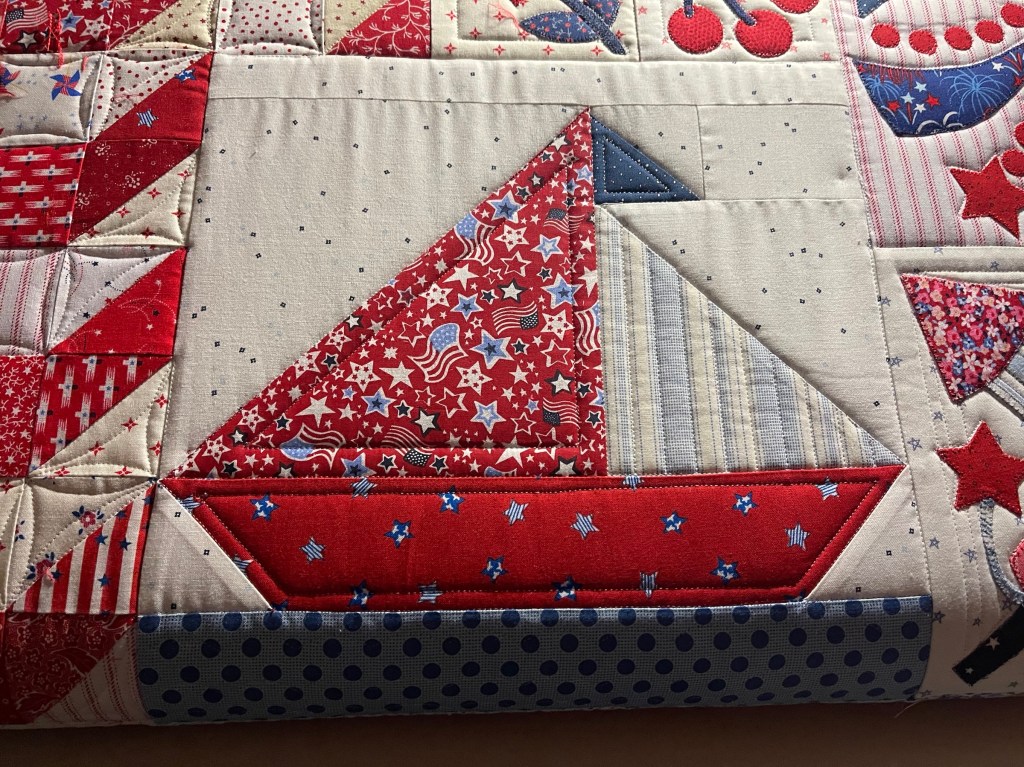
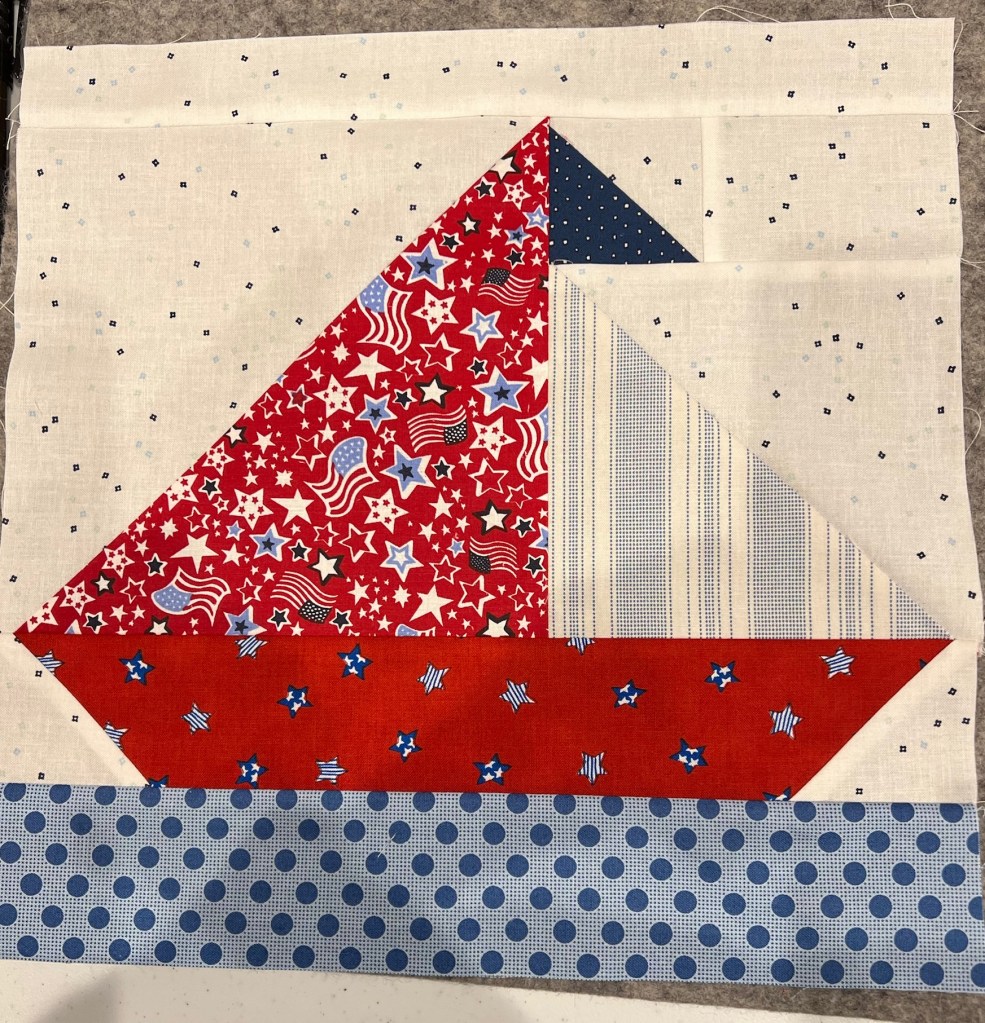
How cute is this sail boat!
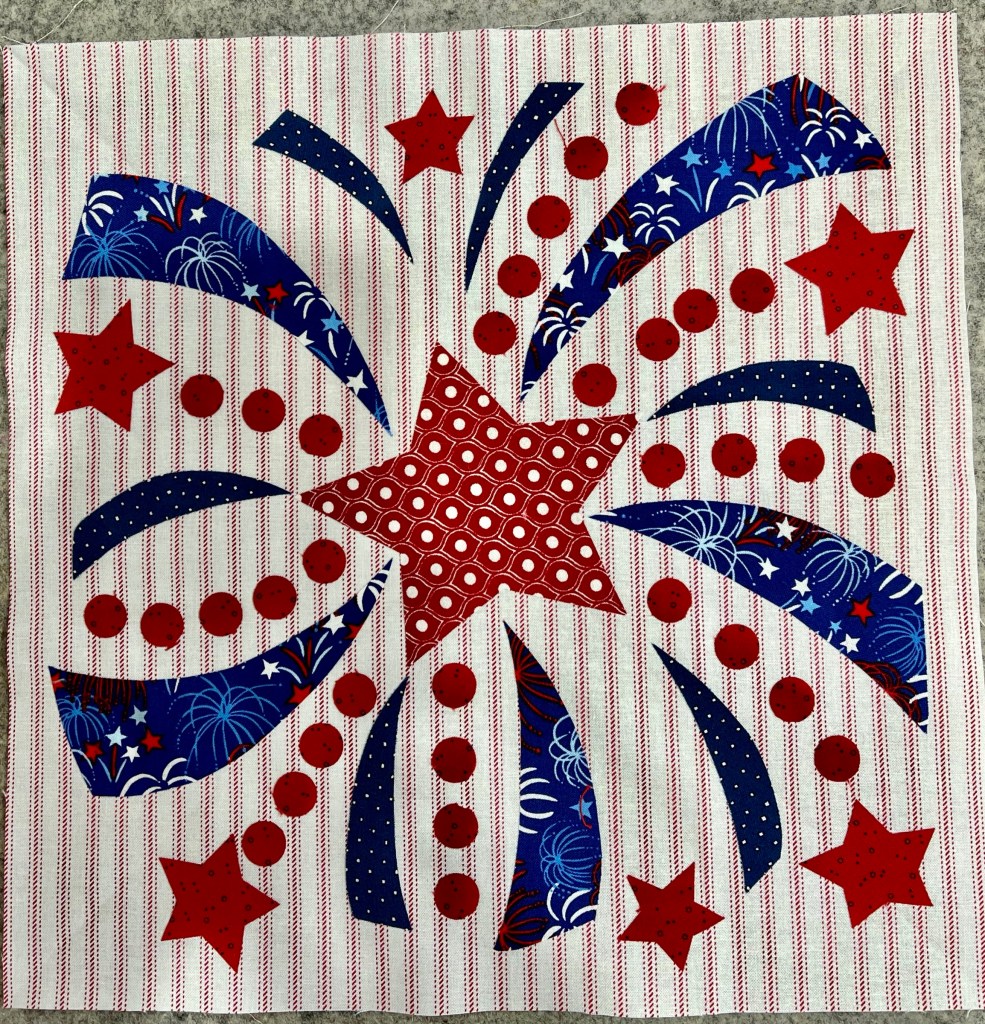
Oh I’m loving this one!
The tiny red circles…33 of them…two identical blocks means I’ve got 66 of these to machine applique! Yikes!!
But what are the prep steps for my machine applique? I’m a big fan of Heat ‘n Bond Lite fusible. I buy it by the bolt (with a coupon) at JoAnn Fabrics. When my fusible is more than 3/4” wide I “donut cut”, see the melons above and the number 4 below.
Why “donut cut”? It greatly reduces bulk, especially when there are overlapping applique pieces.
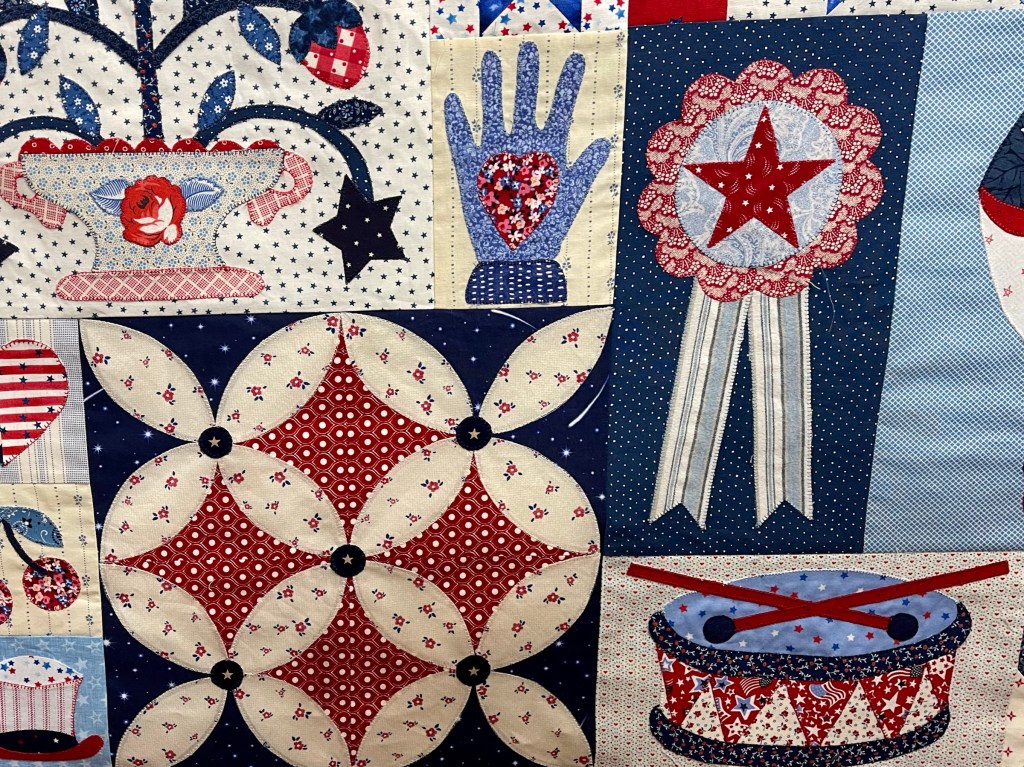
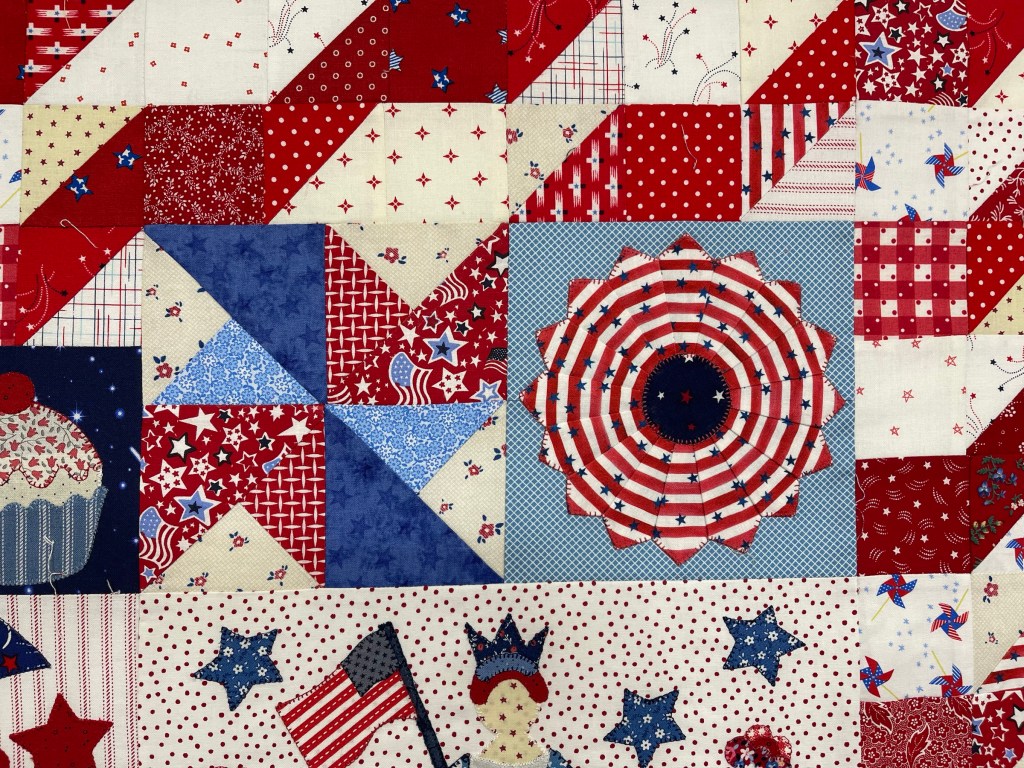
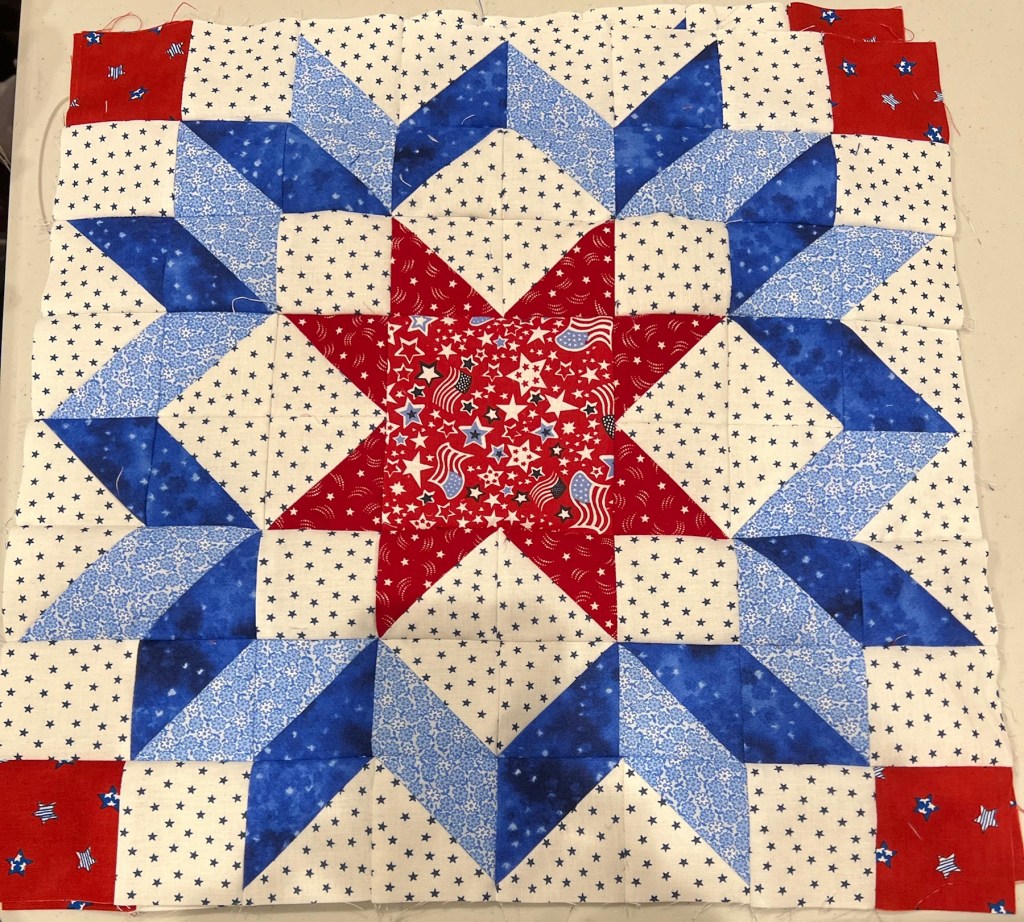
The fabulous Carpenter’s Square block!
If you look carefully at the above and below pictures you’ll notice I changed the background fabric for the Heart in Hand block.
These blocks are going to be so much fun to machine applique!
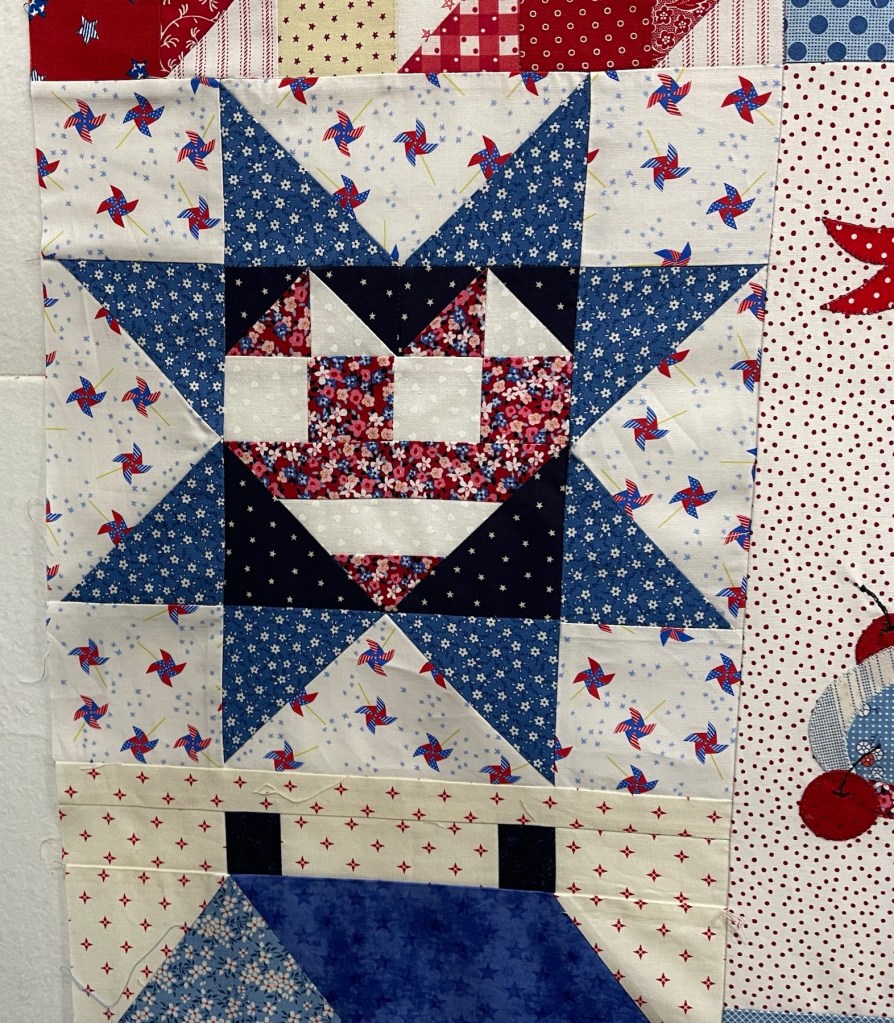
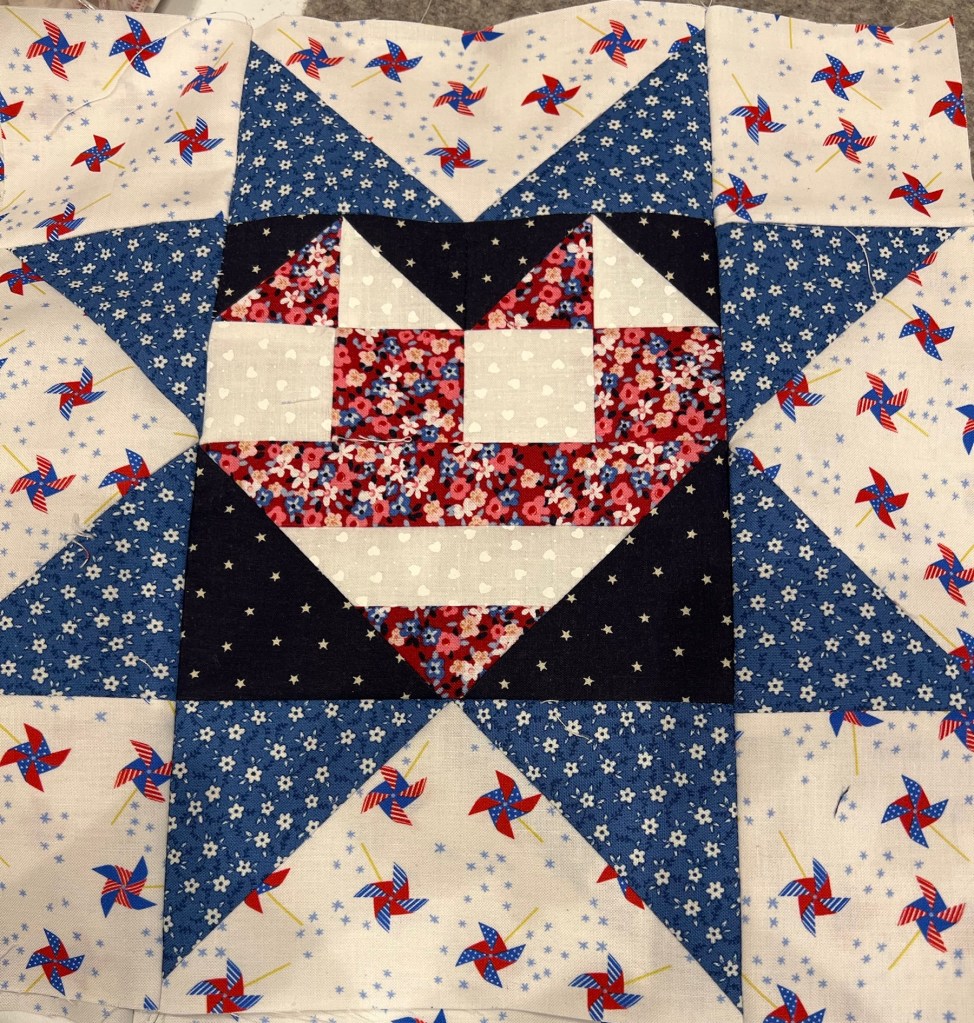
This is the Heart in Star block:
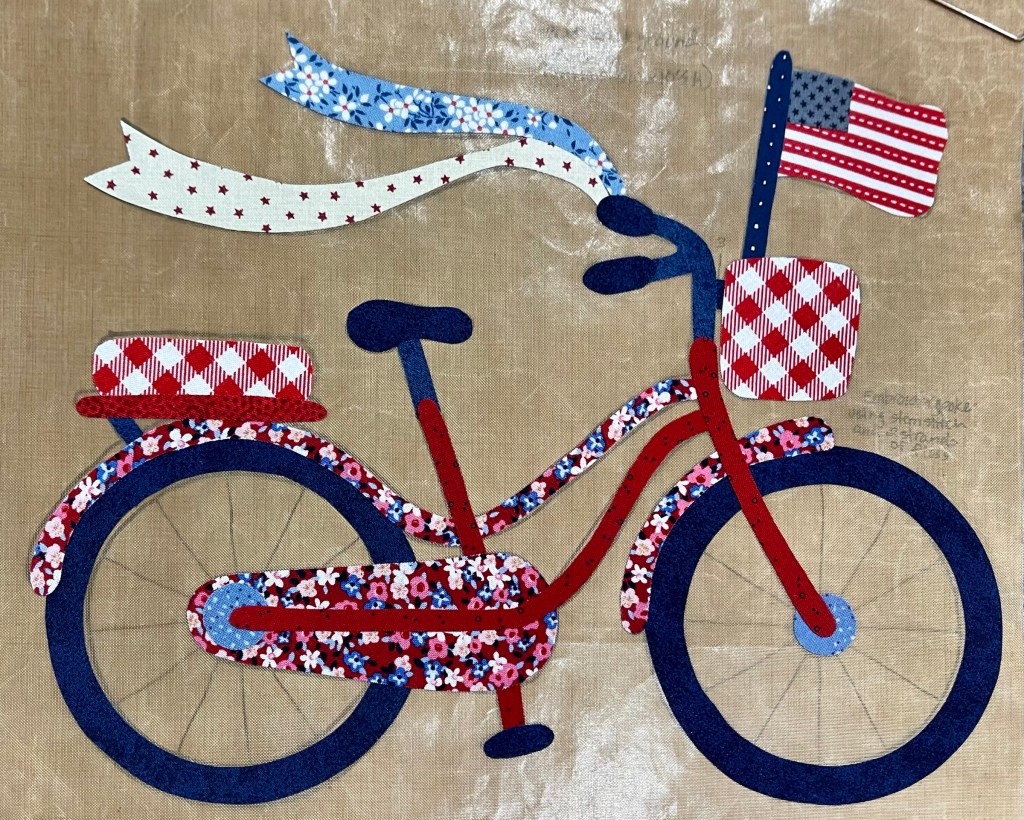
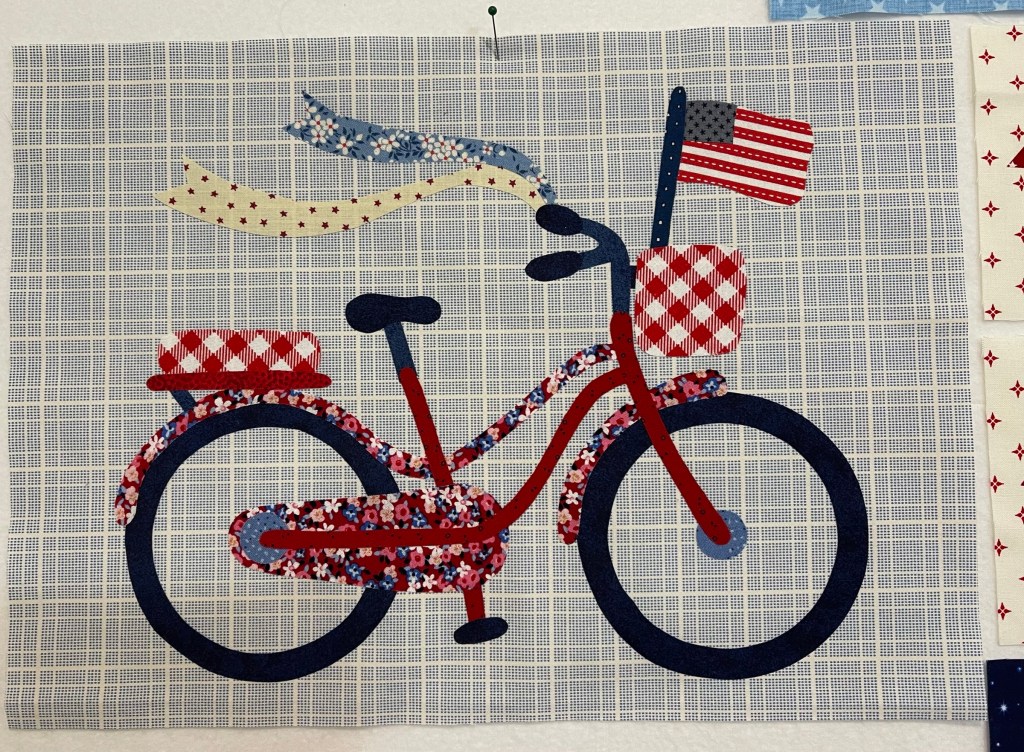
And oh be still my heart…just feast your eyes on this bicycle block:
I’ll add the tire spokes later.
Once the star is appliqued in the cabin window this block will be finished!
What’s up next? The block below has 50 applique pieces! I’ve got all the fusible pieces traced and cut out, now it’s on to choosing the fabrics!
Yes this is a huge project but when you break this down into manageable segments things progress nicely!
Stay tuned for future updates… Happy quilting and blessings,