


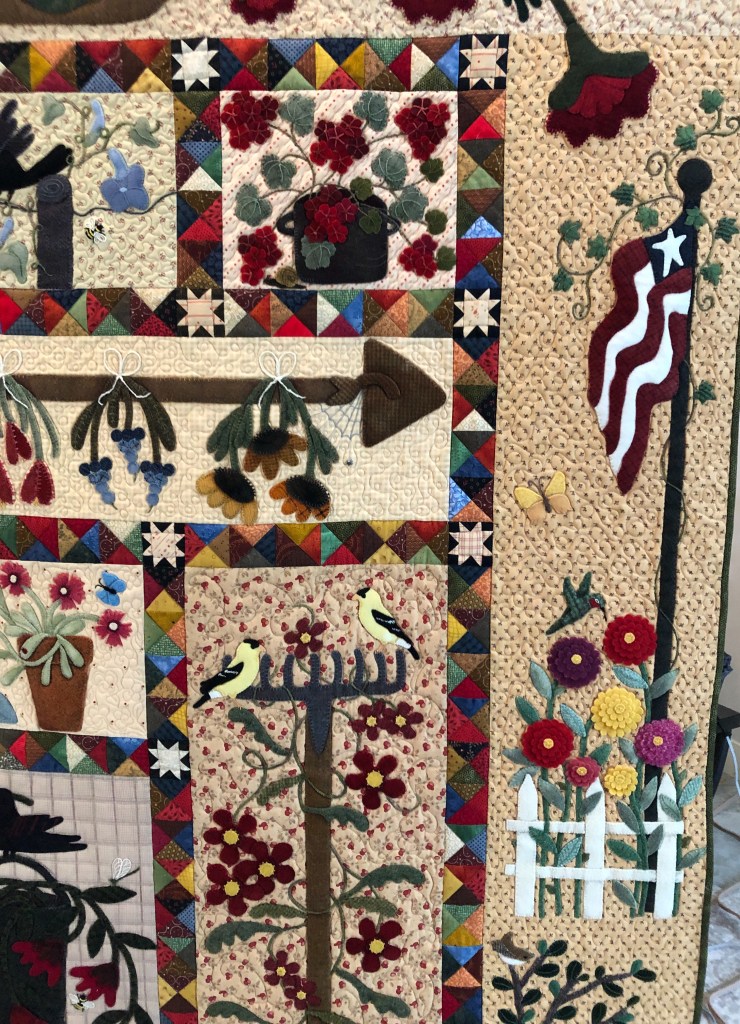
I’ve scanned and commented on most all of the following pictures of the “Add-Ons” to my Primitive Garden Quilt, just as a reminder, this is a wonderful pattern by Lisa Bongean of: Primitive Gatherings.
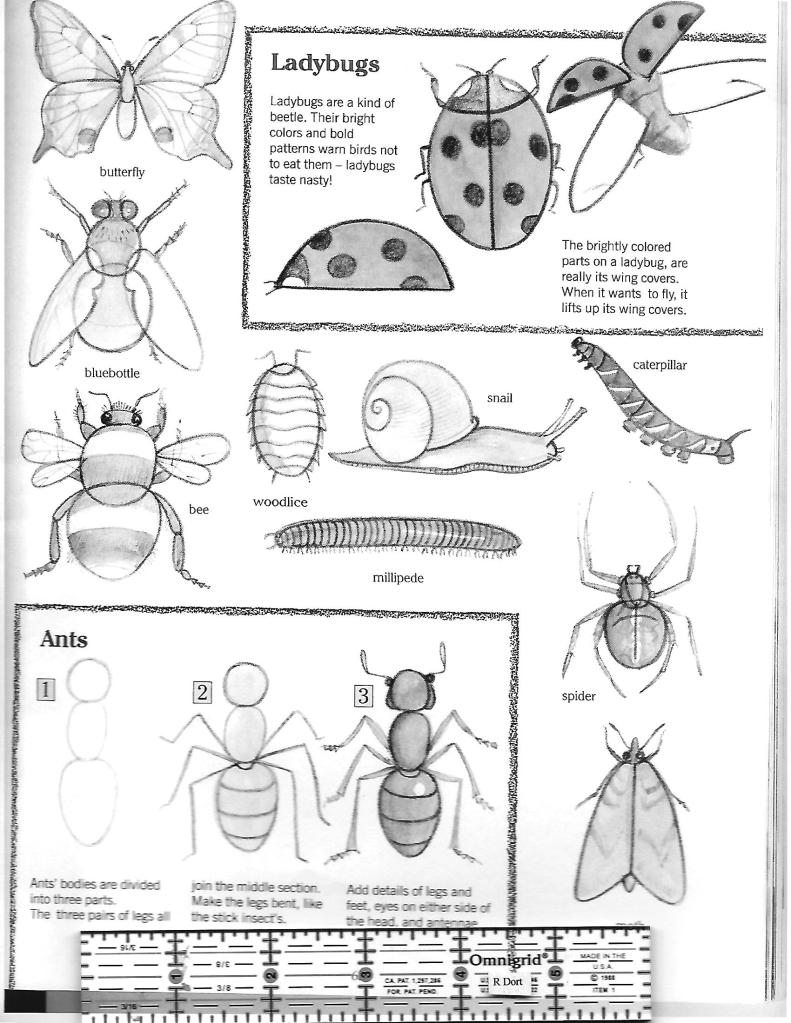
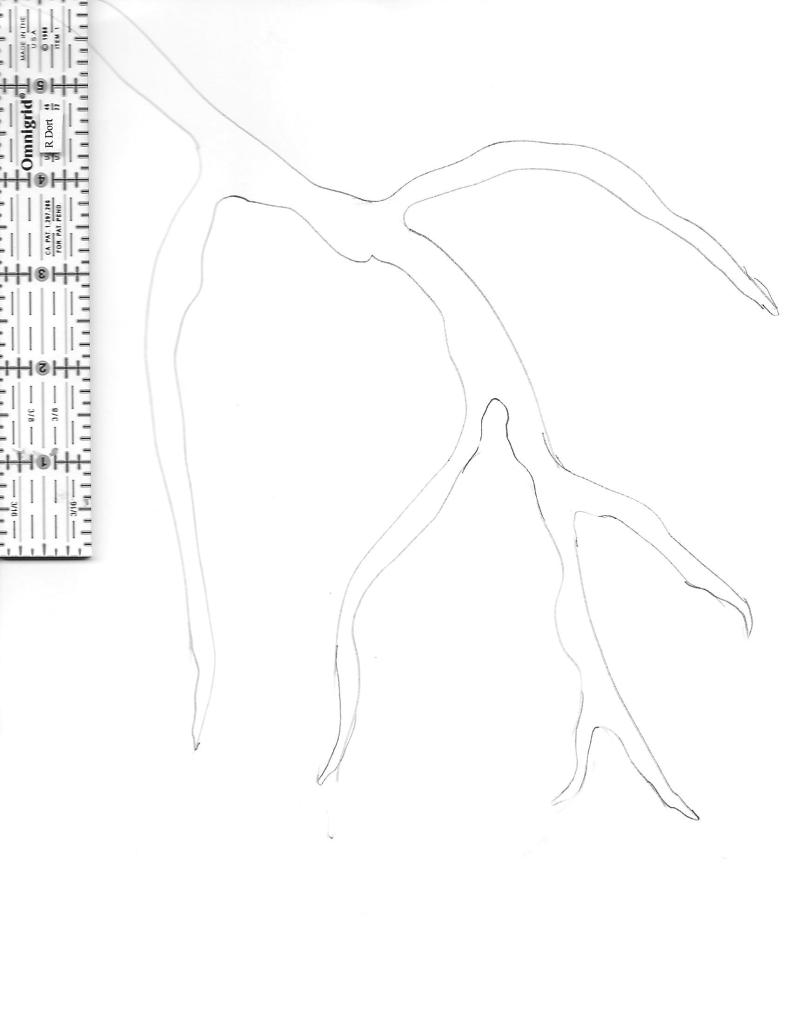
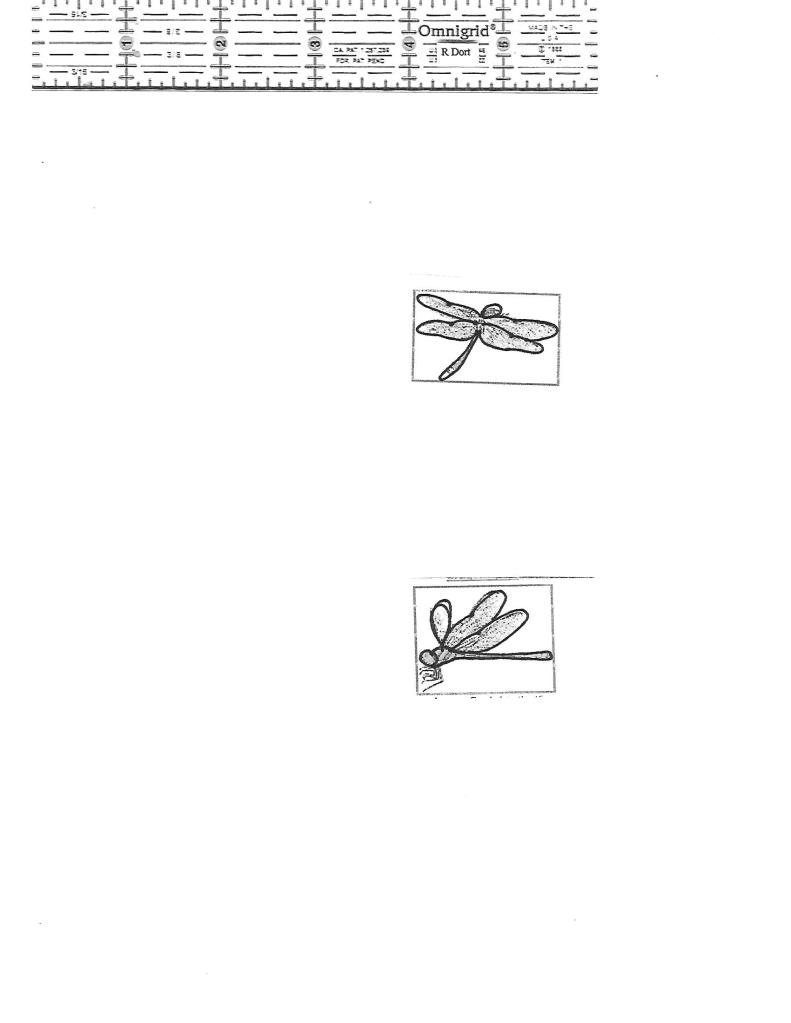
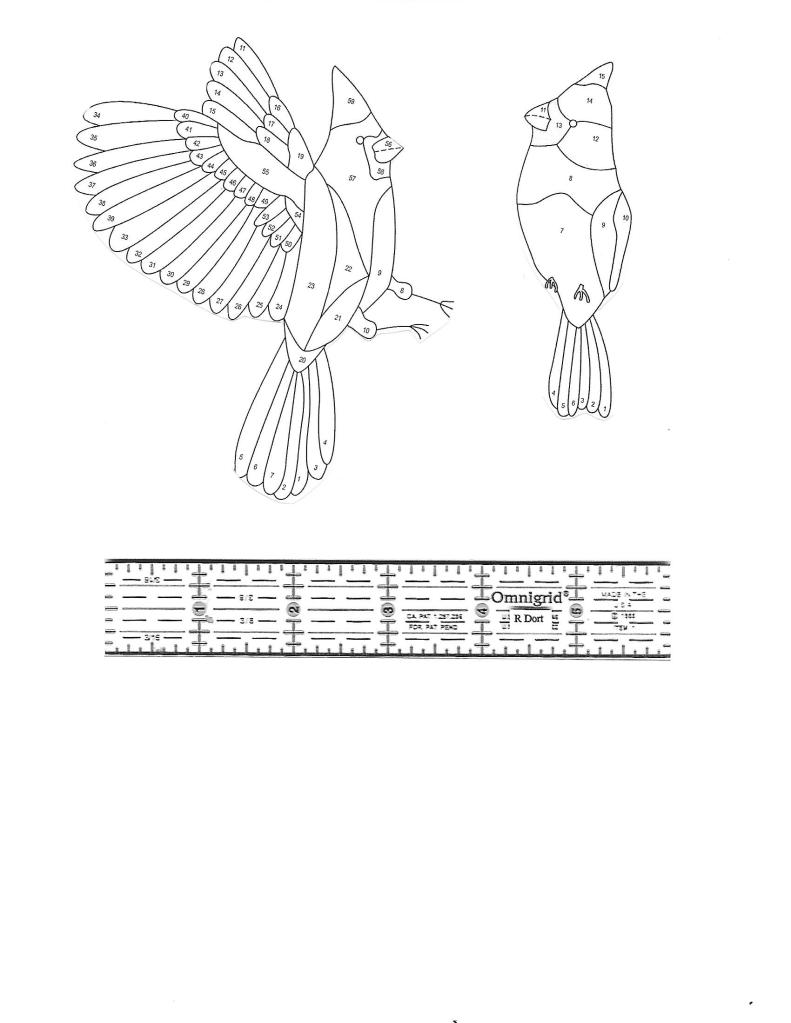
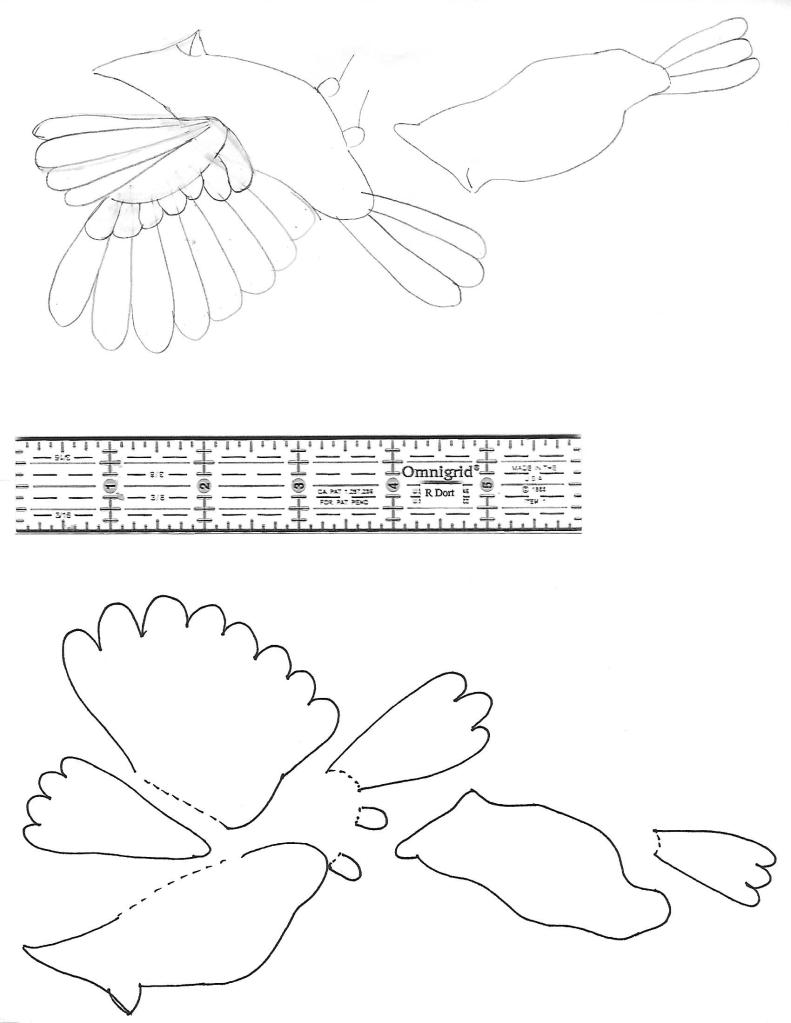
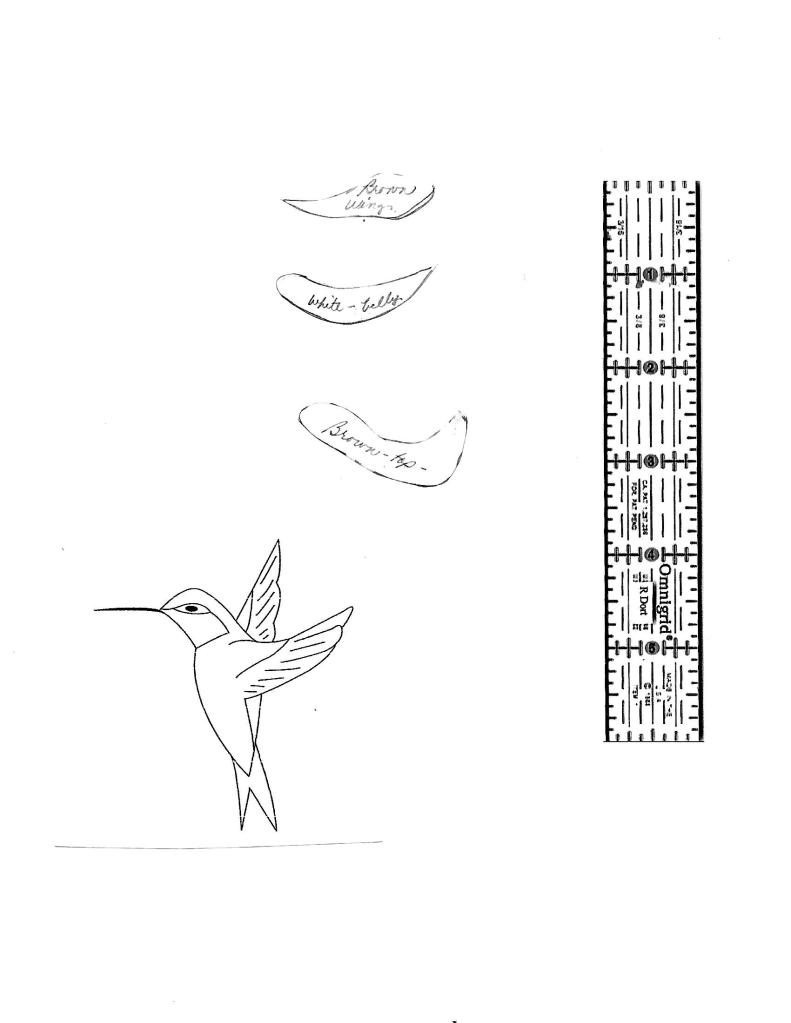
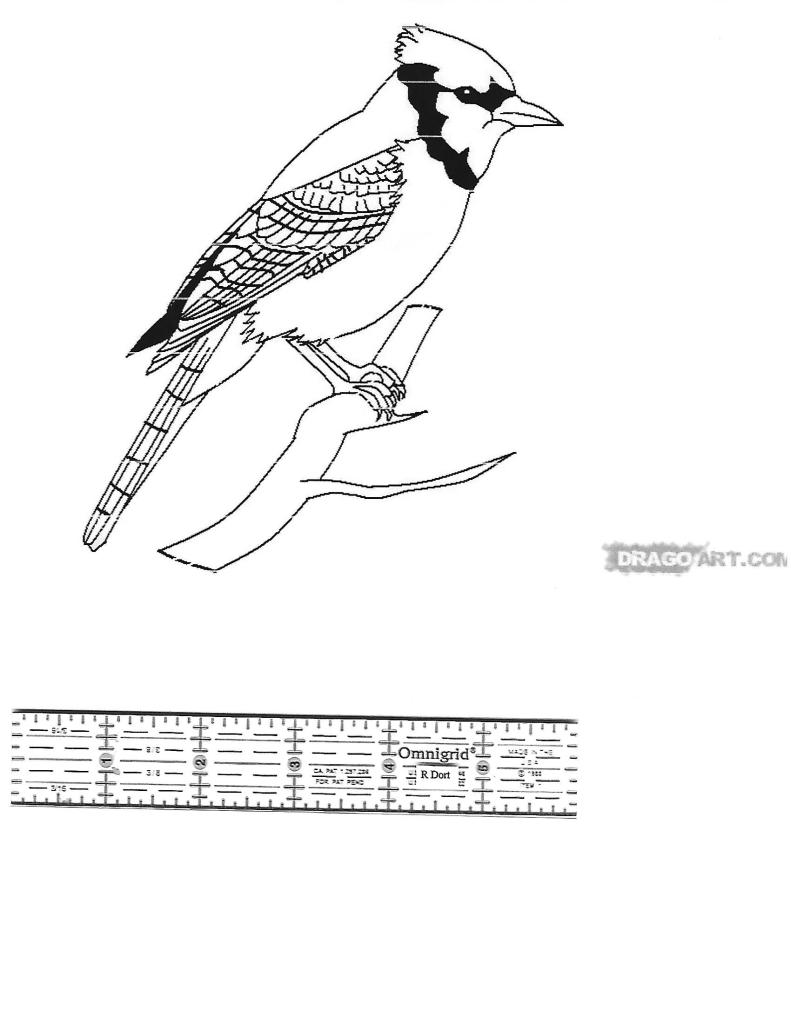
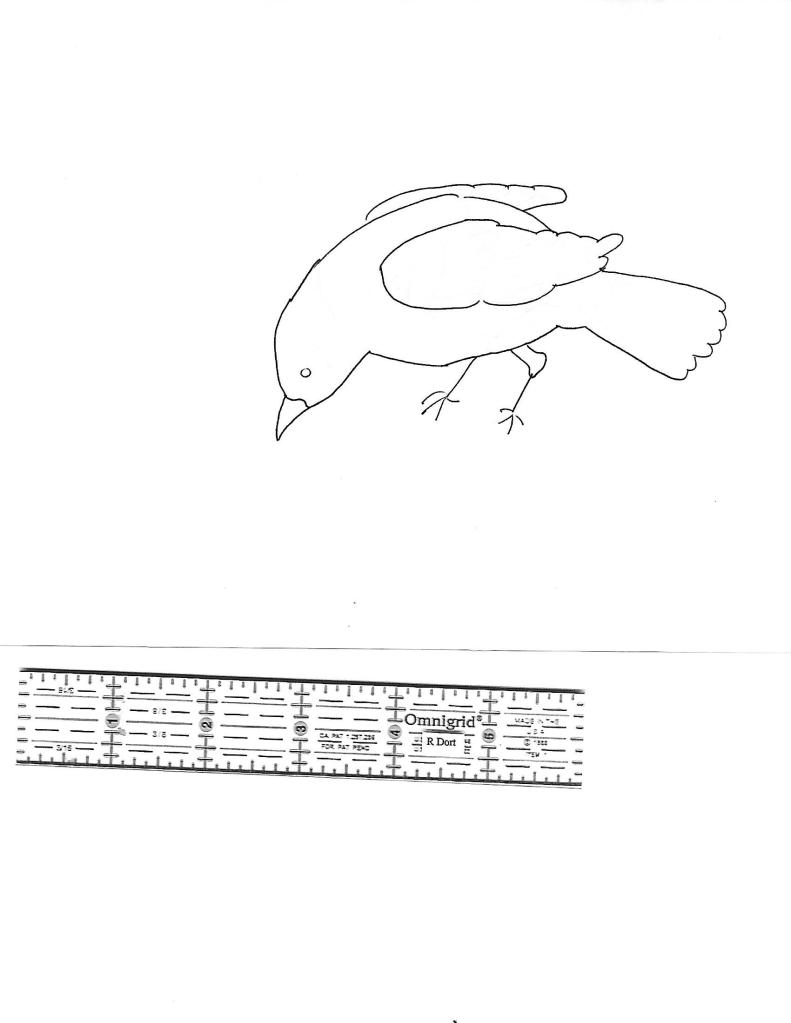
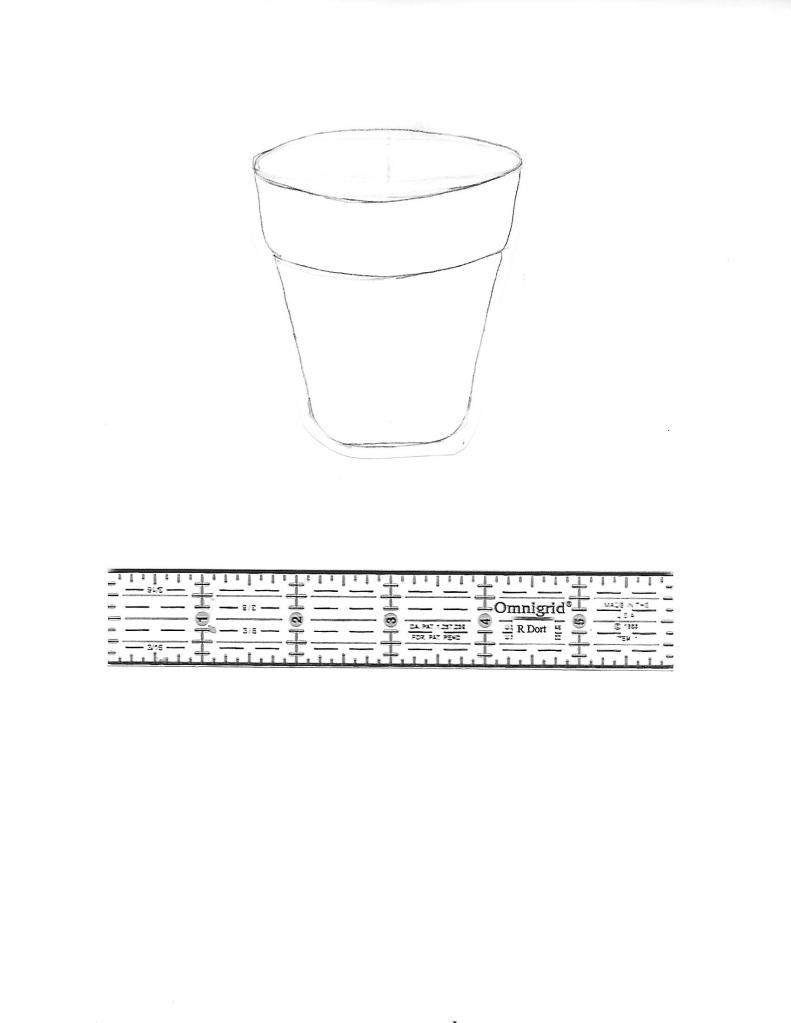
Why is there a 6″ ruler in each of the black and white pattern pictures? For scale! Often times our printers do not print full scale. This way if you print, you can use your own measuring devise to determine if you’ve printed full or 100% scale.
😦 I cannot find the patterns for the 3 little gourds at the bottom of the left block but they should be very easy to replicate on your own.
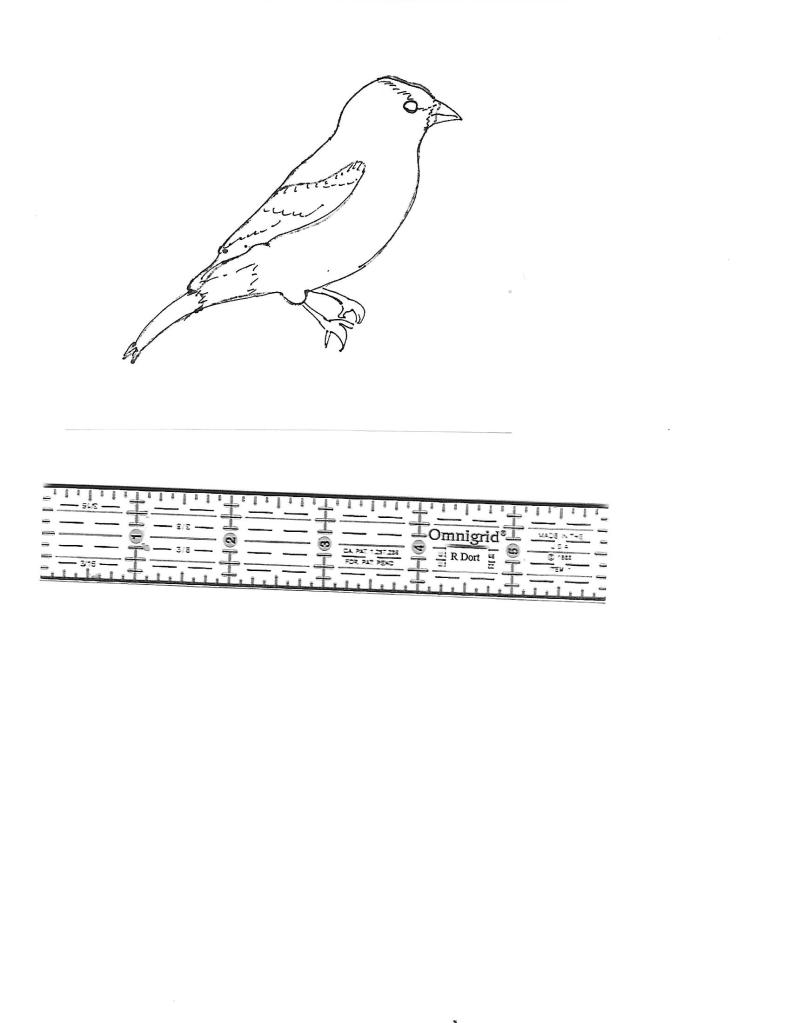
I also could not locate the pattern I used for the Carolina Wren on the Birdhouse Block. You can easily use the House Wren pattern, enlarge it a bit and make the tail feather pattern piece stand up.
The Queen Anne’s Lace flowers in the picture above… they are just lots of ivory wool 1/2″ squares that I’ve cinched/gathered in my needle and embroidery floss. I put a pale yellow french/colonial knot in the center of each of the cinched squares. You’ll need 12-15 little squares per blossom head to get the same look. Once the blossom heads were in place I embroidered stems where needed.
***And just as a reminder, create all your “multi-pieced” motifs on a teflon pressing sheet. Once they are fused together and have sufficiently cooled off, gently peel them from the pressing sheet, audition them on your quilt block in several different places. Once you think you have the perfect placement, walk away from your block for a few minutes. Once you return if you’re still happy with the placement, then it’s time to press them in place. Keep in mind that if you’re working with felted wool, don’t use the hottest setting on your iron!***
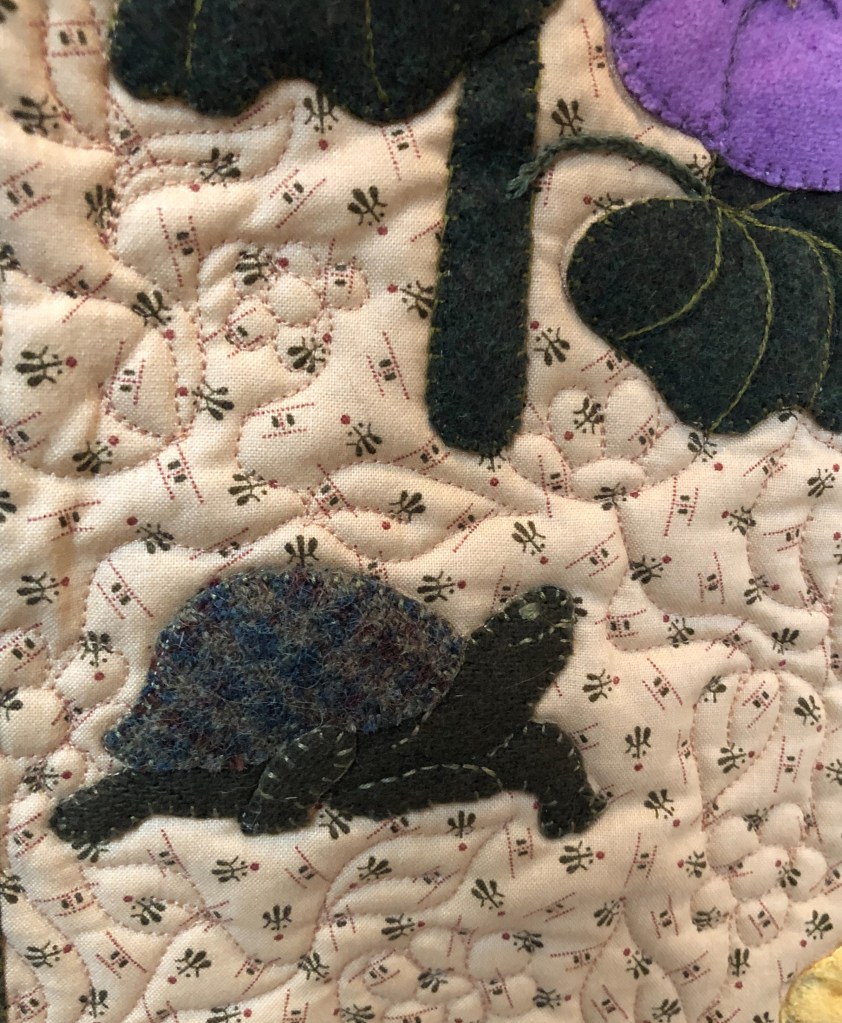
The turtle is only 3 pieces, the shell, the body and the front leg on the left. The additional details are highlighted by the hand embroidery.

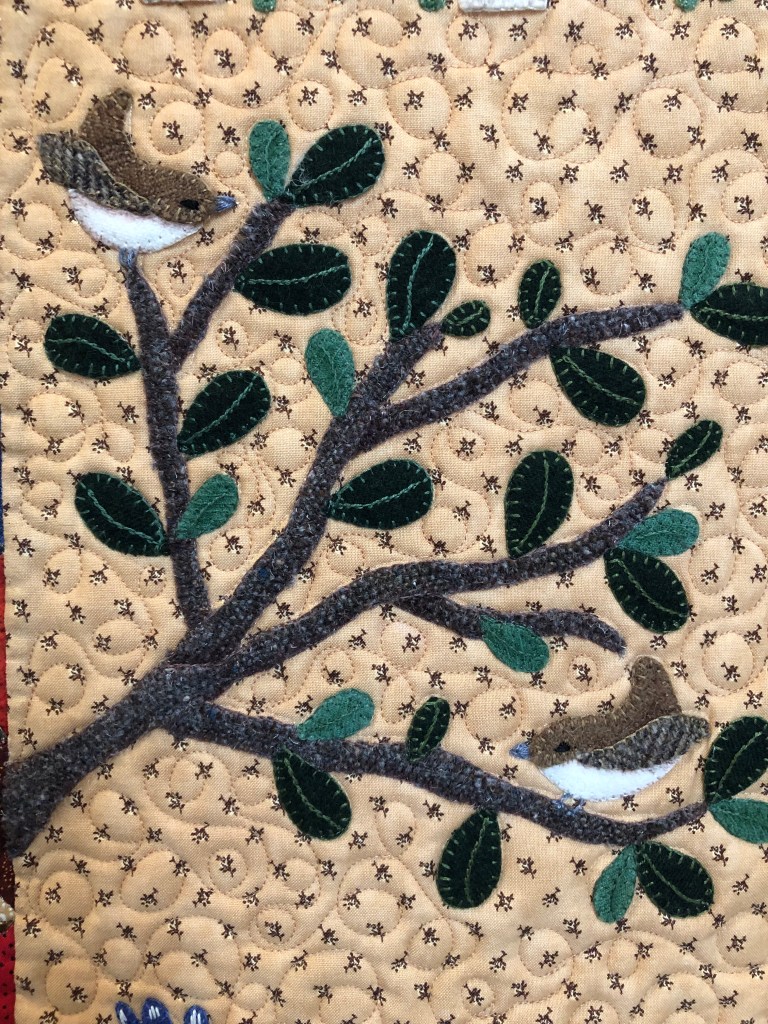
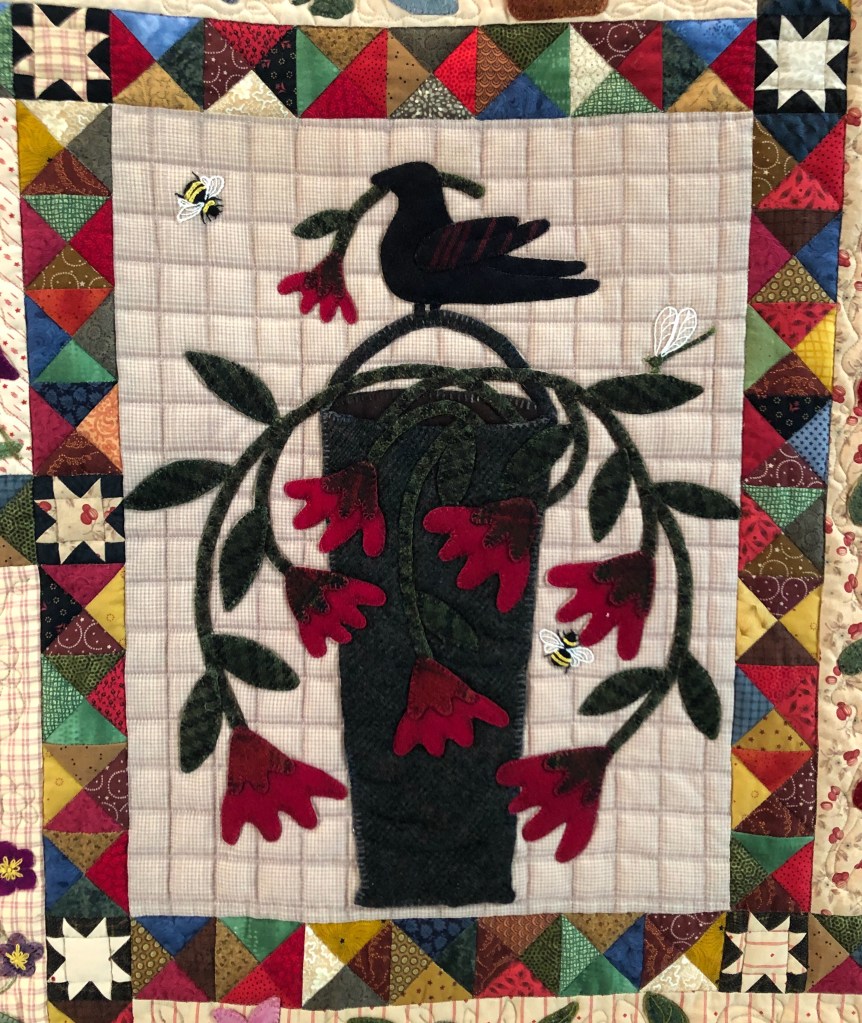
If you vary the size of the leaves in this block, you will add visual interest. You can choose to place any number of birds in your tree branch, I just decided that 2 of them would be enough for me.
About the Tree Branch pattern, you should feel free to add or subtract branches, whatever fits your needs.
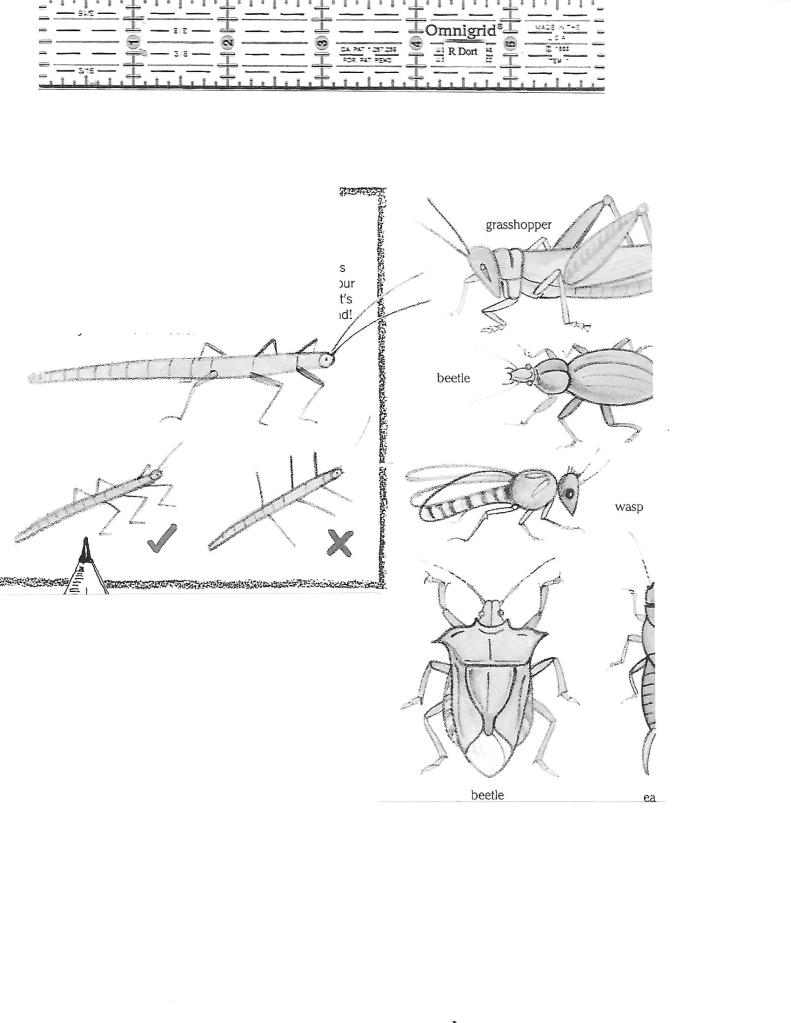
I had intended to put a couple of Walking Stick Bugs in my quilt as I used to be both terrified and intrigued by these bugs growing up. Sadly I forgot to include them but thought you might like the diagram for them anyway.
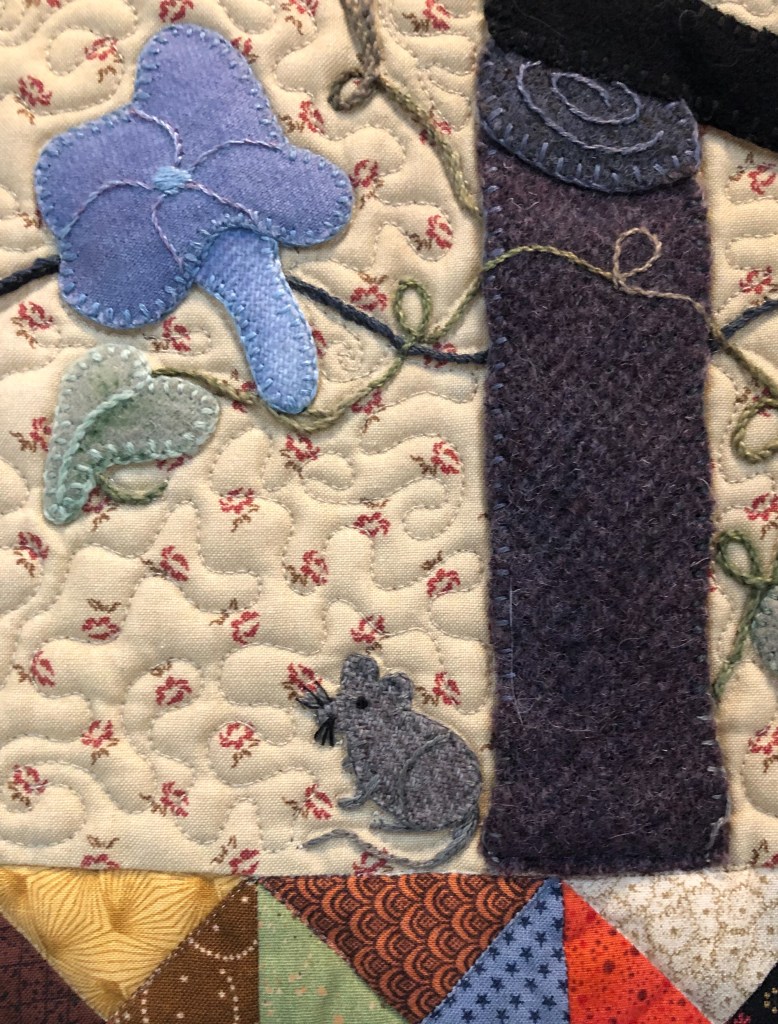
Mr. Field Mouse. He is tiny but cute! The exploded pattern pieces are down below the Blue Jay pictures, they are unmarked but you’ll find them in the top right hand corner of a black and white pic.
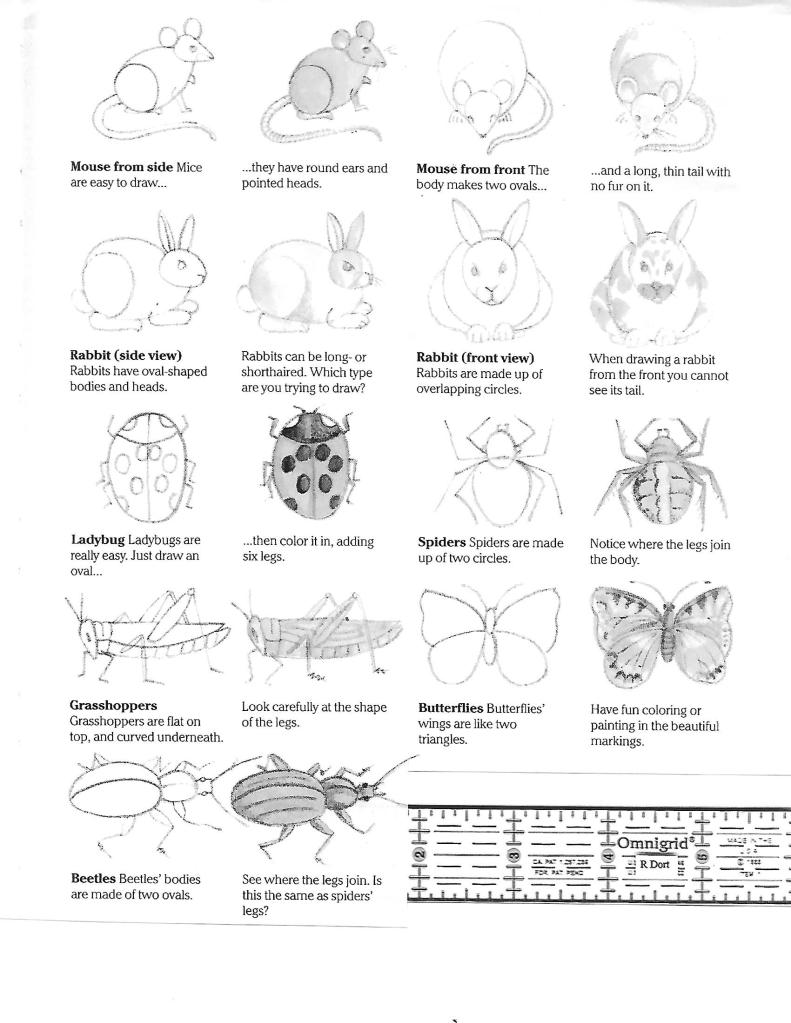
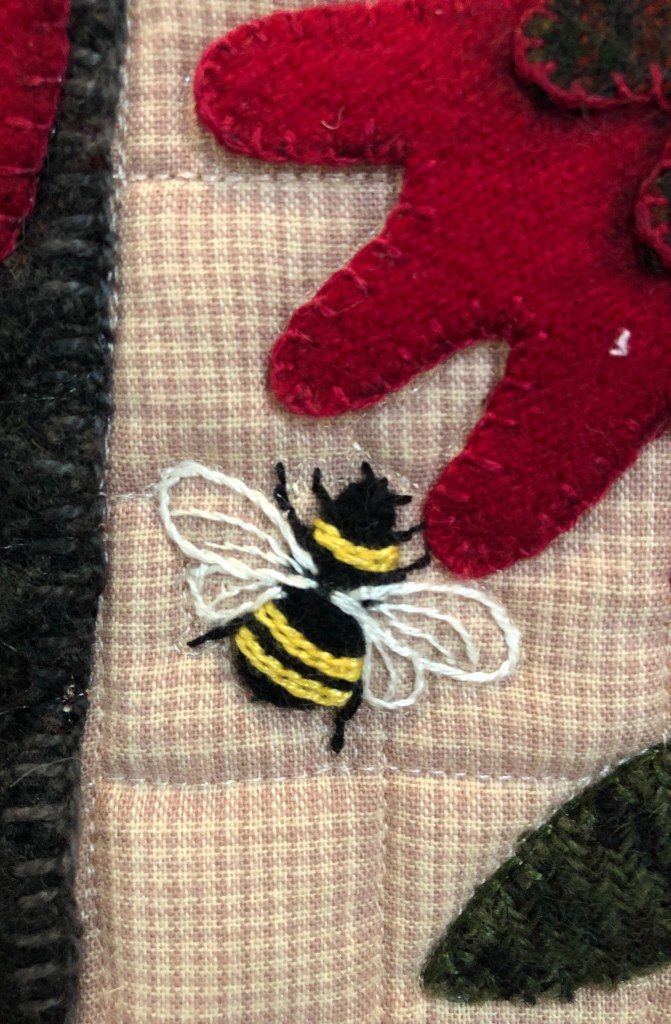
The Bumblebees and the profile Dragonfly.
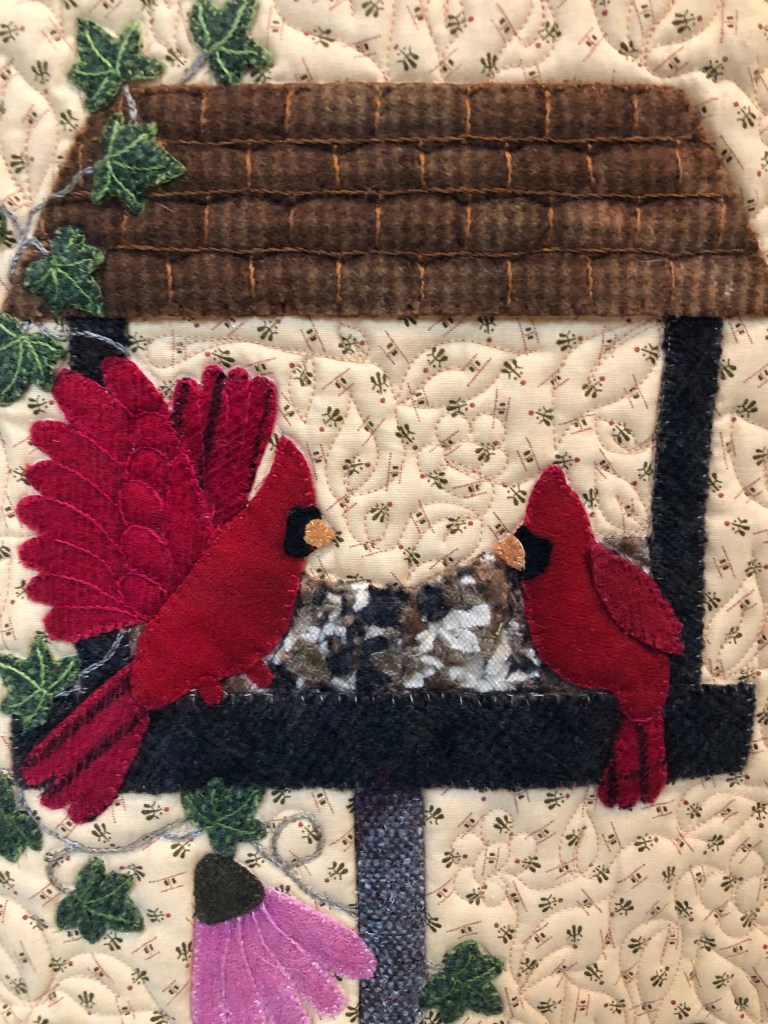
This pattern underwent some serious changes but I stayed true to the intent of the original design. I added undulating ivy, extended the cone flower blossoms to almost touch the bottom of the feeder and redesigned the structure to include the roof. Using my rotary cutter, I placed pieces of “bird seed looking wool” on my cutting mat and sliced them almost to bits. I laid them carefully on the background fabric and placed smoke colored netting/tulle over-top. The netting holds the pieces generally in place. You could use a bit of very light weight fusible directly under the bird seed wool bits if desired.
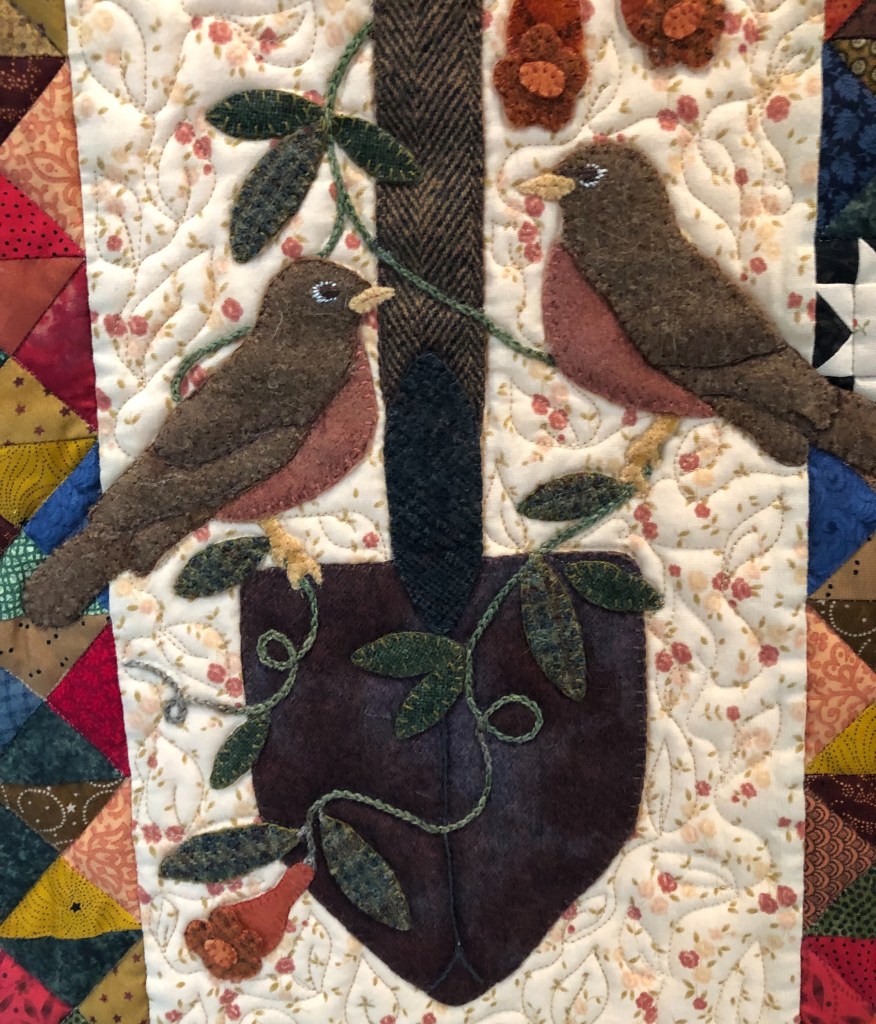
Are you surprised the Robins are only 5 pieces? Again, its’ the hand embroidery that creates excellent detail. I’m sorry to say I think I have lost the pattern for both the beak and the feet but they are easily re-created.
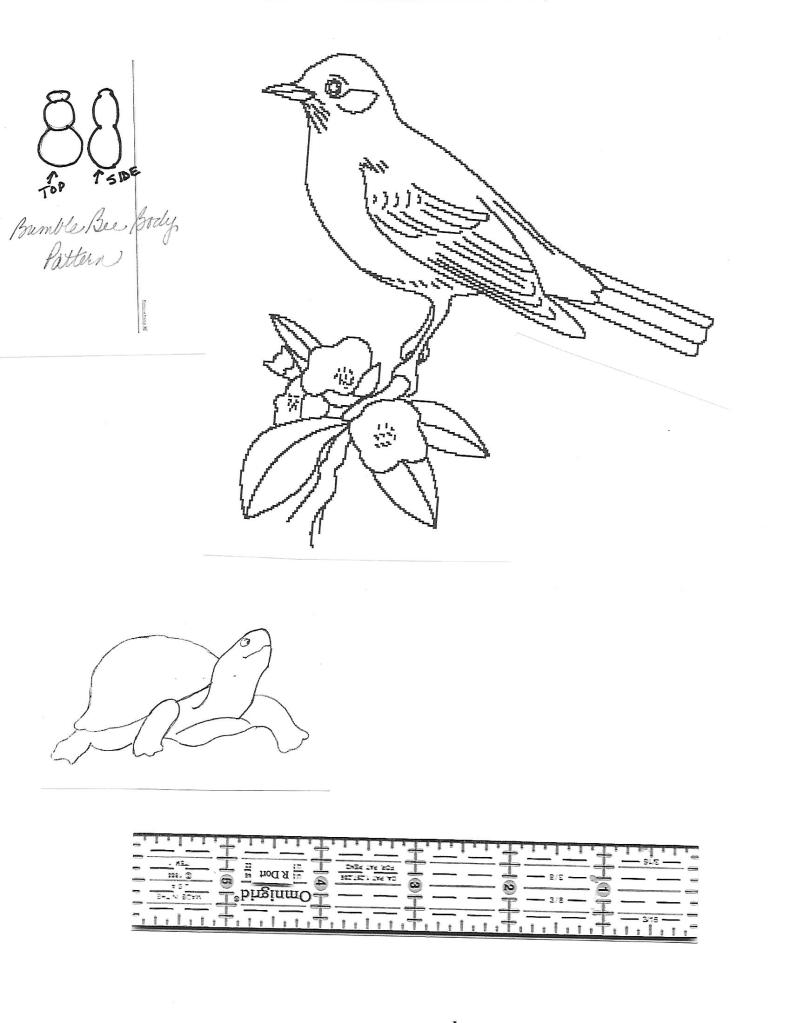
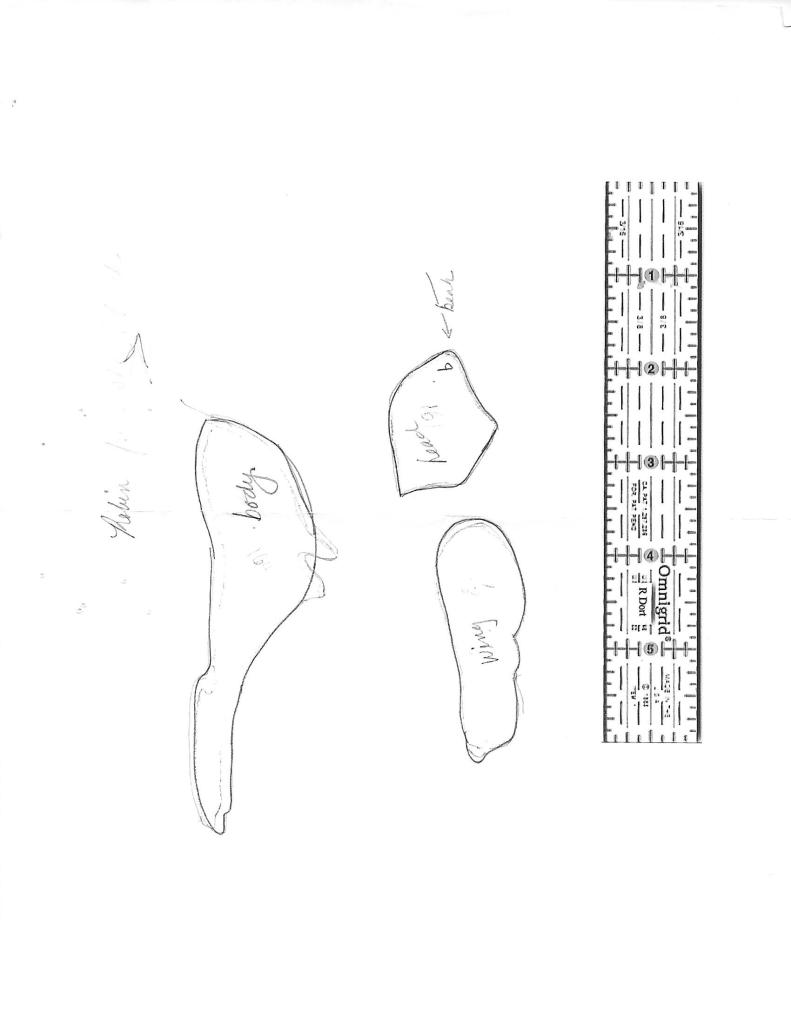
Above you’ll find the pattern pieces for the Robins.
The top right 3 pieces are for the House Wren.
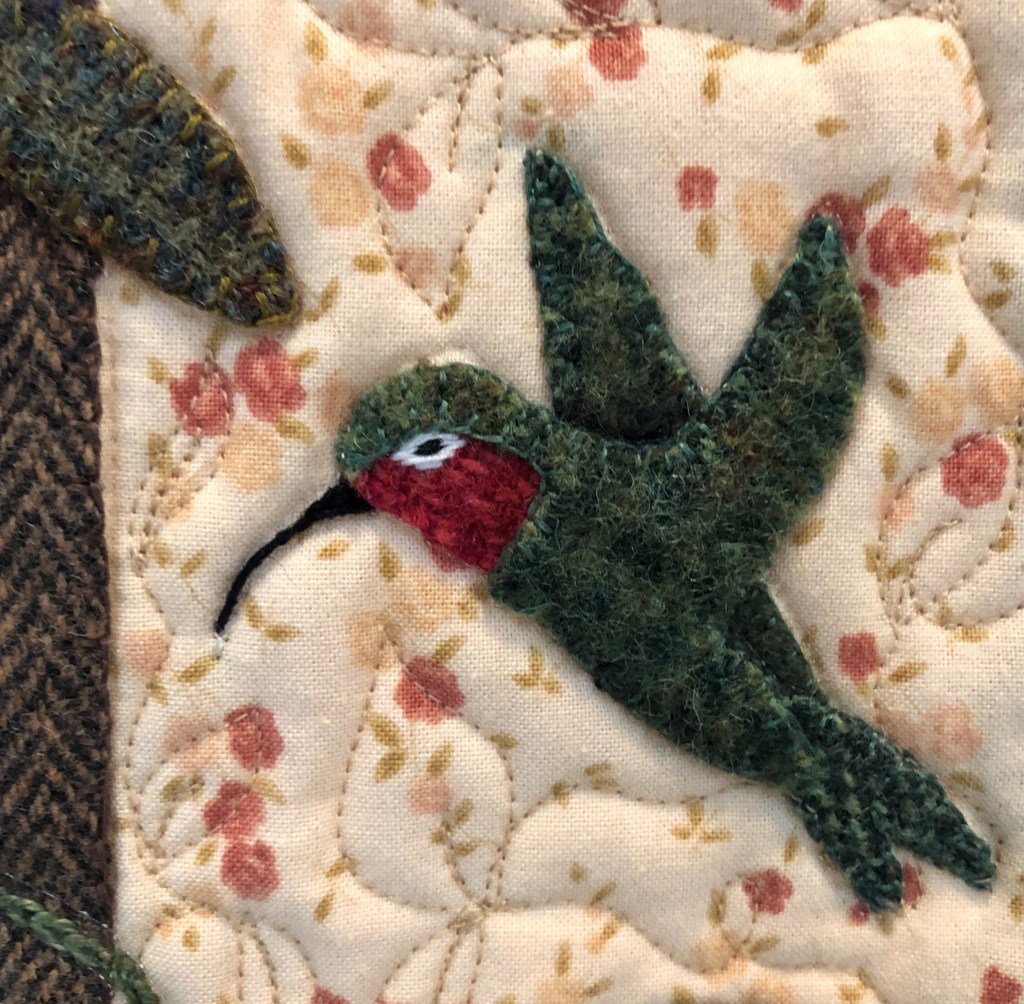
The Male Ruby Throated Hummingbird is one of my favorites!
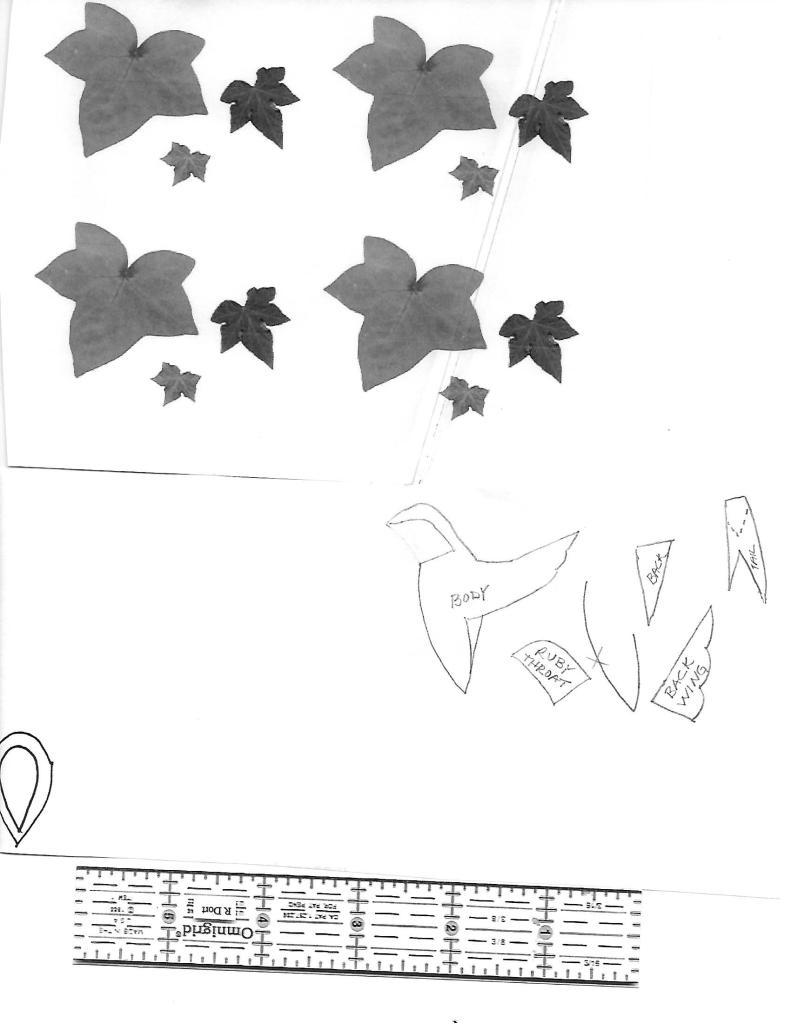
The exploded pattern pieces are the Hummingbird. The little tear-drop looking thing is a pattern for tree leaves.
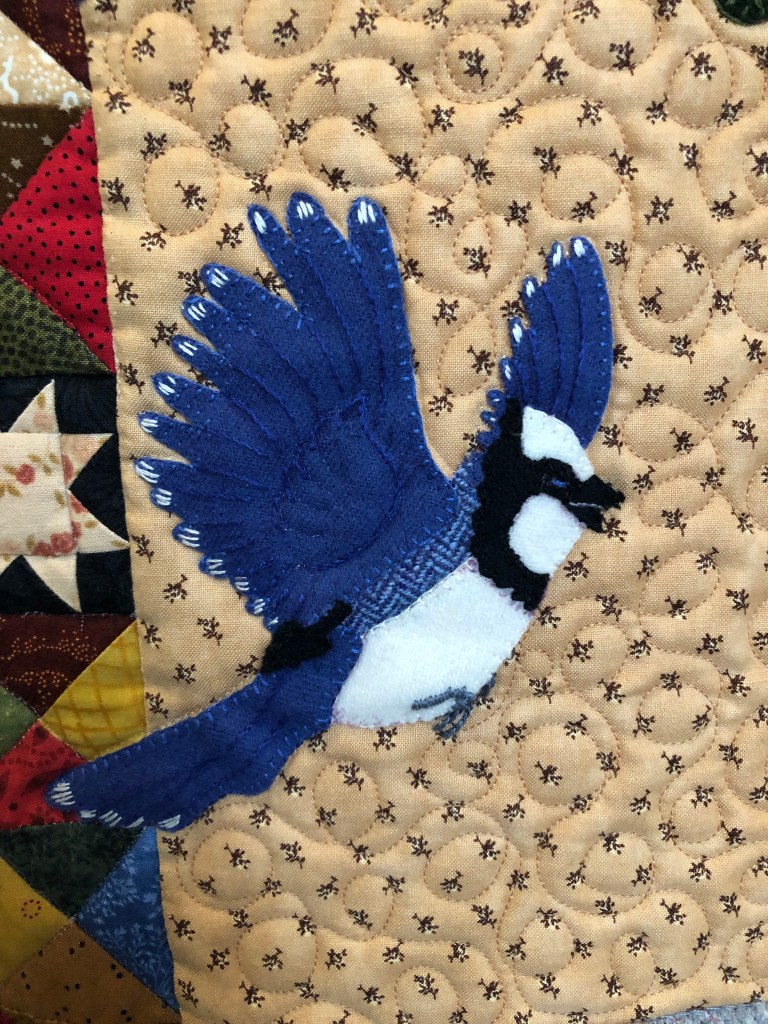
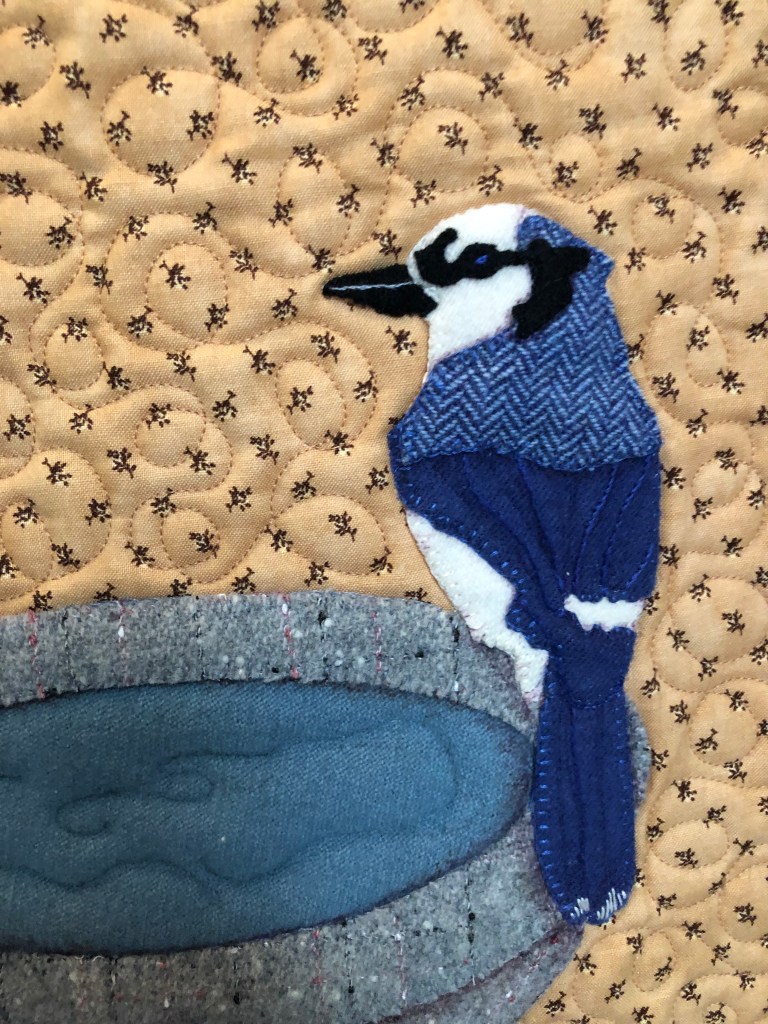
I love the Blue Jays. They have a lot of pieces but I feel like they were well worth the effort!
The top right 3 pieces (ignore the cone shape with the X in the middle) are the Field Mouse.
The left pieces are for the sitting Blue Jay.
And finally, the frog/toad. You will need to enlarge him to create both the large and small frog/toad on the Garden Tools Block.
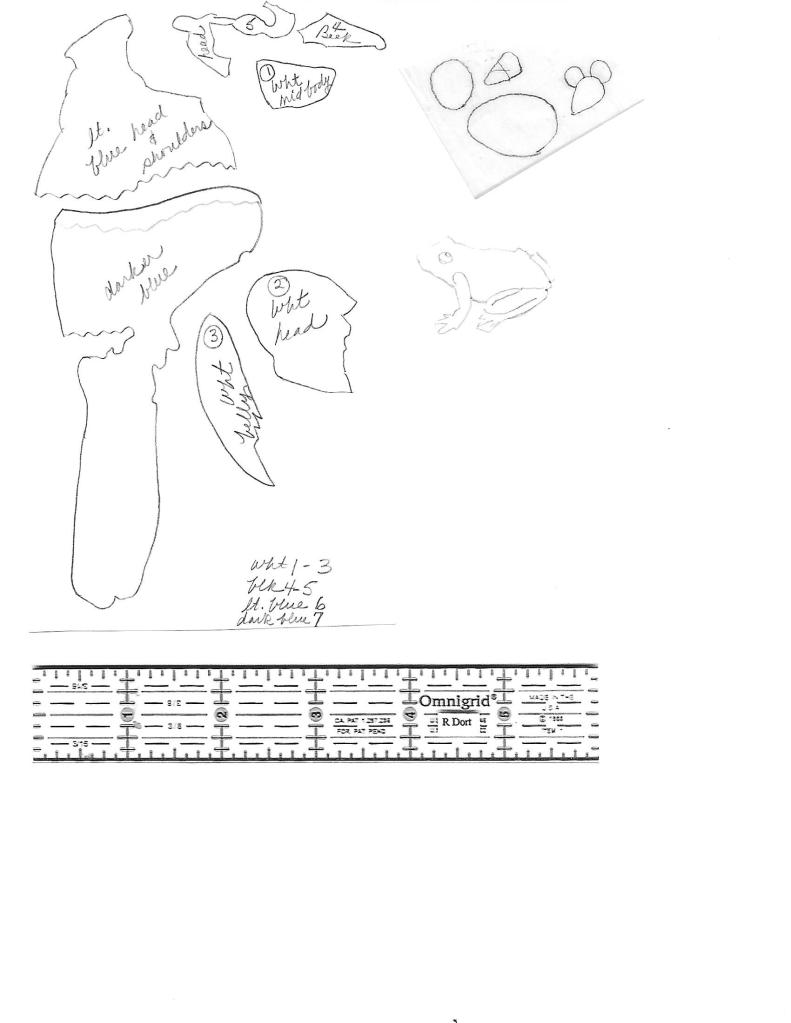
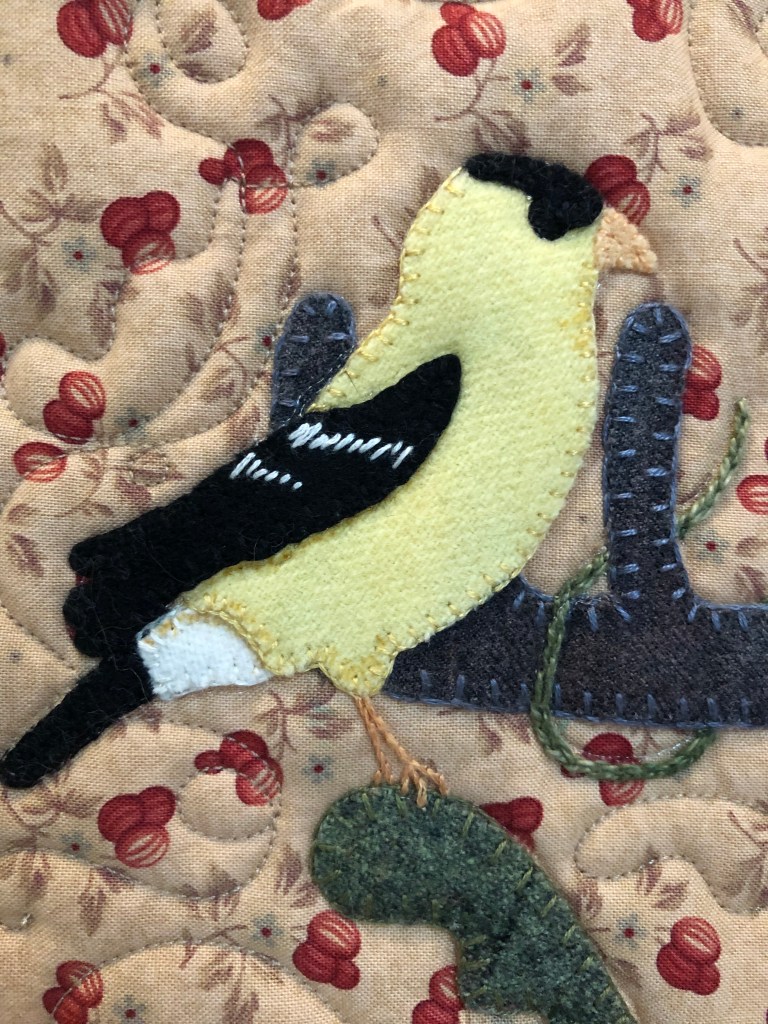
I also can not find the individual pieces to the American Gold Finch. He is composed of: yellow body, black tail and head cap, white spot at the top of his tail, his beak and his feet.
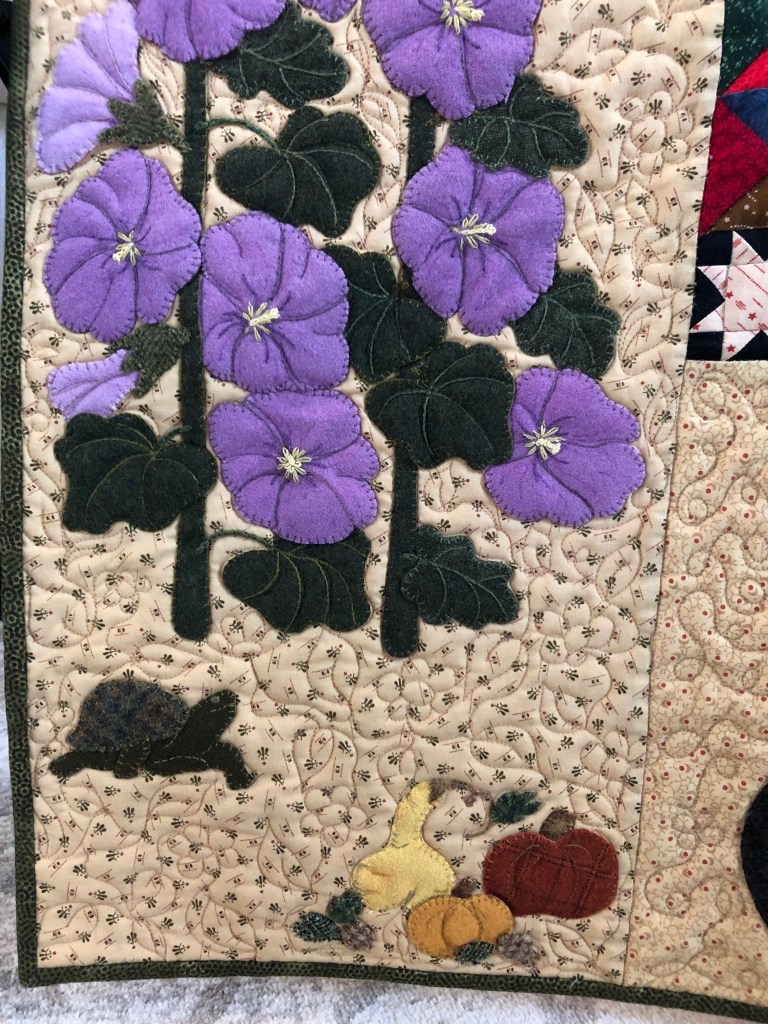
While I liked the original pattern for the Hollyhocks, I decided to use a graphic I found instead. They are fuller flowers and leaves. I added a lot more of each to the left border.

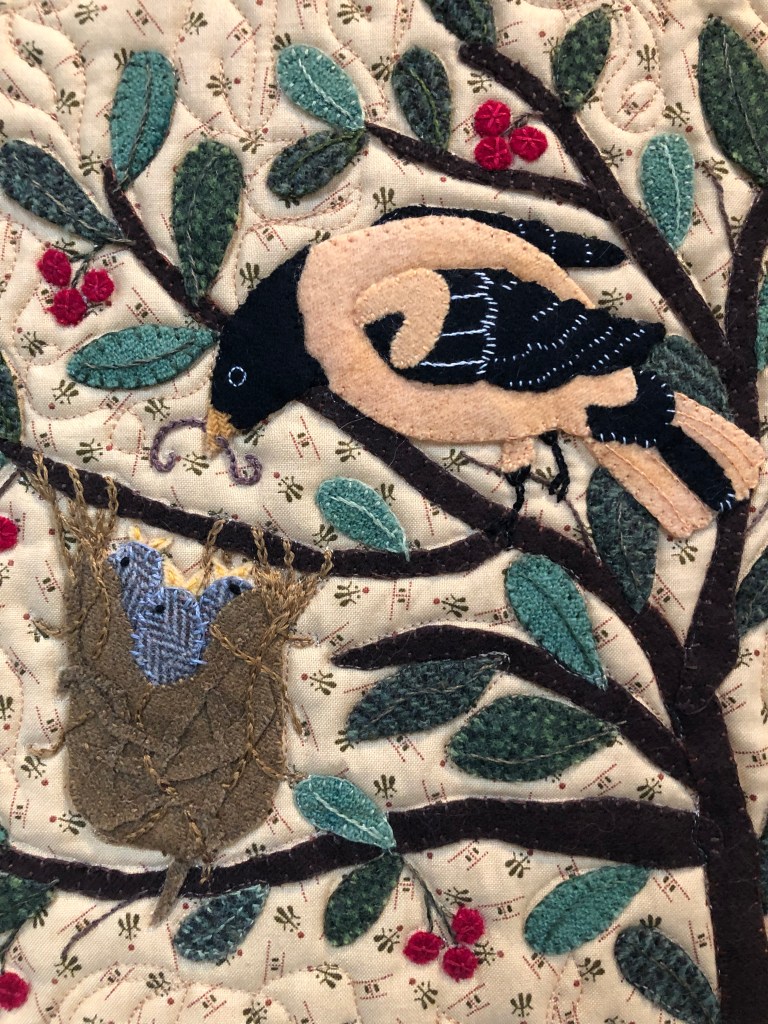
This pattern addition is my favorite. Mr. Baltimore Oriole is feeding his 3 babies. The nest is just a bunch of pieces of brown felted wool layered on top of eachother. The hand embroidered chain stitch creates the “branches” that hold the nest onto the tree. I added a worm in the dad’s mouth.

If I was doing this over again, I would have the plant stem coming out of the dirt and angled much more sharply off to the left. I didn’t have a pattern for the spilled soil, just wing it, it’s easy.
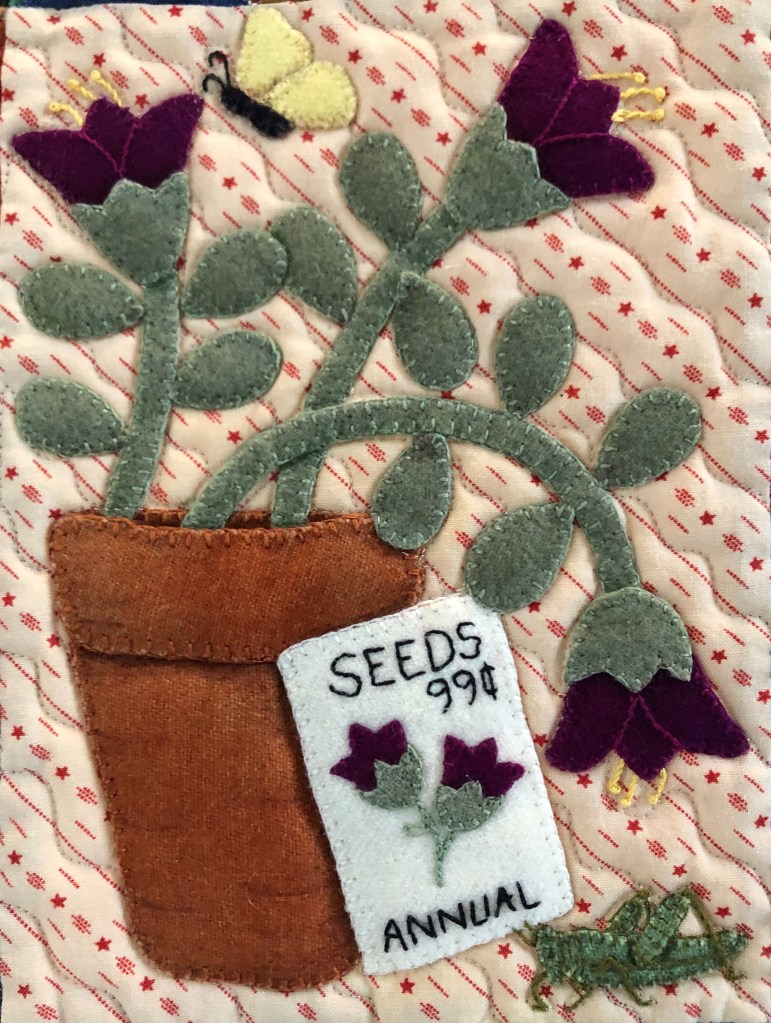
The pattern for the darling little grasshopper is found way up in the black and white picture that also had the Field Mouse. He is 3 pattern pieces, the body, the front and the back leg. Again, it’s the hand embroidery that finished this one!
You may remember, mom made and gave me the Squirrel so I don’t have a pattern for him either.
Does this help you in choosing to personalize this wonderful pattern? I hope so!
Do you have questions? I’m ready to answer anything I can, just send me a comment and I’ll answer back as soon as possible.
If you find that you cannot print the black and white pattern pages from this blog, email me ( rhondadort@gmail.com ) and I will sent you all the patterns of my little extras.
Merry Christmas and Happy New Year to everyone, and of course, happy quilting!
Rhonda

WOW – What a wonderful and instructive post. Thank you.
LikeLiked by 1 person
Thank you!!
LikeLike
Thank you for breaking down this pattern and explaining how to make each bird and other “creatures” more lifelike. I love birds and am always trying to make them more lifelike. Thank you again for breaking down this pattern! Merry Christmas!
LikeLiked by 1 person
Merry Christmas to you too! Thank you for your kind words!!
LikeLike